introduction to python - computer sciencelin/comp089h/papers/intro2python.pdf · python code, print...
TRANSCRIPT
Introduction to Python COMP 089H Fall 2015 Written by Tanya Amert
last updated 9/30/15
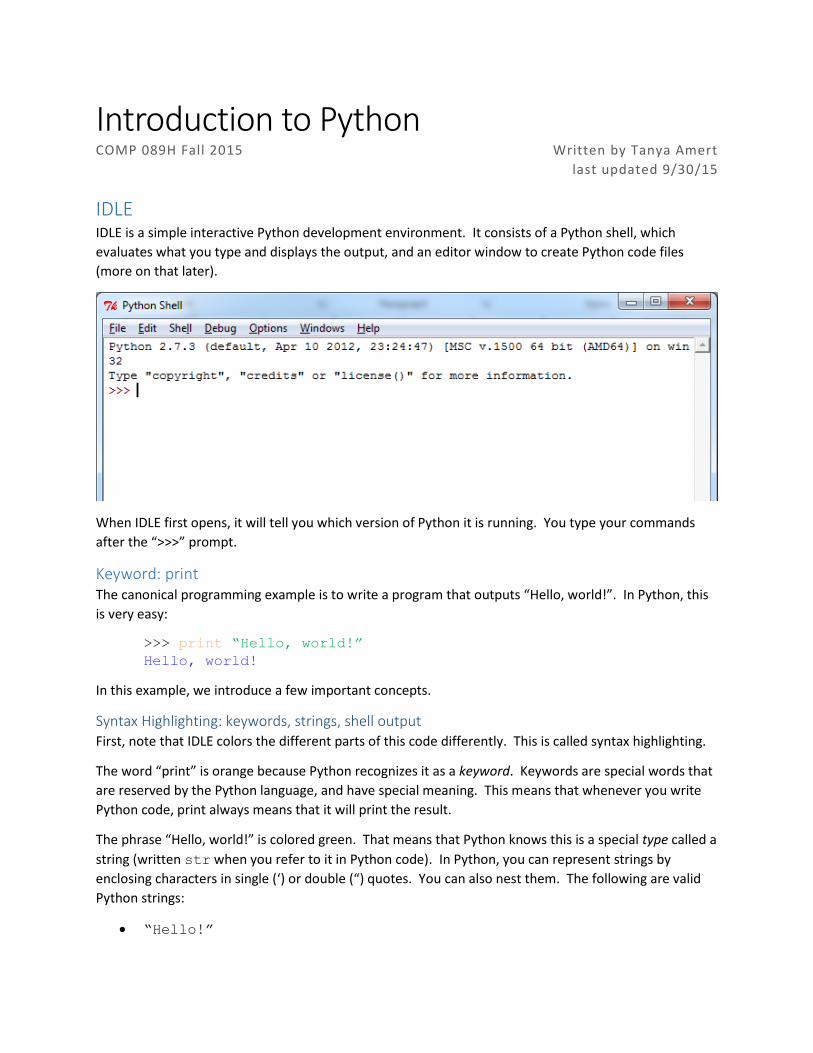
IDLE IDLE is a simple interactive Python development environment. It consists of a Python shell, which
evaluates what you type and displays the output, and an editor window to create Python code files
(more on that later).
When IDLE first opens, it will tell you which version of Python it is running. You type your commands
after the “>>>” prompt.
Keyword: print The canonical programming example is to write a program that outputs “Hello, world!”. In Python, this
is very easy:
>>> print “Hello, world!”
Hello, world!
In this example, we introduce a few important concepts.
Syntax Highlighting: keywords, strings, shell output First, note that IDLE colors the different parts of this code differently. This is called syntax highlighting.
The word “print” is orange because Python recognizes it as a keyword. Keywords are special words that
are reserved by the Python language, and have special meaning. This means that whenever you write
Python code, print always means that it will print the result.
The phrase “Hello, world!” is colored green. That means that Python knows this is a special type called a
string (written str when you refer to it in Python code). In Python, you can represent strings by
enclosing characters in single (‘) or double (“) quotes. You can also nest them. The following are valid
Python strings:
“Hello!”
‘Hi!’
“I really like ‘Python’!”
Finally, the result, “Hello, world!”, is colored blue. This means that it is the result displayed in the shell.
(There are other uses for blue in IDLE, but we won’t be covering them in this class. Look up the keyword
“class” and Object Oriented Programming if you’re curious.)
Types: str, int, float
So far, we have introduced a type called str. In addition to using strings in print statements, you can
also concatenate them together:
>>> print “Hello,” + “ world!”
Hello, world!
There are many other types in Python. For example, two more basic types are int and float. These store
integers and floating-point numbers, respectively.
We can use the print statement with ints and floats as well:
>>> print 4
4
>>> print 6.
6.0
>>> print 2.3914
2.3914
In this example, 4 is an int and 6. and 2.3914 are floats.
We can also combine ints and floats. In Python, combining two ints gives an int result, but
combining an int and a float or two floats gives a float result. For example:
>>> print 4 + 6
10
>>> print 6. - 3
3.0
>>> print 2 * 10.0
20.0
>>> print 2 / 10.0
0.2
>>> print 7 % 2
1
>>> print 2 ** 3
8
However, not all results are you might expect:
>>> print 2 / 3
0
The result of an int divided by an int is an int, so Python rounds this down. This can lead to very
unexpected behavior, so if you’re doing a division, it’s good to make sure either the numerator or
denominator is a float.
Variables So far, all of our computations have been very simple. However, sometimes you want to re-use values,
and to do that you need to store them in variables. You can use a variable similar to how you would in
algebra. You give it a name, store a value in it, and you can use or change that value later.
In Python, you create or update a variable using ‘=’, with the name on the left and the result on the
right:
>>> a = 2
>>> print a
2
>>> b = 5
>>> print a + b
7
In some other programming languages (“statically-typed” languages), you have to keep a variable the
same type for its entire lifetime. Python is a “dynamically-typed” language, so you can change the type
of value stored in the variable:
>>> someVar = 2
>>> print someVar
2
>>> someVar = “Why hello there”
>>> print someVar
Why hello there
Variable Names Like many other languages, there are some restrictions on what you can name your variables. Variable
names must:
be at least one character long
contain only A-Z, a-z, 0-9, and _
not start with a number
not be a keyword
Similar to the last bullet point, there are some other names in Python that are not keywords, but are
reserved. It is generally a bad idea to have variable names of the form __stuff__ (note the double _, not
just single _), because Python can make those keywords in the future. Finally, by convention, Python
variable names do not usually start with a capital letter.
Getting user input Python provides some handy functions for getting user input. In Python 2.x, there are two choices,
input and raw_input. We will only use raw_input, because it always returns a str. (The
function input evaluates its input, which can be very dangerous if you’re not careful. We will not use
that function in this course.)
Side note: Python 3.x only provides a single function called input, which behaves like Python 2.x’s
raw_input function.
Here is an example using raw_input:
>>> favoriteColor = raw_input(“What is your favorite color? ”)
What is your favorite color? teal
>>> print “Your favorite color is”, favoriteColor
Your favorite color is teal
This example introduces a few new concepts, which we go into below.
Functions In this example, raw_input is colored purple. This is because it is a function that is built-in to Python.
This means it’s also a good idea not to name your variables anything that turns purple – it already has a
meaning and you’ll get some weird behavior! (See https://docs.python.org/2/library/functions.html for
a full list of built-in functions.)
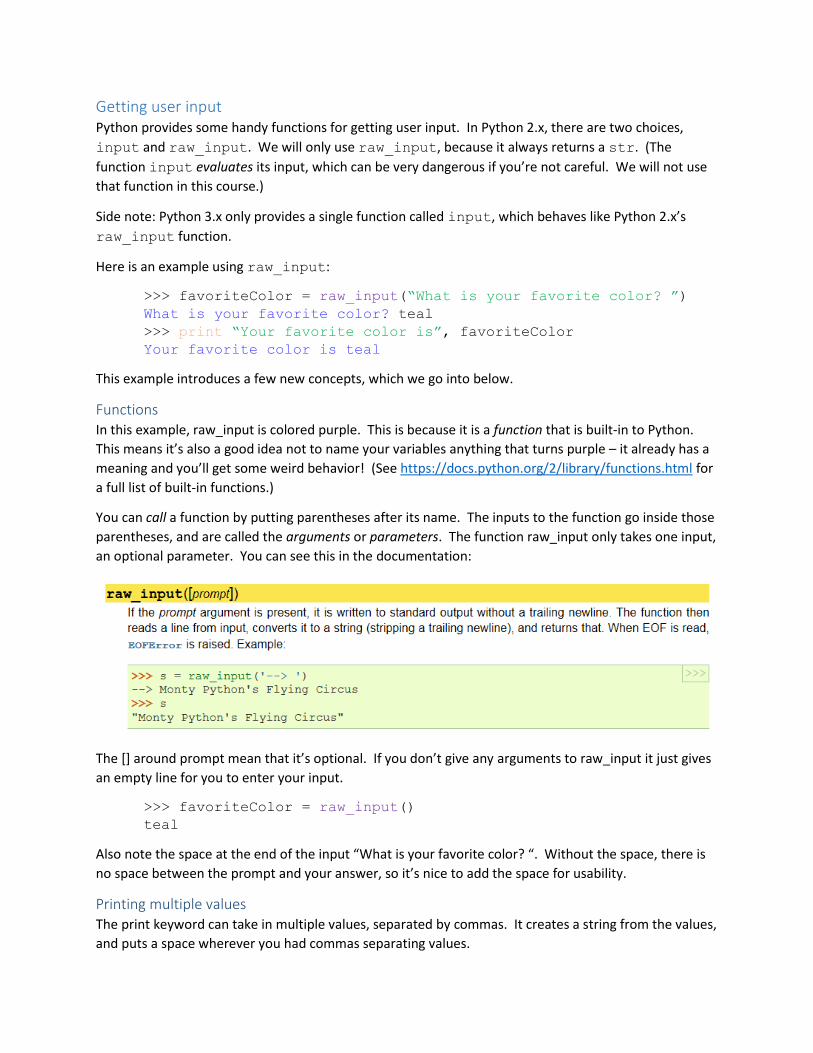
You can call a function by putting parentheses after its name. The inputs to the function go inside those
parentheses, and are called the arguments or parameters. The function raw_input only takes one input,
an optional parameter. You can see this in the documentation:
The [] around prompt mean that it’s optional. If you don’t give any arguments to raw_input it just gives
an empty line for you to enter your input.
>>> favoriteColor = raw_input()
teal
Also note the space at the end of the input “What is your favorite color? “. Without the space, there is
no space between the prompt and your answer, so it’s nice to add the space for usability.
Printing multiple values The print keyword can take in multiple values, separated by commas. It creates a string from the values,
and puts a space wherever you had commas separating values.

>>> print 4, 2, 9
4 2 9
If you don’t want spaces, you can use the built-in function str to change the value to a string and then
concatenate the strings using the + operator.
>>> print “a” + str(1) + “b” + str(2)
a1b2
Creating a .py file If you want to save your work in IDLE, you can create a .py file. From the shell, go to File -> New
Window, or type Ctrl-N. You can type your code here and save it, but make sure you enter .py as the
file extension. Historically, IDLE has not been great about this and won’t give your file an extension, so
you don’t get syntax highlighting (the colors).
When you are done with your program, go to Run -> Run Module (or hit F5), save your file (don’t forget
to make the extension .py!), and it will run.
If you don’t have an open Shell window, IDLE will open a new one for you:
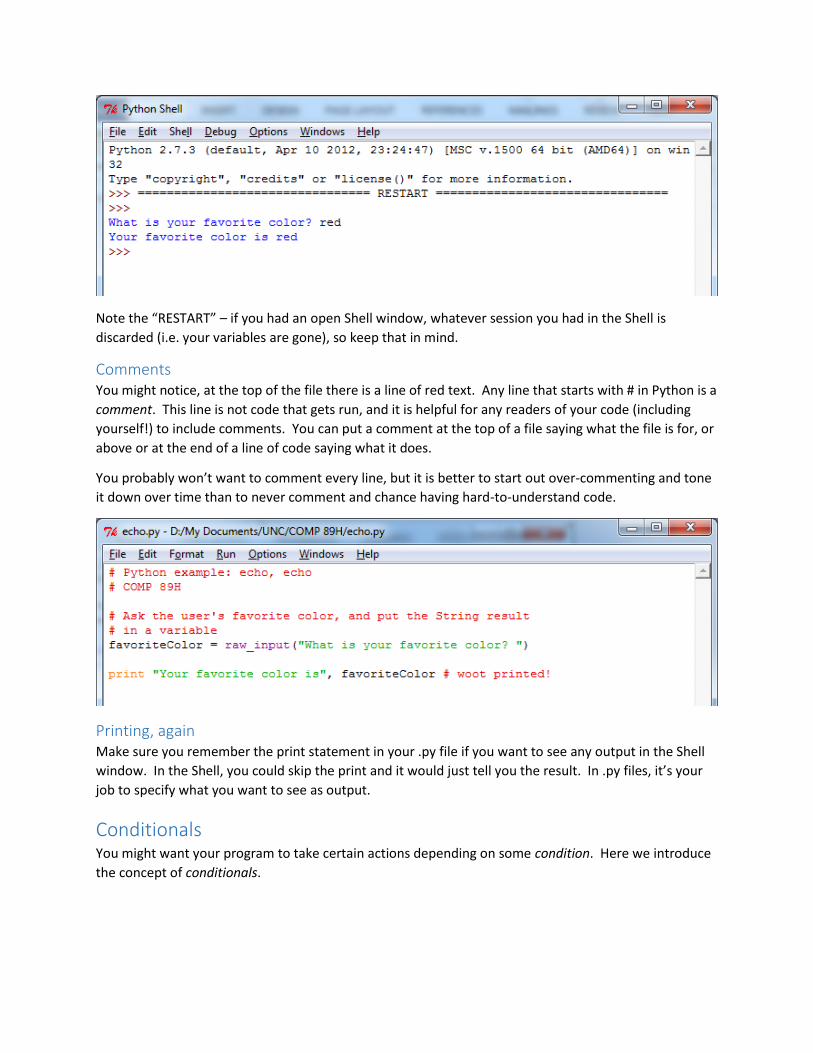
Note the “RESTART” – if you had an open Shell window, whatever session you had in the Shell is
discarded (i.e. your variables are gone), so keep that in mind.
Comments You might notice, at the top of the file there is a line of red text. Any line that starts with # in Python is a
comment. This line is not code that gets run, and it is helpful for any readers of your code (including
yourself!) to include comments. You can put a comment at the top of a file saying what the file is for, or
above or at the end of a line of code saying what it does.
You probably won’t want to comment every line, but it is better to start out over-commenting and tone
it down over time than to never comment and chance having hard-to-understand code.
Printing, again Make sure you remember the print statement in your .py file if you want to see any output in the Shell
window. In the Shell, you could skip the print and it would just tell you the result. In .py files, it’s your
job to specify what you want to see as output.
Conditionals You might want your program to take certain actions depending on some condition. Here we introduce
the concept of conditionals.

Data type: Boolean Before introducing conditionals, we need to understand the concepts of True and False in Python.
These are a data type called Booleans (bool in Python). Note that you’ll need to capitalize the T and F
or Python will not recognize them. Also, they should turn purple in IDLE.
Comparing values
You can compare values with == and !=, as well as <, <=, >, and >=. The result of any of these
expressions is True or False.
>>> a = 2
>>> b = 5
>>> a > b
False
>>> a <= b
True
>>> a == b # does a equal b?
False
>>> a != b # does a not-equal b?
True
We can even combine these expressions (parentheses are your friends) or use True and False in
them:
>>> a = 2
>>> b = 5
>>> False == (a > b)
True
Keywords: and/or/not
Python provides the keywords and, or, and not to allow for combining conditionals. If you haven’t
been exposed to Boolean logic, it works a lot like you might expect just reading it aloud.
>>> a = 2
>>> b = 5
>>> a < b and False
False
>>> a < b or a == b
True
>>> a < b and a == b
False
>>> True and False
False
>>> True and True
True
>>> True or False
True
>>> not True
False
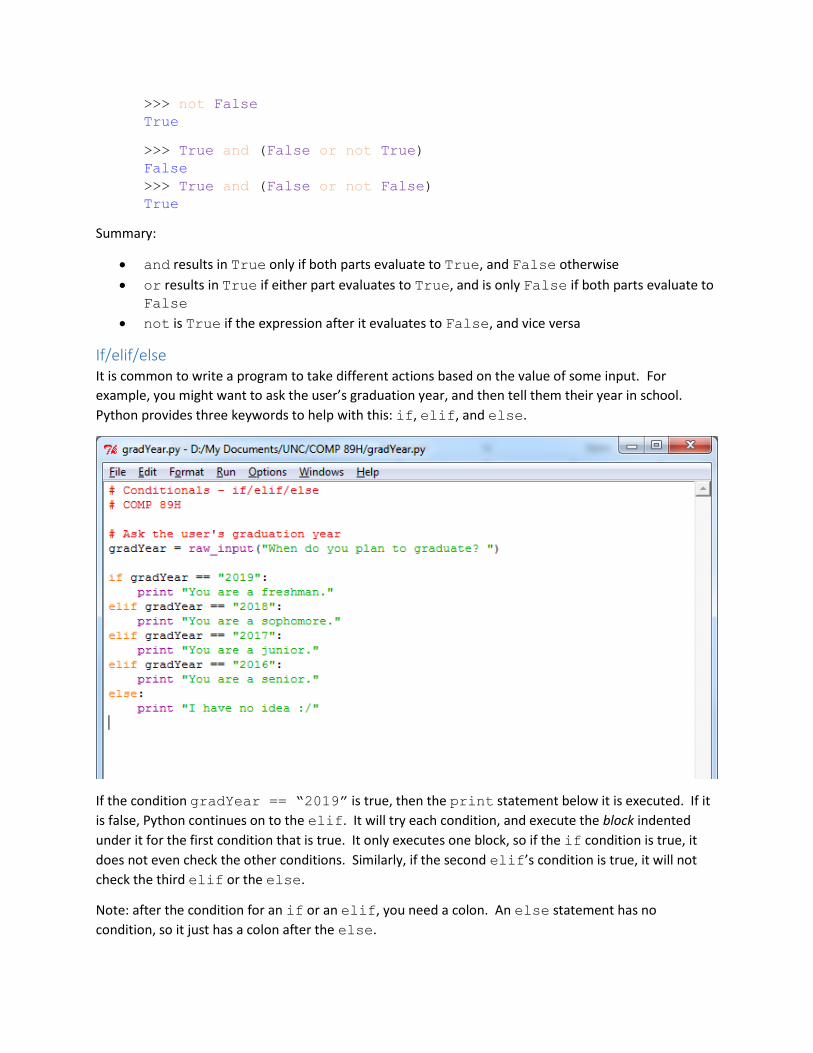
>>> not False
True
>>> True and (False or not True)
False
>>> True and (False or not False)
True
Summary:
and results in True only if both parts evaluate to True, and False otherwise
or results in True if either part evaluates to True, and is only False if both parts evaluate to False
not is True if the expression after it evaluates to False, and vice versa
If/elif/else It is common to write a program to take different actions based on the value of some input. For
example, you might want to ask the user’s graduation year, and then tell them their year in school.
Python provides three keywords to help with this: if, elif, and else.
If the condition gradYear == “2019” is true, then the print statement below it is executed. If it
is false, Python continues on to the elif. It will try each condition, and execute the block indented
under it for the first condition that is true. It only executes one block, so if the if condition is true, it
does not even check the other conditions. Similarly, if the second elif’s condition is true, it will not
check the third elif or the else.
Note: after the condition for an if or an elif, you need a colon. An else statement has no
condition, so it just has a colon after the else.
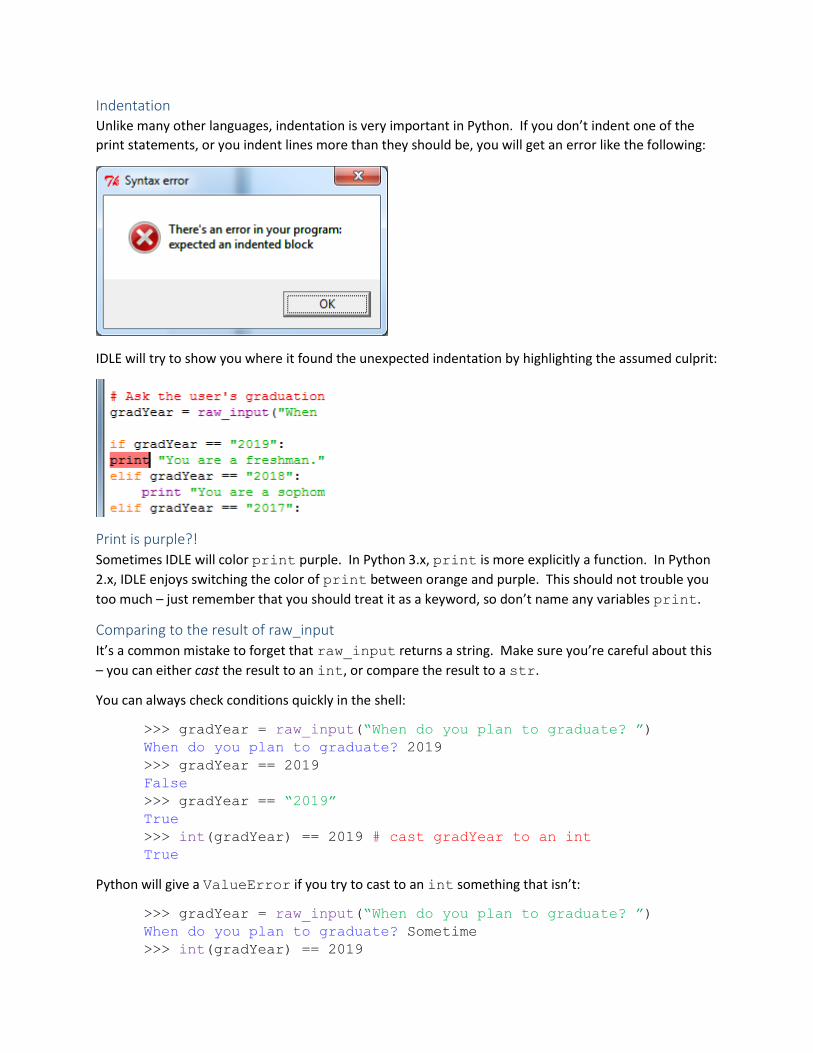
Indentation Unlike many other languages, indentation is very important in Python. If you don’t indent one of the
print statements, or you indent lines more than they should be, you will get an error like the following:
IDLE will try to show you where it found the unexpected indentation by highlighting the assumed culprit:
Print is purple?!
Sometimes IDLE will color print purple. In Python 3.x, print is more explicitly a function. In Python
2.x, IDLE enjoys switching the color of print between orange and purple. This should not trouble you
too much – just remember that you should treat it as a keyword, so don’t name any variables print.
Comparing to the result of raw_input
It’s a common mistake to forget that raw_input returns a string. Make sure you’re careful about this
– you can either cast the result to an int, or compare the result to a str.
You can always check conditions quickly in the shell:
>>> gradYear = raw_input(“When do you plan to graduate? ”)
When do you plan to graduate? 2019
>>> gradYear == 2019
False
>>> gradYear == “2019”
True
>>> int(gradYear) == 2019 # cast gradYear to an int
True
Python will give a ValueError if you try to cast to an int something that isn’t:
>>> gradYear = raw_input(“When do you plan to graduate? ”)
When do you plan to graduate? Sometime
>>> int(gradYear) == 2019
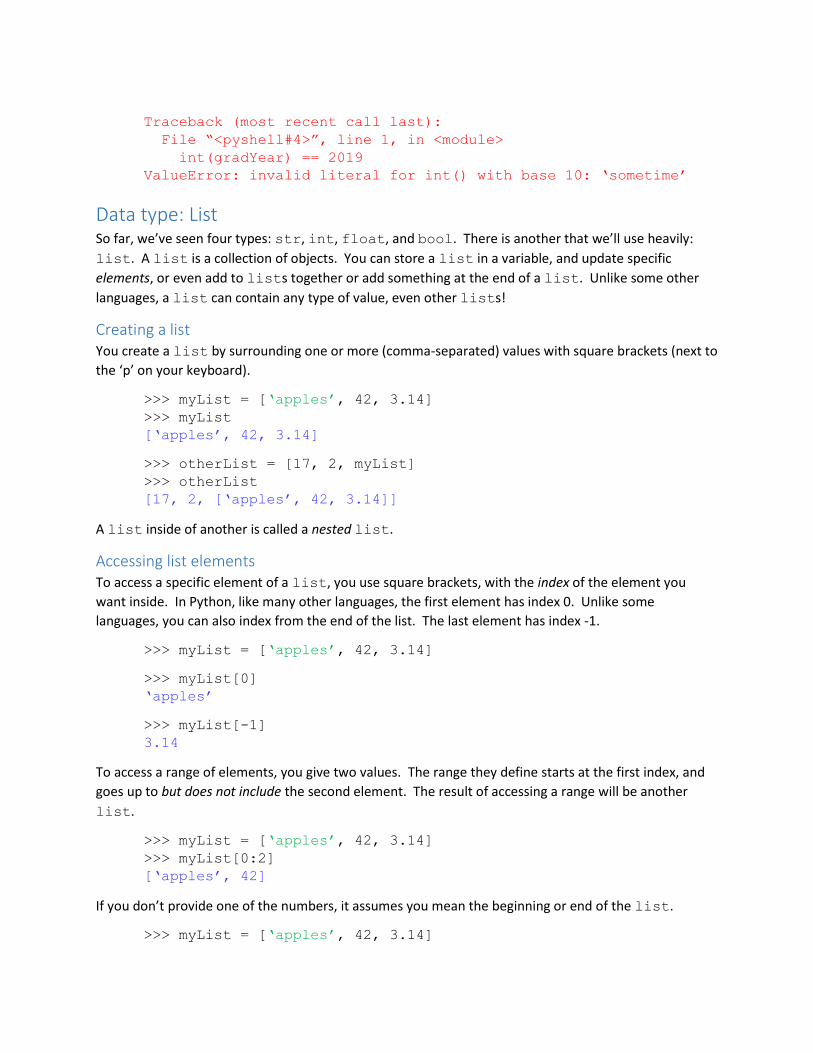
Traceback (most recent call last):
File “<pyshell#4>”, line 1, in <module>
int(gradYear) == 2019
ValueError: invalid literal for int() with base 10: ‘sometime’
Data type: List So far, we’ve seen four types: str, int, float, and bool. There is another that we’ll use heavily:
list. A list is a collection of objects. You can store a list in a variable, and update specific
elements, or even add to lists together or add something at the end of a list. Unlike some other
languages, a list can contain any type of value, even other lists!
Creating a list You create a list by surrounding one or more (comma-separated) values with square brackets (next to
the ‘p’ on your keyboard).
>>> myList = [‘apples’, 42, 3.14]
>>> myList
[‘apples’, 42, 3.14]
>>> otherList = [17, 2, myList]
>>> otherList
[17, 2, [‘apples’, 42, 3.14]]
A list inside of another is called a nested list.
Accessing list elements To access a specific element of a list, you use square brackets, with the index of the element you
want inside. In Python, like many other languages, the first element has index 0. Unlike some
languages, you can also index from the end of the list. The last element has index -1.
>>> myList = [‘apples’, 42, 3.14]
>>> myList[0]
‘apples’
>>> myList[-1]
3.14
To access a range of elements, you give two values. The range they define starts at the first index, and
goes up to but does not include the second element. The result of accessing a range will be another
list.
>>> myList = [‘apples’, 42, 3.14]
>>> myList[0:2]
[‘apples’, 42]
If you don’t provide one of the numbers, it assumes you mean the beginning or end of the list.
>>> myList = [‘apples’, 42, 3.14]
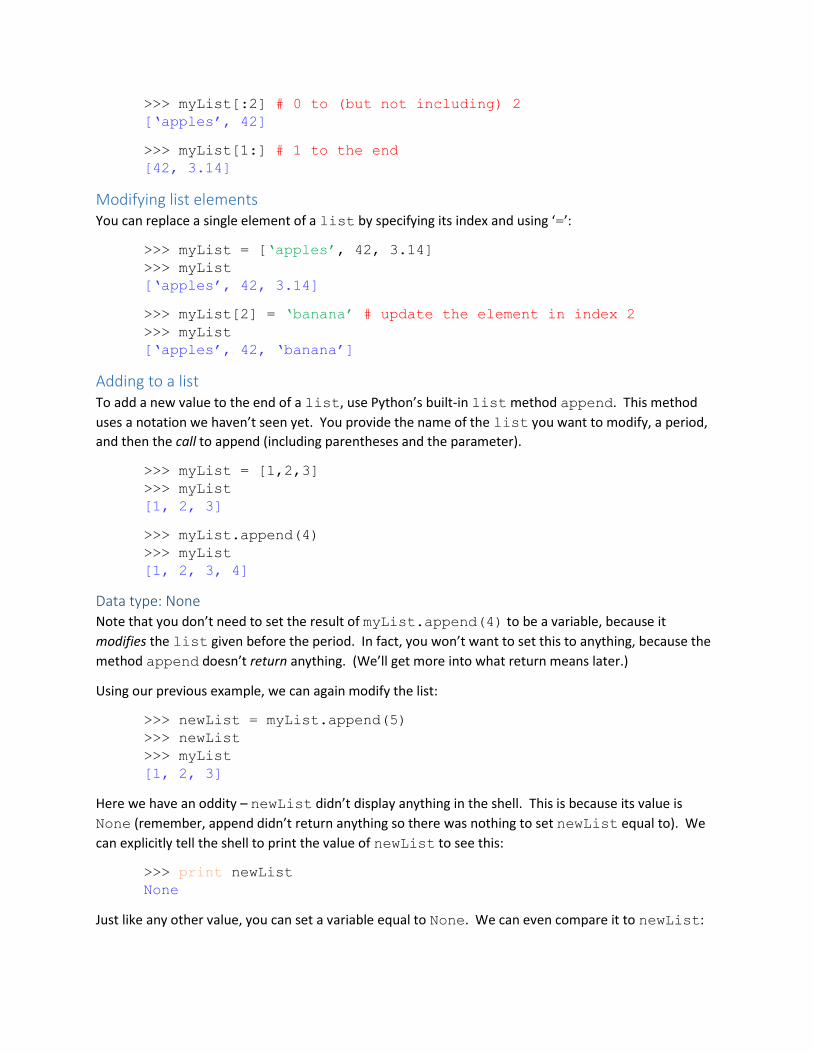
>>> myList[:2] # 0 to (but not including) 2
[‘apples’, 42]
>>> myList[1:] # 1 to the end
[42, 3.14]
Modifying list elements You can replace a single element of a list by specifying its index and using ‘=’:
>>> myList = [‘apples’, 42, 3.14]
>>> myList
[‘apples’, 42, 3.14]
>>> myList[2] = ‘banana’ # update the element in index 2
>>> myList
[‘apples’, 42, ‘banana’]
Adding to a list To add a new value to the end of a list, use Python’s built-in list method append. This method
uses a notation we haven’t seen yet. You provide the name of the list you want to modify, a period,
and then the call to append (including parentheses and the parameter).
>>> myList = [1,2,3]
>>> myList
[1, 2, 3]
>>> myList.append(4)
>>> myList
[1, 2, 3, 4]
Data type: None
Note that you don’t need to set the result of myList.append(4) to be a variable, because it
modifies the list given before the period. In fact, you won’t want to set this to anything, because the
method append doesn’t return anything. (We’ll get more into what return means later.)
Using our previous example, we can again modify the list:
>>> newList = myList.append(5)
>>> newList
>>> myList
[1, 2, 3]
Here we have an oddity – newList didn’t display anything in the shell. This is because its value is
None (remember, append didn’t return anything so there was nothing to set newList equal to). We
can explicitly tell the shell to print the value of newList to see this:
>>> print newList
None
Just like any other value, you can set a variable equal to None. We can even compare it to newList:
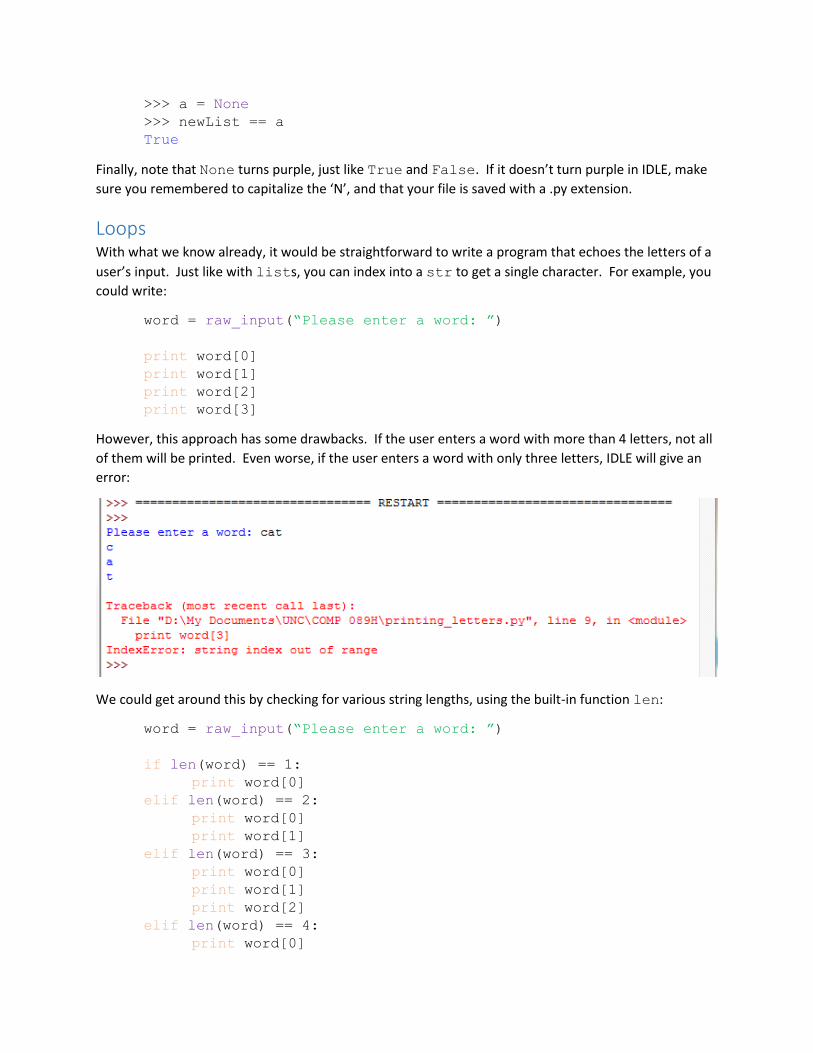
>>> a = None
>>> newList == a
True
Finally, note that None turns purple, just like True and False. If it doesn’t turn purple in IDLE, make
sure you remembered to capitalize the ‘N’, and that your file is saved with a .py extension.
Loops With what we know already, it would be straightforward to write a program that echoes the letters of a
user’s input. Just like with lists, you can index into a str to get a single character. For example, you
could write:
word = raw_input(“Please enter a word: ”)
print word[0]
print word[1]
print word[2]
print word[3]
However, this approach has some drawbacks. If the user enters a word with more than 4 letters, not all
of them will be printed. Even worse, if the user enters a word with only three letters, IDLE will give an
error:
We could get around this by checking for various string lengths, using the built-in function len:
word = raw_input(“Please enter a word: ”)
if len(word) == 1:
print word[0]
elif len(word) == 2:
print word[0]
print word[1]
elif len(word) == 3:
print word[0]
print word[1]
print word[2]
elif len(word) == 4:
print word[0]
print word[1]
print word[2]
print word[3]
Not only is this approach painfully repetitive, but the word entered can be any of a variety of lengths.
More importantly, it requires us to hard-code the possible word lengths in the code. It would be better
to be able to take some action for each letter, without having to take into account the number of letters
explicitly.
For loops Python provides for loops that fit our needs perfectly. They use the keywords for and in.
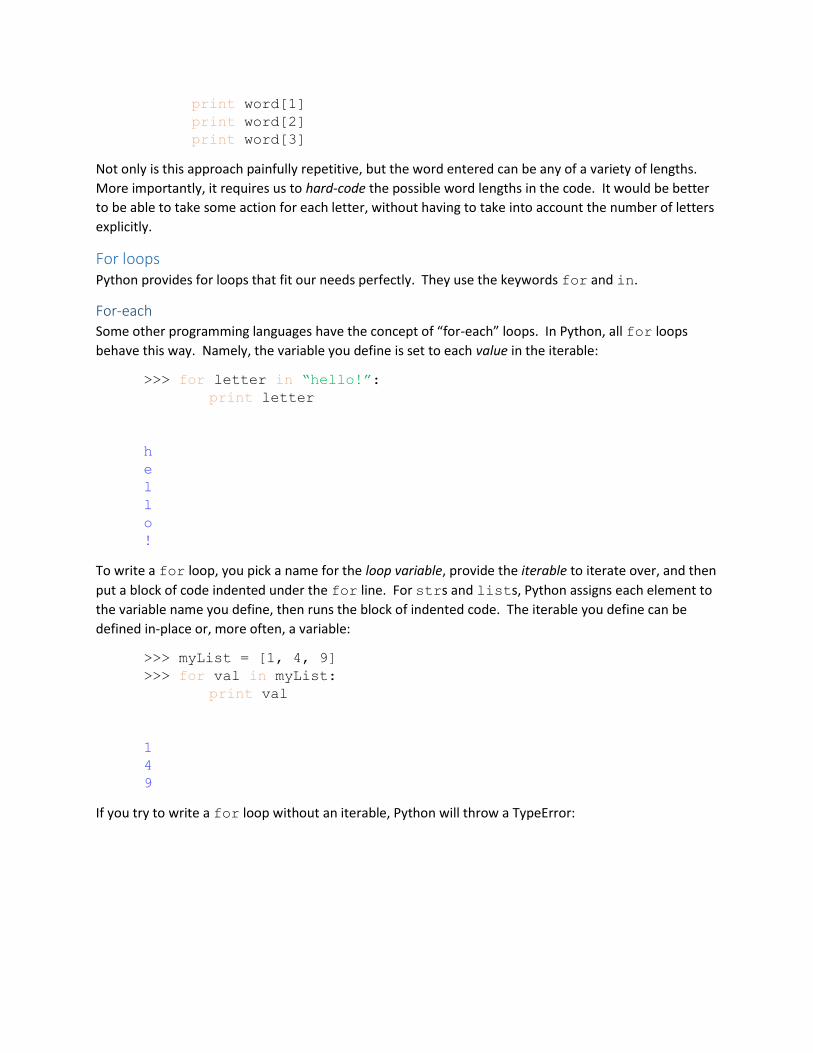
For-each
Some other programming languages have the concept of “for-each” loops. In Python, all for loops
behave this way. Namely, the variable you define is set to each value in the iterable:
>>> for letter in “hello!”:
print letter
h
e
l
l
o
!
To write a for loop, you pick a name for the loop variable, provide the iterable to iterate over, and then
put a block of code indented under the for line. For strs and lists, Python assigns each element to
the variable name you define, then runs the block of indented code. The iterable you define can be
defined in-place or, more often, a variable:
>>> myList = [1, 4, 9]
>>> for val in myList:
print val
1
4
9
If you try to write a for loop without an iterable, Python will throw a TypeError:
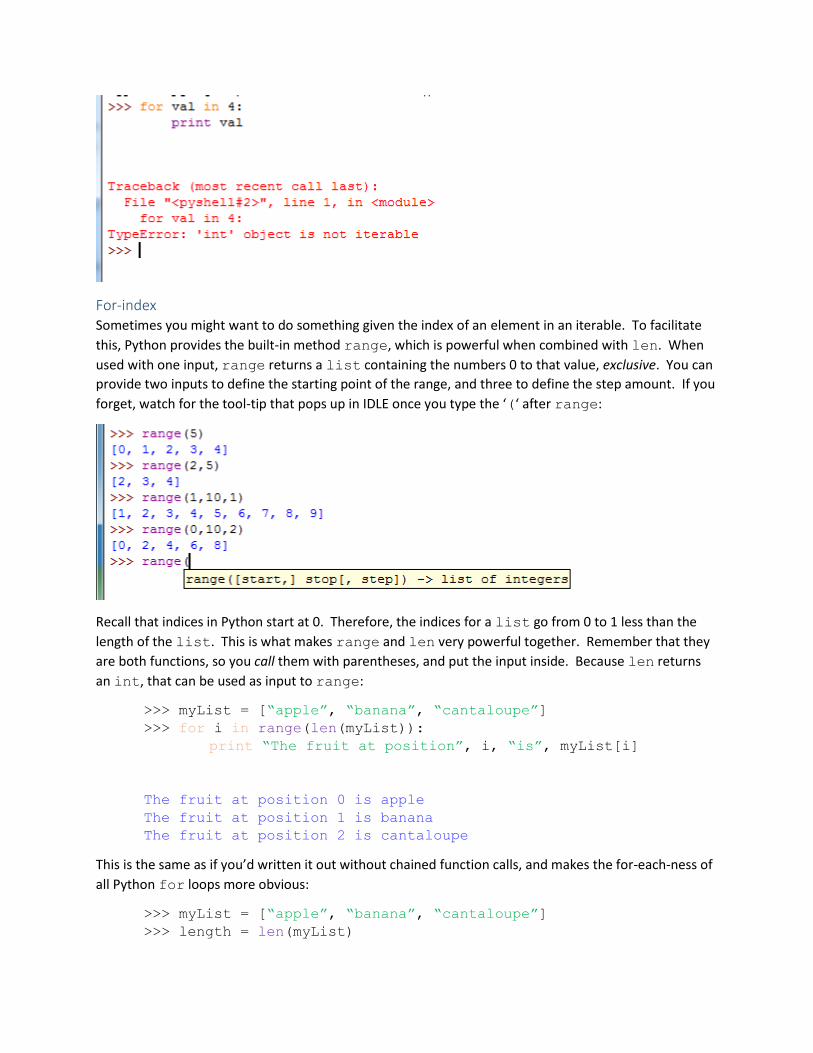
For-index Sometimes you might want to do something given the index of an element in an iterable. To facilitate
this, Python provides the built-in method range, which is powerful when combined with len. When
used with one input, range returns a list containing the numbers 0 to that value, exclusive. You can
provide two inputs to define the starting point of the range, and three to define the step amount. If you
forget, watch for the tool-tip that pops up in IDLE once you type the ‘(‘ after range:
Recall that indices in Python start at 0. Therefore, the indices for a list go from 0 to 1 less than the
length of the list. This is what makes range and len very powerful together. Remember that they
are both functions, so you call them with parentheses, and put the input inside. Because len returns
an int, that can be used as input to range:
>>> myList = [“apple”, “banana”, “cantaloupe”]
>>> for i in range(len(myList)):
print “The fruit at position”, i, “is”, myList[i]
The fruit at position 0 is apple
The fruit at position 1 is banana
The fruit at position 2 is cantaloupe
This is the same as if you’d written it out without chained function calls, and makes the for-each-ness of
all Python for loops more obvious:
>>> myList = [“apple”, “banana”, “cantaloupe”]
>>> length = len(myList)
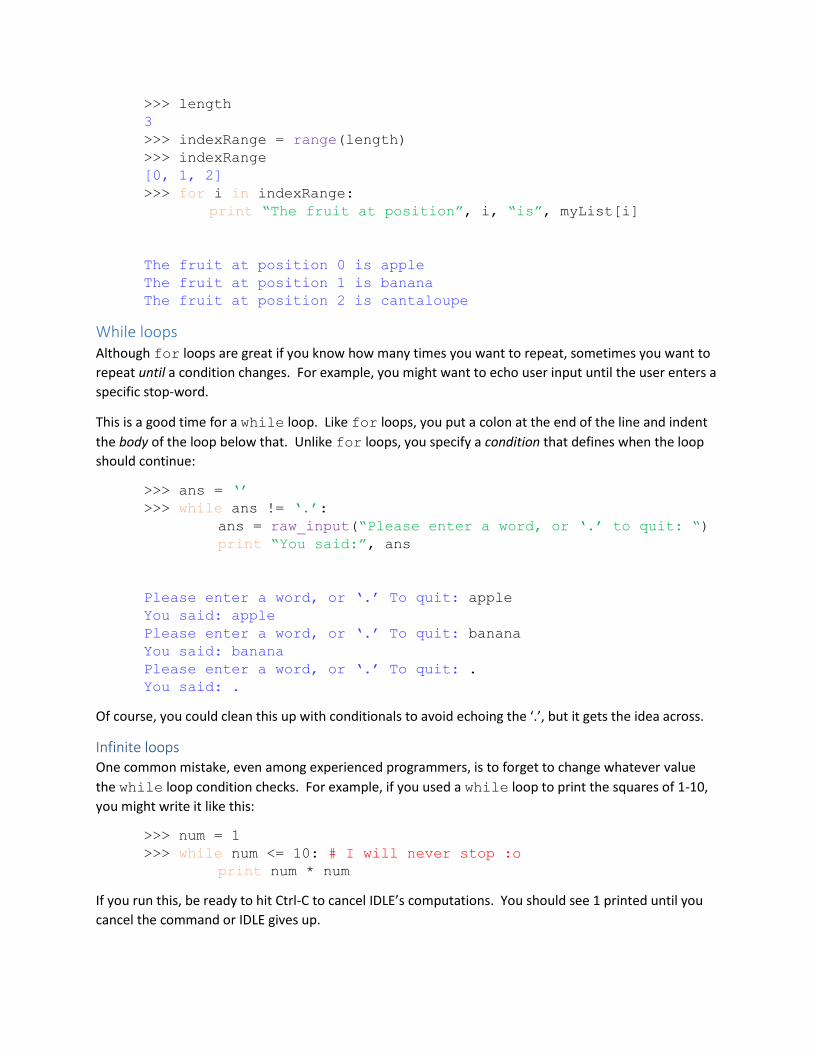
>>> length
3
>>> indexRange = range(length)
>>> indexRange
[0, 1, 2]
>>> for i in indexRange:
print “The fruit at position”, i, “is”, myList[i]
The fruit at position 0 is apple
The fruit at position 1 is banana
The fruit at position 2 is cantaloupe
While loops Although for loops are great if you know how many times you want to repeat, sometimes you want to
repeat until a condition changes. For example, you might want to echo user input until the user enters a
specific stop-word.
This is a good time for a while loop. Like for loops, you put a colon at the end of the line and indent
the body of the loop below that. Unlike for loops, you specify a condition that defines when the loop
should continue:
>>> ans = ‘’
>>> while ans != ‘.’:
ans = raw_input(“Please enter a word, or ‘.’ to quit: “)
print “You said:”, ans
Please enter a word, or ‘.’ To quit: apple
You said: apple
Please enter a word, or ‘.’ To quit: banana
You said: banana
Please enter a word, or ‘.’ To quit: .
You said: .
Of course, you could clean this up with conditionals to avoid echoing the ‘.’, but it gets the idea across.
Infinite loops One common mistake, even among experienced programmers, is to forget to change whatever value
the while loop condition checks. For example, if you used a while loop to print the squares of 1-10,
you might write it like this:
>>> num = 1
>>> while num <= 10: # I will never stop :o
print num * num
If you run this, be ready to hit Ctrl-C to cancel IDLE’s computations. You should see 1 printed until you
cancel the command or IDLE gives up.
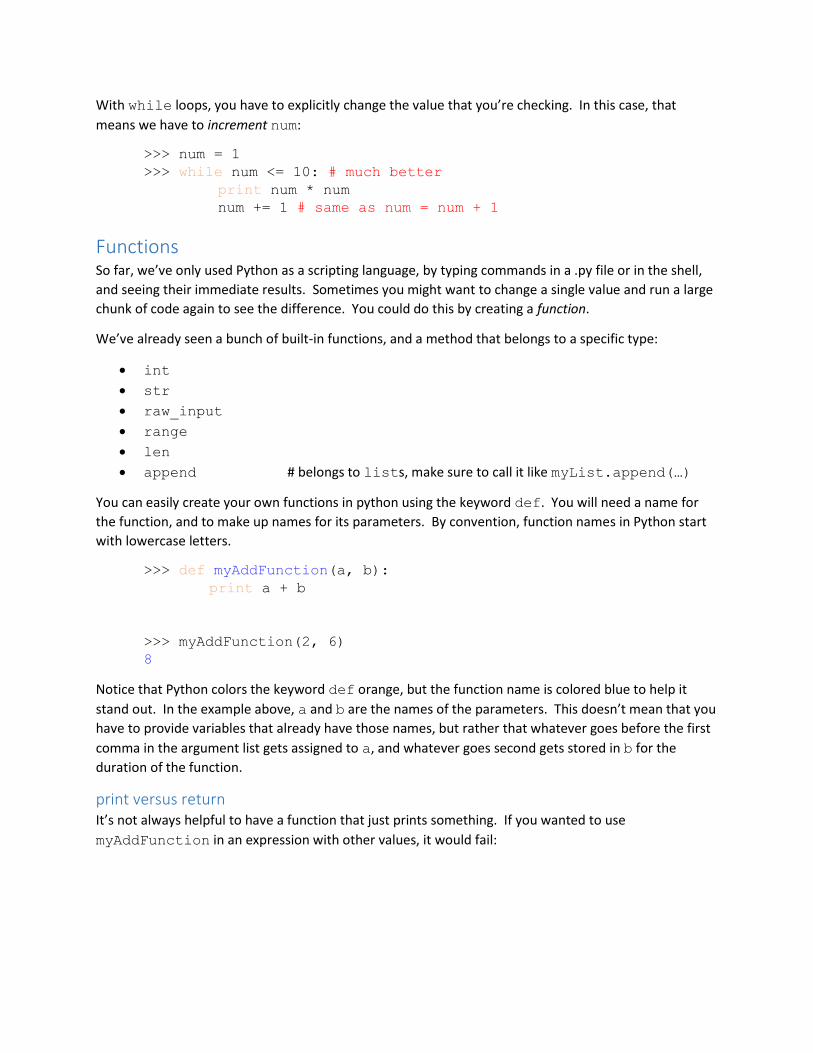
With while loops, you have to explicitly change the value that you’re checking. In this case, that
means we have to increment num:
>>> num = 1
>>> while num <= 10: # much better
print num * num
num += 1 # same as num = num + 1
Functions So far, we’ve only used Python as a scripting language, by typing commands in a .py file or in the shell,
and seeing their immediate results. Sometimes you might want to change a single value and run a large
chunk of code again to see the difference. You could do this by creating a function.
We’ve already seen a bunch of built-in functions, and a method that belongs to a specific type:
int
str
raw_input
range
len
append # belongs to lists, make sure to call it like myList.append(…)
You can easily create your own functions in python using the keyword def. You will need a name for
the function, and to make up names for its parameters. By convention, function names in Python start
with lowercase letters.
>>> def myAddFunction(a, b):
print a + b
>>> myAddFunction(2, 6)
8
Notice that Python colors the keyword def orange, but the function name is colored blue to help it
stand out. In the example above, a and b are the names of the parameters. This doesn’t mean that you
have to provide variables that already have those names, but rather that whatever goes before the first
comma in the argument list gets assigned to a, and whatever goes second gets stored in b for the
duration of the function.
print versus return It’s not always helpful to have a function that just prints something. If you wanted to use
myAddFunction in an expression with other values, it would fail:
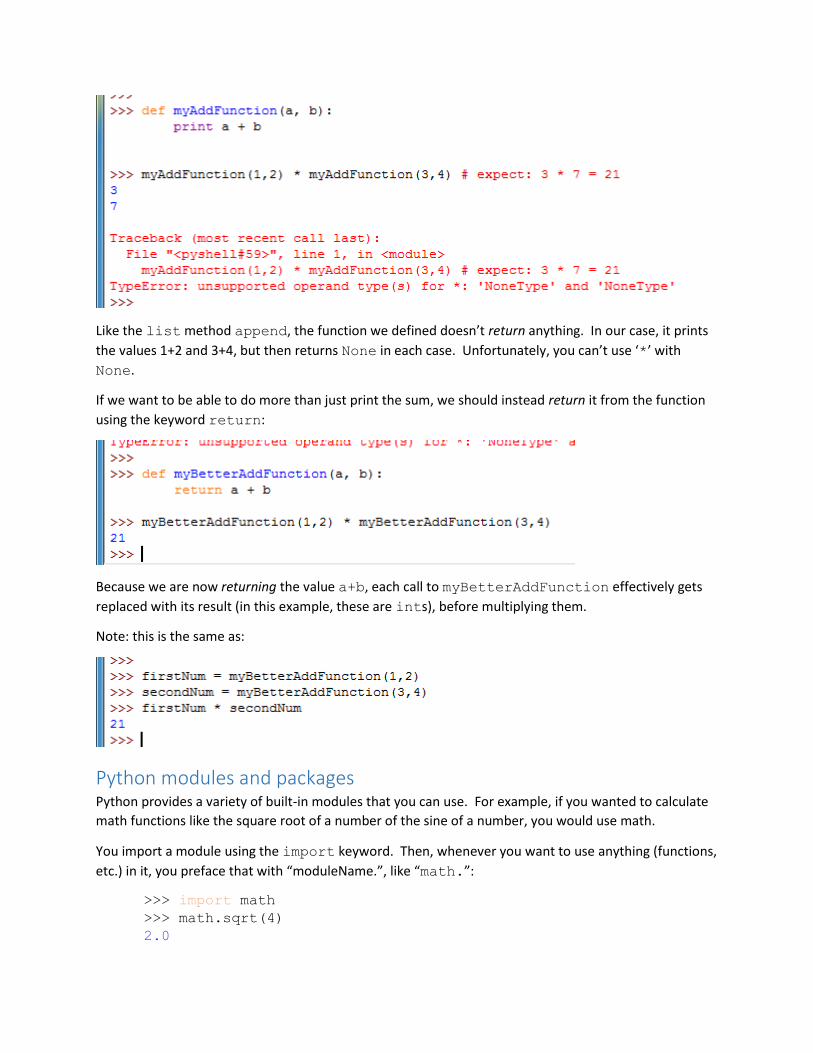
Like the list method append, the function we defined doesn’t return anything. In our case, it prints
the values 1+2 and 3+4, but then returns None in each case. Unfortunately, you can’t use ‘*’ with
None.
If we want to be able to do more than just print the sum, we should instead return it from the function
using the keyword return:
Because we are now returning the value a+b, each call to myBetterAddFunction effectively gets
replaced with its result (in this example, these are ints), before multiplying them.
Note: this is the same as:
Python modules and packages Python provides a variety of built-in modules that you can use. For example, if you wanted to calculate
math functions like the square root of a number of the sine of a number, you would use math.
You import a module using the import keyword. Then, whenever you want to use anything (functions,
etc.) in it, you preface that with “moduleName.”, like “math.”:
>>> import math
>>> math.sqrt(4)
2.0
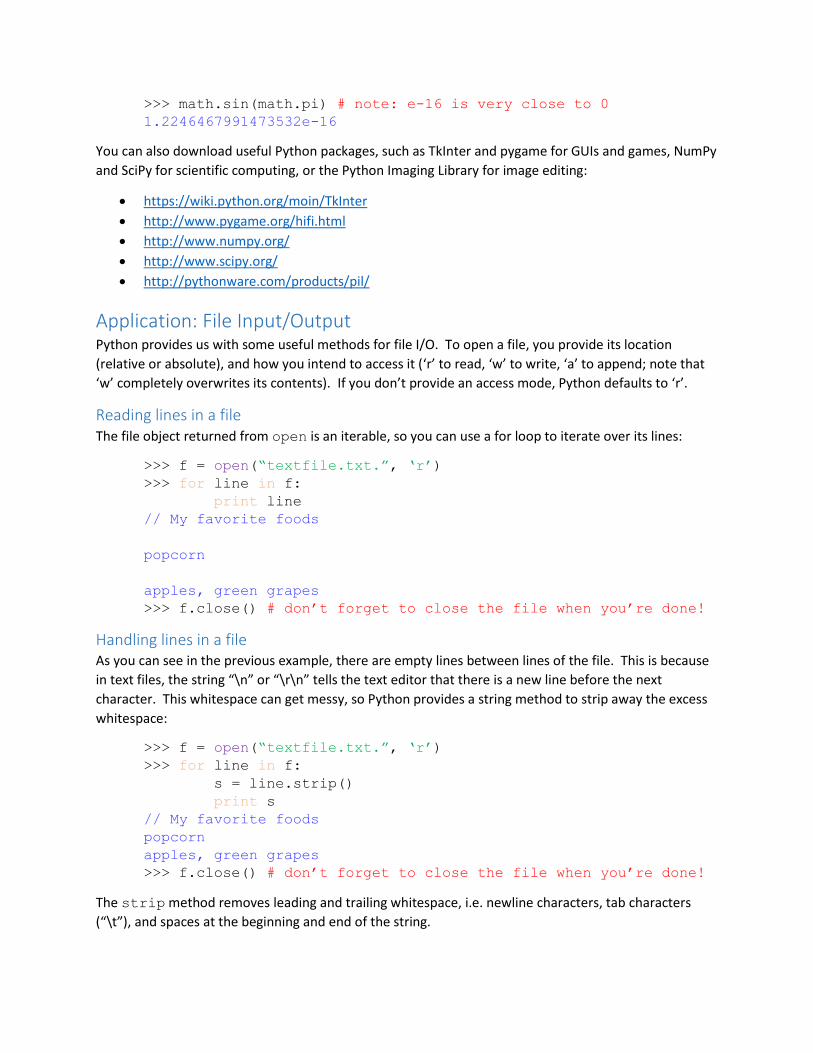
>>> math.sin(math.pi) # note: e-16 is very close to 0
1.2246467991473532e-16
You can also download useful Python packages, such as TkInter and pygame for GUIs and games, NumPy
and SciPy for scientific computing, or the Python Imaging Library for image editing:
https://wiki.python.org/moin/TkInter
http://www.pygame.org/hifi.html
http://www.numpy.org/
http://www.scipy.org/
http://pythonware.com/products/pil/
Application: File Input/Output Python provides us with some useful methods for file I/O. To open a file, you provide its location
(relative or absolute), and how you intend to access it (‘r’ to read, ‘w’ to write, ‘a’ to append; note that
‘w’ completely overwrites its contents). If you don’t provide an access mode, Python defaults to ‘r’.
Reading lines in a file The file object returned from open is an iterable, so you can use a for loop to iterate over its lines:
>>> f = open(“textfile.txt.”, ‘r’)
>>> for line in f:
print line
// My favorite foods
popcorn
apples, green grapes
>>> f.close() # don’t forget to close the file when you’re done!
Handling lines in a file As you can see in the previous example, there are empty lines between lines of the file. This is because
in text files, the string “\n” or “\r\n” tells the text editor that there is a new line before the next
character. This whitespace can get messy, so Python provides a string method to strip away the excess
whitespace:
>>> f = open(“textfile.txt.”, ‘r’)
>>> for line in f:
s = line.strip()
print s
// My favorite foods
popcorn
apples, green grapes
>>> f.close() # don’t forget to close the file when you’re done!
The strip method removes leading and trailing whitespace, i.e. newline characters, tab characters
(“\t”), and spaces at the beginning and end of the string.
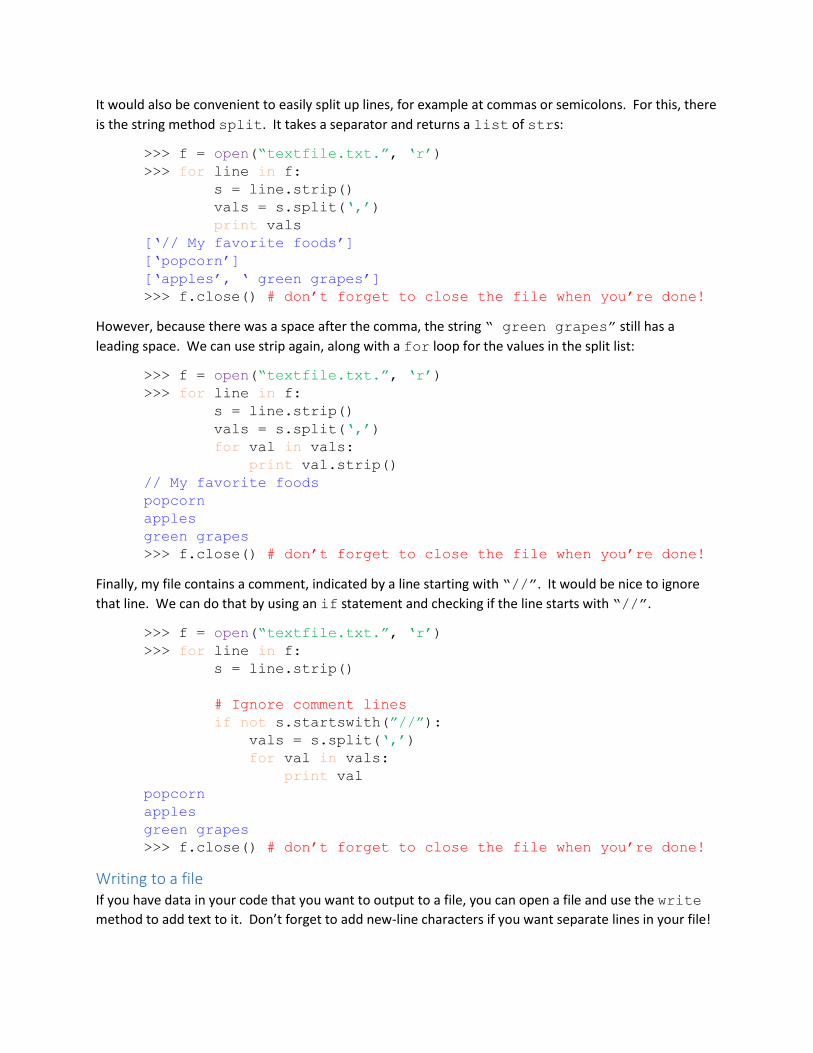
It would also be convenient to easily split up lines, for example at commas or semicolons. For this, there
is the string method split. It takes a separator and returns a list of strs:
>>> f = open(“textfile.txt.”, ‘r’)
>>> for line in f:
s = line.strip()
vals = s.split(‘,’)
print vals
[‘// My favorite foods’]
[‘popcorn’]
[‘apples’, ‘ green grapes’]
>>> f.close() # don’t forget to close the file when you’re done!
However, because there was a space after the comma, the string “ green grapes” still has a
leading space. We can use strip again, along with a for loop for the values in the split list:
>>> f = open(“textfile.txt.”, ‘r’)
>>> for line in f:
s = line.strip()
vals = s.split(‘,’)
for val in vals:
print val.strip()
// My favorite foods
popcorn
apples
green grapes
>>> f.close() # don’t forget to close the file when you’re done!
Finally, my file contains a comment, indicated by a line starting with “//”. It would be nice to ignore
that line. We can do that by using an if statement and checking if the line starts with “//”.
>>> f = open(“textfile.txt.”, ‘r’)
>>> for line in f:
s = line.strip()
# Ignore comment lines
if not s.startswith(”//”):
vals = s.split(‘,’)
for val in vals:
print val
popcorn
apples
green grapes
>>> f.close() # don’t forget to close the file when you’re done!
Writing to a file If you have data in your code that you want to output to a file, you can open a file and use the write
method to add text to it. Don’t forget to add new-line characters if you want separate lines in your file!
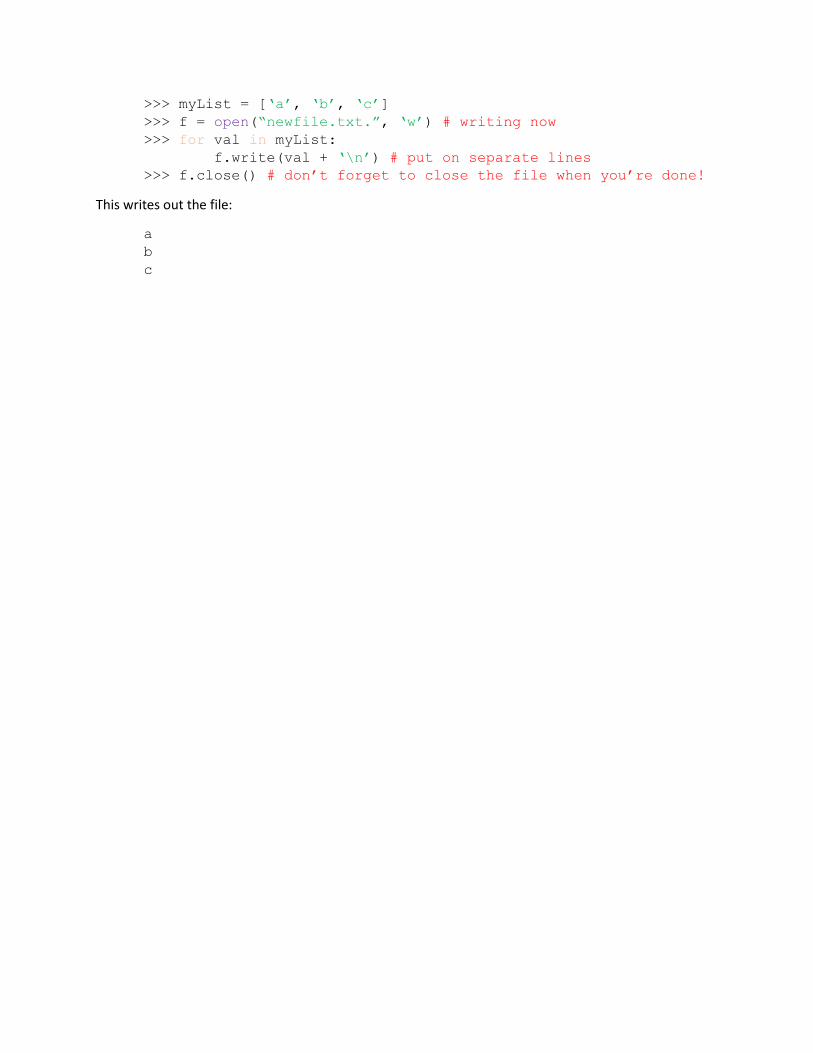
>>> myList = [‘a’, ‘b’, ‘c’]
>>> f = open(“newfile.txt.”, ‘w’) # writing now
>>> for val in myList:
f.write(val + ‘\n’) # put on separate lines
>>> f.close() # don’t forget to close the file when you’re done!
This writes out the file:
a
b
c