introduction to the kanban - · pdf filebenefits of kanban kanban forces people to look at...
TRANSCRIPT

Introduction to the Kanban This guide is meant to be an introduction to Kanban. The importance of Kanban in lean manufacturing will be explained, as well as the basic steps for implementing Kanban. This will lay a good foundation for you to understand Kanban and the reasons so many companies use this principle.
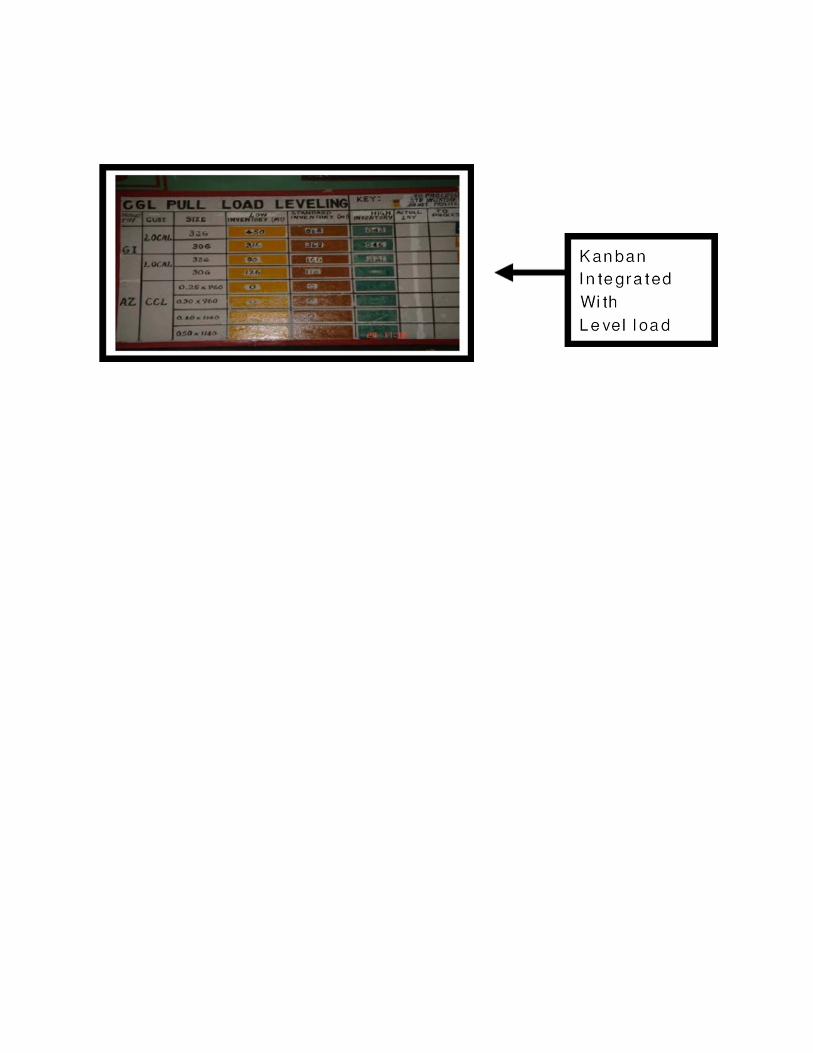
Kanban – The Definition Kanban is a Japanese word that means “signboard”. This is a term that has become synonymous with “Demand Scheduling” or “Just in Time (JIT) Manufacturing”. Its roots are traced to the early days of Toyota’s innovative production system of the late 1940sand early 1950s. Kanban was developed to control production between processes and to implement Just in Time Manufacturing. The ideas of Kanban became popular during the global recession of the 1970s, when it was important for companies to reduce waste and cut costs in order to succeed. The premise of Kanban is to create Visual Indicator’s to allow the operators to be the ones who determine how much of a product to run and when to stop or change over. Kanban rules also tell the operators what steps to take when they have problems and whom to go to when the problem occurs. Operators then produce based on actual usage, rather than forecasted usage. They only produce new product to replace the product consumed by its consumer(s), and immediate next process. They only produce products based on visual signals sent by its customer(s). Since the majority of the decisions in a kanban are being made by the operators, the use of visual indicators also allows managers and supervisors to see the schedule status of a line at a glance. The kanban schedule replaces the traditional daily or weekly production schedule. It replaces this schedule predetermined rules that allow productionoperators to schedule in the line. Kanban scheduling can be looked at, as an execution tool, rather than a planning tool. It directs production on a day-to-day basis. Kanban does not replace planning completely. Material planning information is used to create the kanban, but kanban does replace the daily scheduling activities necessary to operate the production process. It also eliminates the need for production planners and supervisors to continuously monitor schedule status. In addition to freeing up material planners, schedulers and supervisors, it also empowers the operators to control the line
Benefits of Kanban
Kanban forces people to look at production processes in a different way:
1.Reduces Inventory by nearly 50% 2.Improve Flow - Create One PC Flow 3.Prevents Overproduction, which is the mother of all wastes 4.Places control at the operations level 5.Improves responsiveness to changes in demand (reduces Throughput Time) 6.Minimizes risk of having obsolete inventory
Kanban also drives the manufacturing process to constantly improve, which is necessary in for any company to stay Lean, Fit & Competitive.
Inventory Reduction Kanban will generally help to reduce inventory by 50%. That is a huge amount of savings when you consider the cost of the actual inventory, plus the cost involved withholding inventory. Kanban scheduling forces you to examine the parts of your process that allow inventory levels to build up over time. In addition, the free space in your facility can then be used for new business opportunities, or it may even eliminate the need for expansion plans if that is in the works.
Improving Flow The flow of the operation will improve with kanban scheduling. Reduced inventory space as well as the design of the kanban will create a new order in your work space. Setting up control points, flow lanes, and hanging signs that provide directions for moving material will provide the guidance needed to improve the flow in your facility.
Preventing Overproduction Overproduction- (Mother of all wastes) of parts is one of the main wastes in production processes. By using a kanban scheduling system where you specify the production container sizes and the maximum number of containers to produce, overproduction can be greatly reduced. Using the kanban structure allows control without having expensive tracking system. The visual start and stop signals, tells the operators exactly when to start producing and exactly when to stop producing – resulting in less overproduction.
Placing control at the operations level Kanban allows the operators to see the production schedule at a glance. This ensures
that managers and supervisors do not have to be relied upon for controlling the
production process. Since the kanban’s design tells the operators
(A) Exactly what to run?
(B) How much to run?
(C) What sequence to run?
It takes out the guesswork. The visual nature also immediately tells everyone when the process is in trouble so that someone can step in and make the changes that need to be made. Placing control at the operations level reduces waste in the company since operators can control their own production process. You fully use that human resource, and free up other resources for other things. Improving responsiveness to changes in demand – (re duced Throughput Time, small batch production and many products at a time) . Because kanban creates visual signals for maximum and minimum inventory levels it is an immediate indicator of when to produce and when to stop producing. The signal stops production when demand decreases, and when orders begin to increase, the inventory levels will signal the production to begin again.
Minimizing the risk of having obsolete inventory Since kanban keeps you from producing more inventory than necessary, it also keeps you from letting your inventory become obsolete. Kanban is based on actual demand,not a forecast, so it eliminates the guesswork and overproduction. You only build whatyou need. This way, if something in your production changes and you no longer need a product, you do not have large quantities of inventory on hand to get rid of. It also eliminates the possibility of inventory getting “lost” in a back corner of a warehouse somewhere, only to be discovered when that product has become obsolete.
Implementing Kanban There are seven basic steps that are necessary to implement kanban scheduling for a process. This guide will provide you with a basic understanding for a process and what it entails, but you will need to consult other material or a kanban-consulting expert for a

detailed description to guide you through the implementation process. Our goal is to introduce you to the process so you know what to expect and can study how it will benefit your company:
The seven steps to implementing kanban: 1. Collect data
2. Calculate the kanban size
3. Design the kanban
4. Train everyone
5. Start the kanban (implementation)
6. Audit the kanban
7. Improve the kanban
These steps allow you to determine your current status, where you want to go, and how
you want to get there.
Step1: Collecting Data The first step is to collect the data that is necessary to help you make decisions based on the facts, rather than forecasts. This data will allow you to calculate kanban quantities that support customer demand. You start the process by documenting your current state. Before you can implement the kanban, you must see where you are with inventory and operating parameters ‘right now’. You have to be honest and look at your organization as it is at that moment, not as you wish it to be. Once the data is collected, you can analyze it to summarize and understand your ‘current state’.
The following is a list of the data you need to collect regarding your current state in the
production process:
• The number of parts produced
• Changeover times
• Downtime
• Scrap Levels
Number of parts produced by the process You must identify the parts to be produced by the target process. Break the production down into individual part numbers, and do not combine part numbers just because parts are similar. You should also determine what your production-scheduling interval will be. You must decide whether you will produce with monthly, weekly, or daily production requirements. When you answer this question, it will tell you the interval replenishment cycle and all of your calculation will later be scaled to that level

Changeover times Determine your current changeover time. Changeover time is the time from the lastgood production part of the previous production run to the first good, completed part inthe new production run.
Downtime
There are two kinds of downtime –
(A) Planned downtime
(B) Unplanned downtime. Examples of planned downtime are scheduled breaks, lunches, maintenance or upkeep. Examples of unplanned downtime include breakdowns or lack of raw material. It is the total time that the process is scheduled to be producing parts, but is not. This unplanned downtime is what you need to calculate preparation in size of the kanban. Once you have collected all of the above data, you can organize the into a format for analysis. There are many tools and workbooks that will help you do just this. Review data to make sure everything correct, and realistic. Look for errors and make sure all units of measurements are the same. After the data collected, organized and analyzed, you are ready to size your kanban.
Step 2: Calculate the kanban size You will calculate the kanban container size based on your current conditions, not on future plans or desires. The initial calculations use the production requirements, process productivity rate, planed downtime. Changeover times and system scrap rates to calculate the replenishment interval. The replenishment interval is the smallest batch size your production can run and still keep the customer supplied. This tells you how long it will take you to produce your adjusted production requirements. After you determine the replenishment interval, move on to calculating the buffers. Buffers should be looked at as the amount of inventory needed to prevent the item from delaying customer deliveries. The key is to hold enough inventories to protect the customer without holding too much inventory. In calculating the buffer, look at your customer delivery requirements, lead times (both internally and for the supplier) and your comfort level.

The final calculation in sizing your kanban is to determine the number of kanban containers to use. This calculation includes a buffer for safety stock and accounts for any process care, drying or normalization periods. This step is easy once you’ve collected all of your other data. It all comes down to a simple equation for each part:
(Buffer Quantity + Replenishment Interval) X Adjusted Production quantity
Container Capacity
Repeat this equation for each part of the process. This equation determines the number of containers of each product you will require to effectively operate the kanban and keep your customer(s) supplied. These quantities become scheduling signals and indicate the maximum amount of inventory held. When the containers are full, you stop production. These calculations will form the basis of your kanban design.
Step3: Design the kanban Once you calculate the quantities needed to support the production requirements, you can design the kanban. The design will show you how to implement the kanban in your facility. In order to create your design, you will need to do the following:
• Select the signaling mechanism for the kanban
• Develop the rules for operation of the kanban
• Create a visual management plan for the kanban Setting up the scheduling signal means that you develop a signal that tells the production operators when to produce parts, change over, and stop production. The only requirement of your signal is that it is easy to understand and easy to maintain. Your signals will indicate an emergency level (red), the signal to schedule production(yellow), and the normal level (green).
See ‘Kanban Visual Signals” to learn about more options for kanban visual signals. The rules you develop will drive the operation. The rules must be very detailed and give enough guidance to allow operators to control the production schedule. They also should be simple and make sense to your operation. You must spell out exactly who will perform what task, when to get help, and what the helpers will do when contacted. To make your rules easy to understand, use pictures and diagrams where you can. Once you have developed a signal mechanism and the rules, you need to determine how you will communicate the information. In order to communicate the information, you must create a visual management plan which includes putting up signs, posting the rules, marking or taping floors, posting job aids, etc. Here are a few hints to keep in mind
• Make sure each signal explains only one course of action
• Do not duplicate signals
• Make signals easy to manage The visual management plan, will visually explain to (and constantly remind) everyone how to operate the kanban. The goal of your visual management system should be to constantly answer the questions that arise on a daily basis. It should tell someone where to get the materials they need, where to move things to, what colour of container contains what part, whether there more containers of the part located elsewhere and if there is a colour scheme. There are any numbers of questions that will pop-up in any given day. Your visual management plan should do the best job possible at answering these questions. Keep in mind that you cannot over communicate. Use signs, colors, arrows, lines-anything to create order. You should always keep the colors consistent, using a planned color scheme. It is a good idea to avoid red because it is typically associated with safety or quality, and yellow which is generally associated with safety. Make sure you use large print on your signs so they are easy to read, and avoid too many words on your sign. Most people will just glance at a sign, not stop to ready it. One other key to keeping your management plan easy to use is to make sure your forms and signs are easy to update. They should look professional and consistent so they are easy to follow, but always allow for updates because you should constantly best riving for improvement.
Step4: Train everyone Train everyone on how the system will work and let them know what their role is. Do this before you ever begin to schedule the kanban? A good way to introduce everyone to the kanban is with a simple presentation. Also give them ”what-if” scenario to help them understand their roles in the process. Keep in mind that not everyone needs to be a kanban expert. Just train them well to carry out their piece of the puzzle.
Step5: Start the kanban Once everyone is trained, make sure all of the visual management pieces are in place. Have the signals set up, control points marked, and the rules completed and in place before you begin the kanban. This will help you avoid confusion. Anticipate problems, because every new process will show its faults, but take action to correct those problems when you first implement to kanban. This stage is when you will develop a scheduling transition plan. You’ll have to determine the exact point for the change and the amount of inventory required to make the change
Step 6: Audit the kanban After the kanban begins, you must then audit the kanban. This is the step that most often gets overlooked and results in a failed start-up. When you design the kanban, make sure you identify the person or team who will audit it. This person will watch how the scheduling signals are handled and whether the customer is staying supplied. When the auditor discovers a problem, corrective action needs to be taken immediately to maintain the integrity of the kanban design. The auditor must also look at the future to make sure the kanban will be able to meet the expected demand. If you do not adjust the kanban at the beginning to fit with the forecasted demand, then you will continually have to intervene to adjust the quantities, rendering the kanban useless.
Step7: Improve the kanban Once the kanban is running smoothly, look for ways to improve it. Once you see it inaction, you may be able to reduce inventory quantities. Look at the kanban and identify quantities that were oversized and pull the containers that are not needed. After you’ve made this adjustment, only reduce the quantities based on improvements made to the production process. Constant improvement is a keystone to competitive success. You can improve the process by reducing scrap, downtime and change overs. When you do make more adjustments due to an improvement, don’t just guess the quantities. Use the same calculations you used in sizing the original kanban (but with the new number) to determine the amount by which you can reduce the kanban quantities.
Kanban Visual Signals As mentioned earlier, there are a numerous ways for you to set up your kanban visual signals. You may use one of the common types of visual signals or come up with something specific to your facility that no one else has ever done. There are not necessarily any rules for what your visual signals can or cannot be, they just have to work for you. The following are examples of some of the most common types of visual signals
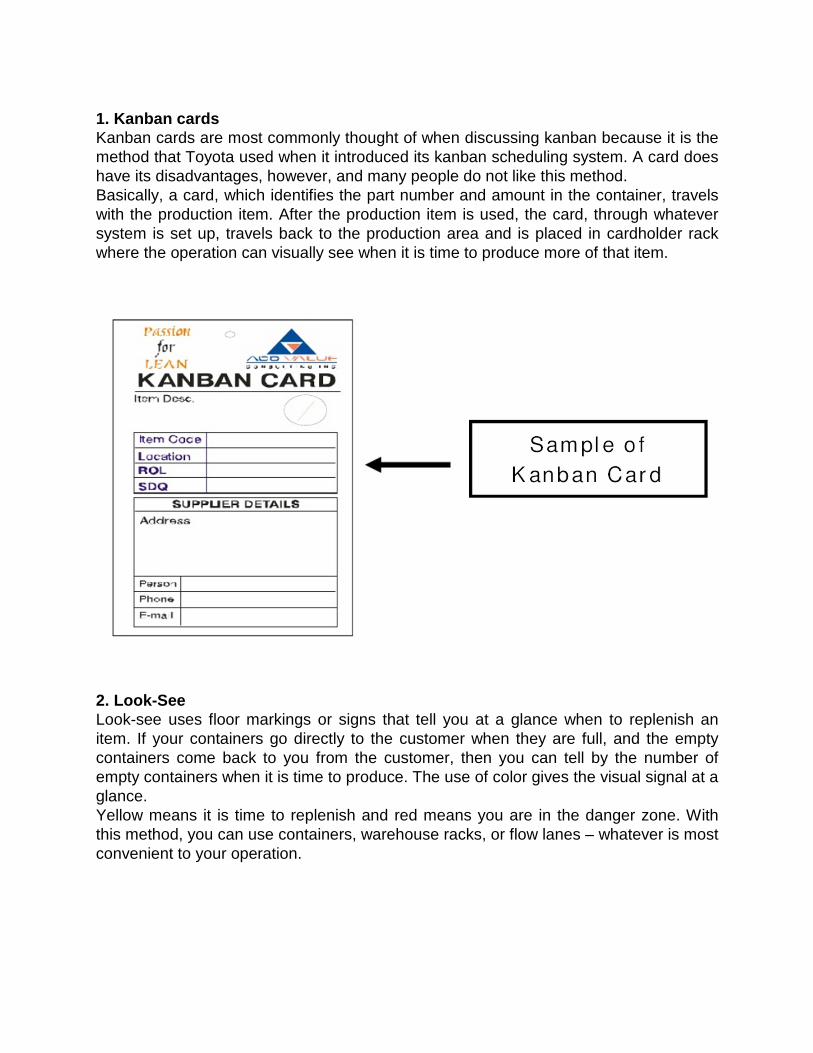
1. Kanban cards Kanban cards are most commonly thought of when discussing kanban because it is the method that Toyota used when it introduced its kanban scheduling system. A card does have its disadvantages, however, and many people do not like this method. Basically, a card, which identifies the part number and amount in the container, travels with the production item. After the production item is used, the card, through whatever system is set up, travels back to the production area and is placed in cardholder rack where the operation can visually see when it is time to produce more of that item.
2. Look-See Look-see uses floor markings or signs that tell you at a glance when to replenish an item. If your containers go directly to the customer when they are full, and the empty containers come back to you from the customer, then you can tell by the number of empty containers when it is time to produce. The use of color gives the visual signal at a glance. Yellow means it is time to replenish and red means you are in the danger zone. With this method, you can use containers, warehouse racks, or flow lanes – whatever is most convenient to your operation.

3. Kanban Boards Kanban boards are variation of kanban cards. The board simply uses magnet, plastic chips, colored washers, etc. attached to the board as a signal. Each object represents a container or production item. It works like the kanban cards, but instead of chasing cards around a building, you are moving objects around a board. The board will have three main areas. You move the magnets to the area on the board that coincides with the container it represents. When a container is produced, the magnet is moved to the “work in process” section. When the container is taken to a work center, the magnet should be moved to the “awaiting production” section. Finally, the ‘completed work in process’ section is divided into red, yellow and green sections. The red gets filled with magnets first and green is last. When you are in the red section that means you must produce more because you are in the danger zone. This is a very simple method of scheduling at a glance.
4. Two-Card Systems Two card systems work well in situations where product rotation is important. This is a mix of kanban board and kanban racks. It uses two kanban cards to signal the product location and age and it typically used for large items where flow racks are not utilized.

5. Faxbans (now emails) Faxbans are a variation of the kanban card system. It used to be done by Fax, but now more often its email. The faxes are used to order a replenishment of products when a plant is large or there are offsite warehouses or vendors.
6. Electronic kanban Electronic kanban is the ‘high-tech’ version of the faxban. The electronic kanban automatically transmits requirements or allows suppliers to access the customer’s inventory status and ship replacement material. This method is not as visual as a kanban board or other look-see methods; however it does have its place. Do not confuse this with your current forecasting system. Even though this may see similar to the method your company uses now, it still needs to be based on demand, not a forecast.
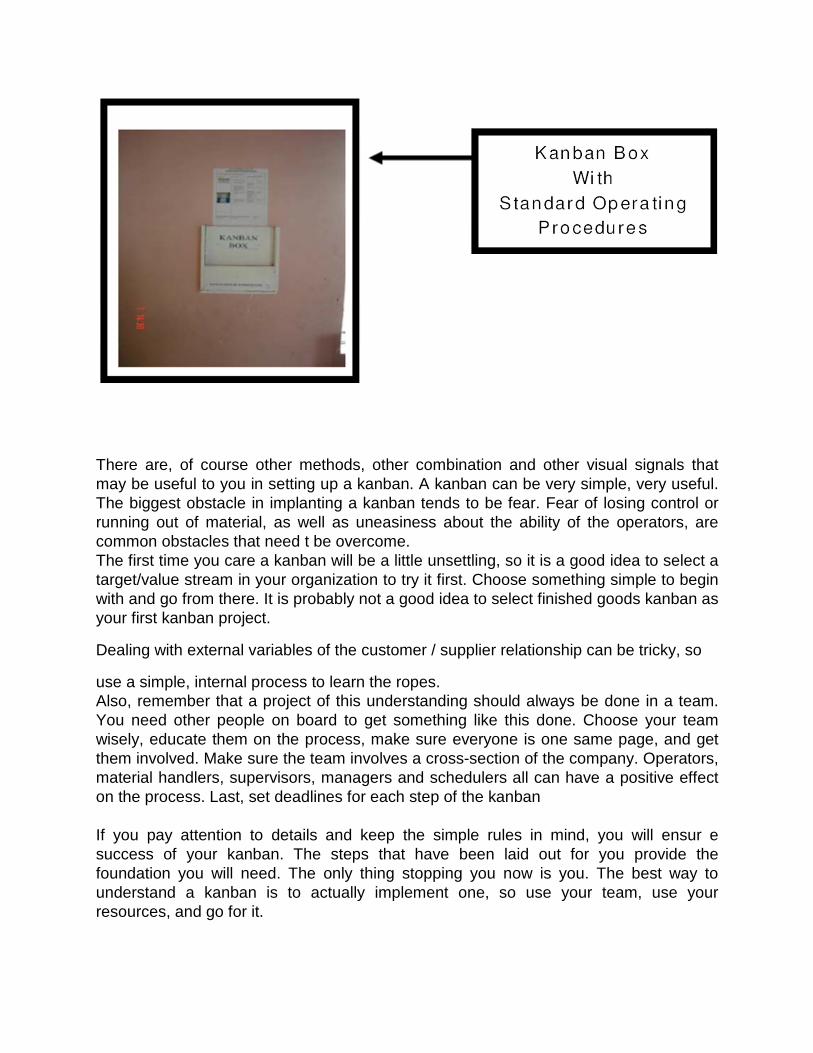
7. Warehouse racks Racks are an effective storage method when paired with another system like a
companion racking system. The racks provide a neat, space friendly storage area, and the tracking system provider’s easy visual management of that storage.
There are, of course other methods, other combination and other visual signals that may be useful to you in setting up a kanban. A kanban can be very simple, very useful. The biggest obstacle in implanting a kanban tends to be fear. Fear of losing control or running out of material, as well as uneasiness about the ability of the operators, are common obstacles that need t be overcome. The first time you care a kanban will be a little unsettling, so it is a good idea to select a target/value stream in your organization to try it first. Choose something simple to begin with and go from there. It is probably not a good idea to select finished goods kanban as your first kanban project.
Dealing with external variables of the customer / supplier relationship can be tricky, so
use a simple, internal process to learn the ropes. Also, remember that a project of this understanding should always be done in a team. You need other people on board to get something like this done. Choose your team wisely, educate them on the process, make sure everyone is one same page, and get them involved. Make sure the team involves a cross-section of the company. Operators, material handlers, supervisors, managers and schedulers all can have a positive effect on the process. Last, set deadlines for each step of the kanban If you pay attention to details and keep the simple rules in mind, you will ensur e success of your kanban. The steps that have been laid out for you provide the foundation you will need. The only thing stopping you now is you. The best way to understand a kanban is to actually implement one, so use your team, use your resources, and go for it.