ios game programming cookbook - sample chapter
DESCRIPTION
Chapter No. 3 Animations and TextureOver 45 interesting game recipes that will help you create your next enthralling gameFor more information : http://bit.ly/19Mo5E6TRANSCRIPT
Free Sample
In this package, you will find: • The authors biography • A preview chapter from the book, Chapter 3 'Animations and Texture' • A synopsis of the book’s content • More information on iOS Game Programming Cookbook
About the Authors Bhanu Birani has 5 years of experience in the software industry and a lifetime association with the technical industry. After years of programming experience in different programming languages, he started developing applications for iOS devices. He started software development along with his graduation and was really interested in learning the new technologies in the market. He then joined a software company and started developing games for them, focusing on artificial intelligence development in games.
He has also authored Application Development with Parse using iOS SDK and Getting Started with Flurry Analytics, both published by Packt Publishing.
Chhavi Vaishnav has more than 4 years of experience in the software industry. After her master's, she started working with IBM as a test engineer and then with extraordinary talent, she was promoted to the role of release manager in the organization. Despite being in the management profile, she has a relentless inclination towards iOS and mobility. She has contributed and worked on several projects directly and indirectly by strategizing and managing the technology in depth. She is a complete package for the organization with a get it done mindset.
iOS Game Programming Cookbook Since the iOS devices are breathing in the market, the games have been started ruling this segment as well. iOS devices provide us with a really powerful gaming platform, which enables all the game developers to develop amazing games for this segment. This book provides you with simple, direct solutions to all your common problems faced during game programming in iOS devices. This book covers a wide range of topics with detail and practical explanations. This book serves starts with simple game animations and an introduction to SpriteKit and then will grow the horizon towards working with the physics engine, 3D game programming, Artificial Intelligence for games and finally we will end up learning multiplayer game programming. The book contains more than 45 interesting game recipes, which you need to learn and implement in your next game. This book serves as an all-in-one package for beginners, intermediates, and experts. You have complete control of each step of the game development. We also provide the solution kit at the end of each chapter once the recipe is finished.
What This Book Covers Chapter 1, iOS Game Development, gets you started with the game development techniques with an understanding of the default game template and developing a mini game.
Chapter 2, SpriteKit, explains the basic structure of SpriteKit with the anatomy of game projects. Then later in the chapter we will take a deeper look into scenes, sprites and nodes. By end of the chapter we will be able to build a mini game with infinite scrolling.
Chapter 3, Animations and Texture, helps us to explore the depth of animations, which can be accomplished in iOS games. We will learn to create a texture atlas and create animations on them. We will also explore character animations and parallax backgrounds in this chapter.
Chapter 4, Particle System and Game Performance, makes us learn and understand the anatomy of particle effects and emitter system in games. In addition to that we will be exploring the evaluation of game performance in this chapter.
Chapter 5, Adding Music to iOS Games and an Introduction to iCloud, teaches us the numerous ways to add the music in the games. We will explore the various events to add music to the games such as background music and various other sounds effects on specific events. At end of the chapter, we will learn about iCloud integration in our games.
Chapter 6, Physics Simulation, gets us started on working with the physics engine in games in order to add more reality to the games. In this chapter, we will learn some exciting real-world simulations by creating a small game.
Chapter 7, Adding Reality to Games, broadens your scope in physics simulation by explaining the nitty gritty of physics joints, contact detection, and collision. In this chapter, we will explore the depth of physics and its impact on the overall game development process.
Chapter 8, Introduction to Game Math and Physics, brushes up your basic mathematics skills in the initial half of the chapter and then going forward explains their usage in the games. This chapter explains various aspects and properties of math and physics that are used in games.
Chapter 9, Autonomous Moving Agents, reveals the most interesting part of the games that is, artificial intelligence. In this chapter, we will practically implement various artificial intelligent behaviors in our game. We will explore, seek, flee, wander, arrive, pursuit, evade behaviors. Other than this, we will also learn group behaviors such as alignment cohesion and separation.
Chapter 10, 3D Game Programming with OpenGL, helps you in exploring 3D game programming. In this chapter we will learn the basics of OpenGL and then going forward in the chapter we will learn create a working 3D game model.
Chapter 11, Getting Started with Multiplayer Games, starts from the basics of the multiplayer game including the anatomy of multiplayer games. You will learn to set up a connection between two iOS devices and then will also learn to send and receive data from one device to another.
Chapter 12, Implementing Multiplayer Games, creates a multiplayer game using which two players can play simultaneously. In this chapter, we will use all the methodologies that we have learned in the introduction chapter.
43
3Animations and Texture
In Chapter 2, SpriteKit, you learned about the basic structure of SpriteKit and its building blocks such as scenes, nodes, sprites, and so on. We got a fl ying spaceship in the sky by touching the screen, and now in this chapter we will be moving to a fully featured game play for the user.
You will learn about how the content of sprites are changed using animations, how textures (which store sprite data) are used to render the sprites, how to create a large image for all game assets using the texture atlas, some character (spaceship) animations, and last but the most beautiful will be creating a parallax background for the game full of animations.
In this chapter, we will be focusing on the following recipes:
Animating your textures
Creating a texture atlas
Adding animations using a texture atlas
Collision detection
Parallax background

Animations and Texture
44
IntroductionAdding animations into our games using SpriteKit is an easy task, as we did in the previous chapter, where we added some SKAction functions to get the spaceship to move. These were the animations related to their movement, orientations, and somewhat related to their transformations. However, now the animation that we are going to talk about is the content change of a sprite. Animations will be animating multiple images (that is, frames) of the same sprite multiple times per second, giving a feel of being alive for the sprite. This is somewhat similar to the way we capture the videos, it's just a sequence of the snapshots per second. These types of animations need a lot of images to be accomplished thereby increasing the memory size for these textures. The texture is represented by a SKTexture object created and attached with the sprite. Texture object automatically loads the sprite data (called Texture data) whenever it is visible and is used to render the sprite in the respective scene. And when the sprite is removed or not visible in the scene, it deletes the texture data, and as a result automatic memory management is simplifi ed.
Technically, all of this means that sprites have display frames, which have different textures that change by a fi xed delay between each frame. And everything we are going to do in the starter and solution kit will be continued from where we left in the previous chapter.
Animating your texturesIn this recipe, we will look at how textures are created and attached to sprites. We will also do some content change (that is, frame changing animations) with the help of textures.
Getting readyTo get started with textures to be animated, we should know about scenes, nodes, and sprites. As sprites are created with an image and are added on scene, which occupies more memory, textures should be a solution to this problem.
How to do it...As the images are stored in App Bundle, the simplest way to create a sprite with texture is to create the texture fi rst and then the sprite using the same texture. At runtime, the images are loaded from the app bundle to become the texture and then the visible entity called sprite.
So in the previous chapter, we created the sprite using its class method:
self.spaceShipSprite = [SKSpriteNode spriteNodeWithImageNamed:@"Spaceship.png"];
Chapter 3
45
Now, we will continue with the fi nal solution kit created in the previous chapter thereby using the SKTexture object to create the sprite in place of the preceding method used to create a sprite:
1. Create the SKTexture object with the same image of the spaceship:
SKTexture* spaceShipTexture = [SKTexture textureWithImageNamed:@"Spaceship.png"];
2. Use the preceding texture object to create the SKSpriteNode object:
self.spaceShipSprite = [SKSpriteNode spriteNodeWithTexture:spaceShipTexture];
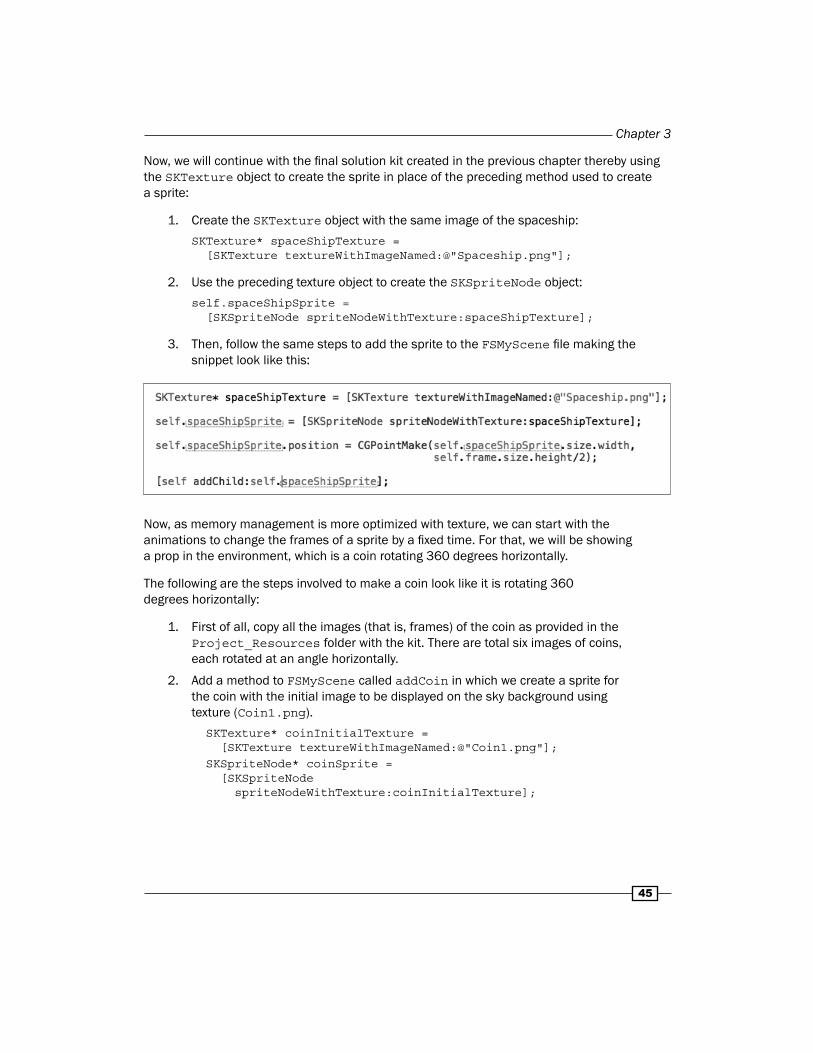
3. Then, follow the same steps to add the sprite to the FSMyScene fi le making the snippet look like this:
Now, as memory management is more optimized with texture, we can start with the animations to change the frames of a sprite by a fi xed time. For that, we will be showing a prop in the environment, which is a coin rotating 360 degrees horizontally.
The following are the steps involved to make a coin look like it is rotating 360 degrees horizontally:
1. First of all, copy all the images (that is, frames) of the coin as provided in the Project_Resources folder with the kit. There are total six images of coins, each rotated at an angle horizontally.
2. Add a method to FSMyScene called addCoin in which we create a sprite for the coin with the initial image to be displayed on the sky background using texture (Coin1.png).
SKTexture* coinInitialTexture = [SKTexture textureWithImageNamed:@"Coin1.png"]; SKSpriteNode* coinSprite = [SKSpriteNode spriteNodeWithTexture:coinInitialTexture];
Animations and Texture
46
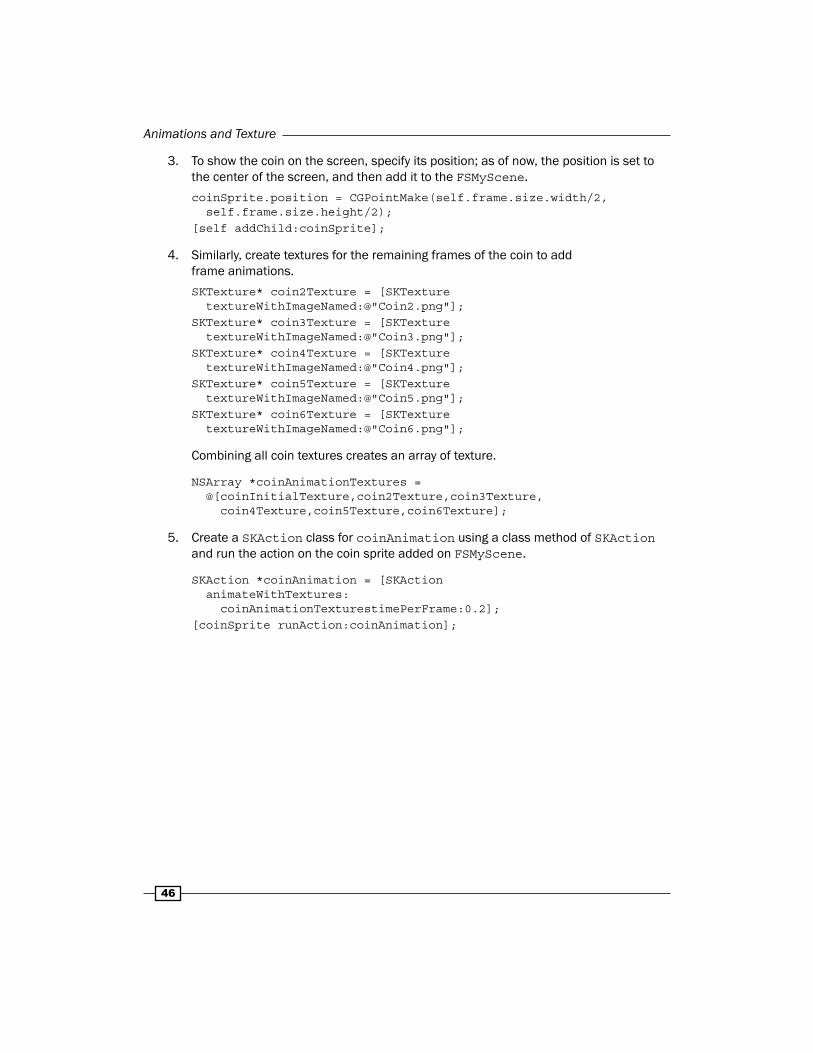
3. To show the coin on the screen, specify its position; as of now, the position is set to the center of the screen, and then add it to the FSMyScene.
coinSprite.position = CGPointMake(self.frame.size.width/2, self.frame.size.height/2);[self addChild:coinSprite];
4. Similarly, create textures for the remaining frames of the coin to add frame animations.
SKTexture* coin2Texture = [SKTexture textureWithImageNamed:@"Coin2.png"];SKTexture* coin3Texture = [SKTexture textureWithImageNamed:@"Coin3.png"];SKTexture* coin4Texture = [SKTexture textureWithImageNamed:@"Coin4.png"];SKTexture* coin5Texture = [SKTexture textureWithImageNamed:@"Coin5.png"];SKTexture* coin6Texture = [SKTexture textureWithImageNamed:@"Coin6.png"];
Combining all coin textures creates an array of texture.
NSArray *coinAnimationTextures = @[coinInitialTexture,coin2Texture,coin3Texture, coin4Texture,coin5Texture,coin6Texture];
5. Create a SKAction class for coinAnimation using a class method of SKAction and run the action on the coin sprite added on FSMyScene.
SKAction *coinAnimation = [SKAction animateWithTextures: coinAnimationTexturestimePerFrame:0.2];[coinSprite runAction:coinAnimation];
Chapter 3
47
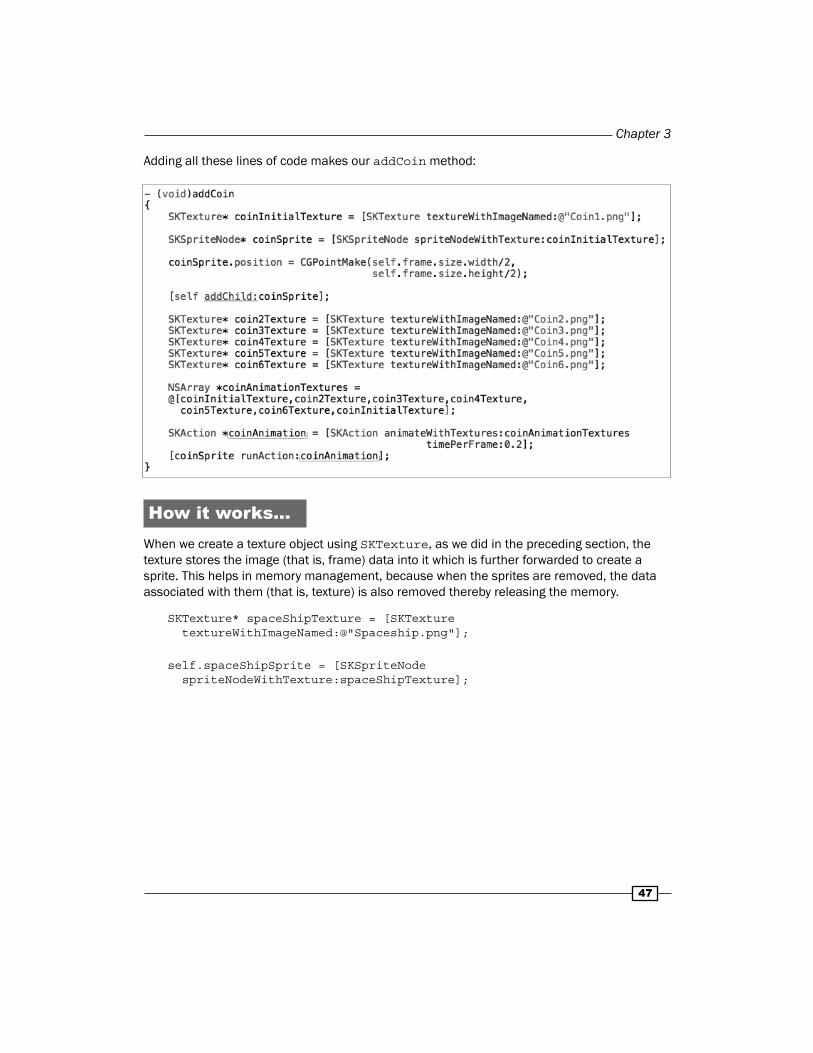
Adding all these lines of code makes our addCoin method:
How it works...When we create a texture object using SKTexture, as we did in the preceding section, the texture stores the image (that is, frame) data into it which is further forwarded to create a sprite. This helps in memory management, because when the sprites are removed, the data associated with them (that is, texture) is also removed thereby releasing the memory.
SKTexture* spaceShipTexture = [SKTexture textureWithImageNamed:@"Spaceship.png"];
self.spaceShipSprite = [SKSpriteNode spriteNodeWithTexture:spaceShipTexture];

Animations and Texture
48
Similarly, the coin is also added using texture in the center of the screen with its initial frame, which looks like this:
Now we will see how animations of frames work using a number of textures. We have just created some textures using some coin images, which are visually designed in increasing order of horizontal rotation angle. So an array in the same order of textures is created.
NSArray *coinAnimationTextures = @[coinInitialTexture,coin2Texture,coin3Texture,coin4Texture, coin5Texture,coin6Texture];
Using a class method of SKAction, the coin animation textures array is given as an input with a frame delay of 0.2 seconds.
SKAction *coinAnimation = [SKAction animateWithTextures:coinAnimationTexturestimePerFrame:0.2];
[coinSprite runAction:coinAnimation];
The preceding function takes the textures and shows them with a delay of 0.2 seconds in the order the textures are given.
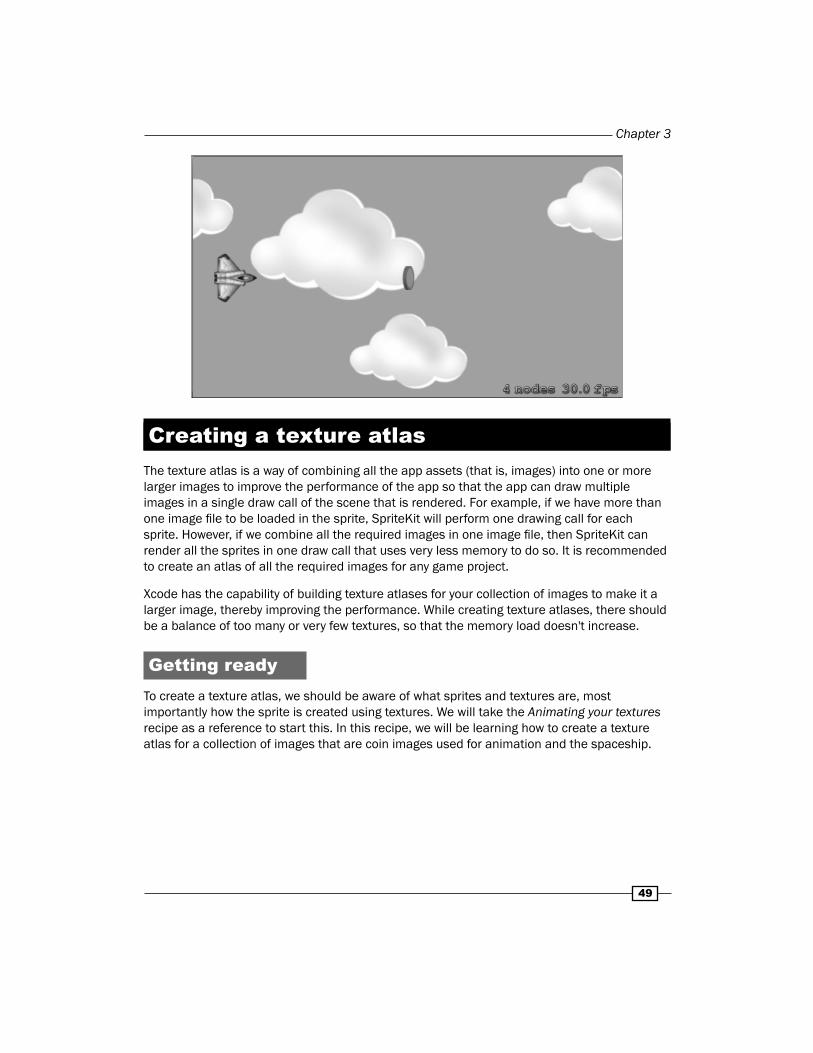
Hence, the overall addCoin method with the animation code written gives a feel that a coin has rotated horizontally once in the center of the screen, and this is what the scene looks like:
Chapter 3
49
Creating a texture atlasThe texture atlas is a way of combining all the app assets (that is, images) into one or more larger images to improve the performance of the app so that the app can draw multiple images in a single draw call of the scene that is rendered. For example, if we have more than one image fi le to be loaded in the sprite, SpriteKit will perform one drawing call for each sprite. However, if we combine all the required images in one image fi le, then SpriteKit can render all the sprites in one draw call that uses very less memory to do so. It is recommended to create an atlas of all the required images for any game project.
Xcode has the capability of building texture atlases for your collection of images to make it a larger image, thereby improving the performance. While creating texture atlases, there should be a balance of too many or very few textures, so that the memory load doesn't increase.
Getting readyTo create a texture atlas, we should be aware of what sprites and textures are, most importantly how the sprite is created using textures. We will take the Animating your textures recipe as a reference to start this. In this recipe, we will be learning how to create a texture atlas for a collection of images that are coin images used for animation and the spaceship.
Animations and Texture
50
How to do it...The following are the steps to be performed for creating a texture atlas for a collection of images:
1. Create a system folder where your project is stored in the starter project of FlyingSpaceship.
It should not be an Xcode group folder; it has to be a system folder.
2. In that folder, add all images of coins and the image of the spaceship added previously in the app bundle.
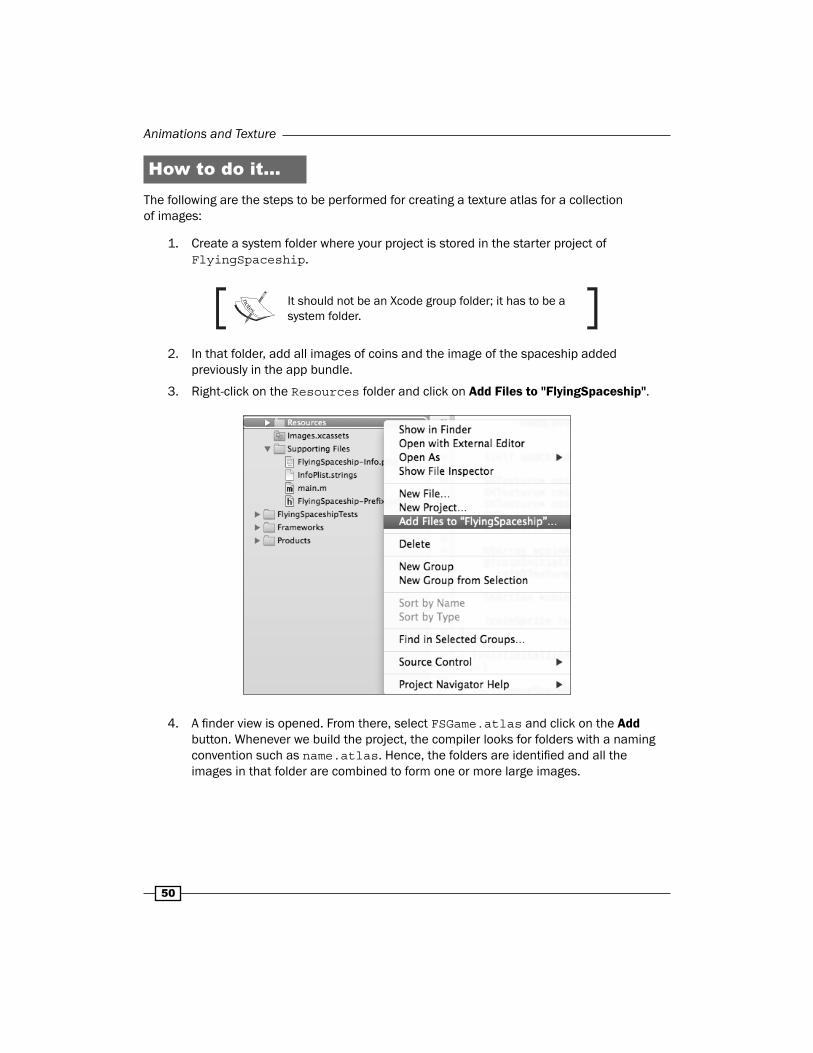
3. Right-click on the Resources folder and click on Add Files to "FlyingSpaceship".
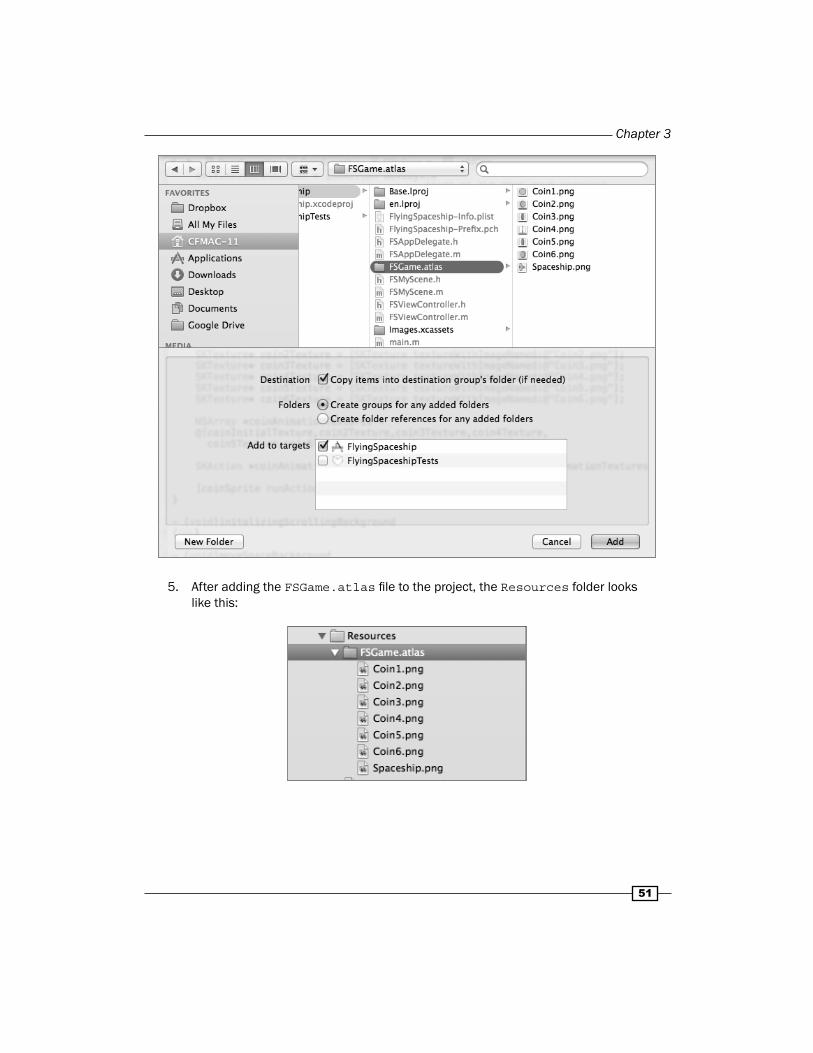
4. A fi nder view is opened. From there, select FSGame.atlas and click on the Add button. Whenever we build the project, the compiler looks for folders with a naming convention such as name.atlas. Hence, the folders are identifi ed and all the images in that folder are combined to form one or more large images.
Chapter 3
51
5. After adding the FSGame.atlas fi le to the project, the Resources folder looks like this:
Animations and Texture
52
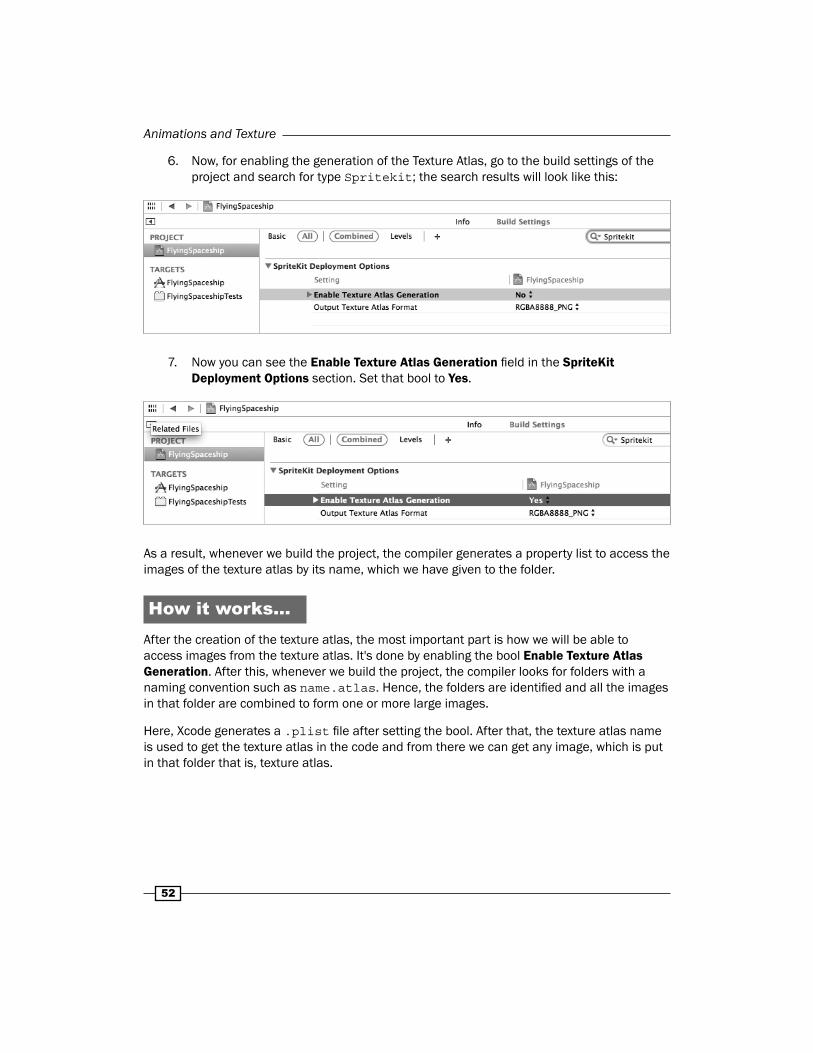
6. Now, for enabling the generation of the Texture Atlas, go to the build settings of the project and search for type Spritekit; the search results will look like this:
7. Now you can see the Enable Texture Atlas Generation fi eld in the SpriteKit Deployment Options section. Set that bool to Yes.
As a result, whenever we build the project, the compiler generates a property list to access the images of the texture atlas by its name, which we have given to the folder.
How it works...After the creation of the texture atlas, the most important part is how we will be able to access images from the texture atlas. It's done by enabling the bool Enable Texture Atlas Generation. After this, whenever we build the project, the compiler looks for folders with a naming convention such as name.atlas. Hence, the folders are identifi ed and all the images in that folder are combined to form one or more large images.
Here, Xcode generates a .plist fi le after setting the bool. After that, the texture atlas name is used to get the texture atlas in the code and from there we can get any image, which is put in that folder that is, texture atlas.
Chapter 3
53
There's more...Whenever we create a texture atlas, there is always a trade-off between using too many textures or few images. When using few images SpriteKit still needs to make many drawing calls to render each frame. And for many textures, the images in quantity may increase the texture data thereby leading to a load on the memory. So it's up to us how we want to go; we can switch between both the alternatives with relative ease. Hence, different confi gurations can be tried out to have the best performance.
Adding animations using a texture atlasWe have already learned about animations even before learning how to use textures for loading images from App Bundle. As we have a texture atlas (that is, a larger combined image), we will be loading the images by that texture atlas. All sprites added in the FSMyScene fi le are loaded by the images from the App Bundle, so now we will be loading all the images by the texture atlas in the sprite. Lastly, some animations will be applied to them using the texture atlas to load the images.
Getting readyBefore starting with the animations using a texture atlas to load images, we should know the process of creating a texture atlas using a combination of images and doing some animations of changing frame after a fi xed delay. So here we will be doing the same animation of coin rotation we did earlier, but now using a texture atlas. This recipe will be called Adding animations using a texture atlas. After that we will animate a bunch of coins from one end to another (right to left) in the FSMyScene in a random fashion giving a feel that coins are just moving in the sky.
How to do it…First of all, we will be replacing the creation of textures using the image by the texture atlas images in App Bundle. Perform the following steps:
1. Create an object of SKTextureAtlas by specifying its name that is, FSGame (name of the texture atlas).
SKTextureAtlas *textureAtlas = [SKTextureAtlas atlasNamed:@"FSGame"];
The images previously added to the project bundle should be removed to avoid redundancy.
SKTexture* spaceShipTexture = [SKTexture textureWithImageNamed:@"Spaceship.png"];

Animations and Texture
54
2. Now create the texture using a texture atlas object by passing the spaceship image that has to be set to the sprite.
SKTexture* spaceShipTexture = [textureAtlas textureNamed:@"Spaceship.png"];
3. In the addCoin method of FSMyScene, use the preceding process to create the textures using the textureAtlas object for all coin textures.
SKTextureAtlas *textureAtlas = [SKTextureAtlas atlasNamed:@"FSGame"];
SKTexture* coinInitialTexture = [textureAtlas textureNamed:@"Coin1.png"];
SKTexture* coin2Texture = [textureAtlas textureNamed:@"Coin2.png"]; SKTexture* coin3Texture = [textureAtlas textureNamed:@"Coin3.png"]; SKTexture* coin4Texture = [textureAtlas textureNamed:@"Coin4.png"]; SKTexture* coin5Texture = [textureAtlas textureNamed:@"Coin5.png"]; SKTexture* coin6Texture = [textureAtlas textureNamed:@"Coin6.png"];
4. Once all the textures are created, use the same code of addCoin to add and animate the coin.
5. Let's make the coin animation more live and natural. Feed the action formed for animating the texture with a fi xed delay to another SKAction making it repeat forever giving a feel of continuous rotation of coin (never ending).
SKAction *rotateAction = [SKAction animateWithTextures:coinAnimationTextures timePerFrame:0.2]; SKAction *coinRepeatForeverAnimation = [SKAction repeatActionForever:rotateAction]; [coinSprite runAction:coinRepeatForeverAnimation];
6. After a little tweaking, remove the last texture from the array so that when the repeatForever action is going to run, the fi rst image will appear after the last image, so there is no need for the last texture.
NSArray *coinAnimationTextures = @[coinInitialTexture,coin2Texture,coin3Texture, coin4Texture,coin5Texture,coin6Texture];
Chapter 3
55
Now our forever rotating coin is built and can be used either as a prop or collectables in our game.
These are the steps to make the coins collectables:
1. For making a coin move from the left end to the right end of the screen, we have to calculate the initial and fi nal positions.
CGFloat coinInitialPositionX = self.frame.size.width + coinSprite.size.width/2; CGFloat coinInitialPositionY = arc4random() % 320; CGPoint coinInitialPosition = CGPointMake(coinInitialPositionX, oinInitialPositionY);
CGFloat coinFinalPositionX = -coinSprite.size.width/2; CGFloat coinFinalPositionY = coinInitialPositionY; CGPoint coinFinalPosition = CGPointMake(coinFinalPositionX, coinFinalPositionY);
2. After that, set the initial position as the coin sprite position.
coinSprite.position = coinInitialPosition;
3. The initial position of the coin is set and now we have to animate the coin from the initial position to the fi nal position. This can be done by adding a move SKAction to the coin sprite specifying its fi nal destination.
SKAction *coinMoveAnimation = [SKAction moveTo:coinFinalPosition duration:5.0]; [coinSprite runAction:coinMoveAnimation];
Finally, our addCoin method has been fully prepared for the game. For moving the coins as collectables, perform the following steps:
1. For making these coins move as collectables in the scene, a little bit of refactoring is required in the update method. Update the diffTime and lastUpdatedTime as shown in the following code:
if (self.lastUpdatedTime) { self.diffTime = currentTime - self.lastUpdatedTime; } else { self.diffTime = 0; }
self.lastUpdatedTime = currentTime;
Animations and Texture
56
2. Now using currentTime, create a timer kind of functionality by declaring a property called lastCoinAdded in the private interface of FSMyScene.
@property (nonatomic, assign) NSTimeInterval lastCoinAdded;
3. So this is the timer added in the update method and the diff of currentTime and lastCoinAdded is checked by 1. Hence, after every 1.0 second, a coin will be added with animation moving from left to right on the screen.
if( currentTime - self.lastCoinAdded > 1) { self.lastCoinAdded = currentTime + 1; [self addCoin]; }
Finally, our update method is ready to animate multiple coins after a set delay.
How it works…Before we were creating the sprite using images from App Bundle, but now we will be using texture atlas to get the images and passing to the sprites. The preceding texture atlas named FSGame.atlas holds multiple images of coins and spaceship in it. The internal code loads the frames and stores them in an array.
SpriteKit fi rst searches for the image fi le, if not found it searches inside the texture atlases build into the app bundle. If we want to work explicitly with texture atlases, use the SKTextureAtlas class. It fetches the texture atlas by specifying its name:
SKTextureAtlas *textureAtlas = [SKTextureAtlas atlasNamed:@"FSGame"];
Then we can use the atlas object to get the required image for creation of sprites.
SKTexture* spaceShipTexture = [textureAtlas textureNamed:@"Spaceship.png"];
Now we will understand how the coins are converted into collectables. For moving the coins, its initial and fi nal positions are to be decided.
The initial position in x dimensions, is fi xed to the width of the frame plus half of its coin so that it is added outside the screen and y dimensions are randomly chosen from 0 to 320 using the arc4random()function.
CGFloat coinInitialPositionX = self.frame.size.width + coinSprite.size.width/2; CGFloat coinInitialPositionY = arc4random() % 320; CGPoint coinInitialPosition = CGPointMake(coinInitialPositionX, coinInitialPositionY);
Chapter 3
57
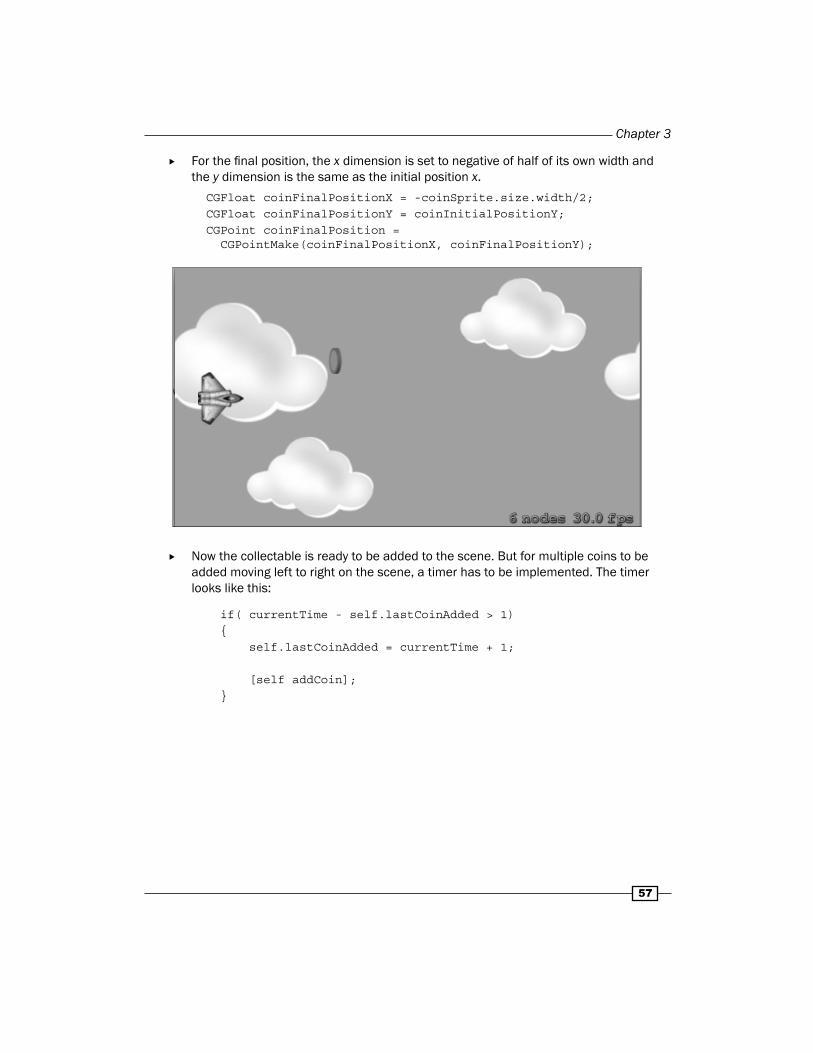
For the fi nal position, the x dimension is set to negative of half of its own width and the y dimension is the same as the initial position x.
CGFloat coinFinalPositionX = -coinSprite.size.width/2; CGFloat coinFinalPositionY = coinInitialPositionY; CGPoint coinFinalPosition = CGPointMake(coinFinalPositionX, coinFinalPositionY);
Now the collectable is ready to be added to the scene. But for multiple coins to be added moving left to right on the scene, a timer has to be implemented. The timer looks like this:
if( currentTime - self.lastCoinAdded > 1) { self.lastCoinAdded = currentTime + 1; [self addCoin]; }
Animations and Texture
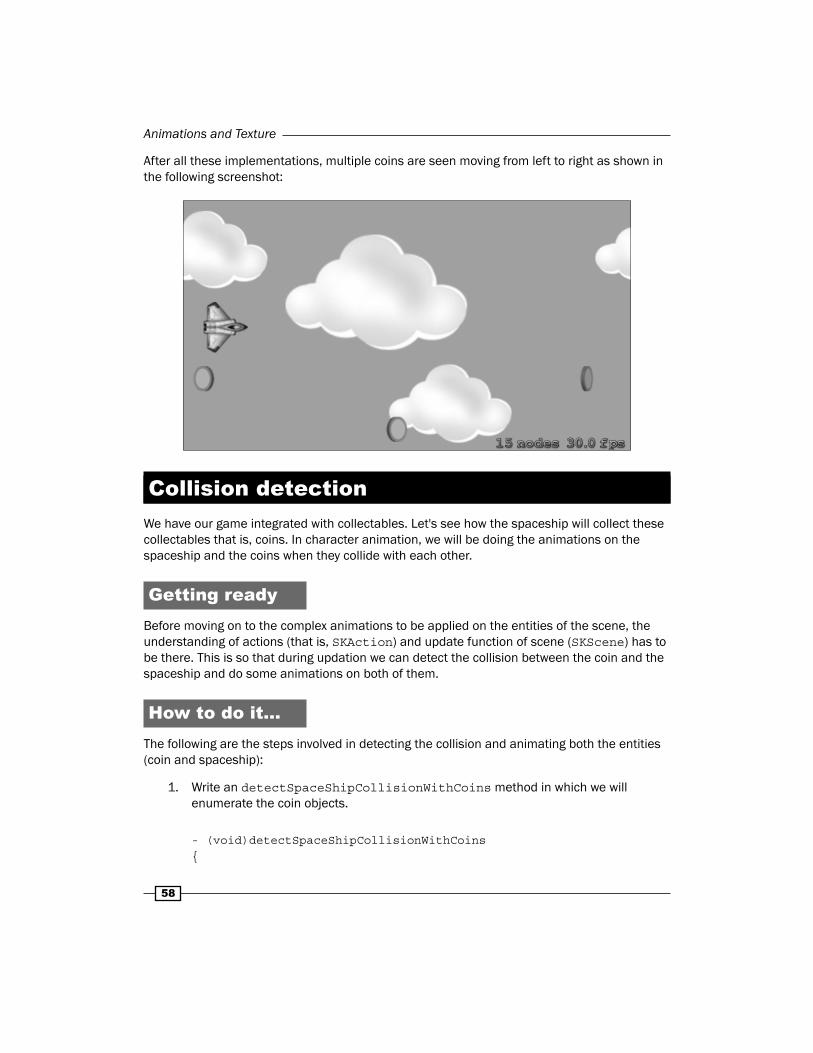
58
After all these implementations, multiple coins are seen moving from left to right as shown in the following screenshot:
Collision detectionWe have our game integrated with collectables. Let's see how the spaceship will collect these collectables that is, coins. In character animation, we will be doing the animations on the spaceship and the coins when they collide with each other.
Getting readyBefore moving on to the complex animations to be applied on the entities of the scene, the understanding of actions (that is, SKAction) and update function of scene (SKScene) has to be there. This is so that during updation we can detect the collision between the coin and the spaceship and do some animations on both of them.
How to do it…The following are the steps involved in detecting the collision and animating both the entities (coin and spaceship):
1. Write an detectSpaceShipCollisionWithCoins method in which we will enumerate the coin objects.
- (void)detectSpaceShipCollisionWithCoins{
Chapter 3
59
[self enumerateChildNodesWithName:@"Coin" usingBlock: ^(SKNode *node, BOOL *stop) { }];}
2. In that enumeration, determine that the frame of the spaceship and the frame of any coin intersects with the help of CGRectIntersectsRect().
[self enumerateChildNodesWithName:@"Coin" usingBlock: ^(SKNode *node, BOOL *stop) { if (CGRectIntersectsRect(self.spaceShipSprite.frame, node.frame)) {
} }];
3. When a collision is detected, inform the scene that a coin has collided with the spaceship by a function called spaceShipCollidedWithCoin.
[self spaceShipCollidedWithCoin:node];
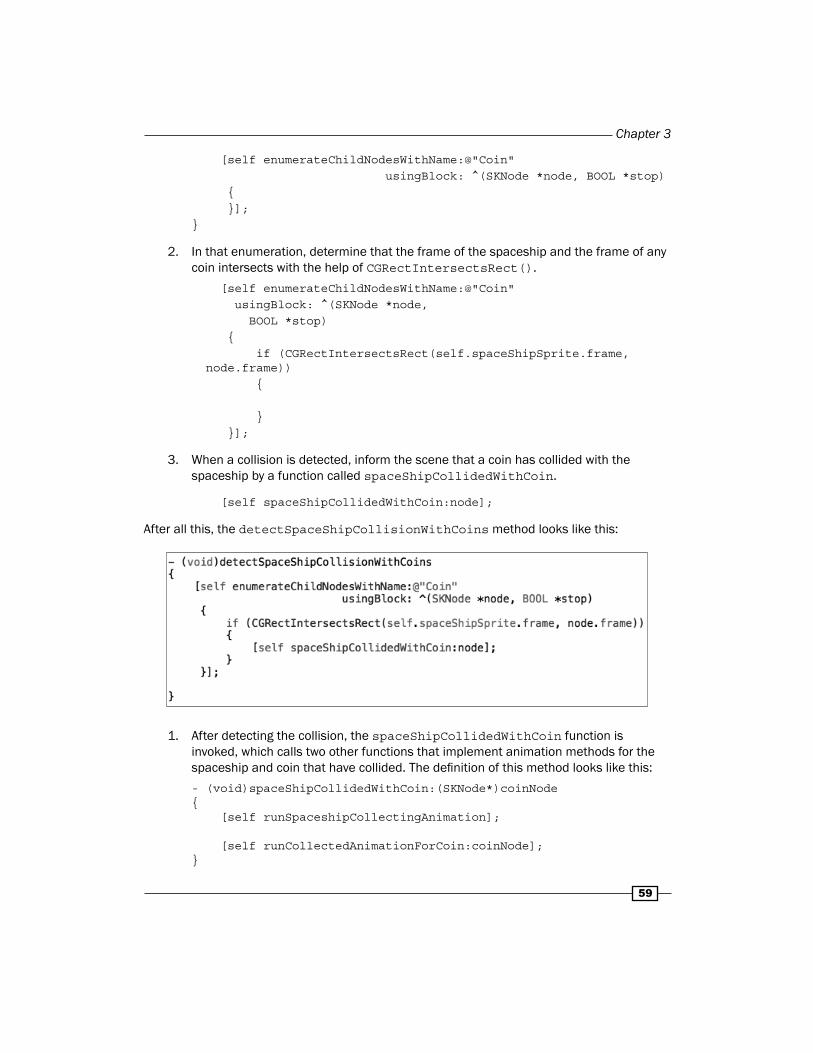
After all this, the detectSpaceShipCollisionWithCoins method looks like this:
1. After detecting the collision, the spaceShipCollidedWithCoin function is invoked, which calls two other functions that implement animation methods for the spaceship and coin that have collided. The defi nition of this method looks like this:
- (void)spaceShipCollidedWithCoin:(SKNode*)coinNode{ [self runSpaceshipCollectingAnimation]; [self runCollectedAnimationForCoin:coinNode];}
Animations and Texture
60
2. The animation written for the spaceship is as if it is taking the coin into itself. There are two actions created for scaleUp and scaleDown with a scale factor 1.4 and 1.0 respectively to be played for 0.2 each.
- (void)runSpaceshipCollectingAnimation{ SKAction* scaleUp = [SKAction scaleTo:1.4 duration:0.2];
SKAction* scaleDown = [SKAction scaleTo:1.0 duration:0.2];}
3. After that, these two animation arrays are formed to be used for creating a sequence action.
NSArray* scaleSequenceAnimations = [NSArray arrayWithObjects:scaleUp, scaleDown, nil];
SKAction* spaceShipCollectingAnimation = [SKAction sequence:scaleSequenceAnimations];
Lastly the sequence action formed runs on the spaceship.
[self.spaceShipSprite runAction:spaceShipCollectingAnimation];
4. For the coin, the animation should be as if it is disappearing as it is taken by the spaceship. Thus, two core animations fadeOut and scaleDown are created with a 0.2 scale factor having a time interval of 0.4 each, forming an array of animations.
- (void)runCollectedAnimationForCoin:(SKNode*)coinNode{ SKAction* coinFadeOutAnimation = [SKAction fadeOutWithDuration:0.4]; SKAction* scaleDownAnimation = [SKAction scaleTo:0.2 duration:0.4]; NSArray* coinAnimations = [NSArray arrayWithObjects:coinFadeOutAnimation, scaleDownAnimation, nil]; }
5. Using these animations, a group animation is formed.
SKAction* coinGroupAnimation = [SKAction group:coinAnimations];
Chapter 3
61
6. As for the coin, when it collides with the spaceship, it has to be removed from the scene when its animation is over. So create an action using the block to remove the coin after the previously created group animation is completed.
SKAction* coinAnimationFinishedCallBack = [SKAction customActionWithDuration:0.0 actionBlock:^(SKNode *node,CGFloat elapsedTime) { [node removeFromParent]; }];
In the preceding code snippet, we are using the removeFromParent function, which is similar to removeFromSuperview in UIKit.
7. As the animations are ready, create the sequence action for it using an array.
NSArray* coinAnimationsSequence = [NSArray arrayWithObjects:coinGroupAnimation, coinAnimationFinishedCallBack, nil]; SKAction* coinSequenceAnimation = [SKAction sequence:coinAnimationsSequence];
Hence, the coin looks as if it is disappearing when the preceding complex actions run on the coin.
[coinNode runAction:coinSequenceAnimation];
8. As all the code of the animation and collision detection is done, call the detechSpaceShipCollisionWithCoins method, so that in each frame the collision is detected and the coin is collected by the character of the game (that is, the spaceship).
[self detectSpaceShipCollisionWithCoins];
How it works…The most important part of this section is the collision detection. It is done with the help of the CGRectIntersectsRect method in which the coins are enumerated and checked whether their frames intersect the spaceship frame. If they do, then two different animations are played on the coin and spaceship.
[self enumerateChildNodesWithName:@"Coin" usingBlock: ^(SKNode *node, BOOL *stop) { if (CGRectIntersectsRect(self.spaceShipSprite.frame, node.frame)) {
} }];
Animations and Texture
62
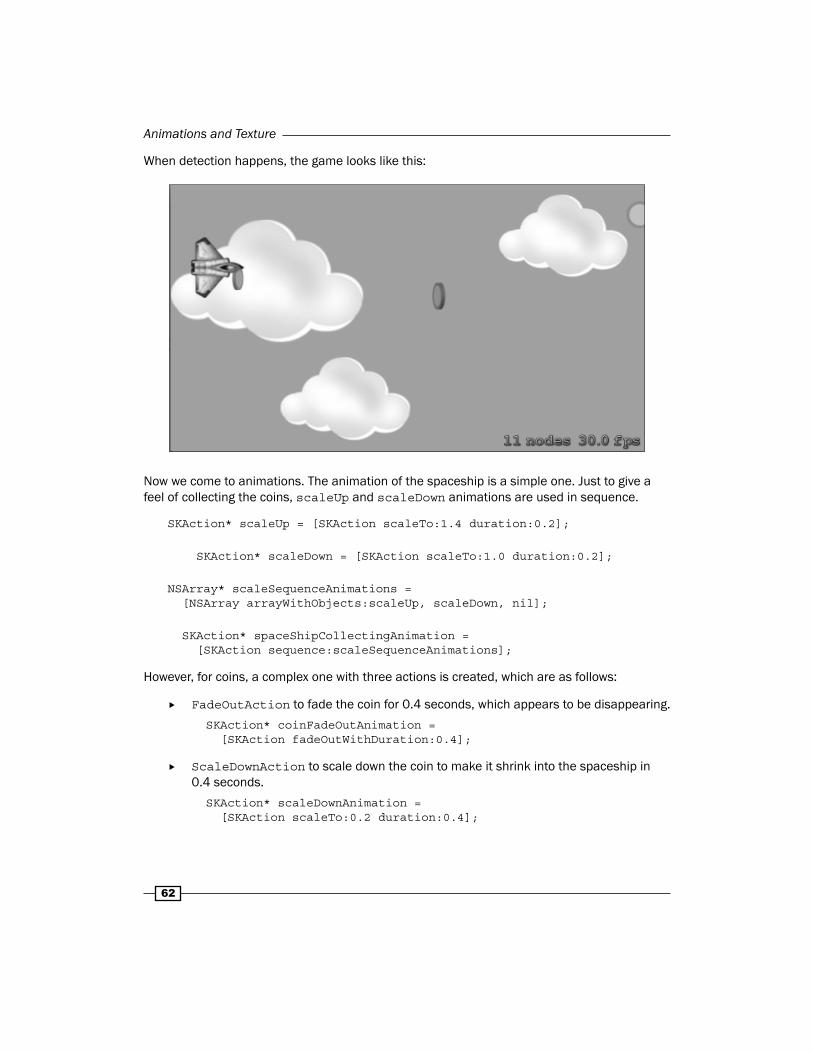
When detection happens, the game looks like this:
Now we come to animations. The animation of the spaceship is a simple one. Just to give a feel of collecting the coins, scaleUp and scaleDown animations are used in sequence.
SKAction* scaleUp = [SKAction scaleTo:1.4 duration:0.2];
SKAction* scaleDown = [SKAction scaleTo:1.0 duration:0.2];
NSArray* scaleSequenceAnimations = [NSArray arrayWithObjects:scaleUp, scaleDown, nil]; SKAction* spaceShipCollectingAnimation = [SKAction sequence:scaleSequenceAnimations];
However, for coins, a complex one with three actions is created, which are as follows:
FadeOutAction to fade the coin for 0.4 seconds, which appears to be disappearing.
SKAction* coinFadeOutAnimation = [SKAction fadeOutWithDuration:0.4];
ScaleDownAction to scale down the coin to make it shrink into the spaceship in 0.4 seconds.
SKAction* scaleDownAnimation = [SKAction scaleTo:0.2 duration:0.4];
Chapter 3
63
A CallBack function that is used to remove the coin from the scene when the preceding animations are over.
SKAction* coinAnimationFinishedCallBack = [SKAction customActionWithDuration:0.0 actionBlock:^(SKNode *node,CGFloat elapsedTime) { [node removeFromParent]; }];
After creation of all these actions, a group of fadeOut and scaleDown, a sequence of animation with a sequence of group animation and callback action is created, which is applied on the coin.
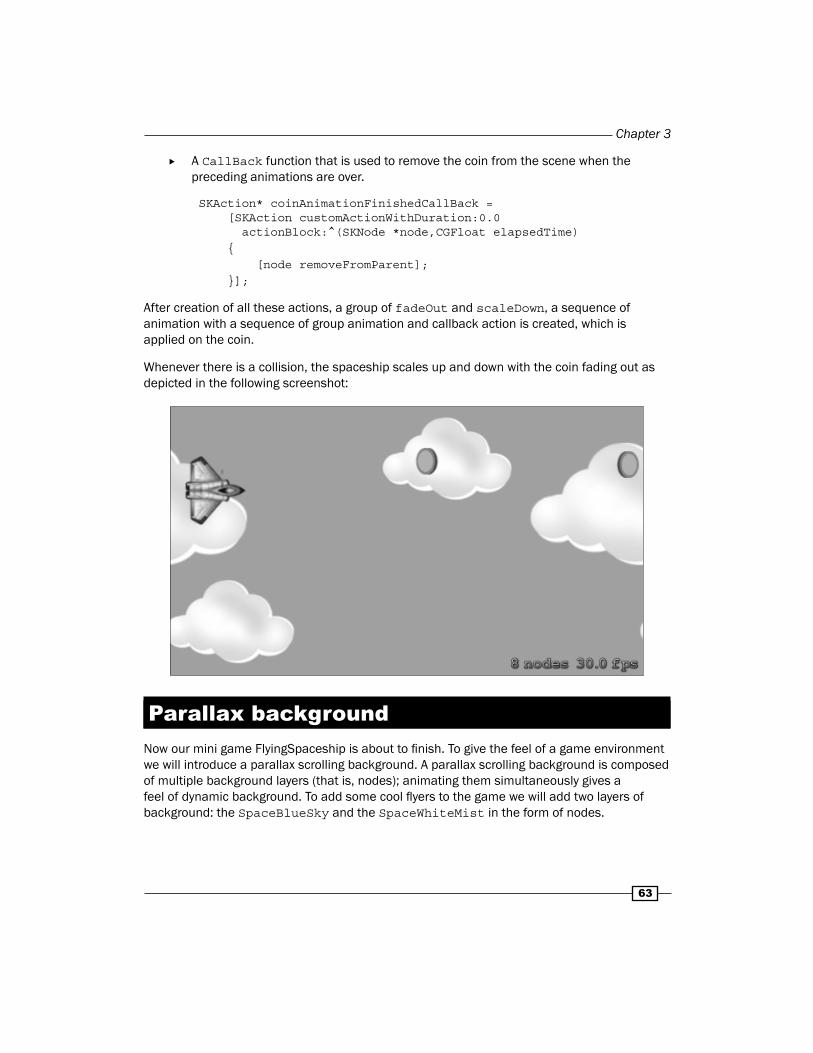
Whenever there is a collision, the spaceship scales up and down with the coin fading out as depicted in the following screenshot:
Parallax backgroundNow our mini game FlyingSpaceship is about to fi nish. To give the feel of a game environment we will introduce a parallax scrolling background. A parallax scrolling background is composed of multiple background layers (that is, nodes); animating them simultaneously gives a feel of dynamic background. To add some cool fl yers to the game we will add two layers of background: the SpaceBlueSky and the SpaceWhiteMist in the form of nodes.
Animations and Texture
64
Getting readyTo start with this cool feature, we should be aware of the scrolling background created in the previous chapter and have a basic knowledge of sprites, nodes, and math. We are going to cook the Parallax background recipe in the FlyingSpaceship game.
How to do it…To create multiple scrolling backgrounds with varying speeds of scrolling, we will be creating a class for it to accomplish the parallax background. The steps involved in creating a class for parallax background named as FSParallaxNode are as follows:
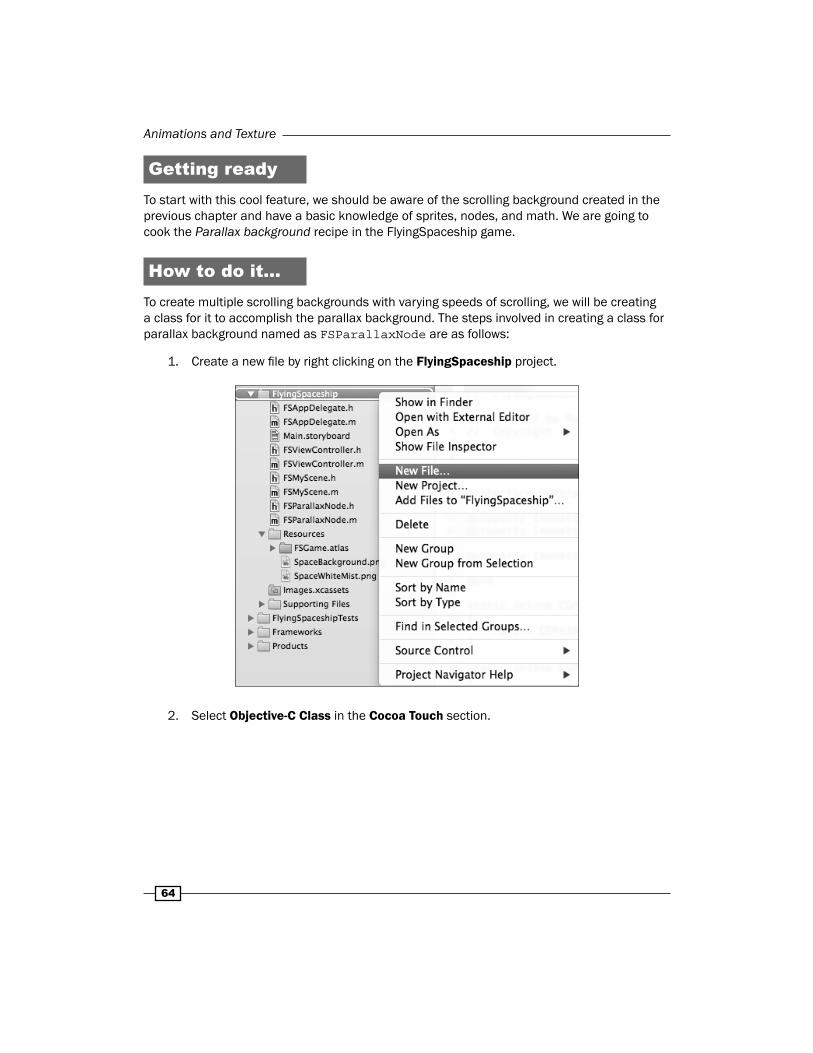
1. Create a new fi le by right clicking on the FlyingSpaceship project.
2. Select Objective-C Class in the Cocoa Touch section.
Chapter 3
65
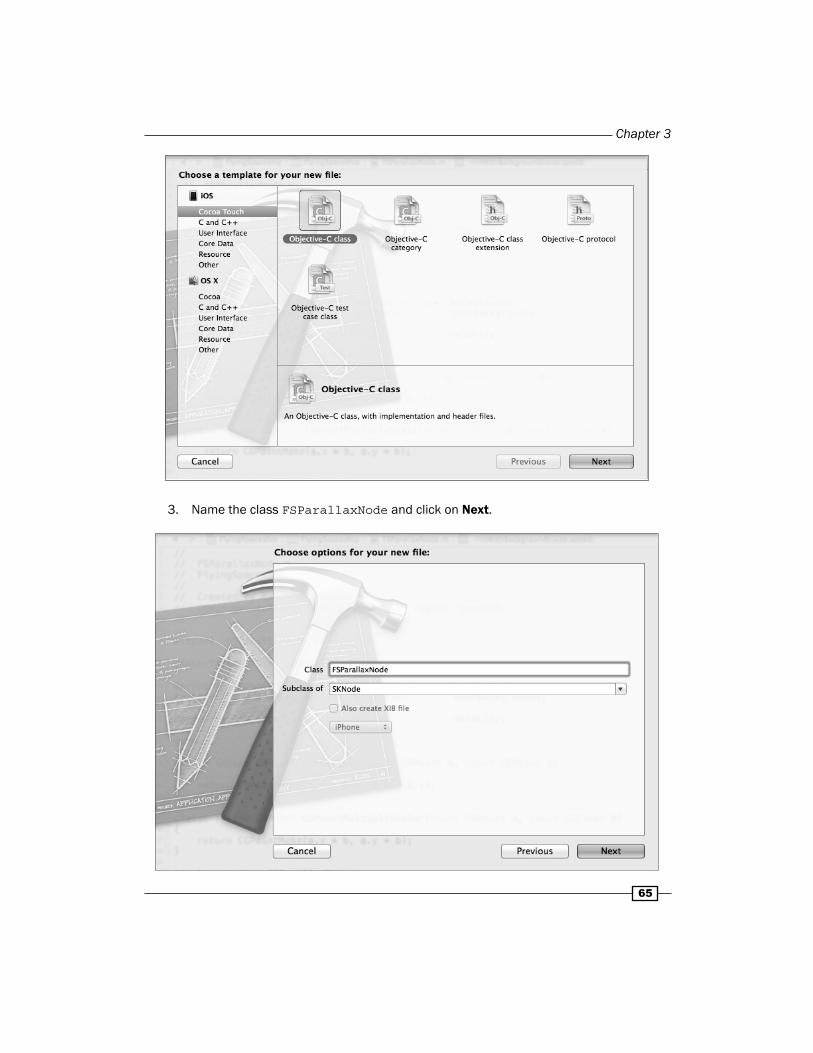
3. Name the class FSParallaxNode and click on Next.
Animations and Texture
66
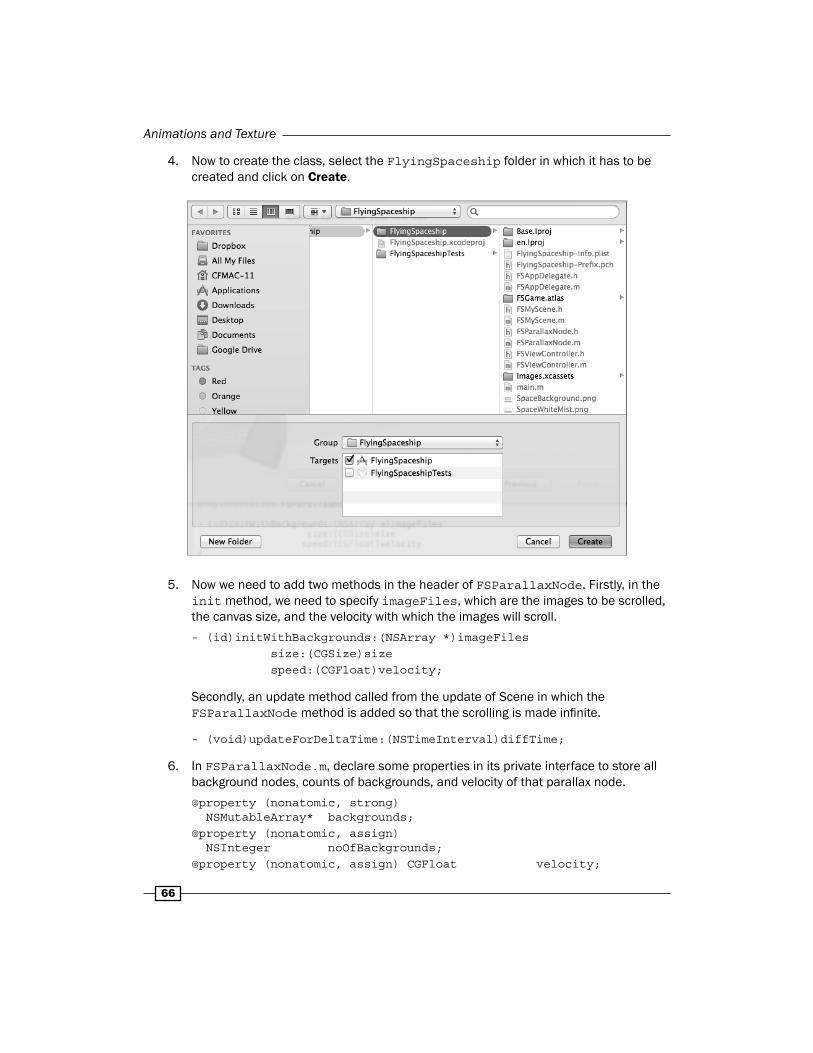
4. Now to create the class, select the FlyingSpaceship folder in which it has to be created and click on Create.
5. Now we need to add two methods in the header of FSParallaxNode. Firstly, in the init method, we need to specify imageFiles, which are the images to be scrolled, the canvas size, and the velocity with which the images will scroll.
- (id)initWithBackgrounds:(NSArray *)imageFiles size:(CGSize)size speed:(CGFloat)velocity;
Secondly, an update method called from the update of Scene in which the FSParallaxNode method is added so that the scrolling is made infi nite.
- (void)updateForDeltaTime:(NSTimeInterval)diffTime;
6. In FSParallaxNode.m, declare some properties in its private interface to store all background nodes, counts of backgrounds, and velocity of that parallax node.
@property (nonatomic, strong) NSMutableArray* backgrounds;@property (nonatomic, assign) NSInteger noOfBackgrounds;@property (nonatomic, assign) CGFloat velocity;

Chapter 3
67
In defi nition of the init method, fi rst assign all the parameters passed in the function like velocity. Now we assign noOfBackgrounds using the imageFiles count and make an array of backgrounds with a capacity of noOfBackgrounds.
- (id)initWithBackgrounds:(NSArray *)imageFiles size:(CGSize)size speed:(CGFloat)velocity{ if (self = [super init]) { self.velocity = velocity; self.noOfBackgrounds = [imageFiles count]; self.backgrounds = [NSMutableArray arrayWithCapacity:self.noOfBackgrounds];
}]; } return self;}
7. Using the imageFiles, enumerate them using the block. In enumeration, add background nodes using the imageFiles class, add them to the backgrounds array and on FSParallaxNode.
[imageFiles enumerateObjectsUsingBlock:^(id obj, NSUInteger idx, BOOL *stop) { SKSpriteNode *backgroundNode = [SKSpriteNode spriteNodeWithImageNamed:obj]; [self.backgrounds addObject:backgroundNode]; [self addChild:backgroundNode]; }];
8. Also, specify the backgroundNode size, which is passed in the init method, its anchorPoint to CGPointZero, its position according to the idx integer and a name of the node as background.
backgroundNode.size = size; backgroundNode.anchorPoint = CGPointZero; backgroundNode.position = CGPointMake(size.width * idx, 0.0); backgroundNode.name = @"background";
Animations and Texture
68
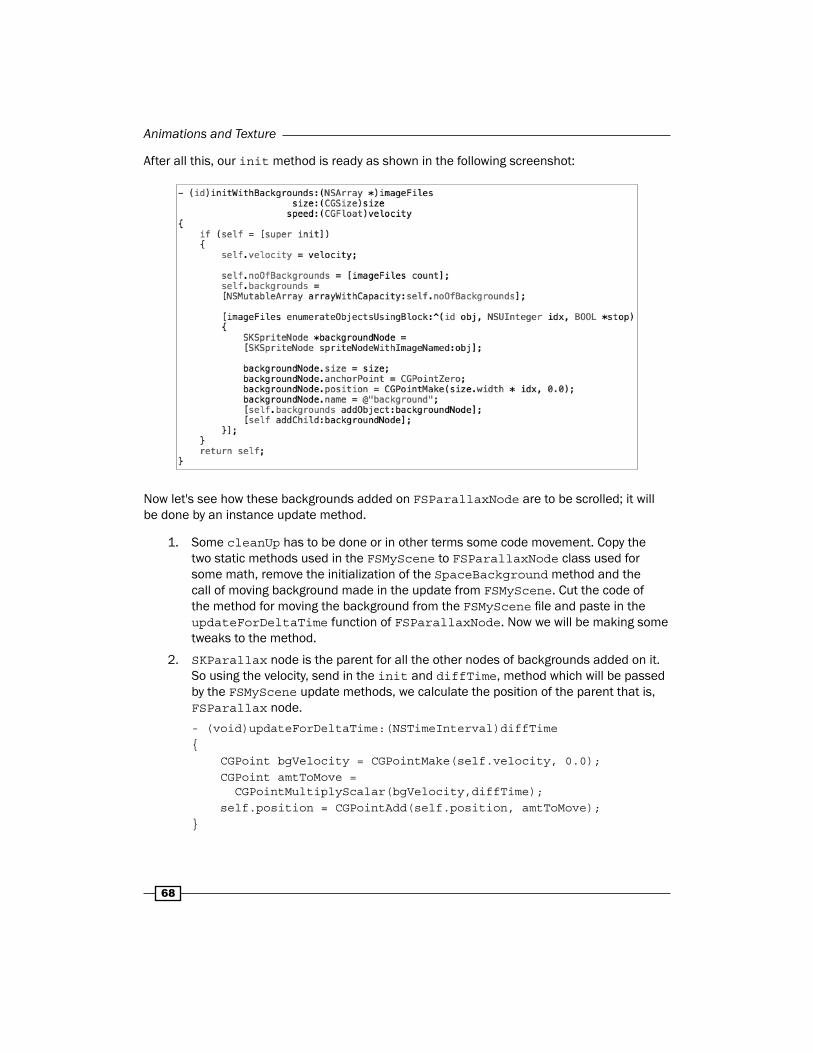
After all this, our init method is ready as shown in the following screenshot:
Now let's see how these backgrounds added on FSParallaxNode are to be scrolled; it will be done by an instance update method.
1. Some cleanUp has to be done or in other terms some code movement. Copy the two static methods used in the FSMyScene to FSParallaxNode class used for some math, remove the initialization of the SpaceBackground method and the call of moving background made in the update from FSMyScene. Cut the code of the method for moving the background from the FSMyScene fi le and paste in the updateForDeltaTime function of FSParallaxNode. Now we will be making some tweaks to the method.
2. SKParallax node is the parent for all the other nodes of backgrounds added on it. So using the velocity, send in the init and diffTime, method which will be passed by the FSMyScene update methods, we calculate the position of the parent that is, FSParallax node.
- (void)updateForDeltaTime:(NSTimeInterval)diffTime{ CGPoint bgVelocity = CGPointMake(self.velocity, 0.0); CGPoint amtToMove = CGPointMultiplyScalar(bgVelocity,diffTime); self.position = CGPointAdd(self.position, amtToMove); }
Chapter 3
69
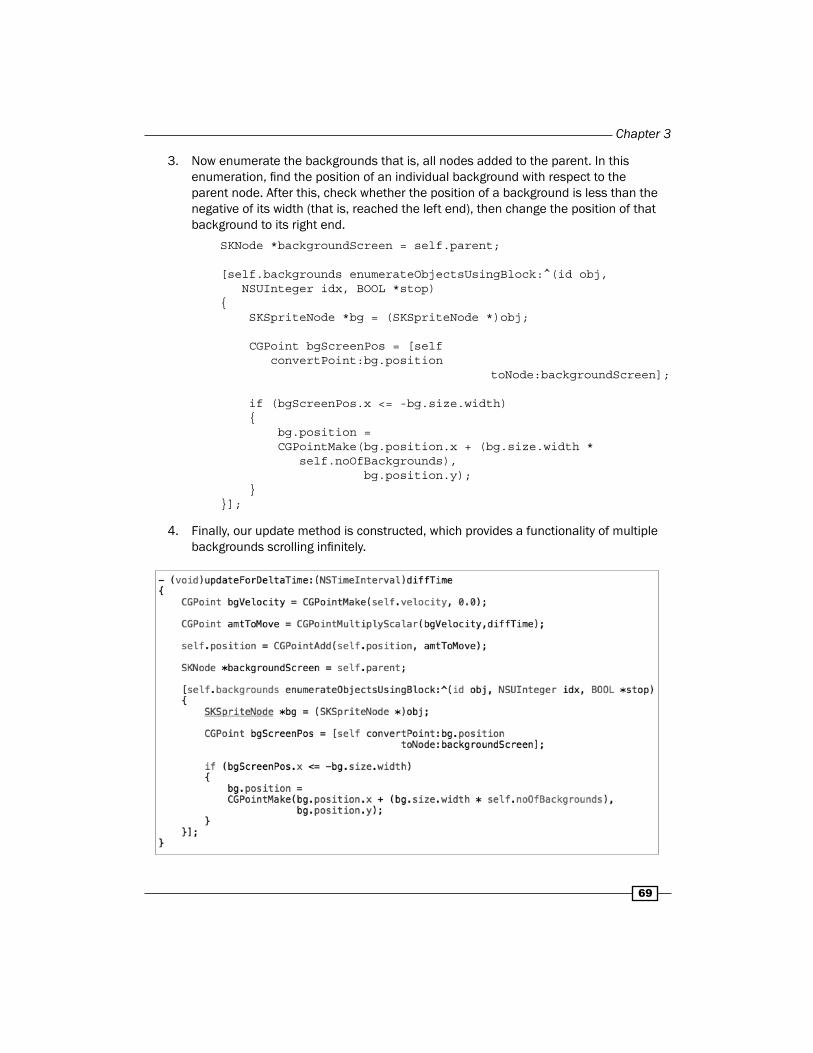
3. Now enumerate the backgrounds that is, all nodes added to the parent. In this enumeration, fi nd the position of an individual background with respect to the parent node. After this, check whether the position of a background is less than the negative of its width (that is, reached the left end), then change the position of that background to its right end.
SKNode *backgroundScreen = self.parent;
[self.backgrounds enumerateObjectsUsingBlock:^(id obj, NSUInteger idx, BOOL *stop) { SKSpriteNode *bg = (SKSpriteNode *)obj;
CGPoint bgScreenPos = [self convertPoint:bg.position toNode:backgroundScreen];
if (bgScreenPos.x <= -bg.size.width) { bg.position = CGPointMake(bg.position.x + (bg.size.width * self.noOfBackgrounds), bg.position.y); } }];
4. Finally, our update method is constructed, which provides a functionality of multiple backgrounds scrolling infi nitely.
Animations and Texture
70
As of now, the FSParallaxNode class, which provides the functionality of parallax scrolling background is created and it's time to create objects in FSMyScene to make a cool environment.
5. We will be adding two background layers BlueSky and WhiteMist, so create two objects for each of them.
@property (nonatomic, strong) FSParallaxNode*spaceBlueSkyParallaxNode;@property (nonatomic, strong) FSParallaxNode*spaceWhiteMistParallaxNode;
Add a method called addParallaxNodes and call it in the fi rst line of the init method of FSMyScene.
[self addParallaxNodes];
6. For two parallax nodes, we have to add the following two constants for their relative speeds.
static const float SPACE_BLUE_SKY_BG_VELOCITY = 20.0;static const float SPACE_WHITE_MIST_BG_VELOCITY = 100.0;
In addParallaxNodes, make an array of blueSkyParallaxBackgroundImages and create an object of FSParallax by passing the size of the scene and velocity at which it is going to scroll.
- (void)addParallaxNodes{ NSArray *blueSkyParallaxBackgroundNames = @[@"SpaceBackground.png", @"SpaceBackground.png",]; self.spaceBlueSkyParallaxNode = [[FSParallaxNode alloc] initWithBackgrounds:blueSkyParallaxBackgroundNames size:self.frame.size speed:-SPACE_BLUE_SKY_BG_VELOCITY]; self.spaceBlueSkyParallaxNode.position = CGPointMake(0, 0); [self addChild:self.spaceBlueSkyParallaxNode];}
Chapter 3
71
7. Similar to the blue sky background, we have to implement the mist images as well. To add more reality to the game, we will add the mistParallaxBackgroundImages function.
NSArray *mistParallaxBackgroundNames = @[@"SpaceWhiteMist.png", @"SpaceWhiteMist.png",]; self.spaceWhiteMistParallaxNode = [[FSParallaxNode alloc] initWithBackgrounds:mistParallaxBackgroundNames size:self.frame.size speed:-SPACE_WHITE_MIST_BG_VELOCITY]; self.spaceWhiteMistParallaxNode.position = CGPointMake(0, 0); [self addChild:self.spaceWhiteMistParallaxNode];
8. Once the nodes have been added to the scene, they need to be updated for scrolling purposes. So call the updateForDeltaTime function of FSMyScene for both the nodes.
if (self.spaceBlueSkyParallaxNode) { [self.spaceBlueSkyParallaxNode updateForDeltaTime:self.diffTime]; } if (self.spaceWhiteMistParallaxNode) { [self.spaceWhiteMistParallaxNode updateForDeltaTime:self.diffTime]; }
After all these steps, the dynamic environment with a parallax scrolling background is ready for the game.
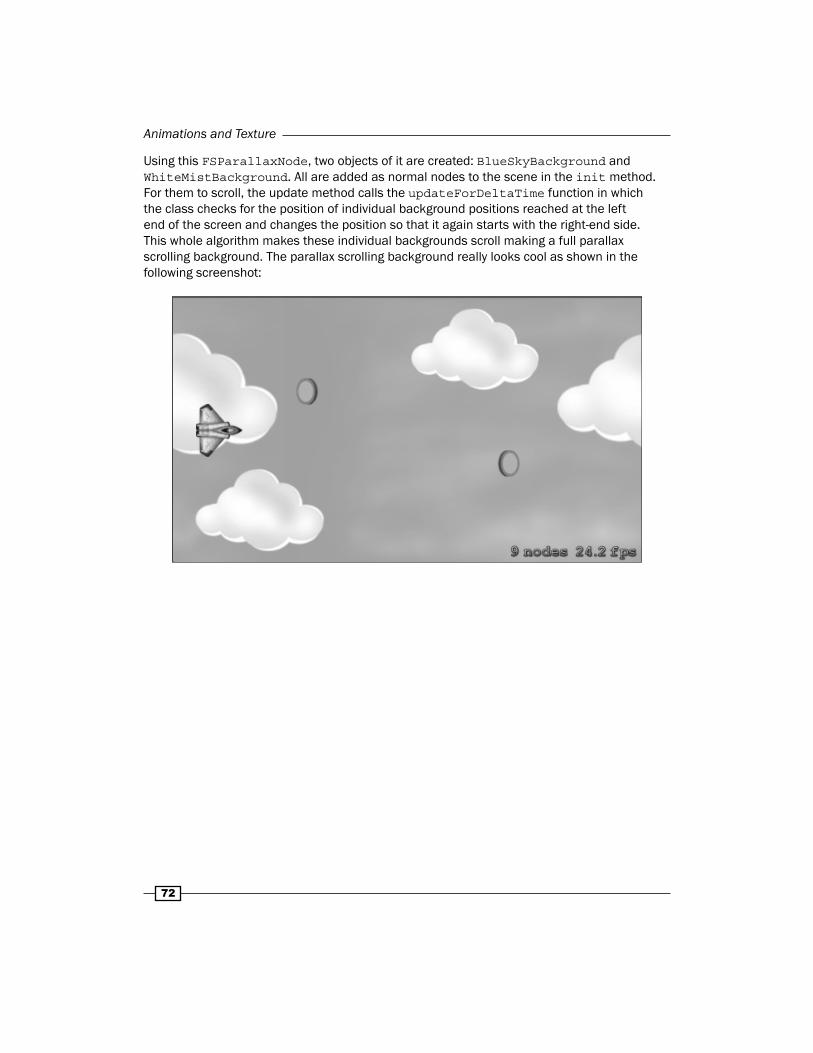
How it works…Since we have done the scrolling of background in the previous chapter, it is time we made a separate class for it called FSParallaxNode. In this class, multiple backgrounds of the same image are placed and scrolled in each update of the scene. It means that the scrolling is done on the basis of the positions of all background nodes added to FSParallaxNode.
Animations and Texture
72
Using this FSParallaxNode, two objects of it are created: BlueSkyBackground and WhiteMistBackground. All are added as normal nodes to the scene in the init method. For them to scroll, the update method calls the updateForDeltaTime function in which the class checks for the position of individual background positions reached at the left end of the screen and changes the position so that it again starts with the right-end side. This whole algorithm makes these individual backgrounds scroll making a full parallax scrolling background. The parallax scrolling background really looks cool as shown in the following screenshot:

Where to buy this book You can buy iOS Game Programming Cookbook from the Packt Publishing website. Alternatively, you can buy the book from Amazon, BN.com, Computer Manuals and most internet book retailers.
Click here for ordering and shipping details.
www.PacktPub.com
Stay Connected:
Get more information iOS Game Programming Cookbook