ipc6perm in schools - pacific-edge
TRANSCRIPT
1ideas for permaculture educators
Permaculture goes to school...
... ideas and bibliography for permaculture educators
An education and networking tool from Pacific Edge Permaculture Permaculture Paper No. 2 — Autumn1997

permaculture goes to school2 3ideas for permaculture educators
A work of many people...The Permaculture in Schools
information kit had its origin at the Sixth International
Permaculture Convergence which took place during October 1996 in Bridgetown, Western Australia.
Pacific Edge Permaculture undertook to publish the information assembled by participants and distribute it.
AimsThe aim of the kit is to bring together the titles of publications and other resources of potential use to people working in permaculture projects in schools or who are working in permaculture with children in other circumstances.
Most of the resource listings were contributed by participants at the Permaculture in Schools Networking Day following the 1996 Convergence.
Others were contributed by participants in Robyn McCurdy’s Children in Permaculture course which took place immediately prior to the February 1995 national Permaculture Convergence at Black Forest Primary School in Adelaide, South Australia.
ContentAs well as the bibliography and resource listing, there are a number of articles.
Thanks are due to all who attended the permaculture in schools sessions at the convergences and who contributed to this resource package, as well as to those who have contributed since.
The package is not intended as a complete listing of all publications of relevance to the practice of permaculture in schools or to working with children in permaculture. It simply aims to record those resources identified as useful by participants of the permaculture convergences.
If there are titles you consider should be included, please send them in the format which appears in the bibliographic listing to Pacific Edge Permaculture. We can include them in updated listings.
CoursesCourses on permaculture in schools are occasionally offered.
Readers are referred to the course listings pages of the Permaculture International Journal (PIJ) for details.
How-to informationThe PIJ carries a regular, two-page section on working with children in permaculture.
The section is produced by Brisbane-based permaculture in schools consultant, Carolyn Nuttall, author of A Children’s Food Forest.
ApproachesThe articles which follow describe different approaches to designing permaculture in school projects.
Whether you find an informal, small projects approach, or a more formal, larger project approach more applicable, we hope you find this education kit of benefit to your work.
By way of int
roduction...
Æ Permaculture Design Courses — part time in Sydney
Æ Home and community gardens —design and implementation
Æ Desktop publishing and design — brochures, newsletters, publicity material
Æ NSW state contact — Australian City Farms and Community Gardens Network
Æ Approved EarthWorks program trainers.
Contact us at:ITV\Y\V >WZX IXe`TVh_gheXFiona Campbell and Russ GraysonPO Box 446, Kogarah NSW 2217 Australia.Phone: 02 9588 6931 Email: [email protected]
Pacific • Edge Permaculture
permaculture goes to school2 3ideas for permaculture educators
The two artilcles which follow describe different approaches to permaculture in schools
project design.
The first was used in a project in inner-urban Sydney. The second,
by Robyn McCurdy,was developed for the
Tlhelego Development Project in rural South Africa.
The ideas are presented only as a guide.
It is important to design projects so they
are compatible with local circumstances, environments, human cultures and resource
availability.
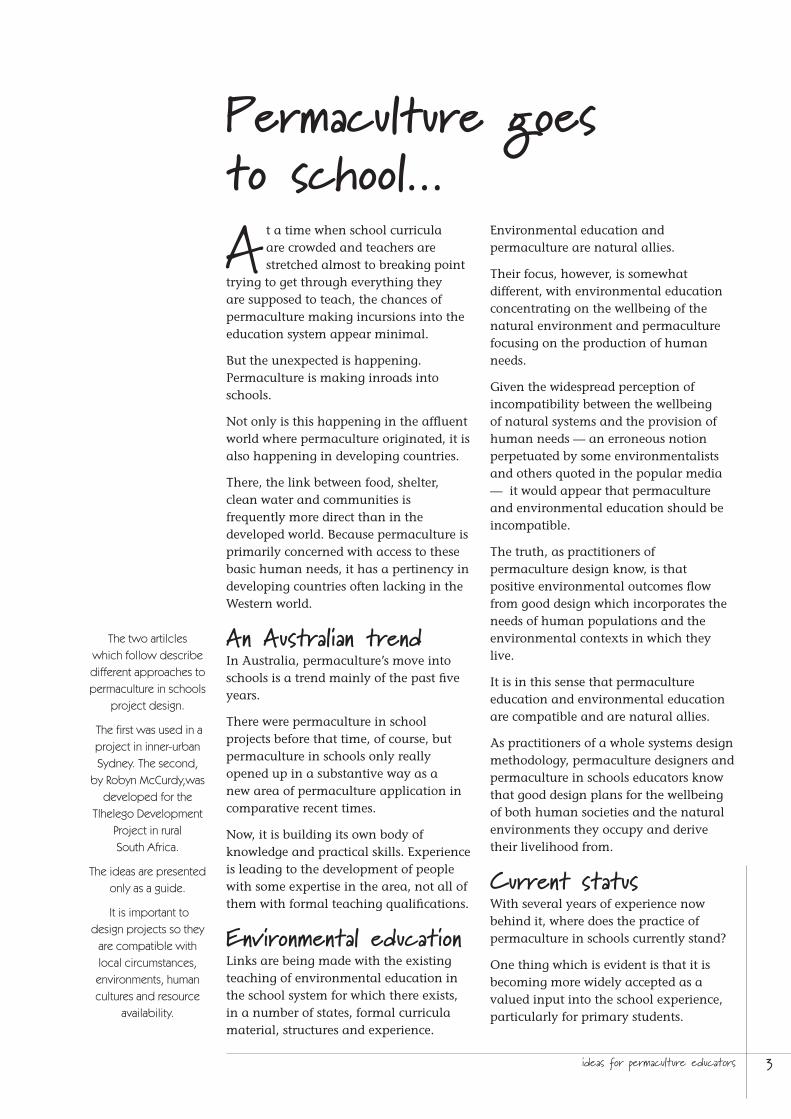
A t a time when school curricula are crowded and teachers are stretched almost to breaking point
trying to get through everything they are supposed to teach, the chances of permaculture making incursions into the education system appear minimal.
But the unexpected is happening. Permaculture is making inroads into schools.
Not only is this happening in the affluent world where permaculture originated, it is also happening in developing countries.
There, the link between food, shelter, clean water and communities is frequently more direct than in the developed world. Because permaculture is primarily concerned with access to these basic human needs, it has a pertinency in developing countries often lacking in the Western world.
An Australian trendIn Australia, permaculture’s move into schools is a trend mainly of the past five years.
There were permaculture in school projects before that time, of course, but permaculture in schools only really opened up in a substantive way as a new area of permaculture application in comparative recent times.
Now, it is building its own body of knowledge and practical skills. Experience is leading to the development of people with some expertise in the area, not all of them with formal teaching qualifications.
Environmental educationLinks are being made with the existing teaching of environmental education in the school system for which there exists, in a number of states, formal curricula material, structures and experience.
Environmental education and permaculture are natural allies.
Their focus, however, is somewhat different, with environmental education concentrating on the wellbeing of the natural environment and permaculture focusing on the production of human needs.
Given the widespread perception of incompatibility between the wellbeing of natural systems and the provision of human needs — an erroneous notion perpetuated by some environmentalists and others quoted in the popular media — it would appear that permaculture and environmental education should be incompatible.
The truth, as practitioners of permaculture design know, is that positive environmental outcomes flow from good design which incorporates the needs of human populations and the environmental contexts in which they live.
It is in this sense that permaculture education and environmental education are compatible and are natural allies.
As practitioners of a whole systems design methodology, permaculture designers and permaculture in schools educators know that good design plans for the wellbeing of both human societies and the natural environments they occupy and derive their livelihood from.
Current statusWith several years of experience now behind it, where does the practice of permaculture in schools currently stand?
One thing which is evident is that it is becoming more widely accepted as a valued input into the school experience, particularly for primary students.
Permaculture goes to school...

permaculture goes to school4 5ideas for permaculture educators
Food gardensCharacteristically, permaculture enters into the school in the form of food gardening.
Permaculture designers are well aware that gardening is only one component of permaculture design, however it is perhaps the easiest to use as an opening into the schools and the most interesting for the students.
Permaculture food gardens, true to the permaculture design principle of multifunction, can be linked with science, mathematics, studies of local and global food systems and other curricula subjects and become truemultiuser sites.
This encourages greater use and makes the garden’s sustainability more assured.
An urgent roleThere is an urgent role which permaculture school gardens may have potential to fill.
Nutrition and health are seldom a primary use for the school permaculture garden in affluent countries where people see food as something to be bought rather than self-produced.
Given the will, it may be possible to link these issues with initiatives such as the Healthy Breakfast program operating in some Sydney council areas. This is a response to children turning up at school without eating breakfast or without having a lunch.
To fulfil this role, permaculture school garden projects would have to be upgraded to a higher level of organisation and planning.
In some developing countries, school food gardens already fulfil a nutritional role.
Resource auditingOther roles for permaculture education within the school system other than food gardening include auditing the school use of energy and water and auditing the production of wastes.
Energy and water audits, when combined with the development of strategies for the
conservation of these resources and the will of school administration to act on the data resulting from the audits, have the potential to reduce energy and water use and to reduce school expenditure on these resources.
Auditing wastesThe waste audit, having identified types of wastes, their sources and quantities, has the potential to be developed into a strategy for dealing with them.
This would involve:
Æ waste separation
Æ recycling of food and garden wastes through the school’s permaculture garden composting or vermiculture (worm farming) system
Æ reuse and recycling of paper and other wastes
Æ strategies for the reduction of wastes, which normally go to landfill, such as introducing the practice of minimal-waste lunches (packaging reduction).
Whole school designA further use of permaculture design in schools is in the development of whole school design.
This involves a thorough analysis of the existing school ground — a role for sector and site analysis as practiced in permaculture design — and the participative development of plans to enhance:
Æ individual and class learning opportunities
Æ shade and shelter from unpleasant winds
Æ the internal climate of buildings by shading and solar access through the use of evergreen and deciduous plantings, and structures such as pergolas and trellising
Æ areas for active, imaginative and creative play
Æ areas for useful plants and animals
Æ natural areas
blah blah blah..
...a further use of
permaculture design in schools is
in the development
of whole school
design...

permaculture goes to school4 5ideas for permaculture educators
Æ areas presenting opportunities for quite reflection, small and large group discussion and socialising
Æ areas for adults.
Students, parents, local community people, teachers and school administration should rightly be involved in a design of this magnitude, no matter how protracted its implementation.
People skills a necessityParticipative design calls for well developed people skills in the permaculture designer if they are to lead the process and implement its community input stages.
Facilitation, negotiation, conflict resolution and a range of participatory skills are useful techniques for the permaculture in schools activist to acquire through appropriate adult evening college courses, books and audio tapes.
Techniques developed by Edward de Bono, such as the Six Thinking Hats, positive/ negative/ interesting comparisons, organising and exploring diagrams would prove of benefit in simplifying the process and maintaining participant focus.
ChallengesIf permaculture designers are to become further involved in education, then there will be a need to develop skills in participative design, the groundwork for which was laid by Robyn McCurdy at the 1995 Permaculture Convergence workshops in Adelaide.
Development of design skills and those pertinent to working successfully with groups of people will be of advantage.
So will the ability to develop designs which are achievable within budget, which are constructed to a timeline and which can be integrated into the curricula.
Project sustainabilityThe designer is unlikely to be able to contribute to the same project for years on end, unless they are a parent of a student at the school or a teacher or groundsperson.
It follows that planning for project sustainability in the absence of direct designer involvement be a part of design.
Education is the key to this — education of interested teachers and local supporters of the school.
Work in this area in Australia has been started by Robyn McCurdy, Ross Mars and Salli Ramsden, among others. However, it will have to become more widespread if projects are not to go into decline if an enthusiastic teacher is transferred or if the permaculture designer moves on to other things.
Networks to worknetsIf permaculture is a means to taking local action on global issues as well as of addressing local concerns, then we need to develop effective networks which include people in different countries as well as people from our own regions.
The idea is to turn these networks into worknets through which we can advise and, where possible, physically assist each other.
This was a reason for organising the Permaculture in Schools networking day at the 1996 International Permaculture Convergence in Bridgetown, Western Australia.
A large core of people active in the area came together on that occasion. More have signalled their interest since.
It is now up to individuals to take the initiative and use the skills, knowledge and experience available through this network. Then we will be on our way to turning the permaculture in schools network into a functioning worknet.
...facilitation, negotiation,
conflict resolution
and a range of
participatory skills are useful
techniques..
permaculture goes to school6 7ideas for permaculture educators
Permaculture works when the designer takes the principles of permaculture design and adapts their application to the circumstances and characteristics of different sites and groups of people.
This is how the designer adapts permaculture to different design contexts.
These contexts consist of:
Æ the physical characteristics of the site and the surrounding catchment
Æ the needs of the client group
Æ availability of funding, time and other resources
Æ the motivation and commitment of participants.
Small, manageable stagesImplementing a larger project as a connected series of small stages rather, than dissipating energy and motivation by tackling too large a segment at a time or by trying to implement bits of several stages over a longer time period. This makes a large project manageable and achievable.
The idea is to break larger projects into smaller stages, tackle them one at a time, consolidate each as it is completed (don’t leave small bits unfinished), then move on to the next small stage.
The completion of each small stage can be treated as a milestone on the way to the successful completion of the entire project.
Don’t forget to celebrate your milestones. A few well chosen words with the group, participants explaining what they liked/ didn’t like about the work and a mini-celebration helps maintain morale and motivation.
Work chunksEven within a small stage, further dividing the job into chunks of work leads to its completion in a logical order. The work chunks can be placed on a timeline if necessary; those requiring finishing before the next step started and those which can be done in parallel identified.
Doing small work chunks in parallel, providing there are enough people to do the work, saves time.
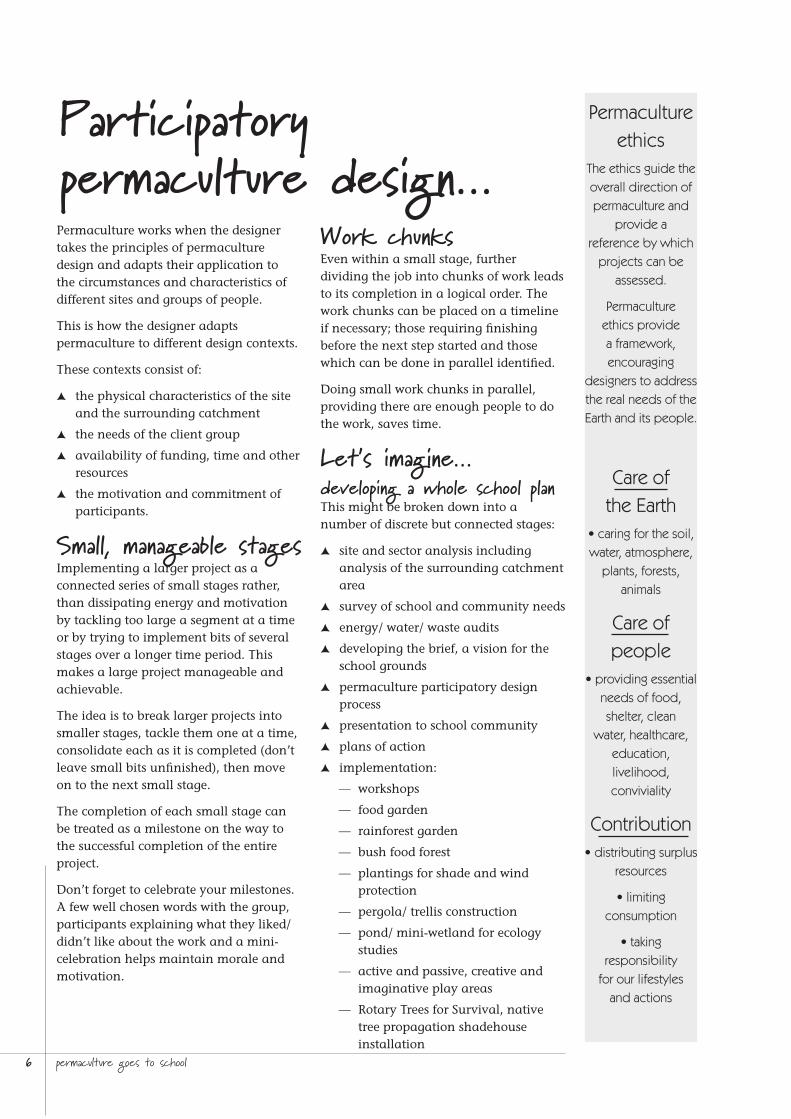
Let’s imagine... developing a whole school planThis might be broken down into a number of discrete but connected stages:
Æ site and sector analysis including analysis of the surrounding catchment area
Æ survey of school and community needs
Æ energy/ water/ waste audits
Æ developing the brief, a vision for the school grounds
Æ permaculture participatory design process
Æ presentation to school community
Æ plans of action
Æ implementation:
workshops
food garden
rainforest garden
bush food forest
plantings for shade and wind protection
pergola/ trellis construction
pond/ mini-wetland for ecology studies
active and passive, creative and imaginative play areas
Rotary Trees for Survival, native tree propagation shadehouse installation
Participatory permaculture design...
Permaculture ethics
The ethics guide the overall direction of permaculture and
provide a reference by which
projects can be assessed.
Permaculture ethics provide a framework, encouraging
designers to address the real needs of the Earth and its people.
Care of the Earth
• caring for the soil, water, atmosphere,
plants, forests, animals
Care of people
• providing essential needs of food, shelter, clean
water, healthcare, education, livelihood, conviviality
Contribution• distributing surplus
resources
• limiting consumption
• taking responsibility
for our lifestyles and actions

permaculture goes to school6 7ideas for permaculture educators
community arts component
adult areas
access to the various components
manual for teachers on integrating project into the school curriculum.
These, together, constitute the redevelopment of the school grounds and link to the academic life of the school.
Designed to complement one another, the components may be implemented over a protracted period of time as separate mini-projects, so that they are manageable and so they can be started as finance, time and other resources become available.
The most appropriate stage is selected as the starting point.
A school food garden or food forest, for instance, is a stage of the total project which can be broken down into a series of smaller steps to be carried out in sequential order — site and sector analysis, site clearance, measuring and marking out garden beds, soil improvement, plant propagation, planting out and maintenance.
Work chunks such as propagation can be carried out in parallel with other works if a small amount of time is dedicated to the activity at each work meeting. This provides a variety of work for students.
The completion of each of these work chunks is marked by a participatory appraisal of how it was carried out, providing a review of procedures and reinforcing the learning for the students.
The process is then followed by a mini-celebration to mark the completion of the segment and the transition to the next, creating an acknowledgement of the value of the student’s work and an anticipation of the next stage.
Teams for sustainabilityWhen key personnel, those with technical knowledge, enthusiastic teachers or permaculture designers from the community, leave a project, the entire process may be placed in jeopardy and, in the worst cases, may collapse.
It follows that project sustainability is something which should be considered during the design stage.
Education of particpants is one way to ensure sustainability. Another means of doing this is to form a design team of people from the local area who have some permaculture training. They can be supplemented by others with relevant skills such as teaching, facilitating, appropriate technology, architecture, horticulture or landscape design knowledge.
A team approach to design accomplishes two main things:
Æ it enables the project to continue in the event of a designer leaving
Æ it upgrades the skills of permaculturists and sets up a team of people capable of taking on other projects in their local area.
Breaking the project into smaller stages and, if useful, breaking those stages down into work chunks may make the sequence of events clearer to participants, make a large project seem achievable and make implementation more manageable.
Working with a design team ensures project sustainability and improves the design skills of team members by experience on a real project with all its opportunities and limitations.
Permaculture principles...
Attitude...• see solutions, not
problems
• be effective as well as efficient
• co-operate rather than compete.
Taking action...• minimise
maintenance and energy inputs while
maximising yield
• work where it counts; educate
people who want to learn
• assist people to become self reliant.
The biosphere...• work with nature rather than against it
• use diversity to encourage stability.
Design for human
settlement...• bring food
production back to the cities to
minimise impact on the land
• use everything to its highest capacity; recycle all wastes
and design for multifunction
• make the least change for the
greatest possible effect through good design.

permaculture goes to school8 9ideas for permaculture educators
The design project...A school
permaculture project starts with an idea.
The idea is developed, then taken to the school principal to get some indication of school interest and project feasibility.
Then, it’s time to present the idea to teachers and school groundspeople, parents and interested community members.
A playground committee made up of parents, teachers, students and community members can be set up to work on and develop the design brief (a description of the project’s aims and purposes) and the design process.
Successfully completed, the design moves into the implementation stage.
The mindmaps on the following pages may be useful in planning the various stages of a permaculture in schools project.
The order in which they are implemented would depend on the circumstances of the particular project...
permaculture goes to school8 9ideas for permaculture educators
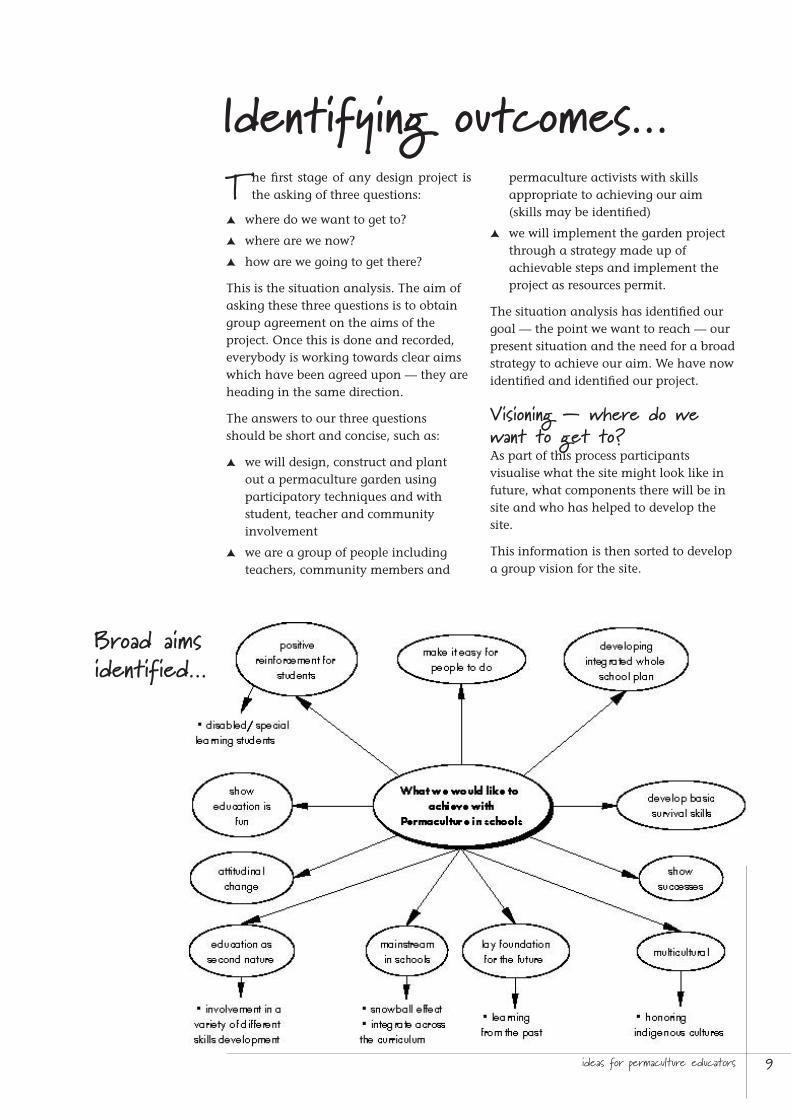
Identifying outcomes...The first stage of any design project is
the asking of three questions:
Æ where do we want to get to?
Æ where are we now?
Æ how are we going to get there?
This is the situation analysis. The aim of asking these three questions is to obtain group agreement on the aims of the project. Once this is done and recorded, everybody is working towards clear aims which have been agreed upon — they are heading in the same direction.
The answers to our three questions should be short and concise, such as:
Æ we will design, construct and plant out a permaculture garden using participatory techniques and with student, teacher and community involvement
Æ we are a group of people including teachers, community members and
Broad aims identified...
permaculture activists with skills appropriate to achieving our aim (skills may be identified)
Æ we will implement the garden project through a strategy made up of achievable steps and implement the project as resources permit.
The situation analysis has identified our goal — the point we want to reach — our present situation and the need for a broad strategy to achieve our aim. We have now identified and identified our project.
Visioning — where do we want to get to?As part of this process participants visualise what the site might look like in future, what components there will be in site and who has helped to develop the site.
This information is then sorted to develop a group vision for the site.
permaculture goes to school10 11ideas for permaculture educators
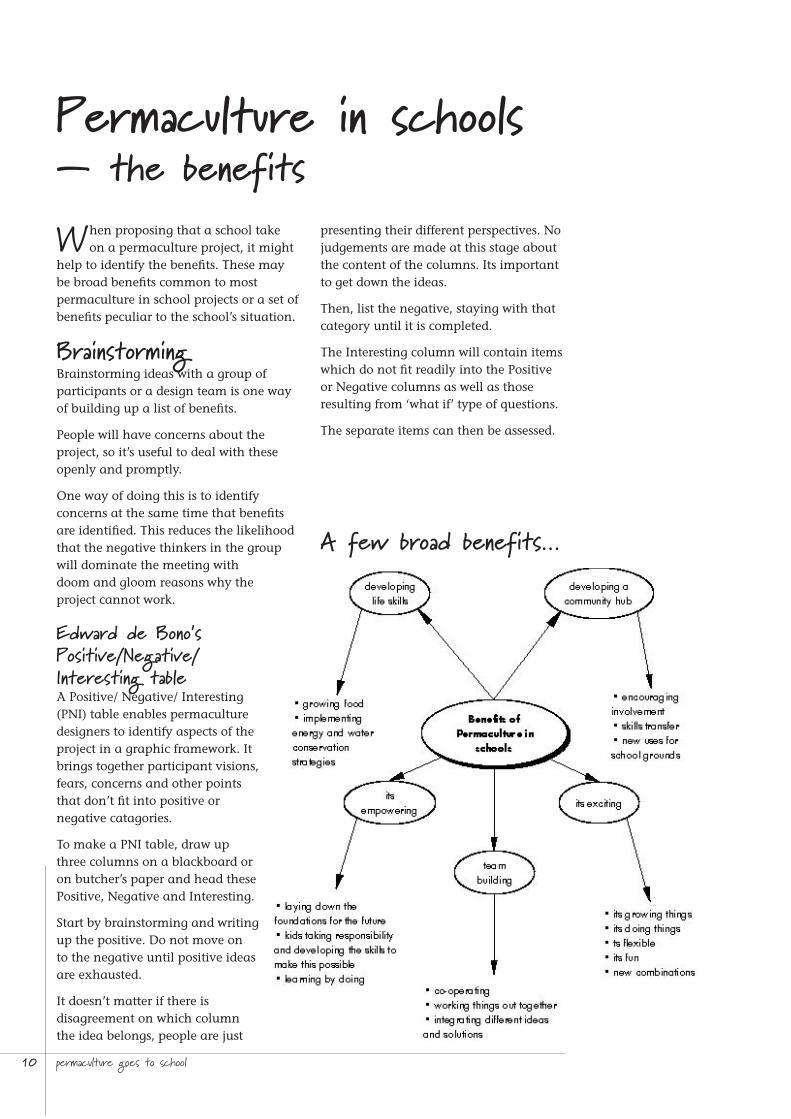
Permaculture in schools — the benefits
When proposing that a school take on a permaculture project, it might
help to identify the benefits. These may be broad benefits common to most permaculture in school projects or a set of benefits peculiar to the school’s situation.
BrainstormingBrainstorming ideas with a group of participants or a design team is one way of building up a list of benefits.
People will have concerns about the project, so it’s useful to deal with these openly and promptly.
One way of doing this is to identify concerns at the same time that benefits are identified. This reduces the likelihood that the negative thinkers in the group will dominate the meeting with doom and gloom reasons why the project cannot work.
Edward de Bono’s Positive/Negative/Interesting tableA Positive/ Negative/ Interesting (PNI) table enables permaculture designers to identify aspects of the project in a graphic framework. It brings together participant visions, fears, concerns and other points that don’t fit into positive or negative catagories.
To make a PNI table, draw up three columns on a blackboard or on butcher’s paper and head these Positive, Negative and Interesting.
Start by brainstorming and writing up the positive. Do not move on to the negative until positive ideas are exhausted.
It doesn’t matter if there is disagreement on which column the idea belongs, people are just
presenting their different perspectives. No judgements are made at this stage about the content of the columns. Its important to get down the ideas.
Then, list the negative, staying with that category until it is completed.
The Interesting column will contain items which do not fit readily into the Positive or Negative columns as well as those resulting from ‘what if’ type of questions.
The separate items can then be assessed.
A few broad benefits...

permaculture goes to school10 11ideas for permaculture educators
Permaculture in schools — the concerns
Teachers and parents will be capable of listing numerous concerns about a
proposed permaculture in schools project.
Some of their concerns will be valid for particular sites, some not.
All concerns should be treated as valid as they have probably all happened at different times and in different places. All deserve careful consideration.
It may prove useful to be aware of how these concerns have been dealt with in other projects. Although their
circumstances may be different, they could provide a general guide to the reality of fears and concerns and how they have been dealt with.
Some concerns may be ongoing while others will be episodic. Vandalism, an issue which always comes up, has proven to be a sporadic event rather than constant event in some schools.
A risk assessment identifying potential hazards and ways they can be minimised may prove useful during this stage.
It is the role of the designer to develop a plan which minimises negative concerns.A few broad concerns...
Teacher/ parent/ community concerns may include:
Æ drain on school resources
Æ ongoing maintenance of site, particularly in school holidays
Æ vandalism
Æ risk management and safety
Æ supervision of students
Æ use by after-school-hours drug users
Æ developing teacher/ parent/ community motivation and skills to sustain project
Æ aesthetics/ visual presentation
Æ lack of parent and teacher time to put into site development
Æ crowded curriculum, lack of time to use and develop the site
Æ being left by designer to fend for themselves.

permaculture goes to school12 13ideas for permaculture educators
Having completed the visioning process and brainstormed benefits and concerns around the project, we assess whether our design group is capable on achieving them.
A SWOT analysis is a means to assess this because it discloses the groups strengths and weaknesses and identifies factors which could limit achievement of the vision.
SWOT analysisNow is the time to do a SWOT analysis of our team to assess our capability of enacting the strategy and reaching our goal. The SWOT analysis identifies our:
Æ S — strengths; those things working in our favour
Æ W — weaknesses; those skills and knowledge we lack but which we need to reach our goal
Æ O — opportunities; factors beyond our own knowledge, skills and capabilities which would work in our favour
Æ T — threats; those things which are likely to stand in our way of threaten the implementation and sustainability of the project.
We now have a broad knowledge of where we stand and can assess whether we can achieve our vision.
Scheduling the stepsTo implement our vision we proceed to action planning in which the key question is: What are the most important things to do to move towards our vision?
This is where we identify and prioritise the stages of the project such as: develop
In the action plan template below,
the objective would be the stage of the
project to be planned; the steps would be the work
chunks which are implemented
to complete the stage.
the brief/ site and sector analysis/ design master plan/ working drawings and so on.
Responsibilities may be assigned or small teams formed to carry out the stages.
We identify the stages and plan when we envisage achieving them, when we should start them, how long each stage is likely to last, which could be happening at the same time and which need to be finished before the next step can be started.
This produces a timeline or action plan and our stages become a set of objectives to be achieved.

permaculture goes to school12 13ideas for permaculture educators
ImplementationHaving reached group agreement on the design and timing for implementing the project, it is time to start the first stage.
We choose an easy-to-implement activity of comparatively short duration to achieve a visible, quick result. This should motivate participants.
It should be preceded by an introduction to site safety — how to use tools safely, appropriate clothing (shoes, hats, suncream), caution near cliffs or water and the importance of cleaning up the site on conclusion of the activity.
The activity should involve the use of imagination, appropriate tools and skills which make use of learning relevant to school subject areas. An example would be setting out garden beds and paths which utilises skills in measuring, map reading and spacial relationships.
With tools and other inputs organised to be on site on time, it is the role of the designer and teachers to supervise implementation, turning the activity into a learning experience, co-ordinating the work and overseeing safety.
Concluding and reinforcingAt the conclusion to the activity it might prove useful to reinforce feelings of accomplishment.
Gather participants into a circle, relax them and ask what they liked most and least about the activity, what was one thing they learned and how the work could be done better next time. Decide the date and time of the next work meeting.
This is the concluding phase to the activity.
MonitoringMonitoring is done at regular intervals to assess how the project is progressing, to identify problems and reinforce strengths.
The conclusion of each school term may be an appropriate interval for monitoring and lessons learned can be used to modify the following term’s program.
Techniqies, organisational and teaching methods are assessed and he actual time of completion of the various stages are plotted against the estimated time.
This is prepared as a report to the school and other participants.
EvaluatingAt the conclusion to a suitable period — after one year, for instance — an evaluation is carried out and written up in a report distributed to participants.
This assesses the implementation of the project and the effectiveness of:
Æ teaching methods
Æ organisational structure
Æ decision making processes
Æ tools and components used in design implementation
Æ problem areas, their causes and solutions
Æ areas of success and the reasons they succeeded
Æ the actual with estimated completion times for the stages of the project.
The evaluation lists suggestions for project reorganisation. It is a document of considerable value to other working in permaculture in schools.
Arrangements are made for the next stage of project design and implementation.

permaculture goes to school14 15ideas for permaculture educators
Designers needsClear brief about needs of school and studentsKnowledge of curricula and how project will be integrated
Good communication and people skillsInformation about resources school will make available to maintain projectCo-operation by and education of grounds and maintenance staff
Support from parent groups
Parents/ community needsChildren's and community safetyVisually attractiveNo pollution - noise, odour, visual
School needsIntegration of project with curriculaIdentification of educational outcomes of projectLow establishment and maintenance costsSafety of students and staff; risk minimisationSupervision of studentsPositive public imageAttractive appearanceAssistance with integration into curricula, ongoing project maintenance
Student needsLearning opportunitiesSpace for recreation, quiet sitting, socialisingProject design which stimulates interestPractical, innovative integration in curriculumAdventurous but low-risk environment
Adelaide's Black Forest Primary School operates a successful and long-
running school food garden project, thanks to the expertise and enthusiasm of project co-ordinator/teacher, Graham Hunt. Graham has integrated the project into the school curriculum.
Funding for the project was obtained as grants from the National Landcare Program, Greening Australia, Trees for Life and from the parents of students.
Graham had to meet a number of challenges, such as the development of staff support and training, production of written curriculum guidelines and lesson ideas and production of a resource file.
To allay fears that he was stuffing more into the curriculum than teachers and students could handle, Graham made sure that environmental education at Black Forest involved hands-on activities across the curriculum.
For any permaculure food growing development to succeed, according to Graham, a co-ordinator with gardening knowledge and communications skills is a necessity. So is the participation of parents and the support of teachers.
“If I was involved in this type of program again”, Grahan explained, “I would want more time to support teachers in their knowledge and skill development.
“If you or your school are considering aspects of environmental education, I would recommend that you develop a vision and school-wide commitment to achieve it. The relevance to children and their increased learning make it worthwhile.”
Black Forest Primary School is probably unique in that the students are involved in the processing of olives into olive oil and its marketing to parents.
The olive trees in the school are remnants of an old orchard which occupied the site long before the school was built.
Science: Ecosystems,
processes, investigations,
energy, gas emissions, research, resources
Technology: Design, construction of
mini-glasshouses, compost bins and
energy efficient systems
Arts: Mime, drama, song,
television, painting, construction
English: Story writing, speaking,
newsletters, posters.
Health/ PE: Environmental
health, air monitoring, water
pollution
Maths: Counting, measuring, graphing,
calculating
Integrating Black Forest primary
garden with school curriculum
Assessing needs...
It's olives and vegies at Black Forest...

permaculture goes to school14 15ideas for permaculture educators
In 1995, Robyn McCurdy, from Tui Community, New Zealand, began working with the Tlholego Development Project in South Africa.
The Tlholego rural development training and living centre utilises permaculture and a host of allied strategies in pursuit of their aim of self reliance.
This is an outline of participatory processes developed at Tlholego for the design of school grounds.
The areas covered are:
Æ Needs assessment
Æ Survey
Æ Water storage assessment
Æ Inventory of bioregional resources
Æ Ideas from other schools and permaculture teaching sessions
Æ Visioning exercise
Æ Decision-making process
Æ Identifying necessary materials
Æ Budgetting
Æ List priorities for implementation
Æ Funding
Æ Allocation of tasks and reponsibilities
Æ Go for it, and have fun!
Needs assessment Carry out a brainstorming session and draw up as a mind map on a big chart in front of the class.
Use headings of students, teachers, the environment, local community.
Do the process with the wider community.
Needs will become evident as you conduct your survey.
SurveyBase surveyConstruct a survey relevant for the age and abilities of the students, including language abilities, for use in small groups.
If short on time, each group may take a different aspect of the survey and report their findings back to the class. If there is plenty of time, each group completes the entire survey.
MapThe teacher supplies a scale map on A3 paper on which students draw and write information. Alternatively, take the time to teach the students in groups of three to five to draw up a scale map.
For a rough approach, stride out the perimeter of your school grounds, then, with a sharp stick, draw in the soil the shape of the grounds and work out where buildings and fixed features are located in this.
Change the lines, shapes and placement of buildings until the group agrees.
Count the number of strides between structure and features and scale this down proportionally. Draw another map and compare with the original. Put in co-ordinates for north, south, east and west.
You now have the beginnings of a map for your school.
Draw a grid on a large sheet of paper and transfer your drawing in soil onto this paper, again using proportional scaling.
You could do a rough sketch map first then a neater one later.
TransectA transect is an important part of the survey. The purpose is to gain
a representative sample of what is taking place on a particular piece of land.
Starting from one perimeter, walk across the land to the other perimeter. Observe closely what lives along that line, mapping it as you go to gain a cross-section of the natural features.
Method1. Divide the class into groups of
three to seven students
— equip each group takes a map showing fixed features, pencil, pressing board, masking tape, trowel and large bag
— allocate each group a letter such as A,B,C for identification, and write all the members names on the top of the map
— each group takes a different starting point so a variety of cross-sections are produced.
2. Choose a beginning place on one perimeter and an ending place on the opposite peritmeter
— students walk an imaginary line from perimeter to perimeter, looking carefully at the ground up to one metre either side of the imaginary line
— students note what is seen — vegetation, hollows, moist spots, erosion, trees, changes to soil type, insects, humps etc.
3. In their plastic bags groups collect specimens of plants, soil types, litter etc
— specimens are labelled with masking tape or paper labels
Particpatory design of school grounds......designed and trialled by Robyn McCurdy, Tlholego Development Project, South Africa
CASE STUDY
permaculture goes to school16 17ideas for permaculture educators
Parti
cip
ato
ry s
cho
ol d
esi
gn.
..in the numeric order (1,2,3 etc) that they are gathered
— the name of the group is written alongside each number and the sample number recorded on the map where the specimens are gathered.
4. Soil samples are taken at regular intervals along the transect to a total of about five samples about three hands deep (filling the hole afterwards)
— each is placed in a separate bag labelled with the location along the transect where it was taken
— after returning to class, students place each sample in a jar of water, shake it, and leave it to settle for a few hours to determine the composition of the soil — clay, sand, silt, loam etc
— the type of soil will affect what use can be made of the particular area of land.
5. If the plant samples can be identified, students write the information on their map or on a separate sheet.
6 Unidentified species are researched and identified by local common name and botanic name later.
7. On completion of thefirst transect, make another transect between two other perimeters, carrying out the same sampling.
8. Each group makes a presentation upon completion of the transects.
9. Collected plant specimens are pressed between newspaper and something heavy placed on top so the plants are pressed flat.
10. Draw a large map of the school area, enlarging the scale of fixed features from the original maps using a grid system; draw every group’s transect onto the large map and include the location of
specimen numbers.
11. Remove plant pressings after several weeks.
12. Stick plant pressings onto the large map
— groups write the names of specimens alongside them on the map
— the result is a map showing what the entire school grounds is made up of
— draw in the prevailing wind, areas receiving most sunshine, shade etc.
13. The map and the soil study allows students to interpret areas in need of erosion control, low damp places for wetlands and water-loving plants, dry flat areas for sports, fertile soil for garden areas and so on.
Water storage assessmentTo calculate the capacity of water storage tanks appropriate to the situation, you need to determine the amount of water the school uses over a given period, the available catchment area and the amount of water which can be harvested.
Method (these are mathematics lessons in their own right):
1. Find the annual rainfall and the rainy months — ask weather bureau, find closest source of weather information; for the future, set up a rain gauge and keep regular records; add the rainfall figures for each month of the year to get the annual total and divide by 12 to find the average monthly rainfall
2. Calculate the total catchment area from school building roofs by measuring the surface area of the floor (length multiplied by breadth) of the building which has rainfall catchment guttering on its roof (imagine the building without a roof, with rain falling onto the floor — the same
amount of rain would be caught as if there was a roof of whatever slope in between as rain falls down like a sheet); it is easier to measure the floor area rather than climbing onto the roof to take measurements
3. Knowing these two figures, you will be able to work out the amount of harvestable rainfall over the rainy season; multiply the average monthly rainfall by the surface area of your roof and you get the amount of rainfall it is possible to catch and store each month
4. Determine the school’s water consumption over a period by adding together calculations for drinking, toilets, washing and garden use:
— drinking: show students one, two and five litre containers and ask what amount of a container they would drink in a day;
add all answers for a class total then divide by the number of students in the class to get an average for the whole class — ie representing one student;
multiply this by the number of students in the school, then by the number of days a month to gain an approximation of the amount of water drunk by students over a month
— toilets and washing: if you use water for toilet flushing, how much water per flush multiplied by the number of flushed a day, average student visits to the toilet;
to calculate a monthly average for the whole school, multiply the number of students by the number of days a month at school
for washing, place a basin beneath the tap and pour the collected water from the

permaculture goes to school16 17ideas for permaculture educators
Parti
cip
ato
ry s
cho
ol d
esi
gn.
..basin into a receptacle of known capacity;
similarly for dish washing; multiply this daily water use for washing by the number of students by the number of days at school in a month
— garden: mark out a square metre of garden and run a hose onto the soil until the soil shows a sheen of water;
time how long the hose ran from turning on the tap to turning it off;
take two buckets and run the water again for the same time, counting the number of filled buckets for the time;
multiply the result by the number of square metres of garden plus trees in the early establishment stage and you have an approximate water usage for one watering session;
multiply this by the number of waterings a day and the number of watering days a year (subtracting the approximate number of rainy days) and you have some idea of your total garden water consumption.
5. Look up annual rainfall figures and find out the average longest period between good falls of rain;
— work out how much water you would use during this dry period;
— by multiplying the number of days of dry period by the amount of daily water consumption you can calculate how much water you need to store; take this as a minimum amount.
6. Estimate the size of tanks or storage to hold this amount and determine what size tanks need to be installed and whether it is more appropriate
to install several smaller tanks (perhaps one for each roof area) amounting to the same volume as one large tank.
7. Cost the materials to make the tanks, investigating cost for different materials such as fibreglass, plastic, wire mesh and cement; determine whether the labour would be without cost or would be added to the budget.
Inventory of bioregional resourcesSurvey industrial by-products in the region available for recycling and under what arrangements; eg cardboard boxes, grass clippings, sacks, wood offcuts etc; ask family and friends employed in such places to make enquiries and put aside useful materials for times the school can arrange its collection; businesses and local authorities are generally sympathetic to school projects.
Ideas from other schools and permaculture teaching sessionsInspiration and ideas can come from audio-visual documentation of what other schools have done, regardless of where they are in the world; sophisticated designs can often be modifies and made simpler; expensive materials can be substituted with cheaper or recycled materials; direct teaching of permaculture themes and approaches to design can provide information to fuel inspiration and commitment.
Visioning exerciseThere is a difference to providing what you need and what you want; it is important to identify and provide for essential needs; it is empowering to create what you want — as long as it is attainable and fits the purpose and character of the school; the visioning exercise focuses on both needs and wants
— it uses verbal expression and creative expression through art media; it begins by looking at the broadscale through class interviews, key questions and mind maps as tools; the wider community can be involved in this process.
Decision makingSelection panelNarrow down the ideas listed in the visioning exercise by applying the following checklist:
Æ is it popular
Æ does it bring about healthy conditions
Æ is it useful to the majority of students
Æ is it relatively simple to make
Æ does it require regular maintenance over the longer term
Æ are the costs reasonable
Æ does it fit the school’s broad vision/ mission/ purpose.
Have a panel — elected or appointed — of no more than seven people, preferably less, decide on the design for the school.
Scale modelUsing paper machee make the topography of the land thick enough to stick things onto and support them; the group makes (or has made) a model of the grounds and fixed features, to scale - and adds to this model all of the new design features, using representatvie symbols to convey additions. The model should show the design as implemented and at maturity. Stages of the design (eg. at one year on, 5 years, 10 years) should be shown separately on large paper, preferably with overlays.
Grounds layoutPrepare the grounds for presentation so that people who have input can see what the design really means on the ground; use ropes to shape representations of the gardens and tall sticks for specimen

permaculture goes to school18
trees and other visual aids which indicate the actual shape and size of the recommended changes and additions.
Presentation to staff, students, the wider communityInvite people to the presentation at which the panel gives a talk and uses the scale model and ground layout to show how the design will develop; invite feedback and put the design to the vote conditional upon financial needs being met.
Identify necessary materialsAsk for specialised help in drawing up technical details of the design where necessary and to identify suitable plant species etc; locate sources for all materials for the first stage of implementation and aim for subsequent stages as well.
BudgetingCheck your inventory of locally recycled materials, then cost other items and make up a budget.
Prioritise implementationDecide on what should be done first and go for the simplest, cheapest thing which will give the best result for the shortest period of labour input; this helps build momentum and confidence.
FundingOnce there is something to show, apply for funding for the next step; begin with parents and school supporters, then the local village, town or suburb; first, try the places which supply the materials to see if they will donate materials, then approach businesses for finance with the attitude of ‘partnership’ so they feel they are receiving something in return for their support, even if it is simply goodwill
Allocate tasksAllocate tasks and responsibilities
Go for it... and have fun!
Robyn Mc Curdy
Acknowledgements to PELUM, Zimbabwe, for introducing me to the map and transect process.
Opportunity to help a school in India...One of the outcomes of the Permaculture in Schools workshop at the Sixth International Permaculture Convergence was the move for permaculture to become a more self-supporting movement.
Implicit in this idea is the need to support each other’s projects. We do this by distributing surplus funds, goods and services — implementing, in effect, the third ethic of per,maculture — the sharing of surplus.
Narsanna Koppula presents us with the opportunity to implement the third ethic by assisting his worthwhile permaculture education project in rural India.
While visiting Australia as a sponsored delegate of India’s Deccan Development Society for the Sixth International Permaculture Convergence, Narsanna wrote this letter...
Dear permaculture people,
There is a green school in Hachnop village (Andra Pradesh, India) in the protected area.
The school was started in 1991-92 and is being managed by the Deccan Development Society.
Most of the children are from a deprived community of dalit families - those who cannot afford to send their children to school.
All the children and staff at the school are involved in the implementation of the school design by practical participation and exposure to aspects of permaculture.
Highly efficient soil and water conservation works such as trenches and bunds constructed on the contour, gully plugging, diversion channels and farm ponds have been completed and are functioning well.
The land is becoming greener and has already started to provide some yields.
We have been struggling to evolve a regular permaculture curriculum or subjects for the students. So far, due to lack of resources, progress has not been very satisfactory.
In this region of India, we need your help in providing some materials and small funds to ensure the poorer students are able to continue their studies.
If resources are not there, it is difficult for the students to learn the permaculture ethics.
I hope I will satisfy you with this small amount of information about our work.
Any kind help would be welcome.
Narsanna Koppula
Deccan Development Society, Pastapur, Zahirabad, Medak, Andra Pradesh, India 502 318