iso: ig g 001 004 installation guide aluexcel · aluminium edge restraint for hard landscape...
TRANSCRIPT

Aluminium edge restraint for hard landscape surfaces
Installation Guide AluExcel®
Standard method to compacted GAP40 sub-base or similar material
Tools Required
• Hammer • Hacksaw/ angle grinder • Level • Tape measure • Spray paint • String line • Shovel/spade
Fixings (included)
• 250mm Spiral Fixing Stake • Strip Connector
0800 CIRTEX | [email protected] | WWW.CIRTEX.CO.NZ
ISO: IG G 001 004 Date Version Created: JULY 2016
Version Number: 01

1
2
Installation GuideAluExcel®: L-profile aluminium edge restraint for hard landscape surfaces
0800 CIRTEX | [email protected] | WWW.CIRTEX.CO.NZ
Sub-base & set out Lay suitable sub-base to required depth (to engineer’s specification). Thorough compaction of the sub-base is essential to ensure a successful installation. Ensure sub-base extends 100-150mm beyond the prepared edge restraint line.
Laying the edging Lay a thin dry-mix bedding layer (e.g. sharp sand and cement) beneath the edging foot to approximately 10mm.This thickness can be varied to adjust levels as required. This also ensures continuous support under the foot of the edging. The edging should not require a wet concrete haunch unless in non-standard applications.
Place the edge restraint and set to correct position.
Fix the Spiral Fixing Stakes through edging foot in the pre-punched holes, at a maximum of 500mm centres. Ensure the nails are firmly secured in the ground and down to the foot of the edging.
NoteAdditional staking is recommended when laying curves or the area is subject to heavy traffic.
ISO: IG G 001 004 Date Version Created: JULY 2016
Version Number: 01
3
4
Installation GuideAluExcel®: L-profile aluminium edge restraint for hard landscape surfaces
0800 CIRTEX | [email protected] | WWW.CIRTEX.CO.NZ
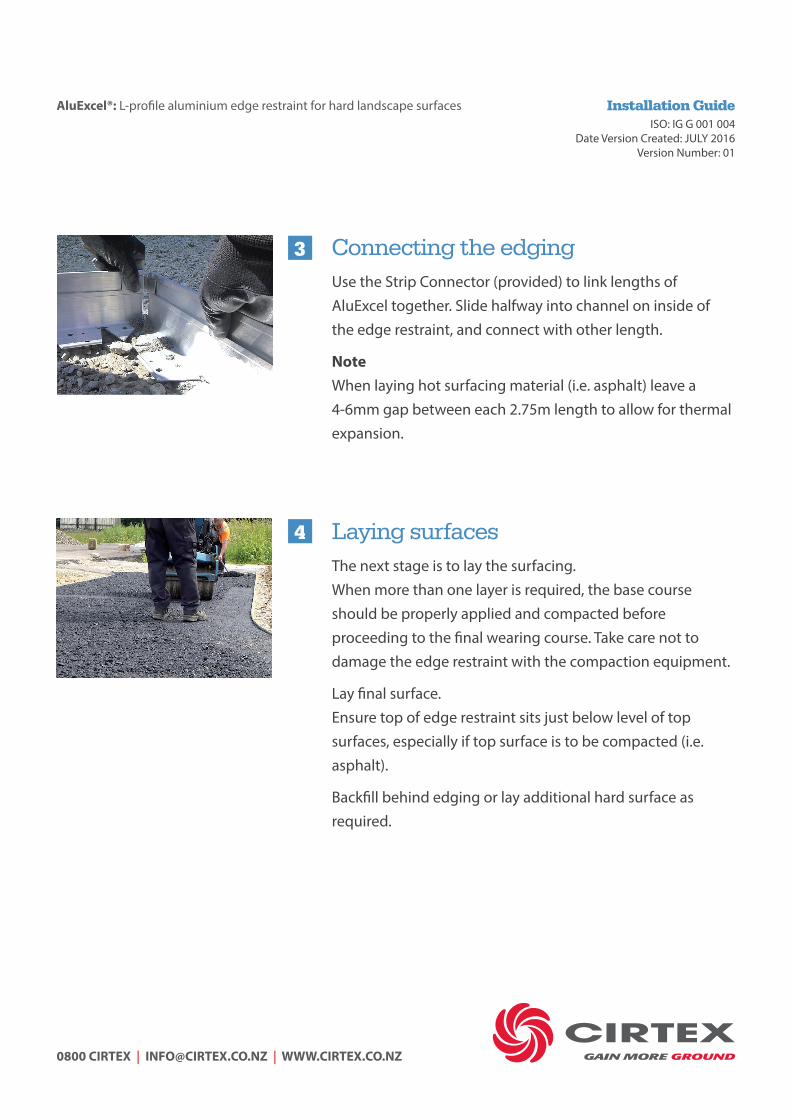
Connecting the edging Use the Strip Connector (provided) to link lengths of AluExcel together. Slide halfway into channel on inside of the edge restraint, and connect with other length.
Note When laying hot surfacing material (i.e. asphalt) leave a 4-6mm gap between each 2.75m length to allow for thermal expansion.
Laying surfaces The next stage is to lay the surfacing. When more than one layer is required, the base course should be properly applied and compacted before proceeding to the final wearing course. Take care not to damage the edge restraint with the compaction equipment.
Lay final surface. Ensure top of edge restraint sits just below level of top surfaces, especially if top surface is to be compacted (i.e. asphalt).
Backfill behind edging or lay additional hard surface as required.
ISO: IG G 001 004 Date Version Created: JULY 2016
Version Number: 01

CIRTEX INDUSTRIES LTDHead Office 16 Queen Street, Kopu, Thames 3578, New ZealandAuckland Sales and Distribution 2 Wilco Place, Wiri, Manukau, Auckland Christchurch Sales and Distribution Unit 2, 652 Halswell Junction Road, Hornby, ChristchurchPostal Address PO Box 470, Thames 3540, New Zealand0800 CIRTEX (247 839) | WWW.CIRTEX.CO.NZ
DISCLAIMER All information provided in this installation guide is correct to the best knowledge of the company and is given out in good faith. The information presented herein is intended only as a general guide to the use of such products and no liability is accepted by Cirtex Industries Ltd for any loss or damage however arising, which results either directly or indirectly from use of such information. Cirtex Industries Ltd have a policy of continuous development therefore information and product specifications may change without notice. This installation guide is subject to copyright in its entirety. The contents may not be reproduced in any form, either in whole or in part, without written permission from Cirtex Industries Ltd. While every effort has been made to ensure the accuracy of the information in this catalogue, Cirtex Industries Ltd assumes no responsibility for errors or omissions or for any consequences of reliance on this installation guide. Copyright 2014. All rights reserved.
5
Installation GuideAluExcel®: L-profile aluminium edge restraint for hard landscape surfaces
Hot lay surfacing
Only in relation to hot rolled surface applications. Compact surfacing with roller. Ensure first pass with roller is 50mm clear of AluExcel®, with vibrating function turned off. Final pass should be made as close to the edge as possible. On the final wearing course, and where applicable, roller should be run over edge of AluExcel® to ensure full compaction and a neat finish.
NoteHot lay surfacing e.g. asphalt, should not exceed 180°C.
ISO: IG G 001 004 Date Version Created: JULY 2016
Version Number: 01
HANDLING AND HAZARDS
BE SAFEWear high visibility clothing, hard hats, and any other PPE required on site.
SHARP CORNERS AND EDGES! Wear gloves.