js5500.3
TRANSCRIPT

Panasonic 5500 Series Version LQ3.5 Workstation Programming Guide
Model No. JS550WS
Please read this manual carefully and keep this documentation in a safe place for future reference.
PG5500LQ35 0200-6054


Acknowledgments
Panasonic® is a registered trademark of Matsushita Electric Industrial Co., Ltd. Other brands and their products are trademarks or registered trademarks of their respective holders and should be noted as such.
FCC Warning
This device complies with Part 15 of the FCC Rules. Operation is subject to the following two conditions: (1) This device may not cause harmful interference, and (2) this device must accept any interference received, including interference that may cause undesired operation. This equipment has been tested and found to comply with the limits for a Class A digital device, pursuant to part 15 of the FCC Rules. These limits are designed to provide reasonable protection against harmful interference when the equipment is operated in a commercial environment. This equipment generates, uses, and can radiate radio frequency energy, and, if not installed and used in accordance with the instruction manual, it may cause harmful interference to radio communications. Operation of this equipment in a residential area is likely to cause harmful interference, in which case the user will be required to correct the interference at his own expense. Disclaimer
The information presented in this document is subject to change without notice. Panasonic reserves the right to make changes to this material, and shall not be held responsible for any damages which may result from reliance on this material. Recycling Notice
Attention: The product you have purchased is powered by a rechargeable battery. Depending upon your state and local laws, it may be illegal to dispose of this battery with your trash. Contact your local solid waste authorities for instructions on how to recycle or properly dispose of the battery in your area.
This product has fluorescent lamps that contain a small amount of mercury. It also
contains lead in some components. Disposal of these materials may be regulated in your community due to environmental considerations. For disposal or recycling information, please contact your local authorities or the Electronics Industries Alliance: <http://www.eiae.org.>


Panasonic 5500 Series Programming Instructions – Version LQ3.5 i
Table of Contents
System Features.........................................................................................................................................1-1 New for LQ3.5...........................................................................................................................1-2
Bilingual Capability .........................................................................................................1-2 Service Time Programming Improvements ......................................................................1-3 Preamble Print Improvement............................................................................................1-4 Net Count for Gift Certificate Sold ..................................................................................1-4 New Electronic Journal options .......................................................................................1-5 Digital Deal Interface .......................................................................................................1-5 Subtotal Discount Control Enhancements......................................................................1-10 Manager Control for PRG Mode (P2) ............................................................................1-10 Speed of Service Programming ......................................................................................1-11 Improved 3 Panel and New 4 Panel Display Enhancement............................................1-12 Gift Card Interface .........................................................................................................1-16
Keylock Positions ....................................................................................................................1-22 Procedure List ..........................................................................................................................1-23
System Set-up............................................................................................................................................2-1 Dip Switch Settings....................................................................................................................2-2 Jumper Settings..........................................................................................................................2-4 Memory Configuration...............................................................................................................2-7 Initial Program Menu .................................................................................................................2-8
Initial Program Overview.................................................................................................2-8 Boot Download ..............................................................................................................2-10 Emergency Boot Loader Program ..................................................................................2-11 TCP/IP Program.............................................................................................................2-13 Flash ROM Clear ...........................................................................................................2-16 Flash ROM Download ...................................................................................................2-17 Flash ROM Downline ....................................................................................................2-20 Boot ROM Test..............................................................................................................2-28
P3 Diagnostics .........................................................................................................................2-29 P21 RAM Clear .......................................................................................................................2-32
P21 RAM Clear Overview .............................................................................................2-32 RAM Clear without Test ................................................................................................2-33 RAM Clear with Test .....................................................................................................2-34 Z Counter/Non-Resettable Net Total Reset ....................................................................2-35 EJ Buffer Reset ..............................................................................................................2-35 Polling Buffer Reset .......................................................................................................2-36 Product Projection Clear ................................................................................................2-37
P20 Self-Diagnostics................................................................................................................2-38 P22 Default Program Load ......................................................................................................2-42 Default Keyboard Layout.........................................................................................................2-44 Hard Key Codes.......................................................................................................................2-45 Hard Key Locations .................................................................................................................2-46
Programming.............................................................................................................................................3-1 Memory Structure ......................................................................................................................3-2 Keyboard Programming .............................................................................................................3-4
Function Key Codes.........................................................................................................3-6 Key Code Definitions.....................................................................................................3-12
Memory Configuration.............................................................................................................3-21 P21 Memory Allocation...........................................................................................................3-27
Table of Contents
ii Panasonic 5500 Series Programming Instructions – Version LQ3.5
Memory Conversion Chart .............................................................................................3-27 P21 Report Total Arrangement ................................................................................................3-29 P21 DCR Report Total Arrangement.......................................................................................3-37 P21 Calculation Totals .............................................................................................................3-39 P23 Tax Configuration.............................................................................................................3-43 P24 System Flags.....................................................................................................................3-47 P24 Miscellaneous Flags..........................................................................................................3-63 P24 Tandem & Macro Commands.........................................................................................3-107 P24 Time-Activated Macros ..................................................................................................3-114 P25 System Descriptors .........................................................................................................3-117 P26 Time Ranges ...................................................................................................................3-129 P28 Product Mix Groups .......................................................................................................3-136 P30 Prompts & Error Messages .............................................................................................3-138 P31 Cashier File.....................................................................................................................3-155 P32 Coupons..........................................................................................................................3-157
Regular Coupons..........................................................................................................3-157 Combo Coupons...........................................................................................................3-158
P34 Groups ............................................................................................................................3-163 P27 PLU Additions & Deletions............................................................................................3-165 P35 PLU File .........................................................................................................................3-167 P36 Manager File...................................................................................................................3-173 P39 Tare Weight ....................................................................................................................3-175 P40 86'd Items........................................................................................................................3-177 P42 Discounts & Surcharges..................................................................................................3-179 P51 KPS Standard Menu .......................................................................................................3-181 P52 Mix & Match File ...........................................................................................................3-183 P59-1 Employee File..............................................................................................................3-187 P59-2 Pay Rates .....................................................................................................................3-189 P59-3 Grace Periods ..............................................................................................................3-191 P59-4 Ingredient File .............................................................................................................3-193 P59-5 Recipe File...................................................................................................................3-195 P59-6 KVS Programs.............................................................................................................3-197
Entering the Program ................................................................................................................................4-1 Overview....................................................................................................................................4-1
Descriptor Codes..............................................................................................................4-4 Alpha Keyboard Layout ...................................................................................................4-5
X1 Mode Programs ..................................................................................................................4-10 Workstation Mode..........................................................................................................4-11 Starting Order Number...................................................................................................4-12 PLU Shift Level .............................................................................................................4-13 Remote Steering .............................................................................................................4-14 Cashier Disable ..............................................................................................................4-17
P33 Date & Time .....................................................................................................................4-18 P71 PLU Copy.........................................................................................................................4-19 P50 Program Printouts .............................................................................................................4-20 P60 Downline Programming....................................................................................................4-21
Appendix A...............................................................................................................................................5-1 New for LQ2.5...........................................................................................................................5-1
Display Enhancements .....................................................................................................5-1 Memory Enhancement .....................................................................................................5-2 MWS - Reporting.............................................................................................................5-2 CAT Tender Correction ...................................................................................................5-3 Receipt Signature Lines ...................................................................................................5-3

Table of Contents
Panasonic 5500 Series Programming Instructions – Version LQ3.5 iii
Downlining Flags .............................................................................................................5-4 Subgroup Lookup in P35 .................................................................................................5-4 Subgroup Lookup Mix & Match......................................................................................5-4
PF Loader...................................................................................................................................5-5 System Close & System Open....................................................................................................5-6 24-Hour Close............................................................................................................................5-8 Mix & Match ...........................................................................................................................5-11 Global Bumping.......................................................................................................................5-14 Deposit & Cash Report (DCR) ................................................................................................5-16 Inventory Count Reset..............................................................................................................5-18
Appendix B ...............................................................................................................................................6-1 Cabling Pin-outs ........................................................................................................................6-1
Panpoll Cable ...................................................................................................................6-1 Panpoll Cable (Modem) ...................................................................................................6-2 Printer Cable ....................................................................................................................6-3 JS-800TP Printer Cable....................................................................................................6-4 Coin Dispenser.................................................................................................................6-5 Coin Dispenser (Telequip) ...............................................................................................6-6 Scale.................................................................................................................................6-7 Mondex Device ................................................................................................................6-8

Table of Contents
iv Panasonic 5500 Series Programming Instructions – Version LQ3.5

Panasonic 5500 Series Programming Instructions – Version LQ3.5 1-1
System Features
The 5500 Series LQ3.5 software is designed to interface with the Panasonic System Manager Pro (SMP) back office application. If you have the Panasonic Manager Workstation Software (MWS) application supporting your back office operations, LQ3.5 is ‘not’ supported, MWS software supports LQ software versions 2.5 and below. Please contact your authorized Panasonic Dealer for further inquires. This section provides a general overview of the 5500 system. It first covers the features new to the LQ3.5 software set. It then provides basic information about your 5500 Series workstations, including a description of the keylock and the range of options available within each keylock position. The last pages of this chapter include a chart of P2 Mode programs for reference.

System Features
1-2 Panasonic 5500 Series Programming Instructions – Version LQ3.5
New for LQ3.5
Bilingual Capability
Your system can now be set up to support two languages for Kitchen Video Systems using RCRT 8
and RCRT 8 Split Screen modes. For these two modes, you can press a Switch Language key to change from the primary to the secondary language. Press the same key a second time to return to the primary language.
New Flag option:
ADD 408: Option H: 1 = Enable Bilingual handling.
PLU descriptor in Program 35
Now you can define the primary and secondary language description for an item. The 16-character descriptor is divided in the following manner: use the first set of eight digits for the primary language and use the second set of eight digits for the secondary language. For example, if English is the primary language and Spanish is the secondary language, the first eight characters set an English description and the last eight characters set a Spanish description. In most instances, only one set of eight characters is visible to the operator at any given time. On the operator display, on the reports, and on the receipt, the primary language always appears for the PLU. If Flag 408 = 0, disabling Bilingual handling, the descriptor can be one to sixteen characters appearing in its entirety on all KVS screens, reports, and receipts.
New Bump Bar: positions for RCRT 8 and RCRT 8 Split Screen mode.
Touch the position noted on the following bump bar diagram to switch from the primary to the secondary language. Touch the position a second time to return to the primary language.

System Features
Panasonic 5500 Series Programming Instructions – Version LQ3.5 1-3
Descriptors: The following chart shows PLU descriptors used for various functions when Bilingual handling is enabled.
Mode Function PLU Descriptor Used
REG Mode Operator Display Primary language (First 8 characters) 1- 199 Menu Look-up First 8 characters 800 Menu Look-up First 8 characters Order Recall (key code 102) First 8 characters Drive-Thru Board Display (key code 105) All Wenview Display (key code 75) All Voids First 8 characters Error Correct First 8 characters Wait First 8 characters Receipt First 8 characters Journal First 8 characters K/P First 8 characters Kitchen Chit First 8 characters Item-by-Item First 8 characters KVS Final transfer First 8 characters Subtotal transfer First 8 characters Item-by-Item transfer First 8 characters MGR Mode 86'd Items All Reports All PLU Report First 8 characters From-To PLU Report First 8 characters 86'd Items Report First 8 characters P2 Mode P40 86'd Items All First 8 characters All
P50 Program Print : 1 - Groups/PLU'S 5 - Standard Menu 24 - 86'd Items First 8 characters
P51 Standard Menu Items All
Service Time Programming Improvements
In previous versions of 5500 Series software, definitions for the Service Time Report Update program
could only be set at the Kitchen Video System controller. The system references this program to update Inside sales or Drive-Thru sales (or neither) when a particular workstation sends an order to a particular KVS CRT screen.
To simplify changes and downlining, you can now set the definitions through the controller, as you have in the past, or you can use Flags 400 through 407. See the Program 24 flags for details.

System Features
1-4 Panasonic 5500 Series Programming Instructions – Version LQ3.5
Preamble Print Improvement
Flag 101 now controls Preamble print for shared Receipt and Kitchen Printers. Previously, the shared
printer's function decided whether or not the preamble printed. The preamble would be pre-printed at the end of a receipt and would not be pre-printed at the end of kitchen orders. If Flag 101 is set, the preamble now prints for both types of orders.
New Flag option:
ADD 101: Option A: 1 = Print Preamble on Receipt. (If set, the preamble prints on the Kitchen Printer when the Receipt and
Kitchen chit share the same printer.) Flag 129 programming consideration:
If you use this new option for a shared printer, Flag 129A must be greater than or equal to 2. Flag 129A decides how many lines feed between orders; an entry of 2 feeds - four lines. If you do not feed at least four lines between orders, the preamble will not have sufficient room to print.
Net Count for Gift Certificate Sold
The handling for the Net Sales count has been changed in the following manner. This handling is not
under flag control, and it has no effect on Gift Certificate Redemption. If a Gift Certificate Sold (key code 29, 30, or 31) is the only purchase within an order, the sale does not
update the Net Sales count.
If a Gift Certificate Sold is combined with any item purchase, the sale updates the Net Sales count. (This is the handling used for the Net Sales count in previous software versions.)

System Features
Panasonic 5500 Series Programming Instructions – Version LQ3.5 1-5
New Electronic Journal options
Flag 295 now provides new options to store P1 and P2 mode key sequences, Macro sequences
performed outside of a sale, and Macro sequences performed within a sale.
ADD 295: Option E: 1 = Send P1 and P2 key sequence data to the EJ. 2 = Store non-sale Macro key data to the EJ.
4 = Store sale Macro data to the EJ.
For time-activated macros and host-activated macros, the number of the macro is stored to the EJ;
descriptors, such as cashier names and PLU descriptors, are not stored.
Digital Deal Interface
Digital Deal is an optional software package available for systems using the Manager Workstation (MWS) software. Digital Deal software can check an order and suggest additional or substitute items at reduced prices. For example, if an order includes a burger, the system can suggest replacing it with a specially priced cheeseburger. This feature is referred to as an "Upsell" function. Programming Considerations Use the following guidelines to set your workstations to work with the Digital Deal Upsell functions.
Note: For details about steps you use to activate the Digital Deal Module, see the documents that accompany the software.
Key Codes
Code # Transaction Type Description
129: Upsell Use this key to display the special offers and their price reductions.
65: Delete The Delete key performs Upsell refunds.
1090: PLU This PLU is used for Upsell refunds.
111: Number 11 This key selects Special Offer Item #1 from the pop-up screen.
112: Number 12 This key selects Special Offer Item #2 from the pop-up screen.
113: Number 13 This key selects the "Decline" option, which clears the pop-up screen without a selection.
Note: The following keys are available while the pop-up Upsell screen displays: 11, 12, 13, CLEAR, and all number keys (0-9).

System Features
1-6 Panasonic 5500 Series Programming Instructions – Version LQ3.5
System & Miscellaneous Flags descriptions defined; also see the P25 System Descriptors section in
this manual.
Flag 152 - To enable Upsell functions, you must enter 1 in Option B. If you also want to require the Upsell key for every order, enter 3 in Option B. 1= Enable Upsell functions. 2= Require the Upsell key prior to payment.
Flag 124 - (This is an existing flag.) If Flag 124A is set to print prices on the Kitchen Printer,
a "SPCL" descriptor appears next to the Special Offer item on the receipt. If Flag 124A is set so that prices do not print, the "SPCL" descriptor does not print.
Flag 139 - (This is an existing flag.) If a customer purchases a Special Offer item, the order
total should be rounded to a whole dollar amount. If the amount is off by a few cents, it can be automatically adjusted. The automatic adjustment is only available when the system decimal appears in the second position. As a result, Flag 139A must be 2. (Also see P35 for adjustment requirements.)
Flag 303 - Use this flag to set retry options for Upsell communications. If a timeout error
occurs, the workstation screen displays a "DPUM Offline" message. A-D: Not Used. E-F: Enter the retry timer for Upsell communications. G: Enter the number of times the system will retry Upsell communications. H: Enter the ID # (1-3) of the PC used for Upsell communications.
Flag 295 - MWS communications must be enabled before you can use Upsell functions. For
Flag 295 (EJ Controls), enter the settings you would normally use for MWS.
Flag 300 - Use this flag to enter the ID # of the PC for MWS functions. Enter the value you normally use for MWS functions; typically Flag 300 = 1.
Flag 301 - This flag sets controls for EJ transfers. Enter values you normally use for MWS
communications; typically Flag 301 = 3111.
Flag 302 - This flag defines PC Polling options. Enter values you normally use for MWS functions; typically, Flag 302 = 1.
Flag 308 - This flag defines additional options for MWS, including the wait timer. A typical
entry would be 10951.

System Features
Panasonic 5500 Series Programming Instructions – Version LQ3.5 1-7
P21 Memory Allocation
EJ: EJ must be enabled, so the EJ allocation should be > 0. Polling: Polling must be enabled, so Polling allocation must be set to 1.
P21 Report Total Codes
Code 105: Use this code to add the Upsell count and total to your programmable reports. P25 System Descriptors
Addr # Descriptor Description
405: SPCL Use this address to customize the descriptor printed with the Special Offer item on the customer receipt.
605: UPSELL Use this address to customize the descriptor for report total code 105.
P30 Prompts & Error Messages
Addr # Descriptor Description
204: DPUM BUSY Use this address to program the message displayed when a busy status is received for Upsell communications.
205: DPUM OFFLINE Use this address to program the message displayed when communication is not established between the workstation and the MWS PC.
206: UP SELL? Use this address to program the message that displays when the Upsell key is required, but not pressed, before a payment. (Flag 165B, value 2 is set to require the Upsell key prior to payment.)

System Features
1-8 Panasonic 5500 Series Programming Instructions – Version LQ3.5
P35 PLU Items
Digital Deal software references menu items you define in Program 35. Keep the following guidelines in mind for Special Offer items.
The descriptions and the original prices of Special Offer items are taken from Program 35.
Special Offer items are not consolidated, even if Flag 132A is set to consolidate items.
The original price of a Special Offer item has a 3-digit limit ($.01 - 9.99).
The decimal position for Special Offer items must be in the second digit position (x.xx).
If a Special Offer item is not found in the PLU file, blank spaces display in the price and
description fields of the pop-up Upsell screen.
The following types of items cannot be used as Special Offer items: Negative PLUs, Memo Modifiers, Scale PLUs, Open PLUs, Tandem PLUs.
A Special Offer item cannot be set to require a Modifier (P35, Status 2, Option C cannot be set
to 2 for a Special Offer item).
A Special Offer item must have a linked Subgroup.

System Features
Panasonic 5500 Series Programming Instructions – Version LQ3.5 1-9
Aside from these guidelines, Special Offer items do not require special P35 entries. The Digital Deal software will reference the normal item programming for its information. P35 has one additional programming consideration for the Upsell feature. For the Automatic Sale Total Adjustment to work, you must program two special PLUs: PLU #999998 and PLU#999999.
When you register a Special Offer item, the sale total normally becomes a whole dollar amount. In some cases, however, the total may be off by a cent or two. To help ensure that the sale total is a whole dollar amount, you must program two "adjustment" PLUs. The settings for these two PLUs are provided below.
P35 Entries for Sales Adjustment PLUs
PLU #999998 #999999 Notes
1 Descriptor ADJUST - ADJUST + #999998 is for Negative Adjustments; #999999 is for Positive Adjustments.
2 Status 1 0200 0000 #999998 should be negative. Tax should not be programmed for either PLU.
3 Status 2 4000 4000 Not Applicable.
4 Status 3 0000 0000 Not Applicable.
5 Class 000-000 000-000 Not Applicable.
6 Price/HALO 000.00 0000.00 Both should be set to $.00.
7 Remote/Priority 99-xxx 99-xxx Use 99 for the priority. Steering can be directed to the Kitchen Printer, if desired.
8 Coupon 0000-0000 0000-0000 Not Applicable.
9 Coupon 0000 0000 Not Applicable.
10 # Modifiers 0 0 Not Allowed - Do not program.
11 Recipe 000 000 Not Applicable.
12 Product Mix 00-00 00-00 Not Applicable.
13 Piece Count 00 00 Not Applicable.
14 Group xxx xxx Enter a valid group number. (This can be omitted if Flag 199A=1, allowing PLUs that do not have a linked subgroup.)
15 Tandem 0 0 Not Allowed.
16 Tare 0 0 Not Allowed.
17 Color # 0 0 Not Allowed.
Details about this function and the operating procedures you use for it are provided with the optional
Digital Deal software. Please see that document for additional information about this function.

System Features
1-10 Panasonic 5500 Series Programming Instructions – Version LQ3.5
Subtotal Discount Control Enhancements
New Flag options provide additional control for Subtotal Discounts and Discountable Subtotal
(DCTL) Discounts. Both can now be restricted to one discount per transaction.
ADD 107:
Option B: 1 = Allow only one Subtotal Discount per transaction. 2 = Allow only one Discountable Subtotal (DCTL) Discount per transaction.
If either restriction is set, an "Invalid Operation" error message displays if the cashier tries to perform
more than one discount within an order.
Manager Control for PRG Mode (P2)
You can now restrict user level access to the program files available when the keylock position is set to
the P2 mode, see section on Keylock Positions in this manual. New flag
ADD 248: Require Manager for P2 Mode.
Option H: 0 = No log on, all Cashier, Mgr1 and Mgr2 level user is allowed 1 = Mgr1 level only is allowed
2 = Mgr2 level only is allowed
3 = Mgr1 or Mgr2 level user is allowed
Flag 248 controls all programming file access in PRG2 mode. Individual file access level restriction is
not available. When accessing P2 mode programming functions within a macro routine, the manager compulsory
setting in flag 248 option H is ignored.

System Features
Panasonic 5500 Series Programming Instructions – Version LQ3.5 1-11
Speed of Service Programming
Speed of Service reporting allows you to receive up to the minute reports on how your staff is
performing in relation to the customer flow. Different times will be made available and stored in the electronic journal area in the workstation. These times will then be updated to the system manager PC to be reported on in a variety of ways.
The Speed of Service reporting set-up is done in the System Manager Pro application. The section
covers an overview of the feature, new program keys that are available and new flag settings that you need to be aware of for configuration.
In this document, Speed of Service is defined as the time interval parameters recorded during
workstation activity. Service Time is the time interval parameters recorded based on the kitchen video system (KVS) activity. At this time, the Speed of Service variables cannot be combined with the Service Time reporting.
New flag option:
ADD 108: Option A: 1 = Enable Speed of Service 2 = Require Cash Drawer Close for Park/Serve
Existing flag consideration:
ADD 106: If the Speed of Service time report is using the ‘Drawer Close Time’ parameter, you would want to enable this flag so to require the cash drawer to be closed before begging a new order.
Option A: 1 = Enable Drawer Compulsion
Key Codes; also see the keyboard programming section in this manual.
Code # Transaction Type Description
150: FCSV1 Used to serve the order from the first panel area (when viewing panels left to right) when the workstation is operating in a front counter mode.
151: FCSV2 Used to serve the order from the middle panel area when the workstation is operating in a front counter mode.
152: FCSV3 Used to serve the order from the third panel area (when viewing panels left to right) when the workstation is operating in a front counter mode.

System Features
1-12 Panasonic 5500 Series Programming Instructions – Version LQ3.5
Improved 3 Panel and New 4 Panel Display Enhancement
This feature is available in LQ2.5 software, but was not documented in the previous manual. It is a
continuum of the Display Enhancement described in Appendix A. In addition to the standard display format, three new screen formats are available. They are identified
by the new flag values described here.
ADD 131:
Option A: 1 = 4 panel 21 lines: display 4 panels – 2 panels for current order, and 2 panels for previous order area (previous -1 order area is not displayed). View up to 21 line items with tax, total, and tender line in previous panel display area, on the 22nd line entry in the current order – expand the view to a 3 panel current order area, hiding the previous order.
Option B: 0 = Standard 3 panel 8 lines: display 3 panels for current order, previous order, and previous -1 order areas. View up to 8 line items with tax, total and tender in each panel.
1 = 3 panel 13 lines: display 3 panels for current order, previous order, and previous -1 order areas. View up to 13 line items without total lines in previous panel display area, on the 9th line entry in the current order – expand the view to a 2 panel current order area, hiding the previous order panels.
2 = 4 panel 26 lines: display 4 panels – 2 panels for current order, and 2 panels for previous order area (previous -1 order area is not displayed). View up to 26 line items without total lines in previous panel display area, on the 22nd line entry in the current order – expand the view to a 3 panel current order area, hiding the previous order.
Note: Option B must also equal 2 when selecting Option A = 1, e.g. flag 131 would be set to = 12
Existing flag setting limitation:
ADD 119: is necessary to set to 4 when using the Wait / Wait recall feature with any of the new screen formats
Option B: 4 = Display Wait & Phone Orders in brackets at the bottom of the Counter Terminal screen. This option is required for Phone Order handling. [If not set, up to 3 Wait orders are held on-screen at the Counter Terminals.]

System Features
Panasonic 5500 Series Programming Instructions – Version LQ3.5 1-13
Screen Format Examples: Standard 3 panel 8 lines: display 3 panels for current order, previous order, and previous -1 order
areas. View up to 8 line items with tax, total and tender in each panel.
3 panel 13 lines: display 3 panels for current order, previous order, and previous -1 order areas. View up to 13 line items without total lines in previous panel display area, on the 9th line entry in the current order – expand the view to a 2 panel current order area, hiding the previous order panels.

System Features
1-14 Panasonic 5500 Series Programming Instructions – Version LQ3.5
4 panel 26 lines: display 4 panels – 2 panels for current order, and 2 panels for previous order area
(previous -1 order area is not displayed). View up to 26 line items without total lines in previous panel display area, on the 22nd line entry in the current order – expand the view to a 3 panel current order area, hiding the previous order.

System Features
Panasonic 5500 Series Programming Instructions – Version LQ3.5 1-15
4 panel 21 lines: display 4 panels – 2 panels for current order, and 2 panels for previous order area
(previous -1 order area is not displayed). View up to 21 line items with tax, total, and tender line in previous panel display area, on the 22nd line entry in the current order – expand the view to a 3 panel current order area, hiding the previous order

System Features
1-16 Panasonic 5500 Series Programming Instructions – Version LQ3.5
Gift Card Interface
What do gift card programs provide over paper gift certificates? As seen by store operations and finance executives, the implementation of a gift card provides a retailer with the opportunity to streamline process as it eliminates a variety of less durable paper gift certificates and store credits, while providing controls for validating and authenticating the gift card. The retailer can issue new gift cards or recharge the customer’s existing gift card. Gift Cards provide the customer with an easy to carry tender that can be used by the purchaser or as a gift. Who provides the services? Panasonic has developed the interface to Southern DataComm for custom integration with the Givex and Value Link processors. Gift Card System Considerations:
Panasonic SMP 1.2 or above Panasonic CAT Software Module ProtoBase® Software w/ SoftTrans® module v4.82 or above
Note: Protobase® must be installed before installing the CAT software. Please refer to the latest Product Release Bulletin regarding 5500 CAT software for product details and instructions on installation procedures.
Gift Card Transaction Overview:
Gift Card Transactions
Description Purpose GiveX Applicable
Value Link Applicable
Register The act of registering a GIVEX gift certificate creates and activates a GIVEX number, in place of providing the consumer with a gift card
A service that might be used in the case where a Merchant who does not want to use gift cards or paper based gift certificates, and instead creates a gift certificate using the POS receipt.
Yes No
Activation Merchants are pre-assigned a series of numbers in the form of gift cards, or stickers. Those pre-assigned numbers are not redeemable by the consumer until the merchant has activated them.
Activation of gift cards at the POS is a fraud protection tool. If the card is not active when it is taken out of the merchant’s location, it cannot be redeemed anywhere.
Yes Yes

System Features
Panasonic 5500 Series Programming Instructions – Version LQ3.5 1-17
Gift Card Transaction Overview: cont.,
Gift Card Transactions
Description Purpose GiveX applicable
Value Link Applicable
Increment This service adds monetary value to an already active gift card or POS certificate.
This feature is commonly used by merchants for expense accounts, promotions, and frequent user programs.
Yes Yes
Redemption This transaction is used to decrement the value from an already active gift card.
The consumer uses the card for full or partial payment on the purchase they are making.
Yes Yes
Cancel This service allows the merchant to cancel a transaction processed during the same business day. Primarily an administrative function, this transaction may require a User ID and Password generated by the processor (GIVEX or Value Link).
A number may be accidentally activated, redeemed or incremented for an improper amount and that transaction needs to be cancelled.
Yes Yes
Balance This service allows a merchant to check the gift card balance.
It is common for a consumer to walk up to a cashier and ask for a balance check, before they do their purchasing /dining.
Yes Yes
Return This service allows the merchant to cancel a transaction processed during a different business day. Primarily an administrative function, this transaction may require a User ID and Password generated by the processor (GIVEX or Value Link).
A number may be activated, redeemed or incremented for an improper amount and that transaction needs to be cancelled from a purchase made in a prior business day.
Yes Yes

System Features
1-18 Panasonic 5500 Series Programming Instructions – Version LQ3.5
Gift Card Programming Considerations Key Codes; also see the keyboard programming section in this manual.
Code # Transaction Type Description
154: REGISTER Start a gift card REGISTER transaction.
155: ACTIVATION Start a gift card ACTIVATE transaction.
156: INCREMENT Start a gift card INCREMENT transaction
157: REDEMPTION Finalize an order using a Gift Card
158: CANCEL CANCEL a Gift Card Transaction that occurred in the same day.
159: BALANCE INQUIRY Start a gift card BALANCE INQUIRY transaction.
160: RETURN Start a gift card RETURN transaction.
Report Total Codes; also see the P21 Report Total Arrangement section in this manual.
Total Code Count Amount Tax Status Transaction
132 Y Y without tax GIVEX Register 133 Y Y without tax GIVEX Activate 134 Y Y without tax GIVEX Increment 135 Y Y with tax GIVEX Redemption 136 Y Y with tax GIVEX Cancel 137 Y N --- GIVEX Inquiry 138 Y Y without tax GIVEX Return
142 Y Y without tax VALUE LINK Register 143 Y Y without tax VALUE LINK Activate 144 Y Y without tax VALUE LINK Increment 145 Y Y with tax VALUE LINK Redemption 146 Y Y with tax VALUE LINK Cancel 147 Y N --- VALUE LINK Inquiry 148 Y Y Without tax VALUE LINK Return

System Features
Panasonic 5500 Series Programming Instructions – Version LQ3.5 1-19
New Descriptor Codes; also see the P25 System Descriptors section in this manual.
4 char 8 char 16 char 4 char desc 8 char desc
432 632 --- REG GIVX REG
433 633 --- ACT GIVX ACT
434 634 --- INCR GIVX INCR
435 635 --- GIVX GIVX RED
436 636 --- CANC GIVX CANC
437 637 --- INQ GIVX INQ
438 638 --- RTRN GIVX RTRN
402 602 --- GIVX or VLNK
GIVX or VLNK
442 642 --- REG VLNK REG
443 643 --- ACT VLNK ACT
444 644 --- INCR VLNK INCR
445 645 --- VLNK VLNK RED
446 646 --- CANC VLNK CANC
447 647 --- INQ VLNK INQ
448 648 --- RTRN VLNK RTRN
New 16 Character Messages; also see the P30 Prompts and Error Messages section in this manual.
ADDRESS Default 16 Character Message
252 GIVX PROCESSING
253 ERR DATA RECEIVE

System Features
1-20 Panasonic 5500 Series Programming Instructions – Version LQ3.5
Existing and New Print Messages; also see the P30 Prompts and Error Messages section in this
manual.
ADDRESS Default 16 Character Message Status
367 EXP. DATE existing
368 AUTH.# existing
374 SERVICE TYPE new
375 TRANSACTION# new
376 CARD ISSUER new
377 CERTIFICATE# new
378 CURRENT BAL new
379 INCREMENT BAL new
380 RED. BAL new
381 CANCEL BAL new
382 NEW. BAL new
383 HOST RESP. CODE new
384 Not Used new
385 REGISTER new
386 ACTIVATION new
387 INCREMENT new
388 REDEMPTION new
389 CANCEL new
390 BALANCE INQUIRY new
391 RETURN new
392 RETURN BAL new

System Features
Panasonic 5500 Series Programming Instructions – Version LQ3.5 1-21
New Flags Values; also see the P24 System and Miscellaneous Flag section in this manual.
ADD 180: Gift Card MGR Controls
Option A: 1= Require MGR for Gift Card REDEMPTION. 2= Require MGR for Gift Card CANCEL.
4= Require MGR for Gift Card BALANCE INQUIRY.
Option B: 1= Require MGR for Gift Card REGISTER. 2= Require MGR for Gift Card ACTIVATION.
4= Require MGR for Gift Card INCREMENT.
ADD 181: Gift Card MGR Control cont.,
Option B: 1= Require MGR for Gift Card RETURN.
ADD 304: PC Link Controls
Option D: Identify the PC (0-3) destination for the Gift Card communications (Also make sure you have defined
the PC destination in Flag 300H.)
ADD 317: Gift Card Controls
Option A-C: Define the length of time (0-255 seconds) before timing out, for Gift Card communications, between the PC and the host processing company.
Option D-F: Define the length of time (0-255 seconds) before timing out, between the WS and PC, when the Gift Card processor is not available.
Option G-H: Enter the number of retry attempts (0-99) for Gift Card communications.
ADD 318: Gift Card Printer Controls
Option A-D: Enter the number (0-204) of the workstation ID and RS232 Channel where the Receipt Printer for printing the Gift Certificates is located.
Option E-H: Not Used
Examples: Workstation #1, CH1 = 11 Workstation #20, CH1 = 201 Workstation #1, CH2 = 12 Workstation #20, CH2 = 202 Workstation #1, CH3 = 13 Workstation #20, CH3 = 203 Workstation #1, CH4 = 14 Workstation #20, CH4 = 204
ADD 139: existing flag Important Note: This flag must be set when using Gift Cards
Option A: 2= Position the system decimal in the 2nd position (xxxx.xx).
Special Considerations:
1 The Panasonic Interface supports the “ISO” gift card format, where track 2 is supported and track 1 is not supported.
2 The JS-550WS does not support Bar Codes.

System Features
1-22 Panasonic 5500 Series Programming Instructions – Version LQ3.5
Keylock Positions The keylock for the 5500 Series workstation has five positions. Three keys (REG, MGR, and PRG) control access to these keylock positions. The first diagram below shows the keylock and lists the functions available for each keylock position. The second diagram shows positions you can access with each of the available keys.
Keylock Modes & Functions Position Function CLOSED: Closed (Off) REG: Operating (Registration) Mode MGR: X1 Programs, X Reports, Z Reports Period-to-Date Reports (X2 and Z2) Training Mode P1 Mode Programs P2: P2 Mode Programs P3: Keyboard Program, Initial Program menu Note: For security reasons, the P2 and P3 keylock positions are not marked on the workstation.
Key Access: Key Type Key Access REG: CLOSED REG MGR: CLOSED REG MGR PRG: CLOSED REG MGR P2 P3
Closed
REG
MGR
P2
P3

System Features
Panasonic 5500 Series Programming Instructions – Version LQ3.5 1-23
Procedure List
Procedure & Modes
Procedure & Modes
20 Self-Test (P2, P1 Mode) 1 LCD (Cashier Display) 11 Time Clock 2 Rear Display 12 RS-232C 3 Keyboard 13 RAM 4 ROM 14 Video RAM 5 Magnetic Card Reader 7 Drawer A 8 Drawer B 9 Inline (Send) 10 Inline (Receive) 21 Memory Allocation (P2 Mode) 0 All RAM Clear 1 Memory Allocation 2 Register (Media) Report Totals 3 Cashier Report Totals 4 Manager Report Totals 5 Station Totals 6 DCR Totals 7 Calculation Tables 22 Default Program Load (P2 Mode) 220122 Default Flags 220222 Default System Descriptors 220322 Default Prompts & Error Messages 220422 Default Keyboard 220522 Default KVS Programs 220622 Default Memory & Report Totals 23 Tax Tables (P2 Mode) 24 System & Misc Flags (P2 Mode) Miscellaneous Flags (P1 limited access) Macros (P2, P1 Mode)
25 System Descriptors (P2 Mode) 26 Time Ranges (P2, P1 Mode) 27 PLU Add/Delete (P2, P1 Mode) 28 Product Mix (P2, P1 Mode) 30 Prompts & Error Messages (P2, P1 Mode) 31 Cashier File (P2 Mode, P1 limited access) 32 Coupon File (P2, P1 Mode) 33 Date & Time (P2, P1 Mode) 34 Groups (P2, P1 Mode) 35 PLU File (P2, P1 Mode) 36 Manager File (P2, P1 Mode) 39 Tare Weight Tables (P2, P1 Mode) 40 86-Items (P2, P1 Mode) 42 Discounts (P2, P1 Mode)

System Features
1-24 Panasonic 5500 Series Programming Instructions – Version LQ3.5
Procedure & Modes
Procedure & Modes
50 Program Print (P2, P1 Mode)
0 Cashiers 15 Memory Allocation 1 Groups & PLUs 16 Tare Weight 2 Coupons 17 Recipes 3 Product Mixes 18 Ingredients 4 Prompts & Messages 19 Employees 5 KPS Standard Menu 20 Pay Rates 6 Time Ranges 21 Grace Periods 7 Tax Tables 22 KVS Programs 10 System & Misc Flags 23 Manager File
11 Macros 24 86-Items 12 System Descriptors 26 Discounts 13 Report Totals 27 Mix & Match 14 Keyboard Layouts
51 KPS Standard Menu (P2, P1 Mode) 52 Mix & Match File (P1, P2 Mode) 60 Downline (P2, P1 Mode)
0 Date & Time 16 KPS Standard Menu 1 All Groups 17 Macros 2 All PLUs 18 Time Ranges 3 Cashiers 19 Combo Coupons 4 Product Mix 20 Tare Weight 5 Prompts & Messages 21 Managers 6 Tax Tables 23 86-Items 7 System Flags 26 Discount Tables 8 Misc Flags 27 Mix & Match 9 Regular Coupons 10 System Descriptors 40 KVS Programs 11 Key Locations 50 Master Files 12 Report Totals 90 All Programs 13 Memory Allocation
* 59-1 Employee File (P2, P1 Mode) * 59-2 Pay Rates (P2, P1 Mode) * 59-3 Grace Periods (P2, P1 Mode) * 59-4 Ingredients (P2, P1 Mode) * 59-5 Recipe File (P2, P1 Mode) * 59-6 Kitchen Video System (P2, P1 Mode) 1 KVS Mode 2 KVS Descriptors 3 KVS Color Selections * 70 PF Loader ( P2, P1 Mode) 71 PLU Copy ( P2, P1 Mode) X1 Mode Programs (X1 Mode) 1 Workstation Mode 2 Starting Order # 3 PLU Shift Level 7 Remote Steering 8 Cashier Disable
Panasonic 5500 Series Programming Instructions – Version LQ3.5 2-1
System Set-up Before you start customizing your application program, you must complete a few basic set-up procedures. For example, you must identify the workstation that acts as the System Master. You must also install the amount of RAM memory required to support your program. This section covers basic set-up procedures for your workstations. It also describes the procedures you use to clear the installed memory and to test workstation components.

System Set-up
2-2 Panasonic 5500 Series Programming Instructions – Version LQ3.5
Dip Switch Settings
The 5500 Series workstation has two dip switches (SW2 and SW3) you must check or adjust for initial set-up. Descriptions for the definitions of these dip switches begin below. Dip Switch 2 (SW2) Dip Switch 2 is an 8-pin dip switch on your workstation processor board. It identifies the workstation function (Master or Basic), as well as the availability of optional features for your workstation. The following chart shows the definitions for this dip switch.
Pin
Function
OFF
ON
1
System Master
Basic
Master
2
External VGA (Future)
Not Installed
Installed
3
External Rear Display (Future)
Not Installed
Installed
4
External ArcNet (Future)
Not Installed
Installed
5
Drive-Thru LCD Board
Generic D/T Board
Wenview
6
- Not Used -
----
----
7
- Not Used -
----
----
8
Emergency Boot Loader
Disallowed
Allowed
Note: SW2, Pin 1 must be set at every workstation to identify the Master and Basic
workstations.

System Set-up
Panasonic 5500 Series Programming Instructions – Version LQ3.5 2-3
Dip Switch 3 (SW3) Dip Switch 3 (SW3) is an 8-pin dip switch on your workstation processor board. Its definitions primarily help determine how much RAM memory is available to your workstation. The following chart shows the SW3 definitions. Pin
Function
OFF
ON
1
- Not Used -
----
----
2
- Not Used -
----
----
3
- Not Used -
----
----
4
- Not Used -
----
----
5
- Not Used -
----
----
6
Additional RAM
Not Installed
Installed
7
*See Note*
*See Note*
8
RAM Size
*See Note* *See Note*
Note: Set Pin 6 = ON if you add any additional RAM to your workstation.
Use the following Pin 7 and Pin 8 combinations to identify the size of the RAM chips installed in your workstation.
1Mbit (128Kbyte) : Pin 7 = OFF, Pin 8 = OFF 4Mbit (512Kbyte) : Pin 7 = ON, Pin 8 = ON

System Set-up
2-4 Panasonic 5500 Series Programming Instructions – Version LQ3.5
Jumper Settings
For initial set-up, you must confirm jumper settings for the CPU Board and for the optional RS-232C Board, if installed. On the CPU Board, adjust JP2 and JP4 to specify the RAM configuration. On the RS-232C Board, use JP201 - JP205 to define options for RS-232C polling communications. See the following charts for a description of jumper settings for the two boards.

System Set-up
Panasonic 5500 Series Programming Instructions – Version LQ3.5 2-5
CPU Board Jumpers (JP2 & JP4) The main processor board has two jumpers, JP2 and JP4, that identify the RAM configuration you are using. Set these two jumpers to match the RAM memory installed in each workstation. The following chart shows the definitions for the CPU Board jumpers.
Jumper Setting
Definition
JP2: [1 o=o o 3]
1M RAM
[1 o o=o 3]
4M RAM
JP4: [1 o=o o 3]
1M RAM
[1 o o=o 3]
4M RAM
1M RAM: JP2 = 1-2 Short, 2-3 Open 4M RAM: JP2 = 1-2 Open, 2-3 Short
JP4 = 1-2 Short, 2-3 Open JP4 = 1-2 Open, 2-3 Short
RS-232C Board Jumpers (JP201-JP205) Adjust Jumpers JP201-JP205 on the optional RS-232C Board to define options for Channel 1 (CH1) and Channel 2 (CH2) connections. The following chart shows the definitions for the RS-232C Board jumpers.
Jumper Setting
Definition
JP201: [1 o=o o 3]
CTS Disabled for CH1
[1 o o=o 3]
CTS Enabled for CH1
JP202: [1 o=o o 3]
CTS Disabled for CH2
[1 o o=o 3]
CTS Enabled for CH2
JP203: [1 o=o o 3]
DSR Enabled for CH2
[1 o o=o 3]
CI Enabled for CH2
JP204: [1 o=o o 3]
DSR Enabled for CH1
[1 o o=o 3]
CI Enabled for CH1
JP205: [1 o=o o 3]
(Future Use)
1M 4M
1M 4M
1M 4M
1M 4M

System Set-up
2-6 Panasonic 5500 Series Programming Instructions – Version LQ3.5
The following summary shows RS-232C Board jumper definitions by channel (CH1 or CH2).
RS-232C Channel 1:
Disable CTS: JP201 = 1-2 Short, 2-3 Open Enable CTS: JP201 = 1-2 Open, 2-3 Short Enable DSR: JP204 = 1-2 Short, 2-3 Open Enable CI: JP204 = 1-2 Open, 2-3 Short
RS-232C Channel 2:
Disable CTS: JP202 = 1-2 Short, 2-3 Open Enable CTS: JP202 = 1-2 Open, 2-3 Short Enable DSR: JP203 = 1-2 Short, 2-3 Open Enable CI: JP203 = 1-2 Open, 2-3 Short
Note: JP201 and JP202 should always be set to 2-3 (Short). For Printers, enable DSR; for polling, enable CI. Optional RS-232C Channels 3 (CH3) and 4 ( CH4) are not currently available for polling communications.

System Set-up
Panasonic 5500 Series Programming Instructions – Version LQ3.5 2-7
Memory Configuration
Use the Memory Configuration worksheets to estimate the amount of RAM memory your application program needs. The P21 worksheets, provided in the Programming section of this manual, help you estimate the memory requirement for the System Master workstation and for each Basic workstation. Because the system rounds up most allocation entries, your actual memory requirement may be higher than the totals you obtain with the Configuration worksheets. You can determine the exact requirement with the P21 Memory Allocation program. As you enter values for the P21 addresses, the screen displays a hexadecimal value. Convert this value from hexadecimal to decimal to get the true memory requirement for your system. After you determine how much memory is needed, make sure your workstation has enough memory to support your program. Install additional chips, if necessary, and remember to perform a RAM Clear to erase existing information or distortion that may be present on the RAM chips.

System Set-up
2-8 Panasonic 5500 Series Programming Instructions – Version LQ3.5
Initial Program Menu
The P3 Initial Program menu gives you access to functions you use to program the Flash ROMs in your workstations. It has procedures you use the erase, test, and install the 5500 LQ2.6 image file and the Boot ROM image file. This section covers the following P3 Initial Program functions.
Boot ROM Download TCP/IP Program Download Flash ROM Clear Flash ROM (Program) Download Flash ROM (Program) Downline Boot ROM Test
Use the procedures in this section before you start to customize your program. If no program currently exists, you cannot proceed until you load a Flash ROM program.
Initial Program Overview
Use the following steps to go into the Initial Program menu. 1. Turn the keylock to P3 Mode. 2. Turn OFF the workstation Power Switch. 3. Hold down the Receipt Stop key and turn ON the Power Switch.
Note: You must use the default Receipt Stop key position (in the upper right corner of the keyboard) for this procedure.
The screen now displays the Initial Mode menu, which includes the Continue, Initial Program, and Diagnostics options. If you have not yet programmed the Flash ROMs, and the Flash ROMs do not have a program, a "No Program" message displays.

System Set-up
Panasonic 5500 Series Programming Instructions – Version LQ3.5 2-9
4. Enter 2 and press CASH to go into the Initial Program menu, shown below.
2 CASH
5. You use five of the Initial Program procedures to program Flash ROMs.
Perform a Boot ROM Download to install the Boot ROM image file (if necessary). Perform a Flash ROM Clear to erase existing application program data. Use the TCP/IP Program to enter applicable network protocol settings. Perform a Flash ROM Download to program the Flash ROMs in the System Master
workstation. Use the Flash ROM Downline procedure to send the program from a PC or from the System
Master workstation to all Basic workstations. 6. Once the Initial Program menu displays, refer to the procedure you need.
Important: You must use the default key positions (CASH, CLEAR, etc.) for all procedures in the Initial Program menu.

System Set-up
2-10 Panasonic 5500 Series Programming Instructions – Version LQ3.5
Boot Download
A Boot ROM image file is factory-loaded in every workstation. If the workstation already has the correct Boot ROM image, you need not perform a Boot ROM download. Use the following procedure only if you must update the installed Boot ROM image file.
Note: If your workstation does not have a Boot image file, and you cannot access the following program, see the Emergency Boot Loader procedure described next in this section.
1. Go to the Initial Program menu. (To access this menu, start in P3 Mode. Hold down the Receipt
Stop key and turn on the power switch. Select the Initial Program option [2 CASH].) 2. Select Boot Download to display the Boot Program screen.
5 CASH
3. Select the Execute option to display a "Waiting" message on your screen. Leave this message on
the workstation screen and go to the PC you are using to load the Boot ROM image file.
1 CASH
Note: If a "Waiting" message does not display, press CASH to exit; then retry this procedure. If
till unsuccessful, go to the Emergency Boot Loader Program procedure described on the next page.

System Set-up
Panasonic 5500 Series Programming Instructions – Version LQ3.5 2-11
Note: For the Boot Download, use Panasonic PF Loader software and RS-232C. You must
connect to workstation RS-232C Channel 1 (CH1) for this procedure. (RS-232C and PF Loader software are used for the Boot Download; other download procedures communicate via Ethernet.)
4. From the PC, use PF Loader software to download the Boot ROM image file (for example,
5500BTL25.img).
As the program downloads, the workstation screen displays a "Connect to PC" message. If the download is successful, the screen displays a "Program: OK" message. If the download attempt fails, the screen displays a "Program: Text Size Error" message.
5. When you are ready to leave this screen, press CASH twice. 6. You can now select another option from the Initial Program screen. For initial set-up, continue to
the Flash ROM Clear procedure.
Emergency Boot Loader Program
If the Boot ROM in your workstation is not programmed, or if your current Boot ROM and workstation image files are incompatible, you may not be able to use the normal procedure to download the Boot ROM image file. If you cannot successfully load the Boot ROM program, you can use the following procedure to load a special image file utility that lets you perform the download.
Important: This procedure should ONLY be used in an emergency situation, where you cannot access the normal Boot Download procedure. This procedure MUST be followed by a normal Boot Download.
1. Go to the Initial Program menu. (To access this menu, hold down the Receipt Stop key and turn on
the power switch with the keylock in P3 Mode. Then select the Initial Program option [2 CASH].) 2. Enter 9 and press CASH to access the Boot Loader Download screen.
Note: This option is not listed on your screen.
9 CASH
System Set-up
2-12 Panasonic 5500 Series Programming Instructions – Version LQ3.5
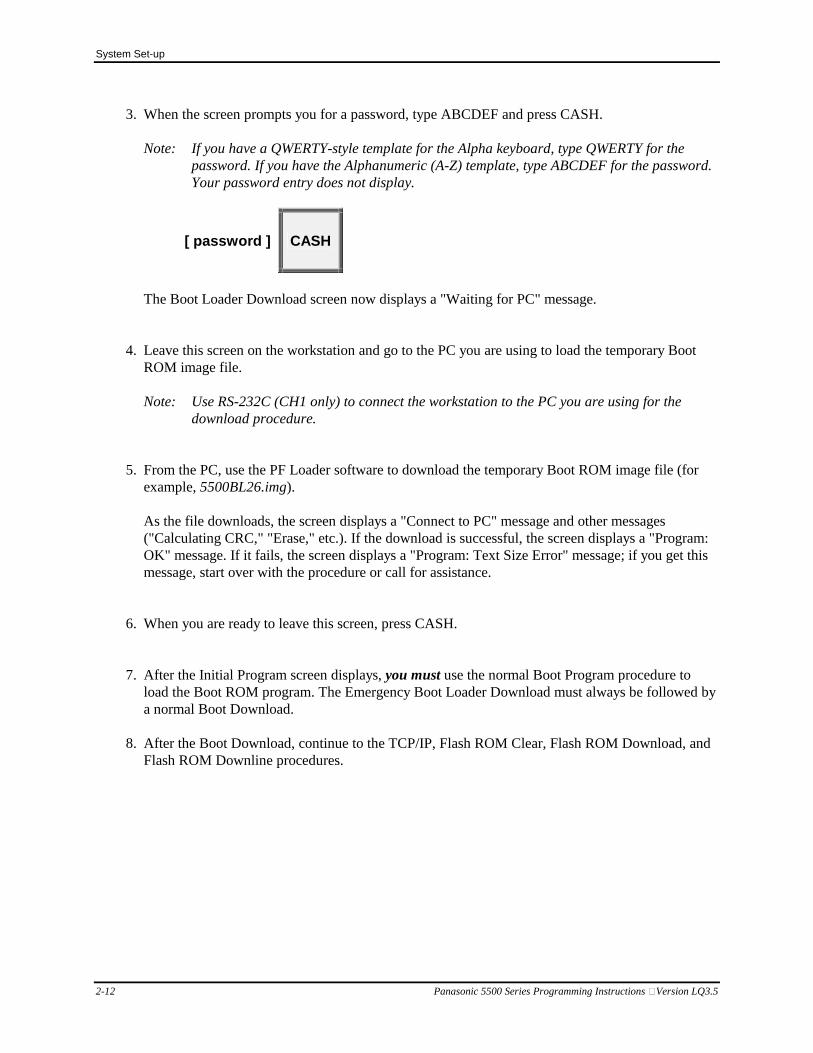
3. When the screen prompts you for a password, type ABCDEF and press CASH.
Note: If you have a QWERTY-style template for the Alpha keyboard, type QWERTY for the password. If you have the Alphanumeric (A-Z) template, type ABCDEF for the password. Your password entry does not display.
[ password ] CASH
The Boot Loader Download screen now displays a "Waiting for PC" message.
4. Leave this screen on the workstation and go to the PC you are using to load the temporary Boot
ROM image file.
Note: Use RS-232C (CH1 only) to connect the workstation to the PC you are using for the download procedure.
5. From the PC, use the PF Loader software to download the temporary Boot ROM image file (for
example, 5500BL26.img).
As the file downloads, the screen displays a "Connect to PC" message and other messages ("Calculating CRC," "Erase," etc.). If the download is successful, the screen displays a "Program: OK" message. If it fails, the screen displays a "Program: Text Size Error" message; if you get this message, start over with the procedure or call for assistance.
6. When you are ready to leave this screen, press CASH.
7. After the Initial Program screen displays, you must use the normal Boot Program procedure to load the Boot ROM program. The Emergency Boot Loader Download must always be followed by a normal Boot Download.
8. After the Boot Download, continue to the TCP/IP, Flash ROM Clear, Flash ROM Download, and
Flash ROM Downline procedures.

System Set-up
Panasonic 5500 Series Programming Instructions – Version LQ3.5 2-13
TCP/IP Program
Use the following steps to define network protocol settings for all workstations on the Ethernet system.
Note: TCP/IP settings are not affected by a Flash ROM Clear or by a RAM Clear. 1. Go to the Initial Program menu. (To access this menu, hold down the Receipt Stop key and turn on
the power switch with the keylock in P3 Mode. Then select the Initial Program option [2 CASH].)
2. Select the TCP/IP Program to display the following screen.
7 CASH
3. Select IP Address.
1 CASH
4. Enter the IP Address for this workstation. Enter 010.010.010.nnn and press CASH. (Replace nnn
with the 3-digit address you are assigning to this workstation. For example, enter 010.010.010.001 for a workstation with Address 001.)

System Set-up
2-14 Panasonic 5500 Series Programming Instructions – Version LQ3.5
Note: Valid IP Addresses for the 5500 Series workstations are 001-020. The last two digits of this entry are referenced for the Flag 239 workstation number and for other flags concerning workstation communications. Use IP Address 209 for the KVS controller.
[ IP address ] CASH
5. Press CASH to return to the TCP/IP Program screen.
CASH
6. Select Port Address.
2 CASH
7. Enter 29000 for the Port Address and press CASH.
Note: Use Port Address 29000 for all workstations.
[ 29000 ] CASH
8. Press CASH to return to the TCP/IP Program screen.
CASH
9. Select the Timer option.
3 CASH

System Set-up
Panasonic 5500 Series Programming Instructions – Version LQ3.5 2-15
10. Enter the length for communication retries. (Your entry is multiplied by 100 milliseconds. The
recommended entry is 1.)
[ timer ] CASH
11. Press CASH to return to the TCP/IP Program screen.
CASH
12. Select the Retry Count option.
4 CASH
13. Enter the number of times the system should retry communications. (The recommended entry is 1.)
[ retry count ] CASH
14. Enter 0 and press CASH to return to the Initial Program menu. (An "EPROM Write" message
briefly displays while the system writes your entries to the Flash ROMs.)
0 CASH
15. You can now select another option from the Initial Program menu. For initial set-up, continue from this program to the Flash ROM Download and Flash ROM Downline procedures.

System Set-up
2-16 Panasonic 5500 Series Programming Instructions – Version LQ3.5
Flash ROM Clear
The Flash ROM Clear procedure erases data from the Flash ROMs and tests each ROM position. You can use this procedure if you want to manually clear the program data before performing a Flash ROM Download or a Flash ROM Downline.
Note: The Flash ROM Download and Flash ROM Downline procedures automatically perform a Flash ROM Clear before loading the program.
1. Start in the Initial Program menu. (To access this menu, hold down the Receipt Stop key and
power up the workstation in P3 Mode. Then select the Initial Program option [2 CASH].) 2. Select Flash ROM Clear.
2 CASH
3. Select the Execute option to begin the Flash ROM Clear.
Note: If you want to escape from this procedure without erasing the Flash ROM data, press CASH now to exit.
1 CASH
The Flash ROM Clear procedure now begins. The following screen displays while the system tests and clears the Flash ROMs.
Note: An asterisk (*) displays next to the position currently being cleared and tested. "OK" displays if the ROM was successfully tested and cleared. "NG" displays for defective ROM chips. "--" indicates that a ROM chip is not installed in this position.

System Set-up
Panasonic 5500 Series Programming Instructions – Version LQ3.5 2-17
4. When the test finishes, a blinking "Initial End" message displays on your screen. Press CASH to
leave this test screen.
CASH
5. The screen returns to the Initial Program Mode menu. From here, continue to the Flash ROM
Download and Flash ROM Downline procedures.
Flash ROM Download
The Flash ROM Download procedure loads the 5500 LQ image file to the Flash ROMs. For this procedure, you will use the Panasonic LQ Loader software to download the image file from a PC to the workstation being programmed. Before you start, use the following steps to prepare the workstation for the download.

System Set-up
2-18 Panasonic 5500 Series Programming Instructions – Version LQ3.5
Note: For this procedure, use Ethernet and the Panasonic LQ Loader software to download the workstation image file from the PC to the workstation.
1. Start in the Initial Program menu at the workstation. 2. Select the Program Download option.
3 CASH
3. While this screen displays on the workstation, go to the PC you are using for the download. At the
PC, assign the IP Address for the PC.
[ 010.010.010.nnn ] ENTER
Note: Replace nnn with the IP Address for your PC. It MUST be different from the workstation IP Address. For PC 1, for example, you can replace nnn with 097. TCP/IP protocol MUST be active on the PC.

System Set-up
Panasonic 5500 Series Programming Instructions – Version LQ3.5 2-19
4. Also at the PC, enter the Subnet Mask number.
[ 255.255.255.0 ] ENTER
5. From Windows, launch the LQ Loader Program. 6. In the LQ Loader program, select Program Downline. 7. Confirm that the TCP/IP settings in the LQ Loader program match the settings in your
workstation. (For example, if you set IP Address 010.010.010.001 for the workstation, set the same address here in the LQ Loader fields.)
8. Select Files. Then go into the folder with the LQ application software and select the applicable
5500 LQ2.6 workstation image file.
Your file selection appears in the Object Files window. 9. Highlight the selection in the Object Files window and select Execute to start the Flash ROM
download.
The PC clears any existing programming before it sends the program files. The workstation notes actions being performed. (The "Text No." message notes the last text number received.) When downloading is finished, workstation screen should display a "Good!" message.
Note: The final Text Number can vary. If a "Communication Error" message displays in place
of the "Good!" message, the program download was not successful. 10. When the download is complete, return to the workstation and press CASH to leave the Flash
ROM Download screen.
Note: You can now return to the PC and exit the LQ Loader program. 11. The workstation screen returns to the Initial Program menu. Repeat this procedure for each
workstation to which the image file should be sent.

System Set-up
2-20 Panasonic 5500 Series Programming Instructions – Version LQ3.5
Flash ROM Downline
After you program the Flash ROMs in the System Master workstation, you can downline the program to remaining workstations on your system. The Flash ROM Downline screen lists the following selections.
Flash ROM Program Downline Remote Flash ROM Clear Flash ROM Clear Test
Note: These functions are not available for the first versions of LQ1.0 software.
Before you downline the program, the receiving workstations must have an assigned TCP/IP address. The Flash ROM Program Downline procedure automatically erases existing data from the Flash ROMs, so you might only use the Remote Flash ROM Clear procedure for special circumstances. The three Flash ROM Downline procedures begin below.
Remote Flash ROM Clear (Downline) The following procedure erases data from the Flash ROMs of designated workstations. It also tests the Flash ROM positions being erased. Use the following procedure if you want to manually clear the Flash ROMs of a designated workstation before downlining new program data.
Note: Before you start this procedure, a unique TCP/IP Address must be assigned to all workstations involved in the Remote Flash ROM Clear. If you have not yet assigned the TCP/IP Address numbers, see the TCP/IP Program procedure (earlier in this section) to assign an address to all workstations. The Flash ROM Downline procedure automatically erases the Flash ROMs before attempting to load the program.
1. Go to the workstation you are using for the Remote Flash ROM Downline procedure and access
the Initial Program menu. (Hold down the Receipt Stop key and turn on the power switch with the keylock in P3 Mode. Then enter 2 CASH to go to the Initial Program menu.)
2. Select the Program Downline option to display the Program Downline menu.
4 CASH

System Set-up
Panasonic 5500 Series Programming Instructions – Version LQ3.5 2-21
3. Select the Clear Downline option.
2 CASH
4. Now identify the range of workstations with Flash ROMs you want to erase. Enter two digits for
the first workstation in the range and two digits for the last workstation in the range. Then press CSHR (Cashier).
[ first workstation # ] [ last workstation # ] CSHR
Note: Use the workstation numbers you assigned in the TCP/IP Program. For example, if you want to clear the Flash ROMs in Workstations 2-4 (assigned IP Addresses 002 - 004), enter 0204 and press CSHR.
Important: This procedure will erase Flash ROM programming from all workstations that fall within the range listed on the screen. Continue only if you are certain you identified the correct range.

System Set-up
2-22 Panasonic 5500 Series Programming Instructions – Version LQ3.5
5. Make sure the Beginning and Ending Range lists the workstations with the Flash ROMs you want
to clear. (This procedure will erase Flash ROM data from all workstations that fall within the identified range.)
6. Select the Execute option to start the Flash ROM Clear.
Note: If you want to leave this procedure without erasing the Flash ROMs in the designated range of workstations, press CASH now. If you are sure you want to continue with the Flash ROM Clear, select Execute.
1 CASH
7. When you are ready to leave the Clear Downline screen, press CASH to go back to the Program
Downline menu.
CASH
8. If you want to confirm that the Flash ROMs were successfully erased, you can next use the Flash
ROM Clear Test, described next. Otherwise, continue to the Flash ROM Program Downline procedure to downline the Flash ROM program to these workstations.

System Set-up
Panasonic 5500 Series Programming Instructions – Version LQ3.5 2-23
Flash ROM Clear Test (Downline) You cannot downline a Flash ROM program until the system erases all existing Flash ROM data from the receiving workstations. The Clear Test lets you check a range of workstations to confirm that the Flash ROMs have been erased. The steps for this procedure begin below.
Note: This function is not available for early versions of LQ1.0 software.
1. Go into the Initial Program menu. (To access this menu, hold down the Receipt Stop key and turn on the workstation power switch with the keylock in P3 Mode. Then enter 2 CASH to display the Initial Program menu.)
2. From the Initial Program menu, select the Program Downline (WS-WS) option.
4 CASH
3. From the Program Downline menu, select the Clear Test option.
3 CASH
4. Identify the range of workstations you want to test. Enter two digits for the first workstation and two digits for the last workstation in the range. Then press CSHR.
[ first workstation # ] [ last workstation # ] CSHR
Note: Use workstation numbers you assigned in the TCP/IP Program. For example, if you want to see if the Flash ROMs are clear in Workstations 2-5 (assigned IP Addresses 002 through 005), enter 0205 CSHR.
5. Use the following sequence to start the Flash ROM Clear Test.
1 CASH

System Set-up
2-24 Panasonic 5500 Series Programming Instructions – Version LQ3.5
When the test finishes, the following screen displays.
Note: The screen lists workstations that fall within the range you identified. If the Flash ROMs
are clear, the workstation number displays in reverse video. If the ROMs are not clear, the number displays in normal video.
6. When you are ready to leave this screen, press CASH to go back to the Program Downline
menu.
CASH
7. You can now continue to the Flash ROM Downline procedure to send the program to
designated workstations. (The Flash ROM Downline procedure automatically performs a Flash ROM Clear before loading the program to the designated workstations.)

System Set-up
Panasonic 5500 Series Programming Instructions – Version LQ3.5 2-25
Flash ROM Program Downline Use this option to send the Flash ROM program to designated workstations. After you program the Flash ROMs in any one workstation, you can send the program to all additional workstations on your system. This procedure is described below. 1. Go to the workstation with the valid Flash ROM program and access the Initial Program menu.
(To access this menu, power up the workstation with the keylock in P3 Mode. Then enter 2 CASH to display the Initial Program menu.)
2. Use the following sequence to go into the Program Downline menu, shown below.
4 CASH 1 CASH
Note: The first "Term#" line lists the number assigned to this workstation. The second lists
the range of workstations that will receive the Flash ROM program.
3. Identify the range of workstations receiving the Flash ROM program. Use two digits for the first workstation in the range and two digits for the last workstation in the range. Then press CSHR.
Note: Use workstation numbers you assigned in the TCP/IP Program. If you are downlining to
Workstation #2 through #20 (with IP Addresses 002 through 020), for example, enter 0220 CSHR. Also remember to use default key positions for the steps in this procedure.
[ first workstation # ] [ last workstation # ] CSHR

System Set-up
2-26 Panasonic 5500 Series Programming Instructions – Version LQ3.5
4. Select the Execute option to start the downlining command.
1 CASH
The workstation displays the following screen during this communication.
The Workstation Update List shows workstation numbers within the range you identified. "Communication" displays at these workstations while downlining is in progress. At the receiving workstation, a "Programming!" message displays as the system writes data to the Flash ROM.
5. When Flash ROM downlining is complete, the following screen displays. Check the screen to be sure all workstations received the Flash ROM program.

System Set-up
Panasonic 5500 Series Programming Instructions – Version LQ3.5 2-27
Note: If the Flash ROM program downlines successfully, the workstation number displays in
reverse video. If the communication fails for a particular workstation, the workstation number displays in normal video.
If the communication fails:
- Make sure you performed a Flash ROM Clear at all receiving workstations.
- Make sure you set a workstation number for all receiving workstations.
- Make sure the Initial Program menu displays on the receiving workstation.
6. When you are ready to leave this screen, press CASH twice to go to the Initial Program screen.
CASH CASH
7. After this downline, you have completed all steps needed to program the Flash ROMs. You can
now run the Boot ROM test described on the next page, or exit the Initial Program menu.

System Set-up
2-28 Panasonic 5500 Series Programming Instructions – Version LQ3.5
Boot ROM Test
Use the following procedure to test the installed Boot ROM in your workstation. 1. Start in the Initial Program menu. (If you are not already in this menu, power up the workstation in
P3 Mode. Then select Initial Program.) 2. Select Boot ROM Test to display the screen shown below.
8 CASH
Note: The displayed version and checksum depends upon the Boot ROM you installed. The information on your screen may vary from this example.
3. When you are ready to leave this screen, press CASH.
CASH
Note: After you leave the Boot ROM test, you can choose another option or exit the Initial Program menu.

System Set-up
Panasonic 5500 Series Programming Instructions – Version LQ3.5 2-29
P3 Diagnostics
The Initial Mode menu includes a Diagnostics option, which lets you test workstation components before you load the Flash ROM programs. The tests available through this menu and the procedures you use to run these tests are described below. 1. If the Initial Mode menu does not already display on your workstation, turn the keylock to P3
Mode and turn OFF the Power Switch.
Note: If the Initial Mode menu displays, skip to Step 3. 2. Hold down the Receipt Stop key and turn ON the Power Switch to display the Initial Mode menu,
illustrated below.
3. Select Diagnostics.
8 CASH
4. Enter the number of the test you want to run and press CASH.
[ test # ] CASH

System Set-up
2-30 Panasonic 5500 Series Programming Instructions – Version LQ3.5
Test
Description
1 LCD Display
Displays several test patterns to check screen pixels, lighting, and various characters. This test is part of the P20 Display test.
2 Rear Display Checks the optional customer display at the back of the workstation. This test is part of the P20 Customer Display test.
3 Keyboard Lets you check the various positions of the workstation keyboard. This test is the same as the P20 Keyboard test.
4 Mode Switch Tests your keylock positions. As you turn the key, the screen displays the keylock position (CLS, REG, MGR, P2, P3). The screen also shows the current Dip Switch 2 (SW2) and Dip Switch 3 (SW3) settings.
5 Magnetic Card Reader When you swipe a card through the optional reader, the screen reads and displays the Track 1 and Track 2 data.
6 Date & Time Use this test to set the date and time. You can then turn off the power switch to verify that the battery is supplying power to the internal time clock.
7 Drawer A Tests the function of Drawer A (the primary drawer on your workstation).
8 Drawer B Tests the function of Drawer B (the secondary drawer on a 2-drawer workstation).
9 ROM Lists ROM checksums and performs a basic test of the ROM memory chips.
10 Inline (Ethernet) Tests communications between devices on your Ethernet system.
11 Time Clock Performs a test of the internal time clock (primarily an engineering function).
12 RS-232C Checks the function of the RS-232C ports. You must install a direct-connect modem eliminator cable before starting this test, which is also available in Program 20.
13 RAM Performs a read/write test of the Base RAM and all Data RAMs. Also lists the size of installed RAM chips (128KB or 512KB).
14 VRAM Tests the workstation Video RAM.
15 RAM Backup This is a destructive RAM test. It first writes data to the RAM chips and reports the results (OK or NG). At this point you must turn the Power Switch off and on. The test then reads the data written to the RAM. RAM Data existing prior to the test will be destroyed.
16 Flash ROM Performs a read/write test of the Flash ROMs, including the Boot ROM and Program ROMs.
30 Auto Test Runs each of the P3 tests one time.
31 Heatrun Test Repeatedly runs the P3 tests. Power off and on in P3 Mode to end the test loop.
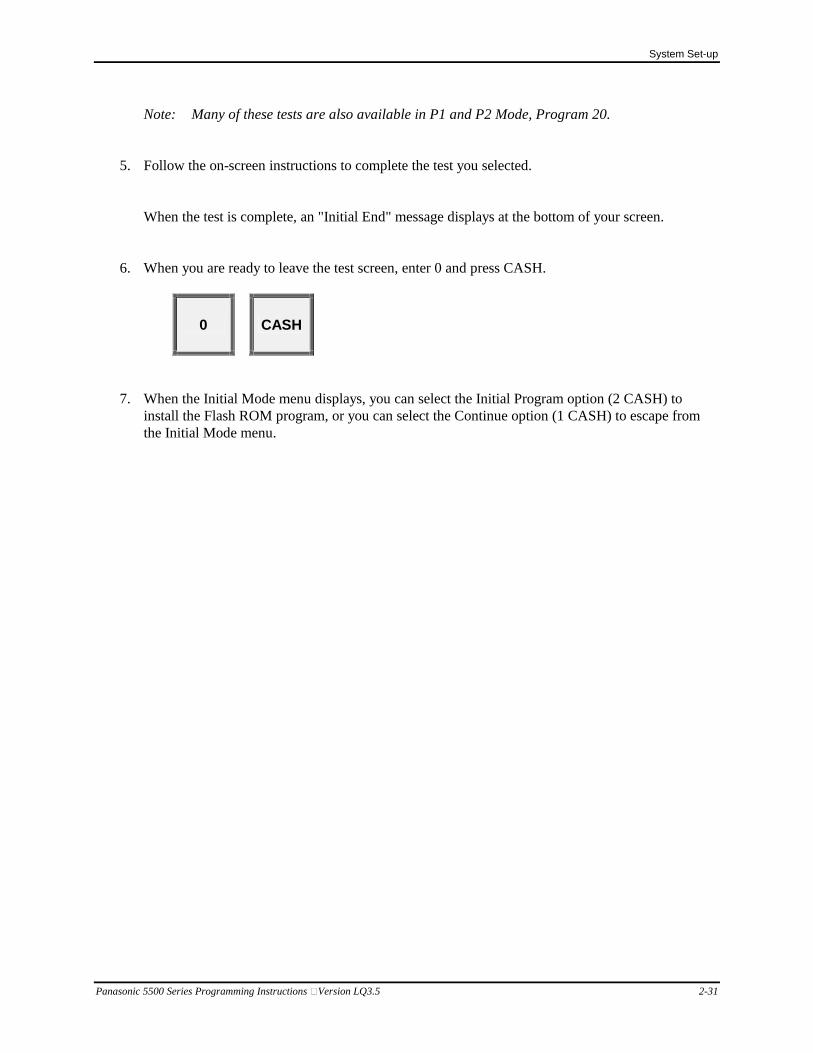
System Set-up
Panasonic 5500 Series Programming Instructions – Version LQ3.5 2-31
Note: Many of these tests are also available in P1 and P2 Mode, Program 20. 5. Follow the on-screen instructions to complete the test you selected.
When the test is complete, an "Initial End" message displays at the bottom of your screen. 6. When you are ready to leave the test screen, enter 0 and press CASH.
0 CASH
7. When the Initial Mode menu displays, you can select the Initial Program option (2 CASH) to
install the Flash ROM program, or you can select the Continue option (1 CASH) to escape from the Initial Mode menu.

System Set-up
2-32 Panasonic 5500 Series Programming Instructions – Version LQ3.5
P21 RAM Clear
The P21 RAM Clear procedure erases all existing data from the RAM chips, and then loads the default program. You should perform a RAM Clear before you enter a new program, whenever you upgrade the Flash ROM, and whenever you significantly change the workstation memory allocation.
Note: The RAM Clear procedures in this menu clear all RAM areas. The RAM Clear procedure in the P3 Initial Mode menu clears only the two 128KB RAMs soldered onto the CPU Board.
The P21 RAM Clear menu also gives you access to procedures that reset the Product Projection and Comparison totals, Z Report counters, and Electronic Journal buffers.
P21 RAM Clear Overview
Use the following procedure to access the options in the P21 All RAM Clear menu. 1. Turn the keylock to P2 Mode. 2. Use the following sequence to go into the All RAM Clear screen.
2 1 CASH 0 CASH

System Set-up
Panasonic 5500 Series Programming Instructions – Version LQ3.5 2-33
3. The All RAM Clear menu gives you access to the following:
RAM Clear without Test RAM Clear with Test Z Counter/NRNT Reset EJ Buffer Reset Polling Buffer Reset Product Projection/Comparison Reset
From here, refer to the procedure for the function you want to perform.
RAM Clear without Test
This command erases all data you have entered for the program files, and then loads the default program. Use the following sequence to perform a RAM Clear, without testing the RAM chips.
Note: If you have not yet tested the installed RAM in your workstation, you should instead use the RAM Clear with Test procedure.
1. Start in the All RAM Clear menu. (See the P21 RAM Clear Overview for this procedure.) 2. Use the following sequence to start the RAM Clear.
2 1 0 0 2
1 CASH
Note: After the RAM Clear finishes, the screen automatically returns to the P21 All RAM Clear menu. 3. You can now select another option from the P21 RAM Clear menu or press CASH to return to the
P2 Mode menu.

System Set-up
2-34 Panasonic 5500 Series Programming Instructions – Version LQ3.5
RAM Clear with Test
This selection tests Base RAM and Data RAM positions as it erases existing data. It then loads the default program. Use the following procedure for this RAM Clear command. 1. Start in the All RAM Clear menu. (See the P21 RAM Clear Overview for this procedure.) 2. Use the following sequence to test and clear the RAM.
2 1 6 4 2
1 CASH
The RAM Test screen displays as the system erases, and then tests the RAM chips.
Note: An asterisk (*) displays next to the RAM address being tested. "OK" displays if the test is successful. "NG" indicates the RAM is defective. "--" displays if a RAM chip is not installed in the indicated position. For reference, the screen also displays the size of the RAM chip installed. When the test finishes, a beeper sounds, and the screen returns to the All RAM Clear menu.
3. When the All RAM Clear menu displays, you can select another option or press CASH to return to
the P2 Mode menu.

System Set-up
Panasonic 5500 Series Programming Instructions – Version LQ3.5 2-35
Z Counter/Non-Resettable Net Total Reset
The system updates Z1 report counters each time you reset a report. After testing and training, you can use the following command to reset the counters to zero. This command also resets the Non-Resettable Net Total and any non-resettable calculation totals you may have created. 1. Start in the All RAM Clear menu. (See the P21 RAM Clear Overview for this procedure.) 2. Use the following sequence to reset the Z1 report counters, the NRNT, and all non-resettable
calculation totals.
2 1 6 5 2
1 CASH
Note: This sequence does not change the screen. The data resets immediately after you press the
CASH key. 3. You can now select another option from the All RAM Clear menu or press CASH twice to return
to the P2 Mode menu.
EJ Buffer Reset
Once you activate the Electronic Journal (EJ), selected data begins to accumulate in the EJ buffers. You can use the following procedure to clear all data currently stored in these buffers. 1. Start in the All RAM Clear menu. (See the P21 RAM Clear Overview.)

System Set-up
2-36 Panasonic 5500 Series Programming Instructions – Version LQ3.5
2. Use the following sequence to reset the data stored in the Electronic Journal.
2 1 6 6 2
1 CASH
Note: The screen does not advance. EJ data resets immediately after you press the final CASH key. 3. You can select another option from the All RAM Clear screen or press CASH twice to return to
the P2 Mode menu.
Polling Buffer Reset
Use the following procedure to clear the data stored in the multi-day polling buffer. This procedure should be performed at the System Master workstation. 1. Start in the All RAM Clear menu. (See the P21 RAM Clear Overview.) 2. Use the following sequence to reset the data in the Polling Buffer.
2 1 6 7 2
1 CASH
Note: The above sequence does not cause the screen to change. The data resets as soon as you
press the CASH key. 3. You can select another option from the All RAM Clear screen or press CASH twice to return to
the P2 Mode menu.

System Set-up
Panasonic 5500 Series Programming Instructions – Version LQ3.5 2-37
Product Projection Clear
If you enable the Product Projection and Product Comparison Reports, counts accumulate in the historical files every time you reset the workstation reports. Use the following steps to erase any counts you may have accumulated during testing and training. This procedure must be performed at the System Master workstation. 1. Start in the All RAM Clear menu. (See the P21 RAM Clear Overview.) 2. Use the following sequence to reset the Projection and Comparison totals.
2 1 9 9 2
1 CASH
Note: This sequence immediately resets the Projection and Comparison totals. The screen does
not advance. 3. You can now select another option from the All RAM Clear menu or press CASH twice to go to
the P2 Mode menu.

System Set-up
2-38 Panasonic 5500 Series Programming Instructions – Version LQ3.5
P20 Self-Diagnostics
The 5500 system has a variety of diagnostics you can use to test specific system components. Before you start entering your program, you can run these tests to check the workstations. If you have not yet set up your keyboard, you can use the default Keyboard Layout for the tests.
Note: Tests in this menu are non-destructive, so you can use them any time you want to check workstation functions.
1. Turn the keylock to P2 Mode. 2. Use the following sequence to go into the Self-Test menu.
2 0 CASH
The Self-Test menu lists the tests you can run. The available tests are listed below.
Note: The numbers you use to run these tests are listed to the left of the description.
3. Select the test you want to run.
[ test # ] CASH
Note: When the test is finished, a buzzer sounds and "**Test End**" displays. Brief descriptions of these tests are provided on the following pages. If you would like additional details about the tests, please refer to the Panasonic 5500 Series Operating Instructions.

System Set-up
Panasonic 5500 Series Programming Instructions – Version LQ3.5 2-39
4. Most of the tests begin as soon as you enter the test number and press CASH. The test descriptions
on the next pages let you know which tests require additional information. The test screens also summarize the key sequences needed to continue with the test.
When the test is finished, press CLEAR if you want to return to the Self-Test menu, where you can run additional tests.
CLEAR
5. When you are ready to leave the Self-Test menu and return to the P2 Mode menu, press CASH.
CASH
Note: Many Self-Tests are available in P1 Mode, so restaurant personnel can check system components.

System Set-up
2-40 Panasonic 5500 Series Programming Instructions – Version LQ3.5
Test Descriptions
Test
Description
#1 LCD Display
This test checks the workstation LCD that displays to the operator. The first part of the test shows diagonal lines. Touch CASH to go to the next part of the test, which checks the screen lighting. Touch CASH again to start the last part of the test, where the upper half of the screen displays single characters, and the lower half displays bold characters. The characters blink, reverse, and then the screen pauses. Press CASH to leave the test.
#2 Rear Display
Use this test to check the customer display. The test displays available numbers in sequential order. Test End displays on the test screen when the test finishes.
#3 Keyboard
After you access this test screen, press the key position you want to check. The screen displays the hard key code for the key you pressed. (The Hard Key Codes for Self-Tests are provided later in this section.) After you check the position, turn the keylock and press CLEAR to exit the test. Note that this test displays hard key codes (not soft key codes).
#4 ROM Test
Use this test to display the ROM checksum and the Boot ROM, ROM, and Polling versions. If you installed 256Kbyte (2Mbit) ROMs, the test displays a 3-line checksum. If you installed 128Kbyte (1Mbit) ROMs, it displays a 5-line checksum.
#5 Magnetic Card Reader
This test verifies communication with the optional Magnetic Card Reader. After you select this test, the screen prompts you to swipe a card. Run a credit card or employee card through the optional Magnetic Card Reader. The screen displays the test results.
#7 Drawer A
Use this test to check the function of the primary cash drawer. Close the drawer and press CASH to exit the test.

System Set-up
Panasonic 5500 Series Programming Instructions – Version LQ3.5 2-41
Test
Description
#8 Drawer B
Use this test to check the function of the second drawer on a 2-drawer workstation. Close the drawer and press CASH to exit the test.
#9 Inline (Send)
This test works with the In-line Receive test. Use it to check in-line communications to a workstation, printer, or video controller. After placing one of your workstations or devices in "receive" mode, use this test to send an in-line signal. The screen displays the test results.
#10 Inline (Receive)
This test helps you check communications between workstations. First use this test to place a workstation in "receive" mode. Then go to a second workstation and run the In-line Send test (above). The Send test relays a signal to the receiving workstation. When finished, the screen displays the test results.
#11 Time Clock
This test is used primarily during manufacturing to verify the internal clock output. It does not check communication to an external Time Clock.
#12 RS-232C
Install a Direct-connect modem-eliminator before starting this test. The screen displays test results for all three RS-232C channels. If everything is correct, an "OK" message displays. If a malfunction exists, or if you did not install RS-232C or the modem-eliminator, an "NG" message displays.
#14 RAM
Use this test to check the Base RAM and Data RAM memory. Beside each address range, "OK" or "NG" displays. "OK" displays if the RAM chip tests successfully. "NG" displays if the chip fails the test. "--" displays if a RAM chip is not installed in the indicated address. The screen also displays the type of RAM installed (128KB or 512KB).
#15 Video RAM
This test helps you check the Video RAM. It writes random data into the Video RAM, then reads and compares the data. "Test End" displays when the test is done.
Note: Details about the P20 Self-Tests are provided in the 5500 Series Operating Instructions.

System Set-up
2-42 Panasonic 5500 Series Programming Instructions – Version LQ3.5
P22 Default Program Load
The 5500 system includes a standard "default" program you can use for customer demos or modify for installations. When you perform a RAM Clear, the system automatically loads default values for the various files. If you want to overwrite custom data you entered for a particular file, you can use the following procedure to reload the default values. 1. Turn the keylock to P2 Mode. 2. Select the Default Program Load option.
2 2 CASH
Your screen advances to the Default Program Load menu, shown in the illustration below.

System Set-up
Panasonic 5500 Series Programming Instructions – Version LQ3.5 2-43
3. Enter the sequence for the default file you want to load. Caution: This step causes the system to overwrite any data you already entered for the
selected file. The default values replace your file entries. 220122 CASH - P24 System & Miscellaneous Flags 220222 CASH - P25 System Descriptors P59 KVS Descriptors 220322 CASH - P30 Prompt & Error Messages 220422 CASH - Default Keyboard 220522 CASH - KVS Programs 220622 CASH - P21 Memory Allocation & Report Total Arrangement Note: The screen does not change after these sequences. The system loads the default values as
soon as you enter the key sequence and press CASH.
Command 220422 loads the entire default keyboard. You can load part of this keyboard by turning the power switch off and on with the keylock in P3 position ("P3 Mode power-up"). A P3 Mode power-up assigns the number keys, the CLEAR key, and the CASH key in their default locations. (The default locations are shown on the next page.) The rest of the keyboard is not affected by a P3 Mode power-up..
4. Repeat Step 3 for each default file you want to load. 5. When you are ready to leave this screen, press CLEAR to stay in Default Program Mode screen or
press CASH to return to the P2 Mode Menu.
7 or CASH

System Set-up
2-44 Panasonic 5500 Series Programming Instructions – Version LQ3.5
Default Keyboard Layout
After a RAM Clear or Default Keyboard Program Load, the system loads the default keyboard layout. This layout has keys commonly used for restaurant operations, as shown in the following illustration. Rcpt Stop 9998
---key name ---soft key code
Shift 1 201
Shift 2 202
Shift 3 203
Shift 4 204
Shift 5 205
Shift 6 206
Shift 7 207
Shift 8 208
Shift 9 209
Alpha Shift 9990
Rcpt Issue 76
LCD 9995
MGR # 500
Rcpt Stop 9998
Wait 42
Wait Recall 43
Next Order 64
Change Order 71
Break In 40
PLU 1 1001
PLU 2 1002
PLU 3 1003
PLU 4 1004
PLU 5 1005
PLU 6 1006
PLU 7 1007
PLU 8 1008
PLU 9 1009
Waste 35
Menu Look-up 82
All Void 21
Delete 65
PLU 10 1010
PLU 11 1011
PLU 12 1012
PLU 13 1013
PLU 14 1014
PLU 15 1015
PLU 16 1016
PLU 17 1017
PLU 18 1018
%- 24
PLU 97
Dept # 96
Table # 72
PLU 19 1019
PLU 20 1020
PLU 21 1021
PLU 22 1022
PLU 23 1023
PLU 24 1024
PLU 25 1025
PLU 26 1026
PLU 27 1027
Coupon 1 17
Clear 13
Void 20
@ 16
CSHR 400
PLU 28 1028
PLU 29 1029
PLU 30 1030
PLU 31 1031
PLU 32 1032
PLU 33 1033
PLU 34 1034
PLU 35 1035
PLU 36 1036
Coupon 2 18
7
8
9
SBTL 80
PLU 37 1037
PLU 38 1038
PLU 39 1039
PLU 40 1040
PLU 41 1041
PLU 42 1042
PLU 43 1043
PLU 44 1044
PLU 45 1045
Promo 34
4
5
6
$10 9010
PLU 46 1046
PLU 47 1047
PLU 48 1048
PLU 49 1049
PLU 50 1050
PLU 51 1051
PLU 52 1052
PLU 53 1053
PLU 54 1054
GC Sold 29
1
2
3
$20 9020
PLU 55 1055
PLU 56 1056
PLU 57 1057
PLU 58 1058
PLU 59 1059
PLU 60 1060
PLU 61 1061
PLU 62 1062
PLU 63 1063
GC Redeem 85
0
Cash /
Store 100
In /
Park 32
Out /
Serve 33

System Set-up
Panasonic 5500 Series Programming Instructions – Version LQ3.5 2-45
Hard Key Codes
Each position on the keyboard has a number that identifies its physical location. This number is sometimes called a Hard Key Code. When you press keys in the Keyboard Self-Test, the screen displays these codes. The following chart shows the decimal (upper number) and hexadecimal (lower number) codes for each key. 165 A5
166 A6
167 A7
168 A8
169 A9
170 AA
171 AB
172 AC
173 AD
174 AE
163 A3
162 A2
161 A1
160 A0
10 0A
21 15
32 20
43 2B
54 36
65 41
76 4C
87 57
159 9F
158 9E
157 9D
156 9C
155 9B
154 9A
9 09
20 14
31 1F
42 2A
53 35
64 40
75 4B
86 56
97 61
108 72
119 77
130 82
141 8D
152 98
8 08
19 13
30 1E
41 29
52 34
63 3F
74 4A
85 55
96 60
107 71
118 76
129 81
140 8C
151 97
7 07
18 12
29 1D
40 28
51 33
62 3E
73 49
84 54
95 5F
106 70
117 75
128 80
139 8B
150 96
6 06
17 11
28 1C
39 27
50 32
61 3D
72 48
83 53
94 5E
105 69
116 74
127 7F
138 8A
149 95
5 05
16 10
27 1B
38 26
49 31
60 3C
71 47
82 52
93 5D
104 68
115 73
126 7E
137 89
148 94
4 04
15 0F
26 1A
37 25
48 30
59 3B
70 46
81 51
92 5C
103 67
114 72
125 7D
136 88
147 93
3 03
14 0E
25 19
36 24
47 2F
58 3A
69 45
80 50
91 5B
102 66
113 71
124 7C
135 87
146 92
2 02
13 0D
24 18
35 23
46 2E
57 39
68 44
79 4F
90 5A
101 65
112 70
123 7B
134 86
145 91
1 01
12 0C
23 17
34 22
45 2D
56 38
67 43
78 4E
89 59
100 64
111 6F
133 85
0 0
11 0B
22 16
33 21
44 2C
55 37
66 42
77 4D
88 58
99 63
110 6E
132 84

System Set-up
2-46 Panasonic 5500 Series Programming Instructions – Version LQ3.5
Hard Key Locations
When you use the Program Printout menu to print a keyboard layout, numbers identify the key positions. These numbers or "hard key locations" list the soft key codes you assigned to each of five keyboard levels. Use the following chart to find the hard key location numbers associated with each key on your keyboard. 165
166
167
168
169
170
171
71
172
173
163
162
161
160
10
21
32
43
54
65
76
87
159
158
157
156
155
154
9
20
31
42
53
64
75
86
97
108
119
130
141
152
8
19
30
41
52
63
74
85
96
107
118
129
140
151
7
18
29
40
51
62
73
84
95
106
117
128
139
150
6
17
28
39
50
61
72
83
94
105
116
127
138
149
5
16
27
38
49
60
71
82
93
104
115
126
137
148
4
15
26
37
48
59
70
81
92
103
114
125
136
147
3
14
25
36
47
58
69
80
91
102
113
124
135
146
2
13
24
35
46
57
68
79
90
101
112
123
134
145
1
12
23
34
45
56
67
78
89
100
111
133
0
11
22
33
44
55
66
77
88
99
110
132

Panasonic 5500 Series Programming Instructions – Version LQ3.5 3-1
Programming
This section covers P2 Mode programs you use to design your restaurant application program. These programs allow you to create the keyboard layout, to enter cashier, manager, and employee information, and to enter information about the restaurant menu items. Your entries in these programs decide how the system operates and what information appears on the restaurant reports. Most of the programs in this section are associated with a worksheet. The worksheets help you plan and organize your program entries. They also provide a hard copy of the program you can file for future reference. The order in which you complete the P2 Mode programs is optional. The recommended sequence for entering programs is: Keyboard Layout, Memory Allocation, Report Total Arrangement, System and Miscellaneous Flags, and Tax Tables. You can load the remaining programs (P25-P59) in any order. The explanations in this section are arranged in order of their program number.

Programming
3-2 Panasonic 5500 Series Programming Instructions – Version LQ3.5
Memory Structure
0000:0400 TCP/IP Driver Buffer 1000:00C0 Stack 1000:8000 RTOS Table 1000:F000 TCP/IP Communication Buffer 2000:90D0 Shared Printer Buffer 3000:9E5F Work Area 3000:FFFF Preset Area 4000:0000 Trace Buffer 4000:2080 MWS Work Area 4000:3A90 Register Work Area 4000:3BC0 86'd Items 4000:41B0 Message Data 4000:5AB0 Job, Pay Rate, Grace Periods 4000:6190 Calculation Table Data
Fixed
4000:6E10 Macros : Register Report Totals Time Totals by Destination Coupons (Combo & Regular) Scale Tare Weight Groups (Major & Subgroups) Cashier Interrupt Cashier File (Totals, Cashiers) Manager File (Totals, Managers) Product Mix Totals Product Mix Groups Phone Order/Wait Area
Variable
Store & Forward Station Totals
Fixed
Recipe File Ingredient File Employee File
Variable
Host Polling Buffer EJ KVS Buffer
Fixed
7000-8000 RAM PAGE WINDOW

Programming
Panasonic 5500 Series Programming Instructions – Version LQ3.5 3-3
8000:0000 VRAM
Fixed
Page Change Area
Extended Area (Over 7FFFF) EJ Void Buffer Work Page Buffer MWS Buffer CAT Data SVRCPBF Double D/T Buffer Time & Attendance Buffer Minor Employee Buffer
Fixed
Time & Attendance Polling Buffer
Variable
PC Interface
Fixed
EJ Buffer Multi-day Polling Buffer
Product Projection Buffer
PLU
Variable

Programming
3-4 Panasonic 5500 Series Programming Instructions – Version LQ3.5
Keyboard Programming
You can define up to five keyboards for your workstation. Use the following procedure to enter the key assignments for your application.
Note: If you have already assigned the number, decimal, and CLEAR keys to the positions you plan to use, you can skip Steps 1 and 2. Turn the keylock to P3 Mode and start at Step 3.
1. Turn keylock to P3 Mode and turn the Power Switch off and on. 2. When you turn on the Power Switch, the screen prompts you to assign several keys. Press each of
the keys in the order indicated. Press CLEAR to bypass any key you do not need.
0, 1, 2, 3, 4, 5, 6, 7, 8, 9, 00, 000, . , CLEAR 3. To assign the remaining keys, press the key position you are assigning. Enter the key code and
press the key position again.
(key position) (key code) (key position)
Note: Key codes you use for this step are provided on the next several pages. Enter '9999' if you want to disable a key position.
4. If you use more than one keyboard level, use the default positions for the number, Cash, and Clear
keys. Program your Level 1 keys, and when you finish, turn the keylock to P2 Mode. Enter the next menu level number and press the Menu Level # key to change to the new level you are defining. Then return to P3 Mode and program the keys for this new level.
If you do not use the default positions, you should assign the 10-key pad, Cash, and Clear keys to temporary positions, and then use these temporary positions to enter your keyboard assignments. Make sure you assign a Menu Level # key (code 41) for each layout.
P3 Power-up Note:
Depending upon your entry in Flag 149, a P3 Mode power-up can load default definitions for the number, Cash, and Clear keys. If you enable this Flag 149 option, you should use the default positions for the number, Cash, and Clear keys. Other key positions are unaffected by P3 Mode power-ups.

Programming
Panasonic 5500 Series Programming Instructions – Version LQ3.5 3-5
5500 Series Keyboard Layout Worksheet

Programming
3-6 Panasonic 5500 Series Programming Instructions – Version LQ3.5
Function Key Codes
Code Key
Code Key
Code Key
0 0 1 1 2 2 3 3 4 4 5 5 6 6 7 7 8 8 9 9 10 00 11 000 12 Decimal (.) 13 Clear 14 Phone Order/No Destination 15 Discount # 16 @ 17 Coupon 1 18 Coupon 2 19 Coupon 3 20 Void 21 All Void 22 Error Correct 24 Universal %1 25 Universal %2 26 Universal %3 27 Universal %4 28 Universal %5 29 Gift Certificate Sold 1 30 Gift Certificate Sold 2 31 Gift Certificate Sold 3 32 Eat-in [ Eat-in/Park at CS] 33 Take-out [Take-out/Serve at CS] 34 Promo 35 Waste 36 37 # / Phone # 38 Store 39 Macro # 40 Break-in [not valid at CT] 41 Keyboard / Menu # 42 Wait / Phone Wait 43 Wait Recall / Phone Recall 44 Tax 1 Shift 45 Tax 2 Shift 46 Tax 3 Shift 47 No Tax 48 R/A 49 P/O 50 Cash 51 Check 52 Charge # 53 Currency Exchange 1
54 Currency Exchange 2 55 Currency Exchange 3 56 Currency Exchange 4 57 Phone Send (Remote & Wait) 58 Group Payment 59 60 Cash 2 (for Currency Exchange 4) 61 R/A 2 62 P/O 2 63 No Sale 64 Next Order 65 Delete 66 Cashier Cancel 68 Mix/Match 69 Mix/Match Clear 70 71 Change Order 72 Table # / Pick-up Time 73 Terminal # 74 Tip (Universal Tip) 75 Drive-Thru Board Look 76 Receipt Issue 77 Comment #1 78 Comment #2 79 80 Subtotal 81 Discount Subtotal 82 Menu Look-up 83 Manager # 84 Date & Time 85 G.C. Redemption 86 Clock-In 87 Clock-Out 88 Break (Out) 89 Coupon Look-Up (CLU) 90 Combo Coupon Look-up 91 Cursor Up 92 Cursor Down 93 94 Auto-Tend (Next $) 95 Scale 96 Group # 97 PLU 98 Cashier # 99 100 Cash/Store 101 102 Paid Order Recall 105 Display Board 106 Universal %6 107 Universal %7 108 Universal %8 109 Universal %9 110 Universal %10
127 CAT Look-up 128 Account # 129 Upsell 130 Manual Authorization 131 Void Credit Transaction 132 Return Credit Transaction 133 CAT Receipt 134 D/T Board PgUp 135 D/T Board PgDn 146 Linked Coupon Look-Up 147 Change Screen (LookupRecap) 148 Scroll Up on Recap Screen 149 Scroll Down on Recap Screen 150 Speed of Serv – Left Panel Serve (CT only) 151 Speed of Serv – Center Panel Serve (CT only) 151 Speed of Serv – Right Panel Serve (CT only) 154 Start Gift Card Register Transaction 155 Start Gift Card Activate Transaction 156 Start Gift Card Increment Transaction 157 Order Finalization Key for Gift Card
Redemption 158 Start Gift Card Cancel Transaction 159 Start Gift Card Balance Inquiry
Transaction 160 Start Gift Card Return Transaction 200-209 PLU Shift 0-9 210-219 PLU Shift 00-90 271-280 Destination 1-10 301-310 Charge 1-10 401-450 Cashier 1-50 501-599 Manager 1-99 600-799 Macro 1-199 1001 PLU #1 : 1999 PLU #999 1090 (Digital Deal Refund if Upsell enabled) 9001 $1.00 Speed Tender : 9099 $99.00 Speed Tender 9990 Alpha Shift 9993 Receipt Off 9994 Receipt On 9996 Journal Feed 9997 Receipt Feed 9998 Receipt Stop (Toggle) 9999 Disabled Key

Programming
Panasonic 5500 Series Programming Instructions – Version LQ3.5 3-7
Shift Key Codes
Single Shift Code If Flag 114A <4 If Flag 114A >4
Double Shift Code Key
200 PLU Shift 0 PLU Shift 1000 201 PLU Shift 1 PLU Shift 2000 202 PLU Shift 2 PLU Shift 3000 203 PLU Shift 3 PLU Shift 3000 204 PLU Shift 4 PLU Shift 4000 205 PLU Shift 5 PLU Shift 5000 206 PLU Shift 6 PLU Shift 6000 207 PLU Shift 7 PLU Shift 7000 208 PLU Shift 8 PLU Shift 8000 209 PLU Shift 9 PLU Shift 9000
210 PLU Shift 00 211 PLU Shift 10 212 PLU Shift 20 213 PLU Shift 30 214 PLU Shift 40 215 PLU Shift 50 216 PLU Shift 60 217 PLU Shift 70 218 PLU Shift 80 219 PLU Shift 90
If an item requires one shift, you can use a Single or Double Shift key. If an item requires a Double Shift, you must use a Single and Double Shift combination. If an item allows a Double Shift, you can use a Single and Double Shift combination as long as you register both shift keys before the item. Destination & Charge Key Codes Code Key
Code Key
271 In (Destination 1) 272 Out (Destination 2) 273 Drive-Thru (Destination 3) 274 Phone-In (Destination 4) 275 No Destination (Destination 5) 276 (Destination 6) 277 (Destination 7) 278 (Destination 8) 279 (Destination 9) 280 (Destination 10)
300 Coded Charge 301 Charge 1 302 Charge 2 303 Charge 3 304 Charge 4 305 Charge 5 306 Charge 6 307 Charge 7 308 Charge 8 309 Charge 9 310 Charge 10
Key codes 32 (In/Park) and 33 (Out/Serve) are available for Destination 1 and Destination 2.

Programming
3-8 Panasonic 5500 Series Programming Instructions – Version LQ3.5
Cashier Key Codes Code Key
Code Key
400 Coded Cashier key 401 Cashier #1 402 " #2 403 " #3 404 " #4 405 " #5 406 " #6 407 " #7 408 " #8 409 " #9 410 " #10
411 Cashier #11 412 " #12 413 " #13 414 " #14 415 " #15 416 " #16 417 " #17 418 " #18 419 " #19 : 450 Cashier #50
Cashiers 1-50 can log on with preset keys, where assigned. All cashiers can log on by entering their assigned code number with the CSHR (key code 98) key. Manager Key Codes Code Key
Code Key
500 Coded Manager key 501 Manager #1 502 " #2 503 " #3 504 " #4 505 " #5 506 " #6 507 " #7 508 " #8 509 " #9 510 " #10 511 " #11 512 " #12 513 " #13 514 " #14 515 " #15
516 Manager #16 517 " #17 518 " #18 519 " #19 520 " #20 521 " #21 522 " #22 523 " #23 524 " #24 525 " #25 526 " #26 527 " #27 528 " #28 529 " #29 : 599 Manager #99
If the keys are assigned to the keyboard, managers can log on with any of the preset codes. They can also log on by entering their code number with the Manager # key (key code 500).

Programming
Panasonic 5500 Series Programming Instructions – Version LQ3.5 3-9
Preset Macro Key Codes Code Key
Code Key
Code Key
Code Key
600 Coded Macro 601 Macro #1 602 " #2 603 " #3 604 " #4 605 " #5 606 " #6 607 " #7 608 " #8 609 " #9 610 " #10 611 " #11 612 " #12 613 " #13 614 " #14 615 " #15 616 " #16 617 " #17 618 " #18 619 " #19 620 " #20 621 " #21 622 " #22 623 " #23 624 " #24 625 " #25 626 " #26 627 " #27 628 " #28 629 " #29 630 " #30 631 " #31 632 " #32 633 " #33 634 " #34 635 " #35 636 " #36 637 " #37 638 " #38 639 " #39
640 Macro #40 641 " #41 642 " #42 643 " #43 644 " #44 645 " #45 646 " #46 647 " #47 648 " #48 649 " #49 650 " #50 651 " #51 652 " #52 653 " #53 654 " #54 655 " #55 656 " #56 657 " #57 658 " #58 659 " #59 660 " #60 661 " #61 662 " #62 663 " #63 664 " #64 665 " #65 666 " #66 667 " #67 668 " #68 669 " #69 670 " #70 671 " #71 672 " #72 673 " #73 674 " #74 675 " #75 676 " #76 677 " #77 678 " #78 679 " #79
680 Macro #80 681 " #81 682 " #82 683 " #83 684 " #84 685 " #85 686 " #86 687 " #87 688 " #88 689 " #89 690 " #90 691 " #91 692 " #92 693 " #93 694 " #94 695 " #95 696 " #96 697 " #97 698 " #98 699 " #99 700 " #100 701 " #101 702 " #102 703 " #103 704 " #104 705 " #105 706 " #106 707 " #107 708 " #108 709 " #109 710 " #110 711 " #111 712 " #112 713 " #113 714 " #114 715 " #115 716 " #116 717 " #117 718 " #118 719 " #119
720 Macro #120 721 " #121 722 " #122 723 " #123 724 " #124 725 " #125 726 " #126 727 " #127 728 " #128 729 " #129 730 " #130 731 " #131 732 " #132 733 " #133 734 " #134 735 " #135 736 " #136 737 " #137 738 " #138 739 " #139 740 " #140 741 " #141 742 " #142 743 " #143 744 " #144 745 " #145 746 " #146 747 " #147 748 " #148 749 " #149 750 " #150 751 " #151 752 " #152 753 " #153 754 " #154 755 " #155 756 " #156 757 " #157 : 799 " #199
You can run macros by touching any of the above preset keys or by entering the macro number on the Coded Macro/Macro # key (code 39).

Programming
3-10 Panasonic 5500 Series Programming Instructions – Version LQ3.5
Preset PLU Key Codes
Code
If Flag 114A= 0
If Flag 114A= 1
If Flag 114A= 2
If Flag 114A= 3
1001 1002 1003 1004 1005 : 1099 1100 1101 1102 : 1199 1200 : 1299 1300 : 1399 1400 : 1499 1500 : 1599 1600 : 1699 1700 : 1799 1800 : 1899 1900 : 1998 1999
PLU #1 PLU #2 PLU #3 PLU #4 PLU #5 : PLU #99 PLU #100 PLU #101 PLU #102 : PLU #199 PLU #200 : PLU #299 PLU #300 : PLU #399 PLU #400 : PLU #499 PLU #500 : PLU #599 PLU #600 : PLU #699 PLU #700 : PLU #799 PLU #800 : PLU #899 PLU #900 : PLU #998 PLU #999
PLU #10 PLU #20 PLU #30 PLU #40 PLU #50 : PLU #990 PLU #1000 PLU #1010 PLU #1020 : PLU #1990 PLU #2000 : PLU #2990 PLU #3000 : PLU #3990 PLU #4000 : PLU #4990 PLU #5000 : PLU #5990 PLU #6000 : PLU #6990 PLU #7000 : PLU #7990 PLU #8000 : PLU #8990 PLU #9000 : PLU #9980 PLU #9990
PLU #100 PLU #200 PLU #300 PLU #400 PLU #500 : PLU #9900 PLU #10000 PLU #10100 PLU #10200 : PLU #19900 PLU #20000 : PLU #29900 PLU #30000 : PLU #39900 PLU #40000 : PLU #49900 PLU #50000 : PLU #59900 PLU #60000 : PLU #69900 PLU #70000 : PLU #79900 PLU #80000 : PLU #89900 PLU #90000 : PLU #99800 PLU #99900
PLU #1000 PLU #2000 PLU #3000 PLU #4000 PLU #5000 : PLU #99000 PLU #100000 PLU #101000 PLU #102000 : PLU #199000 PLU #200000 : PLU #299000 PLU #300000 : PLU #399000 PLU #400000 : PLU #499000 PLU #500000 : PLU #599000 PLU #600000 : PLU #699000 PLU #700000 : PLU #799000 PLU #800000 : PLU #899000 PLU #900000 : PLU #998000 PLU #999000
Refer to the column that corresponds to your selection in P24, Flag 114 (Option A).

Programming
Panasonic 5500 Series Programming Instructions – Version LQ3.5 3-11
Speed Tendering Key Codes Code Key
Code Key
9001 $1.00 Cash Tender 9002 $2.00 9003 $3.00 9004 $4.00 9005 $5.00 9006 $6.00 9007 $7.00 9008 $8.00 9009 $9.00 9010 $10.00 9011 $11.00 9012 $12.00 9013 $13.00 9014 $14.00 9015 $15.00 9016 $16.00 9017 $17.00 9018 $18.00 9019 $19.00 9020 $20.00
9021 $21.00 Cash Tender 9022 $22.00 9023 $23.00 9024 $24.00 9025 $25.00 9026 $26.00 9027 $27.00 9028 $28.00 9029 $29.00 9030 $30.00 9031 $31.00 9032 $32.00 9033 $33.00 9034 $34.00 9035 $35.00 9036 $36.00 9037 $37.00 : 9098 $98.00 9099 $99.00
Special Numbering Keys Code Key
Code Key
111 11 key 112 12 key 113 13 key 114 14 key 115 15 key 116 16 key 117 17 key
118 18 key 119 19 key 120 20 key 121 21 key 122 22 key 123 23 key 124 24 key
You can use these keys to simplify condiment or preparation selection from a Compulsory Modifier Display that uses 2-digit masking.

Programming
3-12 Panasonic 5500 Series Programming Instructions – Version LQ3.5
Key Code Definitions
@: This key acts as a multiplication (x) key. Use it to register multiple quantities of a
coded item, an open item, a coupon, or other items. Depending upon your entry in Flag 144, this key may be required to register quantities greater than 9.
All Void: This key lets you cancel everything entered for the current transaction. The system
issues a special "All Void" receipt for all canceled transactions. Auto-Tend (Next $): When you press this key, the system checks the transaction total, and depending
upon your entry in Flag 140A, it registers a tender amount rounded up to the nearest dime, dollar, ten-dollar, etc., increment. If, for example, the transaction total is $5.67, and Flag 140A = 3, the system tenders a $6.00 cash tender.
Break-in: Cashier Station: This key lets you bypass the Order-Taker and register an entire order at the
Cashier Station. Press Break-in if you want to use the Cashier Station to both register items and tender payment for an order. Break-in orders are given priority over all pending orders.
Order-Taker: This key lets you use the Order-Taker to register a complete transaction. It opens
the work area, so you can enter and pay an order from the Order-Taker workstation, without relaying the order to the Cashier Station.
Note: The Break-in key is not valid for Counter Terminals.
Break (Out): If employees are compensated for breaks, they must use this key to note the
beginning of a paid break. (If breaks are not paid, employees can use the Clock-Out key when they leave for a break.)
Cash: Use this key to finalize a cash transaction. You also use it throughout the report
and program screens to move within the menus. Cash 2: If you routinely handle currency exchange transactions, you can have a separate
cash drawer for the foreign currency. Use Currency Exchange 4 to translate the order total to the currency in the second drawer. Then finalize the transaction with the Cash 2 key. Cash 2 works with the Currency Exchange 4 key only.
Cash/Store: This key has the combined function of a Cash and Store key. At all workstations,
you can use it to close a Cash transaction. At the Order-Taker, Order-Taker/Cashier Station, and Cashier Station, you use it to store an order until the car reaches the Drive-Thru window.

Programming
Panasonic 5500 Series Programming Instructions – Version LQ3.5 3-13
$1.00 Tender: This is a preset $1.00 speed tendering key. You can use this speed tendering key
to register a $1.00 cash payment. Additional speed tendering keys are available (in $2.00 to $99.00 values).
Cashier: If all cashiers have an assigned code number, use the Coded Cashier key for the
cashier log-on procedures. Preset cashier keys are available for cashiers 1-50. Cashier Cancel: This key places the current order in a "wait" mode and sends a message to the
kitchen to cancel the order. Cashiers can use this key to place an incorrect order on hold until the manager is available to perform a void. When available, the manager can recall and cancel the waited order to adjust the cashier's accountability.
CAT Look-up: Use this key to access the Manual Authorization, Void Transaction, and Return
Transaction functions. Press it once to display a menu of the functions, and then enter the number of the function you need and press CAT LOOK-UP again.
Change Screen: If you register nine lines of items, the customer's order automatically scrolls into a
second panel of the workstation screen. The order continues into as many as four panels, for a maximum of 44 items. When an order displays in multiple panels, the screen is considered to be in "Lookup" mode. Touch the CHANGE SCREEN key if you want to switch to the single panel "Recap" format. (When the Recap format displays, you can use the SCROLL UP and SCROLL DOWN keys to view items not displayed.)
Change Order: Use this key at the Cashier Station to add items to, or void items from, the order in
the work area. Change order can be optional or compulsory, depending upon your programming.
Charge 1-10: Use Charge keys to tender credit card transactions. Ten charge keys are available
to represent the credit cards (Visa, MC, Amex, etc.) and other charges the restaurant accepts.
Charge Look-up: The Charge Look-up key lets you access restaurant credit cards through a code
number. You can also press the key without a number to list the charges and their associated code numbers. This key is also called a CHARGE # key.
Check: Use this key to tender the transaction when the customer uses a personal check to
pay for the order. Clear: This key resets error conditions and clears numeric key entries (not yet registered)
from your display. It does not erase any items or entries that are already registered.

Programming
3-14 Panasonic 5500 Series Programming Instructions – Version LQ3.5
Clock-in: Employees use this key to clock in at the beginning of their shift or day. They also
use this key to clock in after they return from a break. Clock-out: Employees use this key to clock out at the end of a shift or day. If the restaurant
does not pay for breaks, employees can also use this key to clock out at the beginning of a break. (If breaks are compensated, employees must use the Break key to note a break.)
Comment 1/2: Comment keys are used with the Alpha Shift key to send a message to the kitchen
printers and kitchen videos. After pressing Alpha Shift, you can type up to 16 characters, and then press Comment 1 or 2 to finalize the message entry.
Coupon: Coupon 1, 2, and 3 keys register regular coupons. When you press one of these
keys with an item, the system checks the item program to see which coupon applies. Based on the item program, it then registers the appropriate coupon amount.
Coupon Look-up: The Coupon Look-up (CLU) key lets you register a regular coupon by its code
number. With this key, you enter the coupon number, press CLU, and then press the item to which the coupon applies.
Combo CLU: Use the Combo Coupon key to register a coupon for a package meal. With Combo
Coupons, you need not identify the item to which the coupon applies---the item link is pre-programmed with the coupon.
Currency Exchange: You can use the Currency Exchange key to convert the transaction total from local
to foreign currency. The exchange rates are pre-programmed onto any of four Currency Exchange keys.
Cursor Down: You can use this key with the Void key to perform Cursor Voids. The Cursor
Down () key moves the cursor down, one line at a time. If the item you need to void is closest to the top of the display, press until the appropriate item is underlined. Then press Void.
Cursor Up: This key () moves the cursor up, one line at a time. You can use it to perform
Cursor Voids. If the incorrect item is closest to the bottom of the display, use the key to underline the item. Then press Void.
Date/Time: The Date/Time key issues a stub receipt with the current date and time. You can
place this stub on perishable items to mark the preparation date. If the optional Magnetic Card Reader is unable to read the credit card expiration date, you can also use this key to manually input the date.

Programming
Panasonic 5500 Series Programming Instructions – Version LQ3.5 3-15
Delete: Use this key to void an item from a transaction that has already been finalized.
The Delete key can be programmed to require a time entry in order to help managers update the time period when the error occurred.
Discount Subtotal: Use this key to calculate the discountable itemizer total. When you press it before
a discount key, it separates discountable items from non-discountable items. The discount can then be applied only to the discountable portion of the transaction.
Display Board: If your workstation interfaces to a Drive-Thru Display Board, the system relays
customer transactions to the screen on the outside menu board. You can use this key to see what displays outside.
Drive-Thru: This key directs the transaction total to the Drive-Thru destination for the Time
and Register Reports. The destination is noted on kitchen printers and kitchen videos.
Eat-in: Use the Eat-in key to direct the total to the Eat-in destination for Time and
Register Reports. The destination is also noted on kitchen printers and kitchen videos. You can use an Eat-in/Park combination (key code 32) or a dedicated Eat-in key (key code 271).
Error Correct: Use the Error Correct key to void an incorrect last item entry (Last Item Void).
Depending upon your programming, the Void key may act as the trigger key for an Error Correct.
Gift Redeemed: The Gift Certificate Redeemed key lets you tender a gift certificate coupon as part
of the customer's payment. It can be preset or open, depending upon your programming.
Gift Sold: The Gift Certificate sold key registers the sale of a gift certificate. Three Gift
Certificate Sold keys are available. They can be open or preset, depending upon your programming.
Group #: In the programming and report screens, you can use the Group # key to access a
particular Major Group or Subgroup. Group Payment: When the screen buffer is full, you can press this key to store the order and carry
over its balance to a new order. After this, you can enter additional items or finalize the transaction. Depending upon your selection in P24, Flag 101, this key may instead be used for tray totals. If you use tray totals, Group Payment is not allowed.

Programming
3-16 Panasonic 5500 Series Programming Instructions – Version LQ3.5
Journal Feed: Use the Journal Feed key to advance the paper in the Direct Journal Printer or the
Remote Journal Printer, where applicable. Macro: Macro commands are sequences of pre-recorded keystrokes, which you can
initiate by entering a number on the Macro # key or by pressing a preset key. These commands simplify reports, operations, and programming, by combining a series of steps within a single command.
Macro #: If you do not use individual (preset) macro keys, you can initiate a macro
command through the Macro # key. Enter the macro number before pressing this key to replay the programmed command.
Manager #: If you are using code numbers for manager log-on, use this key to log on a
manager number. You can also use preset Manager keys for log-on. If you have a Magnetic Card Reader, you can perform Manager log-on with an employee card.
Manual Authorization: This key is for Credit Authorization (CAT) functions. If you must call to obtain
authorization for a customer's credit card, use this key to register the manual transaction entry. (You can also access this function through the CAT Look-up screen.)
Menu #: Use the Menu # key to set the menu level needed for the workstation or time of day (breakfast, dinner, etc.). This key allows cashiers or managers to change the keyboard definition, as needed, in REG Mode.
Menu Look-up: The Menu Look-up key displays PLU items and their associated PLU code
numbers. Item prices may be optionally displayed. Menu Look-up can also display items by groups or by classes.
Mix & Match: Mix & Match tables allow you to charge a reduced price for a combination of
items. For example, you can set up a table of doughnuts that can be sold under a "dozen" pricing, as well as individually. Once a table is defined, press the MIX&MATCH key in REG Mode to check to see if the purchase meets the requirements of the Mix & Match table. If the requirements are satisfied, the system adjusts the pricing.
Mix & Match Clear: Use this key to reverse the Mix & Match price adjustment. You must press this
key before attempting to void an item considered for the reduced Mix & Match pricing.
Next Order: Use Next Order at a Single Register Drive-Thru to start a new order. Orders
advance to the work area in the sequence entered. In a two-workstation system, you can use Next Order to both register and pay an order at the Cashier Station.

Programming
Panasonic 5500 Series Programming Instructions – Version LQ3.5 3-17
No Sale: This key opens the cash drawer outside of a transaction. To save space on your
keyboard, you can program the Cash or # key to operate as the trigger key for the No Sale function.
No Tax: Use this key to remove all taxes from all items entered within the transaction. You
can press the No Tax key at any point in the transaction. Number (#): Use the # key to enter a maximum 16-digit number, such as a check or charge
account number. At Counter Terminals, you can also use this key to enter the maximum 14-digit telephone number associated with a phone order. (See also the Phone # key description.)
Paid Order Recall: Paid Order Recall allows you to return a paid order to the left panel of the
workstation screen. If, for example, a customer has a question about his finalized order, you can recall the order for review. Depending upon your programming, you may also be able to print a special receipt (with Receipt Issue) for the paid order.
Paid Out: Use this key, outside of a transaction, to decrease the amount of cash in your
workstation drawer. For example, you can use this key to register a vendor payment, cash skim, or cash pick-up. Two Paid Out (P/O) keys are available.
Park: When a Drive-Thru order requires an unusual amount of preparation time, the
cashier can press the Park key in place of the Serve key. The Park key clears the order from the screen and issues a special receipt, so the customer can move out of the Drive-Thru line. If Automatic Park is enabled, pressing the Park key automatically moves the order to the Park areas of the Park/Serve KVS screen.
Phone #: The Phone # key lets you record the telephone number associated with a phone
order. If entered, this number appears on the screen, customer receipt, and Kitchen Printer. When the customer arrives to pick up the meal, you can use this number to recall the order to the screen for payment.
Phone Order: Use the Phone Order key to signal the beginning of a telephone order that should
not immediately update KVS screens. Items registered after this key are only relayed to applicable Kitchen Printers. Key Code 14 is only available at Counter Terminals; at all other terminals it acts as a No Destination key.
Phone Recall: When a customer arrives to pick up a phone order, use the Phone Recall key to
return the order to the screen for payment. You can enter the order number on the Phone Recall key, or you can use this key with the 300 MLU function to underline and recall the exact order you need.

Programming
3-18 Panasonic 5500 Series Programming Instructions – Version LQ3.5
Phone Send: If you start an order with the Phone Order key, items are not immediately relayed
to KVS screens. Use the Phone Send key when you are ready to relay the phone order items to the Kitchen Video System. Phone Send directs items to applicable screens, then stores the order again.
Phone Wait: Use the Phone Wait key to store a telephone order until the customer arrives to
pick up the meal. If you used Phone Order at the beginning of the transaction, Phone Wait also stores the order until you are ready to send it to the KVS screens.
Pick-up Time: This key allows you to enter the approximate time when the customer will arrive
to pick up a phone order. If entered, the pick-up time displays on your screens and prints on the Receipt and Kitchen Printers.
PLU: Use the PLU (Price Look-Up) key to register a menu item by its code number.
Within the program and report menus, you also use this key to access an item by its programmed code number.
PLU Shift
0-9: (Single Shift). Use this key to modify a PLU menu item. Single Shifts are often used to specify an item size or type. The value of the Single Shift (0-9) is added to the number of the base PLU.
00-90: (Double Shift). This key works with Single Shift keys to modify an item
programmed for double shift compulsion. The value of the Double Shift is added to the base PLU plus the Single Shift value. These keys can also satisfy the requirement for a Single Shift.
Promo: If you need to register a complimentary item, press this key before the item.
Promo temporarily changes the item price to $.00. If you press Promo just prior to Subtotal (Promo Subtotal), all items are registered free of charge.
R/A: Use the Received-on-Account (R/A) key to increase the amount of cash in the
workstation drawer, without registering a transaction. You can have up to two R/A keys.
Receipt Feed: Use Receipt Feed to advance the paper in Direct Receipt Printer or Remote
System Printer (if receipt format is specified in your program). Receipt Issue: Receipt Issue triggers receipt print upon request. If, for example, the restaurant
does not normally issue a customer receipt, this key can be used whenever the customer requests a receipt.

Programming
Panasonic 5500 Series Programming Instructions – Version LQ3.5 3-19
Receipt Off: Use this key to turn off receipt print. An "RS" message at the bottom of your
screen means the receipt is disabled. (This key can only turn off the receipt.) Receipt On: This key turns on the customer receipt. After you press this key, the "RS" message
leaves the screen. (This key can only turn on the receipt.) Receipt Stop: Use Receipt Stop to toggle the receipt on and off. When "RS" displays on the
workstation screen, the receipt is disabled. Return Credit: This key is a Credit Authorization (CAT) function. Use it if you must credit a
customer's credit card after the order has been settled with the processing company. You can also access this function through the CAT Look-up screen.
Scale: Use this key to register items sold by the pound or kilogram. When you press
SCALE, the workstation reads the weight placed on the scale and then bases the item cost on the weight. You can only use the SCALE key for items programmed to allow or to require scale entries.
Scroll Up: Orders with nine or more lines of items can display in multiple screen panels
("Lookup" format) or in a single panel ("Recap" format). While the Recap format displays, you can use the Scroll Up key to advance up to the next set of eight items. Use the CHANGE SCREEN key to select the displayed format.
Scroll Down: While the single-panel Recap format displays on your screen, not all items display
at once. You can use the SCROLL DOWN key to advance down to the next set of eight items registered for the order.
Serve: After a Drive-Thru order is paid, and the customer receives the meal, press Serve
to clear the order from the workstation screen. If Automatic Serve is enabled, touching the Serve key automatically serves (bumps) the order from the Park/Serve KVS screen.
Store: At the Drive-Thru workstations, use the Store key at the end of a transaction to
relay the information to the Cashier Station. At the Cashier Station, this key stores an order until the car reaches the Drive-Thru window for payment.
Subtotal: Use this key to display the transaction total, including any applicable tax. Under
certain circumstances, you can use Eat-in, Take-out, and Drive-Thru keys to subtotal a transaction.
Table #: Use the Table # key to record a table or tent number for the order you are
registering. At Counter Terminals, this key can also be used to enter the pick-up time for a phone order. (See also the Pick-up Time key description).

Programming
3-20 Panasonic 5500 Series Programming Instructions – Version LQ3.5
Take-out: This key directs the transaction total to the Take-out destination, with the
appropriate tax calculation, for the Time and Register Reports. The destination is also noted on your Kitchen Printers and KVS screens.
Tax Shift: Tax Shift reverses the programmed tax status of an item or payment key. For
example, if an item is normally taxable, you can press the Tax Shift key before the item to strip the tax.
Terminal #: Use this key to specify the receiving workstation (terminal) for remote reports,
downlining commands, etc. Univ %: Universal keys are percentages that can be programmed to act as discounts or
surcharges, as needed. You can define as many as ten percentage keys. Void: Use the void key for previous item voids. The void key allows you to erase an
incorrect item at any time prior to payment. It can also be programmed to act as an Error Correct key.
Void Credit: The VOID CREDIT key is for systems using Credit Authorization (CAT). Use
this key if you must delete an order posted to the sales batch file, but not yet transmitted to the processing company. (You can also access this function through the CAT Look-up screen.)
Wait: Use this key to place the transaction in a "wait" or hold mode. The order number
remains on the workstation screen (usually in brackets) until you recall it for payment or correction. If you use Automatic Wait at the Counter Terminals, the complete order remains on-screen until you recall it.
At Counter Terminals, you can also use Wait to store a phone order. (See also the Phone Wait key description.)
Wait Recall: After you place an order in wait mode, you must use the Wait Recall key to return
it to the screen for settlement (payment, correction, etc.). If you use Automatic Wait at the Counter Terminal, Wait Recall stops the timer and allows the order to rotate off of the screen.
If enabled at the Counter Terminals, you can use this key to return a phone order to the screen when the customer arrives to pick up the meal. (See also the Phone Recall key description.)
Waste: Use the Waste key to record finished waste. Finished waste notes menu items that
were prepared, but not sold.

Programming
Panasonic 5500 Series Programming Instructions – Version LQ3.5 3-21
Memory Configuration
Use these worksheets to estimate memory requirements for your workstations. This calculation will not be exact, because the system internally rounds all data entries. As you enter data in Program 21, the screen displays a hexadecimal value, which you can convert to find the actual requirement. 1. Enter values for the files listed below. If you need more information about a file, refer to its
program explanation. Wherever possible, over-allocate the files to allow future updates. Enter 0 for files you do not need.
a) # Destination Time Reports:
Enter the number of destinations (0-10) tracked by time period on the Time Reports. For example, enter 3 if you want to track Eat-in, Take-out, and D/T sales by time period. Enter 0 if you do not plan to use the destination time reports.
b) Register Report Totals:
Enter the number of totals (1-160) you need for the Register Report (Report #1).
c) Product Mix Totals Enter the number of time ranges (0-96) you plan to track for the Product Mix Reports. These ranges are also used for Product Projection, and Product Comparison Reports, where applicable.
d) Product Mix Groups
Product Mix Groups are reported by time range. They are also used for Projection and Comparison Reports, where applicable. Enter the number (0-99) of groups you need.
e) Cashier Totals:
Enter number of totals (1-160) you want to track per cashier on the Cashier Report.
f) # Cashiers: Enter the number (1-99) of cashiers you are tracking. (Do not include managers here.)
g) Manager Report Totals:
Enter the number of totals (1-160) you want to track per manager on the Manager Report.
h) # Managers: Enter the number (1-99) of managers you are tracking.
i) Scale:
Enter 1 if you want to enable the scale. Enter 0 if a scale is not installed.

Programming
3-22 Panasonic 5500 Series Programming Instructions – Version LQ3.5
Memory Configuration Worksheet (Page 1 of 3) # Destination Time Reports a) ____________ x 784 = (max. 10) Register Report Totals b) ____________ x 16 = (max. 160) Product Mix Totals c) ____________ (max. 48) Product Mix Groups d) ___________ (max. 99) __________ x [ ( _________ + 1 ) x 16 + 16] = #PMix PMix Totals Cashier Report Totals e) ____________ (max. 160) # Cashiers f) ____________ (max. 99) __________ x [ ( _________ x 16) + 16] = # Cashiers Cshr Totals (max 65,536) Manager Report Totals g) ____________ (max. 160) # Managers h) ____________ (max. 99) _________ x [ ( _________ x 16) + 16] = # Managers Mgr. Totals (max 65,536) Scale (Enable = 1; 0= Not Used.) i) ___________ x 300 = BASIC WORKSTATION SUBTOTAL (Page 1 Total)

Programming
Panasonic 5500 Series Programming Instructions – Version LQ3.5 3-23
2. Carry over the total from Page 1. Then enter values for the remaining files. j) # Subgroups:
The formula for subgroup allocation depends upon whether or not you use a scale. Use the applicable line to enter the number of subgroups (1-199) you need. A fixed number of twenty Major Groups are taken into account within these formulas.
k) # Regular Coupons: Enter the number (0-199) of regular coupons you need. Exclude combo coupons. l) # Combo Coupons:
Enter the number (0-99) of combo coupons the restaurant will track. Combo coupons apply to a package meal or combination of items, as opposed to a particular item.
m) # PLUs:
The formula for PLUs depends upon whether or not you use a scale. Use the applicable line to enter the number of items, condiments/modifiers, and preparations you need. The maximum depends upon the amount of memory installed in the workstation.
n) Macros: Enter the number (0-199) of macro commands you will use for this application. o) Cashier Interrupt:
Enter the number (0-8) of Cashier Interrupts allowed. This entry decides the number of interrupts available at one time. Each cashier can have only one "interrupted" order. Cashier Interrupt is not available if you allocate Wait/Phone Orders (below).
p) Wait/Phone Orders:
Enter the number of Wait/Phone/Cashier Cancel Orders that can be open at any one time (0-99). If you use System-wide Wait/Phone Orders, enter the maximum number of orders at the System Master and enter at least 1 at each workstation using these functions.
q) Electronic Journal:
Enter the number (0-99) of 8Kbytes to allocate for the Electronic Journal (EJ) buffer. For example, enter 2 10 reserve 16Kbytes for EJ data. Enter 0 if you do not use EJ.
r) Mix & Match:
Enter the number (0-94) of Mix & Match tables you are using. These tables define components and requirements for specially-priced packages (dozen, half-dozen, etc.) and combo meals.
3. Perform the worksheet mathematics to expand each of these files. Then add the totals from
each line to the fixed areas. The total at the bottom of this page is the approximate number of bytes you need for the Basic workstations.

Programming
3-24 Panasonic 5500 Series Programming Instructions – Version LQ3.5
Memory Configuration Worksheet (Page 2 of 3) PAGE 1 SUBTOTAL Without Scale: Subgroups j) [ __________ + 20 ] x 48 = With Scale: [ __________ + 20 ] x 80 (max. 199) Regular Coupons k) ____________ x 32 = (max. 199) Combo Coupons l) ____________ x 48 = (max. 99) Without Scale: PLUs m) ____________ x 96 = With Scale: ____________ x 128 Macros n) ____________ x 32 = (max. 199) Cashier Interrupt o) _____________ x 1200 = (max. 8) Wait/Phone Orders p) ____________ x 1568 = (max. 99) Electronic Journal q) _____________ x 8192 = (max. 99) Mix & Match r) _____________ x 80 = (max. 99) EJ Transfer/Void Data (Enter 1514 if EJ is used; enter 0 if not used.) = Fixed Area (4DF5F) = BASIC WORKSTATION TOTAL (Approximate memory for Basic Workstations)
319,327

Programming
Panasonic 5500 Series Programming Instructions – Version LQ3.5 3-25
4. After you calculate the memory for basic workstations, you can estimate the additional (and total)
amount of memory needed for your System Master.
Transfer the Basic Workstation Total to the first line of this worksheet. Then enter values for the following files to find the requirements for the System Master.
s) Recipe File: Enter the number of recipes (1-500) you need for this application. If you are not using inventory functions, enter 0.
Note: The sum of the allocation for Recipes, Ingredients, Store & Forward, and Station Totals
cannot exceed 64K.
t) Ingredients: Enter the number of raw ingredients (1-300) you plan to use within your menu item recipes. Enter 0 if you are not using inventory functions.
u) Employee File: Enter the number of employees who will use the Time & Attendance functions. You can allocate up to 315 employees; however, a maximum of 250 employees can be active per day. Only 100 employees can be tracked as minors.
v) Projection: Enter 1 to enable the Product Projection and Comparison reports and the KVS Product Comparison screen. [You must also allocate Product Mix groups.]
w) Time Clock: Enter 1 if you want to enable the Time & Attendance functions.
x) Polling: Enter 1 if you want to enable polling communications.
y) Multi-day Polling Buffer: If you want to reserve memory for the Multi-day Polling Buffer, enter the number of 10Kbytes you need. This buffer stores daily report totals in case a communication error prevents totals from being retrieved before the start of a business day.
z) PC Interface: Enter '1' to enable the PC Interface. Enter 0 if you do not use functions that require PC Interface.
5. Perform the calculations indicated for each line of the worksheet. Then add the individual file
allocations to the fixed and Basic workstation totals. This grand total represents the approximate number of bytes you need for your System Master. When you have the approximate number of bytes, refer to the Memory Conversion chart to see how many RAM chips you must install.

Programming
3-26 Panasonic 5500 Series Programming Instructions – Version LQ3.5
Memory Configuration Worksheet (Page 3 of 3) BASIC WORKSTATION TOTAL (from page 2) Recipe File* s) _____________ x 64 = (max. 500) Raw Ingredients* t) _____________ x 112 = (max. 300) Employee File u) [ ____________ x 208 ] + 1020 = (max. 315) Projection v) _____ x ________ x [ 2 x (________ + 1 ) x 29 ] = (Enable=1) #PMix PMix Totals Time Clock Buffer w) ___________ x 8192 = (Enable = 1) Polling x) If the Time Clock Buffer is NOT Enabled: _________ x 4096 (Enable = 1) = If the Time Clock Buffer is Enabled: ________ x [ (_______ x 41) + 12,288 ] (Enable = 1) #Employees Multi-day Polling Buffer y) ___________ x 10240 = (0-9999) PC Interface z) ____________ x 2272 = (Enable = 1) Fixed Area (Store & Forward, Station Totals) = *Note: The sum of Store & Forward, Station Totals, Recipes, and Ingredients cannot exceed 64,000. SYSTEM MASTER TOTAL (Estimated memory required for System Master)
2,860

Programming
Panasonic 5500 Series Programming Instructions – Version LQ3.5 3-27
P21 Memory Allocation
The Memory Configuration worksheets on the preceding pages help you estimate the amount of memory needed for each workstation on your system. After completing the Memory Configuration Worksheets, adjust the amount of RAM memory in your workstation, if necessary. Then transfer the file information from the Memory Configuration worksheets to the P21 Memory Allocation worksheet and program. As you enter data in Program 21, the workstation screen displays a hexadecimal value for the actual memory allocation. If your Program 21 allocation entries exceed the amount of RAM you installed, an "INVALID" message displays, and no further entries will be allowed. Refer to the Memory Conversion Chart to determine the amount of RAM you need for the program and, if necessary, add additional memory before re-entering your memory allocation. You may prefer to reduce the file sizes to make your program fit the installed amount of memory. Important: • Set the Memory Allocation in each workstation before you enter or downline any additional files. • Addresses for Basic Workstations should be identical system-wide. • Addresses for the Master Workstations should be allocated at the System Master and Submaster
workstations only.
Memory Conversion Chart

Programming
3-28 Panasonic 5500 Series Programming Instructions – Version LQ3.5
P21 Memory Allocation Worksheet (P2 Mode) Beginning Sequence: 21 CASH 1 CASH Default
# Destination Time Reports (max. 10) a) 100 CSHR ________ CASH
Register Report Totals (max. 160) b) 101 CSHR ________ CASH
Product Mix Group Totals (max. 48) c) 102 CSHR ________ CASH
# Product Mix Groups (max. 99) d) 103 CSHR ________ CASH
Cashier Report Totals (max. 160) e) 104 CSHR ________ CASH
# Cashiers (max. 99) f) 105 CSHR ________ CASH
Manager Report Totals (max. 160) g) 106 CSHR ________ CASH
# Managers (max. 99) h) 107 CSHR ________ CASH
Scale (1=Enable; 0=Not Used.) i) 108 CSHR ________ CASH
# Subgroups (max. 199) j) 109 CSHR ________ CASH
# Regular Coupons (max. 199) k) 110 CSHR ________ CASH
# Combo Coupons (max. 99) l) 111 CSHR ________ CASH
# PLUs (memory-dependent) m) 112 CSHR ________ CASH
# Macros (max. 199) n) 113 CSHR ________ CASH
Cashier Interrupt (max. 8) o) 114 CSHR ________ CASH
Wait/Phone Orders (max. 99) p) 115 CSHR ________ CASH
Recipes (max. 500) q) 116 CSHR ________ CASH
Ingredients (max. 300) r) 117 CSHR ________ CASH
Employee File (max. 315) s) 118 CSHR ________ CASH
Projection (1= Enable; 0= Not Used) t) 119 CSHR ________ CASH
Time Clock Buffer (1=Enable; 0=Not Used) u) 120 CSHR ________ CASH
Polling (1= Enable; 0= Not Used) v) 121 CSHR ________ CASH
Multi-day Polling Buffer w) 122 CSHR ________ CASH
PC Interface (1= Enable; 0= Not Used) x) 123 CSHR ________ CASH
EJ Buffer (max. 99) y) 124 CSHR ________ CASH
Mix & Match (max. 94) z) 125 CSHR ________ CASH
0
40
24
2
25
4
25
2
0
20
50
10
140
99
0
6
50
30
30
0
0
0
0
0
0
0
Values a through z correspond to your entries on the Memory Configuration Worksheet. The sum of the allocation for Recipes, Ingredients, Station Totals, and Store & Forward cannot exceed 64K.

Programming
Panasonic 5500 Series Programming Instructions – Version LQ3.5 3-29
P21 Report Total Arrangement
Use the Program 21 tables to design your Register, Cashier, Manager, Station Total, and DCR Reports. Your entries in this program determine which totals report, as well as the arrangement of the report totals. Your Memory Allocation decides how many totals you can select for the programmable reports. To design your reports, first identify the totals you need. In order to balance correctly, you must have a total for each function you use. For example, if you use Paid-outs, you must have a Paid-out total. If you use Charge keys, you must have a total for every charge you use. If you use Promo, you must have a Promo total, etc. After you identify the totals, arrange them in the order they should report. (The first total you list will be the first total on the report.) Translate the totals into the report codes in the Report Total Code chart. This chart lists available totals with their codes. It also indicates (see the CT/TL column) whether the code provides an item (I) or activity (A) count and whether or not a total (T) reports. For each report total code, you can also select status options. These options decide the reports (X1, Z1, X2, or Z2) that include the total and the print status of the total. Calculation totals can also use special formatting options. Notes:
• Report Codes 1 through 7 print only on specific reports and in a fixed arrangement. You need not allocate memory for these codes or enter them on the P21 worksheets.
• The Report Total Code Chart lists the default descriptors for each total. You can modify these
descriptors in Program 25, if desired.
• If you do not include R/A and P/O totals on the Register Report, the MGR Mode screen will not list the functions. For example, if you omit R/A2 and P/O2 totals, you cannot access either function through the MGR Mode screen. Also, the Charge Look-up screen will only list Charge 1-10 totals that have been included on the Register Report.
• Cashier Cancel is included in the All Void total. Report Code 47 can be assigned for notation, but
is not required for balancing.
• Your report must include all totals you use to build a custom calculation total. For example, if the Register Report has a calculation total made up of Cash and Charge 1, your Register Report must include Cash and Charge 1 totals. If either total is missing, your calculation total will be inaccurate. For the Register Report, there are no exceptions. For other programmable reports, you might be able to instruct the calculation total to base its calculations on totals from the Register Report.

Programming
3-30 Panasonic 5500 Series Programming Instructions – Version LQ3.5
Address: The P21 addresses correspond to the lines of the report. Address 100 is the first
line of the report, Address 101 is the second, Address 102 is the third, etc. The number of addresses available for each of the programmable reports is determined by your Memory Allocation.
Status & Code: Use this field to enter the total codes you want to report. For each report total
codes, you can select status options. Replace A-B with the options you want to select for the report code. You can add the values, if necessary, or enter 0 if you do not need any of the options. Replace D-F with the report total code.
A: 1= Do Not Print this total on X1 Reports.
2= Do Not Print this total on Z1 Reports. 4= Do Not Print this total on X2/Z2 Reports.
B: 1= Do Not Print the total. (Print only the count.) 2= Do Not Print the count. (Print only the total.) 4= Use % format (available for Calculation Totals only). 5= Use Time format (available for Calculation Totals only).
C: 0= Use the Report Code listed in D-F, below. 1= Use the Calculation Total listed in D-F. This must be set for each Calculation
Total you list on the report. D-F: Enter the code number (from the Report Total Code chart) that corresponds to the
total that should report at this address. If, for example, you want the Void total to print first on the reports, enter 9 for Address 100. If you are listing a Calculation Total, enter the Table number associated with this Calculation total.
Example: The first three totals you want to report are Void, All Void, and Error Correct.
You then want to list Calculation Total (CT) #5, which is the combined total of these corrections. You want all totals to print on Z1 Reports, but do not want the Calculation Total to print on X2/Z2 Reports. For this example, your worksheets would include the following entries.
100 CSHR 9 CASH Void
101 CSHR 1 0 CASH All Void
102 CSHR 4 4 CASH Error Correct
103 CSHR 4 0 1 0 0 5 CASH Calculation Total #5

Programming
Panasonic 5500 Series Programming Instructions – Version LQ3.5 3-31
Report Total Codes
Code Definition CT/TL Description
Code Definition CT/TL Description
1 PLU I,T PLU Total 2 MGRP I,T Major Group Total 3 SGRP I,T Subgroup Total 4 GPTL I,T Group Total 5 TMTL I,T Time Sales Total 6 TRGT T Training Grand TL 7 NRGT T Non-Resettable Grand 8 ITEM I,T Item Total 9 CNCL A,T Void Total 10 VOID A,T All Void Total 11 DSC1 A,T Universal %1 12 DSC2 A,T Universal %2 13 +% A,T Universal %3 14 LOAN A,T Received on Account 15 PKUP A,T Paid Out 16 CASH A,T Cash Total 17 CHCK A,T Check Total 18 AUDC A,T Negative Sales 19 NSTL A,T Net Sales 20 TXB1 T Taxable 1 Sales 21 TXB2 T Taxable 2 Sales 22 TAX T Tax 1 23 TAX2 T Tax 2 24 NTXB T Non-Taxable Total 25 GSTL T Gross Sales 1 26 DRWR T Drawer Total 27 CAID T Cash-In-Drawer 28 CKID A,T Check-In-Drawer 29 CRTX A,T Credited Tax 30 P/B A,T Previous Balance 31 DLET A,T Deletes 32 33 34 BFWD I,T Balance Forward 35 GPTL I,T Group Total 36 MIX I,T Product Mix Total 37 CA A,T Cash 2 (Currency Exch) 38 REBT A,T Manager Reboot Total 39 CHG1 A,T Charge 1 40 CHG2 A,T Charge 2 41 CHG3 A,T Charge 3 42 CHG4 A,T Charge 4 43 CHG5 A,T Charge 5 44 ERRC A,T Error Correct 45 # A,T # Key Entries
46 NS A No Sale Count 47 CSOV A Cashier Cancel 48 CHG6 A,T Charge 6 49 CHG7 A,T Charge 7 50 CHG8 A,T Charge 8 51 CHG9 A,T Charge 9 52 CH10 A,T Charge 10 53 XCH2 A,T Exchange 2 54 XCH3 A,T Exchange 3 55 XCH4 A,T Exchange 4 56 CAOW A,T Cash Owed 57 VDCR A,T Void Credit Transaction 58 RTCR A,T Return Credit Transaction 59 DATE A Date & Time 60 GCRM I,T G.C. Redemption 61 CPTR A,T Coupon Transaction 62 % 4 A,T Universal %4 63 % 5 A,T Universal %5 64 NTAX A,T No Tax 65 WAIT A,T Wait 66 PARK A,T Park 67 RCAL A,T Wait Recall 68 BRAK A Break-in 69 70 PROM I,T Promo 71 WAST I,T Waste 72 GIFT I,T Gift Cert. 1 73 G.C2 I,T Gift Cert. 2 74 G.C3 I,T Gift Cert. 3 75 AVWT V Wait Time 76 OVWT A # Waits over limit 77 AVDT V Drive-Thru Time 78 OVDT A D/T orders over limit 79 80 TIP A,T Universal Tip 81 TXB3 A,T Taxable 3 Sales 82 TAX3 A,T Tax 3 83 EXCH A,T Exchange Total 1 84 R/A2 A,T Received on Acct. 2 85 P/O2 A,T Paid Out 2 86 CPNS I,T Coupon Total 87 TXTL T Tax (1+2+3) 88 PRCG A Price Changes 89 PHON A,T Phone Order Total 90 FCST Food Cost

Programming
3-32 Panasonic 5500 Series Programming Instructions – Version LQ3.5
Report Total Codes
Code Definition CT/TL Description
Code Definition CT/TL Description
91 FC % Food Cost % 92 GRSS T Gross Sales 93 TOTL (general itemizer sum) 94 95 96 97 98 99 TXB4 T Taxable Total 4 (GST) 100 NRNT A,T Non-Resettable Net Sales 101 CAD2 T Cash-in-Drawer 2 102 103 DPST T Total Deposits 104 CMBS A,T Combo Coupons 105 UPSL Upsell 106 107 FC.P A,T Promo Food Cost 108 FC.W A,T Waste Food Cost 109 DSC6 A,T Universal %6 110 DSC7 A,T Universal %7 111 DSC8 A,T Universal %8 112 DSC9 A,T Universal %9 113 DS10 A,T Universal %10 114 PST1 A,T Frequent Diner Post 1 115 PST2 A,T Frequent Diner Post 2 116 PST3 A,T Frequent Diner Post 3 117 PST4 A,T Frequent Diner Post 4 118 PST5 A,T Frequent Diner Post 5 119 120 121 IN A,T Eat-in (Destination 1) 122 OUT A,T Take-out (Destination 2) 123 DR-T A,T Drive-Thru (Destination 3) 124 PHON A,T Phone-in (Destination 4) 125 NODS A,T No Destination (Dest. 5) 126 DST6 A,T Destination 6 127 DST7 A,T Destination 7 128 DST8 A,T Destination 8 129 DST9 A,T Destination 9 130 DT10 A,T Destination 10 131 MPLU A,T All Mix & Match (Sum) 132 REG A,T Register (GIVEX Gift Card) 133 ACT A,T Activate (GIVEX Gift Card) 134 INCR A,T Increment (GIVEX Gft Crd) 135 GIVX A,T Redemption (GIVEX GftC) 136 CANC A,T Cancel (GIVEX Gift Card) 137 INQ A Inquiry (GIVEX Gift Card) 138 RTRN A,T Return (GIVEX Gift Card) 142 REG A,T Register (VLINK Gift Card) 143 ACT A,T Activate (VLNK Gift Card) 144 INCR A,T Increment (VLNK Gft Crd)
145 VLNK A,T Redemption (VLNK GC) 146 CANC A,T Cancel (VLNK Gift Card) 147 INQ A Inquiry (VLNK Gift Card) 148 RTRN A,T Return (VLNK Gift Card) 201 SGP1 I,T Subgroup 1 202 SGP2 I,T Subgroup 2 : 399 SGP199 I,T Subgroup 199 401 MGP1 I,T Major Group 1 402 MGP2 I,T Major Group 2 : 420 MGP20 I,T Major Group 20 103 DPST T All Deposit Total (Sum) 451 DPST1 T Deposit 1 452 DPST2 T Deposit 2 : 460 DPST10 T Deposit 10 501 PRD01 I,T Product Mix 1 502 PRD02 I,T Product Mix 2 : 599 PRD99 I,T Product Mix 99 131 MPLU I,T All Mix &Match (Sum) 601 MPLU1 I,T Mix & Match Table 1 602 MPLU2 I,T Mix & Match Table 2 : 694 MPLU1 I,T Mix & Match Table 94 701 CPN1 I,T Coupon 1 702 CPN2 I,T Coupon 2 : 899 C199 I,T Coupon 199 901 CP201 I,T Combo Coupon 1 902 CP202 I,T Combo Coupon 2 : 999 CP299 I,T Combo Coupon 99 810000 Separation Line: -------------- 820000 Separation Line: ======== 800000 Blank Space 900330 Special Report Message #330 900331 Special Report Message #331 : (from Program 30) 900399 Special Report Message #399

Programming
Panasonic 5500 Series Programming Instructions – Version LQ3.5 3-33
P21 Register Report Total Arrangement Worksheet (P2 Mode) Beginning Sequence: 21 CASH 2 CASH
Address Status & Report Code Comment Address Status & Report Code Comment A B C D E F A B C D E F 100 CSHR CA 125 CSHR CA
101 CSHR CA 126 CSHR CA
102 CSHR CA 127 CSHR CA
103 CSHR CA 128 CSHR CA
104 CSHR CA 129 CSHR CA
105 CSHR CA 130 CSHR CA
106 CSHR CA 131 CSHR CA
107 CSHR CA 132 CSHR CA
108 CSHR CA 133 CSHR CA
109 CSHR CA 134 CSHR CA
110 CSHR CA 135 CSHR CA
111 CSHR CA 136 CSHR CA
112 CSHR CA 137 CSHR CA
113 CSHR CA 138 CSHR CA
114 CSHR CA 139 CSHR CA
115 CSHR CA 140 CSHR CA
116 CSHR CA 141 CSHR CA
117 CSHR CA 142 CSHR CA
118 CSHR CA 143 CSHR CA
119 CSHR CA 144 CSHR CA
120 CSHR CA 145 CSHR CA
121 CSHR CA 146 CSHR CA
122 CSHR CA 147 CSHR CA
123 CSHR CA 148 CSHR CA
124 CSHR CA 149 CSHR CA
Status: A: 1= Disable X1 Print B: 1= Disable Total Print C: 0= Report Code D-F: Report Code # or
2= Disable Z1 Print 2= Disable Count Print 1= Calculation Total Calculation Total # 4= Disable X2/Z2 Print 4= % Format (CT only)
5= Time Format (CT only)

Programming
3-34 Panasonic 5500 Series Programming Instructions – Version LQ3.5
P21 Cashier Report Total Arrangement Worksheet (P2 Mode) Beginning Sequence: 21 CASH 3 CASH
Address Report Code Comment Address Report Code Comment A B C D E F A B C D E F 100 CSHR CA 125 CSHR CA
101 CSHR CA 126 CSHR CA
102 CSHR CA 127 CSHR CA
103 CSHR CA 128 CSHR CA
104 CSHR CA 129 CSHR CA
105 CSHR CA 130 CSHR CA
106 CSHR CA 131 CSHR CA
107 CSHR CA 132 CSHR CA
108 CSHR CA 133 CSHR CA
109 CSHR CA 134 CSHR CA
110 CSHR CA 135 CSHR CA
111 CSHR CA 136 CSHR CA
112 CSHR CA 137 CSHR CA
113 CSHR CA 138 CSHR CA
114 CSHR CA 139 CSHR CA
115 CSHR CA 140 CSHR CA
116 CSHR CA 141 CSHR CA
117 CSHR CA 142 CSHR CA
118 CSHR CA 143 CSHR CA
119 CSHR CA 144 CSHR CA
120 CSHR CA 145 CSHR CA
121 CSHR CA 146 CSHR CA
122 CSHR CA 147 CSHR CA
123 CSHR CA 148 CSHR CA
124 CSHR CA 149 CSHR CA
Status: A: 1= Disable X1 Print B: 1= Disable Total Print C: 0= Report Code D-F: Report Code # or
2= Disable Z1 Print 2= Disable Count Print 1= Calculation Total Calculation Total # 4= Disable X2/Z2 Print 4= % Format (CT only)
5= Time Format (CT only)

Programming
Panasonic 5500 Series Programming Instructions – Version LQ3.5 3-35
P21 Manager Report Total Arrangement Worksheet (P2 Mode) Beginning Sequence: 21 CASH 4 CASH
Address Status & Report Code Comment Address Status & Report Code Comment A B C D E F A B C D E F 100 CSHR CA 125 CSHR CA
101 CSHR CA 126 CSHR CA
102 CSHR CA 127 CSHR CA
103 CSHR CA 128 CSHR CA
104 CSHR CA 129 CSHR CA
105 CSHR CA 130 CSHR CA
106 CSHR CA 131 CSHR CA
107 CSHR CA 132 CSHR CA
108 CSHR CA 133 CSHR CA
109 CSHR CA 134 CSHR CA
110 CSHR CA 135 CSHR CA
111 CSHR CA 136 CSHR CA
112 CSHR CA 137 CSHR CA
113 CSHR CA 138 CSHR CA
114 CSHR CA 139 CSHR CA
115 CSHR CA 140 CSHR CA
116 CSHR CA 141 CSHR CA
117 CSHR CA 142 CSHR CA
118 CSHR CA 143 CSHR CA
119 CSHR CA 144 CSHR CA
120 CSHR CA 145 CSHR CA
121 CSHR CA 146 CSHR CA
122 CSHR CA 147 CSHR CA
123 CSHR CA 148 CSHR CA
124 CSHR CA 149 CSHR CA
Status: A: 1= Disable X1 Print B: 1= Disable Total Print C: 0= Report Code D-F: Report Code # or
2= Disable Z1 Print 2= Disable Count Print 1= Calculation Total Calculation Total # 4= Disable X2/Z2 Print 4= % Format (CT only)
5= Time Format (CT only)

Programming
3-36 Panasonic 5500 Series Programming Instructions – Version LQ3.5
P21 Station Total Arrangement Worksheet (P2 Mode) Beginning Sequence: 21 CASH 5 CASH Address Status & Report Code Comment A B C D E F 100 CSHR CASH
101 CSHR CASH
102 CSHR CASH
103 CSHR CASH
104 CSHR CASH
105 CSHR CASH
106 CSHR CASH
107 CSHR CASH
108 CSHR CASH
109 CSHR CASH Status: A: 1= Disable Print on X1 Reports
2= Disable Print on Z1 Reports 4= Disable Print on X2/Z2 Reports
B: 1= Do not print the Total associated with this code. 2= Do not print the Count associated with this code. 4= Use % Format (for Calculation Totals only) 5= Use Time Format (for Calculation Totals only)
C: 0= Report Code 1= Calculation Total
D-F: Enter the 3-digit Report Total Code or the 3-digit Calculation Total #. Comment: Enter the name of the code assigned to this address (for reference).
Station Totals can only be allocated at the System Master and are only available at the System Master. If you take the report prior to System Close, the report includes only the Master's totals. After a System Close (or Z Accumulation), each workstation is included in the report. Totals allocated to the Station Total Report must also be allocated to the Register Report.
Programming
Panasonic 5500 Series Programming Instructions – Version LQ3.5 3-37
P21 DCR Report Total Arrangement
The Deposit & Cash Report (DCR) lets you build a special report that provides overall restaurant accountability. Use this selection in Program 21 to choose up to twenty totals for the DCR Report. The totals you select here are compared to daily deposits for a restaurant over/short figure.
Note: The DCR is an optional report that can be included in the System Close. If Flag 240, Option H = 0, the DCR will not print.
Address: Addresses 100-119 correspond to the twenty report lines available to the DCR
Report. Your entry at Address 100, for example, represents the first line of the report. Address 101 represents the second line of the report, etc.
Report Code: Enter the report total code (from the Report Total Code chart provided earlier in
this section) that corresponds to the total you want the DCR to report. For example, if you want the Gross Sales Total (Report Code 25) to appear first on the DCR, enter 25 for Address 100. If you have created Calculation Totals (custom totals), you can also include them in the DCR.
The DCR Deposit Total is balanced against the last total you list for this report. If, for example, your last entry is at Address 114, the Over/Short calculation is based on the difference between deposits and the Address 114 total. If your last entry is at Address 119, Over/Short is based on the difference between the Deposit Total and Address 119. As a result, the last address you list should represent a "Net Sales" type of total.
Important: Gross Sales (Report Code 25) must be included on the DCR
report. Comment: This space is provided on the worksheet so you can make note of the Report Total
Code you entered in the previous field.
Note: Additional details about the DCR Report, including its appearance and programming requirements, are provided in the Appendix.

Programming
3-38 Panasonic 5500 Series Programming Instructions – Version LQ3.5
P21 DCR Report Arrangement Worksheet Beginning Sequence: 21 CASH 6 CASH Address Status & Report Code Comment 100 CSHR
CASH
101 CSHR
CASH
102 CSHR
CASH
103 CSHR
CASH
104 CSHR
CASH
105 CSHR
CASH
106 CSHR
CASH
107 CSHR
CASH
108 CSHR
CASH
109 CSHR
CASH
110 CSHR
CASH
111 CSHR
CASH
112 CSHR
CASH
113 CSHR
CASH
114 CSHR
CASH
115 CSHR
CASH
116 CSHR
CASH
117 CSHR
CASH
118 CSHR
CASH
119 CSHR
CASH
Status: A: 1= Disable X1 Print B: 1= Disable Total Print C: 0= Report Code D-F: Report Code # or
2= Disable Z1 Print 2= Disable Count Print 1= Calculation Total Calculation Total # 4= Disable X2/Z2 Print 4= % Format (CT only)
5= Time Format (CT only)

Programming
Panasonic 5500 Series Programming Instructions – Version LQ3.5 3-39
P21 Calculation Totals
The P21 Calculation Total program lets you build custom totals for your Register, Cashier, Manager, DCR, and Station Total Reports. You can create a total that adds, subtracts, multiplies, or divides any of the report codes listed in the Report Total Code chart. You can use constants in your calculations. You can also store results in a buffer, which can later be recalled within the calculation. Note: After you enter a Table # in the P21 Calculation Total program, the cursor appears at the Name
line. Enter a Line # and press SBTL to go to a specific line. Press SBTL if you want to move down one line at a time.
There are four basic steps to this program. First, decide what you are going to call the total you are creating. You can use eight characters for the name. Second, map out each step involved in the calculation. This is the balancing formula for your total. Third, determine whether or not the total resets. And finally, translate the calculation, line by line, into the codes the system uses. When you are ready to translate your calculation, you have several decisions to make. For example, you must identify whether you are using a Report Total Code, a Constant, or a Calculation Table # link for the line. If you enter a Report Total Code, you can use its total or its counter. You can use the value reported, or you can ask for the absolute (always positive) value. You can use the total that appears on the report where this total is used, or you can use the total from the Register Report. Finally, you can add, subtract, divide, or multiply the total, end the calculation, or link it to another calculation. A very basic example of a calculation total would be a "DISC TL" that consolidates Discounts 1, 2, and 3. The formula for this total is: Discount 1 (Report Code 11) + Discount 2 (Report Code 12) + Discount 3 (Report Code 13). This total resets at System Open. It appears on the Cashier Report, and its components are based on totals from the Cashier Report. It uses reported totals (as opposed to absolute values). You would use the following entries to create this total.
Calculation Total Formula 8-Character Description Reset at Z1, Z2, and System Open Start with the Disc 1 (Code 11) Total Add the Disc 2 (Code 12) Total Add the Disc 3 (Code 13) Total End the Calculation
Worksheet Entries 1 Name DISC. TL 2 Status 0 3 Data1 0011-00 4 Data2 0012-01 5 Data3 0013-01 6 Data4 0000-08
The codes you use to translate this formula and any other formula you want to create are detailed on the next page.

Programming
3-40 Panasonic 5500 Series Programming Instructions – Version LQ3.5
Table #: Enter the number (1-99) of the Calculation Total you are creating. Name: Enter the description you want to use for this Calculation Total. You can use up to 8
characters. Status: 0= Reset this total Z1, Z2, and System Open.
1= Non-Resettable Total. Data 1-7: Use these seven fields to create the calculation. For each line, enter values from the
options listed below.
A-D: Enter the Report Total Code (from the Report Total Code Chart) associated with the first total you are using in this calculation. Or, if the first total is a positive constant, enter the value of the constant (0-999). If it is a negative constant, enter 8, then enter the value of the constant (0-999). Or, if you are linking to another table, enter the linked table # (0-99).
E: Select one of the options below to identify the type of count, total, or constant you are
entering on this line. 0= Total Only 1= Counter Only 2= Total Only (from the Register Report) 3= Counter Only (from the Register Report) 4= Absolute Total Only 5= Absolute Counter Only 6= Absolute Total Only (from the Register Report) 7= Absolute Counter Only (from the Register Report) 8= Constant 9= Recall Data from Buffer.
F: Select one of the options below to signal the action/calculation to be performed with the Report Total Code you are entering.
0= No calculation required. 1= Add (+) 2= Subtract (-) 3= Multiply 4= Divide (and round fractions down) 5= Divide (and use normal 5/4 rounding for fractions) 6= Divide (and round fractions up) 7= Go to the Table # indicated. 8= End Calculation 9= Store the results to the buffer

Panasonic 5500 Series Programming Instructions – Version LQ3.5 3-41
P21 Calculation Table Worksheet (Page ___ of ___) Beginning Sequence: 21 CASH 7 CASH Table # Name Status Data 1 Data 2 Data 3 Data 4 Data 5 Data 6 Data 7 A B C D E F A B C D E F A B C D E F A B C D E F A B C D E F A B C D E F A B C D E F __ __CSHR __ __ __ __ __ __ __ __CA ___CA __ __ __ __ __ __CA __ __ __ __ __ __CA __ __ __ __ __ __CA __ __ __ __ __ __CA __ __ __ __ __ __CA __ __ __ __ __ __CA __ __ __ __ __ __ CA __ __CSHR __ __ __ __ __ __ __ __CA ___CA __ __ __ __ __ __CA __ __ __ __ __ __CA __ __ __ __ __ __CA __ __ __ __ __ __CA __ __ __ __ __ __CA __ __ __ __ __ __CA __ __ __ __ __ __ CA __ __CSHR __ __ __ __ __ __ __ __CA ___CA __ __ __ __ __ __CA __ __ __ __ __ __CA __ __ __ __ __ __CA __ __ __ __ __ __CA __ __ __ __ __ __CA __ __ __ __ __ __CA __ __ __ __ __ __ CA __ __CSHR __ __ __ __ __ __ __ __CA ___CA __ __ __ __ __ __CA __ __ __ __ __ __CA __ __ __ __ __ __CA __ __ __ __ __ __CA __ __ __ __ __ __CA __ __ __ __ __ __CA __ __ __ __ __ __ CA __ __CSHR __ __ __ __ __ __ __ __CA ___CA __ __ __ __ __ __CA __ __ __ __ __ __CA __ __ __ __ __ __CA __ __ __ __ __ __CA __ __ __ __ __ __CA __ __ __ __ __ __CA __ __ __ __ __ __ CA __ __CSHR __ __ __ __ __ __ __ __CA ___CA __ __ __ __ __ __CA __ __ __ __ __ __CA __ __ __ __ __ __CA __ __ __ __ __ __CA __ __ __ __ __ __CA __ __ __ __ __ __CA __ __ __ __ __ __ CA __ __CSHR __ __ __ __ __ __ __ __CA ___CA __ __ __ __ __ __CA __ __ __ __ __ __CA __ __ __ __ __ __CA __ __ __ __ __ __CA __ __ __ __ __ __CA __ __ __ __ __ __CA __ __ __ __ __ __ CA __ __CSHR __ __ __ __ __ __ __ __CA ___CA __ __ __ __ __ __CA __ __ __ __ __ __CA __ __ __ __ __ __CA __ __ __ __ __ __CA __ __ __ __ __ __CA __ __ __ __ __ __CA __ __ __ __ __ __ CA __ __CSHR __ __ __ __ __ __ __ __CA ___CA __ __ __ __ __ __CA __ __ __ __ __ __CA __ __ __ __ __ __CA __ __ __ __ __ __CA __ __ __ __ __ __CA __ __ __ __ __ __CA __ __ __ __ __ __ CA __ __CSHR __ __ __ __ __ __ __ __CA ___CA __ __ __ __ __ __CA __ __ __ __ __ __CA __ __ __ __ __ __CA __ __ __ __ __ __CA __ __ __ __ __ __CA __ __ __ __ __ __CA __ __ __ __ __ __ CA __ __CSHR __ __ __ __ __ __ __ __CA ___CA __ __ __ __ __ __CA __ __ __ __ __ __CA __ __ __ __ __ __CA __ __ __ __ __ __CA __ __ __ __ __ __CA __ __ __ __ __ __CA __ __ __ __ __ __ CA __ __CSHR __ __ __ __ __ __ __ __CA ___CA __ __ __ __ __ __CA __ __ __ __ __ __CA __ __ __ __ __ __CA __ __ __ __ __ __CA __ __ __ __ __ __CA __ __ __ __ __ __CA __ __ __ __ __ __ CA __ __CSHR __ __ __ __ __ __ __ __CA ___CA __ __ __ __ __ __CA __ __ __ __ __ __CA __ __ __ __ __ __CA __ __ __ __ __ __CA __ __ __ __ __ __CA __ __ __ __ __ __CA __ __ __ __ __ __ CA __ __CSHR __ __ __ __ __ __ __ __CA ___CA __ __ __ __ __ __CA __ __ __ __ __ __CA __ __ __ __ __ __CA __ __ __ __ __ __CA __ __ __ __ __ __CA __ __ __ __ __ __CA __ __ __ __ __ __ CA __ __CSHR __ __ __ __ __ __ __ __CA ___CA __ __ __ __ __ __CA __ __ __ __ __ __CA __ __ __ __ __ __CA __ __ __ __ __ __CA __ __ __ __ __ __CA __ __ __ __ __ __CA __ __ __ __ __ __ CA (1-99)
STATUS 0= Reset total at Z1, Z2, & System Open 1= Non-Resettable Total
DATA 1- DATA 7
A-D: 0001-9999 = Report Code E: 0= Total F: 0= No Calculation 0001-0999 = Positive Constant 1= Counter 1= Add (+) (1 to 999) 2= Register Total 2= Subtract (-) 8001-8999 = Negative Constant 3= Register Counter 3= Multiply (x) (-1 to -999) 4= Absolute Total 4= Divide (round down) 0001-0099 = Linked Table # 5= Absolute Counter 5= Divide (5/4 rounding) 6= Absolute Total from Register Report 6= Divide (round up) 7= Absolute Counter from Register Report 7= Link to Table # 8= Constant Value 8= End Calculation 9= Recall Buffer Data 9= Store Result to Buffer

Programming
3-42 Panasonic 5500 Series Programming Instructions – Version LQ3.5
P23 Tax Configuration
Use Program 23 to define tax tables, tax rates, and VAT rates for your location. You can enter assignments for up to three taxes. Enter Tax 1 assignments in the 100 Addresses; enter Tax 2 assignments in the 200 Addresses, and enter Tax 3 assignments in the 300 Addresses of the P23 worksheet. There are four possible tax configurations. Your state may use a straight percentage, a tax table, or a combination of the two. Value Added Tax (VAT), where the tax is included in the price of the item, is also available. Refer to the explanation for the type of tax you use. Tax Rate (Straight Percentage) Tax Rates are the easiest type of tax to program. In the first P23 address, you must specify the highest non-taxed amount and follow that entry with the code (4) that signals a Tax Rate. If, for example your first penny of tax begins at 5¢, enter '44' in the first address. (The first 4 states that tax starts at 4¢, and the second 4 identifies a Tax Rate.) The second address identifies the percentage rate. (An entry of 6500 equals 6.5%). Because Tax Rates do not use exception or repeat break points, your last two entries are always '100' and '100'. A sample tax rate program is provided below. 1. ___ ___ ___ ___ ___ ___ ___ 4 (Highest Amount not Taxed) (4= Tax Rate) 2. ___ ___ ___ ___ ___ ___ ___ ___ (Tax Rate Percentage xxxxx.xxx) 3. 1 0 0 (Always 100) 4. 1 0 0 (Always 100) Note: 100 entries take two lines and appear as "01" "??" on the Tax Program Printouts.
Tax Rate Examples 1) 5% Tax Rate:
104 - highest non-taxed amount: $0.10 5000 - 5% Rate 100 - Exception 100 - Repeat
2) 3% Tax Rate: 154 - highest non-taxed amount: $0.15 3000 - 3% Rate 100 - Exception 100 - Repeat

Programming
Panasonic 5500 Series Programming Instructions – Version LQ3.5 3-43
Value-Added Tax (VAT): For Value-Added Tax, enter the highest non-taxed amount in the first address, with a '2' to signal VAT. Enter the rate in the second address, and '100' in the next two addresses. 1. ___ ___ ___ ___ ___ ___ ___ 2 (Highest Amount not Taxed) (2= VAT Tax) 2. ___ ___ ___ ___ ___ ___ ___ ___ (Tax Rate Percentage xxxxx.xxx) 3. 1 0 0 (Always 100) 4. 1 0 0 (Always 100) Note: Do not use Report Code 92 with VAT. Tax Tables If your tax cannot be categorized as a straight percentage, you may need to set up a tax table. In a tax table, each penny of tax falls after an assigned increment. For example, the first penny may be charged after $.10, the second penny after $.21, etc. If you are using this type of tax, obtain the breaks for your area, then find the "pattern" or repeating point. You must also note exceptions, as shown in the description below. 1. ___ ___ ___ ___ ___ ___ ___ 0 (Highest Amount Not Taxed) (0=Table) 2. 1 0 0 0 ___ ___ ___ ___ (Always 1000) (tax on $10.00: 35¢ = 035) 3. ___ ___ ___ ___ ___ ___ ___ ___ ... exception breakpoints; enter all breaks that precede the repeating pattern. Precede the final exception with '1' (End-of-Exception). 4. ___ ___ ___ ___ ___ ___ ___ ___ ...repeat breakpoint. Enter each of the breaks which form the repeating pattern. Precede the final break with a '1'.
VAT Examples
1) 5.2% VAT: 102 - Highest non-taxed amount: $.10
5200 - 5.2% VAT rate 100 - Exception 100 - Repeat
2) 4% VAT:
002 - VAT; $.00 not taxable 4000 - 4% VAT rate 100 - Exception 100 - Repeat
4% Tax Table Example 120 Tax starts after $.12 10000040 Tax on $10.00 ($.40) 12 First exception 22 Second exception 25 Third exception 128 Final exception 125 First (and final) Repeat Break

Programming
3-44 Panasonic 5500 Series Programming Instructions – Version LQ3.5
Tax Tables with Percentages Your state may use a tax formula that begins with a table, but at some point leads into a straight percentage. If your state uses this taxing system, the first address in P23 includes three important elements: the starting point for the defined percentage, the highest non-taxed amount, and the code (8) that signals this type of tax. The second address is used to specify the percentage rate, and the remaining addresses are used to enter the break points of the tax table. 1. ___ ___ ___ ___ ___ ___ ___ 8 (% Start Point)(No Tax Amt.)(8=Table) 2. ___ ___ ___ ___ ___ ___ ___ ___ ( Percentage Rate - xxxxx.xxx ) 3. ___ ___ ___ ___ ___ ___ ___ ___ ... exception breakpoints for the tax table. Enter all exceptions (breaks which do not fit into a pattern). Precede the final exception with a '1' to signal the end of the exception table. 4. ___ ___ ___ ___ ___ ___ ___ ___ ...repeat breakpoint. Enter each of the breaks that form the repeating pattern of the tax table. Precede the final repeat break with a '1' to signal the end of the repeat pattern. Enter up to three tax configurations in Program 23. These configurations will be referenced throughout the program to identify the tax that applies to your menu items, destinations, coupons, etc.
Note: If you already have tax configurations for the Panasonic 5000, 7500, or 7700 Series workstations, you can use the same assignments for the 5500 Series workstations.
6% Table/Percentage Example
Percentage starts at 1090088 - $1.09; highest non-taxed amount is $.08. 6000 - 6% Rate 9 - First exception 16 - Exception 17 - Exception 17 - Exception 16 - Exception 17 - Exception 117 - Final Exception 116 - First (and final) Repeat

Programming
Panasonic 5500 Series Programming Instructions – Version LQ3.5 3-45
P23 Tax Table Worksheet (P2 Mode) Beginning Sequence: 23 CASH ADD Tax 1 ADD Tax 2 ADD Tax 3 100 CSHR ______________ CA 200 CSHR _______________ CA 300 CSHR _______________ CA 101 CSHR ______________ CA 201 CSHR _______________ CA 301 CSHR _______________ CA 102 CSHR ______________ CA 202 CSHR _______________ CA 302 CSHR _______________ CA 103 CSHR ______________ CA 203 CSHR _______________ CA 303 CSHR _______________ CA 104 CSHR ______________ CA 204 CSHR _______________ CA 304 CSHR _______________ CA 105 CSHR ______________ CA 205 CSHR _______________ CA 305 CSHR _______________ CA 106 CSHR ______________ CA 206 CSHR _______________ CA 306 CSHR _______________ CA 107 CSHR ______________ CA 207 CSHR _______________ CA 307 CSHR _______________ CA 108 CSHR ______________ CA 208 CSHR _______________ CA 308 CSHR _______________ CA 109 CSHR ______________ CA 209 CSHR _______________ CA 309 CSHR _______________ CA 110 CSHR ______________ CA 210 CSHR _______________ CA 310 CSHR _______________ CA 111 CSHR ______________ CA 211 CSHR _______________ CA 311 CSHR _______________ CA 112 CSHR ______________ CA 212 CSHR _______________ CA 312 CSHR _______________ CA 113 CSHR ______________ CA 213 CSHR _______________ CA 313 CSHR _______________ CA 114 CSHR ______________ CA 214 CSHR _______________ CA 314 CSHR _______________ CA 115 CSHR ______________ CA 215 CSHR _______________ CA 315 CSHR _______________ CA 116 CSHR ______________ CA 216 CSHR _______________ CA 316 CSHR _______________ CA 117 CSHR ______________ CA 217 CSHR _______________ CA 317 CSHR _______________ CA 118 CSHR ______________ CA 218 CSHR _______________ CA 318 CSHR _______________ CA 119 CSHR ______________ CA 219 CSHR _______________ CA 319 CSHR _______________ CA 120 CSHR ______________ CA 220 CSHR _______________ CA 320 CSHR _______________ CA 121 CSHR ______________ CA 221 CSHR _______________ CA 321 CSHR _______________ CA 122 CSHR ______________ CA 222 CSHR _______________ CA 322 CSHR _______________ CA 123 CSHR ______________ CA 223 CSHR _______________ CA 323 CSHR _______________ CA 124 CSHR ______________ CA 224 CSHR _______________ CA 324 CSHR _______________ CA 125 CSHR ______________ CA 225 CSHR _______________ CA 325 CSHR _______________ CA 126 CSHR ______________ CA 226 CSHR _______________ CA 326 CSHR _______________ CA 127 CSHR ______________ CA 227 CSHR _______________ CA 327 CSHR _______________ CA 128 CSHR ______________ CA 228 CSHR _______________ CA 328 CSHR _______________ CA 129 CSHR ______________ CA 229 CSHR _______________ CA 329 CSHR _______________ CA 130 CSHR ______________ CA 230 CSHR _______________ CA 330 CSHR _______________ CA 131 CSHR ______________ CA 231 CSHR _______________ CA 331 CSHR _______________ CA 132 CSHR ______________ CA 232 CSHR _______________ CA 332 CSHR _______________ CA 133 CSHR ______________ CA 233 CSHR _______________ CA 333 CSHR _______________ CA 134 CSHR ______________ CA 234 CSHR _______________ CA 334 CSHR _______________ CA 135 CSHR ______________ CA 235 CSHR _______________ CA 335 CSHR _______________ CA 136 CSHR ______________ CA 236 CSHR _______________ CA 336 CSHR _______________ CA 137 CSHR ______________ CA 237 CSHR _______________ CA 337 CSHR _______________ CA 138 CSHR ______________ CA 238 CSHR _______________ CA 338 CSHR _______________ CA 139 CSHR ______________ CA 239 CSHR _______________ CA 339 CSHR _______________ CA 140 CSHR ______________ CA 240 CSHR _______________ CA 340 CSHR _______________ CA : : : 150 CSHR ______________ CA 250 CSHR _______________ CA 350 CSHR _______________ CA

Programming
3-46 Panasonic 5500 Series Programming Instructions – Version LQ3.5
P24 System Flags
System Flags define basic system parameters, including manager options, print options, tax options, and report options. After RAM Clear, default values are loaded into the P24 Flags. These defaults represent the most commonly selected options. You can, however, change them to any value needed for the application. System Flags consist of 2-digit entries you assign in Addresses 100-199. The worksheets on the next several pages provide a description of the available options, with the values the system uses to identify your selections. The options are divided into A and B groups. If you want to select an option, enter its value in the space provided to the left. If the option is listed under the A heading, enter the value in the A column. If it is listed under B, enter its value in the B column. You can add values if you need more than one option from a group. Or, if you do not need any of the listed options, you can enter '0'. If you do not enter a value for the address, the system refers to the default value. In most cases, the defaults are zero, but exceptions are noted for your reference. Flag 109 is shown below to illustrate the System Flag procedure. This Flag, or Address, lists options that pertain to MGR Lock compulsion. If you need to require manager authorization (MGR lock) for Waste entries, enter a '4' in the A column of the worksheet. If you also want to set the manager and time entry requirements for Delete, add the values (1 + 2) and enter the sum in the B column, as shown below. Address 109: A: 1= Require MGR for Promo.
2= Require MGR for No Tax. 4= Require MGR for Finished Waste.
B: 1= Require MGR for Delete. 2= Require Time entry for Delete
4 3 109 CSHR ___ ___CA
Default = 6 1
If you do not need any of these options for your application, you simply enter '00' for this address. Note that the Default Value for Flag 109 is '61'. If you do not enter a different value, options 6 and 1 are set, requiring MGR Mode for No Tax, Finished Waste, and Delete. Whenever the default is 0, and you do not need any of the listed options, you can bypass the address with the CSHR key.

Programming
Panasonic 5500 Series Programming Instructions – Version LQ3.5 3-47
P24 System Flags (Page 1 of 15)
Address 100: A: 1= Disable item print on the Receipt Printer at finalization. 2= Disable item print on the System Journal at finalization. 4= Enable item-by-item print. This print is valid only for Direct Printers connected to the workstation. It is not valid for Shared Printers. (If set, the Direct Printer cannot act as a back-up printer.) B: 1= Print Taxable Subtotal on Receipt and Journal. 2= Print General Itemizer on Receipt and Journal. 4= Enable Stub Print on the Direct Receipt Printer (not available for LQ1.0).
100 CSHR ___ ___ CA
Default = 2 0
Address 101: A: 1= Print Preamble on Receipt. (If set, the preamble also prints on the Kitchen
Printer, if a shared printer performs Receipt and Kitchen Printer functions.) 2= Print Postamble on Receipt. 4= Print Receipt upon depression of a Subtotal/Destination (In, Out, etc.) key. B: 1= Allow multiple receipts to be issued with the Receipt Issue key. 2= Print Programming changes to the first available printer listed: D/P Journal,
R/P Journal, R/P Receipt, R/P Report. 4= Enable Tray Totals. (If set, Group Payment is disabled. Tax is printed for
each tray total receipt.)
101 CSHR ___ ___ CA Default = 3 1
Address 102: A: 2= Enable Z1 and Z2 Report menus. [If not set, Z1 menus at the Basic
workstations are blank. At the Master workstation, the Z1 menu displays System Open/Close, and the Z2 screen displays the Z2 All Reset option.]
4= Allow Individual Z1/Z2 Reports with a Macro, even if Flag 102A disables the Z1/Z2 menus.
B: 1= Print the NRGT on X1 & Z1 Register Reports. 4= Reset the Transaction number at each Z1 Register Report.
102 CSHR ___ ___ CA Default = 2 1
Address 103: A: 1= Enable Priority Print/Display for items.
2= Enable Priority Print/Display for Condiments/Modifiers. 4= Enable 256 (vs. 8) Class Match Codes.
B: 1= Print the Training Grand Total (TRGT) on Register Reports. 2= Disable the Drawer and R/P in TR Mode. 4= Disable CAID & DRTL print on Register & Drawer Reports.
103 CSHR ___ ___ CA

Programming
3-48 Panasonic 5500 Series Programming Instructions – Version LQ3.5
P24 System Flags (Page 2 of 15)
Address 104: A: 1= Enable odd/even numbering for 2-drawer systems. (Odd log numbers
use A drawers; even log numbers use B drawers.) 2= Do not open the drawer for the Drawer Report. (This flag is only valid
if Flag 128B is >2.) 4= Do not open the drawer when a sale total is zero ($.00). B: 1= Enable the Error Beeper. 2= Enable Automatic Clear for REG Mode transactions. 4= Reset the TRGT with a Z1 Register Report.
104 CSHR ___ ___ CA
Default = 0 3
Address 105: A: 1= Disallow Coupons for orders with Universal %4 or %5. Use this to
prevent coupon entries on discounted orders. 2= Allow Cashier Cancel after payment. (Not Recommended!) 4= Allow Break-ins at the Order-Taker. B: 1= Require Amount Tender for Cash and Check payments. 2= Inhibit Split Tendering on Cash and Check keys. 4= Require MGR for Negative (Credit Balance) and $.00 sales.
105 CSHR ___ ___ CA
Default = 0 4
Address 106: A: 1= Enable Drawer Compulsion, where the drawer must be closed before
orders can be registered. 2= Enable the Low Paper Warning for Direct Printers. Do not set this
option for Thermal Printers. 4= Record X1 Actual Inventory entries. [If not set, X1 entries provide a
temporary usage calculation that resets when you exit X1 Mode.] B: 1= Require Deposit (Deposit #1) entry at System Close. 2= Require Actual Inventory (for ingredients 1 & 2 only) at System Close. 4= Require MGR for Cashier Log-on.
106 CSHR ___ ___ CA
Default = 6 0
Address 107: This flag does not downline! A: 1= Require a Destination (In, Out, etc.) at the start of Counter Terminal
orders. 2= Allow Destination entries (other than D/T) at the Drive-Thru Cashier
Station and Order-Taker. B: 1= Allow only one Subtotal Discount per transaction. 2= Allow only one Discountable Subtotal (DCTL) Discount per
transaction.
107 CSHR ___ ___ CA

Programming
Panasonic 5500 Series Programming Instructions – Version LQ3.5 3-49
P24 System Flags (Page 3 of 15)
Address 108: A: 1= Enable Speed of Service. 2= Require Cash Drawer Close for Park/Serve. [Also see Flag 106A1 for SOS Cash Drawer Close timer effect.] B: 1= Allow order changes at the Cashier Station without the Change Order key. 2= Disable the Compulsory Condiment Display. 4= Enable Journal print & EJ update at Cash/Store (vs. finalize). Set this
option to enable CCTV & Drive-Thru Boards; it affects only direct printers at CS and OT/CS workstations.
0 108 CSHR ____ ____ CA
Address 109: A: 1= Require MGR for Promo. 2= Require MGR for No Tax. 4= Require MGR for Finished Waste. B: 1= Require MGR for Delete. 2= Require Time Entry for Delete. 4= Do not allow Time Entry for Delete.
109 CSHR ____ ____ CA
Default = 6 1
Address 110: A: 1= Log off Cashiers at the end of each transaction. [If not set, cashiers
remain logged on until logged off.] 2= Log off Managers at the end of each transaction. [If not set,
managers remain logged on until logged off.] B: 1= Require MGR for Received-on-Account. 2= Require MGR for Paid Out. 4= Require MGR for Wait Recall of Cashier Cancel orders.
110 CSHR ____ ____ CA
Address 111: A: 4= Require MGR for Group Payment at the Cashier Station. B: 1= Require MGR for Voids. 2= Require MGR for All Void/Cancel. 4= Disallow Error Correct on the Void key.
111 CSHR ____ ____ CA
Address 112: A: 1= Negative PLUs do not update the PLU Total. 2= Do not reset PLU Staydown level at the end of each order. The level
stays in effect until you press a new shift key. 4= Reset the Keyboard to Menu Level 1 upon depression of a payment
key. B: 2= Require MGR for open, subtracting PLUs.
112 CSHR ____ ____CA

Programming
3-50 Panasonic 5500 Series Programming Instructions – Version LQ3.5
P24 System Flags (Page 4 of 15)
Address 113: A: 1= Enable 48 programmable ranges for Time Reports. [If not set, default
half-hourly ranges are enabled.] 2= Enable 96 time ranges. If set, Time Reports track sales in fixed 15-
minute intervals. (This option is not valid if you set Option 1, above.) 4= Time totals are based on Gross Sales (GSTL). [If not set, time totals
are based on Net Sales (NSTL).] B: 0= Fractions round down to the nearest whole number.
5= Normal rounding [fractions >5 round up, <5 round down] 9= Fractions round up to the next whole number.
113 CSHR ____ ____CA
Default = 0 5
Address 114: A: 1= Assign Preset PLUs in multiples of 10.
2= Assign Preset PLUs in multiples of 100. 3= Assign Preset PLUs in multiples of 1000. 4= Multiply PLU Shift levels 1-9 by 1000. If set, Shift 1 becomes Shift
1000, Shift 2 becomes 2000, etc. B: 1= Enable Staydown for Shifts 10-90. All items entered after the shift
are modified by the shift level. 2= Print the PLU number on the customer receipt. 4= Enable Staydown Mode for Shift levels 0-9.
114 CSHR ____ ____CA
Default = 1 0
Address 115: A: 1= Disable Pending Order Detection for Cashier Z Reports and System
Close. [0= pending orders must first be finalized.] 2= Do Not allow sales between System Close and Open. (Options 2 & 4
affect sales at the System Master workstation only.) 4= Require MGR for sales between System Close and Open.
B: 1= Require Subtotal before payment. 2= Require Table # prior to payment. 4= Enable the running Subtotal on the Customer Display.
115 CSHR ____ ____CA
Address 116: A: Not Used - Enter 0. B: Not Used - Enter 0.
0 0 116 CSHR ____ ____CA
Default = 2 1

Programming
Panasonic 5500 Series Programming Instructions – Version LQ3.5 3-51
P24 System Flags (Page 5 of 15)
Address 117: A: 1= Tip 2 updates Tax 1.
2= Tip 2 updates Tax 2. 4= Tip 2 updates Tax 3.
B: 1= Promo does not affect Tax 1. 2= Promo does not affect Tax 2. 4= Promo does not affect Tax 3.
117 CSHR ____ ____CA
Address 118: This flag does not downline! A: 0= Default this workstation to Destination 10.
1= Default this workstation to Eat-in (Destination 1). 2= Default this workstation to Take-out (Destination 2). 3= Default this workstation to Drive-Thru (Destination 3). 4= Default this workstation to Phone Order (Destination 4). 5= Default this workstation to No Destination (Destination 5). 6= Default this workstation to Destination 6. 7= Default this workstation to Destination 7. 8= Default this workstation to Destination 8. 9= Default this workstation to Destination 9.
B: Not Used - Enter 0.
0 118 CSHR ____ ____CA
Default = 1 0
Address 119: A: 0= Value Added Tax (VAT) and Tax Rates round down.
5= VAT and Tax Rates use normal rounding. 9= VAT and Tax Rates round up to nearest whole number.
See Flag 113 for other percentage rounding. B: 1= Require MGR for Promo Subtotal.
2= Enable Automatic Wait at the Counter Terminal. After pressing Cash, orders automatically enter wait mode.
4= Display Wait & Phone Orders in brackets at the bottom of the Counter Terminal screen. This option is required for Phone Order handling. [If not set, up to 3 Wait orders are held on-screen at the Counter Terminals.][Must also set if using Flag 131 Option A=1]
119 CSHR ____ ____CA
Default = 5 0
Address 120: A: Not Used - Enter 0. B: Not Used - Enter 0.
0 0 120 CSHR ____ ____CA
Default = 0 2

Programming
3-52 Panasonic 5500 Series Programming Instructions – Version LQ3.5
P24 System Flags (Page 6 of 15)
Address 121:
Not Used - Enter 00.
0 0 121 CSHR ____ ____CA
Address 122: (See note after Flag 123, Option B) A: 1= Cash key acts as Receipt Issue.
2= # key acts as Receipt Issue. B: 1= Cash key acts as No Sale.
2= # key acts as No Sale.
122 CSHR ____ ____CA
Default = 0 1
Address 123: A: 1= Require MGR Mode keylock for manager overrides, even if a MGR
1 or 2 level manager is logged on. [If not set, either MGR log-on or MGR Mode allows manager overrides.]
2= Require both MGR (1 or 2) log-on and MGR Mode keylock for manager overrides.
B: 1= Cash key acts as Date/Time Issue. 2= @ key acts as Date/Time Issue.
Note: Cash and # keys are limited to a choice of one Flag 122-123 function. For example, the Cash key cannot act as a Receipt Issue key if it acts as a No Sale key.
123 CSHR ____ ____CA
Address 124: A: Not Used - Enter 0. B: 2= Print prices on the Remote Printer. Two lines print per item. [If not
set, bold items print on one line, without prices.]. 4= Print Tax and Total on Kitchen Printer orders. (To enable tax print,
Flag 126B must be >8.)
0 124 CSHR ____ ____CA
Address 125: A: 1= Do not allow System Open at this workstation.
2= Disable daily Time Clock Reset at System Close. B: Not Used - Enter 0.
0 125 CSHR ____ ____CA

Programming
Panasonic 5500 Series Programming Instructions – Version LQ3.5 3-53
P24 System Flags (Page 7 of 15)
Address 126: A: 1= Include Tax in Net Sales and all Destinations (1-10).
2= Update NSTL and In/Out/DT counters when the order total is $.00. 4= Void, Error Correct, and All Void update NRGT.
B: 1= Disable Tax 1 Print. 2= Disable Tax 2 Print. 4= Disable Tax 3 Print. 8= Print a sum of all taxes (Tax 1-Tax 3).
126 CSHR ____ ____CA
Default = 0 8
Address 127: A: Not Used - Enter 0. B: 1= Require MGR for Timekeeping entries.
2= Use the last 4 digits of the Employee Code for time clock entries. 4= Use the last 6 digits of the Employee Code. 6= Use the last 8 digits of the Employee Code. 8= Use the last 10 digits of the Employee Code.
Note: If Flag 127 <2, the Employee Number (vs. employee code) is used for Clock-in, Clock-out, and Break entries.
0 127 CSHR ____ ____CA
Default = 6 0
Address 128: A: 1= Display @ instead of # for order numbers on the one-panel Recap
screen when the order has over nine items. If you set this option and have more than nine lines of items, Order #101 appears as @101 on the Recap screen. (The @ symbol helps make the cashier aware that not all items display on the single panel of the Recap screen.)
2= Display Double Lines between panels of the Lookup screen order. The Lookup screen is the screen normally displayed to the cashier for the current order. If you set this option and an order continues into multiple panels, double lines appear between the panels of the order.
B: 1= Disable Drawer Assignment compulsion. [If not set, a drawer number must be entered at each log-on]
2= Open the cash drawer at cashier log-on.
128 CSHR ____ ____CA
Default = 0 1
Address 129: A: Enter the number of lines (0-9) to feed between orders on the kitchen
printer. Your entry is multiplied by 2; a 5 entry feeds ten lines between orders. (The auto-cutter is disabled for entries < 3. Enter 3 for TMV200 printer with auto-cutter)
B: 1= Disable Price display on the Menu Look-up screen. 2= Disable the Group Menu Look-up screen. 4= Display 12 items per scroll on the Menu Look-up screen. This option
is only available for use with 8-character descriptors. [If not set, 6 items display per scroll.]
129 CSHR ____ ____CA
Default = 2 0

Programming
3-54 Panasonic 5500 Series Programming Instructions – Version LQ3.5

Programming
Panasonic 5500 Series Programming Instructions – Version LQ3.5 3-55
P24 System Flags (Page 8 of 15)
Address 130: A: 1= Tandem PLUs follow the R/P Steering of their linked PLU.
2= Enable a JS-800 Thermal Printer. [If not set, a JS-800RM Printer is enabled. Enter '2' if you use both printers.]
B: 1= Display Wait, Phone Order, and D/T times in minutes and seconds. [If not set, the time displays in seconds only.]
2= Stop the Drive-Thru timer after pressing the Serve or Park keys (versus the Cash key).
4= Enable red/black print for printers that support red print.
130 CSHR ____ ____CA
Default = 0 1
Address 131: A: 1= 4 panel 21 lines: display 2 panel previous order, with up to 21 line
items including tax, total, and tender line. Display 2 panel current order, on the 22nd line entry expand the view to a 3 panel order area, hiding the previous order panel. (Option B must also = 2, and flag 119 option B should be set to include +4.)
B: 0= 3 panel display format, 8 line items including totals in all panels. 1= 3 panel 13 lines: display 3 panels - View up to 13 line items without
totals in previous panel and prev. -1 display areas, on the 9th line entry in the current order – expand the view to a 2 panel current order area, hiding all previous order panels.
2= 4 panel 26 lines: display 2 panel previous order, View up to 26 line items without totals. In 2 panel current order, on the 22nd line entry expand the view to a 3 panel order area, hiding the previous order panel.
0 0 131 CSHR ____ ____CA
Address 132: A: 1= Disable Like Item Consolidation on the screen, direct and system
printers. [If not set, identical items consolidate.] 2= Report only items for which Actual Inventory has been entered. This
option applies to the Inventory Report. B: Not Used - Enter 0.
0 132 CSHR ____ ____CA

Programming
3-56 Panasonic 5500 Series Programming Instructions – Version LQ3.5
P24 System Flags (Page 9 of 15)
Address 133: A: Enter the count (0-9) for GST exceptions. (The system adds '5' to
your entry; if you enter 2, the exception is 7.) B: 1= Do not allow order entry or adjustment after Subtotal. If set, you can
only enter a payment, promo, discount, wait, tax shift, currency exchange, or destination after SBTL. You cannot register items, void items, or tender coupons.
2= Do not display the Tax or Total until Subtotal. 4= Do not display item prices.
133 CSHR ____ ____CA
Address 134: A: 1= Allow Cashier Log-On with an employee card.
2= Allow Manager Log-On with an employee card. B: Enter the number of minutes (1-9) after which the workstation screen
goes blank for REG Mode orders. Enter '0' to disable the Screen Saver.
134 CSHR ____ ____CA
Address 135:
A: 1= Disable the "Training" message and allow Wait, Cashier Cancel, and Interrupt in TR Mode. [If not set, the "Training" message displays, but the listed functions are disabled in Training Mode.]
B: 1= Base Reorder Reports on X2/Z2 (vs. X1/Z1) data. 2= Print Variance Cost % (VCST%) on X1/X2 Inventory Reports. [If
not set, Efficiency (EFF%) replaces VCST%.] 4= Enable Unit Inventory handling, where ingredients are always
inventoried by the smallest unit. [If not set, Multi-pack (unit/pack/case) handling is enabled.]
135 CSHR ____ ____CA
Address 136: A: 1= Enable Realtime Scale Mode. This option should be set for all
systems using Scale PLUs. 2= Measure scale weight in kilograms (kg.) [If not set, the scale
measures weight in pounds (lbs.)] B: 1= Move the scale decimal to the 1st position (xxxxx.x).
2= Move the scale decimal to the 2nd position (xxxx.xx). 3= Move the scale decimal to the 3rd position (xxx.xxx).
136 CSHR ____ ____CA
Default = 0 2

Programming
Panasonic 5500 Series Programming Instructions – Version LQ3.5 3-57
P24 System Flags (Page 10 of 15)
Address 137: A: 1= Allow manual weight entries. Manual entries are not allowed if
weight is detected on the scale. 2= Allow manual scale entries only if "Comm Busy" displays.
B: 0= Scale fractions (weight x rate) round down. 5= Scale fractions use normal rounding. 9= Scale fractions round up.
137 CSHR ____ ____CA
Default = 0 5
Address 138: A: 4= Enable Cashier Interrupt and disable Wait/Phone Order. [If not set,
Wait/Phone Orders are allowed; Interrupt is not. Interrupt is not available for LQ1.3.]
B: 1= Report PLUs by Group at System Open & Close. [If not set, PLUs report in sequential order].
2= Print NSTL w/GSTL on PLU and Group Reports. 4= Keep the Menu Look-Up by Group list on the screen after a PLU
selection.
138 CSHR ____ ____CA
Address 139: A: 0= Do not use a system decimal.
1= Position the system decimal in the 1st position (xxxxx.x). 2= Position the system decimal in the 2nd position (xxxx.xx). [Must be
set when using Gift Cards.] 3= Position the system decimal in the 3rd position (xxx.xxx). 4= Disable the "Closed" message on customer display. [If not set, a
"Closed" message displays while the keylock is in the Closed position.]
B: 1= Enable 2-digit Masking for Menu Look-up and Compulsory Modifier lists. Listed PLUs display 2-digits numbers, instead of the programmed PLU #, to simplify selection.
2= Allow overrides of the required number of modifiers. 4= Do not display quantity '1' for modifiers/memo modifiers. [If not set,
quantities display for all modifiers.]
139 CSHR ____ ____CA
Default = 2 0

Programming
3-58 Panasonic 5500 Series Programming Instructions – Version LQ3.5
P24 System Flags (Page 11 of 15)
Address 140: A: 0= Auto-Tend/Next$ (key code 94) is not used.
1= Auto-Tend/Next$ rounds to the nearest penny (no rounding). 2= Auto-Tend/Next$ rounds up to the nearest dime. 3= Auto-Tend/Next$ rounds up to the nearest dollar. 4= Auto-Tend/Next$ rounds up to the nearest $10.00. 5= Auto-Tend/Next$ rounds up to the nearest $100.00 6= Auto-Tend/Next$ rounds up to the nearest $1000.00. 7= Auto-Tend/Next$ rounds up to the nearest $10000.00.
B: Not Used - enter 0.
0 140 CSHR ____ ____CA
Default = 3 0
Address 141: A: Enter a value (0-7) for phone number digits. (0= No limit. 1=
Require more than 1 digit, 2= Require more than 2 digits... 7= Require more than 7 digits.)
B: 1= Require Phone # entries for Wait/Phone Orders. (If used at Counter Terminals, Flag 119B must be >4.)
2= Display the quantity of Wait/Phone orders now stored. [If not set, order numbers display at the bottom of the screen.]
141 CSHR ____ ____CA
Address 142: A: 1= Allow Phone Order functions through the Wait key. (If used, do not set Pending Order Detection-Flag 115A-for cashier reports. Workstations can receive downlined information, and managers can access MGR X1 menus, even if Wait/Phone Orders exist.) 2= Print receipts for Wait and Phone Orders. 4= Override Receipt Stop for Wait and Phone Orders. B: 1= Display 6 lines (vs. 12) for Wait/Phone Recall. If set, the phone #, call-in time, pick-up time, and cashier display. 2= Allow a pick-up time entry on the TABLE # key. 4= Require a pick-up time entry for all Wait & Phone Orders.
142 CSHR ____ ____CA
Address 143:
A: 1= Do not allow Wait for unpaid orders. B: 1= Enable System-wide Phone Order/Wait functions.
2= Enable Pending Order Detection for System Close.
143 CSHR ____ ____CA

Programming
Panasonic 5500 Series Programming Instructions – Version LQ3.5 3-59
P24 System Flags (Page 12 of 15)
Address 144:
A: Not Used - Enter 0. B: 1= Restrict main PLU quantity entries to a maximum of 9. If set,
quantities greater than 9 require the @ key.
0 144 CSHR ____ ____CA
Address 145: A: Not Used - Enter 0. B: 1= Activate a second drawer for currency exchange. (The second drawer
holds foreign currency and opens when you use the Cash 2 key with Currency Exchange 4.)
0 145 CSHR ____ ____CA
Address 146:
AB: Enter the 2-digit number of seconds before the Drawer Open Beeper sounds. (00= Disable the Drawer Open Beeper.)
146 CSHR ____ ____CA
Address 147:
AB: Enter the number of seconds before the Customer Display blinks when the drawer is open. (Flag 146 must be >1.)
147 CSHR ____ ____CA
Address 148:
A: Enter the Charge # (0-9) for Mondex Card functions. (1= Charge 1, 2=Charge 2, 0= Mondex Card functions not used.)
B: 1= Enable Mondex Card functions.
148 CSHR ____ ____CA
Address 149: A: 1= Reset Direct Printer settings in Flag 236/237 when a "W/S Printer
Busy" message displays. B: 1= Do not load the default keyboard after a P3 power-up.
2= Do not reset Flag 236/237 after a P3 power-up. 4= Reset Flag 236/237 after a MGR Mode restart.
149 CSHR ____ ____CA
Address 150: A: Not Used - Enter 0. B: 1= Enable Rounding to the nearest 5¢ for Discount 10. This option is
valid for non-taxable sales only. If set, the system ignores Flag 328/329 programming for Charge 10.
2= Update NSTL and GSTL with 5¢ Rounding.
0 150 CSHR ____ ____CA

Programming
3-60 Panasonic 5500 Series Programming Instructions – Version LQ3.5
P24 System Flags (Page 13 of 15)
Address 151: A: Enter the amount (5-9) that rounds up for 5¢ Rounding. B: Enter the amount (0-4) that rounds down for 5¢ Rounding.
Example: 72= $.00-.02 .00; .03-.07 .05; .08-.09 .10. 94= $.00-.04 .00; .05-.09 .05 50= $.00 .00; .01-.05 .05; .06-.09 .10.
151 CSHR ____ ____CA
Default = 7 2
Address 152: A-B: Not Used - Enter 00.
0 0 152 CSHR ____ ____CA
Default = 7 2
Address 153: A: 1= Display the Countdown quantity at the bottom of REG Mode screens. The "countdown" shows how many eligible items must be registered to meet a Mix & Match quantity requirement. [If set, Table #1 defines the counted items; it cannot be used for normal Mix & Match searches. The countdown quantity appears in place of the PLU Shift level normally displayed.] 2= Do not display the "Non-Eligible" message when Mix & Match requirements are not met within the sale. B: 1= Enable Mix & Match functions. [If set, Promo is not allowed.] 2= Require the Mix&Match key before Subtotal and display the "Do Mix/Match" message. 4= Require the Mix&Match key after a Mix&Match Clear.
153 CSHR ____ ____CA
: (Addresses 154 through 159 are not used.)
Address 160: A: 1= Update Tax 1 for Destination 2 (Take-out) orders.
2= Update Tax 2 for Destination 2 (Take-out) orders. 4= Update Tax 3 for Destination 2 (Take-out) orders.
B: 1= Update Tax 1 for Destination 1 (Eat-in) orders. 2= Update Tax 2 for Destination 1 (Eat-in) orders. 4= Update Tax 3 for Destination 1 (Eat-in) orders.
160 CSHR ____ ____CA
Default = 2 1
Address 161: A: 1= Update Tax 1 for Destination 4 (Phone) orders.
2= Update Tax 2 for Destination 4 (Phone) orders. 4= Update Tax 3 for Destination 4 (Phone) orders.
B: 1= Update Tax 1 for Destination 3 (D/T) orders. 2= Update Tax 2 for Destination 3 (D/T) orders. 4= Update Tax 3 for Destination 3 (D/T) orders.
161 CSHR ____ ____CA
Default = 2 2
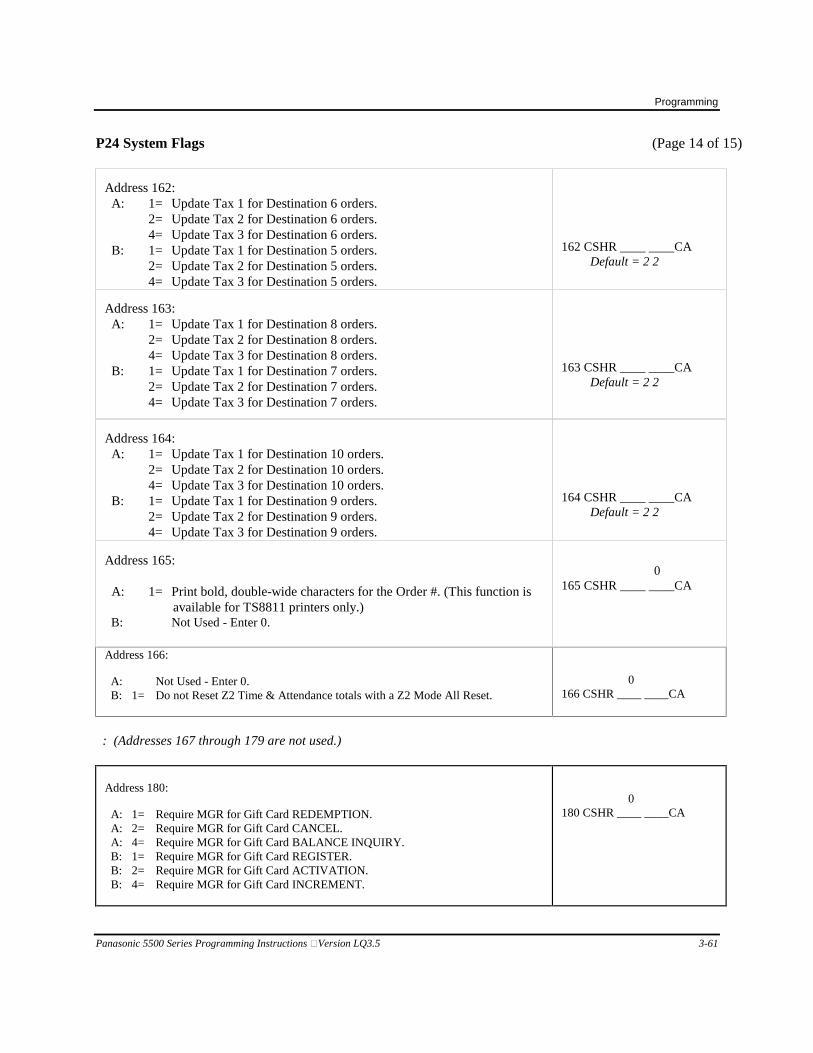
Programming
Panasonic 5500 Series Programming Instructions – Version LQ3.5 3-61
P24 System Flags (Page 14 of 15)
Address 162: A: 1= Update Tax 1 for Destination 6 orders.
2= Update Tax 2 for Destination 6 orders. 4= Update Tax 3 for Destination 6 orders.
B: 1= Update Tax 1 for Destination 5 orders. 2= Update Tax 2 for Destination 5 orders. 4= Update Tax 3 for Destination 5 orders.
162 CSHR ____ ____CA
Default = 2 2
Address 163: A: 1= Update Tax 1 for Destination 8 orders.
2= Update Tax 2 for Destination 8 orders. 4= Update Tax 3 for Destination 8 orders.
B: 1= Update Tax 1 for Destination 7 orders. 2= Update Tax 2 for Destination 7 orders. 4= Update Tax 3 for Destination 7 orders.
163 CSHR ____ ____CA
Default = 2 2
Address 164: A: 1= Update Tax 1 for Destination 10 orders.
2= Update Tax 2 for Destination 10 orders. 4= Update Tax 3 for Destination 10 orders.
B: 1= Update Tax 1 for Destination 9 orders. 2= Update Tax 2 for Destination 9 orders. 4= Update Tax 3 for Destination 9 orders.
164 CSHR ____ ____CA
Default = 2 2
Address 165: A: 1= Print bold, double-wide characters for the Order #. (This function is
available for TS8811 printers only.) B: Not Used - Enter 0.
0 165 CSHR ____ ____CA
Address 166: A: Not Used - Enter 0. B: 1= Do not Reset Z2 Time & Attendance totals with a Z2 Mode All Reset.
0 166 CSHR ____ ____CA
: (Addresses 167 through 179 are not used.)
Address 180: A: 1= Require MGR for Gift Card REDEMPTION. A: 2= Require MGR for Gift Card CANCEL. A: 4= Require MGR for Gift Card BALANCE INQUIRY. B: 1= Require MGR for Gift Card REGISTER. B: 2= Require MGR for Gift Card ACTIVATION. B: 4= Require MGR for Gift Card INCREMENT.
0 180 CSHR ____ ____CA

Programming
3-62 Panasonic 5500 Series Programming Instructions – Version LQ3.5
P24 System Flags (Page 15 of 15)
Address 181: A: Not Used - Enter 0. B: 1= Require MGR for Gift Card RETURN.
0 181 CSHR ____ ____CA
: (Addresses 182 through 189 are not used.)
Address 190: A: Enter the default brightness level (0-9) for the screen, where 0 is the darkest, and
9 is the brightest level available. B: Not Used - Enter 0.
0 190 CSHR ____ ____CA
: (Addresses 191 through 193 are not used.)
Address 194: A: Not Used - Enter 0. B: 1= Display the "Comm Error" message to note that an error occurred during a
systemwide communication. (The message displays and stays on the screen whenever an error occurs, whether or not the communication is eventually successful.) Use P30, Address 205 to define the message.
0 194 CSHR ____ ____CA
: (Addresses 195 and 196 are not used.)
Address 197: A: Not Used - Enter 0. B: 0= Trace Mode only stores key sequences.
1= Trace Mode stores data designated in Flag 198 & 199. 4= Display the Available Communication Queue for debugging. If set, the queue
status displays next to the cashier at the bottom of the screen. An "A" (meaning 10) displays when the workstation is not communicating; the count decreases as communication begins to other devices. The queue status should return to "A" when communication ends.
0 197 CSHR ____ ____CA
Address 198: A: Not Used - Enter 0. B: 1= Trace Mode stores key sequences.
2= Trace Mode stores In-line data. 4= Trace Mode stores messages.
0 198 CSHR ____ ____CA
Address 199: A: 1= Allow sales of items that do not have linked subgroups. B: 1= Enable the QWERTY-style Alpha keyboard. [If not set, the regular
alphanumeric keyboard is enabled.]
199 CSHR ____ ____CA

Programming
Panasonic 5500 Series Programming Instructions – Version LQ3.5 3-63
P24 Miscellaneous Flags
(Page 1 of 44) Miscellaneous Flags are 8-digit entries in the 200 through 500 Addresses of Program 24. The worksheets on the next pages list options represented for these addresses. For each address, select options that apply to your program. You can add option values, except where noted. Enter '0' if you do not need any of the options within a particular set. ADD 200 - 204:
Not Used - Enter 00000000.
A B C D E F G H
0 0 0 0 0 0 0 0 200 CSHR __ __ __ __ __ __ __ __CA 0 0 0 0 0 0 0 0 201 CSHR__ __ __ __ __ __ __ __CA 0 0 0 0 0 0 0 0 202 CSHR__ __ __ __ __ __ __ __CA 0 0 0 0 0 0 0 0 203 CSHR__ __ __ __ __ __ __ __CA 0 0 0 0 0 0 0 0 204 CSHR__ __ __ __ __ __ __ __CA
ADD 205: Gift Certificate Sold 1 (key code 29) ADD 206: Gift Certificate Sold 2 (key code 30) ADD 207: Gift Certificate Sold 3 (key code 31) Option A: 1= Add Tax 1 to G.C. Sold
2= Add Tax 2 to G.C. Sold 4= Add Tax 3 to G.C. Sold
Option B: Enter the number of digits (0-9) for the Open G.C. HALO ('1' = 9¢, 2 = 99¢, 3 = $9.99, etc.).
HALOs are required for Open Gift Certificates. Option C-H: Enter the preset certificate amount or enter '000000' for
open gift certificates.
205 CSHR__ __ __ __ __ __ __ __CA
Default = 200-0500 206 CSHR__ __ __ __ __ __ __ __CA 207 CSHR__ __ __ __ __ __ __ __CA
ADD 208: System Low Amount Lock-Out (LALO) Option A-B: Not Used - enter 00. Option C-H: Enter the lowest dollar amount ($.01- 9999.99) allowed
on this workstation. Enter 0 if this low limit is not used.
0 0 208 CSHR__ __ __ __ __ __ __ __CA

Programming
3-64 Panasonic 5500 Series Programming Instructions – Version LQ3.5
P24 Miscellaneous Flags (Page 2 of 44) ADD 209: Cash-in-Drawer High Amount Lock-Out (HALO) Option A-B: Not used - enter 00. Option C-H: Enter the highest amount of cash allowed in the
workstation drawer. If this amount is exceeded, the system alerts the cashier at the end of each order. Enter 0 if this limit is not used.
0 0 209 CSHR__ __ __ __ __ __ __ __CA
ADD 210: Check Tender Option D: 1= The HALO in Option G (below) applies to change issued
back from a check. [If not set, the HALO applies to the amount tendered on the check.]
2= Require an Account # for personal checks. Option E: Not Used. Option F: 1= Include Tax 1.
2= Include Tax 2. 4= Include Tax 3.
Option G: 1= 1¢ HALO. 5=$1000.00 HALO 2= $1.00 HALO 6=$10000.00 HALO 3= $10.00 HALO 7=$99999.99 HALO 4= $100.00 HALO Option H: Not used. Enter 0.
210 CSHR__ __ __ __ __ __ __ __CA
ADD 211: ADD 212: ADD 213: ADD 214: ADD 215: ADD 216: ADD 217: ADD 218:
Not Used - Enter 00000000. (Note: Charge/Credit Card definitions have moved to Flags 351-359 and 370-389.)
0 0 0 0 0 0 0 0 211 CSHR__ __ __ __ __ __ __ __CA 0 0 0 0 0 0 0 0 212 CSHR__ __ __ __ __ __ __ __CA 0 0 0 0 0 0 0 0 213 CSHR__ __ __ __ __ __ __ __CA 0 0 0 0 0 0 0 0 214 CSHR__ __ __ __ __ __ __ __CA 0 0 0 0 0 0 0 0 215 CSHR__ __ __ __ __ __ __ __CA 0 0 0 0 0 0 0 0 216 CSHR__ __ __ __ __ __ __ __CA 0 0 0 0 0 0 0 0 217 CSHR__ __ __ __ __ __ __ __CA 0 0 0 0 0 0 0 0 218 CSHR__ __ __ __ __ __ __ __CA

Programming
Panasonic 5500 Series Programming Instructions – Version LQ3.5 3-65
P24 Miscellaneous Flags (Page 3 of 44) ADD 219: Coin Dispenser Option A-D: Not Used - Enter 0000. Option E-H: Enter the maximum amount ($.00 - $99.99) issued from the
Coin Dispenser.
0 0 0 0 219 CSHR__ __ __ __ __ __ __ __CA
ADD 220: RS-232C Definitions Option E: Wait Time at Buffer Full (PC Printer)
0= 10 second Wait Time 1-6= Enter the number of seconds for the Wait Time (Your entry
will be multiplied by 10; e.g., 2 = 20 seconds.) 7-9= Wait until ready (Recommended for most applications. Select
'6' if the low paper warning is not enabled). Option F: Enter the value (0-7) for the spacing at the end of the
end of the Direct Receipt. Option G: 1= Print Reports on Journal. Option H: 0= Select printer model TM88ii.
1= Select printer model TM200/300. 2= Select printer model TP800 (Thermal Printer). 3= Select printer model TMU200.
220 CSHR__ __ __ __ __ __ __ __CA
ADD 221: Preclose Definition Option A-D: Not Used - Enter 0000. Option E-F: Enter the starting Workstation # in the Preclose range. (The
first workstation in the range initially reset at System Close.) Option G-H: Enter the ending Workstation # for Preclose. Also see Flags
254 and 303.
0 0 0 0 221 CSHR__ __ __ __ __ __ __ __CA
ADD 222: Drive-Thru Board Option A-D: Not Used - Enter 0000. Option E: Enter the Brightness level (0-9) for the D/T Board, where 0 is
the darkest and 9 is the brightest level. Option F: Blank Lines Control Option G: Not Used - Enter 0. Option H: Enter the number of seconds (0-9) before the Welcome
message displays at the end of an order. (A '0' entry is treated as 5 seconds.)
0 0 0 0 0 222 CSHR__ __ __ __ __ __ __ __CA
ADD 223: Wait & D/T Timers Option A-D: Enter the limit for the D/T timer. When the cashier exceeds
this limit, the timer blinks. Option E-H: Enter the time limit for the Wait Timer.
Note: If timers display seconds only (see Flag 130), enter 0-9999 seconds. If they display minutes and seconds, enter up to 99 minutes, 59 seconds.
223 CSHR__ __ __ __ __ __ __ __CA
Default = 0080-0060

Programming
3-66 Panasonic 5500 Series Programming Instructions – Version LQ3.5
P24 Miscellaneous Flags (Page 4 of 44) ADD 224: Submaster Options
Option A-G: Not Used - Enter 0000000. Option H: 1= Allow System Open/Close and Z2 Reports at the
Submaster.
0 0 0 0 0 0 0 224 CSHR__ __ __ __ __ __ __ __CA
ADD 225: Gift Certificate Redemption Option A: 1= Update Tax 1.
2= Update Tax 2. 4= Update Tax 3.
Option B: Enter the number of digits for the HALO; e.g., 1= 9¢ HALO (1 digit), 2= 99¢, 3= $9.99, etc. HALOs are required for open GC Redemption keys.
Option C-H: Enter the 6-digit redemption amount ($.00 -$9999.99). Enter 000000 for open redemption.
225 CSHR__ __ __ __ __ __ __ __CA
Default = 0200-0050
ADD 226: Communication Parameters Option A: Not Used - Enter 0. Option B: 1= Print Accumulation and System Close at the System
Master. [0= these reports do not print]. Option C-D: Enter the number of Retry attempts before Comm Error or
Comm Busy. The recommended retry is 03. Also set Retry Length in Flag 227. (See Flag 228 to set the KVS Retry.)
Option E-F: Enter the lowest Workstation # (1-20) polled for system-wide reports and downlining. Use numbers set in Flag 239.
Option G-H: Enter the highest Workstation # to be polled for system-wide reports and downlining.
Note: Workstations should be numbered sequentially to avoid
communication delays.
0 226 CSHR__ __ __ __ __ __ __ __CA
Default = 0110-0101
ADD 227: Retry Timers, OT/CS & Cashier Station ID Option A-B: Enter the length (seconds x 100msec) of KVS retrys. [Also
enter the number of retrys in Flag 226, Options C-D] Option C-D: Enter the length (seconds x 10msec) of workstation retrys.
[Also set the number of retrys in Flag 226, Options C-D.] Option E: 2= Disable the Retry when communicating to a Printer. Option F: 1= Disable the Continue option in the System Close menu
when an error is detected. Option G: Enter the ID # (ref. Flag 239) of the Order- Taker/Cashier
Station (0-9). Option H: Enter the Workstation # of the Cashier Station to which
the Order-Taker communicates (0-9).
227 CSHR__ __ __ __ __ __ __ __CA
Default = 1020-0000

Programming
Panasonic 5500 Series Programming Instructions – Version LQ3.5 3-67
P24 Miscellaneous Flags (Page 5 of 44) ADD 228: KVS Retry Option A-F: Not Used - Enter 000000. Option G: Enter the number of Retries for communications to a KVS.
(0 = 1 Retry) Option H: Enter the length (in seconds) for each KVS Retry.
Note: The recommended entry is 0000-0051.
0 0 0 0 0 0 228 CSHR__ __ __ __ __ __ __ __CA
ADD 229: Canada Tax Option A: Not Used - Enter 0. Option B: 7= PST (Province Sales Tax) is not affected by GST. Option C-G: Enter the amount per transaction that is not Taxable.
(Canadian applications only.) Option H: 0= Normal Tax handling.
1= Quebec tax specifications. 2= Ontario tax specifications. 4= Enable GST.
0 229 CSHR__ __ __ __ __ __ __ __CA
ADD 230:
Not Used - DO NOT CHANGE data that appears in this address. (Z1/Z2 CT)
DO NOT CHANGE!! 230 CSHR__ __ __ __ __ __ __ __CA
ADD 231: Transaction #, Workstation ID # Option A-D: (Current transaction counter) Option E-H: Enter the Workstation # to be printed on receipts. The least
significant digit of this entry becomes the most significant digit of order numbers issued at this workstation.
231 CSHR__ __ __ __ __ __ __ __CA
Default = 0001-0001
ADD 232: ADD 233:
Not Used - DO NOT CHANGE data that appears in this address. (GT - lower/upper)
DO NOT CHANGE!! 232 CSHR__ __ __ __ __ __ __ __CA DO NOT CHANGE!! 233 CSHR__ __ __ __ __ __ __ __CA
ADD 234: ADD 235:
Not Used - DO NOT CHANGE data that appears in this address. (TG - lower/upper)
DO NOT CHANGE!! 234 CSHR__ __ __ __ __ __ __ __CA DO NOT CHANGE!! 235 CSHR__ __ __ __ __ __ __ __CA

Programming
3-68 Panasonic 5500 Series Programming Instructions – Version LQ3.5
P24 Miscellaneous Flags (Page 6 of 44) ADD 236: RS-232C Channels 3 & 4 (Optional Channels) Important: After power off & on in P3 Mode, this flag can default to 0.
- Channel 3 - - Channel 4 - Option A: Stop Bits/Parity Option E: Stop Bits/Parity
0= Odd parity 0= Odd parity 1= Even parity 1= Even parity 2= 1 Bit 2= 1 Bit 4= 1.5 Bits 4= 1.5 Bits 6= 2 Bits 6= 2 Bits
Option B: Character Length Option F: Character Length
0= 5 Bits 0= 5 Bits 1= 6 Bits 1= 6 Bits 2= 7 Bits 2= 7 Bits 3= 8 Bits 3= 8 Bits 4= Enable Parity 4= Enable Parity
Option C: Device Selection Option G: Device Selection
1= Scale 1= Scale 2= 80-column Printer 2= 80-column Printer 3= Not Used 3= Not Used 4= Not Used 4= Not Used 5= Direct Receipt 5= Direct Receipt 6= Not Used 6= Not Used 7= Coin Dispenser 7= Coin Dispenser 8= D/T Board 8= D/T Board 9= Mondex POS Device 9= Mondex POS Device
Option D: BAUD Rate Option H: BAUD Rate
0= 1200 BPS 0= 1200 BPS 1= 2400 BPS 1= 2400 BPS 2= 4800 BPS 2= 4800 BPS 3= 6400 BPS 3= 6400 BPS 4= 9600 BPS 4= 9600 BPS 5= 19200 BPS 5= 19200 BPS
236 CSHR__ __ __ __ __ __ __ __CA
Channel 1 Channel 2 Channel 3* Channel 4* Flag 237 Flag 237 Flag 236 Flag 236 (Options A-D) (Options E-H) (Options A-D) (Options E-H)
Note: Channels 3 and 4 require the RS-232C Option Board. Polling is available only through Channel 1 or Channel 2.
Recommended Settings: 80-Column Printer = 2324 PC/Modem = 2334 CCTV = 2354 Direct Receipt = 2354 Coin Dispenser = 3674 Scale = 3614 D/T Board = 2384 Mondex Device = 3690

Programming
Panasonic 5500 Series Programming Instructions – Version LQ3.5 3-69
P24 Miscellaneous Flags (Page 7 of 44) ADD 237: RS-232C Channels 1 & 2 (Standard Channels) Important: After power off & on in P3 Mode, this flag can default to 0!
- Channel 1 - - Channel 2 - Option A: Stop Bits/Parity Option E: Stop Bits/Parity
0= Odd parity 0= Odd parity 1= Even parity 1= Even parity 2= 1 Bit 2= 1 Bit 4= 1.5 Bits 4= 1.5 Bits 6= 2 Bits 6= 2 Bits
Option B: Character Length Option F: Character Length
0= 5 Bits 0= 5 Bits 1= 6 Bits 1= 6 Bits 2= 7 Bits 2= 7 Bits 3= 8 Bits 3= 8 Bits 4= Enable Parity 4= Enable Parity
Option C: Device Selection Option G: Device Selection
1= Scale 1= Scale 2= 80-column Printer 2= 80-column Printer 3= PC 3= PC 4= Not Used 4= Not Used 5= Direct Receipt 5= Direct Receipt 6= Not Used 6= Not Used 7= Coin Dispenser 7= Coin Dispenser 8= D/T Board 8= D/T Board 9= Mondex POS Device 9= Mondex POS Device
Option D: BAUD Rate Option H: BAUD Rate
0= 1200 BPS 0= 1200 BPS 1= 2400 BPS 1= 2400 BPS 2= 4800 BPS 2= 4800 BPS 3= 6400 BPS 3= 6400 BPS 4= 9600 BPS 4= 9600 BPS 5= 19200 BPS 5= 19200 BPS
237 CSHR__ __ __ __ __ __ __ __CA
ADD 238: RS-232C PC Control Timer Option A-B: Retry Time (Default = 05) Option C-D: Control Character Wait (Default=30) Option E-F: TEXT Wait limit. (Default = 99) Option G-H: Wait for ID ENQ. (Default = 30)
Note: Recommended entry, if used, is 05309930.
238 CSHR__ __ __ __ __ __ __ __CA
Default = 0530-9930

Programming
3-70 Panasonic 5500 Series Programming Instructions – Version LQ3.5
P24 Miscellaneous Flags (Page 8 of 44) ADD 239: Workstation #, Submaster #, T/A Master # Option A-B: Not Used - enter 00. Option C-D: Enter the number of the workstation that acts as the
Submaster. This workstation has the back-up Projection / Comparison and Z2 totals. If set, System-wide Z2 Reports are disabled.
Option E-F: This number (1-20) identifies the workstation. It is taken from the P3 Mode IP Address setting and CANNOT BE CHANGED here. (Change the IP Address, if necessary.) This number must be set to enable System-wide Reports, Drive-Thru, and other communications.
Option G-H: Enter the number of the workstation that acts as the System Master workstation (for communications including System Close/Open and for the Time & Attendance functions).
0 0 239 CSHR__ __ __ __ __ __ __ __CA
Default = 0000-0101
ADD 240: Deposits, DCR, Tender Correction Option A: 1= Enable the X1 Mode Tender Correction function. [If not
set, the Tender Correction option does not appear on the X1 Mode Loan & Pickup menu.]
2= Require Cashier Log-on for X1 Mode Tender Correction. Option B-C: Not Used - enter 00. Option D: 1= Allow Deposit entries in X1 Mode.
2= Allow Deposit entries at System Close. Option E: 1= Print the Food Cost Report at System Close. Option F: 1= Print "Sale" after GSTL on the Register Report. Option G: Not Used - Enter 0. Option H: Enter the number of DCR copies to be printed at System
Close [1= one copy, 2=two copies, etc.; 0= disable DCR].
0 0 0 240 CSHR__ __ __ __ __ __ __ __CA
ADD 241: MGR Mode Access
For D-H, enter '0' if access is not restricted. Enter '1' to require MGR1 level numbers. Enter '2' to require MGR2 level numbers. Enter '3' to require MGR1 or MGR2 level numbers.
Option A: 1= P29 requires MGR 2 level log-on. Option B-C: Not Used - Enter 00. Option D: Enter the access level (0-3) for P1 Mode. Option E: Enter the access level (0-3) for TR Mode. Enter '9' to
prevent all access to Training Mode. Option F: Enter the access level (0-3) for PTD Mode. Option G: Enter the access level (0-3) for Z1 Mode. Option H: Enter the access level (0-3) for X1 Mode.
0 0 241 CSHR__ __ __ __ __ __ __ __CA

Programming
Panasonic 5500 Series Programming Instructions – Version LQ3.5 3-71
P24 Miscellaneous Flags (Page 9 of 44) ADD 242: P1 Program Access Option A: 1= P40 requires MGR2 level log-on.
4= P42 requires MGR2 level log-on. Option B: 1= P39 requires MGR2 level log-on. Option C: 1= P60 requires MGR2 level log-on.
2= P71 requires MGR2 level log-on. 4= P36 requires MGR2 level log-on.
Option D: 1= P59-4 requires MGR2 level log-on. 2= P59-5 requires MGR2 level log-on. 4= P59-6 requires MGR2 level log-on.
Option E: 1= P59-1 requires MGR2 level log-on.
2= P59-2 requires MGR2 level log-on. 4= P59-3 requires MGR2 level log-on.
Option F: 1= P33 requires MGR2 level log-on. 2= P34 requires MGR2 level log-on. 4= P35 requires MGR2 level log-on.
Option G: 1= P28 requires MGR2 level log-on. 2= P31 requires MGR2 level log-on. 4= P32 requires MGR2 level log-on.
Option H: 1= P24 requires MGR2 level log-on. 2= P26 requires MGR2 level log-on. 4= P27 requires MGR2 level log-on.
242 CSHR__ __ __ __ __ __ __ __CA
ADD 243: X1 Program Access
Enter '0' if access is unrestricted. Enter '1' to allow MGR1 or '2' to allow MGR2. Enter '3' to allow MGR1 or MGR2.
Option A: Enter the access level for X1 Cashier Disable. Option B: Enter the access level for X1 Remote Steering. Option C-E: Not Used - Enter 000. Option F: Enter the access level for X1 PLU Shift Program. Option G: Enter the access level for X1 Order # Program. Option H: Enter the access level for X1 W/S Mode Program.
0 0 0 243 CSHR__ __ __ __ __ __ __ __CA

Programming
3-72 Panasonic 5500 Series Programming Instructions – Version LQ3.5
P24 Miscellaneous Flags (Page 10 of 44) ADD 244: Currency Exchange 1 (key code 53) ADD 245: Currency Exchange 2 (key code 54) ADD 246: Currency Exchange 3 (key code 55) ADD 247: Currency Exchange 4 (key code 56) Option A: 1= Divide the transaction total by the rate in Option B-H. [If
not set, the total is multiplied by the rate.] Option B-H: Enter the 7-digit (3-digit integer, 4-digit decimal) rate. [If
$1.00= 135.25 Yen, enter 1352500.] Note: Use Currency Exchange 4 for the second cash
drawer.
244 CSHR__ __ __ __ __ __ __ __CA 245 CSHR__ __ __ __ __ __ __ __CA 246 CSHR__ __ __ __ __ __ __ __CA 247 CSHR__ __ __ __ __ __ __ __CA
ADD 248: Require Manager for P2 Mode
For D-H, enter '0' if access is not restricted. Enter '1' to require MGR1 level numbers. Enter '2' to require MGR2 level numbers. Enter '3' to require MGR1 or MGR2 level numbers.
Option A-G: Not Used - Option H: Enter the access level (0-3) for P2 mode.
0 0 0 0 0 0 0 0 248 CSHR__ __ __ __ __ __ __ __CA
ADD 249:
Not Used - Enter 00000000.
0 0 0 0 0 0 0 0 249 CSHR__ __ __ __ __ __ __ __CA
ADD 250: Overtime Calculation Option A-D: Enter the number of hours (xx.xx) in a week after which
Overtime 1 accumulates. For example, if Overtime 1 begins after a forty hour week, enter 4000.
Option E-H: Enter the number of hours (xx.xx) for the daily Overtime 1 calculations. For example, if Overtime 1 begins after an 8.5 hour day, enter 0850.
Note: See Flag 256 to set the definitions for Overtime 2. See
Flag 251 to set the Overtime 1 factor.
250 CSHR__ __ __ __ __ __ __ __CA

Programming
Panasonic 5500 Series Programming Instructions – Version LQ3.5 3-73
P24 Miscellaneous Flags (Page 11 of 44) ADD 251: Break Control, OT Factor Option A: Not Used - Enter 0. Option B: 1= Enable Semi-monthly Pay Period handling for Time &
Attendance functions. [0= Enable Weekly or Biweekly handling.]
Option C: 1= Require a Manager for a Job Code change at Clock-in. 2= Do not print or display Labor Cost (LB$) on the
Timekeeping Reports. Option D: Enter the value for the day of week when Z2 Timekeeping
totals are automatically reset by System Open. (Enter 0 if this option is not used. 1= Monday, 2= Tuesday, 3= Wednesday, 4= Thursday, 5= Friday, 6= Saturday, 7= Sunday).
Option E: 1= Enable Paid Breaks. If set, employees must use the Break key when they leave for a paid break. [If not set, breaks are not paid, and employees can use either the Break or Clock-out key when they leave for a break.]
2= List all Active Employees at System Close. 4= Reset Daily Timekeeping totals at System Open.
Option F-H: Enter the factor for Overtime 1 (0.00 - 9.99) hours. For example, if Overtime 1 compensation is time and a half, enter 150.
0 251 CSHR__ __ __ __ __ __ __ __CA
ADD 252:
Not Used - Enter 00000000.
0 0 0 0 0 0 0 0 252 CSHR__ __ __ __ __ __ __ __CA
ADD 253:
Not Used - Enter 00000000.
0 0 0 0 0 0 0 0 253 CSHR__ __ __ __ __ __ __ __CA

Programming
3-74 Panasonic 5500 Series Programming Instructions – Version LQ3.5
P24 Miscellaneous Flags (Page 12 of 44) ADD 254: 24-Hour Close Option A-E: Not Used - Enter 00000. Option F: 1= Perform 24-hour Close on Sunday. Option G: 1= Perform 24-hour Close on Thursday.
2= Perform 24-hour Close on Friday. 4= Perform 24-hour Close on Saturday.
Option H: 1= Perform 24-hour Close on Monday. 2= Perform 24-hour Close on Tuesday. 4= Perform 24-hour Close on Wednesday.
0 0 0 0 0 254 CSHR__ __ __ __ __ __ __ __CA
ADD 255:
Not Used - Enter 00000000.
0 0 0 0 0 0 0 0 255 CSHR__ __ __ __ __ __ __ __CA
ADD 256: Overtime 2 (OT2) Definitions Option A-D: Enter the weekly hours (xx.xx) for Overtime 2. This flag
works with Flag 250 (OT1). For example, if OT1 starts after a forty-hour week and OT2 starts after a sixty-hour week, enter 2000 here for the OT2 definition. (OT2 will start when an employee works twenty hours more than the OT1 definition. Also enter 4000 for Flag 250 A-D to define a forty-hour start for the weekly OT1 definition.)
Option E-H: Enter the daily hours (xx.xx) for Overtime 2. This flag works with Flag 250 (OT1). For example, if OT1 starts after an 8- hour day and OT2 starts after a 12-hour day, enter 0400 here. (OT2 will start when an employee works 4 hours more than the OT1 definition. For this example, you would also enter 0800 in Flag 250 E-H for the daily OT1 definition.)
Note: This flag is valid only if Flag 250 > 0.
256 CSHR__ __ __ __ __ __ __ __CA
ADD 257: Overtime 2 Factor Option A-E: Not Used - Enter 00000. Option F-H: Enter the factor (x.xx) for Overtime 2. For example, if it is
calculated at twice the normal pay rate, enter 200.
0 0 0 0 0 257 CSHR__ __ __ __ __ __ __ __CA
ADD 258:
Not Used - DO NOT CHANGE data that appears in this address. (*GT - lower 8)
DO NOT CHANGE!! 258 CSHR__ __ __ __ __ __ __ __CA
ADD 259:
Not Used - DO NOT CHANGE data that appears in this address. (*GT - upper 6)
DO NOT CHANGE!! 259 CSHR__ __ __ __ __ __ __ __CA

Programming
Panasonic 5500 Series Programming Instructions – Version LQ3.5 3-75
P24 Miscellaneous Flags (Page 13 of 44) ADD 260: KVS Controller ID # Option A: Not Used - Enter 0. Option B-D: List the KVS Controllers (0-3) you use. [001= Controller 1;
021= Controllers 1 and 2; 321= Controllers 1, 2, and 3.] Option E-H: Not Used - Enter 0000.
0 0 0 0 0 260 CSHR__ __ __ __ __ __ __ __CA
ADD 261:
Not Used - Enter 00000000.
0 0 0 0 0 0 0 0 261 CSHR__ __ __ __ __ __ __ __CA
ADD 262:
Not Used - Enter 00000000.
0 0 0 0 0 0 0 0 262 CSHR__ __ __ __ __ __ __ __CA
ADD 263: Split Screen Options This flag does not downline! Option A-D: Not Used - Enter 0000. Option E: 1= Send Destination 10 to the top half of the KVS Split
Screen. [0= send to lower half.] Option F: 1= Send Destination 7 to the top of the Split Screen.
2= Send Destination 8 to the top of the Split Screen. 4= Send Destination 9 to the top of the Split Screen.
Option G: 1= Send Destination 4 to the top of the Split Screen. 2= Send Destination 5 to the top of the Split Screen. 4= Send Destination 6 to the top of the Split Screen.
Option H: 1= Send Destination 1 to the top of the Split Screen. 2= Send Destination 2 to the top of the Split Screen. 4= Send Destination 3 to the top of the Split Screen.
0 0 0 0 263 CSHR__ __ __ __ __ __ __ __CA
ADD 264: Speed of Service Timers Option A-D: Enter the upper limit (0-9999 seconds) for Efficiency Level
1. Orders completed within this time update the first Service Time Report level.
Option E-H: Enter the upper limit (0-9999 seconds) for Efficiency Level 2. Orders completed after Level 1 and within this time frame update the second Service Time Report level.
264 CSHR__ __ __ __ __ __ __ __CA

Programming
3-76 Panasonic 5500 Series Programming Instructions – Version LQ3.5
P24 Miscellaneous Flags (Page 14 of 44) ADD 265: Speed of Service Timer & Exclusion Option A-D: Enter the number of seconds (0-9999) for the Speed of
Service Exclusion limit. Orders with preparation times exceeding this limit are not included in Service Time reports. [0= all times update the report.]
Option E-H: Enter the upper limit (0-9999 seconds) for Efficiency
Level 3. Orders completed after the Level 2 limit and within this definition update the third level of the Service Time Report.
265 CSHR__ __ __ __ __ __ __ __CA
ADD 266:
Not Used - Enter 00000000.
0 0 0 0 0 0 0 0 266 CSHR__ __ __ __ __ __ __ __CA
ADD 267: KVS Park/Serve & RCRT Timers Option A-D: Enter the time when the RCRT timer starts blinking. [0=
Disable blinking. Max= 9959 (99 minutes and 59 seconds)]
Option E-H: Enter the time when the Park/Serve timer starts blinking.
[0= Disable blinking. Max = 9959 (99 minutes and 59 seconds)]
267 CSHR__ __ __ __ __ __ __ __CA

Programming
Panasonic 5500 Series Programming Instructions – Version LQ3.5 3-77
P24 Miscellaneous Flags (Page 15 of 44) ADD 268: KVS Timers Option A-D: Enter the amount of time after which counts update in the
KPS Standard Menu Zones. [0= Item counts consolidate throughout the day. Max= 9959 (99 minutes, 59 seconds). For example, if counts should update every 15 minutes, enter 1500.]
Option E-H: Enter the time after which All Void orders clear from the
KVS screens. [0= Disable automatic clear for All Void orders.]
268 CSHR__ __ __ __ __ __ __ __CA
ADD 269: KVS Park Option A-B: Not Used - Enter 00. Option C: 1= Auto Park affects KVS #3, CRT 4
2= Auto Park affects KVS #3, CRT 5 4= Auto Park affects KVS #3, CRT 6
Option D: 1= Auto Park affects KVS #3, CRT 1 2= Auto Park affects KVS #3, CRT 2 4= Auto Park affects KVS #3, CRT 3
Option E: 1= Auto Park affects KVS #2, CRT 4
2= Auto Park affects KVS #2, CRT 5 4= Auto Park affects KVS #2, CRT 6
Option F: 1= Auto Park affects KVS #2, CRT 1 2= Auto Park affects KVS #2, CRT 2 4= Auto Park affects KVS #2, CRT 3
Option G: 1= Auto Park affects KVS #1, CRT 4
2= Auto Park affects KVS #1, CRT 5 4= Auto Park affects KVS #1, CRT 6
Option H: 1= Auto Park affects KVS #1, CRT 1 2= Auto Park affects KVS #1, CRT 2 4= Auto Park affects KVS #1, CRT 3
0 0 269 CSHR__ __ __ __ __ __ __ __CA

Programming
3-78 Panasonic 5500 Series Programming Instructions – Version LQ3.5
P24 Miscellaneous Flags (Page 16 of 44) ADD 270: KVS Serve Option A-B: Not Used - Enter 00. Option C: 1= Auto Serve affects KVS #3, CRT 4
2= Auto Serve affects KVS #3, CRT 5 4= Auto Serve affects KVS #3, CRT 6
Option D: 1= Auto Serve affects KVS #3, CRT 1 2= Auto Serve affects KVS #3, CRT 2 4= Auto Serve affects KVS #3, CRT 3
Option E: 1= Auto Serve affects KVS #2, CRT 4 2= Auto Serve affects KVS #2, CRT 5 4= Auto Serve affects KVS #2, CRT 6
Option F: 1= Auto Serve affects KVS #2, CRT 1 2= Auto Serve affects KVS #2, CRT 2 4= Auto Serve affects KVS #2, CRT 3
Option G: 1= Auto Serve affects KVS #1, CRT 4 2= Auto Serve affects KVS #1, CRT 5 4= Auto Serve affects KVS #1, CRT 6
Option H: 1= Auto Serve affects KVS #1, CRT 1 2= Auto Serve affects KVS #1, CRT 2 4= Auto Serve affects KVS #1, CRT 3
0 0 270 CSHR__ __ __ __ __ __ __ __CA
ADD 271: Color KVS Steering Control Option A: 1= Exclude Week 1 from Product Comparison KVS. Option B: 1= Exclude Week 4 from Product Comparison KVS.
2= Exclude Week 3 from Product Comparison KVS. 4= Exclude Week 2 from Product Comparison KVS.
Option C: 1= Enable Independent Steering. [If not set, Combined/Override Steering is enabled.]
Option D: 1= Enable item-by-item transfer to the KVS System. [If not set, items are relayed at finalization.]
2= Transfer items to the KVS and Kitchen Printers upon depression of Subtotal, Destination, Wait, etc.
Option E: Not Used - Enter 0. Option F: 1= Projection fractions round down at the workstation and
KVS. [If not set, fractions round up.] Option G: 1= Display Group Payment orders as a single order. [0=
Group Payment orders display as separate orders.] 2= Change the background color of the KVS screen when an
order is decreased by any of the following: Coupons, Combo Coupons, Voids, Promo, Discounts, Negative (subtracting) Items. If more than one function is used, the color is based on the last adjustment. This option is valid for the RCRT modes only.
Option H: Not Used - Enter 0.
0 0 271 CSHR__ __ __ __ __ __ __ __CA

Programming
Panasonic 5500 Series Programming Instructions – Version LQ3.5 3-79
P24 Miscellaneous Flags (Page 17 of 44) ADD 272: ADD 273: ADD 274:
Not Used - Enter 00000000.
0 0 0 0 0 0 0 0 272 CSHR__ __ __ __ __ __ __ __CA 0 0 0 0 0 0 0 0 273 CSHR__ __ __ __ __ __ __ __CA 0 0 0 0 0 0 0 0 274 CSHR__ __ __ __ __ __ __ __CA
ADD 275: Color KVS Steering This flag does not downline! Use the following 2-digit values for Flags 275-277. 11= KVS 1, CRT 1 21= KVS 2, CRT 1 31= KVS 3, CRT 1 12= KVS 1, CRT 2 22= KVS 2, CRT 2 32= KVS 3, CRT 2 13= KVS 1, CRT 3 23= KVS 2, CRT 3 33= KVS 3, CRT 3 14= KVS 1, CRT 4 24= KVS 2, CRT 4 34= KVS 3, CRT 4 15= KVS 1, CRT 5 25= KVS 2, CRT 5 35= KVS 3, CRT 5 16= KVS 1, CRT 6 26= KVS 2, CRT 6 36= KVS 3, CRT 6 Option A-B: Enter the KVS # where Steer Flag 4 is directed. Option C-D: Enter the KVS # where Steer Flag 3 is directed. Option E-F: Enter the KVS # where Steer Flag 2 is directed. Option G-H: Enter the KVS # where Steer Flag 1 is directed.
275 CSHR__ __ __ __ __ __ __ __CA
ADD 276: Color KVS Steering This flag does not downline! Option A-B: Enter the KVS # where Steer Flag 8 is directed. Option C-D: Enter the KVS # where Steer Flag 7 is directed. Option E-F: Enter the KVS # where Steer Flag 6 is directed. Option G-H: Enter the KVS # where Steer Flag 5 is directed.
276 CSHR__ __ __ __ __ __ __ __CA
ADD 277: Color KVS Steering Option A-F: Not Used - Enter 000000. Option G-H: Enter the KVS # where Steer Flag 9 is directed.
0 0 0 0 0 0 277 CSHR__ __ __ __ __ __ __ __CA

Programming
3-80 Panasonic 5500 Series Programming Instructions – Version LQ3.5
P24 Miscellaneous Flags (Page 18 of 44) ADD 278:
Not Used - Enter 00000000.
0 0 0 0 0 0 0 0 278 CSHR__ __ __ __ __ __ __ __CA
ADD 279:
Not Used - Enter 00000000.
0 0 0 0 0 0 0 0 279 CSHR__ __ __ __ __ __ __ __CA
ADD 280: Suggestive Selling (Suggestion #1)
Use these fields to define Suggestion #1. At Subtotal, the system checks for these subgroups. If a Step 1 item was not registered, the system prompts for a Step 1 (G-H) item. If it finds only a Step 1 item, it prompts for a Step 2 item. If it finds Step 1 and 2 items, it prompts for a Step 3 item, etc.
Option A-B: Enter the Subgroup # for Suggestion #1, Step 4. Option C-D: Enter the Subgroup # for Suggestion #1, Step 3. Option E-F: Enter the Subgroup # for Suggestion #1, Step 2. Option G-H: Enter the Subgroup # for Suggestion #1, Step 1.
280 CSHR__ __ __ __ __ __ __ __CA
ADD 281: Suggestive Selling (Suggestion #2) Option A-B: Enter the Subgroup # for Suggestion #2, Step 4. Option C-D: Enter the Subgroup # for Suggestion #2, Step 3. Option E-F: Enter the Subgroup # for Suggestion #2, Step 2. Option G-H: Enter the Subgroup # for Suggestion #2, Step 1. Also use Flag 282 to identify menus that use Suggestion #1 or #2.
281 CSHR__ __ __ __ __ __ __ __CA

Programming
Panasonic 5500 Series Programming Instructions – Version LQ3.5 3-81
P24 Miscellaneous Flags (Page 19 of 44) ADD 282: Suggestive Selling Menu Level
Identify the menus (1-5) that display each selling suggestion. For example, if you enter '1' in Option D, Suggestion #2 displays while Menu #1 is active. Each menu can display only one suggestion.
Option A: Enter a fourth menu that displays Suggestion #2. Option B: Enter a third menu that displays Suggestion #2. Option C: Enter a second menu that displays Suggestion #2. Option D: Enter the first menu that displays Suggestion #2. Option E: Enter a fourth menu that displays Suggestion #1 Option F: Enter a third menu that displays Suggestion #1. Option G: Enter a second menu that displays Suggestion #1. Option H: Enter the first menu that displays Suggestion #1.
282 CSHR__ __ __ __ __ __ __ __CA
ADD 283: Promotional Item
For Options A-D, identify the menus (1-5) that display the Promotional Item message. For example, if you want to display the message for Menu #1 and Menu #2, enter 0012 in Options A-D.
Option A: Enter a fourth menu for the Promo Item message. Option B: Enter a third menu for the Promo Item message. Option C: Enter a second menu for the Promo Item message. Option D: Enter a first menu for the Promo Item message. Option E: Not Used - Enter 0. Option F-H: Enter the Group # (1-199) of the Promo Item.
Note: This message overwrites any Suggestive Selling Messages you specified in Flags 280 and 281.
0 283 CSHR__ __ __ __ __ __ __ __CA
ADD 284: Receipt Signature Line Option A-F: Not Used - Enter 000000. Option G: 1= Print the Signature line on the receipt for Open Subtracting
PLU items. (Use P30, Addresses 314/315 to define the signature line.)
Option H: 1= Print the Signature Line on the receipt for Discounts. 2= Print the Signature Line on the receipt for Promos. 4= Print the Signature Line on the receipt for Deletes.
0 0 0 0 0 0 284 CSHR__ __ __ __ __ __ __ __CA

Programming
3-82 Panasonic 5500 Series Programming Instructions – Version LQ3.5
P24 Miscellaneous Flags (Page 20 of 44) ADD 285: System Close & Z2 Reset Print Selection Option A-D: Not Used - Enter 0000. Option E: 1= Do Not print Manager Reports.
2= Do Not print Reorder Reports. 4= Do Not print Store & Forward (Close Only).
Option F: 1= Do Not print Time Reports. 2= Do Not print Timekeeping Reports. 4= Do Not print Inventory Reports.
Option G: 1= Do Not print Group Reports. 2= Do Not print Cashier Reports.
Option H: 1= Do Not print PLU Reports. 2= Do Not print Product Mix Reports.
Note: These definitions affect the "All Reset" selection on the Z2 (PTD) menu, as well as System Close.
0 0 0 0 285 CSHR__ __ __ __ __ __ __ __CA
ADD 286: Inactive Totals for Reports Option A-D: Not Used - Enter 0000. Option E: 1= Print inactive totals on DCR Reports. 4= Print inactive totals on Manager Reports. Option F: 1= Print inactive totals on Time Reports. 2= Print inactive totals on Register & Station Total Reports. Option G: 1= Print inactive totals on Group & Coupon Reports. 2= Print inactive totals on Cashier Reports. Option H: 1= Print inactive totals on PLU Reports. 2= Print inactive totals on Product Mix Reports.
0 0 0 0 286 CSHR__ __ __ __ __ __ __ __CA
ADD 287:
Not Used - Enter 00000000.
0 0 0 0 0 0 0 0 287 CSHR__ __ __ __ __ __ __ __CA
ADD 288:
Not Used - Enter 00000000.
0 0 0 0 0 0 0 0 288 CSHR__ __ __ __ __ __ __ __CA

Programming
Panasonic 5500 Series Programming Instructions – Version LQ3.5 3-83
P24 Miscellaneous Flags (Page 21 of 44) ADD 289: 86'd Items Control Option A: 1= Enable the 86'd Items function. Option B: Not Used - Enter 0. Option C: 1= Require MGR to select the "Skip Comm" option that
displays for an 86'd Item Comm Busy. 2= Require MGR to select the "Stop Comm" option that
displays for an 86'd Item Comm Busy. Option D: Enter the item quantity (0-9) that prompts the "Item Qty
Low" message for 86'd items. Option E: 1= Do Not Reset 86'd Item counters to the defined defaults at
System Open. 2= Print the 86'd Item Report at System Open & Close.
Option F: 1= All Void does not update 86'd Item counts. Option G: 1= Delete does not update 86'd Item counts.
2= Waste does not update 86'd Item counts. Option H: 1= Void does not update 86'd Item counts.
2= Error Correct does not update 86'd Item counts.
0 289 CSHR__ __ __ __ __ __ __ __CA
ADD 290: Time & Attendance Parameters Option A: 1= Allow Clock-in/out & Break with employee cards.
2= Enable Clock-in, Clock-out & Break entries. (Make sure the T/A Master is defined in Flag 239.)
Option B-D: Not Used - Enter 000. Option E-F: Enter the starting point for the first half of a Semi-monthly
Pay Period. (01= new pay periods start on the first of each month, 05= start on the fifth of each month, etc.)
Option G-H: Enter the starting point for the second half of a Semi-monthly pay period. (16= the new pay period begins on the sixteenth of each month, etc.)
0 0 0 290 CSHR__ __ __ __ __ __ __ __CA
Default = 2000-0000
ADD 291: Break Control Option A-D: Not Used - Enter 0000. Option E-F: Enter the minimum number of minutes for breaks. Breaks
shorter than this time require MGR Mode. (30= breaks shorter than 30 minutes require MGR Mode, etc.)
Option G-H: Enter the threshold for non-paid breaks (00-99 minutes). Breaks under this time will be paid. [Flag 251, Option E must also be set.]
0 0 0 0 291 CSHR__ __ __ __ __ __ __ __CA
ADD 292:
Not Used - Enter 00000000.
0 0 0 0 0 0 0 0 292 CSHR__ __ __ __ __ __ __ __CA

Programming
3-84 Panasonic 5500 Series Programming Instructions – Version LQ3.5
P24 Miscellaneous Flags (Page 22 of 44) ADD 293: Drive-Thru Board Control Option A-C: Not Used - Enter 000. Option D: Enter the number of seconds for the D/T Board Message
Display Timer. Option E-F: Enter the Workstation # of the Order-Taker that updates
the D/T Board. Option G: 1= 8-line (AccuORDER 192) Board
2= 10-line (AccuORDER 240) Board 3= 12-line (AccuORDER 288) Board 4= GRAPH (AccuORDER 360) Board 5= GRAPH (AccuORDER 200) Board
Option H: 1= Enable Drive-Thru Board functions. 2= Output data to the D/T Board via RS-232C. [If not set, D/T
Board data is output via Ethernet.]
0 0 0 293 CSHR__ __ __ __ __ __ __ __CA
ADD 294:
Not Used - Enter 00000000.
0 0 0 0 0 0 0 0 294 CSHR__ __ __ __ __ __ __ __CA
ADD 295: Electronic Journal, Paid Order Receipt Print Option A-B: Enter the maximum # of paid orders (0-99) that can be
recalled for print. ( EJ must also be allocated/enabled.) Option C: 1= Accumulate EJ files to the System Master at System Close.
2= Reset the System Master EJ file at System Open. Option D: 1= Enable First-in/First-out when the EJ buffer is full. The
oldest data is replaced with new data when the buffer is full. [0= the EJ stops storing data when the buffer is full.]
2= Display "EJ Full" when the buffer is full. 4= Stop item registration and display "EJ Full" at buffer full
(not available if First-in/First-out is enabled above). Option E: 1= Send P1 and P2 key sequence data to the EJ. 2= Store non-sale Macro key data to the EJ. 4= Store REG Mode (sale) Macro data to the EJ. Option F: 2= Send data stored at the Order-Taker and Order-
Taker/Cashier Station to the EJ. Option G: 1= Send X and Z report data (memo only--not totals).
2= Send items to the EJ buffer. Option H: 0= Do Not send transaction data to the EJ.
1= Send all transaction data (data that would normally print on the Journal) to the EJ.
2= Send only orders with negative or zero totals. 3= Send all data except positive and zero price items. 4= Send all credit card (charge 1-10) transactions. Note: Option H Values cannot be added.
295 CSHR__ __ __ __ __ __ __ __CA
Default = 1601-0001

Programming
Panasonic 5500 Series Programming Instructions – Version LQ3.5 3-85
P24 Miscellaneous Flags (Page 23 of 44) ADD 296: Polling Buffer Control Option A-G: Not Used - Enter 0000000. Option H: 1= Enable First-in/First-out storage when the polling buffer is full.
New data replaces the oldest data. [0= Stop storing new data when the buffer is full.]
2= Display "Polling Buffer Full" when the buffer is full.
0 0 0 0 0 0 0 296 CSHR__ __ __ __ __ __ __ __CA
Default = 0000-0003
ADD 297: Multi-Day Polling Buffer Control 1 Option A: 1= Store Z1 Manager Reports in the Multi-Day Polling buffer. 2= Store Z1 86'd Items Reports. Option B: 4= Store Z1 Combo Coupon Reports. Option C: 2= Store Z1 Subgroup Reports. 4= Store Z1 Major Group Report totals. Option D: 2= Store Z1 DCR Reports. 4= Store Z1 Store & Forward Reports. Option E: 1= Store Z1 Projection Reports. Option F: 1= Store Z1 Product Mix Reports. 2= Store Z1 Station Total Reports. 4= Store Z1 Inventory Reports. Option G: 1= Store Z1 PLU Reports. 2= Store Z1 Cashier Reports. 4= Store Z1 Coupon Reports Option H: 1= Store Z1 Register Reports. 2= Store Z1 Time Reports.
297 CSHR__ __ __ __ __ __ __ __CA
ADD 298: Multi-Day Polling Buffer Control 2 Option A: 1= Store Z2 Manager Reports in the Multi-Day Polling buffer. Option B: 4= Store Z2 Combo Coupon Reports. Option C: 2= Store Z2 Subgroup Reports. 4= Store Z2 Major Group Report totals. Option E-F: Not Used - Enter 00. Option G: 1= Store Z2 Projection Reports. Option F: 1= Store Z2 Product Mix Reports. 4= Store Z2 Inventory Reports. Option G: 1= Store Z2 PLU Reports. 2= Store Z2 Cashier Reports. 4= Store Z2 Coupon Reports Option H: 1= Store Z2 Register Reports.. 2= Store Z2 Time Reports.
298 CSHR__ __ __ __ __ __ __ __CA
ADD 299: Multi-Day Polling Buffer Control 3 Option A: 1= Store Z3 Labor data by Job Code. Option B: 1= Store Z2 Labor data by Employee. 2= Store Z2 Labor data by Job Code. 4= Store Z3 Labor data by Employee. Option C: 1= Store Time Clock buffer data. 2= Store Z1 Labor data by Employee. 4= Store Z1 Labor data by Job Code. Option D-H: Not Used - Enter 0000.
299 CSHR__ __ __ __ __ __ __ __CA

Programming
3-86 Panasonic 5500 Series Programming Instructions – Version LQ3.5
P24 Miscellaneous Flags (Page 24 of 44) ADD 300: PC Destination ID Option A-E: Not Used - Enter 00000. Option F: Enter the third PC Destination (0-3). Option G: Enter the second PC Destination (0-3). Option H: Enter the first PC Destination (0-3), where 1= PC #1, 2= PC
#2, and 3=PC #3.
Note: For MWS (Manager Workstation), enter 001 in F-H.
0 0 0 0 0 300 CSHR__ __ __ __ __ __ __ __CA
ADD 301: EJ Data Transfer Control Option A-D: Not Used - Enter 0000. Option E: Enter the seconds before data transfers when the PC is off-
line. (Your entry is multiplied by 5.) Option F: Enter the number of seconds before EJ data transfers to the
PC under normal conditions. Option G: 1= Transfer EJ data to the PC at finalization.
2-9= Transfer EJ data after this number of orders or seconds. (Seconds are multiplied by 10.)
Option H: Enter the number of the PC Destination (1-3) for EJ transfers. Use numbers defined in Flag 300.
Note: For MWS, enter 3511 in Options E-H.
0 0 0 0 301 CSHR__ __ __ __ __ __ __ __CA
ADD 302: Polling Control to PC Option A-D: Enter the number of seconds before transactions update the
PC. (This entry is multiplied by 10msec.) Option E-F: Not Used - Enter 00. Option G: 0= Enable In-line Polling without "Ver" and "Null" Data
elimination. 1= Enable Polling with "Ver" on IDACK text. 2= Enable Polling with "Null" data elimination on report data.
Option H: Enter the number of the PC Destination (1-3) for In-line Polling. Use numbers defined in Flag 300.
Note: For MWS, enter 00250001 in Options A-H.
0 0 302 CSHR__ __ __ __ __ __ __ __CA
ADD 303: End of Day Control from MWS Option A: 1= Pause for CASH after Preclose and before Postclose when
running an End of Day from the MWS PC. If set, you must press CASH at the Master workstation to continue the End of Day after Preclose finishes. (See also Flags 254 & 221.)
Option B-G: Not Used. Enter 000000. Option H: 2= Allow the End of Day command from the MWS PC even when open orders exist at a workstation. If set, you cannot close open orders until the End of Day finishes. (If open at the Master workstation, you must close the order when the End of Day finishes and run another End of Day before you attempt a Start of Day. A second End of Day is not required if the open order is at a Basic workstation.) If used, Flag 115A, Option 1 must also be set.
0 0 0 0 0 0 303 CSHR__ __ __ __ __ __ __ __CA

Programming
Panasonic 5500 Series Programming Instructions – Version LQ3.5 3-87
P24 Miscellaneous Flags (Page 25 of 44) ADD 304: PC Link Controls Option A-C: Not Used. Enter 000. Option D: Identify the PC (0-3) destination for the Gift Card
communications (Also make sure you have defined the PC destination in Flag 300H.)
Option E-G: Not Used. Enter 000. Option H: Identify the PC (0-3) destination for CAT communications.
(Also make sure you have defined the PC destination in Flag 300H.)
0 0 0 0 0 0 304 CSHR__ __ __ __ __ __ __ __CA
ADD 305: PC Controls Option A-D: Not Used - Enter 0000. Option E-F: Enter the Retry timer for PC communications. Your entry is
multiplied by 100ms. Option G: Enter the Retry count for PC communications. Option H: Enter the PC Destination for Delivery communications. (Also
make sure you defined the PC destination in Flag 300.)
0 0 0 0 305 CSHR__ __ __ __ __ __ __ __CA
ADD 306: MWS (Manager Workstation) Controls Option A: 1= Display a blinking "M" at the bottom of the workstation
screen while MWS is communicating to the workstation. This indicator can be used to alert the user that an MWS communication is in progress.
Option B-D: Not Used - Enter 000. Option E-F: Enter a value for the time allocated to workstation operations
during MWS report communications. MWS will pause its communication to allow workstation operations during a report. (The recommended entry is 03. Be careful not to set too high a number-- a large number may not give the PC enough time to complete the reports.)
Option G: 1= Allow R/A and P/O at the MWS PC. Option H: 1= Allow Time Edits at the MWS PC.
2= Allow Inventory entries at the MWS PC. 4= Allow Deposits at the MWS PC.
Note: If allowed at the MWS PC, the R/A, P/O, Time Edit, Inventory, and/or Deposit functions are not allowed at the workstations. For example, if you allow deposits at the MWS PC, you cannot enter deposits in the X1 Mode screen or during a workstation System Close.
0 0 0 306 CSHR__ __ __ __ __ __ __ __CA
ADD 307: Not Used - Enter 00000000.
307 CSHR 0 0 0 0 0 0 0 0 CA

Programming
3-88 Panasonic 5500 Series Programming Instructions – Version LQ3.5
P24 Miscellaneous Flags (Page 26 of 44) ADD 308: Option A-G: Not Used - Enter 00. Option H: Enter a value for the internal wait timer for MWS. Your entry
will be multiplied by 500msec. (Recommended entry =3 or 4). This entry helps handle MWS report uploads while a workstation is finalizing an order with 44 or more items.
308 CSHR __ __ __ __ __ __ __ __CA
ADD 309: Comment 1 & 2 Option A: Select the color for Comment 2 on KVS screens.
0= Display White characters. 1= Display Blue characters. 2= Display Green characters. 3= Display Cyan characters. 4= Display Red characters. 5= Display Magenta characters. 6= Display Yellow characters.
Option B: 1= Do not send Comment 2 to the Kitchen Printer or KVS. Option C: 1= Enable Red print for Comment 2, where applicable.
2= Send Comment 2 to the Drive-Thru Board. Option D: 1= Do not print Comment 2 on the Receipt.
2= Do not Print Comment 2 on the Journal. Option E: Select the color for Comment 1 on KVS screens.
0= Display White characters. 1= Display Blue characters. 2= Display Green characters. 3= Display Cyan characters. 4= Display Red characters. 5= Display Magenta characters. 6= Display Yellow characters.
Option F: 1= Do not send Comment 1 to the Kitchen Printer or KVS. Option G: 1= Enable Red print for Comment 1, where applicable.
2= Send Comment 1 to the Drive-Thru Board. Option H: 1= Do not print Comment 1 on the Receipt.
2= Do not Print Comment 1 on the Journal.
Note: Blink and Reverse options are not valid for Comments 1 and 2.
309 CSHR__ __ __ __ __ __ __ __CA

Programming
Panasonic 5500 Series Programming Instructions – Version LQ3.5 3-89
P24 Miscellaneous Flags (Page 27 of 44) ADD 310: Global Bumping Control 1 Option A: (Bump Bar 4 automatically performs Fill & Clear operations at CRT #4.) 2= Allow Bump Bar 4 to perform Fill & Clear at CRT #5. 4= Allow Bump Bar 4 to perform Fill & Clear at CRT #6. Option B: 1= Allow Bump Bar 4 to perform Fill & Clear at CRT #1. 2= Allow Bump Bar 4 to perform Fill & Clear at CRT #2. 4= Allow Bump Bar 4 to perform Fill & Clear at CRT #3. Option C: 1= Allow Bump Bar 3 to perform Fill & Clear at CRT #4. 2= Allow Bump Bar 3 to perform Fill & Clear at CRT #5. 4= Allow Bump Bar 3 to perform Fill & Clear at CRT #6. Option D: 1= Allow Bump Bar 3 to perform Fill & Clear at CRT #1. 2= Allow Bump Bar 3 to perform Fill & Clear at CRT #2. (Bump Bar 3 automatically performs Fill & Clear operations at CRT #3 .) Option E: 1= Allow Bump Bar 2 to perform Fill & Clear at CRT #4. 2= Allow Bump Bar 2 to perform Fill & Clear at CRT #5. 4= Allow Bump Bar 2 to perform Fill & Clear at CRT #6. Option F: 1= Allow Bump Bar 2 to perform Fill & Clear at CRT #1. (Bump Bar 2 automatically performs Fill & Clear operations at CRT #2.) 4= Allow Bump Bar 2 to perform Fill & Clear at CRT #3. Option G: 1= Allow Bump Bar 1 to perform Fill & Clear at CRT #4. 2= Allow Bump Bar 1 to perform Fill & Clear at CRT #5. 4= Allow Bump Bar 1 to perform Fill & Clear at CRT #6. Option H: (Bump Bar 1 automatically performs Fill & Clear operations at CRT #1.) 2= Allow Bump Bar 1 to perform Fill & Clear at CRT #2. 4= Allow Bump Bar 1 to perform Fill & Clear at CRT #3. Note: Use the Flags 310 and 311 for Global bumping, where
a single bump bar controls Fill & Clear operations at multiple KVS screens (CRTs). To use global bumping, you must have identical modes (RCRT4, RCRT8, or RCRT Split) and identical P59-6 status options for all screens that share a bump bar. See Flag 311 to identify the controller where the above settings are used. See the Appendix for details.
310 CSHR__ __ __ __ __ __ __ __CA

Programming
3-90 Panasonic 5500 Series Programming Instructions – Version LQ3.5
P24 Miscellaneous Flags (Page 28 of 44) ADD 311: Global Bumping Control 2 Option A-C: Not Used - Enter 000. Option D: 1= Activate the Flag 310 & 311 settings at KVS Controller #1. 2= Activate the Flag 310 & 311 settings at KVS Controller #2. 4= Activate the Flag 310 & 311 settings at KVS Controller #3. Option E: 1= Allow Bump Bar 6 to perform Fill & Clear at CRT #4. 2= Allow Bump Bar 6 to perform Fill & Clear at CRT #5. (Bump Bar 6 automatically performs Fill & Clear at CRT #6.) Option F: 1= Allow Bump Bar 6 to perform Fill & Clear at CRT #1. 2= Allow Bump Bar 6 to perform Fill & Clear at CRT #2. 4= Allow Bump Bar 6 to perform Fill & Clear at CRT #3. Option G: 1= Allow Bump Bar 5 to perform Fill & Clear at CRT #4. (Bump Bar 5 automatically performs Fill & Clear at CRT#5) 4= Allow Bump Bar 5 to perform Fill & Clear at CRT #6. Option H: 1= Allow Bump Bar 5 to perform Fill & Clear at CRT #1. 2= Allow Bump Bar 5 to perform Fill & Clear at CRT #2 4= Allow Bump Bar 5 to perform Fill & Clear at CRT #3. Also see Flag 310.
311 CSHR__ __ __ __ __ __ __ __CA
ADD 312: CAT Controls 1 Option A-D: Not Used. Enter 0000. Option E: 2= Read Track 2 data for CAT communications. [If not set, the
system will read Track 1 data.] Option F-G: Not Used. Enter 00. Option H: 1= Require MGR for Return Credit Transactions. 2= Require MGR for Manual Authorization. 4= Require MGR for Void Credit Transactions.
0 0 0 0 0 0 312 CSHR__ __ __ __ __ __ __ __CA
ADD 313: CAT Controls 2 Option A-C: Define the timer (0-255 seconds) for CAT communications
between the PC and the processing company. Option D-F: Define the timer (0-255 seconds) for CAT communications
between that do not involve the processing company. Option G-H: Enter the number of retry attempts (0-99) for CAT
communications.
313 CSHR__ __ __ __ __ __ __ __CA Default = 0600-6003
ADD 314: CAT Receipt Option A-D: Identify the printer where CAT receipts print. Use one digit for
the workstation # and one digit for the channel (Workstation #1, Channel 1 = 0011; Workstation #2, Channel 1 = 0021, etc.).
Option E-H: Not Used - Enter 0000.
0 0 0 0 314 CSHR__ __ __ __ __ __ __ __CA

Programming
Panasonic 5500 Series Programming Instructions – Version LQ3.5 3-91
P24 Miscellaneous Flags (Page 29 of 44) ADD 315: Do Not Change Data that may appear in this address (CAT and Gift Card Reference #s)
DO NOT CHANGE!! 315 CSHR__ __ __ __ __ __ __ __CA
(Address 316 is not used.)
ADD 317: Gift Card Controls Option A-C: Define the length of time (0-255 seconds) before timing out, for
Gift Card communications, between the PC and the host processing company.
Option D-F: Define the length of time (0-255 seconds) before timing out, between the WS and PC, when the Gift Card processor is not available.
Option G-H: Enter the number of retry attempts (0-99) for Gift Card communications.
317 CSHR__ __ __ __ __ __ __ __CA Default = 0600-6003
ADD 318: Gift Card Printer Controls Option A-D: Enter the number (0-204) of the workstation ID and RS232
Channel where the Receipt Printer for printing the Gift Certificates is located.
Option E-H: Not Used
Examples: Workstation #1, CH1 = 11 Workstation #20, CH1 = 201 Workstation #1, CH2 = 12 Workstation #20, CH2 = 202 Workstation #1, CH3 = 13 Workstation #20, CH3 = 203 Workstation #1, CH4 = 14 Workstation #20, CH4 = 204
318 CSHR__ __ __ __ __ __ __ __CA
(Addresses 319 through 329 are not used.)
ADD 330: System Print Control 1 This flag does not downline! Note: For Flags 330-349, use the Workstation # (1-20) and RS-232C
Channel (CH1-CH4) to identify the printer. (For example, enter 24 to choose the printer connected to Workstation #2, RS-232C Channel 4. Additional examples are below.)
Workstation #1, CH1 = 11 Workstation #20, CH1 = 201 Workstation #1, CH2 = 12 Workstation #20, CH2 = 202 Workstation #1, CH3 = 13 Workstation #20, CH3 = 203 Workstation #1, CH4 = 14 Workstation #20, CH4 = 204
Option A-D: Enter the number (0-204) of the System Receipt Printer. Option E-H: Enter the number (0-204) of the System Journal Printer.
330 CSHR__ __ __ __ __ __ __ __CA

Programming
3-92 Panasonic 5500 Series Programming Instructions – Version LQ3.5
P24 Miscellaneous Flags (Page 30 of 44) ADD 331: System Print Control 2 This flag does not downline!
See the note at Flag 330. Option A-D: Enter the number (0-204) of the System Report Printer.
(This printer will also be used for Program Printouts and Self-Tests.)
Option E-H: Enter the number (0-204) of the printer where Charge 1 transactions are directed.
331 CSHR__ __ __ __ __ __ __ __CA
ADD 332: System Print Control 3 This flag does not downline!
See the note at Flag 330. Option A-D: Enter the number of the Printer (0-204) where receipts
print when Store is pressed at the Cashier Station. (0= No Receipts; 11= Print at the printer connected to Workstation 1, CH1, etc.)
Option E-G: Not Used - Enter 000. Option H: Enter number of seconds used to transfer report data. [7=
Wait until ready; 0-6 = (0-6) X 10 seconds.]
0 0 0 332 CSHR__ __ __ __ __ __ __ __CA
ADD 333: Kitchen Printer Steer 1 Note: For Flags 333-349, use the Workstation # (1-20) and RS-232C
Channel (CH1-CH4) to identify the printer. (For example, enter 12 to set the printer connected to Workstation #1, RS-232C Channel 2.)
Option A-D: Enter the number (0-204) of the printer where Steer Flag 2
is directed. Option E-H: Enter the number (0-204) of the printer where Steer Flag 1
is directed.
333 CSHR__ __ __ __ __ __ __ __CA
ADD 334: Kitchen Printer Steer 2 See the note at Flag 333. Option A-D: Enter the number (0-204) of the printer where Steer Flag 4
is directed. Option E-H: Enter the number (0-204) of the printer where Steer Flag 3
is directed.
334 CSHR__ __ __ __ __ __ __ __CA

Programming
Panasonic 5500 Series Programming Instructions – Version LQ3.5 3-93
P24 Miscellaneous Flags (Page 31 of 44) ADD 335: Kitchen Printer Steer 3 See the note at Flag 333. Option A-D: Enter the number (0-204) of the printer where Steer Flag 6
is directed. Option E-H: Enter the number (0-204) of the printer where Steer Flag 5
is directed.
335 CSHR__ __ __ __ __ __ __ __CA
ADD 336: Kitchen Printer Steer 4 See the note at Flag 333. Option A-D: Enter the number (0-204) of the printer where Steer Flag 8
is directed. Option E-H: Enter the number (0-204) of the printer where Steer Flag 7
is directed.
336 CSHR__ __ __ __ __ __ __ __CA
ADD 337: Kitchen Printer Steer 5 See the note at Flag 333. Option A-C: Not Used - Enter 000. Option D: Enter the number (0-204) of lines to feed between items. Option E-H: Enter the number of the printer where Steer Flag 9 is
directed.
0 0 0 337 CSHR__ __ __ __ __ __ __ __CA
ADD 338: Printer Back-up Note: For Flags 333-349, use the Workstation # (1-20) and RS-232C
Channel (CH1-CH4) to identify the printer. For example, enter 12 to designate the printer connected to Workstation #1, RS-232C Channel 2.
Option A-D: Enter the number (0-204) of the back-up printer for
Workstation #2. Option E-H: Enter the number (0-204) of the back-up printer for
Workstation #1.
338 CSHR__ __ __ __ __ __ __ __CA
ADD 339: Printer Back-up 2 Option A-D: Enter the number (0-204) of the back-up printer for
Workstation #4. Option E-H: Enter the number (0-204) of the back-up printer for
Workstation #3.
339 CSHR__ __ __ __ __ __ __ __CA

Programming
3-94 Panasonic 5500 Series Programming Instructions – Version LQ3.5
P24 Miscellaneous Flags (Page 32 of 44) ADD 340: Printer Back-up 3 Option A-D: Enter the number (0-204) of the back-up printer for
Workstation #6. Option E-H: Enter the number (0-204) of the back-up printer for
Workstation #5.
340 CSHR__ __ __ __ __ __ __ __CA
ADD 341: Printer Back-up 4 Option A-D: Enter the number (0-204) of the back-up printer for
Workstation #8. Option E-H: Enter the number (0-204) of the back-up printer for
Workstation #7.
341 CSHR__ __ __ __ __ __ __ __CA
ADD 342: Printer Back-up 5 Option A-D: Enter the number (0-204) of the back-up printer for
Workstation #10. Option E-H: Enter the number (0-204) of the back-up printer for
Workstation #9.
342 CSHR__ __ __ __ __ __ __ __CA
ADD 343: Printer Back-up 6 Option A-D: Enter the number (0-204) of the back-up printer for
Workstation #12. Option E-H: Enter the number (0-204) of the back-up printer for
Workstation #11.
343 CSHR__ __ __ __ __ __ __ __CA
ADD 344: Printer Back-up 7 Note: For Flags 333-349, use the Workstation # (1-20) and RS-232C
Channel (CH1-CH4) to identify the printer. (For example, enter 12 to designate the printer connected to Workstation #1, RS-232C Channel 2.)
Option A-D: Enter the number (0-204) of the back-up printer for
Workstation #14. Option E-H: Enter the number (0-204) of the back-up printer for
Workstation #13.
344 CSHR__ __ __ __ __ __ __ __CA

Programming
Panasonic 5500 Series Programming Instructions – Version LQ3.5 3-95
P24 Miscellaneous Flags (Page 33 of 44) ADD 345: Printer Back-up 8 Option A-D: Enter the number (0-204) of the back-up printer for
Workstation #16. Option E-H: Enter the number (0-204) of the back-up printer for
Workstation #15.
345 CSHR__ __ __ __ __ __ __ __CA
ADD 346: Printer Back-up 9 Option A-D: Enter the number (0-204) of the back-up printer for
Workstation #18. Option E-H: Enter the number (0-204) of the back-up printer for
Workstation #17.
346 CSHR__ __ __ __ __ __ __ __CA
ADD 347: Printer Back-up 10 Option A-D: Enter the number (0-204) of the back-up printer for
Workstation #20. Option E-H: Enter the number (0-204) of the back-up printer for
Workstation #19.
347 CSHR__ __ __ __ __ __ __ __CA
ADD 348: KVS Back-up 1 Option A-D: Enter the number (0-204) of the back-up printer for KVS
Controller #2. (0= no backup; 11= use the printer at Workstation #1, CH1; 12 = use the printer at Workstation #1, CH2, etc.)
Option E-H: Enter the number (0-204) of the back-up printer for KVS Controller #1.
348 CSHR__ __ __ __ __ __ __ __CA
ADD 349: KVS Back-up 2 Option A-D: Not Used. Enter 0000. Option E-H: Enter the number (0-204) of the back-up printer for KVS
Controller #3.
0 0 0 0 349 CSHR__ __ __ __ __ __ __ __CA
ADD 350: Not Used - Enter 00000000.
0 0 0 0 0 0 0 0 350 CSHR__ __ __ __ __ __ __ __CA
ADD 351: Credit Card Range 1 Option A-D: Enter four digits for the start of the range that identifies an
accepted credit card. Option E-H: Enter four digits for the end of the range.
Example: For Discover, enter 6011 for the start of the range and enter 6011 for the end (the default for this flag). See Flags 371-389 to link this range to applicable charges.
351 CSHR__ __ __ __ __ __ __ __CA Default = 6011-6011

Programming
3-96 Panasonic 5500 Series Programming Instructions – Version LQ3.5
P24 Miscellaneous Flags (Page 34 of 44) ADD 352: Credit Card Range 2 Option A-D: Enter four digits for the start of the range that identifies an
accepted credit card. Option E-H: Enter four digits for the end of the range. Example: For Master Card, enter 5100 for the start of the range and
enter 5599 for the end (the default for this flag). See Flags 371-389 to link this range to applicable charges.
352 CSHR__ __ __ __ __ __ __ __CA Default = 5100-5599
ADD 353: Credit Card Range 3 Option A-D: Enter four digits for the start of the range that identifies an
accepted credit card. Option E-H: Enter four digits for the end of the range. Example: For Visa, enter 4000 for the start of the range and enter
4999 for the end (the default for this flag). See Flags 371-389 to link this range to applicable charges.
353 CSHR__ __ __ __ __ __ __ __CA Default = 4000-4999
ADD 354: Credit Card Range 4 Option A-D: Enter four digits for the start of the range that identifies an
accepted credit card. Option E-H: Enter four digits for the end of the range. Example: For American Express, enter 3700 for the start of the
range and enter 3799 for the end (the default for this flag). A second Amex range is set in Flag 355. See Flags 371-389 to link this flag to applicable charges.
354 CSHR__ __ __ __ __ __ __ __CA Default = 3700-3799
ADD 355: Credit Card Range 5 Option A-D: Enter four digits for the start of the range that identifies an
accepted credit card. Option E-H: Enter four digits for the end of the range. Example: For American Express, enter 3400 for the start of the
range and enter 3499 for the end (the default for this flag).
355 CSHR__ __ __ __ __ __ __ __CA Default = 3400-3499
ADD 356: Credit Card Range 6 Option A-D: Enter four digits for the start of the range that identifies an
accepted credit card. Option E-H: Enter four digits for the end of the range. Example: For Diners, enter 3000 for the start of the range and enter
3059 for the end (the default for this flag). Another Diners range is set in Flag 357.
356 CSHR__ __ __ __ __ __ __ __CA Default = 3000-3059

Programming
Panasonic 5500 Series Programming Instructions – Version LQ3.5 3-97
P24 Miscellaneous Flags (Page 35 of 44) ADD 357: Credit Card Range 7 Option A-D: Enter four digits for the start of the range that identifies an
accepted credit card. Option E-H: Enter four digits for the end of the range. Example: For Diners, enter 3600 for the start of the range and enter
3699 for the end (the default for this flag).
357 CSHR__ __ __ __ __ __ __ __CA Default = 3600-3699
ADD 358: Credit Card Range 8 Option A-D: Enter four digits for the start of the range that identifies an
accepted credit card. Option E-H: Enter four digits for the end of the range. Example: For Diners, enter 3800 for the start of the range and enter
3889 for the end (the default for this flag).
358 CSHR__ __ __ __ __ __ __ __CA Default = 3800-3889
ADD 359: Credit Card Range 9 Option A-D: Enter four digits for the start of the range that identifies an
accepted credit card. Option E-H: Enter four digits for the end of the range. Example: For Carte Blanche, enter 3890 for the start of the range
and enter 3899 for the end (the default for this flag).
359 CSHR__ __ __ __ __ __ __ __CA Default = 3890-3899
ADD 360: Minor Employee Handling 1 Option A-B: Enter the Month when the School session ends. Option C-D: Enter the Day when the School session ends. Option E-F: Enter the Month when the School session starts. Option G-H: Enter the Day when the School session starts.
Example: If Summer vacation begins on June 5 and ends on August 26, enter 06050826.
360 CSHR__ __ __ __ __ __ __ __CA

Programming
3-98 Panasonic 5500 Series Programming Instructions – Version LQ3.5
P24 Miscellaneous Flags (Page 36 of 44)
ADD 361: Minor Employee Handling 2
Option A-D: Enter the number of minutes (0-9999) before the Minor
Employee warning message starts. Option E: Enter the number of seconds (0-9) between warning
messages. (This is multiplied by 10; enter 1 if the warning should display every 10 seconds.)
Option F: 1= Designate Sunday as a school day. Option G: 1= Designate Thursday as a school day.
2= Designate Friday as a school day. 4= Designate Saturday as a school day.
Option H: 1= Designate Monday as a school day. 2= Designate Tuesday as a school day. 4= Designate Wednesday as a school day.
361 CSHR__ __ __ __ __ __ __ __CA
Default = 0015-1077
ADD 362: Minor Employee Handling 3 Option A-D: Enter the Daily hour limit (xx:xx) for minors on a non-
school day. Option E-H: Enter the Daily hour limit for a school day.
362 CSHR__ __ __ __ __ __ __ __CA
Default = 0800-0300
ADD 363: Minor Employee Handling 4 Option A-D: Enter the Weekly hour limit (xx:xx) for minors during the
non-school season. Option E-H: Enter the Weekly hour limit for the school season.
363 CSHR__ __ __ __ __ __ __ __CA
Default = 4000-1800
ADD 364: Minor Employee Handling 5 Option A-D: Enter the latest hour minors can work on a non-school day.
(For example, enter 2100 if minors cannot work past 9pm.) Option E-H: Enter the latest hour for minors on a school day.
364 CSHR__ __ __ __ __ __ __ __CA
Default = 2100-1900
(Addresses 365-369 are not used)

Programming
Panasonic 5500 Series Programming Instructions – Version LQ3.5 3-99
P24 Miscellaneous Flags (Page 37 of 44) ADD 370: Charge 1 Controls
Option A: Not Used - Enter 0. Option B: 1= Allow manual entry for this charge. (Applies to Magnetic Card Reader.) Option C: 1= Enable Automatic Finalize for this charge, where the leading digits
identify the card type. (Applies to Magnetic Card Reader.) 2= Do Not open the cash drawer for this charge. (Applies to all charges.) 4= Issue a 2-part receipt. (Applies to Mag. Card Reader and CAT.) Option D: 1= Apply the HALO (in Option G) to the change amount issued for the
charge. [If not set, the HALO limits the amount you can tender on the charge.] (Applies to Charge key only.)
2= Require # or Account # entry. (Applies to Charge key only.) 4= Issue a 2-part charge receipt. (Applies to Charge key only.) Option E: 1= Apply the Option G HALO to change issued for this charge. (Applies to
CAT.) 2= Do Not Allow overtender on this charge (Applies to CAT.) 4= Override Receipt Stop for CAT transactions. Option F: The following tax options apply to all types of charges. 1= Include Tax 1 in this charge. 2= Include Tax 2 in this charge. 4= Include Tax 3 in this charge.
Option G: Enter the value (0-7) for the HALO. (Applies to all types of charges.) Enter 0 if this charge does not use a HALO.
1= .10 5=1000.00 2= 1.00 6=10000.00 3= 10.00 7=99999.99 4= 100.00 Option H: 1= This charge acts is a preset Charge key. 2= This charge uses the Magnetic Card Reader. 4= This charge uses Credit Authorization (CAT).
For Flags 370 - 389, "Charge key" transactions would be ones finalized with a preset
charge key (Visa, Amex, etc.). "Magnetic Card Reader" transactions would be ones where you swipe a card through the reader, but do not communicate to a processing company. "CAT" transactions would be ones where the system communicates to a processing company to authorize the credit card.
0 370 CSHR__ __ __ __ __ __ __ __CA
ADD 371: Charge 1 Range Links If this charge uses Magnetic Card Reader or CAT functions, enter a value for the range of card numbers that identify the charge. Each charge can link to as many as three ranges defined in Flags 351-359. Select from the following. Values cannot be added. 1= Use the Flag 351 range. 6= Use the Flag 356 range. 2= Use the Flag 352 range. 7= Use the Flag 357 range. 3= Use the Flag 353 range. 8= Use the Flag 358 range. 4= Use the Flag 354 range. 9= Use the Flag 359 range. 5= Use the Flag 355 range. Option A-E: Not Used. Option F: Enter a value for the last range that identifies this charge (optional). Option G: Enter a value for the second range that identifies this charge (optional). Option H: Enter a value for the first range of card numbers that identify this charge.
371 CSHR__ __ __ __ __ __ __ __CA

Programming
3-100 Panasonic 5500 Series Programming Instructions – Version LQ3.5
P24 Miscellaneous Flags (Page 38 of 44) ADD 372: Charge 2 Controls Option A: Not Used - Enter 0. Option B: 1= Allow manual entry for this charge. (Applies to Magnetic Card Reader.) Option C: 1= Enable Automatic Finalize for this charge. (Applies to Magnetic Card
Reader.) 2= Do Not open the cash drawer. (Applies to all types of charges.) 4= Issue 2-part charge receipt for this charge. (Applies to Magnetic Card
Reader and CAT.) Option D: 1= Apply the HALO (in Option G) to the change amount issued for the
charge. [If not set, the HALO applies to the amount you can tender.] (Applies to preset Charge key only.)
2= Require # or Account # entry. (Applies to preset Charge key only.) 4= Issue a 2-part charge receipt. (Applies to preset Charge key only.) Option E: 1= Apply the Option G HALO to change issued. (Applies to CAT.) 2= Do Not Allow overtendering on this charge. (Applies to CAT.) 4= Override Receipt Stop for this charge. (Applies to CAT.) Option F: The following tax options apply to all types of charges. 1= Include Tax 1 in this charge. 2= Include Tax 2 in this charge. 4= Include Tax 3 in this charge. Option G: Enter the value (0-7) for the HALO. (Applies to all types of charges.)
Enter 0 if this charge does not use a HALO. 1= .10 5=1000.00 2= 1.00 6=10000.00 3= 10.00 7=99999.99 4= 100.00 Option H: 1= This charge acts as a Normal Charge key. 2= This charge uses the Magnetic Card Reader. 4= This charge uses Credit Authorization (CAT). For Flag 370 - 389, "Charge key" transactions refer to preset charge keys (Visa, MC,
Amex, etc.). "Magnetic Card Reader" transactions refer to transactions where you swipe a card through the reader. "CAT" transactions refer to transactions where the system communicates to a processing company to authorize the credit card.
0 372 CSHR__ __ __ __ __ __ __ __CA
ADD 373: Charge 2 Range Links If this charge uses Magnetic Card Reader or CAT functions, enter a value for the range of card numbers that identify the charge. Each charge can link to as many as three ranges defined in Flags 351-359. Select from the following. Values cannot be added. 1= Use the Flag 351 range. 6= Use the Flag 356 range. 2= Use the Flag 352 range. 7= Use the Flag 357 range. 3= Use the Flag 353 range. 8= Use the Flag 358 range. 4= Use the Flag 354 range. 9= Use the Flag 359 range. 5= Use the Flag 355 range. Option A-E Not Used. Option F: Enter a value for the last range that identifies this charge (optional). Option G: Enter a value for the second range that identifies this charge (optional). Option H: Enter a value for the first range of account numbers that identify this
charge.
373 CSHR__ __ __ __ __ __ __ __CA

Programming
Panasonic 5500 Series Programming Instructions – Version LQ3.5 3-101
P24 Miscellaneous Flags (Page 39 of 44) ADD 374: Charge 3 Controls Select options for Charge 3. See Flags 370 and 372 for available options.
374 CSHR__ __ __ __ __ __ __ __CA
ADD 375: Charge 3 Range Links Enter values to link Charge 3 to valid card number ranges. See Flags 371 and 373 for
details about entries. Option F: Enter a value for the last range that identifies this charge (optional). Option G: Enter a value for the second range that identifies this charge (optional). Option H: Enter a value for the first range of account numbers that identify this charge.
375 CSHR__ __ __ __ __ __ __ __CA
ADD 376: Charge 4 Controls Select options for Charge 4. See Flags 370 and 372 for available options.
376 CSHR__ __ __ __ __ __ __ __CA
ADD 377: Charge 4 Range Links Enter values to link Charge 4 to valid card number ranges. See Flags 371 and 373 for
details about entries. Option F: Enter a value for the last range that identifies this charge (optional). Option G: Enter a value for the second range that identifies this charge (optional). Option H: Enter a value for the first range of account numbers that identify this charge.
377 CSHR__ __ __ __ __ __ __ __CA
ADD 378: Charge 5 Controls Select options for Charge 5. See Flags 370 and 372 for available options.
378 CSHR__ __ __ __ __ __ __ __CA
ADD 379: Charge 5 Range Links Enter values to link Charge 5 to applicable card number ranges. See Flags 371 and 373
for details. Option F: Enter a value for the last range that identifies this charge (optional). Option G: Enter a value for the second range that identifies this charge (optional). Option H: Enter a value for the first range of account numbers that identify this charge.
379 CSHR__ __ __ __ __ __ __ __CA
ADD 380: Charge 6 Controls Select options for Charge 6. See Flags 370 and 372 for available options.
380 CSHR__ __ __ __ __ __ __ __CA
.ADD 381: Charge 6 Range Links Enter values to link Charge 6 to applicable card number ranges. See Flags 371 and 373
for details about entries. Option F: Enter a value for the last range that identifies this charge (optional). Option G: Enter a value for the second range that identifies this charge (optional). Option H: Enter a value for the first range of account numbers that identify this charge.
381 CSHR__ __ __ __ __ __ __ __CA

Programming
3-102 Panasonic 5500 Series Programming Instructions – Version LQ3.5
P24 Miscellaneous Flags (Page 40 of 44) ADD 382: Charge 7 Controls Select options for Charge 7. See Flags 370 and 372 for available options.
382 CSHR__ __ __ __ __ __ __ __CA
ADD 383: Charge 7 Range Links Enter values to link Charge 7 to valid card number ranges. See Flags 371 and 373 for
details about entries. Option F: Enter a value for the last range that identifies this charge (optional). Option G: Enter a value for the second range that identifies this charge (optional). Option H: Enter a value for the first range of account numbers that identify this charge.
383 CSHR__ __ __ __ __ __ __ __CA
ADD 384: Charge 8 Controls Select options for Charge 8. See Flags 370 and 372 for available options.
384 CSHR__ __ __ __ __ __ __ __CA
ADD 385: Charge 8 Range Links Enter values to link Charge 8 to valid card number ranges. See Flags 371 and 373 for
details about entries. Option F: Enter a value for the last range that identifies this charge (optional). Option G: Enter a value for the second range that identifies this charge (optional). Option H: Enter a value for the first range of account numbers that identify this charge.
385 CSHR__ __ __ __ __ __ __ __CA
ADD 386: Charge 9 Controls Select options for Charge 9. See Flags 370 and 372 for available options.
386 CSHR__ __ __ __ __ __ __ __CA
ADD 387: Charge 9 Range Links Enter values to link Charge 9 to applicable card number ranges. See Flags 371 and 373
for details. Option F: Enter a value for the last range that identifies this charge (optional). Option G: Enter a value for the second range that identifies this charge (optional). Option H: Enter a value for the first range of account numbers that identify this charge.
387 CSHR__ __ __ __ __ __ __ __CA
ADD 388: Charge 10 Controls Select options for Charge 10. See Flags 370 and 372 for available options.
388 CSHR__ __ __ __ __ __ __ __CA
ADD 389: Charge 10 Range Links Enter values to link Charge 10 to applicable card number ranges. See Flags 371 and 373
for details. Option F: Enter a value for the last range that identifies this charge (optional). Option G: Enter a value for the second range that identifies this charge (optional). Option H: Enter a value for the first range of account numbers that identify this charge.
389 CSHR__ __ __ __ __ __ __ __CA
Addresses 390 through 399 are not used.

Programming
Panasonic 5500 Series Programming Instructions – Version LQ3.5 3-103
P24 Miscellaneous Flags (Page 41 of 44) ADD 400: KVS Service Time Report Update - CRT1 Orders relayed to the KVS screens can update Inside Sales counters, Drive-Thru Sales counters, or none of the Service Time Report counters. Identify the counters updated when the indicated workstation sends orders to the indicated CRT.
Option A: 0= Orders sent from Workstation 8 to CRT1 do not update Service Time reports. 1= Orders sent from Workstation 8 to CRT1 update Inside Sales counters. 2= Orders sent from Workstation 8 to CRT1 update Drive-Thru Sales counters. Option B: 0= Orders sent from Workstation 7 to CRT1 do not update Service Time reports. 1= Orders sent from Workstation 7 to CRT1 update Inside Sales counters. 2= Orders sent from Workstation 7 to CRT1 update Drive-Thru Sales counters. Option C: 0= Orders sent from Workstation 6 to CRT1 do not update Service Time reports. 1= Orders sent from Workstation 6 to CRT1 update Inside Sales counters. 2= Orders sent from Workstation 6 to CRT1 update Drive-Thru Sales counters. Option D: 0= Orders sent from Workstation 5 to CRT1 do not update Service Time reports. 1= Orders sent from Workstation 5 to CRT1 update Inside Sales counters. 2= Orders sent from Workstation 5 to CRT1 update Drive-Thru Sales counters. Option E: 0= Orders sent from Workstation 4 to CRT1 do not update Service Time reports. 1= Orders sent from Workstation 4 to CRT1 update Inside Sales counters. 2= Orders sent from Workstation 4 to CRT1 update Drive-Thru Sales counters. Option F: 0= Orders sent from Workstation 3 to CRT1 do not update Service Time reports. 1= Orders sent from Workstation 3 to CRT1 update Inside Sales counters. 2= Orders sent from Workstation 3 to CRT1 update Drive-Thru Sales counters. Option G: 0= Orders sent from Workstation 2 to CRT1 do not update Service Time reports. 1= Orders sent from Workstation 2 to CRT1 update Inside Sales counters. 2= Orders sent from Workstation 2 to CRT1 update Drive-Thru Sales counters. Option H: 0= Orders sent from Workstation 1 to CRT1 do not update Service Time reports. 1= Orders sent from Workstation 1 to CRT1 update Inside Sales counters. 2= Orders sent from Workstation 1 to CRT1 update Drive-Thru Sales counters.
400 CSHR__ __ __ __ __ __ __ __CA
ADD 401: KVS Service Time Report Update - CRT1 & CRT2 Option A: 0= Orders sent from Workstation 6 to CRT2 do not update Service Time reports. 1= Orders sent from Workstation 6 to CRT2 update Inside Sales counters. 2= Orders sent from Workstation 6 to CRT2 update Drive-Thru Sales counters. Option B: 0= Orders sent from Workstation 5 to CRT2 do not update Service Time reports. 1= Orders sent from Workstation 5 to CRT2 update Inside Sales counters. 2= Orders sent from Workstation 5 to CRT2 update Drive-Thru Sales counters. Option C: 0= Orders sent from Workstation 4 to CRT2 do not update Service Time reports. 1= Orders sent from Workstation 4 to CRT2 update Inside Sales counters. 2= Orders sent from Workstation 4 to CRT2 update Drive-Thru Sales counters. Option D: 0= Orders sent from Workstation 3 to CRT2 do not update Service Time reports. 1= Orders sent from Workstation 3 to CRT2 update Inside Sales counters. 2= Orders sent from Workstation 3 to CRT2 update Drive-Thru Sales counters. Option E: 0= Orders sent from Workstation 2 to CRT2 do not update Service Time reports. 1= Orders sent from Workstation 2 to CRT2 update Inside Sales counters. 2= Orders sent from Workstation 2 to CRT2 update Drive-Thru Sales counters. Option F: 0= Orders sent from Workstation 1 to CRT2 do not update Service Time reports. 1= Orders sent from Workstation 1 to CRT2 update Inside Sales counters. 2= Orders sent from Workstation 1 to CRT2 update Drive-Thru Sales counters. Option G: 0= Orders sent from Workstation 10 to CRT1 do not update Service Time reports. 1= Orders sent from Workstation 10 to CRT1 update Inside Sales counters. 2= Orders sent from Workstation 10 to CRT1 update Drive-Thru Sales counters. Option H: 0= Orders sent from Workstation 9 to CRT1 do not update Service Time reports. 1= Orders sent from Workstation 9 to CRT1 update Inside Sales counters. 2= Orders sent from Workstation 9 to CRT1 update Drive-Thru Sales counters.
401 CSHR__ __ __ __ __ __ __ __CA

Programming
3-104 Panasonic 5500 Series Programming Instructions – Version LQ3.5
P24 Miscellaneous Flags (Page 42 of 44) ADD 402: KVS Service Time Report Update - CRT2 & CRT3 Option A: 0= Orders sent from Workstation 4 to CRT3 do not update Service Time reports. 1= Orders sent from Workstation 4 to CRT3 update Inside Sales counters. 2= Orders sent from Workstation 4 to CRT3 update Drive-Thru Sales counters. Option B: 0= Orders sent from Workstation 3 to CRT3 do not update Service Time reports. 1= Orders sent from Workstation 3 to CRT3 update Inside Sales counters. 2= Orders sent from Workstation 3 to CRT3 update Drive-Thru Sales counters. Option C: 0= Orders sent from Workstation 2 to CRT3 do not update Service Time reports. 1= Orders sent from Workstation 2 to CRT3 update Inside Sales counters. 2= Orders sent from Workstation 2 to CRT3 update Drive-Thru Sales counters. Option D: 0= Orders sent from Workstation 1 to CRT3 do not update Service Time reports. 1= Orders sent from Workstation 1 to CRT3 update Inside Sales counters. 2= Orders sent from Workstation 1 to CRT3 update Drive-Thru Sales counters. Option E: 0= Orders sent from Workstation 10 to CRT2 do not update Service Time reports. 1= Orders sent from Workstation 10 to CRT2 update Inside Sales counters. 2= Orders sent from Workstation 10 to CRT2 update Drive-Thru Sales counters. Option F: 0= Orders sent from Workstation 9 to CRT2 do not update Service Time reports. 1= Orders sent from Workstation 9 to CRT2 update Inside Sales counters. 2= Orders sent from Workstation 9 to CRT2 update Drive-Thru Sales counters. Option G: 0= Orders sent from Workstation 8 to CRT2 do not update Service Time reports. 1= Orders sent from Workstation 8 to CRT2 update Inside Sales counters. 2= Orders sent from Workstation 8 to CRT2 update Drive-Thru Sales counters. Option H: 0= Orders sent from Workstation 7 to CRT2 do not update Service Time reports. 1= Orders sent from Workstation 7 to CRT2 update Inside Sales counters. 2= Orders sent from Workstation 7 to CRT2 update Drive-Thru Sales counters.
402 CSHR__ __ __ __ __ __ __ __CA
ADD 403: KVS Service Time Report Update - CRT3 & CRT4 Option A: 0= Orders sent from Workstation 2 to CRT4 do not update Service Time reports. 1= Orders sent from Workstation 2 to CRT4 update Inside Sales counters. 2= Orders sent from Workstation 2 to CRT4 update Drive-Thru Sales counters. Option B: 0= Orders sent from Workstation 1 to CRT4 do not update Service Time reports. 1= Orders sent from Workstation 1 to CRT4 update Inside Sales counters. 2= Orders sent from Workstation 1 to CRT4 update Drive-Thru Sales counters. Option C: 0= Orders sent from Workstation 10 to CRT3 do not update Service Time reports. 1= Orders sent from Workstation 10 to CRT3 update Inside Sales counters. 2= Orders sent from Workstation 10 to CRT3 update Drive-Thru Sales counters. Option D: 0= Orders sent from Workstation 9 to CRT3 do not update Service Time reports. 1= Orders sent from Workstation 9 to CRT3 update Inside Sales counters. 2= Orders sent from Workstation 9 to CRT3 update Drive-Thru Sales counters. Option E: 0= Orders sent from Workstation 8 to CRT3 do not update Service Time reports. 1= Orders sent from Workstation 8 to CRT3 update Inside Sales counters. 2= Orders sent from Workstation 8 to CRT3 update Drive-Thru Sales counters. Option F: 0= Orders sent from Workstation 7 to CRT3 do not update Service Time reports. 1= Orders sent from Workstation 7 to CRT3 update Inside Sales counters. 2= Orders sent from Workstation 7 to CRT3 update Drive-Thru Sales counters. Option G: 0= Orders sent from Workstation 6 to CRT3 do not update Service Time reports. 1= Orders sent from Workstation 6 to CRT3 update Inside Sales counters. 2= Orders sent from Workstation 6 to CRT3 update Drive-Thru Sales counters. Option H: 0= Orders sent from Workstation 5 to CRT3 do not update Service Time reports. 1= Orders sent from Workstation 5 to CRT3 update Inside Sales counters. 2= Orders sent from Workstation 5 to CRT3 update Drive-Thru Sales counters.
403 CSHR__ __ __ __ __ __ __ __CA

Programming
Panasonic 5500 Series Programming Instructions – Version LQ3.5 3-105
P24 Miscellaneous Flags (Page 43 of 44) ADD 404: KVS Service Time Report Update - CRT4 Option A: 0= Orders sent from Workstation 10 to CRT4 do not update Service Time reports. 1= Orders sent from Workstation 10 to CRT4 update Inside Sales counters. 2= Orders sent from Workstation 10 to CRT4 update Drive-Thru Sales counters. Option B: 0= Orders sent from Workstation 9 to CRT4 do not update Service Time reports. 1= Orders sent from Workstation 9 to CRT4 update Inside Sales counters. 2= Orders sent from Workstation 9 to CRT4 update Drive-Thru Sales counters. Option C: 0= Orders sent from Workstation 8 to CRT4 do not update Service Time reports. 1= Orders sent from Workstation 8 to CRT4 update Inside Sales counters. 2= Orders sent from Workstation 8 to CRT4 update Drive-Thru Sales counters. Option D: 0= Orders sent from Workstation 7 to CRT4 do not update Service Time reports. 1= Orders sent from Workstation 7 to CRT4 update Inside Sales counters. 2= Orders sent from Workstation 7 to CRT4 update Drive-Thru Sales counters. Option E: 0= Orders sent from Workstation 6 to CRT4 do not update Service Time reports. 1= Orders sent from Workstation 6 to CRT4 update Inside Sales counters. 2= Orders sent from Workstation 6 to CRT4 update Drive-Thru Sales counters. Option F: 0= Orders sent from Workstation 5 to CRT4 do not update Service Time reports. 1= Orders sent from Workstation 5 to CRT4 update Inside Sales counters. 2= Orders sent from Workstation 5 to CRT4 update Drive-Thru Sales counters. Option G: 0= Orders sent from Workstation 4 to CRT4 do not update Service Time reports. 1= Orders sent from Workstation 4 to CRT4 update Inside Sales counters. 2= Orders sent from Workstation 4 to CRT4 update Drive-Thru Sales counters. Option H: 0= Orders sent from Workstation 3 to CRT4 do not update Service Time reports. 1= Orders sent from Workstation 3 to CRT4 update Inside Sales counters. 2= Orders sent from Workstation 3 to CRT4 update Drive-Thru Sales counters.
404 CSHR__ __ __ __ __ __ __ __CA
ADD 405: KVS Service Time Report Update - CRT5 Option A: 0= Orders sent from Workstation 8 to CRT5 do not update Service Time reports. 1= Orders sent from Workstation 8 to CRT5 update Inside Sales counters. 2= Orders sent from Workstation 8 to CRT5 update Drive-Thru Sales counters. Option B: 0= Orders sent from Workstation 7 to CRT5 do not update Service Time reports. 1= Orders sent from Workstation 7 to CRT5 update Inside Sales counters. 2= Orders sent from Workstation 7 to CRT5 update Drive-Thru Sales counters. Option C: 0= Orders sent from Workstation 6 to CRT5 do not update Service Time reports. 1= Orders sent from Workstation 6 to CRT5 update Inside Sales counters. 2= Orders sent from Workstation 6 to CRT5 update Drive-Thru Sales counters. Option D: 0= Orders sent from Workstation 5 to CRT5 do not update Service Time reports. 1= Orders sent from Workstation 5 to CRT5 update Inside Sales counters. 2= Orders sent from Workstation 5 to CRT5 update Drive-Thru Sales counters. Option E: 0= Orders sent from Workstation 4 to CRT5 do not update Service Time reports. 1= Orders sent from Workstation 4 to CRT5 update Inside Sales counters. 2= Orders sent from Workstation 4 to CRT5 update Drive-Thru Sales counters. Option F: 0= Orders sent from Workstation 3 to CRT5 do not update Service Time reports. 1= Orders sent from Workstation 3 to CRT5 update Inside Sales counters. 2= Orders sent from Workstation 3 to CRT5 update Drive-Thru Sales counters. Option G: 0= Orders sent from Workstation 2 to CRT5 do not update Service Time reports. 1= Orders sent from Workstation 2 to CRT5 update Inside Sales counters. 2= Orders sent from Workstation 2 to CRT5 update Drive-Thru Sales counters. Option H: 0= Orders sent from Workstation 1 to CRT5 do not update Service Time reports. 1= Orders sent from Workstation 1 to CRT5 update Inside Sales counters. 2= Orders sent from Workstation 1 to CRT5 update Drive-Thru Sales counters.
405 CSHR__ __ __ __ __ __ __ __CA

Programming
3-106 Panasonic 5500 Series Programming Instructions – Version LQ3.5
P24 Miscellaneous Flags (Page 44 of 44) ADD 406: KVS Service Time Report Update - CRT5 & CRT6 Option A: 0= Orders sent from Workstation 6 to CRT6 do not update Service Time reports. 1= Orders sent from Workstation 6 to CRT6 update Inside Sales counters. 2= Orders sent from Workstation 6 to CRT6 update Drive-Thru Sales counters. Option B: 0= Orders sent from Workstation 5 to CRT6 do not update Service Time reports. 1= Orders sent from Workstation 5 to CRT6 update Inside Sales counters. 2= Orders sent from Workstation 5 to CRT6 update Drive-Thru Sales counters. Option C: 0= Orders sent from Workstation 4 to CRT6 do not update Service Time reports. 1= Orders sent from Workstation 4 to CRT6 update Inside Sales counters. 2= Orders sent from Workstation 4 to CRT6 update Drive-Thru Sales counters. Option D: 0= Orders sent from Workstation 3 to CRT6 do not update Service Time reports. 1= Orders sent from Workstation 3 to CRT6 update Inside Sales counters. 2= Orders sent from Workstation 3 to CRT6 update Drive-Thru Sales counters. Option E: 0= Orders sent from Workstation 2 to CRT6 do not update Service Time reports. 1= Orders sent from Workstation 2 to CRT6 update Inside Sales counters. 2= Orders sent from Workstation 2 to CRT6 update Drive-Thru Sales counters. Option F: 0= Orders sent from Workstation 1 to CRT6 do not update Service Time reports. 1= Orders sent from Workstation 1 to CRT6 update Inside Sales counters. 2= Orders sent from Workstation 1 to CRT6 update Drive-Thru Sales counters. Option G: 0= Orders sent from Workstation 10 to CRT5 do not update Service Time reports. 1= Orders sent from Workstation 10 to CRT5 update Inside Sales counters. 2= Orders sent from Workstation 10 to CRT5 update Drive-Thru Sales counters. Option H: 0= Orders sent from Workstation 9 to CRT5 do not update Service Time reports. 1= Orders sent from Workstation 9 to CRT5 update Inside Sales counters. 2= Orders sent from Workstation 9 to CRT5 update Drive-Thru Sales counters.
406 CSHR__ __ __ __ __ __ __ __CA
ADD 407: KVS Service Time Report Update - CRT6 Option A-D Not Used. Option E: 0= Orders sent from Workstation 10 to CRT6 do not update Service Time reports. 1= Orders sent from Workstation 10 to CRT6 update Inside Sales counters. 2= Orders sent from Workstation 10 to CRT6 update Drive-Thru Sales counters. Option F: 0= Orders sent from Workstation 9 to CRT6 do not update Service Time reports. 1= Orders sent from Workstation 9 to CRT6 update Inside Sales counters. 2= Orders sent from Workstation 9 to CRT6 update Drive-Thru Sales counters. Option G: 0= Orders sent from Workstation 8 to CRT6 do not update Service Time reports. 1= Orders sent from Workstation 8 to CRT6 update Inside Sales counters. 2= Orders sent from Workstation 8 to CRT6 update Drive-Thru Sales counters. Option H: 0= Orders sent from Workstation 7 to CRT6 do not update Service Time reports. 1= Orders sent from Workstation 7 to CRT6 update Inside Sales counters. 2= Orders sent from Workstation 7 to CRT6 update Drive-Thru Sales counters.
407 CSHR__ __ __ __ __ __ __ __CA
ADD 408: Bilingual PLU handling Option A-G: Not Used. Option H: 1= Enable Bilingual handling. If set, the P35 descriptor can switch between a
primary and secondary language on KVS screens with RCRT 8 or RCRT 8 Split Screen; the first 8 descriptor characters are for the primary language, and the last 8 characters are for the secondary. See the Appendix for details.
408 CSHR__ __ __ __ __ __ __ __CA
Addresses 409 - 599 are not used.

Programming
Panasonic 5500 Series Programming Instructions – Version LQ3.5 3-107
P24 Tandem & Macro Commands
Tandem and macro commands record frequently-used operating sequences, which can be played back with a single keystroke. The two types of commands are virtually identical, but Tandems 96-99 are listed on the report and downlining screens. You can use both to record special meal sequences, report command strings, and programming sequences. Once programmed, cashiers and managers can start the command by pressing a preset macro key or by entering a macro number on the Macro # key.
Note: You can also instruct the system to automatically run a macro on a certain day and time. If you want to use this feature, see the Time-activated Macro procedure after you program the macro. Host-activated Macros are also available with the Panasonic MWS software.
Within this program, you can use any of the following codes to set up the macro and tandem commands. You can also use key codes listed in the Key Code Charts.
Macro Code Chart Key Macro Code
Key Macro Code
Stop Code 9999 Receipt Stop 9998 Receipt Feed 9997 Journal Feed 9996 Receipt Off 9994 Receipt On 9993 Shift 00 210 Shift 10 211 : Shift 90 219 Macro 1 601 Macro 2 602 : Macro 199 799 Pause 0 930 Pause 1 (with message) 931 Pause 2 (with message) 932 Pause 3 (with message) 933 Pause 4 (with message) 934 Pause 5 (with message) 935
MGR & Mode Clear 900 MGR Mode Set 902 P2 Mode Set 903 REG Mode Set 904 MGR 1 or 2 Compulsion check 906 MGR 2 Compulsion check 907 MGR 1 Compulsion check 908 MGR Mode check 912 P2 Mode check 913 REG Mode check 914 Cashier Compulsion check 916 Manager Compulsion check 917 Auto Cashier # Entry 921 Auto Manager # Entry 922 Repeat (Start) 936 Repeat (End) 937 Workstation 1 & 11 941 Workstation 2 & 12 942 : : Workstation 9 & 19 949 Workstation 10 & 20 940

Programming
3-108 Panasonic 5500 Series Programming Instructions – Version LQ3.5
Before starting this program, test the sequence you are recording and note every key you use. List these keystrokes on the worksheets, and then translate them into the corresponding macro codes. You can use the key codes from the Key Code Charts and the codes from the Macro Code Chart. You can also chain one macro to another, if the macro needs more than fifteen lines. Unless your macro ends at Line 15, you must add a stop code (9999) to signal the end of the macro. You can use a macro or tandem to reset the Register Report and PLUs 1 through 10. This report command uses the following keystrokes. Important: You cannot create a macro for a Z1 Report unless individual Z1 Report menus are
enabled in Flag 102. 2, CASH, 1, CASH, 8, CASH, 1, PLU, 1, 0, PLU, CASH, CASH The above sequence uses the 2-digit soft key codes and a Stop Code. The following entries would set up a macro or tandem for this report sequence. 626 SBTL (Macro #26) 1 CSHR 2 CASH 2 2 CSHR 5 0 CASH Cash (Z Report Menu) 3 CSHR 1 CASH 1 4 CSHR 5 0 CASH Cash (Register Report) 5 CSHR 8 CASH 8 6 CSHR 5 0 CASH Cash (PLU Report) 7 CSHR 1 CASH 1 8 CSHR 9 7 CASH PLU (PLU #1) 9 CSHR 1 CASH 1 10 CSHR 0 CASH 0 11 CSHR 9 7 CASH PLU# (PLU #100) 12 CSHR 5 0 CASH Cash Exit Report Menu 13 CSHR 5 0 CASH Cash Exit Z1 Mode 14 CSHR 9 9 9 9 CASH Stop Code You can run this command by entering 26 MACRO# or by pressing a preset Macro #26 key. Pausing within a Macro Your macros and tandems can include "pause" codes, which temporarily stop the command so the user can enter a variable keystroke. The pause code instructs the macro to stop for a single keystroke. As soon as a key is pressed, the macro continues. You can use more than one pause code per macro, if necessary.

Programming
Panasonic 5500 Series Programming Instructions – Version LQ3.5 3-109
Six pause codes are available. Five of these codes include a programmable message, which you can use to prompt the next keystroke. The following chart lists the pause codes and their associated message numbers. When you are programming the macro, insert the pause code at the point where you want to interrupt the command. Key
Macro Code
P30 Default Message
Pause 0 Pause 1 Pause 2 Pause 3 Pause 4 Pause 5
930 931 932 933 934 935
(message not available) #165 Select Next Key1 #166 Select Next Key2 #167 Select Next Key3 #168 Select Next Key4 #169 Select Next Key5
Pause codes are often helpful for special meal packages, where the customer has a choice of beverages or desserts. A macro for a specially priced meal, with a beverage selection and Combo Coupon 123, might use the following keystrokes. BURGER, FRIES, SMALL, (pause for beverage), 123, COMB CLU You can set up a macro that registers these keystrokes and pauses so the cashier can register the beverage selection. This macro could be set up with the following entries. 650 SBTL (Macro #50) 1 CSHR 1 0 0 1 CASH Hamburger (PLU #1) 2 CSHR 1 0 1 0 CASH Fries (PLU #10) 3 CSHR 2 0 1 CASH Small (Shift 1) 4 CSHR 9 3 1 CASH Pause 1 (message 165: "select beverage") 5 CSHR 1 CASH 1 6 CSHR 2 CASH 2 7 CSHR 3 CASH 3 8 CSHR 9 0 CASH Comb CLU (Combo Coupon #123) 9 CSHR 9 9 9 9 CASH Stop Code When it reaches the pause code, this macro temporarily stops so the cashier can register the beverage selection. As soon as the cashier presses any key, the macro continues.

Programming
3-110 Panasonic 5500 Series Programming Instructions – Version LQ3.5
Repeat Codes Repeat codes (936 and 937) let macros accept a quantity entry. If you have a macro that registers one or more items, you can use these codes to identify the part affected by a quantity entry. The repeat codes allow cashiers to use the same multiplication procedure for both macro items and Preset PLU items. Use Repeat codes to surround the repeating part of the macro. Repeat Code 936 marks the start and Repeat Code 937 marks the end of item(s) that allow a repeat entry. These two codes can only be used with an item sequence that normally accepts a quantity entry, and only for macros that do not link to another macro. For example, if you have a macro that registers a hamburger (PLU #500) and subtracts $1.00 (Subtracting PLU #750), you could use the following program entries. 610 SBTL (Macro #10) 1 CSHR 9 3 6 CASH Repeat (Start) 2 CSHR 1 5 0 0 CASH PLU #500 (Hamburger) 3 CSHR 1 7 5 0 CASH PLU #750 (-$1.00) 4 CSHR 9 3 7 CASH Repeat (End) 5 CSHR 9 9 9 9 CASH Stop Code With this set-up, if you need to register five of the specially-priced hamburgers in Macro #10, you can enter 5 and press Preset Macro #10 (or enter 5 @ Preset Macro #10). Either sequence registers five hamburgers and subtracts $5.00. You can also include a quantity before the Repeat codes, as shown in the following example. 611 SBTL (Macro #11) 1 CSHR 2 CASH Quantity 2 CSHR 9 3 6 CASH Repeat (Start) 3 CSHR 1 5 0 0 CASH PLU #500 (Hamburger) 4 CSHR 9 3 7 CASH Repeat (Stop) 5 CSHR 9 9 9 9 CASH Stop Code With this set-up, the macro registers two hamburgers every time you press the Preset Macro #11 key.
Note: You cannot use Repeat codes for macros with more than 15 lines; "Invalid" displays if you use the codes in a macro that links to another macro. Also, in REG Mode you cannot multiply a quantity for a coded macro. The Repeat codes only work with Preset Macros.

Programming
Panasonic 5500 Series Programming Instructions – Version LQ3.5 3-111
Special Macro Instructions If you do not want a macro to automatically change the keylock mode, you can include a "mode check" instruction to remind the operator to turn the key. If the mode is incorrect, a *70* Mode Error message displays, and the command terminates. For example, you could include a MGR Mode check (macro code 912) at the beginning of a System Close macro that should only be performed by a person with a MGR key. With this instruction, the macro cannot be performed until the keylock is turned to MGR Mode. The Manager 1 and 2 Compulsion checks help make sure that the required manager level is logged before the macro is allowed. If you use these instructions and the required level is not logged on, "Call Manager" displays, and the macro command stops. The Manager and Cashier Compulsion checks tell the macro to confirm that a cashier or manager is logged on. You can use codes 916 and 917 for any macro that requires a cashier or manager entry. If it finds that a cashier or manager is not logged on, the macro displays an error message and terminates. If you are creating a macro for a Cashier or Manager Report, you can include the Auto Cashier # and Auto Manager # Entry instructions. These instructions direct the macro to report the cashier or manager who is currently logged onto the workstation.
Note: If you use either of the Auto Log functions, you should also use the Manager or Cashier Compulsion Check instructions to make sure a number is logged on before the command starts. An example showing the Auto Cashier # entry is provided on the next page.
If you change modes within the macro, you should add a MGR & Mode Clear instruction (900) to your macro command. If the macro is interrupted, this instruction has two purposes: It logs off any managers that were logged on by the macro, and it returns the system to the current keylock mode. For example, if you have a macro that allows cashiers to take a Cashier Report, you can include the MGR & Mode Clear instruction. Then, if an error interrupts the macro, the screen is not left in the MGR Mode menu. Macro code 900 must be assigned to the first address of the macro you are programming.
Important: In order to log off a manager and restore the correct mode menu, MGR & Mode Clear (macro code 900) performs a status clear. As a result, you should only include this code for macros initiated outside of a transaction or for macros that begin a transaction.

Programming
3-112 Panasonic 5500 Series Programming Instructions – Version LQ3.5
Switching Modes within a Macro In some instances, you may want to change the keylock mode within the macro. The Macro Code chart includes several "mode set" options. These options instruct the macro to advance from one mode to another, without actually changing the keylock position. With the MGR Mode Set instruction, you can have a macro that starts in REG Mode and performs a MGR Mode report without turning the keylock. You can use the P2 Mode Set instruction for a macro that starts in REG or MGR Mode and performs a function that normally begins in the P2 Mode menu. You may, for example, want to set up a macro that allows cashiers to take their own report at the end of a shift. If so, you can program a macro that starts in REG Mode and changes to MGR Mode, without requiring a MGR key. When the macro reaches MGR Mode, it advances to the X1 Cashier Report Menu. At this point, you can use the Auto Cashier # Entry Code (macro code 921) to instruct the macro to report the cashier who is logged on. After report print begins, the macro restores the REG Mode screen. This macro could be set up in the following manner. 640 SBTL (Macro #40) 1 CSHR 9 0 0 CASH MGR & Mode Clear 2 CSHR 9 1 6 CASH Cashier Compulsion Check 3 CSHR 9 0 2 CASH MGR Mode Set 4 CSHR 1 CASH 5 CSHR 5 0 CASH X1 Mode 6 CSHR 2 CASH 7 CSHR 5 0 CASH Terminal Report 8 CSHR 1 CASH 9 CSHR 5 0 CASH w/Print 10 CSHR 9 CASH 11 CSHR 5 0 CASH Cashier Report 12 CSHR 9 2 1 CASH Auto Cashier # Entry 13 CSHR 5 0 CASH Exit Cashier Report 14 CSHR 5 0 CASH Exit X1 Menu 15 CSHR 9 0 2 CASH REG Mode Set
Note: Because this macro leads into MGR Mode, the MGR & Mode Clear instruction is included at the beginning of this example. This instruction helps ensure that the screen returns to REG Mode if the macro is interrupted. See the Special Macro Instructions explanation for details. Because it uses exactly 15 lines, this macro does not require a Stop Code.
With this set-up, the cashier must log on before attempting to start the Cashier Report macro. If you add a preset Macro #40 key to the keyboard, this macro can be initiated by touching the preset key. The macro can also be started by entering the macro number (#40) on the MACRO# key.

Programming
Panasonic 5500 Series Programming Instructions – Version LQ3.5 3-113
P24 Macro/Tandem Worksheet (P2 Mode) Beginning Sequence: 24 CASH Macro # Macro # ___ ___ ___ SBTL (Macro Address) ___ ___ ___ SBTL (Macro Address) ADD Code Comment ADD Code Comment 1 CSHR ___ ___ ___ ___ CA _______________ 1 CSHR ___ ___ ___ ___ CA _______________ 2 CSHR ___ ___ ___ ___ CA _______________ 2 CSHR ___ ___ ___ ___ CA _______________ 3 CSHR ___ ___ ___ ___ CA _______________ 3 CSHR ___ ___ ___ ___ CA _______________ 4 CSHR ___ ___ ___ ___ CA _______________ 4 CSHR ___ ___ ___ ___ CA _______________ 5 CSHR ___ ___ ___ ___ CA _______________ 5 CSHR ___ ___ ___ ___ CA _______________ 6 CSHR ___ ___ ___ ___ CA _______________ 6 CSHR ___ ___ ___ ___ CA _______________ 7 CSHR ___ ___ ___ ___ CA _______________ 7 CSHR ___ ___ ___ ___ CA _______________ 8 CSHR ___ ___ ___ ___ CA _______________ 8 CSHR ___ ___ ___ ___ CA _______________ 9 CSHR ___ ___ ___ ___ CA _______________ 9 CSHR ___ ___ ___ ___ CA _______________ 10 CSHR ___ ___ ___ ___ CA _______________ 10 CSHR ___ ___ ___ ___ CA _______________ 11 CSHR ___ ___ ___ ___ CA _______________ 11 CSHR ___ ___ ___ ___ CA _______________ 12 CSHR ___ ___ ___ ___ CA _______________ 12 CSHR ___ ___ ___ ___ CA _______________ 13 CSHR ___ ___ ___ ___ CA _______________ 13 CSHR ___ ___ ___ ___ CA _______________ 14 CSHR ___ ___ ___ ___ CA _______________ 14 CSHR ___ ___ ___ ___ CA _______________ 15 CSHR ___ ___ ___ ___ CA _______________ 15 CSHR ___ ___ ___ ___ CA _______________ Macro # Macro # ___ ___ ___ SBTL (Macro Address) ___ ___ ___ SBTL (Macro Address) ADD Code Comment ADD Code Comment 1 CSHR ___ ___ ___ ___ CA _______________ 1 CSHR ___ ___ ___ ___ CA _______________ 2 CSHR ___ ___ ___ ___ CA _______________ 2 CSHR ___ ___ ___ ___ CA _______________ 3 CSHR ___ ___ ___ ___ CA _______________ 3 CSHR ___ ___ ___ ___ CA _______________ 4 CSHR ___ ___ ___ ___ CA _______________ 4 CSHR ___ ___ ___ ___ CA _______________ 5 CSHR ___ ___ ___ ___ CA _______________ 5 CSHR ___ ___ ___ ___ CA _______________ 6 CSHR ___ ___ ___ ___ CA _______________ 6 CSHR ___ ___ ___ ___ CA _______________ 7 CSHR ___ ___ ___ ___ CA _______________ 7 CSHR ___ ___ ___ ___ CA _______________ 8 CSHR ___ ___ ___ ___ CA _______________ 8 CSHR ___ ___ ___ ___ CA _______________ 9 CSHR ___ ___ ___ ___ CA _______________ 9 CSHR ___ ___ ___ ___ CA _______________ 10 CSHR ___ ___ ___ ___ CA _______________ 10 CSHR ___ ___ ___ ___ CA _______________ 11 CSHR ___ ___ ___ ___ CA _______________ 11 CSHR ___ ___ ___ ___ CA _______________ 12 CSHR ___ ___ ___ ___ CA _______________ 12 CSHR ___ ___ ___ ___ CA _______________ 13 CSHR ___ ___ ___ ___ CA _______________ 13 CSHR ___ ___ ___ ___ CA _______________ 14 CSHR ___ ___ ___ ___ CA _______________ 14 CSHR ___ ___ ___ ___ CA _______________ 15 CSHR ___ ___ ___ ___ CA _______________ 15 CSHR ___ ___ ___ ___ CA _______________ Enter the macro address (601-799) on the SBTL line, then arrange the 2-digit soft key codes and 3-digit macro codes on each of the following addresses.

Programming
3-114 Panasonic 5500 Series Programming Instructions – Version LQ3.5
P24 Time-Activated Macros
Some restaurant operations take place at a certain time every day. For example, the manager probably switches to the lunch menu, and then to the dinner menu, at set times. For these operations, you can create a macro that runs automatically at the needed day and time. You can even have one macro for weekdays and another for weekends. In Program 24, first use Addresses 601-799 (depending upon your Memory Allocation) to program all steps the macro performs. Then use Addresses 801-830 to enter the day and time definitions for all Time-Activated macros you use. Table #: Enter the address (801-830) for the Time-Activated Macro Table you are defining. (A
fixed number of thirty tables are available.) Macro #: Enter the number (601-799) of the macro performed through this table. Day #: Replace A-C with values for days that use this automatic time activation.
A: 1= Run this macro on Sunday. B: 1= Run this macro on Thursday.
2= Run this macro on Friday. 4= Run this macro on Saturday.
C: 1= Run this macro on Monday. 2= Run this macro on Tuesday. 4= Run this macro on Wednesday.
Time: Enter the time (00:00 - 23:59) when you want the macro to run. Remember to use military
time for afternoon or evening hours. Comment: Use this line if you want to note the macro involved in this command.
Note: If you build two commands that run on the same day and at the same time, the system runs the lowest-numbered command first.
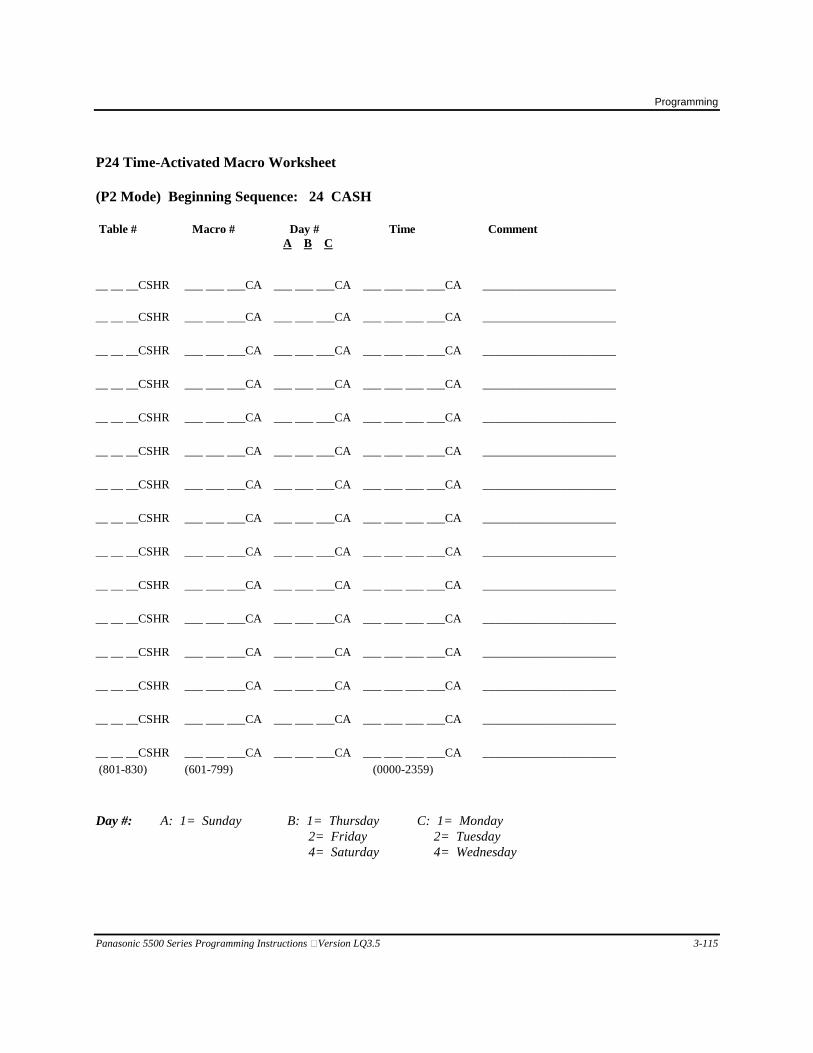
Programming
Panasonic 5500 Series Programming Instructions – Version LQ3.5 3-115
P24 Time-Activated Macro Worksheet (P2 Mode) Beginning Sequence: 24 CASH Table # Macro # Day # Time Comment
A B C __ __ __CSHR ___ ___ ___CA ___ ___ ___CA ___ ___ ___ ___CA ______________________
__ __ __CSHR ___ ___ ___CA ___ ___ ___CA ___ ___ ___ ___CA ______________________
__ __ __CSHR ___ ___ ___CA ___ ___ ___CA ___ ___ ___ ___CA ______________________
__ __ __CSHR ___ ___ ___CA ___ ___ ___CA ___ ___ ___ ___CA ______________________
__ __ __CSHR ___ ___ ___CA ___ ___ ___CA ___ ___ ___ ___CA ______________________
__ __ __CSHR ___ ___ ___CA ___ ___ ___CA ___ ___ ___ ___CA ______________________
__ __ __CSHR ___ ___ ___CA ___ ___ ___CA ___ ___ ___ ___CA ______________________
__ __ __CSHR ___ ___ ___CA ___ ___ ___CA ___ ___ ___ ___CA ______________________
__ __ __CSHR ___ ___ ___CA ___ ___ ___CA ___ ___ ___ ___CA ______________________
__ __ __CSHR ___ ___ ___CA ___ ___ ___CA ___ ___ ___ ___CA ______________________
__ __ __CSHR ___ ___ ___CA ___ ___ ___CA ___ ___ ___ ___CA ______________________
__ __ __CSHR ___ ___ ___CA ___ ___ ___CA ___ ___ ___ ___CA ______________________
__ __ __CSHR ___ ___ ___CA ___ ___ ___CA ___ ___ ___ ___CA ______________________
__ __ __CSHR ___ ___ ___CA ___ ___ ___CA ___ ___ ___ ___CA ______________________
__ __ __CSHR ___ ___ ___CA ___ ___ ___CA ___ ___ ___ ___CA ______________________
(801-830) (601-799) (0000-2359)
Day #: A: 1= Sunday B: 1= Thursday C: 1= Monday 2= Friday 2= Tuesday 4= Saturday 4= Wednesday

Programming
3-116 Panasonic 5500 Series Programming Instructions – Version LQ3.5
P24 Time-Activated Macro Worksheet (P2 Mode) Beginning Sequence: 24 CASH Table # Macro # Day # Time Comment
A B C __ __ __CSHR ___ ___ ___CA ___ ___ ___CA ___ ___ ___ ___CA ______________________
__ __ __CSHR ___ ___ ___CA ___ ___ ___CA ___ ___ ___ ___CA ______________________
__ __ __CSHR ___ ___ ___CA ___ ___ ___CA ___ ___ ___ ___CA ______________________
__ __ __CSHR ___ ___ ___CA ___ ___ ___CA ___ ___ ___ ___CA ______________________
__ __ __CSHR ___ ___ ___CA ___ ___ ___CA ___ ___ ___ ___CA ______________________
__ __ __CSHR ___ ___ ___CA ___ ___ ___CA ___ ___ ___ ___CA ______________________
__ __ __CSHR ___ ___ ___CA ___ ___ ___CA ___ ___ ___ ___CA ______________________
__ __ __CSHR ___ ___ ___CA ___ ___ ___CA ___ ___ ___ ___CA ______________________
__ __ __CSHR ___ ___ ___CA ___ ___ ___CA ___ ___ ___ ___CA ______________________
__ __ __CSHR ___ ___ ___CA ___ ___ ___CA ___ ___ ___ ___CA ______________________
__ __ __CSHR ___ ___ ___CA ___ ___ ___CA ___ ___ ___ ___CA ______________________
__ __ __CSHR ___ ___ ___CA ___ ___ ___CA ___ ___ ___ ___CA ______________________
__ __ __CSHR ___ ___ ___CA ___ ___ ___CA ___ ___ ___ ___CA ______________________
__ __ __CSHR ___ ___ ___CA ___ ___ ___CA ___ ___ ___ ___CA ______________________
__ __ __CSHR ___ ___ ___CA ___ ___ ___CA ___ ___ ___ ___CA ______________________
(801-830) (601-799) (0000-2359)
Day #: A: 1= Sunday B: 1= Thursday C: 1= Monday 2= Friday 2= Tuesday 4= Saturday 4= Wednesday

Programming
Panasonic 5500 Series Programming Instructions – Version LQ3.5 3-117
P25 System Descriptors
Many of the descriptors you see on workstation screens and reports are programmable. During set-up, the RAM Clear command loads default descriptors into your system. You can use these default descriptors for your installation, or you can change them to match the restaurant's terminology. Program 25 gives you access to all of the system-generated descriptors, as well as the job code, deposit, and Store & Forward descriptors. The Default column of the P25 worksheet lists the descriptors that are loaded with the RAM Clear command. If you want to change the default, simply enter the replacement descriptor. Addresses 100-299 provide access to the descriptors for system-generated messages and headings that appear on the screen and the receipt and journal tapes. Addresses 300-499 give you access to the 4-character descriptors for totals that display on the screen. (The Address 414-499 defaults set descriptors for future features.) Addresses 500-699 provide access to the 8-character descriptors that appear on printed reports. Addresses 700-739 let you assign descriptors to the Store & Forward addresses in the System Master. Address 700 corresponds to the descriptor for the first address in the Store & Forward Data Entry screen. Address 701 corresponds to the descriptor for the second address in the Store & Forward Data entry screen, etc. Addresses 740-749 give you access to the Deposit descriptors. You can assign an 8-character descriptor to each of the ten deposit lines. Deposit descriptors should only be entered at the System Master. Addresses 801-820 let you assign descriptors to Job Codes 1 through 20. These descriptors display and print at Clock-in and should only be entered in the System Master.

Programming
3-118 Panasonic 5500 Series Programming Instructions – Version LQ3.5
P25 System Descriptors Worksheet (Page 1 of 11) (P2 Mode) Beginning Sequence: 25 CASH 100
Space
123
TOTL
101 JAN.
124
BEGN
102 FEB.
125
END
103 MAR.
126
@
104 APR.
127
KVS#
105 MAY
128
COMM
106 JUN.
129
PROG
107 JUL.
130
ACCM
108 AUG.
131
SUMM
109 SEP.
132
EQIV
110 OCT.
133
CAT
111 NOV.
134
PAID
112 DEC.
135
RATE
113 SBTL
136
EXTL
114 CHNG
137
115 AMDU
138
116 PLU
139
117 GRP
140
CPN1
118 CSHR
141
CPN2
119 EMPL
142
CPN3
120 TRNG
143
CLU
121 INVT
144
LNKD
122 TIME
145
MIX#

Programming
Panasonic 5500 Series Programming Instructions – Version LQ3.5 3-119
P25 System Descriptors Worksheet (Page 2 of 11) 146
DCTL
171
MON
147 CPN%
172
TUE
148 AVCP
173
WED
149 SFT0
174
THU
150 SFT1
175
FRI
151 SFT2
176
SAT
152 SFT3
177
SUN
153 SFT4
178
CONT
154 SFT5
179
MGR
155 SFT6
180
SF00
156 SFT7
181
SF10
157 SFT8
182
SF20
158 SFT9
183
SF30
159 HEAD
184
SF40
160 SALE
185
SF50
161
186
SF60
162
187
SF70
163
188
SF80
164
189
SF90
165
190
TBL#
166
191
LB$
167 CPN#
192
XTL2
168 RCP#
193
XTL3
169 ING#
194
XTL4
170 STN#
195
LVL1

Programming
3-120 Panasonic 5500 Series Programming Instructions – Version LQ3.5
P25 System Descriptors Worksheet (Page 3 of 11) 196
LVL2
221
197
LVL3
222
198
LVL4
223
199
LVL5
224
200
225
201
UNV%
226
202
CHRG
227
203
MORE
228
204
PKUP
229
205
R/P#
230
206
K/P#
231
207
P.C#
232
208
LCLU
233
209
234
210
235
211
236
212
CASE
237
213
PACK
238
214
UNIT
239
215
MENU
240
216
UP
241
217
DOWN
242
218
243
219
:
220
299

Programming
Panasonic 5500 Series Programming Instructions – Version LQ3.5 3-121
P25 System Descriptors Worksheet (Page 4 of 11) 300
323
TAX2
301
PLU
324
NTXB
302
MGRP
325
GSTL
303
SGRP
326
DRWR
304
GPTL
327
CAID
305
TMTL
328
CKID
306
TRGT
329
CRTX
307
PRGT
330
P/B
308
ITEM
331
DLET
309
CNCL
332
310
VOID
333
311
DSC1
334
BFWD
312
DSC2
335
GPTL
313
+%
336
MIX
314
LOAN
337
CA 2
315
PKUP
338
REBT
316
CASH
339
CHG1
317
CHCK
340
CHG2
318
AUDC
341
CHG3
319
NSTL
342
CHG4
320
TXB1
343
CHG5
321
TXB2
344
ERRC
322
TAX
345
#

Programming
3-122 Panasonic 5500 Series Programming Instructions – Version LQ3.5
P25 System Descriptors Worksheet (Page 5 of 11) 346
NS
371
WAST
347
CSOV
372
GIFT
348
CHG6
373
G.C2
349
CHG7
374
G.C3
350
CHG8
375
AVWT
351
CHG9
376
OVWT
352
CH10
377
AVDT
353
XCH2
378
OVDT
354
XCH3
379
SERV
355
XCH4
380
TIP
356
CAOW
381
TXB3
357
VDCR
382
TAX3
358
RTCR
383
EXCH
359
DATE
384
R/A2
360
GCRM
385
P/O2
361
CPTR
386
CPNS
362
%4
387
TXTL
363
%5
388
PRCG
364
NTAX
389
PHON
365
WAIT
390
FCST
366
PARK
391
FC%
367
RCAL
392
GRSS
368
BRAK
:
369
TP.E
399
TXB4
370
PROM
400
NRNT

Programming
Panasonic 5500 Series Programming Instructions – Version LQ3.5 3-123
P25 System Descriptors Worksheet (Page 6 of 11) 401
CAD2
426
DST6
402
GCRD
427
DST7
403
DPST
428
DST8
404
CMBS
429
DST9
405
430
DT10
406
431
M&MS
407
FC.P
432
REG (GIVEX)
408
FC.W
433
ACT (GIVEX)
409
DSC6
434
INCR (GIVEX)
410
DSC7
435
GIVX
411
DSC8
436
CANC (GIVEX)
412
DSC9
437
INQ (GIVEX)
413
DS10
438
RTRN (GIVEX)
414
PST1
439
415
PST2
440
416
PST3
441
417
PST4
442
REG (VLNK)
418
PST5
443
ACT (VLNK)
419
444
INCR (VLNK)
420
445
VLNK
421
IN
446 CANC (VLNK)
422
OUT
447 INQ (VLNK)
423
DR-T
448 RTRN (VLNK)
424
PHON
:
425
NODS
499

Programming
3-124 Panasonic 5500 Series Programming Instructions – Version LQ3.5
P25 System Descriptors Worksheet (Page 7 of 11) 500
525
GROSS SL
501
PLU'S
526
DRAWER
502
M-GRP TL
527
CASH DWR
503
S-GRP TL
528
CHEK DWR
504
GROUP TL
529
CRED TAX
505
TIME TL
530
PREV BAL
506
TRAINING
531
DELETE
507
GRAND TL
532
508
ITEM TL
533
509
CNCL ITM
534
BAL FWD
510
CNCL ORD
535
ALL GRUP
511
% DISC 1
536
PROD MIX
512
% DISC 2
537
CA TD
513
% PLUS
538
514
LOAN
539
CHARGE 1
515
PICK-UP
540
CHARGE 2
516
CASH TD
541
CHARGE 3
517
CHECK TD
542
CHARGE 4
518
AUDIT
543
CHARGE 5
519
NET SALE
544
ERR CORR
520
TAXABLE1
545
# ENTRY
521
TAXABLE2
546
NO SALE
522
TAX
547
CSHR OVR
523
TAX 2
548
CHARGE 6
524
NON-TXBL
549
CHARGE 7

Programming
Panasonic 5500 Series Programming Instructions – Version LQ3.5 3-125
P25 System Descriptors Worksheet (Page 8 of 11) 550
CHARGE 8
575
AVE WAIT
551
CHARGE 9
576
OVR WAIT
552
CHARGE 10
577
AVE DR-T
553
EXCHANG2
578
OVR DR-T
554
EXCHANG3
579
SERVE
555
EXCHANG4
580
TIP
556
CASH DUE
581
TAXABLE3
557
VOIDCRDT
582
TAX3
558
RTRNCRDT
583
EXCHANGE
559
DATE&TM
584
R/A 2
560
GIFT RDM
585
P/O 2
561
CPNTRANS
586
COUPONS
562
% DISC 4
587
TAX TOTL
563
% DISC 5
588
PRICE CG
564
NO-TAX
589
PHONE-IN
565
WAIT TL
590
FD COST
566
PARK TL
591
FD COST %
567
WAIT RCL
592
GROSS TL
568
BREAK IN
593
569
TIP EDIT
594
570
FREE ITM
595
571
F WASTE
596
572
GIFT CRT
597
573
GIFT 2
598
574
GIFT 3
599
TAXABLE4
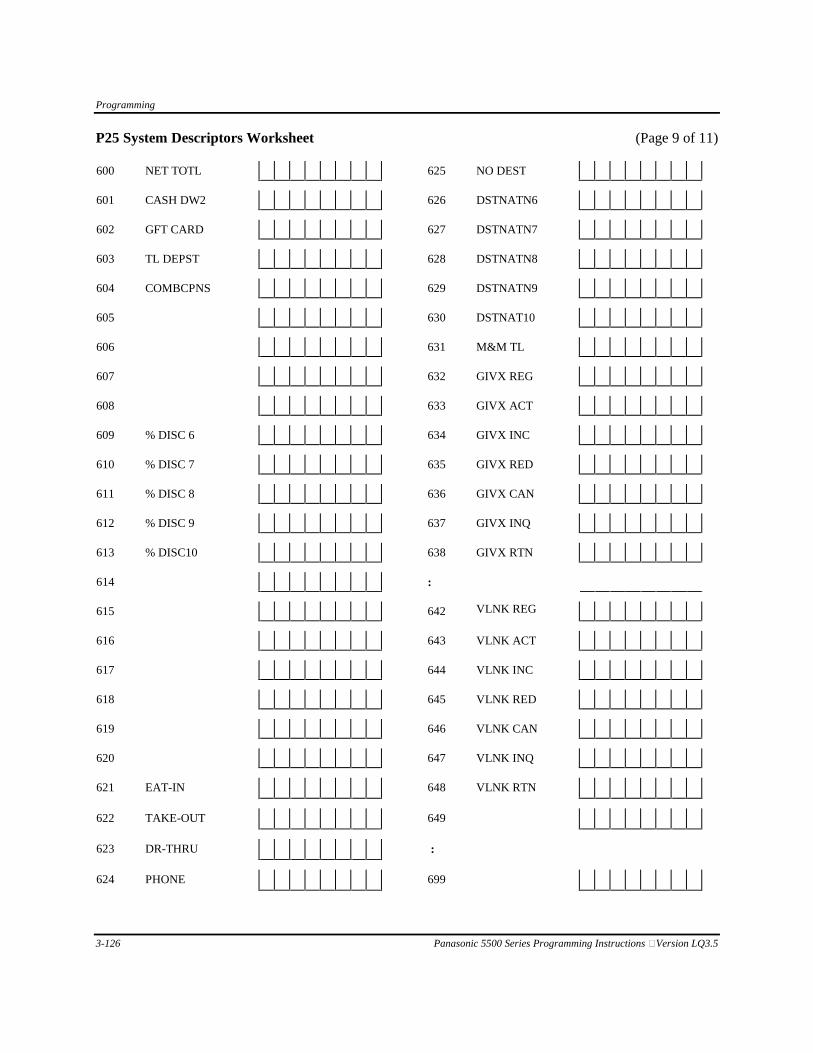
Programming
3-126 Panasonic 5500 Series Programming Instructions – Version LQ3.5
P25 System Descriptors Worksheet (Page 9 of 11) 600
NET TOTL
625
NO DEST
601
CASH DW2
626
DSTNATN6
602
GFT CARD
627
DSTNATN7
603
TL DEPST
628
DSTNATN8
604
COMBCPNS
629
DSTNATN9
605
630
DSTNAT10
606
631
M&M TL
607
632
GIVX REG
608
633
GIVX ACT
609
% DISC 6
634
GIVX INC
610
% DISC 7
635
GIVX RED
611
% DISC 8
636
GIVX CAN
612
% DISC 9
637
GIVX INQ
613
% DISC10
638
GIVX RTN
614
:
615
642
VLNK REG
616
643
VLNK ACT
617
644
VLNK INC
618
645
VLNK RED
619
646
VLNK CAN
620
647
VLNK INQ
621
EAT-IN
648
VLNK RTN
622
TAKE-OUT
649
623
DR-THRU
:
624
PHONE
699

Programming
Panasonic 5500 Series Programming Instructions – Version LQ3.5 3-127
P25 System Descriptors Worksheet (Page 10 of 11) 700
(Store & Fwd 1)
725
(Store & Fwd 26)
701
(Store & Fwd 2)
726
(Store & Fwd 27)
702
(Store & Fwd 3)
727
(Store & Fwd 28)
703
(Store & Fwd 4)
728
(Store & Fwd 29)
704
(Store & Fwd 5)
729
(Store & Fwd 30)
705
(Store & Fwd 6)
730
(Store & Fwd 31)
706
(Store & Fwd 7)
731
(Store & Fwd 32)
707
(Store & Fwd 8)
732
(Store & Fwd 33)
708
(Store & Fwd 9)
733
(Store & Fwd 34)
709
(Store & Fwd 10)
734
(Store & Fwd 35)
710
(Store & Fwd 11)
735
(Store & Fwd 36)
711
(Store & Fwd 12)
736
(Store & Fwd 37)
712
(Store & Fwd 13)
737
(Store & Fwd 38)
713
(Store & Fwd 14)
738
(Store & Fwd 39)
714
(Store & Fwd 15)
739
(Store & Fwd 40)
715
(Store & Fwd 16)
740
DEPOSIT 1
716
(Store & Fwd 17)
741
DEPOSIT 2
717
(Store & Fwd 18)
742
DEPOSIT 3
718
(Store & Fwd 19)
743
DEPOSIT 4
719
(Store & Fwd 20)
744
DEPOSIT 5
720
(Store & Fwd 21)
745
DEPOSIT 6
721
(Store & Fwd 22)
746
DEPOSIT 7
722
(Store & Fwd 23)
747
DEPOSIT 8
723
(Store & Fwd 24)
748
DEPOSIT 9
724
(Store & Fwd 25)
749
DEPOSIT10

Programming
3-128 Panasonic 5500 Series Programming Instructions – Version LQ3.5
P25 System Descriptors Worksheet (Page 11 of 11) 801
(Job Code 1)
802
(Job Code 2)
803
(Job Code 3)
804
(Job Code 4)
805
(Job Code 5)
806
(Job Code 6)
807
(Job Code 7)
808
(Job Code 8)
809
(Job Code 9)
810
(Job Code 10)
811
(Job Code 11)
812
(Job Code 12)
813
(Job Code 13)
814
(Job Code 14)
815
(Job Code 15)
816
(Job Code 16)
817
(Job Code 17)
818
(Job Code 18)
819
(Job Code 19)
820
(Job Code 20)

Programming
Panasonic 5500 Series Programming Instructions – Version LQ3.5 3-129
P26 Time Ranges
The 5500 System can report all sales, destination sales, and product mix sales by time period. The Destination, Product Mix, and All Sales Time Reports track activity for up to 96 time periods. Use Program 26 to define the starting and ending times for each period you track. Flag 113A decides how many ranges are available for the Destination and All Sales Time Reports. It also decides whether or not the ranges are programmable. If Flag 113A= 0, Destination and Sales Time Reports use the 48 default half-hourly ranges. If Flag 113A= 1, both types of reports reference the 48 time periods you define in P26. If Flag 113A= 2 or 3, the Destination Time Reports use the default half-hourly ranges, and the Sales Time Report uses the 96 quarter-hourly time ranges. Note: Flag 113A also affects the Flash Time Report. If Flag 113A= 0 or 1 (48 time ranges), the Flash
Report provides sales for three ranges. If Flag 113A= 2 (96 time ranges), the Flash Report provides sales for six ranges.
You can also define ranges for the Service Time Reports. These reports are based on the three Efficiency Levels set in Miscellaneous Flags 264 and 265. Each Efficiency Level reports activity for the ten time ranges you define here (with addresses 300-309). Program 26 defines starting and ending times for each address. The first four digits set the starting time, and the last four digits set the ending time, as shown below. 1 1 0 0 1 2 0 0 100 CSHR CA (tracks sales from 11:00 p.m. through 11:59 p.m.)
1
2
0
0
1
3
0
0
101 CSHR CA (tracks sales from 12:00 p.m. through 12:59 p.m.)
(Starting Time) (Ending Time)
Afternoon and evening time ranges must be entered in military time, i.e., 12:00 (noon) = 1200, 1:00 pm = 1300, 2:00 pm = 1400 ... 11:00 pm = 2300, and 12:00 (midnight) = 0000.
Note: Programmable ranges can be set to track almost any time interval. However, a period of time cannot report to more than one time range, and time ranges cannot overlap. For example, you cannot have a range that tracks 11:00 a.m. to 12:00 p.m. sales if another range tracks 10:00 a.m. to 2:00 p.m. sales. When ranges overlap, totals update only the range with the lowest address.
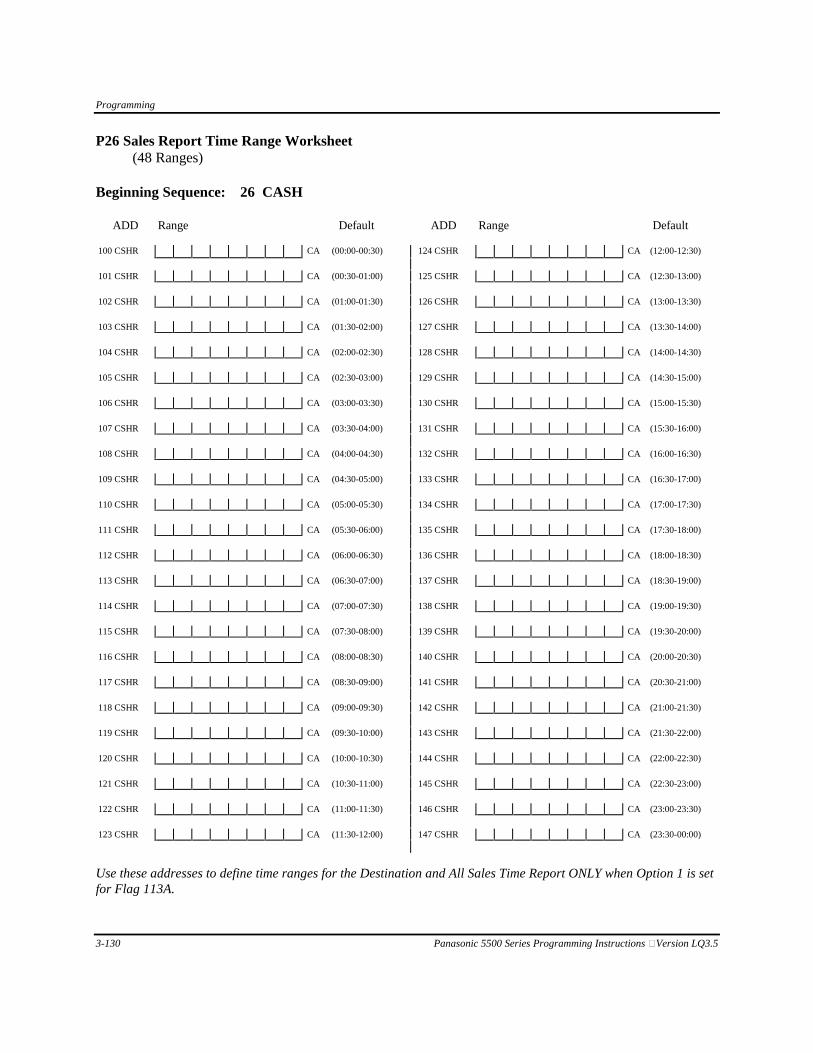
Programming
3-130 Panasonic 5500 Series Programming Instructions – Version LQ3.5
P26 Sales Report Time Range Worksheet
(48 Ranges) Beginning Sequence: 26 CASH ADD Range Default ADD Range Default 100 CSHR CA (00:00-00:30) 124 CSHR CA (12:00-12:30)
101 CSHR CA (00:30-01:00) 125 CSHR CA (12:30-13:00)
102 CSHR CA (01:00-01:30) 126 CSHR CA (13:00-13:30)
103 CSHR CA (01:30-02:00) 127 CSHR CA (13:30-14:00)
104 CSHR CA (02:00-02:30) 128 CSHR CA (14:00-14:30)
105 CSHR CA (02:30-03:00) 129 CSHR CA (14:30-15:00)
106 CSHR CA (03:00-03:30) 130 CSHR CA (15:00-15:30)
107 CSHR CA (03:30-04:00) 131 CSHR CA (15:30-16:00)
108 CSHR CA (04:00-04:30) 132 CSHR CA (16:00-16:30)
109 CSHR CA (04:30-05:00) 133 CSHR CA (16:30-17:00)
110 CSHR CA (05:00-05:30) 134 CSHR CA (17:00-17:30)
111 CSHR CA (05:30-06:00) 135 CSHR CA (17:30-18:00)
112 CSHR CA (06:00-06:30) 136 CSHR CA (18:00-18:30)
113 CSHR CA (06:30-07:00) 137 CSHR CA (18:30-19:00)
114 CSHR CA (07:00-07:30) 138 CSHR CA (19:00-19:30)
115 CSHR CA (07:30-08:00) 139 CSHR CA (19:30-20:00)
116 CSHR CA (08:00-08:30) 140 CSHR CA (20:00-20:30)
117 CSHR CA (08:30-09:00) 141 CSHR CA (20:30-21:00)
118 CSHR CA (09:00-09:30) 142 CSHR CA (21:00-21:30)
119 CSHR CA (09:30-10:00) 143 CSHR CA (21:30-22:00)
120 CSHR CA (10:00-10:30) 144 CSHR CA (22:00-22:30)
121 CSHR CA (10:30-11:00) 145 CSHR CA (22:30-23:00)
122 CSHR CA (11:00-11:30) 146 CSHR CA (23:00-23:30)
123 CSHR CA (11:30-12:00) 147 CSHR CA (23:30-00:00)
Use these addresses to define time ranges for the Destination and All Sales Time Report ONLY when Option 1 is set for Flag 113A.

Programming
Panasonic 5500 Series Programming Instructions – Version LQ3.5 3-131
P26 Sales Report Time Range Worksheet (Page 1 of 2)
(96 Ranges) Beginning Sequence: 26 CASH ADD Range ADD Range 100 CSHR 0 0 0 0 0 0 1 5 CA 124 CSHR 0 6 0 0 0 6 1 5 CA
101 CSHR 0 0 1 5 0 0 3 0 CA 125 CSHR 0 6 1 5 0 6 3 0 CA
102 CSHR 0 0 3 0 0 0 4 5 CA 126 CSHR 0 6 3 0 0 6 4 5 CA
103 CSHR 0 0 4 5 0 1 0 0 CA 127 CSHR 0 6 4 5 0 7 0 0 CA
104 CSHR 0 1 0 0 0 1 1 5 CA 128 CSHR 0 7 0 0 0 7 1 5 CA
105 CSHR 0 1 1 5 0 1 3 0 CA 129 CSHR 0 7 1 5 0 7 3 0 CA
106 CSHR 0 1 3 0 0 1 4 5 CA 130 CSHR 0 7 3 0 0 7 4 5 CA
107 CSHR 0 1 4 5 0 2 0 0 CA 131 CSHR 0 7 4 5 0 8 0 0 CA
108 CSHR 0 2 0 0 0 2 1 5 CA 132 CSHR 0 8 0 0 0 8 1 5 CA
109 CSHR 0 2 1 5 0 2 3 0 CA 133 CSHR 0 8 1 5 0 8 3 0 CA
110 CSHR 0 2 3 0 0 2 4 5 CA 134 CSHR 0 8 3 0 0 8 4 5 CA
111 CSHR 0 2 4 5 0 3 0 0 CA 135 CSHR 0 8 4 5 0 9 0 0 CA
112 CSHR 0 3 0 0 0 3 1 5 CA 136 CSHR 0 9 0 0 0 9 1 5 CA
113 CSHR 0 3 1 5 0 3 3 0 CA 137 CSHR 0 9 1 5 0 9 3 0 CA
114 CSHR 0 3 3 0 0 3 4 5 CA 138 CSHR 0 9 3 0 0 9 4 5 CA
115 CSHR 0 3 4 5 0 4 0 0 CA 139 CSHR 0 9 4 5 1 0 0 0 CA
116 CSHR 0 4 0 0 0 4 1 5 CA 140 CSHR 1 0 0 0 1 0 1 5 CA
117 CSHR 0 4 1 5 0 4 3 0 CA 141 CSHR 1 0 1 5 1 0 3 0 CA
118 CSHR 0 4 3 0 0 4 4 5 CA 142 CSHR 1 0 3 0 1 0 4 5 CA
119 CSHR 0 4 4 5 0 5 0 0 CA 143 CSHR 1 0 4 5 1 1 0 0 CA
120 CSHR 0 5 0 0 0 5 1 5 CA 144 CSHR 1 1 0 0 1 1 1 5 CA
121 CSHR 0 5 1 5 0 5 3 0 CA 145 CSHR 1 1 1 5 1 1 3 0 CA
122 CSHR 0 5 3 0 0 5 4 5 CA 146 CSHR 1 1 3 0 1 1 4 5 CA
123 CSHR 0 5 4 5 0 6 0 0 CA 147 CSHR 1 1 4 5 1 2 0 0 CA
The addresses on this page and the next page define time ranges for the All Sales Time Report ONLY when Option 2 is set for Flag 113A.
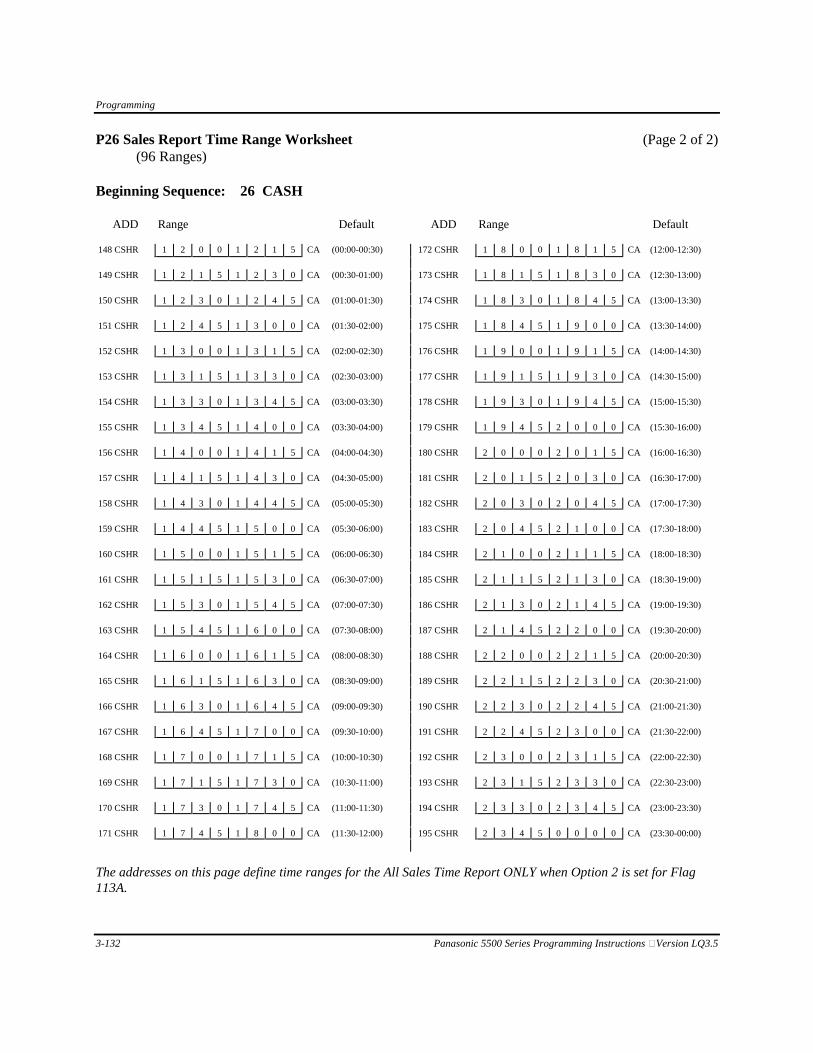
Programming
3-132 Panasonic 5500 Series Programming Instructions – Version LQ3.5
P26 Sales Report Time Range Worksheet (Page 2 of 2)
(96 Ranges) Beginning Sequence: 26 CASH ADD Range Default ADD Range Default 148 CSHR 1 2 0 0 1 2 1 5 CA (00:00-00:30) 172 CSHR 1 8 0 0 1 8 1 5 CA (12:00-12:30)
149 CSHR 1 2 1 5 1 2 3 0 CA (00:30-01:00) 173 CSHR 1 8 1 5 1 8 3 0 CA (12:30-13:00)
150 CSHR 1 2 3 0 1 2 4 5 CA (01:00-01:30) 174 CSHR 1 8 3 0 1 8 4 5 CA (13:00-13:30)
151 CSHR 1 2 4 5 1 3 0 0 CA (01:30-02:00) 175 CSHR 1 8 4 5 1 9 0 0 CA (13:30-14:00)
152 CSHR 1 3 0 0 1 3 1 5 CA (02:00-02:30) 176 CSHR 1 9 0 0 1 9 1 5 CA (14:00-14:30)
153 CSHR 1 3 1 5 1 3 3 0 CA (02:30-03:00) 177 CSHR 1 9 1 5 1 9 3 0 CA (14:30-15:00)
154 CSHR 1 3 3 0 1 3 4 5 CA (03:00-03:30) 178 CSHR 1 9 3 0 1 9 4 5 CA (15:00-15:30)
155 CSHR 1 3 4 5 1 4 0 0 CA (03:30-04:00) 179 CSHR 1 9 4 5 2 0 0 0 CA (15:30-16:00)
156 CSHR 1 4 0 0 1 4 1 5 CA (04:00-04:30) 180 CSHR 2 0 0 0 2 0 1 5 CA (16:00-16:30)
157 CSHR 1 4 1 5 1 4 3 0 CA (04:30-05:00) 181 CSHR 2 0 1 5 2 0 3 0 CA (16:30-17:00)
158 CSHR 1 4 3 0 1 4 4 5 CA (05:00-05:30) 182 CSHR 2 0 3 0 2 0 4 5 CA (17:00-17:30)
159 CSHR 1 4 4 5 1 5 0 0 CA (05:30-06:00) 183 CSHR 2 0 4 5 2 1 0 0 CA (17:30-18:00)
160 CSHR 1 5 0 0 1 5 1 5 CA (06:00-06:30) 184 CSHR 2 1 0 0 2 1 1 5 CA (18:00-18:30)
161 CSHR 1 5 1 5 1 5 3 0 CA (06:30-07:00) 185 CSHR 2 1 1 5 2 1 3 0 CA (18:30-19:00)
162 CSHR 1 5 3 0 1 5 4 5 CA (07:00-07:30) 186 CSHR 2 1 3 0 2 1 4 5 CA (19:00-19:30)
163 CSHR 1 5 4 5 1 6 0 0 CA (07:30-08:00) 187 CSHR 2 1 4 5 2 2 0 0 CA (19:30-20:00)
164 CSHR 1 6 0 0 1 6 1 5 CA (08:00-08:30) 188 CSHR 2 2 0 0 2 2 1 5 CA (20:00-20:30)
165 CSHR 1 6 1 5 1 6 3 0 CA (08:30-09:00) 189 CSHR 2 2 1 5 2 2 3 0 CA (20:30-21:00)
166 CSHR 1 6 3 0 1 6 4 5 CA (09:00-09:30) 190 CSHR 2 2 3 0 2 2 4 5 CA (21:00-21:30)
167 CSHR 1 6 4 5 1 7 0 0 CA (09:30-10:00) 191 CSHR 2 2 4 5 2 3 0 0 CA (21:30-22:00)
168 CSHR 1 7 0 0 1 7 1 5 CA (10:00-10:30) 192 CSHR 2 3 0 0 2 3 1 5 CA (22:00-22:30)
169 CSHR 1 7 1 5 1 7 3 0 CA (10:30-11:00) 193 CSHR 2 3 1 5 2 3 3 0 CA (22:30-23:00)
170 CSHR 1 7 3 0 1 7 4 5 CA (11:00-11:30) 194 CSHR 2 3 3 0 2 3 4 5 CA (23:00-23:30)
171 CSHR 1 7 4 5 1 8 0 0 CA (11:30-12:00) 195 CSHR 2 3 4 5 0 0 0 0 CA (23:30-00:00)
The addresses on this page define time ranges for the All Sales Time Report ONLY when Option 2 is set for Flag 113A.

Programming
Panasonic 5500 Series Programming Instructions – Version LQ3.5 3-133
P26 Product Report Time Range Worksheet (Page 1 of 2)
Beginning Sequence: 26 CASH ADD Range ADD Range 200 CSHR CA 224 CSHR CA
201 CSHR CA 225 CSHR CA
202 CSHR CA 226 CSHR CA
203 CSHR CA 227 CSHR CA
204 CSHR CA 228 CSHR CA
205 CSHR CA 229 CSHR CA
206 CSHR CA 230 CSHR CA
207 CSHR CA 231 CSHR CA
208 CSHR CA 232 CSHR CA
209 CSHR CA 233 CSHR CA
210 CSHR CA 234 CSHR CA
211 CSHR CA 235 CSHR CA
212 CSHR CA 236 CSHR CA
213 CSHR CA 237 CSHR CA
214 CSHR CA 238 CSHR CA
215 CSHR CA 239 CSHR CA
216 CSHR CA 240 CSHR CA
217 CSHR CA 241 CSHR CA
218 CSHR CA 242 CSHR CA
219 CSHR CA 243 CSHR CA
220 CSHR CA 244 CSHR CA
221 CSHR CA 245 CSHR CA
222 CSHR CA 246 CSHR CA
223 CSHR CA 247 CSHR CA
Memory Allocation determines the number of addresses available for these reports.

Programming
3-134 Panasonic 5500 Series Programming Instructions – Version LQ3.5
P26 Product Report Time Range Worksheet (Page 2 of 2) ADD Range Default ADD Range Default 248 CSHR CA (00:00-00:30) 272 CSHR CA (12:00-12:30)
249 CSHR CA (00:30-01:00) 273 CSHR CA (12:30-13:00)
250 CSHR CA (01:00-01:30) 274 CSHR CA (13:00-13:30)
251 CSHR CA (01:30-02:00) 275 CSHR CA (13:30-14:00)
252 CSHR CA (02:00-02:30) 276 CSHR CA (14:00-14:30)
253 CSHR CA (02:30-03:00) 277 CSHR CA (14:30-15:00)
254 CSHR CA (03:00-03:30) 278 CSHR CA (15:00-15:30)
255 CSHR CA (03:30-04:00) 279 CSHR CA (15:30-16:00)
256 CSHR CA (04:00-04:30) 280 CSHR CA (16:00-16:30)
257 CSHR CA (04:30-05:00) 281 CSHR CA (16:30-17:00)
258 CSHR CA (05:00-05:30) 282 CSHR CA (17:00-17:30)
259 CSHR CA (05:30-06:00) 283 CSHR CA (17:30-18:00)
260 CSHR CA (06:00-06:30) 284 CSHR CA (18:00-18:30)
261 CSHR CA (06:30-07:00) 285 CSHR CA (18:30-19:00)
262 CSHR CA (07:00-07:30) 286 CSHR CA (19:00-19:30)
263 CSHR CA (07:30-08:00) 287 CSHR CA (19:30-20:00)
264 CSHR CA (08:00-08:30) 288 CSHR CA (20:00-20:30)
265 CSHR CA (08:30-09:00) 289 CSHR CA (20:30-21:00)
266 CSHR CA (09:00-09:30) 290 CSHR CA (21:00-21:30)
267 CSHR CA (09:30-10:00) 291 CSHR CA (21:30-22:00)
268 CSHR CA (10:00-10:30) 292 CSHR CA (22:00-22:30)
269 CSHR CA (10:30-11:00) 293 CSHR CA (22:30-23:00)
270 CSHR CA (11:00-11:30) 294 CSHR CA (23:00-23:30)
271 CSHR CA (11:30-12:00) 295 CSHR CA (23:30-00:00)
Use these addresses to define ranges for the Product Mix, Projection, and Comparison Reports. The number of addresses you can assign depends upon your Memory Allocation.

Programming
Panasonic 5500 Series Programming Instructions – Version LQ3.5 3-135
P26 Service Time Ranges Worksheet (P2 Mode) Beginning Sequence: 26 CASH ADD Range 300 CSHR CA
301 CSHR CA
302 CSHR CA
303 CSHR CA
304 CSHR CA
305 CSHR CA
306 CSHR CA
307 CSHR CA
308 CSHR CA
309 CSHR CA
Define the ranges for the Service Time Reports. You can use a maximum of ten addresses.

Programming
3-136 Panasonic 5500 Series Programming Instructions – Version LQ3.5
P28 Product Mix Groups
Product Mix groups provide an account of sales by time range. Items linked to these groups update the Product Mix, Projection, and Comparison Reports. The groups can also report to the KVS Product Comparison screen. Use Program 28 to define the descriptor, count type, and status for each Product Mix Group you are tracking. Name: Enter the name of the Product Mix Group you are programming. #/Unit: Enter '0' to track piece or item counts for this Product Mix Group. Upon registration, items update
this group's counter by one (unless you specify a different number of pieces for the item in the PLU program).
OR
If you use head count for this group, enter the number (1-99) of pieces, slices, etc., that make up a whole unit or "head." A typical example would be Chicken, where nine pieces make up a whole chicken. If you enter '9', you must sell nine pieces of chicken to update the group's counter by one.
Note: With head count, group counts report in fractional quantities. The whole number
represents the number of heads or whole units. The fractional quantity indicates the remaining number of pieces. For example, if you program a Chicken group that tracks nine pieces per head, the report shows a 1.2 count when you sell 11 pieces of chicken.
Status: If you do not want the group to display at all KVS screens using Product Comparison mode, enter
a 2-digit value from the selections below. Enter '0' if you do not use this mode or if groups display at all CRTs.
A: 1= Do Not Display at CRT #4. B: 1= Do not Display at CRT #1. 2= Do Not Display at CRT #5. 2= Do not Display at CRT #2. 4= Do Not Display at CRT #6. 4= Do not Display at CRT #3.
Color: Select from the options below if you use a Color KVS System.
A: 0= Normal Video B: 0= White 4= Red 1= Blink 1= Blue 5= Magenta 2= Reverse Video 2= Green 6= Yellow
3= Cyan

Programming
Panasonic 5500 Series Programming Instructions – Version LQ3.5 3-137
P28 Product Mix Groups (Page ____ of____) (P2 Mode) Beginning Sequence: 28 CASH PMix # Name #/Unit Status Color ___ ___CSHR ___ ___ ___ ___ ___ ___ ___ ___CA ___ ___CA ___ ___CA ___ ___CA
___ ___CSHR ___ ___ ___ ___ ___ ___ ___ ___CA ___ ___CA ___ ___CA ___ ___CA
___ ___CSHR ___ ___ ___ ___ ___ ___ ___ ___CA ___ ___CA ___ ___CA ___ ___CA
___ ___CSHR ___ ___ ___ ___ ___ ___ ___ ___CA ___ ___CA ___ ___CA ___ ___CA
___ ___CSHR ___ ___ ___ ___ ___ ___ ___ ___CA ___ ___CA ___ ___CA ___ ___CA
___ ___CSHR ___ ___ ___ ___ ___ ___ ___ ___CA ___ ___CA ___ ___CA ___ ___CA
___ ___CSHR ___ ___ ___ ___ ___ ___ ___ ___CA ___ ___CA ___ ___CA ___ ___CA
___ ___CSHR ___ ___ ___ ___ ___ ___ ___ ___CA ___ ___CA ___ ___CA ___ ___CA
___ ___CSHR ___ ___ ___ ___ ___ ___ ___ ___CA ___ ___CA ___ ___CA ___ ___CA
___ ___CSHR ___ ___ ___ ___ ___ ___ ___ ___CA ___ ___CA ___ ___CA ___ ___CA
___ ___CSHR ___ ___ ___ ___ ___ ___ ___ ___CA ___ ___CA ___ ___CA ___ ___CA
___ ___CSHR ___ ___ ___ ___ ___ ___ ___ ___CA ___ ___CA ___ ___CA ___ ___CA
___ ___CSHR ___ ___ ___ ___ ___ ___ ___ ___CA ___ ___CA ___ ___CA ___ ___CA
___ ___CSHR ___ ___ ___ ___ ___ ___ ___ ___CA ___ ___CA ___ ___CA ___ ___CA
___ ___CSHR ___ ___ ___ ___ ___ ___ ___ ___CA ___ ___CA ___ ___CA ___ ___CA
___ ___CSHR ___ ___ ___ ___ ___ ___ ___ ___CA ___ ___CA ___ ___CA ___ ___CA #/Unit: 0 = Item or Piece count. Color: A: 0= Normal Video
1-99 = # pieces per unit. 1= Blink 2= Reverse
Status: A: 1= Disable Display @ CRT #4 B: 0= White 2= Disable Display @ CRT #5 1= Blue 4= Disable Display @ CRT #6 2= Green
3= Cyan B: 1= Disable Display @ CRT #1 4= Red
2= Disable Display @ CRT #2 5= Magenta 4= Disable Display @ CRT #3 6= Yellow

Programming
3-138 Panasonic 5500 Series Programming Instructions – Version LQ3.5
P30 Prompts & Error Messages
Program 30 gives you access to many of the messages that print and display for workstation operations. Use this program, for example, if you want to customize the preamble or the postamble. Also use it to customize credit card approval and CAT messages, and messages that display for the Drive-Thru Board. After a RAM Clear, the system loads default messages for the printers, the workstation screens, and the optional Drive-Thru Board. You can use the defaults provided or change them to meet the restaurant's specifications. Descriptions for the entries in this program begin below. Prompts & Error Messages Use Addresses 100 - 299 to modify system prompts and error messages. After a RAM Clear, the system loads the defaults listed on the P30 worksheets. If you want to change these defaults, enter up to 16 characters for the line you want to change. The worksheets also list the error numbers that display with the messages. The 5500 Series documentation refers to the defaults when discussing errors. If you change the defaults, you can use the error number to identify the message. Note, however, that the 200 series addresses display the same error numbers as the 100 series addresses. Preamble/Postamble If you want to add Preamble and Postamble messages to your customer receipts, you must first enable the messages in P24, Flag 101. If you do not enable the messages, the system will not acknowledge your entries in this program. You can use up to three lines for the Preamble/Logo, which appears at the top of the customer's receipt. Use Addresses 306 and 307 to program the first line of the Preamble. Use Addresses 308 and 309 for Preamble Line 2, and Addresses 310 and 311 for Preamble Line 3. For example, a Preamble with "PANASONIC 5500 SERIES" centered on the first line would be entered in the following manner:
P A N A S O N I C 306 CSHR ___ ___ ___ ___ ___ ___ ___ ___ ___ ___ ___ ___ ___ ___ ___ ___ CA
5 5 0 0 S E R I E S
307 CSHR ___ ___ ___ ___ ___ ___ ___ ___ ___ ___ ___ ___ ___ ___ ___ ___ CA

Programming
Panasonic 5500 Series Programming Instructions – Version LQ3.5 3-139
You can also program up to three lines for the Postamble. The Postamble prints just above the transaction line on the customer receipt. Use Addresses 300 and 301 for the first line of the Postamble. Use Addresses 302-303 for the second line and use Addresses 304-305 for the third line of the Postamble. A typical Postamble message, 'THANK YOU - VISIT AGAIN', could be set up with the following entries.
T H A N K Y O U - 300 CSHR ___ ___ ___ ___ ___ ___ ___ ___ ___ ___ ___ ___ ___ ___ ___ ___ CA
V I S I T A G A I N
301 CSHR ___ ___ ___ ___ ___ ___ ___ ___ ___ ___ ___ ___ ___ ___ ___ ___ CA You can also design Preamble and Postamble messages for your kitchen printers. Use Addresses 321 through 324 if you want to program a 2-line Postamble. Use Addresses 394 through 399 if you want to program a 3-line Preamble for the kitchen printers.
Note: The Kitchen Printer Preamble only prints if you enter a message in Addresses 394-399. Leave these addresses blank if you do not need the Preamble.
Approval Message Your system can be set up to print an approval message at the bottom of credit card receipts. This message has four programmable lines, which include the customer signature line. The defaults for this message are listed below, by address. You can use Addresses 312 - 319 to modify the default definitions. (Addresses 312 & 313) CARD NUMBER EXPIR. (Addresses 314 & 315) SIGN:___________________________________ (Addresses 316 & 317) PLEASE KEEP THIS COPY (Addresses 318 & 319) FOR YOUR RECORDS. If your system is set up for Credit Authorization, use Addresses 329 - 358 to modify CAT messages. CAT transactions share the signature line you program in Address 314 and 315. You can use Addresses 339 - 352 to define up to seven lines for the CAT Receipt Header. You can also customize the two "agreement" lines that appear above the signature line at the bottom of the receipt and the 1st copy/2nd copy line that appears above the cashier line.

Programming
3-140 Panasonic 5500 Series Programming Instructions – Version LQ3.5
Report Messages You can add special messages to your programmable (Register, Cashier, etc.) reports. Although the Report Total Arrangement Tables allow you to link to addresses 300-399, try to use only Addresses 330 through 399 for your special report messages; Addresses 300 through 329 will be used for future prompts and error messages. An example of a special report message would be a restaurant number. If you want to print the restaurant number at the beginning of every Cashier Report, you could enter Report Code 900330 on the first address of the Cashier Report. The 90 prefix signals a message entry. 0330 links to Message #330, where you can program a descriptor similar to the one in the example below.
R E S T . # 1 2 3 4 5 6 7 8 9 0 330 CSHR ___ ___ ___ ___ ___ ___ ___ ___ ___ ___ ___ ___ ___ ___ ___ ___ CA
Drive-Thru Board Messages Your Drive-Thru workstations can interface to an optional Drive-Thru Board. With this option, the workstations send orders to an outside LCD screen on the Menu Board, so customers can see the items they ordered, as well as the transaction total. The Drive-Thru Board can help customers catch errors before the kitchen prepares the items. Between customer orders, the Drive-Thru Board displays a welcome message. You can use P30, Addresses 400-479 to program the welcome message and to customize the tax, total, or discount descriptors that display to the customer outside. The Drive-Thru welcome message can be one to twelve lines, each with 24 characters. For the first line of the message, use all of Address 400 and the first half of Address 401. For the second line of the message, use the second half of Address 401 and all of Address 402. For example, if you want to center a double-wide "Welcome!" on the first line, use the following entries for Addresses 400 and 401. W E L C O M E ! 400 CSHR __ __ __ __ __ __ __ __ __ __ __ __ 401 CSHR __ __ __ __ __ __ __ __ __ __ __ __CA
The dot (║) on the worksheet indicates the point where the address changes from one line to another.

Programming
Panasonic 5500 Series Programming Instructions – Version LQ3.5 3-141
Suggestive Selling Messages Use Addresses 480 through 488 to program the Suggestive Selling and Promotional Item messages. Each menu can display Suggestion #1, Suggestion #2, or Promotional Item message. Use Flags 280 and 282 to set up Suggestion #1. Use Flags 281 and 282 to set up Suggestion #2. Use Flag 283 for the Promotional Item. Then use Program 30 to define the messages for the two suggestions and the promotional item.
P24 Flag & Option P30 Address Suggestion #1: Flag 280, Option G-H (Step 1) Message/Address 480
Flag 280, Option E-F (Step 2) Message/Address 481 Flag 280, Option C-D (Step 3) Message/Address 482 Flag 280, Option A-B (Step 4) Message/Address 483
Suggestion #2: Flag 281, Option G-H (Step 1) Message/Address 484
Flag 281, Option E-F (Step 2) Message/Address 485 Flag 281, Option C-D (Step 3) Message/Address 486 Flag 281, Option A-B (Step 4) Message/Address 487
Promo Item: Flag 283, Option F-H Message/Address 488 If the restaurant adds an item to the menu, you can use the Promotional Item flag (Flag 283) to list the subgroup number and menu (s) for this item. Then, if the system does not detect this subgroup when the cashier presses Subtotal, a message reminds the cashier to suggest the new item.
Note: The Suggestions are activated with the Subtotal key and are only available at Counter Terminal and Order-Taker workstations.
In one example, Suggestion #1 prompts for a Beverage (Subgroup 1), Fries (Subgroup 3), Salad (Subgroup 8), and Dessert (Subgroup 5). In Program 24, Flag 280 = 05080301. In P30, Address 480 = "Drink?", Address 481 = "Fries?", Address 482 = "Salad?", and Address 483 = "Dessert?" The Subtotal key triggers the Suggestion messages. With this example, if the customer orders a sandwich only, the "Drink?" suggestion displays when you press Subtotal. If the customer orders a sandwich and beverage, the "Fries?" suggestion displays. If the customer orders a sandwich, beverage, and fries, the "Salad?" suggestion displays. And if the customer orders a sandwich, beverage, fries, and salad, the "Dessert?" suggestion displays.

Programming
3-142 Panasonic 5500 Series Programming Instructions – Version LQ3.5
P30 Prompts & Error Messages Worksheet (Page 1 of 13) (P2 Mode) Beginning Sequence: 30 CASH # Default Message ADD Message 00 HALO/LALO ERR 100 CSHR __ __ __ __ __ __ __ __ __ __ __ __ __ __ __ _CA 01 SUBTOTAL ? 101 CSHR __ __ __ __ __ __ __ __ __ __ __ __ __ __ __ __CA 02 ENTER CASHIER # 102 CSHR __ __ __ __ __ __ __ __ __ __ __ __ __ __ __ __CA 03 NON ELIGIBLE 102 CSHR __ __ __ __ __ __ __ __ __ __ __ __ __ __ __ __CA 04 ENTER AMOUNT 104 CSHR __ __ __ __ __ __ __ __ __ __ __ __ __ __ __ __CA 05 CAID HALO 105 CSHR __ __ __ __ __ __ __ __ __ __ __ __ __ __ __ __CA 06 MODIFIER? 106 CSHR __ __ __ __ __ __ __ __ __ __ __ __ __ __ __ __CA 07 BREAK IN 107 CSHR __ __ __ __ __ __ __ __ __ __ __ __ __ __ __ __CA 08 PARK BUFF FULL 108 CSHR __ __ __ __ __ __ __ __ __ __ __ __ __ __ __ __CA 09 ENTER # 109 CSHR __ __ __ __ __ __ __ __ __ __ __ __ __ __ __ __CA 10 PENDING ORDERS 110 CSHR __ __ __ __ __ __ __ __ __ __ __ __ __ __ __ __CA 11 [CLEAR] TO EXIT 111 CSHR __ __ __ __ __ __ __ __ __ __ __ __ __ __ __ __CA 12 RE-ENTER 112 CSHR __ __ __ __ __ __ __ __ __ __ __ __ __ __ __ __CA 13 OVERFLOW 113 CSHR __ __ __ __ __ __ __ __ __ __ __ __ __ __ __ __CA 14 CHANGE ROLL & RS 114 CSHR __ __ __ __ __ __ __ __ __ __ __ __ __ __ __ __CA 15 DRAWER OPEN 115 CSHR __ __ __ __ __ __ __ __ __ __ __ __ __ __ __ __CA 16 COMM BUSY 116 CSHR __ __ __ __ __ __ __ __ __ __ __ __ __ __ __ __CA 17 TERMINAL BUSY 117 CSHR __ __ __ __ __ __ __ __ __ __ __ __ __ __ __ __CA 18 INVALID OPERAT'N 118 CSHR __ __ __ __ __ __ __ __ __ __ __ __ __ __ __ __CA 19 BUFFER FULL 119 CSHR __ __ __ __ __ __ __ __ __ __ __ __ __ __ __ __CA 20 120 CSHR __ __ __ __ __ __ __ __ __ __ __ __ __ __ __ __CA 21 121 CSHR __ __ __ __ __ __ __ __ __ __ __ __ __ __ __ __CA 22 *OVERRING* 122 CSHR __ __ __ __ __ __ __ __ __ __ __ __ __ __ __ __CA 23 COMM START 123 CSHR __ __ __ __ __ __ __ __ __ __ __ __ __ __ __ __CA 24 COMM END 124 CSHR __ __ __ __ __ __ __ __ __ __ __ __ __ __ __ __CA 25 ENTER IN/OUT 125 CSHR __ __ __ __ __ __ __ __ __ __ __ __ __ __ __ __CA 26 ENTER TABLE # 126 CSHR __ __ __ __ __ __ __ __ __ __ __ __ __ __ __ __CA 27 PLU SHIFT ? 127 CSHR __ __ __ __ __ __ __ __ __ __ __ __ __ __ __ __CA 28 GROUP PAYMENT 128 CSHR __ __ __ __ __ __ __ __ __ __ __ __ __ __ __ __CA 29 TYPE OF ORDER? 129 CSHR __ __ __ __ __ __ __ __ __ __ __ __ __ __ __ __CA 30 *ALL VOID* 130 CSHR __ __ __ __ __ __ __ __ __ __ __ __ __ __ __ __CA

Programming
Panasonic 5500 Series Programming Instructions – Version LQ3.5 3-143
P30 Prompts & Error Messages Worksheet (Page 2 of 13) 31 CALL MANAGER 131 CSHR __ __ __ __ __ __ __ __ __ __ __ __ __ __ __ __CA 32 TRAINING MODE 132 CSHR __ __ __ __ __ __ __ __ __ __ __ __ __ __ __ __CA 33 INVALID RECEIPT 133 CSHR __ __ __ __ __ __ __ __ __ __ __ __ __ __ __ __CA 34 ORDER CHANGE 134 CSHR __ __ __ __ __ __ __ __ __ __ __ __ __ __ __ __CA 35 ENTER TIME 135 CSHR __ __ __ __ __ __ __ __ __ __ __ __ __ __ __ __CA 36 TERM# PROG ERR 136 CSHR __ __ __ __ __ __ __ __ __ __ __ __ __ __ __ __CA 37 TIME CLOCK BUSY 137 CSHR __ __ __ __ __ __ __ __ __ __ __ __ __ __ __ __CA 38 ENTER ACT INVT 138 CSHR __ __ __ __ __ __ __ __ __ __ __ __ __ __ __ __CA 39 STORE NOT CLOSED 139 CSHR __ __ __ __ __ __ __ __ __ __ __ __ __ __ __ __CA 40 VERIFY DEPOSITS 140 CSHR __ __ __ __ __ __ __ __ __ __ __ __ __ __ __ __CA 41 ENTER DEPOSITS 141 CSHR __ __ __ __ __ __ __ __ __ __ __ __ __ __ __ __CA 42 VERIFY INVENTORY 142 CSHR __ __ __ __ __ __ __ __ __ __ __ __ __ __ __ __CA 43 HOST POLLING 143 CSHR __ __ __ __ __ __ __ __ __ __ __ __ __ __ __ __CA 44 ENTER MANAGER # 144 CSHR __ __ __ __ __ __ __ __ __ __ __ __ __ __ __ __CA 45 MODFR MISMATCH 145 CSHR __ __ __ __ __ __ __ __ __ __ __ __ __ __ __ __CA 46 STORE NOT OPENED 146 CSHR __ __ __ __ __ __ __ __ __ __ __ __ __ __ __ __CA 47 W/S PRINTR BUSY 147 CSHR __ __ __ __ __ __ __ __ __ __ __ __ __ __ __ __CA 48 INVALID AMOUNT 148 CSHR __ __ __ __ __ __ __ __ __ __ __ __ __ __ __ __CA 49 TENDER CORRECT 149 CSHR __ __ __ __ __ __ __ __ __ __ __ __ __ __ __ __CA 50 CASHIER DISABLED 150 CSHR __ __ __ __ __ __ __ __ __ __ __ __ __ __ __ __CA 51 NOT FINALIZED 151 CSHR __ __ __ __ __ __ __ __ __ __ __ __ __ __ __ __CA 52 152 CSHR __ __ __ __ __ __ __ __ __ __ __ __ __ __ __ __CA 53 *** TIME IN *** 153 CSHR __ __ __ __ __ __ __ __ __ __ __ __ __ __ __ __CA 54 *** TIME OUT *** 154 CSHR __ __ __ __ __ __ __ __ __ __ __ __ __ __ __ __CA 55 ** BREAK OUT ** 155 CSHR __ __ __ __ __ __ __ __ __ __ __ __ __ __ __ __CA 56 ENTER DRAWER# 156 CSHR __ __ __ __ __ __ __ __ __ __ __ __ __ __ __ __CA 57 INVALID COUPON 157 CSHR __ __ __ __ __ __ __ __ __ __ __ __ __ __ __ __CA 58 *BACK-UP MODE* 158 CSHR __ __ __ __ __ __ __ __ __ __ __ __ __ __ __ __CA 59 ENTER PHONE # 159 CSHR __ __ __ __ __ __ __ __ __ __ __ __ __ __ __ __CA 60 RE-ENTER PHONE # 160 CSHR __ __ __ __ __ __ __ __ __ __ __ __ __ __ __ __CA 61 PHONE-IN ORDERS 161 CSHR __ __ __ __ __ __ __ __ __ __ __ __ __ __ __ __CA 62 ENT. PICKUP TIME 162 CSHR __ __ __ __ __ __ __ __ __ __ __ __ __ __ __ __CA 63 NOT FOUND 163 CSHR __ __ __ __ __ __ __ __ __ __ __ __ __ __ __ __CA 64 164 CSHR __ __ __ __ __ __ __ __ __ __ __ __ __ __ __ __CA 65 SELECT NEXT KEY1 165 CSHR __ __ __ __ __ __ __ __ __ __ __ __ __ __ __ __CA

Programming
3-144 Panasonic 5500 Series Programming Instructions – Version LQ3.5
P30 Prompts & Error Messages Worksheet (Page 3 of 13) 66 SELECT NEXT KEY2 166 CSHR __ __ __ __ __ __ __ __ __ __ __ __ __ __ __ __CA 67 SELECT NEXT KEY3 167 CSHR __ __ __ __ __ __ __ __ __ __ __ __ __ __ __ __CA 68 SELECT NEXT KEY4 168 CSHR __ __ __ __ __ __ __ __ __ __ __ __ __ __ __ __CA 69 SELECT NEXT KEY5 169 CSHR __ __ __ __ __ __ __ __ __ __ __ __ __ __ __ __CA 70 MODE CHECK ERROR 170 CSHR __ __ __ __ __ __ __ __ __ __ __ __ __ __ __ __CA 71 WRONG TERMINAL 171 CSHR __ __ __ __ __ __ __ __ __ __ __ __ __ __ __ __CA 72 SWIPE CARD 172 CSHR __ __ __ __ __ __ __ __ __ __ __ __ __ __ __ __CA 73 CARD HAS EXPIRED 173 CSHR __ __ __ __ __ __ __ __ __ __ __ __ __ __ __ __CA 74 CARD# : N # 174 CSHR __ __ __ __ __ __ __ __ __ __ __ __ __ __ __ __CA 75 EXP. : MMYY DATE 175 CSHR __ __ __ __ __ __ __ __ __ __ __ __ __ __ __ __CA 76 E.J. BUFFER FULL 176 CSHR __ __ __ __ __ __ __ __ __ __ __ __ __ __ __ __CA 77 INVALID CARD# 177 CSHR __ __ __ __ __ __ __ __ __ __ __ __ __ __ __ __CA 78 LOW COIN ALARM 178 CSHR __ __ __ __ __ __ __ __ __ __ __ __ __ __ __ __CA 79 DISPENSER ERROR 179 CSHR __ __ __ __ __ __ __ __ __ __ __ __ __ __ __ __CA 80 PLEASE TRY AGAIN 180 CSHR __ __ __ __ __ __ __ __ __ __ __ __ __ __ __ __CA 81 GRACE TIME ERROR 181 CSHR __ __ __ __ __ __ __ __ __ __ __ __ __ __ __ __CA 82 CASHIER ID ERROR 182 CSHR __ __ __ __ __ __ __ __ __ __ __ __ __ __ __ __CA 83 MANAGER ID ERROR 183 CSHR __ __ __ __ __ __ __ __ __ __ __ __ __ __ __ __CA 84 PROGRAM ERROR 184 CSHR __ __ __ __ __ __ __ __ __ __ __ __ __ __ __ __CA 85 MOTION ERROR 185 CSHR __ __ __ __ __ __ __ __ __ __ __ __ __ __ __ __CA 86 ZERO ERROR 186 CSHR __ __ __ __ __ __ __ __ __ __ __ __ __ __ __ __CA 87 OVER CAPACITY 187 CSHR __ __ __ __ __ __ __ __ __ __ __ __ __ __ __ __CA 88 UNDER CAPACITY 188 CSHR __ __ __ __ __ __ __ __ __ __ __ __ __ __ __ __CA 89 WEIGHING 189 CSHR __ __ __ __ __ __ __ __ __ __ __ __ __ __ __ __CA 90 KILOGRAM ERROR 190 CSHR __ __ __ __ __ __ __ __ __ __ __ __ __ __ __ __CA 91 POUND WHT ERROR 191 CSHR __ __ __ __ __ __ __ __ __ __ __ __ __ __ __ __CA 92 NON SCALE ITEM 192 CSHR __ __ __ __ __ __ __ __ __ __ __ __ __ __ __ __CA 93 SCALE ITEM ? 193 CSHR __ __ __ __ __ __ __ __ __ __ __ __ __ __ __ __CA 94 ENTER WEIGHT 194 CSHR __ __ __ __ __ __ __ __ __ __ __ __ __ __ __ __CA 95 VIDEO BUSY 195 CSHR __ __ __ __ __ __ __ __ __ __ __ __ __ __ __ __CA 96 PRINTER BUSY 196 CSHR __ __ __ __ __ __ __ __ __ __ __ __ __ __ __ __CA 97 DATA TRANSFER 197 CSHR __ __ __ __ __ __ __ __ __ __ __ __ __ __ __ __CA 98 (Store ID) 198 CSHR __ __ __ __ __ __ __ __ __ __ __ __ __ __ __ __CA 99 (Host ID) 199 CSHR __ __ __ __ __ __ __ __ __ __ __ __ __ __ __ __CA

Programming
Panasonic 5500 Series Programming Instructions – Version LQ3.5 3-145
P30 Prompts & Error Messages Worksheet (Page 4 of 13) 00 PC OFFLINE 200 CSHR __ __ __ __ __ __ __ __ __ __ __ __ __ __ __ __CA 01 PC ONLINE 201 CSHR __ __ __ __ __ __ __ __ __ __ __ __ __ __ __ __CA 02 POLL UPDATE 202 CSHR __ __ __ __ __ __ __ __ __ __ __ __ __ __ __ __CA 03 POLL BUFFER FULL 203 CSHR __ __ __ __ __ __ __ __ __ __ __ __ __ __ __ __CA 04 PC COMMUNICATION 204 CSHR __ __ __ __ __ __ __ __ __ __ __ __ __ __ __ __CA 05 COMM ERROR 205 CSHR __ __ __ __ __ __ __ __ __ __ __ __ __ __ __ __CA 06 206 CSHR __ __ __ __ __ __ __ __ __ __ __ __ __ __ __ __CA
07 DO MIX MATCH 207 CSHR __ __ __ __ __ __ __ __ __ __ __ __ __ __ __ __CA 08 208 CSHR __ __ __ __ __ __ __ __ __ __ __ __ __ __ __ __CA 09 209 CSHR __ __ __ __ __ __ __ __ __ __ __ __ __ __ __ __CA 10 ITEM IS 86'D 210 CSHR __ __ __ __ __ __ __ __ __ __ __ __ __ __ __ __CA 11 ITEM QTY LOW 211 CSHR __ __ __ __ __ __ __ __ __ __ __ __ __ __ __ __CA 12 86 ITEMS 212 CSHR __ __ __ __ __ __ __ __ __ __ __ __ __ __ __ __CA 13 MASTER DOWN 213 CSHR __ __ __ __ __ __ __ __ __ __ __ __ __ __ __ __CA 14 LINK GROUP ERROR 214 CSHR __ __ __ __ __ __ __ __ __ __ __ __ __ __ __ __CA 15 MINOR EMP HALO 215 CSHR __ __ __ __ __ __ __ __ __ __ __ __ __ __ __ __CA 16 ENTER RESPONSE 216 CSHR __ __ __ __ __ __ __ __ __ __ __ __ __ __ __ __CA 17 FD NOT ACCEPT 217 CSHR __ __ __ __ __ __ __ __ __ __ __ __ __ __ __ __CA 18 BOARD BUSY 218 CSHR __ __ __ __ __ __ __ __ __ __ __ __ __ __ __ __CA 19 D-T BOARD SCREEN 219 CSHR __ __ __ __ __ __ __ __ __ __ __ __ __ __ __ __CA 20 NO BOARD DATA 220 CSHR __ __ __ __ __ __ __ __ __ __ __ __ __ __ __ __CA 21 WAIT PC I/F 221 CSHR __ __ __ __ __ __ __ __ __ __ __ __ __ __ __ __CA 22 REQUEST ACCEPTED 222 CSHR __ __ __ __ __ __ __ __ __ __ __ __ __ __ __ __CA 23 REQUEST REJECTED 223 CSHR __ __ __ __ __ __ __ __ __ __ __ __ __ __ __ __CA 24 MONDEX CONNECT 224 CSHR __ __ __ __ __ __ __ __ __ __ __ __ __ __ __ __CA : : 31 ENTER CHG. KEY 231 CSHR __ __ __ __ __ __ __ __ __ __ __ __ __ __ __ __CA 32 MANUAL AUTH. 232 CSHR __ __ __ __ __ __ __ __ __ __ __ __ __ __ __ __CA 33 VOID TRAN 233 CSHR __ __ __ __ __ __ __ __ __ __ __ __ __ __ __ __CA 34 RETURN TRAN. 234 CSHR __ __ __ __ __ __ __ __ __ __ __ __ __ __ __ __CA 35 235 CSHR __ __ __ __ __ __ __ __ __ __ __ __ __ __ __ __CA 36 236 CSHR __ __ __ __ __ __ __ __ __ __ __ __ __ __ __ __CA 37 CAT RECEIPT 237 CSHR __ __ __ __ __ __ __ __ __ __ __ __ __ __ __ __CA 38 CAT PROCESSING 238 CSHR __ __ __ __ __ __ __ __ __ __ __ __ __ __ __ __CA 39 DENIED 239 CSHR __ __ __ __ __ __ __ __ __ __ __ __ __ __ __ __CA 40 CAT OFFLINE 240 CSHR __ __ __ __ __ __ __ __ __ __ __ __ __ __ __ __CA

Programming
3-146 Panasonic 5500 Series Programming Instructions – Version LQ3.5
P30 Prompts & Error Messages Worksheet (Page 5 of 13) 41 241 CSHR __ __ __ __ __ __ __ __ __ __ __ __ __ __ __ __CA 42 ENTER AUTH# 242 CSHR __ __ __ __ __ __ __ __ __ __ __ __ __ __ __ __CA 43 ENTER REF# 243 CSHR __ __ __ __ __ __ __ __ __ __ __ __ __ __ __ __CA 44 244 CSHR __ __ __ __ __ __ __ __ __ __ __ __ __ __ __ __CA 45 245 CSHR __ __ __ __ __ __ __ __ __ __ __ __ __ __ __ __CA 46 PRESS T.EDIT KEY 246 CSHR __ __ __ __ __ __ __ __ __ __ __ __ __ __ __ __CA 47 (Reserved - CAT PCACK) 247 CSHR __ __ __ __ __ __ __ __ __ __ __ __ __ __ __ __CA 48 (Reserved - CAT PCNACK) 248 CSHR __ __ __ __ __ __ __ __ __ __ __ __ __ __ __ __CA 49 249 CSHR __ __ __ __ __ __ __ __ __ __ __ __ __ __ __ __CA 50 ENTER JOB 250 CSHR __ __ __ __ __ __ __ __ __ __ __ __ __ __ __ __CA 51 ENTER TIP 251 CSHR __ __ __ __ __ __ __ __ __ __ __ __ __ __ __ __CA 52 GIVX PROCESSING 252 CSHR __ __ __ __ __ __ __ __ __ __ __ __ __ __ __ __CA 53 ERR DATA RECEIVE 253 CSHR __ __ __ __ __ __ __ __ __ __ __ __ __ __ __ __CA (Gift Card Transmission) : : 80 RCT ORD BUF FUL 280 CSHR __ __ __ __ __ __ __ __ __ __ __ __ __ __ __ __CA 81 TERM ORD BUF FUL 281 CSHR __ __ __ __ __ __ __ __ __ __ __ __ __ __ __ __CA 82 RCT ITEM BUF FUL 282 CSHR __ __ __ __ __ __ __ __ __ __ __ __ __ __ __ __CA 83 PRT ORD BUF FUL 283 CSHR __ __ __ __ __ __ __ __ __ __ __ __ __ __ __ __CA 84 PRT ITEM BUF FUL 284 CSHR __ __ __ __ __ __ __ __ __ __ __ __ __ __ __ __CA 85 PRINTER BUF FUL 285 CSHR __ __ __ __ __ __ __ __ __ __ __ __ __ __ __ __CA 86 KVS BUFFER FUL 286 CSHR __ __ __ __ __ __ __ __ __ __ __ __ __ __ __ __CA 87 SHARED BUF FUL 287 CSHR __ __ __ __ __ __ __ __ __ __ __ __ __ __ __ __CA 88 288 CSHR __ __ __ __ __ __ __ __ __ __ __ __ __ __ __ __CA 89 289 CSHR __ __ __ __ __ __ __ __ __ __ __ __ __ __ __ __CA 90 DDCS SEND FAIL 290 CSHR __ __ __ __ __ __ __ __ __ __ __ __ __ __ __ __CA 91 DDOT RECV ERROR 291 CSHR __ __ __ __ __ __ __ __ __ __ __ __ __ __ __ __CA : : 96 MWS LAN END 1 296 CSHR __ __ __ __ __ __ __ __ __ __ __ __ __ __ __ __CA 97 MWS LAN END 2 297 CSHR __ __ __ __ __ __ __ __ __ __ __ __ __ __ __ __CA
98 BALANCE ERROR 298 CSHR __ __ __ __ __ __ __ __ __ __ __ __ __ __ __ __CA
99 IP# ADDR.ERROR 299 CSHR __ __ __ __ __ __ __ __ __ __ __ __ __ __ __ __CA

Programming
Panasonic 5500 Series Programming Instructions – Version LQ3.5 3-147
P30 Prompts & Error Messages Worksheet (Page 6 of 13) (P2 Mode) Beginning Sequence: 30 CASH Postamble/Trailer Message: Line 1: 300 CSHR___ ___ ___ ___ ___ ___ ___ ___ ___ ___ ___ ___ ___ ___ ___ ___CA
301 CSHR___ ___ ___ ___ ___ ___ ___ ___ ___ ___ ___ ___ ___ ___ ___ ___CA Line 2: 302 CSHR___ ___ ___ ___ ___ ___ ___ ___ ___ ___ ___ ___ ___ ___ ___ ___CA
303 CSHR___ ___ ___ ___ ___ ___ ___ ___ ___ ___ ___ ___ ___ ___ ___ ___CA Line 3: 304 CSHR___ ___ ___ ___ ___ ___ ___ ___ ___ ___ ___ ___ ___ ___ ___ ___CA
305 CSHR___ ___ ___ ___ ___ ___ ___ ___ ___ ___ ___ ___ ___ ___ ___ ___CA Preamble/Logo: Line 1: 306 CSHR___ ___ ___ ___ ___ ___ ___ ___ ___ ___ ___ ___ ___ ___ ___ ___CA
307 CSHR___ ___ ___ ___ ___ ___ ___ ___ ___ ___ ___ ___ ___ ___ ___ ___CA Line 2: 308 CSHR___ ___ ___ ___ ___ ___ ___ ___ ___ ___ ___ ___ ___ ___ ___ ___CA
309 CSHR___ ___ ___ ___ ___ ___ ___ ___ ___ ___ ___ ___ ___ ___ ___ ___CA Line 3: 310 CSHR___ ___ ___ ___ ___ ___ ___ ___ ___ ___ ___ ___ ___ ___ ___ ___CA
311 CSHR___ ___ ___ ___ ___ ___ ___ ___ ___ ___ ___ ___ ___ ___ ___ ___CA
Note: If you want to use these addresses, you must enable the Preamble and Postamble in P24, Flag 101.

Programming
3-148 Panasonic 5500 Series Programming Instructions – Version LQ3.5
P30 Prompts & Error Messages Worksheet (Page 7 of 13) Credit Card Receipt Message: Line 1: 312 CSHR___ ___ ___ ___ ___ ___ ___ ___ ___ ___ ___ ___ ___ ___ ___ ___CA
313 CSHR___ ___ ___ ___ ___ ___ ___ ___ ___ ___ ___ ___ ___ ___ ___ ___CA
Line 2: 314 CSHR___ ___ ___ ___ ___ ___ ___ ___ ___ ___ ___ ___ ___ ___ ___ ___CA
315 CSHR___ ___ ___ ___ ___ ___ ___ ___ ___ ___ ___ ___ ___ ___ ___ ___CA Line 3: 316 CSHR___ ___ ___ ___ ___ ___ ___ ___ ___ ___ ___ ___ ___ ___ ___ ___CA
317 CSHR___ ___ ___ ___ ___ ___ ___ ___ ___ ___ ___ ___ ___ ___ ___ ___CA Line 4: 318 CSHR___ ___ ___ ___ ___ ___ ___ ___ ___ ___ ___ ___ ___ ___ ___ ___CA
319 CSHR___ ___ ___ ___ ___ ___ ___ ___ ___ ___ ___ ___ ___ ___ ___ ___CA Kitchen Printer Postamble: Line 1: 321 CSHR___ ___ ___ ___ ___ ___ ___ ___ ___ ___ ___ ___ ___ ___ ___ ___CA
322 CSHR___ ___ ___ ___ ___ ___ ___ ___ ___ ___ ___ ___ ___ ___ ___ ___CA Line 2: 323 CSHR___ ___ ___ ___ ___ ___ ___ ___ ___ ___ ___ ___ ___ ___ ___ ___CA
324 CSHR___ ___ ___ ___ ___ ___ ___ ___ ___ ___ ___ ___ ___ ___ ___ ___CA CAT Agreement Message: Line 1: 329 CSHR___ ___ ___ ___ ___ ___ ___ ___ ___ ___ ___ ___ ___ ___ ___ ___CA
330 CSHR___ ___ ___ ___ ___ ___ ___ ___ ___ ___ ___ ___ ___ ___ ___ ___CA (future) 331 CSHR___ ___ ___ ___ ___ ___ ___ ___ ___ ___ ___ ___ ___ ___ ___ ___CA
332 CSHR___ ___ ___ ___ ___ ___ ___ ___ ___ ___ ___ ___ ___ ___ ___ ___CA CAT Header Message: Line 1: 339 CSHR___ ___ ___ ___ ___ ___ ___ ___ ___ ___ ___ ___ ___ ___ ___ ___CA
340 CSHR___ ___ ___ ___ ___ ___ ___ ___ ___ ___ ___ ___ ___ ___ ___ ___CA
Line 2: 341 CSHR___ ___ ___ ___ ___ ___ ___ ___ ___ ___ ___ ___ ___ ___ ___ ___CA
342 CSHR___ ___ ___ ___ ___ ___ ___ ___ ___ ___ ___ ___ ___ ___ ___ ___CA

Programming
Panasonic 5500 Series Programming Instructions – Version LQ3.5 3-149
P30 Prompts & Error Messages Worksheet (Page 8 of 13) CAT Header Message (cont.): Line 3: 343 CSHR___ ___ ___ ___ ___ ___ ___ ___ ___ ___ ___ ___ ___ ___ ___ ___CA
344 CSHR___ ___ ___ ___ ___ ___ ___ ___ ___ ___ ___ ___ ___ ___ ___ ___CA Line 4: 345 CSHR___ ___ ___ ___ ___ ___ ___ ___ ___ ___ ___ ___ ___ ___ ___ ___CA
346 CSHR___ ___ ___ ___ ___ ___ ___ ___ ___ ___ ___ ___ ___ ___ ___ ___CA Line 5: 347 CSHR___ ___ ___ ___ ___ ___ ___ ___ ___ ___ ___ ___ ___ ___ ___ ___CA
348 CSHR___ ___ ___ ___ ___ ___ ___ ___ ___ ___ ___ ___ ___ ___ ___ ___CA Line 6: 349 CSHR___ ___ ___ ___ ___ ___ ___ ___ ___ ___ ___ ___ ___ ___ ___ ___CA
350 CSHR___ ___ ___ ___ ___ ___ ___ ___ ___ ___ ___ ___ ___ ___ ___ ___CA Line 7: 351 CSHR___ ___ ___ ___ ___ ___ ___ ___ ___ ___ ___ ___ ___ ___ ___ ___CA
352 CSHR___ ___ ___ ___ ___ ___ ___ ___ ___ ___ ___ ___ ___ ___ ___ ___CA CAT Trailer Messages: Line 3: 353 CSHR___ ___ ___ ___ ___ ___ ___ ___ ___ ___ ___ ___ ___ ___ ___ ___CA
354 CSHR___ ___ ___ ___ ___ ___ ___ ___ ___ ___ ___ ___ ___ ___ ___ ___CA Line 4: 355 CSHR___ ___ ___ ___ ___ ___ ___ ___ ___ ___ ___ ___ ___ ___ ___ ___CA
356 CSHR___ ___ ___ ___ ___ ___ ___ ___ ___ ___ ___ ___ ___ ___ ___ ___CA Line 5: 357 CSHR___ ___ ___ ___ ___ ___ ___ ___ ___ ___ ___ ___ ___ ___ ___ ___CA
358 CSHR___ ___ ___ ___ ___ ___ ___ ___ ___ ___ ___ ___ ___ ___ ___ ___CA Kitchen Printer Preamble: Line 1: 394 CSHR___ ___ ___ ___ ___ ___ ___ ___ ___ ___ ___ ___ ___ ___ ___ ___CA
395 CSHR___ ___ ___ ___ ___ ___ ___ ___ ___ ___ ___ ___ ___ ___ ___ ___CA Line 2: 396 CSHR___ ___ ___ ___ ___ ___ ___ ___ ___ ___ ___ ___ ___ ___ ___ ___CA
397 CSHR___ ___ ___ ___ ___ ___ ___ ___ ___ ___ ___ ___ ___ ___ ___ ___CA Line 3: 398 CSHR___ ___ ___ ___ ___ ___ ___ ___ ___ ___ ___ ___ ___ ___ ___ ___CA
399 CSHR___ ___ ___ ___ ___ ___ ___ ___ ___ ___ ___ ___ ___ ___ ___ ___CA

Programming
3-150 Panasonic 5500 Series Programming Instructions – Version LQ3.5
P30 Prompts & Error Messages Worksheet (Page 9 of 13) Report Messages 320 RE-PRINT RECEIPT 320 CSHR __ __ __ __ __ __ __ __ __ __ __ __ __ __ __ __CA 321 (K/P Preamble) 322 (K/P Preamble) 323 (K/P Preamble) 324 (K/P Preamble) 325 (Reserved) 325 CSHR __ __ __ __ __ __ __ __ __ __ __ __ __ __ __ __CA 326 (Reserved) 326 CSHR __ __ __ __ __ __ __ __ __ __ __ __ __ __ __ __CA 327 (Reserved) 327 CSHR __ __ __ __ __ __ __ __ __ __ __ __ __ __ __ __CA 328 (Reserved) 328 CSHR __ __ __ __ __ __ __ __ __ __ __ __ __ __ __ __CA 329 (Agreement) 329 CSHR __ __ __ __ __ __ __ __ __ __ __ __ __ __ __ __CA 330 (Agreement) 330 CSHR __ __ __ __ __ __ __ __ __ __ __ __ __ __ __ __CA 331 (Reserved) 331 CSHR __ __ __ __ __ __ __ __ __ __ __ __ __ __ __ __CA 332 (Reserved) 332 CSHR __ __ __ __ __ __ __ __ __ __ __ __ __ __ __ __CA 333 333 CSHR __ __ __ __ __ __ __ __ __ __ __ __ __ __ __ __CA 334 334 CSHR __ __ __ __ __ __ __ __ __ __ __ __ __ __ __ __CA 335 335 CSHR __ __ __ __ __ __ __ __ __ __ __ __ __ __ __ __CA 336 336 CSHR __ __ __ __ __ __ __ __ __ __ __ __ __ __ __ __CA 337 337 CSHR __ __ __ __ __ __ __ __ __ __ __ __ __ __ __ __CA 338 338 CSHR __ __ __ __ __ __ __ __ __ __ __ __ __ __ __ __CA 339 (CAT Header1) 339 CSHR __ __ __ __ __ __ __ __ __ __ __ __ __ __ __ __CA 340 (CAT Header) 340 CSHR __ __ __ __ __ __ __ __ __ __ __ __ __ __ __ __CA 341 (CAT Header 2) 341 CSHR __ __ __ __ __ __ __ __ __ __ __ __ __ __ __ __CA 342 (CAT Header) 342 CSHR __ __ __ __ __ __ __ __ __ __ __ __ __ __ __ __CA 343 (CAT Header 3) 343 CSHR __ __ __ __ __ __ __ __ __ __ __ __ __ __ __ __CA 344 (CAT Header) 344 CSHR __ __ __ __ __ __ __ __ __ __ __ __ __ __ __ __CA 345 (CAT Header 4) 345 CSHR __ __ __ __ __ __ __ __ __ __ __ __ __ __ __ __CA 346 (CAT Header) 346 CSHR __ __ __ __ __ __ __ __ __ __ __ __ __ __ __ __CA 347 (CAT Header 5) 347 CSHR __ __ __ __ __ __ __ __ __ __ __ __ __ __ __ __CA 348 (CAT Header) 348 CSHR __ __ __ __ __ __ __ __ __ __ __ __ __ __ __ __CA

Programming
Panasonic 5500 Series Programming Instructions – Version LQ3.5 3-151
P30 Prompts & Error Messages Worksheet (Page 10 of 13) 349 (CAT Header 6) 349 CSHR __ __ __ __ __ __ __ __ __ __ __ __ __ __ __ __CA 350 (CAT Header) 350 CSHR __ __ __ __ __ __ __ __ __ __ __ __ __ __ __ __CA 351 (CAT Header 7) 351 CSHR __ __ __ __ __ __ __ __ __ __ __ __ __ __ __ __CA 352 (CAT Header) 352 CSHR __ __ __ __ __ __ __ __ __ __ __ __ __ __ __ __CA 353 (CAT Trailer) 353 CSHR __ __ __ __ __ __ __ __ __ __ __ __ __ __ __ __CA 354 (CAT Trailer) 354 CSHR __ __ __ __ __ __ __ __ __ __ __ __ __ __ __ __CA 355 (CAT Trailer) 355 CSHR __ __ __ __ __ __ __ __ __ __ __ __ __ __ __ __CA 356 (CAT Trailer) 356 CSHR __ __ __ __ __ __ __ __ __ __ __ __ __ __ __ __CA 357 (CAT Trailer) 357 CSHR __ __ __ __ __ __ __ __ __ __ __ __ __ __ __ __CA 358 (CAT Trailer) 358 CSHR __ __ __ __ __ __ __ __ __ __ __ __ __ __ __ __CA 359 TR TYPE 359 CSHR __ __ __ __ __ __ __ __ __ __ __ __ __ __ __ __CA 360 MERCHNT# 360 CSHR __ __ __ __ __ __ __ __ __ __ __ __ __ __ __ __CA 361 361 CSHR __ __ __ __ __ __ __ __ __ __ __ __ __ __ __ __CA 362 362 CSHR __ __ __ __ __ __ __ __ __ __ __ __ __ __ __ __CA 363 ORDER # 363 CSHR __ __ __ __ __ __ __ __ __ __ __ __ __ __ __ __CA 364 REF# 364 CSHR __ __ __ __ __ __ __ __ __ __ __ __ __ __ __ __CA 365 PAYMENT 365 CSHR __ __ __ __ __ __ __ __ __ __ __ __ __ __ __ __CA 366 CARD# 366 CSHR __ __ __ __ __ __ __ __ __ __ __ __ __ __ __ __CA 367 EXP.DATE 367 CSHR __ __ __ __ __ __ __ __ __ __ __ __ __ __ __ __CA 368 AUTH.# 368 CSHR __ __ __ __ __ __ __ __ __ __ __ __ __ __ __ __CA 369 369 CSHR __ __ __ __ __ __ __ __ __ __ __ __ __ __ __ __CA 370 AUTHSALE 370 CSHR __ __ __ __ __ __ __ __ __ __ __ __ __ __ __ __CA 371 371 CSHR __ __ __ __ __ __ __ __ __ __ __ __ __ __ __ __CA 372 VOIDTRNS 372 CSHR __ __ __ __ __ __ __ __ __ __ __ __ __ __ __ __CA 373 RTRNTRNS 373 CSHR __ __ __ __ __ __ __ __ __ __ __ __ __ __ __ __CA 374 SERVICE TYPE 374 CSHR __ __ __ __ __ __ __ __ __ __ __ __ __ __ __ __CA 375 TRANSACTION# 375 CSHR __ __ __ __ __ __ __ __ __ __ __ __ __ __ __ __CA

Programming
3-152 Panasonic 5500 Series Programming Instructions – Version LQ3.5
P30 Prompts & Error Messages Worksheet (Page 11 of 13) 376 CARD ISSUER 376 CSHR __ __ __ __ __ __ __ __ __ __ __ __ __ __ __ __CA 377 CERTIFICATE# 377 CSHR __ __ __ __ __ __ __ __ __ __ __ __ __ __ __ __CA 378 CURRENT BAL 378 CSHR __ __ __ __ __ __ __ __ __ __ __ __ __ __ __ __CA 379 INCREMENT BAL 379 CSHR __ __ __ __ __ __ __ __ __ __ __ __ __ __ __ __CA 380 RED. BAL 380 CSHR __ __ __ __ __ __ __ __ __ __ __ __ __ __ __ __CA 381 CANCEL BAL 381 CSHR __ __ __ __ __ __ __ __ __ __ __ __ __ __ __ __CA 382 NEW. BAL 382 CSHR __ __ __ __ __ __ __ __ __ __ __ __ __ __ __ __CA 383 HOST RESPONSE CO (line 1/2) 383 CSHR __ __ __ __ __ __ __ __ __ __ __ __ __ __ __ __CA 384 DE (line 2/2) 384 CSHR __ __ __ __ __ __ __ __ __ __ __ __ __ __ __ __CA 385 REGISTER 385 CSHR __ __ __ __ __ __ __ __ __ __ __ __ __ __ __ __CA 386 ACTIVATION 386 CSHR __ __ __ __ __ __ __ __ __ __ __ __ __ __ __ __CA 387 INCREMENT 387 CSHR __ __ __ __ __ __ __ __ __ __ __ __ __ __ __ __CA 388 REDEMPTION 388 CSHR __ __ __ __ __ __ __ __ __ __ __ __ __ __ __ __CA 389 CANCEL 389 CSHR __ __ __ __ __ __ __ __ __ __ __ __ __ __ __ __CA 390 BALANCE INQUIRY 390 CSHR __ __ __ __ __ __ __ __ __ __ __ __ __ __ __ __CA 391 RETURN 391 CSHR __ __ __ __ __ __ __ __ __ __ __ __ __ __ __ __CA 392 RETURN BAL 392 CSHR __ __ __ __ __ __ __ __ __ __ __ __ __ __ __ __CA : 399

Panasonic 5500 Series Programming Instructions – Version LQ3.5 3-153
30 Prompts & Error Messages Worksheet (Page 12 of 13) Drive-Thru Board Messages: 400 CSHR __ __ __ __ __ __ __ __ __ __ __ __ __ __ __ __CA 401 CSHR__ __ __ __ __ __ __ __ __ __ __ __ __ __ __ __CA 402 CSHR__ __ __ __ __ __ __ __ __ __ __ __ __ __ __ __CA
------------------------------------------------ Welcome Message Line 1 ---------------------------------║ ---------------------------- Welcome Message Line 2 ------------------------------------------------------ 403 CSHR __ __ __ __ __ __ __ __ __ __ __ __ __ __ __ __CA 404 CSHR__ __ __ __ __ __ __ __ __ __ __ __ __ __ __ __CA 405 CSHR__ __ __ __ __ __ __ __ __ __ __ __ __ __ __ __CA
------------------------------------------------ Welcome Message Line 3 ----------------------------------║ ------------------------------------- Welcome Message Line 4 --------------------------------------------- 406 CSHR __ __ __ __ __ __ __ __ __ __ __ __ __ __ __ __CA 407 CSHR__ __ __ __ __ __ __ __ __ __ __ __ __ __ __ __CA 408 CSHR__ __ __ __ __ __ __ __ __ __ __ __ __ __ __ __CA
------------------------------------------------ Welcome Message Line 5 ----------------------------------║ ------------------------------------- Welcome Message Line 6 --------------------------------------------- 409 CSHR __ __ __ __ __ __ __ __ __ __ __ __ __ __ __ __CA 410 CSHR__ __ __ __ __ __ __ __ __ __ __ __ __ __ __ __CA 411 CSHR__ __ __ __ __ __ __ __ __ __ __ __ __ __ __ __CA
------------------------------------------------ Welcome Message Line 7 ----------------------------------║ ------------------------------------- Welcome Message Line87 -------------------------------------------- 412 CSHR __ __ __ __ __ __ __ __ __ __ __ __ __ __ __ __CA 413 CSHR__ __ __ __ __ __ __ __ __ __ __ __ __ __ __ __CA 414 CSHR__ __ __ __ __ __ __ __ __ __ __ __ __ __ __ __CA
------------------------------------------------ Welcome Message Line 9-----------------------------------║ ------------------------------------- Welcome Message Line 10-------------------------------------------- 415 CSHR __ __ __ __ __ __ __ __ __ __ __ __ __ __ __ __CA 416 CSHR__ __ __ __ __ __ __ __ __ __ __ __ __ __ __ __CA 417 CSHR__ __ __ __ __ __ __ __ __ __ __ __ __ __ __ __CA
------------------------------------------------ Welcome Message Line 11 ---------------------------------║ ------------------------------------- Welcome Message Line 12-------------------------------------------- 418 CSHR __ __ __ __ __ __ __ __ __ __ __ __ __ __ __ __CA Blank (Scroll Message 1) 419 CSHR __ __ __ __ __ __ __ __ __ __ __ __ __ __ __ __CA Blank (Scroll Message 2) 420 CSHR __ __ __ __ __ __ __ __ __ __ __ __ __ __ __ __CA Blank (Scroll Message 3) 421 CSHR __ __ __ __ __ __ __ __ __ __ __ __ __ __ __ __CA DISC: (Discount String) 422 CSHR __ __ __ __ __ __ __ __ __ __ __ __ __ __ __ __CA TAX: (Tax String) 423 CSHR __ __ __ __ __ __ __ __ __ __ __ __ __ __ __ __CA TOTL: (Total String) 424 CSHR __ __ __ __ __ __ __ __ __ __ __ __ __ __ __ __CA : (Addresses 425-478 are not used) 479 CSHR __ __ __ __ __ __ __ __ __ __ __ __ __ __ __ __CA

Programming
3-154 Panasonic 5500 Series Programming Instructions – Version LQ3.5
P30 Prompts & Error Messages Worksheet (Page 13 of 13) Suggestive Selling Message #1: Step 1: 480 CSHR ___ ___ ___ ___ ___ ___ ___ ___ ___ ___ ___ ___ ___ ___ ___ ___CA Step 2: 481 CSHR ___ ___ ___ ___ ___ ___ ___ ___ ___ ___ ___ ___ ___ ___ ___ ___CA Step 3: 482 CSHR ___ ___ ___ ___ ___ ___ ___ ___ ___ ___ ___ ___ ___ ___ ___ ___CA Step 4: 483 CSHR ___ ___ ___ ___ ___ ___ ___ ___ ___ ___ ___ ___ ___ ___ ___ ___CA Note: Use Flag 280 to identify the groups that trigger these messages. Suggestive Selling Message #2: Step 1: 484 CSHR ___ ___ ___ ___ ___ ___ ___ ___ ___ ___ ___ ___ ___ ___ ___ ___CA Step 2: 485 CSHR ___ ___ ___ ___ ___ ___ ___ ___ ___ ___ ___ ___ ___ ___ ___ ___CA Step 3: 486 CSHR ___ ___ ___ ___ ___ ___ ___ ___ ___ ___ ___ ___ ___ ___ ___ ___CA Step 4: 487 CSHR ___ ___ ___ ___ ___ ___ ___ ___ ___ ___ ___ ___ ___ ___ ___ ___CA Note: Use Flag 281 to identify the groups that trigger these messages. Promotional Item: Line 1: 488 CSHR ___ ___ ___ ___ ___ ___ ___ ___ ___ ___ ___ ___ ___ ___ ___ ___CA Note: Use Flag 283 to identify the group that triggers this message.

Programming
Panasonic 5500 Series Programming Instructions – Version LQ3.5 3-155
P31 Cashier File
Use Program 31 to define the numbers cashiers use to log onto the workstations. For each of the numbers, you can also enter a maximum 8-character name. The worksheet entries for this program are explained below.
Note: Manager (and manager-level cashier) log numbers are defined in another program: Program 36. See the P36 explanation for a description of the entries you use for managers who operate the 5500 Series workstations.
Cashier #: This field identifies the memory location of the cashier. It is the number you use to access the cashier within program and report menus. Your entry is restricted to the number you entered for # Cashiers in Memory Allocation. For example, if you allocated two cashiers, the only valid entries are 1 and 2. Code #: The Code # determines the number the cashier uses to log onto a workstation. You can enter up to ten digits. If, for example, you enter 0123456789, this cashier logs onto the workstation with the following sequence: CSHR, 0123456789, CSHR. Descriptor: Enter up to 8 characters for the cashier name. If you do not enter a description, the Cashier number (your first entry in this program) displays and prints.

Programming
3-156 Panasonic 5500 Series Programming Instructions – Version LQ3.5
P31 Cashier File Worksheet (Page ___ of ___) (P2 Mode) Beginning Sequence: 31 CASH Cshr# Code # Descriptor
___ ___CSHR ___ ___ ___ ___ ___ ___ ___ ___ ___ ___SBTL ___ ___ ___ ___ ___ ___ ___ ___ CA
___ ___CSHR ___ ___ ___ ___ ___ ___ ___ ___ ___ ___SBTL ___ ___ ___ ___ ___ ___ ___ ___ CA
___ ___CSHR ___ ___ ___ ___ ___ ___ ___ ___ ___ ___SBTL ___ ___ ___ ___ ___ ___ ___ ___ CA
___ ___CSHR ___ ___ ___ ___ ___ ___ ___ ___ ___ ___SBTL ___ ___ ___ ___ ___ ___ ___ ___ CA
___ ___CSHR ___ ___ ___ ___ ___ ___ ___ ___ ___ ___SBTL ___ ___ ___ ___ ___ ___ ___ ___ CA
___ ___CSHR ___ ___ ___ ___ ___ ___ ___ ___ ___ ___SBTL ___ ___ ___ ___ ___ ___ ___ ___ CA
___ ___CSHR ___ ___ ___ ___ ___ ___ ___ ___ ___ ___SBTL ___ ___ ___ ___ ___ ___ ___ ___ CA
___ ___CSHR ___ ___ ___ ___ ___ ___ ___ ___ ___ ___SBTL ___ ___ ___ ___ ___ ___ ___ ___ CA
___ ___CSHR ___ ___ ___ ___ ___ ___ ___ ___ ___ ___SBTL ___ ___ ___ ___ ___ ___ ___ ___ CA
___ ___CSHR ___ ___ ___ ___ ___ ___ ___ ___ ___ ___SBTL ___ ___ ___ ___ ___ ___ ___ ___ CA
___ ___CSHR ___ ___ ___ ___ ___ ___ ___ ___ ___ ___SBTL ___ ___ ___ ___ ___ ___ ___ ___ CA
___ ___CSHR ___ ___ ___ ___ ___ ___ ___ ___ ___ ___SBTL ___ ___ ___ ___ ___ ___ ___ ___ CA
___ ___CSHR ___ ___ ___ ___ ___ ___ ___ ___ ___ ___SBTL ___ ___ ___ ___ ___ ___ ___ ___ CA
___ ___CSHR ___ ___ ___ ___ ___ ___ ___ ___ ___ ___SBTL ___ ___ ___ ___ ___ ___ ___ ___ CA
___ ___CSHR ___ ___ ___ ___ ___ ___ ___ ___ ___ ___SBTL ___ ___ ___ ___ ___ ___ ___ ___ CA
___ ___CSHR ___ ___ ___ ___ ___ ___ ___ ___ ___ ___SBTL ___ ___ ___ ___ ___ ___ ___ ___ CA
___ ___CSHR ___ ___ ___ ___ ___ ___ ___ ___ ___ ___SBTL ___ ___ ___ ___ ___ ___ ___ ___ CA
___ ___CSHR ___ ___ ___ ___ ___ ___ ___ ___ ___ ___SBTL ___ ___ ___ ___ ___ ___ ___ ___ CA
___ ___CSHR ___ ___ ___ ___ ___ ___ ___ ___ ___ ___SBTL ___ ___ ___ ___ ___ ___ ___ ___ CA
___ ___CSHR ___ ___ ___ ___ ___ ___ ___ ___ ___ ___SBTL ___ ___ ___ ___ ___ ___ ___ ___ CA
(1-99)

Programming
Panasonic 5500 Series Programming Instructions – Version LQ3.5 3-157
P32 Coupons
Coupon Search helps the system confirm that an eligible item is registered before it allows a coupon. If you want to enable coupon search, use this program to enter definitions for up to 199 regular and up to 99 combo coupons (depending upon your Memory Allocation). Then use Program 35 to link items to their applicable coupons. The coupon explanation is split into two parts: Regular Coupons and Combo Coupons. Regular coupons apply to one item at a time. A coupon for 50¢ off a Side Salad would be an example of a Regular Coupon. Combo Coupons apply to a package meal. A coupon for 50¢ off the purchase of a Burger, Fries, and Soft Drink would be an example of a Combo Coupon. Refer to the explanation for the coupon you are creating.
Regular Coupons
Regular coupons apply to a single, specific item at a time. After you create this type of coupon, you use Program 35 to link it to all of its associated items. This type of coupon is registered with a preset coupon key (COUP 1, 2, or 3) or with the Coupon Look-Up key (key code 89). You first register the item at its regular price. Then, when you press the coupon with the item, the system checks the item program to see which coupon should be registered. The steps in this process are illustrated below:
Key Sequence:
PLU 100
COUP
1
PLU 100
Note: With Coupon Look-Up, you enter the CLU#, press CLU, then press the item key. The system checks the item program (P35) to see which coupons are allowed. It then checks the coupon program (P32) for information associated with the CLU #.

Programming
3-158 Panasonic 5500 Series Programming Instructions – Version LQ3.5
Combo Coupons
Combo Coupons apply to a package or "combination" meal. An example of a combo coupon would be one that applies to a Salad and Beverage purchase. For this type of coupon, you list up to five items in the coupon's program. The system confirms that these items are registered before it allows the coupon. You register Combo coupons with the Combo Coupon Look-Up key (key code 90). First enter all applicable items, then enter the coupon look-up number and press the Combo Coupon Look-up key. The system checks the coupon program to see if all required items are registered. If all conditions are met, the coupon is registered. For example, if Combo Coupon #217 applies to a Burger (PLU #100) and Fries (PLU #75) combination, the system uses the following process to register the coupon.
Key Sequence:
PLU 100
PLU 75
[ CLU #217 ] COMB CLU
Note: This coupon is registered only if both PLU #100 and PLU #75 are registered.
Wildcard Search options are also available for your Combo Coupons. These options tell the system to search through the range of PLUs associated with the PLU number in the Link field. You use these options if your coupon applies to a non-specific item like a beverage or a sandwich.

Programming
Panasonic 5500 Series Programming Instructions – Version LQ3.5 3-159
You can select a 2-digit or 3-digit Wildcard Search. If you enter 1000 in the Link field, and select a 2-digit search, the system looks for PLUs 1000 through 1099. If you enter 1000 in the Link field and select a 3-digit search, the system looks for PLUs 1000 through 1999. The coupon is allowed for any of the PLUs in the range. To illustrate this option, consider a combo coupon that applies to a Burger, Fries, and Beverage. Enter the Burger PLU number (#100) in the first Link field. Enter the Fries PLU number (#75) in the second Link field. You cannot enter a specific beverage PLU number, because the customer has a choice of several beverages. Eligible beverages range from Milk (#1000) and Small Cola (#1100) to Large Tea (1902). Include the following entries for this combo coupon.
5 LINK 1 0 PL - 000100 (Burger) 6 LINK 2 0 PL - 000075 (Fries) 7 LINK 3 2 PL - 001000 (3-digit Beverage Search)
When you try to register this coupon, the system first checks for a Burger and Fries. If it finds both, the system checks for a beverage entry (a 3-digit search, starting with PLU #1000 and continuing through PLU #1999). If you registered any PLU within this range, the system accepts the coupon. In another example, you have a coupon that applies to any sandwich with an order of fries and a beverage. Sandwich PLU numbers range from #100 (Single Burger) to #180 (Chicken Sandwich). Fries are PLU #200. The beverages range from #2000 (Milk) to #2903 (Large Tea). You would include the following entries for this coupon.
5 LINK 1 1 PL - 000100 (2-digit Sandwich Search) 6 LINK 2 0 PL - 000200 (Fries) 7 LINK 3 2 PL - 002000 (3-digit Beverage Search)
When you try to register this coupon, the system first searches a 2-digit range of PLUs (starting with 100 and continuing through 199) to see if you registered a sandwich. It then checks for PLU #200 (fries). If you registered both, the system searches a 3-digit range (starting with PLU #2000 and continuing through #2999) to see if you registered a beverage. If it finds a PLU within this range, the system accepts the coupon.
Note: You can disallow Combo Coupons for any of your PLU items. Program 35 includes an option that excludes the PLU from the Wildcard Search. You may need to set this option, for example, if the Water PLU falls within the search range, but does not qualify for the coupon.

Programming
3-160 Panasonic 5500 Series Programming Instructions – Version LQ3.5
Coupon #: For Regular Coupons, use numbers 1-199, depending on Memory Allocation. This number
becomes the coupon link you use in P35. Regular Coupons are registered with COUP 1, 2, 3, or CLU (key code 89).
For Combo Coupons, use numbers 201-299, depending upon your Memory Allocation. Combo Coupons are registered with COMB CLU (key code 90).
CLU#: If you use a coupon look-up (CLU) number to register the regular coupon, enter the 1-6 digit
number associated with this coupon. You must assign a CLU number to all Combo Coupons. Status: Select A and B options that apply to this coupon.
A: 1- Update Tax 1. 2- Update Tax 2. 4- Update Tax 3.
B: 1- For Regular Coupons: Open Coupon. For Combo Coupons: Allow the Same Item Link. This option lets you list the same item twice within your combo coupon Link fields. You can use it for Buy-one, Get-one Free coupons.
2- Require MGR Mode for this coupon. 4- This coupon nets the PLU item. [Available for Regular Coupons only.]
Price/Halo: Enter the preset coupon amount ($xxxx.xx). If the coupon is open, enter the highest dollar
amount allowed for this coupon. [0= No HALO.] Wildcard & Links: (For Combo Coupons Only)
Specify up to five item links for this coupon. For each of these links, you have the option to specify a wildcard. If you specify a wildcard, the PLU number you entered in the Link field identifies the range of PLUs included in the search. Simply enter the lowest numbered PLU in the range.
For example, if you enter 1000 in the Link field and 0 in the Wildcard field, this coupon is only accepted if PLU #1000 is registered. If you enter 1000 in the Link field and 1 in the Wildcard field, the system searches for PLUs 1000-1099. If you enter 1000 in the Link field and 2 in the Wildcard field, the system searches for PLUs 1000-1999. The system will accept any coupon that falls within the specified range.
Note: Link 1-5 lines display only if you enter a coupon number that is higher than 200 (for
Combo Coupons). If you enter a coupon number between 1 and 199 (for Regular Coupons), Links 1-5 are not available.

Programming
Panasonic 5500 Series Programming Instructions – Version LQ3.5 3-161
Wildcard 1: 0= Check for the specific PLU # listed in the Link 1 field.
1= Enable a 2-digit Wildcard Search, which includes the PLU # you enter for the Link 1 field.
2= Enable a 3-digit search, which includes the PLU # you enter for Link 1. Link 1: Enter the number of the first PLU in the combination meal that allows this coupon. If you
enter 1 or 2 in the Wildcard 1 field, the system searches the 2-digit or 3-digit range that includes this PLU number.
Wildcard 2: 0= Check for the specific PLU # listed in the Link 2 field.
1= Enable a 2-digit Wildcard Search. 2= Enable a 3-digit Wildcard Search.
Link 2: Enter the number of the second PLU in the combination meal that allows this coupon. If
you entered 1 or 2 in the Wildcard 2 field, the system searches the range of PLUs that includes this PLU #.
Wildcard 3: 0= Check for the specific PLU # listed in the Link 3 field.
1= Enable a 2-digit Wildcard Search. 2= Enable a 3-digit Wildcard Search.
Link 3: Enter the number of the third PLU in the combination meal that allows this coupon. If you
entered 1 or 2 in the Wildcard 3 field, the system searches a range that includes this PLU #.
Wildcard 4: 0= Check for the specific PLU # listed in the Link 4 field.
1= Enable a 2-digit Wildcard Search. 2= Enable a 3-digit Wildcard Search.
Link 4: Enter the number of the fourth PLU in the combination meal to which this coupon applies.
If you entered 1 or 2 in the Wildcard 4 field, the system searches the range of PLUs that includes this PLU #.
Wildcard 5: 0= Check for the specific PLU # listed in the Link 5 field.
1= Enable a 2-digit Wildcard Search. 2= Enable a 3-digit Wildcard Search.
Link 5: Enter the number of the fifth PLU in the combination meal to which this coupon applies.
If you entered 1 or 2 in the Wildcard 5 field, the system searches the range of PLUs that includes this PLU #.

3-162 Panasonic 5500 LQ2.6 Series Programming Instructions
P32 Coupons Worksheet (Page ___ of ___) (P2 Mode) Beginning Sequence: 32 CASH (Cpn #) CPN (Desc) CA (CLU#) CA (Amount) CA (Status) CA (Wild Card) SBTL (Link) CA -1- -2- -3- -4- -5- -6- -7- -8- -9- Coupon# Descriptor CLU # Amount/Halo Status ┌── Link 1 ──┐ ┌── Link 2 ──┐ ┌── Link 3 ──┐ ┌── Link 4 ──┐ ┌─ Link 5 ─┐ A B A B C D E F G A B C D E F G A B C D E F G A B C D E F G A B C D E F G _ _ _ _ _ _ _ _ _ _ _ _ _ _ _ _ _ _ _ _ _ _ _ _ _ __ _ _ _ _ _ _ __ _ _ _ _ _ _ __ _ _ _ _ _ _ __ _ _ _ _ _ _ __ _ _ _ _ _ _ _ _ _ _ _ _ _ _ _ _ _ _ _ _ _ _ _ _ _ _ _ _ _ _ _ __ _ _ _ _ _ _ __ _ _ _ _ _ _ __ _ _ _ _ _ _ __ _ _ _ _ _ _ __ _ _ _ _ _ _ _ _ _ _ _ _ _ _ _ _ _ _ _ _ _ _ _ _ _ _ _ _ _ _ _ __ _ _ _ _ _ _ __ _ _ _ _ _ _ __ _ _ _ _ _ _ __ _ _ _ _ _ _ __ _ _ _ _ _ _ _ _ _ _ _ _ _ _ _ _ _ _ _ _ _ _ _ _ _ _ _ _ _ _ _ __ _ _ _ _ _ _ __ _ _ _ _ _ _ __ _ _ _ _ _ _ __ _ _ _ _ _ _ __ _ _ _ _ _ _ _ _ _ _ _ _ _ _ _ _ _ _ _ _ _ _ _ _ _ _ _ _ _ _ _ __ _ _ _ _ _ _ __ _ _ _ _ _ _ __ _ _ _ _ _ _ __ _ _ _ _ _ _ __ _ _ _ _ _ _ _ _ _ _ _ _ _ _ _ _ _ _ _ _ _ _ _ _ _ _ _ _ _ _ _ __ _ _ _ _ _ _ __ _ _ _ _ _ _ __ _ _ _ _ _ _ __ _ _ _ _ _ _ __ _ _ _ _ _ _ _ _ _ _ _ _ _ _ _ _ _ _ _ _ _ _ _ _ _ _ _ _ _ _ _ __ _ _ _ _ _ _ __ _ _ _ _ _ _ __ _ _ _ _ _ _ __ _ _ _ _ _ _ __ _ _ _ _ _ _ _ _ _ _ _ _ _ _ _ _ _ _ _ _ _ _ _ _ _ _ _ _ _ _ _ __ _ _ _ _ _ _ __ _ _ _ _ _ _ __ _ _ _ _ _ _ __ _ _ _ _ _ _ __ _ _ _ _ _ _ _ _ _ _ _ _ _ _ _ _ _ _ _ _ _ _ _ _ _ _ _ _ _ _ _ __ _ _ _ _ _ _ __ _ _ _ _ _ _ __ _ _ _ _ _ _ __ _ _ _ _ _ _ __ _ _ _ _ _ _ _ _ _ _ _ _ _ _ _ _ _ _ _ _ _ _ _ _ _ _ _ _ _ _ _ __ _ _ _ _ _ _ __ _ _ _ _ _ _ __ _ _ _ _ _ _ __ _ _ _ _ _ _ __ _ _ _ _ _ _ _ _ _ _ _ _ _ _ _ _ _ _ _ _ _ _ _ _ _ _ _ _ _ _ _ __ _ _ _ _ _ _ __ _ _ _ _ _ _ __ _ _ _ _ _ _ __ _ _ _ _ _ _ __ _ _ _ _ _ _ _ _ _ _ _ _ _ _ _ _ _ _ _ _ _ _ _ _ _ _ _ _ _ _ _ __ _ _ _ _ _ _ __ _ _ _ _ _ _ __ _ _ _ _ _ _ __ _ _ _ _ _ _ __ _ _ _ _ _ _
Coupon #
Status
Amount/HALO
Link 1-5
1 - 199 = Regular Coupon 201 - 299 = Combo Coupon Note: Combo Coupons require
a CLU #, entered with the Combo Coupon key (key code 90)
A: 1= Update Tax 1 2= Update Tax 2 4= Update Tax 3 B: 1= Open Coupon (for Regular Coupons only) 2= Require MGR 4= Net PLU & Pmix (for Reg. Coupons only)
Preset Coupons: Enter the preset coupon amount ($.00 - $9999.99) Open Coupons: Enter the highest amount allowed for the coupon.
A: 0= No Wild Card 1= 2-digit Search 2= 3-digit Search B-H: Enter the PLU Link # (1-999999)

Programming
Panasonic 5500 Series Programming Instructions – Version LQ3.5 3-163
P34 Groups
Use Program 34 to set up your Major Group and Subgroup categories. In this program, you first define Major Groups you want to track for restaurant reports. You then create Subgroups (Minor Groups) and link them to an applicable Major Group. Later in Program 35, you link menu items to one of the defined subgroups for two additional breakdowns for restaurant sales activity. Typically, Major Groups represent the broadest category of items, such as Food, Non-Food, or Beverage. Subgroups are a more specific category. For example, the "Food" Major Group could be broken down into Burger, Side Order, and Salad subgroups, depending upon the restaurant's requirements. Plan your group assignments to best fit the restaurant's report needs. Refer to the descriptions below for an explanation of the entries required for Program 34. Group #: For Subgroups, enter the number of the Subgroup you are programming. Use a number
between 1 and 199 (depending upon your Memory Allocation).
For Major Groups, enter the address (201-220) of the Major Group you are programming. [201= Major Group 1, 202= Major Group 2, 203= Major Group 3, 204= Major Group 4, 205= Major Group 5 ... 220= Major Group 20].
Descriptor: Enter the Group name. You can use up to 16 characters. Two lines of print (8 characters
per line) are available per item. Link: Enter the number (1-20) of the Major Group to which this Subgroup links. This option is
only available for Subgroups. It does not display for Major Groups.
Note: Make sure you link the Subgroups to valid Major Group numbers. If you link the Subgroup to a non-existent Major Group, your Group Reports will not balance.

Programming
3-164 Panasonic 5500 Series Programming Instructions – Version LQ3.5
P34 Group Worksheet (Page ____ of ____) (P2 Mode) Beginning Sequence: 34 CASH Group # Descriptor Link ___ ___ ___ CSHR ___ ___ ___ ___ ___ ___ ___ ___ CA ____ SBTL ___ ___ ___ CSHR ___ ___ ___ ___ ___ ___ ___ ___ CA ____ SBTL ___ ___ ___ CSHR ___ ___ ___ ___ ___ ___ ___ ___ CA ____ SBTL ___ ___ ___ CSHR ___ ___ ___ ___ ___ ___ ___ ___ CA ____ SBTL ___ ___ ___ CSHR ___ ___ ___ ___ ___ ___ ___ ___ CA ____ SBTL ___ ___ ___ CSHR ___ ___ ___ ___ ___ ___ ___ ___ CA ____ SBTL ___ ___ ___ CSHR ___ ___ ___ ___ ___ ___ ___ ___ CA ____ SBTL ___ ___ ___ CSHR ___ ___ ___ ___ ___ ___ ___ ___ CA ____ SBTL ___ ___ ___ CSHR ___ ___ ___ ___ ___ ___ ___ ___ CA ____ SBTL ___ ___ ___ CSHR ___ ___ ___ ___ ___ ___ ___ ___ CA ____ SBTL ___ ___ ___ CSHR ___ ___ ___ ___ ___ ___ ___ ___ CA ____ SBTL ___ ___ ___ CSHR ___ ___ ___ ___ ___ ___ ___ ___ CA ____ SBTL ___ ___ ___ CSHR ___ ___ ___ ___ ___ ___ ___ ___ CA ____ SBTL ___ ___ ___ CSHR ___ ___ ___ ___ ___ ___ ___ ___ CA ____ SBTL ___ ___ ___ CSHR ___ ___ ___ ___ ___ ___ ___ ___ CA ____ SBTL ___ ___ ___ CSHR ___ ___ ___ ___ ___ ___ ___ ___ CA ____ SBTL ___ ___ ___ CSHR ___ ___ ___ ___ ___ ___ ___ ___ CA ____ SBTL Coupon #: 1-199= Subgroup #
201-220= Major Group (#1-#20) Link: Enter the Major Group # (1-20) to which the Subgroup is linked. This field is only available for
Subgroups.

Programming
Panasonic 5500 Series Programming Instructions – Version LQ3.5 3-165
P27 PLU Additions & Deletions
You use three programs for PLU items: Program 27 (P27), Program 35 (P35), and Program 71 (P71). Use P27 to create a new number or to delete an existing number from your file. If you create a new number, you next use P35 to enter its price, name, and additional information for the item. P71 is a shortcut you can use to copy information from an existing PLU to a new, similar PLU. The steps for Program 27 depend upon whether you are adding or deleting an item. Refer to the description you need. PLU Additions Each PLU must be assigned a number. You enter this number in Program 27 to open a space in memory for the PLU item. You cannot access the PLU in Program 35 until you enter its number in P27. The numbering convention you use depends upon the type of PLU you are programming. For Coded PLUs, you can use any 1-6 digit number. Preset PLUs must follow guidelines you defined in Flag 114, Option A. If Flag 114A= 0, use numbers 1-999 for your Preset PLUs. If Flag 114A= 1, number Preset PLUs (in multiples of 10) from 10 to 9990. If Flag 114A= 2, number Preset PLUs (in multiples of 100) from 100 to 99900. If Flag 114A= 3, number Preset PLUs (in multiples of 1000) from 1000 to 999000. Important: In order to report accurate totals, your PLU file must be identical system-wide. You can
add PLUs to an existing file during the day, and then individually downline them without affecting or damaging the file. However, if you are going to downline the entire PLU file, you must take Z1 and Z2 PLU Accumulation reports before programming. If you fail to run these reports before an "All PLU" downline, your PLU report totals will be distorted.
PLU # Deletions You can use P27 to delete an incorrect PLU number or a PLU number you no longer need. For each number you need to delete, enter the PLU number, press PLU, and then press the VOID key. Important: You must always take Z1 and Z2 PLU Accumulation reports before deleting items from an
existing file. There are no exceptions. If you fail to take these reports, your PLU totals will be distorted.

Programming
3-166 Panasonic 5500 Series Programming Instructions – Version LQ3.5
P27 PLU Additions & Deletions (P2 Mode) Beginning Sequence: 27 CASH PLU # PLU # ____ ____ ____ ____ ____ ____PLU ____ ____ ____ ____ ____ ____PLU ____ ____ ____ ____ ____ ____PLU ____ ____ ____ ____ ____ ____PLU ____ ____ ____ ____ ____ ____PLU ____ ____ ____ ____ ____ ____PLU ____ ____ ____ ____ ____ ____PLU ____ ____ ____ ____ ____ ____PLU ____ ____ ____ ____ ____ ____PLU ____ ____ ____ ____ ____ ____PLU ____ ____ ____ ____ ____ ____PLU ____ ____ ____ ____ ____ ____PLU ____ ____ ____ ____ ____ ____PLU ____ ____ ____ ____ ____ ____PLU ____ ____ ____ ____ ____ ____PLU ____ ____ ____ ____ ____ ____PLU ____ ____ ____ ____ ____ ____PLU ____ ____ ____ ____ ____ ____PLU ____ ____ ____ ____ ____ ____PLU ____ ____ ____ ____ ____ ____PLU ____ ____ ____ ____ ____ ____PLU ____ ____ ____ ____ ____ ____PLU ____ ____ ____ ____ ____ ____PLU ____ ____ ____ ____ ____ ____PLU ____ ____ ____ ____ ____ ____PLU ____ ____ ____ ____ ____ ____PLU ____ ____ ____ ____ ____ ____PLU ____ ____ ____ ____ ____ ____PLU ____ ____ ____ ____ ____ ____PLU ____ ____ ____ ____ ____ ____PLU ____ ____ ____ ____ ____ ____PLU ____ ____ ____ ____ ____ ____PLU To Delete a PLU: (PLU #) PLU VOID

Programming
Panasonic 5500 Series Programming Instructions – Version LQ3.5 3-167
P35 PLU File
After you add PLU numbers in Program 27, use Program 35 to enter information about the menu item. This program contains the item price, status, description, and remote steering assignments. It also identifies links to applicable coupons, recipes, major groups, subgroups, and product mix groups. Once you go into the Program 35 menu and access the PLU you are programming, enter the line number you need and press CSHR. For example, "1 CSHR" takes you to the Descriptor line. Enter the values that apply to the selected line, then press CASH.
Important: After you add or change information in Program 35, you must downline that information to all other workstations on your system. Product reports will not be accurate if your PLU files are not identical systemwide.
See Program 71 if you want to copy information from an existing PLU to a new PLU.
PLU #: Enter the number of the item and press the PLU key. If you are programming a Preset PLU, you
can simply touch the assigned item key to display its program. For example, if you have a "Burger" Preset PLU key, you can touch the BURGER key in Program 35 go into its program.
Note: A shortcut is available for items registered by subgroup lookup. You can use the
subgroup lookup to list items on the P35 screen, and then enter the item number to go to the item. For example, if you have a DESSERT macro key that performs a subgroup lookup of items linked to the Dessert subgroup, you can touch the DESSERT macro key in Program 35. When the screen lists linked desserts, enter the number displayed for the dessert you are changing.
If you are defining a new item, you must follow guidelines set in Flag 114 for Preset PLUs
(PLUs assigned to the keyboard). If Flag 114A= 0, you must use numbers 1-999 for Preset PLUs. If Flag 114A= 1, assign Preset PLU numbers in multiples of 10 (from 10-9990). If 114A= 2, assign Preset PLU numbers in multiples of 100 (from 100-99900). If 114A= 3, assign Preset PLU numbers in multiples of 1000 (from 1000-999000). If the PLU is not assigned to the keyboard, you can use any PLU number between 1 and 999999.
Line 1: Descriptor
Enter the PLU name. Two lines (8-characters per line) are available for each menu item. Note: If Bilingual handling is enabled (Program 24, Flag 408H = 1), use the first set of
8 characters for the primary language and use the second set of 8 characters for the secondary language. If Flag 408H = 0, all 16 characters are available for the item description

Programming
3-168 Panasonic 5500 Series Programming Instructions – Version LQ3.5
Line 2: Status 1
A: 2- Enable Scale. Set this option for all items that can be weighed. 4- Require Scale. Set this option (and option 2, above) for items that must always be weighed. B: 1- Require a Shift key (e.g., "Small" or "Large") for the item.
2- The PLU price is negative (subtracting). 4- Add Tax 4. [GST (Canada) only.]
C: 1- Add Tax 1 to the item. 2- Add Tax 2 to the item. 4- Add Tax 3 to the item.
D: 1- Disable the item. 2- Enable red print. (This option is valid only if your printer supports red print.) 4- Disable Tandem PLU print and display. (This option is only valid for Tandem PLUs).
Line 3: Status 2
A: 1- Require Double Shift. If set, this item requires a single shift (0-9) and a double shift (10-90). (Also set 1 for Status 1, Option B.) Without this option, you can use two shifts with an item, as long as both shift keys are registered before the item.
2- Track the item by destination. (For this, In= Subgroup+0, Out= Subgroup+1, D/T= Subgroup+2... Destination 9= Subgroup+8, Destination 10= Subgroup+9. For example, if Milk links to Subgroup 1, "In" Milk updates Subgroup 1, "Out" Milk updates Subgroup 2, and "D/T" Milk updates Subgroup 3.)
4- This PLU is Open (not Preset). B: 1- This PLU acts as a Modifier/Condiment.
2- This PLU acts as a Memo Modifier/Condiment, which does not add to the total and does not print on reports. Do not assign prices to this type of PLU.
4- Allow Discounts to this PLU. C: 1- Disallow Promo with this PLU.
2- Require a modifier/condiment with this PLU. 4- Non-add to customer itemizer.
D: 1- Disable Receipt print. 2- Disable Journal print and Electronic Journal storage for this PLU.
Line 4: Status 3
C: 1- Enable On-the-fly KVS Transfer, where this item instantly relays to the KVS (instead of buffering one item). This option only applies to main PLUs when item-by-item transfer is enabled (Flag 271). Do not use this option with: Modifiers, Combined/Override Steering, or last Tandem PLUs. If you register a modifier with an item set for this transfer, the modifier will not go to the KVS.
D: 1- Canada GST Exception. 2- This PLU is a Price-Add Modifier; its price adds into the item price on remote, direct, and
kitchen printers. It is not valid on the workstation screen or with item-by-item transfer. [If not set, the modifier price displays separately, on the same line as the modifier.]

Programming
Panasonic 5500 Series Programming Instructions – Version LQ3.5 3-169
Line 5: Class #
If Flag 103A <4: Positions A-H represent class numbers (A= Class 8, B= Class 7... H= Class 1). Enter '1' in the position of the class you want to set. For example, if you are programming a hamburger, you could enter 100 in the class field. Also enter 100 for associated condiments (lettuce, tomato, mayonnaise, onion, etc.)
( _ _ _ _ _ _1 _0 _ 0 ) A B C D E F G H
Note: When Flag 103<4, the compulsory modifier option (Status 2, option C) applies only to the main item. Modifiers cannot require modifiers.
If Flag 103A >4: Positions D-F represent class links. Use D-F to link the item to its associated condiments. Positions A-C represent a class match. When you program the condiments associated with the item, use the same ("matching") class number.
For an item, replace D-F with the number (0-255) of the class to which this item links. For a modifier, replace A-C with the matching class number (0-255).
( A B C - D E F )
Some sample assignments are provided below.
Salad: Class = 000-005 Burger: Class = 000-001 Ranch Dressing: Class = 005-000 Plain: Class = 001-000 French Dressing: Class = 005-000 Lettuce: Class = 001-000
Note: Class #255 is a "wildcard" class. It matches any class. Class #000 is a valid class
for the last modifier in a sequence. Line 6: Price
For a Preset PLU, enter the item price ($.00-9999.99). For an Open PLU, enter the highest amount allowed (HALO) on this key. For a Scale PLU, enter the price per pound or kilogram.

Programming
3-170 Panasonic 5500 Series Programming Instructions – Version LQ3.5
Line 7: Remote Steering / Priority
A-B: Enter the priority of this item, where 1 is the highest and 99 is the lowest priority. Items with a 0 priority appear after all items with an assigned priority. (Also set Flag 103A to enable priority.)
C: 1- Assign Steer Flag 7 to the item 2- Assign Steer Flag 8 to the item 4- Assign Steer Flag 9 to the item
D: 1- Assign Steer Flag 4 to the item 2- Assign Steer Flag 5 to the item 4- Assign Steer Flag 6 to the item
E: 1- Assign Steer Flag 1 to the item 2- Assign Steer Flag 2 to the item 4- Assign Steer Flag 3 to the item
Line 8: Coupons 2 & 1
You can enter three coupon links per item. These links decide which regular coupons the item accepts. Use A-D for Coupon 2 and use E-H for Coupon 1.
Note: If you use COUP1 and COUP2 keys, COUP1 + this item registers the coupon in
E-H. COUP2 + this item registers the coupon in A-D. If you use look-up (CLU) numbers, the item accepts any regular coupons in the Coupon 1, 2, or 3 fields. Do not list Combo Coupon numbers here; only Option E concerns Combo Coupons.
A: 0- Accept the specific coupon entered in B-D, below.
1- Enable Wildcard Search for the coupon in B-D. (Valid for CLU Coupons only). If enabled, the system performs a 1-digit search through the coupon file, starting with the coupon you enter in B-D. The item accepts any coupon in the range.
B-D: Enter a 3-digit Regular coupon number that applies to this item. If you enabled Wildcard search (Option A), this sets the starting point for the search.
E: 0- Accept the specific coupon entered in F-H, below. 1- Enable Wildcard Search for the coupon in F-H. (Valid for CLU Coupons only). If enabled, the
system performs a 1-digit search through the coupon file, starting with the coupon you enter in F-H. This item accepts any coupon in the range.
2- Exclude this item from a Combo Coupon Search. (Set for Combo Coupons Only) F-H: Enter a 3-digit Regular coupon number. If you enabled Wildcard Search (in Option E), this
entry defines the starting number for the search.

Programming
Panasonic 5500 Series Programming Instructions – Version LQ3.5 3-171
Line 9: Coupon 3
If you use the COUP3 key to register regular coupons, COUP3 + this item registers the coupon you enter in B-D, below.
Note: Do not list Combo Coupons here. Item links for Combo Coupons are built into
the coupon (in Program 32).
A: 0- Accept the specific coupon entered in B-D, below. 1- Enable Wildcard Search for the coupon you identify in B-D. (Valid for CLU Coupons only).
B-D: Enter a 3-digit Regular coupon number that applies to this item. If you enabled Wildcard search (Option A), this defines the starting point for the search.
Line 10: # of Modifiers
Enter the maximum number of modifiers allowed for this item. For example, if you are programming an entree that allows up to two sides, enter '2' here.
Line 11: Recipe
Enter the recipe number you plan to use for this item. Use recipe numbers from P59-5. Line 12: Product Mix
Each PLU can be linked to two Product Mix Groups. Enter the Product Mix Group numbers (from P28) that apply to this item. Both entries are optional.
A-B: Enter the number of the secondary Product Mix group updated by this item. C-D: Enter the number of the primary Product Mix group updated by this item.
Line 13: Piece Count
Use these fields to enter the number of pieces counted each time this item is registered. If, for example, you are programming a 2PC Chicken Snack, you can enter a '2' in the C-D field. Then each time you register a 2PC Chicken Snack, the system adds two to the Chicken Product Mix Group counter.
A-B: Enter the number of pieces this item adds to the secondary Product Mix Group you assigned in Line 12, A-B.
C-D: Enter the number of pieces this item adds to the primary Product Mix Group you assigned in Line 12 C-D.
Line 14: Group
Enter the number of the Subgroup to which this item links. Use Subgroup numbers from P34. Line 15: Tandem PLU
Enter the max. 6-digit tandem PLU number. The PLU number you enter is automatically registered along with this item.

Programming
3-172 Panasonic 5500 Series Programming Instructions – Version LQ3.5
Line 16: Tare #
Enter the default tare weight table number (0-50) for this item. As you register the item, the system deducts the container weight associated with this number from the overall item weight.
Line 17: Color
If you use a Color KVS, select the options that apply to this item.
A: 0= Normal Video B: 0= White 4= Red 1= Blink 1= Blue 5= Magenta 2= Reverse Video 2= Green 6= Yellow
3= Cyan

Programming
Panasonic 5500 Series Programming Instructions – Version LQ3.5 3-173
P36 Manager File
Use Program 36 to define the numbers managers use to log onto the workstations, as well as the manager security levels. Three log-on security levels are available: Basic (Cashier level), MGR 1, and MGR 2. These levels determine which programs and keylock modes the managers can access. The entries required for this program are explained below. MGR #: Enter the address number of the manager you are programming. This is the number you
will use to access the managers in program and report menus. Up to 99 addresses are available, depending upon your memory allocation. For example, if you allocate 5 managers, you can use addresses 1 through 5.
Descriptor: Enter the manager's name. You can use up to eight characters. Code #: Enter the number the manager will use to log onto a workstation. You can use up to ten
digits. Managers log on with the MGR key. If you assign a code number of 0123456789, the procedure for manager log-on will be MGR, 0123456789, MGR.
Status: This entry determines the level of access available to the manager. You can set minimum
access levels for each of the P1 Mode programs. You can also set minimum access levels for many of the keylock modes and X1 Mode programs. These access restrictions are defined in the Miscellaneous Flags (Flags 241, 242, and 243).
If the manager can only access basic, unrestricted operations, or if security levels are not used, enter '0' in this field. If the manager can access any operations that require a MGR 1-level log-on, enter '1'. Or, if the manager can access all MGR 1 and MGR 2-level operations, enter '2'.
Note: To help you protect the security level assignments, this field can only be accessed
in P2 Mode. P1 mode, however, gives you access to the manager log number and name fields.
0= Cashier-level Access (or security levels not used). 1= Manager 1-level Access 2= Manager 2-level Access

Programming
3-174 Panasonic 5500 Series Programming Instructions – Version LQ3.5
P36 Manager File Worksheet (Page ___ of ___) (P2 Mode) Beginning Sequence: 36 CASH MGR# Descriptor Code # Status ___ ___CSHR ___ ___ ___ ___ ___ ___ ___ ___CA ___ ___ ___ ___ ___ ___ ___ ___ ___ ___CA ____CA ___ ___CSHR ___ ___ ___ ___ ___ ___ ___ ___CA ___ ___ ___ ___ ___ ___ ___ ___ ___ ___CA ____CA ___ ___CSHR ___ ___ ___ ___ ___ ___ ___ ___CA ___ ___ ___ ___ ___ ___ ___ ___ ___ ___CA ____CA ___ ___CSHR ___ ___ ___ ___ ___ ___ ___ ___CA ___ ___ ___ ___ ___ ___ ___ ___ ___ ___CA ____CA ___ ___CSHR ___ ___ ___ ___ ___ ___ ___ ___CA ___ ___ ___ ___ ___ ___ ___ ___ ___ ___CA ____CA ___ ___CSHR ___ ___ ___ ___ ___ ___ ___ ___CA ___ ___ ___ ___ ___ ___ ___ ___ ___ ___CA ____CA ___ ___CSHR ___ ___ ___ ___ ___ ___ ___ ___CA ___ ___ ___ ___ ___ ___ ___ ___ ___ ___CA ____CA ___ ___CSHR ___ ___ ___ ___ ___ ___ ___ ___CA ___ ___ ___ ___ ___ ___ ___ ___ ___ ___CA ____CA ___ ___CSHR ___ ___ ___ ___ ___ ___ ___ ___CA ___ ___ ___ ___ ___ ___ ___ ___ ___ ___CA ____CA ___ ___CSHR ___ ___ ___ ___ ___ ___ ___ ___CA ___ ___ ___ ___ ___ ___ ___ ___ ___ ___CA ____CA ___ ___CSHR ___ ___ ___ ___ ___ ___ ___ ___CA ___ ___ ___ ___ ___ ___ ___ ___ ___ ___CA ____CA ___ ___CSHR ___ ___ ___ ___ ___ ___ ___ ___CA ___ ___ ___ ___ ___ ___ ___ ___ ___ ___CA ____CA ___ ___CSHR ___ ___ ___ ___ ___ ___ ___ ___CA ___ ___ ___ ___ ___ ___ ___ ___ ___ ___CA ____CA ___ ___CSHR ___ ___ ___ ___ ___ ___ ___ ___CA ___ ___ ___ ___ ___ ___ ___ ___ ___ ___CA ____CA ___ ___CSHR ___ ___ ___ ___ ___ ___ ___ ___CA ___ ___ ___ ___ ___ ___ ___ ___ ___ ___CA ____CA ___ ___CSHR ___ ___ ___ ___ ___ ___ ___ ___CA ___ ___ ___ ___ ___ ___ ___ ___ ___ ___CA ____CA ___ ___CSHR ___ ___ ___ ___ ___ ___ ___ ___CA ___ ___ ___ ___ ___ ___ ___ ___ ___ ___CA ____CA ___ ___CSHR ___ ___ ___ ___ ___ ___ ___ ___CA ___ ___ ___ ___ ___ ___ ___ ___ ___ ___CA ____CA ___ ___CSHR ___ ___ ___ ___ ___ ___ ___ ___CA ___ ___ ___ ___ ___ ___ ___ ___ ___ ___CA ____CA (1-99) Status: A: 0= Basic Access (cannot override operations requiring a manager)
1= MGR 1 Level Access 2= MGR 2 Level Access

Programming
Panasonic 5500 Series Programming Instructions – Version LQ3.5 3-175
P39 Tare Weight
Use this program to define the various tare weights the restaurant uses for weighed (scale) items. A "tare" is a weight, associated with a container or package, that is deducted from the total weight of a scale item. If yogurt and salads are sold by the pound, the plastic container that holds the salad and the cup that holds the serving of yogurt are examples of tare weights. You must deduct the weight of the cup or container from the overall weight, so the item cost is based only on the weight of the item purchased. Use Program 39 to list the weights of all containers the restaurant uses. You later use Program 35 to link these tare weights to the appropriate scale items. Tare #: Enter the number (1-50) associated with this tare weight. (In Program 35, you use this
number to link the tare weight to all items that use this container.) Descriptor: Enter the description you want to use for this tare weight (e.g., "cup", "bowl", "plate", etc).
You can use up to eight characters. Weight: Use the scale to weigh the empty package or container. Enter its weight in this field. Your
entry is based, in part, on Flag 136. In Flag 136, you specify whether the scale measures pounds or kilograms. You also specify the decimal position. If Flag 136B = 1, you can enter .0 to 999.9 (lbs. or kg.) in this field. If Flag 136B = 2, you can enter .00 to 99.99. Or, if Flag 136B = 3, you can enter 0.000 to 9.999 in this field.

Programming
3-176 Panasonic 5500 Series Programming Instructions – Version LQ3.5
P39 Tare Weight Worksheet (P2 Mode) Beginning Sequence: 39 CASH Tare # Descriptor Weight ____ ____CSHR _____ _____ _____ _____ _____ _____ _____ _____CA ____ ____ ____ ____SBTL ____ ____CSHR _____ _____ _____ _____ _____ _____ _____ _____CA ____ ____ ____ ____SBTL ____ ____CSHR _____ _____ _____ _____ _____ _____ _____ _____CA ____ ____ ____ ____SBTL ____ ____CSHR _____ _____ _____ _____ _____ _____ _____ _____CA ____ ____ ____ ____SBTL ____ ____CSHR _____ _____ _____ _____ _____ _____ _____ _____CA ____ ____ ____ ____SBTL ____ ____CSHR _____ _____ _____ _____ _____ _____ _____ _____CA ____ ____ ____ ____SBTL ____ ____CSHR _____ _____ _____ _____ _____ _____ _____ _____CA ____ ____ ____ ____SBTL ____ ____CSHR _____ _____ _____ _____ _____ _____ _____ _____CA ____ ____ ____ ____SBTL ____ ____CSHR _____ _____ _____ _____ _____ _____ _____ _____CA ____ ____ ____ ____SBTL ____ ____CSHR _____ _____ _____ _____ _____ _____ _____ _____CA ____ ____ ____ ____SBTL ____ ____CSHR _____ _____ _____ _____ _____ _____ _____ _____CA ____ ____ ____ ____SBTL (1-50) Weight: If Flag 136B= 1, enter 000.1 - 999.9
If Flag 136B= 2, enter 00.01 - 99.99 If Flag 136B= 3, enter 0.001 - 9.999
Note: Use Flag 136A to specify the type of weight measurement (lbs. or kg.)

Programming
Panasonic 5500 Series Programming Instructions – Version LQ3.5 3-177
P40 86'd Items
The 86'd Item function helps keep staff aware of availability levels of important menu items. Use Program 40 to list up to twenty-five items the restaurant wants to track. You can also define default quantity levels for each of the items. The system tracks the items you list here and warns the cashier when the item quantity is low or sold out. After you use this program to define the 86'd Items, managers use the X1 Mode 86-Item program to enter and update the availability levels for each listed item. In REG Mode, cashiers can check the current levels with the 800 Menu Look-up function. When they register any of these items, an "Item Qty Low" message displays if the item reaches or drops below the defined low level. An "Item is 86'd" message displays if the item is sold out.
Note: If you want to use the 86'd Item function, you must enable it with Flag 289. Flag 289 determines whether or not System Open loads default levels, and it determines the low level for items on the 86'd list.
Address: This is the sequence number of the item you are tracking on the 86'd item list.
Addresses 1-25 (twenty-five lines of entries) are available. PLU #: Enter the PLU number of the item you are listing at this address. When you are
entering the program you can either enter the number and press PLU or press the item key. The screen automatically displays the descriptor associated with the PLU you identify.
Default Qty: Enter the default level for this item. Depending upon your entry in Flag 289,
System Open can reset the 86'd Item count to the quantity you enter here.

Programming
3-178 Panasonic 5500 Series Programming Instructions – Version LQ3.5
P40 86'd Items Worksheet (P2 Mode) Beginning Sequence: 40 CASH Address PLU # Default Qty 1 CSHR ____ ____ ____ ____ ____ ____ PLU ____ ____ ____ ____ CASH 2 CSHR ____ ____ ____ ____ ____ ____ PLU ____ ____ ____ ____ CASH 3 CSHR ____ ____ ____ ____ ____ ____ PLU ____ ____ ____ ____ CASH 4 CSHR ____ ____ ____ ____ ____ ____ PLU ____ ____ ____ ____ CASH 5 CSHR ____ ____ ____ ____ ____ ____ PLU ____ ____ ____ ____ CASH 6 CSHR ____ ____ ____ ____ ____ ____ PLU ____ ____ ____ ____ CASH 7 CSHR ____ ____ ____ ____ ____ ____ PLU ____ ____ ____ ____ CASH 8 CSHR ____ ____ ____ ____ ____ ____ PLU ____ ____ ____ ____ CASH 9 CSHR ____ ____ ____ ____ ____ ____ PLU ____ ____ ____ ____ CASH 10 CSHR ____ ____ ____ ____ ____ ____ PLU ____ ____ ____ ____ CASH 11 CSHR ____ ____ ____ ____ ____ ____ PLU ____ ____ ____ ____ CASH 12 CSHR ____ ____ ____ ____ ____ ____ PLU ____ ____ ____ ____ CASH 13 CSHR ____ ____ ____ ____ ____ ____ PLU ____ ____ ____ ____ CASH 14 CSHR ____ ____ ____ ____ ____ ____ PLU ____ ____ ____ ____ CASH 15 CSHR ____ ____ ____ ____ ____ ____ PLU ____ ____ ____ ____ CASH 16 CSHR ____ ____ ____ ____ ____ ____ PLU ____ ____ ____ ____ CASH 17 CSHR ____ ____ ____ ____ ____ ____ PLU ____ ____ ____ ____ CASH 18 CSHR ____ ____ ____ ____ ____ ____ PLU ____ ____ ____ ____ CASH 19 CSHR ____ ____ ____ ____ ____ ____ PLU ____ ____ ____ ____ CASH 20 CSHR ____ ____ ____ ____ ____ ____ PLU ____ ____ ____ ____ CASH 21 CSHR ____ ____ ____ ____ ____ ____ PLU ____ ____ ____ ____ CASH 22 CSHR ____ ____ ____ ____ ____ ____ PLU ____ ____ ____ ____ CASH 23 CSHR ____ ____ ____ ____ ____ ____ PLU ____ ____ ____ ____ CASH 24 CSHR ____ ____ ____ ____ ____ ____ PLU ____ ____ ____ ____ CASH 25 CSHR ____ ____ ____ ____ ____ ____ PLU ____ ____ ____ ____ CASH

Programming
Panasonic 5500 Series Programming Instructions – Version LQ3.5 3-179
P42 Discounts & Surcharges
Use this program to define up to ten discount or surcharge keys. This program includes options that decide if the percentage adds to (surcharge) or subtracts from (discount) the customer's subtotal. Other options decide whether or not the percentage has a preset amount and whether or not the percentage updates certain report totals, as described below. Discount #: Use this line to assign a number (1-10) to the discount or surcharge key you are
programming. % Rate: If you are programming a discount or surcharge with a preset percentage, enter the rate
you need (.01% - 99.99%). Enter 0 for an open/manual percentage. Note: For a 100% rate, enter 0 here and select value 4 in Status Option B. Status: Replace A-D with values that apply to your discount or surcharge. You can add values
within a set or enter 0 if no options apply.
A: 1= Update Tax 1. 2= Update Tax 2. 4= Update Tax 3.
B: 1= Update Net Sales Totals. 2= Require a Manager for this percentage. 4= Set a fixed 100% rate.
C: 1= This percentage acts as an Item Discount or Surcharge. (Item Discounts apply to one item at a time.)
2= This percentage acts as a Subtotal Discount or Discount Subtotal (DCTL) Discount. (Subtotal Discounts affect the entire subtotal, and DCTL Discounts affect only discountable items.)
4= This percentage updates Group, PLU, and Product Mix totals ("Net Discount").
Note: Only one Net Sbtl/DCTL Discount is allowed per order. If you
use a Net Item and Net Subtotal Discount with the same item, discrepancies result between the Item Total and NSTL.
D: 1= This is an Open percentage, where the cashier must specify the amount
added or subtracted. (If not set, the percentage is preset.) 2= This is a Subtracting percentage or Discount. (If not set, the percentage
acts as a Surcharge.) 4= Allow an override of the preset percentage.

Programming
3-180 Panasonic 5500 Series Programming Instructions – Version LQ3.5
P42 Discounts & Surcharges Worksheet (P2 Mode) Beginning Sequence: 42 CASH Discount # % Rate Status A B C D 1 CSHR ____ ____ ____ ____ PLU ____ ____ _____ ____ CASH
2 CSHR ____ ____ ____ ____ PLU ____ ____ _____ ____ CASH
3 CSHR ____ ____ ____ ____ PLU ____ ____ _____ ____ CASH
4 CSHR ____ ____ ____ ____ PLU ____ ____ _____ ____ CASH
5 CSHR ____ ____ ____ ____ PLU ____ ____ _____ ____ CASH
6 CSHR ____ ____ ____ ____ PLU ____ ____ _____ ____ CASH
7 CSHR ____ ____ ____ ____ PLU ____ ____ _____ ____ CASH
8 CSHR ____ ____ ____ ____ PLU ____ ____ _____ ____ CASH
9 CSHR ____ ____ ____ ____ PLU ____ ____ _____ ____ CASH
10 CSHR ____ ____ ____ ____ PLU ____ ____ _____ ____ CASH ( 0 - 99.99% )
Status: A: 1= Update Tax 1. C: 1= Allow % by Item.
2= Update Tax 2. 2= Allow % by SBTL or DCTL. 4= Update Tax 3. 4= Update Group, PLU, & PMix.
B: 1= Update Net Sales Totals. D: 1= Open (vs. preset) %.
2= Require MGR. 2= Subtracting % or Discount (vs. Surcharge). 4= Set a fixed 100% rate. 4= Allow override of preset percentages.

Programming
Panasonic 5500 Series Programming Instructions – Version LQ3.5 3-181
P51 KPS Standard Menu
Use Program 51 to list the menu items that display in the Standard Menu Zones of Kitchen Video Systems using KPS Mode. You can direct up to ten items, with 4-character descriptors, to Zone 1. If you are using Dual Screen format, you can direct ten items to Zone 1 and ten items to Zone 2. The menu items you list in addresses 10 through 19 display in Standard Menu Zone 1. Use addresses 20 through 29 to list Standard Menu Zone 2 items. Remember that you can use Zone 2 only if you have selected Dual Screen format for the KPS mode, as shown in the example below.
PLU: Enter the PLU number in the desired Zone 1 or Zone 2 address. When you are ready to
enter the item in Program 51, you can either press the key on the keyboard or enter the PLU number on the PLU key.
Note: Condiments/Modifiers should not be assigned to the Standard Menu Zones.
Descriptor: Enter the 4-character name of the item you entered in the previous field. This descriptor
displays for the item in the Standard Menu Zone.
RCRT Mode Note: You can also use Program 51 to assign 4-character descriptors to as many as twenty RCRT Mode items. Descriptors entered in this program override the descriptors you programmed in P35.

Programming
3-182 Panasonic 5500 Series Programming Instructions – Version LQ3.5
P51 KPS Standard Menu Worksheet (P2 Mode) Beginning Sequence: 51 CASH --- Zone 1 --- --- Zone 2 --- ADD PLU Descriptor ADD PLU Descriptor 10 CSHR __ __ __ __ __ __PLU __ __ __ __CA 20 CSHR __ __ __ __ __ __PLU __ __ __ __CA 11 CSHR __ __ __ __ __ __PLU __ __ __ __CA 21 CSHR __ __ __ __ __ __PLU __ __ __ __CA 12 CSHR __ __ __ __ __ __PLU __ __ __ __CA 22 CSHR __ __ __ __ __ __PLU __ __ __ __CA 13 CSHR __ __ __ __ __ __PLU __ __ __ __CA 23 CSHR __ __ __ __ __ __PLU __ __ __ __CA 14 CSHR __ __ __ __ __ __PLU __ __ __ __CA 24 CSHR __ __ __ __ __ __PLU __ __ __ __CA 15 CSHR __ __ __ __ __ __PLU __ __ __ __CA 25 CSHR __ __ __ __ __ __PLU __ __ __ __CA 16 CSHR __ __ __ __ __ __PLU __ __ __ __CA 26 CSHR __ __ __ __ __ __PLU __ __ __ __CA 17 CSHR __ __ __ __ __ __PLU __ __ __ __CA 27 CSHR __ __ __ __ __ __PLU __ __ __ __CA 18 CSHR __ __ __ __ __ __PLU __ __ __ __CA 28 CSHR __ __ __ __ __ __PLU __ __ __ __CA 19 CSHR __ __ __ __ __ __PLU __ __ __ __CA 29 CSHR __ __ __ __ __ __PLU __ __ __ __CA PLU: Enter the PLU to be displayed at this Standard Menu Address. Zone 2 Addresses
are only available for KPS Dual Screen modes. Descriptor: Enter the 4-Character Item Name.
Note: To Delete an item from Zone 1 or 2 enter the PLU #, press the PLU key, then press VOID.

Programming
Panasonic 5500 Series Programming Instructions – Version LQ3.5 3-183
P52 Mix & Match File
The P52 Mix & Match program lets you identify menu items that can be combined for a special price. Use this program to identify items that can be sold by the dozen, by the half dozen, or in other quantities that affect pricing. Your entries define the criteria for the special price. For example, if one doughnut sells for 60¢, but twelve doughnuts sell for $3.99, you can build a "dozen doughnuts" table. In the table, you identify doughnuts that qualify for the dozen pricing and set 12 as a quantity requirement. Then, when you press the MIX&MATCH key in REG mode, the system bases pricing on the number of eligible doughnuts purchased. Entries for this program are described below. Table #: Enter the table number (1-94, depending upon Memory Allocation). Flag 153 decides how
Table #1 is handled. See the following note. Table 1 Note: If the Countdown feature is enabled in Flag 153, you cannot use Table #1 for normal Mix
& Match entries. If you use the Countdown feature, Table #1 is a work area, where you list items that will be counted. For example, with a Mix & Match table for a dozen doughnuts, you can list all eligible doughnut PLUs in Table #1. (Use wildcards, if necessary.) Then, as you sell doughnuts, the Countdown displays the quantity the customer must purchase for the dozen price. Only Table #1 lists Countdown items. See Example 2 at the end of this section for a possible Table #1 set-up.
Name: Enter up to 8 characters to describe this table. Price: Enter the price registered when the customer purchases all requirements of this table. Stat/Qty: Enter 4-digits (A-D) for the status options and for the quantity requirement. A: 1= Require the specific PLU listed in the Link 1 field. If set, the customer's order must have
at least one of the item in the Link 1 field to receive the special price. If the order does not include a Link 1 item, the Mix & Match search for this table stops. For example, if the table should search for a cup of coffee and any two doughnuts, set Option A=1 (or 5) and set a quantity requirement of 3. List the coffee PLU in the Link 1 field and list all eligible doughnuts in the remaining Link fields. If the order includes a cup of coffee and any two of the listed doughnuts, the customer receives the special price set for this table. If the order does not include a cup of coffee, the Mix & Match search for this table stops.
2= Allow DCTL (Discount Subtotal) Discounts to be applied to the Mix & Match table price. 4= Count the PLU in the Link 1 field one time per Mix & Match search. (You must also set
value '1', above, to require the PLU in the Link 1 field.) For example, set this option if Link 1 lists a PLU for a dozen glazed doughnuts, and you only want that dozen to be counted once within this Mix & Match table.

Programming
3-184 Panasonic 5500 Series Programming Instructions – Version LQ3.5
B: Enter the value (0-7) for taxes updated by this Mix & Match table. C-D: Enter the 2-digit quantity required for the Mix & Match table to be registered at the
special price. For example, when programming a table for "dozen" pricing, enter 12. Enter 00 if pricing is based on specific items in the Link fields, rather than on a defined
quantity. If you enter 00, all items in the Link fields must be registered to satisfy the special pricing requirements.
Link 1~15: Use the Link fields to list items eligible for the Mix & Match table. For example, if the
table allows any combination of doughnuts, list the PLU number of every eligible doughnut. If you have more than fifteen types of doughnuts, set one of the wildcard options and use the Link fields to list either a Subgroup number or a number to identify the valid range of PLUs.
Note: If you set the Stat/Qty option to require the item in the Link 1 field, make sure you
list the required PLU in the Link 1 field. Then, in REG Mode, the Mix & Match search stops if the order does not have at least one of the Link 1 items.
Wildcard Search: Wildcard search options let you specify a range of PLUs for the Mix & Match table. For
example, if you have fewer than fifteen types of doughnuts eligible for "dozen" pricing, you need not use search options; just list each doughnut individually in the Link fields. However, if you have more than fifteen types of doughnuts, you can have the system search for and accept any PLUs within a 2-digit or 3-digit range of numbers. Or you can have the system search for PLUs linked to a particular subgroup.
For example, if you select a 2-digit Wildcard search and enter PLU #100 in the Link field, the system will search for PLU numbers 101-199 when you press the MIX&MATCH key. Any items within that range will satisfy the requirements for the special pricing. If you select a select a 3-digit Wildcard search and enter PLU #100 in the Link field, the system will search for PLU numbers 1- 999 when you press the MIX&MATCH key. Any items within that range will satisfy the requirements for the special pricing.
If you use the subgroup search option and enter 3 in the Link field, the system will search for all PLUs linked to Subgroup #3. Any items linked to Subgroup #3 will satisfy the requirements for the special Mix & Match pricing. Note: The system can search for a combination of specific PLUs and for PLUs linked to
a particular subgroup. List the specific PLU numbers in the Link fields with Wildcard Option 0 and list the Subgroup in the Link field with Wildcard Option 3.
If you plan to use any of the Wildcard options, your PLU file must be organized so that the eligible items can be identified within the range of numbers searched.

Programming
Panasonic 5500 Series Programming Instructions – Version LQ3.5 3-185
Example 1: A bakery has six types of cookies, assigned PLU numbers 310 to 360. Each cookie sells for 90¢. A
dozen cookies sell for $6.95. You could use either of the following entries for this example. Table #: 5 OR Table #: 5 Table Name: Dozen Table Name: Dozen Price: 6.95 Price: 6.95 Stat/Qty: 07-12 Stat/Qty: 07-12 Wildcard/Link 1: 0 PL-000310 Wildcard/Link 1: 1 PL-000310 Wildcard/Link 2: 0 PL-000320 Wildcard/Link 3: 0 PL-000330 Wildcard/Link 4: 0 PL-000340 Wildcard/Link 5: 0 PL-000350 Wildcard/Link 6: 0 PL-000360
The first set-up lists all eligible PLUs in the Link fields; when you press the Mix&Match key, the system checks for any of the listed PLUs. The second set-up shows a 2-digit wildcard search; the system searches for PLUs 301 - 399 when you press the Mix&Match key. With both, the system charges the dozen price if any twelve of the eligible PLUs are registered. If fewer than twelve are registered, the system will charge the normal price (90¢) for each cookie.
Example 2: If you want to display the Countdown for the above example, you must set Table 1 to track the
counted items. The following shows possible programming for Table 1. Table #: 1 Table Name: Price: Stat/Qty: 07-12 Wildcard/Link 1: 1 PL-000310
With this, the Countdown updates every time you sell PLUs 301-399 (the cookie PLUs). For example, when you sell one cookie, an '11' countdown displays. This means eleven more cookies must be sold for the "dozen" pricing.
Example 3: You may be able to use Mix & Match for daily specials. If Special #4 requires the purchase of a
hamburger (PLU #1000), regular order of fries (PLU #2100) and a beverage (PLUs 3001 - 3805), you can use the following P52 entries.
Table #: 10 Table Name: Spec #4 Stat/Qty: 07-00 Wildcard/Link 1: 0 PL-001000 Wildcard/Link 2: 0 PL-002100 Wildcard/Link 3: 2 PL-003001 Because the quantity requirement is 00, the system will search for all three items listed in the Link
fields. If a hamburger (PLU #1000), regular fries (PLU #2100), and any beverage (PLU #3000 through PLU #3999) are registered, the special price can be applied to the order.

Programming
3-186 Panasonic 5500 Series Programming Instructions – Version LQ3.5
P52 Mix & Match Worksheet (Page ___ of ___) Table # Name Status/Qty Wildcard PLU/Subgroup (PLU/Sub Name)
A B C __ __ __MIX&MATCH __ __ __ __ __ __ __ __CA __ __ __ CA (1) ___SBTL __ __ __ __ __ __CA __________________
(2) ___SBTL __ __ __ __ __ __CA __________________
(3) ___SBTL __ __ __ __ __ __CA __________________
(4) ___SBTL __ __ __ __ __ __CA __________________
(5) ___SBTL __ __ __ __ __ __CA ___________________
(6) ___SBTL __ __ __ __ __ __CA ___________________
(7) ___SBTL __ __ __ __ __ __CA ___________________
(8) ___SBTL __ __ __ __ __ __CA ___________________
(9) ___SBTL __ __ __ __ __ __CA ___________________
(10) ___SBTL __ __ __ __ __ __CA ___________________
(11) ___SBTL __ __ __ __ __ __CA ___________________
(12) ___SBTL __ __ __ __ __ __CA ___________________
(13) ___SBTL __ __ __ __ __ __CA ___________________
(14) ___SBTL __ __ __ __ __ __CA ___________________
(15) ___SBTL __ __ __ __ __ __CA ___________________
__ __ __MIX&MATCH __ __ __ __ __ __ __ __CA __ __ __ CA
(1) ___SBTL __ __ __ __ __ __CA ___________________
(2) ___SBTL __ __ __ __ __ __CA ___________________
(3) ___SBTL __ __ __ __ __ __CA ___________________
(4) ___SBTL __ __ __ __ __ __CA ___________________
(5) ___SBTL __ __ __ __ __ __CA ___________________
(6) ___SBTL __ __ __ __ __ __CA ___________________
(7) ___SBTL __ __ __ __ __ __CA ___________________
(8) ___SBTL __ __ __ __ __ __CA ___________________
(9) ___SBTL __ __ __ __ __ __CA ___________________
(10) ___SBTL __ __ __ __ __ __CA ___________________
(11) ___SBTL __ __ __ __ __ __CA ___________________
(12) ___SBTL __ __ __ __ __ __CA ___________________
(13) ___SBTL __ __ __ __ __ __CA ___________________
(14) ___SBTL __ __ __ __ __ __CA ___________________
(15) ___SBTL __ __ __ __ __ __CA ___________________
Status/Qty. A: 1= Require the Link 1 PLU
2= Allow DCTL Discounts 4= Count Link 1 PLU as 1 for table
B: 1= Update Tax 1 2= Update Tax 2 4= Update Tax 3
C-D: Required Quantity (00-99). Wildcard
0= No Search 1= 2-digit Search 2= 3-digit Search 3= Search by Subgroup #

Programming
Panasonic 5500 Series Programming Instructions – Version LQ3.5 3-187
P59-1 Employee File
The first Program 59 selection gives you access to the employee file. Your entries in this program identify the employees, the clock-in/clock-out numbers, and the job codes you use for Time & Attendance functions, as described below. Employee #: Enter the employee's number. You can have up to 400 employees, depending
upon Memory Allocation, but only 250 employees can be active per day. Up to 100 employees can be tracked as minors.
Name: Enter up to 8 characters for the employee's name. Code: Enter 1-10 digits for the employee number (Social Security or I.D. number). All
or part of this number is used for Time & Attendance entries, depending upon your selection in P24, Flag 127.
Job 1:
A-B: Enter the default job code number (1-20). If the employee does not choose another job code at clock-in, the system activates this job code.
C-D: Enter the pay rate number (1-50) for the default job code. (Pay rate numbers are defined in P59-2).
Jobs 2-4: Use Jobs 2-4 to assign three extra job codes per employee, if needed.
A-B: Enter the job code number (1-20) available for this employee. C-D: Enter the number of the pay rate (1-50) associated with the job code you entered
in the previous field. (Refer to P59-2 for pay rate numbers.) Status: Enter values for options that apply to this employee.
A: 1= This employee is a minor (for minor employee handling). The system can track up to 100 minor employees.
B: 1= Require a job code at each Clock-in. (If not set, a job code entry is optional, and the default is set when the employee does not select a job code.)
2= Require a tip entry at Clock-Out. 4= Clock-in this employee if active at System Close, and then carry over hours.
Grace Period: Enter the number of the Grace Period Table (from P59-3) this employee uses.
This link defines how early/late the employee can clock in and how early/late the employee can clock out.
Birthday: Enter the employee's birth date. (This entry is optional.)

Panasonic 5500 Series Programming Instructions – Version LQ3.5 3-188
P59-1 Employee File Worksheet ((Page ____ of ____) Beginning Sequence: 59 CASH 1 CASH -1- -2- -3- -4- -5- -6- -7- -8- -9- EMPL # NAME CODE # JOB 1 JOB 2 JOB 3 JOB 4 STATUS GRACE BIRTHDAY A B C D A B C D A B C D A B C D ___ __ __ ___ ___ ___ ___ ___ ___ ___ ___ ___ ___ ___ ___ ___ ___ ___ ___ ___ ___ ___ ___ ___ ___ ___ ___ ___ ___ ___ ___ ___ ___ ___ ___ ___ ___ ___ ___ ___ ___ ___ ___ ___ ___ ___ ___
___ __ __ ___ ___ ___ ___ ___ ___ ___ ___ ___ ___ ___ ___ ___ ___ ___ ___ ___ ___ ___ ___ ___ ___ ___ ___ ___ ___ ___ ___ ___ ___ ___ ___ ___ ___ ___ ___ ___ ___ ___ ___ ___ ___ ___ ___
___ __ __ ___ ___ ___ ___ ___ ___ ___ ___ ___ ___ ___ ___ ___ ___ ___ ___ ___ ___ ___ ___ ___ ___ ___ ___ ___ ___ ___ ___ ___ ___ ___ ___ ___ ___ ___ ___ ___ ___ ___ ___ ___ ___ ___ ___
___ __ __ ___ ___ ___ ___ ___ ___ ___ ___ ___ ___ ___ ___ ___ ___ ___ ___ ___ ___ ___ ___ ___ ___ ___ ___ ___ ___ ___ ___ ___ ___ ___ ___ ___ ___ ___ ___ ___ ___ ___ ___ ___ ___ ___ ___
___ __ __ ___ ___ ___ ___ ___ ___ ___ ___ ___ ___ ___ ___ ___ ___ ___ ___ ___ ___ ___ ___ ___ ___ ___ ___ ___ ___ ___ ___ ___ ___ ___ ___ ___ ___ ___ ___ ___ ___ ___ ___ ___ ___ ___ ___
___ __ __ ___ ___ ___ ___ ___ ___ ___ ___ ___ ___ ___ ___ ___ ___ ___ ___ ___ ___ ___ ___ ___ ___ ___ ___ ___ ___ ___ ___ ___ ___ ___ ___ ___ ___ ___ ___ ___ ___ ___ ___ ___ ___ ___ ___
___ __ __ ___ ___ ___ ___ ___ ___ ___ ___ ___ ___ ___ ___ ___ ___ ___ ___ ___ ___ ___ ___ ___ ___ ___ ___ ___ ___ ___ ___ ___ ___ ___ ___ ___ ___ ___ ___ ___ ___ ___ ___ ___ ___ ___ ___
___ __ __ ___ ___ ___ ___ ___ ___ ___ ___ ___ ___ ___ ___ ___ ___ ___ ___ ___ ___ ___ ___ ___ ___ ___ ___ ___ ___ ___ ___ ___ ___ ___ ___ ___ ___ ___ ___ ___ ___ ___ ___ ___ ___ ___ ___
___ __ __ ___ ___ ___ ___ ___ ___ ___ ___ ___ ___ ___ ___ ___ ___ ___ ___ ___ ___ ___ ___ ___ ___ ___ ___ ___ ___ ___ ___ ___ ___ ___ ___ ___ ___ ___ ___ ___ ___ ___ ___ ___ ___ ___ ___
___ __ __ ___ ___ ___ ___ ___ ___ ___ ___ ___ ___ ___ ___ ___ ___ ___ ___ ___ ___ ___ ___ ___ ___ ___ ___ ___ ___ ___ ___ ___ ___ ___ ___ ___ ___ ___ ___ ___ ___ ___ ___ ___ ___ ___ ___
___ __ __ ___ ___ ___ ___ ___ ___ ___ ___ ___ ___ ___ ___ ___ ___ ___ ___ ___ ___ ___ ___ ___ ___ ___ ___ ___ ___ ___ ___ ___ ___ ___ ___ ___ ___ ___ ___ ___ ___ ___ ___ ___ ___ ___ ___
(1-400) (8 Characters) (Social Security/ID #)
Job 1
Job 2
Job 3
Job 4
Status
Grace Period
A-B: Default Job Code # (1-20) C-D: Default Pay Rate # (1-50)
A-B: Default Job Code # (1-20) C-D: Default Pay Rate # (1-50)
A-B: Default Job Code # (1-20) C-D: Default Pay Rate # (1-50)
A-B: Default Job Code # (1-20) C-D: Default Pay Rate # (1-50)
A: 1= Minor B: 1= Require Job Code Employee @ Clock-in 2= Require Tip @ Clock-out 4= Clock in Active Employee after System Close
Enter the Grace Period Table # (from P59-3) that applies to this employee

Entering the Program
Panasonic 5500 Series Programming Instructions – Version LQ3.5 3-189
P59-2 Pay Rates
Use the second selection in Program 59 (P59-2) to define the hourly pay rates. In the Employee File, you assign each employee a job code. The job code is linked to the pay rate that applies to the particular employee. The available pay rate numbers are defined in this program. You can list as many as 50 rates. Because job codes are linked, by employee, to a pay rate, two employees who use the same job code number will not necessarily receive the same hourly wage. Enter a pay rate amount ($0.00 - $99.99) for each of the P59-2 addresses, as needed. You can program as many as fifty pay rates.

Programming
Panasonic 5500 Series Programming Instructions – Version LQ3.5 3-190
P59-2 Pay Rates Worksheet (P2 Mode) Beginning Sequence: 59 CASH 2 CASH Rate # Pay Rate Rate # Pay Rate 1 CSHR ____ ____ ____ ____ CASH 26 CSHR ____ ____ ____ ____ CASH 2 CSHR ____ ____ ____ ____ CASH 27 CSHR ____ ____ ____ ____ CASH 3 CSHR ____ ____ ____ ____ CASH 28CSHR ____ ____ ____ ____ CASH 4 CSHR ____ ____ ____ ____ CASH 29 CSHR ____ ____ ____ ____ CASH 5 CSHR ____ ____ ____ ____ CASH 30 CSHR ____ ____ ____ ____ CASH 6 CSHR ____ ____ ____ ____ CASH 31 CSHR ____ ____ ____ ____ CASH 7 CSHR ____ ____ ____ ____ CASH 32 CSHR ____ ____ ____ ____ CASH 8 CSHR ____ ____ ____ ____ CASH 33 CSHR ____ ____ ____ ____ CASH 9 CSHR ____ ____ ____ ____ CASH 34 CSHR ____ ____ ____ ____ CASH 10 CSHR ____ ____ ____ ____ CASH 35 CSHR ____ ____ ____ ____ CASH 11 CSHR ____ ____ ____ ____ CASH 36 CSHR ____ ____ ____ ____ CASH 12 CSHR ____ ____ ____ ____ CASH 37 CSHR ____ ____ ____ ____ CASH 13 CSHR ____ ____ ____ ____ CASH 38 CSHR ____ ____ ____ ____ CASH 14 CSHR ____ ____ ____ ____ CASH 39 CSHR ____ ____ ____ ____ CASH 15 CSHR ____ ____ ____ ____ CASH 40 CSHR ____ ____ ____ ____ CASH 16 CSHR ____ ____ ____ ____ CASH 41 CSHR ____ ____ ____ ____ CASH 17 CSHR ____ ____ ____ ____ CASH 42 CSHR ____ ____ ____ ____ CASH 18 CSHR ____ ____ ____ ____ CASH 43 CSHR ____ ____ ____ ____ CASH 19 CSHR ____ ____ ____ ____ CASH 44 CSHR ____ ____ ____ ____ CASH 20 CSHR ____ ____ ____ ____ CASH 45 CSHR ____ ____ ____ ____ CASH 21 CSHR ____ ____ ____ ____ CASH 46 CSHR ____ ____ ____ ____ CASH 22 CSHR ____ ____ ____ ____ CASH 47 CSHR ____ ____ ____ ____ CASH 23 CSHR ____ ____ ____ ____ CASH 48 CSHR ____ ____ ____ ____ CASH 24 CSHR ____ ____ ____ ____ CASH 49 CSHR ____ ____ ____ ____ CASH 25 CSHR ____ ____ ____ ____ CASH 50 CSHR ____ ____ ____ ____ CASH (xx.xx) (xx.xx)

Entering the Program
Panasonic 5500 Series Programming Instructions – Version LQ3.5 3-191
P59-3 Grace Periods
Grace Periods help you control early and late clock-ins and clock-outs. For example, if employees can clock in five minutes early or late, you can set a 5-minute clock-in grace period. Likewise, if employees can clock out five minutes early or late, you can set a 5-minute clock-out grace period. A manager can override the grace period, if necessary. Use Program 59-3 to define up to forty grace period tables.
Note: Remember to use military time for afternoon and evening hours.
Table #: Enter the Grace Period Table # (1-40) you are programming. You link this number to
applicable employees in Program 59-1. Clock-In 1: You can define two clock-ins and two clock-outs per Table. Use Clock-In 1/ Clock-Out 1
for the first part of the shift. Use Clock-In 2/Clock-Out 2 for the second part of the shift. A-D: Enter the earliest clock-in time allowed for employees using this table. For example, if this
table represents 11:00 clock-ins, and employees can clock in as early as 10:45 (fifteen minutes early), you would enter 1045.
E-H: Enter the latest clock-in time allowed. For an 11:00 clock-in, if employees can clock in up to fifteen minutes late, you would enter 1115.
Clock-Out 1:
A-D: Enter the earliest clock-out time allowed. For example, if this table sets a 4:00 p.m. clock-out, and employees can clock 15 minutes early, enter 15:45.
E-H: Enter the latest clock-out time. For a 4:00 p.m. clock-out, if employees can clock out up to 15 minutes late, you would enter 1615.
Clock-In 2:
A-D: Enter the earliest clock-in time for the second half of the shift. E-H: Enter the latest clock-in time for the second half of the shift.
Clock-Out 2:
A-D: Enter the earliest clock-out time for the second half of the shift. E-H: Enter the latest clock-out time for the second half of the shift.
Example: If you have a second shift that starts at 4:30 and ends at 7:00, and you want to set
15-minute grace periods, you would enter 16151645 for Clock-in 2 and 18451915 for Clock-Out 2.

Programming
Panasonic 5500 Series Programming Instructions – Version LQ3.5 3-192
P59-3 Grace Periods Worksheet (Page ___ of ___) (P2 Mode) Beginning Sequence: 59 CASH 3 CASH Table # Clock-In 1 Clock-Out 1 Clock-In 2 Clock-Out 2 A B C D E F G H A B C D E F G H A B C D E F G H A B C D E F G H __ __CSHR __ __ __ __ __ __ __ __CA __ __ __ __ __ __ __ __CA __ __ __ __ __ __ __ __CA __ __ __ __ __ __ __ __CA __ __CSHR __ __ __ __ __ __ __ __CA __ __ __ __ __ __ __ __CA __ __ __ __ __ __ __ __CA __ __ __ __ __ __ __ __CA __ __CSHR __ __ __ __ __ __ __ __CA __ __ __ __ __ __ __ __CA __ __ __ __ __ __ __ __CA __ __ __ __ __ __ __ __CA __ __CSHR __ __ __ __ __ __ __ __CA __ __ __ __ __ __ __ __CA __ __ __ __ __ __ __ __CA __ __ __ __ __ __ __ __CA __ __CSHR __ __ __ __ __ __ __ __CA __ __ __ __ __ __ __ __CA __ __ __ __ __ __ __ __CA __ __ __ __ __ __ __ __CA __ __CSHR __ __ __ __ __ __ __ __CA __ __ __ __ __ __ __ __CA __ __ __ __ __ __ __ __CA __ __ __ __ __ __ __ __CA __ __CSHR __ __ __ __ __ __ __ __CA __ __ __ __ __ __ __ __CA __ __ __ __ __ __ __ __CA __ __ __ __ __ __ __ __CA __ __CSHR __ __ __ __ __ __ __ __CA __ __ __ __ __ __ __ __CA __ __ __ __ __ __ __ __CA __ __ __ __ __ __ __ __CA __ __CSHR __ __ __ __ __ __ __ __CA __ __ __ __ __ __ __ __CA __ __ __ __ __ __ __ __CA __ __ __ __ __ __ __ __CA __ __CSHR __ __ __ __ __ __ __ __CA __ __ __ __ __ __ __ __CA __ __ __ __ __ __ __ __CA __ __ __ __ __ __ __ __CA __ __CSHR __ __ __ __ __ __ __ __CA __ __ __ __ __ __ __ __CA __ __ __ __ __ __ __ __CA __ __ __ __ __ __ __ __CA __ __CSHR __ __ __ __ __ __ __ __CA __ __ __ __ __ __ __ __CA __ __ __ __ __ __ __ __CA __ __ __ __ __ __ __ __CA __ __CSHR __ __ __ __ __ __ __ __CA __ __ __ __ __ __ __ __CA __ __ __ __ __ __ __ __CA __ __ __ __ __ __ __ __CA __ __CSHR __ __ __ __ __ __ __ __CA __ __ __ __ __ __ __ __CA __ __ __ __ __ __ __ __CA __ __ __ __ __ __ __ __CA __ __CSHR __ __ __ __ __ __ __ __CA __ __ __ __ __ __ __ __CA __ __ __ __ __ __ __ __CA __ __ __ __ __ __ __ __CA __ __CSHR __ __ __ __ __ __ __ __CA __ __ __ __ __ __ __ __CA __ __ __ __ __ __ __ __CA __ __ __ __ __ __ __ __CA __ __CSHR __ __ __ __ __ __ __ __CA __ __ __ __ __ __ __ __CA __ __ __ __ __ __ __ __CA __ __ __ __ __ __ __ __CA __ __CSHR __ __ __ __ __ __ __ __CA __ __ __ __ __ __ __ __CA __ __ __ __ __ __ __ __CA __ __ __ __ __ __ __ __CA __ __CSHR __ __ __ __ __ __ __ __CA __ __ __ __ __ __ __ __CA __ __ __ __ __ __ __ __CA __ __ __ __ __ __ __ __CA __ __CSHR __ __ __ __ __ __ __ __CA __ __ __ __ __ __ __ __CA __ __ __ __ __ __ __ __CA __ __ __ __ __ __ __ __CA (1-40) (Early In) (Late In) (Early Out) (Late Out) (Early In) (Late In) (Early Out) (Late Out)

Entering the Program
Panasonic 5500 Series Programming Instructions – Version LQ3.5 3-193
P59-4 Ingredient File
Use this program to identify raw ingredients you use for restaurant recipes. Here you set the cost of the ingredient and its reorder level. You also assign an ingredient number, which identifies the ingredient when you build item recipes. Enter the descriptor, cost, and reorder level of each ingredient you are tracking. If you use Multi-pack handling, you also enter the number of units per pack and the number of units per case. You can track up to 300 ingredients, depending upon your Memory Allocation. Ingredient: Enter the number of the ingredient (1-300) you are programming. Descriptor: Enter up to 8 characters for the ingredient name. Cost: Enter the ingredient cost ($.00 - 999.999). This entry helps calculate food cost on the
inventory and food cost reports. Reorder: Enter the reorder level for this ingredient (0-9999.99). For example, if you enter '1000',
the item is flagged for reorder when it reaches or drops below 10 units. Status: Enter '1' if you are programming an ingredient used for Scale PLUs. Enter '0' for a normal,
non-scale ingredient. This entry helps the system track and report the appropriate ingredient quantities.
Note: The following two fields are only valid if Flag 135 is set for Multi-Pack handling. With
Multi-pack handling, you can track three types of ingredient sizes: unit, pack, and case. For example, eggs can be ordered by the case. Within the case, there are several cartons or flats containing one or more dozen eggs. So eggs can be tracked by unit (an egg), by pack (a carton or flat), or by case.
Unit/Case: Enter the number of units that make up a case (the largest package for this ingredient).
Leave this field blank if the ingredient is only sold by unit or if you do not use Multi-pack handling.
Unit/Pack: Enter the number of units that make up a pack (the intermediate package for this
ingredient). Leave this field blank if the ingredient is only sold by unit or by case.

Programming
Panasonic 5500 Series Programming Instructions – Version LQ3.5 3-194
P59-4 Ingredient File Worksheet (Page ____ of ____) (P2 Mode) Beginning Sequence: 59 CASH 4 CASH
Units per Units per Ing. # Descriptor Cost Reorder Status Case Pack __ __ __ __ __ __ __ __ __ __ __ __ __ __ __ __ __ __ __ __ __ __ __ ____ __ __ __ __ __ __ __ __ __ __ __ __ __ __ __ __ __ __ __ __ __ __ __ __ __ __ __ __ __ __ __ ____ __ __ __ __ __ __ __ __ __ __ __ __ __ __ __ __ __ __ __ __ __ __ __ __ __ __ __ __ __ __ __ ____ __ __ __ __ __ __ __ __ __ __ __ __ __ __ __ __ __ __ __ __ __ __ __ __ __ __ __ __ __ __ __ ____ __ __ __ __ __ __ __ __ __ __ __ __ __ __ __ __ __ __ __ __ __ __ __ __ __ __ __ __ __ __ __ ____ __ __ __ __ __ __ __ __ __ __ __ __ __ __ __ __ __ __ __ __ __ __ __ __ __ __ __ __ __ __ __ ____ __ __ __ __ __ __ __ __ __ __ __ __ __ __ __ __ __ __ __ __ __ __ __ __ __ __ __ __ __ __ __ ____ __ __ __ __ __ __ __ __ __ __ __ __ __ __ __ __ __ __ __ __ __ __ __ __ __ __ __ __ __ __ __ ____ __ __ __ __ __ __ __ __ __ __ __ __ __ __ __ __ __ __ __ __ __ __ __ __ __ __ __ __ __ __ __ ____ __ __ __ __ __ __ __ __ __ __ __ __ __ __ __ __ __ __ __ __ __ __ __ __ __ __ __ __ __ __ __ ____ __ __ __ __ __ __ __ __ __ __ __ __ __ __ __ __ __ __ __ __ __ __ __ __ __ __ __ __ __ __ __ ____ __ __ __ __ __ __ __ __ __ __ __ __ __ __ __ __ __ __ __ __ __ __ __ __ __ __ __ __ __ __ __ ____ __ __ __ __ __ __ __ __ __ __ __ __ __ __ __ __ __ __ __ __ __ __ __ __ __ __ __ __ __ __ __ ____ __ __ __ __ __ __ __ __ __ __ __ __ __ __ __ __ __ __ __ __ __ __ __ __ __ __ __ __ __ __ __ ____ __ __ __ __ __ __ __ __ __ __ __ __ __ __ __ __ __ __ __ __ __ __ __ __ __ __ __ __ __ __ __ ____ __ __ __ __ __ __ __ __ __ __ __ __ __ __ __ __ __ __ __ __ __ __ __ __ __ __ __ __ __ __ __ ____ __ __ __ __ __ __ __ __ __ __ __ __ __ __ __ __ __ __ __ __ __ __ __ __ __ __ __ __ __ __ __ ____ __ __ __ __ __ __ __ __ __ __ __ __ __ __ __ __ __ __ __ __ __ __ __ __ __ __ __ __ __ __ __ ____ __ __ __ __ __ __ __ __ __ __ __ __ __ __ __ __ __ __ __ __ __ __ __ __ __ __ __ __ __ __ __ ____ __ __ __ __ __ __ __ __ __ __ __ __ __ __ __ __ __ __ __ __ __ __ __ __ __ __ __ __ __ __ __ ____ __ __ __ __ __ __ __ __ __ __ __ __ __ __ __ __ __ __ __ __ __ __ __ __ __ __ __ __ __ __ __ ____ __ __ __ __ __ __ __ __ (1-300) (8 Characters) (xxx.xxx) (xxxx.xx) (0-9999) (0-9999) Status: 0= Non-scale ingredient 1= Scale Ingredient

Entering the Program
Panasonic 5500 Series Programming Instructions – Version LQ3.5 3-195
P59-5 Recipe File
Inventoried items are linked (in P35) to a recipe number. Use the fifth selection in Program 59 (Recipes) to identify the ingredients and ingredient quantities that make up each recipe. You can list up to ten ingredients per recipe. If the recipe uses more than ten ingredients, you can link to an additional, tandem recipe. Recipe #: Enter the number of the recipe you are programming (1-500, depending upon your memory
allocation). Name: Enter up to 8 characters for the recipe name. Address: Ten addresses are available per recipe. Each address references the Line # (1-10) where you
will enter the ingredient or tandem recipe number. Field 1: Enter a value to identify the entry for this line. Enter '0' if you are going to enter an ingredient
number in the next field. Enter '1' if you are going to enter a tandem recipe number. Field 2: If you entered 0 in Field 1, enter the number of one of the ingredients for this recipe. Or, if you
entered 1 in Field 1, enter the number of the recipe you are linking to this recipe. Field 3: Enter the ingredient quantity used within this recipe. For example, if you inventory potatoes by
the bag, and one bag yields 24 portions of the menu item "Small Fries", Small fries will use 1/24th of the bag. You would enter .0417 for the quantity. [Qty = 1 24 = 0.04166 or .0417]
OR
If you are programming a tandem recipe, enter the amount of the recipe being used. (Enter a whole number.) The quantity you enter for a tandem recipe applies to each ingredient. For example, if you link Recipe #1 to Tandem Recipe #8, and enter '2' for the quantity, ALL ingredients in Tandem Recipe #8 will be multiplied by 2.
Note: Use the following steps to move the cursor in the Recipe menu.
(recipe #) CSHR - takes you to the specified recipe #. CSHR - takes you to the next recipe #.
(data) CASH - inputs data and takes you to the next field. SBTL - takes you to the next field (without data entry).
(ADD) (field) SBTL - takes you to the specified line and field number.

Programming
Panasonic 5500 Series Programming Instructions – Version LQ3.5 3-196
P59-5 Recipe File Worksheet (Page ___ of ___) (P2 Mode) Beginning Sequence: 59 CASH 5 CASH Recipe # NAME FIELD 1 FIELD 2 FIELD 3
(1-500) Flag Ing/Recipe# Quantity __ __ __CSHR __ __ __ __ __ ___ __ __CA _____CA __ __ __CA __ __ __ __ __ __CA _____CA __ __ __CA __ __ __ __ __ __CA _____CA __ __ __CA __ __ __ __ __ __CA _____CA __ __ __CA __ __ __ __ __ __CA _____CA __ __ __CA __ __ __ __ __ __CA _____CA __ __ __CA __ __ __ __ __ __CA _____CA __ __ __CA __ __ __ __ __ __CA _____CA __ __ __CA __ __ __ __ __ __CA _____CA __ __ __CA __ __ __ __ __ __CA _____CA __ __ __CA __ __ __ __ __ __CA __ __ __CSHR __ __ __ __ __ ___ __ __CA _____CA __ __ __CA __ __ __ __ __ __CA _____CA __ __ __CA __ __ __ __ __ __CA _____CA __ __ __CA __ __ __ __ __ __CA _____CA __ __ __CA __ __ __ __ __ __CA _____CA __ __ __CA __ __ __ __ __ __CA _____CA __ __ __CA __ __ __ __ __ __CA _____CA __ __ __CA __ __ __ __ __ __CA _____CA __ __ __CA __ __ __ __ __ __CA _____CA __ __ __CA __ __ __ __ __ __CA _____CA __ __ __CA __ __ __ __ __ __CA
(xx.xxxx)
Field 1: 0= Ingredient # Flag
1= Tandem Recipe Flag

Entering the Program
Panasonic 5500 Series Programming Instructions – Version LQ3.5 3-197
P59-6 KVS Programs
Use P59-6 to set up your Kitchen Video System. The P59-6 screen has a submenu that lists the three available KVS programs. The program explanations here are divided into sections that correspond to the three KVS programs: Color KVS Modes, KVS Descriptors, and Screen Colors.
Color KVS Modes Use the first selection in the P59-6 menu to choose the operating mode for each KVS screens. The entries for this program are described below. KVS#: Identify the KVS controller (1-3) you are programming. You can have up to three controllers (or
two controllers with an option board), each with six channels for monitors. Note: The screen lists six addresses per controller. For Controller #1, it lists KVS1-1
(Controller 1, Screen #1) through KVS1-6 (Controller 1, Screen #6). For Controller 2, it lists KVS2-1 (Controller 2, Screen #1) through KVS2-6 (Controller 2, Screen #6). For Controller #3, it lists KVS3-1 through KVS3-6.
Mode: Enter the number (1-15) of the mode displayed for the monitor you are programming.
01= RCRT 8 06= KPS-Single/Combined 12= RCRT 4 Tandem 02= RCRT 4 07= KPS-Dual/Separate 13= RCRT Split Tandem 03= RCRT Split 08= KPS-Dual/Combined 21= RCRT 8 Link 04= Park/Serve 09= Product Comparison 22= RCRT 4 Link 05= KPS-Single/Separate 11= RCRT 8 Tandem 23= RCRT Split Link
Status: Select values for options that apply to your mode selection.
A: 1= Do not display a '1' quantity for modifiers. 2= Enable the Beeper when an order exceeds the time limit.
B: 1= Disable Consolidation. 2= Prioritize KVS Items (not valid for KPS or Product Comparison). 4= Prioritize KVS Modifiers (not valid for KPS or Product Comparison).
C: 1= Require "Done" (indicating a complete order) before Clear. 2= Require Fill before Clear. 4= Enable the Beeper when the screen receives the order.
D: 1= Display the Cashier Name. 4= Display the Order Total.

Programming
Panasonic 5500 Series Programming Instructions – Version LQ3.5 3-198
KVS Descriptors You can use P59-6 to customize many of the descriptions and messages that appear on your KVS screens. The worksheets for this program list the default descriptors loaded when you perform a RAM Clear. If you want to modify the default descriptors or messages, select the Descriptors option on the P59-6 menu and go to the address with the descriptor you want to change. Then enter a new description or a new color selection. The worksheets list the available options, as well as the maximum number of characters available per address. Screen Colors The last selection in the P59-6 menu defines special characteristics for the Color KVS operating modes. Use this selection to set the background color for the screen and the colors for order changes, for lines, and for other screen features. The options in this program are described below. Mode: Enter the number (1-15) for the KVS Mode you are defining.
01= RCRT 8 09= Product Comparison 02= RCRT 4 10= RCRT 8 Tandem 03= RCRT Split 11= RCRT 4 Tandem 04= Park/Serve 12= RCRT Split Tandem 05= KPS-Single/Separate 13= RCRT 8 Link 06= KPS-Single/Combined 14= RCRT 4 Link 07= KPS-Dual/Separate 15= RCRT Split Link 08= KPS-Dual/Combined
ADD: Enter the address (1-16) for the feature you want to modify.
Note: Addresses depend upon the KVS mode you identified in the previous field. RCRT modes (RCRT 4, RCRT 8, Split Screen, RCRT Tandem, and RCRT Link) have one set of features; Park/Serve, KPS, and Product Comparison modes each have a different set of features. Refer to the screen or to the worksheets for features available to each KVS mode.

Entering the Program
Panasonic 5500 Series Programming Instructions – Version LQ3.5 3-199
Feature: Choose characteristics that apply to the selected address. (Note that the options available for the
background addresses differ from other addresses.)
Background Address:
AB: 00= Black 01= Dark Blue 02= Gray 1 03= Gray 2 04= Dark Green 05= Brown 06= Purple 07= User-Defined
Other Addresses:
A: 0= Normal 1= Blinking 2= Reverse Video
B: 0= White
1= Blue 2= Green 3= Cyan 4= Red 5= Magenta 6= Yellow

Programming
Panasonic 5500 Series Programming Instructions – Version LQ3.5 3-200
P59-6 Color KVS Modes Worksheet Beginning Sequence: 59 CASH 6 CASH 1 CASH KVS # Field 1: Mode Field 2: Status A B C D 1 CSHR (KVS #1-CRT 1): _____ _____ CA _____ _____ _____ _____CA
(KVS #1-CRT 2): _____ _____ CA _____ _____ _____ _____CA
(KVS #1-CRT 3): _____ _____ CA _____ _____ _____ _____CA
(KVS #1-CRT 4): _____ _____ CA _____ _____ _____ _____CA
(KVS #1-CRT 5): _____ _____ CA _____ _____ _____ _____CA
(KVS #1-CRT 6): _____ _____ CA _____ _____ _____ _____CA
2 CSHR (KVS #2-CRT 1): _____ _____ CA _____ _____ _____ _____CA
(KVS #2-CRT 2): _____ _____ CA _____ _____ _____ _____CA
(KVS #2-CRT 3): _____ _____ CA _____ _____ _____ _____CA
(KVS #2-CRT 4): _____ _____ CA _____ _____ _____ _____CA
(KVS #2-CRT 5): _____ _____ CA _____ _____ _____ _____CA
(KVS #2-CRT 6): _____ _____ CA _____ _____ _____ _____CA
3 CSHR (KVS #3-CRT 1): _____ _____ CA _____ _____ _____ _____CA
(KVS #3-CRT 2): _____ _____ CA _____ _____ _____ _____CA
(KVS #3-CRT 3): _____ _____ CA _____ _____ _____ _____CA
(KVS #3-CRT 4): _____ _____ CA _____ _____ _____ _____CA
(KVS #3-CRT 5): _____ _____ CA _____ _____ _____ _____CA
(KVS #3-CRT 6): _____ _____ CA _____ _____ _____ _____CA Mode: 1= RCRT 8 11= RCRT 8 Tandem Status: A: 1= Do not display Quantity 1
2= RCRT 4 12= RCRT 4 Tandem 2= Beep when over time limit 3= RCRT Split 13= RCRT Split Tandem B: 1= Disable Consolidation 4= Park/Serve 21= RCRT 8 Link 2= Prioritize Items 5= KPS (Sgl/Sep) 22= RCRT 4 Link 4= Prioritize Modifiers 6= KPS (Sgl/Cmb) 23= RCRT Split Link C: 1= Require Done before Clear 7= KPS (Dual/Sep) 2= Require Fill before Clear 8= KPS (Dual/Cmb) 4= Beep at order receipt 9= Product Comparison D: 1= Display Cashier Name
4= Display Order Total

Entering the Program
Panasonic 5500 Series Programming Instructions – Version LQ3.5 3-201
P59-6 KVS Descriptors Worksheet (Page 1 of 3) Beginning Sequence: 59 CASH 6 CASH 2 CASH Default Message Message Color
A B DONE 100 CSHR __ __ __ __ __ __ __ __ __ __ __ __ __ __ __ __ CA __ __CA (4 characters) IN 101 CSHR __ __ __ __ __ __ __ __ __ __ __ __ __ __ __ __ CA __ __CA (4 characters) OUT 102 CSHR __ __ __ __ __ __ __ __ __ __ __ __ __ __ __ __ CA __ __CA (4 characters) D/T 103 CSHR __ __ __ __ __ __ __ __ __ __ __ __ __ __ __ __ CA __ __CA (4 characters) CONT-> 104 CSHR__ __ __ __ __ __ __ __ __ __ __ __ __ __ __ __ CA __ __CA (6 characters) CANCEL 105 CSHR __ __ __ __ __ __ __ __ __ __ __ __ __ __ __ __ CA __ __CA (6 characters) GCK# 106 CSHR __ __ __ __ __ __ __ __ __ __ __ __ __ __ __ __ CA __ __CA (4 characters) TL 107 CSHR __ __ __ __ __ __ __ __ __ __ __ __ __ __ __ __ CA __ __CA (2 characters) BFWD 108 CSHR __ __ __ __ __ __ __ __ __ __ __ __ __ __ __ __ CA __ __CA (4 characters) PKUP 109 CSHR __ __ __ __ __ __ __ __ __ __ __ __ __ __ __ __ CA __ __CA (4 characters) PHON 110 CSHR __ __ __ __ __ __ __ __ __ __ __ __ __ __ __ __ CA __ __CA (4 characters)
111 CSHR __ __ __ __ __ __ __ __ __ __ __ __ __ __ __ __ CA __ __CA
112 CSHR __ __ __ __ __ __ __ __ __ __ __ __ __ __ __ __ CA __ __CA PROGRAM ERROR 113 CSHR __ __ __ __ __ __ __ __ __ __ __ __ __ __ __ __ CA __ __CA LNK CRT BUF FULL 114 CSHR__ __ __ __ __ __ __ __ __ __ __ __ __ __ __ __ CA __ __CA (16 characters)

Programming
Panasonic 5500 Series Programming Instructions – Version LQ3.5 3-202
P59-6 KVS Descriptors Worksheet (Page 2 of 3) CHNG ORDER 115 CSHR __ __ __ __ __ __ __ __ __ __ __ __ __ __ __ __ CA __ __CA (10 characters) BREAK IN 116 CSHR __ __ __ __ __ __ __ __ __ __ __ __ __ __ __ __ CA __ __CA (10 characters) CSHR OVR 117 CSHR __ __ __ __ __ __ __ __ __ __ __ __ __ __ __ __ CA __ __CA (10 characters) KVS MODE CHANGE 118 CSHR __ __ __ __ __ __ __ __ __ __ __ __ __ __ __ __ CA __ __CA (16 characters) COMM BUSY 119 CSHR__ __ __ __ __ __ __ __ __ __ __ __ __ __ __ __ CA __ __CA (16 characters) PENDING 120 CSHR __ __ __ __ __ __ __ __ __ __ __ __ __ __ __ __ CA __ __CA (16 characters) BUFFER FULL 121 CSHR __ __ __ __ __ __ __ __ __ __ __ __ __ __ __ __ CA __ __CA (16 characters) WRONG STEER DATA 122 CSHR __ __ __ __ __ __ __ __ __ __ __ __ __ __ __ __ CA __ __CA (16 characters) DOWNLINE FRM W/S 123 CSHR__ __ __ __ __ __ __ __ __ __ __ __ __ __ __ __ CA __ __CA (16 characters) COMM ERROR 124 CSHR __ __ __ __ __ __ __ __ __ __ __ __ __ __ __ __ CA __ __CA (16 characters) RECALL 125 CSHR__ __ __ __ __ __ __ __ __ __ __ __ __ __ __ __ CA __ __CA (8 characters) LOOK 126 CSHR __ __ __ __ __ __ __ __ __ __ __ __ __ __ __ __ CA __ __CA (8 characters) SUMMARY 127 CSHR__ __ __ __ __ __ __ __ __ __ __ __ __ __ __ __ CA __ __CA (8 characters) ACTIVE 128 CSHR __ __ __ __ __ __ __ __ __ __ __ __ __ __ __ __ CA __ __CA (8 characters) FILL 129 CSHR __ __ __ __ __ __ __ __ __ __ __ __ __ __ __ __ CA __ __CA (8 characters)
130 CSHR__ __ __ __ __ __ __ __ __ __ __ __ __ __ __ __ CA __ __CA
131 CSHR __ __ __ __ __ __ __ __ __ __ __ __ __ __ __ __ CA __ __CA
132 CSHR __ __ __ __ __ __ __ __ __ __ __ __ __ __ __ __ CA __ __CA

Entering the Program
Panasonic 5500 Series Programming Instructions – Version LQ3.5 3-203
P59-6 KVS Descriptors Worksheet (Page 3 of 3)
133 CSHR __ __ __ __ __ __ __ __ __ __ __ __ __ __ __ __ CA __ __CA OVER 134 CSHR __ __ __ __ __ __ __ __ __ __ __ __ __ __ __ __ CA __ __CA (4 characters) NODN 135 CSHR __ __ __ __ __ __ __ __ __ __ __ __ __ __ __ __ CA __ __CA (4 characters) DST6 136 CSHR__ __ __ __ __ __ __ __ __ __ __ __ __ __ __ __ CA __ __CA (4 characters) DST7 137 CSHR __ __ __ __ __ __ __ __ __ __ __ __ __ __ __ __ CA __ __CA (4 characters) DST8 138 CSHR __ __ __ __ __ __ __ __ __ __ __ __ __ __ __ __ CA __ __CA (4 characters) DST9 139 CSHR__ __ __ __ __ __ __ __ __ __ __ __ __ __ __ __ CA __ __CA (4 characters)
140 CSHR __ __ __ __ __ __ __ __ __ __ __ __ __ __ __ __ CA __ __CA
141 CSHR __ __ __ __ __ __ __ __ __ __ __ __ __ __ __ __ CA __ __CA
142 CSHR __ __ __ __ __ __ __ __ __ __ __ __ __ __ __ __ CA __ __CA
143 CSHR __ __ __ __ __ __ __ __ __ __ __ __ __ __ __ __ CA __ __CA
144 CSHR __ __ __ __ __ __ __ __ __ __ __ __ __ __ __ __ CA __ __CA
145 CSHR __ __ __ __ __ __ __ __ __ __ __ __ __ __ __ __ CA __ __CA
146 CSHR __ __ __ __ __ __ __ __ __ __ __ __ __ __ __ __ CA __ __CA
147 CSHR __ __ __ __ __ __ __ __ __ __ __ __ __ __ __ __ CA __ __CA
Color Options: A: 0= Normal Video B: 0= White 5 = Magenta
1= Blink 1= Blue 6 = Yellow 2= Reverse Video 2= Green
3= Cyan 4= Red

Programming
Panasonic 5500 Series Programming Instructions – Version LQ3.5 3-204
P59-6 KVS Screen Colors Worksheet (Page ___ of ___) Beginning Sequence: 59 CASH 6 CASH 3 CASH RCRT # ADD Feature Color Options
____ ____ 1 SBTL Background ____ ____ CA (1-3, 10-15)
2 SBTL Lines ____ ____ CA 3 SBTL Normal Timer ____ ____ CA 4 SBTL Blinking Timer ____ ____ CA 5 SBTL Cashier Name ____ ____ CA 6 SBTL Fill Timer ____ ____ CA 7 SBTL Normal Counters ____ ____ CA 8 SBTL Change Order Counters ____ ____ CA 9 SBTL Negative Counters ____ ____ CA 10 SBTL Item Voids ____ ____ CA 11 SBTL All Voids ____ ____ CA 12 SBTL Recalled Orders ____ ____ CA 13 SBTL Coupon Order Background ____ ____ CA 14 SBTL Void Order Background ____ ____ CA 15 SBTL Promo Order Background ____ ____ CA 16 SBTL Discount Order Background ____ ____ CA 17 SBTL Negative Order Background ____ ____ CA
Note: Address options are the same for all RCRT (RCRT 4, RCRT 8, Split, Tandem, and Link) modes. Product Comparison 0 9 0 ___ ___ 1 SBTL Background ____ ____ CA
2 SBTL Time ____ ____ CA 3 SBTL Past Time Zone ____ ____ CA 4 SBTL Current Time Zone ____ ____ CA 5 SBTL Future Time Zone ____ ____ CA 6 SBTL Today's Counts ____ ____ CA 7 SBTL Average Counts ____ ____ CA 8 SBTL Not Used ____ ____ CA
Mode: Color: Color (Background only): 01= RCRT 8 11= RCRT 4 Tandem A: 0= Normal AB: 00= Black 02= RCRT 4 12= RCRT Split Tandem 1= Blink 01= Dark Blue 03= RCRT Split 13= RCRT 8 Link 2= Reverse 02= Gray 1 04= Park/Serve 14= RCRT 4 Link B: 0= White 03= Gray 2 05= KPS-Single/Sep. 15= RCRT Split Link 1= Blue 04= Dark Green 06= KPS-Single/Comb. 2= Green 05= Brown 07= KPS-Dual/Sep. 3= Cyan 06= Purple 08= KPS-Dual/Comb. 4= Red 07= User-Defined 09= Product Comparison 5= Magenta 10= RCRT 8 Tandem 6= Yellow

Entering the Program
Panasonic 5500 Series Programming Instructions – Version LQ3.5 3-205
P59-6 KVS Color Selections Worksheet (Page ___ of ___) KPS Mode # ADD Feature Color Options
0 ___ ___ 1 SBTL Background ____ ____ CA
(5-8)
2 SBTL Lines ____ ____ CA 3 SBTL Normal Counter ____ ____ CA 4 SBTL Blinking Counter ____ ____ CA 5 SBTL Change Order Items ____ ____ CA 6 SBTL Previous Counts ____ ____ CA 7 SBTL Current Counts ____ ____ CA
Note: Address options are the same for all KPS (Single/Sep, Single/Comb, Dual/Sep, and Dual/Comb) modes. Park/Serve 0 4 0 ___ ___ 1 SBTL Background ____ ____ CA
2 SBTL Lines ____ ____ CA 3 SBTL Normal Timer ____ ____ CA 4 SBTL Blinking Timer ____ ____ CA 5 SBTL Normal Park Timer ____ ____ CA 6 SBTL Blinking Park Timer ____ ____ CA 7 SBTL Cashier Name ____ ____ CA 8 SBTL Pick-up Time ____ ____ CA 9 SBTL Normal Counter ____ ____ CA 10 SBTL Change Order Counter ____ ____ CA 11 SBTL Negative Counter ____ ____ CA 12 SBTL Change Order Item ____ ____ CA 13 SBTL All Void Orders ____ ____ CA 14 SBTL Recalled Orders ____ ____ CA
Mode: Color: Color (Background only): 01= RCRT 8 11= RCRT 4 Tandem A: 0= Normal AB: 01= Blue 02= RCRT 4 12= RCRT Split Tandem 1= Blink 02= Gray 1 03= RCRT Split 13= RCRT 8 Link 2= Reverse 03= Gray 2 04= Park/Serve 14= RCRT 4 Link B: 0= White 04= Green 05= KPS-Single/Sep. 15= RCRT Split Link 1= Blue 05= Brown 06= KPS-Single/Comb. 2= Green 06= Purple 07= KPS-Dual/Sep. 3= Cyan 07= User-Defined 08= KPS-Dual/Comb. 4= Red 09= Product Comparison 5= Magenta 10= RCRT 8 Tandem 6= Yellow

Programming
Panasonic 5500 Series Programming Instructions – Version LQ3.5 3-206

Panasonic 5500 Series Programming Instructions – Version LQ3.5 4-1
Entering the Program
Once you organize and document your application program, you can enter the information in the
workstation that acts as the System Master (the one where Dip Switch 2, pin 1 [SW2-1] is ON). Entering the program involves the P2 Mode programs (P21-P59) described in the previous section, as well as X1 Mode programs. This section provides an overview of the steps you use to enter your program, downline it to additional workstations, set up the X1 Mode programs, and print a copy of your entries.
Overview
For convenience, you can use P2 Mode to enter all programs described to this point in the manual. After you turn the keylock to P2 Mode, the screen displays all available programs. Enter the numeric value of the program you need, then press CASH to advance to the next screen.
The program screens include prompts that describe key sequences you use within the program. These prompts are abbreviated in order to take up a minimum amount of screen space. Variable data entries are usually shown in parentheses, followed by abbreviations for the keys you use to input the data. Descriptions for these abbreviations are provided on the next page. When you want to escape from any of the program screens, press CASH.

Entering the Program
4-2 Panasonic 5500 Series Programming Instructions – Version LQ3.5
Prompt Abbreviations Data Entries: The following abbreviations describe data you enter within the various programs. (N) - Number. Numeric entry made on the 10-key pad. (N1) - Beginning number (from-to), or first numeric entry. (N2) - Ending number (from-to), or second digit of entry. (N3 N4) - 3rd digit/4th digit of the numeric entry. (NN) - 2-digit numeric entry. (NNN = 3 digit entry, etc). (CODE) - Cashier, Manager, or Employee Code number. (CPN #) - Coupon number. (CSHR#) - Cashier number. (DSCRPT) - Alphanumeric entries for item, employee, etc. name. (EMP #) - Employee number. (GRP #) - Major or Minor Group number. (ING #) - Ingredient number. (MGR #) - Manager number. (MENU#) - Numeric value menu line (or address) you need to access. (MESSGS) - Alphanumeric entries for system messages. (MIX #) - Product Mix Group number. (NAME ) - Alphanumeric entry for name of item, group, cashier, etc. (PRMPTS) - Alphanumeric entries for prompt messages (PRICE/HALO) - If item or coupon is a preset, enter the price; if the item or coupon
is open, enter the high amount limit (optional). (RCP #) - Recipe number. (STATUS) - Numeric entry for options chosen to define operation, print, tax, etc. (TERM #) - Remote Terminal (Workstation) # for Reports or Downlining. (TDM) - Tandem PLU or Recipe number. Keys: The following abbreviations prompt keys you press within the programs. CASH - Cash key. May also be abbreviated as CA. SBTL - Subtotal Key. CSHR - Cashier Key. MENU - Menu Look-Up PLU - Preset PLU key -or- PLU Key. TERM# - Terminal (Workstation) # Key. VOID - Void key. Use the abbreviated screen instructions as a quick guide through the program and, where necessary, in conjunction with worksheets.

Panasonic 5500 Series Programming Instructions – Version LQ3.5 4-3
Suggested Programming Order Before you enter your program, execute one of the RAM Clear commands to erase existing program data. If you do not perform a RAM Clear, you may find distortion in some of the workstation files. In many cases, this distortion is caused by existing data on the RAM chips, which can only be erased by RAM Clear. After RAM Clear, perform the Self-Diagnostics to help ensure that all workstation components are functioning correctly. After you run the tests, you can begin entering your application program. Use the following guidelines for entering your data. Keyboard Layout: Enter the soft key codes you want to assign to each position of the workstation keyboard. Program 21 - Memory Allocation: Enter the P21 Memory Allocation to distribute the files needed for the application. Enter a '0' for unused Memory Map Addresses to erase any values loaded by the Default Program. If an "Invalid" error message displays, you do not have enough memory installed to support your program. This program should be entered before you enter any information for the remaining files. Program 21 - Report Totals: Enter the report codes for the Register, Cashier, Manager, DCR (if used), and Station Total Reports. Program 23 - Tax Tables: Enter the data from the P23 worksheet for each tax table or rate (1, 2, 3) used. Program 24 - System & Miscellaneous Flags: Enter the option values selected for each of the 100 and 200 series addresses in P24. Remaining Programs: (P25 - P59) can be entered in any order. X1 Mode Procedures: Enter the values for applicable X1 programs. The following pages provide an overview of the procedures you use within the program screens. Exceptions that apply to particular programs are noted in Section 3. X1 Mode programming procedures are described at the end of this section, as are downlining, program printout, and PLU Copy procedures.

Entering the Program
4-4 Panasonic 5500 Series Programming Instructions – Version LQ3.5
Descriptor Entries Alphanumeric keyboards are available to help you with descriptor entries. When you want to activate the Alpha Keyboard within a descriptor step, press the Alpha Shift/Receipt Stop key. After you press Alpha Shift, you must either enter a descriptor or press the Alpha CASH key (or Alpha Shift again) to return the keyboard to its normal definition. The Alpha Keyboards definitions are shown on the next pages. You can also enter descriptors with the codes listed below. If you use the codes, you do not need to press Alpha Shift. Simply enter the codes and press CASH.
Descriptor Codes

Panasonic 5500 Series Programming Instructions – Version LQ3.5 4-5
Alpha Keyboard Layout
If System Flag 199B = 1, the system activates the QWERTY keyboard (similar to a typewriter or PC keyboard) when you press the Alpha Shift key. This QWERTY keyboard layout is shown below.
Note: If Flag 199B = 0, the system activates the alphanumeric keyboard shown on the next page.
Alpha Shift
'
.
\
/
<
>
?
;
:
"
'
[
]
!
@
#
$
%
^
&
*
(
)
_
+
-
=
PLU
GRP
#
1
2
3
4
5
6
7
8
9
0
Clear
CSHR
Double Wide
Clear
7
8
9
SBTL
Q
W
E
R
T
Y
U
I
O
P
4
5
6
A
S
D
F
G
H
J
K
L
1
2
3
Z
X
C
V
B
N
M
0
Cash/Store
Backspace
Space
Cash
In / Park
Out / Serve

Entering the Program
4-6 Panasonic 5500 Series Programming Instructions – Version LQ3.5
If System Flag 199B = 0, you use the following alphanumeric keyboard for your descriptor entries. This keyboard is activated whenever you press the Receipt Stop/Alpha Shift key within a descriptor field.
Note: If you want to use a QWERTY-style keyboard (similar to the one you would see on a typewriter), enter 1 in System Flag 199B. The QWERTY keyboard layout is shown on the previous page.
Alpha Shift
'
.
\
/
<
>
?
;
:
"
'
[
]
!
@
#
$
%
^
&
*
(
)
_
+
-
=
PLU
Grp#
1
2
3
4
5
6
7
8
9
0
Clear
CSHR
Double Wide
Clear
7
8
9
SBTL
A
B
C
D
E
F
G
H
I
4
5
6
J
K
L
M
N
O
P
Q
R
1
2
3
S
T
U
V
W
X
Y
Z
0
Cash/Store
Backspace
Space
Cash
In / Park
Out / Serve

Panasonic 5500 Series Programming Instructions – Version LQ3.5 4-7
Miscellaneous Data Entry Procedures The primary keys you use for entering the program are CASH, CSHR (Cashier), SBTL (Subtotal) and VOID. In Program 31 (Cashiers), for example, you enter the cashier number with the CSHR key. You select a line number with the SBTL key and enter data with the CASH key. In some programs, you use the VOID key to delete an entry from the file. Other programs use the MENU LOOK-UP, GROUP#, and Cursor Down keys. The prompts at the top of the screen (and the worksheets) let you know which keys you should use for your entries. Many of the programs, including Programs 34 (Groups), 35 (PLU), and 59 (Master Files) provide menu screens for your program entries. You enter information by moving the cursor to the appropriate menu line, then entering the information with the CASH key. See the following descriptions for the PLU, Ingredient, Recipe, and KVS Mode programs for examples of these entries. PLU Entries: 1. After you go into the PLU program, enter the item PLU# and press the PLU key. If you have
already defined your keyboard and the PLU is a preset item assigned to the keyboard, you can press the item key.
Note: After you access the first PLU, you can press the PLU key without entering a number. The
screen will advance to the next item in the file. 2. The cursor initially appears at Line 6 (Price). You can move to a particular line by entering the line
number and pressing CSHR. If you press CSHR without a number, the cursor steps down to the next line. To advance to lines not initially displayed on your screen, touch the Cursor Down () key.
3. After you reach the line you are programming, enter the numeric values for the options you need
and press CASH. If you are entering a descriptor, press Receipt Stop/Alpha Shift, type the descriptor, then press the CASH key to finalize your entry. You do not need to press the Receipt Stop key if you are using the descriptor codes.
4. Press CSHR to move down to the next line. Repeat Steps 2 and 3 until you have entered all of the
information for the PLU. 5. Repeat Steps 1 through 4 for each PLU to need to program. 6. Press CASH without a number entry to exit the PLU program.

Entering the Program
4-8 Panasonic 5500 Series Programming Instructions – Version LQ3.5
Ingredient Entries: 1. Enter the number of the ingredient you are programming. The cursor initially appears at Line 1
(Name). After you display the first ingredient, you can press the CSHR key to go to the next ingredient in the file.
2. Advance to a specific line by entering the line number and pressing SBTL. 3. Enter a numeric value for the selected line. If you are entering a descriptor, press Alpha Shift, type
the ingredient name, then press CASH. If you are using descriptor codes, you do not need to press Alpha Shift. Simply enter the codes and press CASH.
4. Press SBTL to move down to the next line. Then repeat Steps 2 and 3, as needed for the
ingredient. 5. Repeat Steps 1 through 4 for each ingredient you are programming. 6. When you are ready to leave the program, press CASH. Recipe Entries: 1. After you go into the Recipe File Program, enter the Recipe # and press CSHR. The cursor
initially appears at Line 1, field 1. 2. Enter the Field 1 data and press CASH. The cursor moves to the next column. 3. Enter the data for the column and press CASH. Repeat this step for each column and line.
Note: If you want to go to a particular field, enter the address and field numbers, then press SBTL. For example, 93 SBTL takes you to the address 9, field 3 column. Press SBTL to move the cursor from one address to another without data entry. After you display the initial recipe, you can press CSHR, without a recipe number, to move to the next recipe in the file.
4. Repeat Steps 2 and 3 for each ingredient you need to list for the recipe. 5. When you are finished with all ingredients, repeat Steps 1 through 3 for each recipe you are
programming. 6. When you have programmed all of your recipes, press the CASH key to exit the Recipe File
program.

Panasonic 5500 Series Programming Instructions – Version LQ3.5 4-9
Special Cursor Movement Keys: 1. If a program has lines not displayed on-screen, you can touch the Cursor Down key () to switch
to the additional lines. For example, when you go into the PLU program, the screen displays the first six lines of the program. Touch the key to see Lines 7-13. You can also touch the Subtotal or Cashier key (depending upon the selected program) to step down from one line to another.
2. When a program has displayed options that cannot all fit onto the screen, touch MENU LOOK-UP
to display the additional options. For example, in the PLU Program, Status 1 and Status 2 have several lines of options. You can touch the MENU LOOK-UP key to see the options not initially displayed.
Program Exit The CLEAR and CASH keys are available within most P2 Mode programs. They allow you to exit the current screen, with the guidelines listed below. CASH, preceded by a number entry, takes you to a specified program or enters numeric data. CASH, pressed without a number entry, takes you out of a program and returns you to the main
"Mode" menu. CLEAR, pressed when an error message displays, clears the screen so you can input new data. CLEAR, pressed after a complete data entry, returns you to the previous subscreen. This method is
only available for such subscreens as Reports, X1 Programs, etc. Example: (P2 Mode)
2 0 CASH
Self Test Subscreen
4 CASH
ROM Test
CLEAR
Return to Self Test
1 CASH
LCD Test
CASH
Exit to P2 Mode menu
You must return to the main menu before you can switch the keylock mode. The CASH key will always be the key you press within a program screen.

Entering the Program
4-10 Panasonic 5500 Series Programming Instructions – Version LQ3.5
X1 Mode Programs
Use the X1 Mode programs to put the finishing touches on your workstation program. Because these programs consist of only a single line of data entry, worksheets are not required. You simply go into the program and select the option you need. The X1 Mode programs include Workstation Mode, which defines the operating mode of the workstation, PLU Shift Mode, which sets a "background" shift level for all PLU items, and the Remote Steering Program, which directs the Steer Flags (you assigned in P34 and P35) to the appropriate Remote Device numbers. Two additional programs are available for restaurant personnel. Cashier Enable/Disable helps prevent use of a cashier number that is currently off-shift. A cashier cannot use a disabled number until it is re-enabled with this program. The Starting Order # program lets the restaurant reset the order number issued from the workstation. All of the X1 Mode programs are available at restaurant level to allow managers to make any adjustments for daily operations.

Panasonic 5500 Series Programming Instructions – Version LQ3.5 4-11
Workstation Mode
Use X1 Mode Program 1 to define the screen format and operating mode for each workstation on your system. Four operating modes are available: Counter Terminal (CT), Drive-Thru Order-Taker (OT), Drive-Thru Order-Taker/Cashier Station (OT/CS), and Drive-Thru Cashier Station (CS). Set the appropriate mode at each workstation. Use Counter Terminal Mode for front counter operations, where orders are registered and tendered at the same workstation. Single-workstation Drive-Thru systems usually use the Cashier Station Mode. With this mode, you enter items and tender the order at the same workstation. If you have a two-workstation Drive-Thru, you can place one workstation in Order-Taker mode (where you register items) and the second workstation in Cashier Station mode (where you tender the transaction). For a two-window configuration, you might place one workstation in Order-Taker/Cashier Station mode (where you register and tender the order) and another workstation in Cashier Station mode (where you serve the order). During low volume hours, you can use the Cashier Station to both register and tender the transaction. These modes are detailed in the 5500 Series Operating Instructions. 1. Turn the keylock to MGR Mode. 2. Use the following sequence to go into the Workstation Mode Program.
1 CASH 5 CASH 1
CASH
3. Enter the value associated with the workstation mode you want to set.
[ mode # ] CASH
0 = Counter Terminal (CT) 1 = Order Taker (OT) 2 = Cashier Station (CS) 3 = Order Taker/Cashier Station (OT/CS)
4. Press CASH to exit to X1 Mode. (Press CASH twice if you want to go to MGR Mode.)
Note: Make sure you identify the Cashier Station and Order-Taker/Cashier Station numbers (if used) in P24, Flag 227.

Entering the Program
4-12 Panasonic 5500 Series Programming Instructions – Version LQ3.5
Starting Order Number
Use Program 2 to reset the numbers that identify orders. Order numbers increment sequentially until you reset them with this program. If you want to start each day with order #1, you must use this program on a daily basis. If used, the starting order number should be entered at all workstations. 1. Turn the keylock to MGR Mode. 2. Select the X1 Program option.
1 CASH 5 CASH
3. When the screen displays the X1 Programs, select Starting Order #.
2 CASH
4. Enter the starting order number. You can enter any order number between 1 and 99; zero is not a
valid entry.
[ mode # ] CASH
Note: Displayed order numbers have three digits. The first digit is taken from the Workstation ID# you set in P24, Flag 231. The last two digits start with the number you enter here and continue to 99. As a result, the workstation with Workstation ID #1 issues order numbers 101-199; the workstation with Workstation ID #2 issues order numbers 201-299, etc.
5. If you want to return to the X1 Mode menu, press CASH.
CASH
6. When you are ready to exit to the MGR Mode Menu, press CASH a second time.
CASH

Panasonic 5500 Series Programming Instructions – Version LQ3.5 4-13
PLU Shift Level
X1 Mode Program 3 sets a specified shift level as the background for all PLU item entry. You can select any of ten (0-9) shift levels in this program. If set, the specified shift level will modify every PLU item registered in every transaction.
Important: The PLU Shift program works only if your PLUs are programmed to accept shift levels. If the PLUs do not allow shift levels, or if you set an invalid level, "INVALID ENTRY" displays every time you try to register an item.
1. Turn the keylock to MGR Mode. 2. Select the X1 Program option.
1 CASH 5 CASH
3. When the screen displays the X1 Programs, select PLU Shift.
3 CASH
4. Enter the new shift level (0-9). The screen displays your new level selection.
[ PLU level # ] CASH
5. If you want to return to the X1 Mode menu, press CASH once.
CASH
6. When you are ready to exit to the MGR Mode Menu, press CASH a second time.
CASH

Entering the Program
4-14 Panasonic 5500 Series Programming Instructions – Version LQ3.5
Remote Steering
X1 Mode Program 7 directs Steer Flags to kitchen printers and KVS screens. Before you use this program, you must use Program 35 (PLUs) to assign Steer Flags to your menu items. Then use the following steps to direct the Steer Flags to a kitchen printer or KVS screen, as needed. 1. Turn the keylock to MGR Mode. 2. Select the X1 Program option.
1 CASH 5 CASH
3. Select the Remote Steering program.
7 CASH
The Remote Steering program screen displays the current assignments for this program.
Note: The K/P# column lists assignments for the Kitchen Printer steer flags; the CKVS column lists assignments for Color KVS steer flags.

Panasonic 5500 Series Programming Instructions – Version LQ3.5 4-15
4. Use this step to change your Kitchen Printer steering. (Go to Step 5 if you want to change your
Kitchen Video steering.)
The screen lists the nine available Steer Flags (Steer #1- Steer #9). You can direct any of these nine Steer Flags to a Kitchen Printer. Enter the Steer Flag and Column number of the assignment you are changing and press SBTL (Subtotal). For example, enter 11 SBTL to go to the line for K/P Steer Flag 1; enter 21 SBTL to go to the line for K/P Steer Flag 2. You can also touch the SBTL key until you reach the field you need to change. When you reach the needed field, enter the number of the Kitchen Printer where this Steer Flag should be directed and press CASH.
Note: The printer numbers you use depend upon the printers installed on your system. Numbers are based on the workstation where the printer is installed and on the RS-232C channel where the printer is connected. For example...
11 directs the Steer Flag to the printer at Workstation #1, RS-232C Channel 1. 12 directs the Steer Flag to the printer at Workstation #1, RS-232C Channel 2. 13 directs the Steer Flag to the printer at Workstation #1, RS-232C Channel 3. 14 directs the Steer Flag to the printer at Workstation #1, RS-232C Channel 4. 21 directs the Steer Flag to the printer at Workstation #2, RS-232C Channel 1. 22 directs the Steer Flag to the printer at Workstation #2, RS-232C Channel 1. 31 directs the Steer Flag to the printer at Workstation #3, RS-232C Channel 1. 201 directs the Steer Flag to the printer at Workstation #20, RS-232C Channel 1.
Enter 000 for positions you do not use.
[ line # ] SBTL [ Kitchen Printer # ] CASH
5. Use this step if you must change the steering for your Color Kitchen Video System (CKVS)
monitors.
The screen lists the nine available Steer Flags (Steer #1- Steer #9). Any of these Steer Flags can be steered to a Color Kitchen (CKVS) Video screen.
To go to the field you are changing, enter the Steer Flag and Column numbers and press SBTL (Subtotal). For example, 12 SBTL takes you to the CKVS Steer Flag 1 field; 22 SBTL takes you to the CKVS Steer Flag 2 field. When you reach the needed field, enter the number of the Kitchen Video screen where this Steer Flag should be directed and press CASH.

Entering the Program
4-16 Panasonic 5500 Series Programming Instructions – Version LQ3.5
Note: The CKVS numbers you can use depend upon the number of controllers and monitors installed on your system. If you have one standard controller (CKVS#1) with six screens, you can use numbers 11-16 (11=CKVS Controller #1, Screen #1; 16= CKVS Controller #1, Screen #6).
If you have two controllers, you can use numbers 11-16 and 21-26 (21=CKVS Controller #2, Screen #1; 26= CKVS Controller #2, Screen #6), depending upon the number of screens installed. These same numbers are available if you have a single controller with an option board.
If you have three controllers, you can use numbers 11-16, 21-26, and 31-36 (31=CKVS Controller #3, Screen #1; CKVS Controller #3, Screen #6), depending upon the number of screens installed.
[ line # ] SBTL [ CKVS # ] CASH
6. When you are ready to leave the Remote Steering program, press CASH twice to return to the
MGR Mode menu.
CASH CASH

Panasonic 5500 Series Programming Instructions – Version LQ3.5 4-17
Cashier Disable
X1 Mode Program 8 lets you temporarily disable any cashier numbers currently programmed into your system. You can use this program it to help prevent unauthorized use of a number. Cashier numbers are enabled until you disable them with this program, and they remain disabled until you re-enable them with this program. 1. Turn the keylock to MGR Mode. 2. Use the following sequence to select the X1 Program option.
1 CASH 5 CASH
3. Select the Cashier Disable program.
8 CASH
4. When the screen displays the Cashier Disable menu, follow Procedure a or b, below.
a) To disable the cashier number:
[ cashier # ] CHSR 1 CASH
b) To enable the cashier number:
[ cashier # ] CHSR 0 CASH
5. When you are ready to exit to MGR Mode, press CASH twice.
CASH CASH
Note: Repeat Steps 1-5 at each workstation where the number should be disabled.

Entering the Program
4-18 Panasonic 5500 Series Programming Instructions – Version LQ3.5
P33 Date & Time
After you finish the X1 Mode programs, there are a few remaining P1 and P2 Mode programs you use to complete your application program. Like the X1 Mode programs, these programs do not require worksheet entries. You use them to set the date and time (Program 33), copy PLU information (Program 71), print a copy of your entries (Program 50), and downline the program (Program 60). These programs are described in the remaining portions of this section. Use Program 33 to set the current date and time. After you initially set the date and time, you should need only periodic adjustments for Daylight Savings, etc. Use the following steps to set the date and time. 1. Turn the keylock to P2 Mode. 2. Select the Date & Time program.
3 3 CASH
3. To set the date, enter the 2-digit month, 2-digit day, and 2-digit year. Press CASH.
[ date ] CASH
4. To set the time, enter the 4-digit time (0000 to 2359). Press SBTL.
Note: Remember to use military time for p.m. hours. Noon = 1200, 1:00p.m.= 1300, 2:00p.m.= 1400... 11:00p.m.= 2300, Midnight = 0000.
[ time ] SBTL
5. When you are ready to leave this program, press CASH.
CASH

Panasonic 5500 Series Programming Instructions – Version LQ3.5 4-19
P71 PLU Copy
P71 lets you copy information from an existing PLU to a new PLU. In many instances, this program can help speed up your PLU programming. It can also help simplify programming procedures at restaurant level. You can copy data from the source PLU to a single PLU item or to a range of items, as described below.
Note: If you are copying to a new PLU number, you must make sure that the new number is first entered in Program 27.
1. Turn the keylock to P2 Mode. 2. Select PLU Copy.
7 1 CASH
3. Enter the number of the source PLU (the one with the information you are copying). If the PLU is
assigned to the keyboard, you can simply press the item key.
[ PLU # ] PLU or [ press the PLU item key ]
4. Identify the range of PLUs to which you are copying the information.
Note: The system copies all information (except the descriptor) from the source PLU to the range of PLUs you identify here. For example, if you are copying to PLUs 1 - 20, enter 1 PLU, 20 PLU. If you are copying to PLU #1 only, enter 1 PLU, 1 PLU.
[ 1st PLU # ] PLU [ last PLU # ] PLU
5. Repeat Steps 3 and 4, as needed, for each PLU you want to copy. 6. When you are ready to leave this program, press CASH.
CASH

Entering the Program
4-20 Panasonic 5500 Series Programming Instructions – Version LQ3.5
P50 Program Printouts
After you finish entering your program, you can go to P2 Mode to print a hard copy of the information you entered. You can use this printout to check your program or keep it for future reference. Use the following steps to print a record of the files on your printer. 1. Turn the keylock to P2 Mode. 2. Select Program Printout: 50 CASH. 3. Enter the printout number of the file you are printing: (printout #) CASH.
Note: For Group and PLU printouts, you must identify the starting and ending Group or PLU numbers. The Cashier File printout places an asterisk (*) next to disabled cashier numbers.
4. Repeat Step 3 for each file you want to print. 5. When you are ready to leave this screen, press CASH.

Panasonic 5500 Series Programming Instructions – Version LQ3.5 4-21
P60 Downline Programming
The Downlining commands send program information from one workstation to another. You can downline entire files or individual items to any workstations on your system. Use the following numbers for this procedure.
Note: An asterisk (*) marks files you can access in P1 Mode. The following information does not downline. Memory Allocation does not downline
parameters specific to the System Master workstation. Miscellaneous Flags 230-239, 258, and 259 do not downline. Flags 107, 118, 263, 275, 276, 330, 331, and 332 do not downline. Report totals do not downline.
Downlining to Programmed Workstations 1. Turn the keylock to P2 Mode and select the Downlining program: 60 CASH. 2. Enter the number of the file you are downlining and press CASH. If you changed the Memory
Allocation, downline that file first. (Then enter 90 CASH if you want to send all files.) When a file downlines successfully, its number displays in reverse video.
Important: If you changed the Memory Allocation, downline Memory Allocation first. Read the
PLU Downlining procedures before downlining PLUs. 3. Press CASH when you are ready to leave this screen.

Entering the Program
4-22 Panasonic 5500 Series Programming Instructions – Version LQ3.5
Downlining to Unprogrammed Workstations At Receiving Workstations: 1. Perform a RAM Clear. 2. Set the Workstation # in the P3 Initial Mode, TCP/IP program. (Your entry displays for reference
in Flag 239, Options E and F.) 3. Place the receiving workstation in a non-sale state (outside of a sale transaction). At the Sending Workstation: 1. Turn the keylock to P2 Mode. 2. If not already programmed, use the P3 Initial Mode, TCP/IP program to assign a number to this
workstation. 3. Make sure that P24, Flag 226 has the correct beginning and ending communication numbers. 4. Make sure that P24, Flag 227, Options A-D = 1020 (1020-xxxx). 5. Downline the Memory Allocation [13 CASH]. Important: When downlining to an unprogrammed workstation, Memory Allocation MUST be
downlined before all other files. Downlining the Memory Allocation does not downline files specific to a System Master workstation.
6. Downline the remaining program files, as needed. After Memory Allocation, you can downline
files in any order. The screen highlights the numbers of files that are successfully downlined. (downline function #) CASH
Note: Report Totals are not transmitted or affected by downlining. 7. When you have downlined all needed files, exit to the P2 Mode Menu: CASH. 8. If you want to go back to MGR Mode, press CASH again.

Panasonic 5500 Series Programming Instructions – Version LQ3.5 4-23
Downlining to an Individual Workstation
Note: In order to downline to a specific workstation, your keyboard must include a Terminal # key (key code 73).
1. Turn the keylock to P2 Mode. 2. Select the Downline Program: 60 CASH. 3. Enter the Workstation # (from the TCP/IP program) of the
workstation where the program will be sent: (Workstation #) TERM# 4. Select the file you are downlining: (downline function #) CASH.
Note: "COMM START" displays on the receiving and sending workstations while downlining is in progress. "COMM END" displays when the downlining is complete. If everything is successfully communicated, the file number will be highlighted in reverse video.
5. Repeat Step 4 for each file you need to downline. If an error occurs (or if the file number is not
highlighted in reverse video), begin again at Step 3. 6. When you finish with this program, exit to P2 Mode: CASH
Example: If you want to downline System Descriptors and Error Messages from Workstation #1 to Workstation #2, you would use the following sequence.
P2 Mode (at Workstation #1)
60 CASH Downline Program
2 TERM# Workstation to which the files are being sent
5 CASH Downlines Error Messages
10 CASH Downlines System Descriptors
CASH Returns you to the P2 Mode Menu

Entering the Program
4-24 Panasonic 5500 Series Programming Instructions – Version LQ3.5
Downlining the PLU File If you do not take Z1 (or a System Close) and Z2 PLU Accumulation Reports before you add new PLUs to (or delete existing PLUs from) your file, Downlining Command 2 will distort your totals and counts. Read the following instructions carefully before you downline the entire PLU file. Changes to the PLU File: You can make changes to descriptors, prices, group links, and any other P35 fields at any time during the day. Because they do not alter PLU file sequencing, changes do not require Z1 or Z2 Accumulations. You can perform the change and then downline the entire PLU file without damaging your PLU file. This procedure may distort the PLU you change; it will not, however, harm other PLU totals in your file. PLU Additions: Ideally, Z1/System Close and Z2 Accumulation Reports should be taken before you add items in P27. Under certain circumstances, however, e.g., during restaurant hours, Z Accumulations may not be possible or convenient. You can use the following alternate procedure to bypass the Accumulation reports.
1. P27 - Enter the new PLU number(s), then exit the program. 2. P35 - Enter the data for the new items, then exit the program. 3. P60 - Downline the new PLUs item-by-item with the INDIVIDUAL PLU command; i.e., enter the
PLU #, and press the PLU Key or press the Preset PLU key.
Note: Make sure all new PLUs are downlined and the information is received at all workstations to ensure PLU file redundancy. Your totals will be distorted at System Close if files are not identical system-wide.
If you add a new PLU and then downline the entire PLU file without first resetting the daily and period-to-date reports, your PLU Report (and all associated reports) will be distorted. PLU Deletions: To avoid damaging report totals, you must first take Z1 and Z2 Accumulation Reports. There are no exceptions. Postpone PLU file deletions until you can take the Accumulation Reports. After you reset the reports, delete the PLUs, then downline the entire file. (Command 2)

Panasonic 5500 Series Programming Instructions – Version LQ3.5 5-1
Appendix A
This section provides additional information about features of your 5500 System. It includes information that was added in version LQ2.5 software, the Deposit & Cash Report, PF Loader Software Package, as well as the procedure you initially use to reset inventory counts. It also includes some operational information that may be helpful as you set up your system.
New for LQ2.5
The LQ2.5 software offers a variety of new features and feature updates. Details about the programs, the flags, and the options you use to take advantage of these features are provided throughout this manual. The next several pages give you an overview of what's new.
Display Enhancements
The screen capacity has increased to 44 lines of items per order. After nine lines of items, the order
scrolls to a second screen panel. The order continues to scroll into additional panels, as needed, for up to 44 lines of items.
A new Recap mode lets you view a large order within a single screen panel. In the normal "Lookup"
mode, large orders display across as many as four screen panels. In the Recap mode, the large order displays in one panel; SCROLL UP and SCROLL DOWN keys advance you up and down through the registered items.
New Key Codes:
Key Code 147 = CHANGE SCREEN (Recap Mode Lookup Mode) Key Code 148 = SCROLL UP (for the single-panel Recap Mode only) Key Code 149 = SCROLL DN (for the single-panel Recap Mode only)
New Flag Option:
Flag 128:
A: 1= Display @ instead of # if the order in the single panel Recap screen has over nine items. If you set this option and have more than nine lines of items, Order #101 appears as @101 on the Recap screen.
2= Display Double Lines between panels of the Lookup screen order. The Lookup screen is the screen normally displayed for the current order. If you set this option and an order continues into multiple panels, double lines appear between the panels of the order.
Appendix A
5-2 Panasonic 5500 Series Programming Instructions – Version LQ3.5
Memory Enhancement
The memory structure has been reorganized internally to provide additional resources for customer files. The changes are internal, and do not affect Memory Allocation file entries.
MWS - Reporting
Orders can be registered at the workstation while reports are uploading from the MWS PC. Flag 306 decides the amount of time allocated to workstation operations during communications. It also decides if the workstation displays a blinking "M" while the MWS PC is communicating. Flag 194 decides if the "Comm Error" message displays.
Note: The "Comm Error" message displays to warn that an error occurred. The message stays
on the screen, even if the communication is eventually successful, to note the error. New Flags and options:
Flag 194
A: Not Used - Enter 0.
B: 1= Display the "Comm Error" message to note that an error occurred during a systemwide communication. (The message displays and stays on the screen whenever an error occurs, whether or not the communication is eventually successful.)
Flag 306
Option A: 1= Display a blinking "M" at the bottom of the workstation screen while MWS is communicating to the workstation. This indicator can be used to alert the user that an MWS communication is in progress.
Option B-D: Not Used - Enter 000. Option E-F: Enter a value for the time allocated to workstation operations during MWS report
communications. MWS will pause its communication to allow workstation operations during a report. (The recommended entry is 03. Be careful not to set too high a number-- a large number may not give the PC enough time to complete the reports.)
New Messages:
Program 30, Address 204 = PC COMMUNICATION Program 30, Address 205 = COMM ERROR

Appendix A
Panasonic 5500 Series Programming Instructions – Version LQ3.5 5-3
CAT Tender Correction
A new Tender Correction option allows adjustments to orders settled with an incorrect charge or payment key. This option can be displayed in X1 Mode, depending upon your entry in Flag 240. Flag 240 also decides if cashier log-on is required for Tender Correction entries.
New Flag options:
Flag 240
Option A: 1= Enable the X1 Mode Tender Correction function. [If not set, the Tender Correction option does not appear on the X1 Mode Loan & Pickup menu.]
2= Require Cashier Log-on for X1 Mode Tender Correction.
Receipt Signature Lines
Signature lines are now available for any or all of the following functions: subtracting PLUs, discounts, promos, and deletes. The signature line prints on the receipt for functions you designate in Flag 284.
New Flag:
Flag 284
Option A-F: Not Used - Enter 000000. Option G: 1= Print the Signature line on the receipt for Open Subtracting PLU items.
Option H: 1= Print the Signature Line on the receipt for Discounts. 2= Print the Signature Line on the receipt for Promos. 4= Print the Signature Line on the receipt for Deletes.
New Message:
Program 30, Addresses 314 and 315 define the signature line for the receipt.

Appendix A
5-4 Panasonic 5500 Series Programming Instructions – Version LQ3.5
Downlining Flags
The system no longer downlines the following flags when you select the System and Miscellaneous Flag option in Program 60.
Flag 107 - Require destination to start orders/Allow destination entry at Drive-Thru
Flag 118 - Default destination for the workstation
Flag 263 - Split Screen assignments by Destination
Flag 275 - Color KVS Steering assignments
Flag 276 - Color KVS Steering assignments
Flag 330 - System Receipt Printer & System Journal Printer assignments
Flag 331 - System Report Printer & Charge 1 Transaction Printer assignments
Flag 332 - Cashier Station Printer for Store & Report Transfer Wait time
Subgroup Lookup in P35
You can now use a subgroup lookup to access items in Program 35. For example, if you have a KID MEAL macro key that performs a lookup of items linked to the Kid's Meal subgroup, you can touch the KID MEAL macro key in Program 35. When the P35 screen lists the linked kid's meals, enter the displayed number of the kid's meal item you want to update.
Subgroup Lookup Mix & Match
Wildcard search options help you specify a range of PLUs for the Mix & Match table. For example, if you are using a table for doughnuts, and you have fewer than fifteen types of doughnuts eligible for "dozen" pricing, you may not need search options; you can list each doughnut individually in the Link fields. However, if you have more than fifteen types of doughnuts, you can have the system search for and accept a range of PLUs.
The system now gives you three options for the wildcard search. You can search a 2-digit range of
numbers or a 3-digit range of numbers. You can also search for PLUs linked to a particular subgroup. The search by subgroup option is new.

Appendix A
Panasonic 5500 Series Programming Instructions – Version LQ3.5 5-5
PF Loader
Program 70 works with the Panasonic PF Loader software package. The PF Loader software lets you store application programs, report totals and individual files to a hard disk or to a diskette. You can use this package to load a demo program or to back-up your application programs. Data stored with the PF Loader can be verified and loaded into the workstations within minutes. Before you can use the workstation PF Loader program, you must obtain the PF Loader software. (Contact your Panasonic representative to obtain this software.) At the workstation, go into the P2 Mode menu and select Program 70. Leave the P70 PF Loader screen on the workstation and go to the PC. Execute the PF Loader program and then simply follow the on-screen instructions to perform the needed function.

Appendix A
5-6 Panasonic 5500 Series Programming Instructions – Version LQ3.5
System Close & System Open
System Close resets the daily totals at all Basic workstations, then stores the consolidated totals in the System Master. System Open resets the totals in the System Master. This section describes these two functions, as well as the programming options that affect them. System Close Requirements The following describes the programming options taken into consideration for each stage of the System Close procedure. Dip Switch 2 You can only start System Close at the System Master. The System Master is determined by Dip Switch 2 (SW2). Make sure SW2 is in the ON position at the System Master. Communication Options As with all functions that deal with system-wide communications, System Close relies on the following definitions.
Flag 239 - The Workstation # (TCP/IP Address) must be set at each workstation. Flag 226 - The range of workstations you define in Flag 226 determines which workstations
are included in the System Close. - If you want the report to print, you must enter 1 for Option B. If Option B is 0,
System Close resets without print. - Options C-D define the number of Retry attempts for communication.
Flag 227 - Options A-D determine the length of time for each retry. Procedure Options When you begin System Close with the 100 CASH sequence, the system performs the following procedures. Any options you have within the procedure are noted. 1. The system checks communication to all workstations in the Flag 226 range. If Flag 115B= 0
(enabling pending order detection), open orders prevent System Close. If Flag 115B= 1, the system allows System Close even if there are open transactions at a workstation.
2. The system logs any active cashiers and managers off of the Basic workstations. 3. System Close pauses for Deposit entry if you have enabled the following Flags.
Flag 240 - If Option C > 4, deposits can be entered during System Close. Flag 106 - If 106B = 1,3, or 5, a deposit entry is required at System Close.
4. System Close pauses for inventory entries, depending upon the following settings.
Program 21 - If ingredients are not allocated, inventory prompts are bypassed. Flag 106 - If 106B = 2, 3, 6, or 7, actual inventory entries are required for Ingredient #1
and Ingredient #2.

Appendix A
Panasonic 5500 Series Programming Instructions – Version LQ3.5 5-7
5. System Close pauses for timekeeping entries, depending upon your entries in P21.
Program 21 - If employees are not allocated, timekeeping prompts are bypassed. If you have allocated employees, System Close gives you the option to edit the timekeeping data, if necessary.
6. The system begins to reset the totals in the Basic Workstation. As the totals are reset they are
consolidated in the System Master in the following order.
Register Report Product Mix Reports (Flag 125) PLU Report (Flag 125) Time Reports (Flag 131) Coupon Report Inventory Report (Flag 131) Group Report (Flag 131) Timekeeping Report (Flags 125 & 131) Cashier Reports (Flag 131) Station Total Report Manager Reports (Flag 123) Deposit & Cash Report (Flag 240)
Note: You have the option to disable print for many of the above reports. Flags you use to
disable report print are noted above. For the Timekeeping Report, you can also choose (with Flag 125) not to reset the Timekeeping Report at System Close.
System Open Requirements After you perform a System Close, the consolidated daily totals remain in the System Master until you reset them with System Open. The two functions share many of the same requirements. If you can perform a System Close, you should also be able to perform a System Open. System Open requirements are listed below. Dip Switch 2 System Open must be performed at the same workstation you used for System Close---the System Master. The System Master is determined by Dip Switch 2 (SW2 on the workstation CPU board).

Appendix A
5-8 Panasonic 5500 Series Programming Instructions – Version LQ3.5
24-Hour Close
If your system is being installed in a 24-hour restaurant, you can set parameters for a 24-hour close procedure. With this procedure, you perform System Close in two stages: Preclose and Close. The following explanations describe the steps involved in each stage of the 24-hour close and let you know what programming options are taken into consideration. Preclose During the Preclose portion of System Close, the System Master accumulates totals from a range of workstations. While totals from this range of workstation are being reset, the other workstations on your system remain operational. The following programming options affect Preclose.
Flag 221 - Use Options E-H to define the range of workstations involved in Preclose. If, for example, you enter 0103, Preclose will reset workstations 1-3 and store the totals from these workstations in the System Master.
Flag 254 - Use this flag to specify which days of the week use the 24-hour (Preclose and
Close) Closing procedure. If, for example, you use the 24-hour close every day of the week, you would enter 771 in Options F-H. If you only use the 24-hour close on weekdays (Monday-Friday) you would enter 730 in Options F-H. In this last example, the 24-hour close would be performed in two stages Monday through Friday, and would revert to the normal System Close procedure on Saturday and Sunday.
Flag 303 - Use option A to specify a pause after Preclose and before Postclose when running
an End of Day from the SMP PC. If set, you must press CASH at the Master workstation to continue the End of Day after Preclose finishes.
SW2 - As with the normal System Close, the 24-hour Close must be initiated at the
System Master. Dip Switch 2 (SW2 on the workstation CPU board) must be ON. 1. Enter 100 CASH to begin System Close. The system checks Flag 254 to see if the current day uses
the 24-hour close. If it does, the Preclose portion of System Close begins. If it is not a 24-hour close day, the normal System Close begins.
2. The system checks Flag 221 to see which range of workstations are reset during the Preclose.
During Preclose, the workstations defined in the Flag 221 range must be idle. Workstations not included in the Flag 221 range remain operational until the Close portion of System Close begins.
3. If Pending Order Detection is enabled in Flag 131, the system verifies that orders at the Preclose
workstations are closed. If it detects an open order, Preclose stops. If Pending Order Detection is disabled, the system performs Preclose even if there are open orders.

Appendix A
Panasonic 5500 Series Programming Instructions – Version LQ3.5 5-9
Communication Options The following communication definitions must be set before you can begin System Open.
Flag 239 - Make sure the TCP/IP Address (Workstation #) is set at each workstation. Flag 226 - Beginning and Ending workstation numbers must be defined. Flag 227 - Make sure Options A-D = 1020 (1020-xxxx).
Procedure Options When you start System Open with the 200 CASH command, the system goes through the following steps. There are few program options that affect System Open; in most cases your choices are listed on-screen. Exceptions are noted. 1. The system checks communication to all workstations in the range you defined in Flag 226. This
communication test is primarily done to allow you to see whether an error existed when you performed System Close. If an error is detected, and it can be corrected, you should rerun the System Close to make sure it includes totals from all workstations.
Flag 303
Option H: 2 = Allow the End of Day command from the SMP PC even when open orders exist at a workstation. If set, you cannot close open orders until the End of Day finishes. (If the order is open at the Master workstation, you must close the order when the End of Day finishes; then run another End of Day before you attempt a Start of Day. A second End of Day is not required if the open order is at a Basic workstation; the new order will be considered part of the next day's business.) If used, Flag 115A, Option 1 must also be set.
Note: If an order is open when the SMP PC tries to send a host-activated macro, the
command is stored until the order finalizes. This feature is not under flag control.
You can perform a downlining command from the SMP PC even while the workstation has an open order. This feature is not under flag control.
2. The system prompts for inventory adjustments under the following conditions.
Program 21 - If ingredients are not allocated in the Memory Map, the inventory screens are bypassed in System Open. If ingredients are allocated in P21, you have the option to enter adjustments, if necessary.
3. The system prompts you to select print options for this System Open. You can print all reports as
you reset them. Or you can reset all of the reports without print. The System Open reports should be identical to the System Close reports. The reports reset in the following order.
Register Report Manager Reports PLU Report Product Mix Reports Coupon Report Time Reports Group Report Inventory Report Cashier Reports Station Totals

Appendix A
5-10 Panasonic 5500 Series Programming Instructions – Version LQ3.5
Note: If you have set the option to reset daily timekeeping totals (Flag 251), the Timekeeping Report will also be reset during System Open.
4. After a successful System Open, all daily totals will be reset in all workstations. As the reports are reset, their totals update the Z2 reports in the System Master. The sales counters of the Product Mix groups are also transferred to the Projection file.
5. The system logs off any cashiers and managers active at the Preclose range of workstations. 6. The system next resets all report totals from the Preclose workstations. As the totals reset, they are
consolidated into the System Master. Because at this point you are only addressing a portion of the system, the reports do not print.
7. As soon as the totals are stored in the System Master, Preclose ends. At this point, Preclose
workstations become operational. The restaurant should begin using these workstations and stop using the workstations that are not yet closed.
Close When Preclose is complete, press the CASH key to start the final part of System Close. The Close or "Postclose" portion of the 24-hour close resets remaining Basic workstations on your system. For example, if you have a total of six workstations and Preclose resets workstations 1-3, the following steps will apply to workstations 4-6.
Note: If you perform an End of Day at the MWS PC, Flag 303 decides if the CASH key is required at the System Master workstation after Preclose finishes.
1. If you enabled Pending Order Detection in Flag 131, the system checks the remaining workstations for open orders. If it finds open orders, Close will pause. If you disabled Pending Order Detection, the Close portion of the 24-hour close will continue whether or not unfinalized orders exist.
2. The system prompts for Deposit entries, depending upon your entry in Flag 240 and 106. Flag 240
sets whether or not deposits can be entered during System Close. Flag 106 specifies deposit entry requirement during System Close.
3. If you allocated ingredients in the P21 Memory Map, the system prompts for inventory entries. If
you are not using inventory functions (and did not allocate ingredients), the system bypasses this step.
4. If you are using Time & Attendance functions, the system displays timekeeping options. You can
edit employee hours or bypass the screen. If you did not allocate employees in Memory Allocation, the system bypasses this step.
5. The system resets totals of all remaining workstations that have not reset during Preclose. It then
consolidates the totals into the System Master. The system prints all of the reports, these reports are the final, consolidated account of the day's activity.
6. When the report print is finished, the consolidated totals remain in the System Master until you
reset them with the System Open procedure. If it follows a 24-hour close, System Open bypasses the communication status check.

Appendix A
Panasonic 5500 Series Programming Instructions – Version LQ3.5 5-11
Mix & Match
The Mix & Match function helps you handle special pricing for items sold individually and as part of a quantity, such as a half-dozen or a dozen. For example, if a single pretzel sells for $1.99, but three pretzels sell for $2.99, you can set up a Mix & Match table to handle the 3-pack pricing. If the customer purchases one or two pretzels, the system charges the single price ($1.99 each) when you press the Mix&Match key; if the customer purchases three pretzels, the system charges the 3-pack price ($2.99).
Note: When Mix & Match is enabled, the Promo function is not available. Also, combo coupons cannot be used for items registered as part of a Mix & Match package.
Programming Considerations Use the following programs to set up the Mix & Match function. Key Codes Code 68: Mix&Match. This key checks the registered order to see if the requirements of the Mix &
Match table have been satisfied. If the customer's order satisfies the requirements, the special pricing is registered.
Code 69: Mix&Match Clear. This key is an "undo" key for the Mix & Match function. It removes
the special pricing registered by the Mix&Match key. You must press Mix&Match Clear before you attempt to void an item registered with a Mix&Match price reduction.
Report Codes Code 131: All Mix & Match (Sum). Provides a summary count and total of all Mix & Match items. Code 601-694: Totals for Mix & Match Table #1 through Mix & Match Table #94. (The descriptors for
these totals are taken from your P52 programming.) P21 - Memory Allocation Address 125: Enter the number of Mix & Match tables you are using for the application. You can
allocate up to 94 tables.

Appendix A
5-12 Panasonic 5500 Series Programming Instructions – Version LQ3.5
P24 - System Flags Use Flag 153 to select options for the Mix & Match function. Flag 153: A: 1= Display the Countdown quantity at the bottom of REG Mode screens. The "countdown" shows
how many items must be registered before the Mix & Match quantity requirement is met. If enabled, the countdown quantity replaces the PLU Shift level that normally displays at the bottom of the REG Mode screen.
Note: If you enable the countdown, Table #1 must define counted items; it cannot be used
for normal table entries. 2= Do not display the "Non-Eligible" message when Mix & Match requirements are not met
within the order. If you use Mix & Match within a macro, you may want set this option so that the cashier will not have to press Clear to erase the error message.
B: 1= Enable Mix & Match functions. [If this option is set, Promo is not available.] 2= Require the MIX&MATCH key before Subtotal and display the "Do Mix/Match" message. 4= Require the MIX&MATCH key again if the MIX&MATCH CLEAR key is pressed before Subtotal. P25 - System Descriptors Address 431: MPLU Address 631: M&MPLU'S P30 - Prompts Error Messages Address 207: DO MIX/MATCH Address 103: NON-ELIGIBLE. (This is an existing message.) P52 Mix & Match Program Use Program 52 to define options for the Mix & Match tables you are using. This program defines the following information for the Mix & Match function.

Appendix A
Panasonic 5500 Series Programming Instructions – Version LQ3.5 5-13
Table #: Enter the table number (1-94, depending upon your Memory Allocation). Note: If you enable the countdown quantity in Flag 153, Table #1 cannot be used for
normal Mix & Match table entries. Instead use it to list all items considered for the countdown.
Name: Enter the 8-character table name. Price: Enter the price registered when the customer purchases all requirements of this table. Stat/Qty:
A: 1= Require the PLU listed in the Link 1 field. If the order does not include the Link 1 PLU, the Mix & Match search stops for this table.
2= Allow Discount Subtotal (DCTL) Discounts to be applied to the special price registered. 4= Count the item in the Link 1 field only one time per Mix/Match search for this table.
(Option A, value 1 must also be set.) For example, you can use this option if Link 1 lists a dozen doughnuts, and you want that item to be counted only once per search for this Mix & Match table. (If the item is registered twice, it will be counted only once for this table.)
B: 1= Update Tax 1. 2= Update Tax 2. 4= Update Tax 3. C-D: Enter the 2-digit quantity required for the special price. Enter 00 if the pricing is based on
the specific items in the Link fields, rather than on a defined quantity; if you enter 00, all items in the Link fields must be registered to satisfy the pricing requirements.
Link 1~15: List items that qualify for the Mix & Match table. For example, if the table can be made
up of any combination of doughnuts, list the PLU number of each eligible doughnut. If you have more than fifteen doughnuts, use one of the wild card search options.
Wild Card Search 1~15: Use these fields to identify a range of PLUs to be considered for the Mix & Match search.
You can search for a range of PLU numbers or for PLUs linked to a particular subgroup. If you select a 2-digit wild card search and enter PLU #100 in the Link field, the system
will search for PLU numbers 101-199; all items within that range qualify for the special pricing. If you select a select a 3-digit wild card search and enter PLU #100 in the Link field, the system will search for PLU numbers 1- 999. Any items within that range qualify for the special pricing. If you select the subgroup search and enter Subgroup #10 in the Link field, the system will search for PLUs linked to Subgroup #10. Items linked to subgroup ten qualify for the special pricing.

Appendix A
5-14 Panasonic 5500 Series Programming Instructions – Version LQ3.5
Global Bumping
If your system has more than one KVS monitor, you may be able to use the global bumping feature. This feature allows a bump bar to interact with multiple screens for Fill and Clear operations. For example, if you have four screens, you can set Bump Bar 1 to perform Fill and Clear at CRT #1, CRT #2, CRT #3, and/or CRT #4. Global Bumping is available with the following rules:
Screens that share a bump bar must also share a KVS controller.
Screens that share a bump bar must have identical KVS modes and P59-6 status options.
Global bumping is available for RCRT 8, RCRT 4, and RCRT Split Screen modes. (You cannot use it for Park/Serve, KPS, or Product Comparison modes.)
Global bumping concerns Fill and Clear operations only. Other functions, such as Look or Recall,
are controlled by the bump bar associated with the screen. For example, at CRT #1, the Look function can be performed only with Bump Bar 1.
Programming Considerations Use the following programs to enable Global Bumping. P24 - Miscellaneous Flags Flag 310: Use this flag to set global bumping options for Bump Bars 1-4. Enter values for each bump
bar that will operate multiple screens. For example, if Bump Bar 1 should control Fill and Clear operations at CRT 1-4, enter 1 for Option G and 6 for Option H.
Flag 311: If you are using Global Bumping, you must identify the controller where the bump bars are
connected. Also use this flag to set global bumping options for Bump Bars 5 and 6. P59-6 - KVS Programs Modes Global Bumping is available for RCRT 8, RCRT 4, and RCRT Split Screen modes. The
modes must be identical for all CRT screens using the Global Bumping option. For example, if you are using the feature at CRT screens 1-4, all four screens must be set to RCRT 8 mode, RCRT 4 mode, or RCRT Split Screen mode.
Status The P59-6 Status options must be the same for all screens using the global bumping feature.

Appendix A
Panasonic 5500 Series Programming Instructions – Version LQ3.5 5-15
The following example shows an application where the restaurant has two KVS screens used for preparation and two KVS screens used for assembly. In this example, Bump Bar 1 is set to perform Fill & Clear operations at all four screens--at both Assembly screens and at both Preparation screens. Bump Bar 2 is set to perform Fill & Clear operations at all four screens. Bump Bar 3 controls Fill & Clear operations at the two Preparation screens. Bump Bar 4 controls Fill & Clear operations at both Preparation screens.
With this set-up, a person working in the preparation area can use either Bump Bar 3 or Bump Bar 4 to mark the order they are preparing. (The Fill key highlights the order on both of the preparation screens, so everyone is aware the order is being prepared.) When preparation is complete, this person can use either bump bar to clear the order from both preparation screens at once. At this point, the order is cleared from both preparation screens, but it remains on the two Assembly screens.
Note:The FILL key is used for RCRT 8 and RCRT 4 modes, but not for RCRT Split Screen mode.
If a person working in the Assembly area prepares an order, they can use Bump Bar 1 or Bump Bar 2 to mark the order . (The Fill key highlights the order on all four screens, so everyone--at all stations-- can see the order is being prepared.) When preparation is complete, the person can use either Bump Bar 1 or Bump Bar 2 to clear the order from all screens.

Appendix A
5-16 Panasonic 5500 Series Programming Instructions – Version LQ3.5
Deposit & Cash Report (DCR)
The DCR is an optional report that can be set to print at the end of System Close. The following guidelines outline the requirements for the DCR. P21 Report Totals DCR totals are based on your selections in P21. You can select up to twenty totals from the Report Total Code Chart (see Section 3). Or you can create custom Calculation Totals.
Note: Report Total Code 25 (Gross Sales) must be allocated to the report.
P24 - System & Miscellaneous Flags Use Miscellaneous Flag 240 to define options for your DCR, as shown below. Flag 240: Option H decides whether or not the DCR prints at System Close. If you enter a value > 1,
the DCR prints. If you need multiple copies of the report, you can enter up to 9 (for nine copies of the report). If you enter 0, the report does not print.
Flag 240: Use Option D to determine whether the report prints only active totals or all totals. Flag 106: Flag 106, Option B, should be set to prompt for Deposit entries at System Close. P30 - Messages & Error Prompts You have the option to print the Restaurant I.D. on the DCR. If you enter a number in P30, Address 198, the Restaurant I.D. prints at the top of the DCR Report. Over/Short Calculation The Over/Short calculation is derived from the difference between the last total you list on the DCR Report and the DCR Deposit Total. As a result, your last total should be the restaurant equivalent of a Net Sales total. For example, if your last DCR total is at Address 117, the system uses the following calculations:
Over = P21, DCR Address 117 - Deposit Total < 0. Short = P21, DCR Address 117 - Deposit Total > 0.
If Address 117 = NSTL, which for the day is $2500.00, and daily deposits total $2450, Over/Short is calculated as follows: $2500.00 - 2450.00 = Short $50.00. If the daily deposit was $2505.00, you would be "over" for the day: $2500.00 - 2505.00 = Over $5.00.

Appendix A
Panasonic 5500 Series Programming Instructions – Version LQ3.5 5-17
DCR Appearance & Description The first twenty totals on your DCR depend upon your entries for the DCR Report in Program 21. The Deposit and Over/Short totals are fixed; they automatically appear for all DCR Reports. The following example shows the default DCR Report. The P21 DCR Report Addresses are noted, as are the Report Codes and Calculation Totals (CT) used for the default.
Note: The Over/Short on this report is based on DCR totals and is calculated independently from the Register and Cashier Report Over/Short totals.

Appendix A
5-18 Panasonic 5500 Series Programming Instructions – Version LQ3.5
Inventory Count Reset
Because the 5500 System maintains a perpetual inventory, you cannot reset counts with the normal System Open and Close procedures. Under normal circumstances, you should not need to reset inventory counts to zero. Simply make daily adjustments as the counts increase or decrease. Use the following procedure if, at some point, you must reset all counts to zero. You might use these steps, for example, after initial set-up and testing to return inventory to a zero starting point. Resetting Daily Inventory You can manually reset daily inventory counts during the System Open or System Close. For each ingredient, select the Actual Inventory option and enter '0' for the actual inventory count. No further key entries are required. After you have entered zero for the actual inventory, the System Open report will automatically reset all data (including the PLU Reports, which would normally update inventory totals). Resetting Period-To-Date Inventory Additional steps are required if you want to reset period-to-date inventory counts. For this procedure you must reset the PLU files in a specific sequence, or your inventory counts will not be accurate. To reset all inventory counts, first follow the procedure for resetting daily inventory. Then, to reset your period-to-date counts, carefully follow the steps below.
1. Take a Z2 Inventory Report. Do not enter any updates or counts at this point.
2. Take a Z2 PLU Report.
3. Take a second Z2 Inventory Report. For each ingredient, enter '0' for the Actual Inventory.

Panasonic 5500 Series Programming Instructions – Version LQ3.5 6-1
Appendix B
Cabling Pin-outs
Use the following pin-outs for cable connection to RS-232C Channel 1 (CH1), Channel 2 (CH2), and Channel 3 (CH3), as needed.
Panpoll Cable
Notes: RS-232C Channel 1 (CH1) and Channel 2 (CH2) are available for Panpoll connections.
Set the jumper to CI (vs. DSR) to enable Panpoll communications via RS-232C. Set Jumper 204 for CH1 connections; set Jumper 203 for CH2 connections.

Appendix B
6-2 Panasonic 5500 Series Programming Instructions – Version LQ3.5
Panpoll Cable (Modem)
Notes: RS-232C Channel 1 (CH1) and Channel 2 (CH2) are available for Panpoll connections.
Set the jumper to CI (vs. DSR) to enable Panpoll communications via RS-232C.
Set Jumper 204 for CH1 connections; set Jumper 203 for CH2 connections.

Appendix B
Panasonic 5500 Series Programming Instructions – Version LQ3.5 6-3
Printer Cable
Notes: RS-232C Channels 1-4 (CH1-CH4) can be used for Direct Printers. Set the Jumper to DSR (vs. CI) for Direct Printer connections.

Appendix B
6-4 Panasonic 5500 Series Programming Instructions – Version LQ3.5
JS-800TP Printer Cable
Notes: RS-232C Channels 1-4 (CH1-CH4) can be used for the JS-800TP connection. Set the Jumper to DSR (vs. CI) for Direct Printer connections.

Appendix B
Panasonic 5500 Series Programming Instructions – Version LQ3.5 6-5
Coin Dispenser
Notes: RS-232C Channels 1-4 (CH1-CH4) can be used for Coin Dispensers. Set the Jumper to DSR (vs. CI) for Coin Dispenser connections.

Appendix B
6-6 Panasonic 5500 Series Programming Instructions – Version LQ3.5
Coin Dispenser (Telequip)
Notes: RS-232C Channels 1-4 (CH1-CH4) can be used for Coin Dispensers. Set the Jumper to DSR (vs. CI) for Coin Dispenser connections.

Appendix B
Panasonic 5500 Series Programming Instructions – Version LQ3.5 6-7
Scale
Workstation (9 pin male)
Scale (9 pin female)
1 FG
GND 5
2 RxD
TxD 3
3 TxD
RxD 9
4 DTR
5 SG
SG 1
6 DSR
DTR 4
7 RTS
DSR 6
8 CTS
RTS 7
9 NC
CTS 8
Notes: RS-232C Channels 1-4 (CH1-CH4) can be used for the Scale.
Set the Jumper to DSR (vs. CI) for this connection.

Appendix B
6-8 Panasonic 5500 Series Programming Instructions – Version LQ3.5
Mondex Device
Workstation (9 pin male)
Mondex (8 pin)
1 FG
2 RxD
TxD 7
3 TxD
RxD 1
4 DTR
5 SG
GND 4
6 DSR
7 RTS
8 CTS
9 NC
Notes: RS-232C Channels 1-4 (CH1-CH4) can be used for the Mondex Device. Set the Jumper to DSR (vs. CI) for this connection.

Appendix B
Panasonic 5500 Series Programming Instructions – Version LQ3.5 6-9
After-Sales Service
For Customer Service and Support, Product Information, Operating Assistance, and Additional Purchases, please contact your local Panasonic POS dealer.


Panasonic 5500 Series Programming Instructions – Version LQ3.5 6-1
Panasonic Digital Communications & Security Company A Unit of Matsushita Electric Corporation of America
1707 North Randall Road Elgin, Illinois 60123-7847
Printed in the United States of America
© 2003, 2004 Matsushita Electric Industrial Co., Ltd.
PG5500LQ35 0200-6054