knee replacement patient guide
TRANSCRIPT

Knee Replacement Patient Guide
(562) 933-4014 memorialcare.org/LBJointReplacement
Luke Sayer, 64 Racing motocross competitively two months Post partial knee replacement surgery

2
Table of Contents
Section One: General Information
How to use this guidebook
What the program is all about
Who is on your team
Things you need to know during the next six weeks
Section Two: Before Surgery
Signing up for Joint Class
Making appointments for medical tests and labs Getting cleared for surgery by your medical doctor
Stop smoking Consider writing an Advanced Directive
Stopping medications that may increase bleeding
Section Three: Getting Ready for Surgery
Exercising to strengthen your body before surgery Pre-operative class
Having a “coach” Getting your home ready for your return
Breathing exercises Things to bring to the hospital
Your personal medication list
Things to accomplish four weeks before surgery What to do ten days before surgery
What to do two days before surgery What to do the day before surgery
What to do the night before surgery
Section Four: At the Hospital
What to expect on the day of surgery Understanding pain and how to manage it
What happens during your three-day stay in the hospital Preparing for discharge

3
Table of Contents (Continued)
Section Five: Living With Your Joint Replacement
Caring for yourself at home
Recognizing and preventing potential complications
Post operative exercises and goals
Precautions and home safety tips
Dos and don’ts for the rest of your life
Section Six: Helpful Resources
Understanding anesthesia Blood thinners
Daily Schedule of physical therapy during your hospital stay View of a healthy knee
Importance of lifetime follow-ups with your doctor Exercise instructions; pre-operative and advanced
Frequently asked questions

4
Section One
General Information:
What you will learn in this section:
How to use this guidebook
What the program is all about
Who is on your team Things you need to know during the next six weeks
5
Welcome to the Joint Replacement Center
We are pleased that you have chosen MemorialCare Joint Replacement Center at Long Beach Medical Center. Your decision to have elective joint replacement surgery is the first step towards a healthier lifestyle. Each year, more than 700,000 people make the decision to undergo joint replacement surgery. The surgery aims to relieve your pain, restore your independence and return you to work and other daily activities. The program is designed to return you to an active lifestyle as quickly as possible. Most patients will be able to walk the first day after surgery and move towards normal activity in six to twelve weeks. The Joint Replacement Center has implemented a comprehensive planned course of treatment. We believe that you play a key role in promoting a successful recovery. Our goal is to involve you in your treatment through each step of the program. This guide will give you the necessary information to promote a more successful surgical outcome. Your team includes physicians, physician assistants, patient care assistants, nurses, orthopedic technicians and physical and occupational therapists specializing in total joint care. Every detail, from pre-operative teaching to post-operative exercising, is considered and reviewed with you. The joint care coordinator will plan your individual treatment program and act as your guide.
Purpose of the Guidebook
Preparation, education, continuity of care and a pre-planned discharge are essential for optimum results in joint surgery. Communication is essential to this process. This guidebook is a communication tool for patients, physicians, physical and occupational therapists and nurses. It is designed to educate you so that you know:
What to expect every step of the way
What you need to do How to care for your new joint
Remember, this is just a guide. Your physician, physician assistant, nurses or therapist may add to or change any of the recommendations. Always use their recommendations first and ask questions if you are unsure of any information. Keep your guidebook as a handy reference for at least the first year after your surgery. The information in the guidebook covers a lot of information, so it may look overwhelming. Since it will assist you with your surgery, we recommend reading the entire guide at a pace that suits you.

6
Overview of the Joint Replacement Center
We offer a unique program. Each step is designed to encourage the best results leading to a discharge from the hospital three days after surgery. Features of the program include:
Dedicated nurses and therapists trained to work with joint patients.
Casual clothes (no drafty gowns).
Your own private rooms on a dedicated unit.
Group physical therapy twice per day. Family/friend participating as a “coach” in your recovery process.
A joint care coordinator who organizes preoperative care and discharge planning. A comprehensive patient guide.
Reunion luncheons for former patients and coaches twice yearly.

7
Your Joint Replacement Team
Orthopedic Surgeon
The orthopedic surgeon is the skilled physician who will perform the procedure to repair your damaged joint.
Registered Nurse (RN)
Much of your care will be provided by a nurse responsible for your daily care. Your nurse will assure orders given by your physician are completed, including medications and monitoring your vital signs.
Physical Therapist (PT) The physical therapist will work on your functional mobility skills and teach exercises designed for strength and motion. They will instruct you in safe transfer techniques, walking with an assistive device and stair training.
Occupational Therapist (OT)
The occupational therapist will guide you in performing daily tasks, such as bathing and dressing with your new joint. They may demonstrate special equipment used in your home after you receive your replacement, including shower benches, grab bars, rails and raised toilets.
Joint Care Coordinator (JCC)
The joint care coordinator will be responsible for your care needs from the from the surgeon’s office, to the hospital and home. The joint care coordinator will:
Obtain your health database
Review what you’ll need at home after your surgery, including support if required Assess and plan for your specific care needs, such as anesthesia and medical clearance for surgery
Coordinate your discharge plan when you go home or to a facility with additional support Act as your advocate throughout the course of treatment from surgery to discharge
Answer questions and coordinate your hospital care with the Joint Replacement Center’s team members

8
Section Two
Before Surgery
What you will learn in this section:
Signing up for Joint Class
Making appointments for medical tests and labs
Getting cleared for surgery by your medical doctor Stop smoking
Consider writing an Advanced Directive
Stopping medications that may increase bleeding

9
Six Weeks Before Surgery
Steps Before Surgery
After your surgeon's office has scheduled you for joint surgery, you will be contacted by a member of the Joint Care Team to:
Verify your schedule for the pre-operative joint class, your appointments for medical testing and your preadmission appointment.
Act as a liaison for coordination of your preoperative care between your surgeon’s office, the hospital and the testing facilities, if necessary
Verify that you have made an appointment, if necessary, with your medical doctor and have obtained the preoperative tests your doctor has ordered
Answer questions and direct you to specific resources within the hospital
You may call the joint care coordinator at (562) 933-4014 to ask questions or raise concerns about your pending surgery. Obtain medical clearance When you were scheduled for surgery, you should have received a medical clearance letter from your surgeon, to provide to your primary care physician and/or specialist, such as a cardiologist. Please follow the instructions in the letter. If you need to see your primary care doctor, it will be for preoperative medical clearance. This is in addition to seeing your surgeon preoperatively. Obtain laboratory tests When you were scheduled for surgery, you should have received a laboratory-testing letter from your surgeon. Follow the instructions in this letter. The joint care coordinator may order additional testing. Stop medications that increase bleeding Discontinue all anti-inflammatory medications such as aspirin, Motrin, Naproxen, Vitamin E, etc. These medications may cause increased bleeding. If you are taking a blood thinner, you will need instructions for stopping the medication prior to surgery, either from your surgeon or the doctor who prescribes this medication to you. Examples of herbal medicines, include but are not limited to: echinacea, ginkgo, ginseng, ginger, licorice, garlic, valerian, St. John’s wort, ephedra, goldenseal, feverfew, saw palmetto and kava-kava.

10
Patient Calendar: The Next Six Weeks Before Surgery
MONDAY TUESDAY WEDNESDAY THURSDAY FRIDAY
Week 6
Week 5
Week 4
Week 3
Week 2
Week 1
Plan for Leaving the Hospital Understanding your plan for discharge is an important task in the recovery process. You can expect help from your joint care coordinator to develop a plan that meets your particular needs. Many patients should expect to be able to go directly home, as it is usually best to recover in the privacy and comfort of your own surroundings.

11
Consider an Advance Directive
Put Your Health Care Decisions in Writing
It is our policy to place patients' wishes and individual considerations at the forefront of their care and to respect and uphold those wishes. What are Advance Medical Directives? Advance Directives are a means of communicating to all caregivers the patient's wishes regarding health care. If a patient has a Living Will or has appointed a Health Care Agent and is no longer able to express his or her wishes to the physician, family or hospital staff, the medical center is committed to honoring the wishes of the patient as they are documented at the time the patient was able to make that determination. There are different types of Advance Directives and you may wish to consult your attorney concerning the legal implications of each.
Living Wills are written instructions that explain your wishes for health care if you have a terminal condition or irreversible coma and are unable to communicate.
Appointment of a Health Care Agent (sometimes called a Medical Power of Attorney) is a document that lets you name a person (your agent) to make medical decisions for you, if you become unable to do so.
Health Care Instructions are your specific choices regarding use of life sustaining equipment, hydration, nutrition and use of pain medications.
During your preadmission appointment you will be asked if you have an Advance Directive. If you do, please provide copies of the documents to the hospital so they can become a part of your Medical Record. Advance Directives are not a requirement for hospital admission. In your admission packet you will find “The Five Wishes,” an advance directive form for your convenience.

12
Stop Smoking
It is essential to stop smoking before surgery. Smoking impairs oxygen circulation to your healing joint. Oxygen circulation is vital to the healing process.
Smoking Cessation
Smoking delays your healing process. Smoking reduces the size of your blood vessels and decreases the amount of oxygen circulated in your blood. Smoking can also increase clotting which can cause problems with your heart. Smoking increases your blood pressure and heart rate. If you quit smoking before you have surgery, you will increase your ability to heal. If you need help quitting, ask about hospital resources. Tips to aid quitting:
Decide to quit
Choose the date Cut down the amount you smoke by limiting the area where you can smoke.
Give yourself a reward for each day without cigarettes. When you are ready:
Throw away all your cigarettes.
Throw away all your ashtrays. Don’t smoke in your home.
Don’t put yourself in situations where others smoke, such as bars and parties. Remind yourself that this can be done—be positive.
Take it one day at a time—if you slip—just get right back to your decision to quit.
If you need to, consider aids to quit, such as over the counter products, like chewing gum or prescription aids (patches are an example)—check with your doctor.

13
Section Three
Getting Ready for Surgery
What you will learn in this section:
Exercising to strengthen your body before surgery
Pre-operative class
Having a “coach” Getting your home ready for your return
Breathing exercises
Things to bring to the hospital
Your personal medication list Things to accomplish four weeks before surgery
What to do ten days before surgery What to do two days before surgery
What to do the day before surgery What to do the night before surgery

14
Preoperative Exercises to Strengthen Your Body
Many patients with arthritis favor the painful leg. As a result, the muscles can become up to 30% weaker. It is very important to begin an exercise program before surgery as you will learn the exercises at the optimal time and initiate the work toward improving strength and flexibility. Knowing and performing exercises before surgery can make them easier to do after surgery.
Preoperative Exercises, Goals and Activity Guidelines
It is important to be as flexible and strong as possible before undergoing a total knee replacement. Always consult your physician before starting a preoperative exercise plan. Eleven basic exercises are outlined and your physician may instruct you to start doing these now and continue until surgery. You should be able to do them in 15 - 20 minutes and it is typically recommended that you do all of them twice a day. Consider this a minimum amount of “training” prior to your surgery. Remember that you need to strengthen your entire body, not just your leg. It is very important that you strengthen your arms by doing chair push-ups (exercise #9) because after surgery you will be relying on your arms to support you when walking with a walker or crutches and performing other daily activities. You should also exercise you heart and lungs by performing light endurance activities—for example, walking for 10 - 15 minutes each day. DO NOT do any exercise that is too painful for you to tolerate. Preoperative knee exercises (see exercise section for instructions)
Ankle pumps Quad sets
Gluteal sets Abduction and adduction
Heel-slides Short arc quads
Hamstring stretch with strap optional Straight leg raise
Armchair push-ups
Knee extension stretch Standing heel/toe raises

15
Pre-operative Class/Getting Your Home Ready
Register for Preoperative Class
A special class is held weekly for patients scheduled for joint surgery. You should plan to attend a class prior to your surgery. You will only need to attend one class. Members of the team will be there to answer your questions. It is strongly suggested that you bring a family member or friend to act as your "coach” (someone who will be with you in the hospital and/or at home). The outline of the class is as follows:
Joint disease The role of your "coach"/caregiver
Meet some members of the Joint Replacement Team Tour the Joint Replacement Center
Learn your breathing exercises Reviewing your preoperative exercises
Learn about assistive devices Discharge planning goals
Prepare Your Home for Your Return from the Hospital It is important to have your house ready for your arrival back home.
Use this checklist as your guide:
Put things that you use often (like an iron or coffee pot) on a shelf or surface that is easy to reach
Check or install hand railings on stairs—inside and outside
Clean, do the laundry and put it away Put clean linens on the bed
Prepare meals and freeze them in single serving containers Cut the grass, tend to the garden and finish any other yard work
Pick up throw rugs and tack down loose carpeting Remove electrical cords and other obstructions from walkways
Install night-lights in bathrooms, bedrooms and hallways
Install grab bars in the shower/bathtub Put adhesive slip strips in the bottom of the tub
Arrange to have someone collect your mail and take care of pets

16
Breathing Exercises/What to Bring
Breathing Exercises To prevent potential problems such as pneumonia, it is important to understand and practice breathing exercises. Deep breathing To help you deep breathe, you must use the muscles of your abdomen. To deep breathe:
Breathe in through your nose as deep as you can, fully expanding your chest. Let your breath out slowly and completely through your mouth.
Breathe out as if you were blowing out a candle (this is called “pursed lip breathing”)—if you do this correctly, you should notice your stomach going in.
Take a break then repeat the exercise 10 times.
Coughing To help you cough:
Take a slow deep breath, breathe in through your nose and concentrate on filling your lungs completely, fully expanding your chest
Breathe out through your mouth and concentrate on your chest emptying completely Repeat with another breath in the same way
Take another breath but hold your breath then cough hard—focus on emptying your lungs Repeat all steps twice
What to Bring to the Hospital Bring personal hygiene items (toothbrush, powder, deodorant, razor, etc.), casual clothing (shorts and tops), well-fitted slippers with non-slip soles and flat shoes or tennis shoes to the hospital. If you have adaptive equipment such as a walker or reacher, you may have them brought to you after your surgery. You must bring the following to the hospital:
Your patient guidebook A copy of your advance directives
Any co-payment required by your insurance company Special instructions
You will be given specific instructions from your surgeon regarding medications, skin care and showering.
DO NOT take oral medication for diabetes on the day of surgery
Please leave jewelry, valuables and large amounts of money at home Makeup must be removed before your procedure
Nail polish may be left on

17
Your Personal Medicine List
Name: Family Physician:
Medication Name/Dosage Instructions Reason for Therapy Duration
What is the name of your medication? What is the
dosage?
What time(s) do you usually take this
medication?
Why are you taking this medication?
How long have you been taking this medication?

18
Your Personal Medicine List (Continued)
Name: Family Physician:
Medication Name/Dosage Instructions Reason for Therapy Duration
What is the name of your medication? What is the
dosage?
What time(s) do you usually take this
medication?
Why are you taking this medication?
How long have you been taking this medication?
19
Four Weeks Before Surgery
Four Weeks Before Surgery:
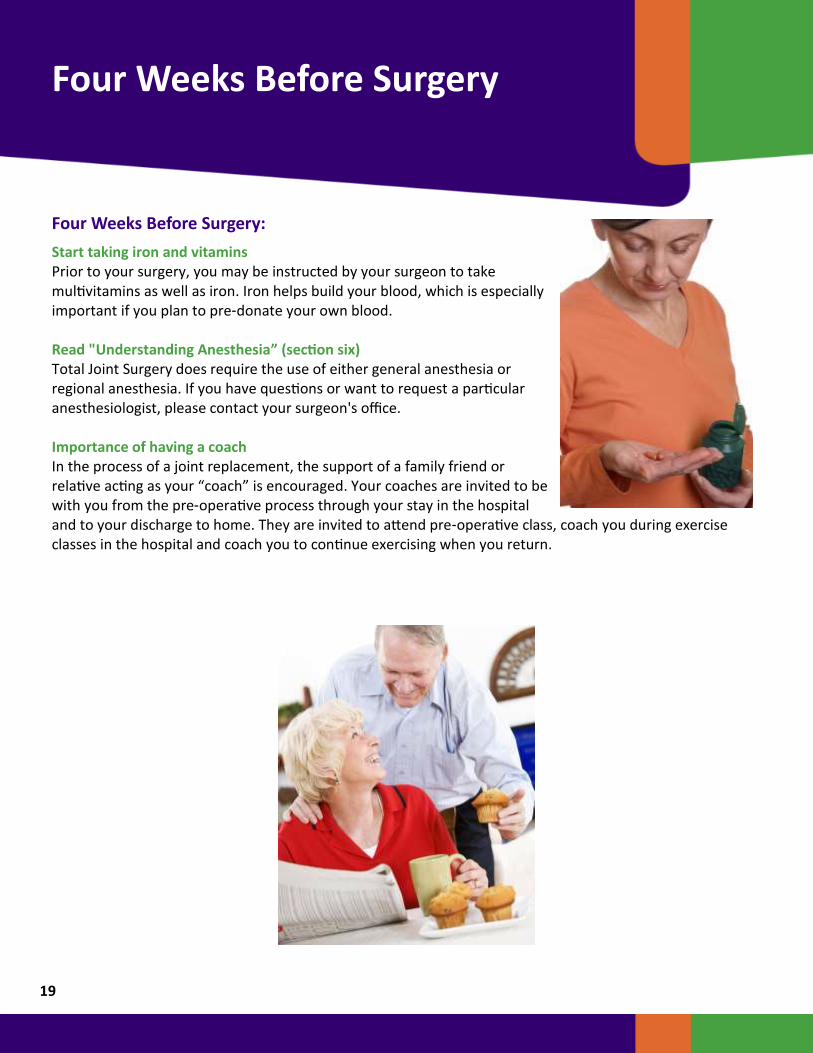
Start taking iron and vitamins Prior to your surgery, you may be instructed by your surgeon to take multivitamins as well as iron. Iron helps build your blood, which is especially important if you plan to pre-donate your own blood. Read "Understanding Anesthesia” (section six) Total Joint Surgery does require the use of either general anesthesia or regional anesthesia. If you have questions or want to request a particular anesthesiologist, please contact your surgeon's office. Importance of having a coach In the process of a joint replacement, the support of a family friend or relative acting as your “coach” is encouraged. Your coaches are invited to be with you from the pre-operative process through your stay in the hospital and to your discharge to home. They are invited to attend pre-operative class, coach you during exercise classes in the hospital and coach you to continue exercising when you return.

20
Days Before Surgery
Days Before Surgery
Ten days before surgery—preoperative visit to the surgeon You should have an appointment in your surgeon's office 7 - 10 days before surgery. Two days before surgery
Do not shave below the neck
Shower prep prior to surgery You will be given pre-packaged skin prep wipes and written instructions for use at the hospital during your pre admit appointment. Please follow the instructions.
Day Before Surgery
Find out your arrival time at the hospital Call your surgeon’s office the day before the surgery (or on Friday if your surgery is on Monday) to find out what time your procedure is scheduled. You will be asked to come to the hospital two hours before the scheduled surgery to give the nursing staff sufficient time to start IV's, prep, and answer questions. It is important that you arrive on time to the hospital.
Night Before Surgery
DO NOT eat or drink. Do not eat or drink anything after midnight, EVEN WATER, unless otherwise instructed to do so.

21
Section Four
At the Hospital
What you will learn in this section:
What to expect on the day of surgery
Understanding pain and how to manage it
What happens during your three-day stay in the hospital Preparing for discharge

22
The Day of Surgery
What to Expect On arrival, patients are prepared for surgery, including starting an IV and prepping your operative site. Your operating room nurse as well as your anesthesiologist will meet and interview you. You will be escorted to the operating room where you will see your surgeon or anesthesiologist. Following surgery, you will be taken to a recovery area where you will remain for two to four hours. During this time, pain control is established, your vital signs are monitored and an X-ray may be taken of your new joint. Dependent on the type of anesthesia used, you may experience blurred vision, a dry mouth or chills. The team will work to make you as comfortable as possible. You will then be taken to the Joint Replacement Center where a joint nurse will care for you. You may have your first physical therapy evaluation by sitting on the edge of bed with assistance of nursing. It is very important that you begin ankle pumps on this first day. This will decrease risk of blood clots from forming in your legs. You should also begin using your Incentive Spirometer and doing the deep breathing exercises that you learned in class.
Understanding Pain All patients have a right to have their pain managed. Pain will change throughout the recovery process. If you need more help with your pain management, talk to your nurse, the JCC or your doctor. Pain scale Using a number to rate your pain can help the Joint Team understand the severity of your pain and help them make the best decision to help manage it. Your role in pain management Using a pain scale to describe your pain will help the team understand your pain level. If “0” means you have no pain and “10” means you are in the worst pain possible, how would you rate your pain? With good communication about your pain, the team can make adjustments to make you more comfortable. Try to relax; when you are relaxed medication works better.

23
After Surgery
After Surgery—Day One
On day one after surgery, you can expect to freshen up, dress in your own clothes and be helped out of bed by 7 a.m. and seated in a recliner in your room. Your surgeon and physician's assistant (if applicable) will visit you. The physical therapist will assess your progress and get you walking with either crutches or a walker. Group therapy is at 9:30 - 10 a.m. and 1 - 2 p.m. Occupational therapy may begin, if needed. Your coach is encouraged to be present as much as possible. If you meet all your goals, you may be discharged this day.
After Surgery—Day Two
Same schedule as day one if you’re not discharged. If you are going directly home Please have someone arrange to pick you up. You will receive written discharge instructions concerning medications, physical therapy, activity, etc. Most patients going home will begin therapy at an outpatient physical therapy facility. If the case manager determines that home health services are needed, the hospital will arrange for these plans preoperatively for care at home. If You are Going to a Skilled Nursing Facility The decision to go home or to a skilled nursing facility will be made collectively by you, the Joint Care Coordinator, your surgeon, physical therapist and your insurance company. Every attempt will be made to have this decision finalized in advance but it may be delayed until the day of discharge. Transportation is by private auto, wheelchair van or ambulance. Your transfer papers will be completed by the nursing staff. Either your primary care physician or a physician from the skilled nursing facility will be caring for you in consultation with your surgeon. Upon discharge home, the skilled nursing facility staff will give you further instructions. Take this guidebook with you. Please remember that skilled nursing facility stays must be approved by your insurance company prior to payment. A patient's stay in a skilled nursing facility must be done in accordance with the guidelines established by Medicare. Although you may desire to go to a skilled nursing facility when you are discharged, your progress will be monitored by your insurance company while you are in the hospital. Upon evaluation of your progress, either you will meet the criteria for admission or your insurance company may recommend that you return home with other care arrangements. Therefore, it is important for you to make alternative plans preoperatively for care at home. In the event a skilled nursing facility is not approved by your insurance company, you can choose to go and pay privately. Please keep in mind that the majority of our patients do so well that they do not meet the guidelines to qualify for skilled nursing facility. Also, keep in mind that insurance companies do not become involved in social issues, such as lack of caregiver, animals, etc. These are issues you will have to address before admission.

24
Section Five
Living With Your Joint Replacement
What you will learn in this section:
Caring for yourself at home
Recognizing and preventing potential complications
Post operative exercises and goals Precautions and home safety tips
Dos and don’ts for the rest of your life

25
Postoperative Care
Caring For Yourself at Home
When you go home, there are a variety of things you need to know for your safety, recovery and comfort. Be comfortable
Take your pain medicine at least 30 minutes before physical therapy. Gradually wean yourself from prescription medication to a non-prescription pain reliever. You may
take two Extra-strength Tylenol® Analgesic in place of your prescription medication up to four times per day.
Change your position every 45 minutes. Use ice for pain control. Applying ice to your affected joint will decrease discomfort but do not use for
more than 15 minutes at a time. You can use it before and after your exercise program. A bag of frozen peas wrapped in a kitchen towel works well because the bag will easily match the shape of your knee. Mark the bag of peas and return them to the freezer so they can be used again later.
Body changes
Your appetite may be poor. Drink plenty of fluids to keep from getting dehydrated. Your desire for solid food will return.
You may have difficulty sleeping, which is normal. Do not sleep or nap too much during the day.
Your energy level may decrease for at least the first month.
Pain medication that contains narcotics promotes constipation.
Use stool softeners or laxatives, if necessary.
Blood clots and anticoagulants (blood thinners) You may be given a blood thinner to help avoid blood clots in your legs. Be sure to take medications as directed by your surgeon. See discharge blood thinner instructions (appendix). Compression stockings You will be asked to wear special stockings called T.E.D. hose. These stockings are used to help compress the veins in your legs. This helps to keep swelling down and helps reduce the chance for blood clots.
If swelling in the operative leg is bothersome, elevate the leg for short periods throughout the day. It is best to lie down and raise the leg above heart level.
Wear the stockings continuously, removing for one to two hours twice a day.
Notify your physician if you notice increased pain or swelling in either leg. Ask your surgeon when you can discontinue stockings.
You may shower when directed by your surgeon. Notify your surgeon if there is increased drainage, redness, pain, odor or heat around the incision.
Take your temperature if you feel hot, chilled or sick. Call your surgeon if it exceeds 101 F.

26
Postoperative Care (Continued)
Caring for Your Incision
Keep your incision dry.
You may shower when directed by your surgeon. Notify your surgeon if there is increased drainage, redness, pain, odor or heat around the incision.
Take your temperature if you feel hot, chilled or sick. Call your surgeon if it exceeds 101 F.
Dressing Change Procedure
Wash your hands.
Open all dressing change materials. Remove stocking and old dressing.
Inspect incision for the following: Increased redness
Increase in clear drainage Yellow/green drainage
Odor Surrounding skin is hot to touch
Pick up dressing material by one corner and layover incision. Be careful not to touch the inside of the dressing that will lie over the incision.
Tape dressing in place or if still wearing compression stocking, pull it up holding the dressing in place.

27
Recognizing & Preventing Complications
Infection
Signs of infection
Increased swelling and redness at incision site
Change in color or amount and odor of drainage
Increased pain in knee Fever greater than 101 F
Prevention of infection
Take proper care of your incision as explained.
Take prophylactic antibiotics when having dental work or other potentially contaminating procedures.
Notify your physician and dentist that you have a joint replacement.
Blood Clots in the Legs
Surgery may cause the blood to slow and coagulate in the veins of your legs, creating a blood clot. This is why you take blood thinners after surgery. If a clot occurs despite these measures, you may need to be admitted to the hospital to receive intravenous blood thinners. Signs of blood clots in legs
Swelling in thigh, calf or ankle that does not go down with elevation Pain, heat, and tenderness in calf, back of knee or groin area
NOTE: blood clots can form in either leg. To help prevent blood clots:
Perform ankle pumps.
Walk several times a day. Wear your compression stockings.
Take your blood thinners as directed.

28
Recognizing & Preventing Complications (Continued)
Pulmonary Embolus
An unrecognized blood clot could break away from the vein and travel to the lungs. This is an emergency and you should CALL 911 if suspected. Signs of a pulmonary embolus
Sudden chest pain Difficult and/or rapid breathing
Shortness of breath Sweating
Confusion
Prevention of pulmonary embolus
Prevent blood clot in legs Recognize if a blood clot forms in your leg and call your physician promptly

29
Postoperative Care Exercises and Goals
Activity Guidelines
Exercising is important to obtain the best results from total knee surgery. You will need to train daily with a home exercise program until your goals are reached. After each therapy session, ask your therapist to outline any changes to your program that will keep you moving toward the goals listed on the next few pages.
Weeks One and Two
After 3 - 4 days, you should be ready for discharge from the hospital. Most joint patients go directly home, but you may be advised to go to a skilled nursing facility as needed. During weeks one and two of your recovery, typical goals are to: Continue with walker or two crutches unless otherwise instructed Walk at least 300 feet with support of assistive device (ie: walker)
If you have them, go up and down a flight of stairs (12 - 14 steps) with a rail once a day Actively bend your knee at least 90 degrees
Straighten your knee completely Independently sponge bathe or shower (after staples are removed) and dress, using assistive
devices (ie: reacher) Gradually resume household tasks.
Do 20 minutes of home exercises twice a day, with or without the therapist, from the program given to you
Postoperative exercise plan (instructions in section six)
Ankle pumps
Quad sets Gluteal sets
Abduction and adduction
Heel slides Short and long arc quad
Hamstring stretch with strap (optional) Straight leg raise
Seated knee flexion Knee extension stretch
Standing heel/toe raises Advanced exercises are listed in the appendix section of your guidebook. Your physical therapist will give you additional exercises at the appropriate time.

30
Postoperative Care Exercises and Goals (Continued)
Weeks Two to Four
Week two to four you will gain more independence. Even if you are receiving outpatient therapy, you will need to be very faithful to your home exercise program to be able to achieve the best outcome. Your goals are to:
Achieve one to two week goals. Move from full support to a cane or single crutch as instructed by your therapist.
Walk at least one-quarter mile. If you have them, go up and down a flight of stairs (12-14 steps) more than once daily.
Bend your knee more than 90 degrees. Straighten your knee completely.
Independently shower and dress. Resume household tasks.
Do 20 minutes of home exercises twice a day with or without the therapist. If your surgical side is on the left leg, begin driving with permission from your surgeon.
Weeks Four to Six Week’s four to six you will see much more recovery to full independence. Your home exercise program will be even more important as you receive less supervised therapy. Your goals are to:
Achieve weeks one to four goals. Walk with a cane or single crutch.
Walk one quarter to one half mile. Begin progressing on stair from one foot at a time to regular stair climbing (foot over foot).
Actively bend knee 110 degrees.
Straighten your knee completely.
Drive a car with your surgeon’s permission.
Continue with home exercise program twice a day.
Weeks Six to Twelve During weeks six to twelve, you should be able to begin resuming all of your activities. Your goals for this time period are to:
Achieve weeks one to six goals. Walk with no cane or crutch and without a limp.
Climb and descend stairs in normal fashion (foot over foot).
Walk one-half to one mile.
Bend knee to 120 degrees. Improve strength to 80%.
Resume activities, including dancing, bowling and golf, as directed by your surgeon.

31
Home Safety Tips and Precautions
Lying in Bed—Keep Knee Straight
Lie in bed with pillow under your ankle. DO NOT put a pillow under your knee. Your knee should be kept as straight as possible. Place a small pillow under your ankle to assist in straightening, and relieving pressure to your heel.
Standing up from Chair
DO NOT pull up on the walker to stand! Sit in a chair with arm rests when possible.
Scoot to the front edge of the chair.
Push up with both hands on the armrests. If sitting in a chair without armrest, place one hand on the center of your walker while pushing off the side of the chair with the other.
Balance yourself before grabbing for the walker.
Transfer—Bed
When getting into bed:
Back up to the bed until you feel it on the back of your legs (you need to be midway between the foot and the head of the bed).
Reaching back with both hands, sit down on the edge of the bed, keeping your surgical leg slightly in front of the other and then scoot back toward the center of the mattress. (Silk pajama bottoms, satin sheets or sitting on a plastic bag may make it easier).
Move your walker out of the way, but keep it within reach. Scoot your hips around so that you are facing the foot of the bed.
Lift your leg onto the bed while scooting around (if this is your surgical leg, you may use your other leg, a cane, a rolled bed sheet, a belt, or an elastic band to assist with lifting that leg into bed).
Keep scooting and lift your other leg onto the bed. Scoot your hips towards the center of the bed.
When getting out of bed:
Scoot your hips or roll to the edge of the bed. Sit up while lowering your non-surgical leg to the floor.
If necessary, use a leg-lifter to lower your surgical leg to the floor. Scoot to the edge of the bed.
Use both hands to push off the bed. If the bed is too low, place one hand in the center of the walker while pushing up off the bed with the other, keeping surgical leg slightly in front of the other.
Balance yourself before grabbing for the walker.

32
Home Safety Tips and Precautions (Continued)
Transfer—Tub
Getting into the tub using a bath seat:
Place the bath seat in the tub facing the faucets.
Back up to the tub until you can feel it at the back of your knees. Make sure you’re in front of the bath seat.
Reach back with one hand for the bath seat. Keep the other hand in the center of the walker. Slowly lower yourself onto the bath seat, keeping the surgical leg out straight.
Move the walker out of the way, but keep it within reach. Lift your legs over the edge of the tub, using a leg lifter or cane for the surgical leg, if necessary. Hold
onto back of shower seat. NOTE:
Although bath seats, grab bars, long-handled bath brushes and hand-held showers make bathing easier and safer, they are typically not covered by insurance.
Use a rubber mat or non-skid adhesive on the bottom of the tub or shower.
To keep soap within easy reach, make a soap-on-a-rope by placing a bar of soap in the toe of an old pair of pantyhose and attach it to the bath seat.
Getting out of the tub using a bath seat:
Lift your legs over the outside of the tub.
Scoot to the edge of the bath seat. Keeping surgical leg slightly in front of the other, push up with one hand on the back of the bath seat
while holding on to the center of the walker with the other hand. Balance yourself before grabbing the walker.
Walking
Move the walker forward.
With all four walker legs firmly on the ground, step forward with surgical leg. Place the foot in the middle of the walker area. Do not move it past the front wheels of the walker. Take even steps.
Step forward with the non-surgical leg.
Take small steps. DO NOT take a step until all four walker legs are flat on the floor. If using a rolling walker, you can advance from this basic technique to a normal walking pattern.
Holding onto the walker, step forward with the surgical leg, pushing the walker as you go; then try to alternate with an equal step forward using the non-surgical leg. Continue to push the walker forward as you would a shopping cart. This may not be possible at first, but you will find this gets easier. Do not walk forward past the walker center or way behind the walker’s rear legs.

33
Home Safety Tips and Precautions (Continued)
Stair Climbing
Ascend with non-surgical leg first (up with the good).
Descend with the surgical leg first (down with the bad). Always hold onto the railing or your walker as instructed by your therapist.
Personal Care—Using a "Reacher" or "Dressing Stick"
Putting on pants and underwear:
Sit down. Put your surgical leg in first and then your non-surgical leg. Use a reacher or dressing stick to guide the
waistband over your foot. Pull your pants up over your knees, within easy reach. Stand with the walker in front of you to pull your pants up the rest of the way.
Taking off pants and underwear:
Back up to the chair or bed where you will be undressing. Unfasten your pants and let them drop to the floor. Push your underwear down to your knees.
Lower yourself down, keeping your surgical leg out straight.
Take your non-surgical leg out first and then the surgical leg. A reacher or dressing stick can help you remove your pants from your foot and off the floor.
How to use a sock aid:
Slide the sock onto the sock aid. Hold the cord and drop the sock aid in front of your foot. It is easier to do this if your knee is bent.
Slip your foot into the sock aid. Straighten your knee, point your toe and pull the sock on. Keep pulling until sock aid pulls out.
If using a long-handled shoehorn:
Use your reacher, dressing stick or long handled shoehorn to slide your shoe in front of your foot.
Place the shoehorn inside the shoe against the back of the heel. Have the curve of the shoehorn match the curve of your shoe.
Lean back, if necessary, as you lift your leg and place your toes in your shoe.
Step down into your shoe, sliding your heel down the shoehorn. NOTE: Wear sturdy slip-on shoes, or shoes with Velcro closures or elastic shoelaces.
DO NOT wear high-heeled shoes or shoes without backs.
34
Home Safety Tips and Precautions (Continued)
Around the House—Saving Energy and Protecting Your Joints
Kitchen
DO NOT get down on your knees to scrub floors. Use a mop and long-handled brushes.
Plan ahead! Gather all your cooking supplies at one time. Then sit to prepare your meal.
Place frequently used cooking supplies and utensils where they can be reached without too much bending or stretching.
To provide a better working height, use a high stool or put cushions on your chair when preparing meals.
Bathroom
DO NOT get down on your knees to scrub the bathtub. Use a mop or other long-handled brushes.
Safety and Avoiding Falls
Pick up throw rugs and tack down loose carpeting. Cover slippery surfaces with carpets that are firmly anchored to the floor or that have non-skid backs.
Be aware of all floor hazards, such as pets, small objects or uneven surfaces.
Provide good lighting throughout your home. Install nightlights in the bathrooms, bedrooms and hallways.
Keep extension cords and telephone cords out of pathways. DO NOT run wires under rugs, this is a | fire hazard.
DO NOT wear open-toe slippers or shoes without backs. They do not provide adequate support and can lead to slips/falls.
Sit in chairs with arms. It makes it easier to get up.
Rise slowly from either a sitting or lying position to avoid getting light-headed. Stand for 15 to 20 seconds before walking.
Do not lift heavy objects for the first three months and then only with your surgeon's permission.

35
Do’s and Don'ts for the Rest of Your Life
Whether you have reached all the recommended goals in three months or not, you need to have a regular exercise program to maintain the fitness and health of the muscles around your joints. You should be on a regular exercise program three to four times per week lasting 20 to 30 minutes. Impact activities, such as running and singles tennis may put too much load on your joint and are not recommended. High-risk activities, such as downhill skiing are likewise discouraged because of the risk of fractures around the prosthesis and damage to the prosthesis itself. Infections are always a potential problem and you may need antibiotics for prevention.
What to Do in General Although the risks are very low for postoperative infections, it is important to realize that the risk remains. A prosthetic joint could possibly attract the bacteria from an infection located in another part of your body. If you should develop a fever of more than 101 F or sustain an injury, such as a deep cut or puncture wound, you should clean it as best you can, put a sterile dressing or an adhesive bandage on it and notify your doctor. The closer the injury is to your prosthesis, the greater the concern. Occasionally, antibiotics may be needed. Superficial scratches may be treated with topical antibiotic ointment. Notify your doctor if the area is painful or reddened.
Take antibiotics one hour before you have dental work or other invasive procedures. When traveling, stop and change positions hourly to prevent your joint from tightening.
See your surgeon yearly unless otherwise recommended.
What to Do for Exercise
Choose a low impact activity
Home program as outlined in your patient guidebook
Regular one to three mile walks
Home treadmill (for walking)
Stationary bike Aquatic exercises
Regular exercise at a fitness center Low-impact sports such as golf, bowling, walking, gardening,
dancing, swimming, etc. Consult with your surgeon about returning to specific sport activities.
What not to do
Do not run or engage in high-impact activities Do not participate in high-risk activities such as downhill skiing, etc.

36
Section Six
Helpful Resources
What you will learn in this section:
Understanding anesthesia
Blood thinners
Daily Schedule of physical therapy during your hospital stay View of a healthy knee
Importance of lifetime follow-ups with your doctor
Exercise instructions; pre-operative and advanced
Frequently asked questions

37
Understanding Anesthesia
Who are the Anesthesiologists?
The hospital is staffed by Board Certified and Board Eligible Physician Anesthesiologists. Each member of the service is an individual practitioner with privileges to practice at this hospital.
What Types of Anesthesia are Available?
Decisions regarding your anesthesia are tailored to your personal needs. The types available are:
General Anesthesia: provides loss of consciousness.
Regional Anesthesia: involves the injection of a local anesthetic to provide numbness, loss of pain or loss of sensation to a large region of the body. Regional anesthetic techniques include spinal blocks and epidural blocks
Will I Have Any Side Effects?
Your anesthesiologist will discuss the risks and benefits associated with the different anesthetic options as well as any complications or side effects that can occur with each type of anesthetic. Nausea or vomiting may be related to anesthesia, but medications to treat nausea and vomiting will be given, if needed.
What Will Happen Before My Surgery?
You will meet your anesthesiologist immediately before your surgery. Your anesthesiologist will review all information needed to evaluate your general health. This will include your medical history, laboratory test results, allergies and current medications. With this information, the anesthesiologist will determine the type of anesthesia best suited for you. He or she will also answer any further questions you may have. You will also meet your surgical nurses. Intravenous (IV) fluids will be started and preoperative medications may be given, if needed. Once in the operating room, monitoring devices will be attached such as a blood pressure cuff, EKG and other devices for your safety. At this point, you will be ready for anesthesia. If you would like to speak to your anesthesiologist before you are admitted to the hospital, this can be arranged through your surgeon’s office.
38
Understanding Anesthesia (Continued)
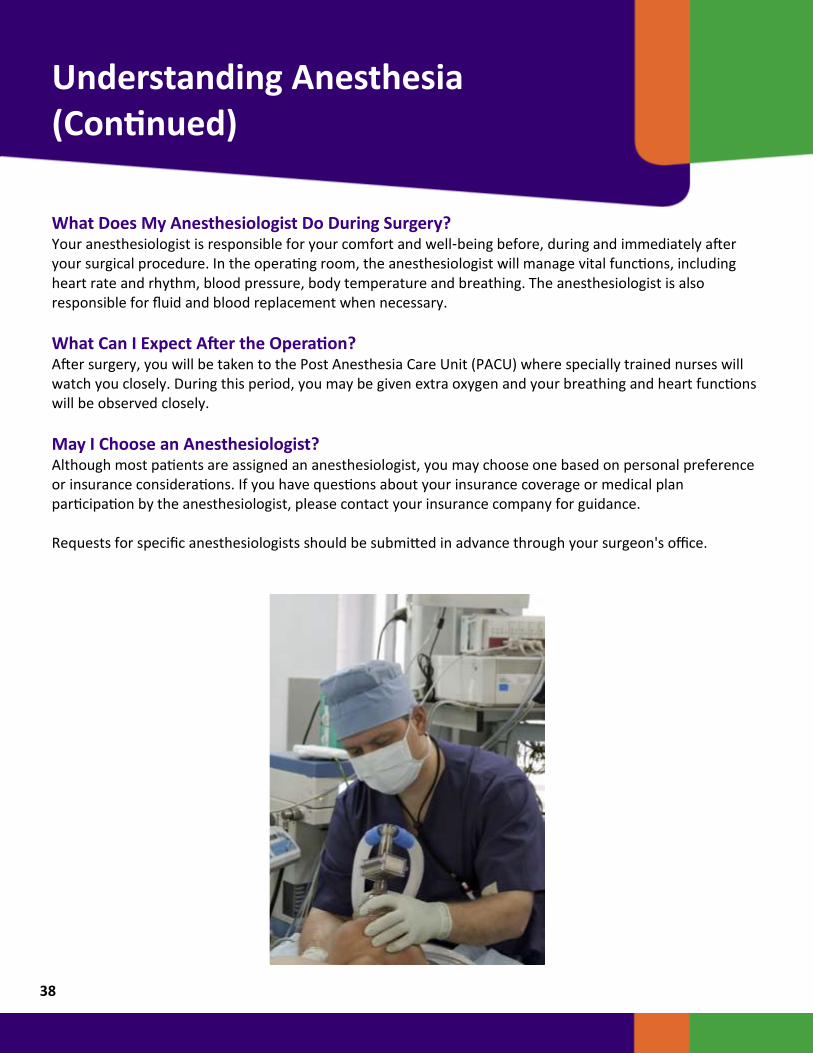
What Does My Anesthesiologist Do During Surgery? Your anesthesiologist is responsible for your comfort and well-being before, during and immediately after your surgical procedure. In the operating room, the anesthesiologist will manage vital functions, including heart rate and rhythm, blood pressure, body temperature and breathing. The anesthesiologist is also responsible for fluid and blood replacement when necessary.
What Can I Expect After the Operation?
After surgery, you will be taken to the Post Anesthesia Care Unit (PACU) where specially trained nurses will watch you closely. During this period, you may be given extra oxygen and your breathing and heart functions will be observed closely.
May I Choose an Anesthesiologist?
Although most patients are assigned an anesthesiologist, you may choose one based on personal preference or insurance considerations. If you have questions about your insurance coverage or medical plan participation by the anesthesiologist, please contact your insurance company for guidance. Requests for specific anesthesiologists should be submitted in advance through your surgeon's office.

39
Blood Thinners
Home You will be on blood thinners when you leave the hospital. The type, frequency and duration will be determined by your surgeon. Some medications are injectables, others require periodic blood test monitoring. The nursing staff will provide you with specific instructions prior to discharge.
Skilled Nursing Facility If you are transferred to a skilled nursing facility, blood thinners will continue there as your surgeon orders. The physician caring for you at the skilled nursing facility will adjust the medications as necessary.
40
Physical Therapy Daily Schedule
NOTE: times are approximate. The physical therapist will advise patients and family members if the times change.
Day of Surgery
Evaluation by physical therapy or you may sit at the edge of your bed with assistance from nursing.
Post Operation—Day One
Patients who were not evaluated on the day of surgery, are evaluated in the morning between 7:45 a.m. and 9:30 a.m. Coaches should be at the hospital on the morning of post operation day one by 9:30 a.m. The first group therapy session will be at 9:30 a.m. on post operation day one. Coaches are encouraged to attend as many group therapy sessions as possible. We understand some coaches cannot be here for all the sessions because of work schedules, but helpful if they must attend at least one group session. The second group therapy session is at 1 p.m.
Post Operation—Day Two
Patients will have two group therapy sessions 9:30 a.m. and 1 p.m. Coaches are encouraged to attend.
Post Operation—Day Three
Same as day one and two if you’re not discharged.

41
View of a Healthy Knee

42
The Importance of Lifetime Follow-Up Visits
Over the past several years, orthopedic surgeons have discovered that many people are not following up with their surgeons on a regular basis. The reason for this may be that they do not realize they are supposed to, or they do not understand why it is important.
So, when should you follow up with your surgeon? These are some general rules:
Every year, unless instructed differently by your physician.
Anytime you have mild pain for more than a week. Anytime you have moderate or severe pain.
There are two good reasons for routine follow-up visits with your orthopedic surgeon If you have a cemented knee, we need to evaluate the integrity of the cement. With time and stress, cement may crack. You probably would be unaware of this happening because it usually happens slowly over time. Seeing a crack in cement does not necessarily mean you need another surgery, but it does mean we need to follow things more closely. Why? Two things could happen. Your knee could become loose and this might lead to pain. Alternatively, the cracked cement could cause a reaction in the bone called osteolysis, which may cause the bone to thin out and cause loosening. In both cases, you might not know this for years. Orthopedists are continually learning more about how to deal with both of these problems. The sooner we know about potential problems, the better chance we have of avoiding problems that are more serious. The second reason for follow-up is that the plastic liner in your knee may wear. Tiny wear particles combine with white blood cells and may get in the bone and cause osteolysis, similar to what can happen with cement. Replacing a worn liner early can keep this from worsening. X-rays taken at your follow-up visits can detect these problems. Your new X-rays can be compared with previous films to make these determinations. This will be done in your doctor's office. If you are unsure how long it has been or when your next visit should be scheduled, call your doctor.

43
Exercise Instructions—Practice Before Surgery
Range of Motion and Strengthening Exercises
Ankle pumps
Flex and point your feet. Perform 30 reps. Quad sets—(knee push-downs) Back lying, press knee into the mat by tightening the muscles on the front of the thigh (quadriceps). Hold for 5 count. DO NOT hold breath. Perform 30 reps.

44
Exercise Instructions—Practice Before Surgery (Continued)
Range of Motion and Strengthening Exercises
Gluteal sets—(bottom squeezes) Squeeze bottom together. Hold for a 5 count. DO NOT hold breath. Perform 30 reps. Hip abduction and adduction—(slide heels out and in) Back lying, with toes pointed to ceiling and knees straight. Tighten the quad muscle and slide legs out to side and back to the starting position. Perform 30 reps.

45
Exercise Instructions—Practice Before Surgery (Continued)
Range of Motion and Strengthening Exercises
Heel slides—(slide heels up and down) Back lying, slide your heel up the surface bending your knee. Post-op, your therapist may have you use a strap around the foot to assist gaining the knee bend. Perform 30 reps. Short arc quads Back lying, place a 6-8 inch roll under the knee. Lift the foot from the surface, straightening the knee as far as possible. Do not raise thigh off roll. Use a strap if necessary to assist. Perform 30 reps.

46
Exercise Instructions—Practice Before Surgery (Continued)
Range of Motion and Strengthening Exercises
Seated hamstring and gastroc stretch without or with strap Sit on couch or bed with surgical leg extended and the other leg dangling off the side. Keeping the surgical knee straight, gently lean forward until a slight stretch is felt in the back of your thigh. As you become more flexible, use a strap to pull up on the foot. Hold for 30 seconds. Perform 5 reps. Straight leg raises Back lying, with the non-surgical knee bent, and foot flat. Tighten the quad on the surgical leg and lift the leg 12 inches from the surface. Keep knee straight and toes pointed towards your head. Perform 30 reps.

47
Exercise Instructions—Practice Before Surgery (Continued)
Range of Motion and Strengthening Exercises
Armchair push-ups Sitting in a sturdy armchair with feet on the floor, scoot to the front of seat, place your hands on the armrests. Straighten your arms raising your bottom up from seat as far as possible. Use your legs as needed to help you lift. As you get stronger, progress to using only your arms and the “non-surgical” leg to perform the push-up. This will be how you will get up from a chair after surgery. Do not hold your breath or strain too hard. Making your arms stronger now will make your post op mobility easier. Perform 2 sets of 10 reps. Standing heel/toe raises Stand, with a firm hold on the kitchen sink. Rise up on toes then back on heels. Stand as straight as possible! Perform 30 reps.

48
Exercise Instructions—Practice Before Surgery (Continued)
Range of Motion and Strengthening Exercises
Seated knee flexion Sitting in straight-back chair, bend the surgical leg as far as possible under the chair (you can use the opposite foot to help). When maximum bend is reached, plant the foot and slide your hips forward further bending the knee. Hold for 20 - 30 seconds; Repeat 30 times. Knee extension stretch Sitting in a comfortable chair, prop the surgical foot on a chair or stool. Place a towel roll under the ankle, and apply an ice pack and 5 pound weight (or bag of rice) on top of the knee. Hold this position for 15 minutes.

49
Advanced Exercises
Exercises Added by the Therapist After Surgery
Knee extension long arc Sit with back against chair and thighs fully supported. Lift the surgical foot up, straightening the knee. Hold for a 5 count. Mini squat Stand, with feet shoulder width apart, and holding on to the kitchen sink. Keep your heels on the floor as you bend your knees to a slight squat. Return to upright position tightening your buttocks and quads. Progress the squat depth as tolerated. Perform 30 Reps.

50
Advanced Exercises (Continued)
Standing terminal knee extension Standing against the wall, with feet about 4 - 6 inches out. Place a 6 - 8 inch ball or towel roll, behind your knee. Push the ball into the wall by tightening the quadriceps muscle. Wall slides Position self with back to wall, feet shoulder width apart and about 12 inches from a wall, slide down wall as far as comfortable—do not take your knees in front of your toes. Make sure you keep equal weight on both legs. Push back up equally through both legs and come to standing.

51
Advanced Exercises (Continued)
Three Position Straight Leg Raises: Perform the straight leg raise in four positions:
Back lying—straight leg progression using weights
Lying on the non-surgical side
Lying on the stomach
Lying on the surgical side

52
Advanced Exercises (Continued)
Quad stretch Stomach Lying, bend knee up and hold; if comfortable. Use a strap around the ankle to pull foot toward buttock. Hold for 30 seconds. Bridges Back lying, with knees bent and feet flat on the surface, tighten the buttock and lift your buttock off the floor. Hold for 30 seconds.

53
Advanced Stair Exercises
Exercises Added by the Therapist 6-12 Weeks After Surgery
Single leg forward step-up Hold onto the stair railing—place the surgical foot on the step. Proceed to step up. Return to the start position. Begin with a 2 - 4 inch step (or book/block) and progress to higher step as tolerated.
Single leg lateral step-up Face the railing with the surgical leg nearest the step. Holding onto the railing, place the foot on the step, and then step up. Return to the start position. Start with a 2 - 4 inch step and progress to higher step as tolerated.

54
Advanced Stair Exercises (Continued)
Retro leg step-up Stand, with your back to the steps and holding the railing. Place the surgical foot on the step and step up backwards until the other foot is on the step. Return to the start position by lowering the non-surgical leg back down to the floor. You may need to begin with a 2 - 4 inch step and progress to the higher step as tolerated.
Standing Stand, holding onto the railing, with toes on the stair and over the edge—relax and let the heels hang down. Hold for 30 seconds.

55
Advanced Stair Exercises (Continued)
Knee stretches Stand, holding onto the railing; place the surgical foot up on 1 or 2 steps (your therapists will instruct on which level to begin). Keeping your non surgical leg straight and on the floor, stretch forward, bending the surgical knee. Hold for 30 seconds. Repeat with the surgical leg on the floor, and the non-surgical leg on the step. Try to keep the surgical heel flat on the floor and the knee straight.

56
Frequently Asked Questions
We are glad you have chosen MemorialCare Joint Replacement Center at Long Beach Medical Center to care for your knee. People facing joint surgery often have the same questions. If there are any other questions that you need answered, please ask your surgeon, the Joint Care Coordinator or any member of your team. We are here to help.
What Is Osteoarthritis and Why Does My Knee Hurt?
Joint cartilage is a tough, smooth tissue that covers the ends of bones where joints are located. It helps cushion the bones during movement, and because it is smooth and slippery, it allows for motion with minimal friction. Osteoarthritis, the most common form of arthritis, is a wear and tear condition that destroys joint cartilage. Sometimes, as the result of trauma, repetitive movement, or for no apparent reason, the cartilage wears down, exposing the bone ends. Over time, cartilage destruction can result in painful bone-on-bone contact, along with swelling and loss of motion. Osteoarthritis usually occurs later in life and may affect a single joint or many joints.
What Is Total Knee Replacement?
The term total knee replacement is misleading. The knee itself is not replaced, as is commonly thought, but rather an implant is used to re-cap the worn bone ends. This is done with a metal alloy on the femur (thigh bone) and tibia (shin bone), a plastic spacer between the metal, and a plastic “button” behind the patella (kneecap). This creates a new, smooth cushion and a functioning joint that can reduce or eliminate pain.
How Long Will My New Knee Last and Can a Second Replacement Be Done?
All implants have a limited life expectancy depending on an individual’s age, weight, activity level, and medical condition(s). A total joint implant's longevity will vary in every patient. It is important to remember that an implant is a medical device subject to wear that may lead to mechanical failure. While it is important to follow all of your surgeon’s recommendations after surgery, there is no guarantee that your particular implant will last for any specified length of time.
What Are the Major Risks?
Most surgeries go well, without any complications. Infection and blood clots are two serious complications. To avoid these complications, your surgeon may use antibiotics and blood thinners. Surgeons also take special precautions in the operating room to reduce the risk of infection.

57
Frequently Asked Questions (Continued)
How Long Will I Be in the Hospital?
Most knee patients will be hospitalized for three days after surgery. There are several goals that must be achieved before discharge.
What If I Live Alone?
You may return home and receive help from your coach, a relative or friend. You may need to stay in a skilled nursing facility following your hospital stay, depending on your progress or lack there of.
How Do I Make Arrangements for Surgery?
After your surgeon has scheduled surgery, the Joint Care Coordinator will contact you. The JCC will guide you through the program. The coordinator’s role is described in the guidebook along with a telephone number.
What Happens During the Surgery?
The hospital reserves approximately two hours for surgery. Some of this time will be taken by the operating room staff to prepare for surgery. You may have a general anesthetic, which most people call “being put to sleep”. Some patients prefer to have a spinal or epidural anesthetic, which numbs the legs and does not require you to be asleep. The choice is between you, your surgeon, and the anesthesiologists. For more information, read “Anesthesia” in your guidebook appendix.
Will the Surgery Be Painful?
You will have discomfort following the surgery. Your discomfort should be manageable. The staff will teach you the pain scale to better assess your pain and give you the appropriate pain medications. Positioning and icing will help with pain control also.
How Long and Where Will My Scar Be?
Surgical scars will vary in length, but most surgeons will make it as short as possible. It will be straight down the center of your knee, unless you have previous scars, in which case your surgeon may use an existing scar. There may be lasting numbness around the scar.
Will I Need a Walker, Crutches, or a Cane?
Patients progress at their own rate. Normally we recommend that you use a walker, crutches or a cane from four to six weeks.

58
Frequently Asked Questions (Continued)
Where Will I Go After Discharge from the Hospital?
Most patients are able to go home directly after discharge. Some patients may transfer to a skilled nursing facility. The Joint Care Coordinator will help you with this decision. You should check with your insurance company to see if you have skilled nursing facility benefits.
Will I Need Help at Home?
Yes, for the first few days or weeks, depending on your progress, you will need someone to assist you with meal preparation, etc. Preparing ahead of time, before your surgery, can minimize the amount of help needed. Having the laundry done, house cleaned, yard work completed, clean linens put on the bed and single portion frozen meals will help reduce the need for extra help.
Will I Need Physical Therapy When I Go Home?
Yes, you will have either outpatient or in-home physical therapy. Patients are encouraged to utilize outpatient physical therapy. We will help you arrange for an outpatient physical therapy appointment. If you need home physical therapy, we will arrange for a physical therapist to provide therapy in your home. Following this, you will go to an outpatient facility three times a week to assist in your rehabilitation. The length of time for this type of therapy varies with each patient.
Will My New Knee Set Off Security Sensors When Travelling?
Your joint replacement is made of a metal alloy and may or may not be detected when going through some security devices. You can carry a medic alert card indicating that you have an artificial joint, but security at check points usually don’t heed the cards, they will need to use their wand devices to check you. Check with your surgeon on how to obtain a medic alert card.