knime python integration installation guide › 2019-12 › python_installation... · this guide...
TRANSCRIPT

KNIME Python IntegrationInstallation Guide
KNIME AG, Zurich, Switzerland
Version 4.1 (last updated on 2020-04-15)
Table of Contents
Introduction. . . . . . . . . . . . . . . . . . . . . . . . . . . . . . . . . . . . . . . . . . . . . . . . . . . . . . . . . . . . . . . . . . . . . 1
Quickstart . . . . . . . . . . . . . . . . . . . . . . . . . . . . . . . . . . . . . . . . . . . . . . . . . . . . . . . . . . . . . . . . . . . . . . 1
Anaconda Setup . . . . . . . . . . . . . . . . . . . . . . . . . . . . . . . . . . . . . . . . . . . . . . . . . . . . . . . . . . . . . . . . . 2
Anaconda installation . . . . . . . . . . . . . . . . . . . . . . . . . . . . . . . . . . . . . . . . . . . . . . . . . . . . . . . . . . 3
Creating a Conda environment . . . . . . . . . . . . . . . . . . . . . . . . . . . . . . . . . . . . . . . . . . . . . . . . . . 3
Manually installing additional Python packages . . . . . . . . . . . . . . . . . . . . . . . . . . . . . . . . . . . . 5
Troubleshooting . . . . . . . . . . . . . . . . . . . . . . . . . . . . . . . . . . . . . . . . . . . . . . . . . . . . . . . . . . . . . . 6
Setting up the KNIME Python Integration . . . . . . . . . . . . . . . . . . . . . . . . . . . . . . . . . . . . . . . . . . . . 6
Installation . . . . . . . . . . . . . . . . . . . . . . . . . . . . . . . . . . . . . . . . . . . . . . . . . . . . . . . . . . . . . . . . . . . 6
Configure the KNIME Python Integration . . . . . . . . . . . . . . . . . . . . . . . . . . . . . . . . . . . . . . . . . . 6
Configure Python environments per node . . . . . . . . . . . . . . . . . . . . . . . . . . . . . . . . . . . . . . . . 11
Load Jupyter notebooks from KNIME . . . . . . . . . . . . . . . . . . . . . . . . . . . . . . . . . . . . . . . . . . . . . . 11
MDF Reader . . . . . . . . . . . . . . . . . . . . . . . . . . . . . . . . . . . . . . . . . . . . . . . . . . . . . . . . . . . . . . . . . . . 12
Introduction
This guide describes how to install the KNIME Python Integration to be used with KNIME
Analytics Platform.
This guide refers to the KNIME Python Integration that is available since the
v3.4 release of KNIME Analytics Platform (not to be confused with the KNIME
Python Scripting Extension). The integration is the recommended and most
recent way to use arbitrary Python™ scripts in KNIME Analytics Platform and
supports both Python 2 as well as Python 3.
The KNIME Python Integration makes use of an existing Python, which is installed alongside
KNIME Analytics Platform. As the KNIME Python Integration depends on certain Python
packages, the Python installation needs to have these packages installed. Our recommended
way to set up such a Python environment is to use the Anaconda Python distribution from
Continuum Analytics. In this guide we describe how to install Python and the necessary
packages using Anaconda, as well as how to configure the KNIME Python Integration.
Quickstart
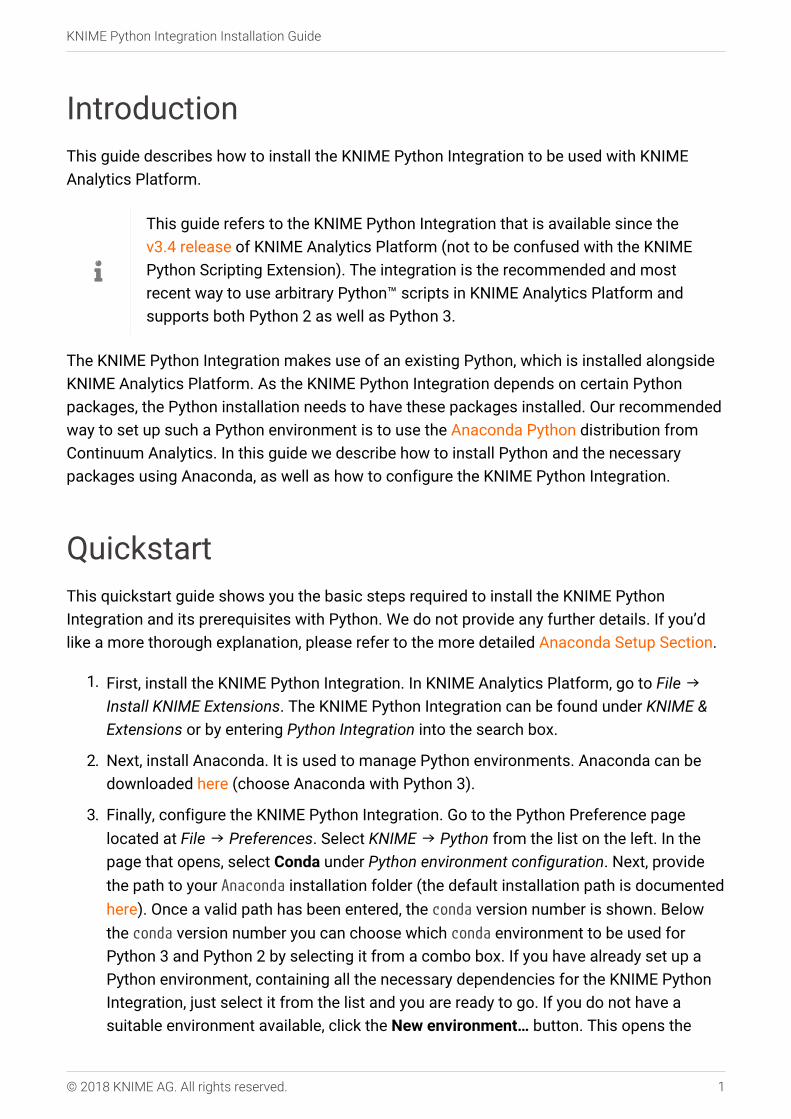
This quickstart guide shows you the basic steps required to install the KNIME Python
Integration and its prerequisites with Python. We do not provide any further details. If you’d
like a more thorough explanation, please refer to the more detailed Anaconda Setup Section.
1. First, install the KNIME Python Integration. In KNIME Analytics Platform, go to File →Install KNIME Extensions. The KNIME Python Integration can be found under KNIME &
Extensions or by entering Python Integration into the search box.
2. Next, install Anaconda. It is used to manage Python environments. Anaconda can be
downloaded here (choose Anaconda with Python 3).
3. Finally, configure the KNIME Python Integration. Go to the Python Preference page
located at File → Preferences. Select KNIME → Python from the list on the left. In the
page that opens, select Conda under Python environment configuration. Next, provide
the path to your Anaconda installation folder (the default installation path is documented
here). Once a valid path has been entered, the conda version number is shown. Below
the conda version number you can choose which conda environment to be used for
Python 3 and Python 2 by selecting it from a combo box. If you have already set up a
Python environment, containing all the necessary dependencies for the KNIME Python
Integration, just select it from the list and you are ready to go. If you do not have a
suitable environment available, click the New environment… button. This opens the
KNIME Python Integration Installation Guide
© 2018 KNIME AG. All rights reserved. 1
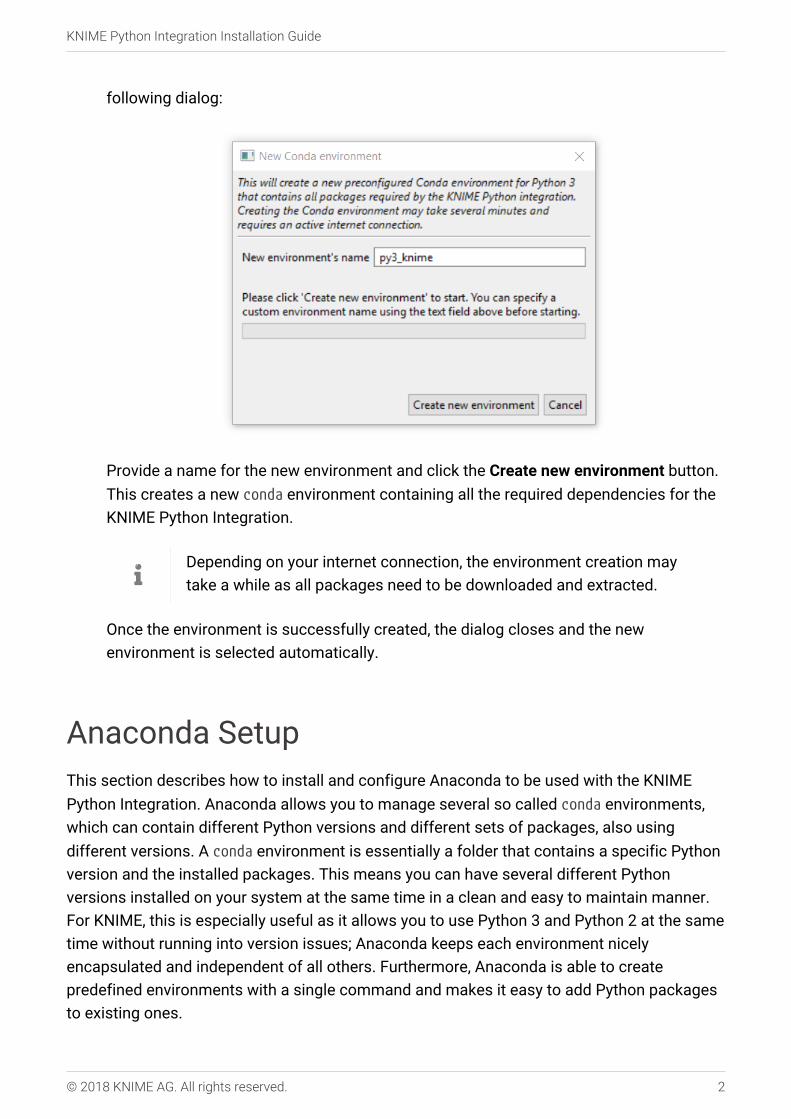
following dialog:
Provide a name for the new environment and click the Create new environment button.
This creates a new conda environment containing all the required dependencies for the
KNIME Python Integration.
Depending on your internet connection, the environment creation may
take a while as all packages need to be downloaded and extracted.
Once the environment is successfully created, the dialog closes and the new
environment is selected automatically.
Anaconda Setup
This section describes how to install and configure Anaconda to be used with the KNIME
Python Integration. Anaconda allows you to manage several so called conda environments,
which can contain different Python versions and different sets of packages, also using
different versions. A conda environment is essentially a folder that contains a specific Python
version and the installed packages. This means you can have several different Python
versions installed on your system at the same time in a clean and easy to maintain manner.
For KNIME, this is especially useful as it allows you to use Python 3 and Python 2 at the same
time without running into version issues; Anaconda keeps each environment nicely
encapsulated and independent of all others. Furthermore, Anaconda is able to create
predefined environments with a single command and makes it easy to add Python packages
to existing ones.
KNIME Python Integration Installation Guide
© 2018 KNIME AG. All rights reserved. 2

Next, you will learn how to set up an environment that contains the dependencies needed for
the KNIME Python Integration.
Anaconda installation
First, you need to install the latest Anaconda version (Anaconda ≥ 2019.03, conda ≥4.6.2). On the Anaconda download page you can choose between Anaconda with Python 3.x
or Python 2.x, however this only affects the root conda environment, which we will not use (as
we are creating our own). Therefore, you can choose either one (if you’re not sure, we
suggest selecting Python 3).
Creating a Conda environment
After Anaconda is installed, you need to create a new conda environment. As of KNIME
Analytics Platform 3.8.0, there are two options to do this:
Option 1: Automatic (recommended)
A Python environment containing all required dependencies can be automatically created in
the KNIME Python Integration Preference page. If you do not explicitly want to create an
environment manually, please continue with Setting up the KNIME Python Integration.
Option 2: Manual
If you do not want to create a conda environment automatically, you can create one manually
after Anaconda is installed. Do this with a YAML configuration file, which lists all of the
packages to be installed in the newly created environment. We have provided two such
configuration files below (one configuration file to create a new Python 3 environment and
one file for Python 2). They list all of the dependencies needed for the KNIME Python
Integration:
py36_knime.yml
KNIME Python Integration Installation Guide
© 2018 KNIME AG. All rights reserved. 3

name: py36_knime # Name of the created environmentchannels: # Repositories to search for packages- defaults- anaconda- conda-forgedependencies: # List of packages that should be installed- python=3.6 # Python- pandas=0.23 # Table data structures- jedi=0.13 # Python script autocompletion- python-dateutil=2.7 # Date and Time utilities- numpy=1.16.1 # N-dimensional arrays- cairo=1.14 # SVG support- pillow=5.3 # Image inputs/outputs- matplotlib=3.0 # Plotting- pyarrow=0.11 # Arrow serialization- IPython=7.1 # Notebook support- nbformat=4.4 # Notebook support- scipy=1.1 # Notebook support- jpype1=0.6.3 # Databases- libiconv=1.15 # MDF Reader node- asammdf=5.13.13 # MDF Reader node
py27_knime.yml
name: py27_knime # Name of the created environmentchannels: # Repositories to search for packages- defaults- anaconda- conda-forgedependencies: # List of packages that should be installed- python=2.7 # Python- pandas=0.23 # Table data structures- jedi=0.13 # Python script autocompletion- python-dateutil=2.7 # Date and Time utilities- numpy=1.15 # N-dimensional arrays- cairo=1.14 # SVG support- pillow=5.3 # Image inputs/outputs- matplotlib=2.2 # Plotting- IPython=5.8 # Notebook support- nbformat=4.4 # Notebook support- scipy=1.1 # Notebook support- jpype1=0.6.3 # Databases- protobuf=3.5 # Serialization for deprecated Python nodes
KNIME Python Integration Installation Guide
© 2018 KNIME AG. All rights reserved. 4

The above configuration files only contain the Python packages that the KNIME
Python Integration depends on. If you want to use more Python packages in
KNIME you can either add the name of the package at the end of the
configuration file or add them after the environment has been created.
For example, for Python 3 you can use the py36_knime.yml and download it to any folder on
your system (e.g. your home folder). In order to create an environment from this file, open a
shell (Linux), terminal (Mac), or Anaconda prompt (Windows, can be found by entering
anaconda in Windows Search), change the directory to the folder that contains the
configuration file and execute the following command:
conda env create -f py36_knime.yml
This command creates a new environment with the name provided at the top of the
configuration file (of course you can change the name). It also downloads and installs all of
the listed packages (depending on your internet speed, this may take a while).
If you want to use both Python 3 and Python 2 at the same time, just repeat the above steps
using the respective configuration file.
The list of dependencies for Python 3 and Python 2 is almost the same,
however version numbers change.
After Anaconda has successfully created the environment, Python is all set up and you are
ready to proceed with Setting up the KNIME Python Integration.
Further information on how to manage Anaconda environments can be found here.
Manually installing additional Python packages
The Anaconda configuration files listed above only contain the packages to be installed so
that the KNIME Python Integration works properly. Hence, if you want to use Python
packages other than the ones listed in the configuration files, these can be easily added
manually after the environment has been created. E.g. if you want to use functionality from
scikit-learn in KNIME Python nodes, you can use the following command:
conda install --name <ENV_NAME> scikit-learn
Just replace <ENV_NAME> with the name of the environment in which you want to install the
package.
KNIME Python Integration Installation Guide
© 2018 KNIME AG. All rights reserved. 5

You can easily specify a specific version of the package with e.g. scikit-
learn==0.20.2
Further information on how to manage Anaconda packages can be found here.
Troubleshooting
Mac Matplotlib
On Mac, there may be issues with the matplotlib package. The following error:
libc++abi.dylib: terminating with uncaught exception of type NSException
can be resolved by executing the following commands:
mkdir ~/.matplotlibecho "backend: TkAgg" > ~/.matplotlib/matplotlibrc
Setting up the KNIME Python Integration
This section describes how to install and configure the KNIME Python Integration using an
existing Anaconda environment. If you haven’t set up Anaconda and/or the recommended
Python environment yet, please refer to the Anaconda Setup guide.
Installation
From KNIME Analytics Platform, install the KNIME Python Integration by going to File →Install KNIME Extensions. The KNIME Python Integration can be found under KNIME &
Extensions or by entering Python Integration into the search box.
Configure the KNIME Python Integration
Now tell KNIME which Python environment should be used. Go to the Preference page of the
KNIME Python Integration located at File → Preferences, and then select KNIME → Python
from the list on the left. A dialog opens giving you two options for configuring the Python
environment:
KNIME Python Integration Installation Guide
© 2018 KNIME AG. All rights reserved. 6

Option 1: Conda (recommended)
Select Conda under Python environment configuration. The dialog should look like the
screenshot shown below.
In this dialog, provide the path to the folder containing your Anaconda installation (the default
installation path is documented here). Once you have entered a valid path, the installed conda
version is displayed and KNIME automatically checks for all available conda environments.
Underneath the conda version number, you can choose which conda environment should be
used for Python 3 and Python 2 by selecting it from a combo box. If you have already set up a
Python environment containing all the necessary dependencies for the KNIME Python
Integration, just select it from the list and you are ready to go. If you do not have a suitable
environment available, click the New environment… button. This opens the following dialog:
KNIME Python Integration Installation Guide
© 2018 KNIME AG. All rights reserved. 7

Provide a name for the new environment and click the Create new environment button. This
creates a new conda environment containing all required dependencies for the KNIME Python
Integration.
Depending on your internet connection, the environment creation may take a
while as all packages need to be downloaded and extracted.
Once the environment is successfully created, the dialog closes and the new environment is
selected automatically. If everything worked out fine, the Python version is now shown below
the environment selection and you are ready to go.
Option 2: Manual
If you choose the manual option, you have to point KNIME to a start script which activates
the environment you want to use for Python 2 and Python 3 respectively. This option
assumes that you have created a suitable Python environment earlier by following the
instructions given under Option 2: Manually of the Creating a Conda environment Section.
In order to use the created Anaconda environment for the KNIME Python Integration, you
need to create a start script (shell script on Linux and Mac, bat file on Windows).
If you are using Linux or Mac, here’s an example shell script for the Python environment:
KNIME Python Integration Installation Guide
© 2018 KNIME AG. All rights reserved. 8

#! /bin/bash# Start by making sure that the anaconda folder is on the PATH# so that the source activate command works.# This isn't necessary if you already know that# the anaconda bin dir is on the PATHexport PATH="<PATH_WHERE_YOU_INSTALLED_ANACONDA>/bin:$PATH"
conda activate <ENVIRONMENT_NAME>python "$@" 1>&1 2>&2
On Windows, the script looks like this:
@REM Adapt the folder in the PATH to your system@SET PATH=<PATH_WHERE_YOU_INSTALLED_ANACONDA>\Scripts;%PATH%@CALL activate <ENVIRONMENT_NAME> || ECHO Activating python environment failed@python %*
These example scripts need to be edited in order to point to the location of your
Anaconda installation and to activate the correct Anaconda environment. I.e.
replace the <PATH_WHERE_YOU_INSTALLED_ANACONDA> with the location of your
Anaconda installation (the default installation path is documented here) and
<ENVIRONMENT_NAME> with the name of the conda environment the script should
start and which you created in the Anaconda Setup guide (e.g. in this case
py36_knime for Python 3.6 or py27_knime for Python 2.7).
For example on Windows, create a new bat script named e.g. py36.bat (py36.sh on Linux or
Mac) and paste the corresponding script to the file.
On Linux/Mac you additionally need to make the file executable (i.e. chmod
gou+x py36.sh).
Once you have created the start script, you’re almost finished setting up Python. The last
thing to do is to point KNIME to the start script you just created. Do this in the Preference
page of the KNIME Python Integration located at File → Preferences. Select KNIME → Python
from the list on the left. The dialog should look like the screenshot shown below.
KNIME Python Integration Installation Guide
© 2018 KNIME AG. All rights reserved. 9

Figure 1. KNIME Python Preferences page. Here you can set the path to the executable script
that launches your Python environment.
On this page you need to provide the path to the script/bat file you created to start Python. If
you like, you can have configurations for both Python 2 and Python 3 (as is shown above).
Just select the one that you would like to have as the default. If everything is set correctly, the
Python version is now shown in the dialog window and you are ready to go.
Advanced
You can choose which serialization library should be used by the KNIME Python Integration
to transfer data from KNIME Analytics Platform to Python.
This option does not usually need to be changed and can be left as the default.
Some of these serialization libraries have additional dependencies stated below, however if
you followed the Anaconda Setup, all required dependencies are already included (see YAML
KNIME Python Integration Installation Guide
© 2018 KNIME AG. All rights reserved. 10

configuration files on the Anaconda Setup guide). Currently, there are three options:
• Flatbuffers Column Serialization (default & recommended): no additional dependencies
• Apache Arrow: depends on pyarrow version 0.11
• CSV (Experimental): depends on pandas version 0.23
Configure Python environments per node
Besides setting up Python for your entire KNIME workspace via the Preference page, you can
also configure individual nodes to use specific Python environments. This is done via flow
variables python2Command and python3Command that each Python scripting node offers under
the Flow Variables tab in its configuration dialog. Both variables accept the path to a Python
start script like in the Manual case above. Which of the two flow variables is respected
depends on whether a node is using Python 2 or Python 3. This can either be configured via
option Use Python Version under the Options tab in the node’s configuration dialog or via flow
variable pythonVersionOption which accepts either python2 or python3 as value.
Load Jupyter notebooks from KNIME
Existing Jupyter notebooks can be accessed within Python Script nodes using the
knime_jupyter Python module (knime_jupyter will be imported automatically). Notebooks
can be opened via the function knime_jupyter.load_notebook, which returns a standard
Python module. The load_notebook function needs the path (path to the folder that contains
the notebook file) and the name of the notebook (filename) as arguments. After a notebook
has been loaded, you can call functions that are defined in the code cells of the notebook like
any other function of a Python module. Furthermore, you can print the textual content of each
cell of a Jupyter notebook using the function knime_jupyter.print_notebook. It takes the
same arguments as the load_notebook function. An example script for a Python Script node
loading a notebook could look like this:
KNIME Python Integration Installation Guide
© 2018 KNIME AG. All rights reserved. 11

# Path to the folder containing the notebook, e.g. the folder 'data' contained# in my workflow foldernotebook_directory = "knime://knime.workflow/data/"
# Filename of the notebooknotebook_name = "sum_table.ipynb"
# Load the notebook as a Python modulemy_notebook = knime_jupyter.load_notebook(notebook_directory, notebook_name)
# Print its textual contentsknime_jupyter.print_notebook(notebook_directory, notebook_name)
# Call a function 'sum_each_row' defined in the notebookoutput_table = my_notebook.sum_each_row(input_table)
The load_notebook and print_notebook functions have two optional arguments:
• notebook_version: The Jupyter notebook format major version. Sometimes the version
can’t be read from a notebook file. In these cases, this option allows to specify the
expected version in order to avoid compatibility issues. Should be an integer.
• only_include_tag: Only load cells that are annotated with the given custom cell tag
(since Jupyter 5.0.0). This is useful to mark cells that are intended to be used in a
Python module. All other cells are excluded. This is e.g. helpful to exclude cells that do
visualization or contain demo code. Should be a string.
The Python nodes support code completion similar to an IDE. Just hit ctrl-
space (command-space on Mac) e.g. after knime_jupyter. in order to show the
available methods and documentation (knime_jupyter refers to the imported
knime_jupyter Python module, e.g. see script example above).
The Jupyter notebook support for the KNIME Python Integration depends on
the packages IPython, nbformat, and scipy, which are already included if you
used the configuration files from the Anaconda Setup.
You can find example workflows using the knime_jupyter Python module on our EXAMPLES
server.
MDF Reader
Similar to the KNIME Deep Learning Integration, the MDF Reader node requires certain
Python packages to be installed in the Python 3 environment. Since the v4.1 release of
KNIME Python Integration Installation Guide
© 2018 KNIME AG. All rights reserved. 12

KNIME Analytics Platform, these will be automatically installed if you set up your Python
environment via the Python Preference page (see here). The required packages are the
following:
numpy=1.16.1libiconv=1.15asammdf=5.13.13
The MDF Reader node requires a newer numpy version (1.16.1) compared to the
numpy version (1.15) required before.
KNIME Python Integration Installation Guide
© 2018 KNIME AG. All rights reserved. 13

KNIME AGTechnoparkstrasse 18005 Zurich, [email protected]
The KNIME® trademark and logo and OPEN FOR INNOVATION® trademark are used by KNIME AG under license
from KNIME GmbH, and are registered in the United States. KNIME® is also registered in Germany.