kodiak commercial fisheries salmon management field camp ... · fuerst, b. a. 2015. kodiak...
TRANSCRIPT

Regional Operational Plan CF.4K.2015.05
Kodiak Commercial Fisheries Salmon Management Field Camp and Weir Operational Plan, 2015
by
Brad A. Fuerst
March 2015
Alaska Department of Fish and Game Divisions of Sport Fish and Commercial Fisheries

Symbols and Abbreviations
The following symbols and abbreviations, and others approved for the Système International d'Unités (SI), are used without definition in the following reports by the Divisions of Sport Fish and of Commercial Fisheries: Fishery Manuscripts, Fishery Data Series Reports, Fishery Management Reports, and Special Publications. All others, including deviations from definitions listed below, are noted in the text at first mention, as well as in the titles or footnotes of tables, and in figure or figure captions. Weights and measures (metric) centimeter cm deciliter dL gram g hectare ha kilogram kg kilometer km liter L meter m milliliter mL millimeter mm Weights and measures (English) cubic feet per second ft3/s foot ft gallon gal inch in mile mi nautical mile nmi ounce oz pound lb quart qt yard yd Time and temperature day d degrees Celsius °C degrees Fahrenheit °F degrees kelvin K hour h minute min second s Physics and chemistry all atomic symbols alternating current AC ampere A calorie cal direct current DC hertz Hz horsepower hp hydrogen ion activity pH (negative log of) parts per million ppm parts per thousand ppt, ‰ volts V watts W
General Alaska Administrative Code AAC all commonly accepted abbreviations e.g., Mr., Mrs.,
AM, PM, etc. all commonly accepted professional titles e.g., Dr., Ph.D., R.N., etc. at @ compass directions:
east E north N south S west W
copyright corporate suffixes:
Company Co. Corporation Corp. Incorporated Inc. Limited Ltd.
District of Columbia D.C. et alii (and others) et al. et cetera (and so forth) etc. exempli gratia (for example) e.g. Federal Information Code FIC id est (that is) i.e. latitude or longitude lat. or long. monetary symbols (U.S.) $, ¢ months (tables and figures): first three letters Jan,...,Dec registered trademark trademark United States (adjective) U.S. United States of America (noun) USA U.S.C. United States
Code U.S. state use two-letter
abbreviations (e.g., AK, WA)
Mathematics, statistics all standard mathematical
signs, symbols and
abbreviations alternate hypothesis HA base of natural logarithm e
catch per unit effort CPUE coefficient of variation CV common test statistics (F, t, 2, etc.) confidence interval CI correlation coefficient (multiple) R correlation coefficient (simple) r covariance cov degree (angular ) ° degrees of freedom df expected value E
greater than > greater than or equal to harvest per unit effort HPUE less than < less than or equal to logarithm (natural) ln logarithm (base 10) log logarithm (specify base) log2, etc. minute (angular) ' not significant NS null hypothesis HO percent % probability P probability of a type I error (rejection of the null hypothesis when true) probability of a type II error (acceptance of the null hypothesis when false) second (angular) " standard deviation SD standard error SE variance population Var sample var

REGIONAL OPERATIONAL PLAN CF.4K.2015.05
KODIAK COMMERCIAL FISHERIES SALMON MANAGEMENT FIELD CAMP AND WEIR OPERATIONAL PLAN, 2015
by
Brad A. Fuerst
Alaska Department of Fish and Game, Division of Commercial Fisheries, Kodiak
Alaska Department of Fish and Game Division of Commercial Fisheries
March 2015

25
The Regional Operational Plan Series was established in 2012 to archive and provide public access to operational plans for fisheries projects of the Divisions of Commercial Fisheries and Sport Fish, as per joint-divisional Operational Planning Policy. Documents in this series are planning documents that may contain raw data, preliminary data analyses and results, and describe operational aspects of fisheries projects that may not actually be implemented. All documents in this series are subject to a technical review process and receive varying degrees of regional, divisional, and biometric approval, but do not generally receive editorial review. Results from the implementation of the operational plan described in this series may be subsequently finalized and published in a different department reporting series or in the formal literature. Please contact the author if you have any questions regarding the information provided in this plan. Regional Operational Plans are available on the Internet at: http://www.adfg.alaska.gov/sf/publications/
Brad A. Fuerst
Alaska Department of Fish and Game, Division of Commercial Fisheries,
351 Research Court, Kodiak, AK 99615, USA
This document should be cited as:
Fuerst, B. A. 2015. Kodiak commercial fisheries salmon management field camp and weir operation plan, 2015.
Alaska Department of Fish and Game, Division of Commercial Fisheries, Regional Operational Plan
ROP.CF.4K.2015.05, Kodiak.
The Alaska Department of Fish and Game (ADF&G) administers all programs and activities free from discrimination based on race, color, national origin, age, sex, religion, marital status, pregnancy, parenthood, or disability. The department administers all programs and activities in compliance with Title VI of the Civil Rights Act of 1964, Section 504 of the Rehabilitation Act of 1973, Title II of the Americans with Disabilities Act (ADA) of 1990, the Age Discrimination Act of 1975, and Title IX of the Education Amendments of 1972.
If you believe you have been discriminated against in any program, activity, or facility please write: ADF&G ADA Coordinator, P.O. Box 115526, Juneau, AK 99811-5526
U.S. Fish and Wildlife Service, 4401 N. Fairfax Drive, MS 2042, Arlington, VA 22203 Office of Equal Opportunity, U.S. Department of the Interior, 1849 C Street NW MS 5230, Washington DC 20240
The department’s ADA Coordinator can be reached via phone at the following numbers: (VOICE) 907-465-6077, (Statewide Telecommunication Device for the Deaf) 1-800-478-3648,
(Juneau TDD) 907-465-3646, or (FAX) 907-465-6078 For information on alternative formats and questions on this publication, please contact:
ADF&G, Division of Sport Fish, Research and Technical Services, 333 Raspberry Rd, Anchorage AK 99518 (907) 267-2375

i

ii

iii
TABLE OF CONTENTS Page
LIST OF TABLES........................................................................................................................................................ iv
LIST OF FIGURES ...................................................................................................................................................... iv
PURPOSE...................................................................................................................................................................... 1
BACKGROUND ........................................................................................................................................................... 1
OBJECTIVES ................................................................................................................................................................ 2
Opening Camp ............................................................................................................................................................... 2
Weir Installation ............................................................................................................................................................ 2
Weir Operation .............................................................................................................................................................. 3
Weir Maintenance.......................................................................................................................................................... 4
Weir Removal ................................................................................................................................................................ 4
Escapement Sampling .................................................................................................................................................... 5
Crew Leader Responsibilities ........................................................................................................................................ 5
Daily Radio Schedule ............................................................................................................................................... 5 Forms ........................................................................................................................................................................ 6 Time Sheets .............................................................................................................................................................. 6 Data Management ..................................................................................................................................................... 6 Camp Inventory and Closing Camp .......................................................................................................................... 6
Additional Guidelines And Procedures ......................................................................................................................... 6
Camp Policies ........................................................................................................................................................... 6 Ordering Food and Supplies ..................................................................................................................................... 7 Visitors/Public Interaction ........................................................................................................................................ 7 Firearms .................................................................................................................................................................... 7 Bears ......................................................................................................................................................................... 7 Garbage ..................................................................................................................................................................... 8 Fire and First Aid Safety ........................................................................................................................................... 8 Drinking Water ......................................................................................................................................................... 8 Boats and ATVs ........................................................................................................................................................ 8 Equipment Maintenance ........................................................................................................................................... 9 Maintenance and Cleanliness of Cabins and Outbuildings ....................................................................................... 9 Compliance with ADF&G Regulations .................................................................................................................... 9 Basic Procedures Regarding Violations .................................................................................................................... 9 Personal Injury ........................................................................................................................................................ 10 Emergencies ............................................................................................................................................................ 10
SCHEDULE AND DELIVERABLES ........................................................................................................................ 11
RESPONSIBILITIES .................................................................................................................................................. 11
REFERENCES CITED ............................................................................................................................................... 11
TABLES AND FIGURES ........................................................................................................................................... 13

iv
TABLE OF CONTENTS Page
APPENDIX A. WEIR CAMPS ................................................................................................................................... 25
Opening Camp............................................................................................................................................... 26 Weir Installation ............................................................................................................................................ 26 Weir Maintenance ......................................................................................................................................... 27 Miscellaneous ................................................................................................................................................ 27 Opening Camp............................................................................................................................................... 28 Weir Installation ............................................................................................................................................ 28 Weir Maintenance ......................................................................................................................................... 28 Miscellaneous ................................................................................................................................................ 29 Opening Camp............................................................................................................................................... 30 Weir Installation ............................................................................................................................................ 30 Weir Maintenance ......................................................................................................................................... 31 Miscellaneous ................................................................................................................................................ 31 Opening Camp............................................................................................................................................... 33 Weir Installation ............................................................................................................................................ 33 Weir Maintenance ......................................................................................................................................... 34 Miscellaneous ................................................................................................................................................ 34
APPENDIX B. SATELLITE TELEPHONE AND DISPATCH INSTRUCTIONS ................................................... 35
APPENDIX C. ELECTRICAL SYSTEM OPERATION MANUAL ......................................................................... 39
APPENDIX D. GENERAL EQUIPMENT AND CAMP MAINTENANCE ............................................................. 43
LIST OF TABLES
Table Page 1. Emergency numbers, radio frequencies and camp GPS coordinates. ............................................................ 14 2. Equipment and supply list. ............................................................................................................................ 15 3. Example of a weir camp closing inventory. .................................................................................................. 17 4. Camp closing checklist. ................................................................................................................................. 18
LIST OF FIGURES
Figure Page 1. Map depicting the Kodiak Salmon Management Area. ................................................................................. 19 2. Map depicting the Kodiak Management Area weir locations operated in 2015. ........................................... 20 3. Picture of weir trap setup. .............................................................................................................................. 21 4. Weekly weir camp reporting form. ............................................................................................................... 22 5. Daily crew leader report. ............................................................................................................................... 23 6. Timesheet example. ....................................................................................................................................... 24
LIST OF APPENDICES Appendix Page A1. Karluk weir. ................................................................................................................................................... 26 A2. Ayakulik weir. ............................................................................................................................................... 28 A3. Upper Station weir. ....................................................................................................................................... 30 A4. Dog Salmon weir. .......................................................................................................................................... 33 B1. Satellite telephone and dispatch instructions. ................................................................................................ 36 C1. Solar panel and electrical system operation manual. ..................................................................................... 40

1
PURPOSE
The Alaska Department of Fish and Game (ADF&G) Division of Commercial Fisheries (CFD) staff will operate eight weirs in the Kodiak Management Area (KMA) in 2015. These weirs are located on the Karluk River, Ayakulik River, Dog Salmon Creek, Olga Creek (Upper Station), Afognak River (Litnik), Saltery Creek, Pasagshak River and Pauls Creek. The weirs are used to enumerate salmon escapements into river systems and are critical management tools because they provide information that assists ADF&G management staff in deciding when to open and close salmon fisheries throughout the season. This operational plan informs seasonal employees of their responsibilities to run effective field camps, operate weirs, and live at remote sites. Operation dates for each weir vary depending upon the run timing of salmon populations into the different systems; however, most begin in late May and continue through mid September. Chinook Oncorhynchus tshawytscha, sockeye O. nerka, coho O. kisutch, pink O. gorbuscha, and
chum salmon O. keta; as well as steelhead trout O. mykiss, and Dolly Varden char Salvelinus
malma are individually counted by field crews. Escapement data collected provides the basis for inseason management actions regulating the commercial, sport, and subsistence fisheries in the KMA. Key words: weir, escapement, salmon, Kodiak Management Area, field camp, operational plan, ADF&G, KMA,
CFD, Upper Station, Litnik, Dog Salmon, Karluk, Ayakulik, Saltery, Pasagshak, Pauls, fishery, Chinook salmon, Oncorhynchus tshawytscha, sockeye salmon, Oncorhynchus nerka, coho salmon, Oncorhynchus kisutch, pink salmon, Oncorhynchus gorbuscha, chum salmon, Oncorhynchus keta, Dolly Varden, Salvelinus malma, ROP
BACKGROUND
This operational plan informs Alaska Department of Fish and Game (ADF&G) seasonal field camp employees of their responsibilities for opening and closing field camps. This operational plan instructs them on preparing, maintaining, installing, and operating weirs, and provides tips on how to effectively accomplish required tasks, duties, and responsibilities while in the field. Field employees must read the Standard Operating Procedures (SOP) pertinent to their position and be familiar with the 2015 Kodiak Management Area (KMA) commercial salmon fishery harvest strategy (Jackson In prep). Also, this document is intended to show how the weirs will be operated in 2015 for future users of the results.
The KMA encompasses the entire Kodiak Archipelago and that portion of the Alaska Peninsula with waters draining into Shelikof Strait from Cape Douglas to Kilokak Rocks (Figure 1). The KMA is composed of seven commercial salmon fishing districts and 52 sections, which encompass approximately 440 streams supporting commercially viable salmon runs. Five species of salmon are harvested within the KMA. The sum of the escapement goal ranges for KMA salmon spawning systems are 7,000–13,000 Chinook salmon Oncorhynchus tshawytscha, 789,000–1,691,000 sockeye salmon O. nerka, 7,300–16,000 coho salmon O. kisutch, 2,250,000–6,000,000 pink salmon O. gorbuscha in odd years and 3,250,000–8,000,000 in even years, and 255,000 chum salmon O. keta (Sagalkin et al. 2013). Only four streams in the KMA have established coho salmon escapement goals, all of which are accessible from the Kodiak road system.
Weirs are used to enumerate the number of sockeye salmon in major systems in the KMA. These systems include the Karluk River, Ayakulik River, Dog Salmon Creek, and Upper Station (Olga Creek); (Figure 2). Litnik (Afognak River), Pauls Bay (Pauls creek), and Pasagshak weirs are the

2
only weirs on minor systems (Figure 2) operated by ADF&G Division of Commercial Fish (CFD) Research staff. Other weirs located on minor systems include Buskin River and Lake Louise weirs (ADF&G Sport Fish), and Saltery Creek weir (ADF&G with funding from Kodiak Regional Aquaculture Association). Aerial and foot surveys are conducted to estimate escapement on streams without weirs.
ADF&G personnel will collect biological samples from sockeye salmon (i.e., scales for age, sex, and length data [ASL]). These samples provide the foundation for preseason run forecasts, escapement goal evaluation, and accurate assignment of the run to the stock of origin (run reconstruction; Wattum In prep). It is important that the data collected are of the highest quality.
ADF&G will operate KMA weirs from approximately May 22 through September 15. Two crew members are assigned to each weir. Additional assistance may be provided during weir installation and removal, periods of intense salmon escapements, high water, and heavy debris loads.
James Jackson, the Kodiak Finfish Area Management Biologist, is responsible for the management of KMA commercial salmon fisheries and is the overall project supervisor. Kodiak finfish management biologists Geoff Spalinger and Todd Anderson are the weir camp project biologists. Brad Fuerst is the weir camp technical advisor. They will provide oversight, logistical, and technical support for weir operations (Table 1).
OBJECTIVES
The objectives of this plan are annually
1. Enumerate adult salmon escapement through the weir and estimate salmon abundance below the weir in rivers, lagoons and bays,
2. Monitor and collect accurate data on escapement quality, including the number of net-marked and “jack” (salmon ≤400 mm mid eye to tail fork) sockeye salmon, and
3. Collect and maintain accurate age, sex, length (ASL) data for sockeye salmon, including collection of scale samples that are representative of salmon escapements.
METHODS OPENING CAMP
Gather necessary equipment from the ADF&G warehouse prior to departure (Table 2). Upon arrival at camp, the first day of work will consist of opening the field camp facility, organizing and storing supplies and personal gear, setting up the single sideband (SSB) radio & satellite dispatch phone, and preparing the necessary gear and equipment for weir installation. Weir installation will normally occur after the field cabin has been readied.
WEIR INSTALLATION
Refer to Appendix A for weir operations specific to individual camps.
The following list describes procedures relevant to all camps:
Move tripods from their staged location into the river and evenly space them across the river.
Line up and square the tripods perpendicular to the river flow.

3
Fine tune tripod spacing and leveling. Level each tripod by digging under the highest rear leg to level it out. Leveled tripods make it easier to install and level the boardwalk.
Install the entire boardwalk shiplap on the posterior portion of the tripod arms; do not nail boardwalk down until it is all leveled. Start at one end of the weir, laying a 2” x 12” x 14’ board across the first set of tripod arms and ensuring it rests on the next consecutive tripod arm. Continue laying out the boardwalk the length of the weir.
Level the boardwalk with spacers or leveling blocks nailed to the tripod arm, and fine-tune the straightness of the boardwalk. Toenail the boardwalk to tripod arms and toenail the boards that overlap one another together with 16d duplex nails. Make sure the end of each individual board rests on a tripod arm.
Place large rocks or sandbags on each tripod platform to weigh them down.
Install upper and lower stringers in an alternating pattern across all tripods and extending to the riverbanks on both ends of the weir.
Begin installing weir panels. Lay each panel flat against the stringers with the base of the panel up off the riverbed approximately 10 inches. Rake and dig a channel in the river bottom to set the panel into. Once a channel is dug, set the panel into the channel and make sure it is straight and level. Next, backfill the channel with stream gravel and rock to ensure it is fish tight. Continue setting weir panels the length of the weir.
Install counting gate frames along with your weir panels. Determine counting gate locations based on stream depth and river flow. Install gate frames where water flow is greater and depth is adequate for fish passage.
Tie off all of the weir panels to the upper and lower stringer with seine twine or cable ties.
Install flash panels in front of and against each counting gate on the river bottom and weigh down with large rocks or sandbags.
Inspect your work. Walk along the front of the weir backfilling the base of panels with gravel where necessary to ensure the weir is fish tight.
Install fish trap (Figure 3).
Install “keep off weir” signs at either side of the weir.
WEIR OPERATION
Refer to Appendix A for weir operations specific to individual camps.
The following list describes procedures relevant to all camps:
The crew leader will organize a schedule to monitor weirs throughout the day to pass fish.
If you don’t have experience identifying fish, your crew leader will train you to visually recognize the different salmon species and their swimming patterns.
Open a gate and begin counting fish with hand-held tally counters, one tally counter for each species. Regulate the gate opening by using a wedge to lock the gate into position. If you open the gate too far, fish will pass through quickly, and you will not be able to accurately count and identify them.

4
If a counting gate will not open, it is probably locked up by gravel or a rock wedged into the framework. Do not attempt to force the gate, or the entire framework may pull out of place along with the flash panel. Free up the gate by inspecting for wedged rock or gravel and removing it with your fingers or a fish pew.
When counting fish and conducting surveys, wear polarized glasses for greater visual recognition and eye protection from the sun’s reflection off of the water.
Periodically check your tally counters to ensure they are working properly.
When you are done counting make sure the counting gate is closed completely. Then write your numbers down on the dry erase board upon entering the cabin or tent.
WEIR MAINTENANCE
Refer to Appendix A for weir operations specific to individual camps.
The following list describes procedures relevant to all camps:
When out on the weir, be very careful not to injure yourself.
The weir must be cleaned and inspected daily. Debris build up on the weir may cause poor water flow, leading to scouring at the base of weir panels and weir washout during periods of high water.
Cleaning the weir includes getting into the river to remove sticks, logs, leaves, grass, gravel and fish carcasses.
Throw all debris downstream of the weir, allowing it to flow down river.
Inspect the weir to ensure it is fish tight. Look for scour holes, panels out of place, gaps that are too large between panels, and sandbags that have been pushed off of tripods by bears. Make sure flash panels are secure and in place, as well as clean.
Make sure the framework of the weir is sound and secure. If you find any of the boardwalks loose, any section or parts of the weir broken by bears or that are unsafe, repair it immediately.
If water levels increase considerably you may need to pull weir panels to avoid a weir wash out. When panels are pulled, an estimate of the number of salmon behind the weir at the time of pulling panels, and an estimate of what may have escaped through while panels were pulled should be documented.
Keep bears away and off of the weir as much as possible to minimize damage. Install electric fences as needed. Follow camp protocol for bear determent.
WEIR REMOVAL
Refer to Appendix A for weir operations specific to individual camps.
The following list describes procedures relevant to all camps:
Remove counting seats and “keep off weir” signs.
Cut and remove all seine twine or cable ties attaching the weir panels to the upper and lower stringers.

5
Remove all weir panels, counting gates, and flash panels, and place them on the rear of the tripods. Place half of all weir panels, gates, and flash panels at staging locations on either side of the river.
Remove all upper and lower stringers and store in appropriate staging location.
Remove all duplex nails securing the boardwalk, then move all sections of the boardwalk and store in appropriate staging location.
Remove all sandbags from tripods and place half of them on one side of the river bank and the other half on the other side of the river bank.
Remove half of all tripods and stage on one side of the river; remove the other half and stage on the opposite side of the river.
Remove all sandbags from the river.
Stage weir materials in a location far enough from the bank of the river to avoid damage from flooding and ice movement during spring break-up.
ESCAPEMENT SAMPLING
In most camps, sockeye salmon ASL sampling is conducted at a rate of 240 fish per statistical week (Sunday through Saturday). Ideally, 80 samples are collected each Monday, Wednesday, and Friday. If it is obvious to the crew leader that following this strategy will result in failure to obtain the desired 240 samples per week, adjustments should be made. Before the field season begins, KMA salmon research staff will provide field crews a salmon escapement sampling operational plan (Wattum In prep). Refer to this plan for sampling guidelines and procedures. Ask a weir camp project supervisor if you have any sampling questions.
CREW LEADER RESPONSIBILITIES
Crew leaders are responsible for training new employees, establishing work schedules, prioritizing daily work assignments, and supervising camp duties. The crew leader will ensure safety is a priority and collect accurate, complete, and well organized data.
Daily Radio Schedule The previous day’s counts and cumulative salmon escapement information will be reported each morning at approximately 8:10 AM on single side band (SSB) frequency 3.230 MHz (Table 1) to the Kodiak ADF&G office. A second radio report will be at 4:30 PM on the SSB. The afternoon schedule is intended to check on field personnel, discuss salmon escapement and build up, pass along short lists of supply requests, and receive the latest commercial fishery announcements. Radio schedules are very important, and must be taken seriously. Failure to make two consecutive radio schedules may result in a flight to the camp to ensure the safety of the crew. Advise your supervisor if you plan to miss a radio schedule. Keep your SSB battery charged and have spare fuses available. You may contact someone at the Kodiak ADF&G during normal working hours (M-F 8:00AM–4:30PM) on SSB frequency 3.230 MHz. Use the satellite dispatch phone if the radio will not operate. The satellite dispatch phone may also be used for communicating with the office when SSB reception is poor. Refer to Appendix B for satellite phone and dispatch instructions and Appendix C for instructions on operating your electrical system.

6
Forms The crew leader will fill out a weekly salmon weir camp report (Figure 4) and a daily crew leader report (Figure 5). The weekly salmon weir camp report includes weather and daily escapement data that occurred during the past week. The daily crew leader report will keep the project supervisor informed of fish estimates, conflicts with crew or public, and the duties accomplished during the past two weeks. In addition, any items that were sent to the office and any items that were not received on the most recent supply flight will be recorded. All paperwork is to be sent to the office on resupply flights.
Time Sheets Crew leaders are responsible for keeping an accurate record of each employee’s work hours. Each employee will fill out a timesheet on the 15th and the last day of each month (Figure 6). Most projects can be finished within normal working hours; however, there may be occasions when the normal working day (7.5 hours) is insufficient to complete the necessary tasks. If unusual circumstances arise that require additional overtime, the crew leader must notify the project leader immediately. Send in signed timesheets with resupply flights. Complete timesheets in PEN only (blue ink). If you cross out anything on your timesheet you must initial by where you crossed it out. Do not use whiteout.
Data Management It is imperative that measurements be accurate and data be recorded properly. Forms and samples should be complete, correct, and neat. It is the crew leader’s responsibility to keep a daily log that includes a record of weather, water temperature, stream depth (recorded at 7:55 AM), water conditions, work accomplished, escapement counts, and survey notes. Additional entries should include comments related to fishing activity, bear and people encounters, smolt migrations, weir problems, regulation violations, cabin maintenance, and aircraft traffic.
Camp Inventory and Closing Camp Each camp will be inventoried for all gear, supplies and fuels that remain on site prior to camp closure. Winterizing the cabin should include (but is not limited to) covering windows, covering and insulating propane connections, closing and locking all doors, winterizing all motorized equipment, and chaining and locking boats in a secure location. See Tables 2, 3, and 4 for examples of a weir camp closing inventory and a camp closing checklist.
ADDITIONAL GUIDELINES AND PROCEDURES
Refer to SOP III-720 for Field Camp Safety procedures, SOP III-730 for Aircraft Safety for Passengers and SOP III-770 for Small Tool Handling.
Camp Policies The use of alcoholic beverages while on duty will be grounds for dismissal. The use of
illegal drugs at any time will be grounds for dismissal. For more information on possession and use of alcohol, refer to SOP II-071 and SOP III-700
All ADF&G employees are required to act in a professional manner at all times and be especially courteous to the public.

7
Injuries and loss or damage of state equipment must be reported to the project supervisor within 24 hours.
Ordering Food and Supplies Field crews will purchase necessary items prior to leaving Kodiak and may also request items (e.g., groceries, supplies and equipment) while in the field. Crews will only purchase items authorized by the project leader. Grocery and supply flights are scheduled twice a month. Grocery orders for 2 weeks out will need to be sent in on the backhaul of the last grocery flight (i.e. your grocery order will need to be sent in 2 weeks early). You can always add items to the list at a later time before the supply flight. Order enough food to eat healthy, but be reasonable. If grocery orders become unreasonable, less expensive items will be substituted. Grocery and supply orders must be in the Kodiak office at least one week prior to the scheduled flight. Grocery forms/ordering lists are provided to keep track of needed items.
Alcoholic beverages, personal grooming supplies, newspapers, magazines, and tobacco must be purchased with personal funds. Personal funds may be left with the logistics specialist who will put the funds in a secure location until requested for use in purchasing personal items.
Visitors/Public Interaction Weir sites often receive many visitors that come by the camp to see bears and watch fish passing through the weir. Keep the camp clean and be courteous and helpful to visitors, but also inform them of the boundaries. The general public is not allowed to access the weir. Make sure “keep off weir” signs are posted in visible locations at both ends of the weir. In addition to those signs make sure to install the “no sport fishing” signs 100 yards upstream and downstream of the weir. Remember, your primary role is to operate and maintain the weir and accomplish the associated responsibilities of the project.
Firearms All field camp employees must be able to safely use firearms. A state-owned shotgun will be provided at each camp. Training on safe handling and shooting of firearms will be conducted for all personnel. Only load firearms when working, traveling or camping in bear country, or when firing for practice. Load a round into the chamber only when confrontation with a bear is imminent. Anyone handling a firearm should always treat it as if it is loaded. Guns should be cleaned frequently, especially after being fired. Make certain that firearms are completely unloaded while doing so. Firearms will be stored on site in a location out of reach of the public. Misuse of firearms will not be tolerated and may be cause for immediate dismissal. Always unload a firearm of all ammunition before boarding a vessel or aircraft. Ammunition should be stored in a cool place in a waterproof container to avoid corrosion. For more information on firearm safety, refer to SOP III-780.
Bears Weir camps have high concentrations of bears. Do not antagonize bears. Make every attempt to coexist with them. Each bear is a potential danger. Do not attract bears by leaving food or unburned garbage around camp. Make sure to burn trash completely and maintain a clean camp. If you are having problems with a particular bear notify your supervisor. When attempting to frighten a bear away by shooting, shoot away from the bear to avoid inadvertently wounding it. Do not shoot a bear unless, in your best judgment, it is endangering someone’s life. Do not shoot

8
unless it is absolutely necessary. If a bear is shot, notify your project supervisor immediately. If a bear hangs around or on the weir and will not leave, cracker shells can be loaded and shot in the approximate direction of bears, but NOT directly at the bears. Rocks may also be used at your discretion, keeping in mind that a bear is a potential danger. For more information on bear safety, refer to SOP III-780 and SOP III-720.
Garbage Burn garbage completely to prevent bear problems. Do not burn during windy or dry weather conditions. The U.S. Fish and Wildlife Service prohibits garbage pits on the Refuge. Never start fires with fuel. To prevent grass fires keep grass and brush trimmed at least fifteen feet away from the burn barrel. It is best to burn trash early in the morning or late in the evening when the wind is minimal and humidity is high. Never leave a fire unattended.
Burn tin cans along with burnable garbage. Burning cans eliminates residual food and odors that attract bears. Send in burnt cans and non-burnable items on supply flights. All garbage must be double bagged. Empty fuel containers should also be sent in as soon as possible on return grocery flights for immediate recycling.
Use a slop bucket for biodegradable garbage (food scraps, etc.) that is dumped away from camp either in the river or bay. Do not compost food because it attracts bears.
Fire and First Aid Safety All crew members will attend a mandatory CPR and First Aid training course prior to going to the field. Ensure a fully stocked first aid kit and fully charged, operational fire extinguishers are in camp and that all personnel know where they are located and how to use them. Make sure smoke and carbon monoxide alarms are installed and operational. (Install new batteries at the beginning of each season). Refer to SOP III-700 and SOP III-720 for more information regarding safety and first aid.
Drinking Water Drinking water for field camps is obtained from the nearby lakes and streams, but it may be contaminated with bacteria or harmful parasites. “Micron” water filters are provided in field camps to filter all drinking water. If filter cartridges are damaged, replace them immediately. If filters are not available, boil your drinking water for at least 10 minutes. Be sure to read the instruction manual with each filter for cleaning and care information.
Boats and ATVs Refer to SOP III-740 for Boating Safety protocol.
Some camps are furnished with boats or ATVs. They have been provided to transport materials, supplies, and equipment between campsites and supply planes or vessels. They may be used for transportation to and from assigned field duties such as surveys, fishery monitoring, or collecting harvest information. They are not intended for personal use or recreational purposes. Boats and ATVs may be accessed and operated only by trained ADF&G personnel and will be secured when not in use. Be safety conscious at all times; do not speed or drive recklessly.
All personnel must wear United States Coast Guard (U.S.C.G.) approved Personal Flotation Devices (life jacket, float coat, or exposure suit) at all times when operating boats. If you suspect conditions may be dangerously rough, do not go out on the water. A VHF radio, waterproof

9
Emergency Positioning Indicator Radio Beacon (EPIRB), a flare kit and a tool kit (including wrenches, pliers, screw drivers, spare spark plugs, and spark plug wrench) must be in the boat or raft at all times. If you must travel at night, carry a flashlight. Know how to activate your EPIRB; check the battery power and expiration date.
Unauthorized use of an ADF&G ATV or boat will result in a notation on your evaluation, and the discontinuation of ATV or boat use at your field station, or your dismissal from employment.
Only state employees may use ADF&G vehicles, ATVs, and boats.
Only one employee may ride on an ATV at a time.
A safety helmet must always be worn when riding an ATV.
Equipment Maintenance Outboard motors and generators must be kept in good operating condition and require regular maintenance. At the end of each season, equipment should be tagged with a description of the equipment’s condition and most recent maintenance on the tag. All equipment returning to Kodiak is stored at the warehouse in the salmon management locker or the salmon management trailer van behind the warehouse. See Appendix D for instructions on operation and maintenance of outboards and generators.
Maintenance and Cleanliness of Cabins and Outbuildings Cabin and facility maintenance is an important aspect of camp life; the buildings must be kept clean, structurally sound, and safe. Make a list of projects and repairs that need to be accomplished during the season. Send in a list of materials needed for these projects/repairs. Order supplies in advance. Repairs and maintenance should be scheduled on days when fish migrations are slow to keep this work within normal work periods.
Compliance with ADF&G Regulations All employees are responsible for complying with local subsistence, sport fishing and hunting regulations. Copies of State and Federal regulations will be available to all field camp personnel. Any violation will be recorded on your evaluation and may be cause for immediate dismissal. Refer to SOP II-040.
Basic Procedures Regarding Violations ADF&G field personnel have a responsibility to be aware of and report violations of state or federal fishing and hunting regulations. The following is a guideline for obtaining the appropriate information and/or evidence to prove that a violation has been committed. If a violation is seen, all pertinent information pertaining to the violation should be recorded immediately, retained by the employee, and the project leader must be notified. A copy of each regulation book should be available in camp.
The use of the following five W’s can aid in obtaining sufficient information pertaining to a violation:
1. What is the violation? 2. When did the violation take place? 3. Where did the violation occur? 4. Who is in violation and who are the witnesses?

10
5. Why was the violation committed?
Interview all witnesses to a violation and record statements pertaining to the violation along with witnesses’ names and contact information (phone number and address). If you have a camera, record as much as possible. Always carry your camera if you suspect you may encounter a violation. Collect as much information and evidence as possible and immediately contact your supervisor or a State Trooper from the Alaska Wildlife Troopers (AWT). (907) 486-4121.
If the violator refuses to cooperate with an employee without enforcement authority, no action should be taken, other than to relay all information and evidence collected to an AWT officer as soon as possible.
Personal Injury Personal injury poses the greatest risk to personnel. In the event of major medical emergencies access to adequate care is limited due to the remote location of the facility. For minor injuries, first aid kits are located in the cabin. In the event that you injure yourself, fill out an injury report as soon as possible and give to your supervisor. For emergencies or injuries that require professional medical attention contact the United States Coast Guard (1-800-478-5555 or VHF channel 16) or refer to Table 1.
Emergencies In the event of a medical emergency, administer first aid to stabilize the situation. If an injury is life threatening, immediately notify the USCG at their Search and Rescue Emergency phone number 1-800-478-5555 on the satellite phone. The USCG can also be reached on SSB radio frequency 4.125 MHz or on VHF channel 16.
When contacting the USCG, have the following information ready to pass along:
Location of your field camp or specific location of the emergency (Table 1); Name and phone number of supervisor; General nature of medical emergency; Specific information regarding the patient (name, age, primary complaint and vital signs); Your assessment and treatment; Wind and weather conditions; and Other information pertinent to a possible medical evacuation.

11
SCHEDULE AND DELIVERABLES
Date Activity
Late May Open camps, install weirs
Late May through Mid-September Pass, enumerate, sample salmon
Every two weeks Resupply camps, send in sampling data
Mid-September Remove weirs, close camps
RESPONSIBILITIES
Project Fisheries Biologist II Supervise project, assist in setup as needed, coordinate logistics
Project Fisheries Biologist I Assist crew with setup, sampling, and enumeration as needed
Project Fish and Wildlife Technician III Crew leader, create work schedules, supervise daily activities, train new personnel, ensure project and sampling goals are met, update Project FB II daily,
Project Fish and Wildlife Technician II Assist crew leader with daily tasks to attain project goals
REFERENCES CITED
Jackson, J. In prep. Kodiak management area harvest strategy for the 2015 commercial salmon fishery. Alaska Department of Fish and Game, Fishery Management Report No. 15-XX, Anchorage.
Sagalkin, N. H., B. Foster, M. B. Loewen, and J. W. Erickson. 2013. Review of salmon escapement goals in the Kodiak Management Area, 2013. Alaska Department of Fish and Game, Fishery Manuscript Series No. 13-11, Anchorage.
Wattum, M. L. In prep. Kodiak Management Area salmon catch and escapement sampling operational plan, 2015. Alaska Department of Fish and Game, Regional Operational Plan, Kodiak.
Wattum, M. L. In prep. Kodiak Management Area salmon escapement and catch sampling results, 2014. Alaska Department of Fish and Game, Fishery Data Series, Anchorage.

12

13
TABLES AND FIGURES

14
Table 1.–Emergency numbers, radio frequencies and camp GPS coordinates. Contact Phone Number Radio Frequency Other Frequencies
US Coast Guard 800-478-5555 SSB Freq. 4.125 MHZ VHF Channel 16
ADF&G Office 486-1830 or 486-1825 SSB Freq. 3.230 MHZ (WON 32)
2.450 MHz, 4.125 MHz
State Troopers 486-4121
ADF&G Staff Phone Number
James Jackson (w) 486-1808, (c) 539-2097, (h) 486-2480
Geoff Spalinger
Todd Anderson
(w) 486-1804, (c) 952-567-1420, (h) 486-5582
(w) 486-1807, (c) 701-214-7667
Brad Fuerst (w) 486-1810, (c) 539-9033, (h) 486-4891
Jeff Wadle (w) 486-1813, (c) 654-9113, (h) 481-2974
Camps GPS Coordinates SSB Radio Call Sign
Ayakulik 57° 11.60’ N. Lat., 154° 31.39’ W. Long WQF 466
Karluk 57° 33.58’ N. Lat., 154° 23.75’ W. Long. WNJI 929
Upper Station 57° 03.33 N. Lat., 154° 21.17’ W. Long. WNJI 929
Dog Salmon 57° 07.75’ N. Lat., 154° 00.10’ W. Long. WNJI 929

15
Table 2.–Equipment and supply list.
Field equipment for the commercial fisheries salmon management weir and field projects is stored at the ADF&G warehouse on Rezanof Drive.
Tent(s) - If needed.
Visqueen or tarp - Use for tent ground cloth and to keep equipment and supplies covered when you arrive or depart from field camp.
Raft - If needed. Make sure proper floorboards, pump-hose, oars, drain plug, and patch kit are included. Assemble and inflate raft and check for leaks. Make sure you secure extra raft chamber valves.
Outboard motor - Bring spare spark plugs, lower end lube, fuel hose, and fuel filters. Make sure you have the proper fuel hose and tank for your motor. Don’t forget 2-cycle or 4-cycle oil for the motors, as appropriate. Gas tanks are stored in the fuel shed. Change lower end unit lube at the end of the season.
Cook stove & hose - If needed, check to ensure it works. Propane tanks are in the fuel shed at the warehouse.
Cooler(s) - If needed.
Lantern - Remember to purchase lantern fuel and extra mantles. Make sure it works.
SSB radio - Make sure the radio suitcase contains the black coaxial cable, 12-volt power cable, antenna (3.230 MHz frequency) and spare fuses.
Satellite Phone - Make sure battery is good and that the phone is activated.
Communications - Handheld VHF radios plus an extra set of AA batteries.
12 Volt battery - Make sure to charge battery; battery testers are available at the office or the warehouse (battery must be transported in a case).
Solar panel - Check wires and connections.
Boat kit - A Rubbermaid tote should include: Lower end lube, fuel filters, hose connectors, hose clamps, seine twine, tool kit, outboard oil, cable ties, metal wire, fuel pump diaphragms and a flare kit.
Propane - Make sure propane tanks are full.
Stove oil - Use only #1 heating oil.
Outboard gas tank, hose, oil & gas - Be sure to know the correct mixture of your motor. Take at least 3 containers of gas, preferably one cruise tank and two 5-gallon containers.
Firearm & cleaning kit - Shotguns, ammunition, and gun cases are available at the office; check with a project supervisor. Know how to clean, load, and carry the firearm safely.
Emergency/ safety equipment - EPIRB, rescue light, first aid kit, mustang suit or float coat.
Groceries - Purchase sufficient groceries for approximately two weeks, plus some extra quick meals in case supply flights are delayed. When selecting groceries, consider the weight and bulk of your items, as space is limited on flights.
-continued-

16
Table 2.–Page 2 of 2.
Paperwork - Paperwork is located in camp boxes in ADF&G office for your camp.
Personal gear - Warm clothes, sleeping bag & pad, books and any other hobbies you may want to work on.
Sampling gear - Scale cards, write in the rain books, polarized glasses, gloves, waders, wading boots and rain gear. Also a computer and RDA will be provided for sampling purposes only.
At the end of the field season, please make sure all equipment from your camp is put away properly and in the correct place. If you choose to return next season, this may again be your gear. A few items such as lanterns, SSB radios, and 12-volt batteries probably will be shared with the herring camps. Label your personal gear (waders, rain gear, etc.) with your name to ensure you receive your gear next season.

17
Table 3.–Example of a weir camp closing inventory.
WEIR CAMP CLOSING INVENTORY
Weir Camp: Karluk
Date 9/2012
# item Location1 Stihl chainsaw Shed1 DeWalt tool set Town warehouse1 Skillsaw Shed1 Ratchet set Shed1 Stihl weed-eater Shed2 Flashlights Attic2 Headlamps Attic1 Shotgun cleaning kit Storage bench1 First aid kit Town warehouse3 Extension cords Shed2 Come alongs Shed3 Shovels Shed2 Rakes Shed3 Pews Shed2 4' levels Shed2 Hammers Shed1 Toolbox Shed1 5 gal. Gasoline Shed1 5 gal. Stove oil Shed1 100 lb. Propane tank (1/3 full) Shed1 40lb. Propane tank (1/2 full) Shed2 Handheld VHF's Town warehouseNeed for next season100lb. Propane tank (full)15 gal. Gasoline15 gal. Stove oilNew headlampsGarbage can

18
Table 4.–Camp closing checklist.
Camp chores (Depending on field camp) Box/store food
Clean stove Clean behind stove Clean refrigerator-defrost and block door open
Mop floor Make sure coax cable is secure
Disconnect propane lines and tape ends Make a pile of gear to return to town Clean ashes out of wood stoves
Spray tools with WD-40 Winterize outboard-if not brought to town
Store gas jugs in shed Flip outhouse and cover hole Lock and chain skiffs that remain onsite
Make sure batteries are properly hooked up to solar panels for an overwinter charge Place mothballs in each room
Store all tools Clean up burn pit Board windows Board shed door shut
Cover chimneys with buckets
Items to bring to town Radios-SSB and VHF Shotgun
Satellite phone First aid kit Outboard motor-depending on camp
Generator-depending on camp Rafts (if any)

19
Figure 1.–Map depicting the Kodiak Salmon Management Area.
Alask
a Pen
insu
la
Kilokak Rocks
Alask
a Pen
insu
la
Alitak District
SW KodiakDistrict
NW KodiakDistrict
Mainlan
d District
0
Kodiak Island
Mainlan
d District
Cape Douglas
AfognakDistrict
Eastside KodiakDistrict
7035
miles
NW Kodiak District
NE KodiakDistrict
Afognak IslandAfognak IslandAfognak IslandAfognak IslandAfognak IslandAfognak IslandAfognak IslandAfognak IslandAfognak Island
Al a
sk
a P
en
i ns
ul a
Alaska
Kodi ak
I sl and
District Line

20
Figure 2.–Map depicting the Kodiak Management Area weir locations operated in 2015.

21
Figure 3.–Picture of weir trap setup.

22
Figure 4.–Weekly weir camp reporting form.
ALASKA DEPARTMENT OF FISH AND GAME
KODIAK MANAGEMENT AREA
WEEKLY SALMON WEIR CAMP REPORT FOR YEAR: 2005
Location: Ayakulik Personnel: Chiles/Reid Weekly Report no: 7 For Week Ending Saturday: July 7
Daily Total Salmon Escapement Daily Steelhead Jack Jack % Net Mark Reds Dollys H2O H2OWeather
Date Sockeye L. Sockeye Chinook Pink Coho Chum Totals Down Up No. Sockeye Sockeye Sampled up Level Temp. Ceiling Vis. Wind Dir/Sp
Sun. D 296 56 0 0 0 352 0 0 20 6.8 4 0 12 13 7.5 2,000 solid 5 SE 15-20
7/1 C 213,789 6,211 0 0 0 220000 697 0 4,256 2.0 675 623 Rain
Mon. D 26 100 0 0 0 126 0 0 0 0.0 1 80 36 13.5 7.5 1,000 Solid 3-5 E 10-15
7/2 C 213,815 6,311 0 0 0 220126 697 0 4,256 2.0 676 659 RDF
Tue. D 569 29 0 0 0 598 0 0 102 17.9 15 0 50 13.5 7.5 500 Solid 1-2 NE 20-25
7/3 C 214,384 6,340 0 0 0 220724 697 0 4,358 2.0 691 709 RDF
Wed. D 2,326 39 0 0 0 2365 0 0 156 6.7 30 80 106 14 7.5 CAVU SW 5-10
7/4 C 216,710 6,379 0 0 0 223089 697 0 4,514 2.1 721 815
Thur. D 781 212 0 0 0 993 0 0 68 8.7 24 0 26 14 8 CAVU Calm
7/5 C 217,491 6,591 0 0 0 224082 697 0 4,582 2.1 745 841
Fri. D 105 62 0 0 0 167 0 0 9 8.6 5 80 16 13.5 8 4,000 Unl. W 15
7/6 C 217,596 6,653 0 0 0 224249 697 0 4,591 2.1 750 857
Sat. D 265 106 0 0 0 371 0 0 18 6.8 9 0 93 13.5 8 4,000 Unl. SW 15-25
7/7 C 217,861 6,759 0 0 0 224620 697 0 4,609 2.1 759 950
Total
for w eek
Additional Comments: Bear and people problems, smolt migration, weir problems, estimated escapements, cabin repair, etc.
1-Jul Approximately 2,000 Sockeye in lagoon
2-Jul No additional build up in lagoon, small numbers of jumpers off mouth
3-Jul Found hole in weir this morning, Estimate of 200 Sockeye included in escapment counts
4-Jul Several rafters today, fishing is slow upriver
5-Jul Approximately 500 Sockeye in lagoon
6-Jul New sow with cubs trying to fish behind weir, respond well to yelling
7-Jul Lots of jumpers off the mouth, looks like some pinks starting to jump.
*Note Daily sockeye jack counts must be included in the overall daily count
88 240 3394,368 604 4,972 373

23
Figure 5.–Daily crew leader report.
Weir Camp: Ayakulik Project Biologist: Geoff Spalinger
Time Period for Report: May 1-May 14
Date: Weir was fish tight? yes Hrs. compromised between:
If not why? Estimated escapement through by species:
Survey: Kings Reds Pink Coho Chum Time Turbidity
Quality: 500 20 2 1 5:25pm clear
Describe where fish were seen: Ceiling Visibility Wind dr/sp
In banya hole 3k broken Unlimited Calm
Date: Weir was fish tight? Hrs. compromised between:
If not why? Estimated escapement through by species:
Survey: Kings Reds Pink Coho Chum Time Turbidity
Quality:
Describe where fish were seen: Ceiling Visibility Wind dr/sp
Date: Weir was fish tight? Hrs. compromised between:
If not why? Estimated escapement through by species:
Survey: Kings Reds Pink Coho Chum Time Turbidity
Quality:
Describe where fish were seen: Ceiling Visibility Wind dr/sp
Date: Weir was fish tight? Hrs. compromised between:
If not why? Estimated escapement through by species:
Survey: Kings Reds Pink Coho Chum Time Turbidity
Quality:
Describe where fish were seen: Ceiling Visibility Wind dr/sp
Date: Weir was fish tight? Hrs. compromised between:
If not why? Estimated escapement through by species:
Survey: Kings Reds Pink Coho Chum Time Turbidity
Quality:
Describe where fish were seen: Ceiling Visibility Wind dr/sp

24
Figure 6.–Timesheet example.

25
APPENDIX A. WEIR CAMPS

26
Appendix A1.–Karluk weir.
The Karluk weir is approximately 90 m (295 ft) long and is located about 0.8 km (0.5 mi) upstream from the confluence of Karluk River and Karluk Lagoon on the southwest side of Kodiak Island (Figure 1). The weir was first constructed in 1921 at its current location and was operated annually here until 1941. The weir was moved to “the portage,” approximately 12.9 km (8 mi) down river from the Karluk Lake outlet from 1942 to 1945. Between 1946 and 1975 it was operated at the outlet of Karluk Lake. It was re-established at its present location in 1976.
Opening Camp
Obtain cabin keys and lock combinations from your project supervisor. Equipment and tools for the Karluk weir are stored in the ADF&G warehouse and labeled. Batteries and solar panels are stored at the ADF&G warehouse in the salmon locker. Fuels needed for this camp include: propane, #1 heating oil, unleaded gasoline, two-cycle oil for
the sampling boat outboard, and 10W-30 motor oil for the generator, and 5W-30 oil for the Go-Devil motor. Talk to your project supervisor to determine what quantity of each item is needed.
Weir personnel will be transported to the float plane landing in the upper lagoon and then will either cross the lagoon to the cabin to obtain the survey skiff or the plane will taxi over to the cabin site. All gear and supplies are moved to the cabin from the skiff landing.
The cabin consists of a 2-story, 24’ x 32’ cabin with propane refrigerator and stove/oven, an outhouse, and a tool shed.
There is no water supply to the cabin. Water is obtained from the adjacent mountain creek and filtered for consumption.
The outhouse is located in close proximity to the cabin Weir materials are stored near the edge of the lagoon and are moved to the weir location with
the scow at high tide. Weir Installation
The 2015 weir will be placed in the same location as in 2014. The Karluk weir is a conventional wooden tripod weir. The boardwalk for the weir consists of 2” x 12” x 14’ boards and is staged with the other weir materials
Carefully move the scow and spud barge from their storage locations to their docking location in the lagoon.
Transport weir materials from staging location to weir site with scow and barge. Weigh tripods down with large rocks from the riverbed or sandbags. Install five to six counting gates accompanied by flash panels and one gate for the sampling
trap. More may be required on even years. Secure and tie off weir panels to the upper and lower stringers with seine twine. Install adult sampling trap and steelhead trap (Figure 3). Move spud barge up to the weir with the scow at high tide. Secure with anchors, drop the spuds
and jack the barge up out of the water, lower drawbridge and set up the weatherport.
-continued-

27
Appendix A1.–Page 2 of 2.
Weir Maintenance
Clean debris from the front of the weir and inspect for scour holes first thing in the morning and periodically throughout the day.
The debris load is usually heavy after moderate to heavy rainfall and may increase later in the season, especially on large pink salmon years.
Pull some weir panels during high water events; when the river begins to cloud up, when debris build-up increases significantly, and when the water level covers the sampling trap. This will prevent from the weir washing out. Estimate the number of fish and species past the weir when not fish tight.
Miscellaneous
Install “No Sport Fishing” regulatory markers 100 yards upstream and downstream from the weir.
During the season, the scow is moored to an anchor line in the lagoon, and the skiffs are moored to a running line that is set up to the west of the boat landing in from of the cabin.
Make repairs, and maintain buildings and grounds surrounding the cabin, shed and banya. Trim the grass along the trail to the boat landing. At season’s end, cut a trail and an area large enough to stage tripods in the storage area by the lagoon.
Repair and/or maintain the skiffs and canoes. During the season, the skiffs are moored on the running line at the skiff landing. The canoes should be stored out of the reach of bears inside the bear fence around the tool shed.
Conduct surveys of the lagoon and river when directed by office staff. Inform the office of any fish build-ups you may notice in the lagoon.
Clean and lime outhouse on a regular basis to help keep bears away.
The grocery/supply flight arrives on the north shore of the lagoon approximately 0.5 km below the upper lagoon boat landing. Very rarely do the flights coincide with a tide high enough to reach the skiff landing.
All tools, gear, and equipment brought out at the beginning of the season are returned to Kodiak and stored in the warehouse.
Remove all food from cabin at the end of the season and bring to town bunkhouse.

28
Appendix A2.–Ayakulik weir.
The Ayakulik weir is approximately 35 m (120 ft) long and is located about 1.3 km (0.8 mi) upstream from the outlet of the Ayakulik River into the Shelikof Strait, on the southwest side of Kodiak Island (Figure 1). A weir was originally constructed on the Ayakulik River in 1929 at the outlet of Red Lake and operated at that location until 1969. The weir has been at its current location since 1970.
Opening Camp
Assorted tools and equipment for the Ayakulik camp are stored at the ADF&G warehouse. Fuels required at this camp include: unleaded gasoline, propane and two-cycle oils. Talk to
your project supervisor to figure out how much of each you will need prior to going out to your camp.
Obtain the keys to the cabin from your project supervisor. You will need a cordless drill, claw hammer and an adjustable wrench. The basement of the cabin is locked and nailed shut. The basement must be opened first to obtain a ladder to reach the window on the northeast corner of the cabin.
Living quarters consist of a one story, 16’ x 20’ one room cabin with half basement (red house) and a 16’ x 24’ one story cabin with loft (green house). The green cabin has three bunks, a propane refrigerator and cook stove, a gravity fed water system, a wood heating stove, and 12-volt lights. The red cabin has one bunk, a wood heating stove, and a 12-volt solar power system.
Propane connections are located in the basement for refrigerator and cook stove. The banya and outhouse are located near the cabin. Firewood for heating the cabin and banya
is obtained from the beach. Water for the gravity fed water system is pumped from the river to a 55-gallon drum that
supplies the kitchen sink. This water is non-potable and needs to be treated before ingestion. The water filter for drinking water is located above the kitchen sink.
The cabin has a 12-volt battery bank charged by solar panels permanently attached to the roof. This 12-volt system powers the lights, SSB radio 12-volt water pump and AC/DC invertors.
Weir Installation
The 2015 weir will be placed in the same location as in 2014. The Ayakulik weir is a wooden tripod weir. The tripods and weir panels are staged near the banya.
Weigh down each tripod with large rocks from the river bottom along with sand bags. Install four to six counting gates accompanied by flash panels and one fish trap gate. Secure the upper portion of weir panels to the upper stringers with seine twine. Install the adult and steelhead sampling trap.
Weir Maintenance
The weir needs to be cleaned and inspected for scouring and holes every morning and cleaned throughout the day as necessary.
Debris load is usually heavy after moderate to heavy rainfall.
-continued-

29
Appendix A2.–Page 2 of 2.
Miscellaneous
Consider pulling the weir panels when you see standing water in the yard and when water in the river begins to cloud up. An indicator rock is located 30 yards downstream from the weir. When the water level covers this rock you should evaluate the situation and consider pulling panels.
Install “No Sport Fishing” regulatory markers 100 yards upstream and downstream from the weir.
This camp has a large number of bears that frequent the weir. Do not let them loiter around the camp and weir! Install the electric bear fence around the perimeter of the weir.
Make repairs and maintain buildings and grounds surrounding the cabin and banya. Trim grass around buildings, the trail to weir and the boat landing at the lagoon.
Clean and lime the outhouse on a regular basis. Dig a new hole and relocate if the need arises. Repair and maintain the boat. During the season the boat is anchored on the shore of the river
next to the trail by the south lodge. Grocery and supply flights land on the beach near the lodge and sometimes in the lagoon. Keep
the landing area free from logs, large boulders, and other debris that would hinder landing. Use the ATV to haul groceries and firewood from the boat landing, but be sure to return it to its
home under the green cabin after each use and keep the door closed and locked to prevent bears from damaging it.
At the end of the season the boat is stored next to the green cabin with four to six full sandbags on top.
The 12-volt battery bank remains connected to the solar panel at the end of the season and the switch is to remain in the “on” position.
Window boards are attached with carriage bolts and the nuts are attached from the inside. You must exit the cabin through the window on the northeast corner. This window must be left open one half inch because it locks from the inside. The board covering this window is attached with two padlocks and two lag bolts.
All tools, generator, ladder, the old outboard motor, and fuels are stored in the basement at the end of the season make sure to winterize and fog the outboard engine before storage. The remaining equipment including power tools, new outboard motor (if on site), and chain saw are returned to Kodiak and stored in the warehouse.
Remove all food from the cabin at the end of the season and bring to bunkhouse. At the end of the season return the shotgun, SSB radio and antenna, first aid kit, cordless drill,
handheld VHF, and logbooks back to Kodiak to store in the warehouse.

30
Appendix A3.–Upper Station weir.
The Upper Station weir is approximately 11 m (35 ft) long and is located near the outlet of Olga Creek into upper Olga Bay on the south end of Kodiak Island (Figure 1). The weir was first constructed in 1929 just above the lagoon, approximately 0.23 km (0.14 mi) above its current location, and was operated there until 1969. From 1969 to 1992 the weir was operated near the outlet of lower Olga Lake. The weir was moved to its current location in 1993.
Opening Camp
Obtain the lock combination from your weir camp project leader before departing for this camp. You will need a cordless drill with Phillips and square-head bits to remove window board screws.
Fuels needed for this camp include: propane, #1 heating oil, unleaded gasoline and two-cycle oil for an outboard engine that is used at the end of the season to move tripods in the metal skiff. Obtain quantity information from your camp supervisor.
An air charter will transport personnel to Olga Bay. Personnel will then cross the creek in chest waders and install the footbridge across the creek to move gear and supplies to the cabin. The footbridge involves placement of one tripod in the middle of the creek and installing a section of boardwalk from each bank of the river to the tripod.
Living quarters consist of a one story, 14’ x 24’ cabin. The cabin is wired to operate 12v DC powered lights. An oil stove heats the cabin.
There is an outbuilding that serves as a one person bunkhouse and banya. The master buss bar fuse stored next to the fuse panel may need to be installed prior to
operating the 12-volt solar system. The SSB radio, VHF, and two 12-volt lights are powered by a bank of five 12-volt batteries
located on the deck near the main cabin that are connected to a permanently mounted solar panel on the roof of the cabin.
Two propane connections for the refrigerator, stove and lights are located behind the cabin. Rainwater from the roof collects in plastic garbage cans and feeds the gravity fed water
system to the kitchen sink. There is also a pump and hose used to pump water from the creek. There is a filtration container on site for drinking water.
Weir Installation
The 2015 weir will be placed in the same location as in 2014. The weir is located nearly directly in front of the cabin. There is a boardwalk from the cabin leading to the weir. The beach also gives access to the weir.
The Upper Station weir is a conventional wooden tripod weir. It has four tripods, one counting gate, and one sampling trap gate.
Tripods for the weir are staged adjacent to the banya. The tripods are floated downstream to the weir site, and returned to the staging location at the end of the season by tilting them into a metal boat and motoring them back upstream for winter storage.
Other weir materials are staged on the bluff above the weir site.
-continued-

31
Appendix A3.–Page 2 of 3.
Install the sampling trap on the beach side of the creek, reasonably close to the creek bank. Weigh the tripods down with sandbags and rocks. Secure the upper portion of weir panels to the upper stringers with seine twine. Install the debris trap on the upstream side of the footbridge if necessary during the season.
Weir Maintenance
The weir is cleaned and inspected for scouring and holes every morning and cleaned throughout the day as necessary.
Debris load can be heavy after moderate to heavy rainfall, or after high easterly winds when large amounts of river and lake grass may build up on this weir.
Consider pulling weir panels during high water, when the water in the river begins to cloud up, when debris build-up increases significantly and when the water level covers the adult salmon trap.
Miscellaneous
Install “No Sport Fishing” regulatory markers 100 yards upstream and downstream from the weir.
This camp has a banya for washing. There is a shortage of wood at Upper Station, however wood can be gathered with the skiff at Stintz Bluffs or elsewhere.
Conduct a visual survey of the bay each morning before radio schedule. It is normally adequate to survey from the shore with binoculars viewing east towards Stintz Bluff and west toward Hook Point.
Conduct salmon surveys of the stream several times per day. The best technique is to walk the beach side of the river from the mouth to the weir.
Clean and lime the outhouse on a regular basis. The outhouse hole tends to fill with water at this site no matter where you dig a new hole.
Grocery and supply flights are normally unloaded on the beach near the footbridge. Weather conditions may force the plane to land at lower Olga Lake. Supplies are transported in a wheelbarrow to the camp.
The 12-volt battery bank remains connected to solar panels at the end of the season. Box up all food from the cabin and bring to town at the end of the season. The aluminum workboat is stored next to the tripods after they are staged at the end of the
season which is located by the banya. Window boards are attached with square head screws. At season’s end return the shotgun, SSB, SSB antenna, first aid kit, cordless drill, handheld
VHF, and logbooks back to Kodiak.
-continued-

32
Appendix A3.–Page 3 of 3.
Winterize motorized equipment stored on site at the end of the season. Drain and clean the rain barrels and water filter at season’s end. All tools and the generator are stored in the cabin at season’s end. Fuels are stored in the fuel
shed and remaining gear and equipment is returned to Kodiak and stored in the warehouse

33
Appendix A4.–Dog Salmon weir.
The Dog Salmon weir consists of three weirs, 38 m (125'), 41 m (135'), and 8 m (25') in length on the three lower forks of the Dog Salmon River, 0.5 km (0.3 mi) upstream of their outlets into Olga Bay on the south end of Kodiak Island (Figure 2). The Dog Salmon River drains from Frazer Lake.
Opening Camp
Before departing Kodiak for camp, obtain keys from the project supervisor. Fuels needed for this camp include: propane, #1 heating oil, unleaded gasoline and two-cycle
oil. If possible, arrange your arrival time during high tide in Olga Bay. The air charter can
then taxi into the river and drop personnel and supplies on the bank of the east river branch upstream near the trailhead close to the signpost. Have your chest waders handy.
All tools and motorized equipment are normally stored on site. Living quarters consist of a 16’ x 20’ two-bedroom cabin with a mudroom entry and a storage
and equipment shed attached at the rear. The main cabin has an oil stove, propane and 12-volt lights and is wired for 110-volt service by connecting the three prong 110 plug located in the generator shed to the generator.
There is an outbuilding that serves as a one person bunkhouse and banya. A wood stove heats the banya. Wood used for burning is obtained from dead trees on site or wood collected on the weir throughout the season.
A 12-volt battery bank located on the east deck of the cabin powers the SSB and VHF radios, the refrigerator igniter and 12-volt lights. This battery bank is charged by three solar panels permanently mounted to the roof.
Window shutters are attached with wing nuts screwed to hanger bolts. There are three propane connections with regulators located on the west side of the cabin. Each
hookup is stored under the cabin on shelving between floor joists. One hookup is for propane lights in the bedrooms, one is for propane lights in the main room and the last hookup is for the refrigerator and cook stove.
Weir Installation
The 2015 weirs will be placed in the same locations as the 2014 weirs. The east weir is located adjacent to the cabin. The west and far west weirs are approximately one-quarter of a mile from the cabin with trails leading to each weir. The Dog Salmon weirs are conventional wooden tripod weirs and utilize approximately 22 tripods. All weir materials are staged on the bank of their respective weir sites.
Weigh each tripod down with sandbags. The gravel and rock in the riverbed at the east weir tends to scour under panels. Make sure
panels are entrenched when this weir is installed. Install four counting gates accompanied by flash panels at both the east and west weirs. Secure the upper portion of weir panels to the upper stringers with seine twine. Install the steelhead trap on the east and west weirs.
-continued-

34
Appendix A4.–Page 2 of 2.
Weir Maintenance
The weirs are cleaned and inspected for scouring and holes every morning and cleaned throughout the day as necessary.
Debris load can be heavy after moderate to heavy rainfall or high winds. Consider pulling weir panels during high water when the river begins to cloud up, when debris
build-up increases significantly or when the water level rises two-thirds of the way up the indicator rock located just behind the west weir.
Miscellaneous
Install “No Sport Fishing” regulatory markers 100 yards upstream and downstream from the weirs.
Maintain buildings and grounds surrounding the cabin and banya. Keep trail to the boat landing and the west weir mowed to provide good visibility or the
surroundings. Maintain and make repairs on two boats. The 22 foot boat is moored offshore at the edge of Dog
Salmon Flats or to the east of the camp in Iverson’s Cove. The 16 foot Lund is moored in the river at upper or lower skiff landings, depending on the river water level.
Fuel for boats, the generator and motorized equipment as well as propane and #1 heating oil are purchased from the Ocean Beauty tender operating in Olga Bay.
Conduct surveys of the river branches and the Dog Salmon Flats Section throughout the day as required.
Survey the lower East River and the Dog Salmon Flats Section with the small skiff. The West River is surveyed by walking the west riverbank. The prime time to survey is three hours after low tide. Typically, fish move into the river on low tide and tend to move up to the weir on high tide.
Biodegradables from the slop bucket are to be dumped in the bay. Clean and lime outhouse on a regular basis. Check and maintain 12-volt battery bank. Grocery and supply flights land in the bay on the Dog Salmon Flats. The smaller boat is used
to meet the chartered flight and to transport groceries and supplies to the upper boat landing. At the end of the season, the large skiff is transported back to Kodiak by tender and the smaller
skiff is chained and locked to a cottonwood tree next to the east weir materials staging platform. The outboard motor for the smaller boat is stored in the equipment shed. Make sure to winterize and fog engine before storing for the winter.
All tools, generator, outboard motor for the smaller boat, ladders and fuels are stored on site at the end of the season. The remaining gear and equipment are returned to Kodiak and are stored in the warehouse.
Remove all perishable food from cabin at the end of the season and bring back to town. The 12-volt battery bank remains connected to solar panel at the end of the season. Window boards are attached with wing nuts and washers to hanger bolts mounted at each
window.

35
APPENDIX B. SATELLITE TELEPHONE AND DISPATCH
INSTRUCTIONS

36
Appendix B1.–Satellite telephone and dispatch instructions.
The following information serves as a Policy Statement regarding the allowable uses of ADF&G satellite phones and instructions on the proper method to successfully set up and operate the satellite phone system assigned to your camp.
These systems are not like standard telephones or cell phones, nor are they like a single side band or VHF radio. Communication is sent through the transmitter to low level satellites, then is beamed down to ground stations, either directly to another satellite phone system or to a switching station linked to standard telephone lines. As such, there is a much higher cost involved in operation than with standard telephone long distance or cell phone charges.
Under no circumstances may you use this satellite phone system for personal calls unless, for each event, you have obtained direct and explicit permission from your project supervisor. This does not mean that field crew leaders may grant permission for personal use of this phone. Only the project supervisor may give you such permission. Any deliberate misuse of this system, such as making unapproved, non-emergency, or personal calls, will result in disciplinary action which may include suspension or discharge. After each authorized use of the satellite phone- business or personal, the log must be filled out. This log is to be turned into the office on every other resupply flight. The primary purpose for having this satellite phone is for your safety. The secondary purpose is for secure, reliable communications between remote field stations and ADF&G offices (Kodiak, Chignik, Cold Bay, Sand Point or Port Moller), ADF&G research vessels (Resolution or K-Hi-C), Fish and Wildlife Protection vessels and offices or other field camps that are similarly equipped. With these phones you are capable of directly dialing emergency services at any time of the day or night. It is essential that these phone systems are maintained in good working order, are fully charged or hooked to sufficient power at all times, and remain available for official or emergency use.
Instructions The portable sat phone/dispatch unit must be charged with power. There is an internal battery pack and a 12-volt adapter is available in order to hook the phone to a larger battery bank that may in turn be recharged by generator or solar panels.
Turn the unit on using the power switch in the lower left corner. A green light, just above the switch, should come on indicating that the unit is sufficiently powered. If no light or a red light comes on, you will need to charge the unit or attach it to your 12-volt battery bank via the appropriate connections.
The back or top of the briefcase unit is the antenna and it must be oriented correctly in order to access the receiving satellite. The top of the case should be open and pointed in a general east-southeast direction. You must have a fairly clear line-of sight to the horizon in that direction; this unit will not work through walls or mountains. The angle of the antenna should be almost vertical; remember to lock the support arm that attaches the lid to the main body of the unit along the right side.
-continued-

37
Appendix B1.–Page 2 of 3.
This system has two means for calling: a telephone-like handset (for dial in or dial out phone calls), and a push-to-talk microphone (for ‘dispatch’, unit to unit, calls). All calls made with the handset are billed per minute of use, at an expensive rate. All calls on the ‘AlaskaNet’ dispatch system, using the microphone, are essentially free.
When first turned on, the handset and microphone should become active with the display panels on the top of the phone handset and microphone lighting up (one LED panel, should read sleep). The display will show, after a few moments, whether a connection has been established with the satellite and how strong the signal is (ex. B05 S 21). Turn the unit slightly and raise or lower the lid/antenna slightly until the highest possible signal strength is indicated (normally above 20 but will work down to 8). Lock the lid/antenna in place and do not turn the unit again until your communications are finished. Once a strong signal is acquired push the “*” button for 2 seconds. Wait until there is a “beep” and the LCD screen displays ’00:DN ??’, then dial the number. To intercept a call, follow the above procedure.
Alaska Dispatch System Because all calls made on the dispatch system are free, this is the method of choice for using the satellite phone units. There are several ADF&G offices, many field camps and two research vessels on the AlaskaNet dispatch system.
On the microphone display, below the signal strength, there should be a query, ‘00:DN ??’. This is asking you to ‘dial’ in the 4-digit dispatch number that you wish to call. After you have entered the 4-digit dispatch number of the unit you wish to contact, hold in the microphone key and a connection will be made with the satellite, which will then try to connect with the dispatch number you punched in. If a connection is made you will hear two beeps (“bird chirps”) and the microphone display will read SELF. While continuing to hold in the microphone key, call the station you wish to talk to. Use all the same formalities as when calling on a SSB radio. For example, say “Calling the ADF&G Kodiak Office, Calling the ADF&G Kodiak Office; this is Karluk Weir”. When you release the microphone key, the unit will beep again.
Be patient. It will take some time for the signal to go up to the satellite, then down to the number you called. It may take the other party some time to get to the microphone and respond (this is especially true for calls to the ADF&G office; supervisors have to walk down to the radio room to respond). When they respond, their 4-digit dispatch number (DN) will show on the microphone display. This is a private conversation.
LOCKING UP Occasionally if someone hits the wrong buttons on the portable ST-151 model (suitcase model) it could lock up the handset. To unlock the handset there is an unlock code which can be generic or specific to your phone. Turn on the phone and hit 0 0 0 0 (the generic code). If that doesn’t unlock the handset punch in FCN 8, 2 (function, 8, 2). The phone should then give you an UNLOCK CODE message followed by 4 digits. Enter these 4 digits and it should unlock the handset. If this doesn’t work sometimes you can unlock your handset by punching FCN 8, 2 followed by 0 0 0 0. One of these methods should unlock your handset.
-continued-

38
Appendix B1.–Page 3 of 3.
PHONE SYSTEM Do not use the handset to place calls unless absolutely necessary. All calls made with the handset are billed per minute of use, at an expensive rate. Calls should only be made to supervisors either when radio or dispatch contact is not possible or when a confidential message needs to be relayed. Calls are made by dialing out, almost like a standard telephone. Punch in the area code and telephone number, then press send (button located in the upper right corner of the handset). Because there is a satellite relay, there will be a slight delay between when you speak and when the other party hears you, so be patient.
Note every call on the satellite phone in the phone logbook, except for dispatch calls. The system will show you the amount of time you’ve used on the call, on the LED panel. Note the number called, the date, approximate time and the length of the call (minutes and seconds). When the call is completed, you must push the end button (top right corner of handset buttons) otherwise the system will remain active and you will be billed for the time (at almost a dollar a minute). Remember to press end.
If someone calls in to this unit, it will ring like a standard telephone. Press the SEND button to start the conversation but remember to press END to finish the call. ADF&G is billed for all calls made using the handset―both the calls you dial out, and any calls dialed in.
IN CASE OF EMERGENCY: If there is a medical emergency, or a real danger to life or health, immediately call the US Coast Guard Rescue Coordination Center at 1-800-478-5555. Be ready to tell them your name, exact location (latitude and longitude or nearby major landmark) and the exact nature of your emergency. They may question you extensively so be prepared. There are emergency doctors on-call that can advise you. After the call is completed, immediately call your supervisor, at work or at home, and relay the details of the situation.
If there is an enforcement emergency, use the dispatch microphone to call the Kodiak office or the Alaska State Trooper, Bureau of Wildlife Enforcement (DN 6370).
See page 10 for further instruction concerning emergencies.

39
APPENDIX C. ELECTRICAL SYSTEM OPERATION
MANUAL

40
Appendix C1.–Solar panel and electrical system operation manual.
SOLAR PANELS Each field camp utilizes an independent power system consisting of 12-volt photovoltaic (PV) solar panels and a PV charge controller that charge a 12-volt battery bank for powering needed electrical components. Solar PV panels, when oriented towards the sun, will create direct current (DC) electricity. This DC electricity will effectively charge a bank of 12-volt batteries by providing a higher voltage than the battery voltage. In our common 12-volt systems, each solar PV panel will generate approximately 20 volts open circuit when directly oriented towards the sun. Any cloud cover or partial shading will reduce solar PV output considerably.
Both amperage and voltage numbers are displayed digitally on the PV charge controller. The PV charge controller regulates and limits the amount of electrical flow generated by the solar PV panels to the battery bank that is necessary to keep the 12-volt battery bank fully charged. Learn to understand what the amperage and voltage numbers represent and you will be in control of your power system.
Voltage is the most important reading you’ll need to understand. A common misconception is that when a 12-volt battery meters 12.0 volts the battery is fully charged. The reality is that at 12.0 volts the battery is in a very discharged state. Many electronics may not work properly at such a low voltage. A 12-volt battery isn’t fully charged until it reads at least 12.7 volts. The solar panels, batteries and the loads (power being utilized or withdrawn from the system) in each system work in a dynamic equilibrium. The voltage rises and falls as power is deposited and withdrawn throughout the day and night. The actual reading that is important when assessing the state of charge of a battery is the “rest” voltage. This voltage is defined as the voltage reading when the batteries have been at “rest” for several hours. This means no loads on and no solar power coming in. In practical terms this is the voltage early in the morning before any loads are on and after the sun (solar energy) has been off the panels for a few hours.
If your solar array can’t keep up with your essential loads then it will be necessary to add more solar PV panels or run the gas generator to re-charge the batteries as needed. Most of the small gas generators in the field camps have 2 DC output lugs, one positive lug and one negative lug. These output lugs can be wired in parallel to the battery for recharging. Typically these chargers put out a maximum of 8.3 amps DC. At Dog Salmon and Upper Station the gel cell batteries must be trickle charged (less than 2 amps).
Batteries and connections are prone to corrosion in a marine environment. It is essential that battery terminals, all wiring and connections are clean and tight. A good cleaning with a wire brush and a check of all bolts and screws for proper tightness should be performed at the beginning and end of each field season. Most of the batteries that are now in use in our field camps are sealed or gelled electrolyte type. These batteries do not require any maintenance other than cleaning. Some of the older electrolyte lead/acid batteries have removable plastic caps and require a periodic topping off with distilled water. Filtered rainwater can safely be used where no distilled water is available. When the electrolyte level falls below the lead plates in the older style lead/acid batteries, add distilled water. Terminal and connections that are dressed with grease or LPS-3 will be far less prone to corrosion.
-continued-

41
Appendix C1.–Page 2 of 2.
One problem inherent in the operation of the solar powered radio is that some of the charge controllers will create Radio Frequency (RF) noise or static on some radio frequencies when they are regulating voltages above 14.2-volts. In this case, it may be necessary to throw the solar PV input switch to the off position temporarily while you use the radio or device that is experiencing the RF static. After you use the device just remember to put the input switch back in the on position to resume proper charging.
SEASONAL SHUTDOWN PROCEDURE In most cases the solar panels are left in their permanent position and the charge controller remains in the charging mode. The essential thing to remember is that all loads need to be disconnected by throwing the “main load” switch or breaker to the fuse panel to the off position. This disconnects any electrical current flowing to the fuse panel. Remove any other loads that may be directly attached to the battery such as radios, clocks, DC chargers etc. Leave the “PV input” switch or breaker in the ON position.
Batteries can freeze and burst if left in a discharged state in cold ambient temperatures. A fully charged battery will not freeze even at 60 degrees below zero. Make sure you don’t leave the battery bank in a discharged state. If necessary run the generator in order to bring the batteries to a full state of charge before departing camp.
BATTERY STATE OF CHARGE REFERENCE GUIDE Battery near full charge while charging…………………………………13.8 to 14.2 volts Battery near full discharge while charging………………………………12.3 to 13.2 volts Battery fully charged with light load…………………………………….12.4 to 12.7 volts Battery fully charged with heavy load…………………………………...11.8 to 12.5 volts Rest voltage 100% charged………………………………………………12.7 volts Rest voltage 80% charged………………………………………………..12.5 volts Rest voltage 60% charged………………………………………………..12.2 volts Rest voltage 40% charged………………………………………………..11.9 volts Rest voltage 20% charged………………………………………………..11.6 volts
Troubleshooting The first step in troubleshooting is ensuring that you have the proper voltage to the device that’s experiencing a problem. Most electronics in these systems are wired to a DC fuse panel. Next check the fuse panel for a blown fuse. If the fuse is intact, then check to ensure all electrical connections are clean and tight. In addition some devices such as VHF and single sideband radios may also have inline fuses, check these as well. Blown fuses and poor connections are the most common culprit. If the solar PV panels are not charging the 12-volt battery bank, check the main solar input fuse to make sure it is good and ensure that the breaker switch is in the on position. If the solar PV panels still do not put out proper voltage, check the wiring between the panels and the charge controller and check the connections on the rear of the solar PV panels. Make sure all connections are tight and clean. If corrosion is evident, use contact cleaner and or fine emery cloth or sand paper to gently clean connections.

42

43
APPENDIX D. GENERAL EQUIPMENT AND CAMP
MAINTENANCE

44
Appendix D1.–General equipment and camp maintenance.
GENERAL EQUIPMENT AND CAMP MAINTENANCE FUEL Kodiak ADF&G weir camps use three types of fuel: # 1 diesel, regular unleaded gasoline, and propane. There are usually a few containers of leftover fuel at the camp and we take more on the first flight to camp. Additional fuel is ordered from town to supplement fuel levels as needed throughout the season.
#1 Diesel (heating oil) is used for building heat.
Unleaded Gasoline is used for skiff outboards, ATVs, and portable generators as well as landscaping equipment.
Propane is used for ovens and refrigerators.
Engine Oil (2-stroke vs. 4-stroke) 2-stroke engines do not have a dedicated engine oil lubrication system similar to those found in conventional automobiles. Thus, 2-stroke type oil must be mixed with gasoline to lubricate the engine while gas is consumed. Most small outboards require a 100:1 gas/oil mix (1.28 ounces oil for 1 gallon gas).
Many larger 2-stroke outboards have a 2-cycle oil tank and automatically add oil to the engine as needed. Check the outboard for the presence of this tank before adding 2-cycle oil to the fuel tank. To add 2-stroke oil to the 2-stroke outboard motors: directly add the correct ratio of 2-stroke oil to the gas tank. The proper ratio can be located on the back of the 2-stroke oil container. Failure to add 2-stoke oil will quickly destroy any 2-stroke engine.
In contrast, 4-stroke engines have dedicated oil lubrication systems. 4-stroke engine oil is not consumed during normal operation but engine oil must be regularly checked by removing the cowling and checking the oil level on the dipstick. Under normal conditions, 4-stroke engine oil typically needs to be changed only once every season.
Refer to the owner’s manuals in the office for detailed information on each outboard.
NOTE: 2-stoke and 4-stroke oils are not interchangeable. Use the appropriate oil type at all times.
DRIVE SYSTEMS (Propellers vs. Jet Drives) Outboards with propellers are more efficient than jet drives and are used for towing, boating long distance, in deep water or in rough water conditions. In shallow water, extra caution must be used with propellers. Reduce RPM’s to a minimum and tilt the outboard up to prevent striking bottom. Before operating propeller driven skiffs, become familiar with the steering and tilt mechanisms specific to each outboard and ensure a spare prop and the proper tools are onboard. Before and after each use, check props for nicks, rolled tips, or bent blades. Damaged propellers will cause a loss in performance and can create vibrations harmful to the engine. Props with worn blades might also allow the engine to accelerate beyond the recommended operating range resulting in permanent damage to the engine. When a propeller is damaged while operating, stop and assess the damage before continuing. If the prop is severely damaged, slowly proceed to the nearest level shoreline and replace.
-continued-

45
Appendix D1.–Page 2 of 5.
To change propellers use the following procedures: Remove cotter pin holding castle nut in place. Remove castle nut with wrench by turning counter-clockwise while holding the propeller in place. Carefully note order, and remove bushing(s) between castle nut and propeller. Slide propeller off drive shaft. Slide replacement propeller on by aligning groves inside propeller with those on the drive shaft. Replace bushings in same order and arrangement they were removed. Tighten castle nut such that the cotter pin hole in the drive shaft is visible between the ‘castle’ grooves such and a cotter pin can be inserted to prevent the nut from spinning loose. Do not over-tighten the castle nut. Insert new cotter pin and bend the ends outward to secure it in place.
Jet drives work by forcing water through a tapered sleeve (housing) using an internal impeller. The result is a water jet that propels the skiff forward. To work efficiently, there must be a close fit between the impeller and sleeve. Thus, pulling sand, gravel, wood, weeds or other foreign objects into the jet drive can damage both the impeller and sleeve resulting in permanent damage or loss in performance. The impeller may need to shimmed with washers to achieve a close fit. To do so, remove the impeller, clean out the sleeve, return impeller, and add enough washers to the shaft between the impeller and bottom nut to keep the impeller tight to the housing.
When foreign objects (i.e. eel grass in Karluk Lagoon) are pulled into the jet unit (indicated by loss of power or change in RPMs), stop immediately and turn engine off. Lift outboard and remove all objects from the ‘foot grate’ on the bottom of the jet unit. A screw driver or pocket knife may be needed to remove objects lodged in the grate. In some instances the foot will need to be removed to clear objects that have passed through the grate. To remove the foot, slowly proceed to the nearest shoreline and carefully unbolt the foot from the lower unit, clean thoroughly, and replace ensuring the pointed end of the foot is oriented forward (towards bow).
COOLING SYSTEMS All facility outboards are water cooled. Cold water is pulled into the outboard below the waterline and circulated throughout the engine before it’s discharged with the exhaust. Thus, there are no antifreeze levels to check or radiators to maintain. However, all outboards have a small valve above the waterline on the back of cowling that discharges a small stream of water at all times while running. This discharge valve is an indication that the cooling system is working properly. It is important to ensure the discharge valve is working properly before and after each use or immediately after hitting bottom. Running outboards while water is not being ejected from this valve may result in damage to the engine. Occasionally weeds or other objects get sucked into the water system that can damage the water pump or clog the small hose that leads to the discharge valve. If the outboard is overheating (loss of power, surging RPM’s, knocking and/or getting louder), turn off immediately. Raise the lower unit to ensure the water intake ports (located on both sides of lower unit just above the prop, and on the foot of the jet unit) are free from weeds. If the intakes are unobstructed and no water is emitted from the discharge valve after restarting, turn off and check to ensure the valve itself is unobstructed by feeding a short flexible length wire into the valve outlet on the back of the
-continued-
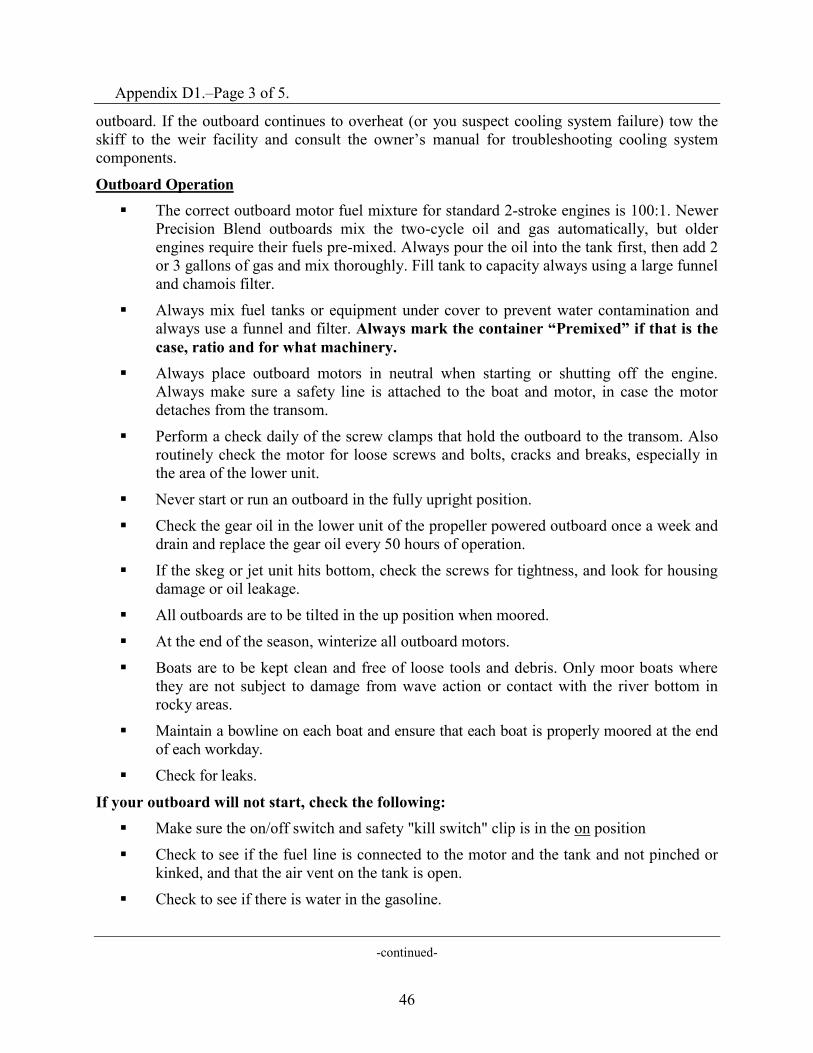
46
Appendix D1.–Page 3 of 5.
outboard. If the outboard continues to overheat (or you suspect cooling system failure) tow the skiff to the weir facility and consult the owner’s manual for troubleshooting cooling system components.
Outboard Operation The correct outboard motor fuel mixture for standard 2-stroke engines is 100:1. Newer
Precision Blend outboards mix the two-cycle oil and gas automatically, but older engines require their fuels pre-mixed. Always pour the oil into the tank first, then add 2 or 3 gallons of gas and mix thoroughly. Fill tank to capacity always using a large funnel and chamois filter.
Always mix fuel tanks or equipment under cover to prevent water contamination and always use a funnel and filter. Always mark the container “Premixed” if that is the case, ratio and for what machinery.
Always place outboard motors in neutral when starting or shutting off the engine. Always make sure a safety line is attached to the boat and motor, in case the motor detaches from the transom.
Perform a check daily of the screw clamps that hold the outboard to the transom. Also routinely check the motor for loose screws and bolts, cracks and breaks, especially in the area of the lower unit.
Never start or run an outboard in the fully upright position.
Check the gear oil in the lower unit of the propeller powered outboard once a week and drain and replace the gear oil every 50 hours of operation.
If the skeg or jet unit hits bottom, check the screws for tightness, and look for housing damage or oil leakage.
All outboards are to be tilted in the up position when moored.
At the end of the season, winterize all outboard motors.
Boats are to be kept clean and free of loose tools and debris. Only moor boats where they are not subject to damage from wave action or contact with the river bottom in rocky areas.
Maintain a bowline on each boat and ensure that each boat is properly moored at the end of each workday.
Check for leaks.
If your outboard will not start, check the following: Make sure the on/off switch and safety "kill switch" clip is in the on position
Check to see if the fuel line is connected to the motor and the tank and not pinched or kinked, and that the air vent on the tank is open.
Check to see if there is water in the gasoline.
-continued-

47
Appendix D1.–Page 4 of 5.
If the engine is flooded, wait five minutes for the plugs to dry before attempting to start again.
Check the spark plugs, they may be fouled or defective (replace if needed), also check for corroded, loose, or disconnected wires.
WINTERIZING OUTBOARDS AND SKIFFS All skiffs and outboards are removed from the water, winterized and stored for the winter. Following are the general guidelines for winterizing outboards and skiffs:
Outboards Disconnect spark plug wires, remove, inspect and clean/replace sparkplugs. Spray fogging oil into each cylinder (1-2 seconds) and replace spark plugs. Turn over engine several times to distribute fogging oil within each cylinder. Rinse exterior with freshwater and clean residue from all surfaces. Remove corrosion
and lubricate electrical connections. Remove outboard from skiff and hang upright in outboard shop. Change lower unit lubricant by removing the lower drain plug and upper vent plug.
Once all lubricant has drained, inject new lubricant into lower drain plug until lube begins to drain out of vent hole. Quickly replace both plugs.
Inspect props and jet impellers sleeves. Service or replace as necessary. Change crankcase oil in 4-stroke engines. Refer to owner’s manual for specific
procedures and oil types (located in office file cabinet). Fill oil reservoirs in 2-stroke models.
Lubricate all service points, including grease zerks, shift/throttle linkages, and steering cables. Refer to owner’s manual for specific lubrication points.
Date and record maintenance activities on a label and attach directly to each outboard (include which skiff the outboard came from).
Skiffs Remove, clean and label all gas tanks/lines, anchors, toolboxes, oars, bilge pumps and
floatation devices. Store in outboard shop. Use a wire brush to remove any rust on tools and lubricate with anti-corrosion spray before storing for winter.
Remove batteries. Clean, label and fully charge for storage. Drain, inspect and replace fuel filters as necessary. Scrub hull and floorboards with bleach and water solution. Clean and lubricate steering and throttle parts to prevent corrosion. Label all cables and
hoses that are removed and make a detailed description of where they are reattached for the following season.
Remove drain plugs and attach to the hull. Secure all skiffs with a sturdy line or chain to prevent them from floating or blowing
away during winter.
-continued-

48
Appendix D1.–Page 5 of 5.
Generators Portable generators are supplied to field camps. Their maintenance follows the same line as outboards. Generators have 4-cycle engines; mixed gas must not be used. The crankcase oil reservoir should be checked daily and maintained at the full level. After 25 hours of operation the oil should be changed. Spark plugs should be checked every season for fouling and gap.