lab 1 - university of evansvillefaculty.evansville.edu/md7/bact02/bacteriology lab 2002.doc · web...
TRANSCRIPT

Lab 1Safety Rules and Bacteria in the Environment
8/28/02
Overall objectives:Microbiology 110 lab has three goals: (1) to provide a “hands on” experience
with some of the fundamental concepts of microbiology, (2) to teach the basic techniques
of working with microorganisms, and (3) to stimulate an appreciation for the importance
of microorganisms in the world. You will learn how to use the basic tools of the
microbiologist, study factors affecting bacterial growth, learn about the structure and
biochemistry of bacteria, identify bacteria, explore some of their practical importance,
and determine the clinical significance of bacteria.
Introduction
Safety is an important consideration in any laboratory. In the microbiology
laboratory you will be handling billions of living bacterial cells and you must follow
certain rules to protect yourself and those around you. The bacteria that you will be
working with are not disease causing under normal circumstances, but all bacteria are
potentially harmful and should be treated with respect. Other sources of harm common
to any laboratory include flames from Bunsen burners and broken glass. The following is
a set of rules that you should read and observe. The rules are fair game on any laboratory
quiz.
Safety Rules for the Microbiology Laboratory
1. Minimize all hand to face contact. Do not eat, drink, or smoke in the lab. Avoid
rubbing your eyes.
2. Shoes with closed toes must be worn in the lab.
3. Extra clothing, books, and other personal items must not be piled on the lab bench.
Place these items under the bench or on the racks provided.

4. Wash your work area before you begin the experiments and after you are finished.
Bottles with a bleach solution along with sponges are provided. If empty notify the
lab instructor.
5. In case of accident where cultures are spilled or dropped:
1. Cover the spill with disinfectant soaked paper towels.
2. Report the accident.
3. Clean up glass with dust pan and hand broom provided. Never brush up broken glass
with you hands.
4. Discard paper towels in biohazard bag.
6. Be careful with the flame of your Bunsen burner. Long hair and clothing may be
hazardous to your health unless you use care. Long hair should be tied back to avoid
getting it burned.
7. Always wash your hands with soap and water before lab starts and after it is finished.
8. Be aware of the locations of the safety equipment.
9. Always read the assigned laboratory material before the start of the laboratory period.
10. Never place anything in your mouth that came in contact with the lab bench (pencils,
rulers, hands, petri plates, etc.).
11. Never pipet by mouth, always use a bulb or pipet pump.
12. Discard all cultures (plates, broth and slate test tubes) in the correct place.
13. Always return microscopes to the cabinets from which you took them. Never lay a
microscope on its side.
14. Use wastebaskets for trash, not floors, sinks or any other containers. Each student is
responsible for cleanup of his/her area in the lab.

Bacteria in the Environment
Objectives
After completing this exercise, you should be able to:
1. Collect environmental samples.
2. Realize the wide distribution of microorganisms in the environment.
3. Realize the wide diversity of microorganisms in the environment.
Introduction
As a group bacteria have three fundamental properties: (1) they are small single
cell organisms (typically about one millionth of a meter across); (2) They often exist in
huge numbers in small amounts of material (for example, 1 gram of garden soil may
contain one billion bacterial cells); (3) They are found almost everywhere in the natural
environment including some habitats where conditions appear very harsh to us.
Their small size makes bacteria difficult to detect in samples from the
environment by direct observation, even with a microscope. Instead, it is usually more
profitable to look for bacteria by attempting to grow them in bacterial culture medium.
The culture medium that you will use to sample the environment is Nutrient agar. It
contains many different nutrients that bacteria can use such as sugars, amino acids,
vitamins, and minerals and is solidified with agar, a carbohydrate from marine algae. If a
bacterial cell from the environment is placed on the surface of a NA (nutrient agar) plate,
it may be able to multiply into a colony of cells visible to the naked eye. A typical
colony contains about one billion cells. The formation of each colony implies that at
least one bacterial cell was found in the environment.
Procedure (pairs)
Materials: 3 NA plates4 sterile cotton swabs in a test tube
Remove the cover from one of the NA plates and leave the agar surface exposed
to the air for about one half hour to see if any bacteria settle out from the air. You can
expect to find more bacteria outdoors than inside the lab. If the weather is warm, you

might try placing your plate on the windowsill. Be sure to label the bottom of your
plate with your name(s), date, temperature of incubation, and specimen using a
grease pencil. In the above case the specimen would be “air” and the location of
collection.
With the two remaining plates, divide both plates in half by placing a grease
pencil marking across the backs. Take one of the sterile swabs and gently rub your arm
with it a few times. Then, starting at the edge of one of the NA plates, lightly pass the
swab back and forth across it about 10 times covering only half of the surface of the
plate.
Take the other swabs and sample some surface in the lab, hallway, bathroom,
water supplies, etc. Smear this sample across the other halves on the NA plates as before.
Place all 3 plates upside down, in a 30o C incubator. The 30o C temperature,
about 7o higher than ordinary room temperature, stimulates the growth of many types of
bacteria. Be sure all 3 plates are labeled with the above information so that you can find
them easily later in case they have been moved. They will be incubated for 48 hours,
then refrigerated until next lab period.
Examine all 3 plates and observe the type of bacterial and fungal growth, which
appears on each. For your lab report, list the places that you obtained the samples,
sketches of the plates with verbal descriptions of the colonies, and comments on the
likelihood of obtaining bacteria from that particular environment.

Lab 2Solid Media, Transfer and Pure Cultures, Streak Plating
9/3/02
Objectives
After completing this exercise, you should be able to:
1. Perform basic bacteriological transfer techniques using broth and agar cultures.
2. Handle bacteriological cultures aseptically.
3. Streak out a mixed culture of bacteria to obtain isolated colonies.
Introduction
A particular phenomenon caused by bacteria, for example a disease, is usually the
result of the growth of one type of bacteria. To learn about the phenomenon it is
necessary to study the one type of bacteria causing it, free of other kinds of
microorganisms which might interfere. This study is done by culturing, growing the
bacteria in the lab. Because there are so many bacteria in the natural environment a
special approach called pure culture is necessary. Pure culture methods make it possible
to (1) isolate a single type of bacteria from a mixture of bacteria such as you would
expect to find in nature, and (2) maintain the isolate in pure culture. A pure culture itself
is defined as a population of cells all of which are descended from a single cell; there can
only be one type of cell. A pure culture is started from a single cell. Pure culture
methods are designed to (1) minimize the chance of contamination (the presence of
unwanted microorganisms) of the culture, and (2) reduce the hazard to a person handling
pathogenic (disease-causing) bacteria. Pure culture methods can be divided into four
categories:
(1) Providing for bacterial cell nutrition with suitable growth media; (2)
Removing all contaminants from materials used by sterilization; (3) Handling cultures
and materials carefully by aseptic techniques; and (4) Employing specific, tested
techniques for isolating and transferring bacteria.
Bacteria vary greatly in their nutritional requirements, so no single culture
medium can support the growth of all bacteria. Each culture medium should provide the
nutrients required by the bacteria it is designed to support at concentrations that will

permit good growth. All growth media have characteristics in common. They have a
mineral base including potassium, phosphorus, magnesium, sulfate, iron and calcium.
Carbon, nitrogen, and energy sources are provided in various forms. Some bacteria use
carbon dioxide, and inorganic nitrogen, such as nitrogen gas or ammonium salts, while
others use specific organic (carbon containing) and nitrogen containing molecules such as
sugars and amino acids. While many have no special requirements beyond this, others
have requirements for particular growth factors, that is, amino acids or vitamins.
A defined (also called synthetic) medium contains chemically identified
substances in known amounts. A complex (also called rich) medium contains substances
of unknown composition, usually extracts or digests of natural products such as water
extract of yeast or digested meat. Microorganisms were originally cultivated in complex
liquid media prepared from aqueous extracts of plant and animal tissues which had been
observed to support microbial growth. The chemical composition of these extracts was
not known exactly and could not be precisely reproduced. While the ingredients of
commercial extracts and digests, sold as dehydrated preparations, from such firms as
Difco and BRL, are also not fully known, they are generally of sufficiently consistent
quality and composition that the complex media prepared from them are reproducible.
Complex media are useful for the cultivation of a wide range of microorganisms,
especially whose precise growth factor requirements have not been established.
Growth media can be prepared in liquid of solid form. Complex liquid medium is
often referred to as broth while solid medium is called agar. Isolation of bacteria is best
done on a solid surface. Isolation in broth would be difficult. The solidifying agent agar
is a sulfur-containing carbohydrate from marine algae. This compound is added to
medium to solidify it in much the same way that pectin is added to jelly to make it a
solid. Originally gelatin (a protein) was used for this purpose, but agar offers several
advantages:
1. Most bacteria will not degrade agar or use it as a nutrient, so the growth characteristic
of the medium are not changed by the addition of agar.
2. Agar is not toxic to most bacteria.
3. Agar remains solid in the temperature range where bacteria grow. It melts at 100o C
and will not resolidify until it cools to 45o C. Thus, many types of bacteria can be

added to it while it is still in the liquid from at about 50o C without a significant loss
of viability.
Growth on solid medium provides a characteristic colony, which is used in a variety
of ways by microbiologists. On solid medium, the progeny from a single cell are
localized so that each single cell gives rise to a clump of cells, a colony, all with the same
ancestor. Each kind of bacteria makes a colony of characteristic appearance. Colony
formation has three major uses:
1. Identification of species
2. Isolation of pure cultures
3. Enumeration of cell concentration
Microorganisms are found in the materials from which media are made, on glassware
such as pipets and petri dishes, in the air, and in the water. Thus it is necessary to
sterilize (kill all living organisms) all materials and media used for pure cultures. We use
the following methods:
1. Glassware is autoclaved with steam at 30 psi (132o C) for 4 minutes and then dried.
2. Media is autoclaved at 15 psi (121o C) for 20 minutes.
3. Transfer loops and needles are flamed.
4. Heat sensitive solutions are passed through a filter with 0.2 micrometer pores which
are smaller than the diameter of most bacterial cells.
Bacteria must be transferred from one container to another to begin growth in fresh
medium or in a different medium, to change growth conditions, to isolate or to enumerate
them. This must be done without contaminating the pure culture of having it contaminate
anything. Since microorganisms are found everywhere, another microorganisms from the
air, glassware or people could contaminate the culture, thus spoiling results. Also, while
we do not work with pathogenic bacteria in this course, all microbes are potentially
harmful under certain conditions, so we must control their spread. The methods of
transfer described below all employ specific steps to minimize the possibility of
contamination or spread. The general approach of avoiding contamination, termed

aseptic technique, is not a particular method, but is a concept that covers all
manipulations performed on pure cultures.
There are two common tools used to transfer bacteria: The inoculating loop and the
pipet. The inoculating loop is a thin metal wire formed into a loop at one end and
attached to a handle. The inoculating needle is similar but lacks the loop. Pipets are
basically calibrated lass tubes, tapered at one end, which are used like a straw for
transferring a known amount of liquid. Transfers are made of bacteria growing in either
solid (usually in petri plates) or liquid media (usually in tubes) to either solid or liquid
media. They may be from one tube to another tube, from a tube to a plate, from a plate to
a plate, or from a plate to a tube.
In order to establish a pure culture, a single bacterial cell has to be isolated from all
other bacterial cells. The most common method used for isolation is the streak plate
using complex medium. To make a streak plate an inoculating loop or needle is used to
distribute a sample containing bacterial cells across the surface of an agar plate. The
streaking is done in such a way that the cells are spread so thinly that individual cells are
actually separated from each other. Incubation of the plate after streaking allows that
isolated cell to divide. Eventually a colony, containing perhaps one billion cells all
descended from the isolated cell, will form. This colony is not a bonafide pure culture,
however. To make a pure culture, the colony is “picked” by touching it with a sterile
inoculating loop (or needle) and “restreaked” on another agar plate. During incubation of
the second plate, colonies will form. If they are all of the same appearance, each of the
isolated colonies on the second plate is considered to be a pure culture and may be used
to make a stock pure culture which can be used with confidence for testing or performing
experiments.
Pipets, glass tubes calibrated for volume, are useful for transferring liquid cultures. A
known volume is usually transferred. They have two kinds of uses in general
microbiology. (1) They are used to dilute liquid cultures (if the volume of culture and the
volume of diluting solution are both known, then the dilution factor (DF) can be
determined). Cultures are often diluted to make a sub-culture (fresh culture). (2) They
are used to plate liquid cultures. In plating, a known volume of culture (or diluted
culture) is placed on an agar plate. The plate is incubated and colonies develop from the

cells plated. Plating is most often used to determine the number of cells present in a
liquid culture.
The following general rules apply to the use of sterile pipets:
1. Keep all sterile pipets in the metal/glass cans in which they are provided until
immediately before use.
2. We use four sizes of pipets: 1ml, 5ml, 10ml, and 25ml. Use the smallest size that will
hold the volume you want to pipet. The smaller the pipets provide greater accuracy
for small volumes.
3. When you know what size pipet you need, check to see if a can/glass is on your lab
bench. If it is not, get one from the instructor. Do not carry sterile pipets across the
room once they have been removed from the can.
4. Place the can/glass of pipets flat on the bench. Open the can/glass with the opening at
the edge of the bench. Never stand the can upright, it could easily be knocked over
breaking the pipets and there is also the possibility that bacteria might settle out of the
air into the can contaminating the pipets.
5. Remove pipets for use one at a time. Grasp the pipet at the end (top) and remove it
trying not to touch the other pipets with your fingers or the tip of the pipet you are
taking.
6. Handle the pipet you are using only at the upper end. If the lower portion of the pipet
touches anything, which is not sterile, discard the pipet without using it further, in a
pipet tray. Never lay a pipet on the bench.
7. Hold the pipet so that your index finger is free to control the flow rate of the pipet.
Do not use your thumb over the top of the pipet.
8. If you decide not to use a pipet, discard it. Do not replace it in the can/glass.
9. When you are finished using a pipet discard it gently into the pipet tray on your
bench.
10. To summarize, pipets should be in one of three places: (1) In the can/glass, sterile; (2)
In your hand in use; (3) in the discard tray.

In the following exercise, you will be using the above methods. Each student will
practice aseptic techniques, transfer cultures (plate to plate, tube to tube, tube to plate,
and plate to tube), and isolate colonies using the streak plate method. The instructions
are written for right-handed people, if you are left-handed change the handedness of the
directions.
Procedure (Individually)
Streak Plating (Tube to Plate Transfer)
Materials: 1 mixed culture of Escherichia coli and Pseudomonas fluorescens in NB
1 tube of sterile nutrient broth (NB)
3 agar plates of Levine eosin-methylene blue (EMB)
The following is the general instruction for tube to plate transfer and steak
plating:
1. Loosen the tube cap, but do not remove it.
2. Hold tube in the palm of the left hand, with the side of the tube resting against the
insides of the fingers and using the thumb to hold them in place.
3. Hold the loop between the thumb and index finger of the right hand. Insert the loop
into the upper portion of the flame at about a 60o angle. Flame the loop until it is red-
hot, remove from the flame and let it cool. Briefly count to ten.
The loop is flamed to kill any organisms on it and cooled so it does not kill cells
in the culture.
4. Using the ring and little fingers of the right hand, remove the cap from the tube
containing the culture and flame the lip of the tube, passing it through the flame only
once.
The tube is flamed to kill organisms around the lip, but it is flamed only briefly so
the tube does not get too hot.
5. Insert the cooled loop without touching the sides of the tube and just immerse the
loop in the top portion of the culture. This is usually sufficient to obtain the proper
number of cells for transfer. It may be necessary to mix the culture tube first to
suspend the cells.

6. Withdraw the loop, flame the lip of the tube and replace the cap by bringing the cap
to the tube.
The culture is capped before continuing with the manipulation to protect the
original culture. The cap is brought to the tube, rather than vice-versa, to
minimize the possibility of contamination by microorganisms in the air.
7. Using the left hand, lift the lid of the plate to approximately a 45o angle.
8. Insert the loop to touch the surface of the agar at the furthest point from the open side.
9. Starting from the top (where you touch the surface of the agar with the loop) streak
back and forth about one-quarter of the way down the plate. Make streaks very close
together. When finished flame the loop.
10. Rotate the plate slightly counterclockwise. Draw the sterile loop through the first
series of streaks once and streak about half of the open area without touching the first
series of streaks again. Do not flame the loop, but go directly to step 11.

11. Rotate the plate counterclockwise. Without touching the second section, finish
streaking the plate. When you are finished streaking, flame the loop before setting it
aside.
Follow the instructions given above and do the following. Streak the mixed
culture on one of the EMB plates. Make another streak of the mixed culture on a separate
EMB plate however flame the loop after taking it out of the broth culture. On the final
plate, make a streak using the tube on sterile uninoculated broth. Label all three plates
appropriately and incubate at 30o C. Observe the plates during the next lab period,
making note of the number of isolated colonies on each and their appearance.
Tube to Tube Transfer (using a loop)
Materials: 1 liquid culture of Escherichia coli in NB
4 sterile tubes of NB
The following is the general instruction for tube to tube transfer:
1. Loosen the tube caps, but do not remove them.
2. Hold both tubes in the palm of the left hand, with the sides of the tubes resting against
the insides of the fingers and using the thumb to hold them in place. The tube
containing material to be transferred should be the nearest the little finger.

3. Hold the loop between the thumb and the index finger of the right hand. Flame the
loop as described in the above procedure.
4. Using the ring and little finger of the right hand, remove the cap from the tube
containing the culture and flame the lip of the tube, passing it through the flame only
once.
5. Insert the cooled loop and retrieve a portion of the culture as stated before.
6. Withdraw the loop, flame the lip of the tube and replace the cap by bringing the cap
to the tube.
7. Remove the cap of the fresh tube, flame the lip, insert the loop into the liquid and
disperse the cells by mixing gently. Withdraw the loop, flame the lip of the tube and
replace the cap. Flame the loop.
8. Tighten the caps on the two tubes and replace then in a rack or carton.
Follow the instructions given above and do the following. Make a transfer from the
E. coli culture to a sterile tube of NB, make another transfer however flame the loop prior
to inoculating the sterile broth, and transfer a loopful of NB to another tube of NB. Label
all three tubes inoculated and place them in a test tube rack and incubate at 30o C.
Observe the tubes during the next lab period, making note of turbidity (growth) in each.
Plate to Plate Transfer
Materials: 1 NA plate inoculated with E. coli
2 sterile NA plates
The following is the general instruction for plate to plate transfer:
1. Flame loop and let cool as stated above.
2. Lift the lid of the inoculated plate at a 45o angle.
3. Gently touch a portion of a colony with the sterile loop, remove loop, and close lid on
the plate.
4. Lift the lid on a sterile fresh plate.
5. Insert loop and perform the streak method mentioned above.
6. Close lid and flame loop.

Follow the above instructions and do the following. Remove a portion of E. coli from
the inoculated plate and streak it on a sterile NA plate. Remove another portion of the
same culture but flame the loop before streaking on a sterile NA plate. Label plates and
incubation at 30o C. Observe the plates during the next lab period, making note of
isolation of colonies.
Plate to Tube Transfer
Materials: 1 NA plate inoculated with E. coli
3 sterile NB tubes
The following is the general instruction for plate to tube transfer:
1. Obtain a portion of a colony from a plate as stated in steps 1 through 3 of the plate to
plate transfer method.
2. Inoculate a tube of liquid medium as stated in steps 7 through 8 of the tube to tube
transfer method.
Follow the instructions above and do the following. Transfer a portion of an E. coli
colony from the plate to a sterile NB tube. Transfer another colony, however, flame the
loop prior to inoculating the sterile tube. Finally, transfer a piece of agar from the E. coli
plate that does not contain a portion of colony into a sterile NB tube. Label all tubes and
incubate at 30o C. Observe the tubes during the next lab period, making note of growth in
each tube.
Tube to Tube Transfer (using a pipet)
Materials: 1 can/glass of 1 ml pipets (to be shared on bench)
1 culture of E. coli in NB
3 sterile tubes of NB
1 green pipet pump
The following is the general instruction for using a pipet for tube to tube transfer:

1. Remove a sterile pipet from a pipet can use the method described above.
If the pipet does touch something, discard it and take a fresh pipet. Do not put an
unsterile pipet back in the can.
2. Hold the pipet between the thumb and middle finger of the right hand then place the
pipet pump on the end of the pipet. Hold the pipet by the pump.
3. Pick up the two tubes that you are to use with your left hand (see procedure for tube
to tube transfer).
4. Using the middle finger and the palm of the right hand, remove the cap from the tube
containing the culture. Flame the lip of the tube.
5. Insert the pipet into the tube and withdraw culture to the appropriate volume.
6. Withdraw the pipet, flame the tube lip and bring the cap to the tube to close.
7. Uncap the fresh tube, flame the lip, touch the tip of the pipet to the inside of the tube
and let the required amount of inoculum run in.
8. Withdraw the pipet, flame the tube lip and replace the cap.
9. Immediately place the pipet in the tray. Never put a used pipet on the lab bench or in
the can/glass pipet container.
Follow the instructions above and do the following. Transfer 0.1 ml of E. coli culture
into a fresh NB tube. Transfer 0.1 ml of sterile NB into another tube of sterile NB. Label
the tubes and incubate at 30o C. Observe tubes during the next lab period, making note of
growth in the tubes.
Answer the following questions. Place your answers on a separate sheet of paper
and hand in on 9/3/99 during lecture.
1. How would you determine whether culture media given to you are sterile before you
use them?
2. What are the signs of growth in a liquid medium?
3. What is the purpose of washing the laboratory bench with disinfectant before you
begin to handle cultures?

4. Why is the neck of a culture tube flamed when it is opened and flamed again before it
is closed?
5. Why is it important to hold open culture tubes in a horizontal type position?
6. Why can a single colony on a plate be used to start a pure culture?
7. Why is it important not to contaminate a pure culture?
8. Why should long hair be controlled in the microbiology laboratory? Can you think of
an actual patient-care situation that would call for its control for the same reason?
9. Name at least two kinds of solutions that may be administered to patients by
intravenous injection and therefore must be sterile. How would you know if they
were not sterile?
From your streak plates:
1. What are the types of colony morphology did you observe on the EMB plates?
2. Did you obtain any colonies on the plate you struck with sterile broth, why?
3. How many isolated colonies did you obtain?
From your tube to tube transfer:
1. What tubes have growth?
2. Is this what you expected, why or why not?
From your plate to plate transfer:
1. What plates have growth?
2. Is this what you expected, why or why not?
From your plate to tube transfer:
1. What tubes have growth?

Lab 4Microscopes, Morphology, and Simple Stains
9/5/02
Objectives
After completing this exercise, you should be able to:
1. Handle the microscope properly, identify its parts, and focus on a slide using all three
powers.
2. Identify the basic shapes of microorganisms by microscopic examination.
3. Prepare a wet mount and locate microorganisms within it.
4. Prepare simple stains of a variety of bacteria and visualize them with the microscope.
Introduction
A good microscope is an essential tool for any microbiology laboratory. There
are many kinds of microscopes, but the type most useful in diagnostic work is the
compound light microscope. By means of a series of lenses and a source of bright light,
it magnifies and illuminates minute objects such as bacteria and other microorganisms
that would otherwise be invisible to the eye. This type of microscope will be used
throughout your laboratory course. As you gain experience using it, you will realize how
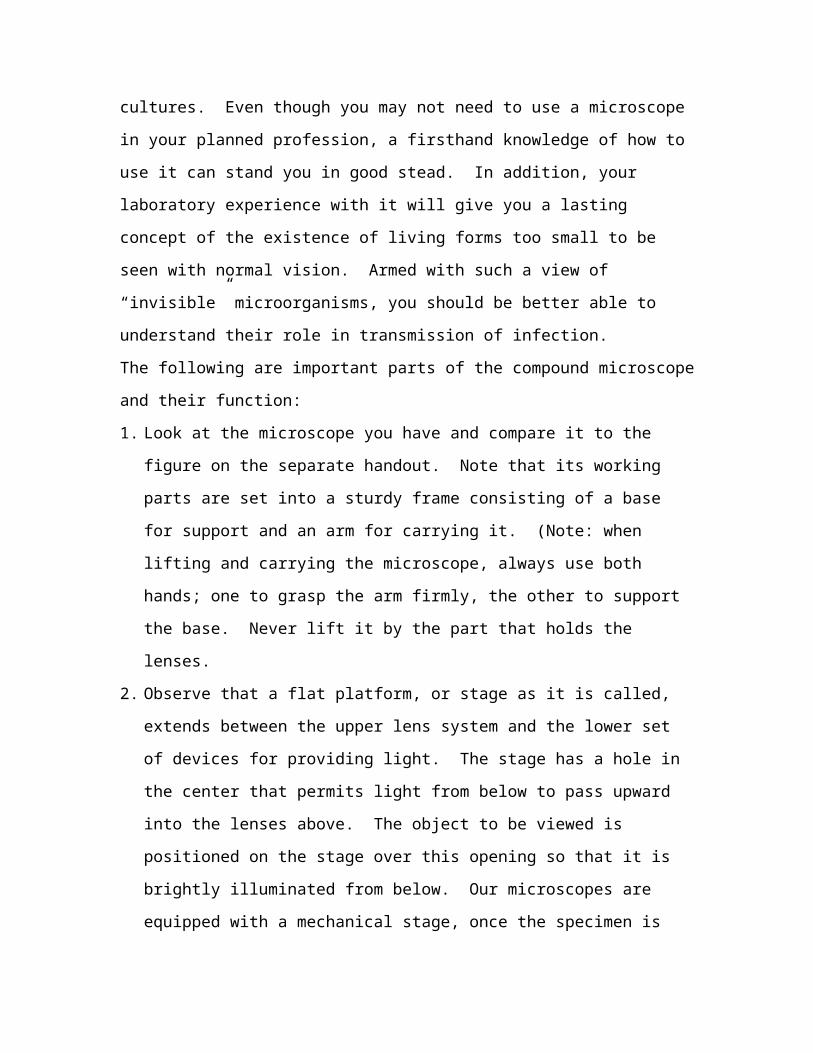
precise it is and how valuable for studying microorganisms present in clinical specimens
and in cultures. Even though you may not need to use a microscope in your planned
profession, a firsthand knowledge of how to use it can stand you in good stead. In
addition, your laboratory experience with it will give you a lasting concept of the
existence of living forms too small to be seen with normal vision. Armed with such a
view of “invisible” microorganisms, you should be better able to understand their role in
transmission of infection.
The following are important parts of the compound microscope and their function:
1. Look at the microscope you have and compare it to the figure on the separate
handout. Note that its working parts are set into a sturdy frame consisting of a base
for support and an arm for carrying it. (Note: when lifting and carrying the

microscope, always use both hands; one to grasp the arm firmly, the other to support
the base. Never lift it by the part that holds the lenses.
2. Observe that a flat platform, or stage as it is called, extends between the upper lens
system and the lower set of devices for providing light. The stage has a hole in the
center that permits light from below to pass upward into the lenses above. The object
to be viewed is positioned on the stage over this opening so that it is brightly
illuminated from below. Our microscopes are equipped with a mechanical stage,
once the specimen is placed into position it no longer needs adjustment by directly
touching it.
3. The light source is at the base. Most microscopes have a built in illuminator.
4. Light from the bulb is directed upward through the condenser, placed under the center
opening in the stage. The condenser contains lenses that collect and concentrate the
light, directing it upward through any object on the stage. It also has a shutter, or iris
diaphragm, which can be used to adjust the amount of light admitted. A lever is
provided on the condenser for operating the diaphragm.
5. Above the stage, attached to the arm, a tube holds the magnifying lenses through
which the object is viewed. The lower end of the tube is fitted with a rotating
nosepiece holding three or four objective lenses. As the nosepiece is rotated, any
chosen objective can be brought into position above the stage opening. The upper
end of the tube holds the ocular lens, or eyepiece.
6. The rotating nosepiece can be raised or lowered by means of coarse and fine
adjustment knobs. These are located below the stage. They are placed in tandem
with the smaller fine adjustment extending from the larger coarse wheel. The coarse
adjustment is used to bring the objective down into position over any object on the
stage, while looking at it from the side to avoid striking the object and thus damaging
the expensive objective lens. The fine adjustment knob moves the tube to such a
slight degree that it cannot be observed from the side. It is used when one is viewing
the object through the lenses to make the small adjustments necessary for a sharp,
clear image. The adjustment knobs should always be turned slowly and gently, with
one’s attention on the relative positions of objective and object. Avoid bringing the
objective down with the fine adjustment while viewing, because this unperceived

motion may force the lens against the object. Bring the lens safely down first with
the coarse knob, then, while looking through the ocular, turn the fine knob to raise the
lens until you have a clear view of the subject. Rotating the fine adjustment too far in
either direction may cause it to jam. If this should happen, never attempt to force it.
To avoid jamming, gently locate the two extremes to which the fine knob can be
turned, then bring it back to the middle of its span and keep it within one turn of this
central position.
7. The total magnification achieved with the microscope depends on the combination of
the ocular and objective lens used. Look at the ocular lens on your microscope. You
will see that it is marked 10X, meaning that it magnifies 10 times. Now look at the
three objective lenses on the nosepiece. The short one is the low-power objective. Its
metal shaft bears a 10X mark, indicating that it gives tenfold magnification. When an
object is viewed with the10X objective combined with the 10X ocular, it is magnified
10 times 10, or 100X. Each of the other objectives carries a different magnification,
with the oil immersion lens being the most powerful at 100X itself. Note the higher
the magnification used, the more intense the light must be, but the density of the
object also determines the amount of illumination needed. For example, more light is
needed to view stained than unstained preparations.
8. The focal length of an objective is directly proportional to the diameter of its lens.
You can see this by comparing your three objectives when positioned as close to the
stage as the coarse adjustment permits.
9. Take a piece of clean, soft lens paper and brush it lightly over the ocular and
objective lenses and the top of the condenser. With subdued light coming through,
look into the microscope. If you see specks of dust, rotate the ocular in its socket to
see whether the dirt moves. If it does, it is on the ocular and should be wiped off
more carefully. It you cannot solve the problem, call the instructor. Never wipe the
lenses with anything but clean, dry lens paper.
10. Because students in other laboratory sections may also use your microscope, you
should examine the microscope carefully at the beginning of each laboratory session
and clean it completely when finished.

Most kinds of bacteria exist as single cells. To observe a single bacterial cell requires
a microscope because the cell is likely to be about 100 times smaller than the smallest
object distinctly visible to the unaided human eye. The unit of length used to describe
bacterial cells is the micrometer (abbreviated m), which is equal to one millionth of a
meter or 10-6 meter. The diameter of a typical bacterial cell is about one micrometer.
Most kinds of bacteria have one of three basic shapes due to their rigid cell wall.
They are spherical, rod, or spiral shaped. Spherically shaped cells are called cocci (Greek
for grapes). Cocci are typically one to two micrometers in diameter. The cells of each
kind of coccus often adhere to one another so that they are seen in-groups in the
microscope. The arrangement within the group is characteristic of the kind of bacteria
and is a useful clue for identification. Some of the more common arrangements are
irregular clusters (staphylococci), one-dimensional chains (streptococci), and cube-
shaped packets (sarcinae).
Rod-shaped bacterial cells are called bacilli (Greek for rod). Bacilli vary in their
dimensions. In the short dimension (diameter) they may be as thin as 0.5 m or as thick
as 2m. In length they range from 1 m to 10 m. The ratio between length and
diameter also varies so that bacilli may be long and skinny or short and fat. Bacilli do not
form the characteristic arrangements of the cocci although they may sometimes be found
in end-to-end chains. They usually occur as individual cells.
Spiral-shaped bacteria include the spirilla and spirochaetes. They vary greatly in size,
with some greater than 500 m long and some as thin as 0.2 m in diameter, and in how
tightly they are coiled. They are also very difficult to culture.
Microbiologists observe microorganisms most often after they have been stained.
However, staining usually requires heat fixation, which kills and often shrinks the
specimen. By preparing wet mounts, living organisms can be observed. Viewing live
microbes allows you to observe motility and accurately measure their size. The microbes
you will view are eukaryotic algae, protozoa, and yeast, and prokaryotic bacteria. Algae
and protozoa are relatively easy to view at low and intermediate magnifications. Algae
contain photosynthetic pigments and can be green, red, or brown. Protozoa are usually
colorless and are characterized by rapid movement from cilia (rows of short hair-like
appendages) and flagella, or by slower amoeboid motion. Yeast are small spheres and

most bacteria are very tiny rods and spheres with very low contrast. By suspending the
microbes in a drop of liquid on a glass slide and putting a coverslip on the drop, features
like color, size, shape, and motility can be observed.
As you have read above wet mounts of bacterial cultures can be very informative, but
they have limitations. Bacteria bounce about in fluid suspensions, with Brownian
movement or true motility, and are difficult to visualize sharply. We can see their shapes
and appreciate their activity under a cover glass, but it is difficult to form a complete idea
of their morphology.
An important part of the problem is the minute size of bacteria. Because they are so
small and have so little substance, they tend to be transparent, even when magnified is
subdued light. The trick, then, is to find ways to still their motion and tag their structures
with something that will make them more visible to the human eye. Many sophisticated
ways of doing this are known, but the simplest is to smear out a bacterial suspension,
“fix” the organisms to the slide, and then stain them with a visible dye.
The best bacterial stains are aniline dyes (synthetic organic dyes made from coal tar
products). When they are used directly on fixed bacterial smears, the contours of
bacterial bodies are clearly seen. These dyes are either acidic, basic, or neutral in
reactivity. Acidic or basic stains are used in bacteriologic work, primarily. The free ions
of acidic dyes are anions (negatively charged) that combine with cations of a base in the
stained cell to form a salt. Basic dyes possess cations (positively charged) that combine
with an acid in the stained material to form a salt. Bacterial cells are rich in ribonucleic
acid (contained in their abundant ribosomes) and therefore stain very well with basic
dyes. Neutral stains are made by combining acid and basic dyes. They are most useful
for staining complex cells of higher forms, for they permit differentiation of interior
structures some of which are basic, some acidic.

Procedure (Individually)
Microscope Examination of Prepared Slides
Now that you are familiar with the parts and mechanisms of the microscope, you are
ready to learn how to focus and use it to study microorganisms.
Materials: 1 microscope
3 prepared stained bacterial slides
1 tube immersion oil
1. Using both hands, remove the microscope from its cabinet and place it on your bench.
Use one hand to grasp the arm of the microscope and support it from beneath with the
other.
2. To obtain a clear image, clean the ocular and the objective lenses before use. Use
only lens paper on lenses. Never touch the lenses with your fingers.
3. Place a slide of stained bacterial cells on the stage with the stain side up.
4. Plug in the light source and turn it on. Adjust the condenser to a position close to the
top of its travel. Move the slide around on the stage until you can see light shining
through the stained material. Move the slide using the knobs located on the side of
the stage.
5. Grasp the nosepiece (not the objectives) and rotate it so that the 10X scanning
objective is positioned over the slide.
6. Watch the objective from the side and lower the nosepiece using the coarse focus
knob (the larger one) until it reaches the bottom of its travel. The scanning objective
and the slide are now as close together as possible.
7. Focus on the stained material with the 10X scanning objective using the coarse focus
knob by slowly raising the nosepiece. The stained material should make a sharp
image, but individual bacterial cells will not be visible. Close the iris diaphragm to
obtain good contrast. Best position is nearly closed.
8. Once the stained material is in focus under the scanning objective, the coarse focus
knob should not be used any more. The microscope should be approximately in focus
with the high dry (40X) or oil immersion (100X) objective in position. A microscope

that has all the objectives approximately in focus at the same point of travel is said to
be parafocal. Any further focusing should be done with the fine focus (small knob).
9. Rotate the high dry objective into position. Sharpen the image using the fine focus
knob. Adjust the diaphragm as necessary.
10. Rotate the high-dry objective out of position and place a single drop of immersion oil
directly on the slide. Rotate the oil immersion objective into position. The tip of the
objective should touch the oil so that there is not air between slide and objective. Use
the fine focus knob to obtain a sharp image. You should be able to distinguish
individual bacterial cells.
11. To look at another slide, you should repeat the entire process.
12. As soon as you are finished observing a slide that is to be saved, wipe the oil off the
slide using lens paper.
13. When you are finished using the microscope, take a small piece of lens paper folded
double and wipe off all the lenses in the order (1) ocular, (2) scanning, (3) high-dry,
(4) oil immersion. Be sure to remove all oil from the oil immersion objective. Be
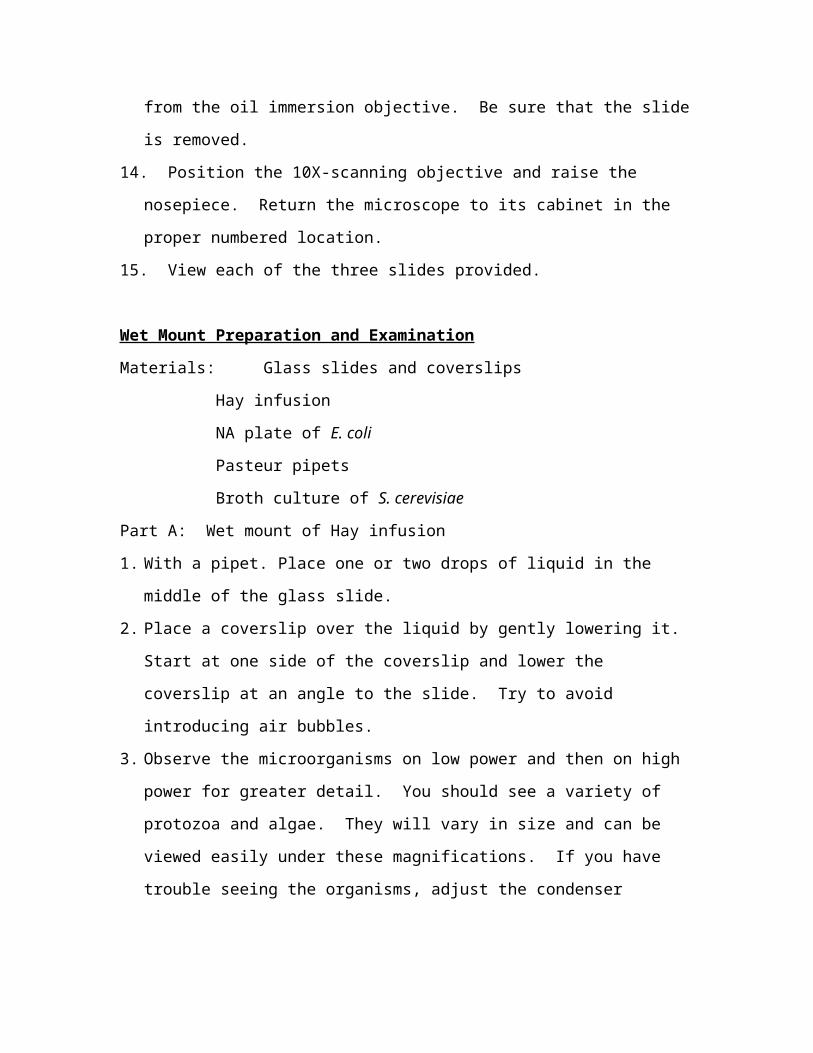
sure that the slide is removed.
14. Position the 10X-scanning objective and raise the nosepiece. Return the microscope
to its cabinet in the proper numbered location.
15. View each of the three slides provided.
Wet Mount Preparation and Examination
Materials: Glass slides and coverslips
Hay infusion
NA plate of E. coli
Pasteur pipets
Broth culture of S. cerevisiae
Part A: Wet mount of Hay infusion
1. With a pipet. Place one or two drops of liquid in the middle of the glass slide.
2. Place a coverslip over the liquid by gently lowering it. Start at one side of the
coverslip and lower the coverslip at an angle to the slide. Try to avoid introducing air
bubbles.
3. Observe the microorganisms on low power and then on high power for greater detail.
You should see a variety of protozoa and algae. They will vary in size and can be
viewed easily under these magnifications. If you have trouble seeing the organisms,
adjust the condenser diaphragm lever to decrease or increase the amount of light
passing through the specimen.
4. Draw your observations on a separate sheet of paper.
Part B: Wet mount of S. cerevisiae
1. Prepare a wet mount of the broth culture of S. cerevisiae using the procedure in Part
A (steps 1 and 2).
2. Observe the yeast under low power, high power, and oil immersion.
3. Draw your observations on a separate sheet of paper.
Part C: Wet mount of E. coli
1. Prepare a wet mount of E. coli from the NA plate. This can be done by sterilizing
your loop, allowing it to cool, and emulsifying a small portion of a colony in a drop
of water.
2. Place a coverslip on the drop as in Part A.
3. Observe this microorganism under low power, high power, and oil immersion.
4. Draw your observations on a separate sheet of paper.
Simple Stains
Materials: 24-hour cultures of the following: S. epidermidis, E. coli, B. subtilis
Methylene blue
Safranin
Toothpicks
1. Slides for microscopic smears must always be sparkling clean. They can be cleaned
in xylene and wiped clean with a soft towel.
2. Take three clean slides and with your marking pencil make a circle (about 1.5 cm in
diameter) in the center. At one end of the slide write the initials of one of the three
assigned organisms.

3. Turn the slides over so that the unmarked side is up (when the slides are to be stained,
wax pencil markings should always be placed on the underside so that the wax will
not smear or wash off, or run into the smear itself).
4. Place a loopful of water in the ringed area of the slide. Use your inoculating loop.
Mix a small amount of bacteria in the water and spread it out.
5. Allow the smear to air dry. You should be able to see a thin white film. If not, add
another loopful of water and more bacteria as in step 4.
6. Heat-fix the smear by passing the slide rapidly through the Bunsen burner flame three
times.
7. Place the slides on a staining rack and flood them with safranin. Leave the stain on
for three minutes.
8. Wash each slide gently with distilled water, drain off excess water, blot (do not rub)
with bibulous paper, and let the slides dry completely in air.
9. Prepare two more slides as in steps 1, 2, and 3. Place a loopful of distilled water in
the ringed area on each slide.
10. With the flat end of a toothpick scrape some material from the surface of your teeth
and around the gums. Emulsify the material in the drop of water on one slide.
Repeat the procedure on the other slide.
11. Allow both slides to dry in air, then heat-fix them. Stain one with methylene blue for
three minutes; the other with safranin, also for three minutes.
12. Wash, drain, and dry the slides as in step 8.
13. Examine all slides, with all three microscope objectives. Make a table with the
following information on a separate sheet of paper: Organism or sample, stain used,
color, shape, cell grouping, and appearance (drawing).
Along with your observations from about answer the following questions on a separate
sheet of paper.
1. List the optical parts of the microscope. How does it achieve magnification?
2. What is the function of the condenser?
3. Why do you use oil on a slide to be examined with the oil-immersion objective?
4. What is the advantage of parafocal lenses?

5. What are the three general shapes of bacteria and what categories did the bacteria you
observed today fall into?
6. What is the purpose of flaming a slide that is to be stained?
7. Why are specimens to be stained suspended in sterile water or distilled water?
8. Which of the microscope objectives is most satisfactory for studying bacteria? Why?
9. For what reasons do we need to stain bacteria?
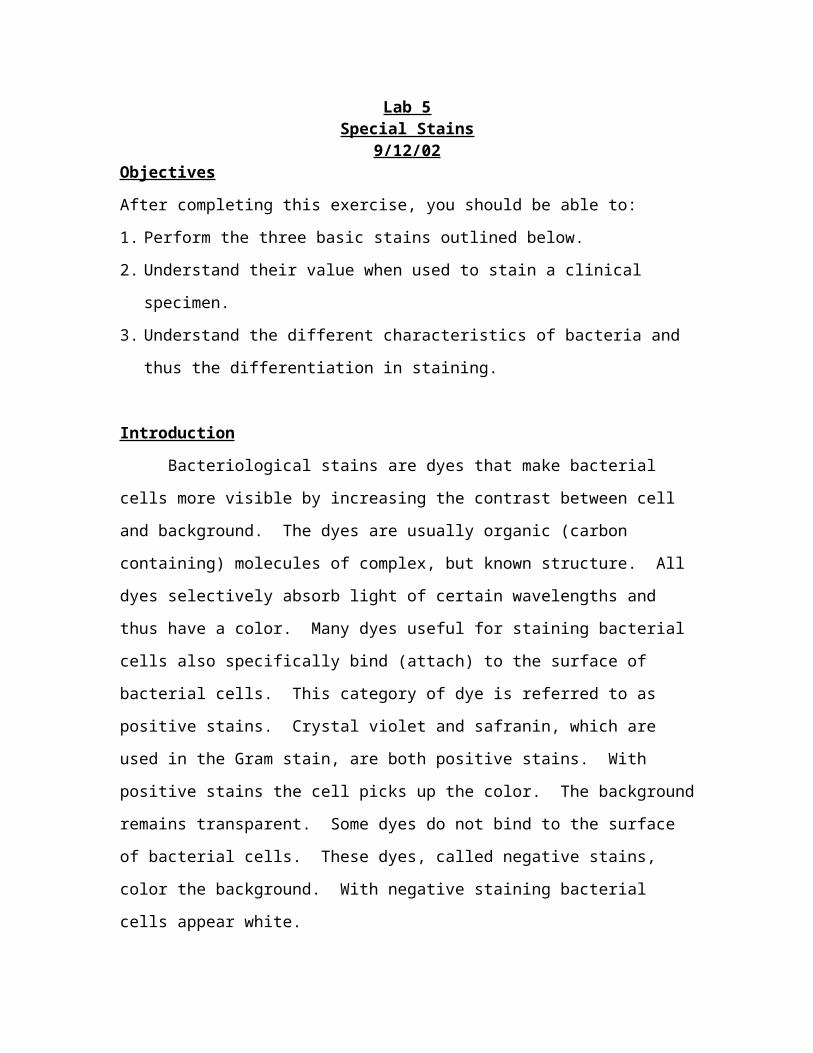
Lab 5Special Stains
9/12/02Objectives
After completing this exercise, you should be able to:
1. Perform the three basic stains outlined below.
2. Understand their value when used to stain a clinical specimen.
3. Understand the different characteristics of bacteria and thus the differentiation in
staining.
Introduction
Bacteriological stains are dyes that make bacterial cells more visible by increasing
the contrast between cell and background. The dyes are usually organic (carbon
containing) molecules of complex, but known structure. All dyes selectively absorb light
of certain wavelengths and thus have a color. Many dyes useful for staining bacterial
cells also specifically bind (attach) to the surface of bacterial cells. This category of dye
is referred to as positive stains. Crystal violet and safranin, which are used in the Gram
stain, are both positive stains. With positive stains the cell picks up the color. The
background remains transparent. Some dyes do not bind to the surface of bacterial cells.
These dyes, called negative stains, color the background. With negative staining
bacterial cells appear white.
Stains help to provide information about cell morphology – size, shape, and
arrangement. Stains can also provide more detailed information about such cell
properties as the presence of a cell wall, of carbohydrate, lipid, and phosphate nutritional
reserves, of flagella, and of nucleoids, which contain DNA, the genetic material. Perhaps
the most important use of stains in microbiology is to help in the identification of
bacteria. Some staining procedures produce different results when applied to different
kinds of bacteria. In this course we will use the Gram stain procedure which
distinguishes two important classes of bacteria, the Gram positive (G+) and the Gram
negative (G-). Because it distinguishes between these two classes, the Gram stain is a
differential stain.

The systematic use of bacterial stains began in the 1870’s. In 1884 the Danish
physician Christian Gram reported a method for staining using the dye crystal violet. He
observed that organic solvents (e.g. ethanol) could more readily remove the crystal violet
from some bacteria (G-) than from others (G+). This phenomenon of decolorization is
what makes the Gram stain differential. The Gram stain has remained an important
technique because its result is taxonomically significant. That is, closely related types of
bacteria usually all have the same Gram reaction. The Gram stain is thus an indicator for
a fundamental division among bacteria. There are other general differences between G+
and G- bacteria. Some of them are given in the table below.
Gram Positive Bacteria Gram Negative Bacteria
Thick cell wall (peptidoglycan) Thin cell wall (peptidoglycan)little lipid in cell envelop (1-4%) much lipid in a cell outer membraneno outer membrane (11-22%) surrounding the cell wall
More sensitive to the antibiotic penicillin Less sensitive to penicillin
Growth inhibited by basic dyes such as Little growth inhibition compared crystal violet to G+’s
Multiple growth factors requirements in Few growth factor requirements insome species (vitamins, amino acids) most species
Examples of Gram positive bacteria include Staphylococcus, Streptococcus, and
Bacillus. Gram negatives include Escherichia, Enterobacter, Proteus, Pseudomonas, and
Alcaligenes. It is important to keep in mind that the differences listed in the table are
differences of degree rather than absolute differences. For example, thinner vs. thicker.
The differential response of G+ and G- cells to the staining procedure is likewise one of
degree, G- cells decolorize (give up the crystal violet stain) faster than G+ cells. If
decolorization is carried out for too long a time, G+ cells will appear G-. There are two
lessons in this. The first is that the Gram stain procedure must be performed carefully
and consistently to give a meaningful result. The second is that even if the procedure is
done properly, some bacterial cells will give atypical results. The most common problem
of this type occurs when an old culture (say, a few days old) is stained. As G+ cells age
the Gram reaction can change to G-. So only recent (say, overnight) cultures should be

used for doing the Gram stain. Old cultures often give a Gram variable reaction. Some
bacteria are always Gram variable (e.g. Neisseria) while others stain poorly (e.g.
spirochetes, Mycobacterium).
The Gram stain procedure consists of four steps:
1. Primary staining by crystal violet.
2. Complexing of crystal violet by iodine (mordant).
3. Decolorization by alcohol.
4. Counterstaining by safranin.
The actual mechanisms by which most positive stains bind to cells are unknown.
Crystal violet (step 1), which carries a positive charge, evidently binds to a negatively
charged molecule (or molecules), probably in the cell envelop. Other factors beside the
attraction of a positive charge for a negative charge may also be involved in the binding
of stains to cells.
Iodine must be added (step 2) to form an insoluble complex with crystal violet.
Otherwise even G+ cells will decolorize. The term mordant comes from the textile
industry and refers to a compound, which fixes a dye in a textile fiber.
The key step is the decolorization (step 3). The G+ bacteria with their thick
peptidoglycan layers and with relatively little lipid decolorize slowly whereas the G-
bacteria decolorize rapidly perhaps because the ethanol dissolves their outer membrane
lipid allowing the crystal violet-iodine complex to be released or because their thin
peptidoglycan layer cannot trap the complex.
The purpose of the counterstain (step 4) with the safranin is to make the G- cells
visible in the microscope. Safranin does not stain as intensely as crystal violet and so has
no effect on the appearance of the G+ cells, which are purple.
Another stain that has been used for years is the indirect or negative stain. The
advantage of this stain is that it is the simplest and often-quickest means of discovering
cell shape and possibly refractile inclusions and endospores. It also does not distort
bacteria, which may happen with Gram stains, since cells sometimes, shrink as a result of
heat fixation and alcohol wash. Preparations can easily be made with natural specimens
or cultures by mixing them with a drop of 7% nigrosin solution and making a thin film.
The preparations reveal bacteria unstained, standing out brightly against a darker

background. Negative stains should not be used to measure cells lengths or widths
because some microbes may have capsules or slime layers which do not stain. In
addition, some cells may be partially collapsed. Furthermore, at pH 7.0, nigrosin is
negatively charged, just like the bacterial cell surface. Therefore, when the stain dries,
the bacteria appear larger than life, even if no capsule exists.
Members of the bacterial genus Mycobacterium contain large amounts of lipid (fatty)
substances within their cell walls. These fatty waxes resist staining by ordinary methods.
Since this genus contains species that cause important human diseases (the agent of
tuberculosis), the diagnostic laboratory must use special stains to reveal them in clinical
specimens or cultures.
When these organisms are stained with a basic dye, such as carbolfuchsin, applied
with heat or a wetting agent (a detergent that decreases the surface tension of fats), the
stain can penetrate the lipid cell wall and reach the cell cytoplasm. Once the cytoplasm is
stained it resists decolorization, even with harsh agents such as acid-alcohol, which
cannot dissolve and penetrate beneath the mycobacterial lipid wall. Under these
conditions of staining, the mycobacteria are said to be acid-fast. Other bacteria whose
cell walls do not contain high concentrations of lipid are readily decolorized by acid-
alcohol after sitting in carbolfuchsin and are said to be non-acid-fast. One medically
important genus, Nocardia, contains species that are partially acid-fast. They resist
decolorization with a weak (1%) sulfuric acid solution, but lose the carbolfuchsin dye
when treated with acid-alcohol. In the acid-fast technique, a counterstain is used to
demonstrate whether or not the fuchsin has been decolorized within the cells and the
second stain taken up.
The original technique for applying carbolfuchsin with heat is called the Ziehl-
Neelsen stain, for the two workers who developed it in the late 1800s. The later
modification of the technique that employs a wetting agent rather than heat to ensure
stain penetration is known as the Kinyoun stain.

Procedure (Individually)
Gram Stain
Materials: 24 hour culture of E. coli on NA
24 hour culture of B. subtilis
Gram stain reagents: 1% aqueous crystal violet
Lugol’s iodine
95% ethanol
2.5% safranin
Perform the following using both bacterial cultures.
1. Using your inoculating loop aseptically remove a small portion of a colony.
2. Place the cells on a slide. Add a loopful of water and smear the cells over an area
about the size of a quarter. Note that it is possible to do two or three different smears
on one slide.
3. Allow the smear to air dry. Do not heat the slide to speed up drying. Heat may cause
boiling and destruction of the cells. Have patience. When the smear is dry it should
appear as a haze on the slide.
4. Once the smear is dry, pass the back of the slide through the flame 3 or 4 times to fix
the cells to the slide. Test the warmth of the slide after each pass by touching it to the
back of your wrist. When the cells are properly fixed, the slide will feel
uncomfortably hot, but will not be intolerable against your skin.
5. Cover the smear with a lot of crystal violet. Stain for 1 minute. Pour off crystal
violet and rinse gently with tap water.
6. Cover the smear with iodine for a few seconds. Pour off and rinse gently with water.
7. Tilt the slide and allow drops of ethanol to flow over the smear. The crystal violet
will wash off the smear. Stop as soon as the wash is colorless. It will take only a few
seconds (about 10 or fewer) to complete this decolorization step. It is important not
to overdecolorize or G+’s will lose the violet stain. Some practice is necessary to
develop a feel for the right extent of decolorization. Rinse with water.
8. Cover the smear with safranin for a few seconds. Pour off and rinse gently with
water. Blot carefully using bibulous paper.

9. Observe the stained bacterial cells under high dry and oil immersion objectives.
Record you observations.
Negative Stain
Materials: 24 hour culture of S. epidermidis on NA
7% nigrosin
toothpicks
Vaseline
Perform the following using the bacterial culture and a scraping from your teeth.
1. Place one small drop of 7% nigrosin stain in the center of a coverslip.
2. With a toothpick, gently scrape your teeth and gums and mix the material with the
nigrosin. You should also, on a separate coverslip, take a small section of the
bacterial colony and mix.
3. Place another coverslip, rotated at 45o, over the nigrosin and slide the two coverslips
apart to from a thin film on each.
4. Turn the top coverslip over and let both films dry completely.
5. With another toothpick, add a small amount of Vaseline to all four corners of each
coverslip to fix the coverslip to the slide.
6. Invert each coverslip on a slide.
7. Find a very thin area of the film and observe the bacteria under oil immersion. Most
of the slide will show large cracks from the dried stain, so find an area that has no
cracks and observe the clear bacteria against a faint gray background.
8. Record your findings.

Acid Fast Stain
Material: young slant culture of Mycobacterium phlei
24 hour broth culture of B. subtilis
Gram stain reagents
Ziehl’s carbolfuchsin
Acid-alcohol solution
Methylene blue
500 ml beaker
tripod with asbestos mat
1. Prepare two heat fixed smears of each culture.
2. Gram stain one set of slides.
3. Stain the other set by the following protocol:
1. Place the slides on a slide rack extended across a beaker of boiling water held on a
tripod. An asbestos mat should protect the beaker from the Bunsen burner flame
beneath.
2. Flood slides with carbolfuchsin and allow to steam gently for three to five minutes.
The stain itself should not boil; if it does, reduce heat. It the stain appears to be
evaporating and drying up too rapidly, add a little more. Keep the slides flooded.
3. Using forceps, hold each hot slide at an angle over the sink and run acid-alcohol
down its surface. Continue (sparingly) until no more fuchsin color runs off.
4. Apply methylene blue (the counterstain) for one minute.
5. Rinse with tap water. Drain and blot slides with bibulous paper.
4. Examine all slides under oil immersion and record observations.
Answer the following questions:
1. Describe what color a Gram positive and a Gram negative organism would have
during each step of the Gram stain procedure.
2. Describe the Gram reaction and cell morphology of the four cultures that you Gram
stained.
3. What is the advantage of the Gram stain over the simple stain?

4. In what kind of clinical situation would a direct smear report from the laboratory be
of urgent importance?
5. Why is a counterstain necessary in the Gram stain?
6. What are the advantages and disadvantages of the negative stain?
7. Is the Gram stain an adequate substitute for an acid-fast stain? Why?
8. When is it appropriate to ask the laboratory to perform an acid-fast stain?
9. Does the presence of an acid-fast organism in a clinical specimen always suggest
serious clinical disease?

Lab 3Viable Counts (dilution techniques) and Growth Curve
9/5/02
Objectives
After completing this exercise, you should be able to do:
1. Use and manipulate pipettes to safely transfer liquids and/or bacterial cultures.
2. Calculate and perform dilutions.
3. Perform the standard plate count technique.
4. Determine the number of viable bacteria/milliliter by means of a spread plate
technique.
5. Recognize and demonstrate the four phases of a typical growth curve.
Introduction
One of the most useful types of information about bacterial cells, whether in an
experiment or in a practical situation is the number of cells which are present per unit of
mass or volume (cell concentration). For example, the rate at which a particular food
spoils can depend on the number of bacterial cells in it. As a consequence food standards
are often expressed in terms of the number of bacterial cells permitted per gram (solid
foods) or per milliliter (liquid foods). Estimation of the number of cells present can be
carried out in two general ways. The first is the actual counting of cells. The second is
the indirect estimate of the cell number from a property of a suspension of the cells. The
most commonly used property is the turbidity (cloudiness) of the cell suspension, but the
speed at which the cell suspension can carry out some chemical reaction is also used.
The first general way, the actual counting of cells, can be done in two ways. The total
cell count is done microscopically. A small volume of cell suspension is placed in a
counting chamber. Under the microscope a grid is visible and the number of cells in each
square is counted. Multiplying the number of cells counted by a constant, which takes
into account the volume of the chamber, yields the number of cells per milliliter. For
bacteria, the counting chamber used is called a Petroff-Hauser chamber. Microscopic
counting is fast. No aseptic technique and no incubation are required. The major
disadvantage of this technique is that all cells, viable (able to divide) and non-viable, are

counted, while only the viable ones may be important. The second way, in which the
actual counting of cells can be done, the plate or viable cell count, counts only viable
cells. The plate count method will be used in this course.
Viable bacterial cells are by definition able to divide. If a single viable cell is
placed on the surface of suitable solid medium and incubated properly it will form a
visible colony. Spreading a limited number of bacterial cells on a plate so that the cells
are all separated from one another, incubating the plate, and counting the number of
colonies formed does the plate count. The number of colonies counted is assumed to be
equal to the number of viable cells which were spread on the plate. This basic
assumption about the viable count may be in error, and the number of viable cells may be
underestimated if (1) the colonies are crowded together on the plate or (2) the growth
conditions are poor.
Let us begin with a plate of colonies we wish to count. There are two limiting
factors in performing plate counts. (1) We normally do not want to spread more than 0.2
ml of cell suspension on a plate. (2) We want to have between 30 and 300 colonies on a
plate. We cannot use a volume greater than 0.2 ml or else the plate surface will be too
wet. Too much moisture on the plate surface results in the dividing cells spreading across
the plate to form a lawn rather than individual colonies. We want to limit the number of
colonies to 30 to 300. More than 300 are very difficult to count accurately and a single
colony may come from more than one cell. Fewer than 30 may cause serious fluctuations
in the number spread because of sample variation and sampling error.
As long as there are no more than 300 cells per 0.1 ml it is possible to plate
directly. However, concentrations of bacterial cells are usually greater than 3000 per
milliliter. In order to plate no more than 300 cells, it is first necessary to dilute the cell
suspension.
Assume that our original concentration of cells is 3 x 10⁵ cells/ml. To spread 300
cells we would need only 0.001 ml:
Concentration = particles per volume
C = P/V
Rearranging, V = P/C
In this case, V = (300 cells/(3 x 105 cells/milliliter))
10-3 ml = 0.001ml
The laboratory pipets available to us are not able to measure such a small volume.
So the original cell concentration is too high for plating directly. It must be diluted in
order to be plated. To determine the dilution factor, we start with the concentration of
cells that we need for plating.
C = P/V = 300 (number of cells) / 0.1 ml (volume to plate)
= 3000 cells/ml = 3 x 10³ cells/ml
Let’s call this concentration C2 and the original cell concentration C1. The volume of
cells that we need at C2 (3000 cells/ml) is more than 0.1 ml. Lets take 10 ml as a
convenient volume. Call this volume V2.
C2 = P2/V2
If we take some number of cells from the original suspension (P1) and dilute it by sterile
dilution fluid (saline or water), the number of cells does not change during the dilution
and
P1 = P2
Substituting,
C1V1 = C2V2
We can solve for V1 in the volume of the original suspension,
V1 = C2V2/C1
V1 = [(3 x 10³ cells/ml)(10 ml)]/(3 x 10 5 cells/ml)
V1 = 0.1 ml
Therefore, if we use 0.1 ml of a 3 x 10⁵ cells/ml and dilute that to 10 ml, we will have a
final concentration of 3 x 10³ cells/ml, which is suitable for plating. NOTE: The formula

C1V1=C2V2 is of great value in determining how to make any of the single-step dilutions
cells, media, or chemical solutions necessary in the lab.
Inspection of the formula should show you that a single-step dilution is not
sufficient in most cases. Consider an original concentration of 3 x 10⁸ cells/ml, a typical
concentration with which you will be dealing.
V1 = [(3 x 10 3 cells/ml)(10 ml)]/(3 x 108 cells/ml)
= 10-4 ml
Again this is too minute a quantity to pipet. Because one dilution is not enough, the
answer is to make an ordered series of dilutions of our original suspension to bring it to a
concentration, which may be plated. This is called a serial dilution.
The particular advantage to the use of plate counts for determining cell
concentrations is that one directly determines the number of viable cells (assuming each
viable cell give rise to a colony). This is of obvious importance in an experiment in
which you measure cell killing and in a number of growth experiments where all of the
cells may not be viable at certain stages. Unfortunately, this method is time-consuming,
requiring about 24 hours after the platings are done before determining the cell number.
If you must know this concentration before proceeding with an experiment, you cannot
rely only upon plate counts.
Growth Curve
Bacteria as a group live and grow under a wide range of environmental
conditions. Because these microorganisms exert most of their effects through growth,
knowledge of the processes involved with microbial growth is essential to the
understanding, study and control of fundamental microbial activities. Bacteria can be
studied at all stages of growth-microscopically, physically, and chemically. The
information acquired through such studies can be used to correlate the chemicals formed
during growth with the appearance of cellular structures.
The term growth as applied to microorganisms usually refers to an increase in the
number of microorganisms or mass beyond that present in the original inoculum. A
single bacterial cell continually increases in size until it is about double its original
dimensions. It then divides and gives rise to two cells approximately the size of the

original parent cell. All structural parts of the cell double during this cell growth division
cycle.
The time required for the formation of two new cells from one is called the
generation time. During this time, the population of cells doubles. Thus, starting with
one bacterium, the increase in population follows a progressive doubling.
Because cell populations can reach levels into the billions, the logarithmic
notation approach that incorporates exponents of 10 is used to handle large numbers.
Bacteria and other unicellular microorganisms exhibit characteristic growth cycles
or patterns, which can be divided into the four distinct growth phases: lag phase;
exponential or logarithmic phase; stationary phase; and death phase. Their general
characteristics are as follows:
1. Lag phase: During this phase, cells in a new inoculum adjust to the medium.
Increases occur in enzyme production and cell size.
2. Exponential or logarithmic phase: During this phase, cells and cell mass double at a
constant rate. Metabolic activities proceed at a constant rate. Environmental
conditions, which include pH, temperature, medium properties, etc., influence this
phase. Because the doubling of the population (generation time) occurs at regular
time intervals, this phase also is referred to as one of balanced growth.
3. Stationary phase: During this phase, toxic products accumulate and/or the availability
of nutrients decreases and the number of viable cells reaches a plateau, resulting from
some cells dying and others still growing and dividing. There is no net increase or
decrease in cell number.
4. Death phase: If toxic substances accumulate and/or cell starvation occurs, the cells of
the population enter this phase. The rate of decline becomes exponential within time.
Spectrophotometers are instruments that electronically quantify the kinds and
amount of light that are absorbed by molecules in solution. Spectrophotometric
measurements such as those described in this exercise are based on the Beer-Bouger Law,
which shows the relationship between a solutions concentration of suspended particles
and its transmission of light. This relationship provides the basis for the quantitative
determinations of the concentration of bacterial cells in a solution by measurement of the
light transmitted by the solution.
Normal white light is a mixture of many different wavelengths (colors) between
380 and 750 nanometers (nm). The eye and brain perceive these different wavelengths as
different colors. The growth measurements require that the light entering solutions
(incident light) being analyzed be monochromatic (composed of a single wavelength). A
spectrophotometer is equipped with a device to separate white light into its component
wavelengths.
The terms percent transmittance and absorbance are used with optical methods of
analysis. Transmittance (T) is the ratio of the transmitted light of the sample to the
incident light on the sample. The value obtained is multiplied by 100 to derive the
percent transmittance.
Absorbance (A), also called optical density (OD), is directly proportional to
concentration (particles suspended) when a solution behaves according to the Beer-
Lambert Law (a modification of the Beer-Bouger Law). Absorbance specifically is the
logarithm to the base 10 of the reciprocal of the transmittance. In this exercise,
absorbance values will be used. On spectrophotometers, the absorbance scale normally is
present along with the transmittance scale.
The spectrophotometer measures the intensity of light (at various wavelengths)
before and after the light has passed through a solution. If the solution contains particles
such as bacteria that absorb light, the concentration of the bacteria can be determined
spectrophotometrically by measuring the absorption of light.
The procedure for spectrophotometric measurements is relatively simple to
perform. In general, it involves placing a light-absorbing particle solution into a cuvette
(a special, small test tube), selecting the appropriate wavelength, and inserting the cuvette
in the light pathway of a spectrophotometer so that the wavelength passes through the
cuvette and the solution it contains. Any light transmitted through the cuvette is directed
onto a photosensitive device, which converts the radiant energy produced into electrical
energy. The spectrophotometer’s meter then measures the electrical current generated.
The absorbance, or percent transmission, is determined by comparing the value
produced by the particle-containing solution to that by a blank solution, which does not
contain the light-absorbing material. Note that standard plate counts and
spectrophotometric measurements will be simultaneously to follow the bacterial growth
cycle and to obtain data with which to plot the corresponding growth curve.
Procedure (Individual for plate count, pairs for growth curve)
Cell Viability (Plate count)
Material: 2 NA plates3 sterile dilution blanks, 9.9 ml water1 sterile dilution blank, 9.0 ml watercan of 1 ml pipets1 hockey stick, beaker, and bottle of alcohol1 culture of bacteria grown overnight in NB
Using the dilution blanks provided, make a serial dilution of the bacterial culture.
Use the 9.0 ml blank last. With aseptic technique remove 0.1 ml of the overnight culture
and pipet it into one of the 9.9 ml blanks (a 1/100 dilution). Mix on a vortex. Label this
tube #1. From tube #1 remove 0.1 ml with a fresh pipet into another 9.9 ml blank (#2).
This is a second 1/100 dilution. Mix. Dilute 0.1 ml from #2 into #3 using a fresh pipet.
You have completed three 1/100 dilutions for a total dilution of 1/106.
Plate 0.1 ml from tube #3 by the spread plate technique as demonstrated.
Make a 1:10 dilution from tube #3 by transferring 1.0 ml to the 9.0 ml dilution
blank (#4) with a fresh pipet. Mix. Plate 0.1 ml on the remaining plate.
Incubate the plates at 37o C for 48 hours, upside down.
Count the colonies on each plate using the counter. If there seem to be more than
300 colonies on one of the plates do not count it. Using a colony count between 30 and
300, calculate the number of viable cells per milliliter in the original overnight culture.
Growth Curve (Spectrophotometric Measurements)
Material: 1 overnight bacterial culture in a 250 ml flask in NB1 sterile test tube of NB2 cuvettes1 spectrophotometerSemilog graph paperKimwipes (lint free)
1. Examine the spectrophotometer and cuvettes provided with the aid of the handout.
2. Rotate the amplifier control (left-hand) knob clockwise to turn on the instrument.
Allow the spectrophotometer to warm up for at least 15 minutes.
3. Close the lid of the sample holder.
4. After the instrument has warmed up, turn the amplifier knob so that the meter needle
will read “0” on the percentage transmission (%T) scale. With this step, the
instrument has been “zeroed.”
5. Obtain a cuvette. Be careful not to handle its bottom portion. This region will be the
one through which the light beam will pass.
6. Rinse the cuvette three times with distilled water.
7. Place about 4 ml of the sterile NB into the cuvette. Use a Kimwipe to remove any
liquid or fingerprints on the sides of the cuvette.
8. Insert the cuvette into the spectrophotometer’s sample holder with the index line or a
frosted triangle on the tube facing toward the front of the instrument.
9. Close the lid.
10. Set the wavelength for 660 nm. This wavelength is used for yellow to brown
solutions.
11. Rotate the light control (right-handed) knob until the meter needle read 100%T. The
spectrophotometer has now been standardized, and is ready for measurements.
12. Open the sample lid and remove the cuvette.
13. Every 20 minutes remove a 4 ml aliquot for the bacterial culture and place it in a
rinsed cuvette.
14. Place the cuvette in the spectrophotometer and close the lid.
15. Read the absorbance.

16. Remove the cuvette and discard the contents in the proper place.
17. Continue the readings for 2 hours, every 20 minutes, record the data on the board.
Answer the following questions.
1. Construct a graph of the growth of your bacterial culture on the semilog paper
provided. Point out each of the phases of growth.
2. Calculate the doubling time of your culture.
3. Explain how you would determine the number of viable cells in each of the growth
phases.
4. At what time did the bacterial culture enter the death phase? Why?
5. Looking at the other types of bacteria used, why are the growth curves different for
different bacteria (they were grown at the same temperature and with the same
media)?
6. In the plate count exercise, how many viable cells were in the original culture?
7. If you did not get between 30 and 300 colonies on either plate explain the possible
reasons.
8. If you have 3 x 10⁵ bacteria in 600 ml, what is the cell concentration (cells/1 ml)?
9. Give two ways to make a 1/100 dilution.
10. In how many milliliters must you dissolve 490 mg of glucose to get a solution having
a concentration of 70 mg/ml?
11. You have 20 ml of bacteria at a concentration of 5.0 x 10⁷ cells/ml. The dilution
factors of your serial dilution are 10, 100, and 100. How many milliliters must you
plate to get 150 colonies?

Lab 7Killing Microbes
9/19/02
Objectives
After completing this exercise you should be able to:
1. Demonstrate the proper techniques for killing microorganisms.
2. Determine antibiotic resistance and sensitivity.
3. Distinguish between antiseptic and disinfectants and determine their effectiveness.
4. Determine and demonstrate the proper physical methods for killing microbes.
Introduction
The goal of efforts to control microbial growth is either (1) to prevent infection by
pathogens (disease causing microorganisms) or (2) to prevent contamination by
microorganisms causing spoilage of foods, water, or other materials.
In examining the chemical and physical methods for control of microorganisms,
we are concerned with a number of practical factors. Does a method kill microorganisms
(Is it bacteriocidal?) or inhibit growth of microorganisms (Is it bacteriostatic?). How
does it work? What is the relative effectiveness of one method versus another? What
other conditions must be taken into account before deciding on the appropriate control
measure?
Microbial infection or contamination usually means that a large number of single
celled organisms are present where they are doing harm. Whatever control agent is used,
its interaction with the population is random. The percentage of the population that dies
in the case of a killing agent in any time period is fixed. The number that is killed
depends on the total number present and a fixed probability that any one cell will be
killed. This can be stated mathematically:
Nk = N
Where Nk is the number of cells killed, N is the number of cells present and is the
probability of any single cell being killed. Likewise, the number that survives Ns also
depends on the number present and the fixed probability that any one cell will be killed.
This can be stated:
Ns = (1 - )N
The constant , the probability that anyone cell will be killed, has a value that depends on
(1) the concentration of a chemical agent (the intensity of a physical agent) and (2) the
time of treatment. The two factors can be combined as dosage. Thus, treatment with
some agent at a certain concentration (intensity) in a certain time provides a certain
dosage. A graph of the number of survivors Ns as a function of increasing dosage gives a
line with a negative slope. This killing curve is exponential because the number of
survivors depends on the population size N. A logarithmic scale is used to provide a
straight curve. A graphic representation looks like this:
In a practical situation, concentration of a chemical (e.g., 70% ethanol) or the intensity of
the physical agent (e.g., heat at 100o C) is usually fixed and the time of treatment varied.
The log of the number of survivors is then plotted as a function of time of treatment. A
family of curves obtained with different concentrations (intensities) can be generated.
For example, heating a bacterial culture at different temperatures gives:

The following example illustrates the implications of exponential killing.
Suppose you are canning chicken soup. Your problem is to kill all the organisms present
in the soup, which is an excellent medium for bacterial growth. You use autoclaving as
your method of killing. Initially, there are 1,000,000 bacteria/can and, after heating for
one minute at 121o C, there are 100,000 live cells left. Does this mean that you need to
autoclave for 0.1 minute more to kill all of the remaining viable cells? You should see
that this is not the case. Remember, a fixed percentage, not number, is killed per unit
time. In one minute, 90% of the cells were killed. Therefore, 90% of those remaining
will be killed in the next unit of time, and so on. This table describes the example:
Time (minutes) Viable Cells Per Can
0 106
1 105
2 104

3 103
4 102
5 101
6 100 (= 1 cell/can)
7 10-1 (= 1 cell/10 cans)
Thus, it would take seven minutes, not 1.1 minutes, to reach a point of less than one live
cell per can. At seven minutes there would be 0.1 of a viable cell. Obviously, there is no
such thing as a fraction of a viable cell; what this means realistically is that on the
average in one out of every ten cans autoclaved for seven minutes, there will be one
viable bacterium left. The canner must pick a time that gives a vanishingly small
probability of having any viable cells left in any can, perhaps 20 minutes or longer.
One can find many instances when the killing curve is not a straight line. For
example:
Such curves indicate that the microbial population is not homogeneous. Either different
species are present, differing in their average resistance to the killing agent, or differences
within the same species five rise to differences in resistance to the killing agent.
While a determination of the slope of the killing curve for any agent is the most
accurate way of measuring killing and is not dependent on the number of bacteria

present, a simpler measurement is made in many cases. This can be done in one of two
ways. A fixed number of cells is used in each determination and it must be remembered
that killing is a function of the strength of the killing agent and the length of time the
agent is applied.
Death point: In this type of measurement, we hold the treatment time constant
and vary the strength of the agent. What we are seeking, then, is the concentration or
intensity that will kill all of the cells in our sample in a fixed period of time. The killing
agent could be temperature, concentration of antibiotic or disinfectant, etc.
Death time: In the second type of measurement, we hold the agent strength
constant and very the time of treatment. Here we are asking what is the shortest period of
time, at a fixed concentration or intensity strength, that will kill all of our cells.
While the exact details may vary, these two methods are often used to measure
killing. They have the advantage of being easily used to compare effectiveness of killing
agents. Examples of this would be to compare death point concentrations of disinfectants
or antibiotics to find the most effective one, or to use the death time to see which species
of bacteria is most resistant to a particular temperature or intensity of ultraviolet
radiation. Often, one specified measurement of a killing agent is set as a standard against
which the effectiveness of other killing agents is judged.
There are a number of agents available for the control of microbial growth. Some
of these agents cause physical changes in the environment. Physical agents include X-
rays, ultraviolet irradiation, temperature and high solute concentrations that cause
changes in osmotic pressure. Chemical agents, include acids, bases, alcohols, phenols,
halogens, heavy metals, and quartenary ammonium compounds (a special class of
detergents). Chemotherapeutic agents, which are used to treat microbial infections in
humans and animals, are a special class of chemical agents suitable for use within a
eukaryotic host.
Control agents and the control process are described by a number of terms such as
“sterilization”, “disinfection”, and so on. A number of these terms are defined below:
Sterilization: A treatment that makes an object completely free of all viable
microorganisms.

Disinfection: A chemical or physical treatment that reduces the infectivity of an object
by killing most of the harmful cells present, but not necessarily the spores present.
Antimicrobial agent: A chemical or physical treatment that interferes with the growth or
activity of microorganisms.
Chemotherapeutic agent: An antimicrobial agent used for treating infections.
Antibiotics are chemotherapeutic agents.
Sanitization: Disinfection designed to meet public health requirements.
Thermal death point: The lowest temperature at which a 10 minute exposure sterilizes a
culture.
Thermal death time: The time required for a given temperature to sterilize a culture.
How effective a control process is dependent on both primary and secondary
factors. The primary factors are (1) the concentration of the chemical or the intensity of
the physical agent, (2) the time of treatment, and (3) the physiological state of the
microorganisms being treated. By way of illustration: (1) a higher temperature is more
effective than a lower temperature even if both are bacteriocidal; (2) a longer time
ensures better control up to the time required for sterilization; (3) in a given situation the
nature of the microorganisms capable of causing a problem may be known. The
treatment can be tailored to the microorganism. Dividing cells are in general more
sensitive to control agents than resting cells, which in turn are more sensitive than
bacterial spores.
The secondary factors include (1) the temperature (when temperature is not the
principal control agent), (2) the pH (when acid or base is not the principal control agent),
and (3) the presence of organic matter. By way of illustration: (1) Even within the
growth range of a microorganism a higher temperature increases the effectiveness of a
control agent such as a chemical disinfectant; (2) Extremes of pH tend to increase the
effectiveness of some control agents by weakening the cells; (3) Organic matter such as
blood serum reduces the effectiveness of some agents including many chemical
disinfectants.

Ultraviolet Irradiation
Ultraviolet light (175 to 350 nanometers in wavelength) has a higher energy than
visible light. Ultraviolet light (UV) of about 260 nanometers wavelength is strongly
absorbed by the DNA molecules in all cells. DNA may be structurally changed as a
result. If the DNA suffers multiple UV “hits”, there are several possible outcomes: (1)
cell division may stop while the cell repairs the UV damage to its DNA (a bacteriostatic
effect); (2) the cell may lose viability (a bacteriocidal effect) because it is unable to repair
its DNA which can no longer function in replication (DNA synthesis) or expression
(mRNA synthesis); (3) the cell may make a mistake during the repair of UV damage
resulting in a viable cell carrying a mutation in a gene.
About 99% of the structural changes in DNA caused by UV are of one type, the
formation of thymine dimers. A thymine dimer results from the fusion of two adjacent
thymine bases in one strand of a DNA molecule into a single covalently linked structure.
It is the formation of thymine dimers which leads to the outcomes described above.
Many bacterial species have enzyme systems, which are capable of repairing UV
damage to DNA. Escherichia coli appears to have three such systems. In this
experiment we will look for evidence of the presence of one of these systems, the
photoreactivation system, in Serratia marcescens. Photoreactivation changes the
thymine dimer back to two separate thymine bases without removing the dimer from the
DNA double helix. It requires a single enzyme, “the photoreactivating enzyme”, and
blue light to work.
There are two limitations to the use of UV as a control agent which must be kept
in mind: (1) UV penetrates poorly. It is only effective on surfaces or thin layers of liquid.
To irradiate plates you must remove the lids. (2) UV can damage your eyes. Never look
directly at an ultraviolet lamp.
In this experiment we will look at the effect of UV irradiation for different periods
of time upon the viability of bacterial cells and at the effect of blue light for overcoming
death caused by prior UV irradiation.

Thermal Death Point Determination and Resistance of Spores to Heating
The effectiveness of an anti-microbial agent for controlling the size of a bacterial
population depends primarily on what type of bacteria are present, the length of time for
which the cells are exposed, and the amount of the agent, which is present. For example,
Staphylococcus aureus cells have an intrinsic sensitivity to temperature above a certain
point, but the effectiveness of high temperature at controlling a population of S. aureus is
also determined by how high the temperature is and how long the population is exposed
to it. In addition, other secondary factors can modify the effectiveness of an agent.
The point of this experiment is to learn the effect of elevated temperature (in an
approximate way) on the survival of pure cultures of bacteria when the time of exposure
is held constant at 10 minutes and the secondary factors are as nearly as possible also
constant. This sort of determination is called thermal death point and is properly defined
as the lowest temperature at which 10 minutes of exposure results in sterilization.
The resistant form of cell, the endospore produced by the Gram positive rods
Bacillus and Clostridium, complicates the problem of sterilization by heat. The spore
enables the microorganism to endure extreme conditions including periods of boiling.
Spores have a low water content compared to cells. This property may help to
account for their resistance to all sorts of extreme conditions including high
concentrations of disinfectants, drying, and irradiation by X-rays, as well as high
temperature.
Mature spores are said to be dormant because they do not divide and show very
little metabolic activity. They do not remain dormant forever and any sterilization
process has to take their resistance into account.
Osmotic Pressure
Bacteria live in an aqueous environment. Their small size gives them a very large
surface area, relative to their volume, in direct contact with their environment. This
allows for extremely rapid transfer of molecules into and out of the cell. This transfer
includes uptake of nutrients, excretion of waste products, and movement both ways of
salts and water. The flow of water is controlled by the osmotic pressure of the
environment. This pressure regulating water flow in and out of the cell depends on the

number of particles dissolved in the water (total solutes) including salts and other
molecules. The net flow of water in or out is described by three terms. A hypertonic
medium is one in which there are more dissolved particles per unit volume outside of the
cell than inside, causing water to flow out of the cell (plasmolysis). An isotonic
environment is in balance with no net flow of water in or out of the cell. A hypotonic
environment contains fewer dissolved particles per volume outside of the cell than inside,
causing water to flow into the cell and swelling it. Most bacteria live in hypotonic
environments.
Animal cells do not have a cell wall and respond to the osmotic pressure of their
environment by swelling or shrinking. However, within an animal’s body the osmotic
pressure remains relatively constant. Most bacteria have rigid cell walls and do not
actually change dimensions, but do respond to the osmotic pressure of their medium.
Few, except certain marine bacteria, are sensitive to hypotonic media, but most are
sensitive to hypertonic media. At high osmotic pressure, water flows out of the cell and
the cytoplasm shrinks away from the cell wall. This alteration of cell structure may be
reversible when the cells are transferred to isotonic or hypotonic solutions or it may be
irreversible (bacteriocidal). The degree of inhibition of growth will depend on the type of
dissolved particles and nature of the microorganism, as well as on the concentration of
the dissolved particles (total solutes).
The concentration of dissolved particles (moles per liter) depends on (1) the mass
of solid added per unit volume of liquid (often expressed in grams of solid per 100 ml
solution or %), (2) the molecular weight of the solute, and (3) the dissociation of the
solute into more than one particle.
Our osmotic pressure experiment is designed to show that (1) bacteria differ in the
range of osmotic pressure (hypertonic environments) over which they can grow, (2)
bacterial growth is inhibited at high osmotic pressures.
Antimicrobial Activity of Disinfectants
A disinfectant is defined as a chemical, which is generally used on objects, and
sometimes on the skin to destroy infectious microorganisms or viruses. Disinfectants
usually act by killing bacterial cells, but are ineffective against bacterial spores. An

example of a disinfectant is bleach, which we use to disinfect lab benches. Other
common disinfectants include Roccal, hydrogen peroxide, and alcohol. Disinfectants can
be used on the human body. For example, the skin disinfected with alcohol before an
injection. Some commercial mouthwash preparations claim to disinfect the mouth.
In this experiment your section will evaluate the anti-bacterial activity of a
number of disinfectants and mouthwashes against a few different kinds of bacteria.
Antibiotic Susceptibility Testing by the Disc Method
The treatment of an infectious disease, caused by a microorganism, requires a
substance, which can penetrate the body and neutralize the effect of the microorganism
without harming the body. There are a limited number of such substances known which
have these properties. They are referred to as chemotherapeutic agents. Most, but not
all, chemotherapeutic agents are antibiotics, organic chemicals produced by
microorganisms in nature, which inhibit the growth of other microorganisms. Some
chemotherapeutic agents such as the sulfa drugs have only been synthesized in the lab
and are not known to exist in nature. They are not considered to be antibiotics. On the
other hand, many antibiotics can now be synthesized chemically in the lab. Sometimes
chemical synthesis just involves modifying an antibiotic produced by a microorganism
into another chemical form, which may be more effective. Antibiotics have only been
found to be produced by a few kinds of microorganisms in nature. One genus of bacteria,
the Streptomyces, is responsible for a majority of the antibiotics, which have been
discovered. Antibiotics are also produced by species of the bacterial genus Bacillus.
Penicillin, the first antibiotic discovered, is produced by the fungus Penicillium.
The essential property of any chemotherapeutic agent, to inhibit the infection
without harming the host is called selective toxicity. This concept was put forward by the
turn of the century microbiologist Paul Ehrlich who discovered the first anti-bacterial
chemotherapeutic agent, Salvarsan, an arsenic-containing compound effective against
Treponema pallidum, the cause of syphilis. Ehrlich used the analogy of the surgeon’s
knife by referring to the ability of Salvarsan to stop a Treponema pallidum infection with
relatively little damage to the human body as the “chemical knife”.

There are several important aspects to selective toxicity. For a substance to be
useful it must not seriously harm the human or animal host suffering the infection. First,
it must cause no, or only minor, direct damage to the host. Examples of direct damage
include interference with blood cell production or with liver function. Some minor direct
damage to the host may be tolerated if the infection is serious (and possibly life
threatening). Second, it must not interfere with the host’s natural defenses against
infection. The host’s immune system is the major way that an infection is eliminated
once it has occurred. The immune system can be divided into humoral immunity,
antibodies which are proteins dissolved in the blood and other body fluids, and cellular
immunity, cells which have specific functions to either directly kill other cells or help
with that killing.
The other important aspects to selective toxicity are concerned with inhibiting the
infection. To inhibit the infection a chemotherapeutic agent (1) must have an affinity for
the microorganism, and (2) must have a toxic potential for the microorganism. Affinity
means that the agent can penetrate the body in an effective concentration (it must be
water-soluble) and that it can bind chemically to the microorganism. Once the agent is
bound specifically to the microorganism, it expresses its toxic potential. The toxic effect
of the agent is to destroy or prevent the growth or activity of the microorganism causing
the infection. Destruction of the microorganism means that the agent has a bacteriocidal
effect. However, it is not necessary that an agent be bacteriocidal to be effective.
Preventing growth means that the agent has a bacteriostatic effect. A bacteriostatic effect
may be satisfactory because it gives the body’s immune system time to catch up with the
infection. Some bacterial diseases progress because of a toxin (a poisonous protein)
produced by the bacterial cells. A chemotherapeutic agent which prevents the activity of
the toxin can slow the disease and five the host the chance to recover.
Selective toxicity comes about because of differences between the cell of the
microorganism and the cells of the host. A chemotherapeutic agent exploits such a
difference to inhibit the microorganism. To put it another way, the microorganism has a
target for the agent that is missing in the host cells. The following table gives four
examples of differences between bacterial and animal cells, which can be exploited to
inhibit bacterial infections.

Bacterial Cell Animal Cell Chemotherapeutic Agent
and
its effect
Peptidoglycan, cell wall No cell wall Penicillin destroys cell wall
Cell membrane
High in protein
Cell membrane
High in lipids
Polymixin destroys
Bacterial cell membrane
70s ribosomes 80s ribosomes Streptomycin inactivates
70s ribosomes
High rate of DNA synthesis Low rate of DNA synthesis Nalidixic acid interferes
With DNA synthesis
To be therapeutically useful an anti-bacterial agent should posses the following
four properties in addition to selective toxicity: (1) It should have a broad spectrum, that
is, be effective against many different types of disease-causing bacteria. A broad
spectrum simplifies the physician’s choice of an appropriate drug. (2) It should not be
subject to frequent mutation to bacterial resistance. Some kinds of bacteria readily
mutate (undergo genetic change) to resistance to certain agents thus eliminating their
affinity or toxic potential for the bacteria. (3) It should not produce side effects such as
allergy, diarrhea, or stomach aches. Occurrence of side effects discourages use. (4) It
should not eliminate the normal intestinal bacteria. Disturbance of the “normal” flora
may create a situation where a secondary intestinal infection by a microorganism (often a
yeast) resistant to the chemotherapeutic agent being administered can develop. In this
way an additional medical problem would be created by the therapy itself.
Microorganisms differ in their sensitivity to different antibiotics. The treatment
of a specific disease depends on knowledge of specific antibiotic susceptibilities of the
pathogen. One rapid way of determining whether a bacterial species is sensitive to a
particular antibiotic is demonstrated in this experiment. The surface of an agar plate is
completely spread with a pure culture of the bacterium and then discs impregnated with
various antibiotics are placed on its surface. The antibiotic diffuses out of the disc into
the agar. When the bacterial lawn grows up, there will be a clear area of no growth
around the antibiotic disc if the culture is sensitive to the antibiotic. The size of the zone

is dependent on several factors: concentration of antibiotic in the disc; sensitivity of the
bacterium; rate of diffusion; decomposition of the antibiotic during incubation. Because
of this, one cannot make a simple correlation between the size of the zone of inhibition
and the relative effectiveness of different antibiotics. This method is very useful
clinically since it provides for rapid determination of sensitivity to a large number of
antibiotics of a pure culture even when the identity of the pathogen is not known.
Procedure (in pairs)
Ultraviolet Irradiation
Materials: Dilution blanks of 9.0 or 9.9 ml water
1 overnight culture of Serratia marcescens
UV light source
6 NA plates
semi-log graph paper
1. Dilute the culture so that you can inoculate 100-300 bacterial cells per plate. Spread
inoculum evenly over the surface of each of the 6 plates. (Do not use more than 0.2
ml inoculum).
2. At a distance of 18 inches from the UV light source, irradiate 2 plates each of the
times listed below. Make sure lids are removed.
3. Label each plate. Place one plate from each pair in a paper bag immediately (or
wrap in paper) and place in the 30o C incubator.
4. Place the other plate from each pair under a regular lamp for 10-15 minutes. Make
sure lids are on.
5. Place these plates also in the incubator.
6. Examine after 48 hours and record the number of colonies per plate in your notes.
Make a table like the one shown.
Time of UV exposure Number of colonies Number of colonies
No photoreactivation + photoreactivation
0 seconds
10 seconds
20 seconds

7. Plot curves of number of survivors per milliliter as a function of UV dose with and
without photoreactivation (regular light) on the same sheet of graph paper.
Thermal Death Point Determination
Materials: Overnight cultures of Pseudomonas fluorescens, Escherichia coli, Bacillus
subtilis
Spore suspension of Bacillus subtilis
Five trypticase-soy broth, 5 ml in tubes
Water baths at various temperatures
Five NA plates
1. Inoculate the 5 tubes of broth each with a drop from one of the cultures or the spore
suspension. Mix. Label the 5 tubes in the set: 50, 60, 80, 100, control; include the
name of the culture on each tube.
2. Place each tube in the waterbath equilibrated to one of the temperatures. Incubate for
exactly 10 minutes. Before starting check the temperature of the bath and make sure
the water is deep enough so that the broth of the tube will be totally immersed. When
the 10 minutes have passed, place the tubes in a beaker of water at room temperature
to cool for 1-2 minutes.
3. Streak out a loopful of each of the cultures from each temperature on a separate NA
plate and incubate at 30o C for 48 hours.
4. Examine the plates, counting the number of colonies per plate for each temperature.
5. Create a table similar to the one above with the results from this section and include it
in the questions.
Osmotic Pressure
Materials: Overnight cultures of Staphylococcus aureus, Streptococcus faecalis,
Bacillus subtilis, Escherichia coli
One agar plate of each of the following: NA, NA + 2% NaCl,
NA + 5% NaCl, NA + 10% NaCl, NA + 20% sucrose
Dilution blanks

1. Inoculate each plate with one of the bacterial cultures above (100 colonies per plate).
Label the plates with organism and type of media.
2. Incubate plates at 30o C for 48 hours.
3. Observe the plates, counting the number of colonies per plate.
4. Create a table with number of colonies on each type of media for your organism.
Antimicrobial Activity of Disinfectants
Materials: Overnight cultures of Bacillus subtilis, Escherichia coli, Staphylococcus
aureus, Streptococcus faecalis
3 NA plates
Various disinfectant and antiseptic solutions
Sterile filter discs
1. Spread out 0.1 ml of the overnight culture of one of the above culture on all 3 NA
plates.
2. Using sterile/flamed forceps obtain a sterile filter disc and immerse it in one of the
disinfectants or antiseptics (beaker provided).
3. Place the disc on one of the plates that you just spread with an organism.
4. Repeat steps 2 and 3 until you have 3 discs with different solution on them in each of
your 3 plates (a total of nine discs on three plates). Label the plates with organism
and type of solution on each disc.
5. Incubate all 3 plates at 30o C for 48 hours.
6. Observe the plates and determine if the solution inhibited growth of the bacteria.
Measure the zone of inhibition (if present).
7. Create a table with organism used, type of disinfectant, and zone of inhibition.
Include this in your answers to the questions.
Antibiotic Susceptibility Testing
Materials: Overnight cultures of Escherichia coli, Pseudomonas fluorescens,
Bacillus subtilis, Staphylococcus aureus
Two NA plates
A selection of antibiotic discs

1. Spread the entire surface of one plate with a Gram positive and a Gram negative
organism (0.1 ml/plate).
2. Using an automatic dispenser or sterile forceps, place five different discs on the
surface of each plate. Be sure to record the letter and numbers on each disc and
indicate which antibiotic it contains.
3. Incubate the plates at 30o for 48 hours.
4. Measure the diameter of any clear areas around the discs and record this information.
5. Summarize the results with a table that you include with you answers to the
questions.
Questions
UV irradiation
1. Was your curve linear? Would you expect it to be?
2. Can you determine from your graph how long it would take to sterilize the surface of
the plates with UV under our conditions?
3. Was the exposure to regular light effective at reactivating UV irradiated cells in your
experiment? Why did we put the lids on during photoreactivation?
4. How could you vary the UV dose without changing the time of irradiation?
Thermal Death Point
1. What is the observed thermal death point for each of the cultures the class tested?
2. Explain how the thermal death point of a particular kind of bacteria could be related
to its temperature growth range.
3. What are some of the features of the structure of the bacterial spore, which make it
resistant to heat?

4. Describe in a few sentences another experiment that you could do to test the
resistance of spores to an adverse environmental condition other than high
temperature.
5. Briefly describe an instance where the resistance of a bacterial spores plays a role in a
human disease.
Osmotic Pressure
1. What is the tolerance limit of your bacterium for NaCl?
2. Provide one example of the use of controlled osmotic pressure in food production or
preservation.
3. Why is 20% sucrose not the same osmotic strength as 20% NaCl?
Antimicrobial Activity of Disinfectants
1. Which of the disinfectants you tested was most effective against the bacterium you
used?
2. Were any of the mouthwashes effective disinfectants?
3. What are three reasons why a laboratory evaluation of disinfectants like the one you
have just carried out might not be relevant to the use of disinfectants in practical
situations?
Antibiotic Susceptibility Testing
1. Did you observe a difference (sensitive vs. resistant) between the Gram positive and
the Gram negative organisms for any of the antibiotics? What properties of the cells
might account for such a difference?
2. Did you find any discrete colonies within a zone of inhibition? What might their
presence indicate?
3. What characteristics would a good antibiotic have?

Lab 6Bacterial Structural Factors
9/17/02
Objectives
After completing this exercise, you should be able to:
1. Perform specialized bacteriological stains in order to observe and distinguish bacterial
cell structures.
2. Identify specialized bacterial structures in an unknown bacterial culture.
Introduction
Perhaps, you have been struck by the fact that microscopic examination of
bacteria reveals very little in terms of cell structure. Size, shape, motility, and Gram
reaction are about all that is visible. Yet bacteria are able to carry out like processes
which, in eukaryotic cells require specialized membrane structures such as mitochondria,
nuclei, endoplasmic reticula, etc.
Bacterial Capsule
All bacteria probably have a certain amount of capsular material surrounding the
cell. In many cases, however, the layer is not large enough to be readily discernible
whereas some species elaborate copious slime layers readily visible in the microscope.
Their composition varies according to species, some consist of polysaccharides, others
appear to be made of glycoprotein, and some are polypeptides. Capsular subunits are
synthesized between the cell membrane and the cell wall and are inserted into the
preexisting capsule outside the cell wall. In some cases the synthesis of capsular subunits
depends on the composition of the medium. For example, some species grown in a high
concentration of sucrose (20%) make much more capsule than the same species grown in
a low concentration (<1%).
The function of the capsule varies from species to species. It may be to protect a
pathogen against phagocytic attack, it may be used as an external food reserve, it may
protect against desiccation, or it may attach the cell to a surface (adhesion).
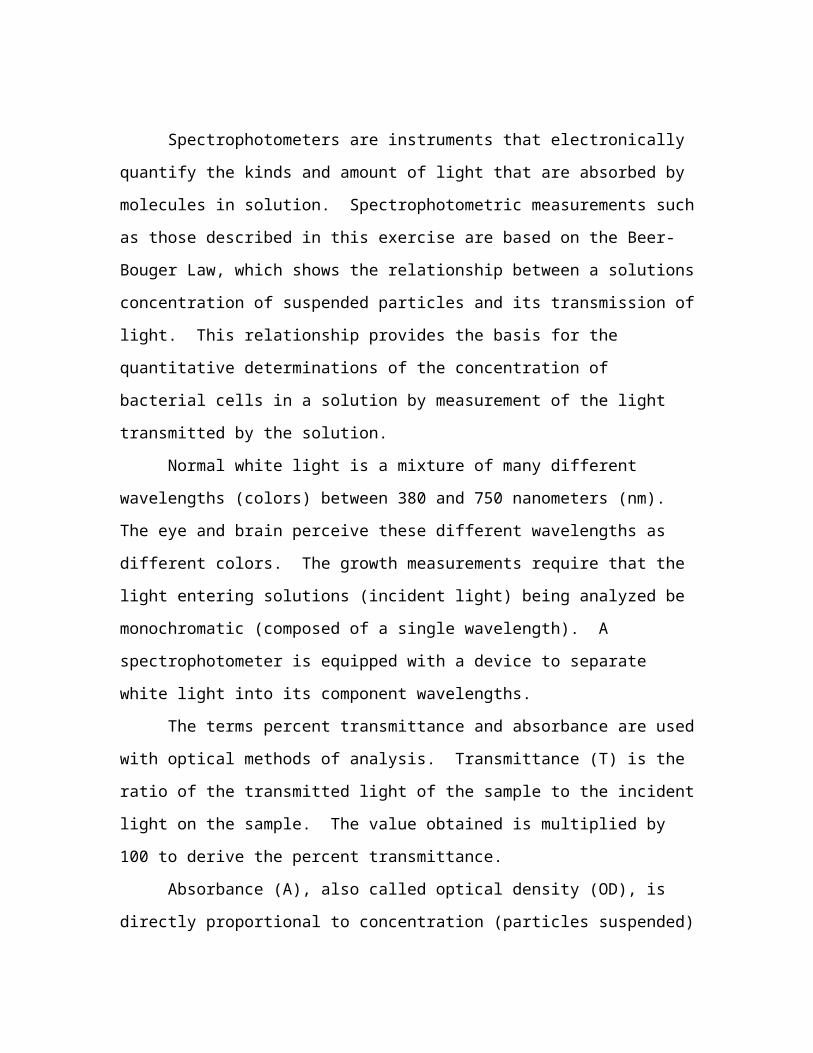
Bacterial Cell Wall
The cell wall is a rigid structure, which confers shape on the cell. A bacillus is
rod-shaped because of the shape of the cell wall. The structure of the cell wall apparently
also determines the specificity of the Gram reaction. Thus, the differences between Gram
positive and Gram negative cells may be attributed to the differences in the structure of
their cell walls. Whereas the Gram positive walls are 80-90% peptidoglycan, Gram
negative envelopes are more complex, containing only about 20% peptidoglycan. The
rest is protein, lipid, and lipopolysaccharide. The wall possesses localized structures with
specific functions: It may contain nutrient binding proteins, the receptors for bacterial
virus attachment, and molecular complexes, which are important, factors in the virulence
of some pathogens.
If a Gram+ wall is completely removed under isotonic conditions, such as in the
presence of 0.6 M sucrose, the cell loses its rigid shape and “rounds up” forming a
spherical protoplast. The term spheroplast is used for G- cells in which the wall or
envelope cannot be completely removed. The cell wall peptidoglycan can be removed by
the enzyme lysozyme, leaving only the membrane to contain the protoplasm. Removal of
the wall in hypotonic media results in lysis, thus pointing out the basic function of the
wall: Protection against osmotic pressure.
Observation of the cell wall requires the use of both a dye and a mordant to
stabilize the dye-cell wall complex.
Bacterial Flagella
Motile bacterial cells usually have one or several flagella to propel them. If the
flagella are inserted at several places on the cell surface, the flagella are said to be
peritrichous. Sometimes, in the case of bacilli (rods) flagella are inserted only at one or
both ends. These flagella are said to be polar. Prokaryotic flagella, unlike eukaryotic
flagella which are surrounded by a membrane, consist of 20,000 to 40,000 copies of a
single protein called flagellin forming a fiber which is attached to a basal body, or hook,
in the cytoplasmic membrane. The hook rotates in the cytoplasmic membrane driven by
the electrical potential across the membrane, causing the flagellum to rotate also. This
rotating flagellum acts like a propeller moving the cell through the water that surrounds
it. Motility permits the cell to move to nutrient-rich locations.

The small diameter of the flagellum makes it impossible to see in the light
microscope without the addition of a large amount of dye. Because there is still no easy
or reliable method for staining flagella, you will view prepared slides of bacteria with
flagella. However, the effect of the rotation of the flagellum can be observed by tethering
a cell to the surface of a slide coverslip by its flagellum. With the distal end of the
flagellum fixed on the surface of the coverslip the rotation of the hook causes the cell to
rotate in place. This cell rotation can be observed in the microscope.
Bacterial Endospores
Certain bacteria chiefly Bacillus and Clostridium are able to form a special cell
resistant to environmental stress called an endospore. The formation of the endospore is
a strategy for enduring extreme conditions that might be lethal to the vegetative cell.
Spore formation does not increase the number of cells because only one spore is made
per cell. Sporulation is a response to a progressively more unfavorable environment.
Unfavorable conditions of themselves do not cause sporulation; sporulation requires
synthesis of highly specialized components and therefore requires a suitable environment
to occur. The genetic information for these specialized components is contained in the
vegetative (unsporulated) cell, but is not expressed until it is “triggered”. What the
trigger is, is not exactly known. Sporulation is one of a few examples of bacterial
differentiation (formation of a specialized cell type that does not divide).
Spores have a characteristic appearance under the microscope and their
development follows a regular pattern. Spore development can be followed in the
brightfield microscope by doing simple stains (spores appear colorless) or special spore
stains (spores appear colored).
With the production of spores the resistance of the culture to many killing agents
becomes greater. Spores are able to withstand greater extremes of temperature, higher
concentrations of toxic chemicals such as acids, and longer periods of ultraviolet and
ionizing radiation then the vegetative cell from which they are derived.
The formation of such a resistant body allows the genetic material of the cells to
withstand toxic environments, but it is not a dead-end. Spore germination, caused by
such stimuli as heat shock (60o C for 30 minutes), chemicals (l-alanine), or physical
abrasion produces a vegetative cell.

Endospores have a thick wall, which makes them quite resistant to penetration by
harmful chemicals. That same thick wall also makes the spores resistant to staining. In
fact, Gram stains of Bacillus sometimes show areas that are unstained. These may be
spores or they may be storage granules. A single unstained area within a cell almost as
wide as the cell itself is likely to be a spore. Endospores can be positioned terminally,
subterminally, or centrally within the cell.
Storage Granules
The cytoplasm of a bacterial cell is extremely complicated. Within the cytoplasm
are the 10,000 ribosomes, the nucleoid, most of the cell’s enzyme systems, and a number
of food reserves that form insoluble granules. These granules are usually quite large and
thus can be differentially stained and observed by brightfield microscopy.
Prokaryotic and eukaryotic cells may store some similar molecules such as
polyphosphate, glycogen, and starch but some molecules are unique to the prokaryotes.
Poly--hydroxy-butyrate (PHB) is such a molecule. This polymer is the equivalent to
neutral fats stored by eukaryotes. Glycogen is a long, branched polymer of glucose,
whereas starch is a long relatively unbranched polymer.
Although neither starch nor glycogen can be seen in untreated cells, both react
with iodine to form colored compounds. Starch is blue and glycogen reddish-brown. A
given species may store one or the other, but generally not both materials. Some species
may be unable to form any such reserves. PHB is not stained well by basic dyes and may
thus give stained cells a “frothy” appearance. In such cases it may be difficult to
differentiate spores from PHB granules. However, PHB is easily stained by Sudan black,
a dye used to stain lipids. Prokaryotes do not store fats of the type found in eukaryotes.
Cells form food reserves only under unusual conditions; PHB, glycogen and
starch are formed only when the nitrogen source becomes growth limiting. These
granules can be used later as a source of energy or carbon if the external supply becomes
limited. Storage in the form of insoluble granules is better for the cell than storage of
soluble subunits such as glucose because it does not increase the osmotic pressure inside
the cell.

Procedure (Individually)
Capsule Stain
Materials: One overnight culture of K. pneumoniae in milk
One overnight culture of E. coli in NB
20% copper sulfate solution
1. Obtain a culture of K. pneumoniae grown in milk and aseptically remove a loopful of
the culture.
2. Spread the inoculum on a slide, making a thin smear over one half of the slide.
3. Obtain a loopful of E. coli and make a thin smear on the other half of the slide.
4. Let the slide air dry.
5. Flood the smear with aqueous crystal violet and let stand 2 minutes.
6. Wash the slide with copious quantities of 20% copper sulfate solution and blot dry.
7. Examine the smear under oil immersion, searching for an area that is thinly stained.
8. Draw and label the cells and their surrounding capsules, include this in your question
section.
Cell Wall Stain
Materials: Overnight cultures of E. coli, P. vulgaris, B. subtilis, S. aureus
Congo red (5.5% in water)
Cepacol (0.01 M cetyl-pyridinum chloride)
Methylene blue (1% in water)
1. Prepare a smear of both Gram+ and Gram- species, air dry, and heat fix.
2. Add 3-4 drops of cepacol to cover each smear.
3. Mix 1 drop of Congo red with the cepacol and spread evenly over each smear. Let sit
for 2-3 minutes.
4. Wash with water.
5. Counterstain for 20-30 seconds with methylene blue.
6. Wash with water.
7. Place a drop of water over the preparation, cover with a coverslip and view under oil
immersion. You should see a red cell wall surrounding the blue cytoplasm. Compare

the thickness of Gram negative and Gram positive walls. Draw your observations in
the question section.
Flagella Stain
1. Obtain the prepared slides of both types of flagella arrangement and observe under oil
immersion.
2. Draw your observations in the question section.
Endospore Stain
Materials: Two-day-old culture of E. coli and B. cereus in NB
Malachite green solution
Boiling water bath (beaker and ring stand)
1. Obtain an old culture of B. cereus and make a smear on one half of a glass slide.
2. On the other half of the slide, make a smear with E. coli.
3. Let the slide air dry and heat fix the smear.
4. Place the slide on a staining rack over a boiling water bath.
5. Flood the smear with malachite green solution for 5 minutes. Note: Replace any
evaporated stain with fresh dye so that it doesn’t become dry.
6. Remove the slide from the rack and allow the slide to cool to room temperature.
7. Rinse with water, drain the slide, and then flood the smear with safranin for 1-2
minutes.
8. Rinse the slide with water and blot dry.
9. Observe the cells under oil immersion. The endospores are green and the vegetative
cells are pink or red. Not all cells produce endospores at the same time.
10. Record your observations (drawings) in the question section.

Inclusion Body Staining
Materials: One culture of B. cereus and E. coli
Sudan Black B stain
Staining jar containing xylene
1. Prepare a smear with two bacteria, B. cereus and E. coli. Each bacterium should be
on one-half of the slide.
2. Heat fix the smear.
3. Immerse the slide in Sudan Black B for 15 minutes.
4. Remove the slide, let it drain and air dry by leaning it against a rack on an absorbent
paper towel.
5. Immerse the slide several times in a staining jar containing xylene.
6. Blot the slide dry with bibulous paper or let air dry.
7. Counterstain with slide by placing it on a staining rack and flooding the smear with
safranin for 10 seconds.
8. Rinse the slide thoroughly with tap water several times and blot dry.
9. Examine the slide using oil immersion. The inclusion bodies are small black
refractile, and form chains inside the rods. You may have to focus up and down to
see the small bodies, which may not appear, in every cell.
10. Record your drawings in the question section.
Questions
1. Certain endospore-forming bacteria are a particular concern of the canned food
industry. Name one of these bacteria and explain why it is of such concern.
2. Is the production of an endospore by a bacterium considered a method of
reproduction? Why?
3. Why do capsules make bacteria so resistant to phagocytosis?
4. Which organism you tested produced a visible capsule?
5. Which organism you tested produced visible endospores? What if the cultures were
only 24 hours old, would spores be visible?
6. Describe the cell wall appearance in both of the cultures you examined.

Lab 8Biochemical Testing of Unknown Bacteria
9/24/02
Objective
After completing this exercise, you should be able to:
1. Perform and interrupt biochemical identification tests.
2. Identify an unknown bacterial organism using the above mentioned tests.
Introduction
In most situations where identification is necessary, the bacterium is not
completely unknown; instead, evidence for the presence of a bacterium from a limited
group of possibilities is sought as in the following examples:
1. A medical laboratory wishes to confirm the presence or absence of a bacterium from
a particular pathogenic microorganism to help in diagnosis.
2. A food laboratory looks for particular microorganisms known to be associated with
specific food products.
3. A government laboratory wants to determine the presence or absence of particular
microorganisms to measure the effectiveness of sewage treatment or the degree of
pollution of a water source.
4. A research laboratory is interested in isolating an organism that performs a specific
task, such as photosynthesis or the degradation of a pesticide.
In these examples, a microbiologist would expect certain kinds of bacteria because of the
location from which the sample is taken (an intestine or throat, a cow’s rumen, lake, mud,
etc.). The list of sample locations is virtually endless, but in each case one can usually
limit the kind or microorganisms which may be present. Knowing the source of an
unknown bacterium, one can begin a scheme for its identification.
The key step in identification is to obtain a pure culture of the microorganism to
be identified. The pure culture is to vital importance because in most of the identification
tests, identification depends on a specific positive or negative reaction caused by the
microorganism. If the known is negative, but a positive contaminant is present, the test

will show a false positive result. In some cases, the two microorganisms may combine to
give either a false positive or a negative result.
The easiest way to obtain a pure culture is by use of a streak plate. The cells must
be spread out on a plate so that on some portion of it they are separated from each other
and can form isolated colonies. An isolated colony is then restreaked to check its purity,
and a colony from this second streak is transferred to a slant for use as the master culture
for the identification. Simple streaking on complex medium, however, may not be
sufficient for obtaining a pure culture from nature because (1) many different
microorganisms may be present, and (2) the microorganism may be present in a small
proportion relative to other microorganisms. Instead, either a selective enrichment or a
differential medium is used as a first step before streaking on complex medium.
Both the desired and undesired bacteria grow on differential medium, but a
reaction with the medium permits differentiation between bacteria. The desired bacteria
alone may not be distinguishable, but the possibilities will be narrowed down to a
manageable group. There are many examples of differential media. MacConkey agar
contains bile salts, neutral red and lactose among its components. Coliform bacteria
grown on this medium appear as brick-red colonies, often surrounded by precipitated
salts, while many Salmonella pathogens have clear, transparent colonies. EMB agar is
used to distinguish between the aerogenes-coli group, which appear as black or dark-
centered colonies, and the typhoid bacteria, which are clear. Mueller-Hinton agar,
containing tellurium, is used to differentiate between diphtheria organisms, which have a
distinct colony morphology and color, and cocci, both of which may be isolated from the
throat. The majority of these differential media were developed to distinguish between
pathogenic and non-pathogenic bacteria.
Every medium is selective and differential to some extent. Choice of techniques
and media is influenced by the source of the isolate, a suspicion of what bacteria are
present, and what type of bacterium is being sought. After using selective or differential
media to isolate a culture, another streak plate is make with less selective medium such as
nutrient agar to ensure isolation of a pure culture.

Identification Tests
Once a pure culture is obtained, the question is the identity of the bacterium. All
identifications depend on the assumption that each bacterium has a set of characteristics
that, in at least one respect (usually more), is unique to that bacterium.
We use the term characteristics to mean morphological or biochemical features of
the cell, which are encoded in its genetic information. While the characteristics may not
always be expressed, under the proper conditions they are always features of the cell.
Morphological features include cell shape and size, cellular arrangement, number
and arrangement of flagella, presence and location of endospores, Gram reaction and
colony morphology. All of these are reflections of a cell’s genetic content and, therefore,
can be used to identify it.
Biochemical features reflect the presence of a particular enzymes or sets of
enzymes. Their presence gives the cell a certain capacity, such as the use of a particular
energy source. Very often in performing an identification test we are not interested in the
particular enzyme(s) itself, but in a determination of some general end result. That is, we
may simply ask whether acid is produced from some metabolite, not how or what acid.
We may ask whether bacteria grow, but not specifically how they are metabolizing the
nutrient. A bacterium, then, can be either positive or negative for this particular
characteristic. As we shall see, either result can be used to identify the bacterium.
You should keep in mind that while our biochemical identification tests yield
information about a cell’s capabilities the key feature of the tests is their ability to
discriminate between bacteria. The tests are designed in such a way as to maximize the
ability to distinguish between groups of bacteria, rather than to measure any specific
biochemical capability. Thus sensitivity and timing become important: (1) Sensitivity –
the tests used are not necessarily the most sensitive but are the ones that will best allow
us to distinguish between the possible bacteria. (2) Timing – some bacteria may give a
negative or a positive result depending on their length of incubation. A variety of other
factors such as medium composition and incubation temperature, are also important for
achieving the best discrimination between the bacteria to be identified.

Carbohydrate Metabolism
Sugar Fermentations – Sucrose, Lactose, Mannitol
Fermentation can be defined as the partial oxidation of an organic compound in
the absence of oxygen with generation of ATP. Fermentation may occur in the presence
of oxygen but it does not act as terminal electron acceptor. Different bacteria can ferment
a wide variety of sugars and other compounds. Several types of acids, alcohols, and
gases may be produced. These products are used as indicators of fermentation. The
determination of a fermentation pattern with a series of different carbon sources, usually
sugars, by an unknown bacterial species is a valuable aid in identifying that species. The
production of acid or alkaline products causes a noticeable color change in the pH
indicator, which is included in the medium. Gas production is determined by the
inclusion of a small, inverted Durham tube in the culture tube. When gas is produced, it
is trapped in the Durham tube and can be seen as a bubble.
Citric Acid Utilization
Citric acid is an intermediate in the tricarboxylic acid (TCA) cycle that oxidizes
pyruvate to carbon dioxide in respiration. To use citric acid, a bacterium must be able to
transport it across the cell membrane. Utilization of citrate (the salt of citric acid)
differentiates between some enteric bacteria. This test is performed to determine whether
a bacterium can use citric acid as its sole carbon source. It is a practical test for
distinguishing between E. coli, a fecal organism which cannot use citrate as the sole
carbon source, and Enterobacter aerogenes, a soil organism often found in water that
can. Since E. coli is an indication of fecal contamination and E. aerogenes is not, this is a
routine test for examining water quality. The test is also useful in distinguishing between
various pathogenic Salmonella species.
Methyl Red / Voges Proskauer (MR/VP) Test
This test can determine how the sugar glucose is metabolized. MR/VP is actually
two tests: The methyl red (MR) test determines whether large quantities of acid have
been produced from fermentation of glucose. The Voges Proskauer (VP) test determines
whether a specific neutral metabolic intermediate, acetoin, has been produced instead of

acid from glucose. The tests are complementary in the sense that often a bacterium will
give a positive reaction for one test and a negative reaction for the other.
The possible patterns of results are:
MR (acid production from glucose) VP (acetoin produced from glucose)
- -
+ -
- +
A positive result may occur for both tests, but it is rare.
MR/VP is a very useful classification test for two reasons: (1) There are basically
three possible patterns, providing good discrimination between bacteria and (2) MR/VP
differentiates between E. coli, a human intestinal organism and E. aerogenes, a common
soil organism. It is thus useful in sanitary analysis of water supplies.
Urease
Urea is a nitrogenous waste product of animals. Some bacteria can cleave it to
produce carbon dioxide and ammonia. The production of ammonia raises the pH of the
media. The indicator phenol red is utilized in the broth, which is orange-yellow at pH
<6.8, and turns pinkish-red at pH >8.1. Hence a positive urea test is denoted by the
change of media color from yellow to red. Urease test distinguishes between Proteus
vulgaris (positive) and E. coli and S. marcescens (negative).
For the above biochemical tests please refer to your Microbiology Atlas for
pictures of positive and negative results. Also he aware that additional tests might be
added as a result of available media, again refer to your Atlas for a description and
possible test results.

Procedure
Testing of Known Organisms with Biochemical Testing Media (in pairs)
Materials: 1 overnight culture of each of the following: S. aureus, S. epidermidis
E. coli, E. aerogenes, S. marcescens, P. vulgaris
6 tubes of the following media (broth or slant)
Mannitol fermentation broth
Sucrose fermentation broth
Lactose fermentation broth
Simmon’s citrate agar
MR/VP broth
Urease broth
The following is the general instructions for inoculation of the above media.
1. Inoculate each of the broth media with a loopful of the organisms separately.
2. Inoculate the agars with a stab then a streak.
3. Incubate for 48 hours at 37o C.
4. Observe grow and/or color change in the media.
5. Construct a chart with each organism and each biochemical test.
Testing of Unknown Organism with Biochemical Testing Media (individually)
Materials: 1 overnight culture of an unknown organism
1 tube of the above biochemical testing media
1. Inoculate each tube with the unknown organism and incubate for 48 hours.
2. Observe grow and/or color change.
3. Determine unknown bacteria by comparing to chart.

Questions
1. Provide a copy of the known organisms results from the biochemical testing media.
2. What is your unknown (letter and result)?
3. What is the purpose of the Durham tube?
4. What is the difference between fermentation and oxidation metabolism?
5. What is the sole carbon source in the Simmon’s media?
6. Would E. coli spheroplasts metabolize citrate? Explain.
7. Why is it very unlikely you would ever see a yellow color in this agar?
8. What is the indicator for the MR reaction?
9. What is acetoin?
10. What are the two possible benefits from the production of acetoin?
11. What benefit does the urease enzyme confer on the cell?