labcollector complete installation manual - agilebio · installation manual 2/17 labcollector works...
TRANSCRIPT
Installation Manual
1/17
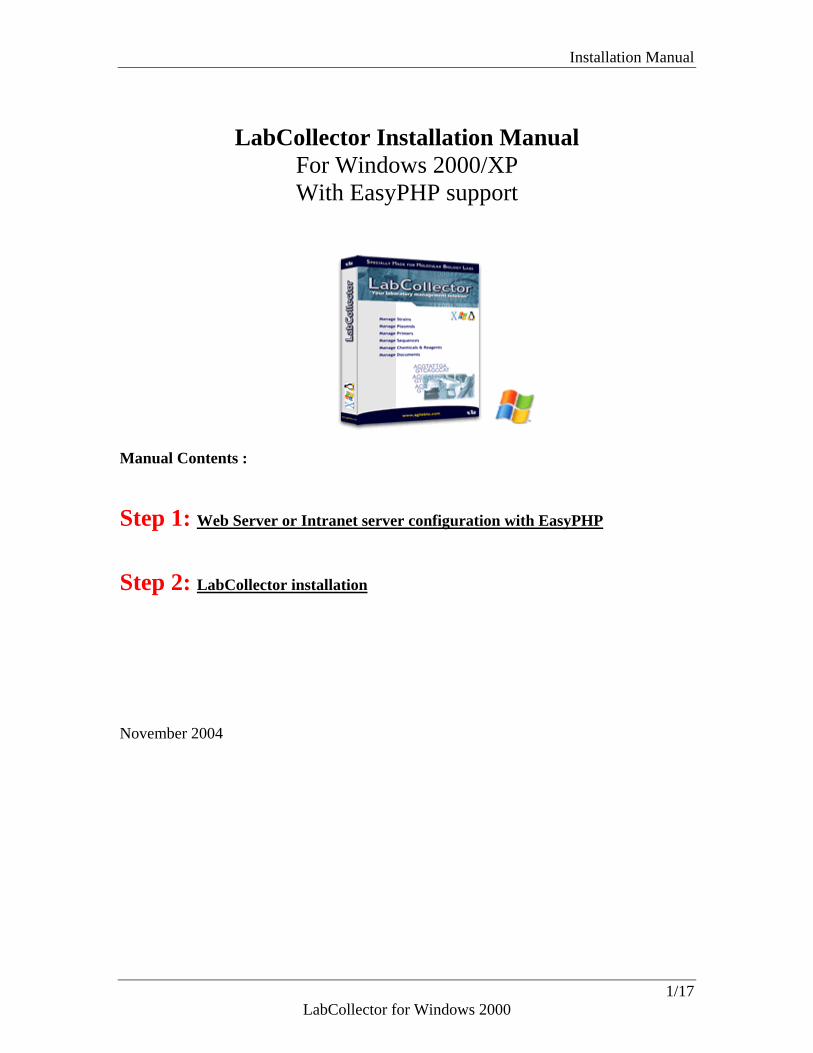
LabCollector Installation Manual For Windows 2000/XP With EasyPHP support
Manual Contents : Step 1: Web Server or Intranet server configuration with EasyPHP Step 2: LabCollector installation November 2004
LabCollector for Windows 2000

Installation Manual
2/17
LabCollector works exactly like a web site, even if you want it confined to your local network. Requirements:
A Web Server with PHP and mySQL Local network or Internet access
Step 1: Web Server or Intranet server configuration You can have LabCollector installed:
Locally on a computer with web server capabilities or have it installed on a user local account opened on the company server. This is
a simple solution, but execution speed will be lowered. or it can be hosted on a normal web hosting provider or ISP (used to host common
web sites on th eInternet). You access it as a normal Internet web site. This is the easiest installation method but the slowest in execution speed (depends on your internet access bandwidth).
Here we will deal with the process of installation in a computer inside your local network using EasyPHP for automatic and All-In-One installation of the Web Server required components. EasyPHP is very easy and automatic. Use the following guide for your assurance and for details in the final configuration processes. 1. Install Web Server with EasyPHP:
1. Before you begin, you should perform a reboot and not run any other programs while installing.
2. Make sure you have at least 50 megs free on your hard drive. 3. If you do not already have the EasyPHP install files, you will need to download
them first at www.easyphp.org.
1.1 EasyPHP Installation
Installing is fairly straight forward. The only thing to watch out for is the default installation directory.
1. Run the 'easyphp1-1_setup.exe' file. This is the file you downloaded from the web site.
Select 'Yes' to continue with the installation.
LabCollector for Windows 2000

Installation Manual
3/17
2. Welcome Screen. Recommends you close all programs before beginning.
Click 'Next' to continue.
3. PHP License Agreement.
Select 'Yes' to indicate you agree with the license, then click 'Next' to continue.
4. Warning Screen. In English it says:
Click on 'Next' to continue.
5. Select your install directory. NOTE: I recommend you
change the default, and not install into the Program Files folder. A shorter directory will make life easier for you in the long run.
Change Install Folder to 'C:\EasyPHP1-7' and then click 'Next' to continue.
If you get a warning that the folder doesn't exist, click 'Yes' to create it.
LabCollector for Windows 2000

Installation Manual
6. Name of entry in your Start Menu. I recommend keeping this as 'EasyPHP 1.7'.
Click on 'Next' to continue.
7. Confirm settings before continuing. This screen will display your current installation settings.
Click on 'Install' to begin the installation.
8. Now just sit back and wait while it installs. This should only take a minute or two. Don't click on anything.
9. Main Installation Done! This screen provides extra information about the installation. Here's a quick translation.
Click on 'Next' to continue.
4/17 LabCollector for Windows 2000

Installation Manual
10. All done. This screen is asking if you would like to launch the welcome html page and also launch the program.
Leave 'ouvrir la page d'accueil' checked if you would like to view the welcome page. Note that this page is in French (We'll fix that next).
Click on 'Finish' to close the installation program, and launch the selected options.
1.2 Now we install English language pack:
For those who prefer English over French, the EasyPHP folks provide a language pack which isn't too difficult to install.
1. Download the English language .ZIP file which I linked to in the Getting EasyPHP page.
2. Extract it using your favorite .ZIP extraction program. Extract it in your EasyPHP folder. When asked to overwrite the existing 'index.php' files, you should agree.
Note: Be sure your zip program extracts the files into the proper folders.
3. Next time you launch the EasyPHP Administrator, it should be in English. Once EasyPHP is started (It probably isn't yet), the administration page will be available at:
'http://localhost/home/'
Note: The FAQ page remains in French.
5/17 LabCollector for Windows 2000
Installation Manual
6/17
Next we will need to launch EasyPHP and make some further preferences and language changes.
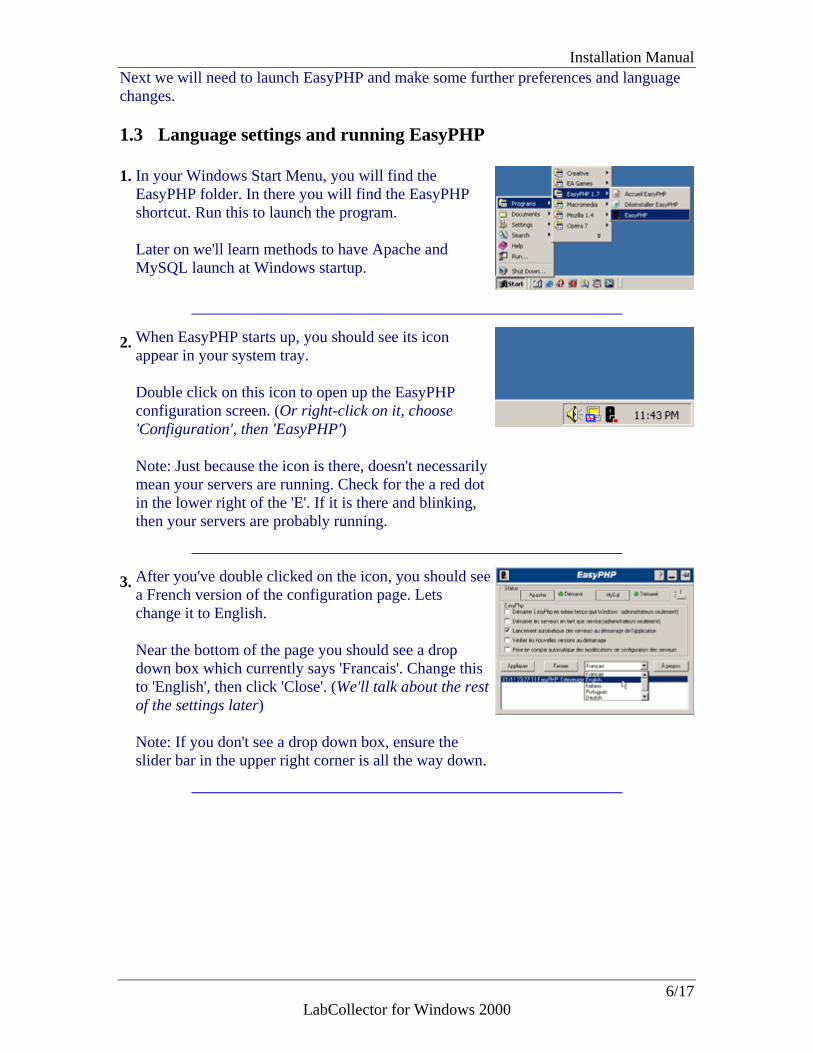
1.3 Language settings and running EasyPHP 1. In your Windows Start Menu, you will find the
EasyPHP folder. In there you will find the EasyPHP shortcut. Run this to launch the program.
Later on we'll learn methods to have Apache and MySQL launch at Windows startup.
2. When EasyPHP starts up, you should see its icon appear in your system tray.
Double click on this icon to open up the EasyPHP configuration screen. (Or right-click on it, choose 'Configuration', then 'EasyPHP')
Note: Just because the icon is there, doesn't necessarily mean your servers are running. Check for the a red dot in the lower right of the 'E'. If it is there and blinking, then your servers are probably running.
3. After you've double clicked on the icon, you should see a French version of the configuration page. Lets change it to English.
Near the bottom of the page you should see a drop down box which currently says 'Francais'. Change this to 'English', then click 'Close'. (We'll talk about the rest of the settings later)
Note: If you don't see a drop down box, ensure the slider bar in the upper right corner is all the way down.
LabCollector for Windows 2000

Installation Manual
4. Right clicking on the EasyPHP taskbar icon brings up the shortcut menu. This is how you start, stop, and configure EasyPHP and the servers.
• Help - Brings up a couple help sites. Not much here.
• Log Files - Will allow you to open Apache's and MySQL's error logs. Note that these can get very big.
• Configuration - Brings up a sub menu linking to some of the configuration files and programs.
• Explore - Launches windows explorer to show your web's root directory.
• Administration - Loads the EasyPHP administration web site.
• Local Web - Launches your default web browser and loads the web site. I recommend manually loading 'http://localhost/' instead as this one defaults to your computer name.
• Restart - Restarts the MySQL and Apache servers. If you change settings, you may need to do this.
• Start / Stop - Start or Stops the MySQL and Apache servers.
• Exit - Quits EasyPHP. This will also stop the MySQL and Apache servers if they aren't installed as services.
5. In the EasyPHP shortcut menu, select 'Start' to launch the servers. If 'Start' is not available and it says 'Stop' instead, then the servers are already running.
You should now be able to use the server!
• 'C:\EasyPHP1-7\www\' - Where you save your web pages
• 'http://localhost/' - Your web root • 'http://localhost/home/' - EasyPHP
Administration • 'http://localhost/mysql/' - PHP MyAdmin
7/17 LabCollector for Windows 2000
1.4 Final configuration of EasyPHP

Installation Manual
8/17
Note that for many changes, the server may need to be restarted for them to take effect.
1.4.1 Automatic Start of EasyPHP
To open the EasyPHP Configuration Program, double click on the icon in your task bar or select the 'Configuration -> EasyPHP' option in the shortcut menu.
1. Apache Server Status - Using the button, you can start, stop, and restart just Apache
2. MySQL Server Status - Using the button, you can start, stop, and restart just MySQL
3. Option Slider - Slide it up to see fewer options, slide it down to show EasyPHP log entries.
4. Start on windows startup - When you boot your computer, do you want EasyPHP to load automatically
5. Start Apache and MySQL as services - If you have Windows NT, 2000, or XP you can launch the servers as services. This is recommended only if you need them running all of the time.
6. Launch servers when EasyPHP starts. - When EasyPHP is run, it will automatically 'try' to start the servers.
7. Check version at Startup - Will connect to the EasyPHP site to determine if there is a newer version available.
8. Automatic consideration of server's configuration modification. - EasyPHP keeps an eye on the Apache and MySQL configuration files. If either are altered, EasyPHP will restart the server for you.
9. Apply / Close / Language / Info - Apply changes / close the configuration program / Change Default Language / About screen.
10. EasyPHP Logo - Click it to bring up the EasyPHP context menu (Same as right clicking on system tray icon)
11. Help / Minimize / Always On Top Toggle - Help didn't work for me / Minimizes EasyPHP back to the system tray / Tells EasyPHP to stay on top of all other windows
For LabCollector we want to have EasyPHP running all the time. So:
LabCollector for Windows 2000

Installation Manual
9/17
- Activate option 5 to run Apache and mySQL as service and option 4 to start services automatically at boot time.
1.4.2 Setting up a password for mySQL
The default EasyPHP installation does a good job of installing MySQL so only programs on the same computer can access it. Doing this should be enough to keep most hackers at bay, however they left the default username 'root' with no password.
Default user= ‘root’
Default password = ‘’
We will fix up the password situation by using PHPMyAdmin. This will also serve as a quick introduction to managing MySQL privileges in PhpMyAdmin.
1. Ensure that EasyPHP is running, and both Apache and MySQL are started.
2. Open the PHPMyAdmin configuration file for editing in your favorite PHP editor.
It is located at:
• C:\EasyPHP\phpmyadmin\config.inc.php
3. Locate the first line which reads: (on or near line #79)
$cfg['Servers'][$i]['auth_type'] = 'config';
LabCollector for Windows 2000

Installation Manual
4. Change the word 'config' to 'http'.
$cfg['Servers'][$i]['auth_type'] = 'http';
Now you can save the file and exit.
This step tells PhpMyAdmin to ask for a password each time before loading.
5. Open up PHPMyAdmin. Either by browsing to 'http://localhost/mysql/' or you can use the EasyPHP System Tray menu.
Right click on the EasyPHP system tray icon, to open the context menu.
Select: 'Configuration -> PhpMyAdmin'
Remember that you can only use this PhpMyAdmin from the the server computer.
6. PhpMyAdmin will ask for a username and password. Enter 'root' for the username, and leave the password blank.
This should take you to the main menu, where you must locate and click on 'Privileges'
7. In the privileges page is a list of all users (Currently there is only one).
Find the 'root' user and click the 'edit' link to the right of it.
Note: This is the same page where you can add / remove other users in the future. Always keep at least 1 super user (such as root).
10/17 LabCollector for Windows 2000

Installation Manual
8. The edit user page has many settings to choose from. Find the 'Change Password' section.
Enter a new password with at least 5 characters(shouldn't be easy to guess, but one you'll remember)
Enter the password again where it asks, then click 'OK'
9. Near the top of the next page, it should say that the password change was successful.
The Password for 'root'@'localhost' was changed successfully.
Now if you click on any of the links, you'll be asked to relog into PhpMyAdmin with the new password.
Now always remember the new mySQL user and password you set, it will be needed for LabCollector installation!
11/17 LabCollector for Windows 2000

Installation Manual
12/17
Step 2: LabCollector installation 2. LabCollector files install 1- Uncompress the LabCollector ZIP you downloaded to a temporary folder (ex:
c:\labcollector_temp). Move the files and folders from the HTML folder to the web server root folder of EasyPHP: c:\program files\easyphp1-7\www NOTE: you have to overwrite the existent index.php
2- Or copy the LabCollector files in the HTML folder if you got the CD-ROM to the web server root folder of EasyPHP: c:\program files\easyphp1-7\www NOTE: you have to overwrite the existent index.php
3- You have now to install the “loader” files. These are located in a LabCollector folder called “ioncube”. So it should have been copied to your hard disk along with LabCollector.
2.1 Adjustments to PHP for LabCollector usage: Note: PHP.INI file is located inside the EasyPHP folder, usually:
1. Right clicking on the EasyPHP taskbar icon brings up the shortcut menu. You have to stop EasyPHP and the servers.
• Click Stop
LabCollector for Windows 2000

Installation Manual
2. Right clicking on the EasyPHP taskbar icon brings up the shortcut menu.
• Choose Configuration >> PHP
This will open PHP.INI file
3. Edit PHP.INI
Find the lines and edit them like this:
register_globalls=on error_reporting = E_ALL & ~E_NOTICE
Also add the loaders extension at the end of the PHP.INI file:
zend_extension_ts = c:\program files\easyphp1-7\www\ioncube\ioncube_loader_win_4.3.dll
Note: If you changed default EasyPHP location edit the path accordingly.
4. Start EasyPHP again. Changes will now take effect and we can continue LabCollector installation.
13/17 LabCollector for Windows 2000

Installation Manual
14/17
2.2 Conclusion of LabCollector installation 4- Open Internet Explorer 5- Execute in it the install.php file from the web server root folder. You can do that by
writing in the URL prompt field of Internet Explorer:
http://localhost/install.php
6- Fill the form fields. You probably can keep the default values:
Database server address: “localhost” - This probably is correct for you. It means that your using your local computer. If not, indicate where is the database (can be on a remote internet server) Database name: “labcollector” - You can change this, but it’s irrelevant. Database user name: “root” – If you installed mySQL server and did not change settings, you can leave it as “root”. If you changed it or want to use another mySQL user name, write it here. Database user password: “EMPTY”. If you installed mySQL server and did not change settings, you can leave it empty. MySQL default settings have no password. If you changed it or want to use another mySQL user name, write the correct password here.
LabCollector for Windows 2000

Installation Manual
15/17
Your LabCollector is now installed and ready to be accessed. Use:
http://localhost You will be prompted for default administration password. Login: admin Password: admin
This default user is the “SuperAdministrator” with all privileges. You will have to edit this in the administration panel.
You can access the administration part by clicking on the [admin] link item in the left part of the screen, or calling directly:
http://localhost/admin.php
LabCollector for Windows 2000

Installation Manual
16/17
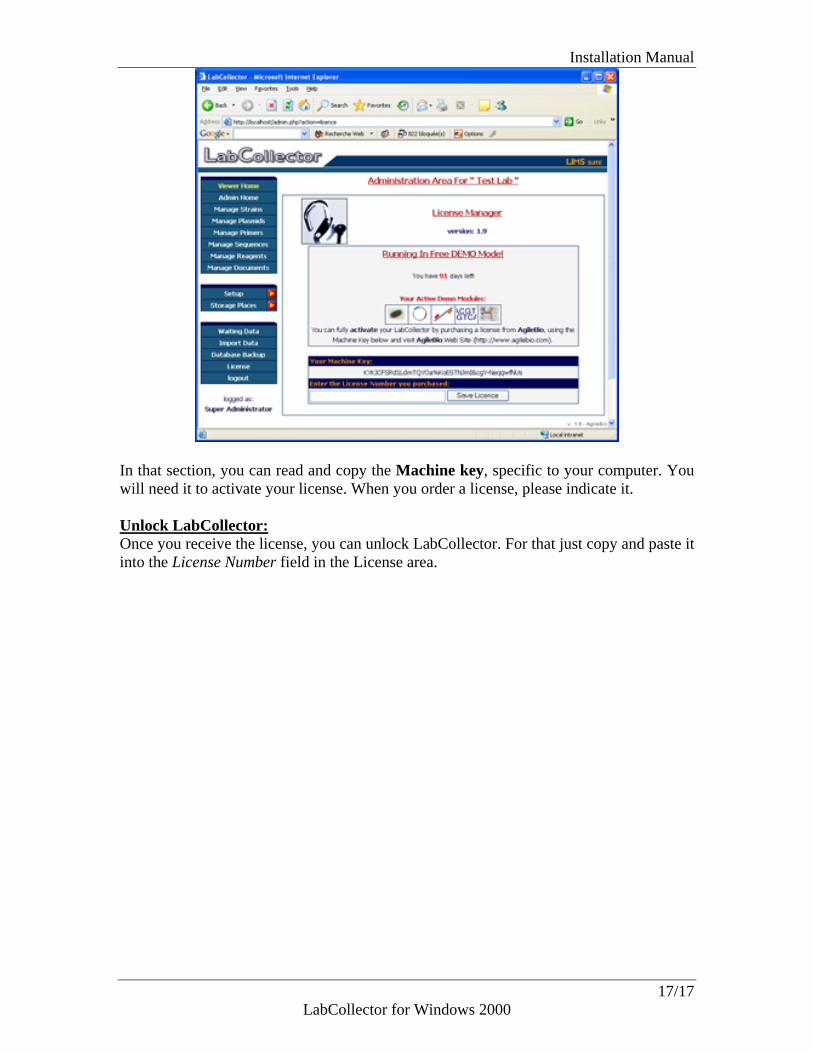
You will enter Administration Area:
You will notice that you are in DEMO mode. DEMO mode is limited in time.
- If you want to purchase a license, you need to get your Machine Key from LabCollector.
- If you already purchased a license, you can unlock LabCollector. - Or you can try the demo.
Get the Machine key from LabCollector: Go to license section:
LabCollector for Windows 2000
Installation Manual
17/17
In that section, you can read and copy the Machine key, specific to your computer. You will need it to activate your license. When you order a license, please indicate it. Unlock LabCollector:Once you receive the license, you can unlock LabCollector. For that just copy and paste it into the License Number field in the License area.
LabCollector for Windows 2000