landscape photography focus settings - rockymtnrefl.com · in landscape photography we are...
TRANSCRIPT

Rocky Mountain Reflections Photography, Inc.
FOCUS SETTINGS FOR
LANDSCAPE PHOTOGRAPHY
This is a discussion on setting up the camera to focus in an appropriate way for landscape photography. Also, we’ll review a sequence of steps to use in the field when taking landscape photos.
Copyright © 2016 by Andy Cook All photography © Andy Cook
www.RockyMtnRefl.com
Focusing the Camera Manually focusing is the simplest way to achieve the correct focus distance when taking landscape photographs.
BUT If you are like me, your eyes just do not work well enough to manually focus. Therefore the camera’s ability to auto focus will be very useful.
In landscape photography we are concerned with setting the focus at a precise distance in order to achieve a particular depth-of-field. To have the camera do this we need to choose three settings.
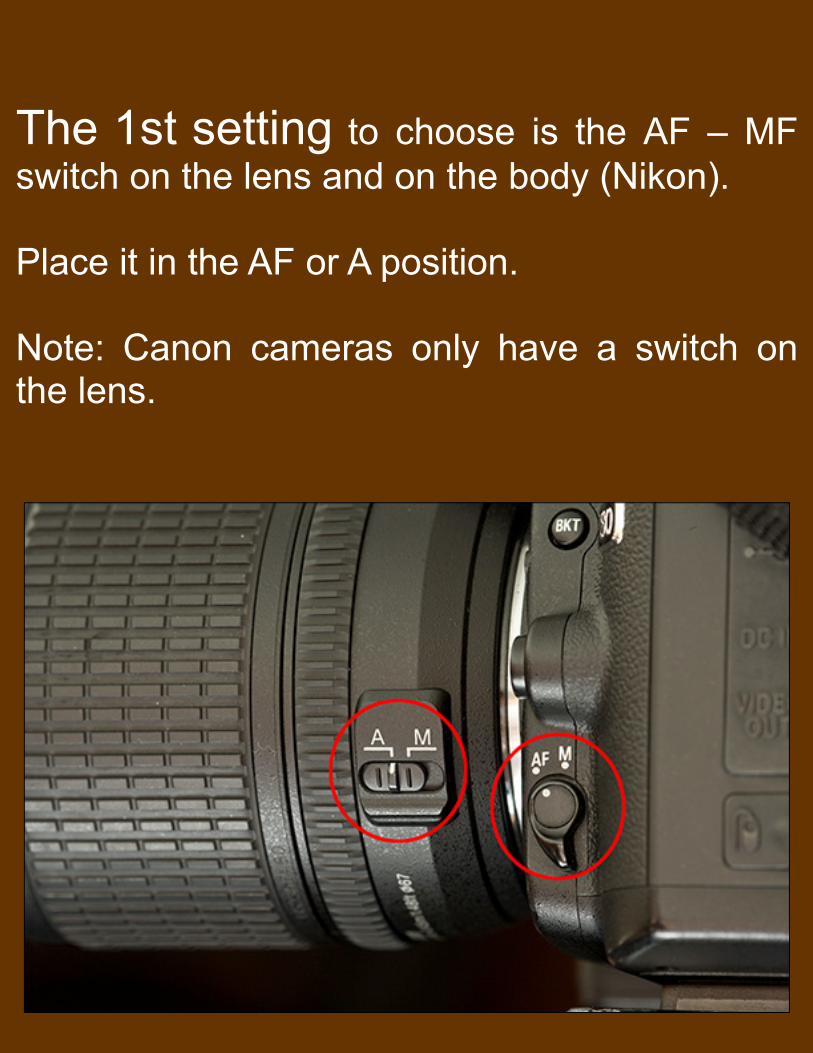
The 1st setting to choose is the AF – MF switch on the lens and on the body (Nikon). Place it in the AF or A position. Note: Canon cameras only have a switch on the lens.
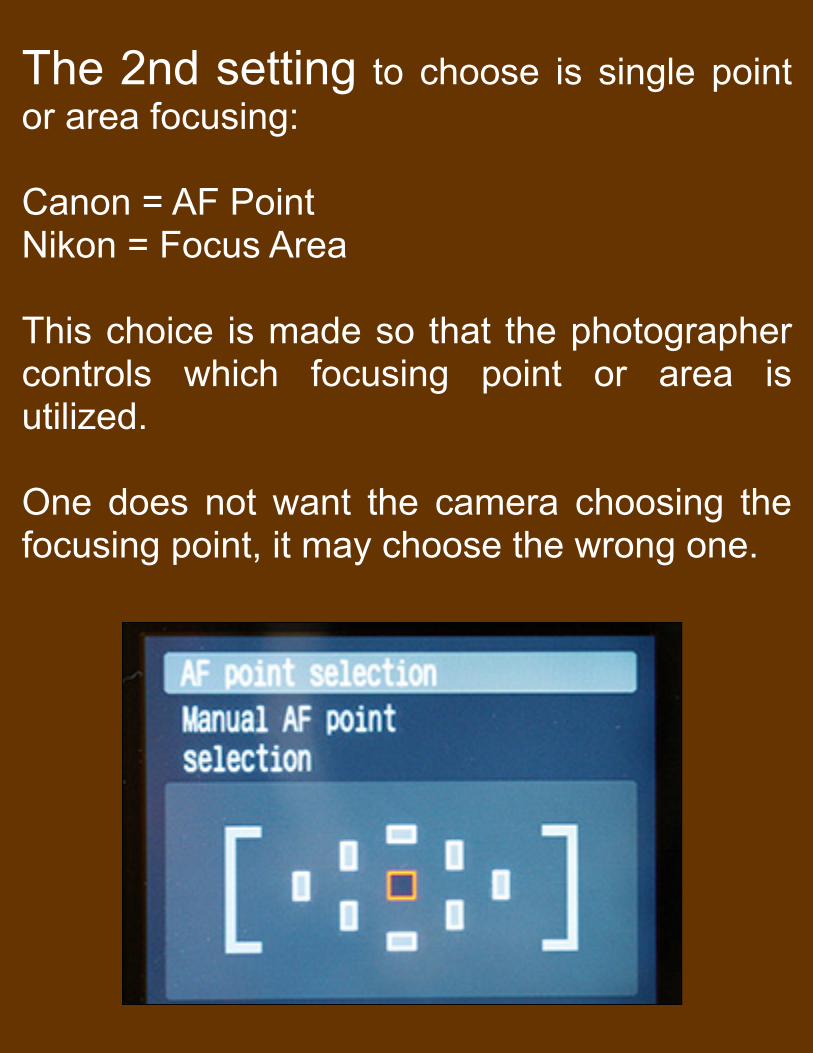
The 2nd setting to choose is single point or area focusing: Canon = AF Point Nikon = Focus Area This choice is made so that the photographer controls which focusing point or area is utilized. One does not want the camera choosing the focusing point, it may choose the wrong one.
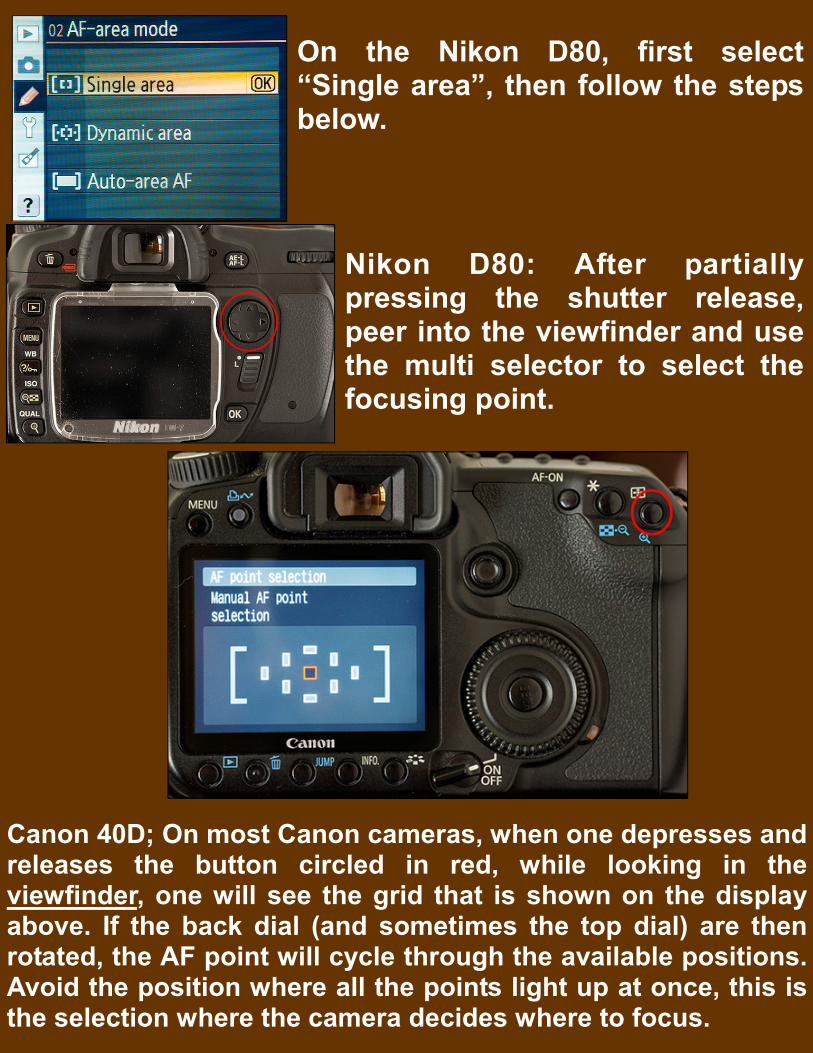
On the Nikon D80, first select “Single area”, then follow the steps below.
Canon 40D; On most Canon cameras, when one depresses and releases the button circled in red, while looking in the viewfinder, one will see the grid that is shown on the display above. If the back dial (and sometimes the top dial) are then rotated, the AF point will cycle through the available positions. Avoid the position where all the points light up at once, this is the selection where the camera decides where to focus.
Nikon D80: After partially pressing the shutter release, peer into the viewfinder and use the multi selector to select the focusing point.
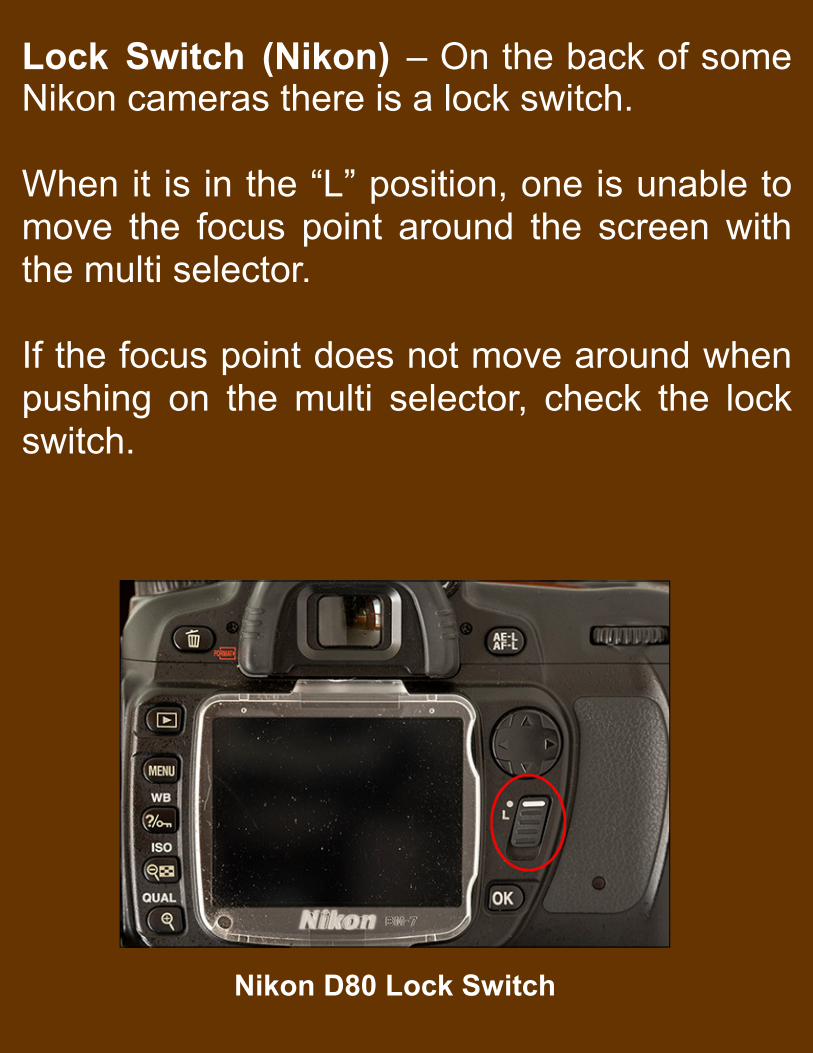
Lock Switch (Nikon) – On the back of some Nikon cameras there is a lock switch. When it is in the “L” position, one is unable to move the focus point around the screen with the multi selector. If the focus point does not move around when pushing on the multi selector, check the lock switch.
Nikon D80 Lock Switch
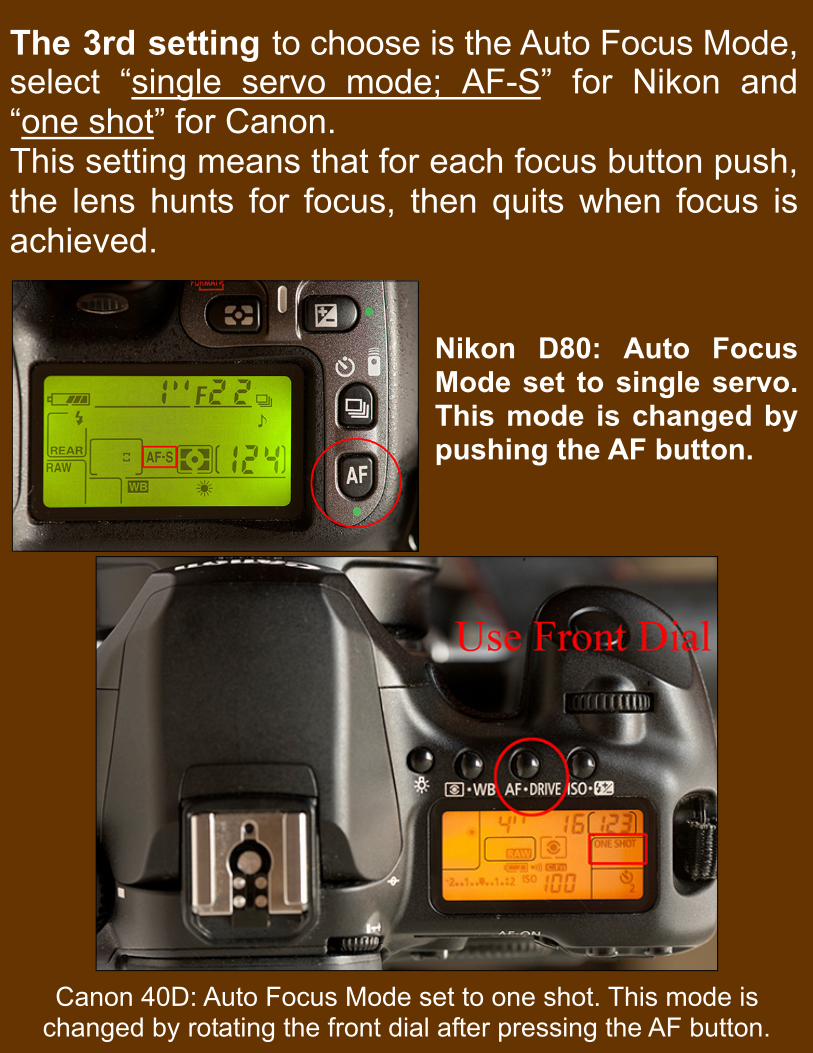
The 3rd setting to choose is the Auto Focus Mode, select “single servo mode; AF-S” for Nikon and “one shot” for Canon. This setting means that for each focus button push, the lens hunts for focus, then quits when focus is achieved.
Nikon D80: Auto Focus Mode set to single servo. This mode is changed by pushing the AF button.
Canon 40D: Auto Focus Mode set to one shot. This mode is changed by rotating the front dial after pressing the AF button.
Ok, now the camera is set up for landscape focusing scenarios, but what is the actual procedure to focus?
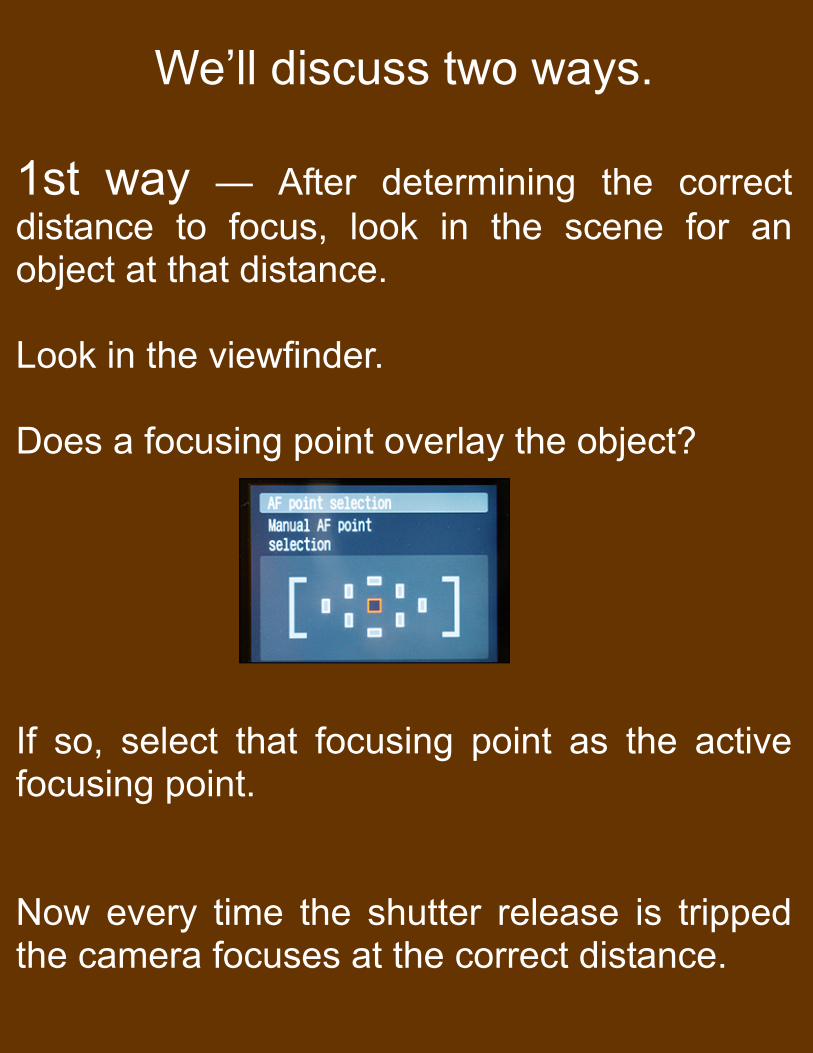
We’ll discuss two ways. 1st way — After determining the correct distance to focus, look in the scene for an object at that distance. Look in the viewfinder. Does a focusing point overlay the object? If so, select that focusing point as the active focusing point. Now every time the shutter release is tripped the camera focuses at the correct distance.
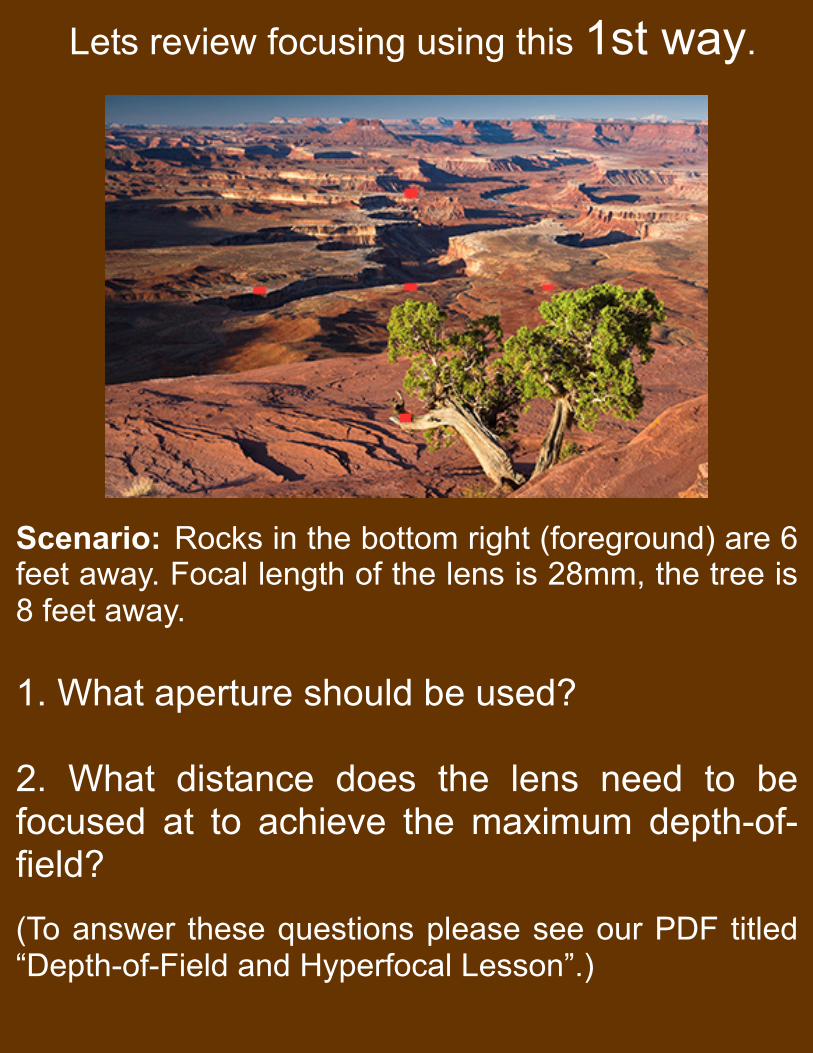
Scenario: Rocks in the bottom right (foreground) are 6 feet away. Focal length of the lens is 28mm, the tree is 8 feet away. 1. What aperture should be used? 2. What distance does the lens need to be focused at to achieve the maximum depth-of-field? (To answer these questions please see our PDF titled “Depth-of-Field and Hyperfocal Lesson”.)
Lets review focusing using this 1st way.
1. What aperture should be used? Answer: F/16 2. What distance does the lens need to be focused at to achieve the maximum depth-of-field? Answer: 8 Feet QUESTION: If a focusing point does not overlay an object at the correct distance, how can the camera be focused to the correct distance? The answer is on the next page.
2nd way (procedure to focus) — After determining the correct distance to focus, hold the camera and point it at an object at the correct distance. Place the active focusing point over the object then depress the shutter release to focus the lens. Now flip the lens A-M switch to the M position. With the lens switch in the M position, the camera will not refocus when the shutter release is depressed. Therefore, the final image may be recomposed and any number of photographs may be taken without concern of the camera refocusing at the wrong distance.
Note: The default settings of some cameras do not allow the shutter to trip if the item under the active focus point is not in focus. To solve this problem with many Nikon models, enter the auto focus area of the menu and change the AF-S priority setting from focus to shutter release.
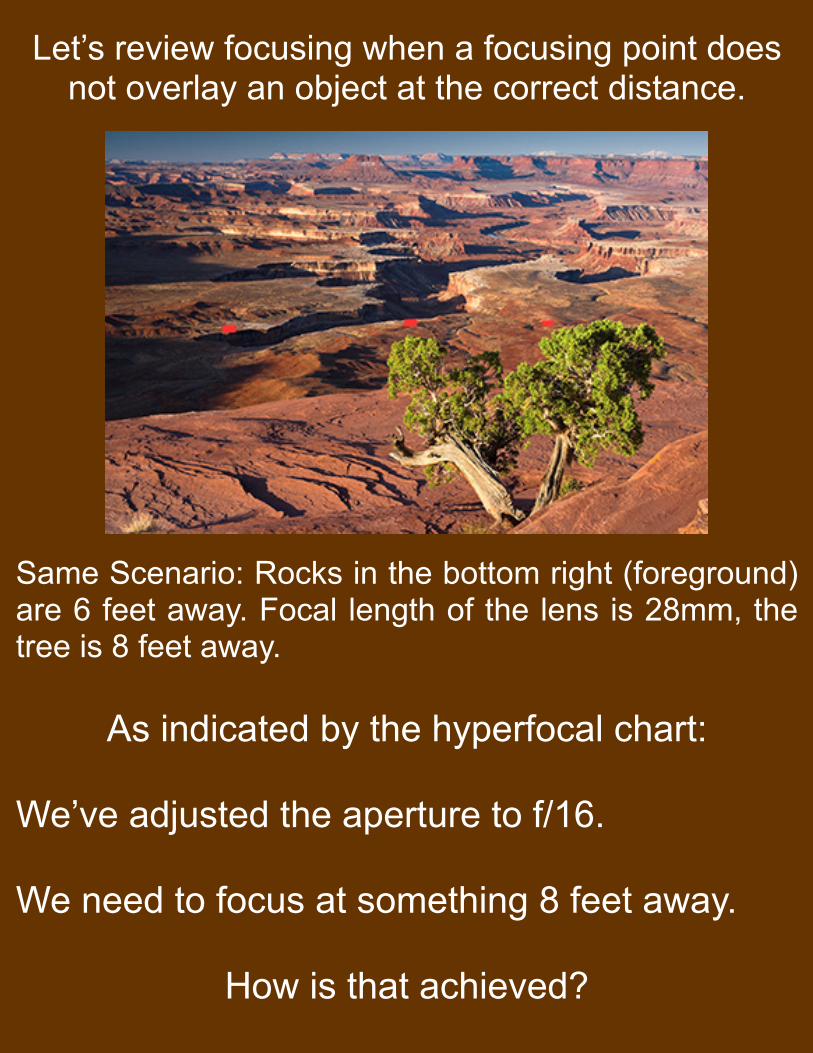
Same Scenario: Rocks in the bottom right (foreground) are 6 feet away. Focal length of the lens is 28mm, the tree is 8 feet away.
As indicated by the hyperfocal chart: We’ve adjusted the aperture to f/16. We need to focus at something 8 feet away.
How is that achieved?
Let’s review focusing when a focusing point does not overlay an object at the correct distance.
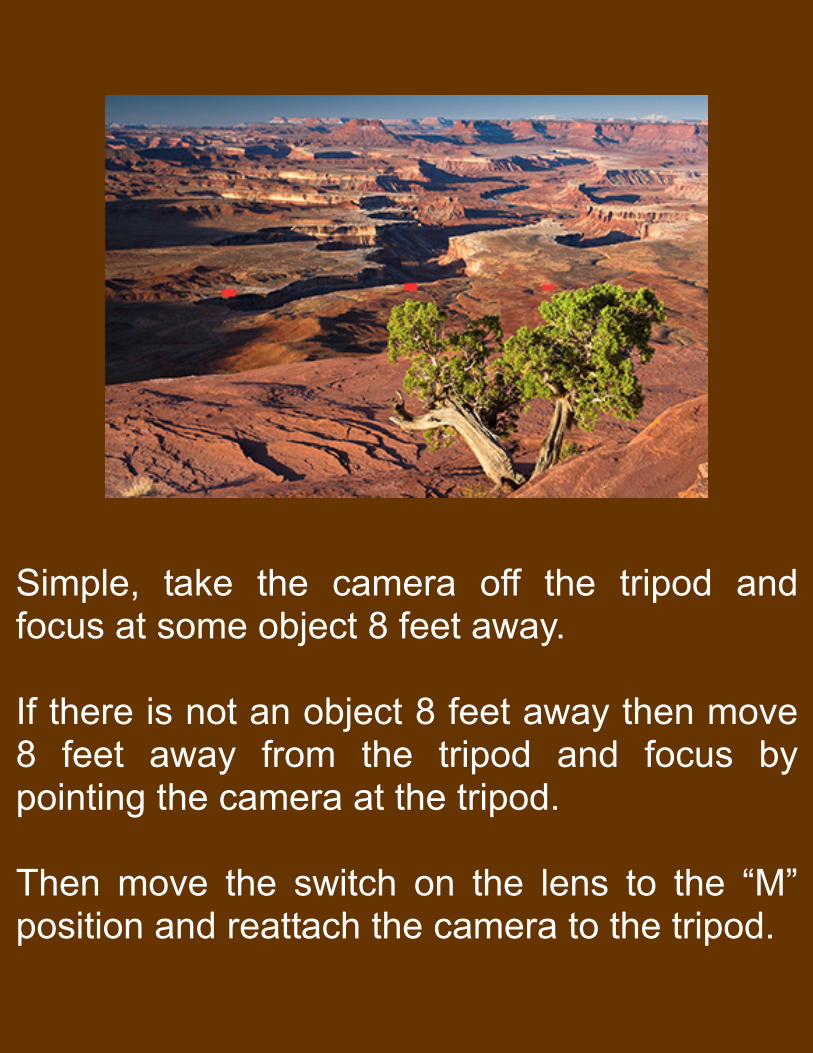
Simple, take the camera off the tripod and focus at some object 8 feet away. If there is not an object 8 feet away then move 8 feet away from the tripod and focus by pointing the camera at the tripod. Then move the switch on the lens to the “M” position and reattach the camera to the tripod.
Constantly moving the “A - M” switch on the lens is a huge weak spot in this focusing procedure. Frequently, the photographer will assume the switch is in one or the other position and instead it will be in the opposite position. This will cause endless heartburn. On some occasions the lens switch may even break from overuse. The very elegant solution is:
BACK BUTTON FOCUSING Most current digital SLR’s have menu settings that disable focusing from the shutter release and enable focusing on one of the back buttons, near the top right of the camera. Focusing is then done by the thumb. Now the lens switch can always be left in the “A” position. I highly recommend back button focusing for all types of photography.
Note: Camera models are changing all the time and each camera has it’s own way of achieving the settings discussed. I recommend having the camera set up to focus, as described in this lesson, before the workshop. However, making the changes may be difficult to figure out. Always consider asking “Lord Google” for help. In the end, if you are still having difficulty and these settings are available on the camera, we’ll get them squared away at the start of the workshop.
© 2016 by Andy Cook RockyMtnRefl.com