leadcare ii blood lead analyzerwaivedleadcaredph.com/download/lcii users manual 7… · ·...
TRANSCRIPT

LeadCare® II Blood Lead Analyzer
User’s Guide
ESA Biosciences, Inc. 22 Alpha Road, Chelmsford, Massachusetts USA 01824-4171 Service: 1.800.275.0102 Fax: 978.250.7092 For use with the LeadCare II Blood Lead Analyzer Model 70-6529 P/N 70-6551 Rev. D AUTHORIZED REPRESENTATIVE IN THE EUROPEAN UNION: ESA Analytical LTD. Units 5 and 6 Brook Farm, Dorton Alylesbury, Bucks England HP 18 9NH

Copyright 2004 - 2008. ESA Biosciences, Inc. All rights reserved. No part of this publication may be reproduced, transmitted, transcribed, stored in a retrieval system, or translated into any language or computer language, in any form, or by any means, electronic, mechanical, magnetic, optical, chemical, manual, or otherwise, without prior written permission of ESA Biosciences, Inc. 22 Alpha Road, Chelmsford, MA 01824. LeadCare® is a registered trademark of ESA Biosciences, Inc. ESA and the ESA logo are registered trademarks of ESA Biosciences, Inc. ESA Biosciences, Inc. 22 Alpha Road, Chelmsford, Massachusetts USA 01824-4171 Service: 1.800.275.0102 Fax: 978.250.7092 For use with the LeadCare® II Blood Lead Analyzer Model 70-6529 Compliance: Complies with EMC Directive 89/336/EEC, EMC Standard EN 61326 also FCC Part 15 Subpart B Class B Safety: Complies with: Low Voltage Directive 73/23/EEC EN61010-1:2001 (EU) UL61010-1:2004 (USA) CSA C22.2 No. 61010-1:2004 (Canada) Requirements for In Vitro Diagnostic (IVD) IEC 61010-2-101:2002 Protection of this equipment may be impaired if used in a manner not specified by the manufacturer. Use only the accessories and cables supplied or specified. FCC
This device complies with Part 15 of the FCC rules. Operation is subject to the following two rules: (1) This device may not cause harmful interference. (2) This device must accept any interference received, including interference that may cause undesired operation.
The LeadCare® II System is Licensed under the following U. S. Patent Numbers: 5,217,594 5,368,707 5,468,366 5,873,990

Preface
The LeadCare® II Blood Lead Analyzer is a CLIA-waived device. Facilities that perform tests with the LeadCare II system must have a CLIA Certificate of Waiver (COW) as issued under the authority of the Public Health Service Act (PHSA) (42 U.S.C. 263(a). In addition to a waiver certificate, all laboratories performing this test must comply with all applicable state and local laws. All laboratories eligible for a CLIA Certificate of Waiver must follow the manufacturer's instructions as specified in the LeadCare II User's Guide (this guide), LeadCare II Quick Reference Guide and in the LeadCare II package insert.
Welcome. The following chapters provide operating and maintenance instructions for the LeadCare II Blood Lead Analyzer.
• Chapter 1 provides information that you need to know before you start using the analyzer, including important precautions for ensuring your safety and the accuracy of the test.
• Chapter 2 provides instructions for making sure the analyzer is ready for testing, by calibrating it for the test kit you are using.
• Chapter 3 provides instructions for performing a blood lead test with the LeadCare II Blood Lead Analyzer.
• Chapter 4 provides instructions for performing control tests that are required to evaluate system performance.
• Chapter 5 contains information about what to do if test results are too high or too low as well as instructions for cleaning the analyzer.
• Appendix A describes how to connect the LeadCare II Blood Lead Analyzer to a printer.
• Appendix B provides specifications and operating requirements for the LeadCare II Blood Lead Analyzer.
• Appendix C provides recommended instructions for collecting blood for lead testing.
• Appendix D contains the LeadCare II material safety data sheets (MSDS).
i

Revision History Date Rev Number Description December, 2005 Initial Release Initial Release February, 2006 A Production Release September, 2006 B FDA Input July, 2007 C Controls Included Other LeadCare® II Documents
• LeadCare II User’s Guide (English/Spanish) - Part Number 70-6551 • LeadCare II Quick Reference Guide (English) - Part Number 70-6552 • LeadCare II Instructional CD-ROM - Part Number 70-6554 • LeadCare II Test Kit Package Insert - Part Number 70-6869 • LeadCare II Level 1 and 2 Controls Material Safety Data Sheet (MSDS) -
Part Number MSDS-058 • LeadCare Treatment Reagent Material Safety Data Sheet (MSDS) - Part
Number MSDS-033 Troubleshooting
Troubleshooting procedures are described in detail in Chapter 5 of this guide. Read this section carefully. If you continue to experience problems with device operation, call ESA Biosciences.
ESA Biosciences, Inc. 22 Alpha Road, Chelmsford, MA 01824-4171 USA www.esainc.com 1.800.275.0102
ii
Figures Chapter 1 Before Testing page Figure 1-1 Analyzer Kit Contents . . . . . . . . . . . . . . . . . . . . . . . 1-3 Figure 1-2 Test Kit Contents . . . . . . . . . . . . . . . . . . . . . . . . . . 1-4 Figure 1-3 Plug in DC Connector/AC Adapter . . . . . . . . . . . . . . . . 1-5 Figure 1-4 Remove Battery Holder Cover. . . . . . . . . . . . . . . . . . . 1-6 Figure 1-5 Insert Batteries . . . . . . . . . . . . . . . . . . . . . . . . . . . 1-6 Figure 1-6 LeadCare II Blood Lead Analyzer . . . . . . . . . . . . . . . . . 1-7 Figure 1-7 Message Screen . . . . . . . . . . . . . . . . . . . . . . . . . . 1-9 Chapter 2 Calibrating the Analyzer Figure 2-1 Power Switch . . . . . . . . . . . . . . . . . . . . . . . . . . . . 2-2 Figure 2-2 Turn Analyzer On . . . . . . . . . . . . . . . . . . . . . . . . . . 2-2 Chapter 3 Blood Lead Testing Figure 3-1 Message Display. . . . . . . . . . . . . . . . . . . . . . . . . . . 3-2 Appendix A Connecting a Printer Figure A-1 Printer Cable Connection . . . . . . . . . . . . . . . . . . . . A-1
iii

Contents
page Preface. . . . . . . . . . . . . . . . . . . . . . . . . . . . . . . . . . . . . . . . . . . i Revision History. . . . . . . . . . . . . . . . . . . . . . . . . . . . . . . . . . . . . . ii Other LeadCare II Documents . . . . . . . . . . . . . . . . . . . . . . . . . . . . . . ii Troubleshooting. . . . . . . . . . . . . . . . . . . . . . . . . . . . . . . . . . . . . . ii Figures. . . . . . . . . . . . . . . . . . . . . . . . . . . . . . . . . . . . . . . . . . iii Chapter 1 Before Testing Definitions and Precaution Symbols . . . . . . . . . . . . . . . . . . . . . . . . . . 1-2 Unpacking the LeadCare II Blood Lead Analyzer . . . . . . . . . . . . . . . . . . . 1-3 Warranty Card . . . . . . . . . . . . . . . . . . . . . . . . . . . . . . . . . . . . . 1-4 Setting up the Analyzer. . . . . . . . . . . . . . . . . . . . . . . . . . . . . . . . . 1-5 Installing Batteries . . . . . . . . . . . . . . . . . . . . . . . . . . . . . . . . . . . 1-5 Notes . . . . . . . . . . . . . . . . . . . . . . . . . . . . . . . . . . . . . . . . . . 1-6 About the LeadCare II Blood Lead Analyzer . . . . . . . . . . . . . . . . . . . . . . 1-7 What is the LeadCare II Blood Lead Analyzer . . . . . . . . . . . . . . . . . . . . 1-7 About Blood Lead Testing . . . . . . . . . . . . . . . . . . . . . . . . . . . . . . . 1-7 How the LeadCare II Blood Lead Analyzer Works . . . . . . . . . . . . . . . . . . 1-7 Intended Use . . . . . . . . . . . . . . . . . . . . . . . . . . . . . . . . . . . . . . 1-8 Operating Requirements . . . . . . . . . . . . . . . . . . . . . . . . . . . . . . . . 1-8 Reading the Analyzer Display . . . . . . . . . . . . . . . . . . . . . . . . . . . . . 1-9 Important Precautions. . . . . . . . . . . . . . . . . . . . . . . . . . . . . . . . . . 1-9 Precautions when Preparing Samples . . . . . . . . . . . . . . . . . . . . . . . . . 1-9 Precautions for Testing a Patient Sample. . . . . . . . . . . . . . . . . . . . . . . 1-10 Precautions When Performing Quality Control Testing . . . . . . . . . . . . . . . . 1-11 Using the Control Materials . . . . . . . . . . . . . . . . . . . . . . . . . . . . . 1-11 More Information. . . . . . . . . . . . . . . . . . . . . . . . . . . . . . . . . . . . 1-11 Blood Sample Collection . . . . . . . . . . . . . . . . . . . . . . . . . . . . . . . 1-12 Blood Lead Testing. . . . . . . . . . . . . . . . . . . . . . . . . . . . . . . . . . 1-12 LeadCare II Product Information . . . . . . . . . . . . . . . . . . . . . . . . . . . 1-12 How to Get Help. . . . . . . . . . . . . . . . . . . . . . . . . . . . . . . . . . . . 1-12 Chapter 2 Calibrating the Analyzer Turning the Analyzer On and Off. . . . . . . . . . . . . . . . . . . . . . . . . . . . 2-2 Turn On the Analyzer. . . . . . . . . . . . . . . . . . . . . . . . . . . . . . . . . . 2-2 About Calibration . . . . . . . . . . . . . . . . . . . . . . . . . . . . . . . . . . . . 2-3 Why Calibration is Important? . . . . . . . . . . . . . . . . . . . . . . . . . . . . . 2-3 The Calibration Button . . . . . . . . . . . . . . . . . . . . . . . . . . . . . . . . . 2-3 Calibrating the Analyzer . . . . . . . . . . . . . . . . . . . . . . . . . . . . . . . . 2-4
iv

Chapter 3 Blood Lead Testing page Overview of the Testing Procedure. . . . . . . . . . . . . . . . . . . . . . . . . . . 3-1 The LeadCare II Message Display . . . . . . . . . . . . . . . . . . . . . . . . . . . 3-2 Required Materials . . . . . . . . . . . . . . . . . . . . . . . . . . . . . . . . . . . 3-2 Precautions. . . . . . . . . . . . . . . . . . . . . . . . . . . . . . . . . . . . . . . 3-2 Testing Procedure . . . . . . . . . . . . . . . . . . . . . . . . . . . . . . . . . . . 3-3 Step 1: Collect Blood . . . . . . . . . . . . . . . . . . . . . . . . . . . . . . . . . . 3-4 Step 2: Prepare Sample . . . . . . . . . . . . . . . . . . . . . . . . . . . . . . . . 3-5 Step 3: Analyze the Sample . . . . . . . . . . . . . . . . . . . . . . . . . . . . . . 3-6 Interpreting Patient Test Results. .. . . . . . . . . . . . . . . . . . . . . . . . . . . 3-8 Retesting Guidelines . . . . . . . . . . . . . . . . . . . . . . . . . . . . . . . . . .3-8 Printing Test Results . . . . . . . . . . . . . . . . . . . . . . . . . . . . . . . . . . 3-9 References. . . . . . . . . . . . . . . . . . . . . . . . . . . . . . . . . . . . . . . 3-9 Chapter 4 Quality Control Procedure What is a LeadCare II Lead Control . . . . . . . . . . . . . . . . . . . . . . . . . . 4-1 Storage and Handling . . . . . . . . . . . . . . . . . . . . . . . . . . . . . . . . . .4-1 How Often Should You Run Test Controls . . . . . . . . . . . . . . . . . . . . . . 4-2 Testing Controls . . . . . . . . . . . . . . . . . . . . . . . . . . . . . . . . . . . . 4-2 Prepare the sample.. . . . . . . . . . . . . . . . . . . . . . . . . . . . . . . . . . . 4-2 Mix with Treatment Reagent. . . . . . . . . . . . . . . . . . . . . . . . . . . . . . 4-2 Test. . . . . . . . . . . . . . . . . . . . . . . . . . . . . . . . . . . . . . . . . . . . 4-3 Interpreting the Control Test Results. .. . . . . . . . . . . . . . . . . . . . . . . . . 4-4 How ESA Assigns Lead Level Ranges . . . . . . . . . . . . . . . . . . . . . . . . . 4-5 Chapter 5 Troubleshooting and Maintenance Calling ESA. . . . . . . . . . . . . . . . . . . . . . . . . . . . . . . . . . . . . . . 5-1 Troubleshooting results below the target or expected value. . . . . . . . . . . . . . 5-2 Troubleshooting results above the target or expected value. . . . . . . . . . . . . . 5-3 Control test results below the target range: possible causes . . . . . . . . . . . . 5-4 Control test results above the target range: possible causes. . . . . . . . . . . . . . 5-5 Summary of Display Messages. . . . . . . . . . . . . . . . . . . . . . . . . . . . . 5-6 Screen Display Messages. . . . . . . . . . . . . . . . . . . . . . . . . . . . . . . 5-7 Maintaining the Analyzer . . . . . . . . . . . . . . . . . . . . . . . . . . . . . . . 5-8
v
Appendix A Connecting a Printer page Connecting the Analyzer to a Printer. . . . . . . . . . . . . . . . . . . . . . . . . . A-1 Appendix B Specifications, Operating Requirements, and
Performance Characteristics Specifications. . . . . . . . . . . . . . . . . . . . . . . . . . . . . . . . . . . . . . B-1 Operating Requirements . . . . . . . . . . . . . . . . . . . . . . . . . . . . . . . . B-2 Interference Substances . . . . . . . . . . . . . . . . . . . . . . . . . . . . . . . . B-2 Appendix C Steps for Collecting Fingerstick Blood Samples in
Micro-Vials for Lead Testing . . . . . . . . . . . . . . C-1 Appendix D Material Safety Data Sheets . . . . . . . . . . . . . . D-1 LeadCare II Lead Controls, Level 1 and Level 2 LeadCare Treatment Reagent Index . . . . . . . . . . . . . . . . . . . . . . . . . . . . . . . . . . . . . . . . . I-1
vi

Chapter 1 Before Testing
Read all instructions carefully before you perform a blood lead test.
This chapter contains important information that you need to know before you use the LeadCare® II Blood Lead Analyzer. Please read the following sections before using the analyzer.
• Unpacking the LeadCare II Blood Lead Analyzer • Setting up the Analyzer • About the LeadCare II Blood Lead Analyzer • Intended Use • Operating Requirements • Reading the Analyzer Display • Important Precautions • How to get Help
ESA recommends that you practice using the system before performing a patient test.
CAUTION
LeadCare® II User's Guide 1-1

Definitions and Precaution Symbols
WARNING
This symbol identifies conditions or practices that could result in injury or loss of life.
CAUTION
This symbol indicates conditions or practices that could cause erroneous results or damage to the analyzer.
This symbol indicates that you should read the instructions carefully.
This symbol indicates the potential for electrostatic discharge. Static electricity can damage or destroy the internal components of devices. It can be generated by scuffing shoes on a carpet or brushing some other materials such as fabrics. When running the analyzer, discharge static electricity by touching a metal object (such as the outside of a computer) in your work area.
This symbol indicates a biohazard.
1-2 LeadCare® II User's Guide

Unpacking the LeadCare II Blood Lead Analyzer LeadCare II materials are contained in two (2) packages: 1. LeadCare II Analyzer Kit
• Analyzer • AC Adapter • Batteries • User’s Guide (this book) • Quick Reference Guide • LeadCare II Instructional CD-ROM • International Power Plug Set • CDC Sample Collection Instructional CD-ROM • Warranty Card
Figure 1-1 Analyzer Kit Contents
When unpacking the analyzer, verify the sensor retainer is in place. Remove the shipping tape prior to using the analyzer.
CAUTION
LeadCare® II User's Guide 1-3

2. LeadCare II Test Kit
• 48 Blood Lead Sensors • 48 LeadCare II Treatment Reagent Tubes • 50 LeadCare II Heparinized Capillary Tubes and Plungers • 50 LeadCare II Droppers • 1 Calibration Button • LeadCare II Package Insert • LeadCare Labels and Worksheets
Figure 1-2 Test Kit Contents Warranty Card Please take a moment to fill out the Warranty Registration Card and mail back to ESA. If you prefer, you may register online by following this link: http://www.esainc.com/resources/product_registration/bloodlead_products Registering your analyzer with ESA will allow you to receive important updates to your LeadCare II Test System.
1-4 LeadCare® II User's Guide

Setting up the Analyzer The Work Area Setup the LeadCare II Blood Lead Analyzer in an area that is free of drafts and temperature extremes. The analyzer needs a stable temperature to operate. You can use the analyzer with an AC power adapter or with batteries. Using the Analyzer with a Power Adapter
Use only the AC adapter supplied with this unit. Attempting to use a different type or manufacturer’s product could damage the analyzer.
CAUTION
To use the analyzer with a power adapter: 1. Plug the DC connector into the back of the analyzer as shown in Figure 1-3.
Figure 1-3 Plug in DC Connector/AC Adapter 2. Plug the adapter into an AC power outlet. 3. Move the power switch to the left to turn the analyzer on. Installing Batteries
CAUTION
When replacing batteries, use only 1.5 V AA size alkaline batteries (4 ea). Shut the analyzer off prior to battery removal. Dispose according to local state and country regulations.
WARNING
Batteries may explode if mishandled or replaced incorrectly. Do not dispose of batteries in fire. Do not attempt to disassemble or recharge batteries. Keep batteries away from children.
LeadCare® II User's Guide 1-5

The battery holder is located at the rear of the analyzer. To install the batteries: 1. Turn the analyzer to access the battery area. 2. Remove the DC input connector. 3. Remove the battery cover as shown in Figure 1-4.
Figure 1-4 Remove Battery Holder Cover 4. Press on the locking tab with one or both thumbs and slide it away from the
analyzer. 5. Insert four 1.5 V AA size alkaline batteries (included with analyzer kit) as
shown in Figure 1-5.
Figure 1-5 Insert Batteries
Observe the polarity of each battery. Inserting one backwards could damage the analyzer. CAUTION
6. Replace the cover by sliding it back on. Make sure it “clicks” into place. 7. Turn the analyzer so the front is facing you. Notes You may use the AC adapter with batteries installed; this overrides the battery operation. The analyzer becomes idle; it has two automatic shut-off limits depending on which power source is being used. Battery - 15 minutes Note: Test results are lost when the analyzer AC Adapter - 60 minutes becomes idle.
1-6 LeadCare® II User's Guide

About the LeadCare II Blood Lead Analyzer What is the LeadCare II Blood Lead Analyzer The LeadCare II Blood Lead Analyzer is a portable device for testing the amount of lead in blood.
Figure 1-6 LeadCare II Blood Lead Analyzer About Blood Lead Testing Lead exposure can occur from breathing air or dust, or eating food or water that contains lead. Children can be exposed by eating lead-based paint chips or by playing in contaminated soil. Lead can damage the nervous system, kidneys and reproductive system. Young children are especially sensitive to the effects of lead but rarely exhibit symptoms of exposure. As a result, most poisoned children go undiagnosed and untreated. High levels of lead in the blood (above 45 micrograms of lead per deciliter of blood) represent lead poisoning. Lower levels require re-testing, checkups, and therapy for lead poisoning. Once lead is found in the blood, treatment can reduce or eliminate the harm of lead poisoning. Therefore, it is important to test for lead in the blood. Lead testing detects the level of lead in the blood (called the Blood Lead Level or BLL). The LeadCare II Blood Lead Analyzer tests the blood lead level and reports it on the screen in three minutes. Results are shown in micrograms (µg) of lead (Pb) per deciliter (dL) of blood. How the LeadCare II Blood Lead Analyzer Works The LeadCare II Blood Lead Analyzer uses an electrochemical process that detects and measures the level of lead in a blood sample. Mixing the blood with the LeadCare II treatment reagent releases the lead from the blood. When the test is complete, the blood level appears on the screen. The test results remain on the screen until you run another test or until the analyzer becomes idle.
LeadCare® II User's Guide 1-7
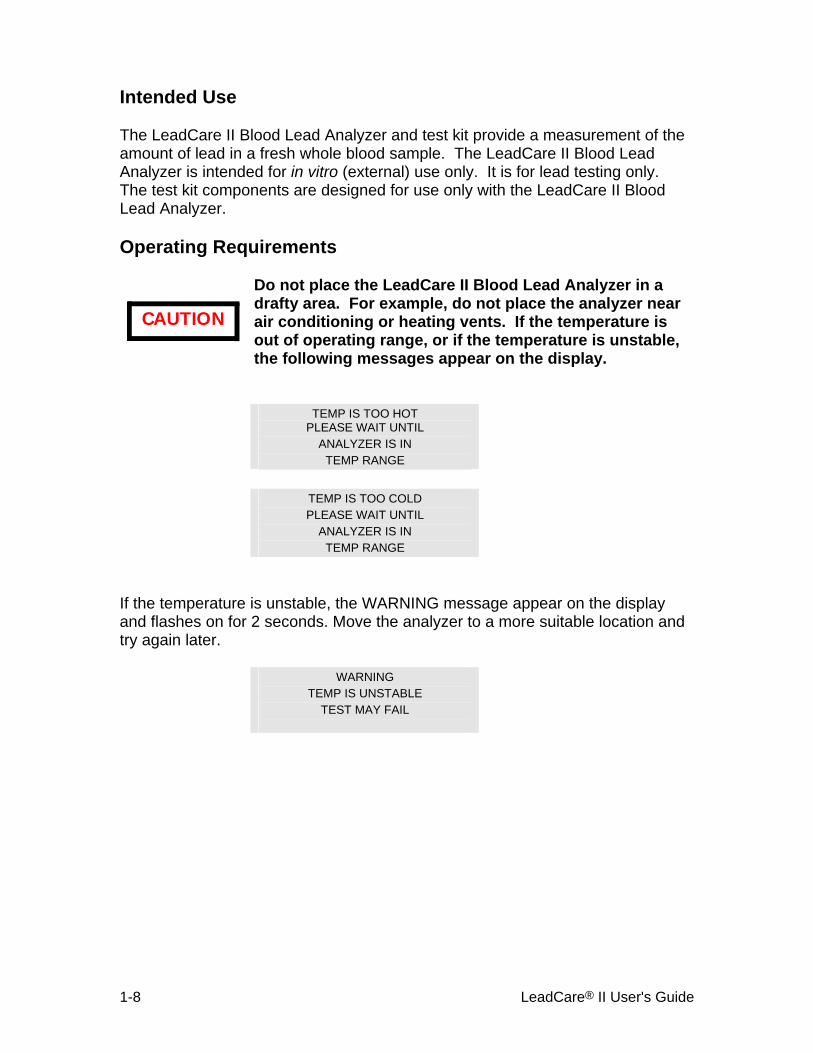
Intended Use The LeadCare II Blood Lead Analyzer and test kit provide a measurement of the amount of lead in a fresh whole blood sample. The LeadCare II Blood Lead Analyzer is intended for in vitro (external) use only. It is for lead testing only. The test kit components are designed for use only with the LeadCare II Blood Lead Analyzer. Operating Requirements
Do not place the LeadCare II Blood Lead Analyzer in a drafty area. For example, do not place the analyzer near air conditioning or heating vents. If the temperature is out of operating range, or if the temperature is unstable, the following messages appear on the display.
CAUTION
TEMP IS TOO HOT PLEASE WAIT UNTIL
ANALYZER IS IN TEMP RANGE
TEMP IS TOO COLD PLEASE WAIT UNTIL
ANALYZER IS IN TEMP RANGE
If the temperature is unstable, the WARNING message appear on the display and flashes on for 2 seconds. Move the analyzer to a more suitable location and try again later.
WARNING TEMP IS UNSTABLE
TEST MAY FAIL
1-8 LeadCare® II User's Guide

Reading the Analyzer Display The LeadCare II Blood Lead Analyzer displays messages that guide you through the test. Do not go to the next step until the message tells you to proceed. The test takes three (3) minutes. When the test is complete, the blood lead level results appear on the display. The test results remain on the screen until you insert a new sensor or for a minimum of 15 minutes.
Message Screen
Figure 1-7 Message Screen
The analyzer monitors the test conditions and displays error messages on the screen if a problem is detected. Chapter 3, Blood Lead Testing, includes a list of the messages and what to do if they appear. Important Precautions This section lists important things you need to know about using the LeadCare II Blood Lead Analyzer. Understand these precautions. Precautions when Preparing Samples
WARNING
Wear protective clothing and eyewear while collecting and handling blood samples. Blood can transmit infectious diseases. Follow the procedures setup by your institution for meeting local, state and federal regulations.
LeadCare® II User's Guide 1-9
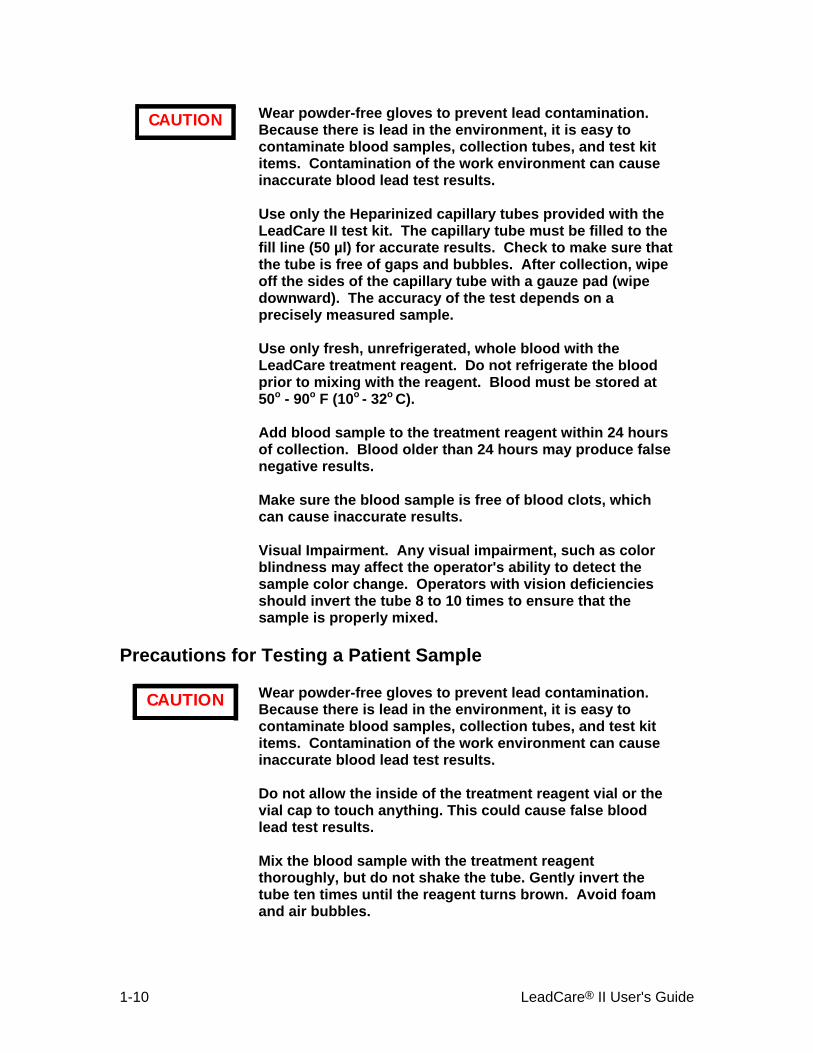
Wear powder-free gloves to prevent lead contamination. Because there is lead in the environment, it is easy to contaminate blood samples, collection tubes, and test kit items. Contamination of the work environment can cause inaccurate blood lead test results. Use only the Heparinized capillary tubes provided with the LeadCare II test kit. The capillary tube must be filled to the fill line (50 µl) for accurate results. Check to make sure that the tube is free of gaps and bubbles. After collection, wipe off the sides of the capillary tube with a gauze pad (wipe downward). The accuracy of the test depends on a precisely measured sample. Use only fresh, unrefrigerated, whole blood with the LeadCare treatment reagent. Do not refrigerate the blood prior to mixing with the reagent. Blood must be stored at 50o - 90o F (10o - 32o C). Add blood sample to the treatment reagent within 24 hours of collection. Blood older than 24 hours may produce false negative results. Make sure the blood sample is free of blood clots, which can cause inaccurate results. Visual Impairment. Any visual impairment, such as color blindness may affect the operator's ability to detect the sample color change. Operators with vision deficiencies should invert the tube 8 to 10 times to ensure that the sample is properly mixed.
CAUTION
Precautions for Testing a Patient Sample
Wear powder-free gloves to prevent lead contamination. Because there is lead in the environment, it is easy to contaminate blood samples, collection tubes, and test kit items. Contamination of the work environment can cause inaccurate blood lead test results. Do not allow the inside of the treatment reagent vial or the vial cap to touch anything. This could cause false blood lead test results. Mix the blood sample with the treatment reagent thoroughly, but do not shake the tube. Gently invert the tube ten times until the reagent turns brown. Avoid foam and air bubbles.
CAUTION
1-10 LeadCare® II User's Guide

Do not leave the treatment reagent vial uncapped other than to add the sample or remove the sample/reagent solution. The tube and its contents could become contaminated causing false test results. Before placing the sample drop on the sensor, make sure the “Add 1 drop” message appears on the display. Keep the sensors in their container until you need them. Do not touch “X” on the sensors, except when applying the sample. This could cause contamination and a false test result.
CAUTION
Precautions When Performing Quality Control Testing
When testing controls, make sure that the value falls within the acceptable range for each control. DO NOT proceed to patient samples if the control results are NOT within acceptable limits. Refer to the Troubleshooting section of the User's Guide, or call Technical Support at (800) 275.0102 to help you resolve the problem.
CAUTION
Using the Control Materials
Treat control material as you would patient samples; add the control to treatment reagent prior to testing. Store the controls at room temperature with all other kit components. Discard unused control material when the kit is finished. Using control material with the wrong kit lot number could yield incorrect results. Refer to Chapter 4, Quality Control, for more information about the control test procedures.
CAUTION
More Information The following references provide additional information about blood sample collection, blood lead testing, and the ESA LeadCare II products.
LeadCare® II User's Guide 1-11

Blood Sample Collection Information about sample collection is available from the Clinical Laboratory Standards Institute (CLSI) or the Centers for Disease Control (CDC).
• CLSI (Clinical and Laboratory Standards Institute) H03-A5: Procedure for the Collection of Diagnostic Blood Specimens by Venipuncture; Approved Standard -- 5th ed. (2003) (ISBN 1-56238-515-1).
• CLSI (Clinical and Laboratory Standards Institute) H18-A3: Procedures for the Handling and Processing of Blood Specimens; Approved Guideline -- 3rd ed. (2004) (ISBN 1-56238-555-0).
• CDC Guidelines for Collecting and Handling Blood Lead Samples - 2004 (CD-ROM) - Video presentation describes how to collect and handle samples that will be used for blood lead testing.
Blood Lead Testing
• Centers for Disease Control. Screening Young Children for Lead Poisoning. Describes how to interpret blood lead level results. You can find this on the Internet at:
http://www.cdc.gov/nceh/lead/guide/guide97.htm or call the CDC at 1.888.232.6789 to obtain a copy. LeadCare II Product Information
• View www.esainc.com for additional information about our products and resources.
How to Get Help Calling ESA Technical Support ESA Technical Service - 1.800.275.0102
1-12 LeadCare® II User's Guide

Chapter 2 Calibrating the Analyzer This chapter describes how to calibrate the analyzer. The analyzer must be calibrated to the lot of sensors to ensure accurate results. This chapter contains the following topics:
• Turning the Analyzer On and Off • About Calibration • Calibrating the Analyzer
Calibration is required for each new lot of test kits. Use the calibration button in the test kit. Use only the button packaged with the kit you are using. Failure to use the correct calibration button with the test kit could cause false results. Do not use items from more than one test kit at a time. Always make sure that the lot numbers on the sensor container and calibration button match the SENSOR LOT number on the analyzer display.
CAUTION
LeadCare® II User's Guide 2-1

Turning the Analyzer On and Off The LeadCare® II Blood Lead Analyzer power switch is located at the back of the device as shown in Figure 2-1.
On
Power Switch
Off
Figure 2-1 Power Switch If the analyzer is not used for 15 minutes (battery operation) or 60 minutes (AC operation), it will go into “sleep” mode. Inserting a sensor or moving the power switch to the ON position will restart the analyzer. Turn On the Analyzer To turn on the analyzer for the first time: 1. Make sure the analyzer is plugged in using the AC adapter, or that batteries
are installed if you are using the analyzer in a remote location. 2. Move the switch on the back of the Analyzer to the ON (|) position.
Figure 2-2 Turn Analyzer On
The analyzer performs a series of self-tests. When you first turn on the analyzer, you will hear a tone and see the start-up and self-test messages.
2-2 LeadCare® II User's Guide

LeadCare® II User's Guide 2-3
You can also turn on the analyzer by inserting a sensor. The first time you turn on the analyzer, the screen reads:
PLEASE CALIBRATE ANALYZER WITH BUTTON
Once the analyzer has been calibrated, the following message appears.
PREPARE SAMPLE USE SENSOR LOT XXXX OR RECALIBRATE
3. If you insert a sensor to turn on the analyzer, the following message appears:
ADD 1 DROP SAMPLE TO X ON SENSOR SENSOR LOT XXXX
About Calibration Why Calibration is Important The analyzer must be calibrated to the lot of sensors to ensure accurate results. You must calibrate the analyzer: • The first time you use the analyzer • Each time you start a new lot of test kits • Any time the analyzer displays a recalibration message
The Calibration Button Each LeadCare II test kit comes with 48 sensors and a calibration button. The button transfers calibration and expiration information to the analyzer. When you touch the calibration button to the button reader, you will hear an audible tone. The lot number from the calibration button appears on the screen to verify that the button was read properly. The CALIBRATION SUCCESSFUL message flashes for 2 seconds.

Calibrating the Analyzer
Calibration is required for each new lot of test kits. Use only the calibration button packaged with the test kit you are using. Failure to use the correct calibration button could cause false results. Do not use items from more than one test kit at a time. Each test kit comes with a calibration button marked with the sensor lot calibration code. Always make sure that the lot numbers on the sensor container and calibration button match the SENSOR LOT number on the analyzer display. See calibration instructions below.
CAUTION
1. Turn on the analyzer. The analyzer is ready when the “Prepare Sample” message appears.
NOTE: The first time you turn on the analyzer, you will see the PLEASE CALIBRATE message.
PREPARE SAMPLE USE SENSOR LOT XXXX
OR RECALIBRATE THEN INSERT SENSOR
2. Locate the calibration button for the test kit you are going
to use. Remove the calibration button from the test kit package.
3. Match the lot number on the sensor container with the calibration code on the button.
4. Hold the calibration button to the button reader until you hear the beep. The button must touch both the center contact and metal side of the button reader.
CALIBRATION SUCCESSFUL
Calibration takes a few seconds. When calibration is complete, the screen briefly reads CALIBRATION SUCCESSFUL, then the PREPARE SAMPLE... message appears.
5. Make sure the number of the button matches the display.
The LeadCare II Blood Lead Analyzer is now ready for testing.
2-4 LeadCare® II User's Guide

Chapter 3 Blood Lead Testing
Read all instructions carefully before you perform a blood lead test.
This chapter describes how to test a patient’s blood for lead. It contains the following topics:
• Overview of the Testing Procedure • The LeadCare II Message Display • Required Materials • Precautions • Testing Procedure • Interpreting Patient Test Results • Printing Test Results • References
Overview of the Testing Procedure Testing for lead in blood with the LeadCare® II Blood Lead Analyzer is fast and easy. Practice lead testing with the control samples or other samples before you perform a blood lead test. The testing procedure consists of the following steps: 1. Make sure you have the required materials. 2. Perform quality control testing and verify the results are within the acceptable
ranges. 3. Collect blood. Check the capillary tube for correct filling. 4. Add blood to the treatment reagent tube. 5. Insert a sensor and match the sensor lot number with the display. 6. Draw a sample from the treatment reagent tube and add a drop to the sensor. 7. Read and record the test result.
LeadCare® II User's Guide 3-1

The LeadCare II Message Display The message display screen is designed to guide you through the testing process. Remember to read the display messages.
LAST TEST RESULT
XXX µg/dL Pb INSERT SENSOR
SENSOR LOT #XXXXX
Figure 3-1 Message Display Required Materials
CAUTION
o Droppers
Make sure the analyzer, test kit, and samples are at room temperature before testing.
• Protective Powder-free Gloves • Alcohol Wipes, Gauze Pads, EDTA Wipes (optional) • Lancets • Absorbent Liner and Biohazard Waste Container • LeadCare II Analyzer and Power Cord or Batteries • LeadCare II Quick Reference Guide • LeadCare II User’s Guide • LeadCare Test Kit Items
o Heparinized Blood Collection Capillary Tubes/Plungers o Treatment Reagent Tubes o Blood Lead Sensors o Sensor Lot Calibration Button o LeadCare II Lead Controls, Level 1 & 2
Precautions Observe the precautions listed throughout this section. Failure to follow these precautions could result in false test results. Important precautions for testing are also listed in "Important Precautions" on page 1-9.
3-2 LeadCare® II User's Guide

WARNING
Wear protective powder-free gloves, safety glasses and lab coats. Dispose of sensors, capillary tubes, plungers, and droppers in biohazard container. Use caution when handling the LeadCare II treatment reagent. This reagent contains dilute hydrochloric acid. Refer to the LeadCare treatment reagent Material Safety Data Sheet that appears in Appendix D of this manual for safe handling instructions.
Do not use sensors that have been dropped, previously handled, broken, scratched or damaged in any way. This could cause false test results. Do not use any test kit or its components past the expiration date. This could cause false test results. Do not leave the treatment reagent vial uncapped other than to add the sample or remove the sample/reagent solution. The tube and its contents could be contaminated causing false test results.
CAUTION
Testing Procedure Gather Testing Materials NOTE: Be sure the following items are part of the same test kit. Do not mix components from different test kits. Place the following items in front of you in a clean work space:
• Container with Heparinized capillary tubes/plungers • Treatment reagent tube • Sensor container (lot number must match the number on the analyzer
display) • Dropper for depositing sample on the sensor • LeadCare II blood lead analyzer
WARNING
Wear protective clothing and eyewear while collecting and handling blood samples. Blood can transmit infectious diseases. Follow the procedures set up by your institution to meet local, state and federal regulations.
LeadCare® II User's Guide 3-3

3-4 LeadCare® II User's Guide
Step 1: Collect Blood
CAUTION
Only use the Heparinized capillary tubes provided with the LeadCare II Test Kit. The capillary tube must be filled to the fill line (50 µl) for accurate results. Check to make sure that the tube is free of gaps and bubbles. After collection, wipe the capillary tube with a gauze pad (wipe downward). The accuracy of the test depends on a precisely measured sample.
1. Label a treatment reagent tube with the patient ID using the label provided.
2. Holding the Heparinized capillary tube almost horizontally with the green band on top, fill to the 50 µL black line. Filling stops when the sample reaches the black line.
NOTE: The CDC’s steps for collecting fingerstick blood samples for lead testing is provided in Appendix C of this User’s Guide.
3. If using a venous sample, hold the capillary tube almost horizontally with the green band on top, fill the capillary tube to the 50 µL black line.
NOTE: The capillary tube should be utilized when preparing controls and proficiency samples for analysis. Refer to Chapter 4 for recommendations on when to test quality control samples.
4. Remove excess blood from the outside of the tube with a clean wipe or gauze pad. Use a downward motion to wipe excess blood from the capillary tube.
Use caution not to drain the blood from the end of the capillary tube.
5. Inspect the capillary tube for proper filling. Make sure there are no gaps or bubbles, or any excess blood on the outside of the capillary tube.

Step 2: Prepare Sample
The system is intended to test fresh whole blood (collected in either EDTA or Heparin). Add the blood to the treatment reagent within 24 hours of collection. Blood older than 24 hours may produce false negative results.
Use only fresh, unrefrigerated, whole blood with the LeadCare treatment reagent. Blood must be stored at 50° - 90° F (10° - 32° C) prior to mixing with treatment reagent.
Make sure the whole blood sample is free of clots, which can cause inaccurate results.
CAUTION
1. Remove the treatment reagent cap from the tube and place it face up on a clean gauze pad. Do not allow the inside of the cap to touch anything. This could contaminate the sample.
2. Place the full capillary tube in the treatment reagent tube. Insert a plunger into the top of the capillary tube. Dispense the entire volume into the treatment reagent.
3. Replace the tube cap. Invert the tube 8 to 10 times to mix the sample completely.
4. The test sample is ready when the mixture turns brown. Repeat sample collection and preparation for each sample to be tested.
CAUTION: Any visual impairment, such as color blindness may affect the operator's ability to detect the sample color change. Operators with vision deficiencies should invert the tube 8 to 10 times to ensure that the sample is properly mixed.
Storing Samples You do not need to test the prepared sample immediately. The mixture of blood and treatment reagent is stable for up to 48 hours at room temperature and up to 7 days refrigerated. Bring to room temperature prior to analysis.
LeadCare® II User's Guide 3-5
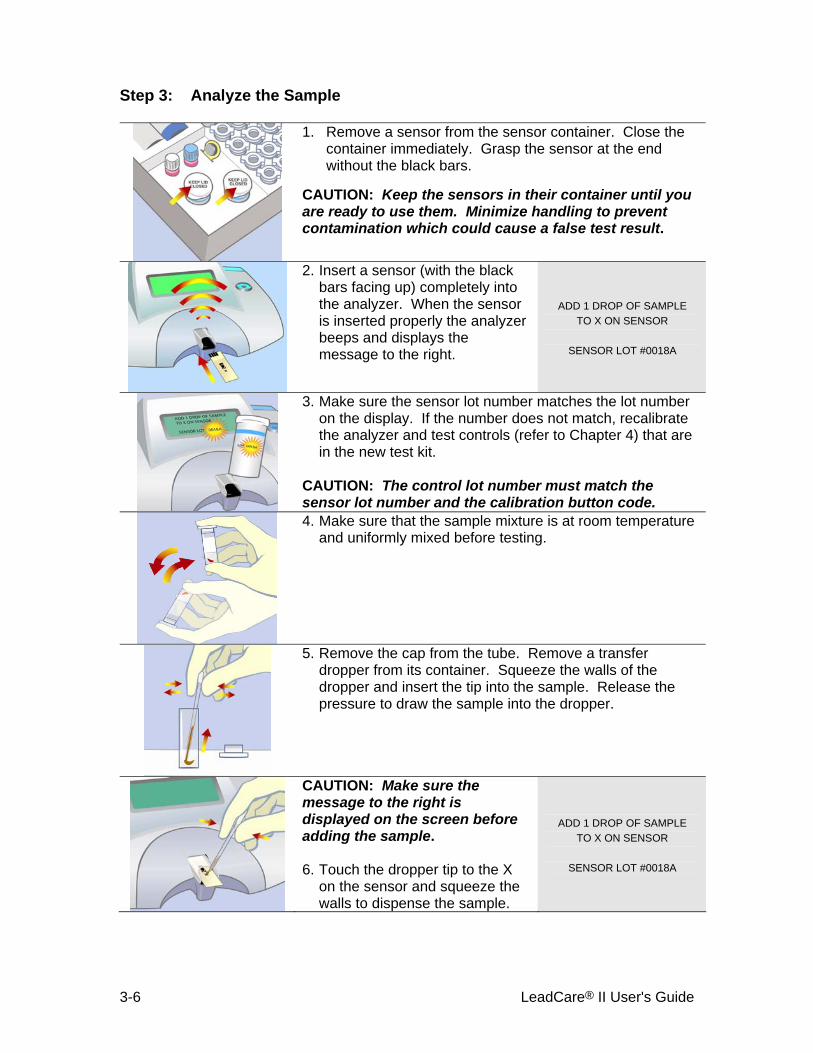
Step 3: Analyze the Sample
1. Remove a sensor from the sensor container. Close the container immediately. Grasp the sensor at the end without the black bars.
CAUTION: Keep the sensors in their container until you are ready to use them. Minimize handling to prevent contamination which could cause a false test result.
2. Insert a sensor (with the black bars facing up) completely into the analyzer. When the sensor is inserted properly the analyzer beeps and displays the message to the right.
ADD 1 DROP OF SAMPLE TO X ON SENSOR
SENSOR LOT #0018A
3. Make sure the sensor lot number matches the lot number on the display. If the number does not match, recalibrate the analyzer and test controls (refer to Chapter 4) that are in the new test kit.
CAUTION: The control lot number must match the sensor lot number and the calibration button code.
4. Make sure that the sample mixture is at room temperature and uniformly mixed before testing.
5. Remove the cap from the tube. Remove a transfer dropper from its container. Squeeze the walls of the dropper and insert the tip into the sample. Release the pressure to draw the sample into the dropper.
CAUTION: Make sure the message to the right is displayed on the screen before adding the sample.
6. Touch the dropper tip to the X
on the sensor and squeeze the walls to dispense the sample.
ADD 1 DROP OF SAMPLE TO X ON SENSOR
SENSOR LOT #0018A
3-6 LeadCare® II User's Guide

7. The analyzer will beep and display the message to the right. After 3 minutes (180 seconds) the analyzer will beep again to indicate that the test is done.
TESTING XXX SECONDS TO GO
SENSOR LOT #0018A
8. Record the test results on the LeadCare II worksheet provided.
RECORD TEST RESULT 7.5 µg/dL Pb
THEN REMOVE SENSOR SENSOR LOT #0018A
9. Remove the used sensor.
10. Discard the materials in an appropriate biohazard container.
11. The analyzer is ready for the next sample when the LAST TEST RESULT message appears on the screen.
LAST TEST RESULT 7.5 µg/dL Pb
INSERT SENSOR SENSOR LOT #0018A
NOTE: The analyzer displays “Low” when it detects a blood lead level below 3.3 µg/dL. “Low” results should be recorded as “<3.3 µg/dL”. The majority of your patient samples should produce “Low” results.
If you do not run another test within 60 minutes (15 minutes in battery mode), the analyzer will automatically go into “sleep” mode. If you have not recorded your test result, it will be lost. You will have to repeat the analysis.
LeadCare® II User's Guide 3-7
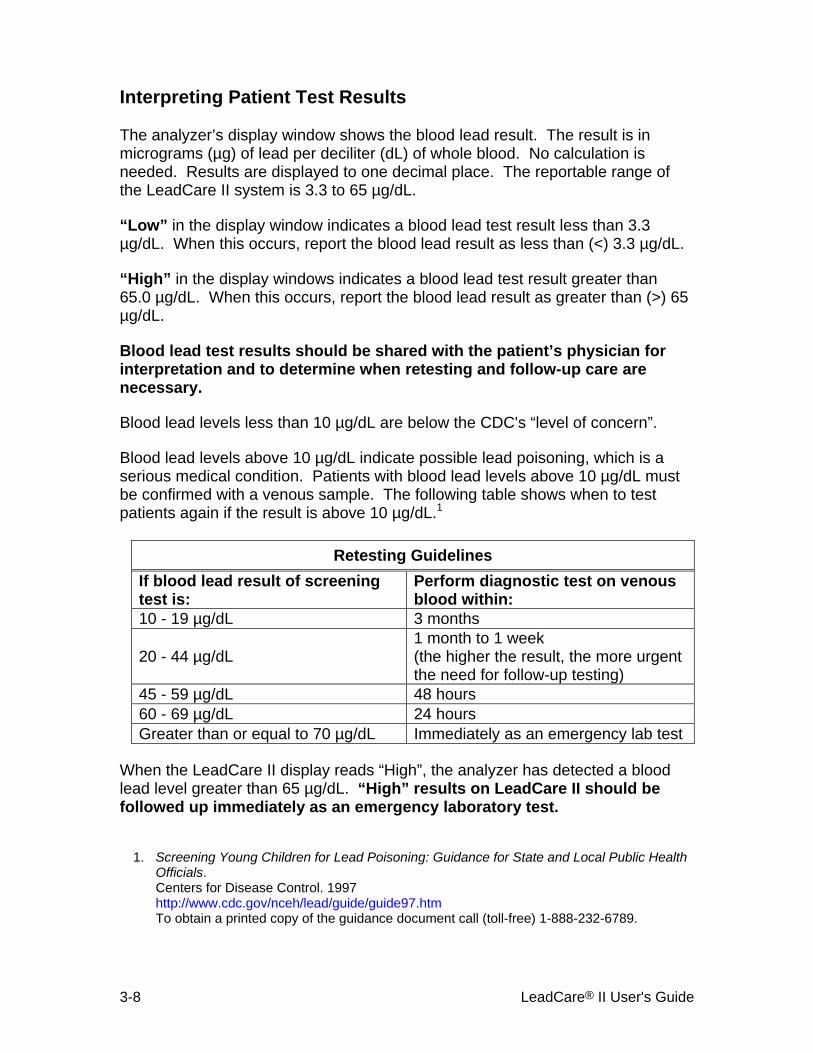
Interpreting Patient Test Results The analyzer’s display window shows the blood lead result. The result is in micrograms (µg) of lead per deciliter (dL) of whole blood. No calculation is needed. Results are displayed to one decimal place. The reportable range of the LeadCare II system is 3.3 to 65 µg/dL. “Low” in the display window indicates a blood lead test result less than 3.3 µg/dL. When this occurs, report the blood lead result as less than (<) 3.3 µg/dL. “High” in the display windows indicates a blood lead test result greater than 65.0 µg/dL. When this occurs, report the blood lead result as greater than (>) 65 µg/dL. Blood lead test results should be shared with the patient’s physician for interpretation and to determine when retesting and follow-up care are necessary. Blood lead levels less than 10 µg/dL are below the CDC's “level of concern”. Blood lead levels above 10 µg/dL indicate possible lead poisoning, which is a serious medical condition. Patients with blood lead levels above 10 µg/dL must be confirmed with a venous sample. The following table shows when to test patients again if the result is above 10 µg/dL.1
Retesting Guidelines If blood lead result of screening test is:
Perform diagnostic test on venous blood within:
10 - 19 µg/dL 3 months
20 - 44 µg/dL 1 month to 1 week (the higher the result, the more urgent the need for follow-up testing)
45 - 59 µg/dL 48 hours 60 - 69 µg/dL 24 hours Greater than or equal to 70 µg/dL Immediately as an emergency lab test
When the LeadCare II display reads “High”, the analyzer has detected a blood lead level greater than 65 µg/dL. “High” results on LeadCare II should be followed up immediately as an emergency laboratory test.
1. Screening Young Children for Lead Poisoning: Guidance for State and Local Public Health Officials. Centers for Disease Control. 1997 http://www.cdc.gov/nceh/lead/guide/guide97.htmTo obtain a printed copy of the guidance document call (toll-free) 1-888-232-6789.
3-8 LeadCare® II User's Guide

Venous confirmation samples can be tested on the LeadCare II System to rule out contamination in the first sample. However, if the result of the venous sample is also above 10 µg/dL, ESA recommends that you send the venous sample to a reference laboratory for confirmation by another method. NOTE: If you are concerned about the accuracy of results near the 10 µg/dL threshold, ESA recommends that you set the confirmation threshold at 8 µg/dL, and have venous samples sent out for confirmation by a reference laboratory. Report all blood lead test results to the appropriate local, state or federal agency. Contact your State Childhood Lead Poisoning Prevention Program for the specific case management guidelines that apply to your patients. Printing Test Results You can print the results by connecting the analyzer to a compatible label printer. Refer to Appendix A: Connecting a Printer. References Preventing Lead Poisoning in Young Children. Guidance for State and Local Public Health Officials. Centers for Disease Control and Prevention 1997 http://www.cdc.gov/nceh/lead/publications/pub_Reas.htm or call the Centers for Disease Control at 1.888.232.6789 for a copy of the document. You can find additional information about lead poisoning at this web address http://www.cdc.gov/nceh/lead/lead.htm
LeadCare® II User's Guide 3-9

This page intentionally left blank.
3-10 LeadCare® II User's Guide

Chapter 4 Quality Control Procedure ESA Biosciences, Inc. provides the LeadCare® II Controls in the test kit for quality control. The Level 1 and Level 2 controls are used to verify system performance and accuracy. This chapter covers the following information:
• What is a LeadCare II Lead Control • Storage and Handling • How often should you run Controls • Testing Controls • Interpreting the Control Test Results
What is a LeadCare II Lead Control A control is a standard against which test results can be evaluated. The LeadCare II controls are room temperature stable solutions designed to mimic blood and spiked with lead to specific target values. The product is supplied in a two level format. Level 1 consists of a normal lead level and the Level 2 consists of an abnormal lead level. Each is assigned a target lead value with an associated acceptable range. The testing of controls will ensure your LeadCare II Blood Lead Analyzer is reporting accurate results. Storage and Handling The control material is supplied in liquid form and ready to use. It should be stored at room temperature and should not be used beyond its expiration date.
Controls should used only with sensors of the same lot number. Discard remaining control solutions when the sensors from the kit are gone. Failure to do so may result in inaccurate patient results.
CAUTION
LeadCare® II User's Guide 4-1
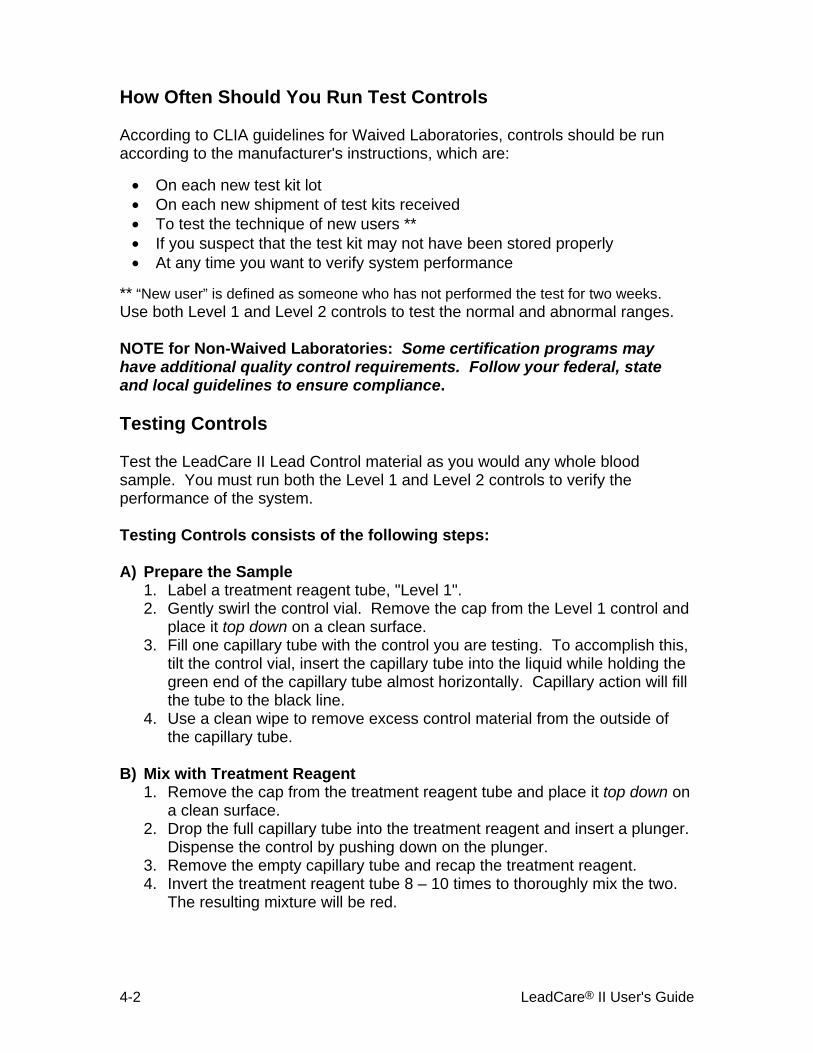
How Often Should You Run Test Controls According to CLIA guidelines for Waived Laboratories, controls should be run according to the manufacturer's instructions, which are:
• On each new test kit lot • On each new shipment of test kits received • To test the technique of new users ** • If you suspect that the test kit may not have been stored properly • At any time you want to verify system performance
** “New user” is defined as someone who has not performed the test for two weeks. Use both Level 1 and Level 2 controls to test the normal and abnormal ranges. NOTE for Non-Waived Laboratories: Some certification programs may have additional quality control requirements. Follow your federal, state and local guidelines to ensure compliance. Testing Controls Test the LeadCare II Lead Control material as you would any whole blood sample. You must run both the Level 1 and Level 2 controls to verify the performance of the system. Testing Controls consists of the following steps: A) Prepare the Sample
1. Label a treatment reagent tube, "Level 1". 2. Gently swirl the control vial. Remove the cap from the Level 1 control and
place it top down on a clean surface. 3. Fill one capillary tube with the control you are testing. To accomplish this,
tilt the control vial, insert the capillary tube into the liquid while holding the green end of the capillary tube almost horizontally. Capillary action will fill the tube to the black line.
4. Use a clean wipe to remove excess control material from the outside of the capillary tube.
B) Mix with Treatment Reagent
1. Remove the cap from the treatment reagent tube and place it top down on a clean surface.
2. Drop the full capillary tube into the treatment reagent and insert a plunger. Dispense the control by pushing down on the plunger.
3. Remove the empty capillary tube and recap the treatment reagent. 4. Invert the treatment reagent tube 8 – 10 times to thoroughly mix the two.
The resulting mixture will be red.
4-2 LeadCare® II User's Guide

LeadCare® II User's Guide 4-3
C) Test 1. Insert a fresh sensor into the LeadCare II analyzer. 2. Ensure the lot number on the display matches the sensor lot you are
using. It must also match the lot number on the control vial. 3. Invert your sample to ensure the sample is well mixed, then remove the
cap. 4. Using the dropper supplied, transfer a drop of the mixture to the X on the
sensor. 5. When the three minute countdown is complete, record your lead result in
µg/dL. 6. Repeat this process for the Level 2 control.
Testing Controls:
1. Label a fresh treatment reagent tube "Level 1 Control".
2. Swirl the control vial gently. Remove the cap from the control and place it top down on a clean laboratory wipe. Ensure the lot number on the control vial matches the sensor lot number you will be testing.
3. Holding the capillary tube almost horizontally with the green band on top, fill it to the 50 µL black line. Filling stops when the sample reaches the black line. Replace the cap on the control vial.
4. Use a downward motion to remove excess control from the outside of the tube with a clean wipe or gauze pad. Use caution not to drain the control from the end of the capillary tube.

4-4 LeadCare® II User's Guide
5. Inspect the capillary tube for proper filling. Make sure there are no gaps or bubbles, or any excess control on the outside of the capillary tube.
6. Remove the cap from a vial of treatment reagent and place it face up on a clean gauze pad. Do not allow the inside of the cap to touch anything. This could cause false test results.
7. Place the capillary tube into the treatment reagent tube. Insert a plunger into the top of the capillary tube. Dispense the entire volume of control into the bottom of the tube.
8. Replace the tube cap. Invert the tube 8 to 10 times to mix the sample completely.
9. Repeat this process (steps 1 thru 8) for the Level 2
control. 10. Analyze control samples according to the instructions
provided in Chapter 3 (Step 3: Analyze the Sample) on pages 3-6 and 3-7.
Interpreting the Control Test Results The target values are printed on the control vials. The blood lead level that appears on the LeadCare II analyzer should be within the acceptable range provided for that control. If the reported value is within the acceptable limits for both the Level 1 and Level 2 controls, your LeadCare II system is operating properly. You may now test patient samples. If the reported blood lead level is not within the acceptable range for the control, refer to the troubleshooting section of the LeadCare II User’s Guide. If, after following the instructions, the control value is still out of range please contact ESA Technical Support at 1·800·275·0102. IMPORTANT: Do NOT proceed to patient samples unless both the Level 1 and Level 2 control results are within the acceptable ranges.
How ESA Assigns Lead Level Ranges. Acceptable ranges for each lot and lead level are established by ESA using LeadCare II Blood Lead Testing Systems. ESA establishes these ranges using extensive replicate analyses and rigid quality control.
LeadCare® II User's Guide 4-5

This page intentionally left blank.
4-6 LeadCare® II User's Guide
Chapter 5 Troubleshooting and
Maintenance Several factors contribute to accurate blood lead testing and control testing. This chapter provides steps you can take if your patient blood lead tests or control tests are out of range. This chapter contains the following topics:
• Calling ESA Biosciences, Inc. (ESA) • Troubleshooting results below the target or expected value • Troubleshooting results above the target or expected value • Control test results below the target range: possible causes • Control test results above the target range: possible causes • Maintaining the analyzer
Calling ESA If you cannot determine why your system is giving high or low results, call ESA Technical Service at 1.800.275.0102. Please write down this information and have it ready before you call: • Serial number of analyzer (on bottom of analyzer)
• Test kit lot number (on end of box)
• Calibration code on calibration button *
• When did you last test with controls? Date:
• Control results last recorded: Level 1 ____ Level 2
• Control lot number *
• Control expiration date
• Sensor lot number * *NOTE: Calibration code, control lot number and sensor lot number should all be the same.
LeadCare® II User's Guide 5-1
Troubleshooting results below the target or expected value Possible causes include:
• Less than 50 µL of blood was transferred to the treatment reagent tube. • Analyzer is not calibrated properly. • The sample is cold.
See detailed precautions below: Blood Sampling
• Less than 50 µL in the capillary tube will lower blood lead level results. • Make sure that there are no clots or bubbles in the tube. • Use only fresh, whole blood from patients collected in heparin or EDTA. Do NOT
use plasma or serum. Blood Sample Preparation
• Always mix the blood sample with treatment reagent. The test does not work with blood only.
Equipment Setup, Calibration and Testing Materials
• Check the expiration date on the test kit box. Do NOT use a test kit that is beyond the expiration date. When calibrated properly, the analyzer will not initiate a test with expired sensors.
• Make sure the analyzer is calibrated properly. Use the calibration button supplied with the test kit you are using. When processing the sample, check to make sure the code on the analyzer screen matches the code of the calibration button for the test kit and the lot number on the sensor container that you are using.
Testing Conditions
• Avoid operating the LeadCare II System in drafts or in locations with low humidity. • Make sure that the analyzer and the test kit are maintained at a constant
temperature. If you move any part of the system from one place to another, (for example, from outside into a laboratory) wait for the analyzer and components to reach a stable temperature.
• Operate the analyzer only within the specified humidity range: (12 to 80% Relative Humidity).
• Make sure that the analyzer and the test kit are maintained at a constant temperature. If you move any part of the system from one place to another, (for example, from outside into a laboratory) wait for the analyzer and components to reach a stable temperature.
User Technique
• Make sure the blood and treatment reagent is thoroughly mixed before placing it onto the sensor. The mixture should appear brown, confirming lysis.
• Do not touch the sensor while the analyzer is running a test. • Make sure the sample/treatment reagent mixture is room temperature before
placing it onto a sensor. This is only relevant when testing samples that were previously mixed with treatment reagent and stored refrigerated.
5-2 LeadCare® II User's Guide

LeadCare® II User's Guide 5-3
Troubleshooting results above the target or expected value Possible causes include:
• Contamination of blood sample. • Excess blood on the capillary tube. • Sample not mixed properly. • The analyzer is not calibrated properly.
See detailed precautions below: Blood Sampling
• Lead is widespread in the environment. It is easy to contaminate a blood sample. Thoroughly clean the collection site with soap and water followed by a clean alcohol wipe prior to puncture. Use clean powder-free gloves during testing and keep your gloved hands clean.
• Make sure you are using lead-free collection devices. • Make sure the capillary tube is filled properly. Be sure to wipe excess blood from
the capillary tube with a downward motion. The accuracy of the test depends on filling the capillary tube with 50 µL. Excess blood on the outside of the capillary tube will tend to produce higher blood lead results.
Blood Sample Preparation
• Do NOT use clotted blood. If there are clots in the blood, obtain a new sample. • Make sure to transfer 50 µL of blood into the treatment reagent tube. Wipe the end
of the capillary with a gauze pad, using a downward motion before adding the blood to the Treatment Reagent tube.
Equipment Setup, Calibration and Testing Materials
• Check the expiration date on the test kit box. Do not use test kit materials that are beyond the expiration date. When calibrated properly the analyzer will not initiate a test with expired sensors.
• Make sure the analyzer is calibrated properly. Use the calibration button that came with the test kit you are using. When processing the sample, check to make sure the code on the analyzer screen matches the code of the calibration button for the test kit.
• Make sure you are using lead-free collection devices. Testing Conditions
• Operate the analyzer only within the specified humidity range: (12 to 80% Relative Humidity).
• Make sure that the analyzer and the test kit are maintained at a constant temperature. If you move any part of the system from one place to another, (for example, from outside into a laboratory) wait for the analyzer and components to reach a stable temperature.

5-4 LeadCare® II User's Guide
User Technique • Do not touch the black bars on the sensor. This could damage the sensor. • Do not touch the ends of the capillary tubes or the plungers. This could cause
contamination. • Make sure to thoroughly mix blood with the treatment reagent. The mixture should
turn brown before you place it on the sensor. • Do not leave the treatment reagent tube uncapped other than to add the whole
blood sample and remove the sample for testing. • Do not touch the sensor while running a test.
Control test results below the target range: possible causes Possible causes of low control test results include:
• Control lot number does not match the sensor lot and calibration code. • Less than 50 µL of control material was transferred to treatment reagent • The test sample is colder than detected by the analyzer. • The analyzer is not calibrated properly.
See detailed precautions below: Control Sample Preparation
• Use the capillary tubes and plungers provided with the test kit to transfer 50 µL of control into the treatment reagent tube.
• Always mix the control material with treatment reagent. Control material delivered directly to the sensor will not yield an accurate result.
Equipment Setup, Calibration and Testing Materials
• Check the expiration date on the control vial to verify the controls have not expired. • Check the expiration on the test kit box to make sure the test kit materials have not
expired. • Make sure that the lot number of the control matches the lot number on the sensor
container and the lot number on the display screen. NOTE: The controls are only intended for use with the test kit in which they come. When the other reagents included in the test kit are used up, discard the controls.
• Make sure the analyzer is calibrated properly. Use the calibration button that came with the test kit you are using. When analyzing the sample, check to make sure the code on the display screen matches the code of the calibration button for the test kit.
• Make sure the controls were properly stored: o Room temperature storage is considered 59 - 80ºF (15 -27ºC).

Testing Conditions • Do not operate the LeadCare II System in drafty locations. • Make sure that the analyzer and the test kit are maintained at a constant
temperature. If you move any part of the system from one place to another, (for example, from outside into a laboratory) wait for the analyzer and components to reach a stable temperature.
User Technique
• Do not touch the black bars on the sensor. • Do not touch the sensor while the analyzer is running a test. • Make sure the control and treatment reagent is thoroughly mixed before placing
onto the sensor. The mixture will appear red. Control test results above the target range: possible causes Possible causes of high control test results include:
• Control lot number does not match the sensor lot and calibration code. • More than 50 µL of control material was transferred to treatment reagent. • The test sample is warmer than detected by the analyzer. • The analyzer is not properly calibrated.
See detailed precautions below: Control Sample Preparation
• Use the capillary tube and plunger to transfer 50 µL of blood into the treatment reagent vial.
• Wipe off the outside of the capillary tube with a clean gauze pad or laboratory wipe before adding the control to the treatment reagent vial.
• Make sure the controls were properly stored: o Room temperature storage is considered 59 - 80ºF (15 -27ºC
Equipment Setup, Calibration and Testing Materials
• Check the expiration date on the control vial to verify the controls have not expired. • Make sure that the lot number of the control matches the lot number on the sensor
container and the lot number on the display screen. NOTE: The controls are only intended for use with the test kit in which they come. When the other reagents included in the test kit are used up, discard the controls.
• Make sure the analyzer is calibrated properly. Use the calibration button that came with the test kit you are using. When processing the sample, check to make sure the code on the analyzer screen matches the lot number on the sensor container you are using.
LeadCare® II User's Guide 5-5

Testing Conditions • Do not operate the LeadCare II System in drafty locations. • Make sure that the analyzer and the test kit are maintained at a constant
temperature. If you move any part of the system from one place to another, (for example, from outside into a laboratory) wait for the analyzer and components to reach a stable temperature.
User Technique
• Do not leave the treatment reagent tube uncapped other than to add the control sample and remove the sample for testing.
• Do not touch the black bars on the sensor. • Do not touch the sensor while the analyzer is running a test. • Make sure the control and treatment reagent is thoroughly mixed before placing
onto the sensor. The mixture will appear red.
Summary of Display Messages Normally, you will see only four messages during the test process. However, other messages may appear if the analyzer detects a condition that prevents normal operation. The following table shows some of the display messages. NOTE: Occasionally, error messages not noted may appear on the display. Please note what error message was displayed and call Technical Service for additional instructions. New user's may want to check that the sensor was completely inserted into the analyzer first. Technical Service can be reached at 1.800.275.0102.
5-6 LeadCare® II User's Guide

Screen Display Messages
Message Definition What to Do
PLEASE CALIBRATE ANALYZER WITH BUTTON
The analyzer must be calibrated the first time you use it and for each new sensor lot.
Calibrate the analyzer. Refer to the calibration instructions in Chapter 2.
ELECTRONIC QC CHECK FAILED
CALL TECH SERVICE ERROR X
The internal quality control check failed. Write down the error number and call Tech Service at 1.800.275.0102
TEMP IS TOO HOT PLEASE WAIT UNTIL
ANALYZER IS IN TEMP RANGE
The temperature is too hot for testing. Wait until the screen display the PREPARE SAMPLE message.
TEMP IS TOO COLD PLEASE WAIT UNTIL
ANALYZER IS IN TEMP RANGE
The temperature is too cold for testing. Wait until the screen display the PREPARE SAMPLE message.
WARNING TEMP IS UNSTABLE
TEST MAY FAIL
The temperature is too unstable for testing.
Wait until the screen display the PREPARE SAMPLE message.
THIS IS A USED SENSOR
PLEASE REMOVE SENSOR
The sensor in the analyzer is wet or previously used.
Remove the used sensor and insert a new sensor COMPLETELY into the analyzer to retest.
PLEASE REMOVE SENSOR A sensor was left in the analyzer. Remove the sensor.
SENSOR OUT OF VIAL TOO LONG
PLEASE REMOVE SENSOR
The sensor in the analyzer has been out of the tube too long and cannot be used.
Remove the sensor and insert a new sensor.
TEST FAILED PLEASE REMOVE SENSOR
There is not enough sample on the sensor or the sensor failed.
Remove the sensor, discard it, and insert a new sensor. When adding the sample to the sensor, make sure the sample completely covers the X area.
SENSOR REMOVED TOO SOON
The sensor was removed from the analyzer before the end of the test.
Remove the sensor. Insert a new sensor and add another drop of sample. Wait 180 seconds (3 minutes) for the test to finish.
TEMP IS UNSTABLE RESULT DISCARDED
PLEASE REMOVE SENSOR
The temperature in the room is too unstable to yield accurate test results.
Move the analyzer to an area where there are fewer temperature changes (away from sources of cold or heat). The temperature is stable enough when the PREPARE SAMPLE message indicates that the analyzer is ready.
PLEASE RECALIBRATE There was a problem transferring the calibration data from the calibration button to the analyzer.
Repeat the calibration procedure. Refer to Chapter 2, calibrating the analyzer.
SENSOR LOT TOO OLD PLEASE RECALIBRATE
The sensor is from a lot that has expired.
Discard the sensor and the expired lot. Use a sensor from a new lot and recalibrate the analyzer.
SYSTEM FAILURE CALL TECH SERVICE
One of the main system components failed. Call ESA Tech Service at 1.800.275.0102
CHANGE BATTERIES SOON (Message flashes before or after
a test)
Voltage too low for the analyzer to run a test.
Change the batteries. Use four 1.5 V AA alkaline batteries.
PLEASE CHANGE BATTERIES The battery voltage is too low. Change the batteries. Analyzer uses four 1.5 V AA alkaline batteries.
LOW POWER CHECK POWER CORD
This message flashes for 2 seconds if the voltage from the AC adapter is low. You can run a test.
LOW POWER CHECK POWER CORD
OR CALL TECH SERVICE
The voltage from the AC adapter is too low. The lead test is NOT allowed. Call ESA Tech Service at 1.800.275.0102
LeadCare® II User's Guide 5-7

Maintaining the Analyzer Cleaning the Analyzer:
• Clean the analyzer with a damp cloth and warm, soapy water. • Disinfect with dilute (10%) bleach solution. • Do not leave any soap film on the analyzer. • Do not allow liquid of any kind into the sensor connector. • Do not wash the inside of the calibration button reader. • Remove the sensor retainer to clean. Dry thoroughly before reinstalling.
5-8 LeadCare® II User's Guide

Appendix A Connecting a Printer
CAUTION
The LeadCare II Analyzer must be running on AC power in order to generate a label. Battery power will not work.
Contact ESA at 1.800.275.0102 for a list of compatible printers.
Connecting the Analyzer to a Printer You can connect a printer to the LeadCare® II Analyzer. When a printer is connected, the analyzer sends the results to the printer as well as displaying them in the message area. The analyzer has a connection for a serial printer cable.
Serial Connection (DB9)
Figure A-1 Printer Cable Connection
To setup a compatible serial printer:
1. Plug the AC adapter into a power outlet and connect to the printer via DC IN port.
2. Plug the DB9 connector into the LeadCare II analyzer (Figure A-1) and
plug the other end (RJ11 connector -telephone type plug) into the printer.
LeadCare® II User's Guide A-1

3. Press the power button to turn the printer on. The status light below the power button will flash green until labels are loaded. The printer is ready when the light is steady green. (The printer may not function properly if the orange light indicating “standby mode” is active. If you see blinking orange press the power button to shut down the printer. Press a second time turning the printer on noting a steady green light.)
4. Lift the label cover and load a roll of standard labels. (The labels are 1 1/8” W X 3.5” L.) Remove the sticker from the roll and place the roll on the spindle. NOTE: If connecting a SLP420 or SLP440 printer discard the 2 1/8" wide labels provided in the manufacturer’s package. Use ESA item 70-3443: printer labels. The labels are 1 1/8” W X 3.5” L. Center the printer labels by moving the label guides. Feed the labels into the slot on the back of the printer. The labels automatically feed to the exit slot. Close the label cover.
5. Ensure the LeadCare II Analyzer is operating on AC power. Battery
power is insufficient for printing. Turn on your LeadCare II Analyzer and assay your sample.
Seiko® printer notes:
Steady green light indicates the printer is ready.
Blinking green light indicates the printer is awaiting labels.
Steady Orange light indicates the printer is in standby mode. Blinking Orange light indicates an error has occurred.
A sample printout is provided below:
A-2 LeadCare® II User's Guide

Appendix B Specifications,
Operating Requirements, and Performance Characteristics
Specifications Table B-1 Physical Dimensions Dimensions (Analyzer Only) Approximately 9" x 6.5" x 3.5" (23 x 17 x 9 cm) Weight (Analyzer with Batteries) Approximately 2.5 lb (1.13 kg)
Table B-2 Electrical Specifications
Power Source Switching power supply (AC input 100-240 V, 0.25 A, 50-60 Hz, DC output +3.3 V-1.2 A) or 1.5 V AA alkaline batteries (4 each)
DC Input Power (External Mode) Less than 600 mA DC Input Power (Battery Mode) Less than 400 mA Battery Life Up to 80 tests (8 hours)
Automatic Shutoff 15 minutes after last use with batteries 60 minutes after last use with AC adapter
The correct power adapter is included with shipment.
Table B-3 Other Specifications CDC Analyte Code and Name 0709 Blood Lead CLIA Complexity Waived
Blood Lead Level Range 3.3 µg/dL Pb to 65 µg/dL Pb (displays "Low" below 3.3 µg/dL and "High" above 65 µg/dL Pb)
Display Resolution 0.1 µg/dL Pb Blood Sample Volume 50 µL Test Time 3 minutes (180 seconds) Calibration Calibration button with each test kit
LeadCare® II User's Guide B-1
Operating Requirements Table B-4 Storage and System Operating Ranges
Storage Ranges
Analyzer 59°F to 86°F (15°C to 30°C) 40%-80% Relative humidity
Test Kit 60°F to 80°F (15°C to 27°C) 40%-80% Relative humidity
Whole Blood Sample (human) EDTA or Heparin are the anticoagulants of choice
Store at room temperature prior to mixing with treatment reagent. RT is 50°F to 90°F (10°C to 32°C)
System Operating Ranges
Temperature 54°F to 97°F (12°C to 36°C) Relative Humidity 12%-80% Relative Humidity (non-condensing)
Interference Substances Tests were conducted by adding the potential interferences at the concentrations listed below to bovine blood with elevated lead levels. Lead results for samples with each potential interference did not differ statistically from lead results obtained on undoctored samples. The following substances at the following concentrations do NOT affect the results of the LeadCare® II System:
• 5,5-Diphenylhydantoin (Phenytoin), 100 µg/mL • Amoxicillin, 100 µg/mL • Amphotericin, 50 µg/mL • Amphotericin, 100 µg/mL • Carbamazepine, 100 µg/mL • Cephalexin Hydrate, 10 µg/mL • Cephalexin Hydrate, 50 µg/mL • Cephalexin Hydrate, 100 µg/mL • Ciprofloxacin, 100 µg/mL • Diphenylhydramine Hydrochloride, 100 µg/mL • Doxycycline Hydrate, 50 µg/mL • Doxycycline Hydrate, 100 µg/mL • D-Amphetamine Sulfate, 100 µg/mL
B-2 LeadCare® II User's Guide
• D-Penicillamine, 50 µg/mL • D-Penicillamine, 100 µg/mL • Erythromycin, 100 µg/mL • Fexofenadine HCl (Allegra), 100 µg/mL • Fluconazole, Diflucan, 100 µg/mL • Ganciclovir (AZT), 100 µg/mL • Hydroxyurea, 98%, 100 µg/mL • Indinavir hydrate, 100 µg/mL • Isoniazide, 50 µg/mL • Isoniazide, 100 µg/mL • Loratadine (Claritin), 50 µg/mL • Loratadine (Claritin), 100 µg/mL • Methyl Phenidate (Ritalin), 100 µg/mL • Metronidazole, 100 µg/mL • Nicotine Hydrogen Tartrate Salt, 10 µg/mL • Nystatin, 100 µg/mL • Phenylephrine, 100 µg/mL • Piperazine, 100 µg/mL • Pseudoephedrine (Guiafenesin), 100 µg/mL • Repeat Isoniazide, 100 µg/mL • Rifampicin, 95%, 100 µg/mL • Trimethoprim, 100 µg/mL • Valproic Acid, 100 µg/mL
LeadCare® II User's Guide B-3

This page intentionally left blank.
B-4 LeadCare® II User's Guide

Appendix C Steps for Collecting
Fingerstick Blood Samples in Micro-Vials for Lead Testing
LeadCare® II User's Guide C-1

This page intentionally left blank.
C-2 LeadCare® II User's Guide

Appendix D Material Safety Data Sheets This chapter contains the following LeadCare® II Material Safety Data Sheets:
• LeadCare II Lead Controls, Level 1 and Level 2 • LeadCare Treatment Reagent
LeadCare® II User's Guide D-1

This page intentionally left blank.
D-2 LeadCare® II User's Guide

Material Safety Data Sheet
LeadCare® II Lead Controls, Level 1 and Level 2
Page 1 of 2 MSDS-058 Rev. A
Section I Chemical Product and Company Identification Importer Manufacturer
Name: Name: Bionostics, Inc. Address: Address: 7 Jackson Road
Devens, Massachusetts USA 01434
Telephone: Telephone: +01 978 772 7070 Fax: Fax: +01 978 772 7072
Product Name: LeadCare II Lead Control
Catalog No: 70-7126 and 70-7127
Product Use: Buffered aqueous solution for in vitro use for quality control of lead analyzers Labeling Text: N/A Danger Symbol(s): N/A Shipping Name: N/A IATA: Not known
Section II Composition/Information on Ingredients Chemical Family: Bovine Serum Albumin solution with salts, dye and lead Chemical Name: N/A Component: Lead CAS Number: 7439-92-1 Concentration Ranges: 8-25ppm lead EEE Symbol / Risk Phrases: Reasonably anticipated to be human carcinogen Contains no hazardous ingredients with concentration greater than 1% or carcinogens with concentration greater than 0.1%
Section III Hazards Identification Eye Contact May cause irritation if in contact with eye. Skin Contact Skin contact may cause irritation. Ingestion Though not a likely route of occupational exposure, ingestion of this product may cause choking, vomiting or nausea. Inhalation N/A Chronic Exposure N/A
Section IV First Aid Measures Eye Contact Although no adverse health reactions are expected from the normal use of this product, it is recommended flush eyes
with water and seek medical advice whenever there has been a potential injury to the eye. Skin Contact If contact with this product leads to redness, inflammation, or irritation, flush the exposed area with running water. If
irritation persists, get medical attention. Ingestion As a precaution, get medical attention if there has been ingestion of this product. Inhalation If breathing becomes difficult, remove victim to fresh air. Get medical attention Chronic Exposure N/A
Section V Firefighting Measures Autoflammability not determined Flash Point (test method) not determined Extinguishing Media Use fire extinguishing media appropriate for site conditions.
Special Firefighting Procedures Structural fire fighting gear and self-contained breathing apparatus will provide adequate protection if this product is in a fire area.
Fire and Explosion Hazards not determined Hazardous Combustion Products Thermal decomposition may emit carbon monoxide and carbon dioxide. Upper Explosion Limit (%) not determined Lower Explosion Limit (%) not determined
Section VI Accidental Release Measures Spill and Leak Procedures Use an absorbent material to contain/pick up the spilled solution.
Section VII Handling and Storage Storage Temperature Store vials as directed in the package insert. Handling / Storage Handle and store vials as directed in the package insert. Ventilation Requirements No special requirements Sensitivity to Static Electricity not known Sensitivity to Mechanical Impact not known

Section VIII Exposure Controls/Personal Protection Respiratory Protection Respiratory protection is not required under normal use of this product. Ventilation Supplemental ventilation is not required for the normal use of this product. Protective gloves Gloves are not required for normal use of this product. Other Protective Equipment None required Other Engineering controls Eye wash stations and deluge showers. Work Practices Do not place in mouth. Hygienic Practices Do not eat, drink, or smoke while working with this product.
Section IX Physical and Chemical Properties Pure substance or preparation Preparation Physical Form Liquid Appearance / Odor Red, odorless pH as is not determined Odor threshold Not determined Boiling point (760 mmHg) not determined Melting / Freezing point Not determined Solubility in Water complete Partition coefficient Not determined Relative density not determined Evaporation rate Not determined Vapor pressure (mmHg) not determined Vapor density (air = 1) Not determined Viscosity not determined Volatiles Not determined Volatile Organic Compounds not determined Autoflammability Not determined Flash point not determined Oxidizing properties Not determined
Section X Physical and Chemical Properties Stability Stable Materials to avoid Strong bases, strong acids and water reactive materials Hazardous decomposition products Thermal decomposition may emit carbon monoxide and carbon dioxide.
Section XI Toxicological Information Route of Entry Ingestion, skin and/or eye contact. Effects of chronic exposure not known Effects of acute exposure not known Special health effects not known Target organs not known Cancer Lists: Probable human carcinogen based on sufficient evidence of carcinogenicity in animals Ingredient: Lead reasonably anticipated to be human carcinogen
Section XII Ecological Information Potential effect on environment Not known Potential to bioaccumulate not known Mobility Not known Ecotoxicity not known Persistence and degradeability Not known Aqua toxicity not known
Section XIII Disposal Considerations Waste disposal Please consult local, state and federal regulations for additional guidance on disposal. Empty container warnings not known
Section XIV Transport Information (See also Section IX) ADR / RID not known CEFIC Tremcard number not known Hazchem code not known Kemmler code not known IMDG classification not known IATA classification not known Marine Pollutant not known UN number (S.I.N) not known UN class not known UN packing group not known
Section XV Regulatory Information EEC hazard classification not known Risk phrases Reasonably anticipated to be human carcinogen Safety phrases not known California Proposition 65 Warning: This product contains lead, a chemical known to the State of California to cause cancer, birth defects
and other reproductive harm.
Section XVI Other Information Directives 88/379/EEC and 91/155/EEC have been considered when compiling this SDS; the information is provided for health and safety assessment by an industrial user. Reference should be made to any relevant local or national health, safety or environmental legislation. This information does not constitute indication of suitability for specific uses. The information, data and recommendations contained herein are based upon information believed by Bionostics, after reasonable investigation and research, to be accurate; however, Bionostics does not warrant the accuracy of this information. All materials and mixtures may present unknown hazards and should be used with caution. When necessary or appropriate, independent opinions regarding the risk of handling or exposure should be obtained from trained professionals. Bionostics disclaims any warranty against patent infringement and the implied warranties of merchantability and fitness for a particular purpose. Customer's sole and exclusive remedy shall be replacement of the product or return of the product and refund of the purchase price, at Bionostics' option. In no case shall Bionostics be liable for incidental or consequential damages, including lost profits.
Page 2 of 2 MSDS-058 Rev. A

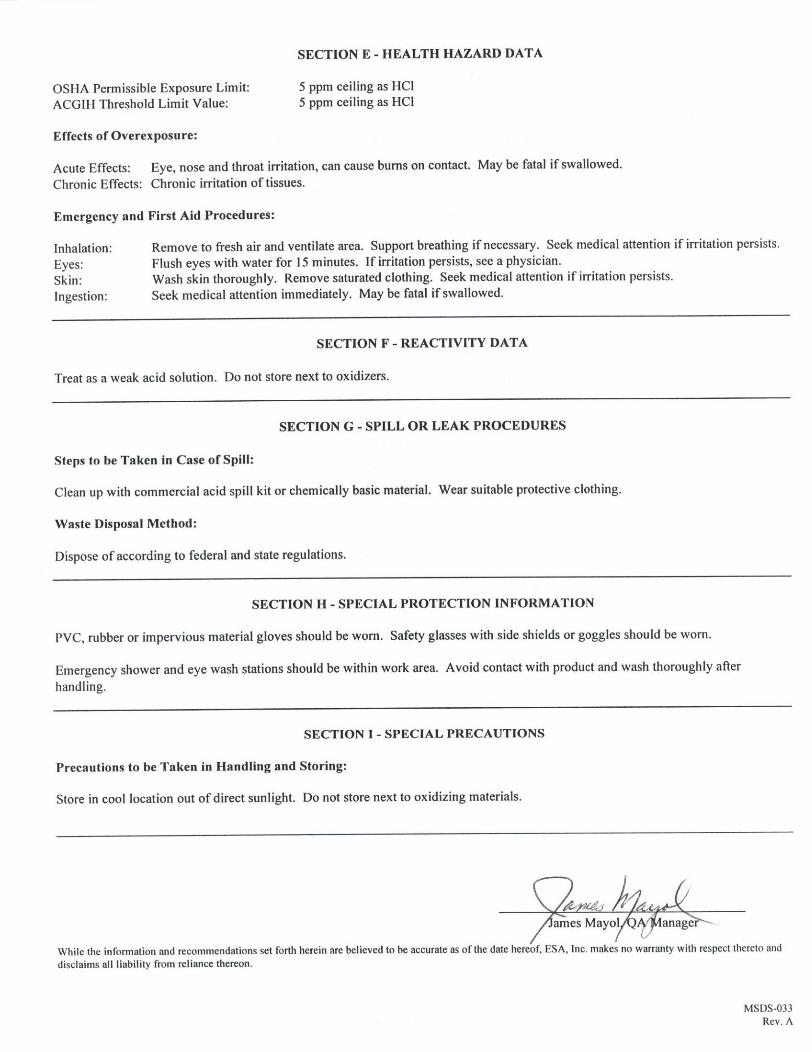

Index A About calibration 2-3 blood lead testing 1-7 LeadCare II 1-7 Analyze the sample 3-6 Analyzer kit 1-3 B Before testing 1-1 Blood lead testing 1-12, 3-1 sample collection 1-12 C Calibrating the analyzer 2-1, 2-4 Calibration button 2-3 Calling ESA 5-1 Cleaning the analyzer 5-8 Collect blood 3-4 Connecting the analyzer to a printer A-1 Control test results above the target 5-5 below the target 5-4 D Definitions symbols 1-2 E Electrical specifications B-1
G Gather testing materials 3-3 H Handling and storage 4-1 How ESA assigns level ranges 4-5 LeadCare II works 1-7 often should you run test 4-2 to get help 1-12 I Important precautions 1-9 Installing batteries 1-5 Interference substances B-2 Interpreting control test results 4-4 patient test results 3-8 K Kit analyzer contents 1-3 test contents 1-4 L LeadCare II message display 3-2 List of figures iii M Maintaining the analyzer 5-8 Maintenance 5-1 Material safety data sheets (MSDS) D-1 Mix with treatment reagent 4-2 More information 1-11
LeadCare® II User's Guide I-1

O Operating requirements 1-8, B-2 Other LeadCare II documents ii specifications B-1 Overview of the testing procedure 3-1 P Performance characteristics B-1 Physical dimensions B-1 Precaution 3-2 symbols 1-2 testing a patient sample 1-10 when performing qc testing 1-11 when preparing samples 1-9 Preface i Prepare sample 3-5, 4-2 Printing test results 3-9 Product information 1-12 Q Quality control procedure 4-1 R Reading the analyzer display 1-9 References 3-9 Required materials 3-2 Retesting guidelines 3-8 Revision history ii Registering the analyzer 1-4 S Screen display messages 5-7 Setting up the analyzer 1-5 Specifications B-1 Steps for collecting blood sample C-1 Storage and handling 4-1 ranges B-2 Summary of display messages 5-6 System operating ranges B-2
T Test 4-3 kit 1-4 Testing controls 4-2 procedure 3-3 Troubleshooting ii, 5-1 above the target 5-3 below the target 5-2 Turning the analyzer on/off 2-2 U Unpacking the analyzer 1-3 Using analyzer w/power cord 1-5 control materials 1-11 W Warranty card 1-4 What is the blood lead analyzer 1-7 lead control 4-1 Why calibration is important 2-3 Work area 1-5
I-2 LeadCare® II User's Guide