learn embedded linux by building a vending machine device · cross-toolchain gcc, binutils, gdb...
TRANSCRIPT

Learn Embedded Linux by Building
a Vending Machine Device
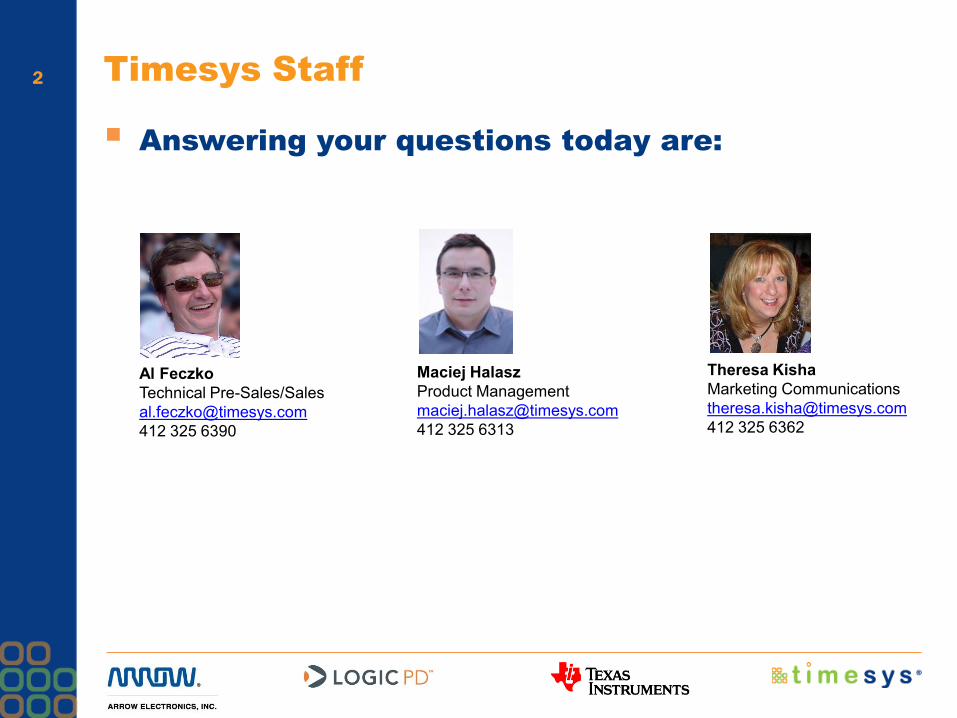
2 Timesys Staff
Answering your questions today are:
Maciej Halasz
Product Management
412 325 6313
Al Feczko
Technical Pre-Sales/Sales
412 325 6390
Theresa Kisha
Marketing Communications
412 325 6362

3 We Are Building a …

4 We Are Building a …
Coffee Vending Machine!

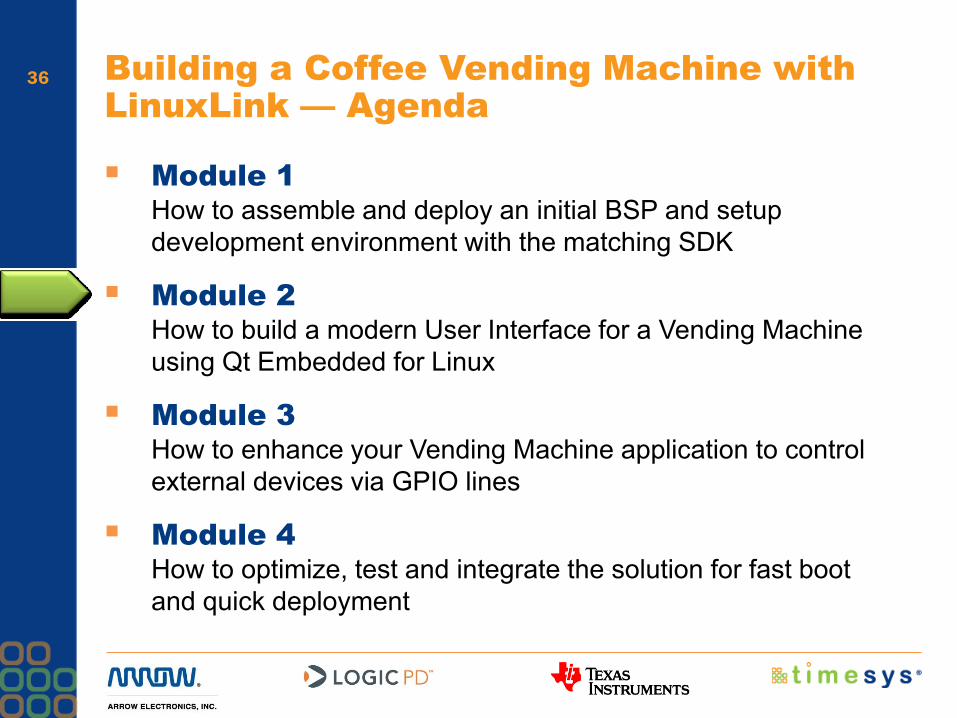
5 Building a Coffee Vending Machine with
LinuxLink — Agenda
Module 1
How to assemble and deploy an initial BSP and setup
development environment with the matching SDK
Module 2
How to build a modern User Interface for a Vending Machine
using Qt Embedded for Linux
Module 3
How to enhance your Vending Machine application to control
external devices via GPIO lines
Module 4
How to optimize, test and integrate the solution for fast boot
and quick deployment

6 Module 1
Your Development Environment
Embedded Linux Primer
Where do I start my Linux design — Product
Requirements
Assemble a custom BSP using the
LinuxLink Web Edition
• Reflect product requirements
• Produce complete Linux design
• Learn how to find information
Application/System Development environment
setup with an SDK
Deploy the images on the
LogicPD DM3730 Torpedo SOM

7
Your Development Environment:
Session Hardware/Software
Requirements

8 What We Need to Build Our Product
A Host Machine
• Linux is the best – any recent version is ok
• Windows is fine, but you’ll need a VirtualBox with a Linux installation
Cross-development environment
Linux source code for the product
• Bootloader
• Linux kernel
• APIs
Various Linux utilities
e.g. mkimage
IDE with WYSIWYG for
faster development
A Development Kit

9 Your Workstation Setup
Development
Environment
• Cross tools
• IDE
Exercises
USB
Ethernet/Serial

10 Having Fun Yet?
Question bucket
Rules: For every correct answer you can draw a
price from our surprise bucket
First person who completes each individual exercise
gets a prize

11
Embedded Linux Primer

12 Embedded Linux Reference Model
Middleware and Application Services
UI NetworkingNetworking
Security Reliability
LCDHW
accel.SD USB more
Linux kernel Driver Driver Driver Driver more
Application 1 Application 2Third-Party Application
Application (e.g. Base Station Control) App Features
SOCBoard
Target Host
Hundreds of APIs from Open
Source and Proprietary
Reliability
Development Tools
• Cross-Development
Environment (SDK)
• IDE
• Application Debugging
• Build System (e.g. Factory)
• RFS, Kernel, App
• Collaborative Development
• Profiling
• Tracing
• System Management
• Target Images
• Binaries Deployment
• Target Management
Ap
plic
ation
Syste
m
Hard
wa
reS
oft
wa
re
Virtualization
• KGDB/ printk Debugging
• JTAG
• SMP support, RT
enhancements
Bootloader Driver Driver Driver Driver more
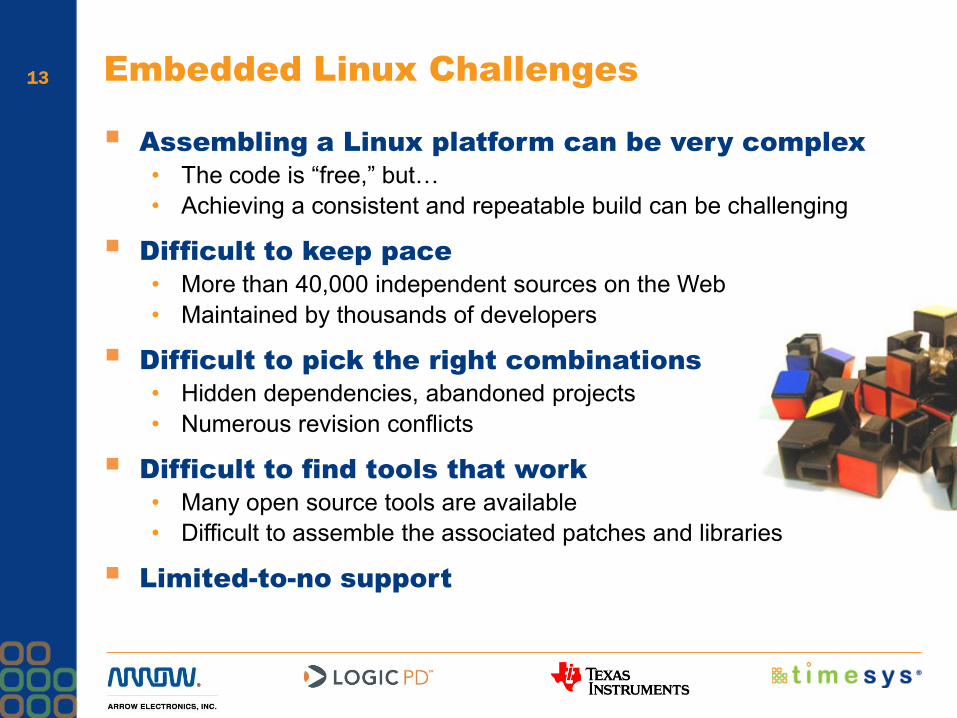
13 Embedded Linux Challenges
Assembling a Linux platform can be very complex
• The code is ―free,‖ but…
• Achieving a consistent and repeatable build can be challenging
Difficult to keep pace
• More than 40,000 independent sources on the Web
• Maintained by thousands of developers
Difficult to pick the right combinations
• Hidden dependencies, abandoned projects
• Numerous revision conflicts
Difficult to find tools that work
• Many open source tools are available
• Difficult to assemble the associated patches and libraries
Limited-to-no support

14
Hardware
Bootloader
Device A Device B
Linux Kernel
Device A Device C
Root Filesystem
Packages Scripts
User Application(s)
Typical Linux System Structure
Power On
Flash init
U-bootHardware Init
U-bootCopies kernel to
memory/uncompress
Kernel BootHardware/Subsystems
initialization
RFSFetch/Mount/Boot into
User Application
Boot Process SequenceT
IME
Boot Process in Brief

15
Product Requirements — Where
Do I Start My Linux Development?

16 Requirements – First Glance
Coffee Vending Machine Features:
GUI with the following features:
• Coffee selection screen
• Purchase screen
• Coffee brewing screen
Interaction with external devices via GPIO
• Coffee Dispensing — Onboard connected LED
Multithreaded implementation (optional)
Early user communication (splash screen)
Boot fast from external SD card

17 Project Requirements (LogicPD DM3730)
• Serial port
communication
• EEthernet
• Secure Connection
• Transfer (FTP/SCP)
• Console (Telnet/SSH)
• Graphics
• Touchscreen
• Applications
• Calibration
• UI
• SD Card
• Filesystem
• Boot
• NAND Flash
• Storage
• Input Action
• Button• Output Action
• LED

18
U-Boot bootloader
Coffee Vending Machine (Blueprint)
Middleware
shell
DM3730
USB
Touch
ScreenLCD
Linux kernel
Coffee Vending Machine
Pay -
TransactionUser Interface, Buttons, Stream sel, etc
SDIONAND
Button
Network control
interfaceAuto-
launch
Qt Embedded
Driver Driver
networking
Wireless tools
openssh
DriverDriver DriverDriver
sysfs
Splash
Screen
setup
scripts
Ethernet
Driver Driver
Serial
Brew
Coffee
LCD
calibration
LED
setup
script
setup
script

19
Exercise 1:
Assemble a Custom BSP Using the
LinuxLink Web Edition

20 LinuxLink Architecture

21 Exercise Details
Identify the initial set of requirements:
• All needed software to simply boot a reference board
• Build a BSP for development
Build a custom BSP and a matching SDK
• Use LinuxLink Web Interface
Starting with a small Linux
design and building it up
per your requirements
provides you with a small
embedded design with only
the features you need.

22 Account Login info
We have accounts setup specifically for Timesys
University
• https://linuxlink.timesys.com
• Login with the following credentials:
U: labuserX where X is 1-20
P: lab123
You can register for a free personal account
• http://www.timesys.com/register

23 Requirements Helper
Feature What I need Where to select
Linux kernel Latest, 2.6.3x kernel Linux kernel
Cross-Toolchain GCC, Binutils, GDB Toolchains
C Library glibc Toolchains
Touch screen tslib Packages
Qt qt-embedded-linux Packages
Networking dropbear Packages
System initialization busybox Packages

24
Application/System Development
Environment Setup with an SDK

25 Embedded Linux Reference Model
Middleware and Application Services
UI NetworkingNetworking
Security Reliability
LCDHW
accel.SD USB more
Linux kernel Driver Driver Driver Driver more
Application 1 Application 2Third-Party Application
Application (e.g. Base Station Control) App Features
SOCBoard
Target Host
Hundreds of APIs from Open
Source and Proprietary
Reliability
Development Tools
• Cross-Development
Environment (SDK)
• IDE
• Application Debugging
• Build System (e.g. Factory)
• RFS, Kernel, App
• Collaborative Development
• Profiling
• Tracing
• System Management
• Target Images
• Binaries Deployment
• Target Management
Ap
plic
ation
Syste
m
Hard
wa
reS
oft
wa
re
Virtualization
• KGDB/ printk Debugging
• JTAG
• SMP support, RT
enhancements

26 Embedded Linux Reference Model
Middleware and Application Services
UI NetworkingNetworking
Security Reliability
LCDHW
accel.SD USB more
Linux kernel Driver Driver Driver Driver more
Application 1 Application 2Third-Party Application
Application (e.g. Base Station Control) App Features
SOCBoard
Target
Hundreds of APIs from Open
Source and Proprietary
Reliability
Ap
plic
ation
Syste
m
Hard
wa
reS
oft
wa
re
Virtualization
Host
Development Tools
• Cross-Development Environment (SDK)
• IDE
• Application Debugging
• Build System (e.g. Factory)
• RFS, Kernel, App
• Collaborative Development
• Profiling
• Tracing
• System Management
• Target Images
• Binaries Deployment
• Target Management
• KGDB/ printk Debugging
• JTAG
• SMP support, RT enhancements

27 Development Environment Setup
Runtime images
Can be used to run
Linux on the target
Software Development
Kit (SDK)
• Install on your host PC
Desktop Factory tools
• Install on your host PC
Can find instructions
for how to setup the
board
The SDK will setup your complete Linux cross-development
environment including: - Compiler
- APIs header files and libraries

28
Exercise 2:
Setup Your Application
Development Environment

29 Exercise Details
Setup your own development environment
• Cross-toolchain
• IDE
• Libraries and header files
The goal
• Easily develop your value add software
30 Exercise Details
Install an SDK from a build output
For your convenience the SDK has been downloaded
for you
• /media/<USB key number>/TSU-LAB/exercise_2
Install it with the command:
• sh <SDK name.sh>
Look at a directory structure
Verify toolchain with command:
• <fully qualified path to toolchain’s gcc> -###
The installed version
is also available under:
[TSU-LAB]/SDK

31
Exercise 3:
Deploying Linux Using NFS

32 Exercise Details
Run the custom BSP on the target
• U-Boot bootloader
• Linux kernel
• Network mounted RFS
The goal
• Easily modify all aspects of your RFS
• Easily deploy and test your application

33 Exercise Details
Services already preset for you
• NFS server
• DHCP server (local subnet)
• TFTP server (/tftpboot)
• Timesys offers getting started guides to walk you through the process
Load U-boot
losh> ifconfig sm0 dhcp //get an ip address from your dhcp server
losh> load elf /tftp/10.0.0.1:u-boot //load u-boot image using tftp
losh> exec - //run u-boot
Setup U-Boot environment to load/run a Linux kernel
> setenv bootfile uImage //image to load
> setenv ipaddr 10.0.0.10 //your local IP
> setenv serverip 10.0.0.1 //server IP
> saveenv //store variables in NAND
> Setenv rootpath <rfs full path> //specify path to nfs exported rfs
> run nfs boot //boot the image using pre-set command

34 Module 1 — Summary
Learned about the DM3730 LinuxLink – needed
for all exercises
Reflected initial product requirements in
Linux BSP and SDK
Built a custom BSP with LinuxLink Web Edition
• Experiment with a pre-built starting point
Setup a development environment
• System level development and optimizations
• Development of a value-add software (applications)
Deployed the system on the target via NFS for
future development
• Transferred images
• Configured bootloader
35 Module 1 — Quiz
1. With LinuxLink, what do you need to know before
you start your initial design?
2. Are you locked into a kernel version when using
LinuxLink?
3. What are the benefits of using LinuxLink?
(name at least 1)
4. How soon can you start your application
development?
36 Building a Coffee Vending Machine with
LinuxLink — Agenda
Module 1
How to assemble and deploy an initial BSP and setup
development environment with the matching SDK
Module 2
How to build a modern User Interface for a Vending Machine
using Qt Embedded for Linux
Module 3
How to enhance your Vending Machine application to control
external devices via GPIO lines
Module 4
How to optimize, test and integrate the solution for fast boot
and quick deployment

37 Module 2
Modify the underlying Linux image to support Qt
Qt development tools installation/setup
Coffee Vending Machine – GUI development
• Create a QMainWindow application
• Use a number of Qt widgets including
• QPushButton
• QLabel
• Layouts and more
• Add a custom widget for the clock
• Create a resource file
• Test your application locally
• Cross-compile for the DM3730 target

38
U-Boot bootloader
Coffee Vending Machine (Blueprint)
Middleware
shell
DM3730
USB
Touch
ScreenLCD
Linux kernel
Coffee Vending Machine
Pay -
TransactionUser Interface, Buttons, Stream sel, etc
SDIONAND
Button
Network control
interfaceAuto-
launch
Qt Embedded
Driver Driver
networking
Wireless tools
openssh
DriverDriver DriverDriver
sysfs
Splash
Screen
setup
scripts
Ethernet
Driver Driver
Serial
Brew
Coffee
LCD
calibration
LED
setup
script
setup
script
39
Adding APIs/Libraries Using the
LinuxLink Desktop Interface

40 LinuxLink Value Proposition
Advanced Customization (all aspects of your
Linux platform)
‘Factory’ – Only easy to use, innovative Build
System with:
• Advice engine — recommends software based on your hardware and application requirements
• Update engine — automatic updates for your custom configuration
‘Build up’ vs. strip down
to small distribution
Affordable –
costs ~40% less
Build Repeatability
Easy Extensibility

41 LinuxLink Architecture

42
Exercise 4:
Enhance Your Design Locally
By Adding Required Packages

43 Exercise Details
Find Desktop Factory under:
• /home/labuser/LAB/factory
Look at the help screen
by running make help
Bring up a configuration screen
• make menuconfig
Familiarize yourself with Desktop Factory data
organization
Locate and select two missing packages
Click the TSU-LAB
icon on the desktop

44 Requirements Helper
Feature What I need Where to select
Linux kernel Latest, 2.6.3x kernel Linux kernel
Cross-Toolchain GCC, Binutils, GDB Toolchains
C Library glibc Toolchains
Touch screen tslib Packages
Qt qt-embedded-linux Packages
Networking dropbear Packages
System initialization busybox Packages

45
Qt Development Tools
Installation/Setup

46 Qt Development Tools
Options
• TimeStorm with Qt https://linuxlink.timesys.com
• Qt Creator http://www.qt.nokia.com
Installation
• Downloaded from your LinuxLink account
• Uncompressed with
tar xzvf timestorm.tar.gz
• Preinstalled in your VirtualBox
Run
• Export your QMAKESPEC variable and point it to linux-timesys-g++ in the SDK
• Execute TimeStorm binary
• Done in a script

47
Host PC/Linux
IDE and Cross-Environment
TimeStorm
LinuxLink
Desktop Interface
Recognizes
Automatically

48
Coffee Vending Machine –
GUI Development

49 The Qt Story
The Qt toolkit is a multi-platform C++ GUI toolkit
(class library)
Developed by Troll Tech AS, later acquired by Nokia
Qt is licensed under dual license:
• LGPL
• Commercial (mostly if you plan to extend Qt and sell it)
Around 1997, Qt was chosen as the code basis for
the KDE Linux desktop environment
Latest version — Qt 4.7.4 is available for Windows,
Unix, Linux, Embedded Linux, Mac OS X libraries
and Symbian OS
Recent additions include:
• Qt Quick (programming with QML)
• Target form factor simulator (cell phones)

50 Widgets
Base class for all UI widgets
• QPushButton, QLineEdit, QTabView, …
Properties
• width, height, backgroundColor, font, mouseTracking, backgroundPixmap, etc.
Slots
• repaint, show, hide, move, setGeometry, setMainWidget, etc.
Signals
• mouseMoveEvent, keyPressEvent, resizeEvent, paintEvent, enterEvent, leaveEvent, etc.

51 Event Handling
Qt’s approach to IPC: signals and slots
• A widget sends out various signals
• Object methods can be declared as slots
• Compatible signals and slots can be connected or plugged together (parameter types must match!!!)
Clear UI/Logic separation
• This separation between UI components and program elements lends itself to component-based programming

52 Signals and Slots
http://doc.qt.nokia.com/latest/signalsandslots.html

53 Signals and Slots (cont.)
#include <QObject>
class Counter : public QObject {
Q_OBJECT
public:
Counter() { m_value = 0; }
int value() const { return m_value; }
public slots:
void setValue(int value);
signals:
void valueChanged(int newValue);
private: int m_value;
};

54 qmake
The qmake utility is typically invoked with the
following commands:
• qmake – project
• qmake
IDE tools invoke qmake automatically
Rules:
• Be sure to place code in its own directory.
• qmake scans all subdirectories for dependencies.
• Looks at the .pro file and generates Makefile structure

55 Events – Triggered by Signals
Signals: emit events
• declare as signals
• You don't implement them, you send them with the keyword ―emit‖– e.g. emit(counterAtZero(100))
Slots: receive and handle events
• Normal member functions declared as slots
Connect: must connect signals to slots
• QObject::connect( Object 1, SIGNAL(activated(int)), Object 2, SLOT(handlingMethod(int)) );

56 Other Qt features
QtCore Core non-graphical classes used by other modules
QtGui Graphical user interface (GUI) components
QtMultimedia Classes for low-level multimedia functionality
QtNetwork Classes for network programming
QtOpenGL OpenGL support classes
QtOpenVG OpenVG support classes
QtScript Classes for evaluating Qt Scripts
QtScriptTools Additional Qt Script components
QtSql Classes for database integration using SQL
QtSvg Classes for displaying the contents of SVG files
QtWebKit Classes for displaying and editing Web content
QtXml Classes for handling XML
QtXmlPatterns An XQuery & XPath engine for XML and custom data models
QtDeclarative An engine for declaratively building fluid user interfaces.
Phonon Multimedia framework classes
Qt3Support Qt 3 compatibility classes

57 Qt Application Structure
.pro file
• Holds information on all files that will be used to build a predefined executable(s)
• Used by qmake to generate Makefiles for your project
.ui file
• User Interface file
• Can open in a designer view
• Has canvas on which you can drag and drop widgets
• Its XML format is translated into C file (moc_) at compile time
.qrc file
• Holds information on all resources (non C++ code) used
• Referenced throughout the project e.g. QPushButton icons
.qss file
• Used to define a style sheet for a custom look and feel
• Loaded at runtime by your application
58
Exercise 5:
Create a GUI application with
TimeStorm and Qt

59 Coffee Vending Machine Application
Start TimeStorm
• Native configuration (select this option – desktop icon)
• Cross configuration
Create a new Workspace
• Save it to your USB key /media/<USB key number>
Create a new Qt GUI Project
• UI Type – QMainWindow
• Don’t need to select any additional Qt frameworks
Create the following components
• Remove menu bar and status bar
• Use layouts
• Add 3 additional GUI Qt classes
• Preset the size of all UIs to 480x272 (will help you see actual design)
• Design UIs on all three screens
Solution can be
found in
Exercise 5 folder

60
Exercise 6:
Develop Logic Behind the GUI

61 Coffee Vending Machine Application
Define/Connect signals (Button)
• Add code for an Espresso Coffee Button
• Capture the signal in a service class
• Implement the service routine (copy/paste from Coffee routine)
Define/Connect signals (Inter-Object)
• Manually connect 2 separate objects
In CoffeeBrewing class constructor
ACDisplay* disp = (ACDisplay*)(ui->brewingWidget);
connect(disp->returnDisplayItem(), SIGNAL(counterAtZero()), this, SLOT(counterDone()));
• Emit the signal
In CountdownDisplayItem::updateTime() function, append at the end
if(secs >0 & secs < 2) //when the countdown timer reaches 1 sec, emit a signal
{
emit counterAtZero();
}
• Service routine is already implemented

62 If we have time …
Add an icon on the Espresso button
• Image already added to your resource file
Look under exercise 6 solutions for full
implementation
Cross compile by launching TimeStorm cross and
by using the solution code
The design also includes the following:
• Custom Style Sheet
• Third-party classes for the clock and the countdown timer

63 Module 2 — Summary
Used LinuxLink Desktop Edition interface
• Added needed packages and rebuilt the runtime BSP and SDK images
Used an IDE to design/develop Qt based UI
Developed a GUI with the following:
• Layers, Several Widgets and Labels
• Implemented signals and handlers
Cross-compiled for DM3730 target

64 Module 2 — Quiz
1. What is Qt?
2. What tools can you use to develop with Qt?
3. How do you trigger cooperation between objects
in Qt?
4. What is the purpose behind using Layers?

65 Building a Coffee Vending Machine with
LinuxLink — Agenda
Module 1
How to assemble and deploy an initial BSP and setup development
environment with the matching SDK
Module 2
How to build a modern User Interface for a Vending Machine using
Qt Embedded for Linux
Module 3
How to enhance your Vending Machine application to control
external devices via GPIO lines
Module 4
How to optimize, test and integrate the solution for fast boot
and quick deployment

66 Module 3
GPIO Primer
Setup GPIO lines to:
• Dispense coffee — LED
Add appropriate code to the UI application
Add a splash screen to a booting Linux kernel
Create auto startup scripts for the complete
system

67
U-Boot bootloader
Coffee Vending Machine (Blueprint)
Middleware
shell
DM3730
USB
Touch
ScreenLCD
Linux kernel
Coffee Vending Machine
Pay -
TransactionUser Interface, Buttons, Stream sel, etc
SDIONAND
Button
Network control
interfaceAuto-
launch
Qt Embedded
Driver Driver
networking
Wireless tools
openssh
DriverDriver DriverDriver
sysfs
Splash
Screen
setup
scripts
Ethernet
Driver Driver
Serial
Brew
Coffee
LCD
calibration
LED
setup
script
setup
script

68
GPIO primer

69 General Purpose IO
Lines are controlled by a device driver
Enable in a Linux kernel
• Use Linux configuration screen
make menuconfig
• Enable GPIO under
device drivers -> GPIO

70 SYSFS and GPIO – What Are They?
What is SYSFS
• Virtual in-memory file system
• Exports information about devices and drivers from the kernel device model to userspace
• Used for configuration of GPIO
GPIO-SYSFS
• User interface to the in kernel gpio framework
• Same interface no matter what platform you're developing for
• Deals with pins strictly one at a time
• Available in all mainline kernels from 2.6.27 onwards

71
Exercise 7:
Enabling GPIO

72 Enabling GPIO
Lines are controlled by a device driver
Enable in a Linux kernel
• Navigate to [TSU-LAB]/factory
• Use Linux configuration screen
make menuconfig
• Enable GPIO under
device drivers -> GPIO
device drivers -> GPIO -> SYSFS
You can reconfigure all aspects of the Linux kernel —
frequently used when moving to a custom hardware

73
GPIO Lines Setup
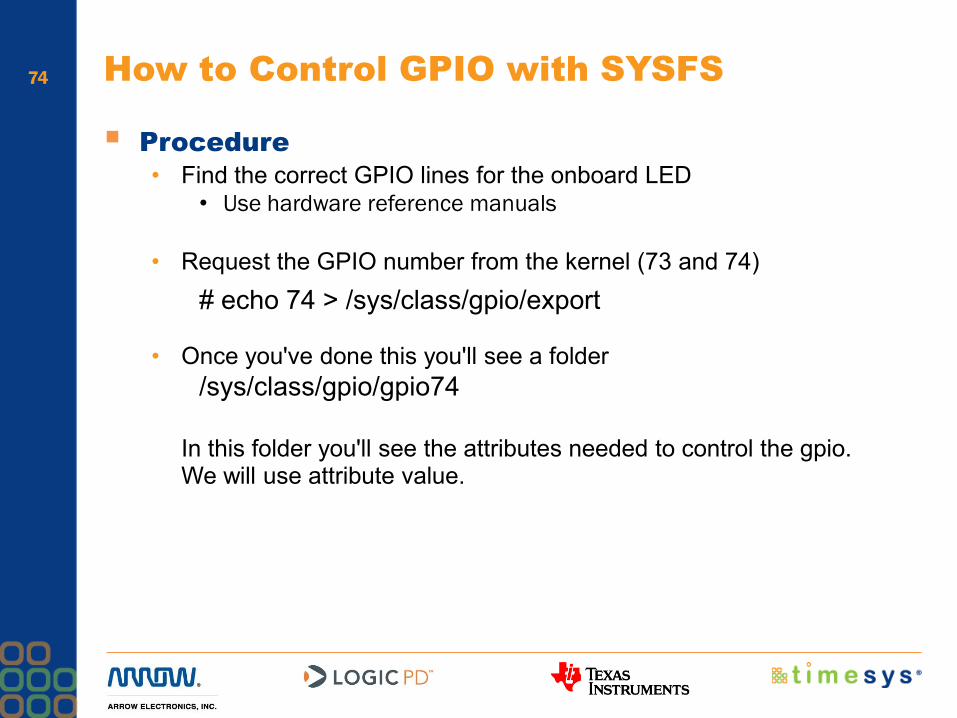
74 How to Control GPIO with SYSFS
Procedure
• Find the correct GPIO lines for the onboard LED• Use hardware reference manuals
• Request the GPIO number from the kernel (73 and 74)
# echo 74 > /sys/class/gpio/export
• Once you've done this you'll see a folder
/sys/class/gpio/gpio74
In this folder you'll see the attributes needed to control the gpio. We will use attribute value.

75 How to Control GPIO with SYSFS (Cont’d)
Procedure
• Set the direction for each GPIO by writing one of "in", "out", "high" or "low" to your gpio's direction attribute. "low" and "out" have the same effect, to change the pin to an output which is initially low. "high" changes the pin to an output which is initially high. "in" changes the pin to an input.
# echo out > /sys/class/gpio/gpio74/direction # cat /sys/class/gpio/gpio74/direction
• Control the GPIO state (LED on/off) by writing ―0‖ or ―1‖ to the value file
# echo 1 > /sys/class/gpio/gpio74/value
• Set links for your application

76
Exercise 8:
GPIO Setup
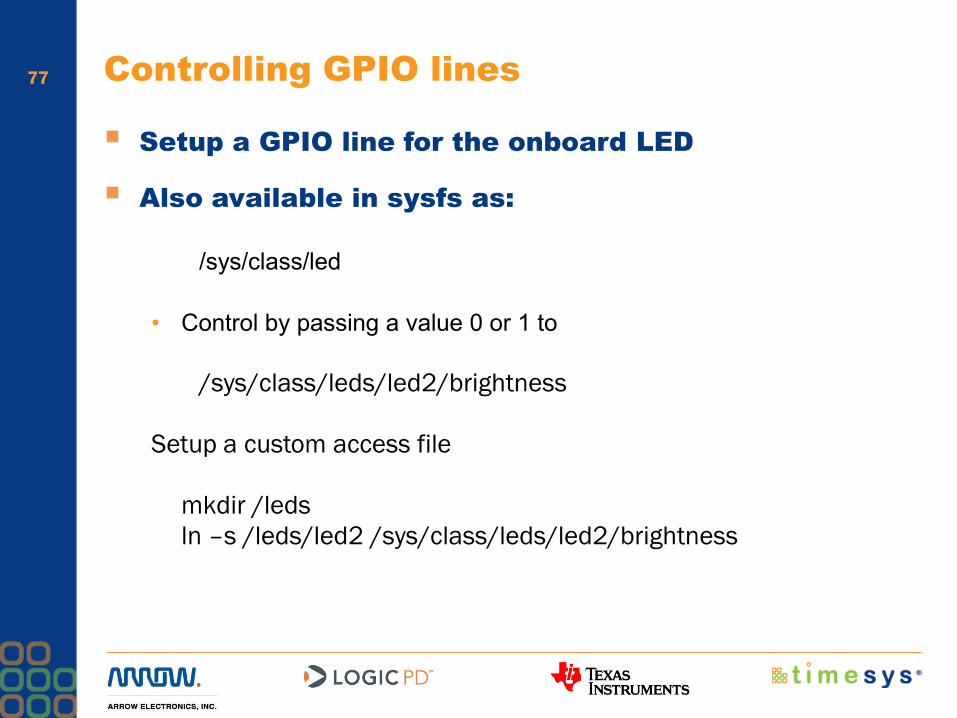
77 Controlling GPIO lines
Setup a GPIO line for the onboard LED
Also available in sysfs as:
/sys/class/led
• Control by passing a value 0 or 1 to
/sys/class/leds/led2/brightness
Setup a custom access file
mkdir /leds
ln –s /leds/led2 /sys/class/leds/led2/brightness

78
Exercise 9:
Linux Kernel Patching
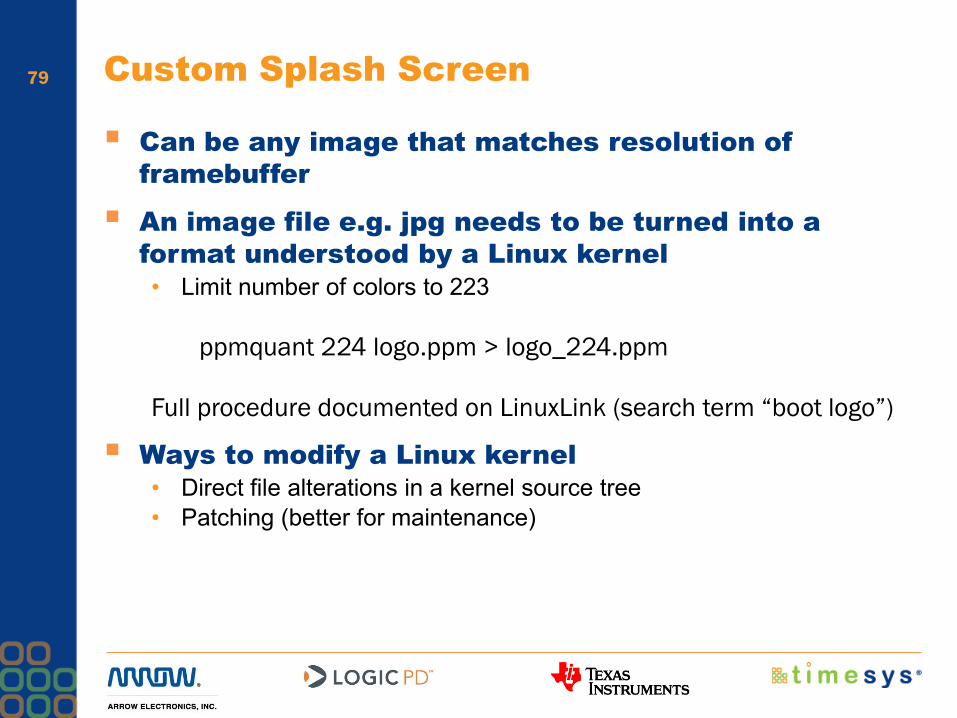
79 Custom Splash Screen
Can be any image that matches resolution of
framebuffer
An image file e.g. jpg needs to be turned into a
format understood by a Linux kernel
• Limit number of colors to 223
ppmquant 224 logo.ppm > logo_224.ppm
Full procedure documented on LinuxLink (search term “boot logo”)
Ways to modify a Linux kernel
• Direct file alterations in a kernel source tree
• Patching (better for maintenance)

80 Custom Splash Screen (Cont’d)
A Linux kernel patch has been created for you
already (see exercise 9 folder)
Apply the patch manually
• Navigate to your Linux kernel directory and execute the following command:
patch p0 < <full path to the patch>
Can be automated via LinixLink Desktop Edition
• Copy your patch to the Desktop Factory src directory for the kernel
• Using factory configuration screen, add your custom patch at the end of the patches field

81 Autoboot
Create a custom SXX startup script in /etc/init.d/
• Export QWS and TSLIB variables
• Start the Coffee Vending application
Create an overlay that includes the following:
• Custom startup script
• Coffee Vending Machine application
• GPIO setup scripts
• Create a tar file with overlay directory structure
Using desktop factory merge the overlay into the
system’s RFS
• Using Desktop Factory Interface navigate to:
• Target Configuration->Build RFS->RFS Content Tarball
file:///<fully qualified path to the overlay tarball
Checkout the overlay under Extra Exercises

82 Module 3 — Quiz
1. What is GPIO?
2. How do you enable GPIO?
3. What is SYSFS?
4. Can I use SYSFS to pass data to/from Linux kernel?

83 Building a Coffee Vending Machine with
LinuxLink — Agenda
Module 1
How to assemble and deploy an initial BSP and setup
development environment with the matching SDK
Module 2
How to build a modern User Interface for a Vending Machine
using Qt Embedded for Linux
Module 3
How to enhance your Vending Machine application to control
external devices via GPIO lines
Module 4
How to optimize, test and integrate the solution for fast boot
and quick deployment

84 Module 4
How to measure boot time in our dev environment
Fast boot optimizations
• Boot process overview
• Bootloader optimizations
• Kernel level optimizations
• Filesystem optimizations
• Other options
Deployment
• SD card preparations

85
Boot time Measurement

86 Measuring the boot time
Each embedded design is different
Instrumentation is available
• Helps measure boot time at all stages
• Most are open source based
• Can be easily removed when you are done
The trick behind boot time optimization is to know where your
system is spending time.
You may end up loosing a lot of time with little results!!!
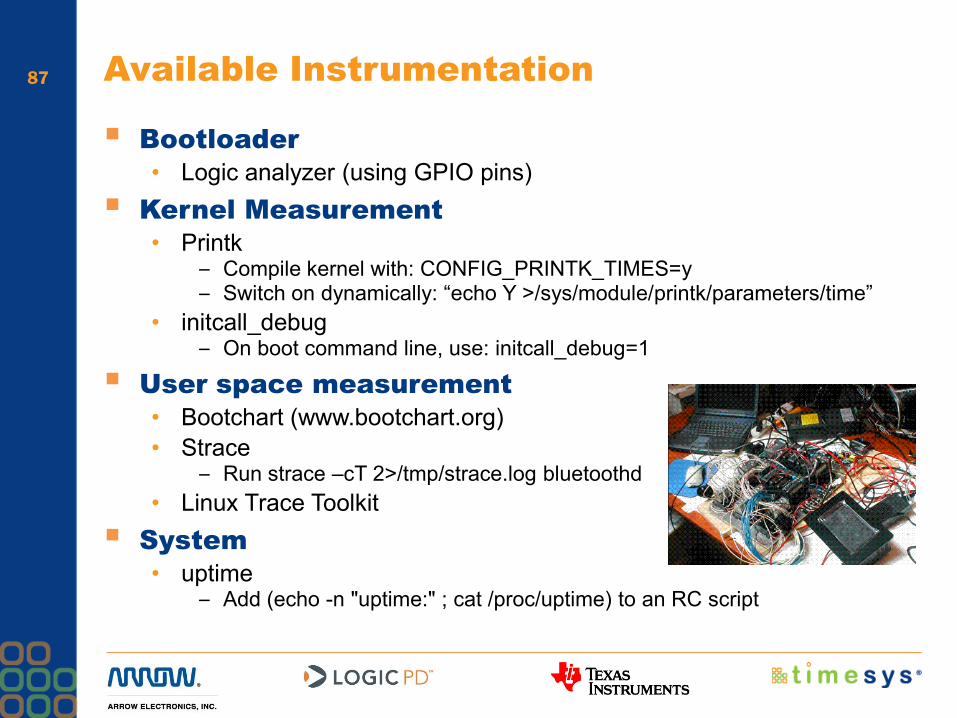
87 Available Instrumentation
Bootloader
• Logic analyzer (using GPIO pins)
Kernel Measurement
• Printk– Compile kernel with: CONFIG_PRINTK_TIMES=y– Switch on dynamically: ―echo Y >/sys/module/printk/parameters/time‖
• initcall_debug– On boot command line, use: initcall_debug=1
User space measurement
• Bootchart (www.bootchart.org)
• Strace– Run strace –cT 2>/tmp/strace.log bluetoothd
• Linux Trace Toolkit
System
• uptime– Add (echo -n "uptime:" ; cat /proc/uptime) to an RC script
88
Fast boot Optimizations

89 Boot Process Overview
U-Boot
• Reset, copy U-Boot to SDRAM and jump to start address
• Basic System Init. (IMPORTANT)
• Copy the Linux kernel Image to SDRAM from SD
• Decompress the kernel if needed
• Jump to upload address and start the kernel
Kernel
• Run Kernel Init code
• Init kernel subsystems (device drivers)
• Init SD card
• Mount SD card partition with RFS
• Execute init script
Application
• Depends on your specific requirements
Power On
Flash init
U-bootHardware Init
U-bootCopies kernel to
memory/uncompress
Kernel BootHardware/Subsystems
initialization
RFSFetch/Mount/Boot into
User Application
Boot Process SequenceTIM
E

90 Bootloader Optimizations
Low hanging fruit
• Set the bootdelay variable to 0 (time savings 4s)
• Preset the bootcmd; do not use setenv (time savings 0.5s)
• Disable console (time savings 2s)
– CFG_CONSOLE_INFO_QUIET
– CONFIG_SILENT_CONSOLE
– In our case- silent=yes
• Disable other tests (time savings 2-6s)
Additional modification/enhancements
• If possible, use uncompressed Linux kernel
• Optimize the NAND read operation, to shorten image copy time
• Rewrite/disable CRC32 checksum code
• Load the image directly to Entry point– Set CONFIG_LOADADDR
• If NOR Flash is used, leverage XIP
• For large kernel image, use different compression algorithms
Boot Time<1s 75s

91 Linux Kernel Optimizations
Low hanging fruit (time savings: 2-15+s)
• Use uncompressed kernel
– Uncompressing takes time
• Remove unused kernel options
– Not used networking i.e. IPV6, multiple file systems
– Debug features and symbols (for final deployment)
• Build not initially used device drivers as Loadable Kernel Modules
– Keep the features needed at boot time built into the kernel
– Remaining drivers built as LKMs will make kernel smaller
• Consider various approaches for your RFS deployment
– JFFS2 with appended journal summary (skip flash scan)
– CRAMFS, UBIFS
• Suppress the console output
– Use ―quiet‖ with your kernel command line
Boot Time<1s 75s

92 Making Linux Kernel Small and Fast
Linux kernel options we will look at today
Kernel Option Comment
CONFIG_EMBEDDED Disables or tweaks a number of kernel options and
settings. Think uClinux
CONFIG_IKCONFIG Saves complete kernel configuration in the kernel
CONFIG_KALLSYMS Prints our symbolic crash information and
backtraces
CONFIG_BUG Disables BUG and WARN functions
CONFIG_HOTPLUG Can be disabled if no external devices will be
attached and if you use static device files
CONFIG_DNOTIFY File change notification to user space
CONFIG_EXT2 Disable if using jffs2 file system
CONFIG_PRINTK Makes kernel silent when disabled
CONFIG_PRINTK_TIME A way to track where time is spent at boot time
CONFIG_CC_OPTIMIZE_FOR_SIZE Will select –Os instead of –O2 resulting in a
smaller kernel

93 Userspace Optimizations
Filesystem modifications
• Optimize the RC Scripts (remove the ones you don’t use)
• If possible replace RC scripts with a single init
• Pre-link
• Link applications statically
• Avoid udev – create needed device nodes ahead of time
• Use static IP address
Filesystem modifications
• Staged booting
• Code level modifications
• Add a splash screen
Boot Time<1s 75s

94 Fast Boot Offering from Timesys
If your requirements include fast booting, Timesys
can help you save time
Implement added levels of optimizations with open
source techniques
• Some of the deep-level optimizations techniques, described earlier
Use non open source technologies available to
Timesys to further speed up the boot-time
• Typically needed when many services have to be up and running asap
This engineering experience is available as a
service

95
Deployment:
SD Card
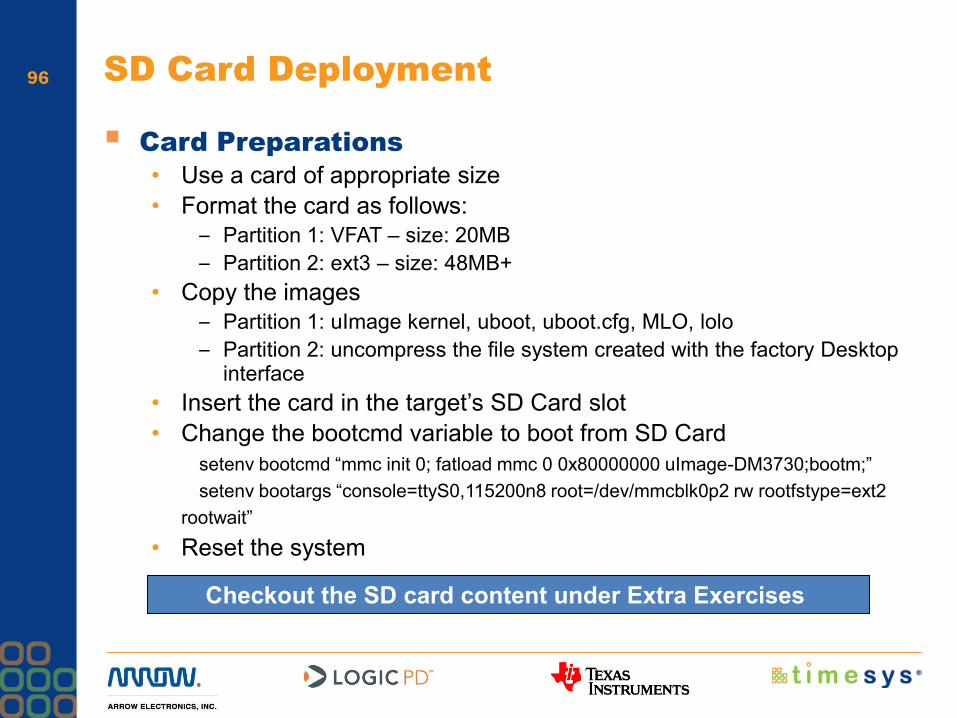
96 SD Card Deployment
Card Preparations
• Use a card of appropriate size
• Format the card as follows:
– Partition 1: VFAT – size: 20MB
– Partition 2: ext3 – size: 48MB+
• Copy the images
– Partition 1: uImage kernel, uboot, uboot.cfg, MLO, lolo
– Partition 2: uncompress the file system created with the factory Desktop interface
• Insert the card in the target’s SD Card slot
• Change the bootcmd variable to boot from SD Card
setenv bootcmd ―mmc init 0; fatload mmc 0 0x80000000 uImage-DM3730;bootm;‖
setenv bootargs ―console=ttyS0,115200n8 root=/dev/mmcblk0p2 rw rootfstype=ext2
rootwait‖
• Reset the system
Checkout the SD card content under Extra Exercises

97 Module 4 — Quiz
1. Why is fast boot useful?
2. What knowledge is required to get under 10s?
3. Can one get to sub 2s boot time?
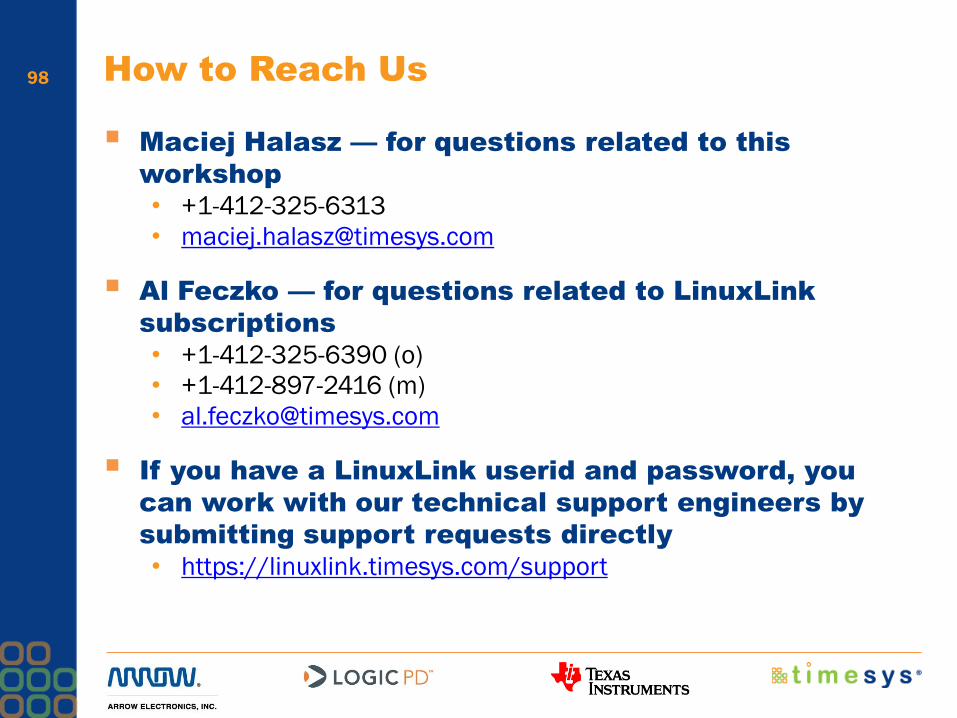
98 How to Reach Us
Maciej Halasz — for questions related to this
workshop
• +1-412-325-6313
Al Feczko — for questions related to LinuxLink
subscriptions
• +1-412-325-6390 (o)
• +1-412-897-2416 (m)
If you have a LinuxLink userid and password, you
can work with our technical support engineers by
submitting support requests directly
• https://linuxlink.timesys.com/support

99
Q&A