ledview firmware update guide
TRANSCRIPT
©Calibre UK Limited issue 2.51 November 2015
LEDView Firmware Update Guide
Version 2.51
Calibre UK Ltd Cornwall House, Cornwall Terrace Bradford, West Yorkshire BD8 7JS, England Telephone +44 (0)1274 394125 Fax + 44 (0)1274 730960 Email [email protected] Web-site www.calibreuk.com
©Calibre UK Limited issue 2.51 November 2015 Page 1
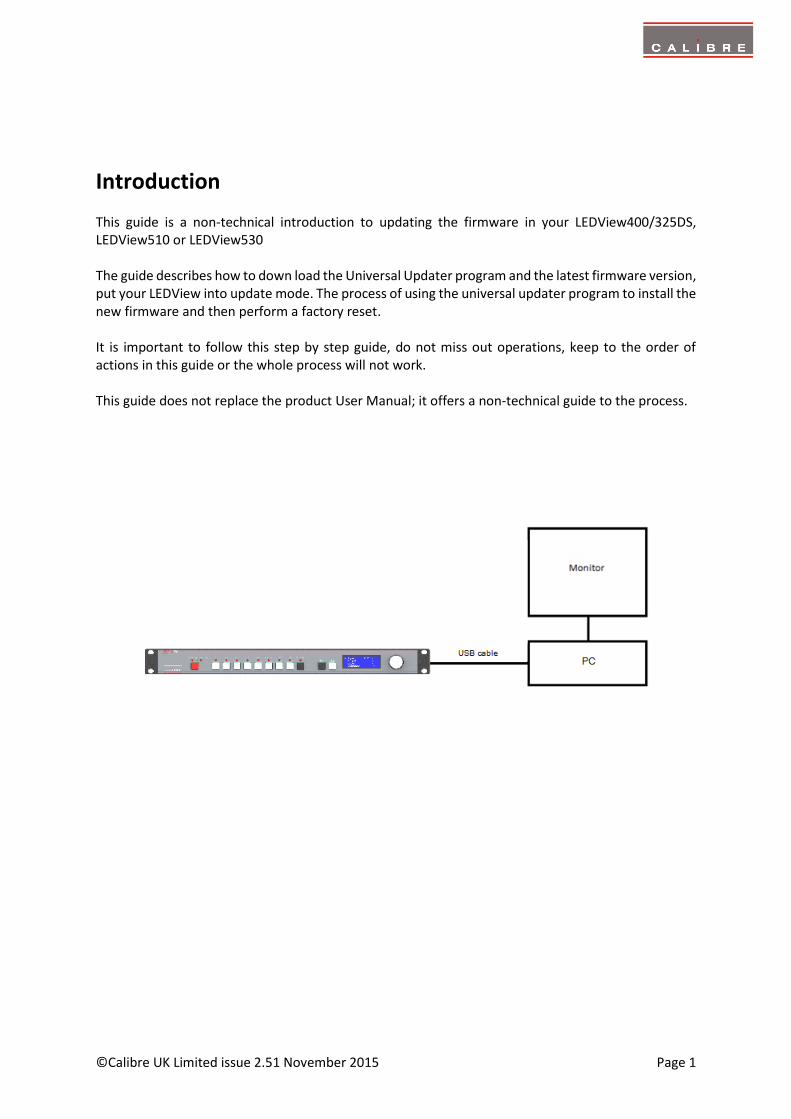
Introduction This guide is a non-technical introduction to updating the firmware in your LEDView400/325DS, LEDView510 or LEDView530 The guide describes how to down load the Universal Updater program and the latest firmware version, put your LEDView into update mode. The process of using the universal updater program to install the new firmware and then perform a factory reset. It is important to follow this step by step guide, do not miss out operations, keep to the order of actions in this guide or the whole process will not work. This guide does not replace the product User Manual; it offers a non-technical guide to the process.

©Calibre UK Limited issue 2.51 November 2015 Page 2
Configuration Back-up
Download Universal Updater program
Install Universal Updater
Back up Configuration
Download latest Firmware
Open Universal Updater
Browse to find Firmware
LEDView Update Mode
Connect USB
Update Firmware
Factory Reset
©Calibre UK Limited issue 2.51 November 2015 Page 3
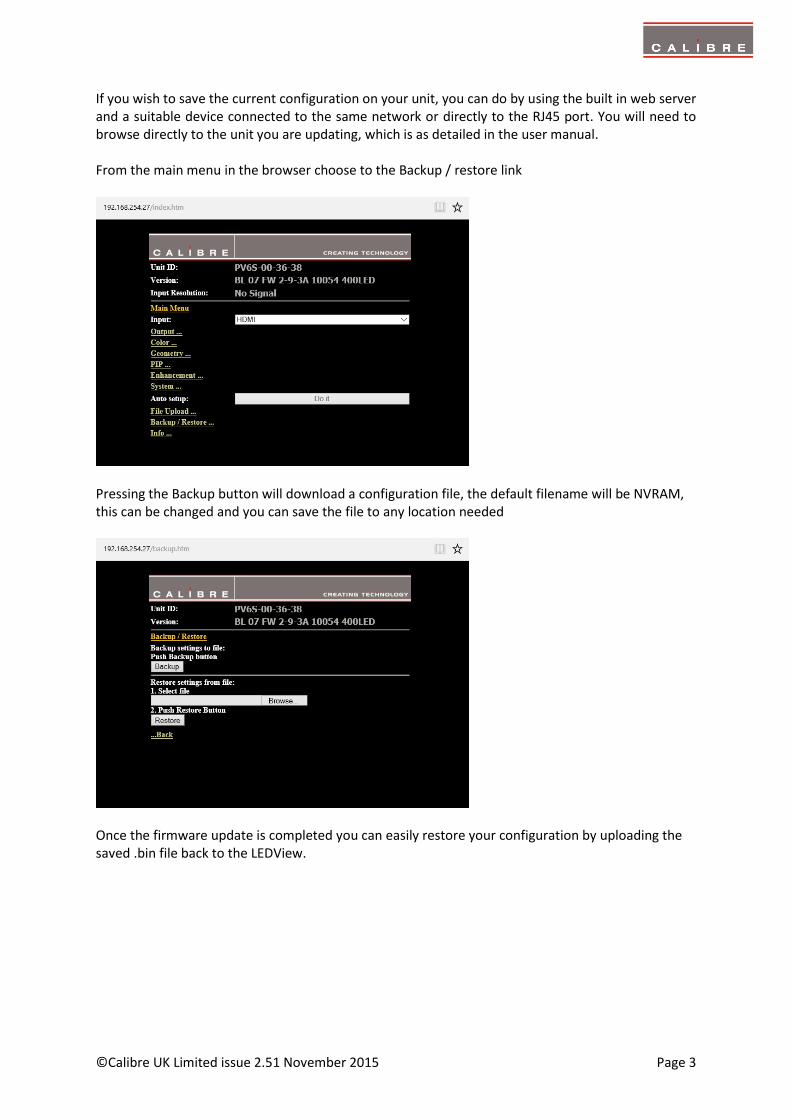
If you wish to save the current configuration on your unit, you can do by using the built in web server and a suitable device connected to the same network or directly to the RJ45 port. You will need to browse directly to the unit you are updating, which is as detailed in the user manual. From the main menu in the browser choose to the Backup / restore link
Pressing the Backup button will download a configuration file, the default filename will be NVRAM, this can be changed and you can save the file to any location needed
Once the firmware update is completed you can easily restore your configuration by uploading the saved .bin file back to the LEDView.

©Calibre UK Limited issue 2.51 November 2015 Page 4
Download the Universal Updater tool and Latest firmware Start by downloading the ‘Universal Updater’ program from the Calibre UK web site, You can find it at this link http://www.calibreuk.com/product_pages/scalers/led-downloads.php Or You can find it by going to our web site www.calibreuk.com Select ‘LED Screen Scalers’ as indicated by the picture below
Then select ‘Product Downloads’

©Calibre UK Limited issue 2.51 November 2015 Page 5
Next download and ‘RUN’ the Universal Updater Installer indicated by the arrow in the picture below. This program needs to be installed on your computer before you can update your unit.

©Calibre UK Limited issue 2.51 November 2015 Page 6
Next download the latest LEDView firmware. Go to the drop down box for software and firmware for the correct LEDView model. The arrow in the picture above used the LEDView530 as an example
Select the ‘Firmware Version xxxx-xxxx for your LEDView model Click on the ‘Go’ button and store the file on your computer where you will know where to find it.
©Calibre UK Limited issue 2.51 November 2015 Page 7
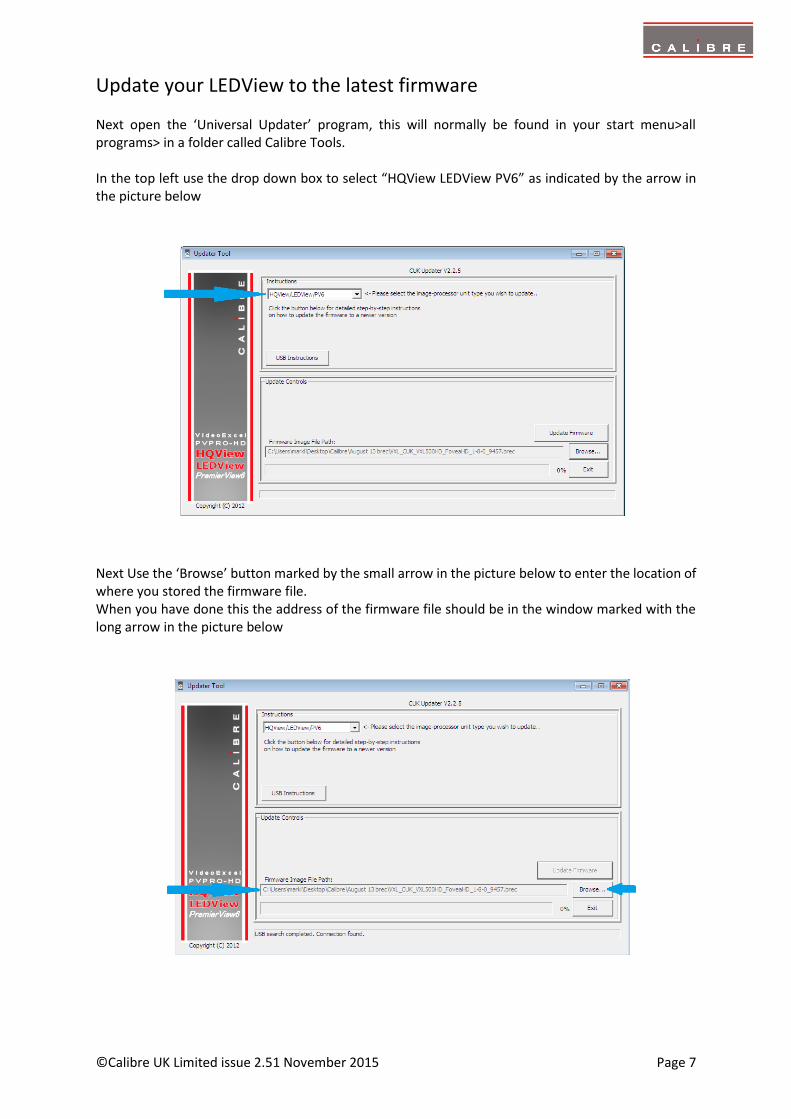
Update your LEDView to the latest firmware Next open the ‘Universal Updater’ program, this will normally be found in your start menu>all programs> in a folder called Calibre Tools. In the top left use the drop down box to select “HQView LEDView PV6” as indicated by the arrow in the picture below
Next Use the ‘Browse’ button marked by the small arrow in the picture below to enter the location of where you stored the firmware file. When you have done this the address of the firmware file should be in the window marked with the long arrow in the picture below

©Calibre UK Limited issue 2.51 November 2015 Page 8
Now start the LEDView in update mode by pressing and holding in the Menu key whilst connecting the power. Note: there must be no leads connected to either the LAN or USB ports during this operation.
LEDView530
LEDView400, LEDView325DS or LEDView510
When the power has been applied release the Menu key. The LEDView530 will now display the ‘Ready for update’ message
The LEDView400, LEDView325DS and LEDView510 power light will repeat a double flash indicating that it is ‘update mode’ Note: Only when your processor is successfully in ‘Update’ mode can you perform this next operation. Next connect the USB lead between your computer and the USB socket on the rear of the LEDView as indicated in the picture below
LEDview530 and LEDView510
LEDView400
LEDView325DS
©Calibre UK Limited issue 2.51 November 2015 Page 9
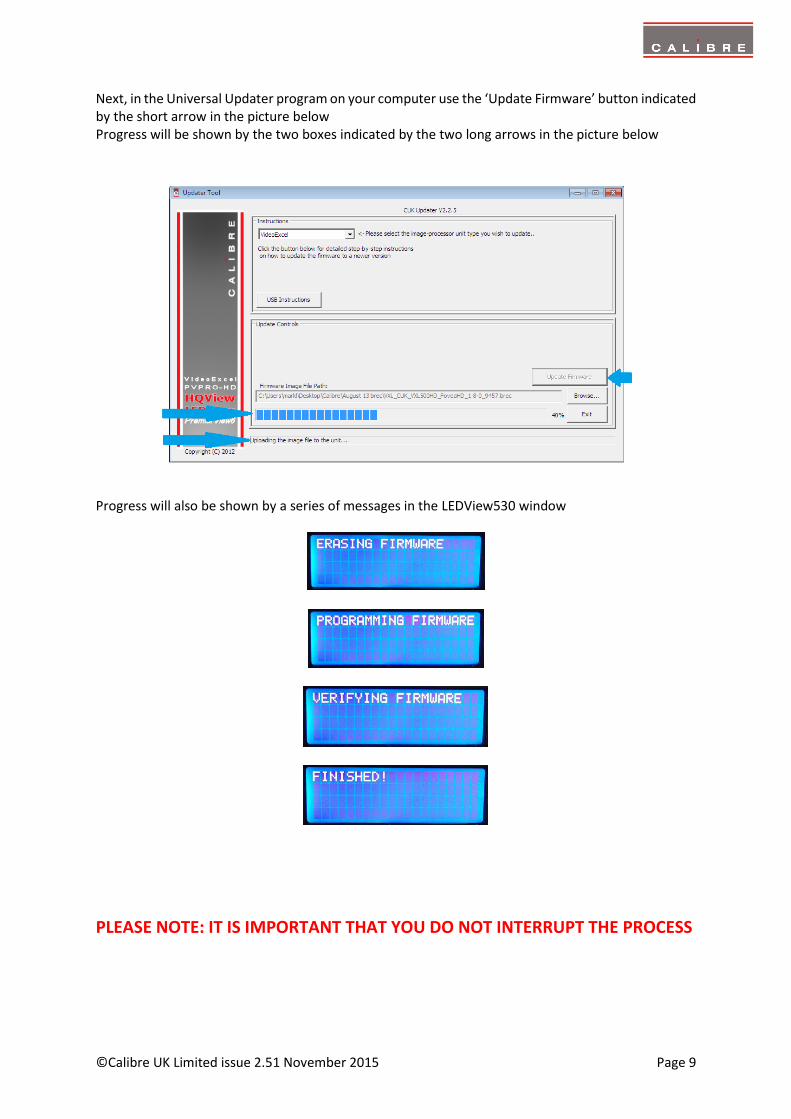
Next, in the Universal Updater program on your computer use the ‘Update Firmware’ button indicated by the short arrow in the picture below Progress will be shown by the two boxes indicated by the two long arrows in the picture below
Progress will also be shown by a series of messages in the LEDView530 window
PLEASE NOTE: IT IS IMPORTANT THAT YOU DO NOT INTERRUPT THE PROCESS

©Calibre UK Limited issue 2.51 November 2015 Page 10
When the update process is complete a window will appear stating ‘Firmware Update Complete’ Press the OK button as indicated by the arrow in the picture below
After a few seconds the bottom line of the Universal Updater will then show confirmation that the firmware has been successfully updated as indicated in the picture below

©Calibre UK Limited issue 2.51 November 2015 Page 11
Final Steps Next remove the USB lead Then remove the power from the LEDView and then re-apply the power. The LEDView530 widow will give a series of messages as it re-boots The green power LED on the LEDView 510 and LEDView400 will flash during the reboot process When the front panel power light stops flashing and remains green the re-boot is complete.
Next perform a factory reset This is found in Menu>System>Factory Defaults Please confirm and press Enter The LEDView will re-boot When the front panel green power light stops flashing and remains green the update process is complete. If you have saved your configuration, re-upload the saved file back to your unit, following the steps on page 3 of this document.
END
E&OE