lesson 2 (getting to know red worms) in unit 3, k-3 … · unit 3 lesson 2: getting to know red...
TRANSCRIPT

Lesson 2: Getting to Know Red Worms
K-3 Module, Unit 3:Vermicomposting 121
K–3 Module
Unit 3
Lesson 2: Getting to Know Red Worms
K-3 Module, Unit 3: Vermicomposting
Lesson’s ConceptRed worms, like all other living things, “take in nutrients, give off wastes, grow, reproduce, and respond to stimuli from their environments.” (Science Framework, page 116)
PURPOSEStudents learn about red worms through observations and humane experiments.
OVERVIEWIn this lesson students will:
• List the ways to humanely observe and handle a red worm, and using the list, they write a song or sing a song that is already written.
• Observe a red worm by using a magnify-ing lens and record their observations.
• Conduct humane experiments to deter-mine whether red worms prefer light or dark.
• Practice measuring on gummy worms and then measure live red worms, chart these measurements, and develop a graph to compare the length of 20 red worms.
• Draw pictures or write stories about red worms.
CORRELATIONS TO CALIFORNIA’S CONTENT STANDARDS AND FRAMEWORKS AND TO BENCH-MARKS FOR SCIENCE LITERACY• Students observe, compare, and properly
handle red worms. They graph the various sizes of 20 worms.
- “Different types of plants and animals inhabit the Earth. As a basis for under-standing this concept, students know . . . how to identify major structures of common plants and animals.” (Science Content Standards, Grades K–12; Kinder-garten; Life Science, Standard 2c)
- Students “should have opportunities, in the context of science, to interact with living things in ways that promote respect.” (Benchmarks for Science Literacy, page 15)
- “By the end of the second grade, stu-
dents should know that there is varia-tion among individuals of one kind within a population. Offspring are very much, but not exactly, like their parents and like one another.” (Benchmarks for Science Literacy, page 107)
- “Scientific progress is made by asking meaningful questions and conducting careful investigations. As a basis for understanding this concept . . . students will . . . record observations and data with pictures, numbers, and/or written statements.” (Science Content Standards, Grades K–12; Grade 1; Investigation and Experimentation, Standard 4b)
- “Simple graphs can help to tell about observations.” (Benchmarks for Science Literacy, page 211)
- “Students will construct bar graphs to record data using appropriately labeled axes.” (Science Content Standards, Grades K–12; Grade 2; Investigation and Ex-perimentation, Standard 4e)
• Students use magnifiers to observe red worms and rulers to measure them.
- “Tools such as thermometers, magni-fiers, rulers, or balances often give more information about things than can be obtained by just observing things with-out their help.” (Benchmarks for Science Literacy, page 10)
• Students draw a worm.
- “Students create original artworks based on personal experiences or responses.” (Visual and Performing Arts Framework; Visual Art: Creative Expres-sion Component, Goal 4, page 101)
- “Students will draw pictures that por-tray some features of the thing being described.” (Science Content Standards, Grades K–12; Grade 1; Investigation and Experimentation, Standard 4a)

CLOSING THE LOOPK-3 Module, Unit 3:
Vermicomposting122
- “Adaptations in physical structure or behavior may improve an organism’s chance for survival. As a basis for understanding this concept, students know plants and animals have struc-tures that serve different functions in growth, survival, and reproduction.” (Science Content Standards, Grades K–12; Grade 3; Life Sciences, Standard 3a)
• Students write about worms.
- Students “select a focus when writ-ing.” (English–Language Arts Content Standards for California Public Schools, Kindergarten Through Grade Twelve, page 8)
- Students “write brief expository de-scriptions of a real object, person, place, or event, using sensory details.” (Eng-
lish–Language Arts Content Standards for California Public Schools, Kindergarten Through Grade Twelve, page 8)
Scientific Thinking Processesobserving, communicating, comparing, clas-sifying, relating
Time30–45 minutes to prepare for the lesson; 60–90 minutes for two days to implement the lesson
Vocabularyred worm (Select one or two additional words from this lesson that students should know.)
Preparation___ 1. Read the “Background Information for
the Teacher” at the end of this lesson.
___ 2. Make a copy of the “Worm Investiga-tion Sheet” for each pair of students (page 130).
___ 3. Make transparencies of “Handling Our Worms” (page 129); “Do Red Worms Prefer Light or Dark?” (page 132); and “A Red Worm” (page 131).
___ 4. Make an outline of a large red worm out of butcher paper about 10–15 feet long.
Materials
For “Pre-Activity Questions”
___ The transparency of “Handling Our Worms”
For “Part I, Observing a Worm”
___ Magnifying lens for each pair of students___ A paper towel for each student___ One worm for each student___ Spray bottle with water (to keep the paper
towels moist for the worms)___ The “Worm Investigation Sheet” for each
pair of students
___ The transparency of “A Red Worm”
For “Part II, Studying Whether Worms Prefer Light or Dark”
___ The transparency of “Do Red Worms Prefer Light or Dark?”
___ One worm for each group of students___ A plate or lid to a shoe box for each group
of students
For “Part III, Measuring Worms”
___ Gummy worms, one for each student___ One ruler for each pair of students___ Strip of paper, 1/2 inch wide and several
inches long, for each student___ Graph paper with 1/2-inch grid for each
student___ Colored markers___ At least 20 red worms of various sizes
For “Application”
___ Outline of a large (10 to 15 feet long) worm on butcher paper
___ Colored markers
PRE-ACTIVITY QUESTIONSA. Discuss with students how they can hold a
worm in a way that will not injure it. Dis-cuss the humane treatment of worms. This should include:
• Handling the worms very gently

Lesson 2: Getting to Know Red Worms
K-3 Module, Unit 3:Vermicomposting 123
K–3 Module
Unit 3
• Avoiding dropping the worms
• Keeping the worms moist (Explain to students that worms “breathe” through their wet skin, and must be kept moist.)
• Keeping the worms away from bright lights (Later in the lesson you can explain that worms have sensory cells, which are concentrated on their skin at the front end of their bodies. These sen-sory cells detect light. Red worms prefer darkness and will usually avoid light.)
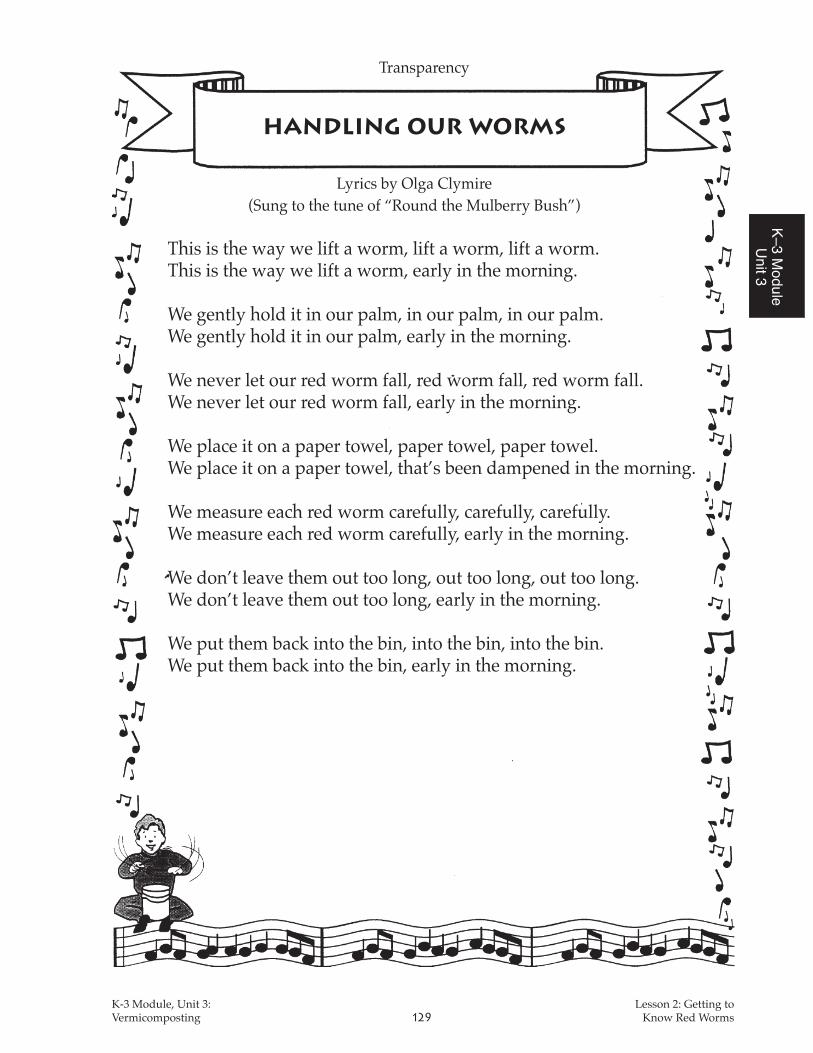
B. Have students help you develop a list of what they should do when studying a red worm outside the bin. This list could be used to develop a poem that students can recite or a song that students can sing; or students can sing “Handling Our Worms” (in this lesson).
PROCEDURE
Part I, Observing a WormNote: You might first need to perform worm appreciation exercises for students who have aversions to worms. Many students find organ-isms like insects, snakes, and worms distasteful, disgusting, or frightening, so it might be helpful to take some time to explain the interconnec-ted-ness of living things and the important role that these species play. Worms, for example, play an important role in soil productivity by breaking down organic waste and converting it to rich compost that enriches soil for plant growth. (Additional information about this topic will be addressed in lessons 3 and 4.) Also, students should know that worms are very timid crea-tures and cannot bite (since they have no teeth) or hurt anyone in any way.
A. Distribute to each pair of students a magni-fying lens and a piece of dampened paper towel. Allow students to use the magnify-ing lenses by looking at various objects, including the paper towel. Have them practice focusing by moving the magnifying lens and their eyes farther away from and closer to an object.
1. Remind students of the rules for han-dling red worms and provide each stu-dent with a worm. Ask students to look at a worm through the magnifying lens and without the magnifying lens. Dur-ing their observations students might need to redampen their paper towels,
which can be done with a spray bottle.
2. Ask students to complete the following statements and list their descriptions on the chalkboard:
• Using only my eyes, my worm looks like . . . it’s shiny, 2 centimeters long, spaghetti string, a pink sausage.
• Using a magnifying lens, my worm looks like . . . little lines, little spikes, reddish-brown, shiny, slippery, pointed head and tail.
• Some words that describe my worm are . . . muscular, band is thick, wiggly, soft, slow.
• Using only my eyes, my worm looks like:
- reddish brown color - stretches - a rubber band - has sections
• Using a magnifying lens, my worm looks like:
- looks bigger and longer - sticky
• Some words that describe my worm are: - squirmy - wet - reddish brown - stretchy - squishes in and out - pointy nose
Submitted by Donna Flores’s third-grade class, Nightingale Elementary School, Stockton Unified School District.
Some words that describe my worm are:
- pretty (bonito) - with lines (con lineas)- fat (gordo) - earth colored (color de tierra)- slimy (resbaloso) - red (rojo)
Submitted by Mario Chang’s second-grade class, Mission Education Center, San Francisco Unified School District.
B. Provide a copy of the “Worm Investigation Sheet” to each pair of students. For younger students, you might want to do this as a class.

CLOSING THE LOOPK-3 Module, Unit 3:
Vermicomposting124
• Ask students to observe the worms and to answer the questions on their sheets.
• Remind students to keep the paper towels damp, so the red worms are kept damp and can breathe.
Students in Gayle MacDonald-Gura’s third-grade class at Lower Lake Elementary School observe red worms.
C. When students have finished drawing their red worms, ask them to gently place the worms back into the bin under some bed-ding.
Note: Some paper towels used in these observa-tions of the red worms can be reused for “Part II” and “Part III.” Then the paper towels can be shredded and placed into the worm bin for recycling.
D. Ask students to share their observations. Use the “Worm Investigation Sheet” as a guide for questions.
E. Ask students how they determine which end of a worm is the front. To find out which is the front end of the red worm, students should observe how a worm moves and which end leads the body. When a worm moves, the front (head) end usually goes first. Another distinguishing feature is the clitellum, the swelling or band which is usually lighter in color, that is nearer to the front end. Ask students to find the clitel-lum on their worms. For more information about the clitellum, see “Background Infor-mation for the Teacher” in Lesson 3.
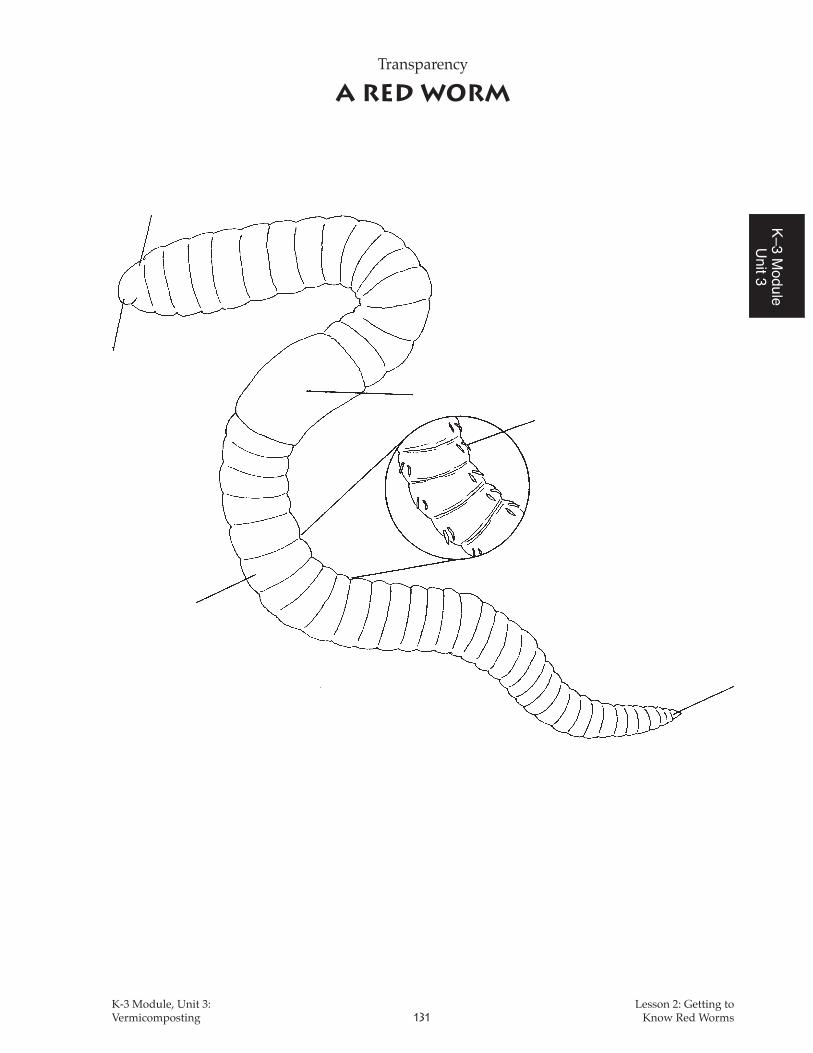
F. Project the transparency of “A Red Worm.” Ask students to compare their drawings to the one on the transparency. Have them identify each part of the worm (mouth,
head, segments, band, tail), as you write these on the transparency.
Part II, Studying Whether Worms Prefer Light or DarkA. Ask students how the class can deter-
mine whether worms prefer light or dark. Select those suggestions that are the most humane to the worm and help students design and set up the experiments and/or conduct the experiment described in step 2.
Note: If students will be conducting their own experiments to test the preferences of several worms, they should do so under your supervi-sion.
1. Project the transparency “Do Red Worms Prefer Light or Dark?” and have students vote their predictions, as you write them on the chart. Discuss reasons for students’ predictions. Protection, moisture, food.
2. One way to determine whether worms prefer light or dark is to use a plate or a lid to a shoe box that is partially covered. The bottom of the container should be lined with a wet paper towel.
• Ask students to help you record the observations that they make. Perhaps each group can test one worm as the class members observe and record the data.
• The following can be done with several worms:
- Place a worm in the middle between the light and the dark part on the plate (or a shoe box lid) and see where it goes. (This might take some time.)
- Place a worm in the light section to see if it moves away from the light.
- Place a worm in the dark and see if it moves into the light.
B. Discuss with students why red worms tend to prefer dark over light. Have students consider where the worms live naturally. (This instinct to avoid light may have evolved as a protection from the dry-ing rays of sunlight.) How do the worms find their way around? They have sensory cells which detect light.
Part III, Measuring Worms

Lesson 2: Getting to Know Red Worms
K-3 Module, Unit 3:Vermicomposting 125
K–3 Module
Unit 3
A student in Lynda Mooney’s first-grade class at Las Palmas Elementary School measures a gummy worm.
A student in Lynda Mooney’s first-grade class at Las Palmas Elementary School measures a red worm.
Note: Younger students may have difficulty measuring with rulers, but could compare lon-ger and shorter worms.
A. Provide gummy worms and rulers and allow students to practice measuring. One way to do this is to provide a strip of paper about 1/2 inch wide and several inches long for each pair of students. Have students place a pencil mark on the paper strip to in-dicate the length of the worm. They can use a ruler to measure the length of the paper strip. The purpose of using the paper strip is that it might be difficult for young stu-dents to get an accurate reading on a ruler when a live red worm is moving, whereas a strip of paper can be quickly torn or marked to indicate the length of the worm. Then time can be spent accurately measuring the paper strip with the ruler.
B. Once students have shown you that they know how to measure a worm, and can do so without injuring a live worm, provide a damp paper towel, a live red worm, and a strip of paper for each pair of students. Ask students to:
• Measure the worm when it is extended to its full length.
• Mark the paper strip to indicate the length of the worm.
• Use a ruler to measure the paper strip.
• Record the worm’s length.
C. Check students’ measurements (or have students check each other’s measurements), and then have them return their worms to the worm bin. Give pairs who completed measuring one worm another worm to measure, until a class total of 20 worms have been measured.
D. Develop a chart with students to compare the measurements of at least 20 worms. Then have them record the lengths of their worms on the chart.
E. Provide students with graph paper with a 1/2-inch grid. Show students how to graph the results. This can be done by writing the

CLOSING THE LOOPK-3 Module, Unit 3:
Vermicomposting126
number of worms on the bottom of the page (horizontally along the X axis) and labeling the length in inches or centimeters going up the page (vertically along the Y). Students can do a bar graph by using colored mark-ers to color spaces for each worm’s length.
Note: With younger students, do a simple bar graph on butcher paper as a class.
Students from Lynda Mooney’s first-grade class at Las Palmas Elementary School make a graph to show the variations in length of some red worms.
F. Discuss with students:
• Who had the shortest worm? What was its length?
• Who had the longest worm? What was its length?
• How long were most worms?
• Why are the worms different in size? Some are older; some eat more.
DISCUSSION/QUESTIONSA. Ask students, “What do we know about
red worms?” They do not like light; they range in size; they need to be kept damp. Add students’ responses to the chart they de-veloped in Lesson 1. Encourage students to add to the chart throughout this unit.
B. Ask students, “What more do we want to know about red worms?” Add their responses to the list they began in Lesson 1. Encourage students to find the infor-mation that the class would like to know about red worms.
ApplicationA. Have students make a large worm out of
construction or butcher paper to hang in the classroom. Students should individu-ally or in pairs color and label the parts of the large drawing of a red worm which you prepared in “Preparation” step “3.”
B. Do the following on the carpet in the classroom or on a lawn area on the school grounds:
• Ask students to move individually as a worm (the act of moving the body can awaken creative thinking); move toward food; move away from light. Then form a giant worm with the class; each student can represent a segment of the worm’s body. Allow students to use knees and elbows to simulate the worm’s setae.
• Create phrases about movement and compile into a poem or song.
C. Discuss with students this lesson’s con-cept: Red worms, like all other animals, “take in nutrients, give off wastes, grow, reproduce, and respond to stimuli from their environments.”
• Ask them to explain what food red worms take in.
• Ask students what they think a worm’s wastes might look like.
• Discuss how worms respond to stimuli
Students in Mario Chang’s second-grade class at Mis-sion Education Center measure red worms and record their lengths.

Lesson 2: Getting to Know Red Worms
K-3 Module, Unit 3:Vermicomposting 127
K–3 Module
Unit 3
from their environment (e.g., they crawl from light to dark).
D. Have students select any one of the ideas listed below or come up with their own ideas for writing in their journals about red worms. If you have access to older students or adult volunteers, they can help the younger students by writing down what the younger students dictate.
1. Write a conversation between two worms in a worm bin. (Younger stu-dents might need help with this.)
2. Write a short story about “My Day as a Worm . . .” Students might begin, When I woke up this morning, I realized that I was a red worm. I . . .. They can answer any or all of the following questions:
• What do you do all day?
• Where do you go?
• What other animals are your friends?
• What do you eat?
• Why are you important?
• What funny things happen to you?
• In what kind of trouble do you find yourself?
Note: Younger students can illustrate and label the story.
3. Write several things that are true and several things that are false about red worms.
Two students from Gayle MacDonald-Gura’s third-grade class at Lower Lake Elementary School move like a worm.
4. Write a poem entitled “I Like Worms” and include the types of worms you like (e.g., little worms, big worms, fast worms, slow worms) and worms that . . . (e.g., move, slither, eat food waste).
5. Complete the following chart:
What I thought I knew:
What I expected to learn:
What I learned:
Next time, I:
6. Have students complete the following:
• The first time I saw a worm, I . . . did not want to hold it.
• The first time I touched a worm, . . . it was slimy, but drier than it looked.
A student from Gayle MacDonald-Gura’s third-grade class at Lower Lake Elementary School writes and illus-trates a story about worms.

CLOSING THE LOOPK-3 Module, Unit 3:
Vermicomposting128
Submitted by Lynda Mooney, first-grade teacher, Las Palmas Elementary School, National School District.
Project Idea: Compile a class booklet, com-plete with illustrations, about the first time students saw a red worm. The booklet could include the name of each student in the class, followed by a description written or dictated by the named student. (For example, “The first time Charles saw a worm . . .”; “the first time Marina touched a worm . . .”)
Note: For the class booklet, older students could work with younger students by re-cording what the younger students say they observed.
Homework Assignment: Ask students to do one of the following:
• Design a home for a red worm. The home needs to meet all the conditions that a worm needs in order to survive.
• Write a friendship letter or poem to a worm.
E. Ask students to share their homework assignments.
RESOURCES
VideoWormania! Available from The Let’s Get Grow-ing! Company, 1900 Commercial Way, Santa Cruz, CA 95065; 1-800-408-1868; FAX (408) 476-1427 (26 minutes).
Stars Mary Appelhof and songs by Bil-lie B. Explains the natural history of the red worm. Shows a baby worm hatching, explains how worms move, and describes how they reproduce. Although designed for students in upper elementary grades, some parts would be very interesting to younger students.
BookAppelhof, Mary, and others. Worms Eat Our Garbage: Classroom Activities for a Better En-vironment. Kalamazoo, Mich.: Flower Press, 1993.
Contains student activities concerning red worms.
Students from Gayle MacDonald-Gura’s third-grade class at Lower Lake Elementary School make a worm out of butcher paper.
Lesson 2: Getting to Know Red Worms
K-3 Module, Unit 3:Vermicomposting 129
K–3 Module
Unit 3
Handling Our Worms
Lyrics by Olga Clymire(Sung to the tune of “Round the Mulberry Bush”)
This is the way we lift a worm, lift a worm, lift a worm.This is the way we lift a worm, early in the morning.
We gently hold it in our palm, in our palm, in our palm.We gently hold it in our palm, early in the morning.
We never let our red worm fall, red worm fall, red worm fall.We never let our red worm fall, early in the morning.
We place it on a paper towel, paper towel, paper towel.We place it on a paper towel, that’s been dampened in the morning.
We measure each red worm carefully, carefully, carefully.We measure each red worm carefully, early in the morning.
We don’t leave them out too long, out too long, out too long.We don’t leave them out too long, early in the morning.
We put them back into the bin, into the bin, into the bin.We put them back into the bin, early in the morning.
Transparency

CLOSING THE LOOPK-3 Module, Unit 3:
Vermicomposting130
Names: Date:
Student’s Page
Worm Investigation Sheet
Place your worm on a damp paper towel where you can observe it. Make certain to keep the paper towel wet so that the red worm can breathe.
1. What color is the worm?
2. What shape is the worm? Use one word to describe it.
3. How does the worm’s skin feel?
4. How can you tell which is the front end of a worm and which is the back end?
5. Draw the worm on the back of this sheet. Label the head, tail, mouth, segments, and band. Draw a line pointing to each part and write the name on it.
Lesson 2: Getting to Know Red Worms
K-3 Module, Unit 3:Vermicomposting 131
K–3 Module
Unit 3
Transparency
A Red Worm

CLOSING THE LOOPK-3 Module, Unit 3:
Vermicomposting132
Worm B
Worm placed between dark and light
Worm placed in light
Worm placed in dark
Worm A
Worm placed between dark and light
Worm placed in light
Worm placed in dark
Worm C
Worm placed between dark and light
Worm placed in light
Worm placed in dark
Worm D
Worm placed between dark and light
Worm placed in light
Worm placed in dark
Worm Worm didnot move.
Wormcrawledto dark.
Worm crawledto light.
Transparency
Do Red Worms Prefer Light or Dark?
Class predictions:
______ Number of students predicting that the red worms will move away from light.
______ Number of students predicting that the red worms will move toward light.

Lesson 2: Getting to Know Red Worms
K-3 Module, Unit 3:Vermicomposting 133
K–3 Module
Unit 3
Background Information For The Teacher
Red worms live naturally in decaying leaf lit-ter, compost piles, or manure just above the ground’s surface. Microorganisms such as bac-teria and fungi aid worms, which do not have teeth, by breaking down pieces of food. Bacteria act as digesters, and fungi break down cellulose. Red worms also eat the bacteria and fungi.
A red worm’s mouth has a small sensitive pad of flesh, called the prostomium, that protrudes above its mouth and stretches out to sense suit-able food particles. Worms have a muscular giz-zard, which functions similarly to that of birds. Small grains of sand and mineral particles lodge in this gizzard. Muscular contractions compress these hard materials against each other and the food, mix it with some fluid, and grind it into smaller particles. Undigested matter, such as soil, will pass through their lengthy intestines. The tiny, dark-colored masses the worms deposit are called worm castings. Other names for worm castings are worm manure or worm feces. Cast-ings contain many nutrients which plants need to grow.
Red worms move by contracting and relaxing their muscles in waves, alternating between circular and long muscles. Contraction of the cir-cular muscles forces the worm’s body forward. Then the long muscles contract, drawing the tail
end of the worm towards the skinny front end. When the long muscles contract, the circular muscles relax, causing the worm to become thick. To keep from sliding during movement, tiny bristles called setae act as brakes to hold part of the worm’s body against the surface. The worm moves forward and backward in similar ways.
Even though red worms have no eyes, they do have sensory cells, concentrated on their skin at the front end of their bodies, which detect light. Red worms prefer darkness; when they sense light, they move away from it. However, they can be observed under a red light (used in photographic darkrooms or a flashlight covered with a red transparent plastic) without causing them to crawl away from the light.
Worms respire by absorbing oxygen through the wet surfaces of their bodies. Their bodies must be moist in order for the exchange of air to take place. A damp, but not soggy, environment is essential for the survival of red worms. Strips of damp newspaper fluffed up to allow oxygen to circulate make ideal bedding for red worms in a worm bin.
CLOSING THE LOOPK-3 Module, Unit 3:
Vermicomposting134
NOTES