level 5: creating a main character - amazon...
TRANSCRIPT
Level 5: Creating a Main Character
Welcome to Level 5 of the RPG Maker VX Introductory Course. In Level 4, we created an Event for the
conversation with the Good King and looked at the fundamentals of Switches.
In this level, we’ll move away from Events and focus on creating our Hero.
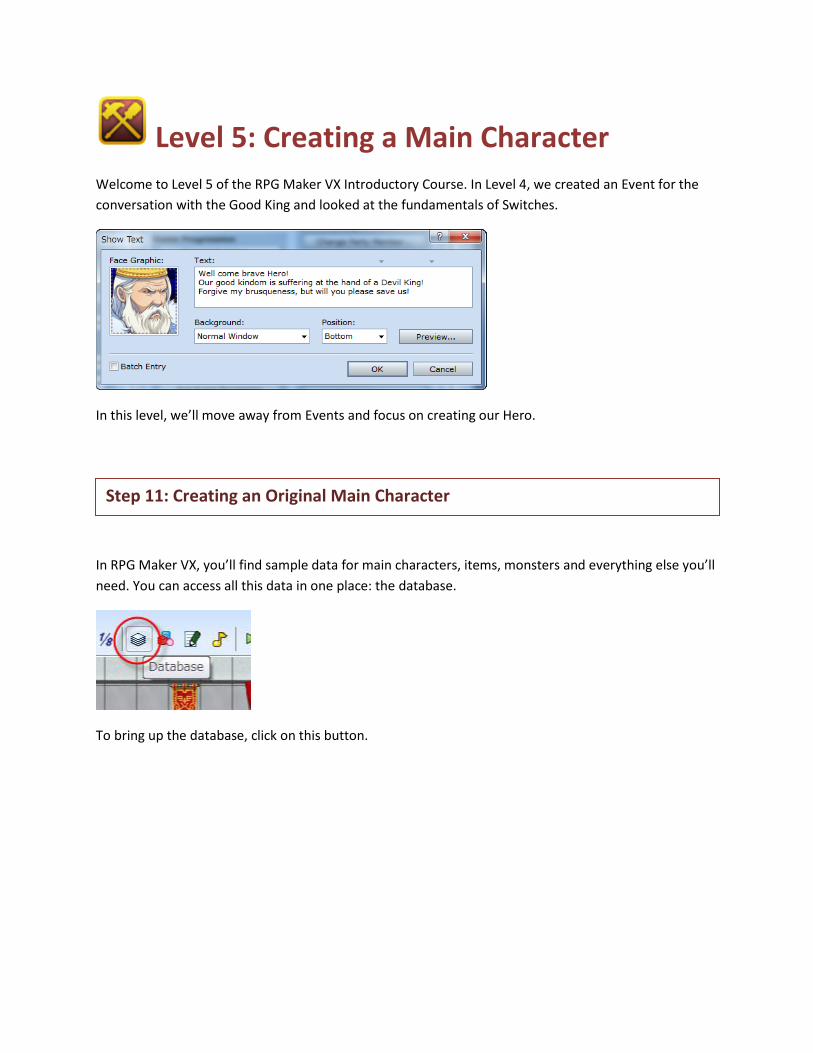
In RPG Maker VX, you’ll find sample data for main characters, items, monsters and everything else you’ll
need. You can access all this data in one place: the database.
To bring up the database, click on this button.
Step 11: Creating an Original Main Character

*The Database window.
The components of the database are separated in tabs. There are so many options here that it is
impossible to set everything at once. Instead, we call up the database on an as-needed basis and edit
only what is necessary. In this step, we’ll create the main character.
To adjust the settings for the main character, select the “Actor” tab in the far left. The King’s throne
should be located at coordinates 008,004 in the Good King’s Castle map. Put the mouse pointer over this
spot.
Preparing to Create the Main Character

*The “Actor” tab.
On the left, you will see a list of all the available characters. There are 8 in the full version and 4 in the
trial version. We’re going to leave these characters alone and add two of our own.

Click the “Change Maximum” button on the bottom left.
*The Change Maximum dialogue.
Since we’re adding 2 characters, increase the number in the box by 2 and click “OK”.
*2 additional spots for characters appear in the list.
We’ve now added 2 new spots to create our original characters.

*Inputting the name.
Let’s change 009:’s name to “Kenta” and 010:’s to “Bray”. Do this by selecting each character
individually and entering the new names in the “Name” box on the right. The “Class” drop menu located
underneath the “Name” box and the “Classes” tab located next to the current “Actor” tab are connected.
The ”Initial Level” indicates the characters ability at the beginning of the game. For members of your
party who join later, it indicates their level when they join your party. For most purposes, we can start
with Level 1.
“Character Graphic” and “Face Graphic” are the options we can adjust for how our character looks in the
game. By double-clicking in each box we open up a window where we can choose each graphic.
Choosing a Character Graphic
Entering the Main Characters' Names

*Selecting the graphic for Kenta
For Kenta, we chose the young man with the green hair located in the top row, 3rd box from the left in
the Actor1 selection.
*Selecting the graphic for Bray
For Bray, we chose the young girl wearing a hat located in the top row, 4th box from the left in the
Actor1 selection.
Here, we can define our character as a warrior, a sorcerer, or choose from a wide selection. We can
further refine the details of each class in the “Classes” tab. For this tutorial we will keep the default
settings.
Choosing the Class

*Setting Kenta as a warrior.
Kenta looks like he’ll make a good warrior, so that’s what we selected. As a warrior, he’ll be unable to
use magic, but he’ll be able to utilize nearly all items.
*Setting Bray as a priest.
Bray looks like she’ll make a good priestess, so that’s what we’ve selected for her. The kinds of items she
can carry will be limited, but she’ll be very good with magic.
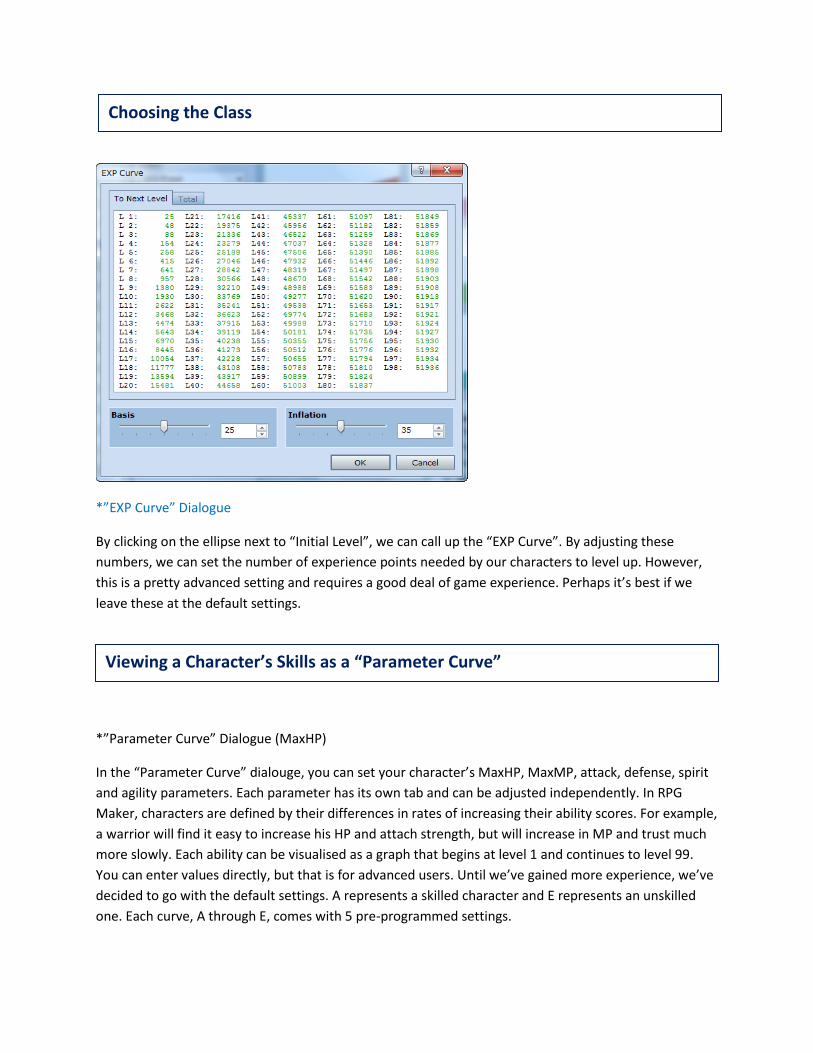
*”EXP Curve” Dialogue
By clicking on the ellipse next to “Initial Level”, we can call up the “EXP Curve”. By adjusting these
numbers, we can set the number of experience points needed by our characters to level up. However,
this is a pretty advanced setting and requires a good deal of game experience. Perhaps it’s best if we
leave these at the default settings.
*”Parameter Curve” Dialogue (MaxHP)
In the “Parameter Curve” dialouge, you can set your character’s MaxHP, MaxMP, attack, defense, spirit
and agility parameters. Each parameter has its own tab and can be adjusted independently. In RPG
Maker, characters are defined by their differences in rates of increasing their ability scores. For example,
a warrior will find it easy to increase his HP and attach strength, but will increase in MP and trust much
more slowly. Each ability can be visualised as a graph that begins at level 1 and continues to level 99.
You can enter values directly, but that is for advanced users. Until we’ve gained more experience, we’ve
decided to go with the default settings. A represents a skilled character and E represents an unskilled
one. Each curve, A through E, comes with 5 pre-programmed settings.
Choosing the Class
Viewing a Character’s Skills as a “Parameter Curve”

Point: Type of Parameters
Parameters are a way of expressing the main character’s strength in numbers. These numbers are used
to assess the damage caused by a character during battle.
MaxHP A character’s maximum hit points. If set to zero, a character is unusable.
MaxMP A character’s maximum magic points. These are consumed when spells are cast.
Attack Influences the amount of damage a character can inflict on enemies.
Defense Influences the amount of damaged received in attacks.
Spirit Influences a character’s offensive and defensive strength with skills/magic.
Agility Influences the order of attack in battle.
*Kenta’s parameters.
We’ve decided to make Kenta a very physical warrior. Accordingly, we’ve set his MaxHP to curve A, his
MaxMP to curve E, his Attack to curve A, his Defense to curve C, his Spirit to curve E and his Agility to
curve C. Kenta is very skilled with weapons, but has no ability with magic whatsoever.

*Bray’s parameters
We’ve decided to make Bray a priest with strong recovery skills. Her MaxHP is set to curve C, her
MaxMP to curve A, her Attack to curve D, her Defense to curve D, her Spirit to curve A and her Agility to
curve C. She is very good with magic, but won’t be much help in a battle with weapons.
*Starting Equipment and Options
In the “Starting Equipment” pane, you can decide what weapons and defensive gear your characters
will start the game off with. Click on the drop-down arrow “▼” to see a list of all available items. The
available items in the list will depend on what class your character is.
Add Some Uniqueness to by Customizing Starting Equipment
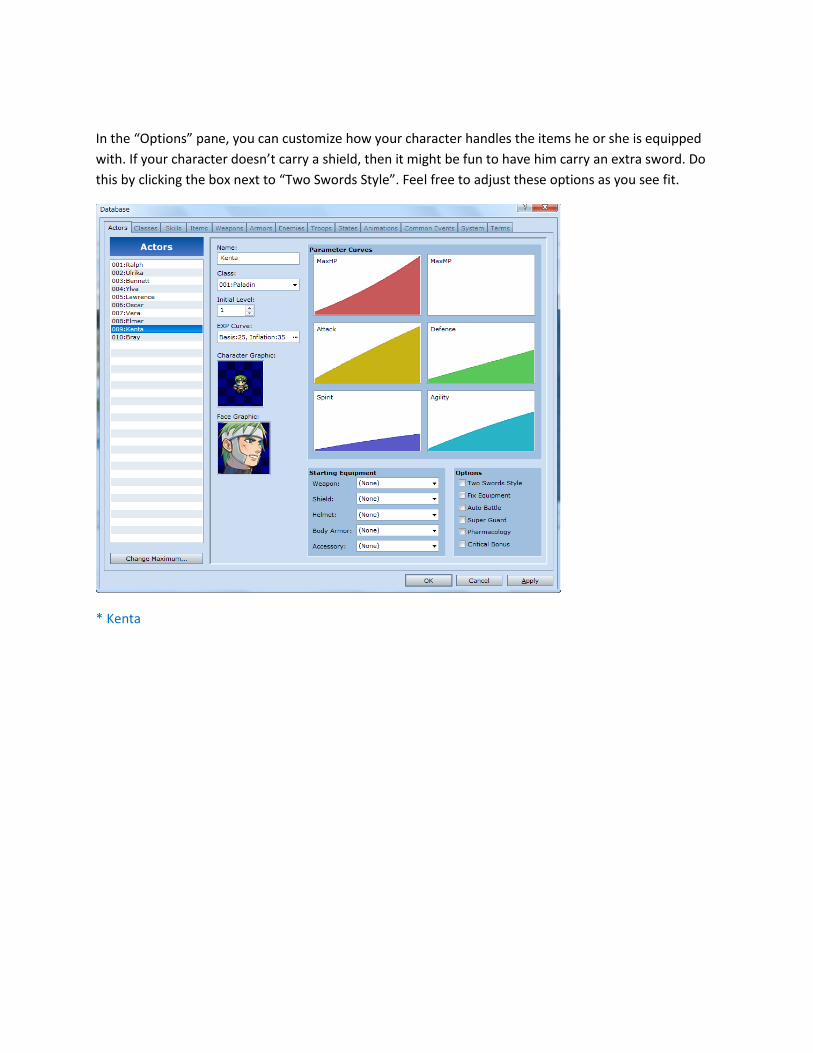
In the “Options” pane, you can customize how your character handles the items he or she is equipped
with. If your character doesn’t carry a shield, then it might be fun to have him carry an extra sword. Do
this by clicking the box next to “Two Swords Style”. Feel free to adjust these options as you see fit.
* Kenta

* Bray
Now the main character called “Kenta” and “Bray” are created.
Next, let’s bring our new characters into the game.
Step 12: Bringing your Initial Party Together

Click on the “System” tab in the database.
*Initial Party pane
In the “Initial Party” pane you’ll see a list of the four characters (Ralph, Ulrika, Bennett, and Ylva) who
make up the default Initial Party. You can choose up to 4 members.
Let’s change this so only Kenta and Bray are in the Initial Party.
First, delete the four names from the default Initial Pary.
*Deleting members.

Right click on each member and select “Delete” from the pop-up menu. Repeat for the remaining
members.
*Adding members with “Edit”
In the now empty box, right-click on the very top row and select “Edit...” from the pop-up menu.
*Initial Party dialogue.
You should now see the Initial Party dialogue. From the pull-down menu select Kenta, and then Bray.
Finally, click “OK” in the bottom right of the database to set all of our changes.
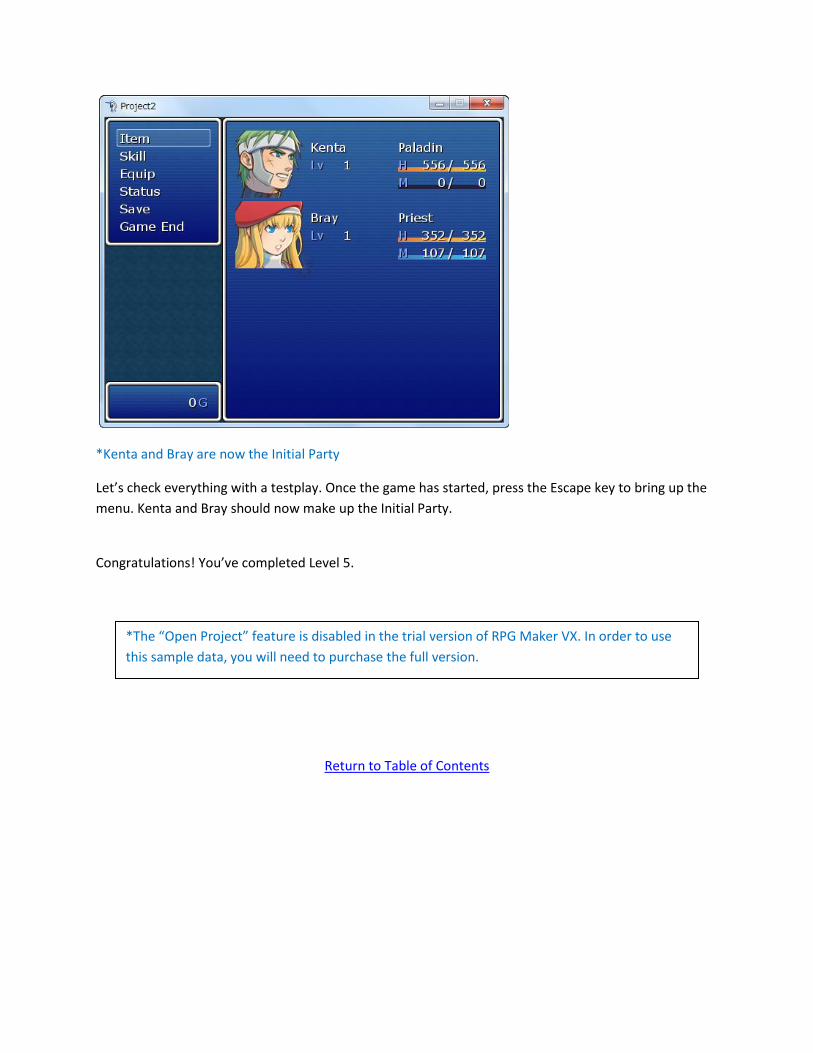
*Kenta and Bray are now the Initial Party
Let’s check everything with a testplay. Once the game has started, press the Escape key to bring up the
menu. Kenta and Bray should now make up the Initial Party.
Congratulations! You’ve completed Level 5.
Return to Table of Contents
*The “Open Project” feature is disabled in the trial version of RPG Maker VX. In order to use
this sample data, you will need to purchase the full version.