lfs258 kubernetes fundamentals€¦ · contents 1 introduction 1 1.1 labs. . . . . . . . . . . . ....
TRANSCRIPT

LFS258
KubernetesFundamentals
Version 2018-08-06
LFS258: Version 2018-08-06
c© Copyright the Linux Foundation 2018. All rights reserved.

ii
c© Copyright the Linux Foundation 2018. All rights reserved.
The training materials provided or developed by The Linux Foundation in connection with the training services are protectedby copyright and other intellectual property rights.
Open source code incorporated herein may have other copyright holders and is used pursuant to the applicable open sourcelicense.
The training materials are provided for individual use by participants in the form in which they are provided. They may not becopied, modified, distributed to non-participants or used to provide training to others without the prior written consent of TheLinux Foundation.
No part of this publication may be reproduced, photocopied, stored on a retrieval system, or transmitted without express priorwritten consent.
Published by:
the Linux Foundationhttp://www.linuxfoundation.org
No representations or warranties are made with respect to the contents or use of this material, and any express or impliedwarranties of merchantability or fitness for any particular purpose or specifically disclaimed.
Although third-party application software packages may be referenced herein, this is for demonstration purposes only andshall not constitute an endorsement of any of these software applications.
Linux is a registered trademark of Linus Torvalds. Other trademarks within this course material are the property of theirrespective owners.
If there are any questions about proper and fair use of the material herein, please contact:[email protected]
LFS258: V 2018-08-06 c© Copyright the Linux Foundation 2018. All rights reserved.

Contents
1 Introduction 1
1.1 Labs . . . . . . . . . . . . . . . . . . . . . . . . . . . . . . . . . . . . . . . . . . . . . . . . . . . . . . . . . 1
2 Basics of Kubernetes 3
2.1 Labs . . . . . . . . . . . . . . . . . . . . . . . . . . . . . . . . . . . . . . . . . . . . . . . . . . . . . . . . . 3
3 Installation and Configuration 5
3.1 Labs . . . . . . . . . . . . . . . . . . . . . . . . . . . . . . . . . . . . . . . . . . . . . . . . . . . . . . . . . 5
4 Kubernetes Architecture 19
4.1 Labs . . . . . . . . . . . . . . . . . . . . . . . . . . . . . . . . . . . . . . . . . . . . . . . . . . . . . . . . . 19
5 APIs and Access 29
5.1 Labs . . . . . . . . . . . . . . . . . . . . . . . . . . . . . . . . . . . . . . . . . . . . . . . . . . . . . . . . . 29
6 API Objects 35
6.1 Labs . . . . . . . . . . . . . . . . . . . . . . . . . . . . . . . . . . . . . . . . . . . . . . . . . . . . . . . . . 35
7 Managing State With Deployments 39
7.1 Labs . . . . . . . . . . . . . . . . . . . . . . . . . . . . . . . . . . . . . . . . . . . . . . . . . . . . . . . . . 39
8 Services 47
8.1 Labs . . . . . . . . . . . . . . . . . . . . . . . . . . . . . . . . . . . . . . . . . . . . . . . . . . . . . . . . . 47
9 Volumes and Data 53
9.1 Labs . . . . . . . . . . . . . . . . . . . . . . . . . . . . . . . . . . . . . . . . . . . . . . . . . . . . . . . . . 53
10 Ingress 69
10.1 Labs . . . . . . . . . . . . . . . . . . . . . . . . . . . . . . . . . . . . . . . . . . . . . . . . . . . . . . . . . 69
11 Scheduling 71
11.1 Labs . . . . . . . . . . . . . . . . . . . . . . . . . . . . . . . . . . . . . . . . . . . . . . . . . . . . . . . . . 71
12 Logging and Troubleshooting 79
12.1 Labs . . . . . . . . . . . . . . . . . . . . . . . . . . . . . . . . . . . . . . . . . . . . . . . . . . . . . . . . . 79
13 Custom Resource Definition 83
13.1 Labs . . . . . . . . . . . . . . . . . . . . . . . . . . . . . . . . . . . . . . . . . . . . . . . . . . . . . . . . . 83
14 Kubernetes Federation 87
iii

iv CONTENTS
14.1 Labs . . . . . . . . . . . . . . . . . . . . . . . . . . . . . . . . . . . . . . . . . . . . . . . . . . . . . . . . . 87
15 Helm 89
15.1 Labs . . . . . . . . . . . . . . . . . . . . . . . . . . . . . . . . . . . . . . . . . . . . . . . . . . . . . . . . . 89
16 Security 95
16.1 Labs . . . . . . . . . . . . . . . . . . . . . . . . . . . . . . . . . . . . . . . . . . . . . . . . . . . . . . . . . 95
LFS258: V 2018-08-06 c© Copyright the Linux Foundation 2018. All rights reserved.

List of Figures
3.1 External Access via Browser . . . . . . . . . . . . . . . . . . . . . . . . . . . . . . . . . . . . . . . . . . . . 17
v

vi LIST OF FIGURES
LFS258: V 2018-08-06 c© Copyright the Linux Foundation 2018. All rights reserved.
Chapter 1
Introduction
1.1 Labs
Exercise 1.1: Configuring the System for sudoIt is very dangerous to run a root shell unless absolutely necessary: a single typo or other mistake can cause serious (evenfatal) damage.
Thus, the sensible procedure is to configure things such that single commands may be run with superuser privilege, by usingthe sudo mechanism. With sudo the user only needs to know their own password and never needs to know the root password.
If you are using a distribution such as Ubuntu, you may not need to do this lab to get sudo configured properly for the course.However, you should still make sure you understand the procedure.
To check if your system is already configured to let the user account you are using run sudo, just do a simple command like:
$ sudo ls
You should be prompted for your user password and then the command should execute. If instead, you get an error messageyou need to execute the following procedure.
Launch a root shell by typing su and then giving the root password, not your user password.
On all recent Linux distributions you should navigate to the /etc/sudoers.d subdirectory and create a file, usually with thename of the user to whom root wishes to grant sudo access. However, this convention is not actually necessary as sudo willscan all files in this directory as needed. The file can simply contain:
student ALL=(ALL) ALL
if the user is student.
An older practice (which certainly still works) is to add such a line at the end of the file /etc/sudoers. It is best to do so usingthe visudo program, which is careful about making sure you use the right syntax in your edit.
You probably also need to set proper permissions on the file by typing:
$ chmod 440 /etc/sudoers.d/student
1

2 CHAPTER 1. INTRODUCTION
(Note some Linux distributions may require 400 instead of 440 for the permissions.)
After you have done these steps, exit the root shell by typing exit and then try to do sudo ls again.
There are many other ways an administrator can configure sudo, including specifying only certain permissions for certainusers, limiting searched paths etc. The /etc/sudoers file is very well self-documented.
However, there is one more setting we highly recommend you do, even if your system already has sudo configured. Mostdistributions establish a different path for finding executables for normal users as compared to root users. In particular thedirectories /sbin and /usr/sbin are not searched, since sudo inherits the PATH of the user, not the full root user.
Thus, in this course we would have to be constantly reminding you of the full path to many system administration utilities;any enhancement to security is probably not worth the extra typing and figuring out which directories these programs are in.Consequently, we suggest you add the following line to the .bashrc file in your home directory:
PATH=$PATH:/usr/sbin:/sbin
If you log out and then log in again (you don’t have to reboot) this will be fully effective.
LFS258: V 2018-08-06 c© Copyright the Linux Foundation 2018. All rights reserved.

Chapter 2
Basics of Kubernetes
2.1 Labs
Exercise 2.1: View Online Resources
Visit kubernetes.io
With such a fast changing project, it is important to keep track of updates. The main place to find documentation of the currentversion is https://kubernetes.io/.
1. Open a browser and visit the https://kubernetes.io/ website.
2. In the upper right hand corner, use the drop down to view the versions available. It will say something like v1.9.
3. Select the top level link for Documentation. The links on the left of the page can be helpful in navigation.
4. As time permits navigate around other sub-pages such as SETUP, CONCEPTS, and TASKS to become familiar with thelayout.
Track Kubernetes Issues
There are hundreds, perhaps thousands, working on Kubernetes every day. With that many people working in parallel thereare good resources to see if others are experiencing a similar outage. Both the source code as well as feature and issuetracking are currently on github.com.
1. To view the main page use your browser to visit https://github.com/kubernetes/kubernetes/
2. Click on various sub-directories and view the basic information available.
3. Update your URL to point to https://github.com/kubernetes/kubernetes/issues. You should see a series ofissues, feature requests, and support communication.
3

4 CHAPTER 2. BASICS OF KUBERNETES
4. In the search box you probably see some existing text like is:issue is:open which allows you to filter on the kind ofinformation you would like to see. Append the search string to read: is:issue is:open label:kind/bug then pressenter.
5. You should now see bugs in descending date order. Across the top of the issues a menu area allows you to view entriesby author, labels, projects, milestones, and assignee as well. Take a moment to view the various other selection criteria.
6. Some times you may want to exclude a kind of output. Update the URL again, but precede the label with a minus sign,like: is:issue is:open -label:kind/bug. Now you see everything except bug reports.
7. Explore the page with the remaining time left.
LFS258: V 2018-08-06 c© Copyright the Linux Foundation 2018. All rights reserved.

Chapter 3
Installation and Configuration
3.1 Labs
Exercise 3.1: Install Kubernetes
Overview
There are several Kubernetes installation tools provided by various vendors. In this lab we will learn to use kubeadm As anindependent tool , it is planned to become the primary manner to build a Kubernetes cluster.
The labs were written using Ubuntu instances running on Google Cloud Platform (GCP). They have been written to bevendor-agnostic so could run on AWS, local hardware, or inside of virtualization to give you the most flexibility and options.Each platform will have different access methods and considerations.
If using your own equipment you should configure sudo access as shown in a previous lab. While most commands are runas a regular user, there are some which require root privilege. If you are accessing the nodes remotely, such as with GCP orAWS, you will need to use an SSH client such as a local terminal or PuTTY if not using Linux or a Mac. You can downloadPuTTY from www.putty.org. You would also require a .pem or .ppk file to access the nodes. Each cloud provider will have aprocess to download or create this file. If attending in-person instructor led training the file will be made available during class.
In the following exercise we will install Kubernetes on a single node then grow our cluster, adding more compute resources.Both nodes used are the same size, providing 2 vCPUs and 7.5G of memory. Smaller nodes could be used, but would runslower.
Various exercises will use YAML files, which are included in the text. You are encouraged to write the files when possible, asthe syntax of YAML has white space indentation requirements that are important to learn. An important note, do not use tabsin your YAML files, white space only. Indentation matters.
If using a PDF the use of copy and paste often does not paste the single quote correctly. It pastes as a back-quote instead.You will need to modify it by hand. The files have also been made available as a compressed tar file. You can view theresources by navigating to this URL:
https://training.linuxfoundation.org/cm/LFS258
To login use user: LFtraining and a password of: Penguin2014
5

6 CHAPTER 3. INSTALLATION AND CONFIGURATION
Once you find the name and link of the current file, which will change as the course updates, use wget to download the fileinto your node from the command line then expand it like this:
$ wget https://training.linuxfoundation.org/cm/LFS258/LFS258 V2018-08-06 SOLUTIONS.tar.bz2 \--user=LFtraining --password=Penguin2014
$ tar -xvf LFS258 V2018-08-06 SOLUTIONS.tar.bz2
(Note: depending on your software, if you are cutting and pasting the above instructions, the underscores may disappear andbe replaced by spaces, so you may have to edit the command line by hand!)
Install Kubernetes
Log into your nodes. If attending in-person instructor led training the node IP addresses will be provided by the instructor. Youwill need to use a .pem or .ppk key for access, depending on if you are using ssh from a terminal or PuTTY. The instructorwill provide this to you.
1. Open a terminal session on your first node. For example, connect via PuTTY or SSH session to the first GCP node. Theuser name may be different than the one shown, student. The IP used in the example will be different than the one youwill use.
[student@laptop ~]$ ssh -i LFS458.pem [email protected]
The authenticity of host ’54.214.214.156 (35.226.100.87)’ can’t be established.
ECDSA key fingerprint is SHA256:IPvznbkx93/Wc+ACwXrCcDDgvBwmvEXC9vmYhk2Wo1E.
ECDSA key fingerprint is MD5:d8:c9:4b:b0:b0:82:d3:95:08:08:4a:74:1b:f6:e1:9f.
Are you sure you want to continue connecting (yes/no)? yes
Warning: Permanently added ’35.226.100.87’ (ECDSA) to the list of known hosts.
<output_omitted>
2. Become root and update and upgrade the system. Answer any questions to use the defaults.
student@lfs458-node-1a0a:~$ sudo -i
root@lfs458-node-1a0a:~# apt-get update && apt-get upgrade -y
<output_omitted>
3. The main choices for a container environment are Docker and CoreOS Rocket - rkt. We will user Docker for class, asrkt requires a fair amount of extra work to enable for Kubernetes.
root@lfs458-node-1a0a:~# apt-get install -y docker.io
<output-omitted>
4. Add new repo for kubernetes. You could also get a tar file or use code from GitHub. Create the file and add an entry forthe main repo for your distribution.
root@lfs458-node-1a0a:~# vim /etc/apt/sources.list.d/kubernetes.list
deb http://apt.kubernetes.io/ kubernetes-xenial main
5. Add a GPG key for the packages.
root@lfs458-node-1a0a:~# curl -s https://packages.cloud.google.com/apt/doc/apt-key.gpg \
| apt-key add -
OK
6. Update with new repo.
root@lfs458-node-1a0a:~# apt-get update
<output-omitted>
LFS258: V 2018-08-06 c© Copyright the Linux Foundation 2018. All rights reserved.

3.1. LABS 7
7. Install the software. There are regular releases, the newest of which can be used by omitting the equal and versioninformation on the command line. Historically new version have lots of changes and a good chance of a bug or two.
root@lfs458-node-1a0a:~# apt-get install -y \
kubeadm=1.11.1-00 kubelet=1.11.1-00 kubectl=1.11.1-00
<output-omitted>
8. Deciding which pod network to use for Container Networking Interface (CNI), should take into account the expecteddemands on the cluster. There can be only one pod network per cluster, although the CNI-Genie project is trying tochange this.
The network must allow container-to-container, pod-to-pod, pod-to-service, and external-to-service communications. AsDocker uses host-private networking, using the docker0 virtual bridge and veth interfaces you would need to be onthat host to communicate.
While Flannel supports a wide range of architectures and is simple to deploy it does not support the use of NetworkPolicies, which we will work with later in the course. Instead we will use Calico which has this feature, but currentlydoes not deploy using CNI by default. Download the configuration file for Calico. Once downloaded look for the expectedIP range for containers. It is different than Flannel. A short url is shown, for this URL: https://docs.projectcalico.org/v2.6/getting-started/kubernetes/installation/hosted/kubeadm/1.6/calico.yaml
root@lfs458-node-1a0a:~# wget https://goo.gl/eWLkzb -O calico.yaml
root@lfs458-node-1a0a:~# less calico.yaml
....
# Configure the IP Pool from which Pod IPs will be chosen.
- name: CALICO_IPV4POOL_CIDR
value: "192.168.0.0/16"
....
9. Initialize the master. Read through the output line by line. Expect the output to change as the software matures. Atthe end are configuration directions to run as a non-root user. The token is mentioned as well. This information can befound later with the kubeadm token list command. The output also directs you to create a pod network to the cluster,which will be our next step. Pass the network settings Calico has it its configuration file.
root@lfs458-node-1a0a:~# kubeadm init --pod-network-cidr 192.168.0.0/16
init] using Kubernetes version: v1.11.1
[preflight] running pre-flight checks
I0729 21:28:27.255652 8722 kernel_validator.go:81] Validating kernel version
I0729 21:28:27.255959 8722 kernel_validator.go:96] Validating kernel config
[preflight/images] Pulling images required for setting up a Kubernetes cluster
<output-omitted>
Your Kubernetes master has initialized successfully!
To start using your cluster, you need to run (as a regular user):
mkdir -p $HOME/.kube
sudo cp -i /etc/kubernetes/admin.conf $HOME/.kube/config
sudo chown $(id -u):$(id -g) $HOME/.kube/config
You should now deploy a pod network to the cluster.
Run "kubectl apply -f [podnetwork].yaml" with one of the options listed at:
http://kubernetes.io/docs/admin/addons/
You can now join any number of machines by running the following on each node
as root:
kubeadm join --token 563c3c.9c978c8c0e5fbbe4 10.128.0.3:6443
--discovery-token-ca-cert-hash sha256:726e98586a8d12d428c0ee46
cbea90c094b8a78cb272917e2681f7b75abf875f
LFS258: V 2018-08-06 c© Copyright the Linux Foundation 2018. All rights reserved.

8 CHAPTER 3. INSTALLATION AND CONFIGURATION
10. Follow the directions at the end of the previous output to allow a non-root user access to the cluster. Take a quick lookat the configuration file once it has been copied and the permissions fixed.
root@lfs458-node-1a0a:~# exit
logout
student@lfs458-node-1a0a:~$ mkdir -p $HOME/.kube
student@lfs458-node-1a0a:~$ sudo cp -i /etc/kubernetes/admin.conf $HOME/.kube/config
student@lfs458-node-1a0a:~$ sudo chown $(id -u):$(id -g) $HOME/.kube/config
student@lfs458-node-1a0a:~$ less .kube/config
apiVersion: v1
clusters:
- cluster:
<output_omitted>
11. Apply the network plugin configuration to your cluster. Remember to copy the file to the current, non-root user directoryfirst. When it finished you should see a new tunnel interface. It may take up to a minute to be created. As you addobjects more interfaces will be created.
student@lfs458-node-1a0a:~$ sudo cp /root/calico.yaml .
student@lfs458-node-1a0a:~$ kubectl apply -f calico.yaml
configmap/calico-config created
daemonset.extensions/calico-etcd created
service/calico-etcd created
daemonset.extensions/calico-node created
<output_omitted>
student@lfs458-node-1a0a:~$ ip a
<output_omitted>
4: tunl0@NONE: <NOARP> mtu 1480 qdisc noop state DOWN group default qlen 1000
link/ipip 0.0.0.0 brd 0.0.0.0
12. View the available nodes of the cluster. It can take a minute or two for the status to change from NotReady to Ready.The NAME field can be used to look at the details. Your node name will be different.
student@lfs458-node-1a0a:~$ kubectl get node
NAME STATUS ROLES AGE VERSION
lfs458-node-1a0a Ready master 2m v1.11.1
13. Look at the details of the node. Work line by line to view the resources and their current status. Notice the status ofTaints. The master wont allow non-internal pods by default for security reasons. Take a moment to read each line ofoutput, some appear to be an error until you notice the status shows False.
student@lfs458-node-1a0a:~$ kubectl describe node lfs458-node-1a0a
Name: lfs458-node-1a0a
Roles: master
Labels: beta.kubernetes.io/arch=amd64
beta.kubernetes.io/os=linux
kubernetes.io/hostname=lfs458-node-1a0a
node-role.kubernetes.io/master=
Annotations: kubeadm.alpha.kubernetes.io/cri-socket=/var/run/dockershim.sock
node.alpha.kubernetes.io/ttl=0
volumes.kubernetes.io/controller-managed-attach-detach=true
CreationTimestamp: Sun, 29 Jul 2018 21:29:32 +0000
Taints: node-role.kubernetes.io/master:NoSchedule
<output_omitted>
LFS258: V 2018-08-06 c© Copyright the Linux Foundation 2018. All rights reserved.

3.1. LABS 9
14. Determine if the DNS and Calico pods are ready for use. They should all show a status of Running. It may take a minuteor two to transition from Pending.
student@lfs458-node-1a0a:~$ kubectl get pods --all-namespaces
NAMESPACE NAME READY STATUS RESTARTS AGE
kube-system calico-etcd-jlgwr 1/1 Running 0 6m
kube-system calico-kube-controllers-74b888b647-wlqf5 1/1 Running 0 6m
kube-system calico-node-tpvnr 2/2 Running 0 6m
kube-system coredns-78fcdf6894-nc5cn 1/1 Running 0 17m
kube-system coredns-78fcdf6894-xs96m 1/1 Running 0 17m
<output_omitted>
15. Allow the master server to run non-infrastructure pods. The master node begins tainted for security and performancereasons. Will will allow usage of the node in the training environment, but this step may be skipped in a productionenvironment. Note the minus sign (-) at the end, which is the syntax to remove a taint.
student@lfs458-node-1a0a:~$ kubectl taint nodes --all node-role.kubernetes.io/master-
node/lfs458-node-1a0a untainted
student@lfs458-node-1a0a:~$ kubectl describe node lfs458-node-1a0a | grep -i taint
Taints: <none>
16. While many objects have short names, a kubectl command can be a lot to type. We will enable bash auto-completion.Begin by adding the settings to the current shell. Then update the ~/.bashrc file to make it persistent.
student@lfs458-node-1a0a:~$ source <(kubectl completion bash)
student@lfs458-node-1a0a:~$ echo "source <(kubectl completion bash)" >> ~/.bashrc
17. Test by describing the node again. Type the first three letters of the sub-command then type the Tab key. Auto-completionassumes the default namespace. Pass the namespace first to use auto-completion with a different namespace.
student@lfs458-node-1a0a:~$ kubectl des<Tab> n<Tab><Tab> lfs458-<Tab>
student@lfs458-node-1a0a:~$ kubectl -n kube-s<Tab> g<Tab> po e<Tab>
Exercise 3.2: Grow the ClusterOpen another terminal and connect into a your second node. Install Docker and Kubernetes software. These are the samesteps we did on the master node.
We will use the lfs458-worker prompt for the node being added to help keep track of the proper node for each command.Note that the prompt indicates both the which user and which system to run the command.
1. Using the same process as before connect to a second node. If attending ILT use the same .pem key and a new IPprovided by the instructor to access the new node. Giving a title or color to the new terminal window is probably a goodidea to keep track of the two systems. The prompts can look very similar.
student@lfs458-worker:~$ sudo -i
root@lfs458-worker:~# apt-get update && apt-get upgrade -y
root@lfs458-worker:~# apt-get install -y docker.io
root@lfs458-worker:~# vim /etc/apt/sources.list.d/kubernetes.list
deb http://apt.kubernetes.io/ kubernetes-xenial main
root@lfs458-worker:~# curl -s \
https://packages.cloud.google.com/apt/doc/apt-key.gpg \
| apt-key add -
LFS258: V 2018-08-06 c© Copyright the Linux Foundation 2018. All rights reserved.
10 CHAPTER 3. INSTALLATION AND CONFIGURATION
root@lfs458-worker:~# apt-get update
root@lfs458-worker:~# apt-get install -y \
kubeadm=1.11.1-00 kubelet=1.11.1-00 kubectl=1.11.1-00
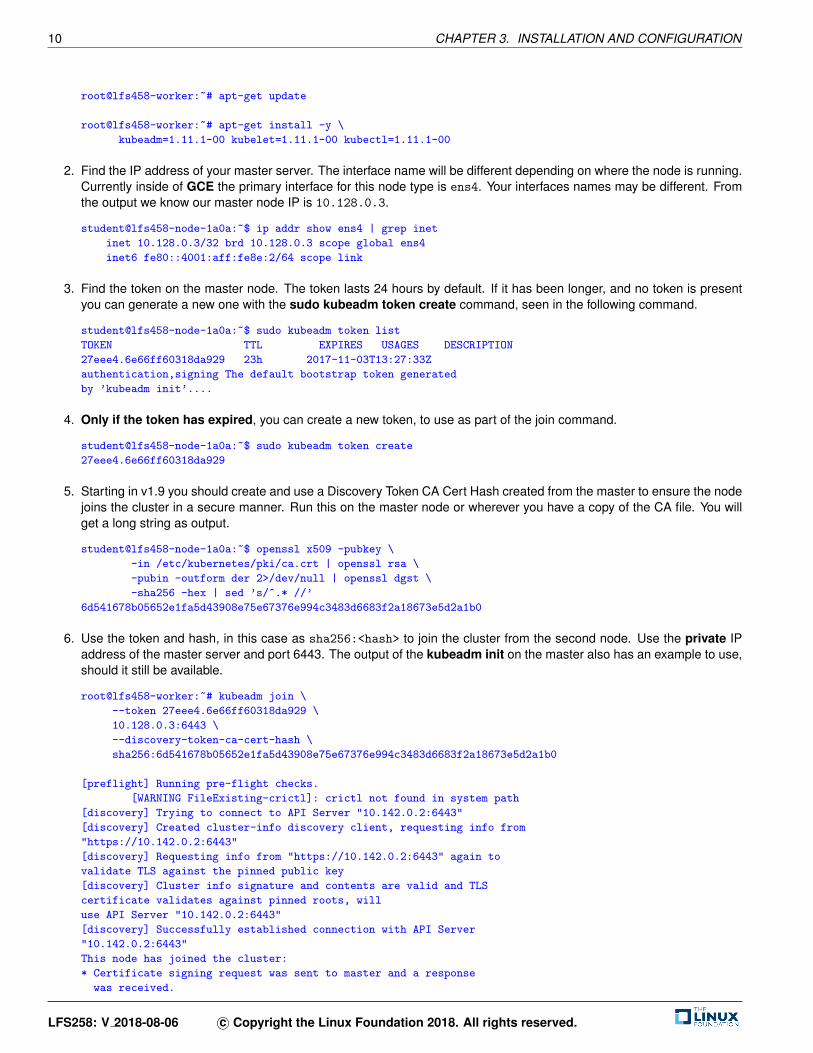
2. Find the IP address of your master server. The interface name will be different depending on where the node is running.Currently inside of GCE the primary interface for this node type is ens4. Your interfaces names may be different. Fromthe output we know our master node IP is 10.128.0.3.
student@lfs458-node-1a0a:~$ ip addr show ens4 | grep inet
inet 10.128.0.3/32 brd 10.128.0.3 scope global ens4
inet6 fe80::4001:aff:fe8e:2/64 scope link
3. Find the token on the master node. The token lasts 24 hours by default. If it has been longer, and no token is presentyou can generate a new one with the sudo kubeadm token create command, seen in the following command.
student@lfs458-node-1a0a:~$ sudo kubeadm token list
TOKEN TTL EXPIRES USAGES DESCRIPTION
27eee4.6e66ff60318da929 23h 2017-11-03T13:27:33Z
authentication,signing The default bootstrap token generated
by ’kubeadm init’....
4. Only if the token has expired, you can create a new token, to use as part of the join command.
student@lfs458-node-1a0a:~$ sudo kubeadm token create
27eee4.6e66ff60318da929
5. Starting in v1.9 you should create and use a Discovery Token CA Cert Hash created from the master to ensure the nodejoins the cluster in a secure manner. Run this on the master node or wherever you have a copy of the CA file. You willget a long string as output.
student@lfs458-node-1a0a:~$ openssl x509 -pubkey \
-in /etc/kubernetes/pki/ca.crt | openssl rsa \
-pubin -outform der 2>/dev/null | openssl dgst \
-sha256 -hex | sed ’s/^.* //’
6d541678b05652e1fa5d43908e75e67376e994c3483d6683f2a18673e5d2a1b0
6. Use the token and hash, in this case as sha256:<hash> to join the cluster from the second node. Use the private IPaddress of the master server and port 6443. The output of the kubeadm init on the master also has an example to use,should it still be available.
root@lfs458-worker:~# kubeadm join \
--token 27eee4.6e66ff60318da929 \
10.128.0.3:6443 \
--discovery-token-ca-cert-hash \
sha256:6d541678b05652e1fa5d43908e75e67376e994c3483d6683f2a18673e5d2a1b0
[preflight] Running pre-flight checks.
[WARNING FileExisting-crictl]: crictl not found in system path
[discovery] Trying to connect to API Server "10.142.0.2:6443"
[discovery] Created cluster-info discovery client, requesting info from
"https://10.142.0.2:6443"
[discovery] Requesting info from "https://10.142.0.2:6443" again to
validate TLS against the pinned public key
[discovery] Cluster info signature and contents are valid and TLS
certificate validates against pinned roots, will
use API Server "10.142.0.2:6443"
[discovery] Successfully established connection with API Server
"10.142.0.2:6443"
This node has joined the cluster:
* Certificate signing request was sent to master and a response
was received.
LFS258: V 2018-08-06 c© Copyright the Linux Foundation 2018. All rights reserved.

3.1. LABS 11
* The Kubelet was informed of the new secure connection details.
Run ’kubectl get nodes’ on the master to see this node join the cluster.
7. Try to run the kubectl command on the secondary system. It should fail. You do not have the cluster or authenticationkeys in your local .kube/config file.
root@lfs458-worker:~# exit
student@lfs458-worker:~$ kubectl get nodes
The connection to the server localhost:8080 was refused
- did you specify the right host or port?
student@lfs458-worker:~$ ls -l .kube
ls: cannot access ’.kube’: No such file or directory
8. Verify the node has joined the cluster from the master node. You may need to wait a minute for the node to show aReady state.
student@lfs458-node-1a0a:~$ kubectl get nodes
NAME STATUS ROLES AGE VERSION
lfs458-node-1a0a Ready master 17m v1.11.1
lfs458-worker NotReady <none> 23s v1.11.1
student@lfs458-node-1a0a:~$ kubectl get nodes
NAME STATUS ROLES AGE VERSION
lfs458-node-1a0a Ready master 17m v1.11.1
lfs458-worker Ready <none> 1m v1.11.1
9. View the current namespaces configured on the cluster.
student@lfs458-node-1a0a:~$ kubectl get namespace
NAME STATUS AGE
default Active 17m
kube-public Active 17m
kube-system Active 17m
10. View the networking on the master and second node. You should see a docker0, tunl0, and calic interfaces amongothers.
student@lfs458-node-1a0a:~$ ip a
<output_omitted>
Exercise 3.3: Deploy A Simple ApplicationWe will test to see if we can deploy a simple application, in this case the nginx web server.
1. Create a new deployment, which is an Kubernetes object while will deploy and monitor an application in a container.Verify it is running and the desired number of container matches the available.
student@lfs458-node-1a0a:~$ kubectl run nginx --image nginx
deployment.apps/nginx created
student@lfs458-node-1a0a:~$ kubectl get deployments
NAME DESIRED CURRENT UP-TO-DATE AVAILABLE AGE
nginx 1 1 1 1 6s
2. View the details of the deployment. Remember auto-completion will work for sub-commands and resources as well.
student@lfs458-node-1a0a:~$ kubectl describe deployment nginx
Name: nginx
Namespace: default
CreationTimestamp: Tue, 26 Sep 2017 21:49:51 +0000
LFS258: V 2018-08-06 c© Copyright the Linux Foundation 2018. All rights reserved.

12 CHAPTER 3. INSTALLATION AND CONFIGURATION
Labels: run=nginx
Annotations: deployment.kubernetes.io/revision=1
Selector: run=nginx
Replicas: 1 desired | 1 updated | 1 total | 1 available | 0 unavailable
StrategyType: RollingUpdate
MinReadySeconds: 0
RollingUpdateStrategy: 25% max unavailable, 25% max surge
<output_omitted>
3. View the basic steps the cluster took in order to pull and deploy the new application. You should see about ten long linesof output.
student@lfs458-node-1a0a:~$ kubectl get events
<output_omitted>
4. You can also view the output in yaml format, which could be used to create this deployment again or new deployments.Get the information but change the output to yaml. Note that halfway down there is status information of the currentdeployment.
student@lfs458-node-1a0a:~$ kubectl get deployment nginx -o yaml
apiVersion: extensions/v1beta1
kind: Deployment
metadata:
annotations:
deployment.kubernetes.io/revision: "1"
creationTimestamp: 2017-09-27T18:21:25Z
<output_omitted>
5. Run the command again and redirect the output to a file. Then edit the file. Remove the creationTimestamp,resourceVersion, selfLink, and uid lines. Also remove all the lines including and after status:, which shouldbe somewhere around line 39, if others have already been removed.
student@lfs458-node-1a0a:~$ kubectl get deployment nginx -o yaml > first.yaml
student@lfs458-node-1a0a:~$ vim first.yaml
6. Delete the existing deployment.
student@lfs458-node-1a0a:~$ kubectl delete deployment nginx
deployment.extensions "nginx" deleted
7. Create the deployment again this time using the file.
student@lfs458-node-1a0a:~$ kubectl create -f first.yaml
deployment.extension/nginx created
8. Look at the yaml output of this iteration and compare it against the first. The time stamp, resource version and
uid we had deleted are in the new file. These are generated for each resource we create, so we need to delete themfrom yaml files to avoid conflicts or false information. The status should not be hard-coded either.
student@lfs458-node-1a0a:~$ kubectl get deployment nginx -o yaml > second.yaml
student@lfs458-node-1a0a:~$ diff first.yaml second.yaml
<output_omitted>
9. Now that we have worked with the raw output we will explore two other ways of generating useful YAML or JSON. Usethe --dry-run option and verify no object was created. Only the prior nginx deployment should be found. The outputlacks the unique information we removed before.
student@lfs458-node-1a0a:~$ kubectl run two --image=nginx --dry-run -o yaml
apiVersion: apps/v1beta1
kind: Deployment
metadata:
LFS258: V 2018-08-06 c© Copyright the Linux Foundation 2018. All rights reserved.

3.1. LABS 13
creationTimestamp: null
labels:
run: two
name: two
spec:
<output_omitted>
student@lfs458-node-1a0a:~$ kubectl get deployment
NAME DESIRED CURRENT UP-TO-DATE AVAILABLE AGE
nginx 1 1 1 1 7m
10. Existing objects can be viewed in a ready to use YAML output. Take a look at the existing nginx deployment. Note thereis more detail to the –export option.
student@lfs458-node-1a0a:~$ kubectl get deployments nginx --export -o yaml
apiVersion: extensions/v1beta1
kind: Deployment
metadata:
annotations:
deployment.kubernetes.io/revision: "1"
creationTimestamp: null
generation: 1
labels:
run: nginx
<output_omitted>
11. The output can also be viewed in JSON output.
student@lfs458-node-1a0a:~$ kubectl get deployments. nginx --export -o json
{
"apiVersion": "extensions/v1beta1",
"kind": "Deployment",
"metadata": {
"annotations": {
"deployment.kubernetes.io/revision": "1"
},
<output_omitted>
12. The newly deployed nginx container is a light weight web server. We will need to create a service to view the defaultwelcome page. Begin by looking at the help output. Note that there are several examples given, about halfway throughthe output.
student@lfs458-node-1a0a:~$ kubectl expose -h
<output_omitted>
13. Now try to gain access to the web server. As we have not declared a port to use you will receive an error.
student@lfs458-node-1a0a:~$ kubectl expose deployment/nginx
error: couldn’t find port via --port flag or introspection
See ’kubectl expose -h’ for help and examples.
14. To change an existing configuration in a cluster can be done with subcommands apply, edit or patch for non-disruptiveupdates. The apply command does a three-way diff of previous, current, and supplied input to determine modificationsto make. Fields not mentioned are unaffected. The edit function performs a get, opens an editor, then an apply. Youcan update API objects in place with JSON patch and merge patch or strategic merge patch functionality.
If the configuration has resource fields which cannot be updated once initialized then a disruptive update could be doneusing the replace --force option. This deletes first then re-creates a resource.
Edit the file. Find the container name, somewhere around line 31 and add the port information as shown below.
student@lfs458-node-1a0a:~$ vim first.yaml
....
spec:
LFS258: V 2018-08-06 c© Copyright the Linux Foundation 2018. All rights reserved.

14 CHAPTER 3. INSTALLATION AND CONFIGURATION
containers:
- image: nginx
imagePullPolicy: Always
name: nginx
ports: # Add these
- containerPort: 80 # three
protocol: TCP # lines
resources: {}
....
15. Due to how the object was created we will need to use replace to terminate and create a new deployment.
student@lfs458-node-1a0a:~$ kubectl replace -f first.yaml
deployment.extensions/nginx replaced
16. View the Pod and Deployment. Note the AGE shows the Pod was re-created.
student@lfs458-node-1a0a:~$ kubectl get deploy,pod
NAME DESIRED CURRENT UP-TO-DATE AVAILABLE AGE
deployment.extensions/nginx 1 1 1 1 8s
NAME READY STATUS RESTARTS AGE
pod/nginx-7cbc4b4d9c-l8cgl 1/1 Running 0 8s
17. Try to expose the resource again. This time it should work.
student@lfs458-node-1a0a:~$ kubectl expose deployment/nginx
service/nginx exposed
18. Verify the service configuration. First look at the service information, then at the endpoint information. Note the ClusterIP is not the current endpoint. Take note of the current endpoint IP. In the example below it is 10.244.1.99:80. We willuse this information in a few steps.
student@lfs458-node-1a0a:~$ kubectl get svc nginx
NAME TYPE CLUSTER-IP EXTERNAL-IP PORT(S) AGE
nginx ClusterIP 10.100.61.122 <none> 80/TCP 3m
student@lfs458-node-1a0a:~$ kubectl get ep nginx
NAME ENDPOINTS AGE
nginx 10.244.1.99:80 4m
19. Determine which node the container is running on. Log into that node and use tcpdump to view traffic on the tunl0,as in tunnel zero, interface. The second node in this example. You may also see traffic on an interface which starts withcali and some string. Leave that command running while you run curl in the following step. You should see severalmessages go back and forth, including a HTTP: HTTP/1.1 200 OK and a ack response to the same sequence.
student@lfs458-node-1a0a:~$ kubectl describe pod nginx-7cbc4b4d9c-d27xw \
| grep Node:
Node: lfs458-worker/10.128.0.5
student@lfs458-worker:~$ sudo tcpdump -i tunl0
tcpdump: verbose output suppressed, use -v or -vv for full protocol...
listening on tunl0, link-type EN10MB (Ethernet), capture size...
<output_omitted>
20. Test access to the Cluster IP, port 80. You should see the generic nginx installed and working page. The output shouldbe the same when you look at the ENDPOINTS IP address. If the curl command times out the pod may be running onthe other node. Run the same command on that node and it should work.
student@lfs458-node-1a0a:~$ curl 10.100.61.122:80
<!DOCTYPE html>
<html>
<head>
LFS258: V 2018-08-06 c© Copyright the Linux Foundation 2018. All rights reserved.

3.1. LABS 15
<title>Welcome to nginx!</title>
<style>
<output_omitted>
21. Now scale up the deployment from one to three web servers.
student@lfs458-node-1a0a:~$ kubectl get deployment nginx
NAME DESIRED CURRENT UP-TO-DATE AVAILABLE AGE
nginx 1 1 1 1 12m
student@lfs458-node-1a0a:~$ kubectl scale deployment nginx --replicas=3
deployment.extensions/nginx scaled
student@lfs458-node-1a0a:~$ kubectl get deployment nginx
NAME DESIRED CURRENT UP-TO-DATE AVAILABLE AGE
nginx 3 3 3 3 12m
22. View the current endpoints. There now should be three. If the DESIRED above said three, but AVAILABLE said two waita few seconds and try again, it could be slow to fully deploy.
student@lfs458-node-1a0a:~$ kubectl get ep nginx
NAME ENDPOINTS AGE
nginx 10.244.0.66:80,10.244.1.100:80,10.244.1.99:80 10m
23. Find the oldest pod of the nginx deployment and delete it. The Tab key can be helpful for the long names. Use the AGE
field to determine which was running the longest. You will notice activity in the other terminal where tcpdump is running,when you delete the pod.
student@lfs458-node-1a0a:~$ kubectl get po -o wide
NAME READY STATUS RESTARTS AGE IP
nginx-1423793266-7f1qw 1/1 Running 0 14m 10.244.0.66
nginx-1423793266-8w2nk 1/1 Running 0 1m 10.244.1.100
nginx-1423793266-fbt4b 1/1 Running 0 1m 10.244.1.101
student@lfs458-node-1a0a:~$ kubectl delete po nginx-1423793266-7f1qw
pod "nginx-1423793266-7f1qw" deleted
24. Wait a minute or two then view the pods again. One should be newer than the others. In the following example twominutes instead of four. If your tcpdump was using the veth interface of that container it will error out.
student@lfs458-node-1a0a:~$ kubectl get po
NAME READY STATUS RESTARTS AGE
nginx-1423793266-13p69 1/1 Running 0 2m
nginx-1423793266-8w2nk 1/1 Running 0 4m
nginx-1423793266-fbt4b 1/1 Running 0 4m
25. View the endpoints again. The original endpoint IP is no longer in use. You can delete any of the pods and the service
will forward traffic to the existing backend pods.
student@lfs458-node-1a0a:~$ kubectl get ep nginx
NAME ENDPOINTS AGE
nginx 10.244.0.66:80,10.244.1.100:80,10.244.1.101:80 15m
26. Test access to the web server again, using the ClusterIP address, then any of the endpoint IP addresses. Even thoughthe endpoints have changed you still have access to the web server. This access is only from within the cluster.
student@lfs458-node-1a0a:~$ curl 10.100.61.122:80
<!DOCTYPE html>
<html>
<head>
<title>Welcome to nginx!</title>
<style>
body {
<output_omitted>
LFS258: V 2018-08-06 c© Copyright the Linux Foundation 2018. All rights reserved.

16 CHAPTER 3. INSTALLATION AND CONFIGURATION
Exercise 3.4: Access from Outside the ClusterYou can access a Service from outside the cluster using a DNS add-on or vi environment variables. We will use environmentvariables to gain access to a Pod.
1. Begin by getting a list of the pods.
student@lfs458-node-1a0a:~$ kubectl get po
NAME READY STATUS RESTARTS AGE
nginx-1423793266-13p69 1/1 Running 0 8m
nginx-1423793266-8w2nk 1/1 Running 0 10m
nginx-1423793266-fbt4b 1/1 Running 0 10m
2. Choose one of the pods and use the exec command to run printenv inside the pod. The following example uses thefirst pod listed above.
student@lfs458-node-1a0a:~$ kubectl exec nginx-1423793266-13p69 \
-- printenv |grep KUBERNETES
KUBERNETES_SERVICE_PORT_HTTPS=443
KUBERNETES_SERVICE_HOST=10.96.0.1
KUBERNETES_SERVICE_PORT=443
NGINX_SERVICE_HOST=10.100.61.122
NGINX_SERVICE_PORT=80
<output_omitted>
3. Find and then delete the existing service for nginx.
student@lfs458-node-1a0a:~$ kubectl get svc
NAME TYPE CLUSTER-IP EXTERNAL-IP PORT(S) AGE
kubernetes ClusterIP 10.96.0.1 <none> 443/TCP 2d
nginx ClusterIP 10.100.61.122 <none> 80/TCP 40m
4. Delete the service.
student@lfs458-node-1a0a:~$ kubectl delete svc nginx
service "nginx" deleted
5. Create the service again, but this time pass the LoadBalancer type. Check to see the status and note the external portsmentioned. The output will show the External-IP as pending. Unless a provider responds with a load balancer it willcontinue to show as pending.
student@lfs458-node-1a0a:~$ kubectl expose deployment nginx --type=LoadBalancer
service/nginx exposed
student@lfs458-node-1a0a:~$ kubectl get svc
NAME TYPE CLUSTER-IP EXTERNAL-IP PORT(S) AGE
kubernetes ClusterIP 10.96.0.1 <none> 443/TCP 2d
nginx LoadBalancer 10.104.249.102 <pending> 80:32753/TCP 2s
6. Open a browser on your local system, not the GCE node, and use the public IP of your node and port 32753, shownin the output above. If running the labs on a remote system like AWS or GCE the CLUSTER-IPs are internal. Use thepublic IP you used with SSH to gain access.
LFS258: V 2018-08-06 c© Copyright the Linux Foundation 2018. All rights reserved.

3.1. LABS 17
Figure 3.1: External Access via Browser
7. Scale the deployment to zero replicas. Then test the web page again. It should fail.
student@lfs458-node-1a0a:~$ kubectl scale deployment nginx --replicas=0
deployment.extensions/nginx scaled
student@lfs458-node-1a0a:~$ kubectl get po
No resources found.
8. Scale the deployment up to two replicas. The web page should work again.
student@lfs458-node-1a0a:~$ kubectl scale deployment nginx --replicas=2
deployment.extensions/nginx scaled
student@lfs458-node-1a0a:~$ kubectl get po
.NAME READY STATUS RESTARTS AGE
nginx-1423793266-7x181 1/1 Running 0 1m
nginx-1423793266-s6vcz 1/1 Running 0 1m
9. Delete the deployment to recover system resources. Note that deleting a deployment does not delete the endpoints orservices.
student@lfs458-node-1a0a:~$ kubectl delete deployments nginx
deployment.extensions "nginx" deleted
student@lfs458-node-1a0a:~$ kubectl delete ep nginx
endpoints "nginx" deleted
student@lfs458-node-1a0a:~$ kubectl delete svc nginx
service "nginx" deleted
LFS258: V 2018-08-06 c© Copyright the Linux Foundation 2018. All rights reserved.

18 CHAPTER 3. INSTALLATION AND CONFIGURATION
LFS258: V 2018-08-06 c© Copyright the Linux Foundation 2018. All rights reserved.

Chapter 4
Kubernetes Architecture
4.1 Labs
Exercise 4.1: Working with CPU and Memory Constraints
Overview
We will continue working with our cluster, which we built in the previous lab. We will work with resource limits, more withnamespaces and then a complex deployment which you can explore to further understand the architecture and relationships.
Use SSH or PuTTY to connect to the nodes you installed in the previous exercise. We will deploy an application called stressinside a container, and then use resource limits to constrain the resources the application has access to use.
1. Use a container called stress, which we will name hog, to generate load. Verify you have a container running.
student@lfs458-node-1a0a:~$ kubectl run hog --image vish/stress
deployment.apps/hog created
student@lfs458-node-1a0a:~$ kubectl get deployments
NAME DESIRED CURRENT UP-TO-DATE AVAILABLE AGE
hog 1 1 1 1 12s
2. Use the describe argument to view details, then view the output in YAML format. Note there are no settings limitingresource usage. Instead, there are empty curly brackets.
student@lfs458-node-1a0a:~$ kubectl describe deployment hog
Name: hog
Namespace: default
CreationTimestamp: Wed, 27 Sep 2017 20:09:57 +0000
Labels: run=hog
<output_omitted>
student@lfs458-node-1a0a:~$ kubectl get deployment hog -o yaml
apiVersion: extensions/v1beta1
kind: Deployment
19

20 CHAPTER 4. KUBERNETES ARCHITECTURE
Metadata:
<output_omitted>
template:
metadata:
creationTimestamp: null
labels:
run: hog
spec:
containers:
- image: vish/stress
imagePullPolicy: Always
name: hog
resources: {}
terminationMessagePath: /dev/termination-log
<output_omitted>
3. We will use the YAML output to create our own configuration file. The --export option can be useful to not includeunique parameters.
student@lfs458-node-1a0a:~$ kubectl get deployment hog \
--export -o yaml > hog.yaml
4. If you did not use the --export option we will need to remove the status output, creationTimestamp and othersettings, as we don’t want to set unique generated parameters. We will also add in memory limits found below.
student@lfs458-node-1a0a:~$ vim hog.yaml
.
imagePullPolicy: Always
name: hog
resources: # Edit to remove {}
limits: # Add these 4 lines
memory: "4Gi"
requests:
memory: "2500Mi"
terminationMessagePath: /dev/termination-log
terminationMessagePolicy: File
....
5. Replace the deployment using the newly edited file.
student@lfs458-node-1a0a:~$ kubectl replace -f hog.yaml
deployment.extensions/hog replaced
6. Verify the change has been made. The deployment should now show resource limits.
student@lfs458-node-1a0a:~$ kubectl get deployment hog -o yaml |less
....
resources:
limits:
memory: 4Gi
requests:
memory: 2500Mi
terminationMessagePath: /dev/termination-log
....
7. View the stdio of the hog container. Note how how much memory has been allocated.
student@lfs458-node-1a0a:~$ kubectl get po
NAME READY STATUS RESTARTS AGE
hog-64cbfcc7cf-lwq66 1/1 Running 0 2m
LFS258: V 2018-08-06 c© Copyright the Linux Foundation 2018. All rights reserved.

4.1. LABS 21
student@lfs458-node-1a0a:~$ kubectl logs hog-64cbfcc7cf-lwq66
I1102 16:16:42.638972 1 main.go:26] Allocating "0" memory, in
"4Ki" chunks, with a 1ms sleep between allocations
I1102 16:16:42.639064 1 main.go:29] Allocated "0" memory
8. Open a second and third terminal to access both master and second nodes. Run top to view resource usage. Youshould not see unusual resource usage at this point. The dockerd and top processes should be using about the sameamount of resources. The stress command should not be using enough resources to show up.
9. Edit the hog configuration file and add arguments for stress to consume CPU and memory.
student@lfs458-node-1a0a:~$ vim hog.yaml
resources:
limits:
cpu: "1"
memory: "4Gi"
requests:
cpu: "0.5"
memory: "500Mi"
args:
- -cpus
- "2"
- -mem-total
- "950Mi"
- -mem-alloc-size
- "100Mi"
- -mem-alloc-sleep
- "1s"
10. Delete and recreate the deployment. You should see CPU usage almost immediately and memory allocation happen in100M chunks allocated to the stress program. Check both nodes as the container could deployed to either. The nextstep will help if you have errors.
student@lfs458-node-1a0a:~$ kubectl delete deployment hog
deployment.extensions/hog deleted
student@lfs458-node-1a0a:~$ kubectl apply -f hog.yaml
deployment.extensions/hog created
11. Should the resources not show as used, there may have been an issue inside of the container. Kubernetes shows itas running, but the actual workload has failed. Or the container may have failed; for example if you were missing aparameter the container may panic and show the following output.
student@lfs458-node-1a0a:~$ kubectl get pod
NAME READY STATUS RESTARTS AGE
hog-1985182137-5bz2w 0/1 Error 1 5s
student@lfs458-node-1a0a:~$ kubectl logs hog-1985182137-5bz2w
panic: cannot parse ’150mi’: unable to parse quantity’s suffix
goroutine 1 [running]:
panic(0x5ff9a0, 0xc820014cb0)
/usr/local/go/src/runtime/panic.go:481 +0x3e6
k8s.io/kubernetes/pkg/api/resource.MustParse(0x7ffe460c0e69, 0x5, 0x0, 0x0, 0x0, 0x0, 0x0, 0x0, 0x0)
/usr/local/google/home/vishnuk/go/src/k8s.io/kubernetes/pkg/api/resource/quantity.go:134 +0x287
main.main()
/usr/local/google/home/vishnuk/go/src/github.com/vishh/stress/main.go:24 +0x43
12. Here is an example of an improper parameter. The container is running, but not allocating memory. It should show theusage requested from the YAML file.
LFS258: V 2018-08-06 c© Copyright the Linux Foundation 2018. All rights reserved.

22 CHAPTER 4. KUBERNETES ARCHITECTURE
student@lfs458-node-1a0a:~$ kubectl get po
NAME READY STATUS RESTARTS AGE
hog-1603763060-x3vnn 1/1 Running 0 8s
student@lfs458-node-1a0a:~$ kubectl logs hog-1603763060-x3vnn
I0927 21:09:23.514921 1 main.go:26] Allocating "0" memory, in "4Ki" chunks, with a 1ms sleep \
between allocations
I0927 21:09:23.514984 1 main.go:39] Spawning a thread to consume CPU
I0927 21:09:23.514991 1 main.go:39] Spawning a thread to consume CPU
I0927 21:09:23.514997 1 main.go:29] Allocated "0" memory
Exercise 4.2: Resource Limits for a NamespaceThe previous steps set limits for that particular deployment. You can also set limits on an entire namespace. We will createa new namespace and configure the hog deployment to run within. When set hog should not be able to use the previousamount of resources.
1. Begin by creating a new namespace called low-usage-limit and verify it exists.
student@lfs458-node-1a0a:~$ kubectl create namespace low-usage-limit
namespace/low-usage-limit created
student@lfs458-node-1a0a:~$ kubectl get namespace
NAME STATUS AGE
default Active 1h
kube-public Active 1h
kube-system Active 1h
low-usage-limit Active 42s
2. Create a YAML file which limits CPU and memory usage. The kind to use is LimitRange.
student@lfs458-node-1a0a:~$ vim low-resource-range.yaml
apiVersion: v1
kind: LimitRange
metadata:
name: low-resource-range
spec:
limits:
- default:
cpu: 1
memory: 500Mi
defaultRequest:
cpu: 0.5
memory: 100Mi
type: Container
3. Create the LimitRange object and assign it to the newly created namespace low-usage-limit
student@lfs458-node-1a0a:~$ kubectl create -f low-resource-range.yaml \
--namespace=low-usage-limit
limitrange/low-resource-range created
4. Verify it works. Remember that every command needs a namespace and context to work. Defaults are used if notprovided.
student@lfs458-node-1a0a:~$ kubectl get LimitRange
No resources found.
student@lfs458-node-1a0a:~$ kubectl get LimitRange --all-namespaces
NAMESPACE NAME CREATED AT
low-usage-limit low-resource-range 2018-07-08T06:28:33Z
LFS258: V 2018-08-06 c© Copyright the Linux Foundation 2018. All rights reserved.

4.1. LABS 23
5. Create a new deployment in the namespace.
student@lfs458-node-1a0a:~$ kubectl run limited-hog \
--image vish/stress -n low-usage-limit
deployment.apps/limited-hog created
6. List the current deployments. Note hog continues to run in the default namespace. If you chose to use the Caliconetwork policy you may see a couple more than what is listed below.
student@lfs458-node-1a0a:~$ kubectl get deployments --all-namespaces
NAMESPACE NAME DESIRED CURRENT UP-TO-DATE AVAILABLE AGE
default hog 1 1 1 1 25m
kube-system kube-dns 1 1 1 1 2d
low-usage-limit limited-hog 1 1 1 1 1m
7. View all pods within the namespace.
student@lfs458-node-1a0a:~$ kubectl get pods -n low-usage-limit
NAME READY STATUS RESTARTS AGE
limited-hog-2556092078-wnpnv 1/1 Running 0 3m
8. Look at the details of the pod. You will note it has the settings inherited from the entire namespace. The use of shellcompletion should work if you declare the namespace first.
student@lfs459-node-1a0a:~$ kubectl -n low-usage-limit get pod limited-hog-2556092078-wnpnv -o yaml
<output_omitted>
spec:
containers:
- image: vish/stress
imagePullPolicy: Always
name: limited-hog
resources:
limits:
cpu: "1"
memory: 500Mi
requests:
cpu: 500m
memory: 100Mi
terminationMessagePath: /dev/termination-log
<output_omitted>
9. Copy and edit the config file for the original hog file. Add the namespace: line so that a new deployment would be in thelow-usage-limit namespace.
student@lfs458-node-1a0a:~$ cp hog.yaml hog2.yaml
student@lfs458-node-1a0a:~$ vim hog2.yaml
....
labels:
run: hog
name: hog
namespace: low-usage-limit #<<--- Add this line
spec:
....
10. Open up extra terminal sessions so you can have top running in each. When the new deployment is created it willprobably be scheduled on the node not yet under any stress.
Create the deployment.
student@lfs458-node-1a0a:~$ kubectl create -f hog2.yaml
deployment.extensions/hog created
11. View the deployments. Note there are two with the same name, but in different namespaces.
LFS258: V 2018-08-06 c© Copyright the Linux Foundation 2018. All rights reserved.

24 CHAPTER 4. KUBERNETES ARCHITECTURE
student@lfs458-node-1a0a:~$ kubectl get deployments --all-namespaces
NAMESPACE NAME DESIRED CURRENT UP-TO-DATE AVAILABLE AGE
default hog 1 1 1 1 15m
kube-system kube-dns 1 1 1 1 3h
low-usage-limit hog 1 1 1 1 27s
low-usage-limit limited-hog 1 1 1 1 4m
12. Look at the top output running in other terminals. You should find that both deployments are using the same amountof resources, once the memory is fully allocated. Per-deployment settings override the global namespace settings. Youshould see something like the following lines one from each node
25128 root 20 0 958532 954672 3180 R 100.0 11.7 0:52.27 stress
24875 root 20 0 958532 954800 3180 R 100.3 11.7 41:04.97 stress
13. Delete the hog deployments to recover system resources.
student@lfs458-node-1a0a:~$ kubectl -n low-usage-limit delete deployment hog i
deployment.extensions "hog" deleted
student@lfs458-node-1a0a:~$ kubectl delete deployment hog
deployment.extensions "hog" deleted
Exercise 4.3: More Complex DeploymentWe will now deploy a more complex demo application to test the cluster. When completed it will be a sock shopping site.The short URL is shown below for: https://raw.githubusercontent.com/microservices-demo/microservices-demo/master/deploy/kubernetes/complete-demo.yaml
1. Begin by downloading the pre-made YAML file from github.
student@lfs458-node-1a0a:~$ wget https://tinyurl.com/y8bn2awp -O complete-demo.yaml
Resolving tinyurl.com (tinyurl.com)... 104.20.218.42, 104.20.219.42,
Connecting to tinyurl.com (tinyurl.com)|104.20.218.42|:443... connected.
HTTP request sent, awaiting response... 301 Moved Permanently
Location: https://raw.githubusercontent.com/microservices-demo/microservices-...
--2017-11-02 16:54:27-- https://raw.githubusercontent.com/microservices-dem...
Resolving raw.githubusercontent.com (raw.githubusercontent.com)... 151.101.5...
Connecting to raw.githubusercontent.com (raw.githubusercontent.com)|151.101....
HTTP request sent, awaiting response... 200 OK
<output_omitted>
2. Find the expected namespaces inside the file. It should be sock-shop. Also note the various settings. This file willdeploy several containers which work together, providing a shopping website. As we work with other parameters youcould revisit this file to see potential settings.
student@lfs458-node-1a0a:~$ less complete-demo.yaml
apiVersion: extensions/v1beta1
kind: Deployment
metadata:
name: carts-db
labels:
name: carts-db
namespace: sock-shop
spec:
replicas: 1
<output_omitted>
3. Create the namespace and verify it was made.
LFS258: V 2018-08-06 c© Copyright the Linux Foundation 2018. All rights reserved.

4.1. LABS 25
student@lfs458-node-1a0a:~$ kubectl create namespace sock-shop
namespace/sock-shop created
student@lfs458-node-1a0a:~$ kubectl get namespace
NAME STATUS AGE
default Active 35m
kube-public Active 35m
kube-system Active 35m
low-usage-limit Active 25m
sock-shop Active 5s
4. View the images the new application will deploy.
student@lfs458-node-1a0a:~$ grep image complete-demo.yaml
image: mongo
image: weaveworksdemos/carts:0.4.8
image: weaveworksdemos/catalogue-db:0.3.0
image: weaveworksdemos/catalogue:0.3.5
image: weaveworksdemos/front-end:0.3.12
image: mongo
image: weaveworksdemos/orders:0.4.7
image: weaveworksdemos/payment:0.4.3
image: weaveworksdemos/queue-master:0.3.1
image: rabbitmq:3.6.8
image: weaveworksdemos/shipping:0.4.8
image: weaveworksdemos/user-db:0.4.0
image: weaveworksdemos/user:0.4.4
5. Create the new shopping website using the YAML file. Use the namespace you recently created. Note that the deploy-ments match the images we saw in the file.
student@lfs458-node-1a0a:~$ kubectl apply -n sock-shop -f complete-demo.yaml
deployment "carts-db" created
service "carts-db" created
deployment "carts" created
service "carts" created
<output_omitted>
6. Using the proper namespace will be important. This can be set on a per-command basis or as a shell parameter. Notethe first command shows no pods. We must remember to pass the proper namespace. Some containers may not havefully downloaded or deployed by the time you run the command.
student@lfs458-node-1a0a:~$ kubectl get pods
No resources found.
student@lfs458-node-1a0a:~$ kubectl -n sock-shop get pods
NAME READY STATUS RESTARTS AGE
carts-511261774-c4jwv 1/1 Running 0 1m
carts-db-549516398-tw9zs 1/1 Running 0 1m
catalogue-4293036822-sp5kt 1/1 Running 0 1m
catalogue-db-1846494424-qzhvk 1/1 Running 0 1m
front-end-2337481689-6s65c 1/1 Running 0 1m
orders-208161811-1gc6k 1/1 Running 0 1m
orders-db-2069777334-4sp01 1/1 Running 0 1m
payment-3050936124-2cn2l 1/1 Running 0 1m
queue-master-2067646375-vzq77 1/1 Running 0 1m
rabbitmq-241640118-vk3m9 0/1 ContainerCreating 0 1m
shipping-3132821717-lm7kn 0/1 ContainerCreating 0 1m
user-1574605338-24xrb 0/1 ContainerCreating 0 1m
user-db-2947298815-lx9kp 1/1 Running 0 1m
7. Verify the shopping cart is exposing a web page. Use the public IP address of your AWS node (not the one derived fromthe prompt) to view the page. Note the external IP is not yet configured. Find the NodePort service. First try port 80then try port 30001 as shown under the PORTS column.
LFS258: V 2018-08-06 c© Copyright the Linux Foundation 2018. All rights reserved.
26 CHAPTER 4. KUBERNETES ARCHITECTURE
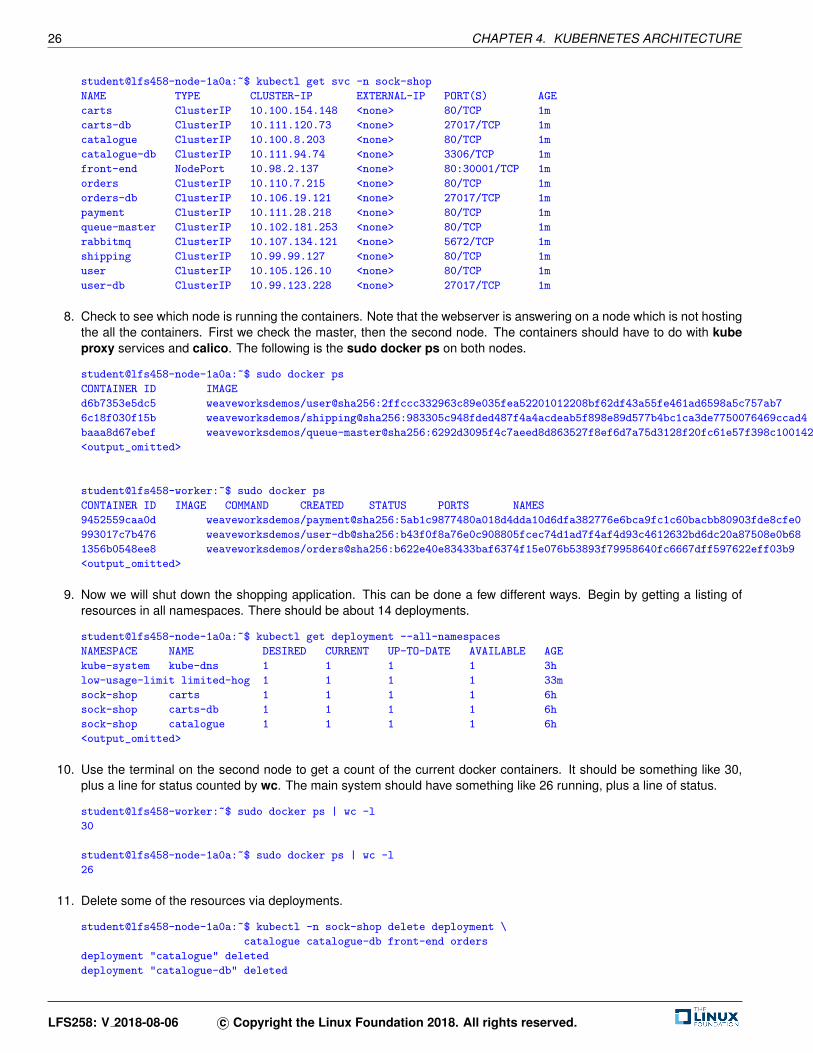
student@lfs458-node-1a0a:~$ kubectl get svc -n sock-shop
NAME TYPE CLUSTER-IP EXTERNAL-IP PORT(S) AGE
carts ClusterIP 10.100.154.148 <none> 80/TCP 1m
carts-db ClusterIP 10.111.120.73 <none> 27017/TCP 1m
catalogue ClusterIP 10.100.8.203 <none> 80/TCP 1m
catalogue-db ClusterIP 10.111.94.74 <none> 3306/TCP 1m
front-end NodePort 10.98.2.137 <none> 80:30001/TCP 1m
orders ClusterIP 10.110.7.215 <none> 80/TCP 1m
orders-db ClusterIP 10.106.19.121 <none> 27017/TCP 1m
payment ClusterIP 10.111.28.218 <none> 80/TCP 1m
queue-master ClusterIP 10.102.181.253 <none> 80/TCP 1m
rabbitmq ClusterIP 10.107.134.121 <none> 5672/TCP 1m
shipping ClusterIP 10.99.99.127 <none> 80/TCP 1m
user ClusterIP 10.105.126.10 <none> 80/TCP 1m
user-db ClusterIP 10.99.123.228 <none> 27017/TCP 1m
8. Check to see which node is running the containers. Note that the webserver is answering on a node which is not hostingthe all the containers. First we check the master, then the second node. The containers should have to do with kubeproxy services and calico. The following is the sudo docker ps on both nodes.
student@lfs458-node-1a0a:~$ sudo docker ps
CONTAINER ID IMAGE COMMAND CREATED STATUS PORTS NAMES
d6b7353e5dc5 weaveworksdemos/user@sha256:2ffccc332963c89e035fea52201012208bf62df43a55fe461ad6598a5c757ab7 "/user -port=80" 2 minutes ago Up 2 minutes k8s_user_user-7848fb86db-5zmkj_sock-shop_584d7db5-947b-11e8-8cfb-42010a800002_0
6c18f030f15b weaveworksdemos/shipping@sha256:983305c948fded487f4a4acdeab5f898e89d577b4bc1ca3de7750076469ccad4 "/usr/local/bin/ja..." 2 minutes ago Up 2 minutes k8s_shipping_shipping-64f8c7558c-9kgm2_sock-shop_580a50f9-947b-11e8-8cfb-42010a800002_0
baaa8d67ebef weaveworksdemos/queue-master@sha256:6292d3095f4c7aeed8d863527f8ef6d7a75d3128f20fc61e57f398c100142712 "/usr/local/bin/ja..." 2 minutes ago Up 2 minutes k8s_queue-master_queue-master-787b68b7fd-2tld8_sock-shop_57dca0ab-947b-11e8-8cfb-42010a800002_0
<output_omitted>
student@lfs458-worker:~$ sudo docker ps
CONTAINER ID IMAGE COMMAND CREATED STATUS PORTS NAMES
9452559caa0d weaveworksdemos/payment@sha256:5ab1c9877480a018d4dda10d6dfa382776e6bca9fc1c60bacbb80903fde8cfe0 "/app -port=80" 2 minutes ago Up 2 minutes k8s_payment_payment-5df6dc6bcc-k2hbl_sock-shop_57c79b30-947b-11e8-8cfb-42010a800002_0
993017c7b476 weaveworksdemos/user-db@sha256:b43f0f8a76e0c908805fcec74d1ad7f4af4d93c4612632bd6dc20a87508e0b68 "/entrypoint.sh mo..." 2 minutes ago Up 2 minutes k8s_user-db_user-db-586b8566b4-j7f24_sock-shop_58418841-947b-11e8-8cfb-42010a800002_0
1356b0548ee8 weaveworksdemos/orders@sha256:b622e40e83433baf6374f15e076b53893f79958640fc6667dff597622eff03b9 "/usr/local/bin/ja..." 2 minutes ago Up 2 minutes k8s_orders_orders-5c4f477565-gzh7x_sock-shop_57bf7576-947b-11e8-8cfb-42010a800002_0
<output_omitted>
9. Now we will shut down the shopping application. This can be done a few different ways. Begin by getting a listing ofresources in all namespaces. There should be about 14 deployments.
student@lfs458-node-1a0a:~$ kubectl get deployment --all-namespaces
NAMESPACE NAME DESIRED CURRENT UP-TO-DATE AVAILABLE AGE
kube-system kube-dns 1 1 1 1 3h
low-usage-limit limited-hog 1 1 1 1 33m
sock-shop carts 1 1 1 1 6h
sock-shop carts-db 1 1 1 1 6h
sock-shop catalogue 1 1 1 1 6h
<output_omitted>
10. Use the terminal on the second node to get a count of the current docker containers. It should be something like 30,plus a line for status counted by wc. The main system should have something like 26 running, plus a line of status.
student@lfs458-worker:~$ sudo docker ps | wc -l
30
student@lfs458-node-1a0a:~$ sudo docker ps | wc -l
26
11. Delete some of the resources via deployments.
student@lfs458-node-1a0a:~$ kubectl -n sock-shop delete deployment \
catalogue catalogue-db front-end orders
deployment "catalogue" deleted
deployment "catalogue-db" deleted
LFS258: V 2018-08-06 c© Copyright the Linux Foundation 2018. All rights reserved.

4.1. LABS 27
12. Get a list of the pods that are running.
student@lfs458-node-1a0a:~$ kubectl -n sock-shop get pod
NAME READY STATUS RESTARTS AGE
carts-db-549516398-tw9zs 1/1 Running 0 6h
catalogue-4293036822-sp5kt 1/1 Running 0 6h
<output_omitted>
13. Delete a few resources using the pod name.
student@lfs458-node-1a0a:~$ kubectl -n sock-shop delete pod \
catalogue-4293036822-sp5kt catalogue-db-1846494424-qzhvk \
front-end-2337481689-6s65c orders-208161811-1gc6k \
orders-db-2069777334-4sp01
pod "catalogue-4293036822-sp5kt" deleted
pod "catalogue-db-1846494424-qzhvk" deleted
<output_omitted>
14. Check the status of the pods. There should be some pods running for only a few seconds. These will have the samename-stub as the Pods you recently deleted. The Deployment controller noticed expected number of Pods was notproper, so created new Pods until the current state matches the Pod manifest.
student@lfs458-node-1a0a:~$ kubectl -n sock-shop get pod
NAME READY STATUS RESTARTS AGE
catalogue-4293036822-mtz8m 1/1 Running 0 2s
catalogue-db-1846494424-16n2p 1/1 Running 0 22s
front-end-2337481689-6s65c 1/1 Terminating 0 6h
front-end-2337481689-80gwt 1/1 Running 0 22s
15. Delete the rest of the deployments. When no resources are found, examine the output of the docker ps command.None of the sock-shop containers should be found.
student@lfs458-node-1a0a:~$ kubectl get deployment --all-namespaces
NAMESPACE NAME DESIRED CURRENT UP-TO-DATE AVAILABLE AGE
kube-system kube-dns 1 1 1 1 4h
low-usage-limit limited-hog 1 1 1 1 1h
sock-shop carts 1 1 1 1 54m
sock-shop carts-db 1 1 1 1 54m
<output_omitted>
student@lfs458-node-1a0a:~$ kubectl delete -f complete-demo.yaml
<output_omitted>
LFS258: V 2018-08-06 c© Copyright the Linux Foundation 2018. All rights reserved.

28 CHAPTER 4. KUBERNETES ARCHITECTURE
LFS258: V 2018-08-06 c© Copyright the Linux Foundation 2018. All rights reserved.

Chapter 5
APIs and Access
5.1 Labs
Exercise 5.1: Configuring TLS Access
Overview
Using the Kubernetes API, kubectl makes API calls for you. With the appropriate TLS keys you could run curl as well use agolang client. Calls to the kube-apiserver get or set a PodSpec, or desired state. If the request represents a new state theKubernetes Control Plane will update the cluster until the current state matches the specified state. Some end states mayrequire multiple requests. For example, to delete a ReplicaSet, you would first set the number of replicas to zero, then deletethe ReplicaSet.
An API request must pass information as JSON. kubectl converts .yaml to JSON when making an API request on yourbehalf. The API request has many settings, but must include apiVersion, kind and metadata, and spec settings to declarewhat kind of container to deploy. The spec fields depend on the object being created.
We will begin by configuring remote access to the kube-apiserver then explore more of the API.
Configuring TLS Access
1. Begin by reviewing the kubectl configuration file. We will use the three certificates and the API server address.
student@lfs458-node-1a0a:~$ less ~/.kube/config
<output_omitted>
2. We will set the certificates as variables. You may want to double-check each parameter as you set it. Begin with settingthe client-certificate-data key.
student@lfs458-node-1a0a:~$ export client=$(grep client-cert ~/.kube/config |cut -d" " -f 6)
student@lfs458-node-1a0a:~$ echo $client
LS0tLS1CRUdJTiBDRVJUSUZJQ0FURS0tLS0tCk1JSUM4akNDQWRxZ0F3SUJ
29

30 CHAPTER 5. APIS AND ACCESS
BZ0lJRy9wbC9rWEpNdmd3RFFZSktvWklodmNOQVFFTEJRQXdGVEVUTUJFR0
ExVUUKQXhNS2EzVmlaWEp1WlhSbGN6QWVGdzB4TnpFeU1UTXhOelEyTXpKY
UZ3MHhPREV5TVRNeE56UTJNelJhTURReApGekFWQmdOVkJBb1REbk41YzNS
<output_omitted>
3. Almost the same command, but this time collect the client-key-data as the key variable.
student@lfs458-node-1a0a:~$ export key=$(grep client-key-data ~/.kube/config |cut -d " " -f 6)
student@lfs458-node-1a0a:~$ echo $key
<output_omitted>
4. Finally set the auth variable with the certificate-authority-data key.
student@lfs458-node-1a0a:~$ export auth=$(grep certificate-authority-data ~/.kube/config |cut -d " " -f 6)
student@lfs458-node-1a0a:~$ echo $auth
<output_omitted>
5. Now encode the keys for use with curl.
student@lfs458-node-1a0a:~$ echo $client | base64 -d - > ./client.pem
student@lfs458-node-1a0a:~$ echo $key | base64 -d - > ./client-key.pem
student@lfs458-node-1a0a:~$ echo $auth | base64 -d - > ./ca.pem
6. Pull the API server URL from the config file.
student@lfs458-node-1a0a:~$ kubectl config view |grep server
server: https://10.128.0.3:6443
7. Use curl command and the encoded keys to connect to the API server.
student@lfs458-node-1a0a:~$ curl --cert ./client.pem \
--key ./client-key.pem \
--cacert ./ca.pem \
https://10.128.0.3:6443/api/v1/pods
{
"kind": "PodList",
"apiVersion": "v1",
"metadata": {
"selfLink": "/api/v1/pods",
"resourceVersion": "239414"
},
<output_omitted>
8. If the previous command was successful, create a JSON file to create a new pod.
student@lfs458-node-1a0a:~$ vim curlpod.json
{
"kind": "Pod",
"apiVersion": "v1",
"metadata":{
"name": "curlpod",
"namespace": "default",
"labels": {
"name": "examplepod"
}
},
"spec": {
"containers": [{
"name": "nginx",
LFS258: V 2018-08-06 c© Copyright the Linux Foundation 2018. All rights reserved.
5.1. LABS 31
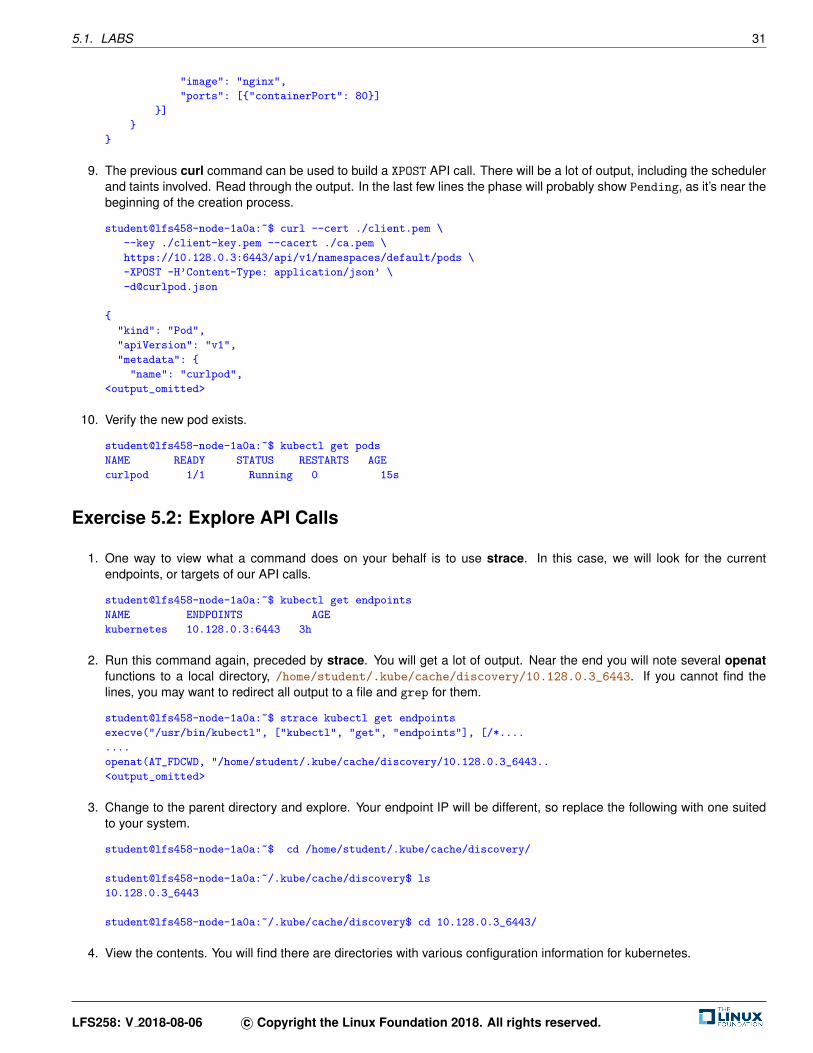
"image": "nginx",
"ports": [{"containerPort": 80}]
}]
}
}
9. The previous curl command can be used to build a XPOST API call. There will be a lot of output, including the schedulerand taints involved. Read through the output. In the last few lines the phase will probably show Pending, as it’s near thebeginning of the creation process.
student@lfs458-node-1a0a:~$ curl --cert ./client.pem \
--key ./client-key.pem --cacert ./ca.pem \
https://10.128.0.3:6443/api/v1/namespaces/default/pods \
-XPOST -H’Content-Type: application/json’ \
{
"kind": "Pod",
"apiVersion": "v1",
"metadata": {
"name": "curlpod",
<output_omitted>
10. Verify the new pod exists.
student@lfs458-node-1a0a:~$ kubectl get pods
NAME READY STATUS RESTARTS AGE
curlpod 1/1 Running 0 15s
Exercise 5.2: Explore API Calls
1. One way to view what a command does on your behalf is to use strace. In this case, we will look for the currentendpoints, or targets of our API calls.
student@lfs458-node-1a0a:~$ kubectl get endpoints
NAME ENDPOINTS AGE
kubernetes 10.128.0.3:6443 3h
2. Run this command again, preceded by strace. You will get a lot of output. Near the end you will note several openatfunctions to a local directory, /home/student/.kube/cache/discovery/10.128.0.3_6443. If you cannot find thelines, you may want to redirect all output to a file and grep for them.
student@lfs458-node-1a0a:~$ strace kubectl get endpoints
execve("/usr/bin/kubectl", ["kubectl", "get", "endpoints"], [/*....
....
openat(AT_FDCWD, "/home/student/.kube/cache/discovery/10.128.0.3_6443..
<output_omitted>
3. Change to the parent directory and explore. Your endpoint IP will be different, so replace the following with one suitedto your system.
student@lfs458-node-1a0a:~$ cd /home/student/.kube/cache/discovery/
student@lfs458-node-1a0a:~/.kube/cache/discovery$ ls
10.128.0.3_6443
student@lfs458-node-1a0a:~/.kube/cache/discovery$ cd 10.128.0.3_6443/
4. View the contents. You will find there are directories with various configuration information for kubernetes.
LFS258: V 2018-08-06 c© Copyright the Linux Foundation 2018. All rights reserved.

32 CHAPTER 5. APIS AND ACCESS
student@lfs458-node-1a0a:~/.kube/cache/discovery/10.128.0.3_6443$ ls
apiextensions.k8s.io batch servergroups.json
apiregistration.k8s.io certificates.k8s.io settings.k8s.io
apps extensions storage.k8s.io
authentication.k8s.io networking.k8s.io v1
authorization.k8s.io policy
autoscaling rbac.authorization.k8s.io
5. Use the find command to list out the subfiles. The prompt has been modified to look better on this page.
student@lfs458-node-1a0a:./10.128.0.3_6443$ find .
.
./authorization.k8s.io
./authorization.k8s.io/v1beta1
./authorization.k8s.io/v1beta1/serverresources.json
./authorization.k8s.io/v1
./authorization.k8s.io/v1/serverresources.json
./autoscaling
./autoscaling/v1
./autoscaling/v1/serverresources.json
<output_omitted>
6. View the objects available in version 1 of the API. For each object, or kind:, you can view the verbs or actions for thatobject, such as create seen in the following example. Note the prompt has been truncated for the command to fit on oneline.
student@lfs458-node-1a0a:.$ python -m json.tool v1/serverresources.json
{
"apiVersion": "v1",
"groupVersion": "v1",
"kind": "APIResourceList",
"resources": [
{
"kind": "Binding",
"name": "bindings",
"namespaced": true,
"singularName": "",
"verbs": [
"create"
]
},
<output_omitted>
7. Some of the objects have shortNames, which makes using them on the command line much easier. Locate theshortName for endpoints.
student@lfs458-node-1a0a:.$ python -m json.tool v1/serverresources.json | less
.
{
"kind": "Endpoints",
"name": "endpoints",
"namespaced": true,
"shortNames": [
"ep"
],
"singularName": "",
"verbs": [
"create",
"delete",
.
8. Use the shortName to view the endpoints. It should match the output from the previous command.
LFS258: V 2018-08-06 c© Copyright the Linux Foundation 2018. All rights reserved.

5.1. LABS 33
student@lfs458-node-1a0a:.$ kubectl get ep
NAME ENDPOINTS AGE
kubernetes 10.128.0.3:6443 3h
9. We can see there are 37 objects in version 1 file.
student@lfs458-node-1a0a:.$ python -m json.tool v1/serverresources.json | grep kind
"kind": "APIResourceList",
"kind": "Binding",
"kind": "ComponentStatus",
"kind": "ConfigMap",
"kind": "Endpoints",
"kind": "Event",
<output_omitted>
10. Looking at another file we find nine more.
student@lfs458-node-1a0a:$ python -m json.tool \
apps/v1beta1/serverresources.json | grep kind
"kind": "APIResourceList",
"kind": "ControllerRevision",
"kind": "Deployment",
<output_omitted>
11. Delete the curlpod to recoup system resources.
student@lfs458-node-1a0a:$ kubectl delete po curlpod
pod "curlpod" deleted
12. Take a look around the other files as time permits.
LFS258: V 2018-08-06 c© Copyright the Linux Foundation 2018. All rights reserved.

34 CHAPTER 5. APIS AND ACCESS
LFS258: V 2018-08-06 c© Copyright the Linux Foundation 2018. All rights reserved.
Chapter 6
API Objects
6.1 Labs
Exercise 6.1: RESTful API Access
Overview
We will continue to explore ways of accessing the control plane of our cluster. In the security chapter we will discuss thereare several authentication methods, one of which is use of a Bearer token We will work with one then deploy a local proxyserver for application-level access to the Kubernetes API.
RESTful API Access
We will use the curl command to make API requests to the cluster, in an in-secure manner. Once we know the IP addressand port, then the token we can retrieve cluster data in a RESTful manner. By default most of the information is restricted, butchanges to authentication policy could allow more access.
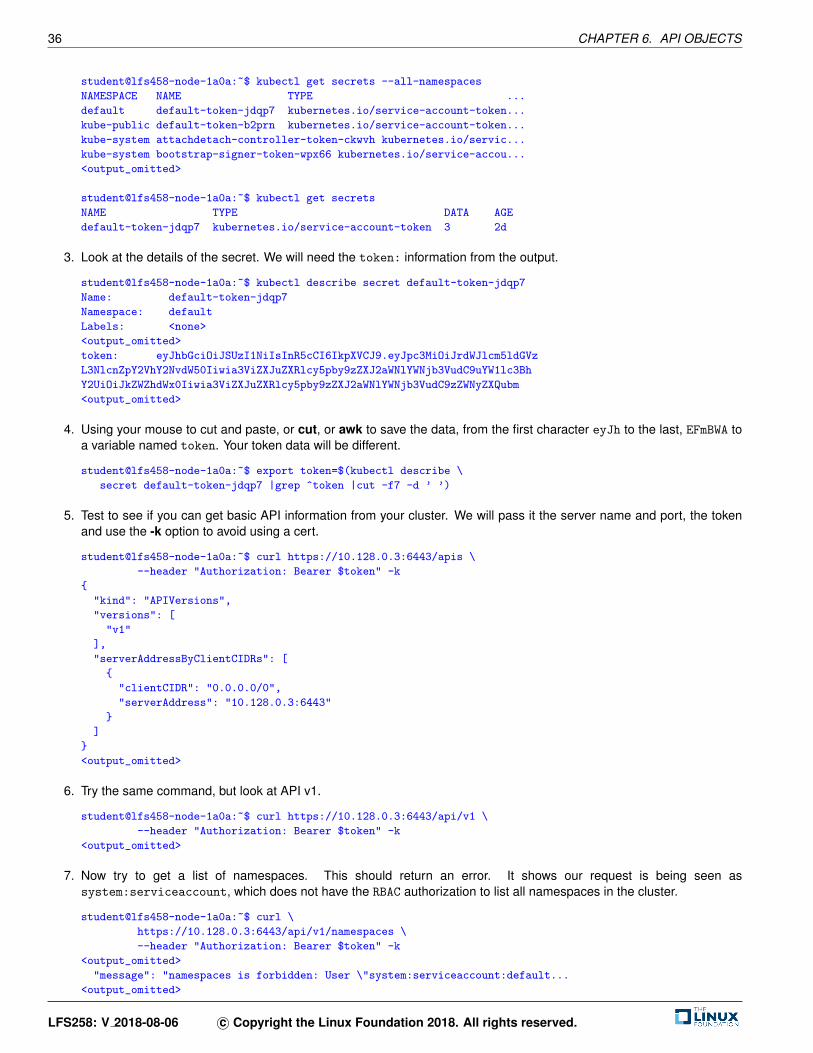
1. First we need to know the IP and port of a node running a replica of the API server. The master system will typicallyhave one running. Use kubectl config view to get overall cluster configuration, and find the server entry. This will giveus both the IP and the port.
student@lfs458-node-1a0a:~$ kubectl config view
apiVersion: v1
clusters:
- cluster:
certificate-authority-data: REDACTED
server: https://10.128.0.3:6443
name: kubernetes
<output_omitted>
2. Next we need to find the bearer token. This is part of a default token. Look at a list of tokens, first all on the cluster, thenjust those in the default namespace. There will be a secret for each of the controllers of the cluster.
35
36 CHAPTER 6. API OBJECTS
student@lfs458-node-1a0a:~$ kubectl get secrets --all-namespaces
NAMESPACE NAME TYPE ...
default default-token-jdqp7 kubernetes.io/service-account-token...
kube-public default-token-b2prn kubernetes.io/service-account-token...
kube-system attachdetach-controller-token-ckwvh kubernetes.io/servic...
kube-system bootstrap-signer-token-wpx66 kubernetes.io/service-accou...
<output_omitted>
student@lfs458-node-1a0a:~$ kubectl get secrets
NAME TYPE DATA AGE
default-token-jdqp7 kubernetes.io/service-account-token 3 2d
3. Look at the details of the secret. We will need the token: information from the output.
student@lfs458-node-1a0a:~$ kubectl describe secret default-token-jdqp7
Name: default-token-jdqp7
Namespace: default
Labels: <none>
<output_omitted>
token: eyJhbGciOiJSUzI1NiIsInR5cCI6IkpXVCJ9.eyJpc3MiOiJrdWJlcm5ldGVz
L3NlcnZpY2VhY2NvdW50Iiwia3ViZXJuZXRlcy5pby9zZXJ2aWNlYWNjb3VudC9uYW1lc3Bh
Y2UiOiJkZWZhdWx0Iiwia3ViZXJuZXRlcy5pby9zZXJ2aWNlYWNjb3VudC9zZWNyZXQubm
<output_omitted>
4. Using your mouse to cut and paste, or cut, or awk to save the data, from the first character eyJh to the last, EFmBWA toa variable named token. Your token data will be different.
student@lfs458-node-1a0a:~$ export token=$(kubectl describe \
secret default-token-jdqp7 |grep ^token |cut -f7 -d ’ ’)
5. Test to see if you can get basic API information from your cluster. We will pass it the server name and port, the tokenand use the -k option to avoid using a cert.
student@lfs458-node-1a0a:~$ curl https://10.128.0.3:6443/apis \
--header "Authorization: Bearer $token" -k
{
"kind": "APIVersions",
"versions": [
"v1"
],
"serverAddressByClientCIDRs": [
{
"clientCIDR": "0.0.0.0/0",
"serverAddress": "10.128.0.3:6443"
}
]
}
<output_omitted>
6. Try the same command, but look at API v1.
student@lfs458-node-1a0a:~$ curl https://10.128.0.3:6443/api/v1 \
--header "Authorization: Bearer $token" -k
<output_omitted>
7. Now try to get a list of namespaces. This should return an error. It shows our request is being seen assystem:serviceaccount, which does not have the RBAC authorization to list all namespaces in the cluster.
student@lfs458-node-1a0a:~$ curl \
https://10.128.0.3:6443/api/v1/namespaces \
--header "Authorization: Bearer $token" -k
<output_omitted>
"message": "namespaces is forbidden: User \"system:serviceaccount:default...
<output_omitted>
LFS258: V 2018-08-06 c© Copyright the Linux Foundation 2018. All rights reserved.
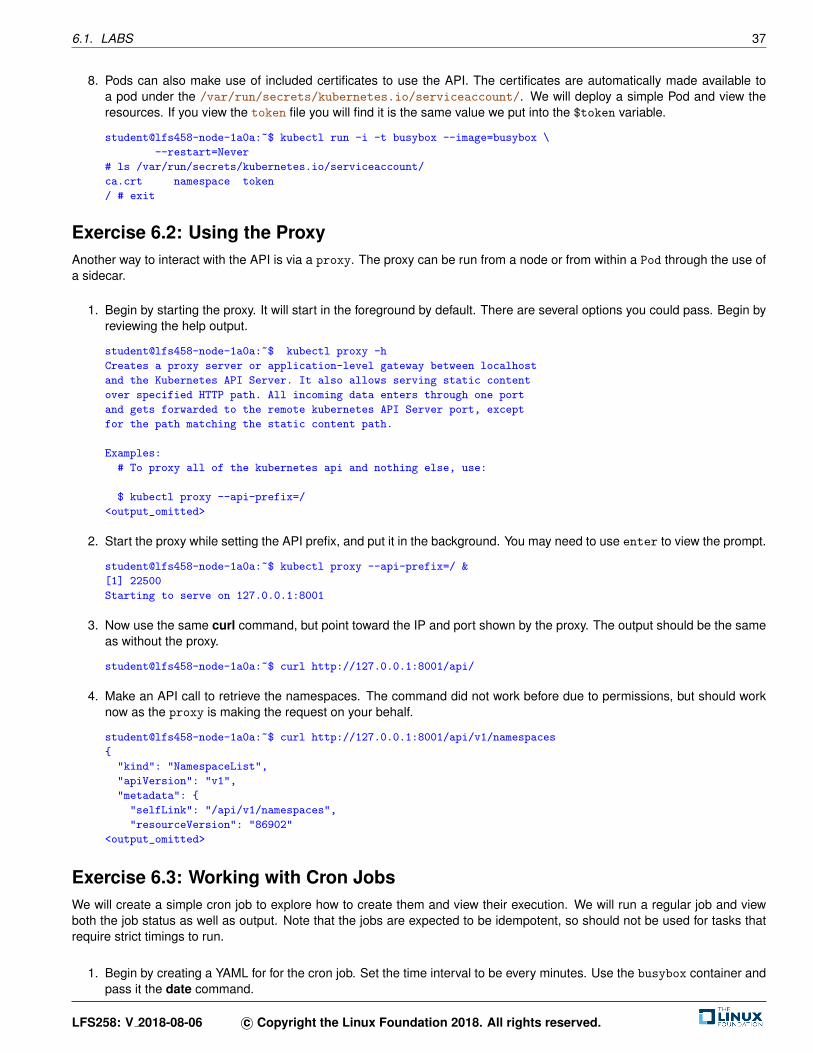
6.1. LABS 37
8. Pods can also make use of included certificates to use the API. The certificates are automatically made available toa pod under the /var/run/secrets/kubernetes.io/serviceaccount/. We will deploy a simple Pod and view theresources. If you view the token file you will find it is the same value we put into the $token variable.
student@lfs458-node-1a0a:~$ kubectl run -i -t busybox --image=busybox \
--restart=Never
# ls /var/run/secrets/kubernetes.io/serviceaccount/
ca.crt namespace token
/ # exit
Exercise 6.2: Using the ProxyAnother way to interact with the API is via a proxy. The proxy can be run from a node or from within a Pod through the use ofa sidecar.
1. Begin by starting the proxy. It will start in the foreground by default. There are several options you could pass. Begin byreviewing the help output.
student@lfs458-node-1a0a:~$ kubectl proxy -h
Creates a proxy server or application-level gateway between localhost
and the Kubernetes API Server. It also allows serving static content
over specified HTTP path. All incoming data enters through one port
and gets forwarded to the remote kubernetes API Server port, except
for the path matching the static content path.
Examples:
# To proxy all of the kubernetes api and nothing else, use:
$ kubectl proxy --api-prefix=/
<output_omitted>
2. Start the proxy while setting the API prefix, and put it in the background. You may need to use enter to view the prompt.
student@lfs458-node-1a0a:~$ kubectl proxy --api-prefix=/ &
[1] 22500
Starting to serve on 127.0.0.1:8001
3. Now use the same curl command, but point toward the IP and port shown by the proxy. The output should be the sameas without the proxy.
student@lfs458-node-1a0a:~$ curl http://127.0.0.1:8001/api/
4. Make an API call to retrieve the namespaces. The command did not work before due to permissions, but should worknow as the proxy is making the request on your behalf.
student@lfs458-node-1a0a:~$ curl http://127.0.0.1:8001/api/v1/namespaces
{
"kind": "NamespaceList",
"apiVersion": "v1",
"metadata": {
"selfLink": "/api/v1/namespaces",
"resourceVersion": "86902"
<output_omitted>
Exercise 6.3: Working with Cron JobsWe will create a simple cron job to explore how to create them and view their execution. We will run a regular job and viewboth the job status as well as output. Note that the jobs are expected to be idempotent, so should not be used for tasks thatrequire strict timings to run.
1. Begin by creating a YAML for for the cron job. Set the time interval to be every minutes. Use the busybox container andpass it the date command.
LFS258: V 2018-08-06 c© Copyright the Linux Foundation 2018. All rights reserved.

38 CHAPTER 6. API OBJECTS
student@lfs458-node-1a0a:~$ vim cron-job.yaml
apiVersion: batch/v1beta1
kind: CronJob
metadata:
name: date
spec:
schedule: "*/1 * * * *"
jobTemplate:
spec:
template:
spec:
containers:
- name: dateperminute
image: busybox
args:
- /bin/sh
- -c
- date; sleep 30
restartPolicy: OnFailure
2. Create the cron job.
student@lfs458-node-9q6r:~$ kubectl create -f cron-job.yaml
cronjob.batch/date created
3. Wait about a minute for the job to ingested, then check that the job has been active and scheduled.
student@lfs458-node-9q6r:~$ kubectl get cronjob date
NAME SCHEDULE SUSPEND ACTIVE LAST SCHEDULE AGE
date */1 * * * * False 1 33s 1m
4. The first attempt at the job may fail, depending on when in the time configured it was created. Also note that the outputbelow shows that other jobs failed. Pass the –watch argument to view the jobs as they are created. Use ctrl-c to regainaccess to the shell.
student@lfs458-node-9q6r:~$ kubectl get jobs --watch
NAME DESIRED SUCCESSFUL AGE
date-1513785360 1 1 19s
date-1513785420 1 0 0s
date-1513785420 1 1 33s
date-1513785480 1 0 0s
^C
5. Find Pods, including completed, associated with the date cronjob.
student@lfs458-node-9q6r:~$ kubectl get pods |grep date
date-1513786020-ws9j5 0/1 Completed 0 1m
date-1513786080-s7wfc 0/1 Completed 0 53s
6. Choose a particular pods and review its log. It should show the output of the data command when it executed.
student@lfs458-node-9q6r:~$ kubectl logs date-1513786080-s7wfc
Wed Dec 20 16:08:06 UTC 2017
7. When finished with the cronjob delete it.
student@lfs458-node-9q6r:~$ kubectl delete cronjob date
cronjob "date" deleted
LFS258: V 2018-08-06 c© Copyright the Linux Foundation 2018. All rights reserved.

Chapter 7
Managing State With Deployments
7.1 Labs
Exercise 7.1: Working with ReplicaSets
Overview
Understanding and managing the state of containers is a core Kubernetes task. In this lab we will first explore the API objectsused to manage groups of containers. The objects available have changed as Kubernetes has matured, so the Kubernetesversion in use will determine which are available. Our first object will be a ReplicaSet, which does not include newermanagement features found with Deployments. A Deployment will will manage ReplicaSets for you. We will also work withanother object called a DaemonSet which ensures a container is running on newly added node.
Then we will update the software in a container, view the revision history, and roll-back to a previous version.
Working with ReplicaSets
A ReplicaSet is a next-generation of a Replication Controller, which differs only in the selectors supported. The onlyreason to use a ReplicaSet anymore is if you have no need for updating container software or require update orchestrationwhich won’t work with the typical process.
1. View any current ReplicaSets. If you deleted resources at the end of a previous lab, you should have none show fromthe command.
student@lfs458-node-1a0a:~$ kubectl get rs
No resources found.
2. Create a YAML file for a simple ReplicaSet. The apiVersion setting depends on the version of Kubernetes you areusing. Versions 1.8 and beyond will use apps/v1beta1, then apps/v1beta2 and then probably apps/v1.
student@lfs458-node-1a0a:~$ vim rs.yaml
39

40 CHAPTER 7. MANAGING STATE WITH DEPLOYMENTS
apiVersion: extensions/v1beta1
kind: ReplicaSet
metadata:
name: rs-one
spec:
replicas: 2
template:
metadata:
labels:
system: ReplicaOne
spec:
containers:
- name: nginx
image: nginx:1.7.9
ports:
- containerPort: 80
3. Create the ReplicaSet:
student@lfs458-node-1a0a:~$ kubectl create -f rs.yaml
replicaset.extensions/rs-one created
4. View the newly created ReplicaSet:
student@lfs458-node-1a0a:~$ kubectl describe rs rs-one
Name: rs-one
Namespace: default
Selector: system=ReplicaOne
Labels: system=ReplicaOne
Annotations: <none>
Replicas: 2 current / 2 desired
Pods Status: 2 Running / 0 Waiting / 0 Succeeded / 0 Failed
Pod Template:
Labels: system=ReplicaOne
Containers:
nginx:
Image: nginx:1.7.9
Port: 80/TCP
Environment: <none>
Mounts: <none>
Volumes: <none>
Events: <none>
5. View the Pods created with the ReplicaSet. From the yaml file created there should be two Pods. You may see aCompleted busybox which will be cleared out eventually.
student@lfs458-node-1a0a:~$ kubectl get pods
NAME READY STATUS RESTARTS AGE
rs-one-2p9x4 1/1 Running 0 5m
rs-one-3c6pb 1/1 Running 0 5m
6. Now we will delete the ReplicaSet, but not the Pods it controls.
student@lfs458-node-1a0a:~$ kubectl delete rs rs-one --cascade=false
replicaset.extensions "rs-one" deleted
View the ReplicaSet and Pods again:
7. student@lfs458-node-1a0a:~$ kubectl describe rs rs-one
Error from server (NotFound): replicasets.extensions "rs-one" not found
student@lfs458-node-1a0a:~$ kubectl get pods
LFS258: V 2018-08-06 c© Copyright the Linux Foundation 2018. All rights reserved.

7.1. LABS 41
NAME READY STATUS RESTARTS AGE
rs-one-2p9x4 1/1 Running 0 7m
rs-one-3c6pb 1/1 Running 0 7m
8. Create the ReplicaSet again. As long as we do not change the selector field, the new ReplicaSet should takeownership. Pod software versions cannot be updated this way.
student@lfs458-node-1a0a:~$ kubectl create -f rs.yaml
replicaset.extensions/rs-one created
9. View the age of the ReplicaSet and then the Pods within:
student@lfs458-node-1a0a:~$ kubectl get rs
NAME DESIRED CURRENT READY AGE
rs-one 2 2 2 46s
student@lfs458-node-1a0a:~$ kubectl get pods
NAME READY STATUS RESTARTS AGE
rs-one-2p9x4 1/1 Running 0 8m
rs-one-3c6pb 1/1 Running 0 8m
10. We will now isolate a Pod from its ReplicaSet. Begin by editing the label of a Pod. We will change the system:
parameter to be IsolatedPod.
student@lfs458-node-1a0a:~$ kubectl edit po rs-one-3c6pb
....
labels:
system: IsolatedPod
name: rs-one-3c6pb
....
11. View the number of pods within the ReplicaSet. You should see two running.
student@lfs458-node-1a0a:~$ kubectl get rs
NAME DESIRED CURRENT READY AGE
rs-one 2 2 2 4m
12. Now view the pods. You should note that there are three, with one being newer than others. The ReplicaSet madesure to keep two replicas, replacing the Pod which was isolated.
student@lfs458-node-1a0a:~$ kubectl get po -L system
NAME READY STATUS RESTARTS AGE SYSTEM
rs-one-3c6pb 1/1 Running 0 10m IsolatedPod
rs-one-2p9x4 1/1 Running 0 10m ReplicaOne
rs-one-dq5xd 1/1 Running 0 30s ReplicaOne
13. Delete the ReplicaSet, then view any remaining Pods.
student@lfs458-node-1a0a:~$ kubectl delete rs rs-one
replicaset.extensions "rs-one" deleted
student@lfs458-node-1a0a:~$ kubectl get po
NAME READY STATUS RESTARTS AGE
rs-one-3c6pb 1/1 Running 0 14m
rs-one-dq5xd 0/1 Terminating 0 4m
14. In the above example the Pods had not finished termination. Wait for a bit and check again. There should be noReplicaSets, but one Pod.
LFS258: V 2018-08-06 c© Copyright the Linux Foundation 2018. All rights reserved.

42 CHAPTER 7. MANAGING STATE WITH DEPLOYMENTS
student@lfs458-node-1a0a:~$ kubectl get rs
No resources found.
student@lfs458-node-1a0a:~$ kubectl get po
NAME READY STATUS RESTARTS AGE
rs-one-3c6pb 1/1 Running 0 16m
15. Delete the remaining Pod using the label.
student@lfs458-node-1a0a:~$ kubectl delete po -l system=IsolatedPod
pod "rs-one-3c6pb" deleted
Exercise 7.2: Working with DaemonSetsA DaemonSet is a more flexible version of a Deployment which we have been working with in the rest of the labs. TheDaemonSet ensures that as nodes are added to a cluster Pods will be created on them. A Deployment would only ensure aparticular number of Pods are created in general. Should a node be be removed from a cluster the DaemonSet would ensurethe Pods are garbage collected before removal.
This extra step of automation can be useful for using with products like ceph where storage is often added or removed. Theyallow for complex deployments when used with declared resources like memory, CPU or volumes. While similar to ReplicationControllers they are better used to allocate resources to particular systems.
1. We begin by creating a yaml file. In this case the kind would be set to DaemonSet. For ease of use we will copy thepreviously created rs.yaml file and make a couple edits. Remove the Replicas: 2 line. Be aware in future APIversions, starting with v1.8, you may need to declare a Pod selector.
student@lfs458-node-1a0a:~$ cp rs.yaml ds.yaml
student@lfs458-node-1a0a:~$ vim ds.yaml
...
kind: DaemonSet
...
name: ds-one
....
replicas: 2 #<<<----Remove this line
...
system: DaemonSetOne
2. Create and verify the newly formed DaemonSet. There should be one Pod per node in the cluster.
student@lfs458-node-1a0a:~$ kubectl create -f ds.yaml
daemonset.extensions/ds-one created
student@lfs458-node-1a0a:~$ kubectl get ds
NAME DESIRED CURRENT READY UP-TO-DATE AVAILABLE NODE-SELECTOR AGE
ds-one 2 2 2 2 2 <none> 1m
student@lfs458-node-1a0a:~$ kubectl get po
NAME READY STATUS RESTARTS AGE
ds-one-b1dcv 1/1 Running 0 2m
ds-one-z31r4 1/1 Running 0 2m
3. Verify the image running inside the Pods. We will use this information in the next section.
student@lfs458-node-1a0a:~$ kubectl describe po ds-one-b1dcv | grep Image:
Image: nginx:1.7.9
LFS258: V 2018-08-06 c© Copyright the Linux Foundation 2018. All rights reserved.
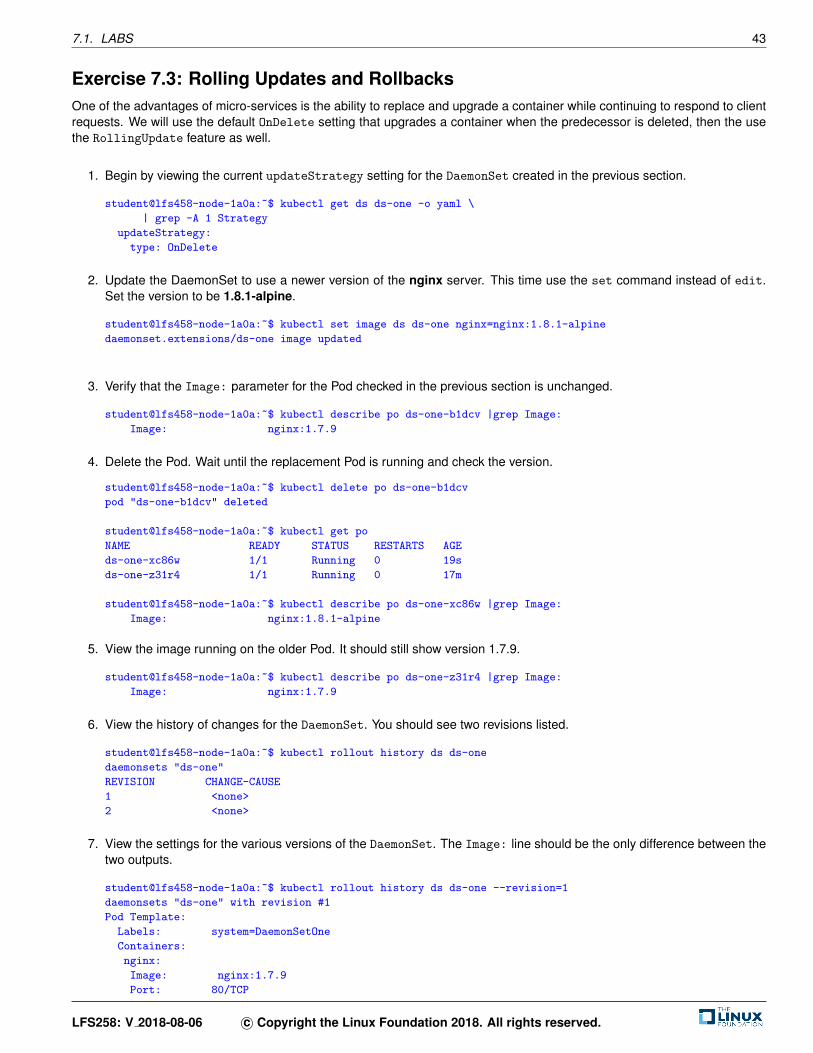
7.1. LABS 43
Exercise 7.3: Rolling Updates and RollbacksOne of the advantages of micro-services is the ability to replace and upgrade a container while continuing to respond to clientrequests. We will use the default OnDelete setting that upgrades a container when the predecessor is deleted, then the usethe RollingUpdate feature as well.
1. Begin by viewing the current updateStrategy setting for the DaemonSet created in the previous section.
student@lfs458-node-1a0a:~$ kubectl get ds ds-one -o yaml \
| grep -A 1 Strategy
updateStrategy:
type: OnDelete
2. Update the DaemonSet to use a newer version of the nginx server. This time use the set command instead of edit.Set the version to be 1.8.1-alpine.
student@lfs458-node-1a0a:~$ kubectl set image ds ds-one nginx=nginx:1.8.1-alpine
daemonset.extensions/ds-one image updated
3. Verify that the Image: parameter for the Pod checked in the previous section is unchanged.
student@lfs458-node-1a0a:~$ kubectl describe po ds-one-b1dcv |grep Image:
Image: nginx:1.7.9
4. Delete the Pod. Wait until the replacement Pod is running and check the version.
student@lfs458-node-1a0a:~$ kubectl delete po ds-one-b1dcv
pod "ds-one-b1dcv" deleted
student@lfs458-node-1a0a:~$ kubectl get po
NAME READY STATUS RESTARTS AGE
ds-one-xc86w 1/1 Running 0 19s
ds-one-z31r4 1/1 Running 0 17m
student@lfs458-node-1a0a:~$ kubectl describe po ds-one-xc86w |grep Image:
Image: nginx:1.8.1-alpine
5. View the image running on the older Pod. It should still show version 1.7.9.
student@lfs458-node-1a0a:~$ kubectl describe po ds-one-z31r4 |grep Image:
Image: nginx:1.7.9
6. View the history of changes for the DaemonSet. You should see two revisions listed.
student@lfs458-node-1a0a:~$ kubectl rollout history ds ds-one
daemonsets "ds-one"
REVISION CHANGE-CAUSE
1 <none>
2 <none>
7. View the settings for the various versions of the DaemonSet. The Image: line should be the only difference between thetwo outputs.
student@lfs458-node-1a0a:~$ kubectl rollout history ds ds-one --revision=1
daemonsets "ds-one" with revision #1
Pod Template:
Labels: system=DaemonSetOne
Containers:
nginx:
Image: nginx:1.7.9
Port: 80/TCP
LFS258: V 2018-08-06 c© Copyright the Linux Foundation 2018. All rights reserved.

44 CHAPTER 7. MANAGING STATE WITH DEPLOYMENTS
Environment: <none>
Mounts: <none>
Volumes: <none>
student@lfs458-node-1a0a:~$ kubectl rollout history ds ds-one --revision=2
....
Image: nginx:1.8.1-alpine
.....
8. Use kubectl rollout undo to change the DaemonSet back to an earlier version. As we are still using the OnDelete
strategy there should be no change to the Pods.
student@lfs458-node-1a0a:~$ kubectl rollout undo ds ds-one --to-revision=1
daemonset.extensions/ds-one rolled back
student@lfs458-node-1a0a:~$ kubectl describe po ds-one-xc86w |grep Image:
Image: nginx:1.8.1-alpine
9. Delete the Pod, wait for the replacement to spawn then check the image version again.
student@lfs458-node-1a0a:~$ kubectl delete po ds-one-xc86w
pod "ds-one-xc86w" deleted
student@lfs458-node-1a0a:~$ kubectl get po
NAME READY STATUS RESTARTS AGE
ds-one-qc72k 1/1 Running 0 10s
ds-one-xc86w 0/1 Terminating 0 12m
ds-one-z31r4 1/1 Running 0 28m
student@lfs458-node-1a0a:~$ kubectl describe po ds-one-qc72k |grep Image:
Image: nginx:1.7.9
10. View the details of the DaemonSet. The Image should be v1.7.9 in the output.
student@lfs458-node-1a0a:~$ kubectl describe ds |grep Image:
Image: nginx:1.7.9
11. View the current configuration for the DaemonSet in YAML output. Look for the update strategy near the end of theoutput.
student@lfs458-node-1a0a:~$ kubectl get ds ds-one -o yaml
apiVersion: extensions/v1beta1
kind: DaemonSet
.....
terminationGracePeriodSeconds: 30
templateGeneration: 3
updateStrategy:
type: OnDelete
status:
currentNumberScheduled: 2
.....
12. Create a new DaemonSet, this time setting the update policy to RollingUpdate. Begin by generating a new config file.
student@lfs458-node-1a0a:~$ kubectl get ds ds-one -o yaml --export > ds2.yaml
13. Edit the file. Change the name, around line eight and the update strategy around line 38.
student@lfs458-node-1a0a:~$ vim ds2.yaml
....
name: ds-two
....
type: RollingUpdate
LFS258: V 2018-08-06 c© Copyright the Linux Foundation 2018. All rights reserved.

7.1. LABS 45
14. Create the new DaemonSet and verify the nginx version in the new pods.
student@lfs458-node-1a0a:~$ kubectl create -f ds2.yaml
daemonset.extensions/ds-two created
student@lfs458-node-1a0a:~$ kubectl get po
NAME READY STATUS RESTARTS AGE
ds-one-qc72k 1/1 Running 0 28m
ds-one-z31r4 1/1 Running 0 57m
ds-two-10khc 1/1 Running 0 5m
ds-two-kzp9g 1/1 Running 0 5m
student@lfs458-node-1a0a:~$ kubectl describe po ds-two-10khc |grep Image:
Image: nginx:1.7.9
15. Edit the configuration file and set the image to a newer version such as 1.8.1-alpine.
student@lfs458-node-1a0a:~$ kubectl edit ds ds-two
....
- image: nginx:1.8.1-alpine
.....
16. View the age of the DaemonSets. It should be around ten minutes old, depending on how fast you type.
student@lfs458-node-1a0a:~$ kubectl get ds ds-two
NAME DESIRED CURRENT READY UP-TO-DATE AVAILABLE NODE-SELECTOR AGE
ds-two 2 2 2 2 2 <none> 10m
17. Now view the age of the Pods. Two should be much younger than the DaemonSet.
student@lfs458-node-1a0a:~$ kubectl get po
NAME READY STATUS RESTARTS AGE
ds-one-qc72k 1/1 Running 0 36m
ds-one-z31r4 1/1 Running 0 1h
ds-two-2p8vz 1/1 Running 0 34s
ds-two-8lx7k 1/1 Running 0 32s
18. Verify the Pods are using the new version of the software.
student@lfs458-node-1a0a:~$ kubectl describe po ds-two-8lx7k |grep Image:
Image: nginx:1.8.1-alpine
19. View the rollout status and the history of the DaemonSets.
student@lfs458-node-1a0a:~$ kubectl rollout status ds ds-two
daemon set "ds-two" successfully rolled out
student@lfs458-node-1a0a:~$ kubectl rollout history ds ds-two
daemonsets "ds-two"
REVISION CHANGE-CAUSE
1 <none>
2 <none>
20. View the changes in the update they should look the same as the previous history, but did not require the Pods to bedeleted for the update to take place.
student@lfs458-node-1a0a:~$ kubectl rollout history ds ds-two --revision=2
...
Image: nginx:1.8.1-alpine
21. Clean up the system by removing one of the DaemonSets. We will leave the other running.
student@lfs458-node-1a0a:~$ kubectl delete ds ds-two
daemonset.extensions "ds-two" deleted
LFS258: V 2018-08-06 c© Copyright the Linux Foundation 2018. All rights reserved.

46 CHAPTER 7. MANAGING STATE WITH DEPLOYMENTS
LFS258: V 2018-08-06 c© Copyright the Linux Foundation 2018. All rights reserved.

Chapter 8
Services
8.1 Labs
Exercise 8.1: Deploy A New Service
Overview
Services (also called microservices) are objects which declare a policy to access a logical set of Pods. They are typicallyassigned with labels to allow persistent access to a resource, when front or back end containers are terminated and replaced.
Native applications can use the Endpoints API for access. Non-native applications can use a Virtual IP-based bridge toaccess back end pods. ServiceTypes Type could be:
• ClusterIP default - exposes on a cluster-internal IP. Only reachable within cluster
• NodePort Exposes node IP at a static port. A ClusterIP is also automatically created.
• LoadBalancer Exposes service externally using cloud providers load balancer. NodePort and ClusterIP automaticallycreated.
• ExternalName Maps service to contents of externalName using a CNAME record.
We use services as part of decoupling such that any agent or object can be replaced without interruption to access from clientto back end application.
Deploy A New Service
1. Deploy two nginx servers using kubectl and a new .yaml file. We will use the v1beta version of the API. The kindshould be Deployment and label it with nginx. Create two replicas and expose port 8080. What follows is a welldocumented file. There is no need to include the comments when you create the file.
student@lfs458-node-1a0a:~$ vim nginx-one.yaml
47

48 CHAPTER 8. SERVICES
apiVersion: extensions/v1beta1
# Determines YAML versioned schema.
kind: Deployment
# Describes the resource defined in this file.
metadata:
name: nginx-one
labels:
system: secondary
# Required string which defines object within namespace.
namespace: accounting
# Existing namespace resource will be deployed into.
spec:
replicas: 2
# How many Pods of following containers to deploy
template:
metadata:
labels:
app: nginx
# Some string meaningful to users, not cluster. Keys
# must be unique for each object. Allows for mapping
# to customer needs.
spec:
containers:
# Array of objects describing containerized application with a Pod.
# Referenced with shorthand spec.template.spec.containers
- image: nginx:1.7.9
# The Docker image to deploy
imagePullPolicy: Always
name: nginx
# Unique name for each container, use local or Docker repo image
ports:
- containerPort: 8080
protocol: TCP
# Optional resources this container may need to function.
nodeSelector:
system: secondOne
# One method of node affinity.
2. View the existing labels on the nodes in the cluster.
student@lfs458-node-1a0a:~$ kubectl get nodes --show-labels
3. Run the following command and look for the errors. Assuming there is no typo, you should have gotten an error aboutabout the accounting namespace.
student@lfs458-node-1a0a:~$ kubectl create -f nginx-one.yaml
Error from server (NotFound): error when creating
"nginx-one.yaml": namespaces "accounting" not found
4. Create the namespace and try to create the deployment again. There should be no errors this time.
student@lfs458-node-1a0a:~$ kubectl create ns accounting
namespace/accounting" created
student@lfs458-node-1a0a:~$ kubectl create -f nginx-one.yaml
deployment.extensions/nginx-one created
5. View the status of the new nodes. Note they do not show a Running status.
student@lfs458-node-1a0a:~$ kubectl get pods -n accounting
NAME READY STATUS RESTARTS AGE
nginx-one-74dd9d578d-fcpmv 0/1 Pending 0 4m
nginx-one-74dd9d578d-r2d67 0/1 Pending 0 4m
LFS258: V 2018-08-06 c© Copyright the Linux Foundation 2018. All rights reserved.
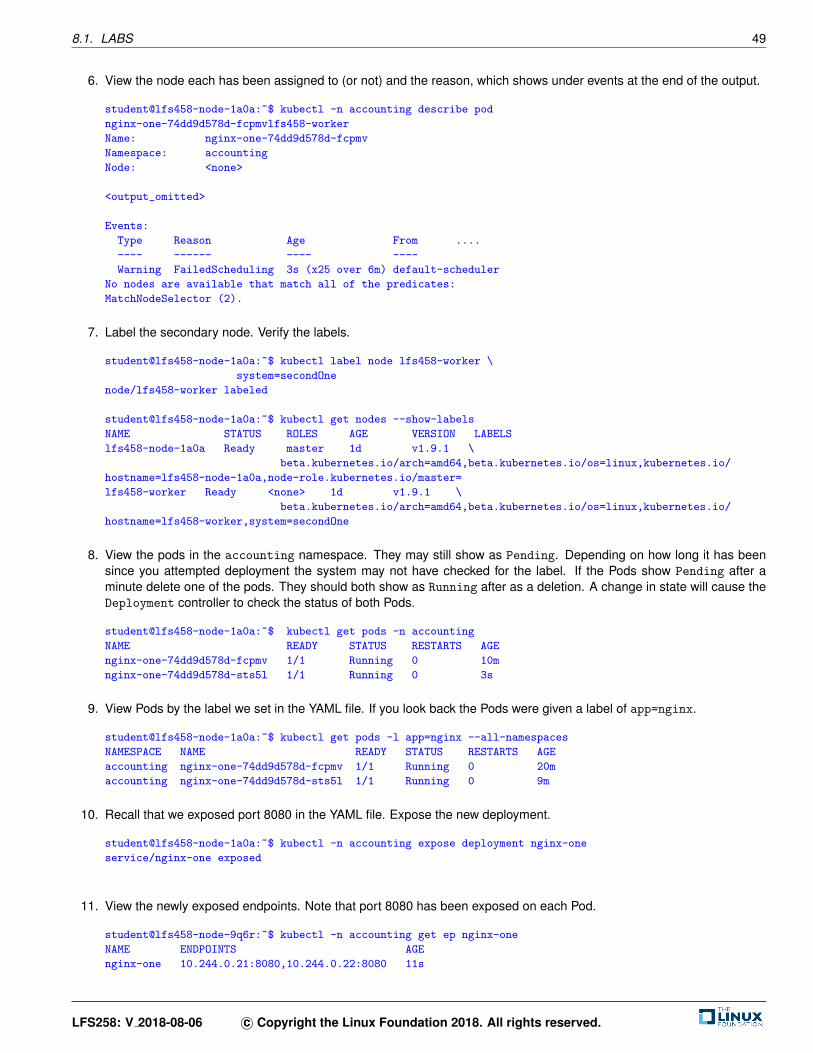
8.1. LABS 49
6. View the node each has been assigned to (or not) and the reason, which shows under events at the end of the output.
student@lfs458-node-1a0a:~$ kubectl -n accounting describe pod
nginx-one-74dd9d578d-fcpmvlfs458-worker
Name: nginx-one-74dd9d578d-fcpmv
Namespace: accounting
Node: <none>
<output_omitted>
Events:
Type Reason Age From ....
---- ------ ---- ----
Warning FailedScheduling 3s (x25 over 6m) default-scheduler
No nodes are available that match all of the predicates:
MatchNodeSelector (2).
7. Label the secondary node. Verify the labels.
student@lfs458-node-1a0a:~$ kubectl label node lfs458-worker \
system=secondOne
node/lfs458-worker labeled
student@lfs458-node-1a0a:~$ kubectl get nodes --show-labels
NAME STATUS ROLES AGE VERSION LABELS
lfs458-node-1a0a Ready master 1d v1.9.1 \
beta.kubernetes.io/arch=amd64,beta.kubernetes.io/os=linux,kubernetes.io/
hostname=lfs458-node-1a0a,node-role.kubernetes.io/master=
lfs458-worker Ready <none> 1d v1.9.1 \
beta.kubernetes.io/arch=amd64,beta.kubernetes.io/os=linux,kubernetes.io/
hostname=lfs458-worker,system=secondOne
8. View the pods in the accounting namespace. They may still show as Pending. Depending on how long it has beensince you attempted deployment the system may not have checked for the label. If the Pods show Pending after aminute delete one of the pods. They should both show as Running after as a deletion. A change in state will cause theDeployment controller to check the status of both Pods.
student@lfs458-node-1a0a:~$ kubectl get pods -n accounting
NAME READY STATUS RESTARTS AGE
nginx-one-74dd9d578d-fcpmv 1/1 Running 0 10m
nginx-one-74dd9d578d-sts5l 1/1 Running 0 3s
9. View Pods by the label we set in the YAML file. If you look back the Pods were given a label of app=nginx.
student@lfs458-node-1a0a:~$ kubectl get pods -l app=nginx --all-namespaces
NAMESPACE NAME READY STATUS RESTARTS AGE
accounting nginx-one-74dd9d578d-fcpmv 1/1 Running 0 20m
accounting nginx-one-74dd9d578d-sts5l 1/1 Running 0 9m
10. Recall that we exposed port 8080 in the YAML file. Expose the new deployment.
student@lfs458-node-1a0a:~$ kubectl -n accounting expose deployment nginx-one
service/nginx-one exposed
11. View the newly exposed endpoints. Note that port 8080 has been exposed on each Pod.
student@lfs458-node-9q6r:~$ kubectl -n accounting get ep nginx-one
NAME ENDPOINTS AGE
nginx-one 10.244.0.21:8080,10.244.0.22:8080 11s
LFS258: V 2018-08-06 c© Copyright the Linux Foundation 2018. All rights reserved.

50 CHAPTER 8. SERVICES
12. Attempt to access the Pod on port 8080, then on port 80. Even though we exposed port 8080 of the container theapplication within has not been configured to listen on this port. The nginx server will listens on port 80 by default. Acurl command to that port should return the typical welcome page.
student@lfs458-node-1a0a:~$ curl 10.244.0.21:8080
curl: (7) Failed to connect to 10.244.0.21 port 8080: Connection refused
student@lfs458-node-1a0a:~$ curl 10.244.0.21:80
<!DOCTYPE html>
<html>
<head>
<title>Welcome to nginx!</title>
<output_omitted>
13. Delete the deployment. Edit the YAML file to expose port 80 and create the deployment again.
student@lfs458-node-1a0a:~$ kubectl -n accounting delete deploy nginx-one
deployment.extensions "nginx-one" deleted
student@lfs458-node-1a0a:~$ vim nginx-one.yaml
student@lfs458-node-1a0a:~$ kubectl create -f nginx-one.yaml
deployment.extensions/nginx-one created
Exercise 8.2: Configure a NodePortIn a previous exercise we deployed a LoadBalancer which deployed a ClusterIP andNodePort automatically. In this exercisewe will deploy a NodePort. While you can access a container from within the cluster, one can use a NodePort to NAT trafficfrom outside the cluster. One reason to deploy a NodePort instead, is that a LoadBalancer is also a load balancer resourcefrom cloud providers like GKE and AWS.
1. In a previous step we were able to view the nginx page using the internal Pod IP address. Now expose the deploymentusing the --type=NodePort. We will also give it an easy to remember name and place it in the accounting namespace.We could pass the port as well, which could help with opening ports in the firewall.
student@lfs458-node-1a0a:~$ kubectl -n accounting expose deployment \
nginx-one --type=NodePort --name=service-lab
service/service-lab exposed
2. View the details of the services in the accounting namespace. We are looking for the autogenerated port.
student@lfs458-node-1a0a:~$ kubectl describe services -n accounting
....
NodePort: <unset> 32103/TCP
....
3. Locate the exterior facing IP address of the cluster. As we are using GCP nodes, which we access via a FloatingIP,we will first check the internal only public IP address. Look for the Kubernetes master URL.
student@lfs458-node-1a0a:~$ kubectl cluster-info
Kubernetes master is running at https://10.128.0.3:6443
KubeDNS is running at https://10.128.0.3:6443/api/v1/namespaces/
kube-system/services/kube-dns/proxy
To further debug and diagnose cluster problems, use
’kubectl cluster-info dump’.
4. Test access to the nginx web server using the combination of master URL and NodePort.
LFS258: V 2018-08-06 c© Copyright the Linux Foundation 2018. All rights reserved.
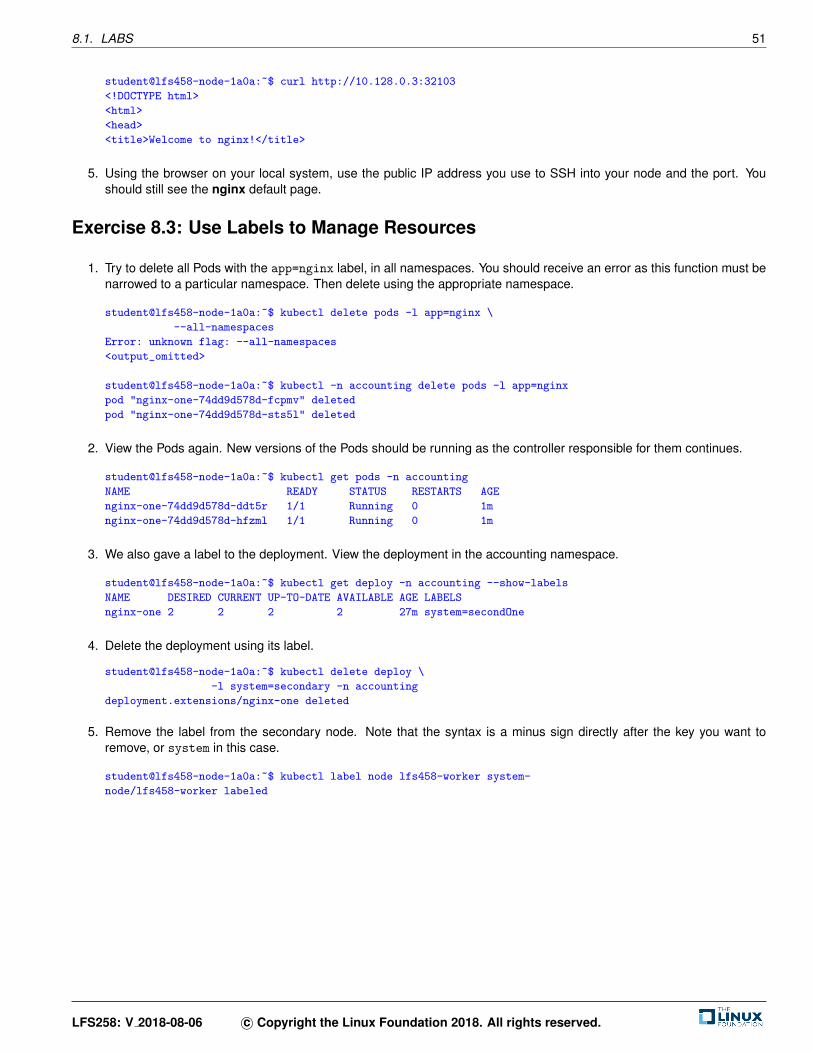
8.1. LABS 51
student@lfs458-node-1a0a:~$ curl http://10.128.0.3:32103
<!DOCTYPE html>
<html>
<head>
<title>Welcome to nginx!</title>
5. Using the browser on your local system, use the public IP address you use to SSH into your node and the port. Youshould still see the nginx default page.
Exercise 8.3: Use Labels to Manage Resources
1. Try to delete all Pods with the app=nginx label, in all namespaces. You should receive an error as this function must benarrowed to a particular namespace. Then delete using the appropriate namespace.
student@lfs458-node-1a0a:~$ kubectl delete pods -l app=nginx \
--all-namespaces
Error: unknown flag: --all-namespaces
<output_omitted>
student@lfs458-node-1a0a:~$ kubectl -n accounting delete pods -l app=nginx
pod "nginx-one-74dd9d578d-fcpmv" deleted
pod "nginx-one-74dd9d578d-sts5l" deleted
2. View the Pods again. New versions of the Pods should be running as the controller responsible for them continues.
student@lfs458-node-1a0a:~$ kubectl get pods -n accounting
NAME READY STATUS RESTARTS AGE
nginx-one-74dd9d578d-ddt5r 1/1 Running 0 1m
nginx-one-74dd9d578d-hfzml 1/1 Running 0 1m
3. We also gave a label to the deployment. View the deployment in the accounting namespace.
student@lfs458-node-1a0a:~$ kubectl get deploy -n accounting --show-labels
NAME DESIRED CURRENT UP-TO-DATE AVAILABLE AGE LABELS
nginx-one 2 2 2 2 27m system=secondOne
4. Delete the deployment using its label.
student@lfs458-node-1a0a:~$ kubectl delete deploy \
-l system=secondary -n accounting
deployment.extensions/nginx-one deleted
5. Remove the label from the secondary node. Note that the syntax is a minus sign directly after the key you want toremove, or system in this case.
student@lfs458-node-1a0a:~$ kubectl label node lfs458-worker system-
node/lfs458-worker labeled
LFS258: V 2018-08-06 c© Copyright the Linux Foundation 2018. All rights reserved.

52 CHAPTER 8. SERVICES
LFS258: V 2018-08-06 c© Copyright the Linux Foundation 2018. All rights reserved.

Chapter 9
Volumes and Data
9.1 Labs
Exercise 9.1: Create a ConfigMap
Overview
Container files are ephemeral, which can be problematic for some applications. Should a container be restarted the files willbe lost. In addition, we need a method to share files between containers inside a Pod.
A Volume is a directory accessible to containers in a Pod. Cloud providers offer volumes which persist further than the life ofthe Pod, such that AWS or GCE volumes could be pre-populated and offered to Pods, or transferred from one Pod to another.Ceph is also another popular solution for dynamic, persistent volumes.
Unlike current Docker volumes a Kubernetes volume has the lifetime of the Pod, not the containers within. You can also use dif-ferent types of volumes in the same Pod simultaneously, but Volumes cannot mount in a nested fashion. Each must have theirown mount point. Volumes are declared with spec.volumes and mount points with spec.containers.volumeMounts pa-rameters. Each particular volume type, 24 currently, may have other restrictions. https://kubernetes.io/docs/concepts/storage/volumes/#types-of-volumes
We will also work with a ConfigMap, which is basically a set of key-value pairs. This data can be made available so that a Podcan read the data as environment variables or configuration data. A ConfigMap is similar to a Secret, except they are notbase64 byte encoded arrays. They are stored as strings and can be read in serialized form.
Create a ConfigMap
There are three different ways a ConfigMap can ingest data, from a literal value, from a file or from a directory of files.
1. We will create a ConfigMap containing primary colors. We will create a series of files to ingest into the ConfigMap.First, we create a directory primary and populate it with four files. Then we create a file in our home directory with ourfavorite color.
53
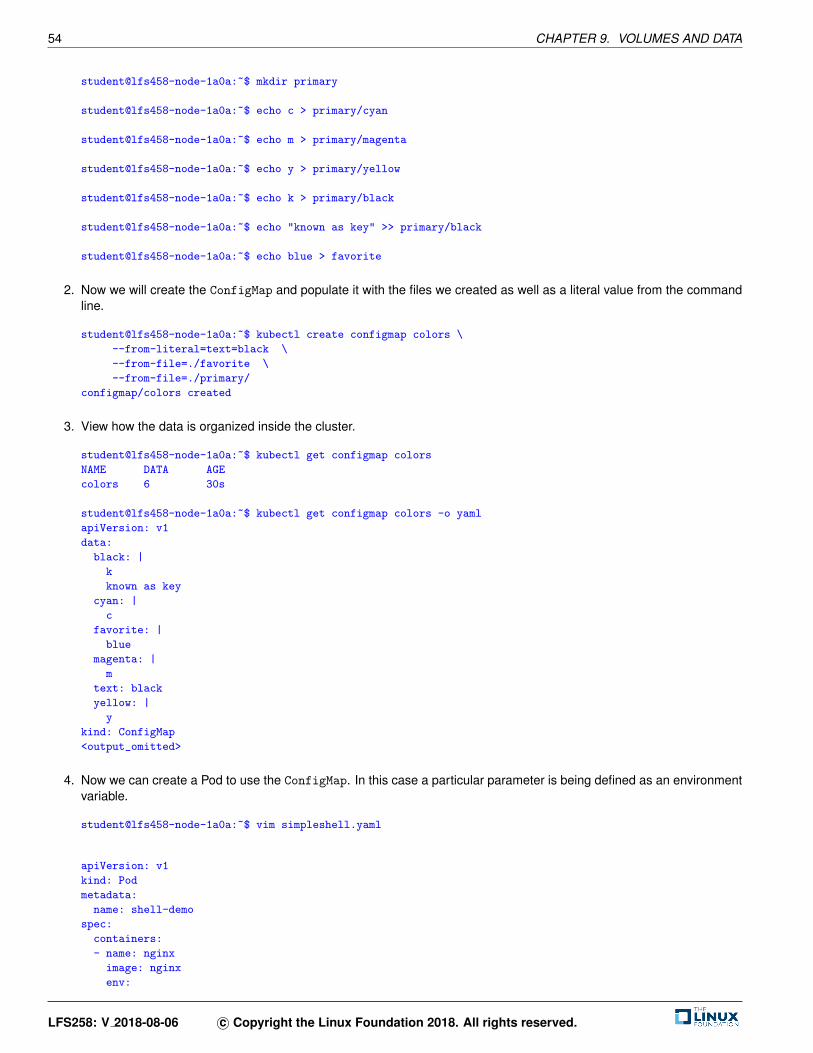
54 CHAPTER 9. VOLUMES AND DATA
student@lfs458-node-1a0a:~$ mkdir primary
student@lfs458-node-1a0a:~$ echo c > primary/cyan
student@lfs458-node-1a0a:~$ echo m > primary/magenta
student@lfs458-node-1a0a:~$ echo y > primary/yellow
student@lfs458-node-1a0a:~$ echo k > primary/black
student@lfs458-node-1a0a:~$ echo "known as key" >> primary/black
student@lfs458-node-1a0a:~$ echo blue > favorite
2. Now we will create the ConfigMap and populate it with the files we created as well as a literal value from the commandline.
student@lfs458-node-1a0a:~$ kubectl create configmap colors \
--from-literal=text=black \
--from-file=./favorite \
--from-file=./primary/
configmap/colors created
3. View how the data is organized inside the cluster.
student@lfs458-node-1a0a:~$ kubectl get configmap colors
NAME DATA AGE
colors 6 30s
student@lfs458-node-1a0a:~$ kubectl get configmap colors -o yaml
apiVersion: v1
data:
black: |
k
known as key
cyan: |
c
favorite: |
blue
magenta: |
m
text: black
yellow: |
y
kind: ConfigMap
<output_omitted>
4. Now we can create a Pod to use the ConfigMap. In this case a particular parameter is being defined as an environmentvariable.
student@lfs458-node-1a0a:~$ vim simpleshell.yaml
apiVersion: v1
kind: Pod
metadata:
name: shell-demo
spec:
containers:
- name: nginx
image: nginx
env:
LFS258: V 2018-08-06 c© Copyright the Linux Foundation 2018. All rights reserved.

9.1. LABS 55
- name: ilike
valueFrom:
configMapKeyRef:
name: colors
key: favorite
5. Create the Pod and view the environmental variable. After you view the parameter, exit out and delete the pod.
student@lfs458-node-1a0a:~$ kubectl create -f simpleshell.yaml
pod/shell-demo created
student@lfs458-node-1a0a:~$ kubectl exec -it shell-demo \
-- /bin/bash -c ’echo $ilike’
blue
student@lfs458-node-1a0a:~$ kubectl delete pod shell-demo
pod "shell-demo" deleted
6. All variables from a file can be included as environment variables as well. Comment out the previous env: stanzaand add a slightly different envFrom to the file. Having new and old code at the same time can be helpful to see andunderstand the differences. Recreate the Pod, check all variables and delete the pod again. They can be found spreadthroughout the environment variable output.
student@lfs458-node-1a0a:~$ vim simpleshell.yaml
<output_omitted>
image: nginx
# env:
# - name: ilike
# valueFrom:
# configMapKeyRef:
# name: colors
# key: favorite
envFrom:
- configMapRef:
name: colors
student@lfs458-node-1a0a:~$ kubectl create -f simpleshell.yaml
pod/shell-demo created
student@lfs458-node-1a0a:~$ kubectl exec -it shell-demo \
-- /bin/bash -c ’env’
HOSTNAME=shell-demo
NJS_VERSION=1.13.6.0.1.14-1~stretch
NGINX_VERSION=1.13.6-1~stretch
black=k
know as key
favorite=blue
<output_omitted>
student@lfs458-node-1a0a:~$ kubectl delete pod shell-demo
pod "shell-demo" deleted
7. A ConfigMap can also be created from a YAML file. Create one with a few parameters to describe a car.
student@lfs458-node-1a0a:~$ vim car-map.yaml
apiVersion: v1
kind: ConfigMap
metadata:
name: fast-car
LFS258: V 2018-08-06 c© Copyright the Linux Foundation 2018. All rights reserved.

56 CHAPTER 9. VOLUMES AND DATA
namespace: default
data:
car.make: Ford
car.model: Mustang
car.trim: Shelby
8. Create the ConfigMap and verify the settings.
student@lfs458-node-1a0a:~$ kubectl create -f car-map.yaml
configmap/fast-car created
student@lfs458-node-1a0a:~$ kubectl get configmap fast-car -o yaml
apiVersion: v1
data:
car.make: Ford
car.model: Mustang
car.trim: Shelby
kind: ConfigMap
<output_omitted>
9. We will now make the ConfigMap available to a Pod as a mounted volume. You can again comment out the previousenvironmental settings and add the following new stanza. The containers: and volumes: entries are indented thesame number of spaces.
student@lfs458-node-1a0a:~$ vim simpleshell.yaml
<output_omitted>
spec:
containers:
- name: nginx
image: nginx
volumeMounts:
- name: car-vol
mountPath: /etc/cars
volumes:
- name: car-vol
configMap:
name: fast-car
<comment out rest of file>
10. Create the Pod again. Verify the volume exists and the contents of a file within. Due to the lack of a carriage return inthe file your next prompt may be on the same line as the output, Shelby.
student@lfs458-node-1a0a:~$ kubectl create -f simpleshell.yaml
pod "shell-demo" created
student@lfs458-node-1a0a:~$ kubectl exec -it shell-demo -- \
/bin/bash -c ’df -ha |grep car’
/dev/sda1 20G 4.7G 15G 25% /etc/cars
student@lfs458-node-1a0a:~$ kubectl exec -it shell-demo -- \
/bin/bash -c ’cat /etc/cars/car.trim’
Shelby
11. Delete the Pod and ConfigMaps we were using.
student@lfs458-node-1a0a:~$ kubectl delete pods shell-demo
pod "shell-demo" deleted
student@lfs458-node-1a0a:~$ kubectl delete configmap fast-car colors
configmap "fast-car" deleted
configmap "colors" deleted
LFS258: V 2018-08-06 c© Copyright the Linux Foundation 2018. All rights reserved.

9.1. LABS 57
Exercise 9.2: Creating a Persistent NFS Volume (PV)We will first deploy an NFS server. Once tested we will create a persistent NFS volume for containers to claim.
1. Install the software on your master node.
student@lfs458-node-1a0a:~$ sudo apt-get update && sudo \
apt-get install -y nfs-kernel-server
<output_omitted>
2. Make and populate a directory to be shared. Also give it similar permissions to /tmp/
student@lfs458-node-1a0a:~$ sudo mkdir /opt/sfw
student@lfs458-node-1a0a:~$ sudo chmod 1777 /opt/sfw/
student@lfs458-node-1a0a:~$ sudo bash -c \
’echo software > /opt/sfw/hello.txt’
3. Edit the NFS server file to share out the newly created directory. In this case we will share the directory with all. You canalways snoop to see the inbound request in a later step and update the file to be more narrow.
student@lfs458-node-1a0a:~$ sudo vim /etc/exports
/opt/sfw/ *(rw,sync,no_root_squash,subtree_check)
4. Cause /etc/exports to be re-read:
student@lfs458-node-1a0a:~$ sudo exportfs -ra
5. Test by mounting the resource from your second node.
student@lfs458-worker:~$ sudo apt-get -y install nfs-common
<output_omitted>
student@lfs458-worker:~$ showmount -e lfs458-node-1a0a
Export list for lfs458-node-1a0a:
/opt/sfw *
student@lfs458-worker:~$ sudo mount 10.128.0.3:/opt/sfw /mnt
student@lfs458-worker:~$ ls -l /mnt
total 4
-rw-r--r-- 1 root root 9 Sep 28 17:55 hello.txt
6. Return to the master node and create a YAML file for the object with kind, PersistentVolume. Use the hostnameof the master server and the directory you created in the previous step. Only syntax is checked, an incorrect nameor directory will not generate an error, but a Pod using the resource will not start. Note that the accessModes do notcurrently affect actual access and are typically used as labels instead.
student@lfs458-node-1a0a:~$ vim PVol.yaml
apiVersion: v1
kind: PersistentVolume
metadata:
name: pvvol-1
spec:
capacity:
storage: 1Gi
accessModes:
- ReadWriteMany
persistentVolumeReclaimPolicy: Retain
LFS258: V 2018-08-06 c© Copyright the Linux Foundation 2018. All rights reserved.
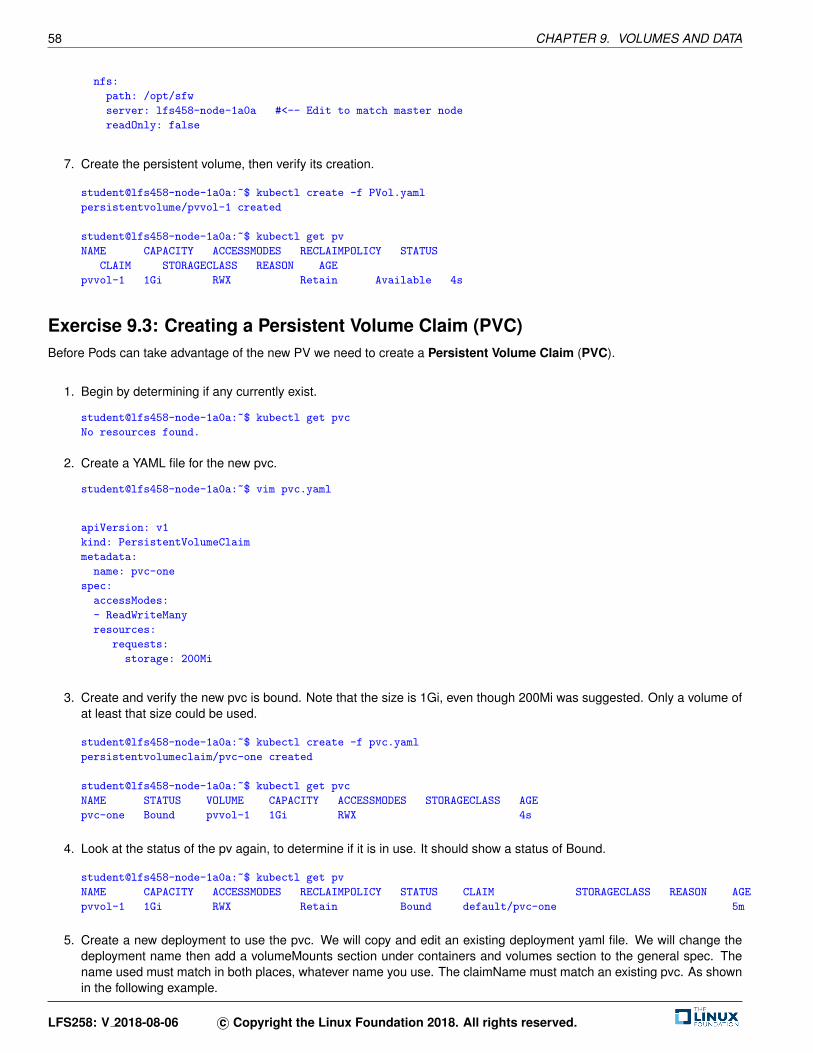
58 CHAPTER 9. VOLUMES AND DATA
nfs:
path: /opt/sfw
server: lfs458-node-1a0a #<-- Edit to match master node
readOnly: false
7. Create the persistent volume, then verify its creation.
student@lfs458-node-1a0a:~$ kubectl create -f PVol.yaml
persistentvolume/pvvol-1 created
student@lfs458-node-1a0a:~$ kubectl get pv
NAME CAPACITY ACCESSMODES RECLAIMPOLICY STATUS
CLAIM STORAGECLASS REASON AGE
pvvol-1 1Gi RWX Retain Available 4s
Exercise 9.3: Creating a Persistent Volume Claim (PVC)Before Pods can take advantage of the new PV we need to create a Persistent Volume Claim (PVC).
1. Begin by determining if any currently exist.
student@lfs458-node-1a0a:~$ kubectl get pvc
No resources found.
2. Create a YAML file for the new pvc.
student@lfs458-node-1a0a:~$ vim pvc.yaml
apiVersion: v1
kind: PersistentVolumeClaim
metadata:
name: pvc-one
spec:
accessModes:
- ReadWriteMany
resources:
requests:
storage: 200Mi
3. Create and verify the new pvc is bound. Note that the size is 1Gi, even though 200Mi was suggested. Only a volume ofat least that size could be used.
student@lfs458-node-1a0a:~$ kubectl create -f pvc.yaml
persistentvolumeclaim/pvc-one created
student@lfs458-node-1a0a:~$ kubectl get pvc
NAME STATUS VOLUME CAPACITY ACCESSMODES STORAGECLASS AGE
pvc-one Bound pvvol-1 1Gi RWX 4s
4. Look at the status of the pv again, to determine if it is in use. It should show a status of Bound.
student@lfs458-node-1a0a:~$ kubectl get pv
NAME CAPACITY ACCESSMODES RECLAIMPOLICY STATUS CLAIM STORAGECLASS REASON AGE
pvvol-1 1Gi RWX Retain Bound default/pvc-one 5m
5. Create a new deployment to use the pvc. We will copy and edit an existing deployment yaml file. We will change thedeployment name then add a volumeMounts section under containers and volumes section to the general spec. Thename used must match in both places, whatever name you use. The claimName must match an existing pvc. As shownin the following example.
LFS258: V 2018-08-06 c© Copyright the Linux Foundation 2018. All rights reserved.

9.1. LABS 59
student@lfs458-node-1a0a:~$ cp first.yaml nfs-pod.yaml
student@lfs458-node-1a0a:~$ vim nfs-pod.yaml
apiVersion: apps/v1beta1
kind: Deployment
metadata:
annotations:
deployment.kubernetes.io/revision: "1"
generation: 1
labels:
run: nginx
name: nginx-nfs
namespace: default
resourceVersion: "1411"
spec:
replicas: 1
selector:
matchLabels:
run: nginx
strategy:
rollingUpdate:
maxSurge: 1
maxUnavailable: 1
type: RollingUpdate
template:
metadata:
creationTimestamp: null
labels:
run: nginx
spec:
containers:
- image: nginx
imagePullPolicy: Always
name: nginx
volumeMounts:
- name: nfs-vol
mountPath: /opt
ports:
- containerPort: 80
protocol: TCP
resources: {}
terminationMessagePath: /dev/termination-log
terminationMessagePolicy: File
volumes: #<<-- These four lines
- name: nfs-vol
persistentVolumeClaim:
claimName: pvc-one
dnsPolicy: ClusterFirst
restartPolicy: Always
schedulerName: default-scheduler
securityContext: {}
terminationGracePeriodSeconds: 30
6. Create the pod using the newly edited file.
student@lfs458-node-1a0a:~$ kubectl create -f nfs-pod.yaml
deployment.apps/nginx-nfs created
7. Look at the details of the pod. You may see the daemonset pods running as well.
LFS258: V 2018-08-06 c© Copyright the Linux Foundation 2018. All rights reserved.

60 CHAPTER 9. VOLUMES AND DATA
student@lfs458-node-1a0a:~$ kubectl get pods
NAME READY STATUS RESTARTS AGE
nginx-nfs-1054709768-s8g28 1/1 Running 0 3m
student@lfs458-node-1a0a:~$ kubectl describe pod nginx-nfs-1054709768-s8g28
Name: nginx-nfs-1054709768-s8g28
Namespace: default
Node: lfs458-worker/10.128.0.5
<output_omitted>
Mounts:
/opt from nfs-vol (rw)
<output_omitted>
Volumes:
nfs-vol:
Type: PersistentVolumeClaim (a reference to a PersistentV...
ClaimName: pvc-one
ReadOnly: false
<output_omitted>
8. View the status of the PVC. It should show as bound.
student@lfs458-node-1a0a:~$ kubectl get pvc
NAME STATUS VOLUME CAPACITY ACCESS MODES STORAGECLASS AGE
pvc-one Bound pvvol-1 1Gi RWX 2m
Exercise 9.4: Using a ResourceQuota to Limit PVC Count and UsageThe flexibility of cloud-based storage often requires limiting consumption among users. We will use the ResourceQuota objectto both limit the total consumption as well as the number of persistent volume claims.
1. Begin by deleting the deployment we had created to use NFS, the pv and the pvc.
student@lfs458-node-1a0a:~$ kubectl delete deploy nginx-nfs
deployment.extensions "nginx-nfs" deleted
student@lfs458-node-1a0a:~$ kubectl delete pvc pvc-one
persistentvolumeclaim "pvc-one" deleted
student@lfs458-node-1a0a:~$ kubectl delete pv pvvol-1
persistentvolume "pvvol-1" deleted
2. Create a yaml file for the ResourceQuota object. Set the storage limit to ten claims with a total usage of 500Mi.
student@lfs458-node-1a0a:~$ vim storage-quota.yaml
apiVersion: v1
kind: ResourceQuota
metadata:
name: storagequota
spec:
hard:
persistentvolumeclaims: "10"
requests.storage: "500Mi"
LFS258: V 2018-08-06 c© Copyright the Linux Foundation 2018. All rights reserved.

9.1. LABS 61
3. Create a new namespace called small. View the namespace information prior to the new quota. Either the long namewith double dashes --namespace or the nickname ns work for the resource.
student@lfs458-node-1a0a:~$ kubectl create namespace small
namespace/small created
student@lfs458-node-1a0a:~$ kubectl describe ns small
Name: small
Labels: <none>
Annotations: <none>
Status: Active
No resource quota.
No resource limits.
4. Create a new pv and pvc in the small namespace.
student@lfs458-node-1a0a:~$ kubectl create -f PVol.yaml -n small
persistentvolume/pvvol-1 created
student@lfs458-node-1a0a:~$ kubectl create -f pvc.yaml -n small
persistentvolumeclaim/pvc-one created
5. Create the new resource quota, placing this object into the low-usage-limit namespace.
student@lfs458-node-1a0a:~$ kubectl create -f storage-quota.yaml \
-n small
resourcequota/storagequota created
6. Verify the small namespace has quotas. Compare the output to the same command above.
student@lfs458-node-1a0a:~$ kubectl describe ns small
Name: small
Labels: <none>
Annotations: <none>
Status: Active
Resource Quotas
Name: storagequota
Resource Used Hard
-------- --- ---
persistentvolumeclaims 1 10
requests.storage 200Mi 500Mi
No resource limits.
7. Remove the namespace line from the nfs-pod.yaml file. Should be around line 11 or so. This will allow us to passother namespaces on the command line.
student@lfs458-node-1a0a:~$ vim nfs-pod.yaml
8. Create the container again.
student@lfs458-node-1a0a:~$ kubectl create -f nfs-pod.yaml \
-n small
deployment.apps/nginx-nfs created
9. Determine if the deployment has a running pod.
LFS258: V 2018-08-06 c© Copyright the Linux Foundation 2018. All rights reserved.

62 CHAPTER 9. VOLUMES AND DATA
student@lfs458-node-1a0a:~$ kubectl get deploy --namespace=small
NAME DESIRED CURRENT UP-TO-DATE AVAILABLE AGE
nginx-nfs 1 1 1 0 43s
student@lfs458-node-1a0a:~$ kubectl -n small describe deploy \
nginx-nfs
<output_omitted>
10. Look to see if the pods are ready.
student@lfs458-node-1a0a:~$ kubectl get po -n small
NAME READY STATUS RESTARTS AGE
nginx-nfs-2854978848-g3khf 1/1 Running 0 37s
11. Ensure the Pod is running and is using the NFS mounted volume. If you pass the namespace first Tab will auto-completethe pod name.
student@lfs458-node-1a0a:~$ kubectl -n small describe po \
nginx-nfs-2854978848-g3khf
Name: nginx-nfs-2854978848-g3khf
Namespace: small
<output_omitted>
Mounts:
/opt from nfs-vol (rw)
<output_omitted>
12. View the quota usage of the namespace
student@lfs458-node-1a0a:~$ kubectl describe ns small
<output_omitted>
Resource Quotas
Name: storagequota
Resource Used Hard
-------- --- ---
persistentvolumeclaims 1 10
requests.storage 200Mi 500Mi
No resource limits.
13. Create a 300M file inside of the /opt/sfw directory on the host and view the quota usage again. Note that with NFS thesize of the share is not counted against the deployment.
student@lfs458-node-1a0a:~$ sudo dd if=/dev/zero \
of=/opt/sfw/bigfile bs=1M count=300
300+0 records in
300+0 records out
314572800 bytes (315 MB, 300 MiB) copied, 0.196794 s, 1.6 GB/s
student@lfs458-node-1a0a:~$ kubectl describe ns small
<output_omitted>
Resource Quotas
Name: storagequota
Resource Used Hard
-------- --- ---
persistentvolumeclaims 1 10
requests.storage 200Mi 500Mi
<output_omitted>
student@lfs458-node-1a0a:~$ du -h /opt/
301M /opt/sfw
LFS258: V 2018-08-06 c© Copyright the Linux Foundation 2018. All rights reserved.

9.1. LABS 63
41M /opt/cni/bin
41M /opt/cni
341M /opt/
14. Now let us illustrate what happens when a deployment requests more than the quota. Begin by shutting down theexisting deployment.
student@lfs458-node-1a0a:~$ kubectl -n small get deploy
NAME DESIRED CURRENT UP-TO-DATE AVAILABLE AGE
nginx-nfs 1 1 1 1 11m
student@lfs458-node-1a0a:~$ kubectl -n small delete deploy nginx-nfs
deployment.extensions "nginx-nfs" deleted
15. Once the Pod has shut down view the resource usage of the namespace again. Note the storage did not get cleanedup when the pod was shut down.
student@lfs458-node-1a0a:~$ kubectl describe ns small
<output_omitted>
Resource Quotas
Name: storagequota
Resource Used Hard
-------- --- ---
persistentvolumeclaims 1 10
requests.storage 200Mi 500Mi
16. Remove the pvc then view the pv it was using. Note the RECLAIM POLICY and STATUS.
student@lfs458-node-1a0a:~$ kubectl get pvc -n small
NAME STATUS VOLUME CAPACITY ACCESSMODES STORAGECLASS AGE
pvc-one Bound pvvol-1 1Gi RWX 19m
student@lfs458-node-1a0a:~$ kubectl -n small delete pvc pvc-one
persistentvolumeclaim "pvc-one" deleted
student@lfs458-node-1a0a:~$ kubectl -n small get pv
NAME CAPACITY ACCESSMODES RECLAIMPOLICY STATUS CLAIM
STORAGECLASS REASON AGE
pvvol-1 1Gi RWX Retain Released small/pvc-one 44m
17. Dynamically provisioned storage uses the ReclaimPolicy of the StorageClass which could be Delete, Retain, orsome types allow Recycle. Manually created persistent volumes default to Retain unless set otherwise at creation.The default storage policy is to retain the storage to allow recovery of any data. To change this begin by viewing theyaml output.
student@lfs458-node-1a0a:~$ kubectl get pv/pvvol-1 -o yaml
....
path: /opt/sfw
server: lfs458-node-1a0a
persistentVolumeReclaimPolicy: Retain
status:
phase: Released
18. Currently we will need to delete and re-create the object. Future development on a deleter plugin is planned. We willre-create the volume and allow it to use the Retain policy, then change it once running.
student@lfs458-node-1a0a:~$ kubectl delete pv/pvvol-1
persistentvolume "pvvol-1" deleted
student@lfs458-node-1a0a:~$ grep Retain PVol.yaml
persistentVolumeReclaimPolicy: Retain
student@lfs458-node-1a0a:~$ kubectl create -f PVol.yaml
persistentvolume "pvvol-1" created
LFS258: V 2018-08-06 c© Copyright the Linux Foundation 2018. All rights reserved.

64 CHAPTER 9. VOLUMES AND DATA
19. We will use kubectl patch to change the retention policy to Delete. The yaml output from before can be helpful ingetting the correct syntax.
student@lfs458-node-1a0a:~$ kubectl patch pv pvvol-1 -p \
’{"spec":{"persistentVolumeReclaimPolicy":"Delete"}}’
persistentvolume/pvvol-1 patched
student@lfs458-node-1a0a:~$ kubectl get pv/pvvol-1
NAME CAPACITY ACCESSMODES RECLAIMPOLICY STATUS CLAIM
STORAGECLASS REASON AGE
pvvol-1 1Gi RWX Delete Available 2m
20. View the current quota settings.
student@lfs458-node-1a0a:~$ kubectl describe ns small
.
requests.storage 0 500Mi
21. Create the pvc again. Even with no pods running, note the resource usage.
student@lfs458-node-1a0a:~$ kubectl -n small create -f pvc.yaml
persistentvolumeclaim/pvc-one created
student@lfs458-node-1a0a:~$ kubectl describe ns small
.
requests.storage 200Mi 500Mi
22. Remove the existing quota from the namespace.
student@lfs458-node-1a0a:~$ kubectl -n small get resourcequota
NAME CREATED AT
storagequota 2018-08-01T04:10:02Z
student@lfs458-node-1a0a:~$ kubectl -n small delete \
resourcequota storagequota
resourcequota "storagequota" deleted
23. Edit the storagequota.yaml file and lower the capacity to 100Mi.
student@lfs458-node-1a0a:~$ vim storage-quota.yaml
.
requests.storage: "100Mi"
24. Create and verify the new storage quota. Note the hard limit has already been exceeded.
student@lfs458-node-1a0a:~$ kubectl create -f storage-quota.yaml -n small
resourcequota/storagequota created
student@lfs458-node-1a0a:~$ kubectl describe ns small
.
persistentvolumeclaims 1 10
requests.storage 200Mi 100Mi
No resource limits.
25. Create the deployment again. View the deployment. Note there are no errors seen.
LFS258: V 2018-08-06 c© Copyright the Linux Foundation 2018. All rights reserved.

9.1. LABS 65
student@lfs458-node-1a0a:~$ kubectl create -f nfs-pod.yaml \
-n small
deployment.apps/nginx-nfs created
student@lfs458-node-1a0a:~$ kubectl -n small describe deploy/nginx-nfs
Name: nginx-nfs
Namespace: small
<output_omitted>
26. Examine the pods to see if they are actually running.
student@lfs458-node-1a0a:~$ kubectl -n small get po
NAME READY STATUS RESTARTS AGE
nginx-nfs-2854978848-vb6bh 1/1 Running 0 58s
27. As we were able to deploy more pods even with apparent hard quota set, let us test to see if the reclaim of storage takesplace. Remove the deployment and the persistent volume claim.
student@lfs458-node-1a0a:~$ kubectl -n small delete deploy nginx-nfs
deployment.extensions "nginx-nfs" deleted
student@lfs458-node-1a0a:~$ kubectl -n small delete pvc/pvc-one
persistentvolumeclaim "pvc-one" deleted
28. View if the persistent volume exists. You will see it attempted a removal, but failed. If you look closer you will find theerror has to do with the lack of a deleter volume plugin for NFS. Other storage protocols have a plugin.
student@lfs458-node-1a0a:~$ kubectl -n small get pv
NAME CAPACITY ACCESSMODES RECLAIMPOLICY STATUS CLAIM
STORAGECLASS REASON AGE
pvvol-1 1Gi RWX Delete Failed small/pvc-one 20m
29. Ensure the deployment, pvc and pv are all removed.
student@lfs458-node-1a0a:~$ kubectl delete pv/pvvol-1
persistentvolume "pvvol-1" deleted
30. Edit the persistent volume YAML file and change the persistentVolumeReclaimPolicy: to Recycle.
student@lfs458-node-1a0a:~$ vim PVol.yaml
....
persistentVolumeReclaimPolicy: Recycle
....
31. Add a LimitRange to the namespace and attempt to create the persistent volume and persistent volume claim again.We can use the LimitRange we used earlier.
student@lfs458-node-1a0a:~$ kubectl -n small create -f \
low-resource-range.yaml
limitrange/low-resource-range created
32. View the settings for the namespace. Both quotas and resource limits should be seen.
student@lfs458-node-1a0a:~$ kubectl describe ns small
<output_omitted>
Resource Limits
Type Resource Min Max Default Request Default Limit ...
---- -------- --- --- --------------- ------------- -...
Container cpu - - 500m 1 -
Container memory - - 100Mi 500Mi -
LFS258: V 2018-08-06 c© Copyright the Linux Foundation 2018. All rights reserved.

66 CHAPTER 9. VOLUMES AND DATA
33. Create the persistent volume again. View the resource. Note the Reclaim Policy is Recycle.
student@lfs458-node-1a0a:~$ kubectl -n small create -f PVol.yaml
persistentvolume/pvvol-1 created
student@lfs458-node-1a0a:~$ kubectl get pv
NAME CAPACITY ACCESS MODES RECLAIM POLICY STATUS ...
pvvol-1 1Gi RWX Recycle Available ...
34. Attempt to create the persistent volume claim again. The quota only takes effect if there is also a resource limit in effect.
student@lfs458-node-1a0a:~$ kubectl -n small create -f pvc.yaml
Error from server (Forbidden): error when creating "pvc.yaml":
persistentvolumeclaims "pvc-one" is forbidden: exceeded quota:
storagequota, requested: requests.storage=200Mi, used:
requests.storage=0, limited: requests.storage=100Mi
35. Edit the resourcequota to increase the requests.storage to 500mi.
student@lfs458-node-1a0a:~$ kubectl -n small edit resourcequota
....
spec:
hard:
persistentvolumeclaims: "10"
requests.storage: 500Mi
status:
hard:
persistentvolumeclaims: "10"
....
36. Create the pvc again. It should work this time. Then create the deployment again.
student@lfs458-node-1a0a:~$ kubectl -n small create -f pvc.yaml
persistentvolumeclaim/pvc-one created
student@lfs458-node-1a0a:~$ kubectl -n small create -f nfs-pod.yaml
deployment.apps/nginx-nfs created
37. View the namespace settings.
student@lfs458-node-1a0a:~$ kubectl describe ns small
<output_omitted>
38. Delete the deployment. View the status of the pv and pvc.
student@lfs458-node-1a0a:~$ kubectl -n small delete deploy nginx-nfs
deployment.extensions "nginx-nfs" deleted
student@lfs458-node-1a0a:~$ kubectl get pvc -n small
NAME STATUS VOLUME CAPACITY ACCESS MODES STORAGECLASS AGE
pvc-one Bound pvvol-1 1Gi RWX 7m
student@lfs458-node-1a0a:~$ kubectl -n small get pv
NAME CAPACITY ACCESS MODES RECLAIM POLICY STATUS CLAIM STORA...
pvvol-1 1Gi RWX Recycle Bound small/pvc-one ...
39. Delete the pvc and check the status of the pv. It should show as Available.
student@lfs458-node-1a0a:~$ kubectl -n small delete pvc pvc-one
persistentvolumeclaim "pvc-one" deleted
student@lfs458-node-1a0a:~$ kubectl -n small get pv
NAME CAPACITY ACCESS MODES RECLAIM POLICY STATUS CLAIM STORA...
pvvol-1 1Gi RWX Recycle Available ...
LFS258: V 2018-08-06 c© Copyright the Linux Foundation 2018. All rights reserved.

9.1. LABS 67
40. Remove the pv and any other resources created during this lab.
student@lfs458-node-1a0a:~$ kubectl delete pv pvvol-1
persistentvolume "pvvol-1" deleted
LFS258: V 2018-08-06 c© Copyright the Linux Foundation 2018. All rights reserved.

68 CHAPTER 9. VOLUMES AND DATA
LFS258: V 2018-08-06 c© Copyright the Linux Foundation 2018. All rights reserved.
Chapter 10
Ingress
10.1 Labs
There is no lab to complete for this chapter.
69

70 CHAPTER 10. INGRESS
LFS258: V 2018-08-06 c© Copyright the Linux Foundation 2018. All rights reserved.

Chapter 11
Scheduling
11.1 Labs
Exercise 11.1: Assign Pods Using Labels
Overview
While allowing the system to distribute Pods on your behalf is typically the best route, you may want to determine which nodesa Pod will use. For example you may have particular hardware requirements to meet for the workload. You may want to assignVIP Pods to new, faster hardware and everyone else to older hardware.
In this exercise we will use labels to schedule Pods to a particular node. Then we will explore taints to have more flexibledeployment in a large environment.
Assign Pods Using Labels
1. Begin by getting a list of the nodes. They should be in the ready state and without added labels or taints.
student@lfs458-node-1a0a:~$ kubectl get nodes
NAME STATUS ROLES AGE VERSION
lfs458-node-1a0a Ready master 2d v1.11.1
lfs458-worker Ready <none> 2d v1.11.1
2. View the current labels and taints for the nodes.
student@lfs458-node-1a0a:~$ kubectl describe nodes |grep -i label
Labels: beta.kubernetes.io/arch=amd64
Labels: beta.kubernetes.io/arch=amd64
student@lfs458-node-1a0a:~$ kubectl describe nodes |grep -i taint
Taints: <none>
Taints: <none>
71
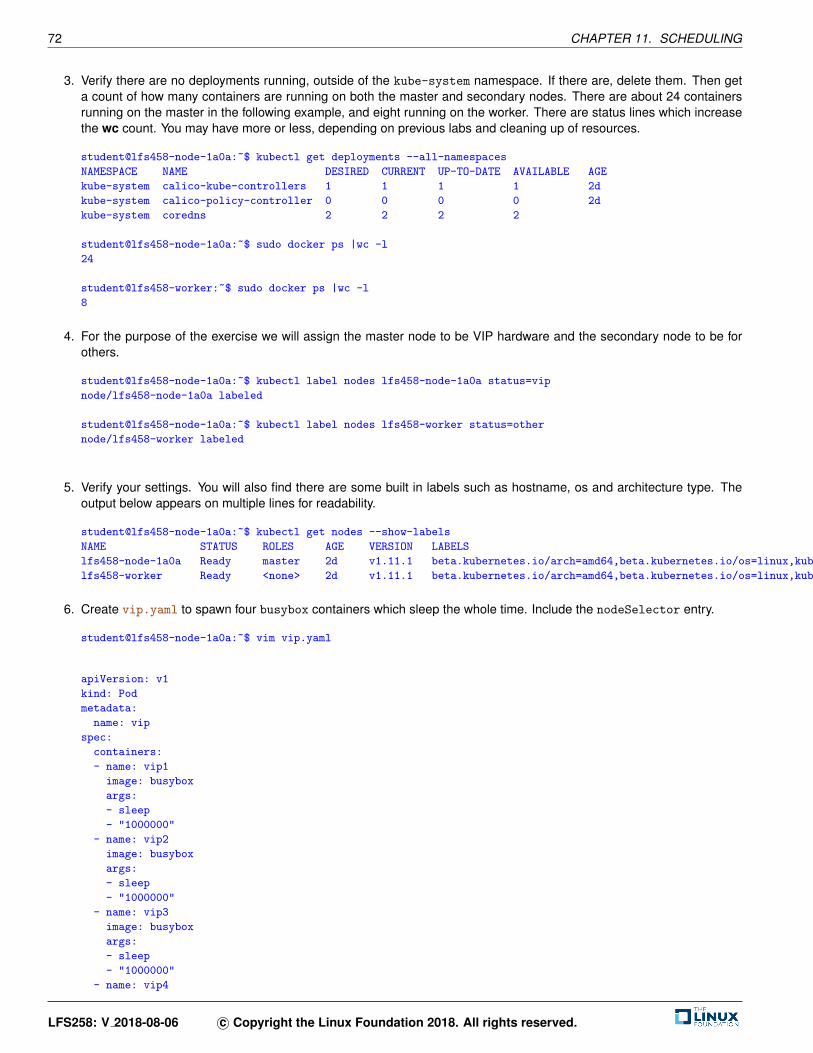
72 CHAPTER 11. SCHEDULING
3. Verify there are no deployments running, outside of the kube-system namespace. If there are, delete them. Then geta count of how many containers are running on both the master and secondary nodes. There are about 24 containersrunning on the master in the following example, and eight running on the worker. There are status lines which increasethe wc count. You may have more or less, depending on previous labs and cleaning up of resources.
student@lfs458-node-1a0a:~$ kubectl get deployments --all-namespaces
NAMESPACE NAME DESIRED CURRENT UP-TO-DATE AVAILABLE AGE
kube-system calico-kube-controllers 1 1 1 1 2d
kube-system calico-policy-controller 0 0 0 0 2d
kube-system coredns 2 2 2 2
student@lfs458-node-1a0a:~$ sudo docker ps |wc -l
24
student@lfs458-worker:~$ sudo docker ps |wc -l
8
4. For the purpose of the exercise we will assign the master node to be VIP hardware and the secondary node to be forothers.
student@lfs458-node-1a0a:~$ kubectl label nodes lfs458-node-1a0a status=vip
node/lfs458-node-1a0a labeled
student@lfs458-node-1a0a:~$ kubectl label nodes lfs458-worker status=other
node/lfs458-worker labeled
5. Verify your settings. You will also find there are some built in labels such as hostname, os and architecture type. Theoutput below appears on multiple lines for readability.
student@lfs458-node-1a0a:~$ kubectl get nodes --show-labels
NAME STATUS ROLES AGE VERSION LABELS
lfs458-node-1a0a Ready master 2d v1.11.1 beta.kubernetes.io/arch=amd64,beta.kubernetes.io/os=linux,kubernetes.io/hostname=lfs458-node-1a0a,node-role.kubernetes.io/master=,status=vip
lfs458-worker Ready <none> 2d v1.11.1 beta.kubernetes.io/arch=amd64,beta.kubernetes.io/os=linux,kubernetes.io/hostname=lfs458-worker,status=other
6. Create vip.yaml to spawn four busybox containers which sleep the whole time. Include the nodeSelector entry.
student@lfs458-node-1a0a:~$ vim vip.yaml
apiVersion: v1
kind: Pod
metadata:
name: vip
spec:
containers:
- name: vip1
image: busybox
args:
- sleep
- "1000000"
- name: vip2
image: busybox
args:
- sleep
- "1000000"
- name: vip3
image: busybox
args:
- sleep
- "1000000"
- name: vip4
LFS258: V 2018-08-06 c© Copyright the Linux Foundation 2018. All rights reserved.

11.1. LABS 73
image: busybox
args:
- sleep
- "1000000"
nodeSelector:
status: vip
7. Deploy the new pod. Verify the containers have been created on the master node. It may take a few seconds for all thecontainers to spawn. Check both the master and the secondary nodes.
student@lfs458-node-1a0a:~$ kubectl create -f vip.yaml
pod/vip created
student@lfs458-node-1a0a:~$ sudo docker ps |wc -l
29
student@lfs458-worker:~$ sudo docker ps |wc -l
8
8. Delete the pod then edit the file, commenting out the nodeSelector lines. It may take a while for the containers to fullyterminate.
student@lfs458-node-1a0a:~$ kubectl delete pod vip
pod "vip" deleted
student@lfs458-node-1a0a:~$ vim vip.yaml
....
# nodeSelector:
# status: vip
9. Create the pod again. Containers should now be spawning on both nodes. You may see pods for the daemonsets aswell.
student@lfs458-node-1a0a:~$ kubectl get pods
NAME READY STATUS RESTARTS AGE
vip 0/4 Terminating 0 5m
student@lfs458-node-1a0a:~$ kubectl get pods
No resources found.
student@lfs458-node-1a0a:~$ kubectl create -f vip.yaml
pod/vip created
10. Determine where the new containers have been deployed.
student@lfs458-node-1a0a:~$ sudo docker ps |wc -l
24
student@lfs458-worker:~$ sudo docker ps |wc -l
13
11. Create another file for other users. Change the names from vip to others, and uncomment the nodeSelector lines.
student@lfs458-node-1a0a:~$ cp vip.yaml other.yaml
student@lfs458-node-1a0a:~$ sed -i s/vip/other/g other.yaml
student@lfs458-node-1a0a:~$ vim other.yaml
.
nodeSelector:
status: other
LFS258: V 2018-08-06 c© Copyright the Linux Foundation 2018. All rights reserved.

74 CHAPTER 11. SCHEDULING
12. Create the other containers. Determine where they deploy.
student@lfs458-node-1a0a:~$ kubectl create -f other.yaml
pod/other created
student@lfs458-node-1a0a:~$ sudo docker ps |wc -l
24
student@lfs458-worker:~$ sudo docker ps |wc -l
18
13. Shut down both pods and verify they are terminating.
student@lfs458-node-1a0a:~$ kubectl delete pods vip other
pod "vip" deleted
pod "other" deleted
student@lfs458-node-1a0a:~$ kubectl get pods
NAME READY STATUS RESTARTS AGE
other 4/4 Terminating 0 5m
vip 4/4 Terminating 0 10m
Exercise 11.2: Using Taints to Control Pod DeploymentUse taints to manage where Pods are deployed or allowed to run. In addition to assigning a Pod to a group of nodes, you mayalso want to limit usage on a node or fully evacuate Pods. Using taints is one way to achieve this. You may remember that themaster node begins with a NoSchedule taint. We will work with three taints to limit or remove running pods.
1. Verify that the master and secondary node have the minimal number of containers running.
2. Create a deployment which will deploy eight nginx containers. Begin by creating a YAML file.
student@lfs458-node-1a0a:~$ vim taint.yaml
apiVersion: apps/v1beta1
kind: Deployment
metadata:
name: taint-deployment
spec:
replicas: 8
template:
metadata:
labels:
app: nginx
spec:
containers:
- name: nginx
image: nginx:1.7.9
ports:
- containerPort: 80
3. Apply the file to create the deployment.
student@lfs458-node-1a0a:~$ kubectl apply -f taint.yaml
deployment.apps/taint-deployment created
4. Determine where the containers are running. In the following example three have been deployed on the master nodeand five on the secondary node. Remember there will be other housekeeping containers created as well.
LFS258: V 2018-08-06 c© Copyright the Linux Foundation 2018. All rights reserved.

11.1. LABS 75
student@lfs458-node-1a0a:~$ sudo docker ps |grep nginx
00c1be5df1e7 nginx@sha256:e3456c851a152494c3e..
<output_omitted>
student@lfs458-node-1a0a:~$ sudo docker ps |wc -l
30
student@lfs458-worker:~$ sudo docker ps |wc -l
18
5. Delete the deployment. Verify the containers are gone.
student@lfs458-node-1a0a:~$ kubectl delete deployment taint-deployment
deployment.extensions "taint-deployment" deleted
student@lfs458-node-1a0a:~$ sudo docker ps |wc -l
24
6. Now we will use a taint to affect the deployment of new containers. There are three taints, NoSchedule,PreferNoSchedule and NoExecute. The taints having to do with schedules will be used to determine newly deployedcontainers, but will not affect running containers. The use of NoExectute will cause running containers to move.
Taint the secondary node, verify it has the taint then create the deployment again. We will use the key of bubba toillustrate the key name is just some string an admin can use to track Pods.
student@lfs458-node-1a0a:~$ kubectl taint nodes lfs458-worker \
bubba=value:PreferNoSchedule
node/lfs458-worker tainted
student@lfs458-node-1a0a:~$ kubectl describe node |grep Taint
Taints: bubba=value:PreferNoSchedule
Taints: <none>
student@lfs458-node-1a0a:~$ kubectl apply -f taint.yaml
deployment.apps/taint-deployment created
7. Locate where the containers are running. We can see that more containers are on the master, but there still were somecreated on the secondary. Delete the deployment when you have gathered the numbers.
student@lfs458-node-1a0a:~$ sudo docker ps |wc -l
32
student@lfs458-worker:~$ sudo docker ps |wc -l
16
student@lfs458-node-1a0a:~$ kubectl delete deployment taint-deployment
deployment.extensions "taint-deployment" deleted
8. Remove the taint, verify it has been removed. Note that the key is used with a minus sign appended to the end.
student@lfs458-node-1a0a:~$ kubectl taint nodes lfs458-worker bubba-
node/lfs458-worker untainted
student@lfs458-node-1a0a:~$ kubectl describe node |grep Taint
Taints: <none>
Taints: <none>
9. This time use the NoSchedule taint, then create the deployment again. The secondary node should not have any newcontainers.
student@lfs458-node-1a0a:~$ kubectl taint nodes lfs458-worker \
bubba=value:NoSchedule
node/lfs458-worker tainted
LFS258: V 2018-08-06 c© Copyright the Linux Foundation 2018. All rights reserved.
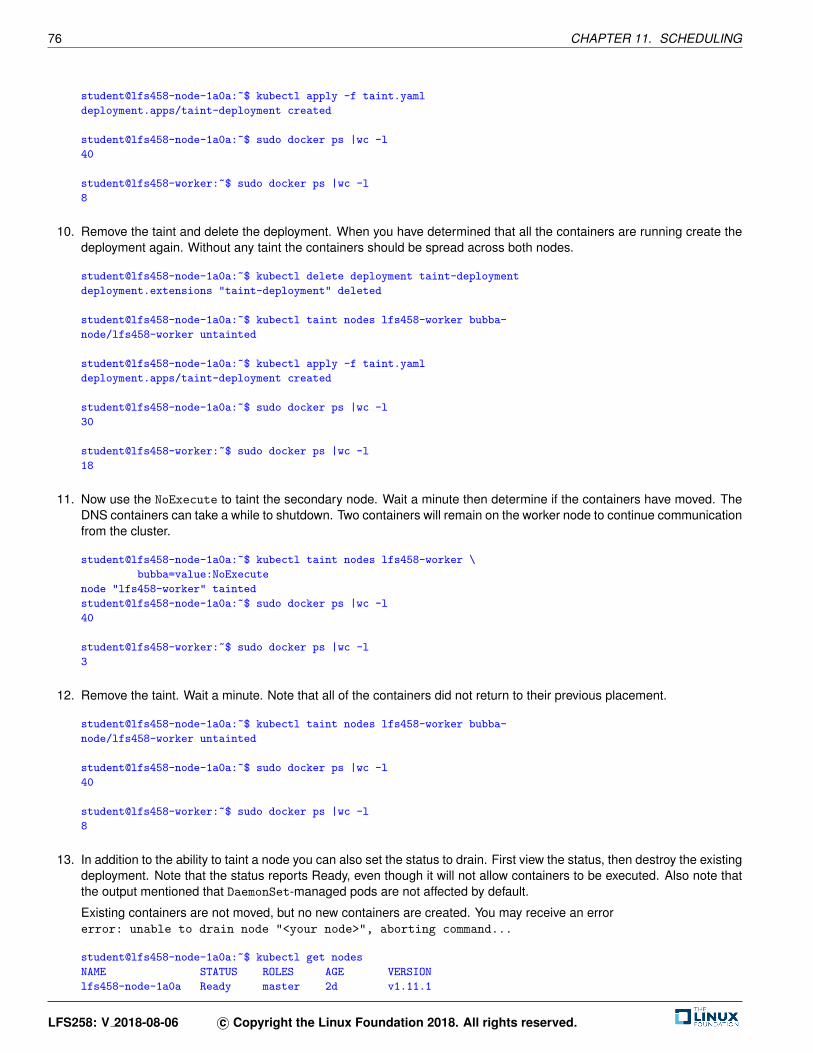
76 CHAPTER 11. SCHEDULING
student@lfs458-node-1a0a:~$ kubectl apply -f taint.yaml
deployment.apps/taint-deployment created
student@lfs458-node-1a0a:~$ sudo docker ps |wc -l
40
student@lfs458-worker:~$ sudo docker ps |wc -l
8
10. Remove the taint and delete the deployment. When you have determined that all the containers are running create thedeployment again. Without any taint the containers should be spread across both nodes.
student@lfs458-node-1a0a:~$ kubectl delete deployment taint-deployment
deployment.extensions "taint-deployment" deleted
student@lfs458-node-1a0a:~$ kubectl taint nodes lfs458-worker bubba-
node/lfs458-worker untainted
student@lfs458-node-1a0a:~$ kubectl apply -f taint.yaml
deployment.apps/taint-deployment created
student@lfs458-node-1a0a:~$ sudo docker ps |wc -l
30
student@lfs458-worker:~$ sudo docker ps |wc -l
18
11. Now use the NoExecute to taint the secondary node. Wait a minute then determine if the containers have moved. TheDNS containers can take a while to shutdown. Two containers will remain on the worker node to continue communicationfrom the cluster.
student@lfs458-node-1a0a:~$ kubectl taint nodes lfs458-worker \
bubba=value:NoExecute
node "lfs458-worker" tainted
student@lfs458-node-1a0a:~$ sudo docker ps |wc -l
40
student@lfs458-worker:~$ sudo docker ps |wc -l
3
12. Remove the taint. Wait a minute. Note that all of the containers did not return to their previous placement.
student@lfs458-node-1a0a:~$ kubectl taint nodes lfs458-worker bubba-
node/lfs458-worker untainted
student@lfs458-node-1a0a:~$ sudo docker ps |wc -l
40
student@lfs458-worker:~$ sudo docker ps |wc -l
8
13. In addition to the ability to taint a node you can also set the status to drain. First view the status, then destroy the existingdeployment. Note that the status reports Ready, even though it will not allow containers to be executed. Also note thatthe output mentioned that DaemonSet-managed pods are not affected by default.
Existing containers are not moved, but no new containers are created. You may receive an errorerror: unable to drain node "<your node>", aborting command...
student@lfs458-node-1a0a:~$ kubectl get nodes
NAME STATUS ROLES AGE VERSION
lfs458-node-1a0a Ready master 2d v1.11.1
LFS258: V 2018-08-06 c© Copyright the Linux Foundation 2018. All rights reserved.

11.1. LABS 77
lfs458-worker Ready <none> 2d v1.11.1
student@lfs458-node-1a0a:~$ kubectl drain lfs458-worker
node/lfs458-worker cordoned
error: DaemonSet-managed pods (use --ignore-daemonsets to ignore): kube-flannel-ds-fx3tx, kube-proxy-q2q4k
14. Verify the state change of the node. It should indicate no new Pods will be scheduled.
student@lfs458-node-1a0a:~$ kubectl get nodes
NAME STATUS ROLES AGE VERSION
lfs458-node-1a0a Ready master 2d v1.11.1
lfs458-worker Ready,SchedulingDisabled <none> 2d v1.11.1
15. Delete the deployment to destroy the current Pods.
student@lfs458-node-1a0a:~$ kubectl delete deployment taint-deployment
deployment.extensions "taint-deployment" deleted
16. Create the deployment again and determine where the containers have been deployed.
student@lfs458-node-1a0a:~$ kubectl apply -f taint.yaml
deployment.apps/taint-deployment created
student@lfs458-node-1a0a:~$ sudo docker ps |wc -l
40
17. Return the status to Ready, then destroy and create the deployment again. The containers should be spread across thenodes. Begin by removing the cordon on the node.
student@lfs458-node-1a0a:~$ kubectl uncordon lfs458-worker
node/lfs458-worker uncordoned
student@lfs458-node-1a0a:~$ kubectl get nodes
NAME STATUS ROLES AGE VERSION
lfs458-node-1a0a Ready master 2d v1.11.1
lfs458-worker Ready <none> 2d v1.11.1
18. Delete and re-create the deployment.
student@lfs458-node-1a0a:~$ kubectl delete deployment taint-deployment
deployment.extensions "taint-deployment" deleted
student@lfs458-node-1a0a:~$ kubectl apply -f taint.yaml
deployment.apps/taint-deployment created
19. View the docker ps output again. Both nodes should have almost the same number of containers deployed. The masterwill have a few more, due to its role.
20. Remove the deployment a final time to free up resources.
student@lfs458-node-1a0a:~$ kubectl delete deployment taint-deployment
deployment.extensions "taint-deployment" deleted
LFS258: V 2018-08-06 c© Copyright the Linux Foundation 2018. All rights reserved.

78 CHAPTER 11. SCHEDULING
LFS258: V 2018-08-06 c© Copyright the Linux Foundation 2018. All rights reserved.

Chapter 12
Logging and Troubleshooting
12.1 Labs
Exercise 12.1: Review Log File Locations
Overview
In addition to various logs files and command output, you can use journalctl to view logs from the node perspective. We willview common locations of log files, then a command to view container logs. There are other logging options, such as the useof a sidecar container dedicated to loading the logs of another container in a pod.
Whole cluster logging is not yet available with Kubernetes. Outside software is typically used, such as Fluentd, part ofhttps://fluentd.org/, which is another member project of CNCF, like Kubernetes.
Review Log File Locations
Take a quick look at the following log files and web sites. As server processes move from node level to running in containersthe logging also moves.
1. If using a systemd based Kubernetes cluster view the node level logs for kubelet, the local Kubernetes agent. Eachnode will have different contents as this is node specific.
student@lfs458-node-1a0a:~$ journalctl -u kubelet |less
<output_omitted>
2. Major Kubernetes processes now run in containers. You can view them from the container or the pod perspective. Usethe find command to locate the kube-apiserver log. Your output will be different, but will be very long. Once you locatethe files use the diff utility to compare them. There should be no difference.
student@lfs458-node-1a0a:~$ sudo find / -name "*apiserver*log"
/var/log/pods/56c55117e68ed986eaddeb0f78ca405e/kube-apiserver_0.log
79

80 CHAPTER 12. LOGGING AND TROUBLESHOOTING
/var/log/containers/kube-apiserver-lfs458-node-9q6r_kube-system_kube...
student@lfs458-node-1a0a:~$ sudo diff \
/var/log/pods/56c55117e68ed986eaddeb0f78ca405e/kube-apiserver_0.log
/var/log/containers/kube-apiserver-lfs458-node-9q6r_kube-system_kube...
3. Take a look at the log file.
student@lfs458-node-1a0a:~$ sudo less \
/var/log/pods/56c55117e68ed986eaddeb0f78ca405e/kube-apiserver_0.log
4. Search for and review other log files for kube-dns, kube-flannel, and kube-proxy.
5. If not on a Kubernetes cluster using systemd you can view the text files on the master node.
(a) /var/log/kube-apiserver.log
Responsible for serving the API
(b) /var/log/kube-scheduler.log
Responsible for making scheduling decisions
(c) /var/log/kube-controller-manager.log
Controller that manages replication controllers
6. /var/log/containers
Various container logs
7. /var/log/pods/
More log files for current Pods.
8. Worker Nodes Files (on non-systemd systems)
(a) /var/log/kubelet.log
Responsible for running containers on the node
(b) /var/log/kube-proxy.log
Responsible for service load balancing
9. More reading: https://kubernetes.io/docs/tasks/debug-application-cluster/\debug-service/ and https:
//kubernetes.io/docs/tasks/debug-application-cluster/\determine-reason-pod-failure/
Exercise 12.2: Viewing Logs OutputContainer standard out can be seen via the kubectl logs command. If there is no standard out, you would not see any output.In addition, the logs would be destroyed if the container is destroyed.
1. View the current Pods in the cluster. Be sure to view Pods in all namespaces.
student@lfs458-node-1a0a:~$ kubectl get po --all-namespaces
NAMESPACE NAME READY STATUS RESTARTS AGE
default ds-one-qc72k 1/1 Running 0 3h
default ds-one-z31r4 1/1 Running 0 3h
....
kube-system etcd-lfs458-node-1a0a 1/1 Running 2 9h
kube-system kube-apiserver-lfs458-node-1a0a 1/1 Running 2 9h
kube-system kube-controller-manager-lfs458-node-1a0a 1/1 Running 2 9h
kube-system kube-dns-2425271678-w80vx 3/3 Running 6 9h
kube-system kube-scheduler-lfs458-node-1a0a 1/1 Running 2 9h
...
LFS258: V 2018-08-06 c© Copyright the Linux Foundation 2018. All rights reserved.

12.1. LABS 81
2. View the logs associated with various infrastructure pods. Using the Tab key you can get a list and choose a container.Then you can start typing the name of a pod and use Tab to complete the name.
student@lfs458-node-1a0a:~$ kubectl -n kube-system logs <Tab><Tab>
calico-etcd-n6h2q
etcd-lfs458-1-11-1update-cm35
calico-kube-controllers-74b888b647-9ds42
kube-apiserver-lfs458-1-11-1update-cm35
calico-node-6j8hc
kube-controller-manager-lfs458-1-11-1update-cm35
calico-node-dq6kf
kube-proxy-8sn6f
coredns-78fcdf6894-7fpfp
kube-proxy-wf5dr
coredns-78fcdf6894-g6k99
kube-scheduler-lfs458-1-11-1update-cm35
student@lfs458-node-1a0a:~$ kubectl -n kube-system logs \
kube-apiserver-lfs458-1-11-1update-cm35
Flag --insecure-port has been deprecated, This flag will be
removed in a future version.
I0729 21:29:23.026394 1 server.go:703] external host
was not specified, using 10.128.0.2
I0729 21:29:23.026667 1 server.go:145] Version: v1.11.1
I0729 21:29:23.784000 1 plugins.go:158] Loaded 8 mutating
admission controller(s) successfully in the following order:
NamespaceLifecycle,LimitRanger,ServiceAccount,NodeRestriction,
Priority,DefaultTolerationSeconds,DefaultStorageClass,
MutatingAdmissionWebhook.
I0729 21:29:23.784025 1 plugins.go:161] Loaded 6 validating
admission controller(s) successfully in the following order:
LimitRanger,ServiceAccount,Priority,PersistentVolumeClaimResize,
ValidatingAdmissionWebhook,ResourceQuota.
<output_omitted>
3. View the logs of other Pods in your cluster.
LFS258: V 2018-08-06 c© Copyright the Linux Foundation 2018. All rights reserved.

82 CHAPTER 12. LOGGING AND TROUBLESHOOTING
LFS258: V 2018-08-06 c© Copyright the Linux Foundation 2018. All rights reserved.

Chapter 13
Custom Resource Definition
13.1 Labs
Exercise 13.1: Create a Custom Resource Definition
Overview
ThirdPartyResource is no longer included with the API in v1.8 and its use will return a validation error. If you have upgradedfrom a version prior to Kubernetes v1.7, you will need to convert them to CustomResourceDefinitions (CRD). A newresource often requires a controller to manage the resource. Creation of the controller is beyond the scope of this course,basically it is a watch-loop comparing a spec file to the current state and making changes until the states match. A gooddiscussion of creating a controller can be found here: https://coreos.com/blog/introducing-operators.html.
Create a Custom Resource Definition
We will make a simple CRD, but without any particular action. It will be enough to find the object ingested into the API andresponding to commands.
1. We will create a new YAML file.
student@lfs458-node-1a0a:~$ vim crd.yaml
apiVersion: apiextensions.k8s.io/v1beta1
kind: CustomResourceDefinition
metadata:
name: crontabs.training.lfs458.com
# This name must match names below.
# <plural>.<group> syntax
spec:
scope: Cluster #Could also be Namespaced
group: training.lfs458.com
83

84 CHAPTER 13. CUSTOM RESOURCE DEFINITION
version: v1
names:
kind: CronTab #Typically CamelCased for resource manifest
plural: crontabs #Shown in URL
singular: crontab #Short name for CLI alias
shortNames:
- ct #CLI short name
2. Add the new resource to the cluster.
student@lfs458-node-1a0a:~$ kubectl create -f crd.yaml
customresourcedefinition.apiextensions.k8s.io/crontabs.training.lfs458.com
created
3. View and describe the resource. You’ll note the describe output is unlike other objects we have seen so far.
student@lfs458-node-1a0a:~$ kubectl get crd
NAME CREATED AT
crontabs.training.lfs458.com 2018-08-03T05:25:20Z
student@lfs458-node-1a0a:~$ kubectl describe crd
Name: crontabs.training.lfs458.com
Namespace:
Labels: <none>
Annotations: <none>
API Version: apiextensions.k8s.io/v1beta1
Kind: CustomResourceDefinition
<output_omitted>
4. Now that we have a new API resource we can create a new object of that type. In this case it will be a crontab-likeimage, which does not actually exist, but is being used for demonstration.
student@lfs458-node-1a0a:~$ vim new-crontab.yaml
apiVersion: "training.lfs458.com/v1"
# This is from the group and version of new CRD
kind: CronTab
# The kind from the new CRD
metadata:
name: new-cron-object
spec:
cronSpec: "*/5 * * * *"
image: some-cron-image
#Does not exist
5. Create the new object and view the resource using short and long name.
student@lfs458-node-1a0a:~$ kubectl create -f new-crontab.yaml
crontab.training.lfs458.com/new-cron-object created
student@lfs458-node-1a0a:~$ kubectl get CronTab
NAME AGE
new-cron-object 22s
student@lfs458-node-1a0a:~$ kubectl get ct
NAME AGE
new-cron-object 29s
student@lfs458-node-1a0a:~$ kubectl describe ct
Name: new-cron-object
LFS258: V 2018-08-06 c© Copyright the Linux Foundation 2018. All rights reserved.

13.1. LABS 85
Namespace:
Labels: <none>
<output_omitted>
Spec:
Cron Spec: */5 * * * *
Image: some-cron-image
Events: <none>
6. To clean up the resources we will delete the CRD. This should delete all of the endpoints and objects using it as well.
student@lfs458-node-1a0a:~$ kubectl delete -f crd.yaml
customresourcedefinition.apiextensions.k8s.io
"crontabs.training.lfs458.com" deleted
student@lfs458-node-1a0a:~$ kubectl get ct
Error from server (NotFound): Unable to list "crontabs": the server
could not find the requested resource
(get crontabs.training.lfs458.com)
LFS258: V 2018-08-06 c© Copyright the Linux Foundation 2018. All rights reserved.

86 CHAPTER 13. CUSTOM RESOURCE DEFINITION
LFS258: V 2018-08-06 c© Copyright the Linux Foundation 2018. All rights reserved.
Chapter 14
Kubernetes Federation
14.1 Labs
There is no lab to complete for this chapter.
87

88 CHAPTER 14. KUBERNETES FEDERATION
LFS258: V 2018-08-06 c© Copyright the Linux Foundation 2018. All rights reserved.

Chapter 15
Helm
15.1 Labs
Exercise 15.1: Working with Helm and Charts
Overview
helm allows for easy deployment of complex configurations. This could be handy for a vendor to deploy a multi-part applicationin a single step. Through the use of a Chart, or template file, the required components and their relationships are declared.Local agents like Tiller use the API to create objects on your behalf. Effectively its orchestration for orchestration.
There are a few ways to install Helm. The newest version may require building from source code. We will download a recent,stable version. Once installed we will deploy a Chart, which will configure Hadoop on our cluster.
Install Helm
1. On the master node use wget to download the compressed tar file. The short URL below is for: https://storage.googleapis.com/kubernetes-helm/helm-v2.7.0-linux-amd64.tar.gz
student@lfs458-node-1a0a:~$ wget goo.gl/nbEcHn
<output_omitted>
nbEcHn 100%[====================>] 11.61M --.-KB/s in 0.1s
2018-08-03 05:34:56 (91.7 MB/s) - nbEcHn saved [12169373/12169373]
2. Uncompress and expand the file.
student@lfs458-node-1a0a:~$ tar -xvf nbEcHn
linux-amd64/
linux-amd64/README.md
linux-amd64/helm
linux-amd64/LICENSE
89

90 CHAPTER 15. HELM
3. Copy the helm binary to the /usr/local/bin/ directory, so it is usable via the shell search path.
student@lfs458-node-1a0a:~$ sudo cp linux-amd64/helm /usr/local/bin/
4. Due to new RBAC configuration helm is unable to run in the default namespace, in this version of Kubernetes. Duringinitialization you could choose to create and declare a new namespace. Other RBAC issues may be encountered eventhen. In this lab we will create a service account for tiller, and give it admin abilities on the cluster. More on RBAC inanother chapter.
Begin by creating the serviceaccount object.
student@lfs458-node-1a0a:~$ kubectl create serviceaccount \
--namespace kube-system tiller
serviceaccount "tiller" created
5. Bind the serviceaccount to the admin role called cluster-admin inside the kube-system namespace.
student@lfs458-node-1a0a:~$ kubectl create clusterrolebinding \
tiller-cluster-rule \
--clusterrole=cluster-admin \
--serviceaccount=kube-system:tiller
clusterrolebinding.rbac.authorization.k8s.io/tiller-cluster-rule created
6. We can now initialize helm. This process will also configure tiller the client process. There are several possible optionsto pass such as nodeAffinity, a particular version of software, alternate storage backend, and even a dry-run optionto generate JSON or YAML output. The output could be edited and ingested into kubectl. We will use default values inthis case.
student@lfs458-node-1a0a:~$ helm init
<output_omitted>
7. Update the tiller-deploy deployment to have the service account.
student@lfs458-node-1a0a:~$ kubectl -n kube-system patch deployment \
tiller-deploy -p \
’{"spec":{"template":{"spec":{"serviceAccount":"tiller"}}}}’
deployment.extensions/tiller-deploy patched
8. Verify the tiller pod is running. Examine the logs of the pod. Note that each line of log begins with an tag of thecomponent generating the messages, such as [main], [storage], and [storage].
student@lfs458-node-1a0a:~$ kubectl get pods --all-namespaces
<output_omitted>
kube-system tiller-deploy-84b97f465c-76lvs 1/1 Running 0 30m
student@lfs458-node-1a0a:~$ kubectl -n kube-system logs \
tiller-deploy-84b97f465c-76lvs
<output_omitted>
9. View the available sub-commands for helm. As with other Kubernetes tools, expect ongoing change.
student@lfs458-node-1a0a:~$ helm help
<output_omitted>
10. View the current configuration files, archives and plugins for helm. Return to this directory after you have worked with aChart later in the lab.
LFS258: V 2018-08-06 c© Copyright the Linux Foundation 2018. All rights reserved.

15.1. LABS 91
student@lfs458-node-1a0a:~$ helm home
/home/student/.helm
student@lfs458-node-1a0a:~$ ls -R /home/student/.helm/
/home/student/.helm/:
cache plugins repository starters
/home/student/.helm/cache:
archive
<output_omitted>
11. Verify helm and tiller are responding, also check the current version installed.
student@lfs458-node-1a0a:~$ helm version
Client: &version.Version{SemVer:"v2.7.0", GitCommit:"08c1144f5...
Server: &version.Version{SemVer:"v2.7.0", GitCommit:"08c1144f5...
12. Ensure both are upgraded to the most recent stable version.
student@lfs458-node-1a0a:~$ helm init --upgrade
$HELM_HOME has been configured at /home/student/.helm.
Tiller (the Helm server-side component) has been upgraded
to the current version.
Happy Helming!
13. A Chart is a collection of containers to deploy an application. There is a collection available on https://github.com/
kubernetes/charts/tree/master/stable, provided by vendors, or you can make your own. Take a moment andview the current stable Charts. Then search for available stable databases.
student@lfs458-node-1a0a:~$ helm search database
NAME VERSION DESCRIPTION
stable/cockroachdb 0.5.4 CockroachDB is a scalable, ...
stable/dokuwiki 0.2.1 DokuWiki is a standards-compliant...
stable/mariadb 2.1.3 Fast, reliable, scalable, and eas...
stable/mediawiki 0.6.1 Extremely powerful, scalable soft...
stable/mongodb 0.4.22 NoSQL document-oriented database ...
stable/mongodb-replicaset 2.1.4 NoSQL document-oriented datab...
stable/mysql 0.3.4 Fast, reliable, scalable, and eas...
<output_omitted>
14. We will install the mariadb. Take a look at install details https://github.com/kubernetes/charts/tree/master/
stable/mariadb#custom-mycnf-configuration The –debug option will create a lot of output. Note the interestingname for the deployment, like illmannered-salamander. The output will typically suggest ways to access the software.As well we will indicate that we do not want persistent storage, which would require use to create an available PV.
student@lfs458-node-1a0a:~$ helm --debug install stable/mariadb \
--set master.persistence.enabled=false \
--set slave.persistence.enabled=false
[debug] Created tunnel using local port: ’38396’
[debug] SERVER: "localhost:38396"
[debug] Original chart version: ""
[debug] Fetched stable/mariadb to /home/student/.helm/cache/archive/mar...
[debug] CHART PATH: /home/student/.helm/cache/archive/mariadb-2.0.1.tgz
NAME: illmannered-salamander
<output_omitted>
LFS258: V 2018-08-06 c© Copyright the Linux Foundation 2018. All rights reserved.

92 CHAPTER 15. HELM
15. Using some of the information at the end of the previous command output we will deploy another container and accessthe database. We begin by getting the root password for illmannered-salamander. Be aware the output lacks acarriage return, so the next prompt will appear on the same line. We will need the password to access the runningMariaDB database.
student@lfs458-node-1a0a:~$ kubectl get secret -n default \
illmannered-salamander-mariadb \
-o jsonpath="{.data.mariadb-root-password}" \
| base64 --decode
IFBldzAQfx
16. Now we will install another container to act as a client for the database. We will use apt-get to install client software.
student@lfs458-node-1a0a:~$ kubectl run -i --tty ubuntu \
--image=ubuntu:16.04 --restart=Never -- bash -il
If you don’t see a command prompt, try pressing enter.
root@ubuntu:/#
root@ubuntu:/# apt-get update ; apt-get install -y mariadb-client
<output_omitted>
17. Use the client software to access the database. The following command uses the server name and the root passwordwe found in a previous step. Both of yours will be different.
root@ubuntu:/# mysql -h illmannered-salamander-mariadb -p
Enter password: IFBldzAQfx
Welcome to the MariaDB monitor. Commands end with ; or \g.
Your MariaDB connection id is 153
Server version: 10.1.28-MariaDB Source distribution
Copyright (c) 2000, 2017, Oracle, MariaDB Corporation Ab and others.
Type ’help;’ or ’\h’ for help. Type ’\c’ to clear the current input statement.
MariaDB [(none)]> SHOW DATABASES;
+--------------------+
| Database |
+--------------------+
| information_schema |
| mysql |
| performance_schema |
+--------------------+
3 rows in set (0.00 sec)
MariaDB [(none)]>
MariaDB [(none)]> quit
root@ubuntu:/# exit
18. View the Chart history on the system. The use of the -a option will show all Charts including deleted and failed
attempts. The output below shows the current running Chart as well as a previously deleted hadoop Chart.
student@lfs458-node-1a0a:~$ helm list -a
NAME REVISION UPDATED STATUS CHART NAMESPACE
goodly-beetle 1 Wed Nov 8 23:01:24 2017 DELETED hadoop-1.0.1 default
illmannered-salamander 1 Thu Nov 9 05:00:12 2017 DEPLOYED mariadb-...
19. Delete the mariadb Chart. No output should happen from the list.
LFS258: V 2018-08-06 c© Copyright the Linux Foundation 2018. All rights reserved.
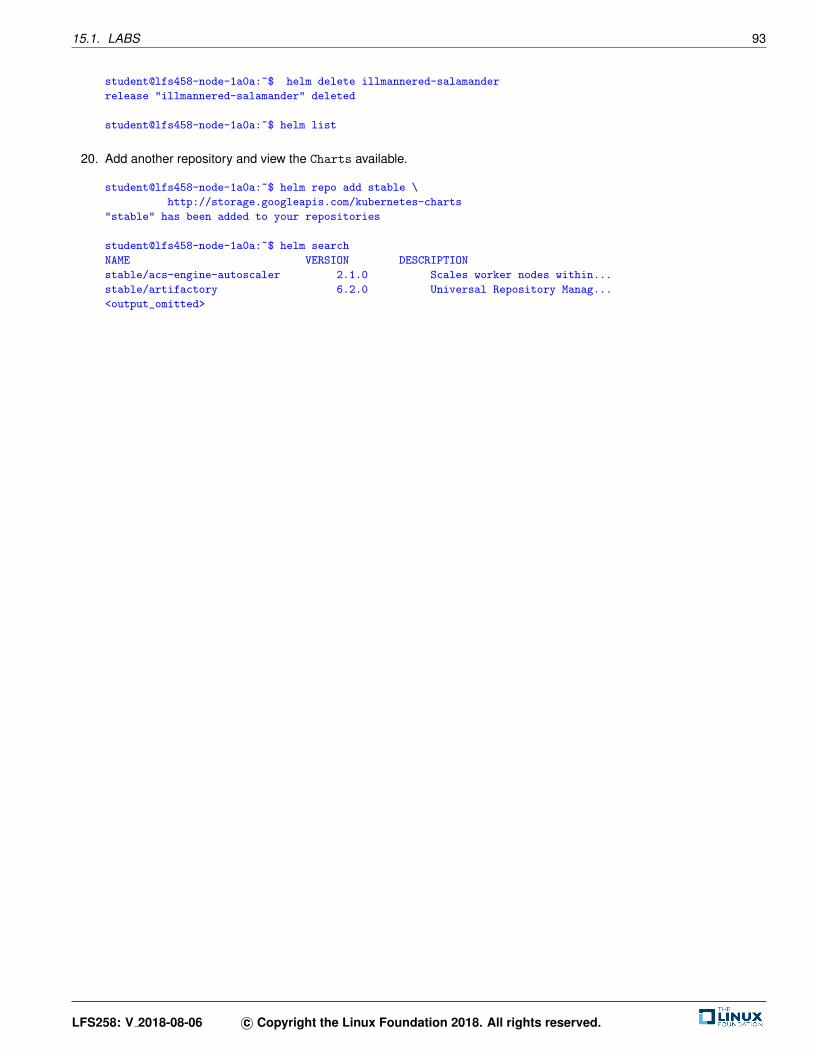
15.1. LABS 93
student@lfs458-node-1a0a:~$ helm delete illmannered-salamander
release "illmannered-salamander" deleted
student@lfs458-node-1a0a:~$ helm list
20. Add another repository and view the Charts available.
student@lfs458-node-1a0a:~$ helm repo add stable \
http://storage.googleapis.com/kubernetes-charts
"stable" has been added to your repositories
student@lfs458-node-1a0a:~$ helm search
NAME VERSION DESCRIPTION
stable/acs-engine-autoscaler 2.1.0 Scales worker nodes within...
stable/artifactory 6.2.0 Universal Repository Manag...
<output_omitted>
LFS258: V 2018-08-06 c© Copyright the Linux Foundation 2018. All rights reserved.

94 CHAPTER 15. HELM
LFS258: V 2018-08-06 c© Copyright the Linux Foundation 2018. All rights reserved.

Chapter 16
Security
16.1 Labs
Exercise 16.1: Working with TLS
Overview
We have learned that the flow of access to a cluster begins with TLS connectivity, then authentication followed by authorization,finally an admission control plug-in allows advanced features prior to the request being fulfilled. The use of Initializersallows the flexibility of a shell-script to dynamically modify the request. As security is an important, ongoing concern, theremay be multiple configurations used depending on the needs of the cluster.
Every process making API requests to the cluster must authenticate or be treated as an anonymous user.
Working with TLS
While one can have multiple cluster root Certificate Authorities (CA) by default each cluster uses their own, intended for intra-cluster communication. The CA certificate bundle is distributed to each node and as a secret to default service accounts. Thekubelet is a local agent which ensures local containers are running and healthy.
1. View the kubelet on both the master and secondary nodes. The kube-apiserver also shows security information suchas certificates and authorization mode. As kubelet is a systemd service we will start looking at that output.
student@lfs458-node-1a0a:~$ systemctl status kubelet.service
kubelet.service - kubelet: The Kubernetes Node Agent
Loaded: loaded (/lib/systemd/system/kubelet.service; enabled; vendor preset: en
Drop-In: /etc/systemd/system/kubelet.service.d
10-kubeadm.conf
<output_omitted>
2. If we look at the status output, and follow the cgroup information, which is a long line we where configuration settingsare drawn from, we see where the configuration file can be found.
95

96 CHAPTER 16. SECURITY
CGroup: /system.slice/kubelet.service
19523 /usr/bin/kubelet .... --config=/var/lib/kubelet/config.yaml ..
3. Take a look at the settings in the /var/lib/kubelet/config.yaml file. Among other information we can see the/etc/kubernetes/pki/ directory is used for accessing the kube-apiserver. Near the end of the output it also sets thedirectory to find other pod spec files.
student@lfs458-node-1a0a:~$ sudo less /var/lib/kubelet/config.yaml
address: 0.0.0.0
apiVersion: kubelet.config.k8s.io/v1beta1
authentication:
anonymous:
enabled: false
webhook:
cacheTTL: 2m0s
enabled: true
p x509:
clientCAFile: /etc/kubernetes/pki/ca.crt
4. Other agents on the master node interact with the kube-apiserver. View the configuration files where these settingsare made. This was set in the previous YAML file. Look at one of the files for cert information.
student@lfs458-node-1a0a:~$ sudo ls /etc/kubernetes/manifests/
etcd.yaml kube-controller-manager.yaml
kube-apiserver.yaml kube-scheduler.yaml
student@lfs458-node-1a0a:~$ sudo less \
/etc/kubernetes/manifests/kube-controller-manager.yaml
<output_omitted>
5.
6. The use of tokens has become central to authorizing component communication. The tokens are kept as secrets. Takea look at the current secrets in the kube-system namespace.
student@lfs458-node-1a0a:~$ kubectl -n kube-system get secrets
NAME TYPE
DATA AGE
attachdetach-controller-token-xqr8n kubernetes.io/service-account-token
3 5d
bootstrap-signer-token-xbp6s kubernetes.io/service-account-token
3 5d
bootstrap-token-i3r13t bootstrap.kubernetes.io/token
7 5d
<output_omitted>
7. Take a closer look at one of the secrets and the token within. The certificate-controller-token could be one tolook at. The use of the Tab key can help with long names. Long lines have been truncated in the output below.
student@lfs458-node-1a0a:~$ kubectl -n kube-system get secrets \
certificate<Tab> -o yaml
apiVersion: v1
data:
ca.crt: LS0tLS1CRUdJTi.....
namespace: a3ViZS1zeXN0ZW0=
token: ZXlKaGJHY2lPaUpTVXpJM....
kind: Secret
metadata:
annotations:
kubernetes.io/service-account.name: certificate-controller
kubernetes.io/service-account.uid: 7dfa2aa0-9376-11e8-8cfb
-42010a800002
LFS258: V 2018-08-06 c© Copyright the Linux Foundation 2018. All rights reserved.

16.1. LABS 97
creationTimestamp: 2018-07-29T21:29:36Z
name: certificate-controller-token-wnrwh
namespace: kube-system
resourceVersion: "196"
selfLink: /api/v1/namespaces/kube-system/secrets/certificate-
controller-token-wnrwh
uid: 7dfbb237-9376-11e8-8cfb-42010a800002
type: kubernetes.io/service-account-token
8. The kubectl config command can also be used to view and update parameters. When making updates this could avoida typo removing access to the cluster. View the current configuration settings. The keys and certs are redacted from theoutput automatically.
student@lfs458-node-1a0a:~$ kubectl config view
apiVersion: v1
clusters:
- cluster:
certificate-authority-data: REDACTED
<output_omitted>
9. View the options, such as setting a password for the admin instead of a key. Read through the examples and options.
student@lfs458-node-1a0a:~$ kubectl config set-credentials -h
Sets a user entry in kubeconfig
<output_omitted>
10. Make a copy of your access configuration file. Later steps will update this file and we can view the differences.
student@lfs458-node-1a0a:~$ cp ~/.kube/config ~/cluster-api-config
11. Explore working with cluster and security configurations both using kubectl and kubeadm. Among other values, findthe name of your cluster. You will need to become root to work with kubeadm.
student@lfs458-node-1a0a:~$ kubectl config <Tab><Tab>
current-context get-contexts set-context view
delete-cluster rename-context set-credentials
delete-context set unset
get-clusters set-cluster use-context
student@lfs458-node-1a0a:~$ sudo -i
root@lfs458-node-1a0a:~# kubeadm token -h
<output_omitted>
root@lfs458-node-1a0a:~# kubeadm config -h
<output_omitted>
12. Review the cluster default configuration settings. At over 150 lines there may be some interesting tidbits to the securityand infrastructure of the cluster.
student@lfs458-node-1a0a:~$ kubeadm config print-default
api:
advertiseAddress: 10.128.0.2
bindPort: 6443
controlPlaneEndpoint: ""
apiVersion: kubeadm.k8s.io/v1alpha2
auditPolicy:
logDir: /var/log/kubernetes/audit
logMaxAge: 2
path: ""
bootstrapTokens:
- groups:
LFS258: V 2018-08-06 c© Copyright the Linux Foundation 2018. All rights reserved.

98 CHAPTER 16. SECURITY
- system:bootstrappers:kubeadm:default-node-token
token: abcdef.0123456789abcdef
<output_omitted>
Exercise 16.2: Authentication and AuthorizationKubernetes clusters have to types of users service accounts and normal users, but normal users are assumed to bemanaged by an outside service. There are no objects to represent them and they cannot be added via an API call, but serviceaccounts can be added.
We will use RBAC to configure access to actions within a namespace for a new contractor, Developer Dan who will be workingon a new project.
1. Create two namespaces, one for production and the other for development.
student@lfs458-node-1a0a:~$ kubectl create ns development
namespace "development" created
student@lfs458-node-1a0a:~$ kubectl create ns production
namespace "production" created
2. View the current clusters and context available. The context allows you to configure the cluster to use, namespace anduser for kubectl commands in an easy and consistent manner.
student@lfs458-node-1a0a:~$ kubectl config get-contexts
CURRENT NAME CLUSTER AUTHINFO NAMESPACE
* kubernetes-admin@kubernetes kubernetes kubernetes-admin
3. Create a new user DevDan and assign a password of lfs458.
student@lfs458-node-1a0a:~$ sudo useradd -s /bin/bash DevDan
student@lfs458-node-1a0a:~$ sudo passwd DevDan
Enter new UNIX password: lfs458
Retype new UNIX password: lfs458
passwd: password updated successfully
4. Generate a private key then Certificate Signing Request (CSR) for DevDan.
student@lfs458-node-1a0a:~$ openssl genrsa -out DevDan.key 2048
Generating RSA private key, 2048 bit long modulus
......+++
.........+++
e is 65537 (0x10001)
student@lfs458-node-1a0a:~$ openssl req -new -key DevDan.key \
-out DevDan.csr -subj "/CN=DevDan/O=development"
5. Using thew newly created request generate a self-signed certificate using the x509 protocol. Use the CA keys for theKubernetes cluster and set a 45 day expiration. You’ll need to use sudo to access to the inbound files.
student@lfs458-node-1a0a:~$ sudo openssl x509 -req -in DevDan.csr \
-CA /etc/kubernetes/pki/ca.crt \
-CAkey /etc/kubernetes/pki/ca.key \
-CAcreateserial \
-out DevDan.crt -days 45
Signature ok
subject=/CN=DevDan/O=development
Getting CA Private Key
6. Update the access config file to reference the new key and certificate. Normally we would move them to a safe directoryinstead of a non-root user’s home.
LFS258: V 2018-08-06 c© Copyright the Linux Foundation 2018. All rights reserved.

16.1. LABS 99
student@lfs458-node-1a0a:~$ kubectl config set-credentials DevDan \
--client-certificate=/home/student/DevDan.crt \
--client-key=/home/student/DevDan.key
User "DevDan" set.
7. View the update to your credentials file. Use diff to compare against the copy we made earlier.
student@lfs458-node-1a0a:~$ diff cluster-api-config .kube/config
9a10,14
> namespace: development
> user: DevDan
> name: DevDan-context
> - context:
> cluster: kubernetes
15a21,25
> - name: DevDan
> user:
> as-user-extra: {}
> client-certificate: /home/student/DevDan.crt
> client-key: /home/student/DevDan.key
8. We will now create a context. For this we will need the name of the cluster, namespace and CN of the user we set orsaw in previous steps.
student@lfs458-node-1a0a:~$ kubectl config set-context DevDan-context \
--cluster=kubernetes \
--namespace=development \
--user=DevDan
Context "DevDan-context" created.
9. Attempt to view the Pods inside the DevDan-context. Be aware you will get an error.
student@lfs458-node-1a0a:~$ kubectl --context=DevDan-context get pods
Error from server (Forbidden): pods is forbidden: User "DevDan"
cannot list pods in the namespace "development"
10. Verify the context has been properly set.
student@lfs458-node-1a0a:~$ kubectl config get-contexts
CURRENT NAME CLUSTER AUTHINFO NAMESPACE
DevDan-context kubernetes DevDan development
* kubernetes-admin@kubernetes kubernetes kubernetes-admin
11. Again check the recent changes to the cluster access config file.
student@lfs458-node-1a0a:~$ diff cluster-api-config .kube/config
9a10,14
> namespace: development
> user: DevDan
> name: DevDan-context
> - context:
> cluster: kubernetes
15a21,25
> - name: DevDan
> user:
<output_omitted>
12. We will now create a YAML file to associate RBAC rights to a particular namespace and Role.
student@lfs458-node-1a0a:~$ vim role-dev.yaml
kind: Role
apiVersion: rbac.authorization.k8s.io/v1beta1
metadata:
namespace: development
LFS258: V 2018-08-06 c© Copyright the Linux Foundation 2018. All rights reserved.

100 CHAPTER 16. SECURITY
name: developer
rules:
- apiGroups: ["", "extensions", "apps"]
resources: ["deployments", "replicasets", "pods"]
verbs: ["list", "get", "watch", "create", "update", "patch", "delete"]
# You can use ["*"] for all verbs
13. Create the object. Check white space and for typos if you encounter errors.
student@lfs458-node-1a0a:~$ kubectl create -f role-dev.yaml
role.rbac.authorization.k8s.io/developer created
14. Now we create a RoleBinding to associate the Role we just created with a user. Create the object when the file hasbeen created.
student@lfs458-node-1a0a:~$ vim rolebind.yaml
kind: RoleBinding
apiVersion: rbac.authorization.k8s.io/v1beta1
metadata:
name: developer-role-binding
namespace: development
subjects:
- kind: User
name: DevDan
apiGroup: ""
roleRef:
kind: Role
name: developer
apiGroup: ""
student@lfs458-node-1a0a:~$ kubectl apply -f rolebind.yaml
rolebinding.rbac.authorization.k8s.io/developer-role-binding created
15. Test the context again. This time it should work. There are no Pods running so you should get a response of Noresources found.
student@lfs458-node-1a0a:~$ kubectl --context=DevDan-context get pods
No resources found.
16. Create a new pod, verify it exists, then delete it.
student@lfs458-node-1a0a:~$ kubectl --context=DevDan-context run nginx --image=nginx
deployment/nginx created
student@lfs458-node-1a0a:~$ kubectl --context=DevDan-context get pods
NAME READY STATUS RESTARTS AGE
nginx-7c87f569d-7gb9k 1/1 Running 0 5s
student@lfs458-node-1a0a:~$ kubectl --context=DevDan-context delete deploy nginx
deployment.extensions "nginx" deleted
17. We will now create a different context for production systems. The Role will only have the ability to view, but not createor delete resources. Begin by copying and editing the Role and RoleBindings YAML files.
student@lfs458-node-1a0a:~$ cp role-dev.yaml role-prod.yaml
student@lfs458-node-1a0a:~$ vim role-prod.yaml
kind: Role
apiVersion: rbac.authorization.k8s.io/v1beta1
metadata:
LFS258: V 2018-08-06 c© Copyright the Linux Foundation 2018. All rights reserved.

16.1. LABS 101
namespace: production #<<- This line
name: dev-prod #<<- and this line
rules:
- apiGroups: ["", "extensions", "apps"]
resources: ["deployments", "replicasets", "pods"]
verbs: ["get", "list", "watch"] #<<- and this one
student@lfs458-node-1a0a:~$ cp rolebind.yaml rolebindprod.yaml
student@lfs458-node-1a0a:~$ vim rolebindprod.yaml
kind: RoleBinding
apiVersion: rbac.authorization.k8s.io/v1beta1
metadata:
name: production-role-binding
namespace: production
subjects:
- kind: User
name: DevDan
apiGroup: ""
roleRef:
kind: Role
name: dev-prod
apiGroup: ""
18. Create both new objects.
student@lfs458-node-1a0a:~$ kubectl apply -f role-prod.yaml
role.rbac.authorization.k8s.io/dev-prod created
student@lfs458-node-1a0a:~$ kubectl apply -f rolebindprod.yaml
rolebinding.rbac.authorization.k8s.io/production-role-binding created
19. Create the new context for production use.
student@lfs458-node-1a0a:~$ kubectl config set-context ProdDan-context \
--cluster=kubernetes \
--namespace=production \
--user=DevDan
Context "ProdDan-context" created.
20. Verify that user DevDan can view pods using the new context.
student@lfs458-node-1a0a:~$ kubectl --context=ProdDan-context get pods
No resources found.
21. Try to create a Pod in production. The developer should be Forbidden.
student@lfs458-node-1a0a:~$ kubectl --context=ProdDan-context run \
nginx --image=nginx
Error from server (Forbidden): deployments.extensions is forbidden: User "DevDan" cannot create deployments.extensions in the namespace "production"
22. View the details of a role.
student@lfs458-node-1a0a:~$ kubectl describe role dev-prod -n production
Name: dev-prod
Labels: <none>
Annotations: kubectl.kubernetes.io/last-applied-configuration=
{"apiVersion":"rbac.authorization.k8s.io/v1beta1","kind":"Role"
,"metadata":{"annotations":{},"name":"dev-prod","namespace":
"production"},"rules":[{"api...
PolicyRule:
LFS258: V 2018-08-06 c© Copyright the Linux Foundation 2018. All rights reserved.

102 CHAPTER 16. SECURITY
Resources Non-Resource URLs Resource Names Verbs
--------- ----------------- -------------- -----
deployments [] [] [get list watch]
deployments.apps [] [] [get list watch]
<output_omitted>
23. Experiment with other subcommands in both contexts. They should match those listed in the respective roles.
Exercise 16.3: Admission ControllersThe last stop before a request is sent to the API server is an admission control plug-in. They interact with features suchas setting parameters like a default storage class, checking resource quotas, or security settings. A newer feature (v1.7.x) isdynamic controllers which allow new controllers to be ingested or configured at runtime.
1. View the current admission controller settings. Unlike earlier versions of Kubernetes the controllers are now com-piled into the server, instead of being passed at run-time. Instead of a list of which controllers to use we can enable anddisable specific plugins.
student@lfs458-node-1a0a:~$ sudo grep admission \
/etc/kubernetes/manifests/kube-apiserver.yaml
- --disable-admission-plugins=PersistentVolumeLabel
- --enable-admission-plugins=NodeRestriction
LFS258: V 2018-08-06 c© Copyright the Linux Foundation 2018. All rights reserved.