liferay portal 5.2 systems development - packt · liferay portal 5.2 systems development liferay...
TRANSCRIPT

Liferay Portal 5.2 Systems Development
Jonas X. Yuan
Chapter No. 5 "Managing Pages"

For More Information: www.packtpub.com/liferay-portal-5-2-systems-development/book
In this package, you will find: A Biography of the author of the book
A preview chapter from the book, Chapter NO.5 "Managing Pages"
A synopsis of the book’s content
Information on where to buy this book
About the Author Dr. Jonas X. Yuan is a Senior Technical Analyst at CIGNEX. He holds a Ph. D. in Computer Science from University of Zurich specializing in Integrity Control in Federated Database Systems. He earned his M.S. and B.S. degrees from China, where he conducted research on expert systems for predicting landslides. Jonas is experienced in Systems Development Life Cycle (SDLC). Previously, he worked as a Project Manager and a Technical Architect in Web GIS (Geographic Information System). He has deep, hands-on skills in J2EE technologies. Most importantly, he had developed a BPEL (Business Process Execution Language) Engine called BPELPower from scratch in NASA data center. He has a strong experience on content management and publishing such as Media/Games/Publishing. He is also an expert in Liferay portal, Alfresco Content Management Systems (CMS), OpenX Ad Serving, Intalio | BPM, Pentaho Business Intelligence, LDAP, and SSO.
He has also authored the book: Liferay Portal Enterprise Intranets; ISBN 978-1-84719-272-1.

For More Information: www.packtpub.com/liferay-portal-5-2-systems-development/book
Liferay Portal 5.2 Systems Development Liferay portal is one of the most mature portal frameworks in the market. It offers many key business benefits that involve personalization, customization, and workflow. If you are a Java developer who wants to build custom web sites and intranet applications using Liferay portal, this is where your search ends.
Liferay Portal provides within a secure, administrated framework, an ability to organize the potential chaos of an unfettered Web 2.0 environment. It empowers users with tools such as blogs, instant emails, message boards, instant messaging, shared calendar, social networking, social office, CMS, WCM, and so on.
This book shows how Java developers can use Liferay as a framework to develop custom intranet systems based on Liferay portal platform, thus, helping you to maximize your productivity gains. Get ready for a rich, friendly, intuitive, and collaborative end user experience.
Using this book, you can customize Liferay into a single point of access to all of an organization's data, content, web content, and other information from both the existing in-house applications (such as HR and CRM) and the external sources (such as Alfresco, FatWire, Magnolia, and Vignette).
What This Book Covers In Chapter 1, we look at what Liferay portal is and why we should use it. Then we introduce the Liferay portal architecture and framework. Liferay portal can be extendible at three levels—Plugins SDK environment, Extension environment, and Liferay portal source code. Finally, we discuss portal development strategies in detail.
In Chapter 2, we cover the experience of Liferay portal and portlets, using JSR-286 portlets, employing portlet configuration, context, request, response, and preferences, extending JSR-286 portlets, serving resources, and coordinating portlets. It helps you to build larger applications and re-use portlets in different scenarios.
In Chapter 3, we look at how to set up, build, and deploy Ext by using ServiceBuilder, how to set up Plugins SDK, and how to use development environments in an efficient way.

For More Information: www.packtpub.com/liferay-portal-5-2-systems-development/book
In Chapter 4, we include experiencing Struts portlets in our discussion, where we first discuss how to develop a JSP portlet. Then we introduce how to develop a basic Struts portlet in Ext—defining the portlet, and specifying page action, and page layout. Accordingly, we also introduce how to develop an advanced Struts portlet in Ext—redirecting, adding more actions, setting up permissions, and so on. Finally, we address how to use Struts efficiently.
In Chapter 5, we first look at extending the Communities portlet, then we move on how to customize the Manage Pages portlet. We also look at how to customize page management with more features, and use communities and layout pages in an efficient way.
In Chapter 6, we focus on customizing the WYSIWYG editor. We first introduce how to configure the WYSIWYG editor, quickly deploy the updates, and upgrade it. Then we introduce how to customize FCKeditor to make images, links, videos, games, video queues, video lists, and playlists a part of web content. Finally, we introduce how to use the WYSIWYG editor FCKeditor.
In Chapter 7, we look at one of the most common parts of Liferay portal—CMS and WCM. We first discuss how to manage the terms of use dynamically with a journal article. Then, we present a way to build articles with multiple image icons, rating, comments, polls, related content, recently added content, and so on. Finally, we discuss how to use and extend CMS and WCM. We also discuss relationship among articles, structures, and article templates, CMS extension, and the Asset Publisher portlet extension.
In Chapter 8, we look at how to build My Community in general, and how to customize and extend this feature as well. First, we introduce how to share web site, pages, or portlets with friends. Then we introduce how to customize My Account and how to build My Street with personalized preferences. Finally, we address the best practices to use My Community efficiently, including dynamic query API, pop-up JavaScript, My Community settings, My Account Control Panel, user account extension, and user preferences.
In Chapter 9, we discuss how to develop layout templates in both Ext and Plugins SDK, and how to build themes in Plugins SDK. It introduces how to build layout templates in Ext first. Then it discusses how to build layout templates and themes in Plugins SDK and how to add Velocity services in themes. Finally, it addresses how to use Plugins SDK in an efficient way.

For More Information: www.packtpub.com/liferay-portal-5-2-systems-development/book
In Chapter 10, we focus on how to build My Social Office in general. We introduce Control Panel first—how it works and how to customize it. Then we address Inter-Portlet Communication (IPC)—how to build IPC portlets. Later, we discuss how to set up Social Office themes and portlets, and how to hook language properties, and portal properties. Finally, we discuss an efficient way to use hooking features.
In Chapter 11, we look at staging and publishing both locally and remotely, where we first discuss simple extension—how to build dynamic navigation and how to construct customized site map. Then, we address how to handle events and model listeners. Based on these features, we further introduce local staging and publishing, and staging workflow. A way to schedule pages and assets is also discussed. Finally, we address how to publish the web content remotely, where portlet-data-handler (for export and import via LAR) is addressed as well.
In Chapter 12, we first cover how to use custom attributes for both journal article templates and custom portlets. Then, we address how to build OpenSearch and how to employ search capabilities. Later, we focus on approaches on how to employ Spring services and how to construct web services. Finally, we discuss the best practices such as using JavaScript portlet URL, customizing the user and organization administration, speeding up portal, sharing UI Taglibs, producing and consuming WSRP, and integrating with SharePoint and Terracotta DSO.

For More Information: www.packtpub.com/liferay-portal-5-2-systems-development/book
Managing PagesThe Internet web sites www.bookpubstreet.com and www.bookpubworkshop.com will be built on top of the Liferay portal. Each site will be represented as a community and each community is made up of a lot of pages, for example, public pages and private pages. A private page in a community can be accessed only by logged-in users—who are a part of the community—whereas, a public page in a community can be accessed by guests. In order to build these web sites, we need to manage communities and, further, manage pages for each community.
The Communities portlet provides the ability to create and manage communities and their users, as well as that of the portlet Manage Pages. The portlet Manage Pages provides the ability to manage a lot of pages of different communities. We have discussed how to customize and extend the portal using Struts. Now, let's use Struts to customize the out of the box portlets—Communities and Manage Pages.
This chapter will fi rst discuss how to extend the Communities portlet with additional fi elds. Then we will address how to customize the Manage Pages portlet with additional fi elds and how to apply layout templates in runtime. Further, this chapter will address how to employ features of page management. Finally, it will introduce how to use communities and layout pages effi ciently.
By the end of this chapter, you will have learned how to:
Extend the Communities portletCustomize the Manage Pages portletCustomize page management with more featuresUse communities and layout pages effi ciently
•
•
•
•

For More Information: www.packtpub.com/liferay-portal-5-2-systems-development/book
Managing Pages
[ 136 ]
Extending Communities portlet The Communities portlet provides the ability to create and manage communities and their users. A community is a special group holding a number of users who share common interests. By default, a community is represented by the Group_ table with fi elds such as groupId, companyId, creatorUserId, name, description, type, typeSettings, friendlyURL, active, and so on. Now let's take an in-depth look at the customization of the community.
As shown in following screenshot, we may want to add one searchable fi eld for each community, which is Keywords. For example, suppose we are creating a new community with the name Book Street, and the description a community for website www.bookpubstreet.com. Now we have a chance to add the new Keywords fi eld with the value, for example, Book; Street; Palm Tree; Publication. Similarly, when editing the properties of a community—for example Name, Description, Type, and Active—we again have a chance to edit Keywords.
In addition, we expect to have more fi elds in the customized communities: Created (when the community was created), ModifierUserId (who modifi ed the community), and Modified (when the community was modifi ed).

For More Information: www.packtpub.com/liferay-portal-5-2-systems-development/book
Chapter 5
[ 137 ]
As shown in the preceding screenshot, when listing communities, not only should default fi elds (for example, Name, Type, Members, Online Now, Active, Pending Requests) and Actions icons (for example, Edit, Permissions, Manage Pages, Assign User Roles, Assign Members, Leave, and Delete) be displayed, but also the customized columns (for example, the username and Keywords ) should be displayed.
How do we implement these features? In this section, we're going to show how to customize the Communities portlet using the above requirements as examples. Obviously, it is open for you to customize this portlet in a number of ways according to your own requirements. In general, the processes for customization of this portlet should be the same.
Building Ext Communities portlet The Communities portlet can be used to create and manage new portal communities and their users. As you can see, a community can be regarded as a separate portal instance; each community gets its own set of pages, content management system, shared calendar, and default permissions. Moreover, a user belonging to multiple communities can navigate among them within the same portal session.
Generally speaking, we do not want to update the Communities portlet, but keep it as it is. Our goal is to customize and extend it. In general, this can be done by using the following two steps:
1. Build a customized Ext Communities portlet, which has exactly the same functions, look, and feel as that of the original Communities portlet.
2. Extend this customized portlet and let it have an additional model and service, and moreover, its own look and feel.
In this part, let's build the Ext Communities portlet, having exactly same functions, look, and feel as that of the Communities portlet.
Constructing the portlet Now let's defi ne a Struts portlet with the name "Ext Communities". We fi rst need to confi gure it in both portlet-ext.xml and liferay-portlet-ext.xml, and then set the title in Language-ext.properties, and then add the Ext Communities portlet to the Book category in liferay-display.xml.

For More Information: www.packtpub.com/liferay-portal-5-2-systems-development/book
Managing Pages
[ 138 ]
First, let's confi gure the Ext Communities portlet in portlet-ext.xml as follows:
1. Locate the portlet-ext.xml fi le in the /ext/ext-web/docroot/WEB-INF folder and open it.
2. Add the following lines between </portlet> and </portlet-app> and save the fi le:
<portlet> <portlet-name>extCommunities</portlet-name> <display-name>Ext Communities</display-name> <portlet-class>com.liferay.portlet.StrutsPortlet</portlet-class> <init-param><name>view-action</name> <value>/ext/communities/view</value></init-param> <expiration-cache>0</expiration-cache> <supports><mime-type>text/html</mime-type></supports> <resource-bundle> com.liferay.portlet.StrutsResourceBundle </resource-bundle> <security-role-ref> <role-name>power-user</role-name> </security-role-ref> <security-role-ref> <role-name>user</role-name> </security-role-ref></portlet>
As shown in the code above, the portlet-name element contains the canonical name of the portlet (for example, extCommunities). The display-name element contains a short name that is intended to be displayed in the portal (for example, Ext Communities). The portlet-class element contains the fully qualifi ed class name of the portlet (for example, com.liferay.portlet.StrutsPortlet). The init-param element contains a name-value pair, for example view-action - ext/communities/view, as an initialization parameter of the portlet. Further, the expiration-cache defi nes expiration-based caching for this portlet. The supports element contains the supported MIME-type. The resource-bundle element contains a resource bundle class, for example com.liferay.portlet.StrutsResourceBundle. Finally, the security-role-ref element contains the declaration of a security role reference in the code of the web application.
Secondly, let's register the extCommunities portlet in liferay-portlet-ext.xml as follows:
1. Locate the liferay-portlet-ext.xml fi le in the /ext/ext-web/docroot/WEB-INF folder and open it.
2. Add the following lines immediately after <!-- Custom Portlets --> and save it:
For More Information: www.packtpub.com/liferay-portal-5-2-systems-development/book
Chapter 5
[ 139 ]
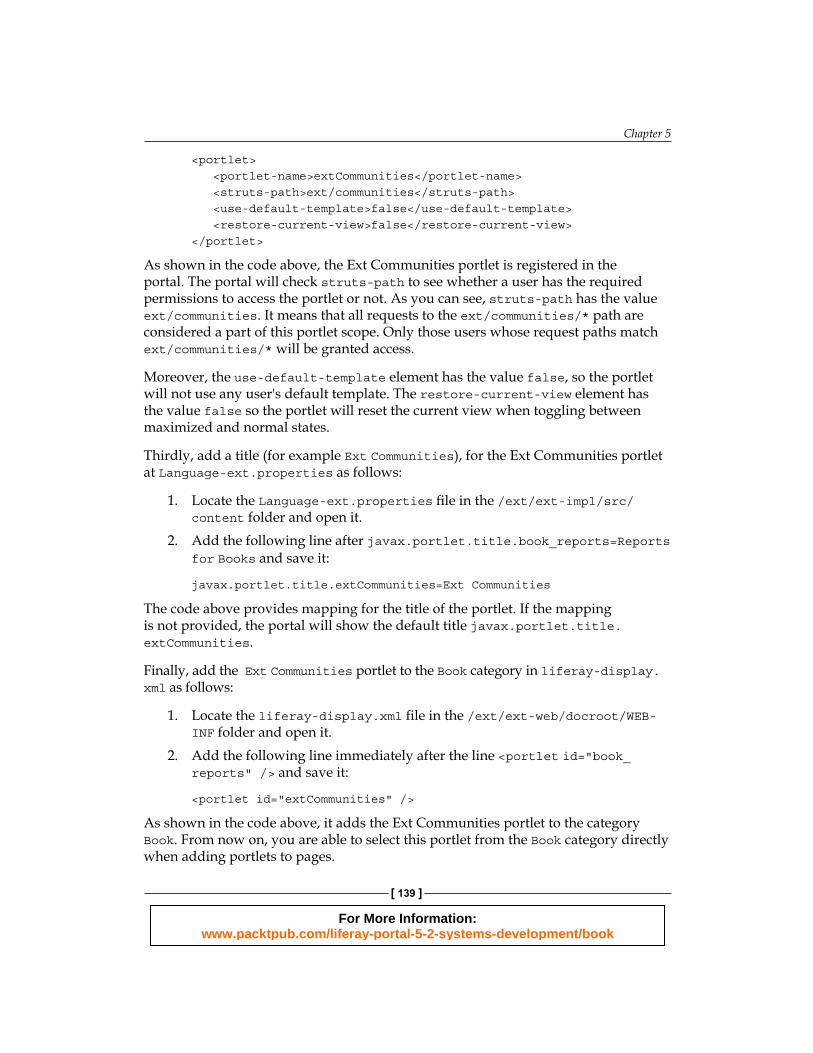
<portlet> <portlet-name>extCommunities</portlet-name> <struts-path>ext/communities</struts-path> <use-default-template>false</use-default-template> <restore-current-view>false</restore-current-view></portlet>
As shown in the code above, the Ext Communities portlet is registered in the portal. The portal will check struts-path to see whether a user has the required permissions to access the portlet or not. As you can see, struts-path has the value ext/communities. It means that all requests to the ext/communities/* path are considered a part of this portlet scope. Only those users whose request paths match ext/communities/* will be granted access.
Moreover, the use-default-template element has the value false, so the portlet will not use any user's default template. The restore-current-view element has the value false so the portlet will reset the current view when toggling between maximized and normal states.
Thirdly, add a title (for example Ext Communities), for the Ext Communities portlet at Language-ext.properties as follows:
1. Locate the Language-ext.properties fi le in the /ext/ext-impl/src/content folder and open it.
2. Add the following line after javax.portlet.title.book_reports=Reports for Books and save it:
javax.portlet.title.extCommunities=Ext Communities
The code above provides mapping for the title of the portlet. If the mapping is not provided, the portal will show the default title javax.portlet.title.extCommunities.
Finally, add the Ext Communities portlet to the Book category in liferay-display.xml as follows:
1. Locate the liferay-display.xml fi le in the /ext/ext-web/docroot/WEB-INF folder and open it.
2. Add the following line immediately after the line <portlet id="book_reports" /> and save it:
<portlet id="extCommunities" />
As shown in the code above, it adds the Ext Communities portlet to the category Book. From now on, you are able to select this portlet from the Book category directly when adding portlets to pages.

For More Information: www.packtpub.com/liferay-portal-5-2-systems-development/book
Managing Pages
[ 140 ]
Setting up actions Now, let's set up all actions required for the Ext Communities portlet. We need to prepare an action class, for example, ExtEditGroupAction. So how do we build this action? You can build the actions from scratch, but our purpose is to customize and extend the Communities portlet. In one word, we expect to reuse the out-of-the-box portlet source code as much as possible and to write minimum code.
As mentioned earlier, we have the portal project for the portal source code in the Eclipse IDE, which is referred to as the /portal prefi x. We also have the ext project for customized code, which is referred to as the /ext prefi x. The following is a process fl ow to build the ExtEditGroupAction action class of the Ext Communities portlet.
1. Create a com.ext.portlet.communities.action package in the /ext/ext-impl/src folder.
2. Create an ExtEditGroupAction class in this package and open it.3. Add the following lines and save it:
public class ExtEditGroupAction extends EditGroupAction { public void processAction( ActionMapping mapping, ActionForm form, PortletConfig portletConfig, ActionRequest actionRequest, ActionResponse actionResponse) throws Exception { String cmd = ParamUtil.getString(actionRequest, Constants.CMD); try { if (cmd.equals(Constants.ADD) || cmd.equals(Constants.UPDATE)) { updateGroup(actionRequest); } else if (cmd.equals(Constants.DELETE)) { deleteGroup(actionRequest); } sendRedirect(actionRequest, actionResponse); } catch (Exception e) { if (e instanceof NoSuchGroupException || e instanceof PrincipalException) { SessionErrors.add(actionRequest, e.getClass().getName()); setForward(actionRequest, "portlet.ext.communities.error"); } else if (e instanceof DuplicateGroupException || e instanceof GroupFriendlyURLException || e instanceof GroupNameException || e instanceof RequiredGroupException) { SessionErrors.add(actionRequest, e.getClass().getName(), e); if (cmd.equals(Constants.DELETE)) { actionResponse.sendRedirect(

For More Information: www.packtpub.com/liferay-portal-5-2-systems-development/book
Chapter 5
[ 141 ]
ParamUtil.getString(actionRequest, "redirect")); } } else { throw e;} } } public ActionForward render(ActionMapping mapping, ActionForm form, PortletConfig portlonfig, RenderRequest renderRequest, RenderResponse renderResponse) throws Exception { try { ActionUtil.getGroup(renderRequest); } catch (Exception e) { if (e instanceof NoSuchGroupException || e instanceof PrincipalException) { SessionErrors.add(renderRequest, e.getClass().getName()); return mapping.findForward ("portlet.ext.communities.error"); } else {throw e;} } return mapping.findForward(getForward(renderRequest, "portlet.ext.communities.edit_community")); }}
As shown in the code above, ExtEditGroupAction extends EditGroupAction from the com.liferay.portlet.communities.action package in the /portal/portal-impl/src folder. It overrides two methods (render and processAction) of EditGroupAction.
Setting up page flow and page layout We have set up the action. We have also updated the forward path as the portlet.ext.communities.* value. In order to get the page fl ow working, we need to set up an action path and a page fl ow.
First, let's set up the action path and page fl ow in struts-config.xml as follows:
1. Locate the struts-config.xml fi le in the /ext/ext-web/docroot/WEB-INF folder and open it.
2. Add the following lines after <struts-config> <action-mappings> and save it:
<!-- Ext Communities --><action path="/ext/communities/edit_community" type="com.ext.portlet.communities.action. ExtEditGroupAction">

For More Information: www.packtpub.com/liferay-portal-5-2-systems-development/book
Managing Pages
[ 142 ]
<forward name="portlet.ext.communities.edit_community" path="portlet.ext.communities.edit_community" /> <forward name="portlet.ext.communities.error" path="portlet.ext.communities.error" /></action><action path="/ext/communities/view" forward="portlet.ext.communities.view" />
The code above defi nes a set of action paths associated with the action and forward paths, as well as those mentioned earlier. For example, the action path /ext/communities/edit_community is associated with the com.ext.portlet.communities.action.ExtEditGroupAction action and the forward path names portlet.ext.communities.edit_community and portlet.ext.communities.error.
Then based on the page fl ow and JSP fi les, let's defi ne the page layout in tiles-defs.xml:
1. Locate the tiles-defs.xml fi le in the ext/ext-web/docroot/WEB-INF folder and open it.
2. Add the following lines after <tiles-definitions> and save it:
<!-- Ext Communities --><definition name="portlet.ext.communities" extends="portlet" /><definition name="portlet.ext.communities.edit_community" extends="portlet.ext.communities"> <put name="portlet_content" value="/portlet/ext/communities/edit_community.jsp" /></definition><definition name="portlet.ext.communities.view" extends="portlet"> <put name="portlet_content" value="/portlet/ext/communities/view.jsp" /></definition><definition name="portlet.ext.communities.error" extends="portlet"> <put name="portlet_content" value="/portlet/communities/error.jsp" /></definition>
The code above defi nes the page layout for the Ext Communities portlet. For example, portlet.ext.communities.edit_community is associated with the JSP fi le /portlet/ext/communities/edit_community.jsp. In addition, it specifi es that the community view page layout (for example, portlet.ext.communities.view) is associated with the JSP page fi le /portlet/ext/communities/view.jsp.

For More Information: www.packtpub.com/liferay-portal-5-2-systems-development/book
Chapter 5
[ 143 ]
Preparing JSP files We have now set up the actions. We have also set up page fl ow and page layout. Now let's set up the JSP fi les that are required for the Ext Communities portlet. We need to prepare JSP fi les such as view.jsp, edit_community.jsp, group_search.jsp, and so on. So how do we build this? You can build them from scratch. However, here we will copy and modify JSP fi les of the Communities portlet. In this section we expect to reuse the source code, including JSP fi les, as much as possible.
First, let's create the view.jsp JSP fi le as follows:
1. Create a communities folder within the /ext/ext-web/docroot/html/portlet/ext/ folder.
2. Locate the view.jsp JSP fi le in the /portal/portal-web/docroot/html/portlet/communities folder, and copy it to the /ext/ext-web/docroot/html/portlet/ext/communities folder.
3. Open view.jsp in the /ext/ext-web/docroot/html/portlet/ext/communities folder, update /communities/edit_community with /ext/communities/edit_community as shown in the following two lines, and save it:portletURL.setParameter("struts_action", "/ext/communities/view");<liferay-ui:search-form page="/html/portlet/ext/communities/group_search.jsp" searchContainer="<%= searchContainer %>" showAddButton="<%= showTabs1 %>" />
Next, we need to create the JSP fi le edit_community.jsp as follows:
1. Locate the JSP fi le edit_community.jsp in the /portal/portal-web/docroot/html/portlet/communities folder, and copy it to the /ext/ext-web/docroot/html/portlet/ext/communities folder.
2. Open edit_community.jsp in the /ext/ext-web/docroot/html/portlet/ext/communities folder, update /communities/edit_community with /ext/communities/edit_community as shown in following line, and save it:<form action="<portlet:actionURL windowState="<%= WindowState.MAXIMIZED. toString() %>">
<portlet:param name="struts_action" value="/ext/communities/edit_community" /> </portlet:actionURL>" method="post" name="<portlet:namespace />fm" onSubmit="<portlet:namespace />saveGroup(); return false;">

For More Information: www.packtpub.com/liferay-portal-5-2-systems-development/book
Managing Pages
[ 144 ]
In addition, we need to make the button Add Community available, in the following manner:
1. Locate JSP fi le group_search.jsp in the /portal/portal-web/docroot/html/portlet/enterprise_admin folder.
2. Copy the JSP fi le group_search.jsp from /portal/portal-web/docroot/html/portlet/ enterprise_admin to /ext/ext-web/docroot/html/portlet/ext/communities, and open it.
3. Update /communities/edit_community with /ext/communities/edit_community as shown in the following lines, and save it:
submitForm(document.<portlet:namespace />fm, '<portlet:renderURL windowState="<%= WindowState.MAXIMIZED.toString() %>"><portlet:param name="struts_action" value="/ext/communities/edit_community" /><portlet:param name="redirect" value="<%= currentURL %>" /></portlet:renderURL>');
Congratulations! You have cloned the Communities portlet. Finally, we can deploy updates into Tomcat as follows:
1. Stop Tomcat if it is running.2. Click on the Ant target: deploy at the Ant view ext.3. Start Tomcat.4. Open up a new browser with the URL http://localhost:8080.5. Click on Sign in and enter [email protected] / test.6. Click on Add Application | Book.
Then you will see the Ext Communities portlet with the Ext Communities title and its contents. As you can see, this portlet is under the Book category now. Note that the implementation of the Actions icons—for example Edit, Permissions, Manage Pages, Assign User Roles, Assign Members, Leave, and Delete—is not included yet. But you can use the above processes to include them.
Setting up the Ext Communities portlet in the backend We have cloned the Communities portlet as well. Now let's see how to implement new features in the backend.
For More Information: www.packtpub.com/liferay-portal-5-2-systems-development/book
Chapter 5
[ 145 ]
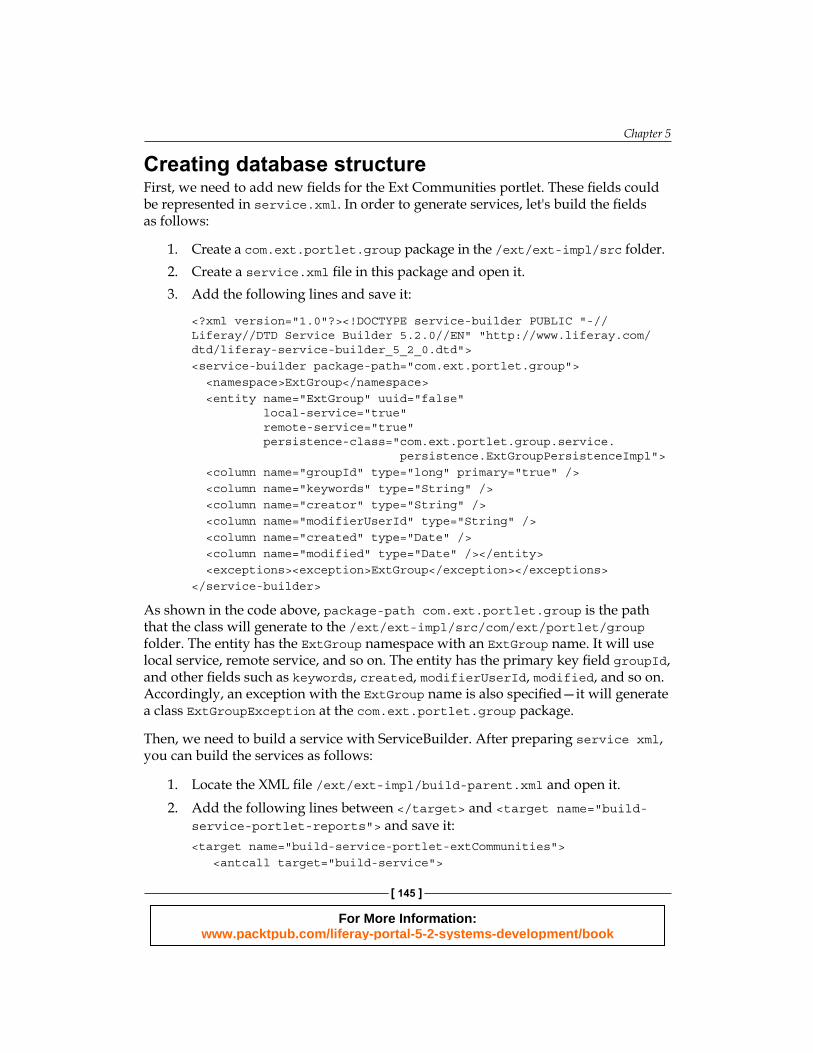
Creating database structure First, we need to add new fi elds for the Ext Communities portlet. These fi elds could be represented in service.xml. In order to generate services, let's build the fi elds as follows:
1. Create a com.ext.portlet.group package in the /ext/ext-impl/src folder.2. Create a service.xml fi le in this package and open it.3. Add the following lines and save it:
<?xml version="1.0"?><!DOCTYPE service-builder PUBLIC "-//Liferay//DTD Service Builder 5.2.0//EN" "http://www.liferay.com/dtd/liferay-service-builder_5_2_0.dtd"><service-builder package-path="com.ext.portlet.group"> <namespace>ExtGroup</namespace> <entity name="ExtGroup" uuid="false" local-service="true" remote-service="true" persistence-class="com.ext.portlet.group.service. persistence.ExtGroupPersistenceImpl"> <column name="groupId" type="long" primary="true" /> <column name="keywords" type="String" /> <column name="creator" type="String" /> <column name="modifierUserId" type="String" /> <column name="created" type="Date" /> <column name="modified" type="Date" /></entity> <exceptions><exception>ExtGroup</exception></exceptions></service-builder>
As shown in the code above, package-path com.ext.portlet.group is the path that the class will generate to the /ext/ext-impl/src/com/ext/portlet/group folder. The entity has the ExtGroup namespace with an ExtGroup name. It will use local service, remote service, and so on. The entity has the primary key fi eld groupId, and other fi elds such as keywords, created, modifierUserId, modified, and so on. Accordingly, an exception with the ExtGroup name is also specifi ed—it will generate a class ExtGroupException at the com.ext.portlet.group package.
Then, we need to build a service with ServiceBuilder. After preparing service xml, you can build the services as follows:
1. Locate the XML fi le /ext/ext-impl/build-parent.xml and open it.2. Add the following lines between </target> and <target name="build-
service-portlet-reports"> and save it:<target name="build-service-portlet-extCommunities"> <antcall target="build-service">

For More Information: www.packtpub.com/liferay-portal-5-2-systems-development/book
Managing Pages
[ 146 ]
<param name="service.file" value="src/com/ext/portlet/group/service.xml" /> </antcall></target>
3. Expand ext-impl in the Ant view.4. Double-click on the target: build-service-portlet-extCommunities.5. Refresh the /ext project.
ServiceBuilder will fi rst generate models, services, and service persistence in the ext/ext-service/src folder. The following are the packages that contain services (SOAP-based web services, REST style web services, or JSON access via JavaScript, and so on):
com.ext.portlet.group
com.ext.portlet.group.model
com.ext.portlet.group.service
com.ext.portlet.group.service.persistence
Similarly, ServiceBuilder will generate implementations of models, services, and service persistence in the /ext/ext-impl/src folder. The following are the packages that contain the implementation of the services (SOAP-based web services, REST style web services, or JSON access via JavaScript, and so on):
com.ext.portlet.group.model.impl
com.ext.portlet.group.service.base
com.ext.portlet.group.service.http
com.ext.portlet.group.service.impl
com.ext.portlet.group.service.persistence
Finally, we need to create a new table ExtGroup in the database in the following manner:
drop table if exists ExtGroup;create table ExtGroup ( groupId bigint not null primary key, keywords varchar(511), modifierUserId bigint, created datetime null, modified datetime null);
As shown in code above, it drops the ExtGroup table if it exists. Then it creates an ExtGroup table with columns groupId, keywords, and so on.
•
•
•
•
•
•
•
•
•

For More Information: www.packtpub.com/liferay-portal-5-2-systems-development/book
Chapter 5
[ 147 ]
Creating methods to update, delete, and retrieve As stated above, the basic services and models are automatically generated by ServiceBuilder. Now we can add the database insert method (to add the community column Keywords) and the database retrieve method (to get all of the additional information about the community). Let's create the action named AddGroupLocalServiceUtil under the com.ext.portlet.group.action of /ext/ext-impl/src package.
public class AddGroupLocalServiceUtil { public static ExtGroup getGroup(long groupId) { ExtGroup group = null; try { group = ExtGroupLocalServiceUtil.getExtGroup(groupId); } catch (Exception e){} if(group == null) group = ExtGroupLocalServiceUtil.createExtGroup(groupId); return group; } public static void deleteGroup(ActionRequest actionRequest) { long groupId = ParamUtil.getLong(actionRequest, "groupId"); try{ ExtGroupLocalServiceUtil.deleteExtGroup(groupId);} catch (Exception e){} } public static void updateGroup(ActionRequest actionRequest) { ThemeDisplay themeDisplay = (ThemeDisplay)actionRequest. getAttribute(WebKeys.THEME_DISPLAY); String name = ParamUtil.getString(actionRequest, "name"); String keywords = ParamUtil.getString(actionRequest, "keywords"); long groupId = ParamUtil.getLong(actionRequest, "groupId"); Date now = new Date(); ExtGroup group = null; try{ Group o = GroupServiceUtil.getGroup (themeDisplay.getCompanyId(), name); if(groupId <= 0) groupId = o.getGroupId(); group = ExtGroupLocalServiceUtil.getExtGroup(groupId); } catch (Exception e){} if (group == null) { group = ExtGroupLocalServiceUtil.createExtGroup(groupId); group.setCreated(now); } else { group.setModified(now); group.setModifierUserId(themeDisplay.getUser().getUserId());} group.setKeywords(keywords); try{ ExtGroupLocalServiceUtil.updateExtGroup(group);} catch (Exception e){} }}

For More Information: www.packtpub.com/liferay-portal-5-2-systems-development/book
Managing Pages
[ 148 ]
As shown in the code above, there are three methods: updateGroup, getGroup, and deleteGroup. The updateGroup method inserts or updates extGroup into the database, the getGroup method retrieves extGroup, and the deleteGroup method deletes extGroup by group ID. We use the name AddGroupLocalServiceUtil for demo purpose only. You can use a different name. Moreover, the service generated by the ServiceBuilder, for example, ExtGroupLocalServiceUtil, includes CRUD operations and handling transaction. We do not expect to modify this service. We simply add a customized wrapper AddGroupLocalServiceUtil on top of the service, for example ExtGroupLocalServiceUtil. Thus, when upgrading ServiceBuilder, we only need to upgrade this wrapper if any changes are involved.
Updating the action classes After creating the methods to update, delete, and retrieve the community's additional information, we need to associate these methods with the corresponding methods in the action class.
First, let's associate the deleteGroup method in AddGroupLocalServiceUtil with the deleteGroup method in ExtEditGroupAction, using the following steps:
1. Locate the ExtEditGroupAction.java fi le under the com.ext.portlet.communities.action package in the /ext/ext-impl/src folder and open it.
2. Add following line before the line deleteGroup(actionRequest); and save it:
AddGroupLocalServiceUtil.deleteGroup(actionRequest);
The code above specifi es a function to delete ExtGroup.
Similarly, we can associate the updateGroup method in AddGroupLocalServiceUtil with the updateGroup method in ExtEditGroupAction.
3. Open the ExtEditGroupAction.java fi le.4. Add following line after the line updateGroup(actionRequest); and save it.
AddGroupLocalServiceUtil.updateGroup(actionRequest);
The code above shows a function to update ExtGroup after updating Group_.

For More Information: www.packtpub.com/liferay-portal-5-2-systems-development/book
Chapter 5
[ 149 ]
Setting up the Ext Communities portlet in the frontend We have set up the Ext Communities portlet in the backend. Now let's set it up in the frontend.
Updating and deleting Community customized columns First, we need to add the service and model imports in the init.jsp fi le as follows:
1. Create an init.jsp fi le in the /ext/ext-web/docroot/portlet/ext/communities folder and open it.
2. Add the following lines at the beginning of this fi le and save it:
<%@ include file="/html/portlet/communities/init.jsp" %><%@ page import="com.ext.portlet.group.action.AddGroupLocalServiceUtil" %><%@ page import="com.ext.portlet.group.model.ExtGroup" %>
Then, we need to update the edit_community.jsp fi le in the /ext/ext-web/docroot/portlet/ext/communities folder in order to support the updates of community-customized fi elds. To do so, update <%@ include file="/html/portlet/communities/init.jsp" %> with <%@ include file="/html/portlet/ext/communities/init.jsp" %>, and add the following lines after the line long groupId = BeanParamUtil.getLong(group, request, "groupId"); in edit_community.jsp fi le:
ExtGroup extGroup = null;if(group != null) extGroup = AddGroupLocalServiceUtil.getGroup(group.getGroupId());
Further, add the following lines after the lines <liferay-ui:input-field model="<%= Group.class %>" bean="<%= group %>" field="name" /></td></tr>:
<tr> <td class="lfr-label"><liferay-ui:message key="keywords" /></td> <td> <liferay-ui:input-field model="<%= ExtGroup.class %>" bean="<%= extGroup %>" field="keywords" /> </td></tr>
As shown in the code above, the JSP gets ExtGroup by the group ID as import. Then it adds a message Keywords, an input with model ExtGroup, bean extGroup, and fi eld Keywords.

For More Information: www.packtpub.com/liferay-portal-5-2-systems-development/book
Managing Pages
[ 150 ]
Retrieving community-customized columns Last but not the least, we need to update the view.jsp fi le in the /ext/ext-web/docroot/portlet/ext/communities folder to properly display community columns Keywords and Creator. To do so, fi rst update <%@ include file="/html/portlet/communities/init.jsp" %> with <%@ include file="/html/portlet/ext/communities/init.jsp" %>. Then add the following lines after the line headerNames.add("name"); in the view.jsp fi le:
headerNames.add("Creator"); //ExtheaderNames.add("Keywords"); //Ext
Finally, add the following lines between row.addText(sb.toString()); and // Type:
// EXTUser creator = UserLocalServiceUtil.getUser (group.getCreatorUserId());row.addText(creator.getFullName());ExtGroup extGroup = AddGroupLocalServiceUtil.getGroup (group.getGroupId());row.addText(extGroup.getKeywords());
As shown in the code above, when retrieving a normal group message, it tries to get the community additional information via the ExtGroup object. Then, it lists the headers for the community columns Creator and Keywords. Finally, it adds the value for customized rows, for example creator.getFullName() and extGroup.getKeywords().
Customizing the Manage Pages portlet As stated earlier, a community may consist of a set of pages, including public pages and private pages. The Communities portlet also provides the ability to manage pages for a given community. In addition, Liferay portal also provides a portlet named Manage Pages (known as Page Settings previously) to manage the pages—either public or private—for a given group or community. Unfortunately, you cannot use it independently. That is, you cannot fi nd it by clicking on Add Applications when you log in as an admin. A link is provided only in the theme at /portal/portal-web/docroot/html/themes/classic/templates/dock.vm as follows:
#if ($show_page_settings)<li class="page-settings"><a href="$page_settings_url">$page_settings_text</a></li>#end

For More Information: www.packtpub.com/liferay-portal-5-2-systems-development/book
Chapter 5
[ 151 ]
As shown in this screenshot, you can click on the link Manage Pages to update page settings. Let us suppose that you are in the Guest community, in the public pages by default and the Welcome page is under editing.
As shown in the following screenshot, here we want to customize the Manage Pages portlet. First, clone this portlet and make it standalone. Then, call it as Ext Manage Pages, and dynamically track the community to which the current page belongs. For example, if the portlet named Ext Manage Pages was added in the page of the Guest community, it should dynamically get the Guest community as a group name. Most importantly, we expect to extend the model of the page layout so that it supports additional messages, for example keywords, created(when it was created), creatorUserId (who created it), modifierUserId (who modifi ed it), modified (when it was modifi ed), and so on.
How to implement the above requirements? As was shown for the Ext Communities portlet, we will show how to customize the Manage Pages portlet. We will use the above requirements as examples to show what will be customized. However, it is up to you to make any decisions about what should be customized according to your requirements.

For More Information: www.packtpub.com/liferay-portal-5-2-systems-development/book
Managing Pages
[ 152 ]
Building a standalone layout management portlet Here we are not going to update the Manage Pages portlet directly. Instead, we are going to build a new portlet named Ext Manage Pages by customizing the Manage Pages portlet.
Constructing the portlet Now let's specify a portlet with the name Ext Manage Pages. Thus, we are required to fi rst confi gure the Ext Manage Pages portlet in both portlet-ext.xml and liferay-portlet-ext.xml, set the title mapping in Language-ext.properties, and add the Ext Manage Pages portlet to the Book category in liferay-display.xml.
To do so, fi rst add the following lines between </portlet> and </portlet-app> in portlet-ext.xml:
<portlet> <portlet-name>extLayoutManagement</portlet-name> <display-name>Ext Manage Pages</display-name> <portlet-class>com.liferay.portlet.StrutsPortlet</portlet-class> <init-param><name>view-action</name> <value>/ext/layout_management/edit_pages</value> </init-param><expiration-cache>0</expiration-cache> <supports><mime-type>text/html</mime-type></supports> <resource-bundle> com.liferay.portlet.StrutsResourceBundle </resource-bundle> <security-role-ref> <role-name>power-user</role-name> </security-role-ref> <security-role-ref> <role-name>user</role-name> </security-role-ref></portlet>
Then add the following lines after the line <!-- Custom Portlets --> in liferay-portlet-ext.xml:
<portlet> <portlet-name>extLayoutManagement</portlet-name> <struts-path>ext/layout_management</struts-path> <use-default-template>false</use-default-template> <restore-current-view>false</restore-current-view></portlet>

For More Information: www.packtpub.com/liferay-portal-5-2-systems-development/book
Chapter 5
[ 153 ]
Moreover, add the following line after the line javax.portlet.title.extCommunities=Ext Communities in Language-ext.properties:
javax.portlet.title.extLayoutManagement=Ext Manage Pages
Finally, add the following line after the line <portlet id="extCommunities" /> in liferay-display.xml:
<portlet id="extLayoutManagement" />
Setting up the action Let's set up the ExtEditPagesAction action required for the Ext Manage Pages portlet as follows:
1. Create an ExtEditPagesAction class in the com.ext.portlet.communities.action package under the /ext/ext-impl/src folder and open it.
2. Add the following lines in this class and save it:
public class ExtEditPagesAction extends EditPagesAction { public void processAction(ActionMapping mapping, ActionForm form, PortletConfig portletConfig, ActionRequest actionRequest, ActionResponse actionResponse) throws Exception { String cmd = ParamUtil.getString(actionRequest, Constants.CMD); try { if (cmd.equals(Constants.ADD) || cmd.equals(Constants.UPDATE)) { updateLayout(actionRequest, actionResponse); } else if (cmd.equals(Constants.DELETE)) { CommunitiesUtil.deleteLayout(actionRequest, actionResponse); } String redirect = ParamUtil.getString( actionRequest, "pagesRedirect"); sendRedirect(actionRequest, actionResponse, redirect); } catch (Exception e) { if (e instanceof NoSuchLayoutException || e instanceof NoSuchProposalException || e instanceof PrincipalException) { SessionErrors.add(actionRequest, e.getClass().getName()); setForward(actionRequest, "portlet.ext.communities.error");

For More Information: www.packtpub.com/liferay-portal-5-2-systems-development/book
Managing Pages
[ 154 ]
} else if (e instanceof RemoteExportException) { SessionErrors.add(actionRequest, e.getClass().getName(), e); String redirect = ParamUtil.getString( actionRequest, "pagesRedirect"); sendRedirect(actionRequest, actionResponse, redirect); } else if (e instanceof LayoutFriendlyURLException || e instanceof LayoutHiddenException || e instanceof LayoutNameException || e instanceof LayoutParentLayoutIdException || e instanceof LayoutSetVirtualHostException || e instanceof LayoutTypeException || e instanceof RequiredLayoutException || e instanceof UploadException) { if (e instanceof LayoutFriendlyURLException) { SessionErrors.add(actionRequest, LayoutFriendlyURLException.class.getName(), e); } else { SessionErrors.add(actionRequest, e.getClass(). getName(), e); } } else { throw e; } } } public ActionForward render(ActionMapping mapping, ActionForm form, PortletConfig portletConfig, RenderRequest renderRequest, RenderResponse renderResponse) throws Exception { ThemeDisplay themeDisplay = (ThemeDisplay)renderRequest. getAttribute(WebKeys.THEME_DISPLAY); long groupId = themeDisplay.getScopeGroupId(); renderRequest.setAttribute("GROUP", GroupLocalServiceUtil.getGroup(groupId)); return mapping.findForward( getForward(renderRequest, "portlet.ext.communities.edit_pages")); }}

For More Information: www.packtpub.com/liferay-portal-5-2-systems-development/book
Chapter 5
[ 155 ]
Setting up page flow and page layout We have set up the action. So how do we get the page fl ow working? We need to set up an action path and page fl ow. To do so, fi rst add the following lines after the lines <struts-config> <action-mappings> in struts-config.xml under the /ext/ext-web/docroot/WEB-INF folder:
<!-- Ext Layout Management --><action path="/ext/layout_management/edit_pages" type="com.ext.portlet.communities.action.ExtEditPagesAction"> <forward name="portlet.ext.communities.edit_pages" path="portlet.ext.layout.edit_pages" /> <forward name="portlet.ext.communities.error" path="portlet.ext.communities.error" /></action>
Then add the following lines after <tiles-definitions> in tiles-defs.xml under the /ext/ext-web/docroot/WEB-INF folder:
<!-- Ext Layout Management --><definition name="portlet.ext.layout.edit_pages" extends="portlet"> <put name="portlet_content" value="/portlet/ext/communities/edit_pages.jsp" /></definition>
Preparing JSP files As mentioned above, we used the edit_pages.jsp fi le in tiles-defs.xml. That is, we need to build the edit_pages.jsp fi le:
1. Locate the edit_pages.jsp fi le in the /portal/portal-web/docroot/html/portlet/communities folder and copy it to the /ext/ext-web/docroot/html/portlet/ext/communities folder.
2. Open this fi le and fi rst update <%@ include file="/html/portlet/communities/init.jsp" %> with <%@ include file="/html/portlet/ext/communities/init.jsp" %>.
3. Then update "/communities/edit_pages" with "/ext/layout_management/edit_pages", as shown in following lines:
portletURL.setParameter("struts_action", "/ext/layout_management/edit_pages");<form action="<portlet:actionURL windowState="<%= WindowState.MAXIMIZED.toString() %>"> <portlet:param name="struts_action"
For More Information: www.packtpub.com/liferay-portal-5-2-systems-development/book
Managing Pages
[ 156 ]
value="/ext/layout_management /edit_pages" /> </portlet:actionURL>" method="post" name="<portlet:namespace />fm" onSubmit="<portlet:namespace />savePage(); return false;">
Cool! You have cloned the Manage Pages portlet successfully. After re-deploying these changes in Tomcat, you will now see the Ext Manage Page portlet with the Ext Manage Page title and contents under the Book category.
Setting up the Ext Layout Management portlet in the backend After cloning the Manage Pages portlet, we will implement new features in the backend. By the way, the implementation fl ow is close to that of the Ext Communities portlet.
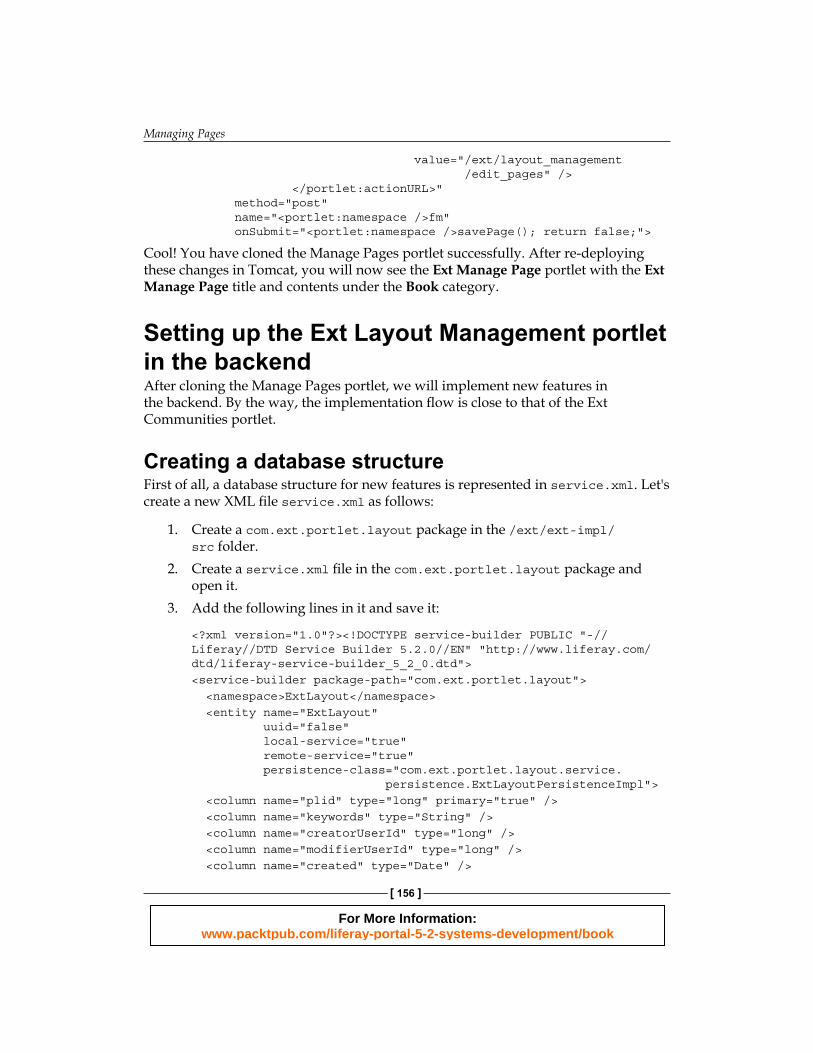
Creating a database structure First of all, a database structure for new features is represented in service.xml. Let's create a new XML fi le service.xml as follows:
1. Create a com.ext.portlet.layout package in the /ext/ext-impl/src folder.
2. Create a service.xml fi le in the com.ext.portlet.layout package and open it.
3. Add the following lines in it and save it:
<?xml version="1.0"?><!DOCTYPE service-builder PUBLIC "-//Liferay//DTD Service Builder 5.2.0//EN" "http://www.liferay.com/dtd/liferay-service-builder_5_2_0.dtd"><service-builder package-path="com.ext.portlet.layout"> <namespace>ExtLayout</namespace> <entity name="ExtLayout" uuid="false" local-service="true" remote-service="true" persistence-class="com.ext.portlet.layout.service. persistence.ExtLayoutPersistenceImpl"> <column name="plid" type="long" primary="true" /> <column name="keywords" type="String" /> <column name="creatorUserId" type="long" /> <column name="modifierUserId" type="long" /> <column name="created" type="Date" />

For More Information: www.packtpub.com/liferay-portal-5-2-systems-development/book
Chapter 5
[ 157 ]
<column name="modified" type="Date" /></entity> <exceptions><exception>ExtLayout</exception></exceptions></service-builder>
As shown in the code above, the entity has the ExtLayout namespace with a name ExtLayout. The entity has the primary key fi eld plid and other fi elds such as keywords, creatorUserId, created, modifierUserId, and modified.
Then, we need to build the services using ServiceBuilder. This process is the same as that of building services of Ext Communities, which is as follows:
1. Locate the XML fi le /ext/ext-impl/build-parent.xml and open it.2. Add the following lines between </target> and <target name="build-
service-portlet-reports"> and save it:<target name="build-service-portlet-extLayout"> <antcall target="build-service"> <param name="service.file" value="src/com/ext/portlet/layout/service.xml" /> </antcall></target>
3. Expand ext-impl in the Ant view.4. Double-click on the build-service-portlet-extLayout target.5. Refresh the /ext project.
Finally, we should create a new table named ExtLayout in the database as follows:
drop table if exists ExtLayout;create table ExtLayout ( plid bigint not null primary key, keywords varchar(511), creatorUserId bigint, modifierUserId bigint, created datetime null,modified datetime null);
As shown in the code above, it fi rst drops the ExtLayout table (if it exists). Then it creates an ExtLayout table with a set of fi elds such as plid and keywords.
For More Information: www.packtpub.com/liferay-portal-5-2-systems-development/book
Managing Pages
[ 158 ]
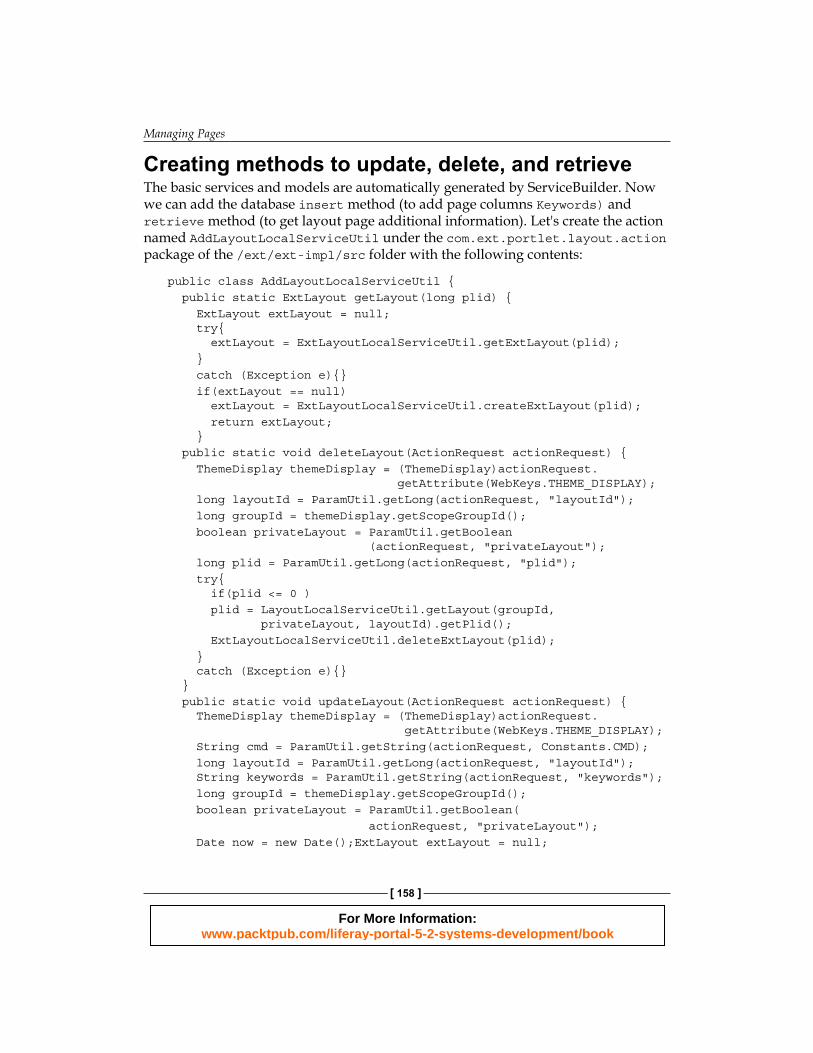
Creating methods to update, delete, and retrieve The basic services and models are automatically generated by ServiceBuilder. Now we can add the database insert method (to add page columns Keyw ords) and retrieve method (to get layout page additional information). Let's create the action named AddLayoutLocalServiceUtil under the com.ext.portlet.layout.action package of the /ext/ext-impl/src folder with the following contents:
public class AddLayoutLocalServiceUtil { public static ExtLayout getLayout(long plid) { ExtLayout extLayout = null; try{ extLayout = ExtLayoutLocalServiceUtil.getExtLayout(plid); } catch (Exception e){} if(extLayout == null) extLayout = ExtLayoutLocalServiceUtil.createExtLayout(plid); return extLayout; } public static void deleteLayout(ActionRequest actionRequest) { ThemeDisplay themeDisplay = (ThemeDisplay)actionRequest. getAttribute(WebKeys.THEME_DISPLAY); long layoutId = ParamUtil.getLong(actionRequest, "layoutId"); long groupId = themeDisplay.getScopeGroupId(); boolean privateLayout = ParamUtil.getBoolean (actionRequest, "privateLayout"); long plid = ParamUtil.getLong(actionRequest, "plid"); try{ if(plid <= 0 ) plid = LayoutLocalServiceUtil.getLayout(groupId, privateLayout, layoutId).getPlid(); ExtLayoutLocalServiceUtil.deleteExtLayout(plid); } catch (Exception e){} } public static void updateLayout(ActionRequest actionRequest) { ThemeDisplay themeDisplay = (ThemeDisplay)actionRequest. getAttribute(WebKeys.THEME_DISPLAY); String cmd = ParamUtil.getString(actionRequest, Constants.CMD); long layoutId = ParamUtil.getLong(actionRequest, "layoutId"); String keywords = ParamUtil.getString(actionRequest, "keywords"); long groupId = themeDisplay.getScopeGroupId(); boolean privateLayout = ParamUtil.getBoolean( actionRequest, "privateLayout"); Date now = new Date();ExtLayout extLayout = null;

For More Information: www.packtpub.com/liferay-portal-5-2-systems-development/book
Chapter 5
[ 159 ]
long plid = 0; try{ if (cmd.equals(Constants.ADD)) layoutId = getLayoutId(groupId, privateLayout); Layout layout = LayoutLocalServiceUtil.getLayout(groupId, privateLayout, layoutId); plid = layout.getPlid(); } catch (Exception e){} try{ extLayout = ExtLayoutLocalServiceUtil.getExtLayout(plid); } catch (Exception e){} if(extLayout == null){ extLayout = ExtLayoutLocalServiceUtil.createExtLayout(plid); extLayout.setCreatorUserId(themeDisplay.getUser().getUserId()); extLayout.setCreated(now); } else { extLayout.setModified(now); extLayout.setModifierUserId(themeDisplay.getUser().getUserId()); } extLayout.setKeywords(keywords); try{ ExtLayoutLocalServiceUtil.updateExtLayout(extLayout); } catch (Exception e){} } public static long getLayoutId(long groupId, boolean privateLayout) throws SystemException { long layoutId = 0; List<Layout> layouts = LayoutLocalServiceUtil.getLayouts (groupId, privateLayout); for (Layout curLayout : layouts) { long curLayoutId = curLayout.getLayoutId(); if (curLayoutId > layoutId) {layoutId = curLayoutId; } } return layoutId;
}}
As shown in code above, there are three methods: updateLayout, getLayout, and deleteLayout. The updateLayout method updates extLayout into the database, the getLayout method retrieves extLayout by page layout ID, and the deleteLayout method deletes extLayout.

For More Information: www.packtpub.com/liferay-portal-5-2-systems-development/book
Managing Pages
[ 160 ]
Updating the action class After creating the methods to update and delete, and getting the page additional information, we need to associate these methods with the corresponding methods in the action class.
First, let's associate the deleteLayout method in AddLayoutLocalServiceUtil.java with the deleteLayout method in ExtEditPagesAction.java. To do so, add the following line before the line CommunitiesUtil.deleteLayout(actionRequest, actionResponse); in ExtEditPagesAction.java:
AddLayoutLocalServiceUtil.deleteLayout(actionRequest);
The code above indicates that when using original method deleteLayout, applies for the extended method deleteLayout of AddLayoutLocalServiceUtil.
In the same way, we need to associate the updateLayout method in AddLayoutLocalServiceUtil.java with the updateLayout method in ExtEditLayoutAction.java. To do so, add the following line after the line updateLayout(actionRequest, actionResponse); in ExtEditLayoutAction.java:
AddLayoutLocalServiceUtil.updateLayout(actionRequest);
Setting up the layout management portlet in the frontend We have set up the Ext Manage Pages portlet in the backend. It is time to construct the Ext Manage pages portlet in the frontend.
First, we need to add the service and model imports in the init.jsp fi le under the /ext/ext-web/docroot/portlet/ext/communities folder, similar to that of Ext Communities. To do so, simply add the following lines at the end of init.jsp:
<%@ page import="com.ext.portlet.layout.action. AddLayoutLocalServiceUtil" %><%@ page import="com.ext.portlet.layout.model.ExtLayout" %>
Then, we need to update the /ext/ext-web/docroot/portlet/ext/communities/edit_pages.jsp fi le in order to use the Ext Manage Pages portlet (the portlet name is extLayoutManagement) instead of the original portlet name PortletKeys.LAYOUT_MANAGEMENT. Simply add a line String extPortlet = "extLayoutManagement"; after the line String tabs4 = ParamUtil.getString(request, "tabs4"); in the edit_pages.jsp. Now update PortletKeys.LAYOUT_MANAGEMENT with extPortlet as follows:

For More Information: www.packtpub.com/liferay-portal-5-2-systems-development/book
Chapter 5
[ 161 ]
String extPortlet = "extLayoutManagement"; if (portletName.equals(extPortlet) || portletName.equals(PortletKeys.MY_ACCOUNT)) { portletURL.setParameter("backURL", backURL); }
The code above tries to use the Ext Manage Pages portlet as well. Further, we need to update the /html/portlet/communities/edit_pages_public_and_private.jspf string with the /html/portlet/ext/communities/edit_pages_public_and_private.jspf string.
As you can see, we involve the JSP fi les edit_pages_public_and_private.jspf directly and edit_pages_page.jsp indirectly. Let's build these JSP fi les as follows:
1. Copy the fi le edit_pages_public_and_private.jspf in the /portal/portal-web/docroot/portlet/communities folder to the /ext/ext-web/docroot/portlet/ext/communities folder and open it.
2. Update the /html/portlet/communities/edit_pages_page.jsp string with the /html/portlet/ext/communities/edit_pages_page.jsp string and save it.
3. Copy the fi le edit_pages_page.jsp in the /portal/portal-web/docroot/portlet/communities folder to the /ext/ext-web/docroot/portlet/ext/communities folder.
Finally, we need to update the JSP fi le edit_pages_page.jsp in the /ext/ext-web/docroot/portlet/ext/communities/ folder in order to support the updates of the customized information. To do so, fi rst update <%@ include file="/html/portlet/communities/init.jsp" %> with <%@ include file="/html/portlet/ext/communities/init.jsp" %> in edit_pages_page.jsp, and then add the following lines after the line Layout selLayout = (Layout)request.getAttribute("edit_pages.jsp-selLayout");.
ExtLayout extLayout = null; if(selLayout != null) 0extLayout = AddLayoutLocalServiceUtil.getLayout (selLayout.getPlid());
Moreover, add the following lines after the lines <tr><td colspan="3"><br /></td></tr><tr><td><liferay-ui:message key="type" />:
<tr> <td><liferay-ui:message key="keywords" /></td> <td> <liferay-ui:input-field model="<%= ExtLayout.class %>" bean="<%= extLayout %>"
For More Information: www.packtpub.com/liferay-portal-5-2-systems-development/book
Managing Pages
[ 162 ]
field="keywords" /> </td> <td></td></tr>
As shown in the code above, the JSP receives ExtLayout by the page layout ID. It also adds a Keywords message and an input with the ExtLayout model, the extLayout bean, and the keywords fi eld. Interestingly, you can make the Keywords localized too. How to reach it? Refer to the following section.
Customizing page management with more features We have successfully customized and extended the Manage Pages portlet. The Ext Manage Pages portlet not only clones the out-of-the-box Manage Pages portlet, but it also extends the model and service—supporting customized data, for example, Keywords. As mentioned earlier, we can make the Keywords localized too.
Adding localized feature Liferay portal is designed to handle as many languages as you want to support. By default, it supports up to 22 languages. When a page is loading, the portal will detect the language, pull up the corresponding language fi le, and display the text in the correct language.
In this section we want the Keywords to be localized too. For example, the default language is English (United States) and the localized language is Deutsch (Deutschland). Thus, you have the ability to enter not only the Name and HTML Title in German, but also the Keywords in German.
As shown in the following screenshot, when you change the language of the page in German using the language portlet, you will see the entire web site changed to German, including the portlet title and input fi elds. For example, the title of the portlet now has the Ext Seiteneinstellungen value and the Keywords now become Schlüsselwörter.
How do we implement this feature? In other words, how do we customize the language display in the page management? Let's add the localized feature for the Ext Manage Pages portlet.

For More Information: www.packtpub.com/liferay-portal-5-2-systems-development/book
Chapter 5
[ 163 ]
Extending model for locale First of all, we need to extend the model and to implement that model in order to support the localized feature. For the ExtLayout model, let's add the locale method fi rst.
1. Locate the ExtLayout.java fi le from the com.ext.portlet.layout.model package in the /ext/ext-service/src folder, and open it.
2. Add the following lines before the line } in ExtLayout.java and save it:
public String getKeywords(Locale locale);public String getKeywords(String localeLanguageId);public String getKeywords(Locale locale, boolean useDefault);public String getKeywords(String localeLanguageId, boolean useDefault);public void setKeywords(String keywords, Locale locale);
As shown in the code above, it adds getting and setting methods for the Keywords fi eld with locale features. Now let's add the implementation for the ExtLayout model:
1. Locate the ExtLayoutImpl.java fi le from the com.ext.portlet.layout.model.impl package in the /ext/ext-impl/src folder and open it.
2. Add the following lines before the last } in ExtLayoutImpl.java fi le and save it:
public String getKeywords(Locale locale) { String localeLanguageId = LocaleUtil.toLanguageId(locale); return getKeywords(localeLanguageId);}public String getKeywords(String localeLanguageId) { return LocalizationUtil.getLocalization(getKeywords(), localeLanguageId);}

For More Information: www.packtpub.com/liferay-portal-5-2-systems-development/book
Managing Pages
[ 164 ]
public String getKeywords(Locale locale, boolean useDefault) { String localeLanguageId = LocaleUtil.toLanguageId(locale); return getKeywords(localeLanguageId, useDefault);}public String getKeywords(String localeLanguageId, boolean useDefault) { return LocalizationUtil.getLocalization( getKeywords(), localeLanguageId, useDefault);}public void setKeywords(String keywords, Locale locale) { String localeLanguageId = LocaleUtil.toLanguageId(locale); if (Validator.isNotNull(keywords)) { setKeywords(LocalizationUtil.updateLocalization( getKeywords(), "keywords", keywords, localeLanguageId)); } else { setKeywords(LocalizationUtil.removeLocalization( getKeywords(), "keywords", localeLanguageId)); }}
As shown in the code above, it adds implementation for getting and setting methods of the ExtLayout model.
Customizing language properties Language fi les have locale-specifi c defi nitions. By default, Language.properties (at /portal/portal-impl/src/content) contains English phrase variations further defi ned for United States, while Language_de.properties (at /portal/portal-impl/src/content) contains German phrase variations further defi ned for Germany. In Ext, Language-ext.properties (available at /ext/ext-impl/src/content) contains English phrase variations further defi ned for United States, while Language-ext_de.properties (should be available at /ext/ext-impl/src/content) contains German phrase variations further defi ned for Germany.
First, let's add a message in Language-ext.properties, by using the following steps:
1. Locate the Language-ext.properties fi le in the /ext/ext-impl/src/content folder and open it.
2. Add the following line after the line view-reports=View Reports for Books and save it.
keywords=Keywords
This code specifi es the keywords message key with a Keywords value in English:

For More Information: www.packtpub.com/liferay-portal-5-2-systems-development/book
Chapter 5
[ 165 ]
Then we need to add German language feature in Language-ext_de.properties as follows:
1. Create a language fi le Language-ext_de.properties in the /ext/ext-impl/src/content folder and open it.
2. Add the following lines at the beginning and save it:
## Portlet namesjavax.portlet.title.EXT_1=Berichtejavax.portlet.title.jsp_portlet=JSP Portletjavax.portlet.title.book_reports=Berichte für das Buchjavax.portlet.title.extLayoutManagement=Ext Seiteneinstellungenjavax.portlet.title.extCommunities=Ext Communities## Messagesview-reports=Ansicht-Berichte für Bücherkeywords=Schlüsselwörter## Category titlescategory.book=Buch## Model resourcesmodel.resource.com.ext.portlet.reports.model.ReportsEntry=Buch## Action namesaction.ADD_BOOK=Fügen Sie Buch hinzu
As shown in the code above, it specifi es the same keys as that of Language-ext.properties. But all the keys' values were specifi ed in German instead of English. For example, the message keywords has a Schlüsselwörter value in German.
In addition, you can set German as the default language and Germany as the default country if it is required. Here are the simple steps to do so:
1. Locate the system-ext.properties fi le in the /ext/ext-impl/src folder and open it.
2. Add the following lines at the end of system-ext.properties and save it:
user.country=DEuser.language=de
The code above sets the default locale—the language German (Deutsch) and the country Germany (Deutschland). In general, there are many language fi les, for example Language-ext.properties and Language-ext_de.properties, and some language fi les would overwrite others in runtime loading. For example, Language-ext_de.properties will overwrite Language-ext.properties when the language is set as German.

For More Information: www.packtpub.com/liferay-portal-5-2-systems-development/book
Managing Pages
[ 166 ]
These are the three simple rules which indicate the priorities of these language fi les:
1. The ext versions take precedence over the non-ext versions.2. The language-specifi c versions, for example _de, take precedence over the
non language-specifi c versions.3. The location-specifi c versions, such as -ext_de, take precedence over the non
location-specifi c versions.
For instance, the following is a ranking from bottom to top for the German language:
1. Language-ext_de.properties
2. Language_de.properties
3. Language-ext.properties
4. Language.properties
Displaying multiple languages In order to support multiple languages, we have to update the updateLayout method at AddLayoutLocalServiceUtil under the com.ext.portlet.layout.action package of ext/ext-impl/src. To do so, add the following lines before the last }:
protected static void setLocalizedAttributes(ExtLayout extLayout, Map<Locale, String> localeKeywordsMap) { Locale[] locales = LanguageUtil.getAvailableLocales(); for (Locale locale : locales) { String keywords = localeKeywordsMap.get(locale); extLayout.setKeywords(keywords, locale); } }
As shown in the code above, it added the locale feature method setLocalizedAttributes. Now, update the line String keywords = ParamUtil.getString(actionRequest, "keywords"); with the following lines in the updateLayout method of AddLayoutLocalServiceUtil:
Locale[] locales = LanguageUtil.getAvailableLocales();Map<Locale, String> localeKeywordsMap = new HashMap<Locale, String>();for (Locale locale : locales) { String languageId = LocaleUtil.toLanguageId(locale); localeKeywordsMap.put( locale, ParamUtil.getString(actionRequest, "keywords_" + languageId));}

For More Information: www.packtpub.com/liferay-portal-5-2-systems-development/book
Chapter 5
[ 167 ]
Further, update the line extLayout.setKeywords(keywords); with the line setLocalizedAttributes(extLayout, localeKeywordsMap); in the updateLayout method of AddLayoutLocalServiceUtil.
Finally, we need to update the JSP fi le edit_pages_page.jsp for the localized feature. To do so, fi rst update the lines <td><liferay-ui:input-field model="<%= ExtLayout.class %>" bean="<%= extLayout %>" field="keywords" /></td><td></td> with the following lines:
<td> <input id="<portlet:namespace />keywords_<%= defaultLanguageId %>" name="<portlet:namespace />keywords_<%= defaultLanguageId %>" size="30" type="text" value="<%= extLayout.getKeywords(defaultLocale) %>" /></td><td> <% for (int i = 0; i < locales.length; i++) { if (locales[i].equals(defaultLocale)) { continue; } %> <input id="<portlet:namespace />keywords_<%= LocaleUtil.toLanguageId(locales[i]) %>" name="<portlet:namespace />keywords_<%= LocaleUtil.toLanguageId(locales[i]) %>" type="hidden" value="<%= extLayout.getKeywords(locales[i], false) %>" /> <% } %> <input id="<portlet:namespace />keywords_temp" size="30" type="text" <%= currentLocale.equals(defaultLocale) ? "style='display: none'" : "" %> onChange="<portlet:namespace />onKeywordsChanged();" /></td>
Then add the following lines after the line var lastLanguageId = "<%= currentLanguageId %>"; in edit_pages_page.jsp:
var keywordsChanged = false;function <portlet:namespace />onKeywordsChanged() { keywordsChanged = true; }
As shown in the code above, it adds the locale feature for the keywords fi eld. It also updates JavaScript for the onKeywordsChanged() method. From now on, the Ext Manage Pages portlet has a locale feature (German, for example) on the customized fi eld, keywords.

For More Information: www.packtpub.com/liferay-portal-5-2-systems-development/book
Managing Pages
[ 168 ]
Moreover, add the following lines after the lines jQuery("#<portlet:namespace />title_" + lastLanguageId).attr("value", titleValue); titleChanged = false; } of the JavaScript method function <portlet:namespace />updateLanguage() in the edit_pages_page.jsp fi le:
if (keywordsChanged) { var keywordsValue = jQuery("#<portlet:namespace /> keywords_temp").attr("value"); if (keywordsValue == null) {keywordsValue = "";} jQuery("#<portlet:namespace />keywords_" + lastLanguageId).attr("value", keywordsValue); keywordsChanged = false; }
Add the line jQuery("#<portlet:namespace />keywords_temp").show(); after the line jQuery("#<portlet:namespace />title_temp").show();. Add the line jQuery("#<portlet:namespace />title_temp").hide(); after the line jQuery("#<portlet:namespace />keywords_temp").hide(); of the function <portlet:namespace />updateLanguage()method in edit_pages_page.jsp:
Last but not the least, we need to update the function <portlet:namespace />updateLanguageTemps(lang) method in edit_pages_page.jsp. To do so, fi rst add the following lines after the line var defaultTitleValue =n jQuery("#<portlet:namespace />title_<%= defaultLanguageId %>").attr("value");:
var keywordsValue = jQuery("#<portlet:namespace />keywords_" + lang).attr("value");var defaultKeywordsValue = jQuery("#<portlet:namespace />keywords_<%= defaultLanguageId %>").attr("value");if (defaultKeywordsValue == null) { defaultKeywordsValue = "";}
Now, add the following lines after the line else { jQuery("#<portlet:namespace />title_temp").attr("value", titleValue); }:
if ((keywordsValue == null) || (keywordsValue == "")) { jQuery("#<portlet:namespace />keywords_temp").attr("value", defaultKeywordsValue); }else { jQuery("#<portlet:namespace />keywords_temp").attr("value", keywordsValue); }
As shown in the code above, it specifi es variables keywordsValue and defaultKeywordsValue. It then uses JQuery to update the states of the attribute, for example, #<portlet:namespace />keywords_temp.

For More Information: www.packtpub.com/liferay-portal-5-2-systems-development/book
Chapter 5
[ 169 ]
Employing tabs As shown in the following screenshot, we expect to add one customized Layout tab beside the Look and Feel tab. When this tab is selected, it will print the current value, for example, tabs3Names = page,children,look-and-feel,layout.
Let's employ the tabs in the Ext Manage Pages portlet. First, update the fi lter of JSP fi le edit_pages.jsp at /ext/ext-web/docroot/html/portlet/ext/communities. To do so, add && !tabs3.equals("layout") after if (tabs2.equals("pages") && ((!tabs3.equals("children") && !tabs3.equals("look-and-feel") as follows:
if (tabs2.equals("pages") && ((!tabs3.equals("children") && !tabs3.equals("look-and-feel") && !tabs3.equals("layout")) || ((selLayout != null) && !PortalUtil.isLayoutParentable(selLayout)))) {
As shown in the code above, it allows the tab value layout available for tabs3 as well as for the values children and look-and-feel.
Then, add the Layout tab and a value in the JSP fi le edit_pages_public_and_private.jspf at /ext/ext-web/docroot/html/portlet/ext/communities. To do so, fi rst replace tabs3Names += ",look-and-feel"; with tabs3Names += ",look-and-feel,layout"; as follows:
if ((selLayout != null) && (permissionChecker.isOmniadmin() || PropsValues.LOOK_AND_FEEL_MODIFIABLE)) { tabs3Names += ",look-and-feel,layout";}
Then, add the following lines before the last </c:choose> tag:
<c:when test='<%= tabs3.equals("layout") %>'>tabs3Names = <%= tabs3Names %></c:when>
As shown in the code above, it adds a Layout tab when the Look and Feel tab is added. If the value was layout, it prints the current value of tabs3Names.

For More Information: www.packtpub.com/liferay-portal-5-2-systems-development/book
Managing Pages
[ 170 ]
In short, the portal can include custom tabs that allow you to create the same look and feel as that of the out of the box tabs in your own portlets. These tabs would essentially be just other JSP pages, and be displayed based on the selection of custom tabs.
Applying layout templates dynamically As stated above, we have added the Layout tab in the Ext Manage Pages portlet. Now let's apply the layout templates dynamically under this tab. Further, the portal comes with several built-in layout templates. Layout templates are the ways of choosing how your portlets will be arranged on a page. They make up the body of the page—the large area where you can drag and drop your portlets to create your pages.
Why do we need this feature? It is great for developers or CMS administrators to manually create pages using the drag-and-drop feature. But for some content creators and content producers, the drag-and-drop functions would be amazing but diffi cult to use. Thus they expect the layout templates to be created by the CMS admin only. Then they only view the possible layout templates for pages, apply layout templates dynamically, and populate the content of pages if applicable.
As shown in the following screenshot, when the content creators and content producers are updating the Welcome page, they want to view the possible layout templates fi rst—how the page looks. Then they want to apply the layout template, for example 1-2-1 columns. For more details, populate the book_reports (Reports for Books) portlet in column-1; populate the jsp_portlet (JSP Portlet) portlet in column-2; and populate the Web Content Display (with portlet ID 56) portlet in column-3 and column-4.

For More Information: www.packtpub.com/liferay-portal-5-2-systems-development/book
Chapter 5
[ 171 ]
In this section, we are going to discuss a generic solution to implement this feature with the above example. By the way, we assume that the Guest community is used for the demo of this feature. Of course, you can confi gure it to any community that you have in the portal.
Setting up pages, layout templates, and portlets mappings First of all, we need to set up mappings among pages, templates, and portlets. Normally, we can specify these mappings in portal-ext.properties. Let's add the following lines at the end of portal-ext.properties:
## Portlets for layoutsGuest_Welcome_1_2_columns_i=book_reports,jsp_portlet,56Guest_Welcome_1_2_columns_ii=56,56,56Guest_Welcome_1_2_1_columns=book_reports,jsp_portlet,56,56Guest_Welcome_2_2_columns=56,56,56,56Guest_Ext_1_2_1_columns=56,56,56,56Guest_Ext_2_2_columns=56,56,book_reports, jsp_portlet
As shown in the code above, it specifi es the mappings among community, pages, layout templates, and portlets. For the Welcome page and the children pages of the Guest community, four layout templates are available: 1_2_columns_i, 1_2_columns_ii, 1_2_1_columns, and 2_2_columns. For example, the Guest_Welcome_1_2_1_columns key contains four portlets: book_reports, jsp_portlet, and two Web Content Display portlets.
The layout template 1_2_1_columns is reused by at least two pages: Welcome and Ext. Further, the 1_2_1_columns layout can be applied fl exibly for different pages with different portlets associated. Most importantly, you can confi gure the mappings among the community, pages, layout templates, and portlets. Obviously, you can also use customized layout templates with associated customized portlets.
Adding layout templates Now we need to add an action in order to add the layout templates for pages. To do so, fi rst add the following lines before the line String redirect = ParamUtil.getString(actionRequest, "pagesRedirect"); in ExtEditPagesAction.java under the com.ext.communities.action package:
else if (cmd.equals("template")) { addTemplate(actionRequest); }
Then add the following method before the last } in ExtEditPagesAction.java:
protected String addTemplate(ActionRequest actionRequest) throws Exception {

For More Information: www.packtpub.com/liferay-portal-5-2-systems-development/book
Managing Pages
[ 172 ]
String prefixColumn = "column-"; String layoutTemplateId = ParamUtil.getString(actionRequest, "layoutTemplateId"); String groupSectionName = ParamUtil.getString(actionRequest, "groupSectionName"); String redirect = ""; ThemeDisplay themeDisplay = (ThemeDisplay) actionRequest. getAttribute(WebKeys.THEME_DISPLAY); long userId = themeDisplay.getUserId(); long groupId = themeDisplay.getScopeGroupId(); boolean privateLayout = ParamUtil.getBoolean(actionRequest, " privateLayout"); long layoutId = ParamUtil.getLong(actionRequest, "layoutId"); Layout layout = LayoutLocalServiceUtil.getLayout(groupId, privateLayout, layoutId); LayoutTypePortlet layoutTypePortlet = (LayoutTypePortlet) layout.getLayoutType(); layoutTypePortlet.setLayoutTemplateId(userId, layoutTemplateId); layoutTypePortlet.resetStates(); LayoutServiceUtil.updateLayout(layout.getGroupId(), layout.isPrivateLayout(), layout.getLayoutId(), layout.getTypeSettings()); redirect = PortalUtil.getLayoutURL(layout, themeDisplay); String plIds[] = PropsUtil.getArray(groupSectionName + layoutTemplateId); List<String> list = layoutTypePortlet.getPortletIds(); for( int i=0; i< list.size(); i++ ){ String obj = (String) list.get(i); PortletPreferencesLocalServiceUtil.deletePortletPreferences (0, 3, layout.getPlid(), obj); layoutTypePortlet.removePortletId(userId, obj); } if(plIds != null) { layoutTypePortlet.resetStates(); for(int i=0;i < plIds.length; i++){ layoutTypePortlet.addPortletId(userId, plIds[i], prefixColumn + (i+1), 0); } LayoutServiceUtil.updateLayout(layout.getGroupId(), layout.isPrivateLayout(), layout.getLayoutId(), layout.getTypeSettings()); } return redirect;}
As shown in the code above, it fi rst adds an action-handling command template. Then it gets page, layout template, and associated portlets. Finally, it populates the associated portlets within the selected layout for a given page.

For More Information: www.packtpub.com/liferay-portal-5-2-systems-development/book
Chapter 5
[ 173 ]
Displaying layout templates by sections We have added the mappings among community, pages, layout templates, and portlets. We have also added an action to handle the layout template updates. Now let's update JSP fi les in order to display and apply the layout templates by sections—fi rst-level pages from root, for example, the community name Guest.
First, let's update the JSP fi le edit_pages_public_and_private.jspf in order to include possible layout templates instead of printing a static message. To do so, simply replace the line tabs3Names = <%= tabs3Names %> with the following line:
<liferay-util:include page="/html/portlet/ext/communities/ edit_pages_layout_templates.jsp" />
Then, let's create a JSP fi le edit_pages_layout_templates.jsp as follows:
1. Create a JSP fi le edit_pages_layout_templates.jsp in the /ext/ext-web/docroot/html/portlet/ext/communities folder and open it.
2. Add the following lines at the beginning of edit_pages_layout_templates.jsp and save it:
<%@ include file="/html/portlet/ext/communities/init.jsp" %> <% String redirect = ParamUtil.getString(request, "redirect"); Layout selLayout = (Layout)request.getAttribute("edit_pages.jsp- selLayout");%> <c:if test="<%= themeDisplay.isSignedIn() && (selLayout != null) && selLayout.getType().equals(LayoutConstants.TYPE_PORTLET) %>"> <input name="doAsUserId" type="hidden" value="<%= themeDisplay.getDoAsUserId() %>" /> <input name="<%= Constants.CMD %>" type="hidden" value="template" /> <input name="<%= WebKeys.REFERER %>" type="hidden" value="<%= HtmlUtil.escape(redirect) %>" /> <input name="refresh" type="hidden" value="true" /> <table border="0" cellpadding="0" cellspacing="10" style="margin-top: 10px;" width="100%"> <% int CELLS_PER_ROW = 4; List layoutTemplates = LayoutTemplateLocalServiceUtil. getLayoutTemplates(theme.getThemeId()); layoutTemplates = PluginUtil.restrictPlugins (layoutTemplates, user); LayoutTypePortlet selLayoutTypePortlet = (LayoutTypePortlet) selLayout.getLayoutType(); Group group = selLayout.getGroup(); String groupSectionName = group.getName()+ "_" + selLayout.getName(locale)+"_";

For More Information: www.packtpub.com/liferay-portal-5-2-systems-development/book
Managing Pages
[ 174 ]
if(selLayout.getParentLayoutId() != LayoutConstants. DEFAULT_PARENT_LAYOUT_ID){ List parents = selLayout.getAncestors(); String parentName = ((Layout)parents.get(parents.size()- 1)).getName(locale); groupSectionName = group.getName()+ "_" + parentName +"_"; } %> <input name="groupSectionName" type="hidden" value="<%= groupSectionName %>" /> <% int index = 0; for (int i = 0; i < layoutTemplates.size(); i++) { LayoutTemplate layoutTemplate = (LayoutTemplate) layoutTemplates.get(i); String key = PropsUtil.get(groupSectionName + layoutTemplate.getLayoutTemplateId()); if(key != null){ %> <c:if test="<%= (index % CELLS_PER_ROW) == 0 %>"> <tr></c:if> <td align="center" width="<%= 100 / CELLS_PER_ROW %>%"> <img onclick="document.getElementById('layoutTemplateId <%= i %>').checked = true;" src="<%= layoutTemplate.getContextPath() %> <%= layoutTemplate.getThumbnailPath() %>" /><br /> <input <%= selLayoutTypePortlet.getLayoutTemplateId(). equals(layoutTemplate.getLayoutTemplateId()) ? "checked" : "" %> id="layoutTemplateId<%= i %>" name="layoutTemplateId" type="radio" value="<%= layoutTemplate.getLayoutTemplateId() %>" /> <label for="layoutTemplateId<%= i %>"> <%= layoutTemplate.getName() %> </label> </td> <c:if test="<%= (index % CELLS_PER_ROW) == (CELLS_PER_ROW - 1) %>"> </tr></c:if> <% index++; } } %> </table> <input class="form-button" type="submit" value="<liferay-ui:message key="apply" />" style="margin: 10px" /></c:if>
As shown in the code above, it uses the fi rst-level navigations as sections. The children pages of a section will share the same group of layout templates.

For More Information: www.packtpub.com/liferay-portal-5-2-systems-development/book
Chapter 5
[ 175 ]
In short, a layout is an instance of a single page, which is composed of one or more portlets arranged inside various columns. Layout templates defi ne the ways in which portlets will be arranged on a page. You, as a developer, can group the layout templates fl exibly and, further, dynamically apply the layout templates for layout pages.
Tracking pages We have built a lot of pages as well. Suppose we want to track all pages using Google Analytics (GA), for example, in order to show how to extend Liferay portal's out of the box tracking ability. Confi guring Liferay portal to work with Google Analytics is pretty simple. The following are the main steps to set up Google Analytics:
Google Analytics generates detailed statistics about the visitors to a web site. Refer to http://www.google.com/analytics.
First, get an account from Google Analytics—UA-5808951-1, for example. You may have your own account number. If you want to use a different one, simply replace the account number.
Then, let's customize the bottom-ext.jsp fi le in the /ext/ext-web folder as follows:
1. Create a /common/themes folder page in the /ext/ext-web/docroot/html folder.
2. Create a JSP fi le bottom-ext.jsp in the /ext/ext-web/docroot/html/common/themes folder and open it.
3. Add the following lines at the end of this fi le and save it:
<script type="text/javascript"> var gaJsHost = (("https:" == document.location.protocol) ? "https://ssl." : "http://www."); document.write(unescape("%3Cscript src='" + gaJsHost + "google- analytics.com/ga.js' type='text/javascript'%3E%3C/script%3E"));</script> <script type="text/javascript"> var pageTracker = _gat._getTracker("UA-5808951-1"); pageTracker._trackPageview();</script>
As shown in the code above, it uses a single Google Analytics account UA-5808951-1 to track the entire portal.
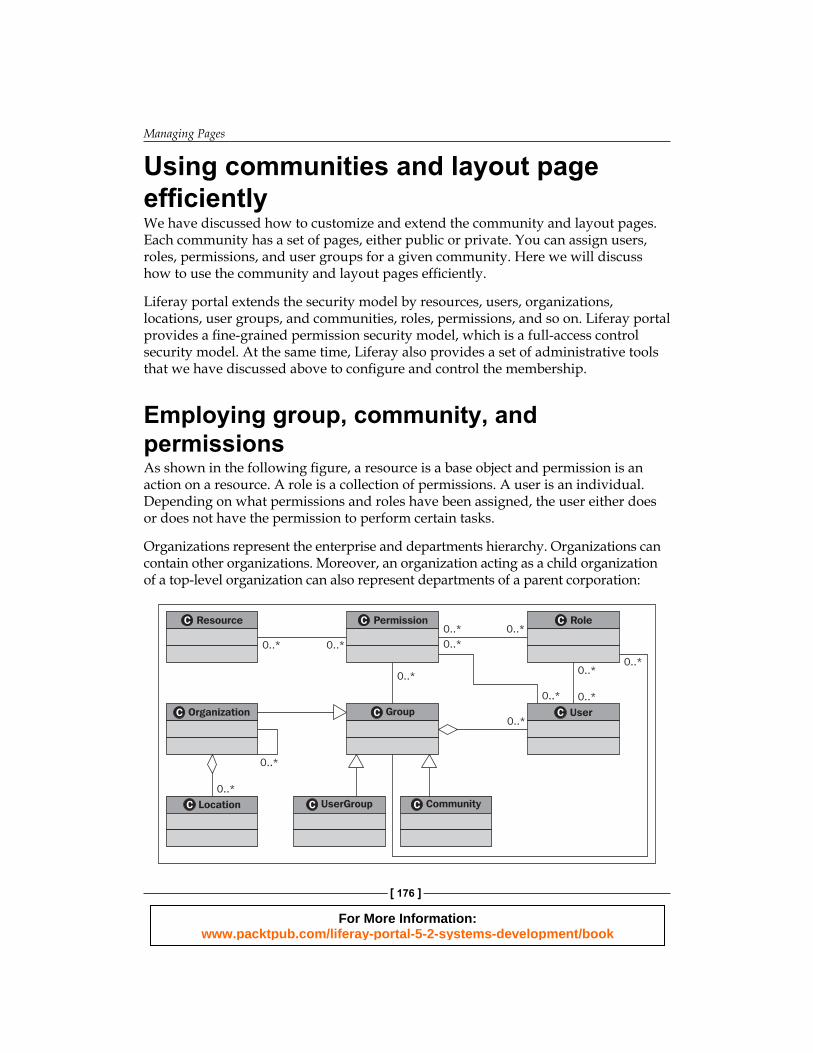
For More Information: www.packtpub.com/liferay-portal-5-2-systems-development/book
Managing Pages
[ 176 ]
Using communities and layout page efficiently We have discussed how to customize and extend the community and layout pages. Each community has a set of pages, either public or private. You can assign users, roles, permissions, and user groups for a given community. Here we will discuss how to use the community and layout pages effi ciently.
Liferay portal extends the security model by resources, users, organizations, locations, user groups, and communities, roles, permissions, and so on. Liferay portal provides a fi ne-grained permission security model, which is a full-access control security model. At the same time, Liferay also provides a set of administrative tools that we have discussed above to confi gure and control the membership.
Employing group, community, and permissions As shown in the following fi gure, a resource is a base object and permission is an action on a resource. A role is a collection of permissions. A user is an individual. Depending on what permissions and roles have been assigned, the user either does or does not have the permission to perform certain tasks.
Organizations represent the enterprise and departments hierarchy. Organizations can contain other organizations. Moreover, an organization acting as a child organization of a top-level organization can also represent departments of a parent corporation:
0..* 0..*
0..*
0..*
0..*0..*
0..*
0..*
0..*
0..*0..*
0..*
0..*
OrganizationC
ResourceC PermissionC RoleC
GroupC UserC
CommunityCUserGroupCLocationC

For More Information: www.packtpub.com/liferay-portal-5-2-systems-development/book
Chapter 5
[ 177 ]
A Location is a special organization with one, and only one, associated parent organization and without an associated child organization. Organizations can have any number of locations and suborganizations. Both roles and individual permissions can be assigned to organizations (locations or suborganizations). By default, locations and suborganizations inherit permissions from their parent organization.
A community is a special group. It may hold a number of users who share common interests. Both roles and individual permissions can be assigned to communities.
Finally, a user group is a special group with no context, which may hold a number of users. Both roles and individual permissions can be assigned to user groups, and every user who belongs to that user group will receive the role or permission.
Using communities, layout pages, comments, and ratings As shown in the following fi gure, a community is made up of a set of pages, including private pages and public pages. You can use a community (for example Book Street) to represent a web site (for example www.bookpubstreet.com), where the public pages represent the public site for public end users in the frontend, and the private pages are employed to present web content management for content creators, content publishers, and content editors in the backend.
A layout page consists of a couple of portlets, including the Journal Content portlet. More interestingly, a layout page may have page comments and associated page ratings. You can specify the comments and ratings in the journal articles.
0..* 0..*
0..1
0..*
0..*Ext GroupC
Group - CommunityC Layout - PageC CommentsC
RatingsC
0..1
Ext LayoutC
For More Information: www.packtpub.com/liferay-portal-5-2-systems-development/book
Managing Pages
[ 178 ]
Extending the community and layout pages We have customized and extended the communities and layout pages in the Ext. At the same time, we did not add columns to Liferay Group_ table and Layout table. As shown in the preceding fi gure, we have just created additional tables (for example ExtGroup and ExtLayout) with a 1:1 relationship with the Group_ table and Layout table, respectively. With this, we will prevent the upgrade risk properly and make the extension reusable.
Users can belong to any number of communities and inherit permissions and roles from them. Notice that in the Group_ table, there is class-Name and class-PK column. If these columns are blank, then the record is a normal community. If class-Name is com.liferay.portal.model.User, then the record represents a private user community. This is used only for Power Users. If the class-Name is com.liferay.portal.model.Organization, then the record represents an organization or location. If the class-Name is com.liferay.portal.model.UserGroup, then the record represents a user group. For instance, if both class-Name and class-PK columns are blank in Group_, it means that this is a normal community, for example Book Street.
SummaryThis chapter fi rst discussed how to customize and extend the Communities portlet. Then it introduced how to customize the Manage Pages portlet. Accordingly, it also introduced how to customize page management with more features such as adding localized features, adding tags, employing layout templates dynamically, tracking pages, and so on. Finally, it addressed how to use the Communities and Layout Pages effi ciently.
In the next chapter, we're going to customize the WYSIWYG editor.

For More Information: www.packtpub.com/liferay-portal-5-2-systems-development/book
Where to buy this book You can buy Liferay Portal 5.2 Systems Development from the Packt Publishing website: http://www.packtpub.com/liferay-portal-5-2-systems-development/book
Free shipping to the US, UK, Europe and selected Asian countries. For more information, please read our shipping policy.
Alternatively, you can buy the book from Amazon, BN.com, Computer Manuals and most internet book retailers.
www.PacktPub.com