light plot deconstructed - nemetschek groupdownload2cf.nemetschek.net/ · 2013-04-29 · by gregg...
TRANSCRIPT
by Gregg Hillmar | fifth editionwritten for version 2013
Light Plot Deconstructed for Vectorworks Spotlight
SAMPLE

Light Plot Deconstructed | © 2013 Gregg Hillmar
gregg [email protected]
© 2009, 2010, 2011, 2012, 2013 gregg hillmarAll rights reserved. No part of this book may be reproduced or transmitted in any form or by any means, electronic or mechanical, including photocopying, recording, faxing, e-mailing, posting online, or by any information storage and retrieval system, without prior written permission of the publisher. Published in the United States of America.
Vectorworks and Renderworks are registered trademarks of Nemetschek Vectorworks, Inc., in the United States and other countries. Windows is a registered trademark of Microsoft Corporation in the United States and other countries. Macintosh is a trademark of Apple Computer, Inc., registered in the United States and other countries. Adobe, Acro-bat, and Reader are registered trademarks of Adobe Systems in the United States and other countries.
The information in this book is distributed on an “as is” basis, without warranty. While every precaution has been taken in the preparation of this book, neither the author nor Nemetschek Vectorworks shall have any liability to any person or entity with respect to any loss or damage caused or alleged to be caused directly or indirectly by the infor-mation contained in this book or by the computer software described in it.
For more Vectorworks training information, or to purchase more copies of this book, please visit www.vectorworks.net/training, or call us at (410) 290-5114.
SAMPLE
©2013 Gregg Hillmar | Contents i
Table of Contents
Introduction .....................................................................................1
Vectorworks ....................................................................................3
What’s New ....................................................................................5
In Ye Olde Days ..............................................................................9
Vectorworks Basics ......................................................................13Opening a New Document .............................................................................................13Workspaces ....................................................................................................................13Palettes ...........................................................................................................................14Customizing Workspaces ...............................................................................................16
Preferences ..................................................................................21Program Preferences .....................................................................................................21Document Preferences ...................................................................................................24Dimensions .....................................................................................................................24
Grids .............................................................................................27
Layers ...........................................................................................31
Design Layers ...............................................................................33Name ..............................................................................................................................34Scale ...............................................................................................................................34Stacking Order ................................................................................................................34Stories ............................................................................................................................34Opacity ...........................................................................................................................35Renderworks Background ..............................................................................................35Color ...............................................................................................................................35Saved Views and Viewport Buttons ................................................................................35
Sheet Layers. ...............................................................................37Page Setup .....................................................................................................................38
SAMPLE

ii Light Plot Deconstructed | © 2013 Gregg Hillmar
Classes .........................................................................................41
Palettes .........................................................................................45Object Info Palette ..........................................................................................................45Resource Browser Palette ..............................................................................................45Palette Arrangement .......................................................................................................46
Saved View ...................................................................................49
Default Template ...........................................................................49
Vectorworks Spotlight ..................................................................51Architecture and Scenery ...............................................................................................51Import Vectorworks File ..................................................................................................51Import as Design Layer Viewport....................................................................................52Import Image Files ..........................................................................................................55Import PDF Files .............................................................................................................56Import DXF/DWG/DWF Files ..........................................................................................573D Files ..........................................................................................................................58Additional Saved Views ..................................................................................................59
Lighting Positions .........................................................................61Curved Lighting Positions ...............................................................................................65Truss Lighting Positions ..................................................................................................66
Focus Areas ..................................................................................69
Instrumentation .............................................................................75Placing Instrumentation ..................................................................................................78Instrument Insertion ........................................................................................................79Beam and Field Display ..................................................................................................813D Instrumentation .........................................................................................................84Photometer Tool..............................................................................................................86Moving Lights .................................................................................................................87MultiCircuit Instruments ..................................................................................................87Instrument Attribute Choices ..........................................................................................88Position Awareness ........................................................................................................89
SAMPLE
© 2013 Gregg Hillmar | Contents iii
Label Legends ..............................................................................91
Accessories ..................................................................................95
Aligning Instruments .....................................................................99
Twoferring ...................................................................................101
Vertical Positions and Instruments .............................................103
Paperwork ..................................................................................107
Lightwright Data Exchange .........................................................109
Viewports ....................................................................................113Cardboards ................................................................................................................... 119
Printing .......................................................................................121
The Plot, Printed .........................................................................123
Third-Party Products ...................................................................125
Acknowledgments ......................................................................127
SAMPLE
© 2013 Gregg Hillmar | Introduction 1
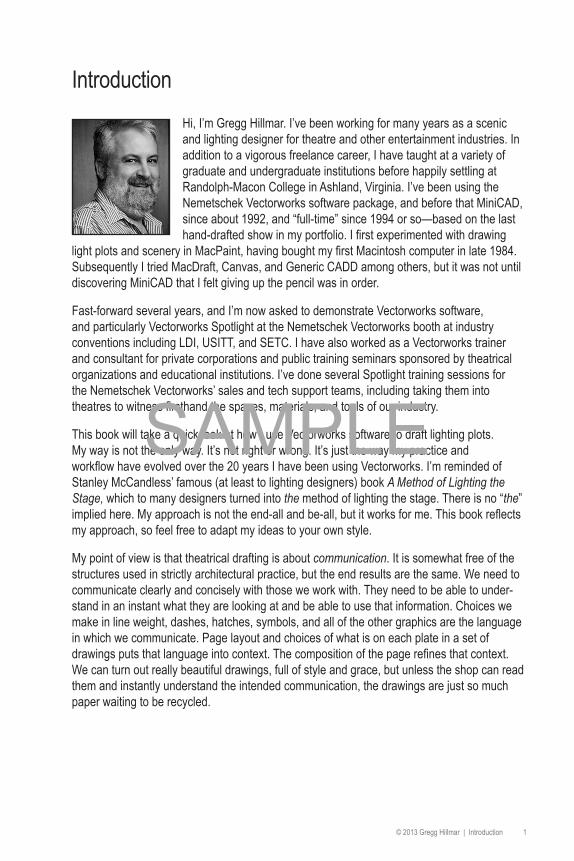
IntroductionHi, I’m Gregg Hillmar. I’ve been working for many years as a scenic and lighting designer for theatre and other entertainment industries. In addition to a vigorous freelance career, I have taught at a variety of graduate and undergraduate institutions before happily settling at Randolph-Macon College in Ashland, Virginia. I’ve been using the Nemetschek Vectorworks software package, and before that MiniCAD, since about 1992, and “full-time” since 1994 or so —based on the last hand-drafted show in my portfolio. I first experimented with drawing
light plots and scenery in MacPaint, having bought my first Macintosh computer in late 1984. Subsequently I tried MacDraft, Canvas, and Generic CADD among others, but it was not until discovering MiniCAD that I felt giving up the pencil was in order.
Fast-forward several years, and I’m now asked to demonstrate Vectorworks software, and particularly Vectorworks Spotlight at the Nemetschek Vectorworks booth at industry conventions including LDI, USITT, and SETC. I have also worked as a Vectorworks trainer and consultant for private corporations and public training seminars sponsored by theatrical organizations and educational institutions. I’ve done several Spotlight training sessions for the Nemetschek Vectorworks’ sales and tech support teams, including taking them into theatres to witness firsthand the spaces, materials, and tools of our industry.
This book will take a quick look at how I use Vectorworks software to draft lighting plots. My way is not the only way. It’s not right or wrong. It’s just the way my practice and workflow have evolved over the 20 years I have been using Vectorworks. I’m reminded of Stanley McCandless’ famous (at least to lighting designers) book A Method of Lighting the Stage, which to many designers turned into the method of lighting the stage. There is no “the” implied here. My approach is not the end-all and be-all, but it works for me. This book reflects my approach, so feel free to adapt my ideas to your own style.
My point of view is that theatrical drafting is about communication. It is somewhat free of the structures used in strictly architectural practice, but the end results are the same. We need to communicate clearly and concisely with those we work with. They need to be able to under-stand in an instant what they are looking at and be able to use that information. Choices we make in line weight, dashes, hatches, symbols, and all of the other graphics are the language in which we communicate. Page layout and choices of what is on each plate in a set of drawings puts that language into context. The composition of the page refines that context. We can turn out really beautiful drawings, full of style and grace, but unless the shop can read them and instantly understand the intended communication, the drawings are just so much paper waiting to be recycled.
SAMPLE
2 Light Plot Deconstructed | © 2013 Gregg Hillmar
This book will certainly reflect my drafting style as taught to me primarily by William H. Lockey (University of Richmond), and John Rothgeb and David Nancarrow (University of Texas, Austin). My style has been further refined by many years of drafting scenery and lighting for the theatre and working with myriad theatre artists who also draft. From them, I’ve borrowed what I like and vowed never do what I don’t like. Note that this is not a book about drafting style. There are better books out there for that; some are CAD-specific, but the ones I like are not.
It is also worth noting that the output this book is geared toward is a 2D plot and paperwork. While we will delve into the 3D world of the Vectorworks program as it assists us in creating the plot, that plot, printed, is our final goal. And a plot, printed, is a 2D representation. 3D computer modeling, and lighting models, is perhaps the subject of another book. If you're interested, start by visiting Nemetschek Vectorworks training guide page on their website and get Kevin Lee Allen's excellent guide, Entertainment and Lighting Design with Vectorworks Spotlight.
Finally, there is not any discussion of DESIGN choices here; you’re on your own for those. We need to remember that the output that this book is geared toward (the plot) is NOT art, but communication. Art happens in the theatre. Perhaps that is best described, even all these years later, by Robert Edmond Jones in “Light and Shadow in the Theatre,” in Chapter 6 of The Dramatic Imagination (1941):
We handle our spotlights and gelatines and dimmers [...and CAD software...] in the theatre with the same delight and the same sense of mastery with which we drive a high-powered automobile or pilot an aeroplane. But at rare moments, in the long quiet hours of light-rehearsals, a strange thing happens. We are overcome by a realization of the livingness of light. As we gradually bring a scene out of the shadows, sending long rays slanting across a column, touching an outline with color, animating the scene moment by moment until it seems to breathe, our work becomes an incantation. We feel the presence of elemental energies (Jones, p. 113).
While we are studying to perfect ourselves in the use of the intricate mechanism of stage lighting we are learning to transcend it. Slowly, slowly, we begin to see lighting in the theatre, not only as an exciting craft but as an art, at once visionary and exact, subtle, powerful, infinitely difficult to learn. We begin to see that a drama is not an engine, running at full speed from the overture to the final curtain, but a living organism. And we see light as a part of that livingness (Jones, p. 114).
And, “Lucidity, penetration, awareness, discovery, inwardness, wonder…. These are the qualities we should try to achieve in our lighting” (Jones, p. 121).
And perhaps best, “Does this mean that we are to carry images of poetry and vision and high passion in our minds while we are shouting out orders to electricians on ladders in light-rehearsals? Yes. This is what it means.” (Jones, p. 128).
SAMPLE
© 2013 Gregg Hillmar | Vectorworks 3
VectorworksVectorworks software has had a long and storied life. First introduced as "MiniCAD" in 1985 by Diehl Graphsoft, the program was originally created by Richard Diehl who, as legend has it, wrote code while sitting at his kitchen table. Initially a Macintosh-only application, the program became cross-platform in 1996. Its evolution continued, and the software was renamed "Vectorworks" in 1999. With the 2000 merger of Diehl Graphsoft, Inc., and Nemetschek AG of Munich, Germany, into Nemetschek Vectorworks, Inc., the company became Nemetschek, AG's largest U.S. subsidiary.
In 2001, Nemetschek Vectorworks introduced several separate industry-specific products. The software is now available as: Vectorworks Fundamentals for basic design, Architect for building design, Landmark for landscape design, and Spotlight for entertainment design. The Vectorworks Designer product includes the features and functionality of all of the industry-specific programs combined into one package, and the Renderworks application, featuring the CINEMA 4D render engine, can be added to each to produce high-quality presentations.
Early in its history, Diehl Graphsoft identified theatrical design as a viable market and is the only major publisher of CAD software that I am aware of who intentionally hired developers with theatre backgrounds to support theatrical applications of that software. In the mid-1990s, Diehl Graphsoft hired Frank Brault to develop some theatre-specific macros and symbols. Brault came from a professional theatre and dance background with lighting experience. The Lighting Toolkit package grew out of his initial work. Sometime thereafter, Kevin Moore and Kevin Linzey were hired, first as student interns and then full-time. Kevin Moore took over Spotlight development. Both Kevins had theatre backgrounds, and both have worked for me on various shows and events. Kevin Moore eventually left Nemetschek to return to event, production, and management work, and Kevin Linzey moved into the lead Spotlight developer role. Kevin Linzey does still occasionally work in theatres while keeping his “day job” with Nemetschek Vectorworks. The people working on and with Spotlight know theatre as well as software development. The ongoing commitment to theatre on the corporate level and the individual level is a huge advantage for all of us.
As noted earlier, MiniCAD was developed initially for the Macintosh. More than a decade after the first PC release, Vectorworks remains a cross-platform program. It works equally well on a PC as it does on a comparable Macintosh. There are no real programming differences. Files created on one can be opened and used on the other and traded back and forth with no issues. There are some minor differences, mainly visual, created by how the two operating systems work. As an example, in the PC world, palettes can be floating or “docked” into the program’s window. On the Macintosh, the drawing window and all the palettes are always separate floating windows. I should mention that all screenshots used here are from the Macintosh version.
SAMPLE

4 Light Plot Deconstructed | © 2013 Gregg Hillmar
SAMPLE
© 2013 Gregg Hillmar | What's New 5
What’s NewThe first edition of Light Plot Deconstructed came out during the Vectorworks 2009 “model year.” I stated then that the concepts and general usage of the book were not specific to one version of Vectorworks. I would still say that, with some modification for changes in workspaces and tools, this book should work fine with many versions of Vectorworks. This book is more about approach and is not a step-by-step tutorial.
That said, I have upgraded this edition to reflect software updates in Vectorworks 2013.
A criticism I hear often is that Vectorworks' yearly update makes changes happen too fast for users to keep up and creates problems with workflow. Having been using the software for a few years now (about 20), I'd disgree. I used to see major upgrades come out every 18 months or so, with "point" upgrades happening in the middle of that cycle. A yearly cycle means that developers have a longer time to work on improvements, and a longer time for the large crew of beta testers to work with the software in real-world situations. This means LESS chance of problems with the upgrade and a better chance that upgrades will IMPROVE the usability of the program.
The Vectorworks 2013 update is a great case-in-point. There are dozens and dozens of improvements in the program, and many of them will greatly improve the workflow of anyone working in the theatre.
As I've said before, a major change in the Vectorworks software over the last several years is the continuing evolution of the 3D model as the basis for all views and details. This presents an interesting dichotomy in that the desired output in this book is a 2D drawing—the plot, printed.
A light plot is a particular 2D view of a 3D space. It is not a simple top view, and it uses symbols, not real objects, to represent items in the view. The lights represented in a typical plot are not a 3D representation of that light; they are a 2D symbol with specific information about that light noted on the plot.
These objects are hybrid objects in that they have a 3D component and a different 2D component. A label legend is used in the 2D view to display particular information associated with each light.
In Vectorworks 2013, the lighting device object has been completely rethought and re-engi-neered. The new objects, while not looking any different on the plot, will redraw substantially faster than the old version. This alone will improve any designer's workflow. They have some new tricks, too. Through preferences or by class, lighting devices can now be colored as desired, a much-requested improvement.
The underlying parameters for information associated with each lighting device has also been re-engineered in this update. Among other benefits (speed, unlimited fields in Label Legends), this update will allow complete customization of these parameters. Custom fields can now be added, and existing fields can be renamed and reordered in the Object Information Pallette and dialog boxes. This is a tremendous improvement.
SAMPLE
6 Light Plot Deconstructed | © 2013 Gregg Hillmar
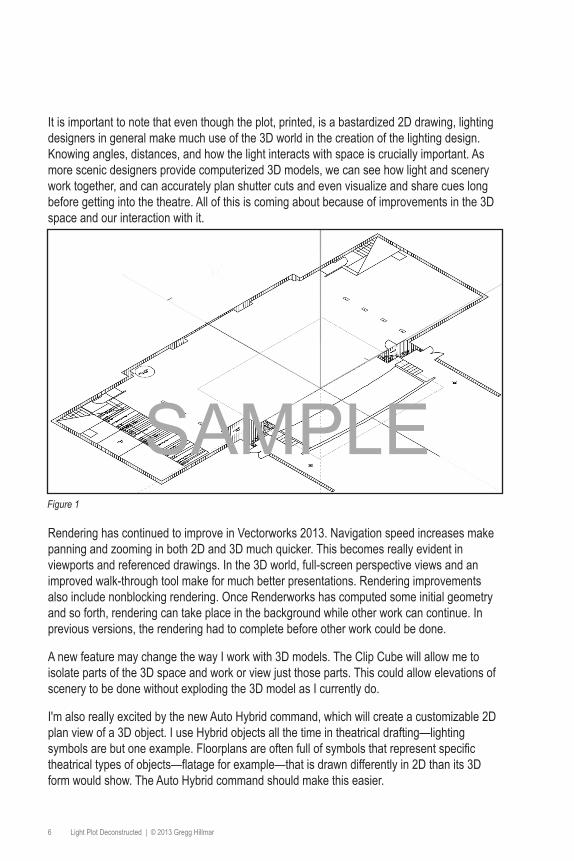
It is important to note that even though the plot, printed, is a bastardized 2D drawing, lighting designers in general make much use of the 3D world in the creation of the lighting design. Knowing angles, distances, and how the light interacts with space is crucially important. As more scenic designers provide computerized 3D models, we can see how light and scenery work together, and can accurately plan shutter cuts and even visualize and share cues long before getting into the theatre. All of this is coming about because of improvements in the 3D space and our interaction with it.
Rendering has continued to improve in Vectorworks 2013. Navigation speed increases make panning and zooming in both 2D and 3D much quicker. This becomes really evident in viewports and referenced drawings. In the 3D world, full-screen perspective views and an improved walk-through tool make for much better presentations. Rendering improvements also include nonblocking rendering. Once Renderworks has computed some initial geometry and so forth, rendering can take place in the background while other work can continue. In previous versions, the rendering had to complete before other work could be done.
A new feature may change the way I work with 3D models. The Clip Cube will allow me to isolate parts of the 3D space and work or view just those parts. This could allow elevations of scenery to be done without exploding the 3D model as I currently do.
I'm also really excited by the new Auto Hybrid command, which will create a customizable 2D plan view of a 3D object. I use Hybrid objects all the time in theatrical drafting—lighting symbols are but one example. Floorplans are often full of symbols that represent specific theatrical types of objects—flatage for example—that is drawn differently in 2D than its 3D form would show. The Auto Hybrid command should make this easier.
Figure 1
SAMPLE
© 2013 Gregg Hillmar | What's New 7
Since almost everything referenced in this book deals with the plot as a 2D document and most tools are used in Top/Plan view (the “2D” view) when creating the plot, many of these changes are not immediately noticeable. However, the way lighting designers use the 3D aspects available in Vectorworks has changed as the ease of working in 3D improves. Scenic designers, of course, have much more use for many of the 3D aspects. As we receive files from them, we’ll be able to put some of the 3D technology to use.
Visit the Nemetschek website for a complete overview of the changes in Vectorworks 2013 and earlier versions.
In this book, illustrations, menu commands, and tool references have been updated as needed to reflect Vectorworks 2013. Most of the tools and techniques I use are available in Spotlight and Renderworks added to Fundamentals, though my copy of the software is a full Designer version. I also use several third-party scripts and macros, which are listed at the back of this book. However, most techniques I discuss will be available to all Vectorworks Spotlight users with Renderworks.
SAMPLE

8 Light Plot Deconstructed | © 2013 Gregg Hillmar
SAMPLE
© 2013 Gregg Hillmar | In Ye Olde Days 9
In Ye Olde Days…In “Ye Olde Days,” using a drafting machine, a parallel, or a T-square, we carefully squared a piece of vellum onto our drafting boards and taped it into place. We then grabbed our lead holder or mechanical drafting pencil, and began drafting…
Ah, but what and where?
While designing scenery, most often I’d start by squaring a bluelined print of the theatre floorplan to the drafting board and then lay a piece of vellum or, if still thinking, a piece of butterpaper over that. Butterpaper was much cheaper than vellum and, so, easily thrown away. Based on quick thumbnail sketches, rough sketchy workings of the floorplan would emerge. Tape down another piece of butterpaper, copy up the good stuff, and keep thinking on paper. Then, slap the vellum on top of the stack on the drafting board, and trace up the architecture and the rough set. Add the titleblock, and it’s done.
Not quite. The floorplan is pulled off the board, another piece of vellum squared down, and elevations are started. Hmmm. Does that door look better if it is off center in the wall? Does that reflect the character of the inhabitants better? Sure, let’s change it! So, we finish roughing in the elevations on that one page. Pull it up, and lay the floorplan back on the drafting board. Pull out the electric eraser, and move the door on the floorplan. Pull up the floorplan, lay down another sheet, and work those elevations. Hmmm. What can the audience see through that window? What can audience members in the balcony see? Pull up the elevation, lay down a blueline of the center line section of the theatre and a piece of vellum, and rough in a section of the set. If we move that wall 6" further downstage, the masking can work with the existing linesets. Finish roughing it in, pull the section off the board, put the floorplan back down, dig out the eraser, and move the wall on the floorplan. Pull that up, tape the elevation back down, and…
Well, only sometimes was the process quite so convoluted, but that was the thought process.
And deciding what each plate looked like was important. Plates of drafting are methods of communication, and composition of the plates was important in that communication. Leading the eye to the important information is part of the job of the composition. Which elevations would fit on which plate with which other elevation? Or with which detail? And where on the plate was best? Balance the tendency to read from top left with the reality of not flipping a whole set of drawings, stapled, all the way open. Top right becomes the first seen, though the placement of the titleblock may influence that. So, just like in any “artistic” composition, I use other elements to control emphasis and visual flow. Decisions about what would be on each plate needed to be made at the beginning of the process, and any changes in those decisions meant tedious redrafting of the entire plate(s).
Drawing a light plot was a little less complicated. I usually started with the floorplan of the set and the architecture of the theatre. In a multiset show, the floorplans might be on different sheets, so again I would have multiple layers of vellum on the drafting board. The section drawing and a composite front elevation of the set were developed and kept close at hand to check the angles at which light was hitting the performer.
SAMPLE