lilypad arduino and circuitblocks: making … · click on “tools” then “ardublock” to...
TRANSCRIPT
Project Name 1 1 1 1
LILYPAD ARDUINO AND C IRCUITBLOCKS: MAKING A LED BLINK
Duration: 15-20 minutes Institution: Science Museum of Minnesota Skill level/Age Level: 8-adult Group size: Individual or in teams of two
This first project in the series shows you how to make a LED blink on an Arduino, and then shows you how to connect it to an external LED with alligator clips.
This activity introduces a great way to get started with the popular Arduino microcontroller by connecting it to CircuitBlocks – a make-it-yourself set of electronic “blocks”. CircuitBlocks essentially are electronic components glued to wood blocks and soldered to nails. You can learn how to make your own here: https://snapguide.com/guides/make-circuit-blocks/
This project and the rest of the series leads you through introducing the Arduino hardware, the programming environment and building simple circuits you control with the Arduino LilyPad – a variation of the Arduino that is used for e-textiles. In our circuits we connect things with alligator clips which make it very easy to quickly build and change. These projects also make it much easier for kids and adults to explore computer programming by using a graphical environment (while keeping the text-based programming available).
KEY CONCEPTS AND/OR SUBJECT AREA
Simple Circuits, Computer Programming, Robotics, Light
MATERIALS AND TOOLS
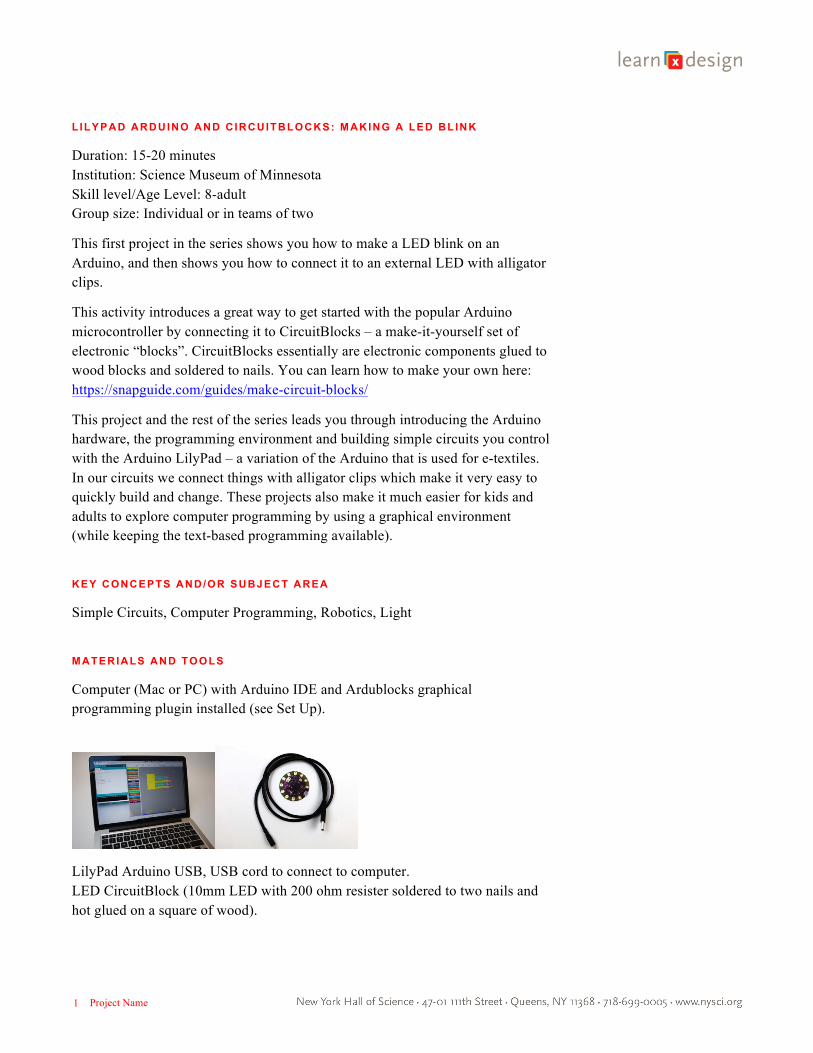
Computer (Mac or PC) with Arduino IDE and Ardublocks graphical programming plugin installed (see Set Up).
LilyPad Arduino USB, USB cord to connect to computer. LED CircuitBlock (10mm LED with 200 ohm resister soldered to two nails and hot glued on a square of wood).
Project Name 2 2 2 2
Alligator clips you’ll need two for this activity.
SET UP
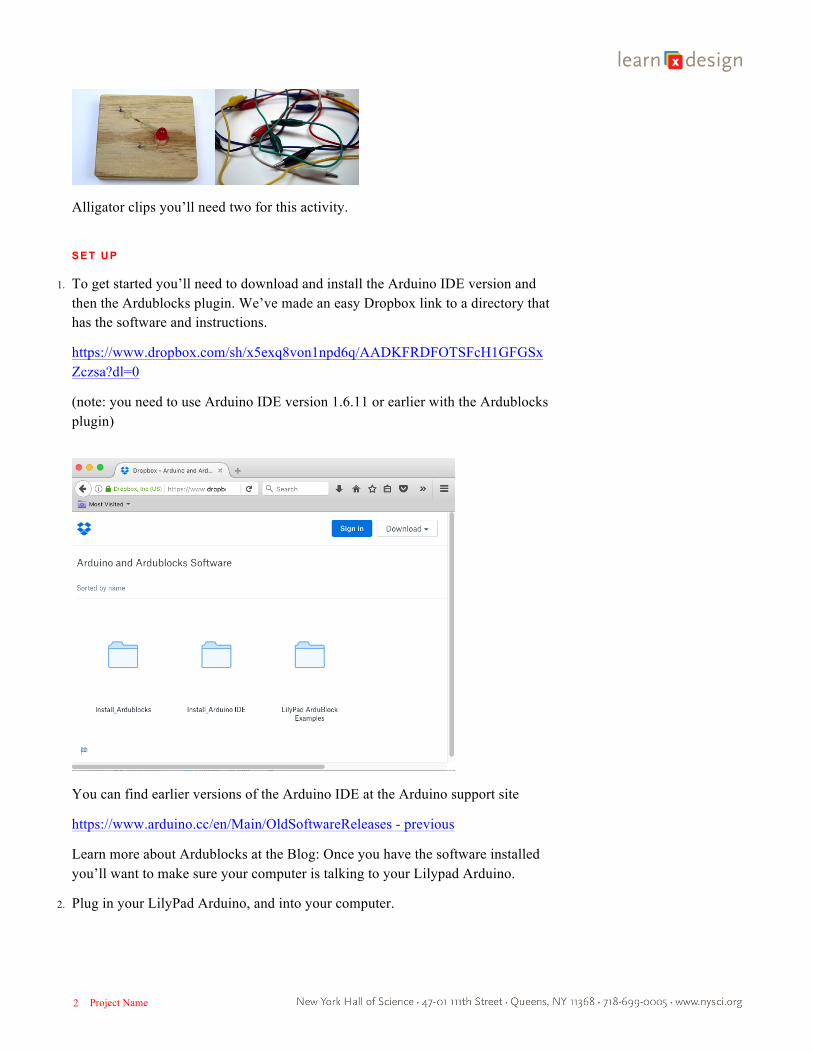
1. To get started you’ll need to download and install the Arduino IDE version and then the Ardublocks plugin. We’ve made an easy Dropbox link to a directory that has the software and instructions.
https://www.dropbox.com/sh/x5exq8von1npd6q/AADKFRDFOTSFcH1GFGSxZczsa?dl=0
(note: you need to use Arduino IDE version 1.6.11 or earlier with the Ardublocks plugin)
You can find earlier versions of the Arduino IDE at the Arduino support site
https://www.arduino.cc/en/Main/OldSoftwareReleases - previous
Learn more about Ardublocks at the Blog: Once you have the software installed you’ll want to make sure your computer is talking to your Lilypad Arduino.
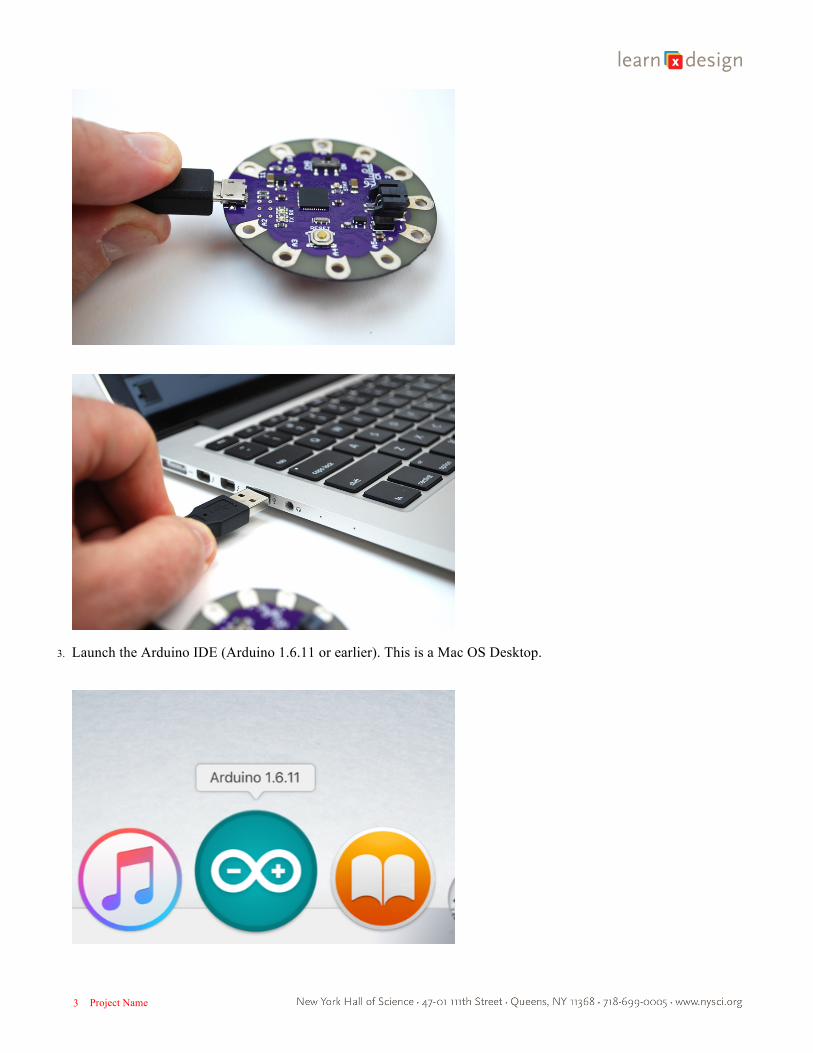
2. Plug in your LilyPad Arduino, and into your computer.
Project Name 3 3 3 3
3. Launch the Arduino IDE (Arduino 1.6.11 or earlier). This is a Mac OS Desktop.
Project Name 4 4 4 4
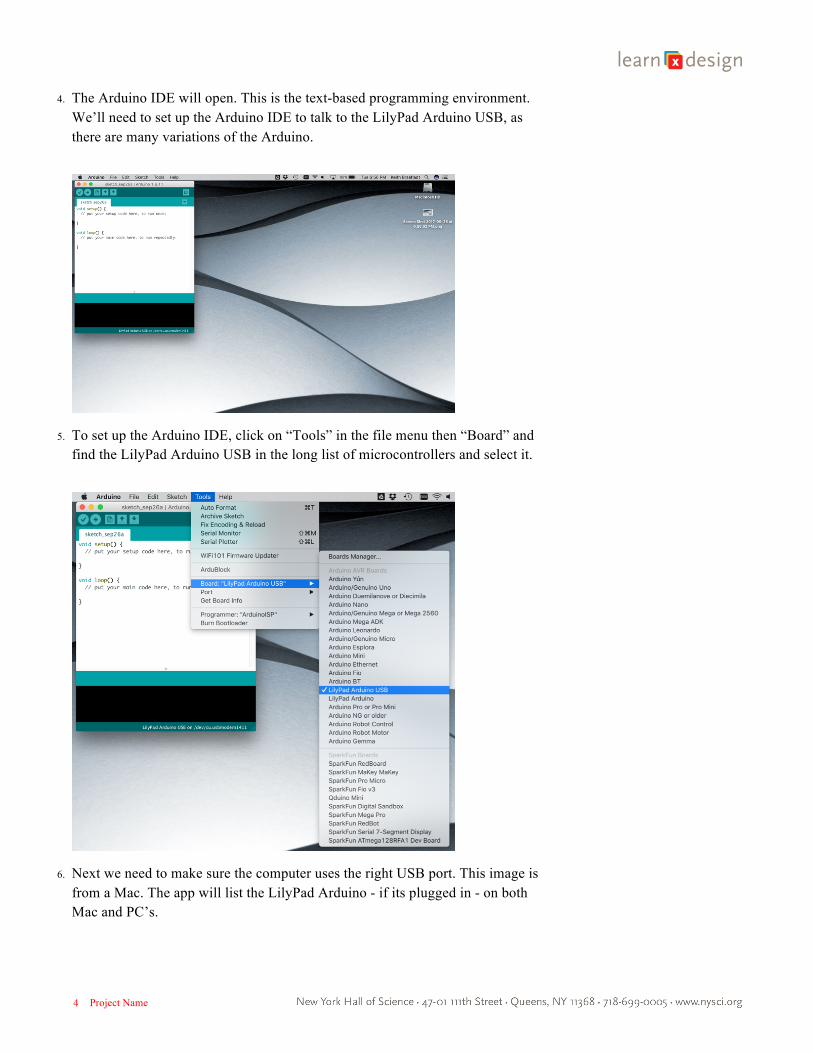
4. The Arduino IDE will open. This is the text-based programming environment. We’ll need to set up the Arduino IDE to talk to the LilyPad Arduino USB, as there are many variations of the Arduino.
5. To set up the Arduino IDE, click on “Tools” in the file menu then “Board” and find the LilyPad Arduino USB in the long list of microcontrollers and select it.
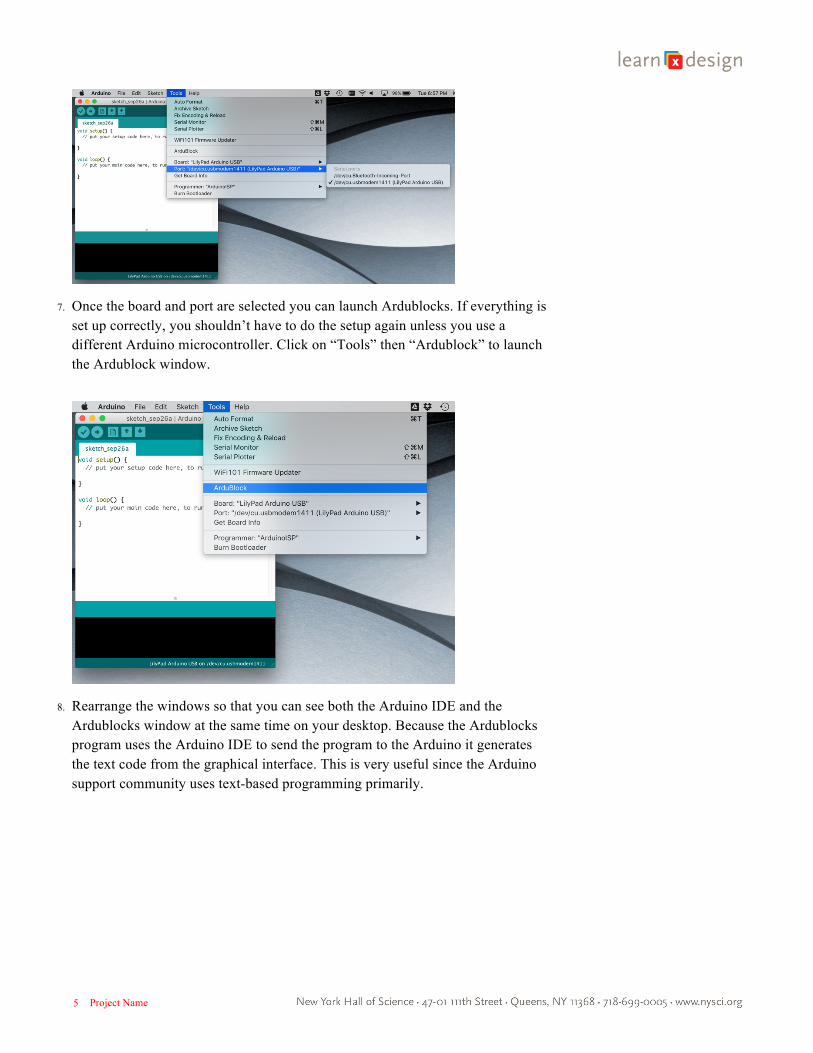
6. Next we need to make sure the computer uses the right USB port. This image is from a Mac. The app will list the LilyPad Arduino - if its plugged in - on both Mac and PC’s.
Project Name 5 5 5 5
7. Once the board and port are selected you can launch Ardublocks. If everything is set up correctly, you shouldn’t have to do the setup again unless you use a different Arduino microcontroller. Click on “Tools” then “Ardublock” to launch the Ardublock window.
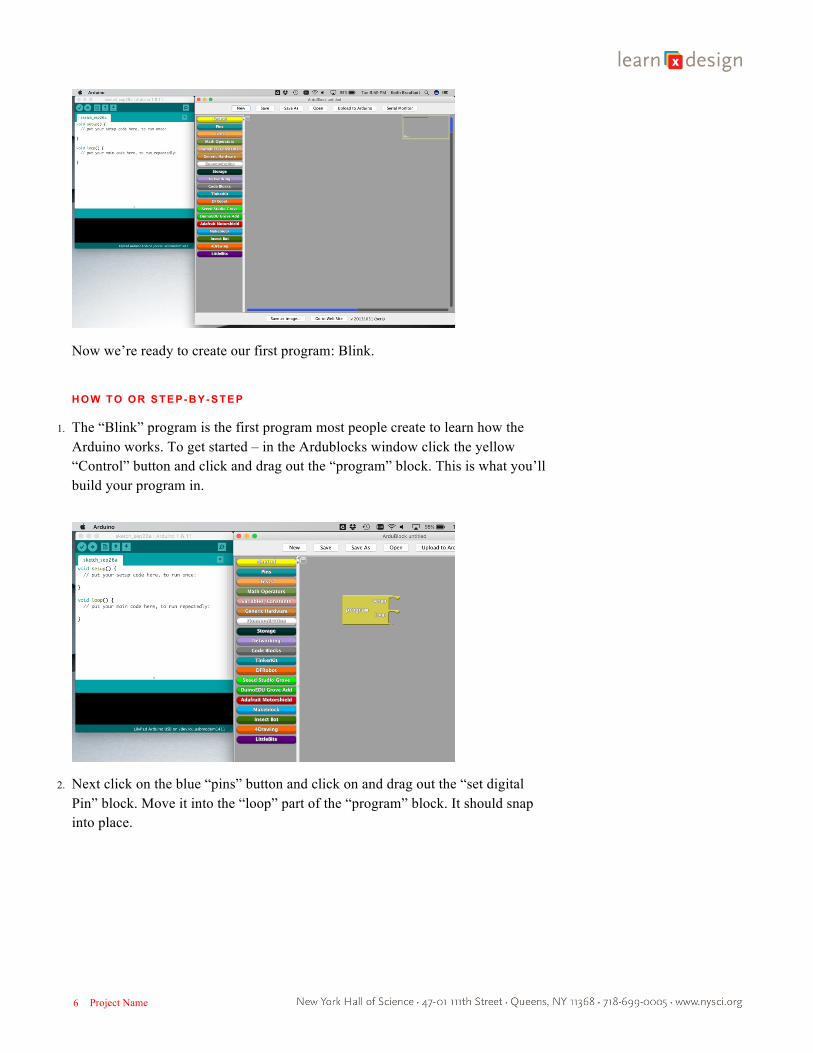
8. Rearrange the windows so that you can see both the Arduino IDE and the Ardublocks window at the same time on your desktop. Because the Ardublocks program uses the Arduino IDE to send the program to the Arduino it generates the text code from the graphical interface. This is very useful since the Arduino support community uses text-based programming primarily.
Project Name 6 6 6 6
Now we’re ready to create our first program: Blink.
HOW TO OR STEP-BY-STEP
1. The “Blink” program is the first program most people create to learn how the Arduino works. To get started – in the Ardublocks window click the yellow “Control” button and click and drag out the “program” block. This is what you’ll build your program in.
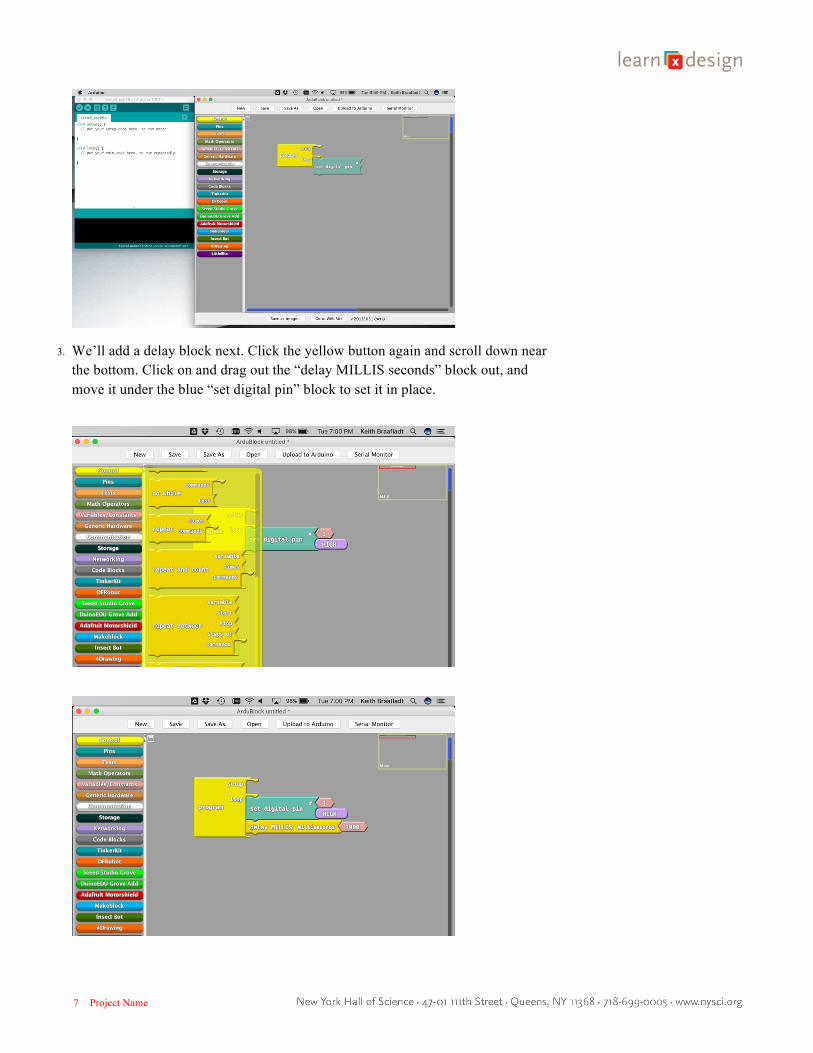
2. Next click on the blue “pins” button and click on and drag out the “set digital Pin” block. Move it into the “loop” part of the “program” block. It should snap into place.
Project Name 7 7 7 7
3. We’ll add a delay block next. Click the yellow button again and scroll down near the bottom. Click on and drag out the “delay MILLIS seconds” block out, and move it under the blue “set digital pin” block to set it in place.
Project Name 8 8 8 8
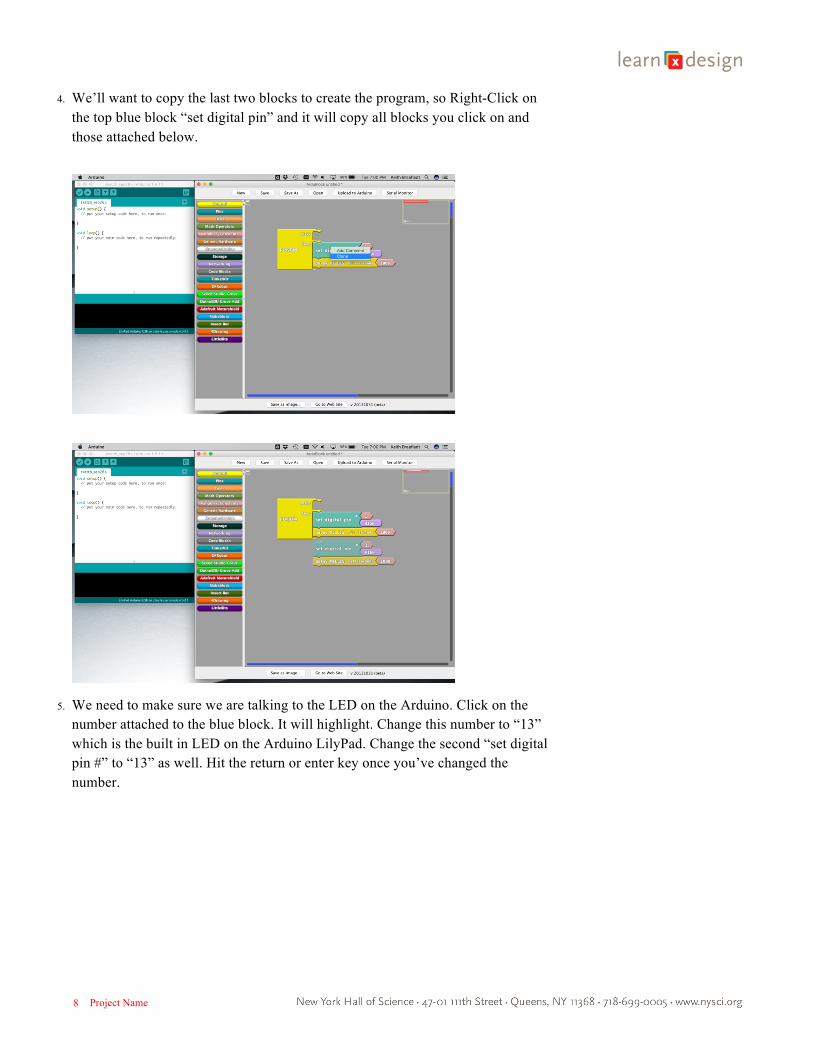
4. We’ll want to copy the last two blocks to create the program, so Right-Click on the top blue block “set digital pin” and it will copy all blocks you click on and those attached below.
5. We need to make sure we are talking to the LED on the Arduino. Click on the number attached to the blue block. It will highlight. Change this number to “13” which is the built in LED on the Arduino LilyPad. Change the second “set digital pin #” to “13” as well. Hit the return or enter key once you’ve changed the number.
Project Name 9 9 9 9
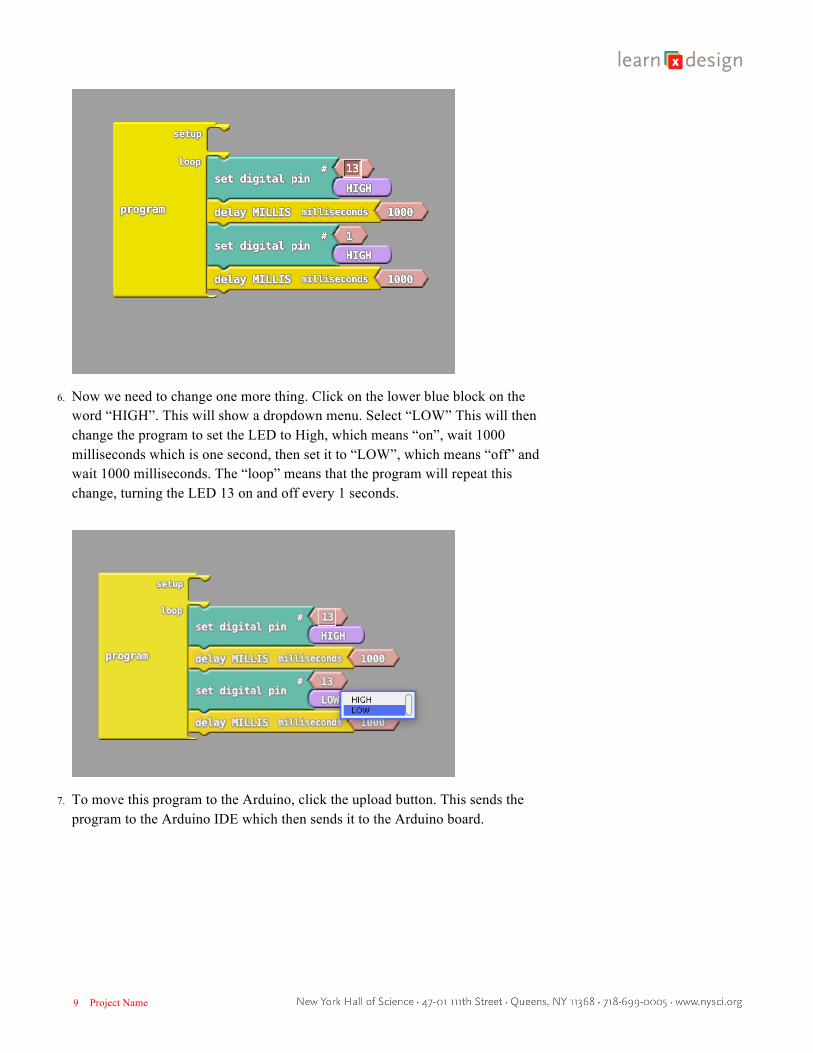
6. Now we need to change one more thing. Click on the lower blue block on the word “HIGH”. This will show a dropdown menu. Select “LOW” This will then change the program to set the LED to High, which means “on”, wait 1000 milliseconds which is one second, then set it to “LOW”, which means “off” and wait 1000 milliseconds. The “loop” means that the program will repeat this change, turning the LED 13 on and off every 1 seconds.
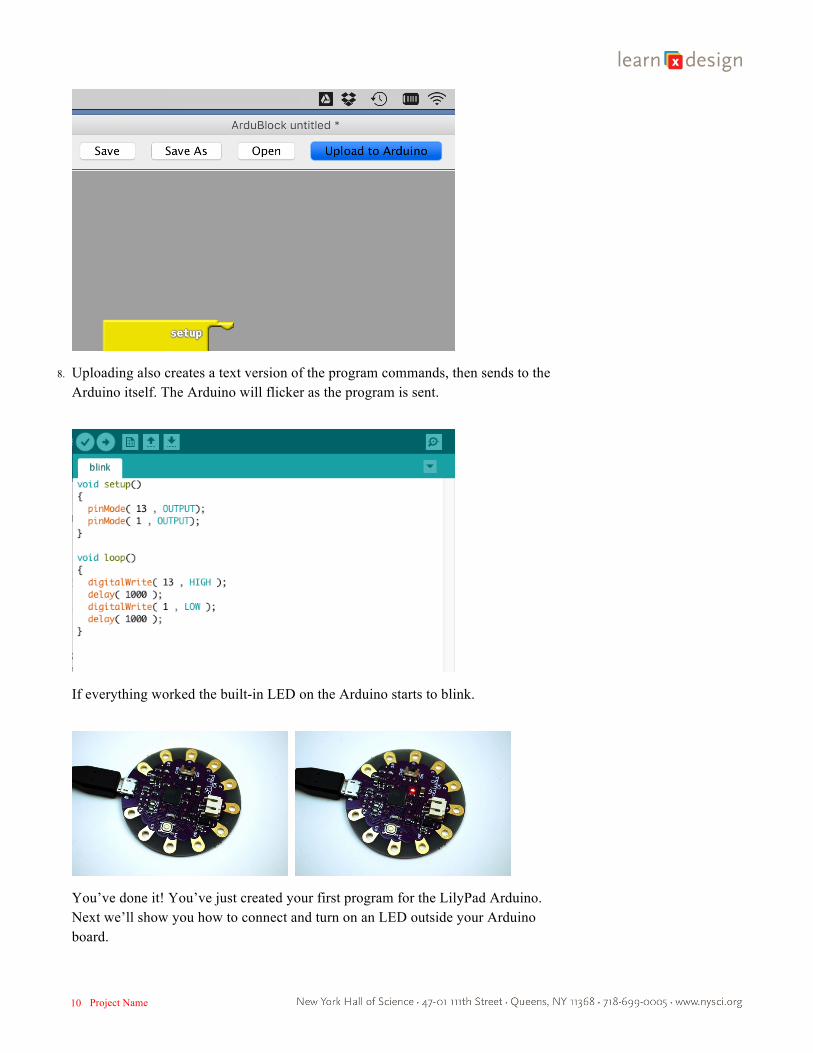
7. To move this program to the Arduino, click the upload button. This sends the program to the Arduino IDE which then sends it to the Arduino board.
Project Name 10 10 10 10
8. Uploading also creates a text version of the program commands, then sends to the Arduino itself. The Arduino will flicker as the program is sent.
If everything worked the built-in LED on the Arduino starts to blink.
You’ve done it! You’ve just created your first program for the LilyPad Arduino. Next we’ll show you how to connect and turn on an LED outside your Arduino board.
Project Name 11 11 11 11
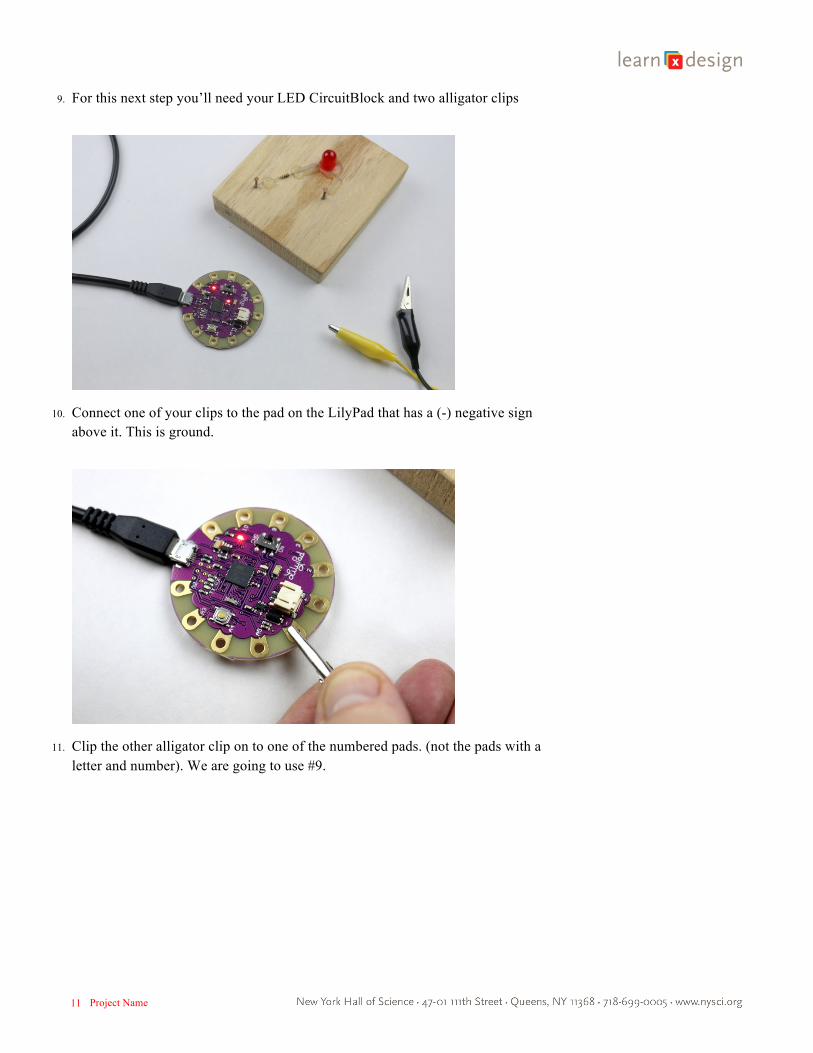
9. For this next step you’ll need your LED CircuitBlock and two alligator clips
10. Connect one of your clips to the pad on the LilyPad that has a (-) negative sign above it. This is ground.
11. Clip the other alligator clip on to one of the numbered pads. (not the pads with a letter and number). We are going to use #9.
Project Name 12 12 12 12
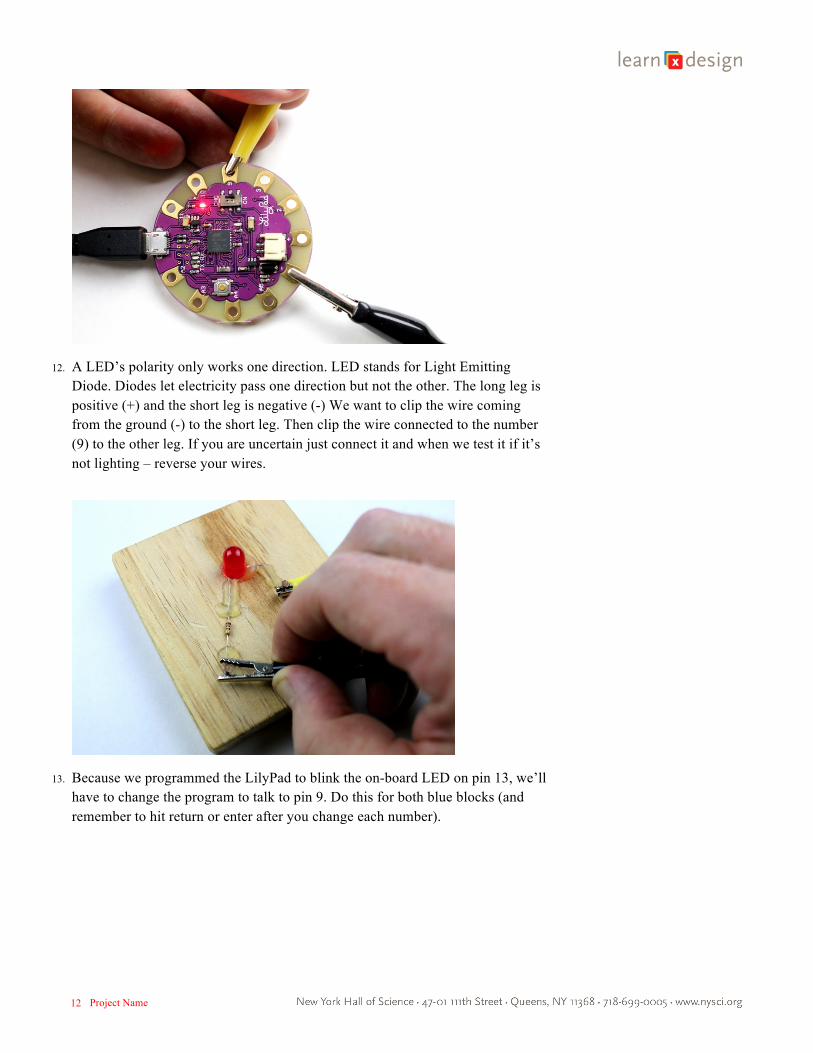
12. A LED’s polarity only works one direction. LED stands for Light Emitting Diode. Diodes let electricity pass one direction but not the other. The long leg is positive (+) and the short leg is negative (-) We want to clip the wire coming from the ground (-) to the short leg. Then clip the wire connected to the number (9) to the other leg. If you are uncertain just connect it and when we test it if it’s not lighting – reverse your wires.
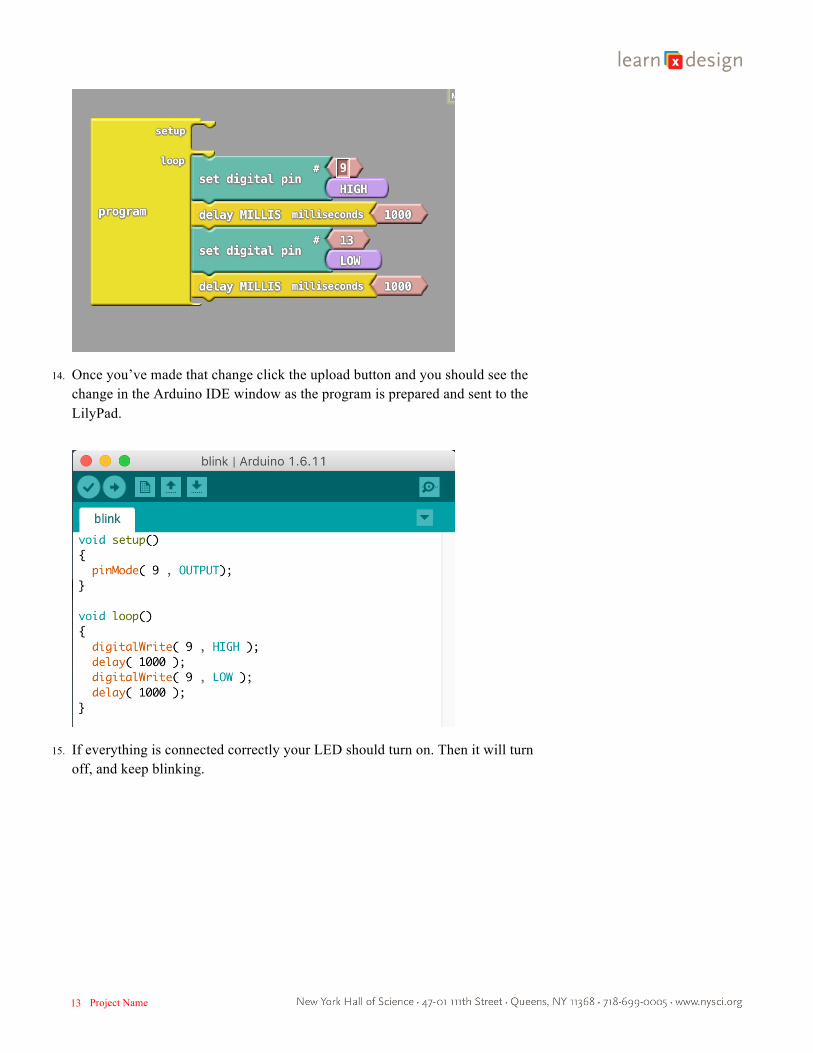
13. Because we programmed the LilyPad to blink the on-board LED on pin 13, we’ll have to change the program to talk to pin 9. Do this for both blue blocks (and remember to hit return or enter after you change each number).
Project Name 13 13 13 13
14. Once you’ve made that change click the upload button and you should see the change in the Arduino IDE window as the program is prepared and sent to the LilyPad.
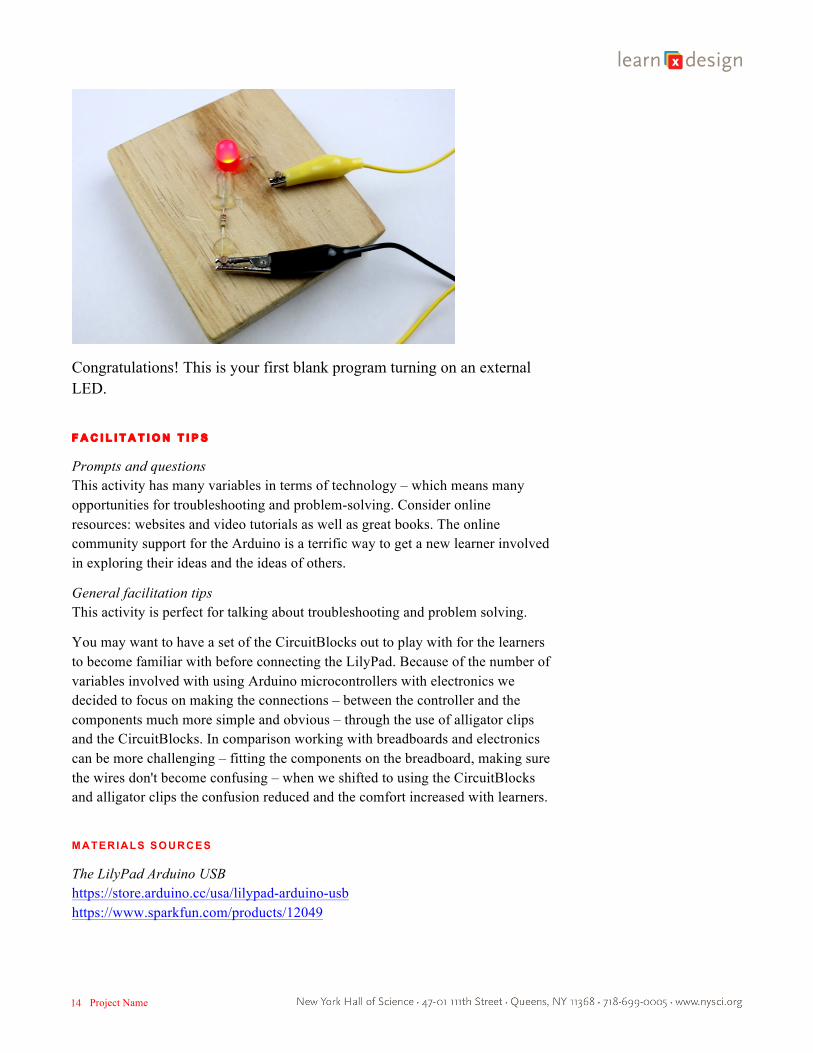
15. If everything is connected correctly your LED should turn on. Then it will turn off, and keep blinking.
Project Name 14 14 14 14
Congratulations! This is your first blank program turning on an external LED.
F A C I L I T A T I O N T I P S
Prompts and questions This activity has many variables in terms of technology – which means many opportunities for troubleshooting and problem-solving. Consider online resources: websites and video tutorials as well as great books. The online community support for the Arduino is a terrific way to get a new learner involved in exploring their ideas and the ideas of others.
General facilitation tips This activity is perfect for talking about troubleshooting and problem solving.
You may want to have a set of the CircuitBlocks out to play with for the learners to become familiar with before connecting the LilyPad. Because of the number of variables involved with using Arduino microcontrollers with electronics we decided to focus on making the connections – between the controller and the components much more simple and obvious – through the use of alligator clips and the CircuitBlocks. In comparison working with breadboards and electronics can be more challenging – fitting the components on the breadboard, making sure the wires don't become confusing – when we shifted to using the CircuitBlocks and alligator clips the confusion reduced and the comfort increased with learners.
MATERIALS SOURCES
The LilyPad Arduino USB https://store.arduino.cc/usa/lilypad-arduino-usb https://www.sparkfun.com/products/12049
Project Name 15 15 15 15
Make your own CircuitBlock https://snapguide.com/guides/make-circuit-blocks/
MORE INFORMATION
Links The Arduino website is a great resource. It has an active online forum, support information and great examples as well as trouble-shooting guides. https://www.arduino.cc/ The Ardublocks blog has how-to and support documents for learning about Ardublocks http://blog.ardublock.com/engetting-started-ardublockzhardublock/
Books: Getting Started with Arduino: The Open Source Electronics Prototyping Platform (Make) https://www.amazon.com/Getting-Started-Arduino-Electronics-Prototyping/dp/1449363334/ref=sr_1_2?ie=UTF8&qid=1506646487&sr=8-2&keywords=arduino+books Arduino Cookbook https://www.amazon.com/Arduino-Cookbook-2nd-Michael-Margolis/dp/1449313876/ref=sr_1_2?s=books&ie=UTF8&qid=1506646620&sr=1-2&keywords=oreilly+programming+the+arduino
KEYWORDS
Computer programming, electronics, circuits,