lost spires walkthrough - my gaming fanboy shed · pdf filelost spires walkthrough by frelay,...
TRANSCRIPT

Lost Spires walkthrough by Frelay, October 2009.
improved, partly rewritten, partly illustrated, trimmed, and made printable, April 2010.
Lost Spires is the acclaimed new guild + quest-adventure mod for the videogame Oblivion.
I, Frelay, am writing this walkthrough for several reasons:
1. Lost Spires is the best of the user adventure mods I have found and played. It is
comparable in quality to the best of main story quests. And it works! Unlike many other
adventure mods I have tried.
2. During the second time playing it, I still had to slog through some of the more extensive
dungeons and puzzles. Writing the walkthrough motivates me to go through it a third
time.
3. There is no written walkthrough for Lost Spires that I can see. So I can contribute in a
small way to Oblivion modding by writing one, to help pay back all the wonderful guides
that made playing Oblivion so enjoyable.
4. The puzzles in Lost Spires are by no means tricky and obscure. Otherwise a puzzle klutz
like me would not have had a chance.

However, dungeons in Lost Spires are often extensive, and actions needed to get the story
moving are sometimes obscure. Having a walkthrough will enable more casual players to
experience this great story.
The writers of Lost Spires do have a request that players of it do not spoil the story. So this
walkthrough tries its best to not contain too many spoilers. Instead, this walkthrough
focuses on clues to help the player complete each quest to enable continued advancement
of the story.
So the titles of the quests below do not correspond exactly to the ones in the mod; and
some details are omitted, often deliberately.
Everyone should load the mod, just to look at the items in the Archaeology Guild. The
textures and the items are just amazing!
General:
Each Quest in Lost Spires has a common format. You have to wander through lots of
dungeon areas. The goal of each Quest is to get to a particular Quest Area. When you get
to the Quest Area, there is always a Quest Item that you have to obtain, take it and put into
your inventory. When you pick up the Quest Item, the mod will detect the event, and
(usually) pop up a message to tell you that your quest is complete, and what to do next.
Until you get this game advancement pop-up message, you will not be able to get further.
It pays to go through all of the areas, even if you know the general way to the Quest Area.
There are always decent loot items to obtain, and the scenario of the Lost Spire world
fleshes itself out this way. Also, often the correct Quest Area is at a corner of a place that
you did not bother to properly investigate the first time around - so going back to a visited
place is also useful. When you do get to the right Quest Area, there may be no large
obvious sign that tells you so. But if you are observant, you can usually see clues directing
you to the important thing in the picture. And of course, many easy hints are provided in
this walkthrough.
Monsters that Lost Spires places in its dungeons can be quite strong, and defeating them can
be quite difficult. So go prepared to take on (or trick, or just go invisible and run from)
tough opponents. Some tough opponents will follow through doors. The loot from the
chests, bags, and monsters of Lost Spires are correspondingly powerful as well, and will go a
long way to making your character powerful, provided you can survive the battles. In
particular, the Souls of the creatures you meet are large, Greater and Grand. So Souls are
easy to get for your enchantment needs, when you have the spells and equipment to use
them.
Obtaining the Lost Spires:
The Lost Spires mod can be found at the developer’s site: http://www.lostspires.com/
There is also a page for the mod at TES NEXUS http://www.testnexus.com/
Installation of the mod is standard. Just read the instructions. It’s not difficult if you have
already installed a few Oblivion mods before. There are some patches you may want to get

too. For instance, the popular landscape mod Unique Landscapes: Dark Forest needs a Lost
Spires compatibility patch mod, due to the location of Tumyr’s campsite.
The readme.txt in the mod contains hints for the difficult areas, and some console
command options to get around difficult areas and potential bugs. So it’s worth your while
keeping it for reference. There is also an interesting developer’s post-mortem document.
The latest version of the mod has spoken dialogue, but if you strongly dislike hearing
American accents in Oblivion, you may want to turn off this voiced dialogue. Subtitles do
have some minor typing errors, though - and some three-line subtitles do not quite contain
all the spoken dialogue (these end with “...”).
Quests in Order:
Starting Quest - Find and join the Archaeology Guild
After you load a save game with Lost Spires, a pop-up message will tell you about the
Archaeology Guild (unless you have a pop-up message blocking mod, of course!). Their
Hall location is a semi-derelict castle-mansion south of the lake surrounding the capital
city. Presumably you didn’t notice it before, because it was concealed from snoopers by a
magical spell.
Find it (there’s a signpost and a collapsing tower, so it’s difficult to miss), enter, look
around, and then talk to Teav near to the entrance door. They don’t really need anyone

who isn’t trained – but after some amusing dialogue, Teav will reluctantly let you join on
approval, as long as you make the right dialogue choices.
He then gives you a nice set of Archaeology Robes. The Robes enable easy living at low
character levels, as they provide an extra 100 points of health, as well as other benefits.
Teav then tells you to introduce yourself to each of the four current members at the castle,
Aster Cei, Verus, Sova, and Norlene. Each of them has very atmospheric quarters. This is
straightforward, but you have to go through the correct dialogue options to get this
introductory quest completed.
While you are exploring the amazing castle, note the locations of various display cases
where you can obtain your rewards later. As you complete each Guild task, there is often
an option for a reward. You will then be given a key so that you can open the appropriate
case to retrieve the rare item. Of course, if you’re really an archaeologist rather than just
an adventurer, you’ll keep the items in their cases for study. You can also take and use
items, without stealing, once you are a member - as is the case with other Guilds.
Don’t forget to also talk to your fellow menial Apprentice, who is a young lad to be found in
the Apprentice Quarters. He has some interesting information to impart. Also have a
sleep in one of the beds here, if you need to level up. You can also safely leave stuff in the
Apprentice Quarters, if your inventory is overloaded with animal pelts and hunks of meat.
Also investigate the library, the dungeon, and generally marvel at the detail and skill used
in creating this excellent Guild Hall. There’s a lot of Morrowind in this mod.
Sova is an accomplished no-nonsense archaeologist, striving to complete the work of her dead tutor.
She has a strong back-story.

Hmm, that Dwemer steam-driven robot guard looks familiar. And look, there’s a Dwemer cog!
First Quest - The Newfound Ruin
When personal introductions have completed, talk again to Teav. He then asks you to
“clear” the chambers discovered beneath the Newfound Ruin, so they can get in to study it
properly. Apparently there has been a rockfall. He doesn’t mention huge monsters.
This First Spire is southeast of Skingrad. Just follow the beautiful river at the back of the
Archaeology Guild’s castle. Take a good bow and at least 60 good arrows.
When you arrive, talk to the young Guild assistants who are examining the above-ground
portion of the Spire. You then need to get under the Spire, an area which is accessed down
easy-to-miss spiral steps. Go through a door at its foot, into a series of caves. The cave
system is extensive. You quickly enter a larger chamber, which has an excavated hole - you
have to jump down this hole. There’s no way back up. There are now two possible paths
to follow.
The main problems in the caves beneath this Spire are the many tough Savage Trolls – this
may be a big sticking point for low-level characters coming to Lost Spires soon after
completing Oblivion’s Main Quest. Don't hold back on taking these Trolls out, if you have
the ability. A single hit from them will kill you if you are not careful. However – even a
level seven character can beat them with tactics - an alternative strategy is to run away, so
that you lure them toward each other, slowing them down as they crowd in the narrow
tunnels, then lead them all down to one of the big pit areas - while you quickly climb out
the other side and skip out of sight down a tunnel on the far side. With luck, the trolls will
then get stuck in the pit long enough to forget about you, and will not follow unless you do

something stupid like trying to stick them with arrows from a distant tunnel entrance.
This is one way to eventually get into the main loot chamber without too much damage.
There are two more Savage Trolls in here, but if you jump onto the “Loot Box” altar
before they thump you, they cannot reach you. Don’t use magic to flame or ice them (no
effect?), just fire arrows from the safety of the altar, as they rage below you. About 25
good arrows each should finish them off. Hopefully you only have two to deal with.
When you get to this end point, you find that the Quest Area is close to the Quest Item –
which is a Matrix stone to take back to Teav at the Guild Hall. There’s a tiny tunnel which
goes under the massive rock-fall, taking you back to the entrance to the West Weald forest.
Once you have the Quest Item and you’re back above ground, this cave system is deemed
to be “cleaned out”. Presumably any remaining Savage Trolls will soon find the bodies of
their dead companions, and then quit the caves in fear that they will share the same fate.
Second Quest - Tumyr's Dissolving Agent
When you bring the Quest Item to Teav, he examines it carefully. There’s writing inside,
partly covered by fused melted rock. Teav asks you to obtain a special archaeological
Dissolving Agent from the Guild’s fossil-hunter, Tumyr. You’ll now note that the
cartographer is plotting your adventures on the wall-map. Sleep and level, if you need to.
Then go find Tumyr at his Excavation Site - due east of the Archaeology Guild, near to
Fort Alessia. If you have the Unique Landscapes : Dark Forest mod, don’t miss the chance
to also venture up into the superb Dark Forest (if it’s daytime...) which is very near.
Arrival at Tumyr’s fossil excavation campsite.

On arrival, you should talk to the two assistants. You will get useful background
information on the Guild. Also take a look at that amazing fossil Tumyr is digging up.
Tumyr is inside a tent that you have to enter via a canvas door. Once in there, Tumyr tells
you he needs more Green Stain Shelf Caps, and then he can make a bottle of Dissolving
Agent for you. Check the whole island for them. Once you gather enough Green Stain
Shelf Caps, go back to Tumyr, get the Dissolving Agent, and you will be ready to bring it
back to Teav to finish this quest.
This is also an easy way to make money, as the Dissolving agent can be sold to merchants
for quite a lot of money. Tumyr will make more for you - once you get enough of the right
Caps, and don't happen to have another bottle on you.
~
Now, having started you off, you’re on your own... what
follows is just a ‘low-spoilers bare-bones’ version of Frelay’s
walkthrough, in case of emergencies...
~
Third Quest - Rythor's Task at the Overgrown Spire
Teav takes the Dissolving Agent. It will need time and care to burn away the
melted rock. He asks you to come back later.
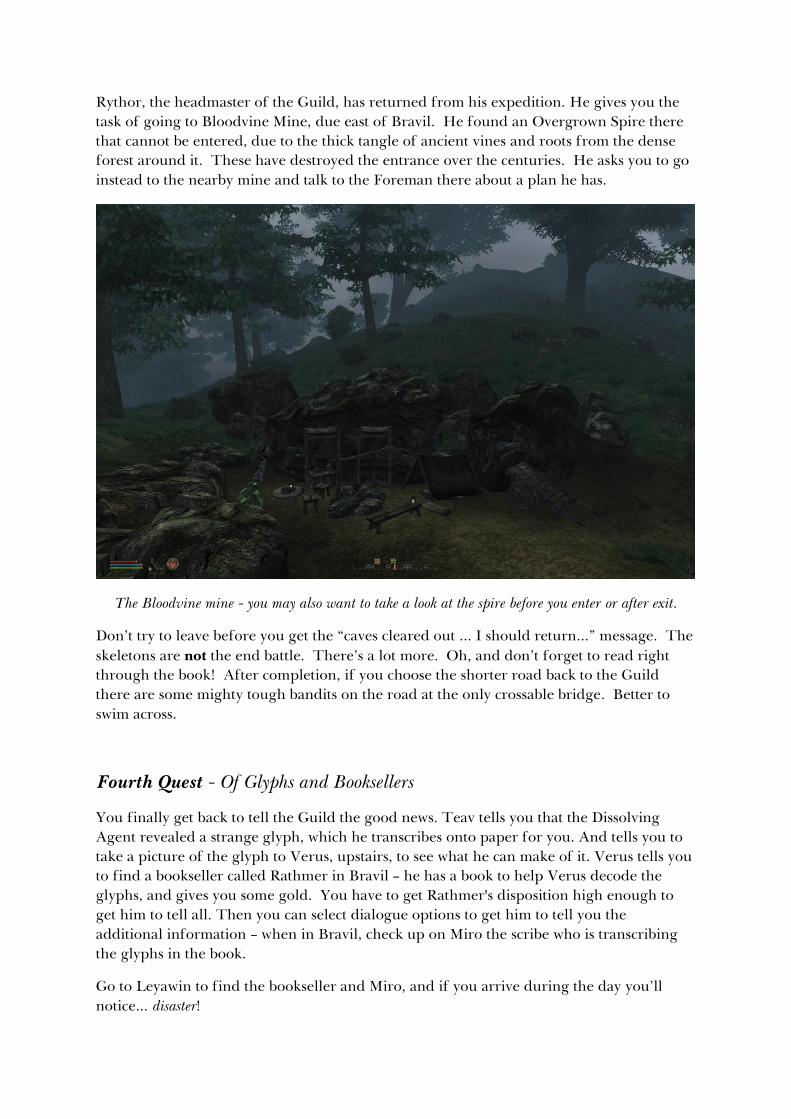
Rythor, the headmaster of the Guild, has returned from his expedition. He gives you the
task of going to Bloodvine Mine, due east of Bravil. He found an Overgrown Spire there
that cannot be entered, due to the thick tangle of ancient vines and roots from the dense
forest around it. These have destroyed the entrance over the centuries. He asks you to go
instead to the nearby mine and talk to the Foreman there about a plan he has.
The Bloodvine mine – you may also want to take a look at the spire before you enter or after exit.
Don’t try to leave before you get the “caves cleared out ... I should return...” message. The
skeletons are not the end battle. There’s a lot more. Oh, and don’t forget to read right
through the book! After completion, if you choose the shorter road back to the Guild
there are some mighty tough bandits on the road at the only crossable bridge. Better to
swim across.
Fourth Quest – Of Glyphs and Booksellers
You finally get back to tell the Guild the good news. Teav tells you that the Dissolving
Agent revealed a strange glyph, which he transcribes onto paper for you. And tells you to
take a picture of the glyph to Verus, upstairs, to see what he can make of it. Verus tells you
to find a bookseller called Rathmer in Bravil – he has a book to help Verus decode the
glyphs, and gives you some gold. You have to get Rathmer's disposition high enough to
get him to tell all. Then you can select dialogue options to get him to tell you the
additional information – when in Bravil, check up on Miro the scribe who is transcribing
the glyphs in the book.
Go to Leyawin to find the bookseller and Miro, and if you arrive during the day you’ll
notice... disaster!

Miro's shop has been has been burned down, along with Miro!
You have to get the disposition of the town guard high enough to let you poke around
inside the burned shop.
Then you have to find the Quest Item to move the plot along. Hint: it’s not on poor Miro's
charred body, but it is definitely in the burnt shop. When you find the Quest Item, go back
to talk to Rathmer about it.
Then go talk to Verus. Verus will decode some information from the Item, then tells you
to give it to Aster Cei who works out the map co-ordinates to another possible Spire.
Fifth Quest - Pristine Spire
This new Pristine Spire is about due East of where you are now, on a high just across the
Cerbele River. You can fast travel to the archaeological dig site first and then take the
road to the new spire from there.
It has extensive caves like the first Spire, and the key place is about due south of the
entrance.
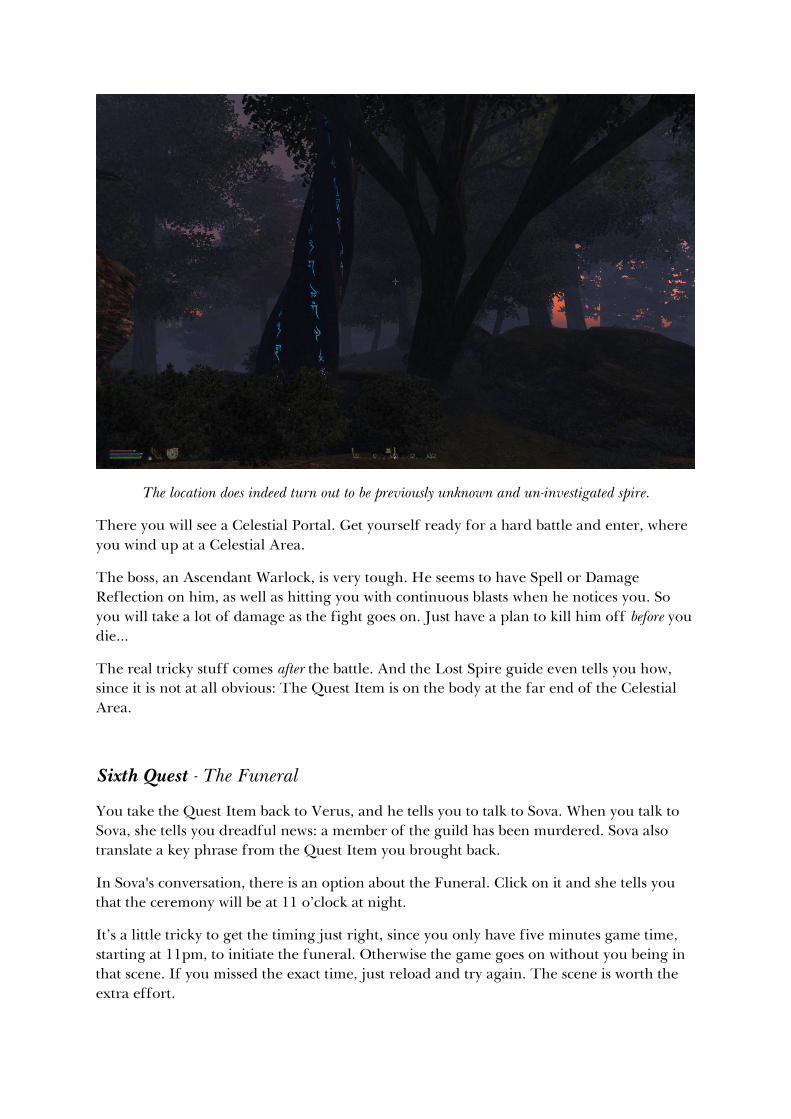
The location does indeed turn out to be previously unknown and un-investigated spire.
There you will see a Celestial Portal. Get yourself ready for a hard battle and enter, where
you wind up at a Celestial Area.
The boss, an Ascendant Warlock, is very tough. He seems to have Spell or Damage
Reflection on him, as well as hitting you with continuous blasts when he notices you. So
you will take a lot of damage as the fight goes on. Just have a plan to kill him off before you
die...
The real tricky stuff comes after the battle. And the Lost Spire guide even tells you how,
since it is not at all obvious: The Quest Item is on the body at the far end of the Celestial
Area.
Sixth Quest - The Funeral
You take the Quest Item back to Verus, and he tells you to talk to Sova. When you talk to
Sova, she tells you dreadful news: a member of the guild has been murdered. Sova also
translate a key phrase from the Quest Item you brought back.
In Sova's conversation, there is an option about the Funeral. Click on it and she tells you
that the ceremony will be at 11 o’clock at night.
It’s a little tricky to get the timing just right, since you only have five minutes game time,
starting at 11pm, to initiate the funeral. Otherwise the game goes on without you being in
that scene. If you missed the exact time, just reload and try again. The scene is worth the
extra effort.

Seventh Quest - A Vengeance Unfulfilled
After the funeral, wait for a couple of hours, then go talk to Sova who will promote you.
Then go talk to Norlene. Select Help, then Responsible Entities, and you get a quest to
check out Rodon Dakkon in Cheydinhal.
This is when you get to play the gangster heavy. Go and accost Dakkon at his house, and
decide what to do with him as your role playing dictates. Dakkon tells you he purchased an
artifact from bandits, whose lair is near Bravil. That’s where you go next.
The Bandits Lair is an extensive dungeon. Dwyff is at the far south east side, and you have
to cross a water channel to get to him. Once you get there, you have to kill Dwyff. Then
you still need to find the Quest Item, which is inside the tent.
Eight Quest - The Primeval Hollow
Take the Scroll to Norlene and she tells you that it reveals another site to explore. So go to
the Primeval Hollow which is at the South Eastern part of the map. It’s much bigger than it
looks from the outside. Enjoy the unique ambiance, and its hard-hitting occupants.
The important quest area is east and south of the entrance. It is not where the giant crabs
are. You will eventually get to a door to a Lost Deity Shrine. Go into it and you are in a
nice area with no monsters to battle. The Quest Item is at the base of statue. Take that to
Norlene and he tells you to talk to Sova.
Ninth Quest - The Lost Labyrinth
Sova tells you to look in a labyrinth in the Elven Gardens of the Imperial City. The
following instructions may be a little hard to follow, since this is the puzzle part of this
adventure:
i) Go to the sewer grate where Baurus entered in the Main Quest and you should see
the labyrinth at the local map directly south east. Go upstairs, to jump down
into the area, and you can start the trek.
ii) Go to the end of the oval corridor to push a block to open the grate blocking your
way. Then turn left at the next grate. Follow the path starting south east and
around the whole large dungeon - and you eventually get back to the entrance,
where you can now get into the Lost Ayelid Ruin structure.
iii) You run into lots of skeletons, a few swinging blades, and through many raised
platforms. You then reach a locked gate, and will have go back to the centre of
the previous large room - to push a block - to open. Then go in a south east
direction from the opened gate.

iv) After you get into a structure, you run into this large room, where you have to step
onto a couple of plates, then push a couple of buttons to get access to side
corridors. Go through either side corridor to get around to the back room.
Then go downstairs at the middle and you will meet Lord Pratal.
v) Kill Lord Pratal and take his key from his Coffer. With this key go through the side
door there and you can push the block that raises the stairs to the centre of the
back room. There you can get the Labyrinth Key which opens a gate that blocks
your way to the real Lost Labyrinth.
vi) The Labyrinth can be traversed if you map it out manually, by writing down the
map on a piece of paper and tracing all the walls. So I won't draw you a map.
Just clear out those distracting skeletons first.
vii) When you get through to the other end, you go through a corridor and wind up at
this Sarcophagus. Beside the Sarcophagus is the Quest Item which you return to
Sova. Talk to Aster Cei and he tells you to look for another Spire at the South
East part of the world map.
Tenth Quest - The Besieged Spire
Go to where Aster Cei tells you and you find the Besieged Spire. It’s another extensive
Spire caves and is as infested as the others were. The Quest Area is toward the far East
then slightly North of the entrance, where you find another Celestial Portal. You don't
have to go into the Portal. But if you do, the Ascendant Warlock is even harder than the
previous one - as he has extra tricks to cause you pain.
Tell Sova and she tells you Rythor wants to talk to you. Go see Rythor in the Guild Library
who tells you to go to check on the Mining Tunnel.
Eleventh Quest - Overgrown Spire (reprise)
Go back to Bloodvein Mine and into the newly-dug Bloodvein Mine Side Tunnel. You will
eventually reach the Overgrown Spire.
There is a side area to the west, the Dank Lair. You may be able to get some items to help
with the main quest, and it may involve freeing someone.
You have to cross molten river where Water Walking is extremely useful for survival. The
Quest Area is south and then a little west, where you see the Quest Item hanging in the
middle of Lava. It is reachable out along the bridge.
There is another Celestial Portal, and going into it to take on the Ascendant Warlock is
optional, but there is some good loot in there.

Twelfth Quest - Fifth Spire
Then it’s just a matter of taking the Quest Item to Rythor. Rythor takes the Quest Item and
gives you a pendant. Take the pendant to Aster Cei who provides you with the location to a
Fifth spire near Sacre Tor – it’s at the north part of the world map.
Go to the Fifth Spire. The Quest Area is not too far West of the entrance. Make a game
save - since advancing the plot seems tricky here.
Click on the body there and your Quest will update. Then pick up the Quest Item on the
body. Then read it.
A long voiceover soliloquy starts – one that you can't stop. It’s worth listening through
since this is the emotional and plot climax of the whole story.
Save the game as the first opportunity, since getting through the plot advancement points
here seem tricky.
Click on EXIT and your quest updates to talk to Aster Cei. DO NOT click on the TAKE
Button - the program crashed on me when I did that.
Thirteenth Quest - The Revelation
Go talk to Aster Cei, who gives you a key that you have to use to get into the Quest Area.
Inside the Quest Area, you find a Quest Item inside the desk. With the Quest Item you can
now get into the dungeon area. The entrance to the dungeon is at the north side of the
room, and is easy to miss if you don't know it’s there.
After this the game is fairly straightforward. Of course, there will be lots of battles that
befit the ending of one of the best MOD adventures ever written.
But there is more!! There is this BIG FINAL BOSS that is tougher than just about any boss
you have ever faced in Oblivion. Figuring out how to get through it, and surviving the
problems afterwards, will be left as an exercise for the reader to solve.
With this, we are at the end of this long and gruelling adventure. There is not much else to
do. You might want to go back and check out the contents of those Guild display cases,
chat to the members, buy a few things, collect the loot you dropped in your room...
Of course there is still the Guild’s mysterious Zinj puzzle to figure out, but you will not get
any help from here, since that is a REAL puzzle and beyond my comprehension.

It’s finished – happy fluffy deer frolick in the woods in safety once again!
Usage of this work is provided by the author(s) under the Creative Commons License.