maintenance manual for nautilus equipment · pdf fileif belt is still loose, repeat this...
TRANSCRIPT
1
MAINTENANCE MANUAL FOR NAUTILUS EQUIPMENT
A GUIDE FOR PREVENTIVE CARE AND MAINTAINING YOUR NAUTILUS EXERCISE EQUIPMENT.
Rue Jean Prouvé 6 CH-1762 Givisiez/Switzerland Pone: + 41 26 460 77 77 Fax: + 41 26 460 77 70

2
Rue Jean Prouvè 6 CH-1762 Givisiez/Switzerland Pone: + 41 26 460 77 77 Fax:: + 41 26 460 77 70

3
EXTERNAL MAINTENANCE
INTERNAL MAINTENANCE

4
INTERNAL MAINTENANCE

5
TROUBLESHOOTING
PARTS AND SERVICE

6
BASIC INSTRUCTIONS FOR MAINTENANCE ON NAUTILUS
EQUIPMENT
7

8
STANDARD MAINTENANCE TOOLS

120
100
80
60
40
TWOQUARTERSFOR SHIMS
TOPWEIGHTSTACK
WEIGHT-PIN
BOLTS
20
4
Nautilus warrants only to the original purchaserthat Nautilus® exercise equipment from themanufacturer is free from defects in material andworkmanship under normal use and service. Ourobligation under this warranty shall be limited to therepair or exchange at our plant (a) of any part or partsof the structural frame, moving weldments or weightstacks which may thus prove defective under normaluse and service for the lifetime of the product fromdelivery to the original purchaser; (b) of any movingpart or parts not otherwise disclosed within thiswarranty which thus may prove defective undernormal use and service within one (1) year fromdelivery to the original purchaser; and (c) of anyupholstery, pads, grips or tethered weight pinconnectors which thus may prove defective undernormal use and service within 120 days from deliveryto the original purchaser. This warranty only appliesto those parts that our own examination discloses toour satisfaction to be thus defective.
This warranty is expressly in lieu of all otherwarranties, express or implied, including thewarranties of merchantability and fitness for use andof all other obligations or liabilities on our part, andwe neither assume nor authorize any other person toassume for us any other liability in connection withthe sale of this NAUTILUS® exercise equipment. Thiswarranty shall not apply to this NAUTILUS® exerciseequipment or to any part thereof which has beensubject to accident, negligence, alteration, abuse, misuse,or a lack of maintenance in accordance with ourrecommended maintenance instructions. We make nowarranty whatsoever in respect to accessories or partsnot manufactured by us and disclaim all warranties,express or implied, as to such accessories and parts. Theterm “original purchaser”, as used in this warranty, shallbe deemed to mean that person or entity for whom thisNAUTILUS® exercise equipment is originally installed.This warranty shall apply only within the boundaries ofthe continental United States.
NAUTILUS® shall not be liable for any loss ordamage, including incidental or consequential damagesresulting directly or indirectly from the use or loss of useof our NAUTILUS® exercise equipment. Withoutlimiting the generality of the foregoing, this exclusionfrom liability embraces the purchaser’s expenses fordowntime or for making up downtime, damages forwhich the purchaser may be liable to other persons,damages to property, and injury to or death of anypersons. We neither assume not authorize any person toassume for us any liability in connection with sale or useof our equipment. There are no oral agreements orwarranties collateral to or affecting this agreement.
Nautilus® Variable Resistance Warranty LimitedWarranty Terms & General Specifications
TM
®
Warranty InformationKevlar™ Belt Adjustment
Instructions
To adjust belt:1. Remove the Shielding.
2. Remove the Tethered Weight-Pin from weight stack hole.See Figure 3.
3. Lift top weight using the appropriate lifting mechanism- in most cases the moving arms for exercising.
4. While top weight is suspended, insert a shim betweenthe first and second weight (two quarters will suffice).
5. Release top weight so the first stack is resting on theshim.
6. Loosen the two bolts at the end of the belt and pullthrough excess belting until tight.
7. Tighten belt bolts and lift top weight to remove the shim.
8. Lower the mechanism to rest on the weight stack.
9. If belt is still loose, repeat this procedure until there isno looseness at the beginning of an exercise.
10. If you experience difficulties in tightening the belts,please contact your Nautilus service professional or call1-800-NAUTILUS (1-800-235-2233), Parts & ServiceDepartment, for assistance.
Belts require tightening when a lack of resistance anduneven feel is noticed at the beginning of an exercise. USECAUTION AROUND THE WEIGHT STACK WHENTIGHTENING KEVLAR™ BELTS.
Figure 3
WARNINGStore indoors only. Do not subjectmachine to high humidity or damp
conditions.
1
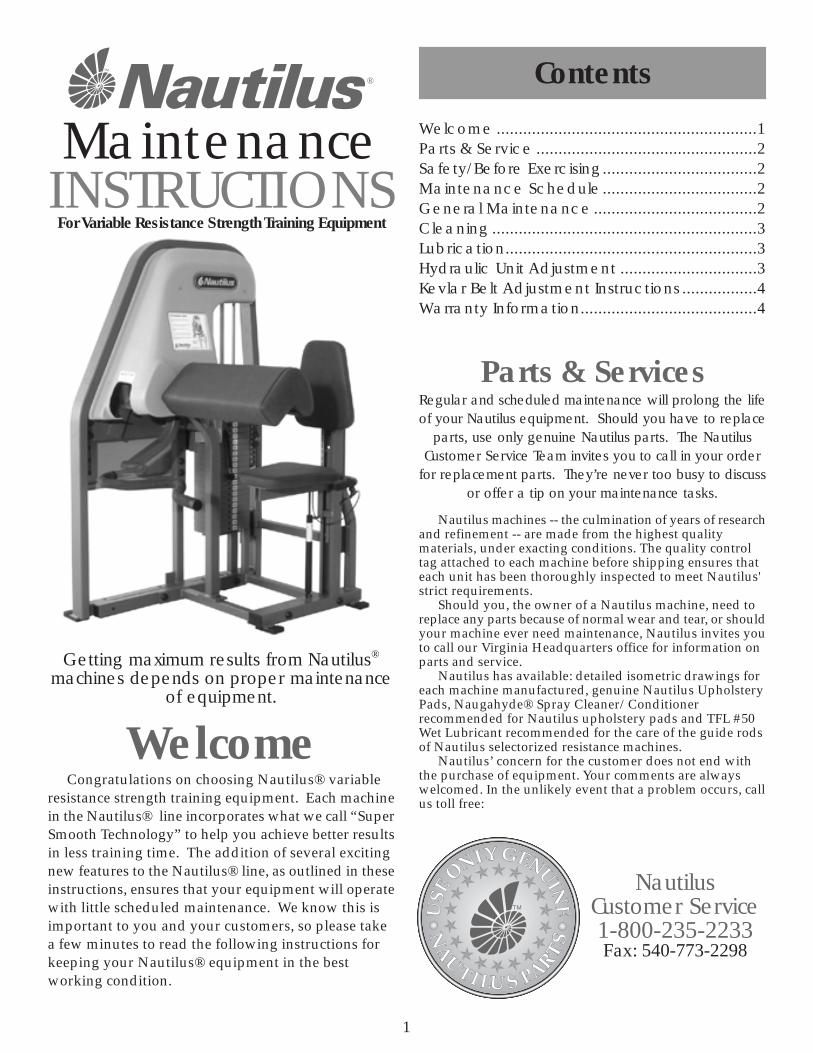
Getting maximum results from Nautilus®
machines depends on proper maintenanceof equipment.
MaintenanceINSTRUCTIONS
TM
®
Welcome
Welcome ...........................................................1Parts & Service ..................................................2Safety/Before Exercising...................................2Maintenance Schedule...................................2General Maintenance.....................................2Cleaning ............................................................3Lubrication.........................................................3Hydraulic Unit Adjustment ...............................3Kevlar Belt Adjustment Instructions .................4Warranty Information........................................4
Contents
TM
Nautilus machines -- the culmination of years of researchand refinement -- are made from the highest qualitymaterials, under exacting conditions. The quality controltag attached to each machine before shipping ensures thateach unit has been thoroughly inspected to meet Nautilus'strict requirements.
Should you, the owner of a Nautilus machine, need toreplace any parts because of normal wear and tear, or shouldyour machine ever need maintenance, Nautilus invites youto call our Virginia Headquarters office for information onparts and service.
Nautilus has available: detailed isometric drawings foreach machine manufactured, genuine Nautilus UpholsteryPads, Naugahyde® Spray Cleaner/Conditionerrecommended for Nautilus upholstery pads and TFL #50Wet Lubricant recommended for the care of the guide rodsof Nautilus selectorized resistance machines.
Nautilus’ concern for the customer does not end withthe purchase of equipment. Your comments are alwayswelcomed. In the unlikely event that a problem occurs, callus toll free:
NautilusCustomer Service1-800-235-2233Fax: 540-773-2298
Parts & ServicesRegular and scheduled maintenance will prolong the lifeof your Nautilus equipment. Should you have to replace
parts, use only genuine Nautilus parts. The NautilusCustomer Service Team invites you to call in your order
for replacement parts. They’re never too busy to discussor offer a tip on your maintenance tasks.
Congratulations on choosing Nautilus® variableresistance strength training equipment. Each machinein the Nautilus® line incorporates what we call “SuperSmooth Technology” to help you achieve better resultsin less training time. The addition of several excitingnew features to the Nautilus® line, as outlined in theseinstructions, ensures that your equipment will operatewith little scheduled maintenance. We know this isimportant to you and your customers, so please takea few minutes to read the following instructions forkeeping your Nautilus® equipment in the bestworking condition.
For Variable Resistance Strength Training Equipment

2
Frequency of maintenance is determined by severalfactors: temperature, humidity, use, ventilation andfiltration, shielding and friction. External maintenancemay vary from daily to monthly, internal maintenancefrom six months in a multi-user setting to a year whenused in a club environment.
Maintenance Schedule
Before Exercising
1. Supervision is necessary when the machine is used by ornear children, invalids, or disabled persons.
2. Follow the instructions for specific exercises on eachmachine
3. Get in and out of the equipment carefully.4. Never operate the machine without shields in place.5. Use only Nautilus selector pins in weight stack. Never drop
or insert any other object into machine opening.6. Use this machine only as intended or described in this
manual.7. Do not operate equipment with loose or damaged parts. If
machine fails to operate correctly, do not attempt to repair.Notify authorized personnel of the problems.
8. Keep hands and feet clear of weights and other movingparts when in use. Keep hands and feet only on the handgrips and foot pads provided.
9. Failure to comply with these instructions may result inpersonal injury.
To guard against injury, all equipment usersshould follow these instructions.
Safety■ Check with your physician and get approval beforebeginning a training routine.
■ Become familiar with the equipment before beginninga training routine.
■ Always warm-up before and cool down after exercising.
■ Move slowly during each exercise. Do not jerk or"throw" the weight.
■ Breathe freely. Do not hold your breath while lifting orlowering weight.
■ Hold movement arms and handles firmly, do notsqueeze or grip tightly.
■ Structure each workout to exercise the largest musclesfirst. Suggested routines are found in the Nautilus TotalFitness Program.
■ Experiment to find the exact weight you need for eachexercise. Select a resistance that allows you to performeight to twelve slow repetitions. Take two seconds to liftthe weight. Pause briefly, and take four seconds to lowerthe weight.
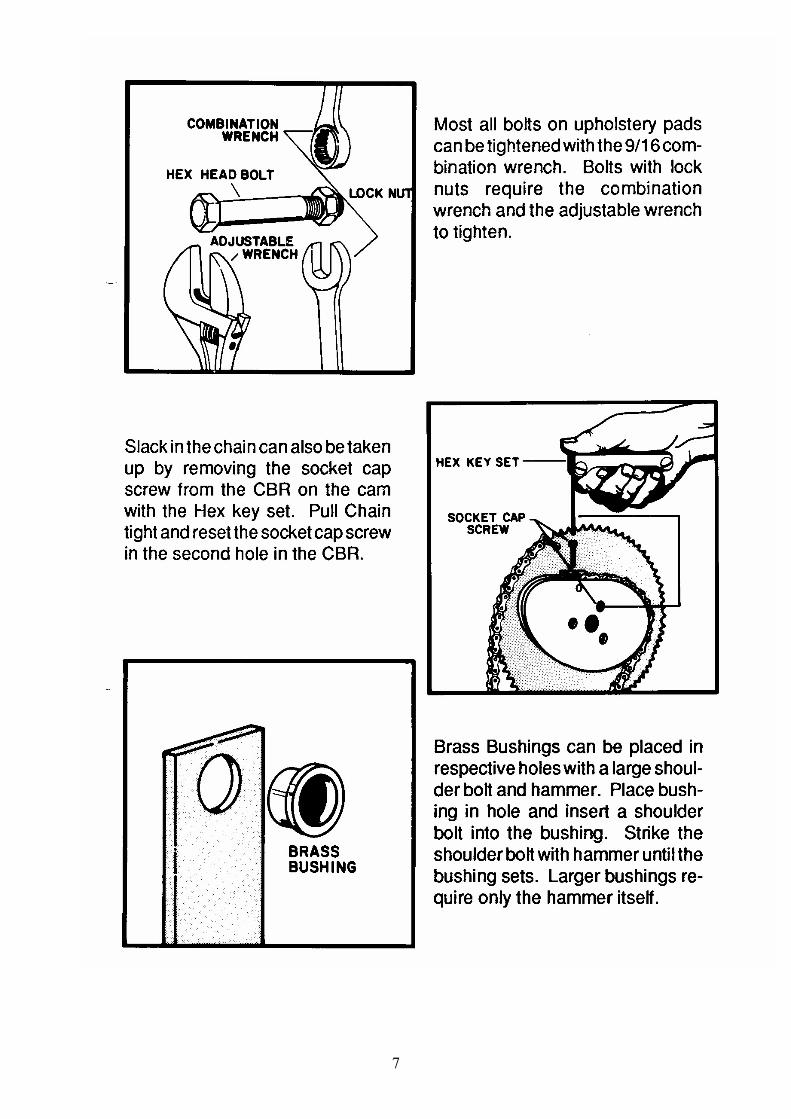
General Maintenance 1. SPOT CHECK LOOSE NUTS AND BOLTSA. Carefully check rotation points.B. Tighten loose parts immediately. Also check for worn
parts, seat belts and upholstery pads.
2. UPHOLSTERY PAD TIGHTENINGMost bolts on upholstery pads can be tightened with a9/16” combination wrench.
Stop exercising immediately if you experience a sharpnerve or joint pain, and seek medical advice.
EVERY 6DAILY WEEKLY MONTHLY MONTHS
General MaintenanceSpot Check Belt ✿✿✿✿✿✿✿✿✿✿✿✿✿✿✿✿✿✿✿✿✿✿✿✿✿✿✿✿✿✿✿✿✿✿✿✿✿✿✿✿✿✿✿✿✿✿■
Spot Check Nuts and Bolts ___________________________________________________________■
Examine Rotation Points ________________________________________________________________________■
CleaningClean Upholstery _____________________________________■
Use Nautilus Disinfectant Cleaner.Clean Surface Area _________________________________________________■
Remove Dust __________________________________________________________________________________■
LubricationLubricate and Clean Guide Rods Using TFL 50___________________________■
Do not lubricate hydraulic cylinders.

3
Do not place equipment in direct sunlight as ultra violetrays can damage shields and upholstery.
NET WT. 10 OZ. (283.5g)
STOCK NO.RG 60127
DANGER! EXTREMELY FLAMMABLE. HARMFUL OR FATAL IF SWALLOWED.CONTENTS UNDER PRESSURE. SEEBACK PANEL.
DANGER! EXTREMEMENT INFLAMMABLE.CONTENU SOUS PRESSION. VOIR ETIQUETT AL'ENDOS.
■ Cleans/Lubricates/Protects■ Homogenized/No Kerosene/No Wax■ Non-Toxic/Environmentally Safe■ Nettote/Lubrifie/Protege■ Produit Homogénéisé/Formule D'avant-Garde/Sans Cire■ Non-Toxique/Sans Effet Sur E'environnement
PARTNUMBER19-1160
*TFL 50WetLubricantRecommendedfor NautilusMachines.
Lubrication
Cleaning1. UPHOLSTERY CLEANING AND PROTECTION
A. Keep pads free of perspiration at all times.B. Clean and disinfect upholstery at the end of each
day, especially areas where perspiration and scalpoil collect.
C. Clean all outside surfaces with non-abrasive,non-chlorinated household cleaners. Virahol®Disinfectant Cleaner is an effective upholsterycare product.
2. CLEANING AND CARE OFPAINTED SURFACES
A. Wipe painted surfaces with adamp cloth and car wax.
B. Let dry and buff with a drycloth.
3. CLEANING AND CARE OF ABSPLASTIC SHIELDING
A. Clean with non-abrasive, non-chlorinated householdcleaners.
B. Vacuum or wipe dust fromrecessed areas and surfaces.
WARNINGDo not lubricate
MINI WEIGHTS.
May cause damage
and VOID
WARRANTY.
MOVING PARTSA. To clean and lubricate guide rods, apply TFL#50
Wet Lubricant to a clean cloth then use to wiperods.
Note: The hydraulic unit only needs adjustment if theseat will not stay in position.
1. Remove CLEVIS and COTTER PINS. RemoveCIRCULAR COTTER PINS by lifting up the wire thatcrosses over straight end of pin, see Figure 1. Save all PINS.
2. Use a flat blade screwdriver to gently unsnap CABLEfrom LEVER MECHANISM. Be careful not to break cablefitting.
3. Remove hydraulic unit from machine, loosen NUT bybacking it down ROD. Hold LEVER MECHANISM andtwist SHAFT until there is free play in LEVER, as shown by"B" in Figure 1.
4. Hold LEVER MECHANISM and twist SHAFT (asshown by "C" in Figure 3) until LEVER free play is gone,then back off 1/8 turn. Tighten NUT against LEVERMECHANISM. The NUT MUST BE PROPERLYTIGHTENED to keep hydraulic unit in adjustment.
5. Twist SHAFT slightly to realign the top and bottomclevis pin holes.
6. Use pliers to snap and lock the CABLE on to theLEVER MECHANISM.
7. Reposition the hydraulic unit on machine and insertCLEVIS and COTTER PINS. The circular COTTER PINS canbe pushed into holes.
8. The HANDLE NUT should be tight against theHANDLE HOUSING, see Figure 2. The HANDLE LEVERshould touch the GRIP when squeezed. If it does not touch,adjust as follows:
a. Loosen the HANDLE NUT by turning counterclockwise.
b. Turn the ADJUSTMENT BARREL clockwise until theHANDLE LEVER has approximately 1/4" free play.
c. Tighten the HANDLE NUT against the HANDLEHOUSING.
3. SHIELD REMOVALNautilus® 2ST machines are equipped with quick-release shield fasteners. To remove Quick-Releaseshielding, gently pull shielding away from the frame.Use a proper screwdriver to remove front shielding,which is attached to the frame with screws.
HOSPITAL DISINFECTANT/CLEANER& INSTRUMENT PRESOAK
TUBERCULOCIDE • VIRUCIDE • BACTERICIDE • FUNGICIDE
READY TO USE • NO MIXING REQUIREDSee Right Panel for Additional Instructions
SEE RIGHT PANEL FOR ADDITIONAL PRECAUTIONARY STATEMENTS
WARNINGKEEP OUT OF REACH 0F CHILDREN ACTIVE INGREDIENT - ISOPROPANOL....70%
INERT INGREDIENTS............................... 30%
TOTAL...............................100%
Figure 1
Figure 2
Hydraulic Unit Adjustment
HIGH PRESSURE : DO NOT LUBRICATEROD. SEAL DAMAGE WILL OCCUR.
EYE AND INJECTION HAZARD EXISTS.
HANDLENUT
ADJUSTMENTBARREL
HANDLE HOUSING
1/4" free play
HANDLELEVER
or COTTER PIN
CLEVISPIN
NUT
LEVERMECHANISM
A
B
SHAFT
LEVER
C
HIG
H P
RE
SS
UR
E :
DO
NO
T LU
BR
ICAT
ER
OD
. SE
AL
DA
MA
GE
WIL
L O
CC
UR
.E
YE
AN
D IN
JEC
TIO
N H
AZA
RD
EX
ISTS
.
HIG
H P
RE
SS
UR
E :
DO
NO
T LU
BR
ICAT
ER
OD
. SE
AL
DA
MA
GE
WIL
L O
CC
UR
.E
YE
AN
D IN
JEC
TIO
N H
AZA
RD
EX
ISTS
.
HIG
H P
RE
SS
UR
E :
DO
NO
T LU
BR
ICAT
ER
OD
. SE
AL
DA
MA
GE
WIL
L O
CC
UR
.E
YE
AN
D IN
JEC
TIO
N H
AZA
RD
EX
ISTS
.
CIRCULAR COTTER PIN
CABLE