manual de penguin · penguin user’s guide 1 introduction features penguin comes with two...
TRANSCRIPT
Penguin Non-photometric rendering for Rhinoceros
User’s Guide Version 1.0
P e n g u i n U s e r ’ s G u i d e i i
Penguin User’s Guide
Version 1.0
© 2002 McNeel Europe SL
Penguin is a trademark of McNeel Europe SL. All brand or product names are registered trademarks or trademarks for their respective holders.

P e n g u i n U s e r ’ s G u i d e i i i
TABLE OF CONTENTS Introduction......................................................................................... 1
Features ......................................................................................... 1 Install Penguin ................................................................................. 1 Rendering with Penguin ..................................................................... 2 Support .......................................................................................... 2
Newsgroup support ........................................................................ 2 Support Web Site .......................................................................... 2 Dealer support .............................................................................. 2 Email Technical support .................................................................. 2 Telephone support ......................................................................... 2
Getting Started..................................................................................... 3 Assign materials ............................................................................... 3 Add lighting ..................................................................................... 3 Set up the environment ..................................................................... 3 Selecting a render style ..................................................................... 4 Render ........................................................................................... 5
Common Settings .................................................................................. 6 Rhino Render Mesh Settings ............................................................... 6 Penguin Common Settings ................................................................. 6
Resolution .................................................................................... 6 Antialiasing................................................................................... 6 Render Colors ............................................................................... 7 Background Bitmap........................................................................ 7
Cartoon Settings ................................................................................... 9 Edges ............................................................................................. 9
Silhouettes ................................................................................... 9 Borders.......................................................................................10 Creases ......................................................................................10
Shading .........................................................................................10 Angle..........................................................................................11 Colors.........................................................................................11
Sketch Settings ....................................................................................12 Edges ............................................................................................12 Line Shape .....................................................................................12
P e n g u i n U s e r ’ s G u i d e i v
Random Seed ..............................................................................13 Wavy (random) ............................................................................13 Ends (random) .............................................................................13 Width Variation ............................................................................13
Line Color.......................................................................................13 Color (random) ............................................................................14 Intensity Variation ........................................................................14
Fill ................................................................................................14
P e n g u i n U s e r ’ s G u i d e 1
INTRODUCTION
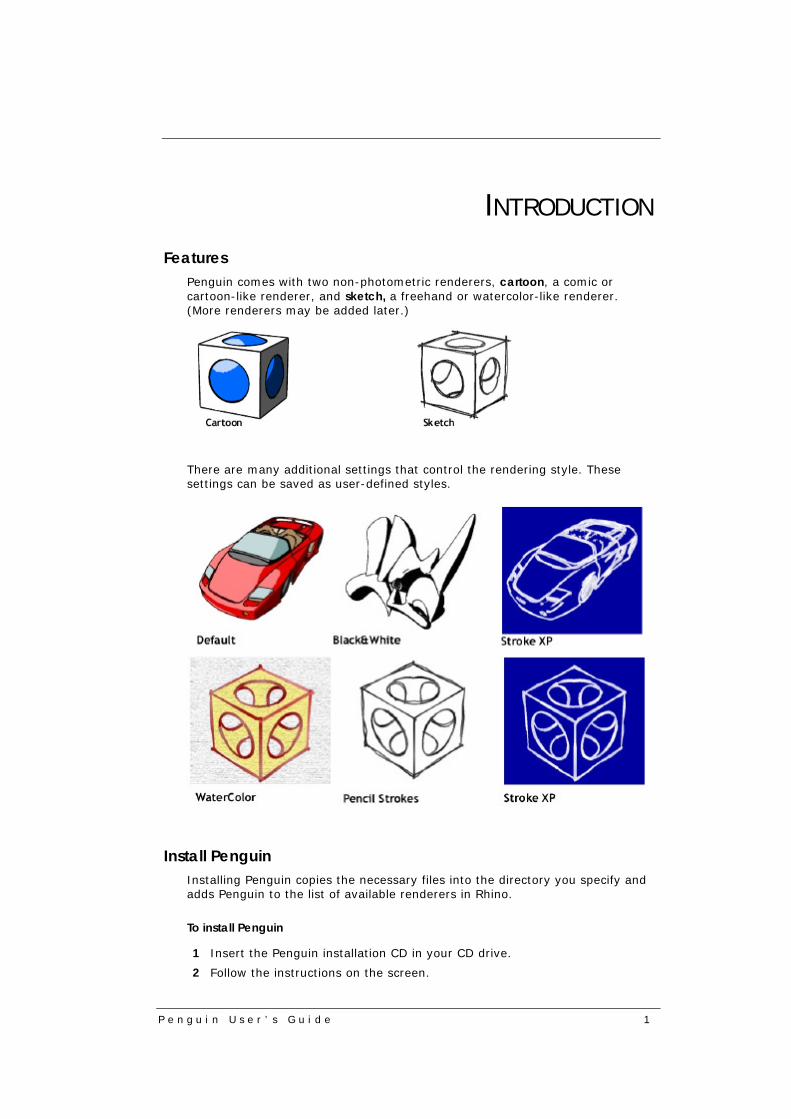
Features Penguin comes with two non-photometric renderers, cartoon, a comic or cartoon-like renderer, and sketch, a freehand or watercolor-like renderer. (More renderers may be added later.)
There are many additional settings that control the rendering style. These settings can be saved as user-defined styles.
Install Penguin Installing Penguin copies the necessary files into the directory you specify and adds Penguin to the list of available renderers in Rhino.
To install Penguin
1 Insert the Penguin installation CD in your CD drive.
2 Follow the instructions on the screen.
P e n g u i n U s e r ’ s G u i d e 2
Rendering with Penguin Penguin works in Rhino and appears on Rhino’s Render menu.
To set Penguin as the current renderer
From the Rhino Render menu, click Current Renderer, and then click Penguin.
To modify the Penguin settings
1 Run the command PenguinSettings.
To render with Penguin
1 From the Rhino Render menu, click Render.
2 In the Penguin dialog box, click Render.
Support If this manual does not answer your questions, try these other resources:
Newsgroup support
This is the fastest way to get help. Visit: news://news.penguin3d.com/support
Support Web Site
The Penguin web site www.penguin3d.com contains up-to-date information on Penguin, tips, and tutorials.
Dealer support
Call your Penguin dealer. They may be able to help.
Email Technical support
Email: [email protected]
Telephone support
Call the McNeel regional office. For the phone number of the nearest McNeel office, visit: www.penguin3d.com/support.htm.
P e n g u i n U s e r ’ s G u i d e 3
GETTING STARTED This chapter introduces the process of using Penguin to render a scene. There are five steps: § Assign materials. § Add lighting. § Set up the environment. § Select a render style. § Render.
Although the steps can be done in any order, this order makes setting up a scene easier.
Assign materials Penguin uses Rhino’s rendering materials that are assigned to a layer or an object. See the Rhino User’s Guide and Rhino Help for details.
Add lighting Penguin uses Rhino’s spotlights, point lights, and directional lights. When no light is added, Penguin will use Rhino’s default directional light.
Do not use the spotlight unless mesh settings are set to high, which increases render time substantially. Moreover, the results are similar to point and directional lights.
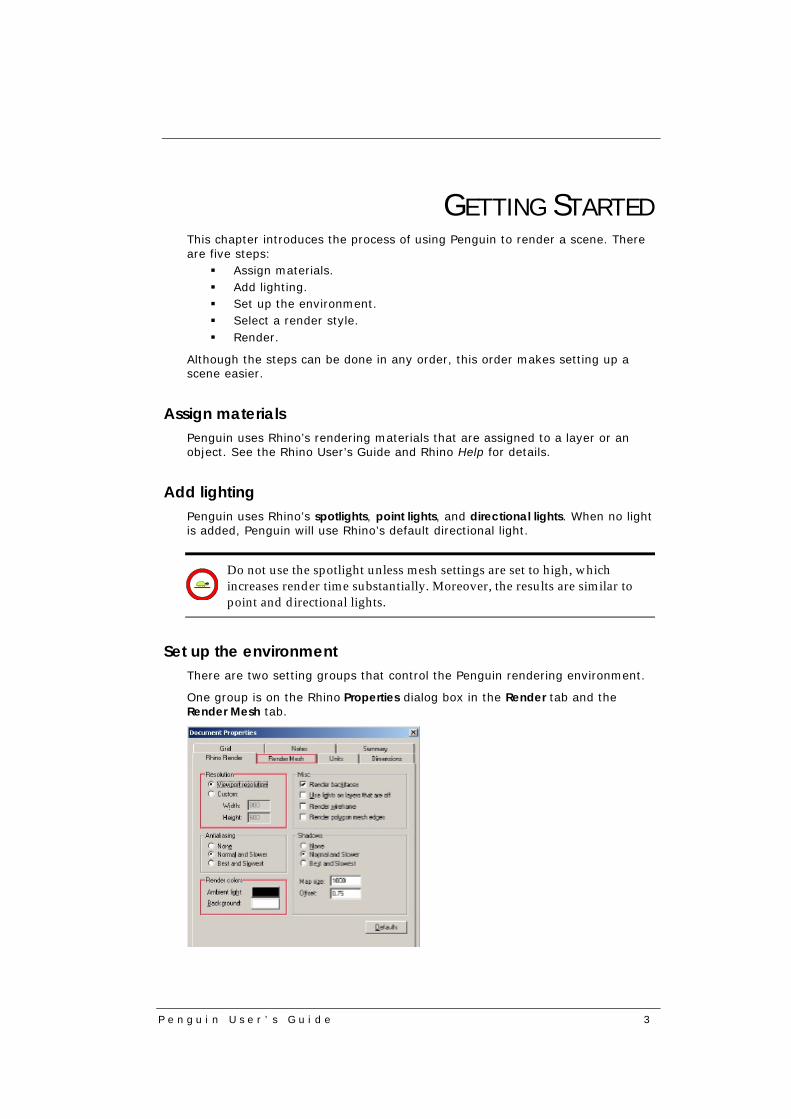
Set up the environment There are two setting groups that control the Penguin rendering environment.
One group is on the Rhino Properties dialog box in the Render tab and the Render Mesh tab.

P e n g u i n U s e r ’ s G u i d e 4
The mesh, antialiasing, and resolution settings have the most impact on the rendering time and often have little impact on the quality of cartoon or sketch style images. Start on the lowest settings and increase them only if necessary.
The other group is in the Penguin dialog box on the Common tab.
Selecting a render style Penguin comes with several user definable styles.
You can use an existing style or create one of your own by changing any of the settings in the Penguin dialog box, by running the PenguinSettings command. You can save your setting in an existing style or create a new one.
P e n g u i n U s e r ’ s G u i d e 5
Render
To render a Rhino viewport
1 From the Rhino Render menu, click Render.
2 In the Penguin dialog box, click Render.
P e n g u i n U s e r ’ s G u i d e 6
COMMON SETTINGS There are four setting groups used by both the Cartoon and Sketch renderers. § Rhino Render Materials. § Rhino Lights. § Rhino Render Mesh settings. § Penguin Common Settings.
For details on setting the Rhino Render Materials and Lights see the “Rhino User’s Guide” and the Rhino Help file.
Rhino Render Mesh Settings
To change the Render Mesh Settings
Click the Mesh Setting tab in the Properties dialog box on File menu.
For details on setting the Rhino Render Mesh Settings see the “Rhino User’s Guide” and the Rhino Help file.
To get desired results, you may need to use custom Max angle, Max edge length, Min edge length in Rhino’s Render Mesh Setting dialog box.
Penguin Common Settings
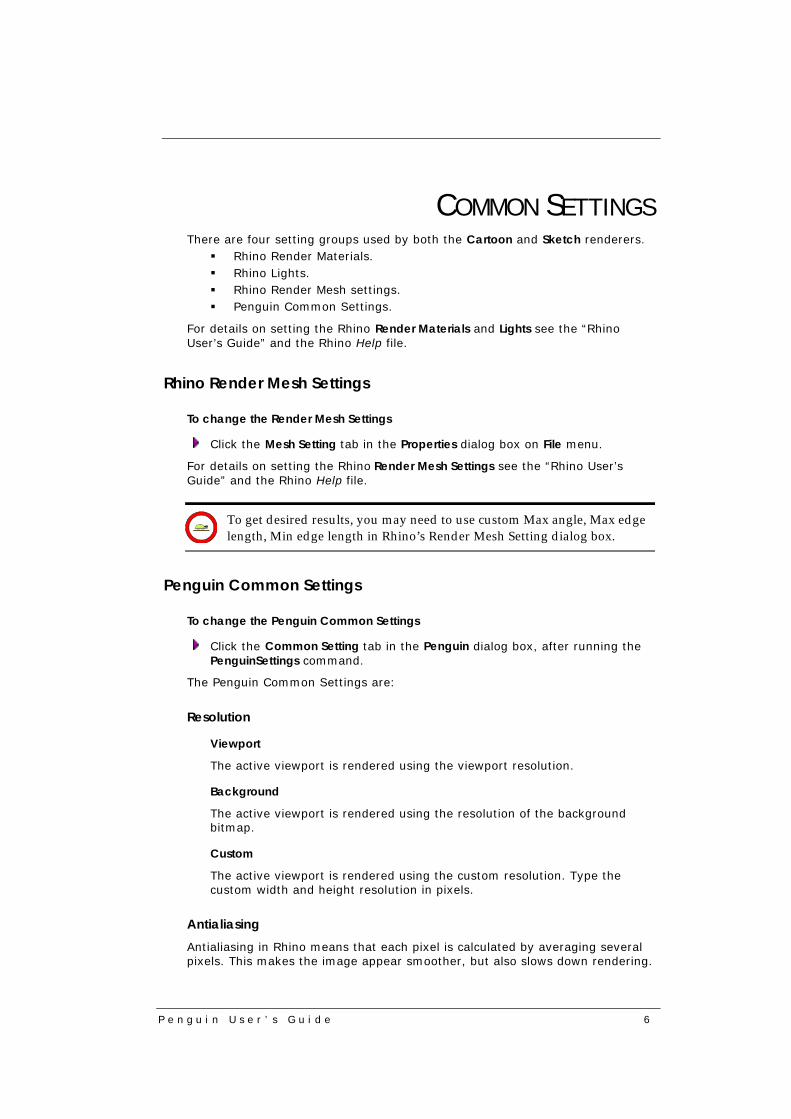
To change the Penguin Common Settings
Click the Common Setting tab in the Penguin dialog box, after running the PenguinSettings command.
The Penguin Common Settings are:
Resolution
Viewport
The active viewport is rendered using the viewport resolution.
Background
The active viewport is rendered using the resolution of the background bitmap.
Custom
The active viewport is rendered using the custom resolution. Type the custom width and height resolution in pixels.
Antialiasing
Antialiasing in Rhino means that each pixel is calculated by averaging several pixels. This makes the image appear smoother, but also slows down rendering.
P e n g u i n U s e r ’ s G u i d e 7
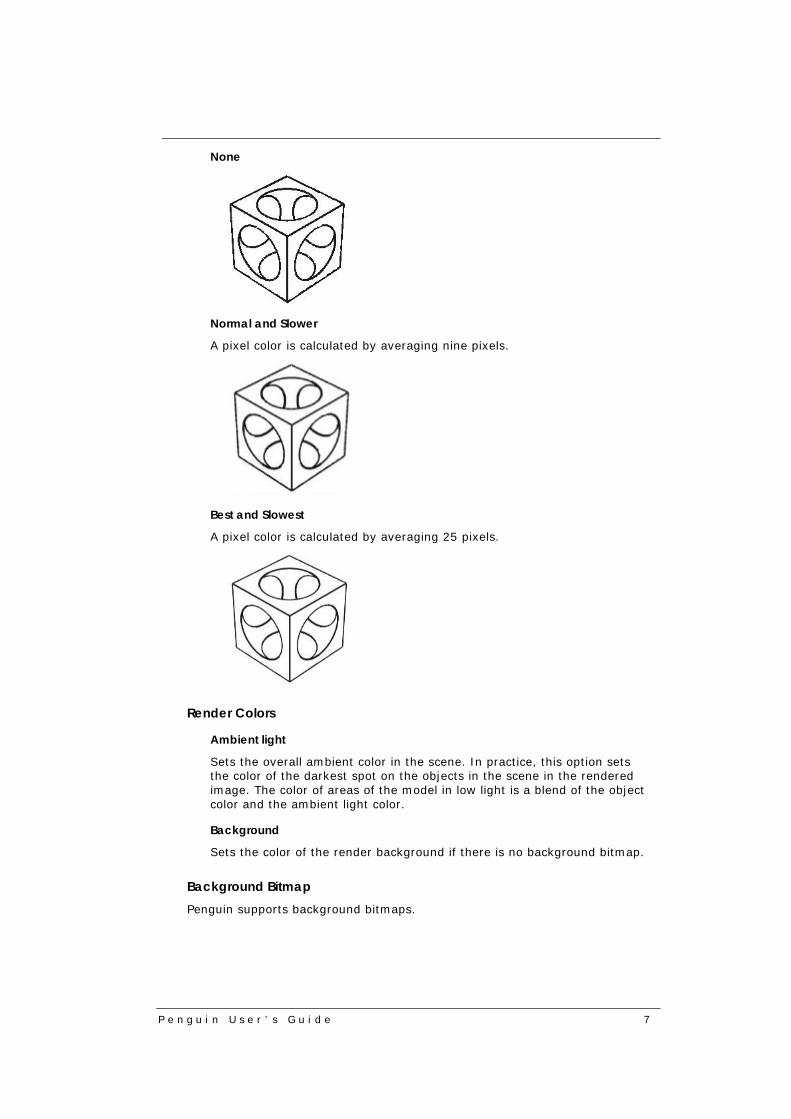
None
Normal and Slower
A pixel color is calculated by averaging nine pixels.
Best and Slowest
A pixel color is calculated by averaging 25 pixels.
Render Colors
Ambient light
Sets the overall ambient color in the scene. In practice, this option sets the color of the darkest spot on the objects in the scene in the rendered image. The color of areas of the model in low light is a blend of the object color and the ambient light color.
Background
Sets the color of the render background if there is no background bitmap.
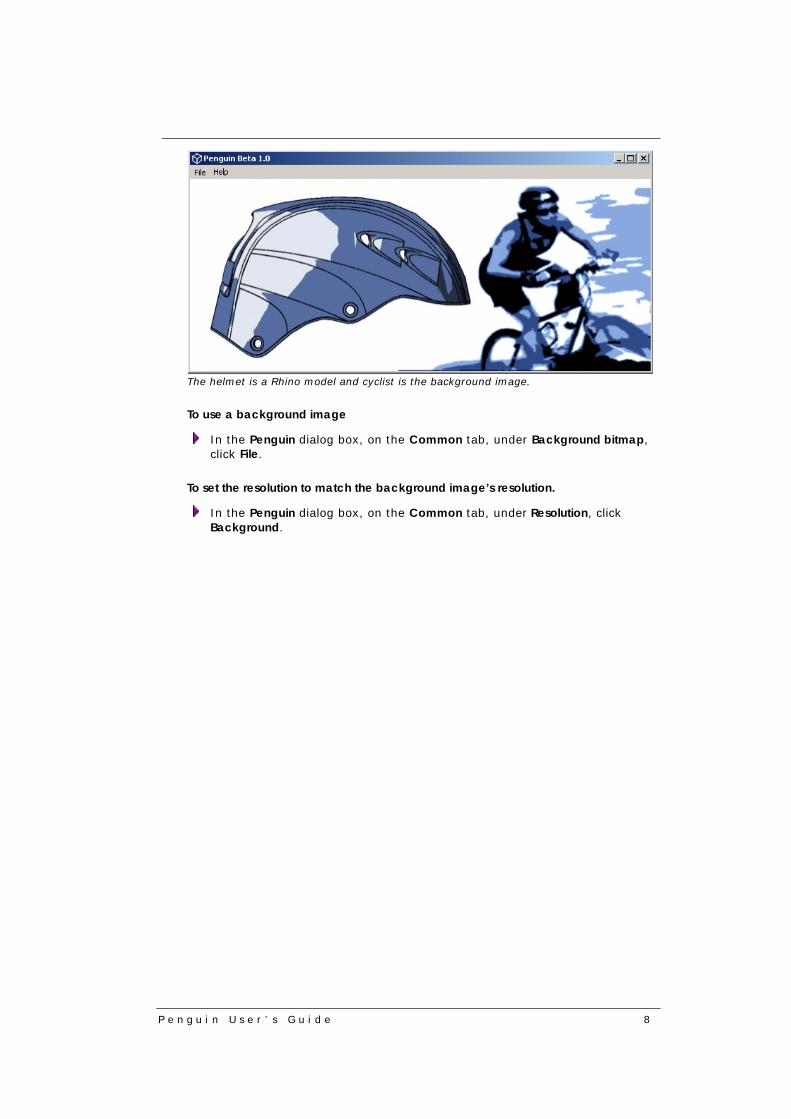
Background Bitmap
Penguin supports background bitmaps.
P e n g u i n U s e r ’ s G u i d e 8
The helmet is a Rhino model and cyclist is the background image.
To use a background image
In the Penguin dialog box, on the Common tab, under Background bitmap, click File.
To set the resolution to match the background image’s resolution.
In the Penguin dialog box, on the Common tab, under Resolution, click Background.
P e n g u i n U s e r ’ s G u i d e 9
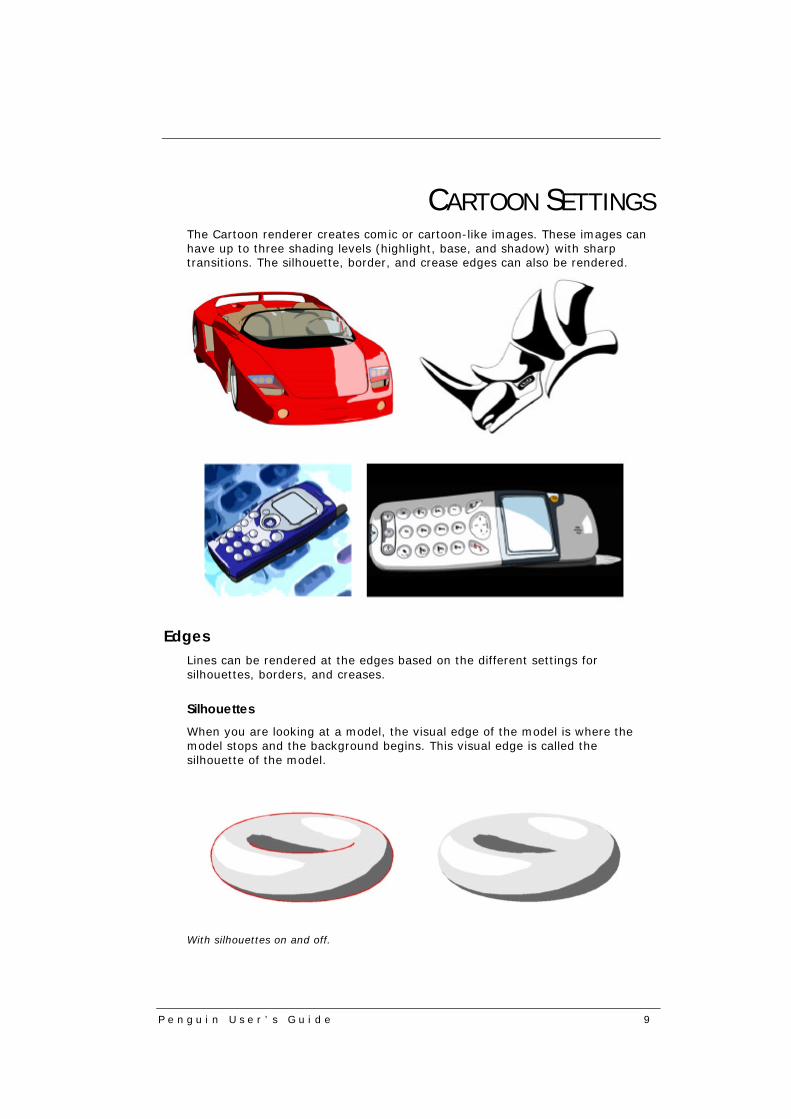
CARTOON SETTINGS The Cartoon renderer creates comic or cartoon-like images. These images can have up to three shading levels (highlight, base, and shadow) with sharp transitions. The silhouette, border, and crease edges can also be rendered.
Edges Lines can be rendered at the edges based on the different settings for silhouettes, borders, and creases.
Silhouettes
When you are looking at a model, the visual edge of the model is where the model stops and the background begins. This visual edge is called the silhouette of the model.
With silhouettes on and off.
P e n g u i n U s e r ’ s G u i d e 1 0
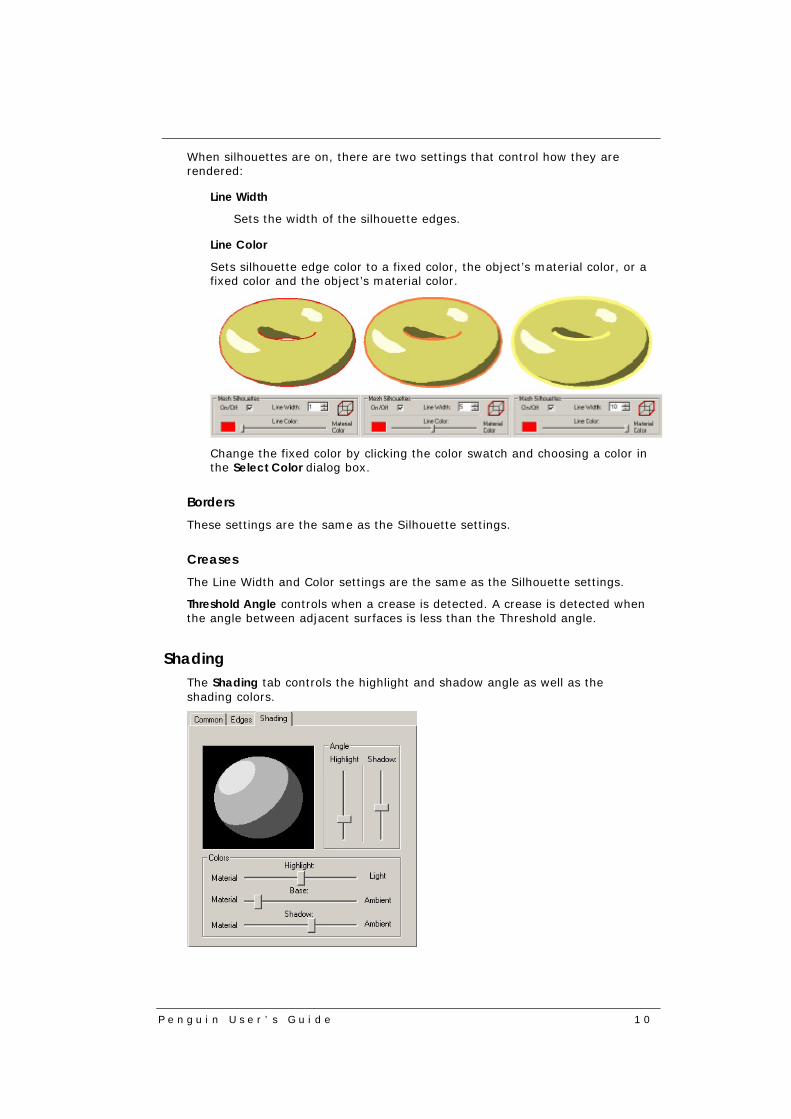
When silhouettes are on, there are two settings that control how they are rendered:
Line Width
Sets the width of the silhouette edges.
Line Color
Sets silhouette edge color to a fixed color, the object’s material color, or a fixed color and the object’s material color.
Change the fixed color by clicking the color swatch and choosing a color in the Select Color dialog box.
Borders
These settings are the same as the Silhouette settings.
Creases
The Line Width and Color settings are the same as the Silhouette settings.
Threshold Angle controls when a crease is detected. A crease is detected when the angle between adjacent surfaces is less than the Threshold angle.
Shading The Shading tab controls the highlight and shadow angle as well as the shading colors.
P e n g u i n U s e r ’ s G u i d e 1 1
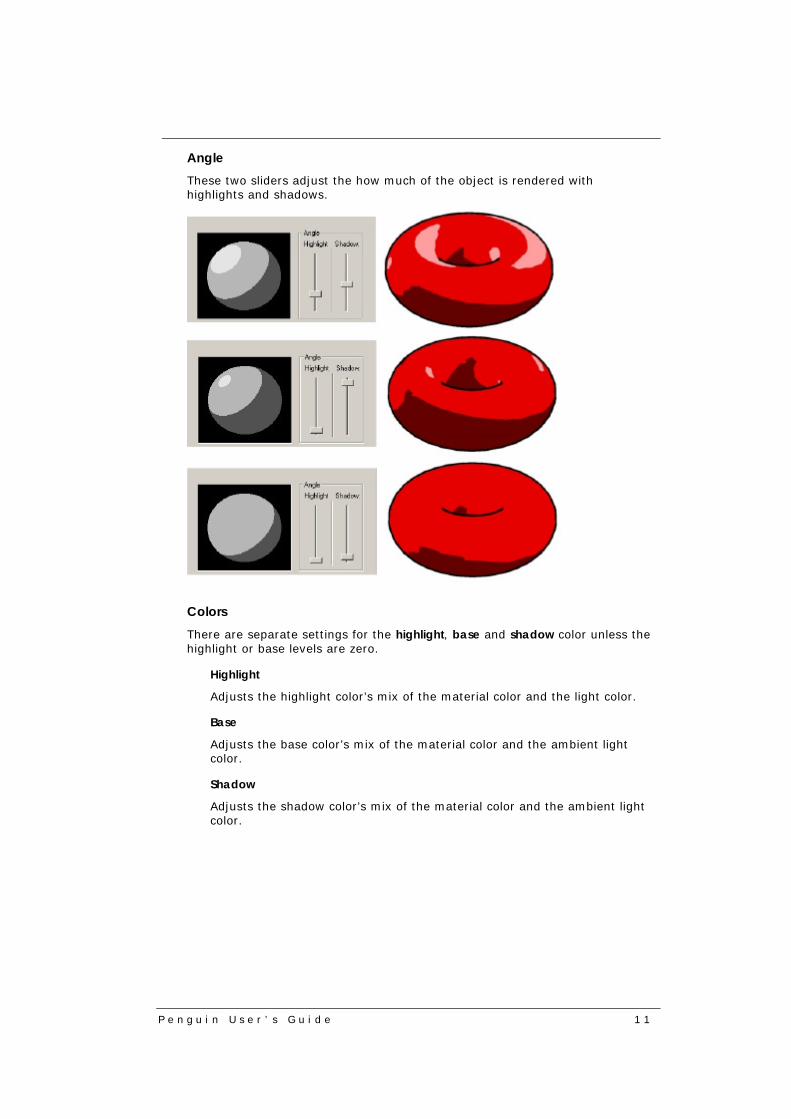
Angle
These two sliders adjust the how much of the object is rendered with highlights and shadows.
Colors
There are separate settings for the highlight, base and shadow color unless the highlight or base levels are zero.
Highlight
Adjusts the highlight color’s mix of the material color and the light color.
Base
Adjusts the base color’s mix of the material color and the ambient light color.
Shadow
Adjusts the shadow color’s mix of the material color and the ambient light color.
P e n g u i n U s e r ’ s G u i d e 1 2
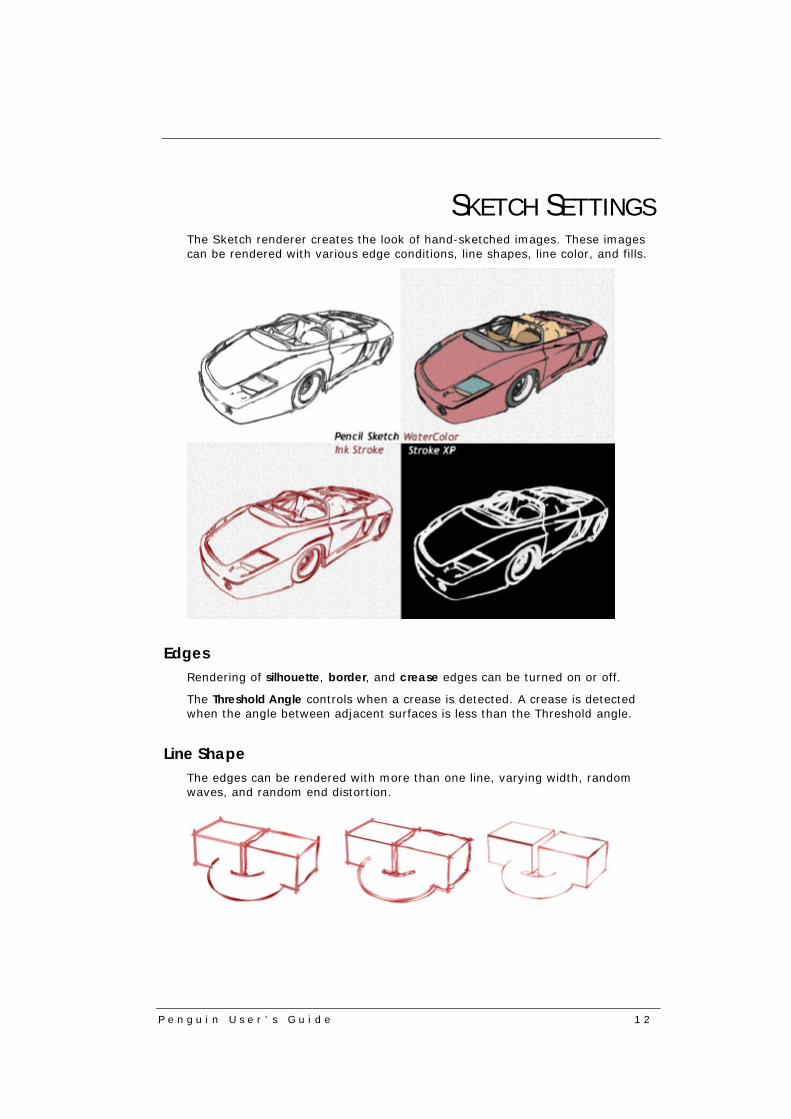
SKETCH SETTINGS The Sketch renderer creates the look of hand-sketched images. These images can be rendered with various edge conditions, line shapes, line color, and fills.
Edges Rendering of silhouette, border, and crease edges can be turned on or off.
The Threshold Angle controls when a crease is detected. A crease is detected when the angle between adjacent surfaces is less than the Threshold angle.
Line Shape The edges can be rendered with more than one line, varying width, random waves, and random end distortion.
P e n g u i n U s e r ’ s G u i d e 1 3
Random Seed
If you want a little different look without changing any of the other settings, change the number in the Random Seed edit box.
Wavy (random)
This setting adds random waves to the lines.
Number of Lines
An edge can have more than one line.
Interval
The number of segments in each wave.
Rhino’s Render Mesh Setting control how many segments are in each edge.
Min. / Max.
The lower and upper limits of the waves.
Ends (random)
This setting adds random distortion to the ends to each line or line segment.
Ends / Segments
The distortion can be applied only to the line ends or to all the intermediate segments.
Min. / Max.
The lower and upper limits of the random distortion.
Width Variation
This setting adds width variations to the lines.
Interval
The number of segments in each width variation.
Min. / Max.
The lower and upper limits of each width variation.
Line Color Lines can be rendered with a fixed color, the material color, or a random color with intensity variation.

P e n g u i n U s e r ’ s G u i d e 1 4
Color (random)
The line color can be based on the objects material, a single color, or a color range with random variation.
Color Material
Uses the object’s material color as a base with random darkening or lightening within the specified limits.
Single color
Uses a base single color for all objects with random darkening or lightening within the specified limits.
Multiple Color
Uses a random color blending red, green and blue within intervals specified.
Intensity Variation
The line color intensity may vary based on these settings.
Interval
The number of segments in each intensity variation.
Min. / Max.
The lower and upper limits of each intensity variation.
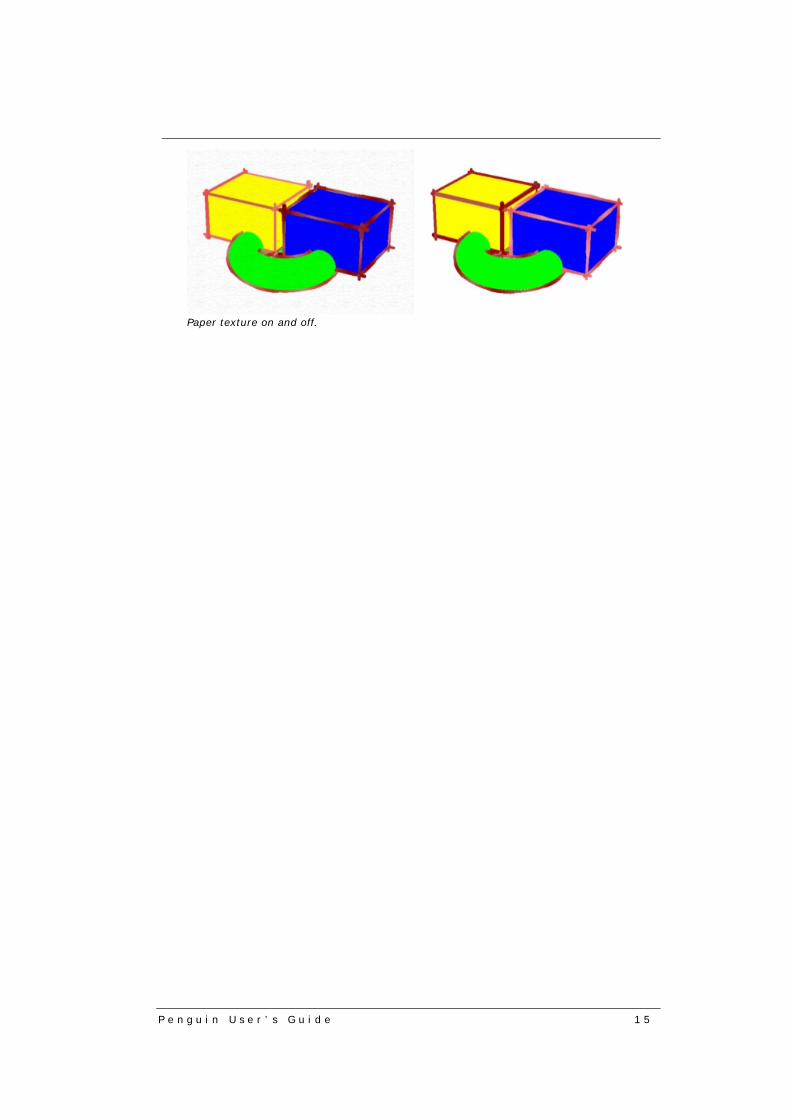
Fill The Sketch rendering can have the objects filled with their object color and have a paper texture.
Fill on and off.
P e n g u i n U s e r ’ s G u i d e 1 5
Paper texture on and off.