mapping expense transactions to qb accounts - microsoft · pdf filemapping expense...
TRANSCRIPT

Mapping Expense Transactions to QB Accounts
©Simple Business Systems, Inc. 2015 Mapping Expense Transactions to QB Accounts Page 1
success, made simple
SimplePort will assign expense transactions (payments) to vendors and appropriate COGS, Equity or Expense accounts, on import (if the expense item is in the QB Item List). This eliminates transactions from landing in the PayPal Default Expense account, pending manual re‐assignment after a QuickBooks data import. This process is a series of mouse clicks performed in the correct order. The screen capture images are from QuickBooks Pro 2012 and are the same for QB 2013 editions. QB 2011 or earlier editions, or QB for Mac, have subtle differences that are explained in this step‐by‐step guide. To view transactions that are imported and assigned to the PayPal Default Expenses account, double left mouse click on the PayPal Default Expenses, or whatever your SimplePort default expenses account is named (an Other Expense account type) in your Chart of Accounts. QB will auto‐generate a QuickReport for the account. Use the date range options to select the dates for the report. To assign the transaction to a vendor (not every expense transaction requires a vendor be used), the name must be added to the Vendor Center. By default, if the name is not in the Vendor Center, QB auto‐generates an Other Name in the Other Names list for expense transaction assignment. By default SimplePort will assign the transaction to a dummy “PayPal Vendor” name, the actual vendor name is in the transaction memo line in the QuickReport. Double click on any transaction in the QuickReport to see the expense transaction check and the vendor name.

Mapping Expense Transactions to QB Accounts
©Simple Business Systems, Inc. 2015 Mapping Expense Transactions to QB Accounts Page 2
success, made simple
Highlight the PAY TO THE ORDER OF vendor name in the check and enter the name of the vendor you wish to use Click anywhere outside the field, QB will pop‐up the Quick Add form click Quick Add button From the Select Name Type pop‐up The name is added to the vendor center Add the expense item to the QuickBooks Item List. From the QB Toolbar select Lists, and from the Lists pick‐list, select Item List.
click Quick Add button
click the Vendor radio button
Mapping Expense Transactions to QB Accounts
©Simple Business Systems, Inc. 2015 Mapping Expense Transactions to QB Accounts Page 3
success, made simple
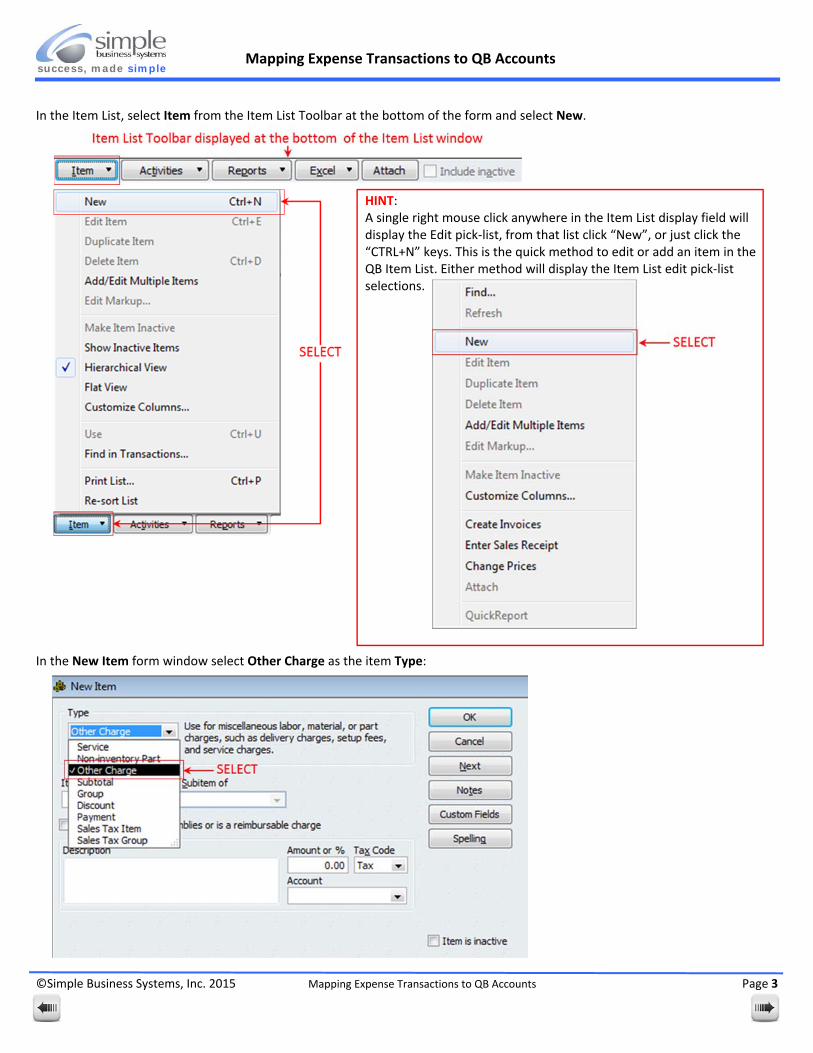
In the Item List, select Item from the Item List Toolbar at the bottom of the form and select New.
HINT: A single right mouse click anywhere in the Item List display field will display the Edit pick‐list, from that list click “New”, or just click the “CTRL+N” keys. This is the quick method to edit or add an item in the QB Item List. Either method will display the Item List edit pick‐list selections.
In the New Item form window select Other Charge as the item Type:
Mapping Expense Transactions to QB Accounts
©Simple Business Systems, Inc. 2015 Mapping Expense Transactions to QB Accounts Page 4
success, made simple
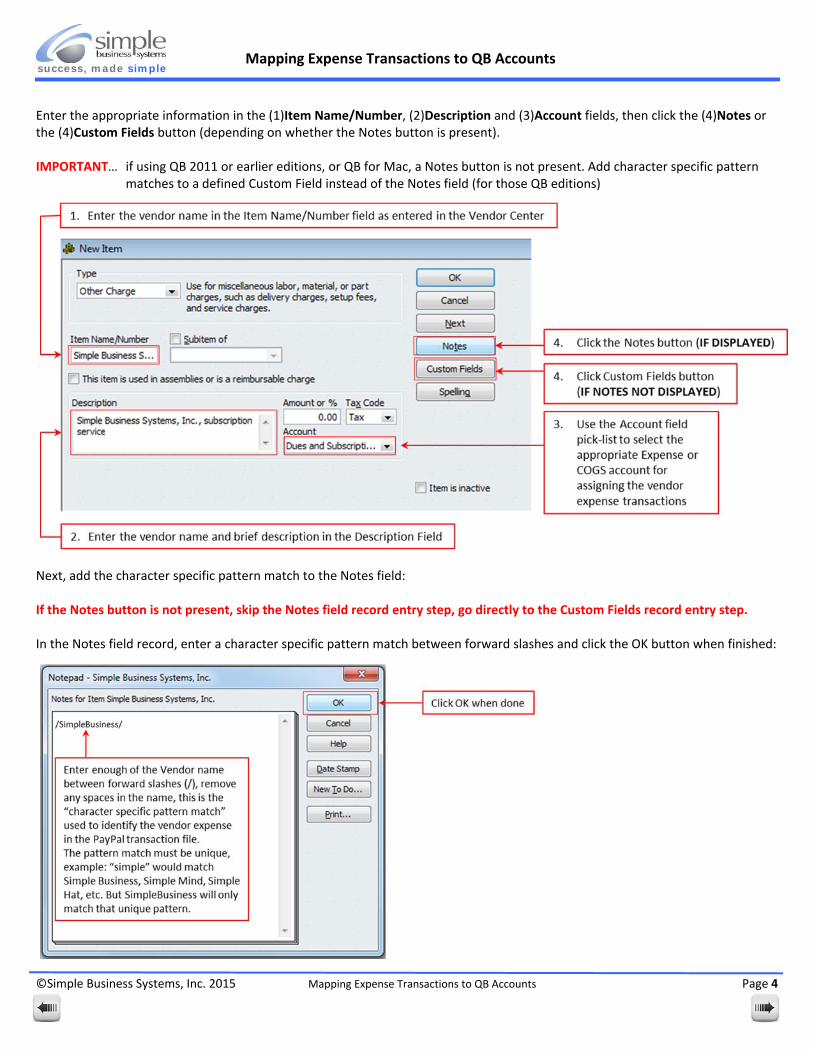
Enter the appropriate information in the (1)Item Name/Number, (2)Description and (3)Account fields, then click the (4)Notes or the (4)Custom Fields button (depending on whether the Notes button is present). IMPORTANT… if using QB 2011 or earlier editions, or QB for Mac, a Notes button is not present. Add character specific pattern
matches to a defined Custom Field instead of the Notes field (for those QB editions) Next, add the character specific pattern match to the Notes field: If the Notes button is not present, skip the Notes field record entry step, go directly to the Custom Fields record entry step.
In the Notes field record, enter a character specific pattern match between forward slashes and click the OK button when finished:

Mapping Expense Transactions to QB Accounts
©Simple Business Systems, Inc. 2015 Mapping Expense Transactions to QB Accounts Page 5
success, made simple
Custom Fields Record Entry (for pre‐QB 2011 and QB for Mac editions) The editions of QuickBooks Pro that do not have a Notes field in the Item List require a defined Custom Field. This field is used for character specific pattern matching necessary for expense item mapping. IMPORTANT… QuickBooks defined custom fields have a 31 character limitation; pattern matches cannot exceed 31 characters. In the New Item form click the Custom Fields button: Accept the QuickBooks warning message: In the Custom Fields for XXXX Name form, click the Define Fields button:

Mapping Expense Transactions to QB Accounts
©Simple Business Systems, Inc. 2015 Mapping Expense Transactions to QB Accounts Page 6
success, made simple
In the Set up Custom Fields for Items form enter “simpleport” in the Label field, check the Use box and default to “Any Text” in the What Kind of Data? field, ignore the Trans and List fields, click the OK button: Accept the QuickBooks warning message: Enter a character specific pattern match In the simpleport defined field, delete any spaces in the name and keep the name to a unique set of characters (remember the field is limited to 31 characters: Once the “simpleport” defined Custom Field has been created it will be available for all items and will not need to be re‐created for future item mapping.
Mapping Expense Transactions to QB Accounts
©Simple Business Systems, Inc. 2015 Mapping Expense Transactions to QB Accounts Page 7
success, made simple
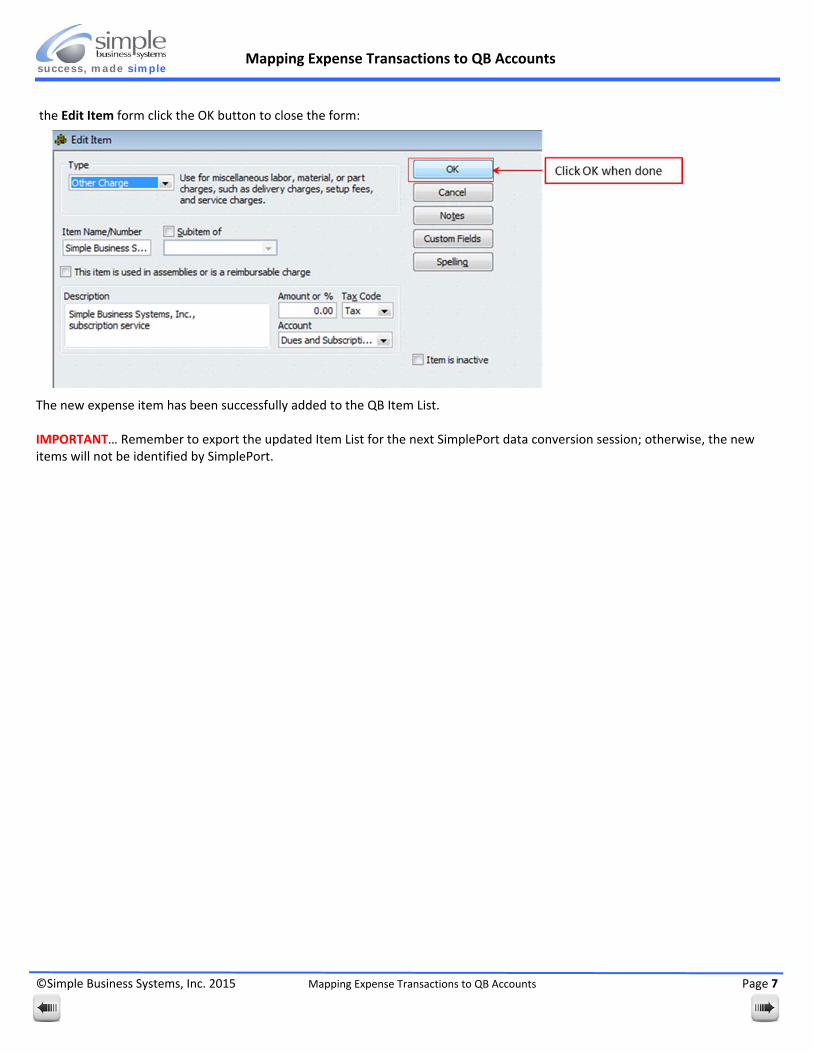
the Edit Item form click the OK button to close the form: The new expense item has been successfully added to the QB Item List. IMPORTANT… Remember to export the updated Item List for the next SimplePort data conversion session; otherwise, the new items will not be identified by SimplePort.