mass spectrometry basics for young students: - american society
TRANSCRIPT

1
Mass Spectrometry Basics for Young Students:
An Interactive Laboratory Tour
Julia H. Jungmann, Nadine E. Mascini, Andras Kiss, Donald F. Smith, Ivo Klinkert, Gert B. Eijkel, Marc C.
Duursma, Berta Cillero Pastor, Kamila Chughtai, Sanaullah Chughtai, Ron M. A. Heeren*
FOM-Institute AMOLF, Science Park 104, 1098 XG Amsterdam, The Netherlands
Running title: Outreach: MS basics for young students
Keywords: mass spectrometry, ions, charged particle manipulation, building blocks of
matter, science education, open day, open house, outreach
* Address reprint requests to Ron M. A. Heeren, FOM-Institute AMOLF, Science Park 104, 1098 XG
Amsterdam, The Netherlands, Telephone: +31-20-7547100, Fax: +31-20-7547290, E-mail:

2
Abstract
It is imperative to fascinate young children at an early stage in their education for the
analytical sciences. The exposure of the public to mass spectrometry presently increases
through the common media. Outreach activities can take advantage of this exposure and
employ mass spectrometry as an exquisite example of an analytical science that children can
be fascinated for. The presented teaching modules introduce young children to mass
spectrometry and give them the opportunity to experience a modern research laboratory.
The modules are highly adaptable and can be applied to young children from the age of 6
years to 14 years. In an interactive tour, the students explore three major scientific concepts
related to mass spectrometry; the building blocks of matter, charged particle manipulation
by electrostatic fields and analyte identification by mass analysis. Also, the students carry
out a mass spectrometry experiment and learn to interpret the resulting mass spectra. The
multistage, inquiry-based tour contains flexible methods which teach the students current-
day research techniques and possible applications to real research topics. Besides the
scientific concepts, laboratory safety and hygiene are stressed and the students are
enthused for the analytical sciences by participating in “hands-on” work. The presented
modules have repeatedly been practiced during laboratory open days but are equally
suitable to complement (early) high school science classes when combined with a laboratory
visit.

3
Introduction
Mass spectrometry (MS) is an analytical technique which identifies compounds based on the
atomic sample composition of the molecules and their charge state [1]. Therefore, “blind”
analysis of unknown samples is possible since MS does not require detailed prior knowledge
of the sample composition. Ideally, the chemical identification by MS is not limited by
analyte pre-selection as, for example, in analysis techniques based on fluorescent or
radioactive labeling. This bears the advantage that the analysis technique itself does not
make any functional changes to the molecules under investigation. The applications of mass
spectrometry range from among others environmental analysis, isotope dating and tracking,
trace gas analysis, proteomics, lipidomics, metabolomics to clinical applications and
forensics.
MS is a particularly interesting and valuable analytical technique to share with children and
young science education students. When explaining mass spectrometry, i.e. “finding out
what something is by weighing it”, the concept of “the building blocks of matter” is
introduced (i.e. the elements and molecules). The specificity of a building block’s mass in
relation to its identity is explained. Also, possible fields of application of MS (which the
participants might already be familiar with through the common media, e.g. crime scene
investigation, food allergies etc) are discussed. Further, the need and concept of
electrostatic fields for the manipulation of charged particles through the mass spectrometer
is explained.
Laboratory experiences for children and early science students are generally accepted as a
valuable learning tool [2]. In particular, it has been proven an effective learning and teaching

4
strategy to give students the opportunity to actively explore and experience the course
content of their science classes [3]. Additionally, it is recognized that a laboratory visit will
reinforce scientific concepts that have been studied in a class room context [4], which
indicates the relevance of the presented teaching modules to complement (early high)
school science education. Additionally, the scientific curiosity of young children can be
triggered and stimulated by open house laboratory days that are specifically tailored to
young children. Akerson and co-workers [5] have demonstrated the importance to start
science education in early childhood years and proved that the children are well capable of
understanding complex scientific concepts when appropriately presented. Benkinson and
Chen have successfully introduced proteomics to the classroom [6].
In this paper, we report on three teaching modules which together introduce the concept of
mass spectrometry to children of the age 6 to 14. The modules are designed to convey a
complex analytical technique to the pre- and/or early-science education level. The main
goals of the modules are threefold: to convey the concept of MS to young children/early
science students, to enthuse children for the analytical sciences and to familiarize them with
a laboratory environment at an early stage. The presented teaching tour is suitable for both
(MS/chemistry) laboratory open days or science classes in combination with a laboratory
visit (see Box 1 for the student learning outcomes).
Box 1: Student learning outcomes.
At the end of the three modules, participants
• Understand the concept of mass spectrometric analysis: Analyte identification via analyte molecular mass.
• Understand that charged particles can be manipulated by electrostatic forces.
• Understand the basic elements of a mass spectrometric experiment: Sample preparation, mass analysis and data interpretation.
• Are introduced to laboratory hygiene and safety.
• Know several areas of application of mass spectrometry.

5
Methods
Teaching Format
The teaching format is a multistage, exploratory tour for children, “Weighing is knowing!”.
The targeted age group is from 6 to 14 years (adjustments are required to fit the respective
age group). Modules have been designed for 8-10 children per group. The three module tour
is suitable for more students if the class is divided into multiple groups of 8-10 students. The
entire tour takes about 45 minutes to one hour.
Description of the teaching program: The interactive laboratory tour
Module 1: Analyte idenfication via analyte mass.
GOAL: Explain the link between mass and analyte (“building block”) identification.
WHAT: An interactive game/competition.
In Module 1 of the tour, the concept of building blocks of matter and analyte identification
via analyte mass, i.e. the core concept of mass spectrometry, is developed interactively with
the children. For a setting in a (MS) lab facility, the explanation is structured as follows: The
children are welcomed to the lab by the teacher. He/she announces that the students will
learn what the research group does in their laboratory. Also, the class is strongly encouraged
to ask questions along the way. The initial welcoming session is intended to trigger the
students to think about how to investigate small “things”. This discussion is steered towards
the concepts of building blocks of matter and mass spectrometry, i.e. “looking” at the
building blocks of matter by “weighing” them. The introduction ends with a rationale

6
describing why it is important to analyze unknown samples by mass spectrometry, which is
easily related to the daily life of the students. The methodology of this introductory session
is provided in Box 2.
After this introductory discussion, an interactive game further illustrates the concept of
analyte identification via analyte mass. The methodology for this game is provided in Box 3
and a list of materials and preparatory instructions are given in the Teaching Materials
section, respectively.
The activities of Module 1 have been conducted several times with students of different age
groups (6-14). The activities of Module 1 do not require any prior science education.
However, dependent on the age and the level of previous science education, the activity and
terminology can easily be tailored to the prior knowledge of the children. The activity is most
suitable if the group of 10 students is divided into 3-5 teams during the game. The activity
can be scaled towards larger classes if the materials are scaled accordingly. The activities of
Module 1 take about 10-15 minutes to complete.

7
Box 2: Instructions and sample questions to Module 1: Analyte idenfication via analyte mass.
• How to investigate small “things”. To start, the students can be challenged with questions: “Does anyone have an idea how you can look at things that are so small that you can barely or even not see them with your eyes?” Many kids think about magnifying glasses or maybe a microscope that they have used in early science education classes. The teacher/researcher points out to them: “This works well for many small things. However, the “things” that are looked at and have to be analyzed in the laboratory here are so small that they cannot be seen with the naked eye at all and even a microscope or magnifying glass will not do the trick. In a mass spectrometry laboratory, there is yet another method to “look” at things that cannot be seen with the naked eye. Even if we cannot see these things, we can “weigh” them with a special type of scale balance.”
• The building blocks of matter. In simple terms, the teacher explains that: “Everything around us consists of very small building blocks “atoms” and clusters of building blocks “molecules”. Atoms and molecules are so small that we cannot see them. The different building blocks of different materials have a different mass.”
• Analyte identification: The teacher asks the students if they have an idea about a technique that could figure out which building block is which. Possibly the students have grasped the concept of analyte (=building block) identification by mass (=weighing) already and will point this out. If not and/or to illustrate the point of analyte identification by mass, the teacher can take two boxes and put a feather in one and a small rock in the other. Then, the lid is closed such that from the outside of the boxes it is impossible to find out what is inside by visual inspection. The teacher asks the students how they would find out about what is in the box and helps to develop the concept of analyte identification by mass spectrometry. Now it becomes clear that: “If you can weigh a sample, you can figure out what it is! We call this technique “identification”.” The small feather-rock experiment naturally leads to the interactive game that is performed in the next stage of the module.
• Why bother? What is mass spectrometry good for? Finally, it is important to motivate why analyte identification by mass spectrometry is relevant to the society and the students. The teacher asks the group if they have any idea why the researchers look at unknown samples by mass spectrometry. “Why do we want to figure out what is inside a sample?” Some students might have an idea; possible examples that trigger the students’ interest are food control (lactose intolerance, nut allergy etc), medical diagnosis or crime scene investigation.

8
Box 3: Instructions for the interactive game, sample questions and explanations (Figure 1).
• Models of the building blocks of matter. The teacher encourages the students to think about the concept of building blocks of matter (Figure 2a): “Let’s look at the building blocks! The building blocks are very small but we have made some models for you.” The teacher shows them the building block models (toy molecular models) and reminds them that everything around them consists of the building blocks. “No matter how big something is. It’s made of small building blocks. And for each building block, we know the mass.”
• Idea behind the game. The teacher introduces the game. “In this game, you can figure out the identity of an unknown sample by weighing it. And, this is what we do in our laboratory here. We have a box with some kind of sample in it but we have no idea what’s inside! We then use our laboratory equipment to find out what building blocks are inside the sample. We do that by weighing the building blocks. Really, our machines in the laboratory are not more than big, fancy scale balances.”
• The game. The teacher divides the class into groups of 2 (to maximally 3) students that will work together. “Now, you get to figure out what’s inside the box.” On one table, there are several numbered boxes (see materials for the preparation of this game). The teacher points out that: “Every box represents one type of molecule (=one material), which has a unique mass. Each box contains one of the molecules that you see here (teacher points to the models of the molecules (Figure 2a); see materials section). From just looking at the box, we do not know which molecule is inside. All boxes look the same. A good way to figure out what is inside the box is …?” The students realize “…to weigh the box!” Every group takes a box from the table and weighs it on a scale balance (Figure 2b). Using the mass from the scale balance, the students come back to the table with the molecular models and “identify” which molecule was in the box (Figure 1). The students can check their result by opening the box (Figure 2c); inside the box there is a photo of the molecule. “Did it work out?” The students are instructed to identify which molecule is inside several of the boxes by weighing them. The teams compete in who can identify all molecules in the shortest time.
• Wrap up. The teacher points out that: “Now you know how to figure out which building blocks are inside an unknown sample: By weighing it!” Now it is time to learn how researchers work with the molecules in the laboratory.
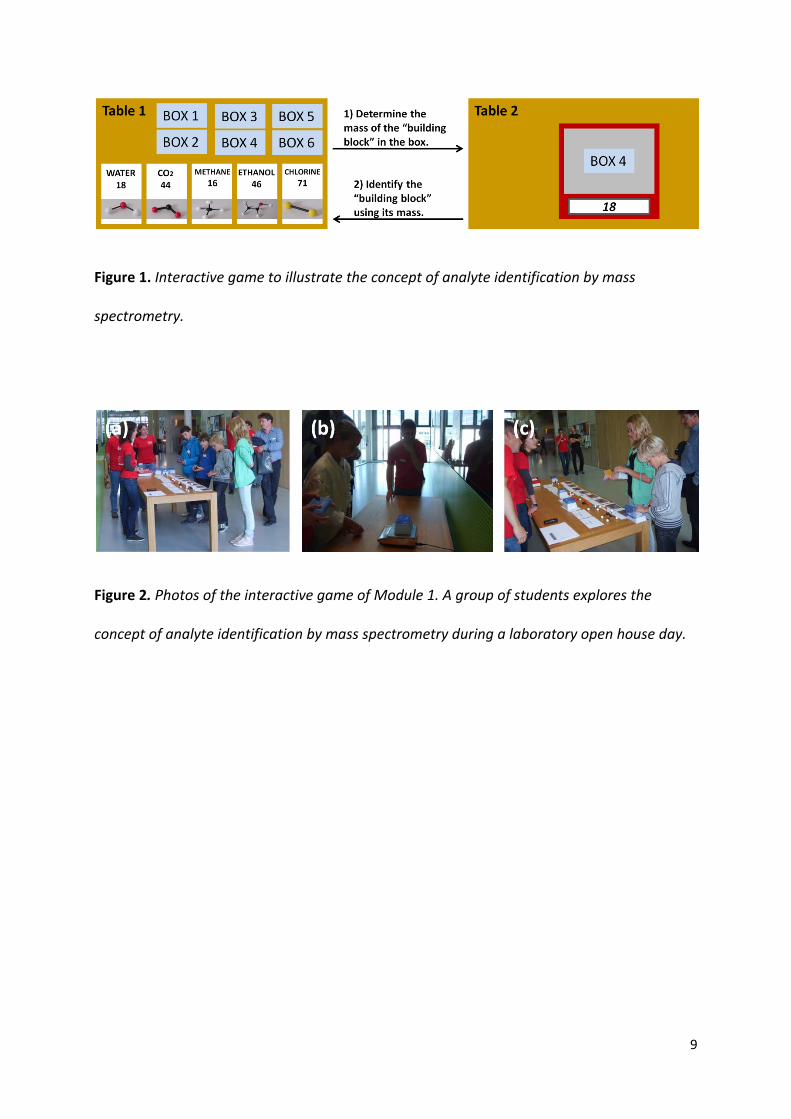
9
Figure 1. Interactive game to illustrate the concept of analyte identification by mass
spectrometry.
Figure 2. Photos of the interactive game of Module 1. A group of students explores the
concept of analyte identification by mass spectrometry during a laboratory open house day.

10
Module 2: Mass spectrometry to identify very small “objects” by mass and the use of
electrostatic fields
GOAL: Explain that a mass spectrometer separates very small “objects” of different mass;
explain that mass separation relies on charged particles.
WHAT: (Interactive) demonstration on charge/static electricity.
Module 2 of the tour shows that mass spectrometry relies among others on the use of
electrostatic fields to manipulate the charged analytes of interest. The concept of
electrostatic fields is illustrated during an interactive demonstration. Electrostatic fields are
conceptually compared to “forces” (like wind) and mass separation by means of electrostatic
fields is demonstrated. The methodology of the demonstration is outlined in Box 4 and
Figure 3; the setup is shown in Figure 4; the required materials are described in the Teaching
Materials section.
The demonstration of Module 2 can be carried out with the entire class or in smaller groups
to increase the interaction with the researchers. The Module takes about 10 minutes.

11
Box 4: Instructions for the interactive demonstration on the use of electrostatic fields for mass spectrometric analysis; sample questions and explanations.
• Introductory questions. The teacher asks the students: “How can we use a “force” (something invisible) to separate things?” Even with prior science education this is a challenging concept to grasp. The teacher can guide the class with an analogy: “Imagine two balls lying on the beach: a soccer ball and an air-filled beach ball. If wind comes up on the beach, which ball will fly away more readily?” The class immediately realizes that the beach ball will fly off more easily. The teacher steers the class to thinking about: “Why does the beach ball fly away and not the soccer ball?” The class easily will realize that this is the case: “Because it is lighter!” The teacher explains: “The wind blows equally strong on both balls but its strength (=the force) has a different effect! Thus, with the invisible “wind force”, we can separate different masses!” The introductory questions convey the concept of mass separation by a (n invisible) force and set the stage for moving on to the concept of electrostatic forces.
• Electrostatic forces. The teacher leads the conversation towards electrostatic forces: “There are more invisible forces. Maybe you experienced some of them before. For instance, if you rub a rubber tube with a piece of cloth, you can lift up your friend’s hair, or styrofoam pieces or pieces of paper.” The teacher asks a student to rub a rubber tube on his/her pullover and then the student can attract some small pieces of paper or his/her friends’ hair (Figure 5a). The teacher points out: “that you can “pull” on things with electrical forces.”
• Electrical forces and mass spectrometry. After this demonstration, the teacher links electrostatic forces and mass spectrometry: “That’s also what we do in a mass spectrometer! We push and pull on particles using electrostatic forces.”
• Demonstration. The goal of this demonstration is to show the separation of different “masses” with electrical forces (Figure 3 and 5b). The teacher can introduce mass separation with a question: "I can lift up your hair with the Perspex rod but when I try to lift the table it won't move ... Why? The table and the hair have different masses!" A dedicated setup is prepared to “mass separate” two liquids. In this setup (Figure 3), tap water and viscous sugar syrup are each pumped through hoses hanging on a stand. When they are pumped through the hoses, both the water and the syrup make it to the end of the hose on the stand and fall straight down into a bucket on the table (Figure 3a). However, if we place a metal sphere connected to a Van de Graaff generator next to it and charge up the sphere, we can make “electrical wind” (forces). Now, the water and the syrup droplets are attracted towards the metal sphere (Figure 3b and 5c)! The teacher points out: “The charged sphere can pull on the water droplets just like we pulled on your hair after we charged up the Perspex rod by rubbing it on your pullover!” The teacher asks the students to watch carefully what is happening now: “The water and the syrup are attracted towards the charged sphere and they fall into different buckets!” The students observe that the water droplets fall into the bucket closer to the sphere and the syrup falls into the next bucket closer to the hoses, i.e. water is “lighter” than syrup! The teacher wraps up by leading the students to realize that: “We have separated the water and the syrup (the different masses!) with electrostatic forces.”

12
Figure 3. Demonstration to show mass separation by means of electrostatic fields. Water and
viscous sugar syrup are pumped out of a beaker into a hose. (a) If no fields are applied both
the water and the syrup fall down into the collecting tray. (b) If the Van de Graaff generator
charges the metal sphere (indicated by stars), the droplets are attracted towards the sphere.
The water is “lighter” than the syrup and will be pulled closer to the sphere. The water and
the syrup fall into different segments of the collecting tray, i.e. mass separation by means of
electrostatic forces.

13
Figure 4. Annotated photograph displaying the major parts of the demo setup.
Figure 5. Photos of the demonstration of Module 2. (a) The students play with static
electricity; they rub a Perspex rod on their pullovers and then can lift up their hair. (b) The
teacher explains the “mass separation setup”. (c) “Mass separation”, i.e. water and syrup are
separated, by electrostatic fields.

14
Module 3: “Real” mass spectrometry in action.
GOAL: Show the students a “real” mass spectrometry laboratory; identification of compound
by mass spectrometry; laboratory experience.
WHAT: (Interactive) demonstration, mass identification game.
In Module 3 of the laboratory tour, the students are brought inside an analytical chemistry
laboratory where the concepts developed in Module 1 and Module 2 are put into practice.
Generally, a MS experiment consists of three distinct parts: Sample preparation, mass
analysis and data analysis/interpretation. In the last stage of the exploratory tour, the
students participate in a “real” MS experiment and hence “hands-on” experience all three
parts of the MS experiments.
Importantly, Module 3 takes the class into an analytical chemistry laboratory and hence
offers the opportunity to introduce basic laboratory safety and chemical hygiene. First, the
students put on lab coats and the teacher can discuss that laboratory coats protect both the
researchers working in the laboratory and prevent the contamination of a “clean” working
environment (Figure 6a). Later during the mass spectrometry measurements, gloves are
used. Second, the class is introduced to the laboratory equipment. The teacher shows them
the mass spectrometers and points out that these machines are our “scale balances” for
molecules: “They are called mass spectrometers because they measure the masses of
different compounds.” After the class is settled in the lab, a hands-on mass spectrometry
experiment is performed in which the students are familiarized with sample preparation,
mass analysis and the analysis of the experimental results. The methodology and procedure
of the experiment and the required materials are given in Box 5, Figure 6 and 7, and the
Teaching Materials section, respectively.

15
The introduction to laboratory safety and laboratory hygiene (as well as dressing into
laboratory coats) takes about 5 minutes for the entire class. The brief introduction to the
laboratory equipment and mass spectrometers can be tailored to the level of the prior
knowledge of the class and can hence take 5-10 minutes. The mass spectrometry
experiments take about 10-15 minutes for about 3 rounds of analysis. This step can be
repeated depending on the size and enthusiasm of the class.
Figure 6. Mass spectrometry experiment in the laboratory. (a) The group is dressed in
laboratory coats and welcomed in the lab. The teacher introduces the equipment and
explains the procedure of the experiment/game. (b) A volunteer chooses one beverage,
drinks a couple of sips and then spits into a cup. (c) A researcher prepares the saliva sample

16
for analysis together with the student and introduces it in the mass spectrometer. (d) Data
interpretation: The students look at the saliva spectrum and compare it to “standard”
spectra of the beverages.
Box 5: Methodology and procedure of the “hands-on” mass spectrometry experiment.
• Setup/idea of the experiment. One student is picked out of the group (volunteer). This student is separated from the group and chooses one out of several beverages (coffee, cola, lemonade etc, Figure 6b). The student does not reveal to the class which drink he/she chose. The student drinks some of the beverage and then spits into a plastic cup, i.e. the student provides a “saliva sample”. The sample is prepared for mass spectrometric analysis and then injected into a mass spectrometer (Figure 6c). The class is provided with the resulting saliva spectrum and spectra of the “pure analytes” (=standards), i.e. a syrup, cola, lemonade etc spectrum. Each of the standard spectra shows a peak characteristic for the drink (Figure 7 a-d). The class can identify which drink was present in the saliva (Figure 7e-f) by comparing the saliva spectrum to the standard spectra (Figure 6c).
• Details of the mass spectrometric analysis. The saliva sample is diluted in methanol (1:1, by volume). Then, the sample is electrosprayed into the mass spectrometer. Depending on the age of the students, a scientist can perform the sample preparation and introduce the sample into the spectrometer, or the student can perform these tasks under supervision. Importantly, here laboratory hygiene (lab coat, gloves) and laboratory safety (“Wear gloves and goggles when handling chemicals! Be careful what you touch!”) can be stressed. The class can watch the spectrum build up online on the computer screen.

17
Figure 7. Mass spectra of standard beverages and “spit spectra” of the children as measured
with an electrospray ionization mass spectrometer (Teaching Materials for Module 3). Standard
mass spectra of (a) raspberry syrup with vitamin B as the “characteristic peak”, (b) tonic water with
quinine, (c) orange lemonade with aspartame and (d) cola with caffeine are displayed. The mass

18
spectra of (e) spit after drinking tonic water and (f) spit after drinking cola are shown; the children
can identify the consumed beverages via “characteristic peaks”: quinine and caffeine, respectively.
Wrap-Up: Relationship with the research in the host laboratory.
GOAL: Relate the newly learned concepts to present-day research topics of the host
laboratory.
WHAT: Discussion.
At the end of the laboratory tour concludes the teaching unit by relating the newly learned
concepts to the state-of-the-art research of the research laboratory. What is the research
used for? And why is this research important. The teacher can relate mass spectrometry
experiments as just performed by the students, for instance, to forensic research (“crime
scene investigation” (CSI)), food control, disease studies or other applications that the
participants might be familiar with.
The concluding discussion takes approximately 5 minutes and can be adjusted to the age of
the students.
General remarks.
The laboratory should be clean and safe. The students should not be exposed to hazardous
substances or unsafe equipment. Instead of one teacher leading the activity, it is also
possible that every module is conducted by a different researcher stressing the fact that
mass spectrometry based research is team work.

19
Conclusion and Outlook
The presented teaching modules have repeatedly been practiced with children in our
laboratory –particularly for open days and high school tours at FOM-AMOLF. This “kids tour”
is perceived as a “great hit” by teachers, scientists and most importantly the children
themselves! We have hosted many groups of children between the age of 6 years to 14
years and are pleased to observe that the basic concepts of mass spectrometry, i.e. the
building blocks of matter, charged particle manipulation by electrostatic fields and analyte
identification by mass analysis, are rapidly understood and applied by the participants. Also,
the laboratory experience (lab coats, gloves, the noise of the pumps on the spectrometers
etc) enthuses the participants and triggers many good questions.
In our experience, most children have been exposed to mass spectrometry through the
media (mainly science-centered drama series on television) and easily relate this field of
analytical chemistry to forensics, food monitoring, the health sector etc. Hence, mass
spectrometry is a very suitable example to fascinate young students for the technical
sciences.
We encourage you, our colleague mass spectrometrists and analytical scientists, to share
your enthusiasm for research with children! The teaching modules presented here give an
indication of what type of activities are feasible and fun for both research laboratory open
days, high school class visits or to complement (early) science education.

20
Remark
We have published this content as “A MASSive Laboratory Tour. An Interactive Mass Spectrometry
Outreach Activity for Children” in the Journal of the American Society for Mass Spectrometry:
DOI: 10.1007/s13361-013-0663-4
Acknowledgements
This work is part of the research program of the "Stichting voor Fundamenteel Onderzoek
der Materie (FOM)", which is financially supported by the "Nederlandse organisatie voor
Wetenschappelijk Onderzoek (NWO)".

21
References
1. De Hoffmann, E.; Stroobant, V. Mass Spectrometry: Principles and Applications, 3rd ed.;
Wiley and Sons; 2007.
2. Downing, E. Supervised study and the science laboratory. School Review. 1917, 25, 646-
651.
3. American Association for the Advancement of Science, Science for all Americans: A project
2061 report on literacy goals in science, mathematics, and technology. Washington D.C.,
AAAS, 1990.
4. Angelini, R.; Ferreira, J. S.; Carmo Araujo, C. S.; Carvalho, A. R. Effect of Outdoor and
Laboratorial Environment Science Activities on Middle School Students Understanding on
Conservation. Natureza & Conservacao, 2011, 9, 93-97.
5. Akerson, V. L.; Buck, G.A.; Donnelly, L. A.; Nargund-Joshi, V.; Weiland, I. S. The Importance
of Teaching and Learning Nature of Science in the Early Childhood Years, J. Sci. Educ.
Technol. 2011, 20, 537-549.
6. Benskin, J.; Chen, S. Proteomics in the Classroom: An Investigative Study of Proteins in
Microorganisms. Am. Biol. Teach. 2012, 74, 237-242

22
Teaching Materials
Materials for Module 1
- 2 non-transparent boxes
- 1 feather
- one small rock
- molecule building sets (or tooth picks and colored styrofoam balls)
- (digital) scale balance
- 10 plastic boxes
- 10 different weights (or sand)
- 8 photos of the molecular models*
- 2 tables (with some free space around them such that the students can run around them)
- print-outs of the “Molecule Card: Weighing = Knowing”
- print-outs of the name and mass of the molecule & the photo of the molecular model
* For more participants or more advanced students, the number and complexity of molecules can be extended.
Description of how to prepare the game:
1) Build the molecules from the list (using the toy molecule set or tooth picks and colored styrofoam balls).
2) Fill the plastic boxes with weights (or sand) such that each box displays the molecular mass of one of the molecules (see “List of Molecules”) when placed on the scale balance. If a kitchen scale balance is used, it is easy to make the weights for the boxes such that 1g corresponds to 1 a.m.u. (tare scale balance for mass of container). The unit of the scale balance (and possibly digits behind the decimal point) should be covered (tape) and/or labeled appropriately. Number each box.
3) Print out the “Molecule Card: Weighing = Knowing” for each participating student.
4) Print out the sheets with the mass of the molecule & the photo of the molecular model.

23
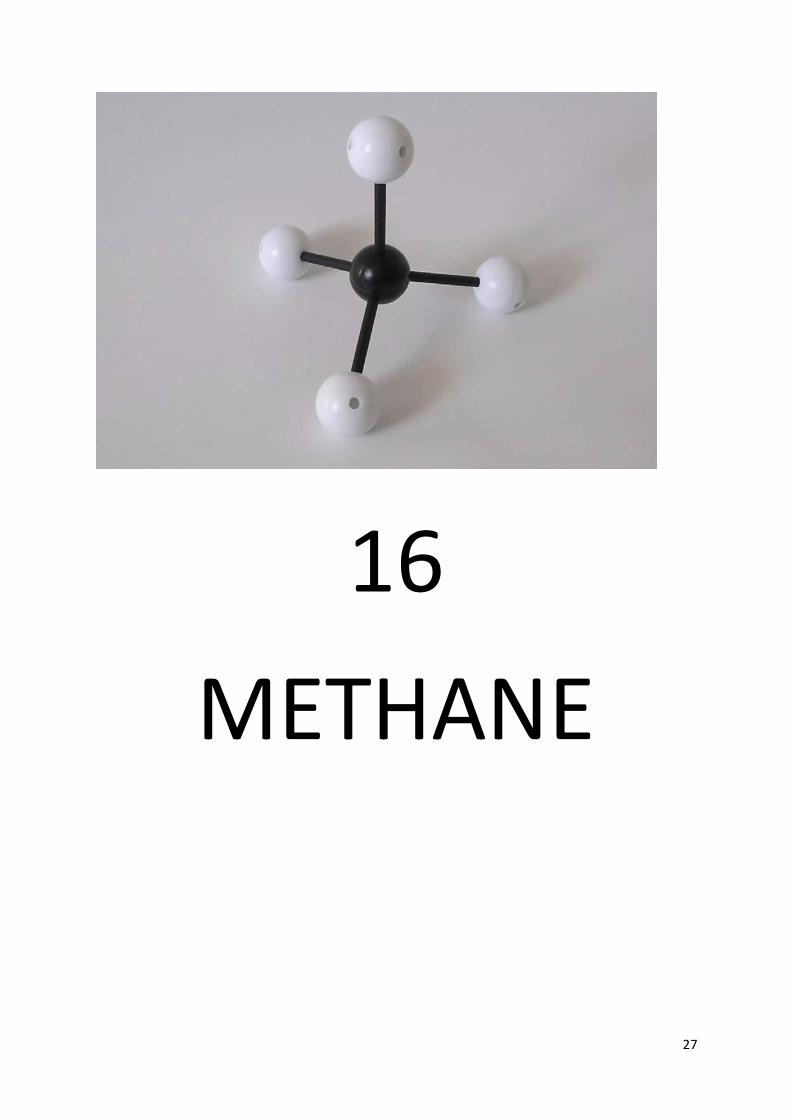
List of Molecules
Molecule Molecular Mass Chemical Formula Number
Water 18 H2O 1
Carbon dioxide 44 CO2 2
Methane 16 CH4 3
Ammonia 17 NH3 4
Ethanol 46 C2H5OH 5
Chlorine gas 71 Cl2 6
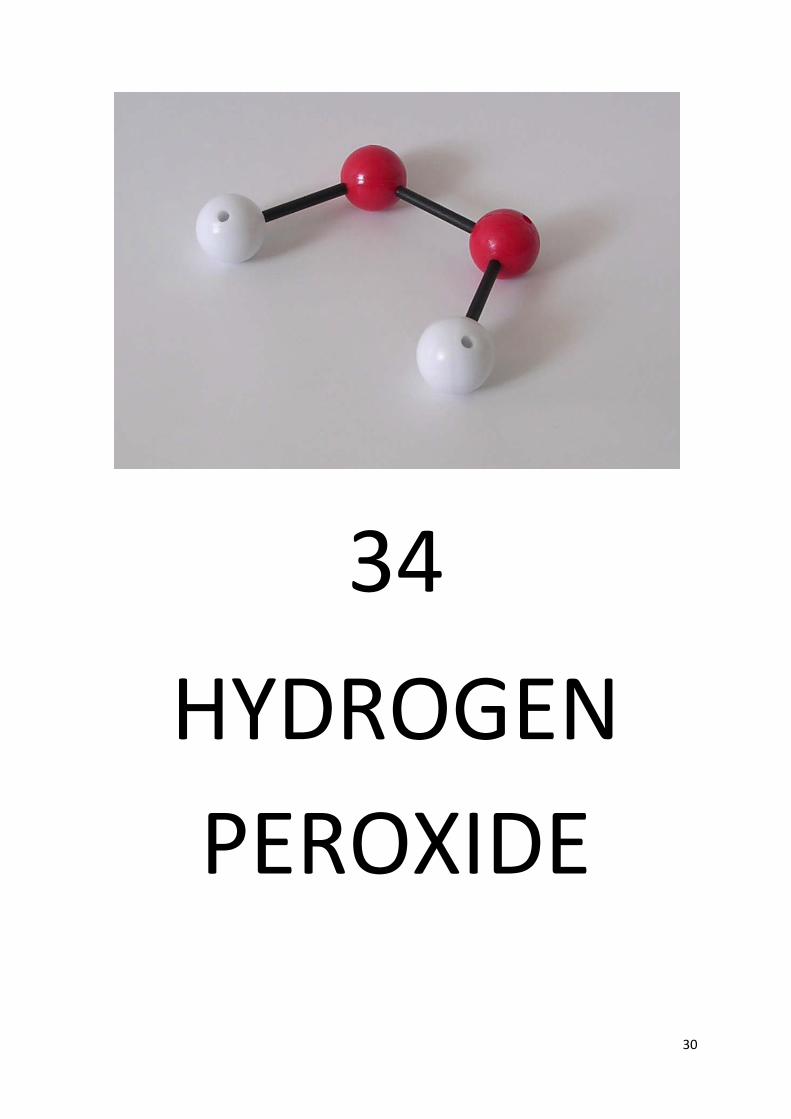
Hydrogen peroxide 34 H2O2 7
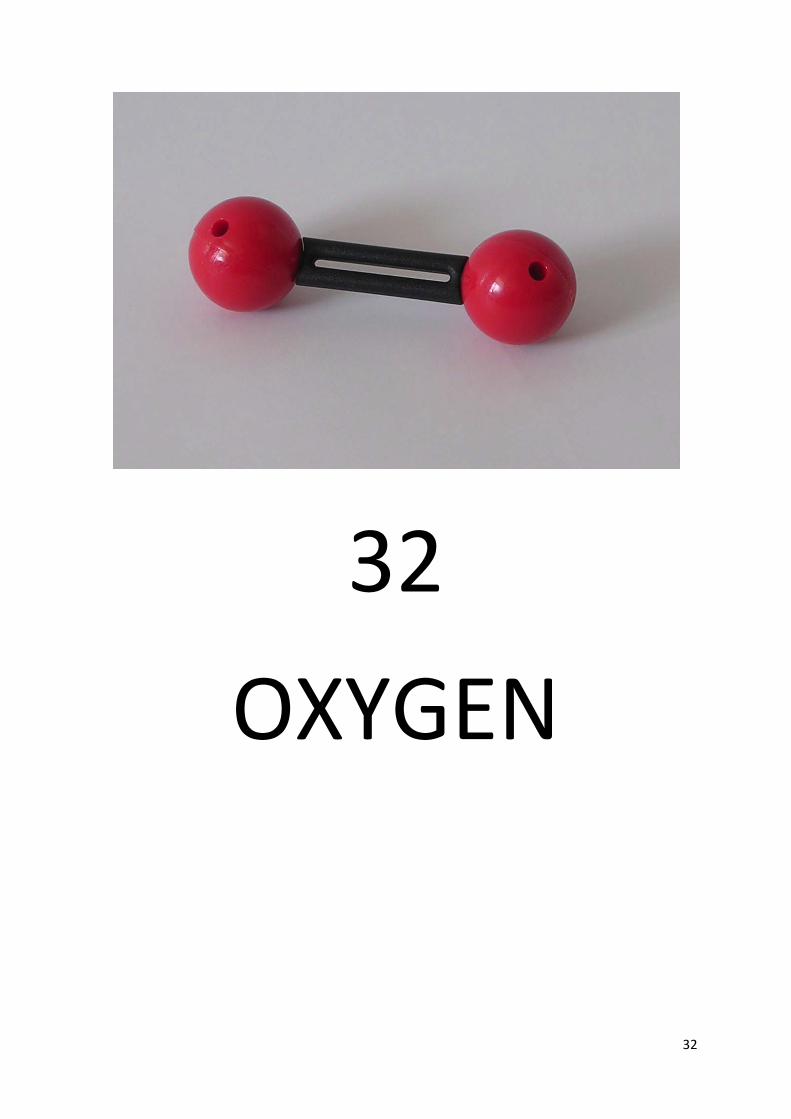
Oxygen 32 O2 8

24
MOLECULE CARD: WEIGHING=KNOWING
MASS NAME OF THE MOLECULE

25
18
WATER

26
44
CARBON DIOXIDE
27
16
METHANE

28
17
AMMONIA

29
46
ETHANOL
30
34
HYDROGEN PEROXIDE

31
71
CHLORINE
32
32
OXYGEN

33
Materials for Module 2
- Perspex rod
- small pieces of paper
- 2 beakers
- water
- sugar syrup
- rubber hoses
- stand with clamps
- multi-segment collection tray (3 compartments)
- Van de Graaff generator
- peristaltic pump with power supply
- connecting cables
- metal sphere on stand to be charged up
Description of how to prepare the demo:
See Figure 4.
1) Prepare 100 ml of water in a beaker; prepare 100 ml of thick sugar syrup (colored) in a second beaker.
2) Insert one hose into the water beaker, insert the second hose into the sugar syrup. The hoses are attached to the stand.
3) Place the beaker with the 3 individual compartments next to the stand. Compartment 1 is directly underneath the opening of the hoses.
4) Switch on the pump. Both the water and the sugar syrup fall into compartment 1.
5) Cable up the Van de Graaff generator and connect to the metal sphere on the stand. Ground the water and the syrup containers.
6) If you switch on the Van de Graaff generator, the water droplets and sugar syrup droplets are attracted towards the charged up sphere. Adjust the voltage on the Van de Graaff generator such that the droplets are “separated” into compartments 2 and 3.The water droplets will fall into compartment 2 and the sugar syrup droplets will fall into compartment 3.

34
Materials for Modules 3
- 4 different beverages: coffee, cola, lemonade and juice
- plastic cups
- rubber gloves
- 100% methanol (as a solvent)
- syringe
- beaker
- Eppendorf tubes (1.5 ml)
- electrospray ionization (ESI) mass spectrometer: We worked with a Thermo Fisher LTQ (Linear Trap Quadrupole, Thermo Fisher Scientific, Bremen, Germany) mass spectrometer in combination with the standard XCalibur software. We expect that other ESI mass spectrometers will function equally well for these tests.
- print-outs of the “standard” spectra of the beverages (Figure 7 a-d) in which one characteristic peak is highlighted