mastering blender 3d copyrighted materialblender incorporates a dizzying amount of functionality in...
TRANSCRIPT

Part I
Mastering Blender 3D◆ Chapter 1: Controlling Your Environment
◆ Chapter 2: Sculpting and Retopo Workfl ow
◆ Chapter 3: Creating Realistic Images with UV Textures
and Node-Based Materials
◆ Chapter 4: Video Compositing with Nodes
◆ Chapter 5: Working with the Video Sequence Editor
07417c01.indd 107417c01.indd 1 2/20/09 9:21:51 AM2/20/09 9:21:51 AM
COPYRIG
HTED M
ATERIAL

07417c01.indd 207417c01.indd 2 2/20/09 9:21:51 AM2/20/09 9:21:51 AM
Chapter 1
Controlling Your Environment
Blender incorporates a dizzying amount of functionality in a single application, and learning to use all the tools as effi ciently as possible is a daunting proposition. Even after the initial shock that every beginner feels upon seeing the buttons window, experienced users often still sense that there is a great deal of potential that they have not fully tapped into. Indeed, many Blender users use only a small fraction of its capabilities for controlling their work environments. These capa-bilities include options available in the User Preferences window and a variety of lesser-known techniques and workfl ow shortcuts. Furthermore, by gaining insight into the design principles behind the Blender interface, you can prepare for the ways that upcoming changes in the code base will help to enhance the power, fl exibility, and accessibility of the interface in the future.
In this chapter, you will learn to
Set the options available to you in the User Preferences window◆
Use lesser-known methods for selecting, grouping, and organizing 3D elements to speed ◆
up your workfl ow
Prepare for changes in the evolving Blender interface by understanding the principles be-◆
hind its unique design
Getting Your Way with BlenderAs I wrote in the introduction to this book, this is a book for people who want to push the enve-lope of their Blender abilities—people who know how to use Blender but want to know more. Likewise, this is a chapter for people who know Blender’s interface and workfl ow, but want to know it better, to understand it more deeply, and to learn to use it faster and more effi ciently—in short, to master it.
This chapter is intended to help you get beyond simply knowing how things are done in Blender and to truly explore the way you do things in Blender. In this chapter, you’ll learn about the preferences you can set to take control of your own working environment. You’ll learn about workfl ow tricks and techniques to give you more options for how to get from A to B in your Blender work. This chapter is intended to give you the knowledge and the confi dence to start telling Blender how you want things done.
User PreferencesWhen you think about options and customization for any software, the fi rst thing that usually comes to mind is the set of user preferences available. Like most applications, Blender has a vari-ety of user preferences that you can adjust. The User Preferences window is the “hidden” third
07417c01.indd 307417c01.indd 3 2/20/09 9:21:51 AM2/20/09 9:21:51 AM

4 | CHAPTER 1 CONTROLLING YOUR ENVIRONMENT
window in the default screen confi guration shown in Figure 1.1. The bar across the top of the default screen may look similar to the menu bar that lines the top of many other applications, but in fact it is the header of the User Preferences window, which you can bring into view by left-clicking on the window border and dragging downward, as shown in Figure 1.2. Seven but-tons are located along the bottom of the User Preferences area. Each of these buttons displays a different subcontext of User Preferences.
Figure 1.1
The default screen confi guration
Figure 1.2
Dragging the User Preferences win-dow into view
07417c01.indd 407417c01.indd 4 2/20/09 9:21:51 AM2/20/09 9:21:51 AM
GETTING YOUR WAY WITH BLENDER | 5
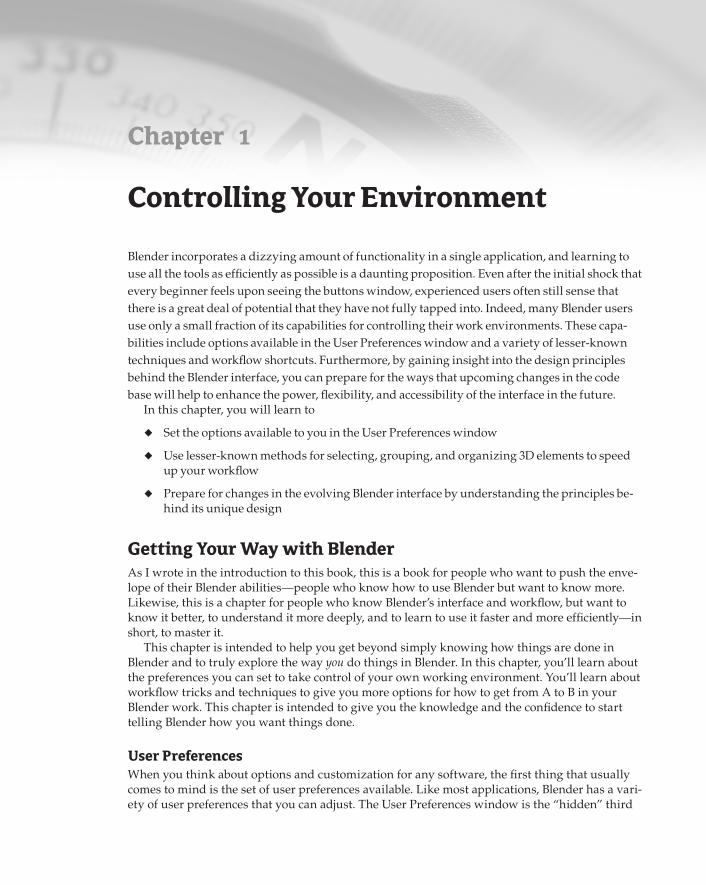
VIEW & CONTROLS
The fi rst subcontext of the User Preferences buttons area is the View & Controls subcontext, shown in Figure 1.3.
The Display options include six buttons that control how information is displayed through-out the interface or in the 3D viewport. Those buttons are as follows:
Tool Tips enables and disables the display of tooltips when the mouse is over interface elements.
Object Info displays the name of the active object in the lower-left corner of the 3D viewport.
Global Scene causes the active scene to hold constant over various screens. If this option is enabled and the scene is changed in any one screen, all the screens will change scenes. If this option is disabled, a screen will continue to display the scene it last displayed, even if the scene is changed in another screen.
Large Cursors enables alternate mouse cursors if they are installed in your system.
View Name displays the name of the view (Front, Back, Top, Bottom, Right, Left, Orthogonal, or Perspective) in the upper-left corner of the 3D viewport.
Playback FPS displays the number of frames per second in the upper-left corner of the 3D viewport when the animation is playing.
The next column of buttons and fi elds includes controls for Blender’s menus, toolboxes, and panels. The options you have here are as follows:
Open On Mouse Over enables menus to open automatically when the mouse is held over them, without clicking. The numerical values for this option determine how long the mouse must be held over the main menu or submenus before the menus open.
Toolbox Click-Hold Delay values determine how quickly the toolbox opens when the right or left mouse button is clicked and held. For immediate toolbox access, the spacebar is used.
Pin Floating Panels causes fl oating panels such as the Transformations panel or other tool panels to be pinned to the spot in the viewport where they opened last. If this option is not activated, panels will appear at the spot where the mouse is.
Plain Menus causes the ordering of the menus to remain fi xed, rather than reversing depending on whether the menu opens upwards or downwards.
The next column of buttons controls snap-to-grid and other 3D navigational controls. The buttons here are as follows:
Grab/Move causes snapping to the grid when objects are moved.
Rotate causes snapping to the grid when objects are rotated.
Figure 1.3
The View & Controls user preferences
07417c01.indd 507417c01.indd 5 2/20/09 9:21:52 AM2/20/09 9:21:52 AM

6 | CHAPTER 1 CONTROLLING YOUR ENVIRONMENT
Scale causes snapping to the grid when objects are scaled.
Auto Depth causes the rotation and zoom of the 3D space to pivot around the point directly under the mouse. This option automatically calculates the depth of the nearest object under the mouse as the pivot point.
Global Pivot causes the selected pivot to be fi xed over all 3D viewport windows. If this option is not selected, each 3D viewport can use a different pivot.
The next column of buttons controls the way the 3D space itself can be navigated and manip-ulated. The buttons here are as follows:
Continue causes the view zoom to continue forward or backward as long as the left mouse button is held down and the mouse is moved above or below the center of the viewport. The distance of the mouse from the horizontal center of the viewport determines the speed with which the zoom moves forward or backward.
Dolly causes the zoom to move forward when the mouse movement is downward and to move backward when the mouse movement is upward, by default.
Scale causes the zoom to move forward when the mouse is pulled away from the center point of the viewport and to move backward when the mouse is pushed toward the center point of the viewport.
Trackball causes the entire view to rotate freely in all directions, analogously to the motion of a trackball.
Turntable causes the entire view to rotate strictly around the three spatial axes, resulting in a more constrained rotation than the Trackball option.
Auto Perspective causes the view to enter Perspective view whenever it is rotated out of Front, Side, or Top views, and to enter Orthogonal view when it enters those views by means of hot keys on the number pad.
Around Selection causes the view to rotate around the median point between selected elements.
The next column of buttons controls the way you can use your mouse. There are also buttons to control the display of the mini axis in the 3D viewport. These buttons are as follows:
Left Mouse causes the left mouse button (LMB) to be used for selecting.
Right Mouse causes the right mouse button (RMB) to be used for selecting.
Emulate 3 Button Mouse enables Alt+RMB to emulate the behavior of the middle mouse button (MMB).
Paste On MMB causes the middle mouse button to paste from the clipboard in the text editor.
Mini Axis controls the display of the miniature axis in the lower-left corner of the 3D viewport.
07417c01.indd 607417c01.indd 6 2/20/09 9:21:52 AM2/20/09 9:21:52 AM
GETTING YOUR WAY WITH BLENDER | 7
The next column includes buttons and fi elds that control the behavior of the middle mouse button and view changes made with the number pad. These buttons include the following:
Rotate View causes the middle mouse button to rotate the 3D view. With this option selected, Shift+MMB pans the view.
Pan View causes the middle mouse button to pan the 3D view. With this option selected, Shift+MMB rotates the view.
Invert Zoom causes the view to zoom forward when the mouse is moved upward and to pull away when the mouse is moved downward across the 3D view (as opposed to the default behavior, which is the reverse of this).
Smooth View sets a time interval in milliseconds for an animated transition between num-ber-pad views.
Rotation Angle sets the degree of rotation used by the 2, 4, 6, and 8 keys on the number pad to rotate the view incrementally.
Finally, the last column includes settings for the 3D Transform Widget and object center dis-plays, and settings for six-degrees-of-freedom (6DoF) devices such as the SpaceNavigator. These values include the following:
Size, Handle, and Hotspot values control the overall size, the handle size, and the size of the clickable area (hot spot) of the 3D manipulator.
Object Center Size controls the display size of object centers.
ndPan and ndRot values control the speed with which the navigation responds to input from a 6DoF input device.
Recommendations for View & Controls Settings
Of course, everybody has their own preferences, which is why options like the ones described in this section exist. Nevertheless, a few nondefault options are particularly worth experimenting with. The Around Selection option for view rotation makes navigating around selected vertices for modeling much easier, particularly when you are working on vertices that are not positioned in the middle of the screen.
The Smooth View value is a great way to visualize the change from one view to another. For example, if you are using Blender to give instruction to students or to create video tutorials, setting this option at 500 (half a second) makes it much easier for observers to maintain their bearings as you navigate the space.
For those who use the 3D Transform Widget, increasing the size of the hot spot can make it much easier to engage the widget.
People accustomed to other 3D packages often feel more comfortable using Turntable view rotation as opposed to Trackball. However, Trackball rotation offers greater fl exibility, so it’s worth getting used to. Likewise, the temptation to switch the selection button to the left mouse button (LMB) should be resisted, because it will lead to a variety of undesirable side effects. For one thing, the capability to use Alt+LMB as an alternate to the middle mouse button (MMB) is no longer available to you if you choose this option, making it out of the question for people with two-button mice.
07417c01.indd 707417c01.indd 7 2/20/09 9:21:52 AM2/20/09 9:21:52 AM

8 | CHAPTER 1 CONTROLLING YOUR ENVIRONMENT
EDIT METHODS
The Edit Methods user-preferences context is shown in Figure 1.4. The options in this window are as follows:
Material Linked To controls whether materials are linked to an object itself or the object’s mesh datablock by default.
Add New Objects options enable you to choose whether to switch to Edit mode automati-cally upon object creation, and whether newly created objects should be aligned to the view or should be placed at the 3D space origin with default orientation.
Transform: Drag Immediately enables you to select and move elements with one mouse button. If you right-click to select an object and drag immediately, this option will cause the object to follow the mouse until you release the right mouse button. With this option dis-abled, you must release the mouse button and click again to verify the transformation.
Undo options enable you to set the number of levels of Undo, the amount of memory devoted to Undo, and whether Global Undo is used. Global Undo requires more memory than regular Undo; however, regular Undo is limited in that you cannot undo edits made in Edit mode incrementally after leaving Edit mode and reentering Edit mode again. Global Undo enables you to do this.
Auto Keyframe options enable you to automatically set keyframes for selected sets of Ipo curves. With this option, keyframes are set in a frame anytime an Ipo’s value is changed, making keyframing with the I key unnecessary.
Grease Pencil options enable you to determine specifi cally how mouse movements are used to draw lines with the Grease Pencil tools. The smaller the Euclidean and Manhattan dis-tances, the less segmented the line will appear.
Duplicate With Object options enable you to select which datablocks will be duplicated when their owner objects are duplicated with Shift+D. Duplication involves a new, inde-pendent instantiation of the datablock being created. Datablocks that are not duplicated are shared between the two duplicated objects.
Recommendations for Edit Methods
Edit Methods options are a little less “personal” than the View & Controls options. The best options in this case are likely to depend on exactly the kind of work you do. If you typically fi nd yourself going straight into modeling when you add a new object, you will save a step by setting the default to Switch To Edit Mode upon adding a new option. If you do a lot of animation and you are com-fortable and confi dent working with Ipos, enabling Auto-Keying may speed up your workfl ow. For beginning animators, I think it’s better to set your keyframes deliberately by hand until you are sure you have the hang of it. For Auto-Keying, the Needed option is useful to keep unnecessary keyframes from being set. For the Duplicate With Object settings, if you fi nd that you rarely want a duplicated object to share an Ipo curve with the original object, you may want to select Ipo in addition to the currently set defaults.
07417c01.indd 807417c01.indd 8 2/20/09 9:21:52 AM2/20/09 9:21:52 AM

GETTING YOUR WAY WITH BLENDER | 9
LANGUAGE & FONT
The Language & Font buttons context is shown in Figure 1.5. It is no secret that internation-alization is an area of Blender that has been unfortunately neglected. One of the reasons for this is the diffi culty of creating and incorporating language translation fi les for the software, which, like many things in Blender, must be done at a low level and compiled directly into the executable.
One thing you can do here is to adjust the size of the font that shows up on your buttons and menus. To do this, click International Fonts and select the size you want from the Font Size menu shown in Figure 1.6.
The Use Textured Fonts option may result in problems displaying the button labels with some hardware drivers. If you have problems seeing the button labels on your computer, dese-lect the Use Textured Fonts option, as shown in Figure 1.7.
You can select international font systems if you have the necessary fonts installed. In Figure 1.8, you can see how Blender looks with Japanese selected as the language and a Japanese font
Figure 1.4
The Edit Methods user preferences
Figure 1.5
The Language & Font user preferences
Figure 1.6
The Font Size drop-down menu
Figure 1.7
Use Textured Fonts disabled
07417c01.indd 907417c01.indd 9 2/20/09 9:21:52 AM2/20/09 9:21:52 AM

10 | CHAPTER 1 CONTROLLING YOUR ENVIRONMENT
selected. Nevertheless, this is of limited usefulness for several reasons. First, almost all documen-tation and learning material is written with the assumption that Blender is in English, and second, the translations are too incomplete to warrant any other assumption, as you can see in Figure 1.9.
Language and Font Recommendations
It would be very welcome if internationalization was made simpler, and perhaps this will become a possibility with the upcoming recode of the event system. For the time being, however, Blender’s internationalization is superfi cial, incomplete, and largely outdated. The only real choice is to use Blender in English.
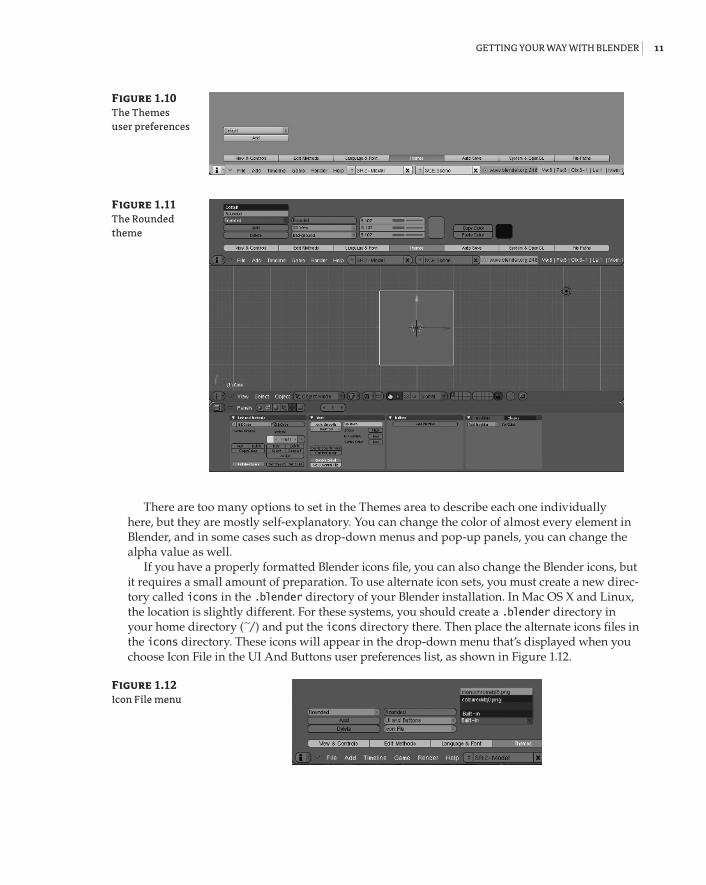
THEMES
The Themes context, shown in Figure 1.10, enables you to create and select themes with various options for the coloring and display of interface elements. You can select the theme you want to use from the drop-down menu. In order to add a new theme to the list, click the Add button. In addition to the default theme itself, another theme is included in the default distribution of Blender, the Rounded theme, shown in Figure 1.11. The theme used in this book is a variation based on the Rounded theme.
Figure 1.8
Blender in Japanese
Figure 1.9
The limits of inter-nationalization
07417c01.indd 1007417c01.indd 10 2/20/09 9:21:52 AM2/20/09 9:21:52 AM
GETTING YOUR WAY WITH BLENDER | 11
There are too many options to set in the Themes area to describe each one individually here, but they are mostly self-explanatory. You can change the color of almost every element in Blender, and in some cases such as drop-down menus and pop-up panels, you can change the alpha value as well.
If you have a properly formatted Blender icons fi le, you can also change the Blender icons, but it requires a small amount of preparation. To use alternate icon sets, you must create a new direc-tory called icons in the .blender directory of your Blender installation. In Mac OS X and Linux, the location is slightly different. For these systems, you should create a .blender directory in your home directory (~/) and put the icons directory there. Then place the alternate icons fi les in the icons directory. These icons will appear in the drop-down menu that’s displayed when you choose Icon File in the UI And Buttons user preferences list, as shown in Figure 1.12.
Figure 1.10
The Themes user preferences
Figure 1.11
The Rounded theme
Figure 1.12
Icon File menu
07417c01.indd 1107417c01.indd 11 2/20/09 9:21:52 AM2/20/09 9:21:52 AM

12 | CHAPTER 1 CONTROLLING YOUR ENVIRONMENT
The icon fi le used throughout this book is shown in Figure 1.13 and repeated in color in this book’s color insert. It was created by BlenderArtists.org user jendrzych, and the icon set itself can be found on that website at http://blenderartists.org/forum/showthread.php?t=84971. The fi le is also included on the CD that accompanies the book. Although this is not the offi cial default icon set for version 2.48, it is a nicer-looking and widely used alternative. Furthermore, it has already been adopted as the offi cial default icon set for Blender version 2.5, so getting accus-tomed to it is a small and painless way to prepare for the changes of that version.
In Figure 1.14 (also repeated in the book’s color insert), you can see the default icons and the alternate icons as they appear in all the headers of the various window types in Blender. This should give you a good reference for which icons correspond to each other, in case you are using a different icon set from the one used in this book. Throughout the book, in cases where there might be some confusion, both default and alternate icons are shown in the appropriate contexts.
Figure 1.13
An alternate icon set
Figure 1.14
Default and alternate icon sets in headers
07417c01.indd 1207417c01.indd 12 2/20/09 9:21:52 AM2/20/09 9:21:52 AM
GETTING YOUR WAY WITH BLENDER | 13
Numerous Blender themes are available online for download. A quick Google search on Blender themes will give you the links for several good theme repositories. The themes may be downloadable in the form of a .blend fi le or in the form of a Python script. In the latter case, simply open the script in a Blender text editor window and execute it with Alt+P.
Theme Recommendations
Themes are a matter of taste; however, there’s a reason why the two themes included in the default installation are largely gray and muted. Bright, lively colored themes can distract attention from what you are working on and can lead to eye strain. You should have enough contrast between ele-ments to see them clearly, but large areas of white or very bright colors can quickly tire your eyes.Other theme options worth noting are those in the 3D View menu list. If you are planning to use Blender for instructing others or for making tutorials, you can change the size at which vertices and face dots are displayed.
AUTO SAVE
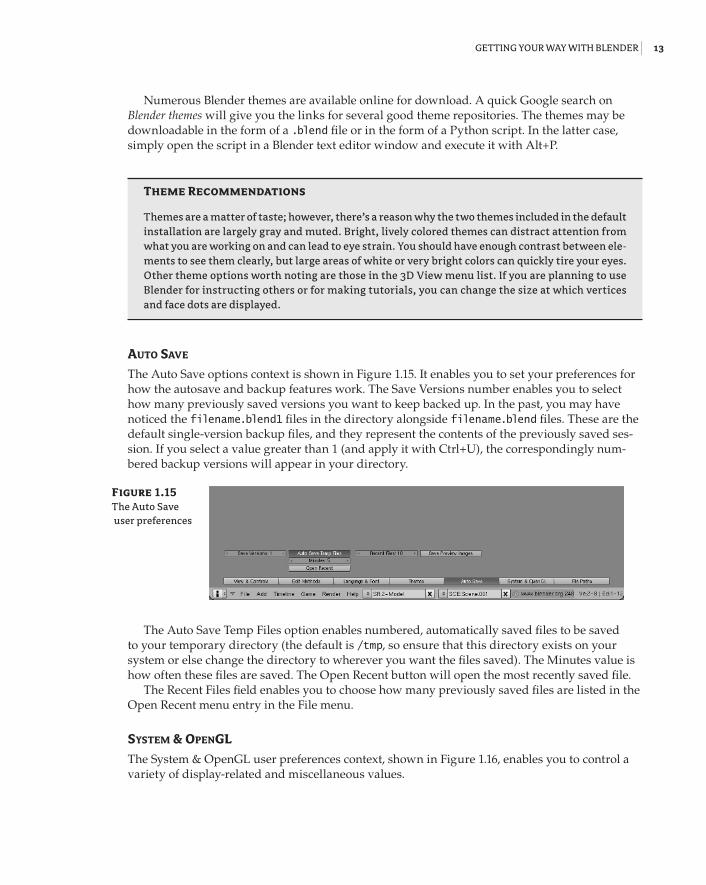
The Auto Save options context is shown in Figure 1.15. It enables you to set your preferences for how the autosave and backup features work. The Save Versions number enables you to select how many previously saved versions you want to keep backed up. In the past, you may have noticed the filename.blend1 fi les in the directory alongside filename.blend fi les. These are the default single-version backup fi les, and they represent the contents of the previously saved ses-sion. If you select a value greater than 1 (and apply it with Ctrl+U), the correspondingly num-bered backup versions will appear in your directory.
The Auto Save Temp Files option enables numbered, automatically saved fi les to be saved to your temporary directory (the default is /tmp, so ensure that this directory exists on your system or else change the directory to wherever you want the fi les saved). The Minutes value is how often these fi les are saved. The Open Recent button will open the most recently saved fi le.
The Recent Files fi eld enables you to choose how many previously saved fi les are listed in the Open Recent menu entry in the File menu.
SYSTEM & OPENGL
The System & OpenGL user preferences context, shown in Figure 1.16, enables you to control a variety of display-related and miscellaneous values.
Figure 1.15
The Auto Save user preferences
07417c01.indd 1307417c01.indd 13 2/20/09 9:21:52 AM2/20/09 9:21:52 AM

14 | CHAPTER 1 CONTROLLING YOUR ENVIRONMENT
There are three possible OpenGL lights that can be used to illuminate objects in the Solid Draw mode. By default, two of these lights are activated. The fi rst is a key light from the left, and the second is a dimmer fi ll light from the right. A third light is also available, which by default is set to provide highlights from the lower right, as shown in Figure 1.17. You can enable or disable each of these lights, adjust their colors, or change their angles by clicking and dragging directly on the preview spheres for the lights.
Figure 1.16
The System & OpenGL user preferences
Figure 1.17
3D view with the default two OpenGL lights activated and the same view with the third solid OpenGL light activated
07417c01.indd 1407417c01.indd 14 2/20/09 9:21:52 AM2/20/09 9:21:52 AM
GETTING YOUR WAY WITH BLENDER | 15
Returning to the System & OpenGL user preferences (Figure 1.16), the Enabled By Default button under Auto Run Python Scripts, when enabled, will allow Python scripts to be run auto-matically from within a .blend fi le. This is convenient in some cases, but it is not recommended if you’re not sure of the source of your .blend fi les.
The Enable All Codecs button under Win Codecs appears on Windows machines. This option will enable the codecs you have installed on your system to be used for rendering in Blender. As the tooltip points out, this is not guaranteed to work in all cases, because support for some codecs remains experimental.
The Color Band button under Color Range For Weight Paint enables you to override the default blue-to-red coloring range for weight painting and to defi ne your own range by using a color-band interface.
The Audio Mixing Buffer buttons enable you to select the amount of memory to devote to audio mixing.
The Emulate Numpad button enables you to use the number keys on the main keypad instead of the number keys on the number pad. This is particularly useful if you are working on a laptop that doesn’t have a separate number pad.
The System & OpenGL buttons and fi elds in the rightmost two columns control a variety of specifi c values that you can adjust to improve your performance if you are having memory problems or you are experiencing slowdowns in your 3D viewport. Disabling Mipmaps or rais-ing the Clip Alpha value can speed up the OpenGL drawing in your viewport at the expense of some image quality.
FILE PATHS
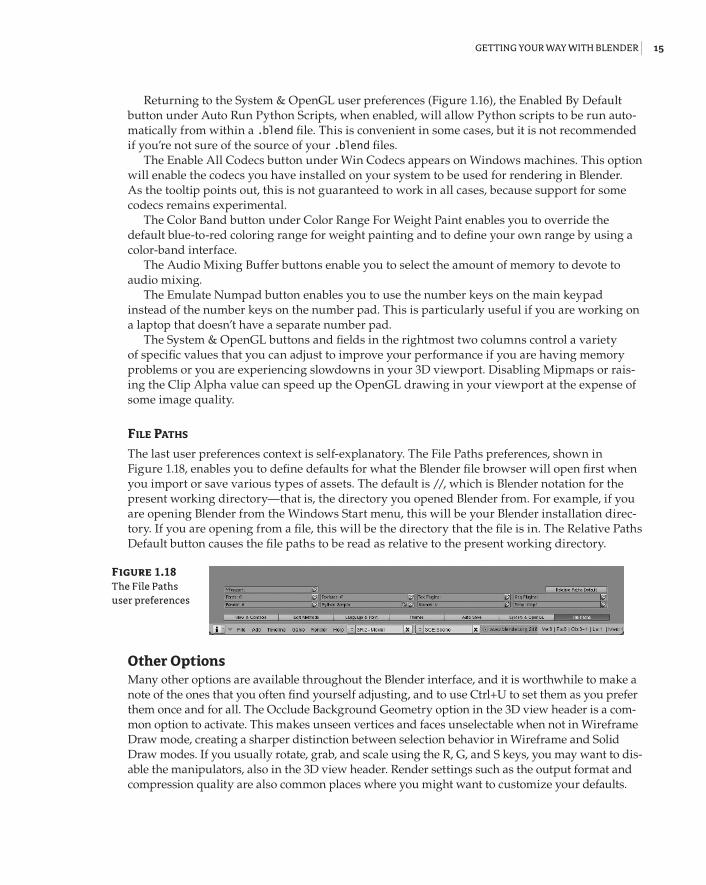
The last user preferences context is self-explanatory. The File Paths preferences, shown in Figure 1.18, enables you to defi ne defaults for what the Blender fi le browser will open fi rst when you import or save various types of assets. The default is //, which is Blender notation for the present working directory—that is, the directory you opened Blender from. For example, if you are opening Blender from the Windows Start menu, this will be your Blender installation direc-tory. If you are opening from a fi le, this will be the directory that the fi le is in. The Relative Paths Default button causes the fi le paths to be read as relative to the present working directory.
Other OptionsMany other options are available throughout the Blender interface, and it is worthwhile to make a note of the ones that you often fi nd yourself adjusting, and to use Ctrl+U to set them as you prefer them once and for all. The Occlude Background Geometry option in the 3D view header is a com-mon option to activate. This makes unseen vertices and faces unselectable when not in Wireframe Draw mode, creating a sharper distinction between selection behavior in Wireframe and Solid Draw modes. If you usually rotate, grab, and scale using the R, G, and S keys, you may want to dis-able the manipulators, also in the 3D view header. Render settings such as the output format and compression quality are also common places where you might want to customize your defaults.
Figure 1.18
The File Paths user preferences
07417c01.indd 1507417c01.indd 15 2/20/09 9:21:52 AM2/20/09 9:21:52 AM

16 | CHAPTER 1 CONTROLLING YOUR ENVIRONMENT
Saving the Changes
After you have set all the options the way you want them, don’t forget to set the current setup as your default setup by using Ctrl+U. Remember, Ctrl+U saves the exact state of Blender at the moment you press it, so be sure you’ve put everything in place exactly the way you want to see it when you open Blender. Objects, materials, animations, and any other data in the .blend fi le will also be saved.
The resulting settings are stored in the .B.blend fi le in your .blender directory. To use these set-tings with another Blender installation, you can simply copy that fi le into the .blender directory of the Blender installation you want to use.
To save the current theme in the form of a Python script, go to the File menu and choose Export � Save Current Theme. The resulting script can then be executed in another instance of Blender to import the theme.
Improving Your Workfl owSetting and saving your user preferences is the fi rst step in optimizing your workfl ow. This sec-tion presents a variety of miscellaneous tips and tricks that you may fi nd helpful for increasing your effi ciency and improving your experience working with Blender.
View Hot Keys and PropertiesThe 3D viewport has a number of hot keys and properties associated with it that enable you to view your work. You are no doubt familiar with the most commonly used number pad short-cuts for Front view (number pad 1), Side view (number pad 3), and Top view (number pad 7). Pressing these keys with Ctrl will show you the reverse view; Ctrl+number pad 1 yields the rear view of the object, and so on. Number pad 5 toggles Orthogonal and Perspective view; and 2, 4, 6, and 8 rotate the 3D space by the amount determined in the Rotation Angle fi eld in the View & Controls user preferences window.
The decimal (.) key on the number pad centers the selected object in the 3D viewport. Related keys on the main keypad include the C key, which shifts the view so that the 3D cursor is cen-tered; the Home key, which displays and centers the median point of all the objects in the scene; and the Shift+C key combination, which does the same thing as the Home key with the addition of placing the 3D cursor at the zero point of the 3D space.
The slash key (/) on the number pad changes the display to show only the selected object. Pressing the same key again toggles back into full scene display mode. On the main keypad, the Alt+B key combination enables you to select even smaller portions of the 3D view for display. Pressing Alt+B and dragging the box to select an area results in clipping the display of every-thing outside of that box selection, as shown in Figure 1.19. The resulting displayed selection can be viewed from all angles.
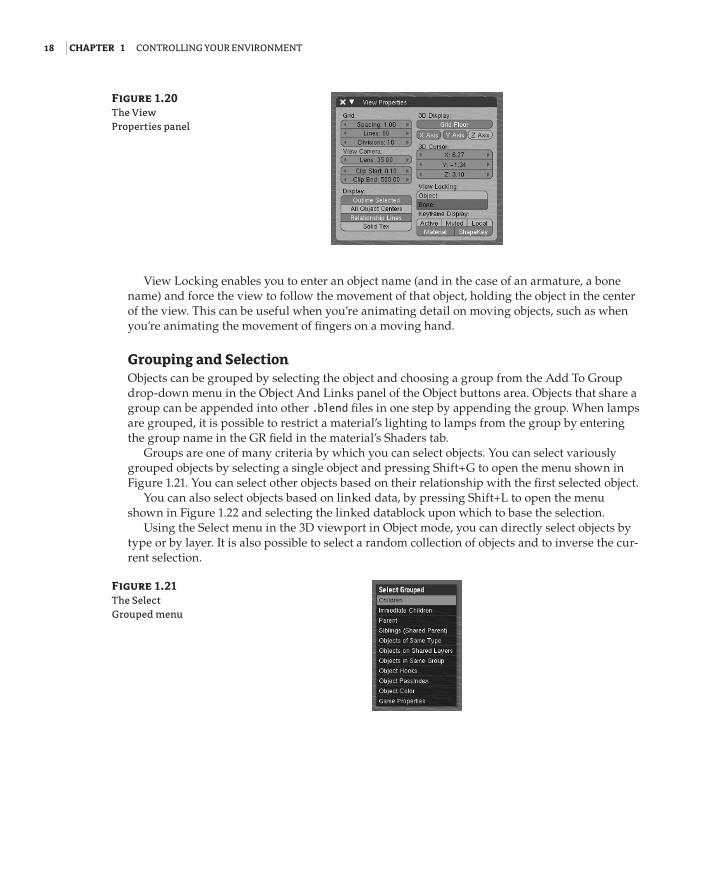
The View Properties panel, shown in Figure 1.20, can be accessed via the View menu in the header of the 3D viewport. Here you can control the display and qualities of the background grid; the X, Y, and Z axes; and the relationship lines (dotted lines between parents and their child objects). You can toggle the drawing of textures in Solid Draw mode with the Solid Tex button, and toggle between displaying all object centers or only the selected object’s center. You can toggle the drawing of an outline around the selected object. You can change the angle of the view lens, adjust the point past which the view is clipped, and place the 3D cursor by entering coordinates by hand.
07417c01.indd 1607417c01.indd 16 2/20/09 9:21:52 AM2/20/09 9:21:52 AM

IMPROVING YOUR WORKFLOW | 17
Figure 1.19
Clipping the view with Alt+B
07417c01.indd 1707417c01.indd 17 2/20/09 9:21:53 AM2/20/09 9:21:53 AM
18 | CHAPTER 1 CONTROLLING YOUR ENVIRONMENT
View Locking enables you to enter an object name (and in the case of an armature, a bone name) and force the view to follow the movement of that object, holding the object in the center of the view. This can be useful when you’re animating detail on moving objects, such as when you’re animating the movement of fi ngers on a moving hand.
Grouping and SelectionObjects can be grouped by selecting the object and choosing a group from the Add To Group drop-down menu in the Object And Links panel of the Object buttons area. Objects that share a group can be appended into other .blend fi les in one step by appending the group. When lamps are grouped, it is possible to restrict a material’s lighting to lamps from the group by entering the group name in the GR fi eld in the material’s Shaders tab.
Groups are one of many criteria by which you can select objects. You can select variously grouped objects by selecting a single object and pressing Shift+G to open the menu shown in Figure 1.21. You can select other objects based on their relationship with the fi rst selected object.
You can also select objects based on linked data, by pressing Shift+L to open the menu shown in Figure 1.22 and selecting the linked datablock upon which to base the selection.
Using the Select menu in the 3D viewport in Object mode, you can directly select objects by type or by layer. It is also possible to select a random collection of objects and to inverse the cur-rent selection.
Figure 1.20
The View Properties panel
Figure 1.21
The Select Grouped menu
07417c01.indd 1807417c01.indd 18 2/20/09 9:21:53 AM2/20/09 9:21:53 AM

IMPROVING YOUR WORKFLOW | 19
BOX, CIRCLE, AND LASSO SELECTION
Pressing the B key once initiates the Box selection state, where you can drag your mouse to select whatever falls within the rectangular area you defi ne. Holding down the Alt key while doing this will deselect whatever falls within that area. Pressing the B key twice will enable the Circle selec-tion state, where you can drag your mouse to select all that falls within a circular area following the mouse. Likewise, holding down the Alt key while doing this will deselect the elements.
Holding down the Ctrl key while dragging the left mouse button introduces the Lasso selec-tion state, which enables you to defi ne the area to be selected by moving your mouse around the area directly. This is a very fast selection method.
EDIT MODE SELECTION
Numerous little-known selection methods are available for meshes in Edit mode. The fi rst option you have is whether to select by vertex, edge, or face. This is chosen by using the view-port header buttons shown in Figure 1.23 (both default and alternate icon sets). Vertex, Edge, and Face selection modes correspond with the buttons from left to right (the rightmost button occludes hidden geometry). You can choose more than one mode simultaneously by holding down the Shift key when you click these buttons.
Selecting Edges, Loops, and Rings
Many selection options are available independently of the specifi c selection mode you are in. Selection options that deal specifi cally with edges can be found by pressing Ctrl+E in Edit mode. The Region To Loop selection option in that menu enables you to choose the edge out-line (strictly speaking, loop here is a misnomer) of any selected region of faces, as shown in Figure 1.24 (this image is repeated for visual clarity in the color insert of this book). The reverse, selecting a region of faces based on a selected closed edge border around the region, is possible with the Loop To Region menu entry.
Other very useful selection options include loop and ring selection using Alt+RMB and Ctrl+Alt+RMB. By holding down the Alt key and right-clicking on a single edge in Edit mode, you can select the entire edge loop that the edge belongs to. By using Ctrl+Alt+RMB, you select the perpendicular ring of faces that includes the edge you clicked on, as shown in Figure 1.25. In Edge selection mode, the behavior is similar, except that the edge ring selected with Ctrl+Alt+RMB does not include faces, as shown in Figure 1.26. In Face selection mode, there is no difference between the selections. Both hot keys select the same ring of faces, as shown in Figure 1.27. These fi gures are also included in the color insert of this book for visual clarity.
Figure 1.22
The Select Linked menu
Figure 1.23
Buttons for choosing the selection mode
07417c01.indd 1907417c01.indd 19 2/20/09 9:21:53 AM2/20/09 9:21:53 AM

20 | CHAPTER 1 CONTROLLING YOUR ENVIRONMENT
Figure 1.24
Choosing a loop from an area
Figure 1.25
Edge loop and ring selection in Vertex selection mode
Figure 1.26
Edge loop and ring selection in Edge selection mode
07417c01.indd 2007417c01.indd 20 2/20/09 9:21:53 AM2/20/09 9:21:53 AM

IMPROVING YOUR WORKFLOW | 21
Another useful selection tool, Select Vertex Path, can be found in the Specials menu by press-ing the W key over the 3D viewport. With exactly two vertices selected, this option will select the shortest edge path between the two vertices.
Selecting Similar Elements
The Shift+G menu enables you to select all similar elements to the currently selected element, based on a variety of possible criteria.
In Vertex selection mode, Shift+G enables you to select other vertices that share the same ver-tex normal direction as the currently selected vertices, vertices that are members of shared vertex groups with the currently selected vertices, or vertices that are used by the same number of faces.
In Edge selection mode, the Shift+G menu enables you to select edges that are the same length, run in the same direction, or have the same number of face users as the selected edges. You can also select edges based on whether they are part of a seam or crease, or based on their sharpness value. This is an excellent method for quickly selecting all seams on an object: Simply select on a seam edge, and then use this selection method to select them all.
In Face selection mode, you can select faces that share the same area, share a material, share an image, have common normal directions, or are coplanar, meaning that the faces share their normal directions and are located on a single imaginary plane in the 3D space. Finally, the Perimeter option enables you to select regions of faces that have the same size perimeter or out-line as the originally selected region.
Figure 1.27
Loop selection in Face selection mode
07417c01.indd 2107417c01.indd 21 2/20/09 9:21:53 AM2/20/09 9:21:53 AM

22 | CHAPTER 1 CONTROLLING YOUR ENVIRONMENT
Object ManipulationThe most commonly used and taught methods of translating, rotating, and scaling 3D ele-ments are the hot keys G, R, and S. These are the easiest to control, but using other methods can increase the speed and effi ciency of your workfl ow in some cases. Most people are aware of the existence of mouse gestures and the 3D manipulator, because both are enabled by default (mouse gestures in particular can be a real nuisance to beginners who activate them inadver-tently), but fewer people understand the correct way to use them.
Mouse gestures are a way of triggering the translation, scale, or rotation state, which are analogous to pressing the G, S, or R key, respectively. This is done by holding the left mouse but-ton and dragging the mouse in one of the three patterns shown in Figure 1.28.
Almost as important as knowing how to use mouse gestures correctly is knowing when they are being activated by accident and what to do when that happens (click the right mouse button to cancel out of the transform). Mouse gestures can be particularly useful with pen tablets. The easiest gesture to use, by far, is the translate gesture. If you spend much time using a pen tablet, it is likely that you will soon quit using the G key altogether, even without thinking about it. The rotate and scale gestures are trickier. To be honest, although they are referred to as “mouse” gestures, I personally fi nd it nearly impossible to consistently produce distinct rotation and scale gestures when working with a mouse. The important quality that distinguishes the rotate ges-ture is the smoothness of the curve. If your curve is choppy or angular, the gesture is likely to be interpreted as the scale gesture. It is much easier to do this correctly with a pen tablet, although it still requires a bit of practice.
It may come as a bit of a surprise, but the 3D manipulator widgets, shown in Figure 1.29 (and repeated in the color insert of this book), also require a little bit of practice to get a feel for using them properly. These can be enabled individually or all at once using the manipulator buttons on the 3D viewport header (to select more than one, hold down the Shift key while choosing, just as in other contexts).
The easiest way to use the manipulator widgets is to left-click on the colored manipulator hot spots (the arrows for translation, curves for rotation, and cube-shaped tips for scale) and drag. The transformations are shown in Figure 1.30 and repeated in the color insert of this book. The transformation is fi nalized when you release the left mouse button. To abort the transformation, either press the Esc key or click the right mouse button before releasing the left mouse button.
Another way to use the manipulators is to left-click once quickly on the appropriate hot spot. It’s important that you do not begin to drag the mouse until after you have clicked. After you click, you will enter the appropriate transformation state, and the object’s behavior will be iden-tical to what it would have been if you had pressed G, R, or S. Right-clicking will cancel out of the transformation, and left-clicking will fi nalize the transformation.
The colored hot spots are not the only way to transform the object. Each manipulator has a thin, orange circle associated with it. Clicking on this will enter the corresponding unconstrained transform state: For translation and rotation, the transformation will be car-ried out with respect to the plane of the viewport; and for scaling, the object will be scaled along all axes.
07417c01.indd 2207417c01.indd 22 2/20/09 9:21:53 AM2/20/09 9:21:53 AM

IMPROVING YOUR WORKFLOW | 23
Figure 1.28
Mouse gestures for (top to bottom) translation, scale, and rotation
Figure 1.29
Translate, rotate, and scale manipu-lator widgets
Figure 1.30
Translating, rotating, and scaling with manipulator widgets
07417c01.indd 2307417c01.indd 23 2/20/09 9:21:53 AM2/20/09 9:21:53 AM

24 | CHAPTER 1 CONTROLLING YOUR ENVIRONMENT
Finally, you can scale or translate along two axes by holding down the Shift key and clicking on the hot spot of the third axis. This is analogous to the way axes are constrained by hot key. Thus, to scale along the X and Y axis as shown in Figure 1.31, hold down Shift and click on the Z axis manipulator hot spot.
Keeping Up with the Blender InterfaceAs an open source application, Blender evolves at a more rapid pace and in a more organic way than many proprietary applications that you might be accustomed to. Releases are not timed to maximize profi ts or to coincide with other merchandising. Rather, they come when the develop-ers decide that the recent developments are signifi cant enough and stable enough to warrant the extra effort required for an offi cial release. When this happens, resources are diverted from new functionality, and the user community and development team focus on intensive beta testing and bug fi xing in preparation for the release.
By this point, many users are already familiar with the new functionality, because the code has been open and freely available all along. Several websites, such as www.graphicall.org, have regularly updated builds of Blender that are as easy to install as the offi cial releases (although not necessarily as stable). It is no problem to install multiple versions of Blender side by side, so there is never a problem experimenting with Blender’s bleeding-edge functionality. The BlenderArtists.org forum is always buzzing with discussions of all the latest features, and you’re sure to fi nd somebody to help you with even the most exotic new features.
Getting familiar with these resources is part and parcel of mastering Blender. Most readers of this book have probably already dipped into experimental, developmental Blender builds when a particularly attractive feature was introduced.
Figure 1.31
Scaling along the X and Y axis
07417c01.indd 2407417c01.indd 24 2/20/09 9:21:53 AM2/20/09 9:21:53 AM

KEEPING UP WITH THE BLENDER INTERFACE | 25
The Coming ChangesAnyone who has participated in recent online discussions about Blender has probably heard about the deep changes afoot for the upcoming Blender version 2.5, in particular as they relate to the interface. Indeed, this release has taken on an almost mythological status in some circles, and opinions (some better informed than others) have been fl ying thick and fast. There is excited hope that all the things that many people fi nd annoying or counterintuitive about the Blender interface will be fi xed, as well as apprehension that many idiosyncrasies that Blender users have come to love may be discarded.
Although this book is written to correspond to Blender 2.48, it is nonetheless worthwhile, in keeping with the thinking of Blender as a constantly evolving piece of software, to get a clearer idea of what direction the evolution of its interface is likely to take in the next few releases.
The 2.5 Event RecodeBlender began its life as an in-house animation tool for a commercial studio. It was developed in C by the same people who used it, a small group who knew the code inside and out and worked very closely together. Unfortunately, although the choice of C as an implementation language helped to ensure that Blender would be a fast and lean executable, the way that the development proceeded meant that many design decisions about even relatively superfi cial things came to be hard-coded at a low level and diffi cult or impossible to alter later in a simple way. This lack of modularity has been a common source of frustration to coders who are new to Blender. For years, it was accepted as a fact of life and worked around, but over time the problem became compounded by code written in an ad hoc way.
This is about to change. As I write this, the Blender Foundation’s resources have been entirely devoted to a long-postponed, ground-up recode of the Blender event-handling system. The event system manages the way in which keyboard, mouse, and other input/output (I/O) events are dealt with, and as such, it is a crucial point of interaction between the interface and the functionality. Until the recode, much of the event handling happened directly in the code imple-menting the functionality itself. In order to change a single hot key, for example, it might be necessary to do considerable digging into the code of the associated functionality. To add such an apparently straightforward and often-requested feature as customizable hot keys, then, was a much thornier problem than many people realized.
It was possible to put off the recode for so long in part because individual requests and fea-tures that the current code makes diffi cult were often fairly superfi cial. Customizable hot keys, for example, are a common request of users seeking to switch over from some other 3D applica-tion. But there are arguments on both sides to be made about the actual importance or wisdom of depending heavily on nonstandard hot key confi gurations. Combined with the intractability of implementing confi gurable hot keys on the old Blender codebase, this was enough to ensure that such requests went for years without being acted on. Now, with the event-system recode underway, Blender users can look forward to not only many new interface features and customi-zability options, but more important, a new ease with which future adaptations and modifi ca-tions can be made.
07417c01.indd 2507417c01.indd 25 2/20/09 9:21:53 AM2/20/09 9:21:53 AM

26 | CHAPTER 1 CONTROLLING YOUR ENVIRONMENT
DNA and RNA
Blender uses a unique internal format called DNA to store and reference 3D assets. The name is an analogy to the biological term, with the implication that DNA is a highly compact encoding of all the information necessary to re-create the contents of what Blender users know as a .blend fi le: scenes, objects, and all associated datablocks. DNA is a binary format, which makes it very fast to load and save. For example, the same data represented in XML may be several orders of magnitude slower to load and save, particularly in the case of large fi les with many scene elements. This is the main reason why .blend fi les are so fl exible, and can be used to store large and complex scenes and even collections of scenes.
RNA is a current development that comprises an important behind-the-scenes component of the 2.5 changes. It is also loosely analogous to the biological meaning of the term. RNA will serve as a wrapper or low-level interface for accessing and setting values in DNA. In practice, RNA will be used to automatically generate interface elements and the Python API, making it easier to keep them up-to-date and consistent. The enhanced access that RNA enables will also have the effect of fi nally realizing the long-held dream of having everything in Blender capable of being animated!
The Evolution of the InterfaceWith the focus of development being on the task of implementing the new event system and porting the existing Blender functionality over to this new foundation, it is an ideal time for a review of the interface itself. In preparation for the coming interface paradigm shift, William Reynish delivered a presentation at the Blender Foundation’s 2008 annual conference in Amsterdam, outlining the latest thinking on the direction that Blender’s interface should take. A 25-page white paper containing a revised version of Reynish’s proposals is available from the offi cial Blender website at http://download.blender.org/documentation/bc2008/evolution_of_blenders_ui.pdf.
Reynish’s paper is an excellent overview of the thinking behind the Blender interface—past, present, and future—and a good read for anybody who would like to better understand why the interface is the way it is and how it is likely to evolve. The paper describes Blender’s inter-face strengths, its weaknesses as of the offi cial 2.48 release, and a number of design goals for the 2.5 release.
STRENGTHS
Reynish outlines four main principles that have informed Blender’s interface. These are long-standing, deliberate design decisions that have made Blender extraordinarily fast to work with for experienced users. These principles are as follows:
The workfl ow should be as nonmodal as possible. Modality in software means that cer-tain functions work in certain modes and not in others. Although Blender does make use of explicit modes for editing and object manipulation, the overall interface is comparatively nonmodal in its behavior. Users have the option of having almost all of Blender’s functional-ity laid out simultaneously before them, for immediate access at any time.
07417c01.indd 2607417c01.indd 26 2/20/09 9:21:53 AM2/20/09 9:21:53 AM

KEEPING UP WITH THE BLENDER INTERFACE | 27
The window organization should be nonoverlapping. For regular users of Blender, this is one of the main strengths of the interface. With functionality as complex as Blender’s, over-lapping windows could very quickly become a nightmare of digging around to fi nd buried windows on the desktop. This never happens with Blender, because its windows are tidily organized in a nonoverlapping way. Users can quickly switch between Screen settings to access other nonoverlapping desktop confi gurations.
It should use fast, effi cient, and consistent hot keys and interface conventions that are minimally dependent on their context. Hot keys, menu entries, and other interface ele-ments should be as consistent as possible across various points in the workfl ow. In Blender, this is accomplished in part by having similar or intuitively analogous functionality from different modes (such as the select, rotate, or grab functionality in Object mode and Edit mode) grouped logically to appropriate hot keys.
The various tools should be highly integrated with each other. Blender has a wide vari-ety of tools under its hood, ranging from mesh modeling and sculpting, to video editing and compositing, to scripting, game creation, and physical simulation. One of Blender’s great strengths is the way all of these various tools are so tightly integrated that the transition from one to the next is nearly seamless. For individuals and small groups, this is a signifi cant time-saver over a less-integrated pipeline that requires numerous export and import steps.
WEAKNESSES
Although Blender has done a good job of adhering to the preceding well-founded principles, some areas of Blender’s interface as of 2.48 have been weak. The chaotic layout of the button areas is one key point that Reynish brings up, citing a variety of examples of highly arbitrary button placements, situations where the button type (radio, action, or toggle) is unclear, and cases where clutter is brought about by the need to maintain consistently square button tab shapes for ease of vertical and horizontal layout.
Another area that Reynish’s paper homes in on is the diffi culty of dealing with multiple objects simultaneously in certain specifi c ways. The example he gives is one of adding the Wire extra draw type to a large number of objects. This can be done using Ctrl+C to copy settings from one object to the others, but not everything can be copied in this way, and as Reynish points out, this is a distracting extra step.
Finally, Reynish’s paper discusses the topic of customizability. Blender’s interface is notori-ous for its lack of customizable key bindings. However, although customizability is a popular request among new users, Reynish concludes that it is a comparatively low priority when measured next to the importance of a good, solid set of defaults. Reynish argues that customiz-ability in itself is an overrated solution—it is sometimes perceived that a poor interface can be improved by the user if the interface allows suffi cient customizability, but this is not in fact the case. Nevertheless, there are a number of reasons why customizability in key bindings and input options is regarded as desirable. Some users may wish to preserve muscle-memory habits acquired from other software. More important, customizable hot keys enable the user to have more freedom in accessing custom-made scripts or other nonstandard functionality.
07417c01.indd 2707417c01.indd 27 2/20/09 9:21:53 AM2/20/09 9:21:53 AM

28 | CHAPTER 1 CONTROLLING YOUR ENVIRONMENT
GOALS AND SUGGESTIONS
Reynish’s paper outlines some key interface goals and some practical suggestions for attaining these goals. He argues that the interface should be nonmodal, nonlinear, logical, fast, fl exible, innovative, and simple.
The practical suggestions are far-reaching. One of the most profound is Reynish’s recommen-dation for the total removal of the buttons area window as it is currently implemented. Instead, it would be replaced by a Properties Editor that would enable logical, organized access to all the properties of any selected object or group of objects. Settings for all Blender datablocks would be accessible in this area.
Reynish further advocates a reworking of tool workfl ow. Rather than the highly modal work-fl ow of tools such as the loop cut or the addition of objects to the scene, in which settings must be decided upon before fi nalizing the tool action, the recommendation is made to increase the interactivity of tools, enabling settings to be adjusted after the tool has been used.
Further recommendations include enhanced context sensitivity to rid the interface of unnec-essary clutter when it is not needed, improved consistency in button and interface widget graph-ics so that distinct interface component types such as radio buttons and action buttons have a distinct and intuitively recognizable look, improved feedback for when the user is required to wait for something, and a preference for vertical layouts for buttons and fi elds for reasons of visual clarity and effi cient screen real-estate usage.
WHAT TO EXPECT
Reynish’s suggestions will not necessarily be implemented exactly as described in the report. Furthermore, the timeline for when they will be implemented is not set in stone. The 2.5 event recode will set the groundwork for making the evolution of the interface possible. Whether the most signifi cant interface changes will be incorporated in that release or subsequently intro-duced remains to be seen.
Users can expect a more fl exible workfl ow and more sensible and consistent organization of interface elements. There will likely be a preference for vertical panel confi gurations, rather than the horizontal panel confi guration that has been the default for Blender’s buttons area in the past. Eventually, users can expect the buttons area to be radically reworked or phased out entirely. Overall, the coming interface developments should go a long way to address many of the pet peeves that plague both new and experienced users of Blender, and help to make Blender an even more powerful and enjoyable tool to work with. As always, you should bring yourself up to speed with new developments for each release by studying the offi cial release notes, which you can link to from the offi cial downloads page at www.blender.org. You can learn more about the focus of the changes to come in 2.5 at http://wiki.blender.org/index.php/BlenderDev/Blender2.5/Focus.
07417c01.indd 2807417c01.indd 28 2/20/09 9:21:53 AM2/20/09 9:21:53 AM

THE BOTTOM LINE | 29
The Developing World
As development on each Blender release intensifi es, the #blendercoders IRC channel and the vari-ous development-related mailing lists are fi lled with developers communicating their ideas and intentions with each other. The 2.5 event recode and the huge task of porting existing Blender functionality over to the new base requires a high degree of organization and coordination, as does every release.
The smooth progress of Blender’s development is all the more remarkable considering what a truly global project Blender is. According to the open source software resource Ohloh.net, Blender’s regu-lar committing developers are spread all over the globe—in Europe, North America, South America, Oceania, and Africa. If you count script contributions and recent coding that has not made it into the offi cial trunk, the area is even wider, with recent code contributions beginning to come from Asia as well.
Some of the stories of Blender development around the world serve as inspiring reminders of the power of open source software. The work of Raúl Fernández Hernández (farsthary) on true volu-metrics for Blender is an excellent example. As a student living in Cuba, Raúl has had limited access to many of the resources that people in other parts of the world take for granted. Nevertheless, he identifi ed a glaring need in Blender for true volumetric simulations and took advantage of the open code to study for himself how to implement his ideas in Blender. Although he lacked regular access to an Internet connection and was unable to access the Subversion code repository directly, participate in chats, or take part in regular communication with developers, he nevertheless suc-ceeded in creating an impressive foundation for true volumetrics. He reported about his work sporadically in his blog, http://farsthary.wordpress.com/, including some amazing renders and animations of convincing fl ame and smoke effects. Although initially carried out with very little interaction with others, Raúl’s work quickly began to get attention from the Blender user and developer community. After hurricane Gustav devastated his town, leaving him without electricity for a week, the community rallied to assist him, and two core Blender developers, Matt Ebb and Daniel Genrich, became more actively involved in helping him recode the volumetric simulation to be more consistent with existing Blender code. The project is progressing very nicely, as you can see from Raúl’s blog, and the exciting new volumetric features will surely be a welcome addition to an upcoming offi cial release.
The Bottom Line
Set the options available to you in the User Preferences window. A wide variety of often-overlooked options are available in the User Preferences window, including settings for View & Controls, Edit Methods, and Themes, among others.
Master It Create your own preferred default starting state and save it so that it will be active every time you start Blender.
07417c01.indd 2907417c01.indd 29 2/20/09 9:21:53 AM2/20/09 9:21:53 AM

30 | CHAPTER 1 CONTROLLING YOUR ENVIRONMENT
Use lesser-known methods for selecting, grouping, and organizing 3D elements to speed up your workfl ow. There are numerous ways to select and group objects and 3D elements that can considerably increase your speed and effi ciency when working.
Master It Use the selection methods described in this chapter to make the face selec-tions as shown in the following graphic.
You should be able to make this selection using a single (modifi ed) mouse click followed by a single hot key combination. There are several ways to do this.
Prepare for changes in the evolving Blender interface by understanding the principles behind its unique design. Blender is constantly evolving. It is in your interest to stay informed about developments, in particular at a time when the 2.5 release is promising big developments in usability.
Master It Inform yourself about the status of the 2.5 event recode and GUI update.
07417c01.indd 3007417c01.indd 30 2/20/09 9:21:53 AM2/20/09 9:21:53 AM