mastering your bernina aurora embroidery system...select floral3.art. open. click on the write to...
TRANSCRIPT

MasteringYour
BERNINA®
BERNINA® Embroidery Module/Machine
MASTERING YOUR BERNINA® EMBROIDERY MODULE/MACHINE
©2005 BERNINA® of America, Inc. Permission to copy granted only to Authorized BERNINA® Dealers
Mastering Your
auroraEmbroidery
System
BERNINA®
Extra pages for the
aurora Embroidery System
Owner’s Workbook

BERNINA® Embroidery Module/Machine
MASTERING YOUR BERNINA® EMBROIDERY MODULE/MACHINE
MasteringYour
BERNINA®
©2005 BERNINA® of America, Inc. Permission to copy granted only to Authorized BERNINA® Dealers
Module/Machine Details
See Owners Manual for details.
• Hoop Clamp
• Selection Menu
• Layout/Edit Screen(s)
• Embroidery/Stitch Screen
General Information:
Your Embroidery Machine/Module
Layout / Edit
Screen
Embroidery
Screen
aurora 430E & 440E

MasteringYour
BERNINA®
BERNINA® Embroidery Module/Machine
MASTERING YOUR BERNINA® EMBROIDERY MODULE/MACHINE
©2005 BERNINA® of America, Inc. Permission to copy granted only to Authorized BERNINA® Dealers
Notes
Editor Lite Quick Start Exercise
This exercise is designed to acquaint you with a variety of features found
in the Editor Lite embroidery program. Please refer to the Editor Lite
manual as needed for additional information.
Install the Editor Lite program on your PC following the Installation Notes
packaged with the software.
Opening an Embroidery Design
• Click on the Open icon.
• From C:/My Designs, select Floral 7, Open.
• From the Settings menu, select Fabric Display, Edit.
- Select the white color chip.
- Click on OK, OK.
Changing Views
• Select Show 1:1 to view design in actual size. Note: Computer
screen must be calibrated in order for Show 1:1 to reflect design
size accurately. Refer to owner’s manual for instructions.
• Click Artistic View to preview the design in actual stitches
• Click Design View to return to the workspace.
Selecting a Hoop
• Click on the Zoom Out 2x icon.
• Right click on the Show Hoop icon to view hoop options.
- Select artista 255x145 Oval Rotated from the hoop list.
- Click OK.
Customizing the Design
• Choose the Select Object tool;
click on the design to select it.
• Left click on the Scale Up/Down
icon.
• Right click on the design to open
the Object Properties dialog box.
- Input 20 in the Rotate By box.
- Press OK.
- Copy, then paste a duplicate.
- While the duplicate is selected,
click Mirror Image Horizontal.
- Use the arrows on the keyboard to move the duplicate to the left.
Position the motifs with just the tips of the leaves touching.
←←←←←
10a

MasteringYour
BERNINA®
BERNINA® Embroidery Module/Machine
MASTERING YOUR BERNINA® EMBROIDERY MODULE/MACHINE
©2005 BERNINA® of America, Inc. Permission to copy granted only to Authorized BERNINA® Dealers
• Edit>Select All
- While both designs are selected, Edit>Duplicate.
- Mirror Image Vertical. Click and drag the duplicates into position
below the first two designs.
- Select Show All.
Saving the Design
• File>Save As.
- In the File Name field, enter Training Floral Frame.
- Click Save.
Adding Lettering
• Left click on the Lettering icon.
• C lick inside the floral frame to begin text.
- Type aurora.
- Press Enter on the keyboard.
- Click and drag one of the corner handles to rescale the lettering.
- Move lettering to center of floral swags.
• Right click on the lettering to open the Object Properties-Lettering
dialog box.
- Change the letter spacing to 2.
- Press OK.
• Save.
Previewing the Design
• Select Show 1:1 and Artistic View.
• Select Design View. View>Slow Redraw. Watch the design stitch.
• Close Slow Redraw.
Notes
10b
MasteringYour
BERNINA®
BERNINA® Embroidery Module/Machine
MASTERING YOUR BERNINA® EMBROIDERY MODULE/MACHINE
©2005 BERNINA® of America, Inc. Permission to copy granted only to Authorized BERNINA® Dealers
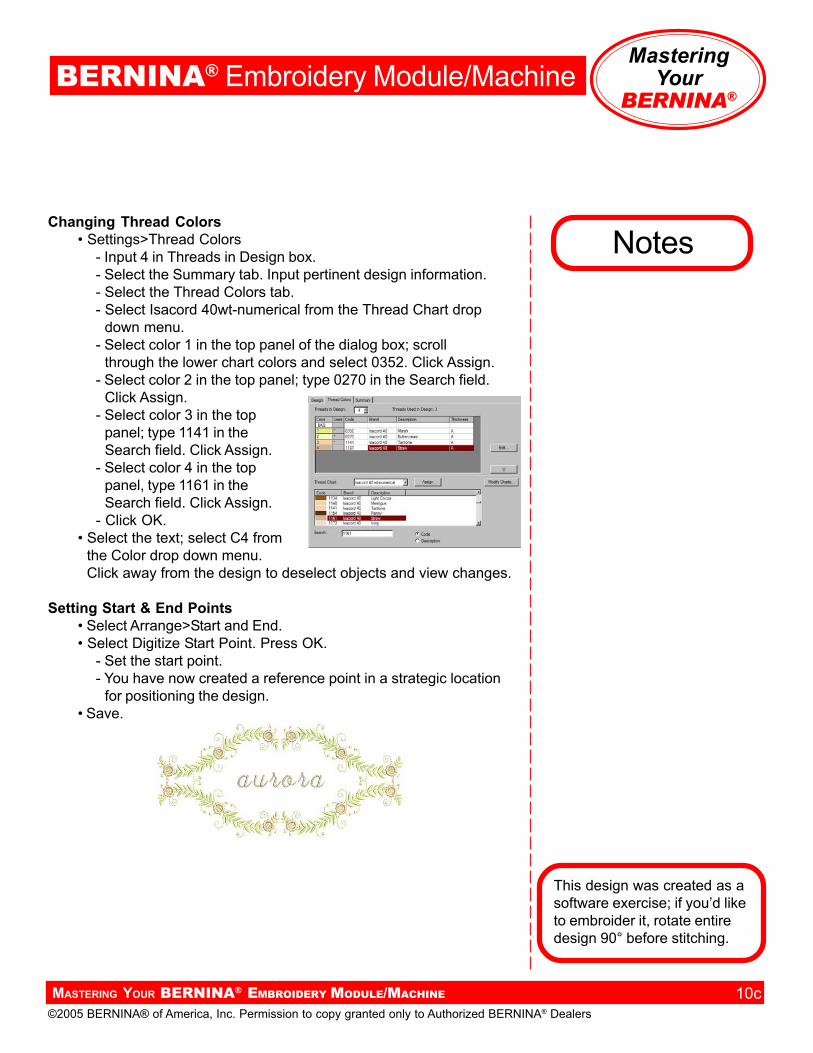
Changing Thread Colors
• Settings>Thread Colors
- Input 4 in Threads in Design box.
- Select the Summary tab. Input pertinent design information.
- Select the Thread Colors tab.
- Select Isacord 40wt-numerical from the Thread Chart drop
down menu.
- Select color 1 in the top panel of the dialog box; scroll
through the lower chart colors and select 0352. Click Assign.
- Select color 2 in the top panel; type 0270 in the Search field.
Click Assign.
- Select color 3 in the top
panel; type 1141 in the
Search field. Click Assign.
- Select color 4 in the top
panel, type 1161 in the
Search field. Click Assign.
- Click OK.
• Select the text; select C4 from
the Color drop down menu.
Click away from the design to deselect objects and view changes.
Setting Start & End Points
• Select Arrange>Start and End.
• Select Digitize Start Point. Press OK.
- Set the start point.
- You have now created a reference point in a strategic location
for positioning the design.
• Save.
Notes
10c
This design was created as a
software exercise; if you’d like
to embroider it, rotate entire
design 90° before stitching.

MasteringYour
BERNINA®
BERNINA® Embroidery Module/Machine
MASTERING YOUR BERNINA® EMBROIDERY MODULE/MACHINE
©2005 BERNINA® of America, Inc. Permission to copy granted only to Authorized BERNINA® Dealers
Notes
Editor Lite: Lettering Basics
Alphabet styles may be viewed in Appendix G of the online manual. Forbest results, stay within recommended size ranges for the selected style.
Straight Baseline Editing• Left click on the Lettering/Values button on the design toolbar. Notice the prompts on the status bar.• Place cursor on design screen; left click. A vertical bar appears.• Type BERNINA using the keyboard. The outline of the lettering will appear on screen. Press Enter; the lettering is filled and selected.• Right click on selected lettering; the Object Properties dialog box opens. The word BERNINA is in the text box.
- Alphabet style, height, width, justification, and baseline can be changed using the Object Properties box.- Change lettering to Swiss Block; change height to 20mm. Click OK.- While lettering is still selected, click on the arrow in the Color Selection box. Select Red; click away from lettering to deselect the object and view your changes.
Straight Baseline Lettering using the Object Properties Dialog Box• Press the A key on the keyboard; the Object Properties box opens.• Type BERNINA in the text window.• Select the London alphabet. Change the width to 80%; click OK.• Follow the prompt in the status bar; left click in the center of thescreen. Press Enter to set the lettering.
Clockwise or Counterclockwise Lettering• Press the A key on the keyboard; the Object Properties box opens.• Type Bernina.• Follow the prompts in the status bar:
- Place the cursor at the center of the circle; left click.- Move cursor straight down to set radius; press Enter to set a circle. For an oval, set cursor at a second reference point and left click; press Enter.- Right click for Object Properties. Change baseline radius to 35°.
Vertical Baseline Lettering• Left click on the New button in the general tool bar.• Select the A key on the keyboard.• Type BERNINA in the text box.• Select vertical baseline; select King Charles alphabet; click OK.• Follow the prompt in the status bar: Left click at the lower end of thecolumn location; press Enter.
10d

MasteringYour
BERNINA®
BERNINA® Embroidery Module/Machine
MASTERING YOUR BERNINA® EMBROIDERY MODULE/MACHINE
©2005 BERNINA® of America, Inc. Permission to copy granted only to Authorized BERNINA® Dealers
Lettering Basics - continued
10e
Exercise: Create a sample with each of the alphabets in the Editor Lite program.Use a different color for each row. Stitch, trim, and mount sample.
aurora 430E & 440E

MasteringYour
BERNINA®
BERNINA® Embroidery Module/Machine
MASTERING YOUR BERNINA® EMBROIDERY MODULE/MACHINE
©2005 BERNINA® of America, Inc. Permission to copy granted only to Authorized BERNINA® Dealers
Notes
Editor Lite: Lettering Editing
Altering Baselines• Left click New on the general tool bar.• Left click on the Lettering/Values button.• Left click on the design screen; type BERNINA. Press Enter.• While the lettering is selected, click on the Reshape Object tool. Click and drag the control point at the lower left corner of the lettering box to change the baseline length or angle. Note: You may need to move the start point marker to access the control point.
Kerning (Manual Spacing)• Left click on the Lettering/Values button.• Left click on the design screen; type BERNINA. Press Enter.• While the lettering is selected, click on the Reshape Object tool. Click and drag the diamond-shaped control points to manually adjust the spacing between individual letters.
Spacing Letters Evenly• Left click on the Lettering/Values button.• Left click on the design screen; type BERNINA. Press Enter.• Drag the arrow at the lower left corner of the lettering to space the letters evenly. Alternate Method: Open the Object Properties dialog box, type the desired spacing amount in the Letter Spacing window.
Changing Lettering Height & Width• Left click New on the general tool bar.• Left click on the Lettering/Values button.• While the lettering is selected, click on the Reshape Object tool.
- Click and drag the top black triangle to scale vertically; Undo.- Click and drag the diagonally-pointing triangle to scale proportionally; Undo.- Click and drag the side triangle to scale horizontally; Undo.
Note: The height and width of lettering may also be changed byselecting it, right clicking to open the Object Properties dialog box,and typing in the desired size.
Editing Individual Letters• Select lettering.• Left click on the Reshape Object tool.• Double left click on the control point in the middle of the letter B. Click on the letter boundary line.• Zoom in for better visibility; click and drag control points to reshape
letter. Press enter to set changes.
10f

MasteringYour
BERNINA®
BERNINA® Embroidery Module/Machine
MASTERING YOUR BERNINA® EMBROIDERY MODULE/MACHINE
©2005 BERNINA® of America, Inc. Permission to copy granted only to Authorized BERNINA® Dealers
Lettering Basics - continued
10g
Changing the Color of Individual LettersMethod 1:
• Select lettering; open Object Properties.• Insert the ^ symbol between each letter; click OK. Note: The colorchanges may be included when the text is first created.
Method 2:• Deselect lettering. Left click on the Lettering/Values button. Move thecursor between the B and e in Bernina.• Hold down the left mouse button; drag cursor to the right, across thee. Release the mouse button; e is highlighted. Select the color of yourchoice from the stitch and color bar.• Deselect the lettering to view your changes.Note: Make all color changes to individual letters last. Color changeswill be lost if any alterations to size, baseline, or style are made afterthe color changes are made.
Exercise: Create samples as shown below; stitch, trim, and mount.
aurora 430E & 440E
Notes

MasteringYour
BERNINA®
BERNINA® Embroidery Module/Machine
MASTERING YOUR BERNINA® EMBROIDERY MODULE/MACHINE
©2005 BERNINA® of America, Inc. Permission to copy granted only to Authorized BERNINA® Dealers
Stitching A Motif
aurora 430E & 440E
Connect aurora to PC following instructions in owner’s manual.
Select File>Open from the main menu. From the My Designs folder,
select Floral3.art. Open.
Click on the Write to Machine icon. Select aurora 430/440 (stitch
out only); EC on PC opens. Note: Make sure the feed dog is
lowered, presser foot is up, and foot control removed.
Attach embroidery hoop to module. Click on the graphic of the module
arm to calibrate the module.
Click on the start button located in the lower left corner of the EC on PC
screen. The hoop will move, then an animation will prompt you to lower
the presser foot and press the Start/Stop button on the machine.
The aurora will sew a few stitches and stop. An animation will appear,
prompting you to trim the thread tail. When the first color is complete,
an animation will prompt you to change the thread to the next color.
When the embroidery is complete, a large check mark will appear in the
lower left corner of the EC on PC screen.
Trim and mount sample.
Note: Editor Lite includes 65 ready-to-stitch embroidery designs.
Embroidery Motifaurora
floral3.art
Fabric & Stabilizer12” x 15” rectangle
Notes

MasteringYour
BERNINA®
BERNINA® Embroidery Module/Machine
MASTERING YOUR BERNINA® aurora EMBROIDERY MODULE/MACHINE
©2003 BERNINA® of America, Inc. Permission to copy granted only to Authorized BERNINA® Dealers
aurora 430E & 440E
Stitching A Motif Sample
21a

MasteringYour
BERNINA®
BERNINA® Embroidery Module/Machine
MASTERING YOUR BERNINA® aurora EMBROIDERY MODULE/MACHINE
Notes
©2003 BERNINA® of America, Inc. Permission to copy granted only to Authorized BERNINA® Dealers
Monochromatic Embroidery
aurora 430E & 440E
Connect aurora to PC following instructions in owner’s manual.
Select File>Open from the main menu. From the My Designs folder,
select Floral3.art. Open.
Click on the Write to Machine icon. Select aurora 430/440 (stitch out only);
EC on PC opens. Note: Make sure the feed dog is lowered, presser foot
is up, and foot control removed.
Attach embroidery hoop to module. Click on the graphic of the module
arm to calibrate the module.
Select the Mono/Multicolor icon (paintbrush). When
engaged, the machine will stitch through the entire design
without stopping for color changes.
Click on the EC on PC start button; the hoop will move and an animation
will prompt you to lower the presser foot and press the Start/Stop button
on the machine.
The aurora will sew a few stitches and stop. An animation will appear,
prompting you to trim the thread tails. Press the Start/Stop button on the
machine to resume embroidery.
When the embroidery is complete, a large check mark will appear in the
lower left corner of the EC on PC screen.
Trim and mount sample.
Embroidery Motifaurora
floral3.art
Fabric & Stabilizer12” x 15” rectangle
22a

MasteringYour
BERNINA®
BERNINA® Embroidery Module/Machine
MASTERING YOUR BERNINA® aurora EMBROIDERY MODULE/MACHINE
©2003 BERNINA® of America, Inc. Permission to copy granted only to Authorized BERNINA® Dealers
aurora 430E & 440E
Monochromatic Embroidery Sample
23a

MasteringYour
BERNINA®
BERNINA® Embroidery Module/Machine
MASTERING YOUR BERNINA® EMBROIDERY MODULE/MACHINE
Notes
©2005 BERNINA® of America, Inc. Permission to copy granted only to Authorized BERNINA® Dealers
Customizing Thread Color
aurora 430E & 440E
Connect aurora to PC following instructions in owner’s manual.
Select File>Open from the main menu. From the My Designs folder,
select Floral3.art. Open.
Select Settings>Thread Colors.
• Select Isacord 40wt-shades.
•Click on Color 1 in the top panel of the
dialog box; scroll through the colors
from the lower panel fo the dialog box
and select color 5934.
•Click Assign.
• Select Color 2 from the top panel. Type
2250 in the Search field.
•Click Assign.
• Click OK.
Select File>Save As
• Type thread color exercise in the File Name field.
•Click Save.
Note: Using the Save As function preserves your original design file.
Send to the aurora to embroider the newly colored design.
Trim and mount sample.
Note: Customizing thread color allows you to preview your designs in
the thread colors you wish to use for your project.
Embroidery Motifaurora
floral3.art
Fabric & Stabilizer12” x 15” rectangle
24a

MasteringYour
BERNINA®
BERNINA® Embroidery Module/Machine
MASTERING YOUR BERNINA® EMBROIDERY MODULE/MACHINE
©2005 BERNINA® of America, Inc. Permission to copy granted only to Authorized BERNINA® Dealers
aurora 430E & 440E
Customizing Thread Color Sample
25a

MasteringYour
BERNINA®
BERNINA® Embroidery Module/Machine
MASTERING YOUR BERNINA® EMBROIDERY MODULE/MACHINE
Notes
©2005 BERNINA® of America, Inc. Permission to copy granted only to Authorized BERNINA® Dealers
Duplicating & Rescaling Motifs
aurora 430E & 440E
Connect aurora to PC following instructions in owner’s manual.
Select File>Open from the main menu. From the My Designs folder,
select Floral5.art. Open.
Choose the Select Object tool; click on the design to select it.
Select Edit>Duplicate from the main menu. There are now two
embroidery motifs on the screen. While the duplicate is selected,
click and drag it to the left. Note: When designs are pasted, the
duplicate is placed in the location from which it was copied.
Right click to open the design’s
Object Properties dialog box.
• Type 180 in the width and
height fields.
• Click OK.
Select File>Save As
• Type duplication exercise in the File Name field.
•Click Save.
Note: Using the Save As function preserves your original design file.
Send the design to the aurora for embroidery.
Trim and mount sample.
Note: With Editor Lite you can use menu commands or the icons on the
toolbars to access features and functions.
Embroidery Motifaurora
floral5.art
Fabric & Stabilizer12” x 15” rectangle
26a

MasteringYour
BERNINA®
BERNINA® Embroidery Module/Machine
MASTERING YOUR BERNINA® EMBROIDERY MODULE/MACHINE
©2005 BERNINA® of America, Inc. Permission to copy granted only to Authorized BERNINA® Dealers
aurora 430E & 440E
Duplicating & Rescaling Motifs Sample
27a
MasteringYour
BERNINA®
BERNINA® Embroidery Module/Machine
MASTERING YOUR BERNINA® EMBROIDERY MODULE/MACHINE
Notes
©2005 BERNINA® of America, Inc. Permission to copy granted only to Authorized BERNINA® Dealers
Rotating Designs
aurora 430E & 440E
Connect aurora to PC following instructions in owner’s manual.
Select File>Open from the main menu. From the My Designs folder,
select BlackBorder2.art. Open.
Select motif. Copy, then paste. While the duplicate is selected, right
click to open design’s Object Properties.
• Type 22 in the Rotation field.
• Click OK.
•Move the duplicate up and to the right.
Click on the Paste icon. While the duplicate is selected, left click
on the Rotate CCW/CW icon to rotate the design 45°. Move the
duplicate up and to the right.
Click on the Paste icon. While the duplicate is selected, right click to open
the design’s Object Properties.
• Type 77 in the Rotate By field.
• Click OK.
•Move the duplicate up and to the right.
Click on the Paste icon. While the duplicate is selected, left click twice on
the Rotate CCW/CW icon. Move the duplicate up and to the right.
Select File>Save As
• Type rotation exercise in the File Name field.
•Click Save.
Note: Using the Save As function preserves your original design file.
Send the design to the aurora for embroidery.
Trim and mount sample.
Note: Editor Lite software provides quick and easy rotation by 45° incre-
ments, free rotation by clicking and dragging, and by inputting a specific
degree of rotation in the Object Properties box.Embroidery Motifaurora
BlackBorder2.art
Fabric & Stabilizer12” x 15” rectangle
30a

MasteringYour
BERNINA®
BERNINA® Embroidery Module/Machine
MASTERING YOUR BERNINA® EMBROIDERY MODULE/MACHINE
©2005 BERNINA® of America, Inc. Permission to copy granted only to Authorized BERNINA® Dealers
aurora 430E & 440E
Rotating Designs Sample
31a

MasteringYour
BERNINA®
BERNINA® Embroidery Module/Machine
MASTERING YOUR BERNINA® EMBROIDERY MODULE/MACHINE
Notes
©2005 BERNINA® of America, Inc. Permission to copy granted only to Authorized BERNINA® Dealers
Proportional Rescaling & Rotation
aurora 430E & 440E
Connect aurora to PC following instructions in owner’s manual.
Select File>Open from the main menu. From the My Designs folder,
select Flower.art. Open.
Select motif. Select Edit>Duplicate from the main menu. There are now
two embroidery motifs on the screen. While the duplicate is selected, click
and drag it to the right. Note: When designs are pasted, the duplicate is
placed in the location from which it was copied.
Notice the black handles around the design. Click and drag
one of the corner sizing handles toward the center of the
motif. This will proportionally scale down the motif.
Left click in the center of the selected motif; the corner
handles are now open (white). Click and drag one of the
corner rotation handles to rotate the design freely.
Position the motifs in a pleasing arrangement.
Select File>Save As. Type proportional rescaling and rotation exer-
cise in the File Name field. Click Save. Note: Using the Save As function
preserves your original design file.
Send to the aurora to embroider the design.
Trim and mount sample.
Embroidery Motifaurora
Flower.art
Fabric & Stabilizer12” x 15” rectangle
32a

MasteringYour
BERNINA®
BERNINA® Embroidery Module/Machine
MASTERING YOUR BERNINA® EMBROIDERY MODULE/MACHINE
©2005 BERNINA® of America, Inc. Permission to copy granted only to Authorized BERNINA® Dealers
aurora 430E & 440E
Proportional Rescaling & Rotation Sample
33a

MasteringYour
BERNINA®
BERNINA® Embroidery Module/Machine
MASTERING YOUR BERNINA® aurora EMBROIDERY MODULE/MACHINE
Notes
©2003 BERNINA® of America, Inc. Permission to copy granted only to Authorized BERNINA® Dealers
Stretching/Skewing Designs
aurora 430E & 440E
Connect aurora to PC following instructions in owner’s manual.
Open a New design file.
Left click on the Lettering icon.
•Click in the middle of the hoop to begin text.
• Type B.
• Press enter on the keyboard.
•Click on one of the corner sizing handles to rescale the letter.
Select the letter. Edit>Duplicate; move the duplicate
down and to the right. Click and drag the top center
sizing handle to alter the height of the letter.
Click on the Paste icon; move the new
duplicate down and to the right. Click and
drag the left center sizing handle to alter
the width of the letter.
Reposition the letters if needed to form a pleasing arrangement.
Select File>Save As. Type stretching and skewing exercise in the File
Name field. Click Save.
Send to the aurora to embroider the design.
Trim and mount sample.
Embroidery Motifaurora
na
Fabric & Stabilizer12” x 15” rectangle
34a

MasteringYour
BERNINA®
BERNINA® Embroidery Module/Machine
MASTERING YOUR BERNINA® aurora EMBROIDERY MODULE/MACHINE
©2003 BERNINA® of America, Inc. Permission to copy granted only to Authorized BERNINA® Dealers
aurora 430E & 440E
Stretching/Skewing Designs Sample
35a

MasteringYour
BERNINA®
BERNINA® Embroidery Module/Machine
MASTERING YOUR BERNINA® aurora EMBROIDERY MODULE/MACHINE
Notes
©2003 BERNINA® of America, Inc. Permission to copy granted only to Authorized BERNINA® Dealers
Horizontal Mirror Imageaurora 430E & 440E
Connect aurora to PC following instructions in owner’s manual.
Select File>Open from the main menu. From the My Designs folder,
select Floral1.art. Open.
Choose the Select Object tool; click on the design to select.
• Left click on the Scale By 20% icon to scale the motif down 20%.
• Select Edit>Duplicate from the main menu. There are now two
embroidery motifs on the screen.
Click on the Mirror Image Horizontal icon to mirror image the motif.
While the duplicate is selected, use the left arrow on the keyboard to
move the design to the left. Note: Use the up or sown arrows to move the
design along its vertical axis, and/or the right and left arrows move the
design along the horizontal axis.
Select File>Save As. Type horizontal mirror image exercise in the File
Name field. Click Save.
Send to the aurora to embroider the design.
Trim and mount sample.
Embroidery Motifaurora
Floral1.art
Fabric & Stabilizer12” x 15” rectangle
36a

MasteringYour
BERNINA®
BERNINA® Embroidery Module/Machine
MASTERING YOUR BERNINA® aurora EMBROIDERY MODULE/MACHINE
©2003 BERNINA® of America, Inc. Permission to copy granted only to Authorized BERNINA® Dealers
aurora 430E & 440E
Horizontal Mirror Image Sample
37a

MasteringYour
BERNINA®
BERNINA® Embroidery Module/Machine
MASTERING YOUR BERNINA® aurora EMBROIDERY MODULE/MACHINE
Notes
©2003 BERNINA® of America, Inc. Permission to copy granted only to Authorized BERNINA® Dealers
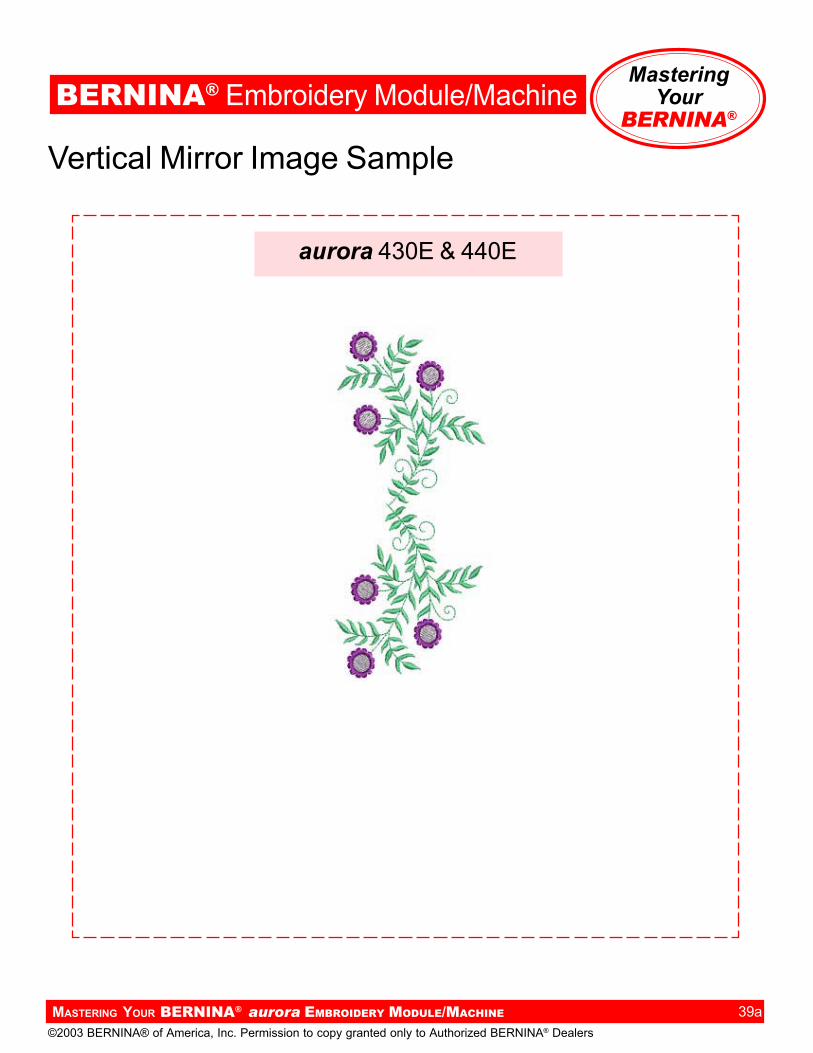
Vertical Mirror Image
aurora 430E & 440E
Connect aurora to PC following instructions in owner’s manual.
Select File>Open from the main menu. From the My Designs folder,
select Floral8.art. Open.
Choose the Select Object tool; click on the design to select.
• Left click on the Scale By 20% icon to scale the motif down 20%.
• Select Edit>Duplicate from the main menu. There are now two
embroidery motifs on the screen.
•While the duplicate is selected, click and drag it toward the
bottom of the hoop.
Click on the Mirror Image Vertical icon to mirror image the motif.
Select File>Save As. Type vertical mirror image exercise in the File
Name field. Click Save.
Send to the aurora to embroider the design.
Trim and mount sample.
Embroidery Motifaurora
Floral8.art
Fabric & Stabilizer12” x 15” rectangle
38a
MasteringYour
BERNINA®
BERNINA® Embroidery Module/Machine
MASTERING YOUR BERNINA® aurora EMBROIDERY MODULE/MACHINE
©2003 BERNINA® of America, Inc. Permission to copy granted only to Authorized BERNINA® Dealers
aurora 430E & 440E
Vertical Mirror Image Sample
39a
MasteringYour
BERNINA®
BERNINA® Embroidery Module/Machine
MASTERING YOUR BERNINA® EMBROIDERY MODULE/MACHINE
Notes
©2005 BERNINA® of America, Inc. Permission to copy granted only to Authorized BERNINA® Dealers
Selecting, Adding, & Deleting Letters
49a
aurora 430E & 440E
Connect aurora to PC following instructions in owner’s manual.
Open a New design file.
Left click on the Lettering Values icon. Note: Notice the prompts on the
status line.
• Place the cursor on the design screen, then left click; a vertical bar
will appear.
• Type BERNANA using the keyboard. The outline of the lettering will
appear on the screen.
• Press Enter on the keyboard; the lettering is filled and selected.
•While the lettering is still selected, right click to open the lettering
Object Properties dialog box.
• Type BERNINA correctly in the text box. Press OK.
Select File>Save As. Type lettering exercise in the File Name field. Click
Save.
Send to the aurora to embroider the design.
Trim and mount sample.
Embroidery Motifaurora
na
Fabric & Stabilizer12” x 15” rectangle

MasteringYour
BERNINA®
BERNINA® Embroidery Module/Machine
MASTERING YOUR BERNINA® EMBROIDERY MODULE/MACHINE
©2005 BERNINA® of America, Inc. Permission to copy granted only to Authorized BERNINA® Dealers
aurora 430E & 440E
49b

MasteringYour
BERNINA®
BERNINA® Embroidery Module/Machine
MASTERING YOUR BERNINA® aurora EMBROIDERY MODULE/MACHINE
Notes
©2003 BERNINA® of America, Inc. Permission to copy granted only to Authorized BERNINA® Dealers
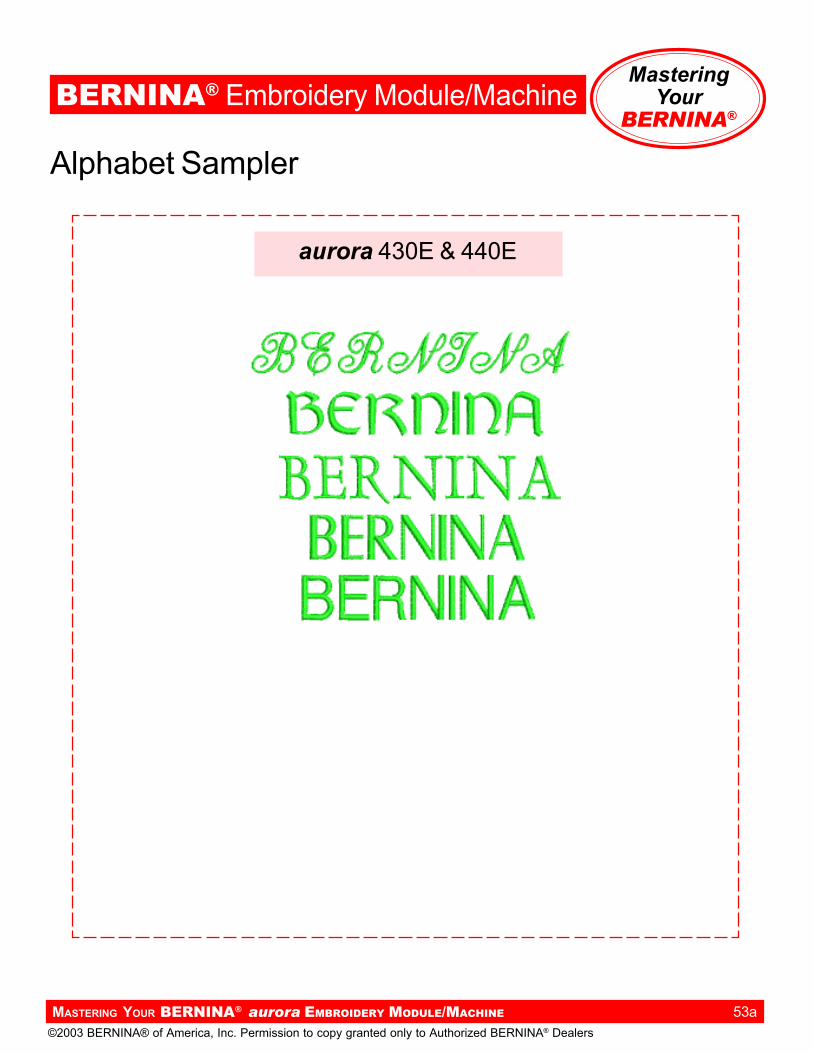
Alphabet Sampler
52a
aurora 430E & 440E
Connect aurora to PC following instructions in owner’s manual.
Open a New design file.
Left click on the Lettering Values icon. Note: Notice the prompts on the
status line.
• Place the cursor on the design screen, then left click; a vertical bar
will appear.
• Type BERNINA using the keyboard. The outline of the lettering will
appear on the screen.
• Press Enter on the keyboard; the lettering is filled and selected.
While the lettering is still selected,
copy and paste a duplicate. Use the
down arrow on the keyboard to move
the duplicate below the original.
•Right click to open the Lettering
Object Properties.
• From Alphabet Type drop down
menu, select Guinevere. Press OK.
•Click away from the lettering to
deselect it.
Touch the letter A on the keyboard; this opens the Lettering Object
Properties dialog box.
• From the Alphabet Type drop down menu, select King Charles.
• Type BERNINA in the text box; press OK.
•Click on the screen below the lettering to set text. Note: Notice
the prompts on the status line.
•Click away from the lettering to deselect it.
Repeat this process, selecting London and Swiss Block alphabets.
Select File>Save As. Type alphabet sampler in the File Name field.
Click Save.
Send to the aurora to embroider the design.
Trim and mount sample.
Embroidery Motifaurora
na
Fabric & Stabilizer12” x 15” rectangle
MasteringYour
BERNINA®
BERNINA® Embroidery Module/Machine
MASTERING YOUR BERNINA® aurora EMBROIDERY MODULE/MACHINE
©2003 BERNINA® of America, Inc. Permission to copy granted only to Authorized BERNINA® Dealers
aurora 430E & 440E
Alphabet Sampler
53a
MasteringYour
BERNINA®
BERNINA® Embroidery Module/Machine
MASTERING YOUR BERNINA® EMBROIDERY MODULE/MACHINE
Notes
©2005 BERNINA® of America, Inc. Permission to copy granted only to Authorized BERNINA® Dealers
Combining Motifs (On-Screen Editing)
58a
aurora 430E & 440E
Connect aurora to PC following instructions in owner’s manual.
Select File>Open from the main menu. From the My Designs folder,
select Floral6.art. Open.
Select File>Insert Design from the main menu. From the My Designs
folder, select Floral3.art. Open.
While the newly inserted design is selected, left click twice on the
Rotate CCW/CW icon. Move the swag to the lower right of the
original design.
Copy and paste in a second floral swag. Mirror Image Horizontal; move
motif to the left.
Edit>Select All. Left click twice on the Rotate CCW/CW icon.
Select Settings>Thread Colors from the main menu. Select Isacord
Shades from the Thread Types drop down menu. Assign thread colors:
•Color 1: 5531
•Color 2: 3910
•Color 3: 0015
•Color 4: 5531
•Color 5: 3920
Click OK.
Select File>Save As. Type combining motifs in the File Name field.
Click Save.
Send to the aurora to embroider the design.
Trim and mount sample.
Embroidery Motifaurora
Floral6.art
Floral3.art
Fabric & Stabilizer12” x 15” rectangle

MasteringYour
BERNINA®
BERNINA® Embroidery Module/Machine
MASTERING YOUR BERNINA® EMBROIDERY MODULE/MACHINE
©2005 BERNINA® of America, Inc. Permission to copy granted only to Authorized BERNINA® Dealers
aurora 430E & 440E
Combining Motifs Sample
59a

MasteringYour
BERNINA®
BERNINA® Embroidery Module/Machine
MASTERING YOUR BERNINA® EMBROIDERY MODULE/MACHINE
Notes
©2005 BERNINA® of America, Inc. Permission to copy granted only to Authorized BERNINA® Dealers
Combining Lettering & Motifs (On-Screen Editing)
60a
aurora 430E & 440E
Connect aurora to PC following instructions in owner’s manual.
Select File>Open from the main menu. From the My Designs folder,
select Quilt8.art. Open.
Select the design; right click twice on the Rotate CCW/CW icon.
Left click on the Scale by 20% icon.
Copy and paste in a second design. Select Mirror Image Horizontal. Move
motif to the left.
Press A on the keyboard to open the Lettering Object Properties box.
•Select Anniversary alphabet, centered justification, and 15mm height.
• Type Custom Creation, press Enter on the keyboard
• Type By, press Enter
• Type your name
• Click OK.
Click to set the lettering in place between the two designs. Note: Follow
the prompts on the status bar.
Adjust the positioning of the designs to create a pleasing arrangement.
Select Edit>Select All from the main menu.
Left click twice on the Rotate CCW/CW icon. While the entire design is
still selected, rescale the combination using one of the corner sizing
handles. Scale the design down to fit inside the hoop.
Select File>Save As. Type motifs and lettering in the File Name field.
Click Save.
Send to the aurora to embroider the design.
Trim and mount sample. Embroidery Motifaurora
Quilt8.art
Fabric & Stabilizer12” x 15” rectangle

MasteringYour
BERNINA®
BERNINA® Embroidery Module/Machine
MASTERING YOUR BERNINA® EMBROIDERY MODULE/MACHINE
©2005 BERNINA® of America, Inc. Permission to copy granted only to Authorized BERNINA® Dealers
aurora 430E & 440E
Combining Lettering & Motifs Sample
61a

MasteringYour
BERNINA®
BERNINA® Embroidery Module/Machine
MASTERING YOUR BERNINA® aurora EMBROIDERY MODULE/MACHINE
Notes
©2003 BERNINA® of America, Inc. Permission to copy granted only to Authorized BERNINA® Dealers
Rehooping
aurora 430E & 440E
Connect aurora to PC following instructions in owner’s manual.
Open a New design file.
Left click on the Lettering Values icon.
• Type BERNINA 440E (or BERNINA 430E); select Swiss Block;
change Height to 1.25”; click OK.
•Click on the screen to place the lettering.
• Right click two times on the Rotate CW/CCW icon.
Note that the lettering does not fit within the hoop.
•Select the lettering; right click to open the Lettering Values icon.
• In the text box, delete A 440E, leaving the letters BERNIN; click OK.
The remaining letters fit inside the hoop.
Mark a baseline on the fabric. Hoop fabric, using plastic hoop template to
position the line vertically. Send to the aurora to embroider the design.
Return to the Editor Lite screen.
•Select the lettering; right click to open the Lettering Values icon.
• In the text box, delete BERNIN and type A 440E; click OK. The
lettering fits inside the hoop.
Rehoop fabric, using plastic hoop template to align the baseline. Send to
the aurora to embroider the design.
Trim and mount sample.
62a

MasteringYour
BERNINA®
BERNINA® Embroidery Module/Machine
MASTERING YOUR BERNINA® aurora EMBROIDERY MODULE/MACHINE
©2003 BERNINA® of America, Inc. Permission to copy granted only to Authorized BERNINA® Dealers
aurora 430E & 440E
Rehooping Sample
○ ○ ○ ○ ○ ○ ○
63a

MasteringYour
BERNINA®
BERNINA® Embroidery Module/Machine
MASTERING YOUR BERNINA® EMBROIDERY MODULE/MACHINE
Notes
©2005 BERNINA® of America, Inc. Permission to copy granted only to Authorized BERNINA® Dealers
Baseline Sampler
66a
aurora 430E & 440EConnect aurora to PC following instructions in owner’s manual.
Open a New design file.
Straight Baseline LetteringLeft click on the Lettering/Values button on thedesign tool bar. Note: Notice the prompts onthe status bar. Place cursor on the designscreen and left click; a vertical bar appears.
Type aurora using the keyboard. The outlineof the lettering will appear on the screen.Press Enter; lettering is filled and selected.
Right click on the selected lettering; the Object Properties dialog boxopens. The word “aurora” is in the text box.
• Using the Object Properties box you can change the alphabet style, height, width, justification, or baseline.• Change lettering to Swiss Block; change height to 20mm; click OK.• While lettering is still selected, click the arrow in the Color Selection box. Select the color (C6), then click away from the lettering to deselect and view your changes.
Clockwise or Counterclockwise LetteringPress A on the keyboard. Type in the word aurora. Select Anniversaryalphabet; height = 24mm; clockwise baseline. Following the prompts onthe status line:
• Place the cursor arrow at the center of the circle; left click.• Move cursor straight down to set radius.• Press Enter to set a circle; or, for an oval, set the cursor arrow at a second reference point, then left click and press Enter.• Right click for Object Properties. Change Baseline Radius to 50°.• Click OK.
Vertical Baseline LetteringSelect the A key. Type aurora in the text box. Select Vertical Baseline;King Charles alphabet; height = 14mm. Click OK. Follow the prompts onthe status bar:
• Left click at the top of the column location; press Enter.• While lettering is still selected, click on the arrow in the select box; select color C4.
Select File>Save As. Type lettering baselines in the File Name field.Click Save.
Send to the aurora to embroider the design. Trim and mount sample.
Embroidery Motifaurora
na
Fabric & Stabilizer12” x 15” rectangle

MasteringYour
BERNINA®
BERNINA® Embroidery Module/Machine
MASTERING YOUR BERNINA® EMBROIDERY MODULE/MACHINE
©2005 BERNINA® of America, Inc. Permission to copy granted only to Authorized BERNINA® Dealers
aurora 430E & 440E
Baseline Sampler
67a

MasteringYour
BERNINA®
BERNINA® Embroidery Module/Machine
MASTERING YOUR BERNINA® EMBROIDERY MODULE/MACHINE
Notes
©2005 BERNINA® of America, Inc. Permission to copy granted only to Authorized BERNINA® Dealers
Changing Lettering Height & Spacing
68a
aurora 430E & 440E
Connect aurora to PC following instructions in owner’s manual.
Open a New design file.
Press A on the keyboard top open the Lettering Object Properties box.
• Select the King Charles alphabet, height 14mm.
• Type aurora, press Enter, click OK.
• Click to set the lettering. Note: Follow the prompts on the status bar.
Copy and past the lettering for a total of five auroras.
Select the second aurora; right click to open the
Lettering Object Properties box. Change the height
to 20mm; press OK.
Select the third aurora; right click to open the Lettering
Object Properties box. Change the letter spacing to 3.5;
press OK.
Select the fourth aurora; click and drag the top center sizing handle to
adjust the height of the lettering.
Select the fifth aurora. Select the Lettering Reshape icon. Adjust the
spacing of the lettering manually by clicking on the diamond control points
and sliding the letters along the baseline.
Reposition the lettering in a pleasing arrangement.
Select File>Save As. Type lettering height and spacing in the File
Name field. Click Save.
Send to the aurora to embroider the design. Trim and mount sample.
Embroidery Motifaurora
na
Fabric & Stabilizer12” x 15” rectangle

MasteringYour
BERNINA®
BERNINA® Embroidery Module/Machine
MASTERING YOUR BERNINA® EMBROIDERY MODULE/MACHINE
©2005 BERNINA® of America, Inc. Permission to copy granted only to Authorized BERNINA® Dealers
aurora 430E & 440E
Changing Lettering Height & Spacing Sample
69a