matubo - návod - matubo miniduo and 8_0 and 6_0 - tunisian tiles.pdf
TRANSCRIPT
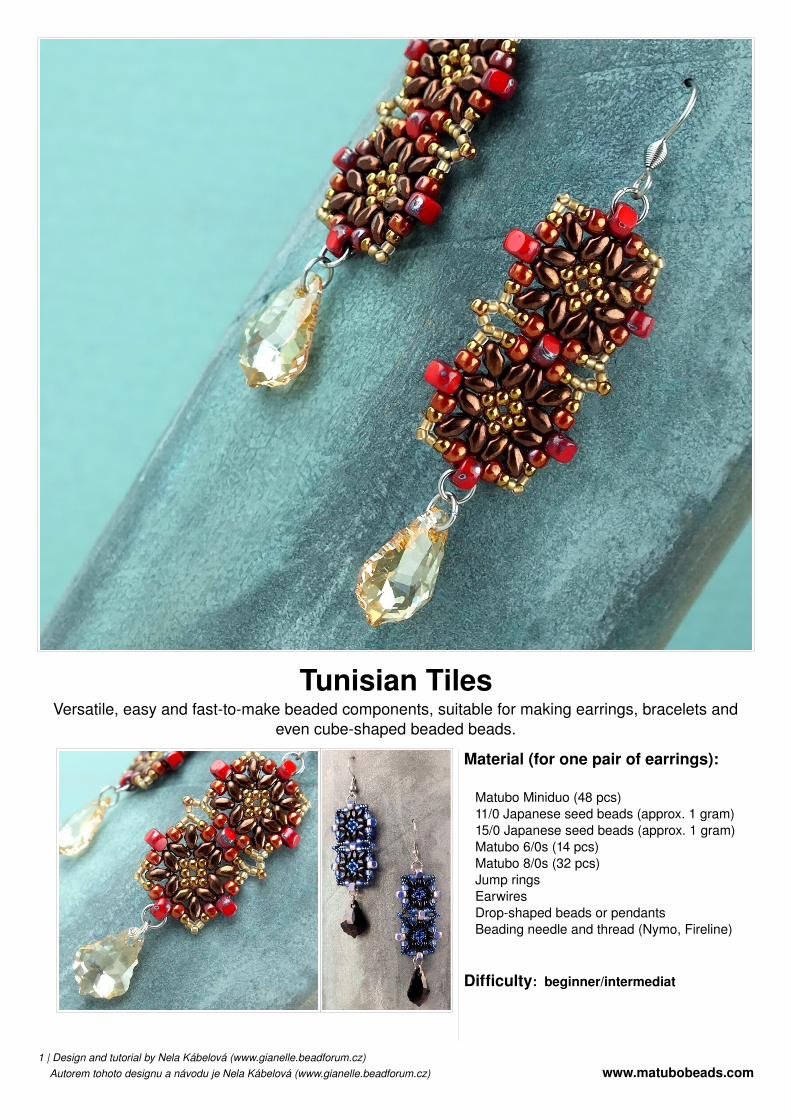
Tunisian TilesVersatile, easy and fasttomake beaded components, suitable for making earrings, bracelets and
even cubeshaped beaded beads.
Material (for one pair of earrings):
Matubo Miniduo (48 pcs)11/0 Japanese seed beads (approx. 1 gram) 15/0 Japanese seed beads (approx. 1 gram) Matubo 6/0s (14 pcs)Matubo 8/0s (32 pcs)Jump ringsEarwiresDropshaped beads or pendantsBeading needle and thread (Nymo, Fireline)
Difficulty: beginner/intermediat
1 | Design and tutorial by Nela Kábelová (www.gianelle.beadforum.cz) Autorem tohoto designu a návodu je Nela Kábelová (www.gianelle.beadforum.cz) www.matubobeads.com
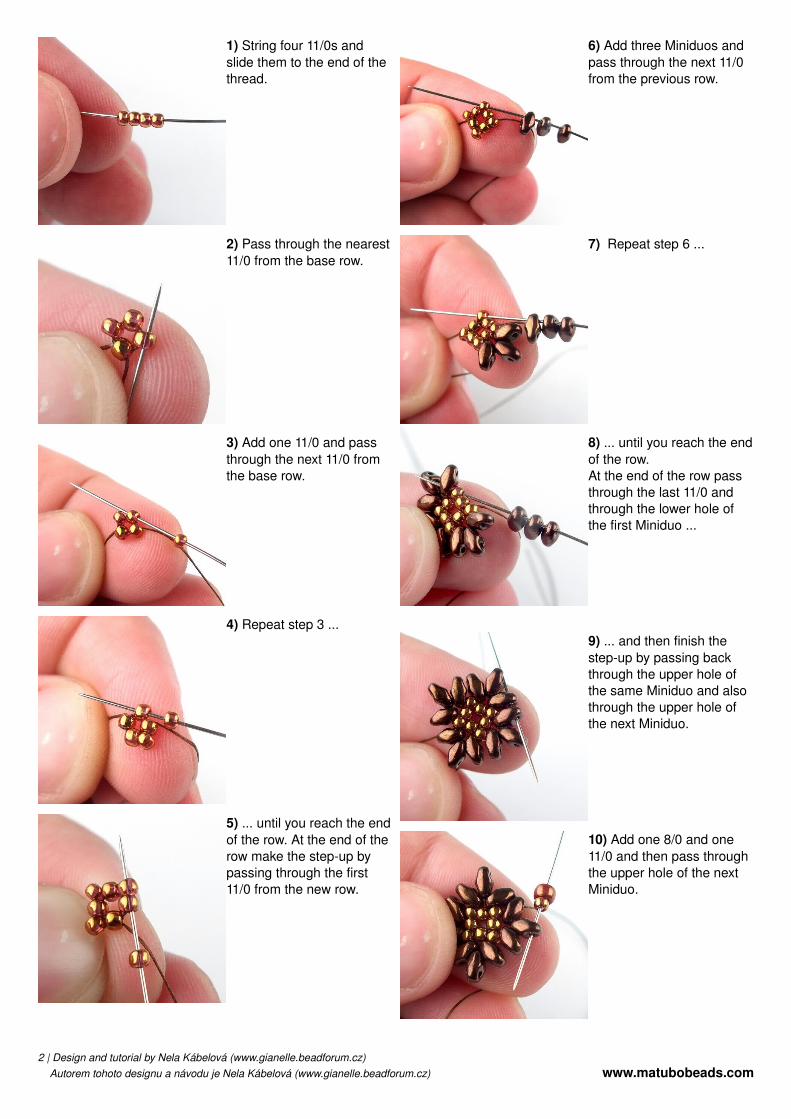
1) String four 11/0s and slide them to the end of the thread.
2) Pass through the nearest 11/0 from the base row.
3) Add one 11/0 and pass through the next 11/0 from the base row.
4) Repeat step 3 ...
5) ... until you reach the end of the row. At the end of the row make the stepup by passing through the first 11/0 from the new row.
6) Add three Miniduos and pass through the next 11/0 from the previous row.
7) Repeat step 6 ...
8) ... until you reach the end of the row.At the end of the row pass through the last 11/0 and through the lower hole of the first Miniduo ...
9) ... and then finish the stepup by passing back through the upper hole of the same Miniduo and also through the upper hole of the next Miniduo.
10) Add one 8/0 and one 11/0 and then pass through the upper hole of the next Miniduo.
2 | Design and tutorial by Nela Kábelová (www.gianelle.beadforum.cz) Autorem tohoto designu a návodu je Nela Kábelová (www.gianelle.beadforum.cz) www.matubobeads.com
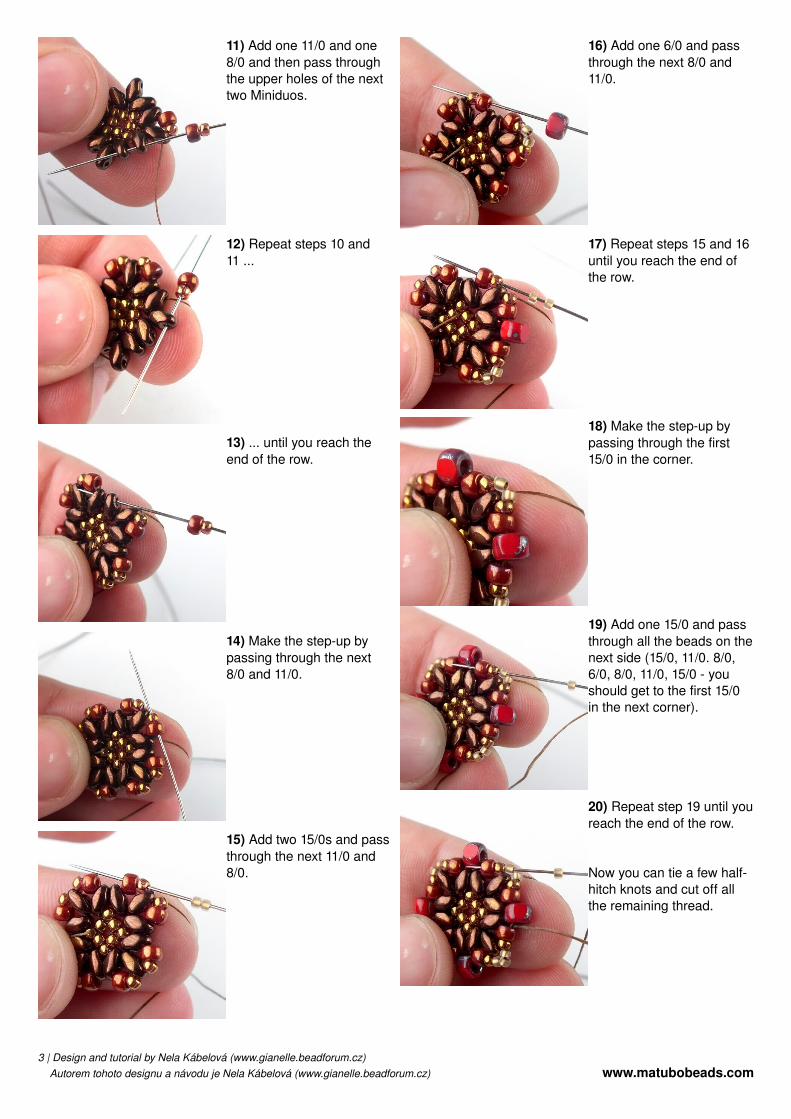
11) Add one 11/0 and one 8/0 and then pass through the upper holes of the next two Miniduos.
12) Repeat steps 10 and 11 ...
13) ... until you reach the end of the row.
14) Make the stepup by passing through the next 8/0 and 11/0.
15) Add two 15/0s and pass through the next 11/0 and 8/0.
16) Add one 6/0 and pass through the next 8/0 and 11/0.
17) Repeat steps 15 and 16 until you reach the end of the row.
18) Make the stepup by passing through the first 15/0 in the corner.
19) Add one 15/0 and pass through all the beads on the next side (15/0, 11/0. 8/0, 6/0, 8/0, 11/0, 15/0 you should get to the first 15/0 in the next corner).
20) Repeat step 19 until you reach the end of the row.
Now you can tie a few halfhitch knots and cut off all the remaining thread.
3 | Design and tutorial by Nela Kábelová (www.gianelle.beadforum.cz) Autorem tohoto designu a návodu je Nela Kábelová (www.gianelle.beadforum.cz) www.matubobeads.com
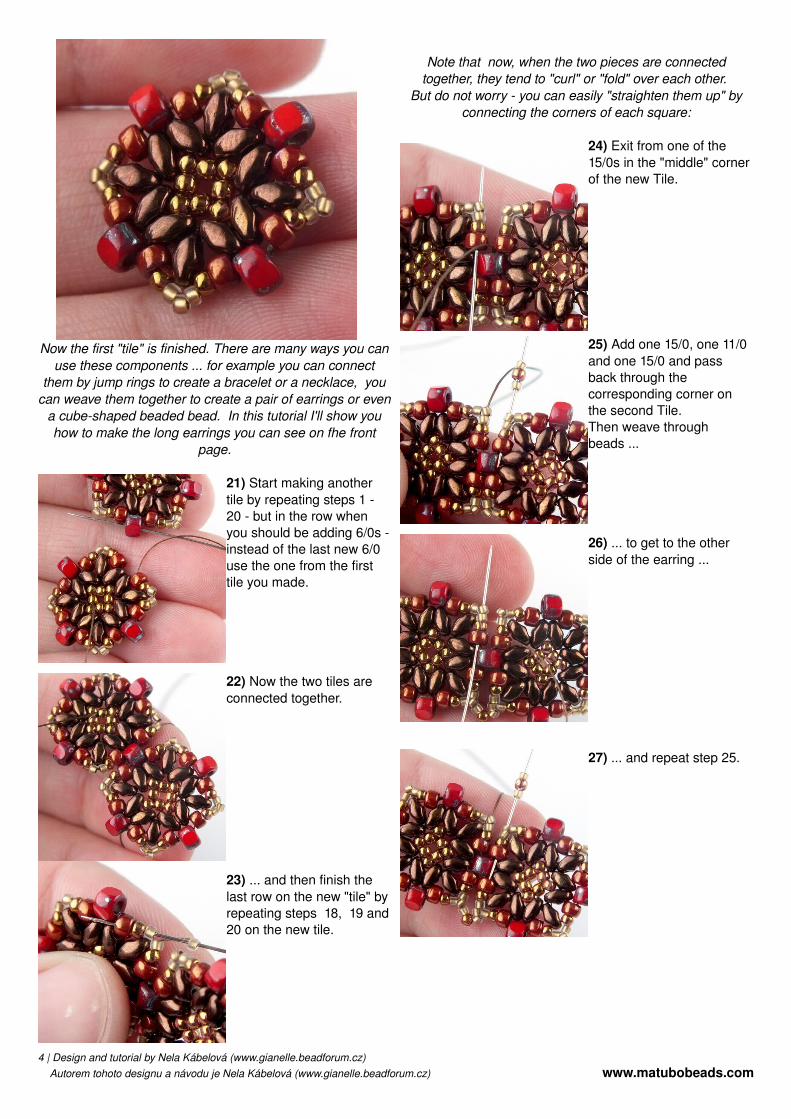
Now the first "tile" is finished. There are many ways you can use these components ... for example you can connect
them by jump rings to create a bracelet or a necklace, you can weave them together to create a pair of earrings or even
a cubeshaped beaded bead. In this tutorial I'll show you how to make the long earrings you can see on fhe front
page.
21) Start making another tile by repeating steps 1 20 but in the row when you should be adding 6/0s instead of the last new 6/0 use the one from the first tile you made.
22) Now the two tiles are connected together.
23) ... and then finish the last row on the new "tile" by repeating steps 18, 19 and 20 on the new tile.
Note that now, when the two pieces are connected together, they tend to "curl" or "fold" over each other.
But do not worry you can easily "straighten them up" by connecting the corners of each square:
24) Exit from one of the 15/0s in the "middle" corner of the new Tile.
25) Add one 15/0, one 11/0 and one 15/0 and pass back through the corresponding corner on the second Tile.Then weave through beads ...
26) ... to get to the other side of the earring ...
27) ... and repeat step 25.
4 | Design and tutorial by Nela Kábelová (www.gianelle.beadforum.cz) Autorem tohoto designu a návodu je Nela Kábelová (www.gianelle.beadforum.cz) www.matubobeads.com
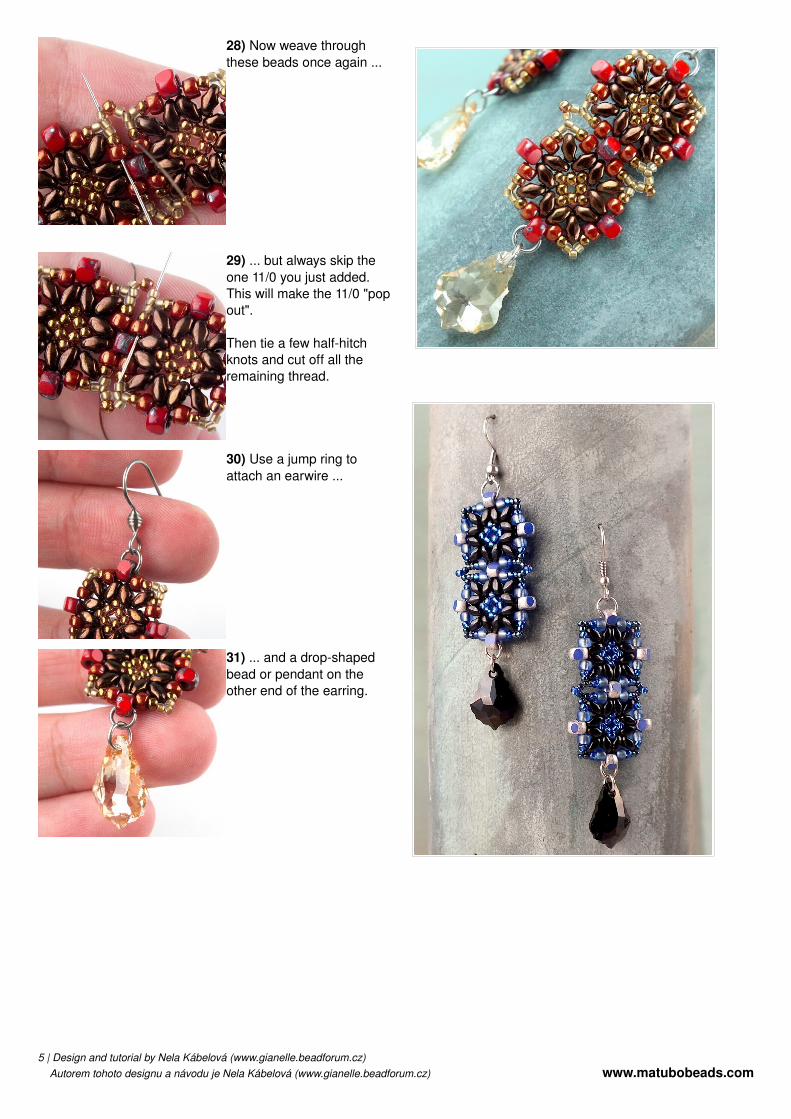
28) Now weave through these beads once again ...
29) ... but always skip the one 11/0 you just added. This will make the 11/0 "pop out".
Then tie a few halfhitch knots and cut off all the remaining thread.
30) Use a jump ring to attach an earwire ...
31) ... and a dropshaped bead or pendant on the other end of the earring.
5 | Design and tutorial by Nela Kábelová (www.gianelle.beadforum.cz) Autorem tohoto designu a návodu je Nela Kábelová (www.gianelle.beadforum.cz) www.matubobeads.com