max 250 hood disassembling and reassembling the hood · max 250 hood disassembling and reassembling...
TRANSCRIPT
MAX 250 Hood Disassembling and Reassembling the hood
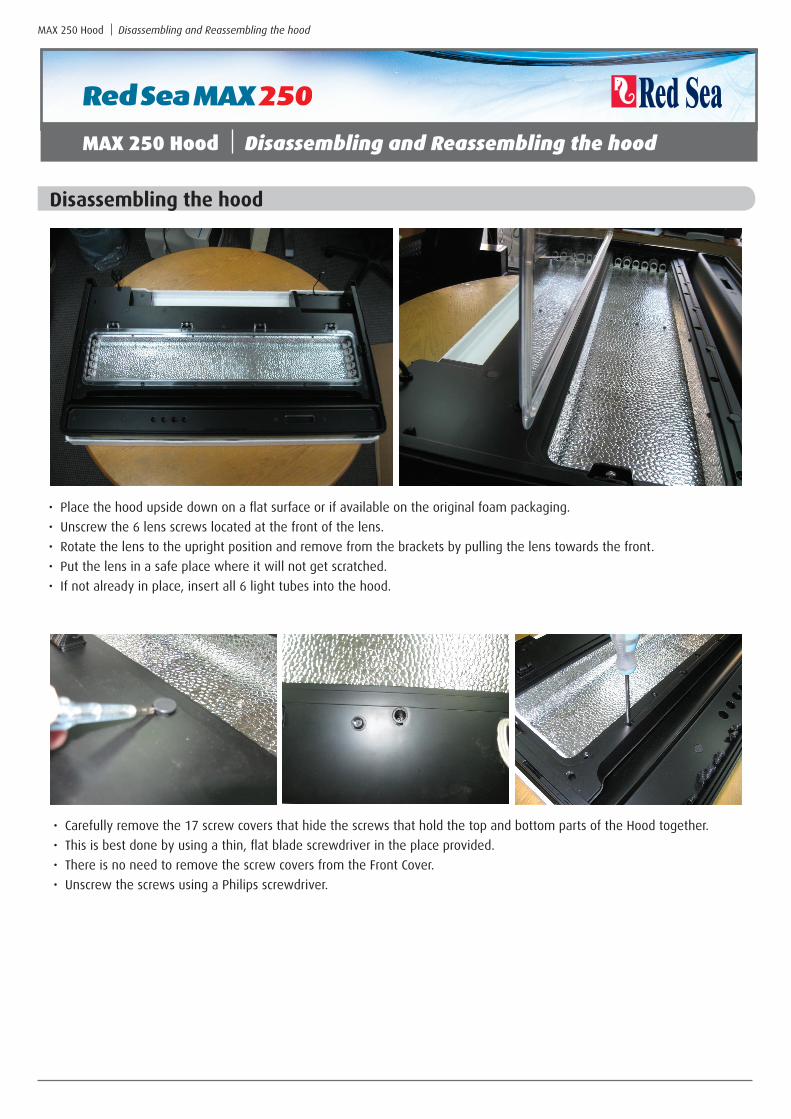
• Place the hood upside down on a flat surface or if available on the original foam packaging.
• Unscrew the 6 lens screws located at the front of the lens.
• Rotate the lens to the upright position and remove from the brackets by pulling the lens towards the front.
• Put the lens in a safe place where it will not get scratched.
• If not already in place, insert all 6 light tubes into the hood.
• Carefully remove the 17 screw covers that hide the screws that hold the top and bottom parts of the Hood together.
• This is best done by using a thin, flat blade screwdriver in the place provided.
• There is no need to remove the screw covers from the Front Cover.
• Unscrew the screws using a Philips screwdriver.
MAX 250 Hood Disassembling and Reassembling the hood
Disassembling the hood
MAX 250 Hood Disassembling and Reassembling the hood
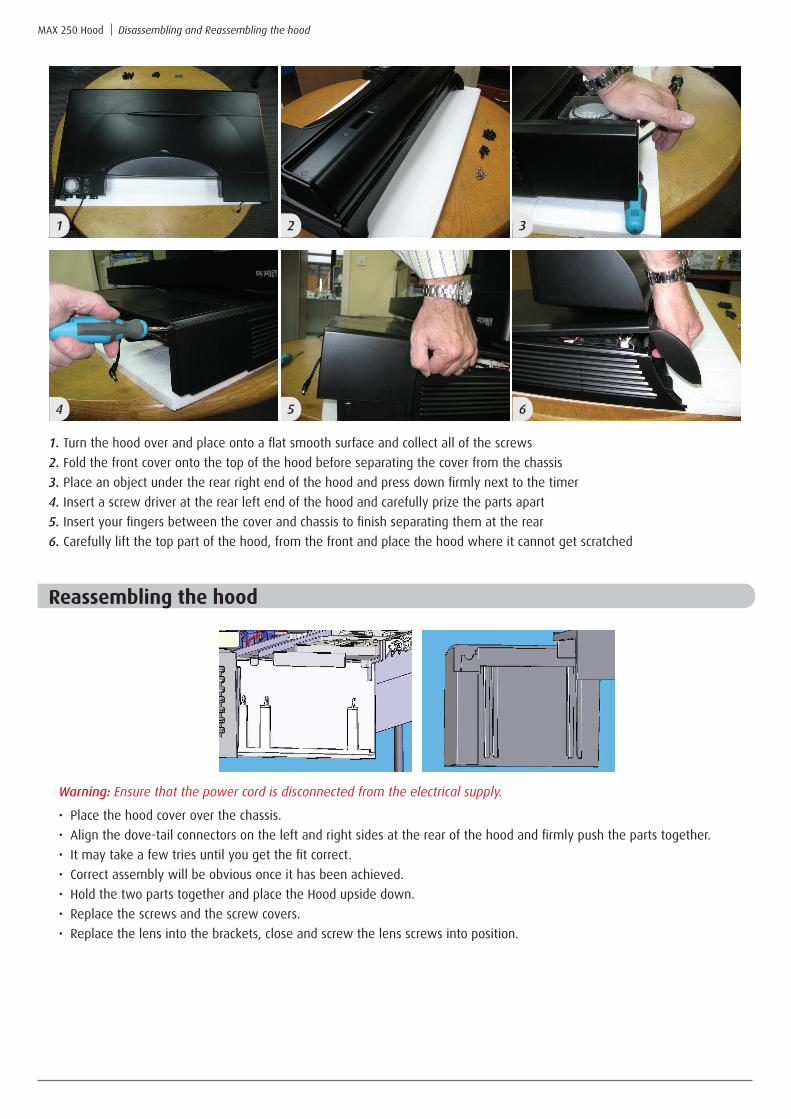
1. Turn the hood over and place onto a flat smooth surface and collect all of the screws
2. Fold the front cover onto the top of the hood before separating the cover from the chassis
3. Place an object under the rear right end of the hood and press down firmly next to the timer
4. Insert a screw driver at the rear left end of the hood and carefully prize the parts apart
5. Insert your fingers between the cover and chassis to finish separating them at the rear
6. Carefully lift the top part of the hood, from the front and place the hood where it cannot get scratched
1
4
2
5
3
6
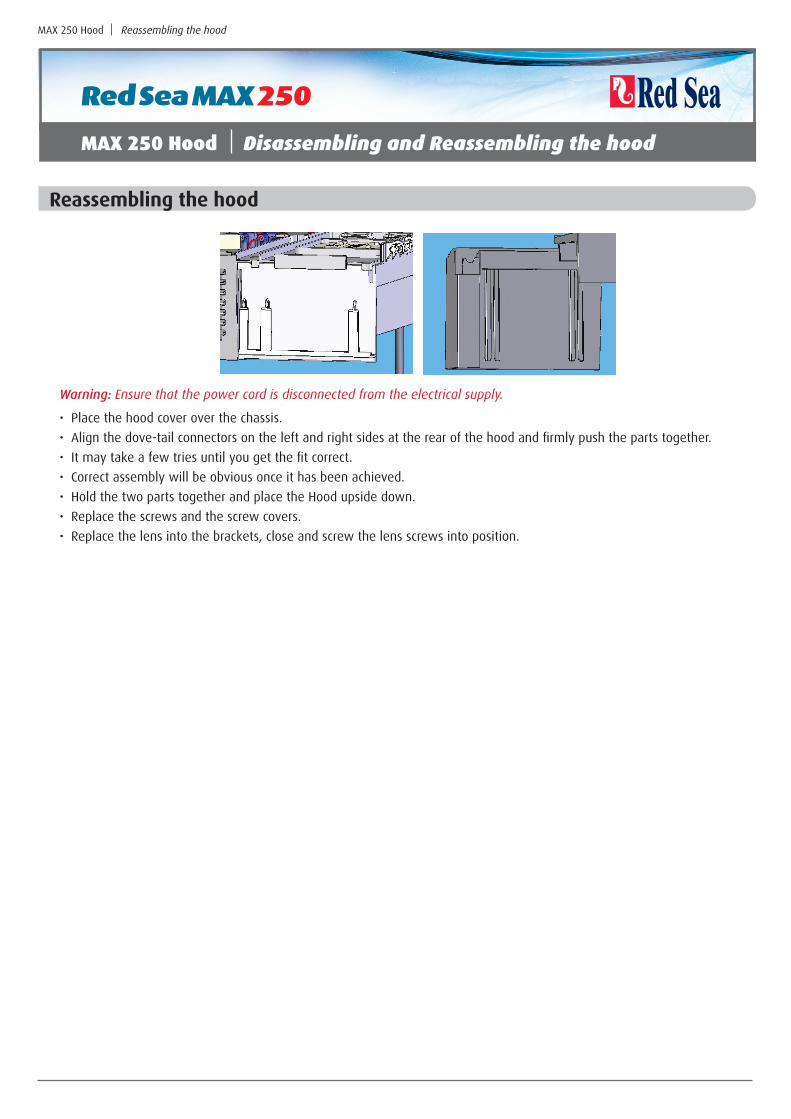
Warning: Ensure that the power cord is disconnected from the electrical supply.
• Place the hood cover over the chassis.
• Align the dove-tail connectors on the left and right sides at the rear of the hood and firmly push the parts together.
• It may take a few tries until you get the fit correct.
• Correct assembly will be obvious once it has been achieved.
• Hold the two parts together and place the Hood upside down.
• Replace the screws and the screw covers.
• Replace the lens into the brackets, close and screw the lens screws into position.
Reassembling the hood
MAX 250 Hood Disassembling and Reassembling the hood
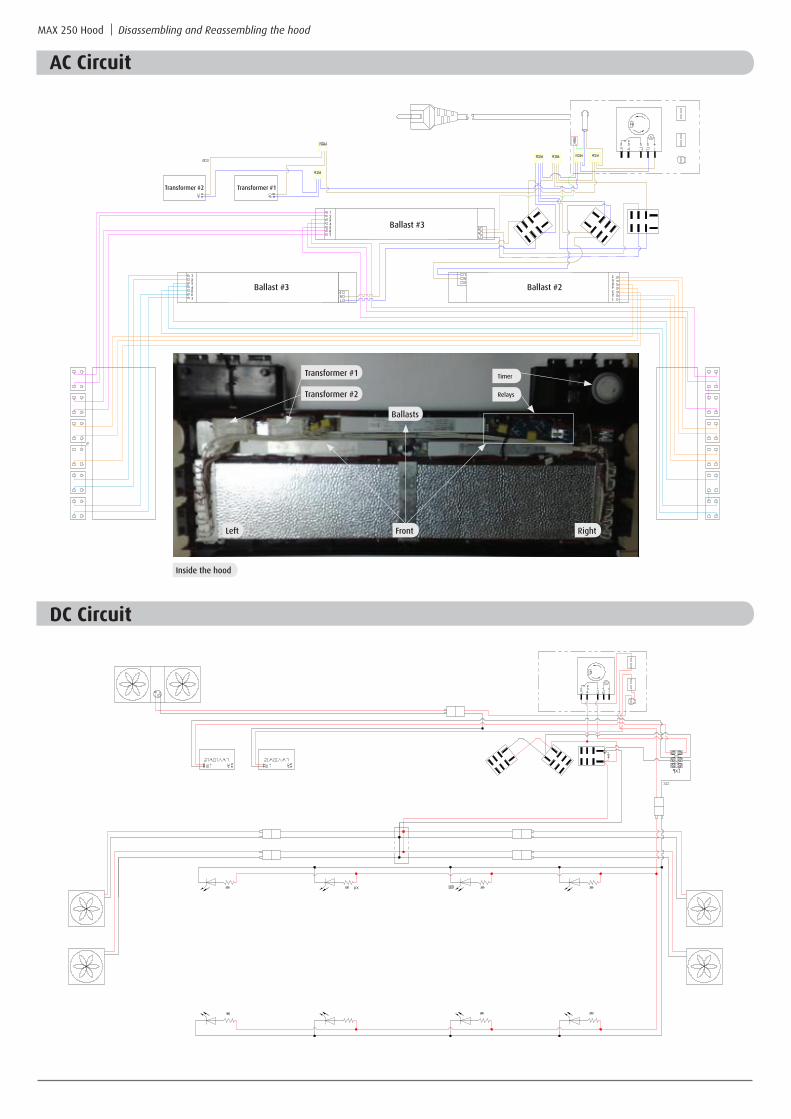
AC Circuit
DC Circuit
Left Front
Ballasts
Transformer #1
Transformer #2
Right
Inside the hood
Timer
Relays
Ballast #2Ballast #3
Ballast #3
Transformer #1Transformer #2
This guide is intended for use by qualified household electrical appliance technicians only!
MAX 250 Hood Replacing fans
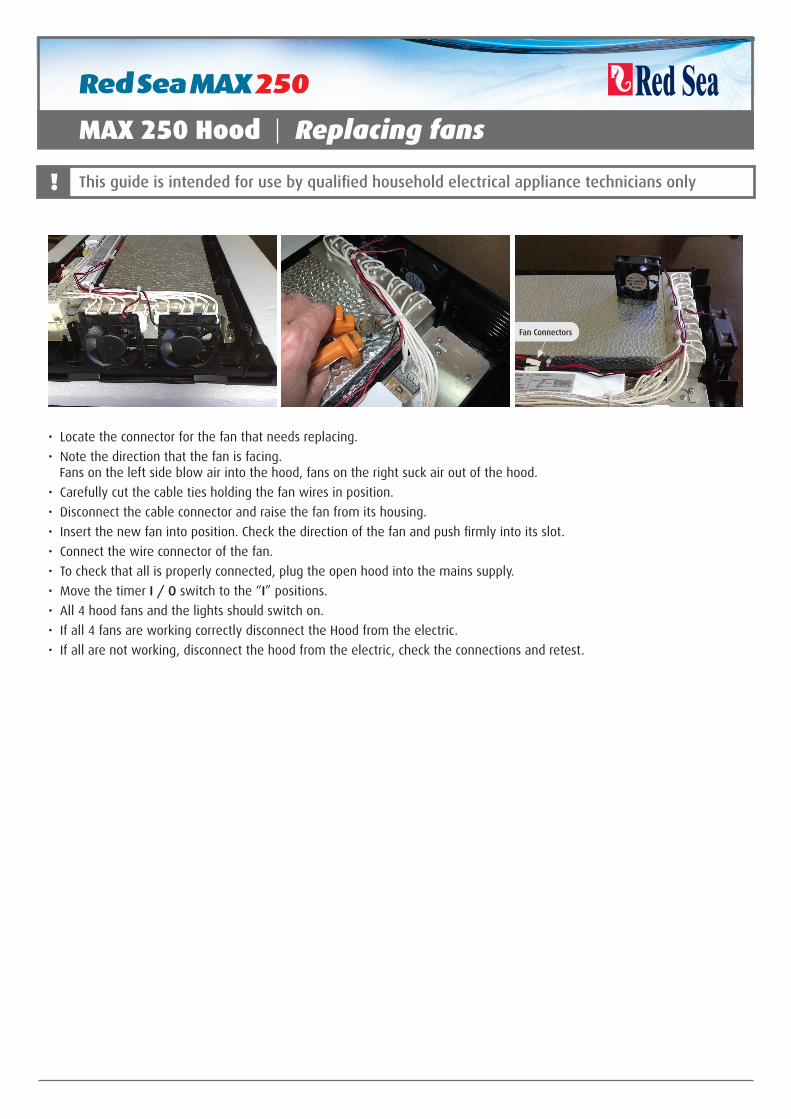
Fan Connectors
• Locate the connector for the fan that needs replacing.
• Note the direction that the fan is facing.Fans on the left side blow air into the hood, fans on the right suck air out of the hood.
• Carefully cut the cable ties holding the fan wires in position.
• Disconnect the cable connector and raise the fan from its housing.
• Insert the new fan into position. Check the direction of the fan and push firmly into its slot.
• Connect the wire connector of the fan.
• To check that all is properly connected, plug the open hood into the mains supply.
• Move the timer I / O switch to the “I” positions.
• All 4 hood fans and the lights should switch on.
• If all 4 fans are working correctly disconnect the Hood from the electric.
• If all are not working, disconnect the hood from the electric, check the connections and retest.
MAX 250 Hood Reassembling the hood
MAX 250 Hood Disassembling and Reassembling the hood
Warning: Ensure that the power cord is disconnected from the electrical supply.
• Place the hood cover over the chassis.
• Align the dove-tail connectors on the left and right sides at the rear of the hood and firmly push the parts together.
• It may take a few tries until you get the fit correct.
• Correct assembly will be obvious once it has been achieved.
• Hold the two parts together and place the Hood upside down.
• Replace the screws and the screw covers.
• Replace the lens into the brackets, close and screw the lens screws into position.
Reassembling the hood