medivet america in-clinic training manual
TRANSCRIPT

MediVet America In-Clinic Training Manual
MediVet America July 2012

Table of Contents
Notes
Section 1
Small and Large Adipose Kit Pre-Procedure Notes:
Section 2
Good Practices: Tissue and Liquid Handling and Aseptic Technique
Section 3
Small Kit Pre-Procedure Checklist
Section 4
Small Adipose Kit (2mL)Procedure Method
Cell Counts for the SVF
Banking of Leftover SVF
Section 5
Large Kit Pre-Procedure Checklist
Section 6
Large Adipose Kit (4mL) Procedure Method
Cell Counts for the SVF
……………………………………………….1
……………………….4
…..………………….6
…………………………………………………………….9
…………………………………….26
………………………………….28
…………………….29
……………..…………………………….…………….32
.……………..…………………….50

Banking of Leftover SVF
Section 7
Liposuction Protocol for Veterinarians
Lipoaspiration Tips & Tricks
Section 8
Adipose Derived Stem Cell Injections
Adipose Stem Cell Treatment Notes
A Note on Antibiotic Flushes
Section 9
Small Animal Joint Injections
Section 10
Small Animal Recovery Timeline
Section 11
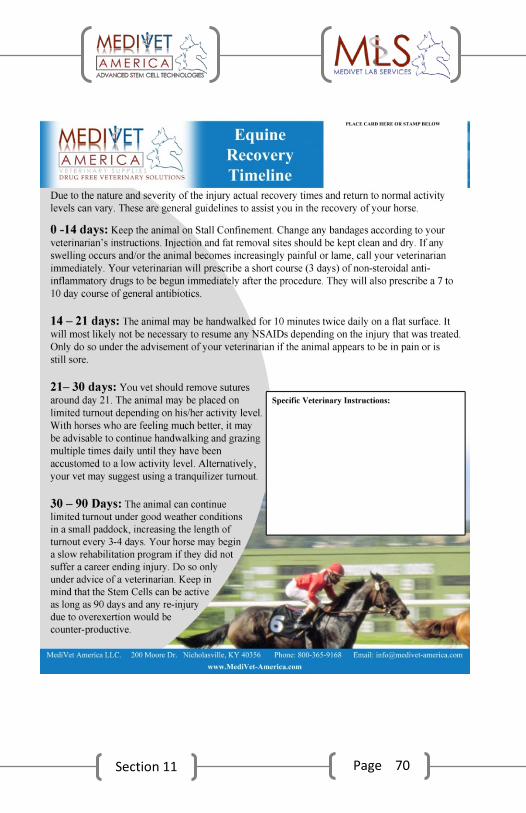
Equine Recovery Timeline
Section 12
MSDS & Safety Information
…..…………..…………………….52
..………………….53
.………………….56
………………..…………….62
…….…………………….69
………………………………….70
………………………………….71
……………....………………….54
……….…………….58
…………...…….…………….60

Our Vet Login Username: _______________________
Our Vet Login Password: ________________________
Access the Vet Login Sections of
www.MediVet-America.com &
www.MediVetLabs.com to view webinars, protocols, forms, and other helpful
documents!
1-800-365-9168

Notes
Page 1 Section 1
Section 1 Small and Large Adipose Kit Pre-Procedure Notes:
• Adipose Stem Cells May Assist With the Following Conditions:
o Osteoarthritis o Ligament Injuries o Tendon Injuries o Fractures o Cartilage and OCD Damage
• Adipose Stem Cell Therapy is Contraindicated in animals with:
o Active or Recent remission of cancer or tumors
o Latent or Overt /infection • Pre-Procedure Work Up - It is recommended
that a complete workup for any abnormalities signifying contraindications be done which may include at the Vet’s Discretion:
o CBC o Complete or Partial Chemistry o Full Body Xrays o Any other Tests
• Conditions that are not listed may be considered for Compassionate Use provided that:

Page 2 Section 1
o The veterinarian is already experienced in treating orthopedic cases with the adipose kit.
o Approval of the case is required by a MediVet Approved Veterinarian – Please email [email protected]
o The Compassionate Use Form (available on www.medivet-america.com) has been signed by both the Animal Owner and the Veterinarian.
o Clients must be informed that there is only anecdotal evidence that the treatment will be effective or last a certain period of time.
o All treatments and outcomes are to be reported to [email protected].
• It is recommended that all patients be taken off non-essential medication 7 – 14 days prior to treatment including immune-suppressive drugs (i.e. steroids used in conditions such as polyarthritis and cyclosporine for chronic allergies).
• It is recommended that the patient be taken of NSAIDs for 48 Hours as a standard precaution against excess bleeding in surgery. NSAIDs are not detrimental to stem cells.

Page 3 Section 1
• Please refer to your area’s CryoBanking or Cell CountingGuide if sending a sample to MediVet Labs

Page 4 Section 2
Section 2 Good Practices: Tissue and Liquid Handling and Aseptic Technique
Use of protective items – Use a face mask, gown or clean lab coat and hair net at all times during the procedure
Use of 70% Isopropyl alcohol – Spraying down the benchtop during down time (i.e. 10 minute spins, incubation time, etc.) is highly recommended to avoid contamination of bench top area
Capping and uncapping of adipose tissue/blood – When tubes are uncapped place the caps face down on the benchtop. All caps in the adipose kits contain a lip around the bottom of the tube that makes it safe for them to be placed on a clean benchtop.
Use of Sterile Gloves – Use of sterile gloves during the procedure should be strictly observed.
Handling of Pipettes – As a strict rule only touch the bulb of the pipette with your hand. Never place a pipette on the benchtop that is to be used again in processing. An extra pipette is included in every kit for your use and Sterile Transfer Pipettes can be easily sourced from your veterinary supply company if you wish to have extra on hand.

Page 5 Section 2
Handling of Mixing Cannula – Never touch the clear plastic part of the mixing cannula with your hand as most of it will be submerged in adipose tissue. Only touch the 20 mL syringe that it is attached to.
Handling of SteriFlip™ Units – Both the 100 um and 60 um SteriFlip™ Units can be taken out of their packaging and touched on the outside (including the spigot). It is the inside of the SteriFlip™ that is not to be handled.
Withdrawing Solutions from vials – It is strongly recommended that all injection cap vials be sprayed with alcohol and blotted with a clean paper towel or gauze pad before entering the vial with a needle
Add Solutions to Tissue and Blood – All solutions (A, B, D, E, F and G) should be added to Conical Tubes (15 mL or 50 mL) at a 45° angle running down the side of the tube. This will prevent unnecessary Cell Death and equal distribution of solution contents.
Multiple Animal Processing – Collect the blood and fat from all animals. Fat and blood may be left at room temperature (<1 hr) or placed in a standard refrigerator (1 – 1.5 hrs) until processing begins. Ensure that the caps and tube bodies are labeled with the animal’s name in permanent marker. Also remember to label the caps and tube bodies after filtration steps – cells are transferred from one tube to the other

Page 6 Section 3
Section 3 Small Kit Pre-Procedure Checklist
7 – 14 Days Before Procedure Please Ensure that:
• Patient is off steroids and other immunosuppressive medications for 7 – 14 Days Prior to Adipose Collection
• Order Cell Count or Cell Bank Packs (free of charge using ground shipping) from http://www.medivetlabs.com/coolerrequest.html if sending a portion of the sample for outside analysis.
3 – 6 Days Before Procedure Please Ensure that:
• Patient is off NSAIDs for 48 hours minimum prior to adipose collection
• Compassionate Use Form has been signed by both the Pet Owner and the Veterinarian if treating any disorder other than arthritis, tendon or ligament damage or a fracture. Please send the Compassionate Use Form to [email protected].
• Make sure there will be one technician to provide undivided attention to processing the adipose tissue.
• Ensure four to six feet of benchtop is available for equipment setup and processing

Page 7 Section 3
• Confirm that all the Veterinarian Supplied Equipment will arrive in time for the procedure:
o 70% Isopropyl Alcohol in a Spray Bottle o Sterile Straight surgical Scissors o Sterile Straight Forceps o Sterile Gloves (multiple pairs) o Gentamicin - Gentocin - Abbot Labs 40
mg/mL (2mL) #07-847-6406 OR Gentafuse – Butler Animal Health 100 mg/mL (100mL) #006913
o 5 x 20mL Syringe o 2 x 10mL Syringe o 1 x 3mL Syringe o 4 x 1mL Syringe o 10 x 20g x 1” Needles o 1 x 18g x 1” Needle o Needles/Syringes for Injections (If App)
and withdrawing SVF from the Cryogenic Vial: Recommended for volumes less
than 1.0 cc – 1cc Tuberculin Syringe
Recommended for joints – Spinal or 1.5” Needle (22g or smaller, depending on the Veterinarian’s preferences)
o Saline Solution for IV use Recommended – 250 mL bag or
bottle Normal Saline

Page 8 Section 3
Recommended – 100 + mL bag or bottle for Small Animals
o Liquid Waste Container o Solid Waste Container o Sharps Disposal Container
2 Days Before Procedure:
• Remind Pet Owner that all NSAIDs should be discontinued 48 hours Before Procedure.
• Check equipment for working capabilities. • It is recommended that all materials
(Equipment, Kits, syringes, needles, glove, etc,) be placed in one area prior to the procedure so that everything is within arm’s reach during the adipose processing.

Page 9 Section 4
Section 4 Small Adipose Kit (2mL) Procedure Method
Stage 1 – Preparation of Platelet Rich Plasma
1. 15-20mL of venous blood is drawn under strict aseptic conditions using a 20 mL syringe and 20g needle before any pre-anesthetic is given. Note: It is important to draw blood before or soon after anesthesia is given.
2. Inject immediately into the provided ACD-A Tubes. Ensure the tubes are filled until the vacuum does not allow for any more blood to fill the tube. If enough cannot be drawn (i.e. fractious animal or poor veins) lacking volume may be substituted with sterile physiological saline solution. Mix the contents by inverting the tubes several times.
3. Centrifuge the tubes at 2500rpm (1000g) for 4 minutes. If good separation is not achieved, the tubes can be spun an additional 4 minutes at 2500rpm.
4. Remove the plasma layer (top layer) from each tube with a sterile transfer pipette and place into the 15 mL tube (Hint: take the lids off all the tubes before removing the plasma). Do not disturb the blood or go near the thin layer of white cells resting on the blood. Leave a 5mm layer of plasma above the red cells.

Page 10 Section 4
a. Note: Squeeze the transfer pipette bulb prior to putting the tip into the plasma and slowly release the bulb so as not to blow bubbles into the plasma.
b. Note: Place tip of the transfer pipette at the top of the plasma and as the plasma is drawn up follow the top of the plasma down the tube.
5. Centrifuge the 15 mL tube containing the plasma for 8 minutes at 2500rpm (1000g). At the end of the centrifuge there should be a pellet of platelets at the bottom of the tube. (Note: To conserve time during the centrifugation of blood for the PRP you should move to stage 2 and start to prepare the solutions)

Page 11 Section 4
6. Remove and discard the top platelet poor plasma down to 3 mLs in the tube using a small transfer pipette. Now resuspend the pellet in the remaining 3 mLs using the same transfer pipette. This is the PRP – platelet rich plasma.
7. The PRP is now activated by removing 0.5 mL Solution G using a 1 mL syringe and 20g needle and adding to the PRP. Mix well by holding the tube between your thumb and forefinger and tapping the tube with your knuckle. After activation (5-15 minutes) the PRP will form a solid gel (Note: To speed up the reaction the

Page 12 Section 4
tube may be placed in the non-shaking MediVet Water bath at 37*C).
8. Once the gel has formed leave it at room temperature and the PRP gel will partially dissolve over the next 1-2 hours. To speed up dissolving of the gel place it at 37*C in the MediVet Water Bath (the bath can be shaking).

Page 13 Section 4
Stage 2 – Preparation of Solutions
1. Add 1.0 mL Solution A to Vial B MediStem using a 1.0 mL syringe and 20g needle. Mix Well.
2. Add 0.5 mL Gentamicin/Gentocin (40 mg/mL) to Solution D using a 1.0 mL syringe and 20g needle (Note: if 100 mg/mL is the only concentration available, use 0.2 mL). Mix well.
3. Add 5.0 mL Solution D to Solution F using a 10 mL syringe and 20g needle. Mix well. (Be sure to complete step 2 before proceeding to step 3).
Stage 3 – Digestion of Adipose Tissue
1. Collect the adipose tissue into the sterile yellow capped 70 mL container in the kit (approximately ½ full). Finely cut the tissue with sharp sterile scissors in the capped container until the pieces of adipose are between 2-4 mm in size (the fat should be like slurry). Ensure you remove any other tissue from the fat such as muscle (muscle tissue will appear as dark red tissue—clearly distinguishable from the soft-pink adipose tissue). The better the mincing the better the digestion of the tissue.

Page 14 Section 4
2. Direct the finely minced tissue into a 50 mL tube using sterile forceps. Ensure you have between 5 mL and 20 mL of adipose in the tube (a maximum of 20 mL of adipose tissue should be used). 1 gram of tissue is equal to 1 mL.
3. Using a sterile 1.0 mL syringe and 20g needle, add exactly 0.4 mL of solution from vial B to the adipose tissue (ensure there are no air bubbles in the syringe, and mix the vial well just prior to use).
4. Add 2.0 mL of Solution D to the adipose using a 3 mL syringe and 20g needle.
5. Add Solution A to the adipose tissue until the total volume in the tube reaches 40 mL (the bottom of the meniscus should be on the 40 mL

Page 15 Section 4
line) using a 20 mL sterile syringe and 20g needle. Mix the contents well by inverting the tube and place in the shaking Medi-Bath pre-warmed to 37oC, at Setting 3.5, for 45 mins. Remove the tube every 10-15 minutes and invert/vortex, and place the tube back into the water bath. This is done to prevent the contents settling down in the tube.
Page 16 Section 4
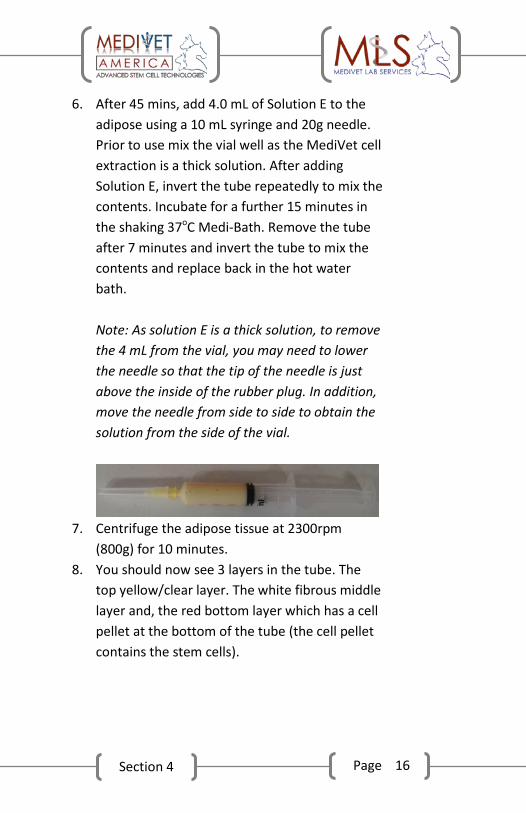
6. After 45 mins, add 4.0 mL of Solution E to the adipose using a 10 mL syringe and 20g needle. Prior to use mix the vial well as the MediVet cell extraction is a thick solution. After adding Solution E, invert the tube repeatedly to mix the contents. Incubate for a further 15 minutes in the shaking 37oC Medi-Bath. Remove the tube after 7 minutes and invert the tube to mix the contents and replace back in the hot water bath. Note: As solution E is a thick solution, to remove the 4 mL from the vial, you may need to lower the needle so that the tip of the needle is just above the inside of the rubber plug. In addition, move the needle from side to side to obtain the solution from the side of the vial.
7. Centrifuge the adipose tissue at 2300rpm
(800g) for 10 minutes. 8. You should now see 3 layers in the tube. The
top yellow/clear layer. The white fibrous middle layer and, the red bottom layer which has a cell pellet at the bottom of the tube (the cell pellet contains the stem cells).

Page 17 Section 4
Remove the cell pellet (which contains the stem cells) and the red layer by placing the sterile mixing cannula firmly on the end of a 20 mL syringe. Slide the end of the cannula slowly to the bottom of the tube (following down the side of the tube). Remove the entire cell pellet by drawing it up into the syringe (Note: it may help to remove all the pellet by moving the tube slowly around the cannula to collect all the cell pellet). Continue to remove most of the red bottom layer as you remove the cell pellet. Stop removing the red layer when the white fibrous layer is down to the beginning of the conical shape of the tube. It is essential you do not
Red Layer + Pellet Contain the SVF!!!
Page 18 Section 4
collect any white fibrous material as this may clog the filter. Note: When the cannula is at the bottom of the tube, you may use the end of the cannula to scrape off parts of the cell pellet which may have become stuck to the side of the conical part of the tube. Note: The cell pellet may also contain some undissolved tissue. If the cannula becomes blocked by this tissue, simply remove it from the adipose tube and expel all the contents in the syringe and cannula including the tissue into the new 50 mL tube (step 9). Then insert the cannula back into the adipose tube and continue to remove the rest of the cell pellet and red layer.
9. Expel all the contents of the syringe into a new 50 mL tube.
10. Remove the 100um SteriFlip™ (SCNY000100) filter unit from the packaging using aseptic technique. Screw the SteriFlip™ onto the top of the tube containing the cell pellet and red layer. Secure it tightly. Attach the vacuum pump into the spigot on the side of the SteriFlip™ Unit.

Page 19 Section 4
Note: It is IMPORTANT to pump 2-3 times prior to flipping the assembly Flip over the assembly so that the sample tube is above the SteriFlip™ unit and create a vacuum by pumping.
Page 20 Section 4
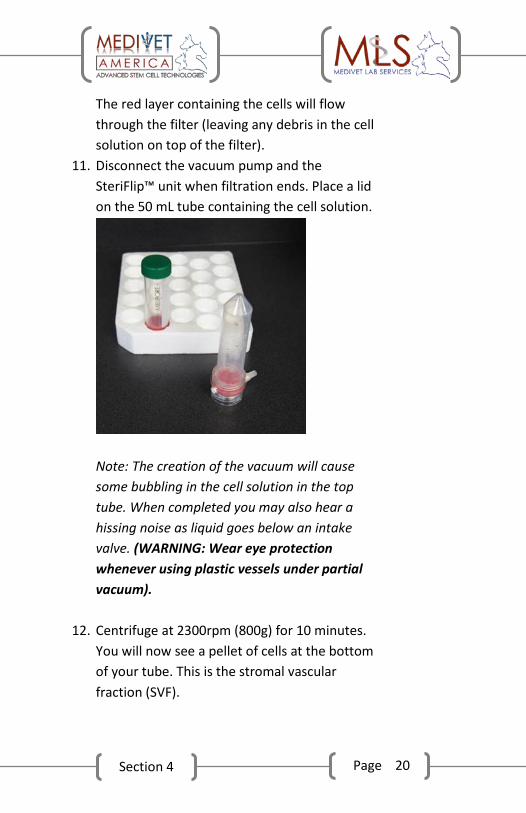
The red layer containing the cells will flow through the filter (leaving any debris in the cell solution on top of the filter).
11. Disconnect the vacuum pump and the SteriFlip™ unit when filtration ends. Place a lid on the 50 mL tube containing the cell solution.
Note: The creation of the vacuum will cause some bubbling in the cell solution in the top tube. When completed you may also hear a hissing noise as liquid goes below an intake valve. (WARNING: Wear eye protection whenever using plastic vessels under partial vacuum).
12. Centrifuge at 2300rpm (800g) for 10 minutes. You will now see a pellet of cells at the bottom of your tube. This is the stromal vascular fraction (SVF).

Page 21 Section 4
13. Remove the supernatant (the red liquid) using the larger transfer pipette without disturbing the cell pellet at the bottom. Leave approximately 1-3 mLs of supernatant above the pellet. Note: There may be some left over brown liquid (dissolved fat) on top of the supernatant try to remove this as you remove the supernatant.

Page 22 Section 4
Resuspend the cell pellet in the leftover 1-3 mLs of the supernatant using the same transfer pipette until it is a single cell suspension.
14. Add 20 mL of Solution F to the tube using a 20 mL syringe and 18g needle. Mix well.
15. Repeat steps 12 and 13 (Spin/remove supernatant and resuspend pellet).
16. After resuspension of the cell pellet add Solution F to the 12 mL mark on the side of the tube (meniscus should be at the 12 mL line) using a 20 mL syringe and 18g needle. Mix well. It is IMPORTANT that it has been resuspended into a single cell suspension and all red blood cell clumps have been broken up. You may see some clear/white fiber floating in the mix this is normal and will be removed in the next step.

Page 23 Section 4
17. Screw the 60 um SteriFlip™ (SCNY00060) onto the top of the tube and then invert the tubes and place the vacuum pump onto the spigot
and create a vacuum by pumping. The cells should flow through the filter leaving any debris in the solution caught in the filter.
18. Transfer all the solution containing the cells to a 15 mL tube using a small transfer pipette.
19. Centrifuge at 800g (2300rpm) for 10 minutes. 20. Using a small transfer pipette remove all the
supernatant without disturbing the cell pellet (down to approximately 0.5 mL).
21. Add the partially dissolved PRP fraction into the cell pellet using the same transfer pipette until the volume in the tube is 1.0-2.0 mL (a minimum of 1.0 mL). The volume will depend on the number of joints required to be injected (See Section 7 For Joint Injection Tables)

Page 24 Section 4
The volume of the PRP added should, at the minimum, be the same volume of the cell pellet. (e.g. if the cell pellet has a volume of 0.5 mL then add a minimum of 0.5 mL PRP.) Note: the transfer pipette has graduation marks each 0.5 mL. Mix the cell pellet with the transfer pipette until it is a single cell suspension.
22. With the same transfer pipette transfer the cell
solution to the cryotube. If you require more volume for your cell suspension, add more PRP. Note: the cells in this solution are the stromal vascular fraction (SVF) which contains the stem cells.

Page 25 Section 4
23. Place the cryotube into the photobiostimulation unit and switch on for 20 minutes. Note: the photobiostimulation light will switch off automatically after 20 minutes.

Page 26 Section 4
Cell Counts for the SVF
You can perform a cell count at the end of the procedure by removing a small proportion of the cells and either:
Send a sample (minimum of 0.2 mL) of the final cell solution which contains the PRP to your local MediVet Laboratories Services for analysis. Store the sample in the fridge until pickup, and ensure the sample is picked up that day. Visit http://www.medivetlabs.com/ob.html to schedule your Cell Counting. Ensure all packaging instructions are followed to ensure safe and timely shipping of your sample.
OR

Page 27 Section 4
Use a standard haemocytometer and count the nucleated cells using a microscope. Ensure that you are familiar with the formula for calculating the cell numbers correctly, taking into account the volume that the cells are resuspended in.
OR
Put a sample of the SVF cells through a suitable coulter counter that counts canine white blood cells. The recent veterinarian cell counters will lyse the red blood cells and count the nucleated cells (the WBC count). When you obtain the results, the WBC is the result you require as this counts the nucleated cells (the SVF fraction which contains the stem cells). The results tend to be in either K/ul or 109/L.
For example:
To calculate the number of cells from a coulter counter you will need to take into account the final volume that the cells are resuspended in.
If the result is in K/ul then multiply the result by 1000 to give the result in mL, then multiply the final volume the cells were resuspended in (e.g. the WBC readout is 15,0 x K/ul and the final volume the SVF cells are in is 3.0 ml (15.0 x K/ul is 15,000/ul)).

Page 28 Section 4
15,000 x 1,000 = 15.0 x 10⁶/mL
Then multiply by your final volume (e.g. 3.0 mL)
15.0 x 10⁶/mL x 3.0 = 45.0 x 10⁶ This is your total nucleated cell count.
If the result is in 109/L then divide the result by 1,000 to give the result in mL. Next, multiply bt the final volume the cells were resuspended in (e.g. the readout is 15,0 x 10⁹/L and the final volume the SVF cells are in is 3.0 mL)
(15.0 x 10⁹) / 1000 = 15.0 x 10⁶/mL
Then multiply by your final volume (e.g. 3.0 mL)
15.0 x 10⁶/mL x 3.0 = 45.0 x 10⁶. This is your total nucleated cell count.
Banking of Leftover SVF
Visit http://www.medivetlabs.com/ob.html to schedule your Cell Banking. Ensure all packaging instructions are followed to ensure safe and timely shipping of your sample.

Page 29 Section 5
Section 5 Large Kit Pre-Procedure Checklist
7 – 14 Days Before Procedure Please Ensure that:
• Order Cell Count or Cell Bank Packs (free of charge using ground shipping) from http://www.medivetlabs.com/coolerrequest.html if sending a portion of the sample for outside analysis.
3 – 6 Days Before Procedure
• Patient is off NSAIDs for 48 hours minimum prior to adipose collection
• Compassionate Use Form has been signed by both the Animal Owner/Agent and the Veterinarian if treating any disorder other than arthritis, tendon or ligament damage or a fracture. Please send the Compassionate Use Form to [email protected].
• Make sure there will be one technician to provide undivided attention to processing the adipose tissue.
• Ensure four to six feet of benchtop is available for equipment setup and processing
• Confirm that all the Veterinarian Supplied Equipment will arrive in time for the procedure:

Page 30 Section 5
o 70% Isopropyl Alcohol in a Spray Bottle o Sterile Straight surgical Scissors o Sterile Straight Forceps o Sterile Gloves (multiple pairs) o Gentamicin - Gentocin - Abbot Labs 40
mg/mL (2mL) #07-847-6406 OR Gentafuse – Butler Animal Health 100 mg/mL (100mL) #006913
o 2 x 60 mL Syringe o 1 x 30 or 35 mL Syringe (For Blood
Collection) OR Vaccutainer Needle for Direct Stick
o 2 x 20 mL Syringe o 1 x 10 mL Syringe o 1 x 5 mL Syringe o 4 x 1 mL Syringe o 10 x 20g x 1” Needles o 1 x 18g x 1” Needles o Needles/Syringes for Injections (If App)
and withdrawing SVF from the Cryogenic Vial: Recommended for volumes less
than 1.0 cc – 1cc Tuberculin Syringe
Recommended for joints – Spinal or 1.5” Needle (22g or smaller, depending on the animal and Veterinarian’s preferences)
o Saline Solution for IV use

Page 31 Section 5
Recommended – 250 mL bag or bottle Normal Saline for Large Animals
Recommended – 100 + mL bag or bottle.
o Liquid Waste Container o Solid Waste Container o Sharps Disposal Container
2 Days Before the Procedure:
• Remind Owner that all NSAIDs should be discontinued 48 hours Before Procedure
• Perform the Pre-Procedure Equipment Check • It is recommended that all materials
(Equipment, Kits, syringes, needles, glove, etc,) be placed in one area prior to the procedure so that everything is within arm’s reach during the adipose processing.

Page 32 Section 6
Section 6 Large Adipose Kit (4mL) Procedure Method
Stage 1 – Preparation of Platelet Rich Plasma
1. 28-30 mL of venous blood sample is drawn under strict aseptic conditions using a 30/35 mL syringe and 20g needle.
2. The blood is then injected evenly into the ACD-A venous blood collection tubes. Mix the contents well by inverting the tubes several times. Ensure the tubes are filled to the interface between yellow and white on the side (7 mL of blood per tube). Any volume lacking in the ACD-A tubes may be filled with physiological saline.
3. Centrifuge the tubes at 2500 rpm (1000g) for 4 minutes. If the plasma has not achieved good separation the tubes may be spun for an additional 4 minutes at 2500 rpm.
4. Remove the plasma layer (the top layer) from each tube with the same large transfer pipette and place into the 15 mL tube until it fills to a maximum volume of 13 mL.

Page 33 Section 6
Hint: take the lids off all tubes before removing the plasma. Do not disturb the blood or go near the thin layer of white cells resting on the blood. Leave a 5 mm layer of plasma above the red blood cells.
5. Centrifuge the 15 mL tube containing the plasma for 8 minutes at 2500 rpm (1000g). At the end of the centrifuge there should be a pellet of platelets at the bottom of the tube. Note: To conserve time during the centrifugation of the blood for PRP you may move to Stage 2 and start to prepare the solutions.
6. Remove and discard the top platelet poor plasma down to 4 mL in the tube using a smaller transfer pipette. Now resuspend the pellet in the remaining 4 mL of plasma using the same

Page 34 Section 6
transfer pipette. This is the PRP – Platelet Rich Plasma.
7. The PRP is now activated by removing 0.7 mL of Solution G using a 1 mL syringe and 20g needle and adding it to the PRP. Mix Well by inverting. Place the PRP tube in the Medi-Bath (37oC). After activation (5-30 minutes) the PRP should form a solid gel (the Medi-Bath should not be shaking).

Page 35 Section 6
8. Once the gel has formed leave it in the water bath for a further 1 - 1½ hours until it has partially dissolved (during this step the Medi-Bath may be put in shaking mode). If it has not dissolved sufficiently by Step 21 take it out and place the spinal needle on a 1 mL syringe and run the spinal needle around the gel breaking its bond to the tube. The gel should rapidly dissolve. If the gel reforms simply repeat the procedure with a new spinal needle.

Page 36 Section 6
Stage 2 – Preparation of solutions
1. Add 1.0 mL of Solution A to Vial B Medistem using a 1 mL syringe and 20g needle. Mix well.
2. Add 0.5 mL Gentamicin/Gentocin (40 mg/mL) to Solution D using a 1.0 mL syringe and 20g needle (Note: if 100 mg/mL is the only concentration available, use 0.2 mL). Mix well.
3. Add 5.0 mL Solution D to Solution F using a 10 mL syringe and 20g needle. Mix well. (Be sure to complete step 2 before proceeding to step 3).
Stage 3 – Digestion of Adipose Tissue
*Note: If using liposuction technique for stem cell extraction , use the guidelines listed in Section 7.
1. Collect the adipose tissue into the sterile yellow capped 70 mL container in the kit (approximately 4/5 full is 40 grams). 1 gram of tissue is equal to 1 mL. Finely cut the tissue with sharp sterile scissors in the yellow capped container until the pieces of adipose are between 2-4 mm in size (the fat should be like slurry). Ensure you remove any other tissue from the fat such as muscle (muscle tissue will appear as dark red tissue—clearly distinguishable from the soft-pink adipose

Page 37 Section 6
tissue). The better the mincing the better the digestion of the tissue.
2. Pour the finely minced tissue into 2 x 50 mL tubes. The adipose tissue should be evenly divided between the two 50 mL tubes. Ensure you have between 10 mL and 20 mL of adipose in each tube (a maximum of 20 mL per tube of adipose tissue should be used).

Page 38 Section 6
3. Using a sterile 1.0 mL syringe and 20g needle, add exactly 0.4 mL of solution from MediStem Vial B to each tube containing the adipose tissue (ensure there are no air bubbles in the syringe and mix the vial well just prior to use).
4. Add 2.0 mL of Solution D to each tube of the adipose using a 5 mL syringe and 20g needle.
5. Add Solution A to each tube of the adipose tissue until the total volume in each tube reaches 40 mL using a 60 mL syringe and 20g needle. Note: the bottom of the meniscus should be on the 40 mL line.
Mix the contents well by vigorously inverting the tubes and place in the shaking Medi-Bath pre-warmed to 37oC, at Setting 3.5, for 45

Page 39 Section 6
minutes. Remove the tube every 10-15 minutes and invert/vortex, and place the tube back into the water bath. This is done to prevent contents settling down in the tube.
6. After 45 minutes, add 4.0 mL of Solution E
MediVet to each tube containing the adipose solution using a 10 mL syringe and 18g needle. Prior to use mix the vial well as the as the MediVet cell extraction media is a thick solution. After adding Solution E, invert the tube repeatedly to mix the contents. Incubate for a further 15 minutes in the shaking 37oC Medi-Bath. Remove the tube after 7 minute and invert the tube to mix the contents and replace back in the Medi-Bath. Note: As Solution E is a thick solution to remove the 8 mL from the vial you may need to lower

Page 40 Section 6
the needle so that the tip of the needle is just above the inside of the rubber plug. In addition, move the needle side to side to obtain the solution from the side of the vial.
7. Centrifuge the adipose tissue at 2300rpm (800g) for 10 minutes.
8. In each tube you should now see 3 layers in the tube. First, the top yellow/clear layer. Second, the white fibrous middle layer. Lastly, the red bottom layer which has a cell pellet at the bottom of the tube.
Note: the cell pellet contains the stem cells. Remove the cell pellet (which contains the stem cells) and the red layer by placing the sterile mixing cannula firmly on the end of a 20 mL syringe. Slide the end of the cannula slowly to
Red Layer + Pellet Contain the SVF!!!

Page 41 Section 6
the bottom of the tube (following down the side of the tube). Remove all of the cell pellet by drawing it up into the syringe. Note: it may help to remove all of the pellet by moving the tube slowly around the cannula to collect all the cell pellet. Continue to remove most of the red bottom layer as you remove the cell pellet. Stop removing the red layer when the white fibrous layer is down to the beginning of the conical shape of the tube. It is essential you do not collect any white fibrous material as this may clog the filter. Note: When the cannula is down the bottom of the tube, you may use the end of the cannula to scrape off parts of the cell pellet which may have become stuck to the side of the conical part of the tube. Note: The cell pellet may also contain some undissolved tissue. If the cannula becomes blocked by this tissue, simply remove it from the adipose tube and expel all of the contents in the syringe and cannula (including the tissue) into the new 50 mL tube (step 10). Then insert the cannula back into the adipose tube and

Page 42 Section 6
continue to remove the rest of the cell pellet and red layer.
9. Expel all the contents of the syringe into a new 50 mL tube. The contents from each digested adipose tube should be expelled into a different 50 mL tube.
10. Remove the 100um SteriFlip™ (SCNY000100) filter unit from the packaging using aseptic technique. Screw the SteriFlip™ onto the top of the tube containing the cell pellet and red layer. Secure it tightly. Attach the vacuum pump into the spigot on the side of the SteriFlip™ Unit.

Page 43 Section 6
Flip over the assembly so that the sample tube is above the SteriFlip™ unit and create a vacuum by pumping.
The red layer containing the cells will flow through the filter (leaving any debris in the cell solution on top of the filter). Disconnect the vacuum pump and the SteriFlip™ unit when filtration ends. Place a lid on the 50 mL tube containing the cell solution.

Page 44 Section 6
Repeat this procedure for the other tube containing the other expelled contents using a new 100um SteriFlip™ and 50 mL Conical Tube. Note: The creation of the vacuum will cause some bubbling in the cell solution in the top tube. When completed you may also hear a hissing noise as liquid goes below an intake valve. (WARNING: Wear eye protection whenever using plastic vessels under partial vacuum).
11. Centrifuge the tubes at 2300rpm (800g) for 10 minutes. The stromal vascular fraction appears as the pellet of cells at the bottom of the tube.

Page 45 Section 6
12. Remove the supernatant (the red liquid) using the large transfer pipette without disturbing the cell pellet at the bottom from both tubes. Leave approximately 1-3 mLs of supernatant above the pellet in each tube (down to the start of the conical shape in the tube). Note: There may be some left over brown liquid (dissolved fat) on
top of the supernatant. Try to remove this as you remove the supernatant). When you are removing the waste supernatant from your tube and squirting it into your waste container, ensure that the tip or any part of the transfer pipette does not touch your previously expelled waste and keep the tip of the transfer pipette out of the waste container (i.e. the tip of the transfer pipette should always be above the waste container when expelling contents. This helps maintain sterility).

Page 46 Section 6
Resuspend the cell pellet in the leftover 1-3 mLs of supernatant using the same transfer pipette until a single cell suspension is in both tubes. Now transfer all of the contents of one tube into the other tube so that you now have both resuspended cell pellets in the one tube.
13. Add Solution F to the tube until it is filled to the 40 mL mark on the tube using a 60 mL syringe and 18g needle. Mix Well.
14. Centrifuge the tube at 2300rpm (800g) for 10
minutes. 15. Again, remove the supernatant using a large
transfer pipette without disturbing the cell pellet at the bottom. Leaving approximately 1-3 mLs of supernatant above the cell pellet in the tube (down to the 5 mL mark on the tube). Vigorously resuspend the cell pellet in the leftover 1-3 mLs of supernatant using the same transfer pipette until it is a single cell
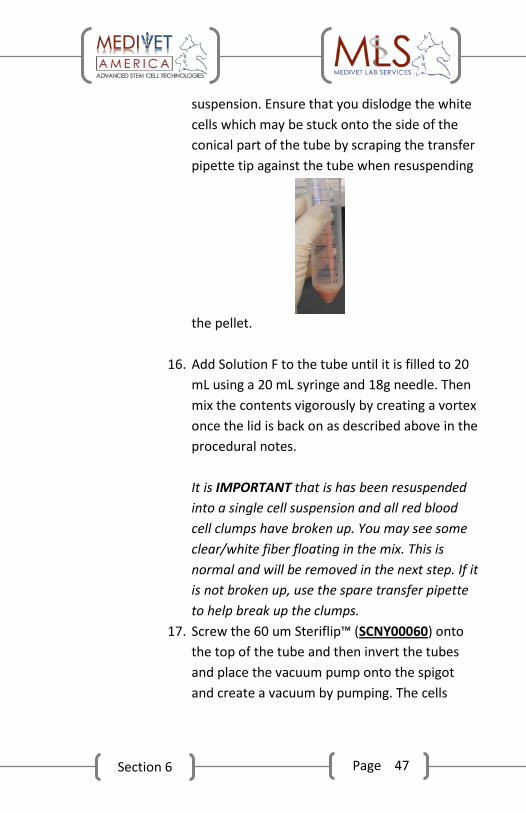
Page 47 Section 6
suspension. Ensure that you dislodge the white cells which may be stuck onto the side of the conical part of the tube by scraping the transfer pipette tip against the tube when resuspending
the pellet.
16. Add Solution F to the tube until it is filled to 20 mL using a 20 mL syringe and 18g needle. Then mix the contents vigorously by creating a vortex once the lid is back on as described above in the procedural notes. It is IMPORTANT that is has been resuspended into a single cell suspension and all red blood cell clumps have broken up. You may see some clear/white fiber floating in the mix. This is normal and will be removed in the next step. If it is not broken up, use the spare transfer pipette to help break up the clumps.
17. Screw the 60 um Steriflip™ (SCNY00060) onto the top of the tube and then invert the tubes and place the vacuum pump onto the spigot and create a vacuum by pumping. The cells

Page 48 Section 6
should flow through the filter leaving any debris in the solution caught in the filter. Unscrew the Steriflip™ unit and place a lid on the tube containing the cell solution.
18. Centrifuge the tube at 2300rpm (800g) for 10 minutes.
19. Using a large transfer pipette remove nearly all of the supernatant without disturbing the cell pellet. Hint: Tilt the tube gently at 45 degrees away from the top edge of the pellet to remove most of the supernatant when you are close to removing all of the supernatant from the cell pellet.
20. Add the partially dissolved PRP fraction into the cell pellet using the same transfer pipette until the volume in the tube is 2.0-4.0 mL (maximum 4.0 mL). The volume will depend on the number of joints or type of injury required to be injected. (See Section 7 for Joint Injection Tables) Note: the transfer pipette has graduation marks each 0.5 mL Mix the cell pellet with the PRP using the same transfer pipette until it is a single cell suspension.

Page 49 Section 6
21. With the same transfer pipette transfer the cell suspension the 5.0 mL cryotube. Note: If you require more volume for your cell suspension then add more PRP to the tube. Note: the cells in this solution are the stromal vascular fraction (SVF) which contains the stem cells.
22. Place the cryotube into the photobiostimulation unit and switch on for 20 minutes. Note: the photobiostimulation light will switch off automatically after 20 minutes.

Page 50 Section 6
Note: the veterinarian may need to use the spare spinal needle in the kit to reach the bottom of the tube when removing the cell solution.
Cell Counts for the SVF
You can perform a cell count at the end of the procedure by removing a small proportion of the cells and either:
Send a sample (0.2 mL) of the final cell solution which contains the PRP to your local MediVet Laboratories Services for analysis. Store the sample in the fridge until pickup, and ensure the sample is picked up that day. Visit http://www.medivetlabs.com/ob.html to schedule your Cell Counting. Ensure all packaging instructions are followed to ensure safe and timely shipping of your sample.
OR
Use a standard haemocytometer and count the nucleated cells using a microscope. Ensure that you are familiar with the formula for calculating the cell numbers correctly, taking into account the volume that the cells are resuspended in.

Page 51 Section 6
OR
Put a sample of the SVF cells through a suitable coulter counter that counts canine white blood cells. The recent veterinarian cell counters will lyse the red blood cells and count the nucleated cells (the WBC count). When you obtain the results, the WBC is the result you require as this counts the nucleated cells (the SVF fraction which contains the stem cells). The results ten to be in either K/ul or 109/L.
For example:
To calculate the number of cells from a coulter counter you will need to take into account the final volume that the cells are resuspended in.
If the result is in K/ul then multiply the result by 1000 to give the result in mL, then multiply the final volume the cells were resuspended in (e.g. the WBC readout is 15,0 x K/ul and the final volume the SVF cells are in is 3.0 ml (15.0 x K/ul is 15,000/ul)).
15,000 x 1,000 = 15.0 x 10⁶/mL
Then multiply by your final volume (e. g. 3.0 mL)
15.0 x 10⁶/mL x 3.0 = 45.0 x 10⁶ This is your total nucleated cell count.

Page 52 Section 6
If the result is in 109/L then divide the result by 1,000 to give the result in mL. Next, multiply bt the final volume the cells were resuspended in (e.g. the readout is 15,0 x 10⁹/L and the final volume the SVF cells are in is 3.0 mL)
(15.0 x 10⁹) / 1000 = 15.0 x 10⁶/mL
Then multiply by your final volume (e.g. 3.0 mL)
15.0 x 10⁶/mL x 3.0 = 45.0 x 10⁶. This is your total nucleated cell count.
Banking of Leftover SVF
Visit http://www.medivetlabs.com/ob.html to schedule your Cell Banking. Ensure all packaging instructions are followed to ensure safe and timely shipping of your sample.

Page 53 Section 7
Section 7 Liposuction Protocol for Veterinarians
LipoAspirate Infiltration Solution:
1. Remove 20cc from a 250cc bottle of sterile physiological saline solution
2. Add 20cc of Lidocaine 3. Add 0.4 cc 1:1000 Epinephrine 4. Mix well.
Procedure:
1. Scrub with clorhexidine or iodine to create a sterile field lateral to the animal’s tail head.
2. Cover with Ioban or drape and secure with towel clamps.
3. Make a puncture using a #11 blade just below the fat pad on the animal’s rump.
4. Using the Pocar instrument or other puncture device such as a 12 gauge needle, create a hole into the subcutaneous tissue (ultrasound guidance is helpful at this stage).
5. Using the tumescent infiltrator, to introduce the Solution into the fat pad until the area becomes tight and stressed.Massage for 15 to 20 minutes. Using ultrasound guidance(optional), remove all fat tissue in the pad with the Harvester Cannula being careful not to remove muscle tissue.

Page 54 Section 7
6. Expel the adipose tissue into the sterile specimen cup and two 50 ml conical tubes if necessary.
7. Have an assistant uncap and recap the tubes promptly, minimizing open air time during collection. Expel all liquid and tissue into the collection containers.
Adipose Lipoaspiration Tips & Tricks
Hints for Vets:
1. Expel the fat tissue directly into two sterile conical 50 ml tubes. You may also expel lipoaspirate into the sterile specimen cup.
2. Have an assistant uncap and recap the tubes promptly, minimizing open air time during collection.
3. Expel all liquid and tissue into the collection containers.
Hints for Techs
Upon receiving the fat, it will be runny and mixed with the saline/epinephrine/lidocaine solution.
Allow all containers to sit for 5-10 minutes. The fat should remain on the top and a good amount of saline/blood mixture will settle to the bottom of the tube.

Page 55 Section 7
Use a sterile transfer pipette and remove the liquid layer from the 50 ml conical tubes. If there is a “pellet” that has settled at the bottom of the tube, do not remove it - it contains the stem cells!
If your vet has used the sterile specimen container, remove the liquid from it in the same fashion as the tubes.
Remember that 1 ml (cc) of tissue is approximately 1 gram of adipose tissue. Do not factor in liquid into your calculation of gram weight.

Page 56 Section 8
Section 8 Adipose Derived Stem Cell Injections
Q: When should I inject the cells? A: As soon as possible. The cells may be placed in a refrigerator or left in a cool, dark place until injection. Be sure to mix well before injection as the cells will settle in the syringes. Q: Should I use an antibiotic when injecting joints? A: Yes. MediVet recommends using a Gentamicin flush of no more than 2 mg/kg body weight or 24 mg total gentamycin (whichever is lower). You may dilute the Gentamicin in sterile saline if needed. Note: See Note On Antibiotic Flushes for more information. Q: Can I use any other antibiotic than Gentamicin when injecting joints? A: No. Studies have shown that Gentamicin is the only antibiotic that will not contribute to massive cell death in the concentrations indicated in the MediVet Protocol.

Page 57 Section 8
Q: What is recommended for post-surgical care? A: MediVet recommends placing the patient on 7-10 days of oral antibiotics and giving a one-time dose of Metacam or Rimadyl injectable when injecting joints or other sensitive sites. Please see the Post-Op Instructions available on the Vet Login of www.MediVet-America.com Q: How do I deliver cells IV? A: An IV Transfusion set with a 200 micron filter is included with each Small and Large Adipose Stem Cell Kit. It is recommended that cells be diluted in a bag of warmed normal saline solution before use (Optional: drain bag to between 20-50cc). Inject the cell suspension into the bag slowly then mix gently. Administer slowly over 10-15 minutes.
Q: What volume should I inject into a small animal joint? A:

Page 58 Section 8
Q: What volume should I inject into an Equine or other large animal joint?
A:
Note: Volume can be maximized with the addition of normal saline solution.
Adipose Stem Cell Treatment Notes
• Prior to injection of the cells, the patient should also be given an injection of NSAIDs. You may notice in some animals that there may be flare ups in the joint in the next 24-48 hrs. This flare up will go down as quickly as it appears and is not a concern.
• Once the cells are ready for injection into the joint. The veterinarian should draw the cell suspension up to the volume required in a single 1.0 or 2.0 ml syringe (or if required into multiple syringes). This depends on the number

Page 59 Section 8
of joints required to be injected. We recommend a maximum of 0.5 mL per joint for a large dog and 0.2 mL per joint for a small animal.
• For an injection into a joint, the MAXIMUM amount of cells that should be used is the amount of cells that are derived from 10mL of adipose tissue. The excess cells may be used intravenously, as there is no maximum for IV use.
• After injection of the cells, flush the needle with a maximum of 2 mg/kg Gentocin/Gentamicin divided into the number of joints to be treated. Do not exceed 2 mg/kg body weight or 24 mg total gentamycin (whichever is lower) (e.g. using a 40 mg/mL bottle of Gentocin/Gentamicin, then 0.6 mL of a 40 mg/mL solution is 24 mg)
• Example: You are treating both hip joints in a 77 lb (35 kg) Labrador. You have a total of 2.0 mL of the activated cells to give. Give 0.5 mL of activated cells into the first hip joint followed by a Gentocin flush of 0.25 mL (10 mg Gentocin). Then give 0.5 mL of activated cells into the second joint followed by a Gentocin flush of 0.25 mL. Give the remaining activated cells (1 mL) intravenously.

Page 60 Section 8
• Alternatively, you are treating an 11 lb (5 kg) Yorkshire Terrier for osteoarthritis of both stifles. You have a total of 1.0 mL of the activated cells to give. Give 0.2 mL of activated cells into the first stifle, followed by a Gentocin flush of 0.1 mL. Give the remaining activated cells (0.6 mL) intravenously.
o For intravenous administration, mix the SVF with at least 6-10 mL of warmed normal saline. Give slowly intravenously over 20 minutes using the enclosed MediVet intravenous filter.
o Place the animal on a 5-7 day course of general antibiotics.
A Note on Antibiotic Flushes
Never exceed a total dose of 2 mg/kg body weight or 24 mg total gentamicin (whichever is lower). If you are injecting several joints on an animal, you may have to dilute the gentamicin mixture with some sterile saline so that you can use the recommended volumes of flush for your chosen needle size.
To flush a 3.5 inch 22G spinal needle, you will need at least .07 cc of fluid. Therefore, 0.15 cc of a gentamicin solution is recommended for hip joints if you are using this spinal needle. However, for all other joints a 1.5 inch 22G needle is adequate and it can be flushed using 0.1 cc of solution.

Page 61 Section 8
Example: If you have a 10 kg dog and you are injecting the hips, stifles and elbows for polyarthritis.
The lower calculation for the Gentamicin is 20 mg (2 mg/kg body weight)
The hips require 0.15 cc and the other joints 0.1 cc.
The gentamicin solution that you are using is 40 mg/ml. If you used the gentamicin straight, you would be flushing into the joints a total of 0.7 cc of the gentamicin which is a total of 28 mg of gentamicin. Since that total exceeds 20 mg gentamicin, you must dilute the gentamicin solution with sterile saline. To do this, add 0.5 cc of sterile saline into a vial with 0.5 cc of gentamicin to yield 20 mg/mL solution. You can now use this solution to flush all of the joints as described above (0.15 for both hips and 0.1 for the other 4 joints) and use a total of 14 mg gentamicin which is well below our maximum dose of 20 mg for this particular patient.
(If you have Gentocin 100 mg/mL solution, take 0.2 cc of the gentocin mixture and mix it with 0.8 cc of sterile saline to get a final 20 mg/mL solution for flushing.)

Page 62 Section 9
Section 9 Small Animal Joint Injections
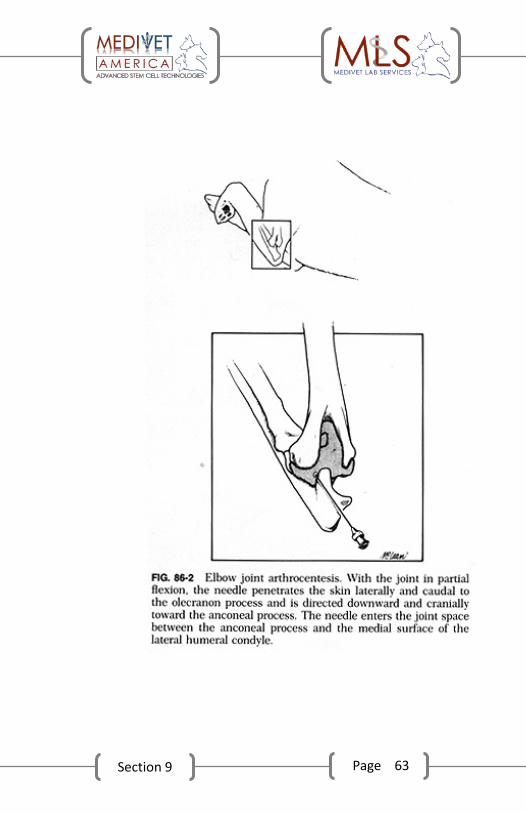
Page 63 Section 9

Page 64 Section 9

Page 65 Section 9

Page 66 Section 9
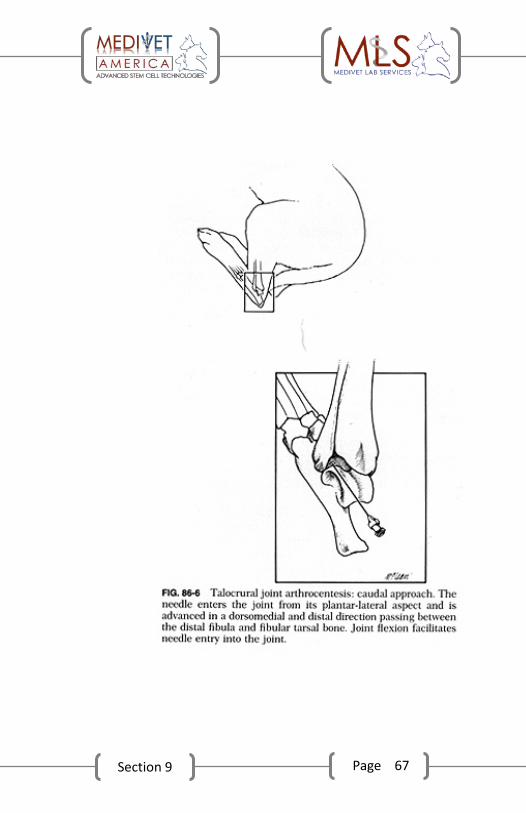
Page 67 Section 9

Page 68 Section 9

Page 69 Section 10
Page 70 Section 11

Page 71 Section 12
Section 12 MSDS & Safety Information
1. First Aid Procedure 2. ActicellTM Activator Solution 3. Cell Extraction Medium 4. MediStemTM Research Grade 5mg

Page 72 Section 12

FIRST AID PROCEDURE
For Personnel Handling Adipose Solutions A-G
Version 1.1 Page 1/2 Printing date 04.09.2010
It is recommended that protective gloves, safety goggles and dust mask be worn throughout the handling of the Adipose stem cell procedure solutions. NOTE: Solutions B & C have additional Safety & Handling guidelines. Ensure MSDS procedures are adhered to at ALL times.
In case of emergency please seek medical assistance immediately or for advice please call the Poisons Information Hotline on 13 11 26
Solutions A, D & F - Phosphate Buffer Solution
Swallowed: If swallowed, DO NOT induce vomiting. If victim is conscious give water. If sickness persists seek medical advice
Eye: If material is splashed into eyes, immediately, flush with plenty of water for 15 minutes, ensuring eye lids are held open. Remove contact lens if worn. If irritation persists seek medical advice.
Skin: Rinse with plenty of soap and water. If skin irritation persists see a doctor. Remove and wash contaminated clothing before re-use.
Inhaled: Move to fresh air. If not breathing, give artificial respiration. If breathing is difficult, give oxygen.
Solution B - MediStemTM Caution: Harmful (blended purified enzymes causing tissue dissociation)
Handling: Do not breathe vapours or dust Avoid contact with skin Wear protective clothing and gloves- see MSDS in procedure manual for recommended respiratory protection
Swallowed: Seek immediate medical attention. DO NOT induce vomiting without medical
advice Eye: If material is splashed into eyes, immediately, flush with plenty of water for 15
minutes, ensuring eye lids are held open. Remove contact lens if worn. Seek medical advice.
Skin: Rinse with plenty of water. If skin irritation persists see a doctor. Remove and wash contaminated clothing before re-use.
Inhaled: Consult a doctor. Move to fresh air. If not breathing, give artificial respiration. If breathing is difficult, give oxygen.
www.medivet.net.au

Solution C - MednaseTM Caution: Harmful (purified enzymes causing tissue dissociation) LARGE ANIMAL
KIT ONLY
Handling: Do not breathe vapours or dust Avoid contact with skin Wear protective clothing and gloves- see MSDS in procedure manual for recommended respiratory protection
Swallowed: Seek immediate medical attention. DO NOT induce vomiting without medical
advice. Eye: If material is splashed into eyes, immediately, flush with plenty of water for 15
minutes, ensuring eye lids are held open. Remove contact lens if worn. Seek medical advice.
Skin: Rinse with plenty of water. If skin irritation persists see a doctor. Remove and wash contaminated clothing before re-use.
Inhaled: Consult a doctor. Move to fresh air. If not breathing, give artificial respiration. If breathing is difficult, give oxygen.
Solution E - Cell Extraction Medium
Swallowed: Seek medical attention. May be harmful if swallowed. DO NOT induce vomiting; give patient 2-3 cups of milk or water.
Eye: May cause eye irritation. Flush thoroughly with water and remove contact lens if worn. If irritation persists seek medical advice
Skin: If material contacts skin flush with water. If skin irritation persists see a doctor. Remove and wash contaminated clothing before re-use.
Inhaled: Consult a doctor. Move to fresh air. If not breathing, give artificial respiration. If breathing is difficult, give oxygen
Solution G - ActiCellTM Activator Solution
Swallowed: Seek medical attention immediately. May be harmful if swallowed. INDUCE vomiting immediately.
Eye: May cause eye irritation. Flush thoroughly with water and remove contact lens if worn. If irritation persists seek medical advice
Skin: If material contacts skin flush with water. If skin irritation persists see a doctor. Remove and wash contaminated clothing before re-use.
Inhaled: Consult a doctor. Move to fresh air. If not breathing, give artificial respiration. If breathing is difficult, give oxygen.
www.medivet.net.au

Must be kept accessible at all times
MATERIAL SAFETY DATA SHEET
ActiCellTM Activator Solution
Version 1. Page 1/4 Printing date 18.06.2010
1. IDENTIFICATION OF THE SUBSTANCE/PREPARATION AND OF THE COMPANY/UNDERTAKING Product information
Commercial Product Name: ActiCellTM Activator Solution Product Description: Trade Secret Intended Use: For use only by a professional CAS: 10043-52-4 Company: Medivet Research Division
Suite 8 Level 1 69 The Mall
Bankstown NSW Australia 2200 E-mail: [email protected] Telephone: +61 2 9708 0040 Fax: +61 2 9708 0041 After Hours: 1800 356 505
2. HAZARDS IDENTIFICATION
Risk advice to man and the environment
Classification: Not hazardous
3. COMPOSITION/INFORMATION ON INGREDIENTS
Ingredients: Trade Secret Chemical class: Inorganic salts Functions: Clot (blood) activation agent
4. FIRST AID MEASURES
Inhalation: Move victim to fresh air. Skin contact: If material contacts skin flush with water Eye contact: May cause eye irritation. Flush thoroughly with water and remove contact
lens if worn. If irritation persists seek medical advice Ingestion: May be harmful if swallowed. Induce vomiting immediately. Seek medical
advice.
www.medivet.net.au

MATERIAL SAFETY DATA SHEET
ActiCellTM Activator Solution
Version 1. Page 2/4 Printing date 18.06.2010
5. FIRE-FIGHTING MEASURES
Extinguishing media: Use extinguishing media appropriate to surrounding fire conditions.
Decomposition: Dangerous decomposition is not anticipated.
6. ACCIDENTAL RELEASE MEASURES
Upon spillage: Wear googles, rubber boots and rubber gloves. Using an ab sorbant cloth wipe spill site. Using warm water and any household dishwashing liquids wash spill site with a fresh cloth, ventilate area to dry.
Absorbent material: Not necessary.
Actions to be taken to Special measures to limit damage are not necessary. limit damage:
7. HANDLING AND STORAGE
Handling: Avoid contact with eyes
Storage: Keep unopened vials refrigerated at 4Û&.
Use: Single use with Adipose Stem Cell Procedure Kit only
8. EXPOSURE CONTROLS/PERSONAL PROTECTION
Personal protective equipment Respiratory protection: Use dust mask type N95 (US) Eye protection: Chemical safety goggles Hand protection: Compatible chemical resistant gloves Hygiene measures: Wash hands before breaks and at the end of workday.
www.medivet.net.au

MATERIAL SAFETY DATA SHEET
ActiCellTM Activator Solution
Version 1. Page 3/4 Printing date 18.06.2010
9. PHYSICAL AND CHEMICAL PROPERTIES
Form: Clear Liquid pH: ~7 Odour: Characteristic
10. STABILITY AND REACTIVITY
Hazardous reactions: Stable under normal conditions Hazardous decomposition products: Unknown Materials to avoid: Strong acids, strong alcohol, strong oxidising agents. Conditions to avoid: Strong heat
11. TOXICOLOGICAL INFORMATION
Toxicological information for the product
Potentially biohazardous material May cause eye irritation
12. ECOLOGICAL INFORMATION
Bioaccumulation: Not determined Aquatic Toxicity: No data is available Ecotoxicity effects: No data is available
13. DISPOSAL CONSIDERATIONS
Disposal should be made in accordance with existing disposal practices employed for infectious waste at your institution. Observe all federal, state and local environmental regulations.
www.medivet.net.au
MATERIAL SAFETY DATA SHEET
ActiCellTM Activator Solution
Version 1. Page 4/4 Printing date 18.06.2010
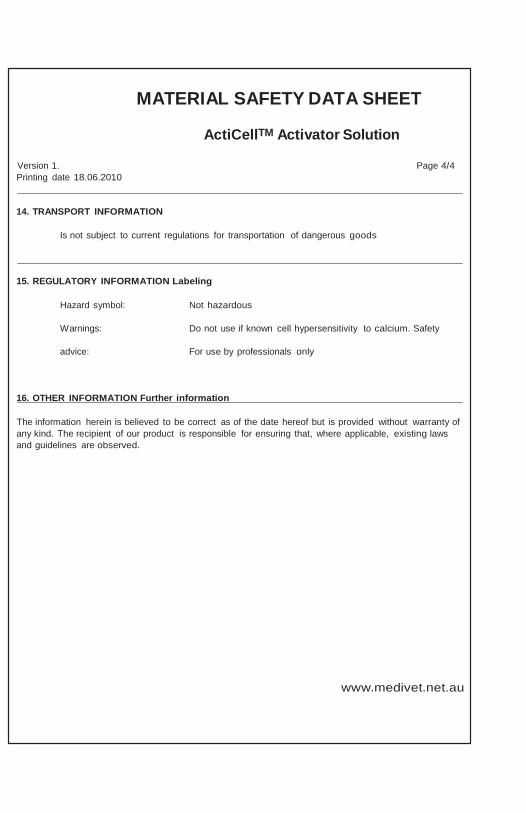
14. TRANSPORT INFORMATION
Is not subject to current regulations for transportation of dangerous goods
15. REGULATORY INFORMATION Labeling
Hazard symbol: Not hazardous
Warnings: Do not use if known cell hypersensitivity to calcium. Safety
advice: For use by professionals only
16. OTHER INFORMATION Further information
The information herein is believed to be correct as of the date hereof but is provided without warranty of any kind. The recipient of our product is responsible for ensuring that, where applicable, existing laws and guidelines are observed.
www.medivet.net.au

Must be kept accessible at all times
MATERIAL SAFETY DATA SHEET
Cell Extraction Medium
Version 1. Page 1/4 Printing date 18.06.2010
1. IDENTIFICATION OF THE SUBSTANCE/PREPARATION AND OF THE COMPANY/UNDERTAKING Product information
Commercial Product Name: Cell Extraction Medium Product Description: Trade Secret Intended use: Cell culture medium for in vitro use only by a professional CAS: 8002-43-5 Company: Medivet Research Division
Suite 8 Level 1 69 The Mall
Bankstown NSW Australia 2200 E-mail: [email protected] Telephone: +61 2 9708 0040 Fax: +61 2 9708 0041 After Hours: 1800 356 505
2. HAZARDS IDENTIFICATION
Risk advice to man and the environment
Classification: Not hazardous
3. COMPOSITION/INFORMATION ON INGREDIENTS
Ingredients: Trade Secret Chemical class: Glyceryl Esters and Derivatives Functions: Surfactant- Emulsifying agent
4. FIRST AID MEASURES
Inhalation: Move victim to fresh air. Skin contact: If material contacts skin flush with water Eye contact: May cause eye irritation. Flush thoroughly with water and remove contact
lens if worn. If irritation persists seek medical advice Ingestion: May be harmful if swallowed. DO NOT induce vomiting, give patient
2-3 cups of milk or water. Seek medical advice.
www.medivet.net.au

MATERIAL SAFETY DATA SHEET
Cell Extraction Medium
Version 1. Page 2/4 Printing date 18.06.2010
5. FIRE-FIGHTING MEASURES
Extinguishing media: Use extinguishing media appropriate to surrounding fire conditions.
Decomposition: Dangerous decomposition is not anticipated.
6. ACCIDENTAL RELEASE MEASURES
Upon spillage: Wear googles, rubber boots and rubber gloves. Using an absorbant cloth wipe spill site. Using warm water and any household dishwashing liquids wash spill site with a fresh cloth, ventilate area to dry.
Absorbent material: Not necessary.
Actions to be taken to Special measures to limit damage are not necessary. limit damage:
7. HANDLING AND STORAGE
Handling: Avoid contact with eyes
Storage: Vials to be refrigerated at 4Û&.
Use: Single use with Adipose Stem Cell Procedure Kit only
8. EXPOSURE CONTROLS/PERSONAL PROTECTION
Personal protective equipment Respiratory protection: Use dust mask type N95 (US) Eye protection: Chemical safety goggles Hand protection: Compatible chemical resistant gloves Hygiene measures: Wash hands before breaks and at the end of workday.
www.medivet.net.au

MATERIAL SAFETY DATA SHEET
Cell Extraction Medium
Version 1. Page 3/4 Printing date 18.06.2010
9. PHYSICAL AND CHEMICAL PROPERTIES
Form: Amber Liquid pH: ~7 Odour: Characteristic
10. STABILITY AND REACTIVITY
Hazardous reactions: Stable under normal conditions Hazardous decomposition products: Unknown Materials to avoid: Strong acids, strong alcohol, strong oxidising agents. Conditions to avoid: Strong heat
11. TOXICOLOGICAL INFORMATION
Toxicological information for the product
Potentially biohazardous material May cause eye irritation
12. ECOLOGICAL INFORMATION
Bioaccumulation: Not determined Aquatic Toxicity: No data is available Ecotoxicity effects: No data is available
13. DISPOSAL CONSIDERATIONS
Disposal should be made in accordance with existing disposal practices employed for infectious waste at your institution. Observe all federal, state and local environmental regulations.
www.medivet.net.au

MATERIAL SAFETY DATA SHEET
Cell Extraction Medium
Version 1. Page 4/4 Printing date 18.06.2010
14. TRANSPORT INFORMATION
Is not subject to current regulations for transportation of dangerous goods
15. REGULATORY INFORMATION Labeling
Hazard symbol: Not hazardous
Warnings: Do not use if known cell hypersensitivity to soy. Safety advice:
For use by professionals only For in-vitro use only
16. OTHER INFORMATION Further information
The information herein is believed to be correct as of the date hereof but is provided without warranty of any kind. The recipient of our product is responsible for ensuring that, where applicable, existing laws and guidelines are observed.
www.medivet.net.au

Must be kept accessible at all times
MATERIAL SAFETY DATA SHEET
MediStemTM Research Grade 5mg
Version 1. Page 1/5 Printing date 18.06.2010
1. IDENTIFICATION OF THE SUBSTANCE/PREPARATION AND OF THE COMPANY/UNDERTAKING Product information
Commercial Product Name: MediStemTM Research Grade 5mg Product Description: Trade Secret CAS: 9001-12-1, 9073-78-3 Intended use: For in vitro use by professionals only Company: Medivet Research Division
Suite 8 Level 1 69 The Mall
Bankstown NSW Australia 2200 E-mail: [email protected] Telephone: +61 2 9708 0040 Fax: +61 2 9708 0041 After Hours: 1800 356 505
2. HAZARDS IDENTIFICATION
Risk advice to man and the environment
Classification: Harmful Warnings: Irritating to eyes, respiratory system and skin.
May cause sensitization by inhalation. Note: Slightly hazardous to water and ground
3. COMPOSITION/INFORMATION ON INGREDIENTS
Ingredients: Trade Secret Labelling: X; R20/21/22/36-38
Ingredients >= 1 % Active Ingredient
www.medivet.net.au
MATERIAL SAFETY DATA SHEET
MediStemTM Research Grade 5mg
Version 1. Page 2/5 Printing date 18.06.2010
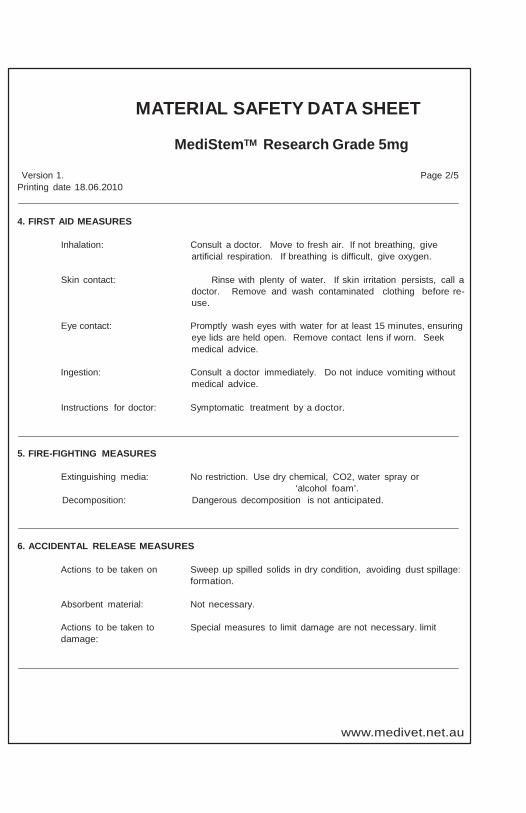
4. FIRST AID MEASURES
Inhalation: Consult a doctor. Move to fresh air. If not breathing, give artificial respiration. If breathing is difficult, give oxygen.
Skin contact: Rinse with plenty of water. If skin irritation persists, call a
doctor. Remove and wash contaminated clothing before re-use.
Eye contact: Promptly wash eyes with water for at least 15 minutes, ensuring
eye lids are held open. Remove contact lens if worn. Seek medical advice.
Ingestion: Consult a doctor immediately. Do not induce vomiting without
medical advice.
Instructions for doctor: Symptomatic treatment by a doctor.
5. FIRE-FIGHTING MEASURES
Extinguishing media: No restriction. Use dry chemical, CO2, water spray or ‘alcohol foam’.
Decomposition: Dangerous decomposition is not anticipated.
6. ACCIDENTAL RELEASE MEASURES
Actions to be taken on Sweep up spilled solids in dry condition, avoiding dust spillage: formation.
Absorbent material: Not necessary.
Actions to be taken to Special measures to limit damage are not necessary. limit damage:
www.medivet.net.au

MATERIAL SAFETY DATA SHEET
MediStemTM Research Grade 5mg
Version 1. Page 3/5 Printing date 18.06.2010
7. HANDLING AND STORAGE
Handling: Combustible substance. Avoid formation of dust; dust extraction by suction is required for procedures associated with dust formation.
Storage: 4ÛC. Keep containers dry and tightly closed to avoid moisture
absorption and contamination.
Use: Single use with Adipose Stem Cell Procedure Kit only
8. EXPOSURE CONTROLS/PERSONAL PROTECTION
Personal protective equipment Respiratory protection: Respiratory protection should be worn. Eye protection: Safety glasses Hand protection: Protective gloves Hygiene measures: Wash hands before breaks and at the end of workday.
9. PHYSICAL AND CHEMICAL PROPERTIES
Form: Solid Colour: White Odour: None Fire promoting: Substance does not have any oxidizing properties. Miscibility with water: Immiscible Water solubility: Soluble
10. STABILITY AND REACTIVITY
Hazardous reactions: none under normal use Hazardous decomposition products: Carbon oxides Materials to avoid: Strong acids and bases. Strong oxidising agents.
www.medivet.net.au

MATERIAL SAFETY DATA SHEET
MediStemTM Research Grade 5mg
Version 1. Page 4/5 Printing date 18.06.2010
11. TOXICOLOGICAL INFORMATION
Toxicological information for the product
Intoxication has so far not become known.
12. ECOLOGICAL INFORMATION
Bioaccumulation: Not determined Aquatic Toxicity: No data is available Ecotoxicity effects: No data is available
13. DISPOSAL CONSIDERATIONS
Waste disposal route: Can be sent to an incineration plant in accordance with local regulations.
Disposal of empty Dispose of empty packs via local recycling or waste disposal packaging: routes- if necessary, clean them beforehand.
14. TRANSPORT INFORMATION
Is not subject to current regulations for transportation of dangerous goods
www.medivet.net.au

MATERIAL SAFETY DATA SHEET
MediStemTM Research Grade 5mg
Version 1. Page 5/5 Printing date 18.06.2010
15. REGULATORY INFORMATION Labelling
Hazard symbol: Harmful
Warnings: Irritating to eyes, respiratory system and skin. May cause sensitisation by inhalation. Safety advice: Do
not breathe dust.
Avoid contact with the skin
In case of contact with eyes, rinse immediately with plenty of water and seek medical advice.
Wear suitable protective clothing and gloves. For professional
use only For in vitro use only
16. OTHER INFORMATION Further information
The information herein is believed to be correct as of the date hereof but is provided without warranty of any kind. The recipient of our product is responsible for ensuring that, where applicable, existing laws and guidelines are observed.
www.medivet.net.au