meridian 10 product - keating of chicago® 10 product ... instructions in this manual should be read...
TRANSCRIPT
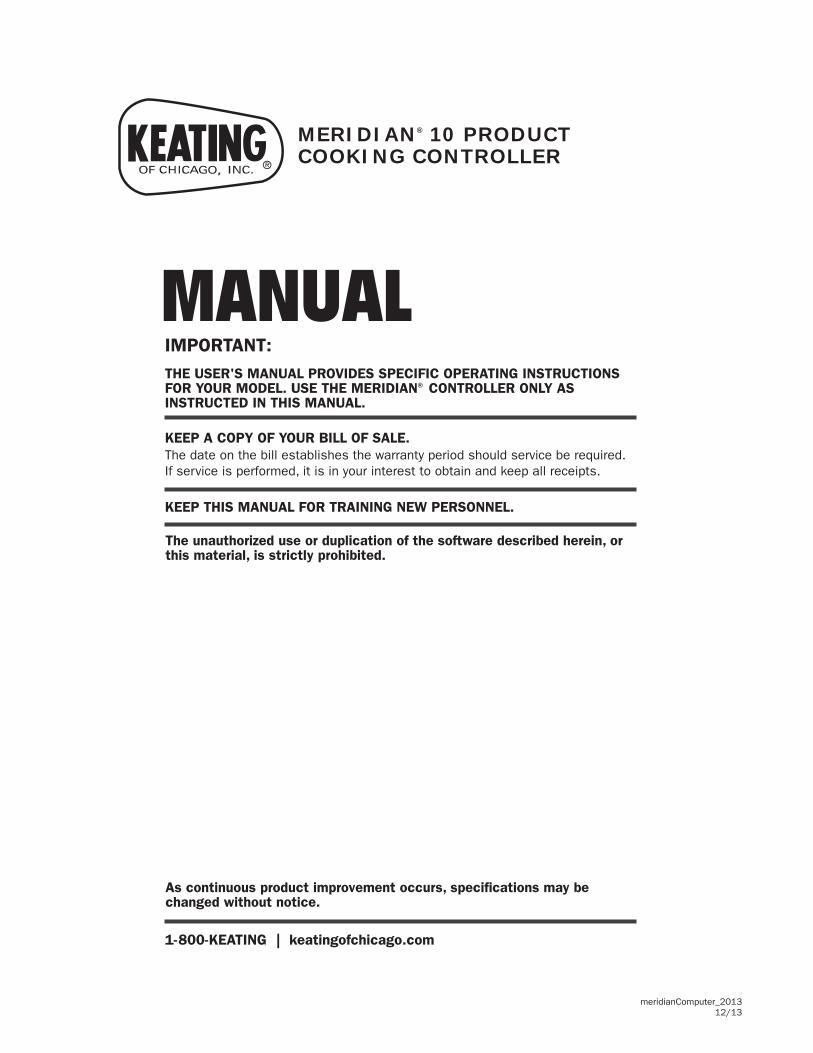
MERIDIAN® 10 PRODUCTCOOKING CONTROLLER
KEEP A COPY OF YOUR BILL OF SALE. The date on the bill establishes the warranty period should service be required. If service is performed, it is in your interest to obtain and keep all receipts.
As continuous product improvement occurs, specifi cations may be changed without notice.
IMPORTANT:THE USER'S MANUAL PROVIDES SPECIFIC OPERATING INSTRUCTIONS FOR YOUR MODEL. USE THE MERIDIAN® CONTROLLER ONLY ASINSTRUCTED IN THIS MANUAL.
meridianComputer_201312/13
1-800-KEATING | keatingofchicago.com
MANUAL
KEEP THIS MANUAL FOR TRAINING NEW PERSONNEL.
The unauthorized use or duplication of the software described herein, or this material, is strictly prohibited.
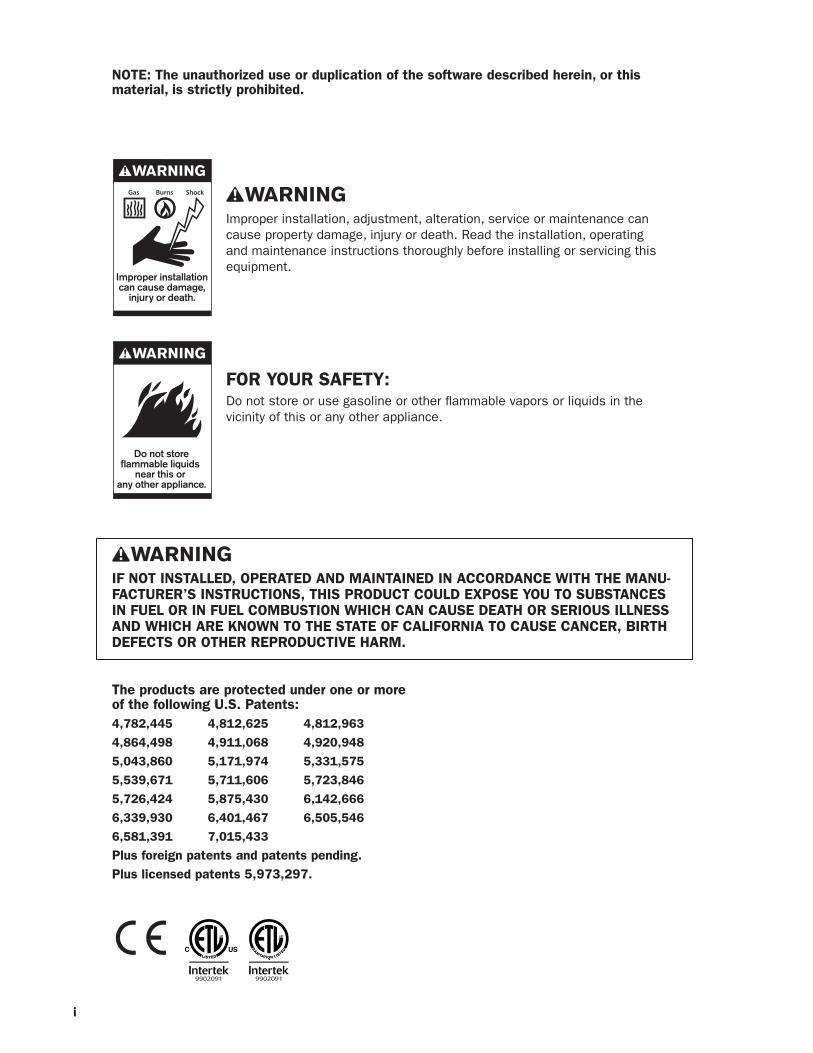
WARNING
Improper installationcan cause damage,
injury or death.
ShockBurnsGas
WARNING
Do not storeflammable liquids
near this or any other appliance.
IF NOT INSTALLED, OPERATED AND MAINTAINED IN ACCORDANCE WITH THE MANU-FACTURER’S INSTRUCTIONS, THIS PRODUCT COULD EXPOSE YOU TO SUBSTANCES IN FUEL OR IN FUEL COMBUSTION WHICH CAN CAUSE DEATH OR SERIOUS ILLNESS AND WHICH ARE KNOWN TO THE STATE OF CALIFORNIA TO CAUSE CANCER, BIRTH DEFECTS OR OTHER REPRODUCTIVE HARM.
i
Improper installation, adjustment, alteration, service or maintenance can cause property damage, injury or death. Read the installation, operating and maintenance instructions thoroughly before installing or servicing this equipment.
Do not store or use gasoline or other fl ammable vapors or liquids in the vicinity of this or any other appliance.
FOR YOUR SAFETY:
9902091 9902091
The products are protected under one or more of the following U.S. Patents:4,782,445 4,812,625 4,812,963
4,864,498 4,911,068 4,920,948
5,043,860 5,171,974 5,331,575
5,539,671 5,711,606 5,723,846
5,726,424 5,875,430 6,142,666
6,339,930 6,401,467 6,505,546
6,581,391 7,015,433
Plus foreign patents and patents pending.Plus licensed patents 5,973,297.
NOTE: The unauthorized use or duplication of the software described herein, or this material, is strictly prohibited.
1-800-KEATING |
MERIDIAN® CONTROLLER
Important Safety Instructions ............................................ i
INTRODUCTION .............................................................. 1
INSTALLATION
Damage During Shipment ................................................ 1
Tools Required ................................................................ 2
Programming Codes ........................................................ 2
Cleaning the Controller .................................................... 2
CONTROLLER KEY DESCRIPTIONS
Standard Features ........................................................... 2
CONTROLLER FEATURES
Controls .................................................................... 2 - 3
DISPLAY DESCRIPTIONS
Programming .............................................................. 3 - 4
OPERATING THE CONTROLLER ........................................ 5
PRODUCT KEY PROGRAMMING ...................................... 8
SYSTEM PROGRAMMING .............................................. 12
OFFSET PROGRAMMING ............................................... 14
PROGRAMMING CUSTOM NAMES/ALARMS .................. 16
SERVICE DIAGNOSIS .................................................... 19
Troubleshooting Chart .................................................... 19
WARRANTY INFORMATION ........................................... 20
TABLE OF CONTENTS
INTRODUCTION
1
Instructions in this manual should be read thoroughly before attempting to operate the Meridian® Controller. All installation and service on Keating equipment must be performed by qualifi ed, certifi ed, licensed and/or authorized installation or service personnel.Operating information for Keating equipment has been prepared for use by qualifi ed and/or authorized personnel.Keating equipment is made in the USA and has American sizes of hardware. All metric conversions are approximate.
INSTALLATION INSTRUCTIONSProper installation will assure top performance. Alterations of any kind to your equipment will void the warranty. Before uncrating, check equipment carefully for damage.
IF EQUIPMENT ARRIVES DAMAGED
Keating does not assume responsibility for loss or damage incurred in transit.
IMPORTANT
This merchandise has been thoroughly inspected and carefully packed before leaving our plant. Responsibility for its safe delivery was assumed by the carrier at the time of shipment. Claims for loss or damage to the contents should, therefore, be made upon the carrier, as follows:
CONCEALED LOSS OR DAMAGE
Concealed loss or damage means loss or damage which does not become apparent until the mer-chandise has been unpacked. The contents may be damaged in transit due to rough handling even though
the carton may not show external damage. When the damage is discovered upon unpacking, make a writ-ten request for inspection by the carrier’s agent within fi fteen days of the delivery date. Then fi le a claim with the carrier since such damage is the carrier’s respon-sibility. By following these instructions carefully, we guarantee our full support of your claims to protect you against loss from concealed damage.
VISIBLE LOSS OR DAMAGE
Any external evidence of loss or damage must be noted on the freight bill or express receipt, and signed by the carrier’s agent. Failure to adequately de-scribe such external evidence of loss or damage may result in the carrier refusing to honor a damage claim. The form required to fi le such a claim will be supplied by the carrier.
DO NOT RETURN DAMAGED MERCHANDISE TO KEATING. FILE YOUR CLAIM AS STATED ABOVE.

| keatingofchicago.com2
FIRST STEPS NOTE: Not all features are available on all models.
INSTALLATION
NOTE: Not all features are available on all models.
Tools Required: Straight Screwdriver
1. Turn appliance power OFF.
2. Connect the wire harness to the controller.
3. Attach the 2 provided tinnerman nuts to the controller. Be sure to line up the holes.
4. Hold the controller against the front panel.
5. Secure the controller to the appliance using the 2 provided screws.
PROGRAMMING CODESProduct Programming . . . . . 1 7 2 4System Programming . . . . . 3 2 2 8Boil Mode . . . . . . . . . . . . . 1 7 2 4
CLEANING THE CONTROLLER
1. Using a clean damp cloth, wipe down your controller daily.
2. Do not allow oil to build up on any part of the controller.
NEVER use chemical or abrasive cleaners on your controller. The controller’s overlay may be damaged.
LARGE LED DISPLAY: 8-character, 14 segment. Displays programming and cook cycle information.
INDICATOR LIGHTS: Lit when there's an active cook cycle and in programming mode.
PRODUCT KEYS: Press to start a cook cycle. Also used in programming.
FEATURE KEYS: Used to access programming functions and controller features.
PROGRAMMING CENTER: Easy, cell phone-like programming. Access programming mode and change cooking parameters.
CONTROLLER KEY DESCRIPTIONS
CONTROLLER OPERATING ENVIRONMENT
NOTE: The solid state components in this control-ler are designed to operate reliably in a temperature range up to 158°F/70°C. Before installing this con-troller, it should be verifi ed that the ambient tem-perature at the mounting location does not exceed 158°F/70°C.

1-800-KEATING |
MERIDIAN® CONTROLLER
3
CONTROLLER FEATURES NOTE: Not all features are available on all models.
AUTOMATIC LEAST HOLD DISPLAY
Product with the least amount of cook time remaining will be shown in the display. Pressing and holding the SCAN key allows you to view each active product’s remaining cook time.
FAHRENHEIT OR CELSIUS TEMPERATURE DISPLAY
The controller can be confi gured to display the tem-perature in degrees Fahrenheit or Celsius (accessible through System Programming mode).
MELT CYCLE
If the vat temperature is below the Melt Limit Temperature and the controller is ON, it will control the melting of the shortening.
PROGRAMMABLE ACTION ALARMS
Up to three action alarms can be programmed for each product key. An action alarm alerts the operator to perform some action at a pre- programmed time.
PROGRAMMABLE APPLIANCE TYPE
A specifi c type of appliance; i.e. gas, electric or gener-ic can be programmed into the controller.
PROGRAMMABLE FILTER LOCKOUT CYCLE COUNT
Ensure good-tasting food is always served to your customers by requiring the shortening to be fi ltered after “x” amount of times. Any product key with Filter Lockout programmed will cease to operate until the shortening is fi ltered. A fi lter lockout cycle count (valid range 0 to 99) can be programmed for each product key. To disable fi lter lockout, enter 0 for the fi lter lock-out count.
PROGRAMMABLE GLOBAL FILTER LOCKOUT
A single fi lter lockout cycle count can be programmed to apply globally to all product keys.
PROGRAMMABLE HOLD TIMES
Product key hold times can be programmed to track product quality through a specifi ed holding period.
Hold time countdown begins as soon as the cook cycle is complete. The controller will sound an alarm when the product’s hold time has expired alerting the operator to discard the product.
PROGRAMMABLE OPERATING MODE
The controller can be programmed to operate as either a controller or timer.
PROGRAMMABLE PRESSURE VALVE
The pressure valve state for each stage on each prod-uct key can be programmed. The valve can be open or closed.
NOTE: The valve is normally open when not cooking.
PROGRAMMABLE (FASTFLEX.)™ TIMING MODE
Flex or straight timing can be confi gured for each stage on each product key. To insure consistent, high-quality food product, fl ex time will adjust the actual cook time taking into consideration the temperaturevariation due to load size, initial product temperature, product moisture content, and other factorsaffecting the cook cycle. If cooking by straight time, the controller will cook only for the specifi ed timewithout adjusting for these variances.

| keatingofchicago.com4
DISPLAY DESCRIPTIONS NOTE: Not all features are available on all models.
Controller is in Operating Mode. Actual vat temperature is more than 10 degrees below the programmed vat temperature.
Controller is in Operating Mode. Actual vat temperature is within the proper cooking temperature range. The vat is ready to start a cook cycle.
Controller is in Operating Mode. Actual vat temperature is more than 40 degrees above the highest programmed vat temperature. A continuous audible alarm will sound.
Controller’s probe is either open or shorted. Display will be accompanied with an audible alarm if shorted. Check or replace the probe.
Controller is in Operating Mode and a cook cycle is in progress.
Controller is in Operating Mode and a cook cycle has been completed.
Controller is waiting for a pass code to be entered.
Controller is in Product Key Programming Standby mode.
Stage cooking time (1-10) is displayed.
Stage cooking temperature (1-10) is displayed.
Stage timing mode (1-10) (fl ex or straight) is displayed.
Solenoid condition (1-10) (open or close) is displayed.
Action alarm status is displayed.
After fryer is fi ltered, this display prompts you to refi ll the fryer with fat.
Controller is in System Programming Standby Mode.
Controller is in Fahrenheit or Celsius Programming Mode.
Controller is in Appliance Type Programming Mode.

1-800-KEATING |
MERIDIAN® CONTROLLER
OPERATING THE CONTROLLER
STARTING A COOK CYCLE
To start a cook cycle, simply press the product key for the product you wish to cook. If the key is programmed, the correct cooking time will be displayed (example: 2:00) and will immediately start to count down in minutes and seconds. DONE will display when the cook cycle has ended.
The pressure solenoid will also close if programmed to do so, or a basket lift will lower if so equipped.
If DONE is displayed immediately and the unit starts to signal, the product key being pressed is not programmed.
STOP A COOK CYCLE
Press and hold an active product key for 3 seconds.
RESPOND TO A DONE ALARM
Cancel the signal by pressing the same product key used to start the cook cycle.
ACTION ALARMS
If the unit is programmed with action alarms, the action alarms will signal at a preset time during the cooking cycle. This signal, a dual rhythm beeping, will last 5 seconds and then self-cancel. The display will fl ash the action alarm time and the unit will then start counting toward 0:00.
HOLDING TIMERS
If the unit is programmed with holding times, they will automatically start counting upon expiration of the cooking cycle. When there are active hold times, the HOLD indicator will be lit. To view all active hold times, press and hold the HOLD key. Upon expiration, the timer will display HOLD and pulse with an audible tone.
To cancel, press the HOLD key.
BOIL MODE
PLEASE CONSULT AND FOLLOW KEATING’S GUIDELINES FOR CLEANING AND BOILING OF THE FRY VATS IN YOUR FRYER MANUAL. The boil function accurately maintains the fryer temperature at 190°F (88°C) to assist in the cleaning of fry vats. To start the boil process, turn the appliance OFF. Empty the fry vat of fat. Once the vat is emptied of fat and refi lled with cold water, the controller and fryer may now go into boil mode.
NOTE: The fry vat will maintain a temperature of 190°F (88°C) to allow the boil function to be performed.
5

| keatingofchicago.com6
TO ENTER BOIL MODE: Press and hold the P key for 3 seconds. COUNTS will be displayed.
Press: Display:
Press the up or down arrow keys until BOIL is displayed, then press the P key. BOIL will be displayed, and boil mode will begin.
Press: Display:
TO EXIT BOIL MODE: Press ON/OFF to stop Boil Mode.
TO TURN APPLIANCE OFF: The controller will no longer have [boiL] in the display. Turn the appliance off. Empty the water from the vat, wipe all remaining water from the vat. Once dry, refi ll the vat with fat.
Refi ll the vat with shortening ONLY when it is completely dry.
FILL MODE
If the controller is programmed for fi lter lockout, FILTER will appear in the display after the pre-programmed number of cook cycles allowed. The controller will stop operating until the fryer is fi ltered. After fi ltering, the display will read FILL. At this time, the fryer MUST be refi lled with shortening. When this step is complete, press ENTER to resume normal operations.
Display: Press:
PRODUCT COUNTS
To Check Product Counts, press and hold the P key for 3 seconds. COUNTS will be displayed.
Press: Display:

1-800-KEATING |
MERIDIAN® CONTROLLER
Press the P key. prod 1 , will be displayed then the number of cooks that were completed on that key.
Display:
RESETTING THE PRODUCT COUNTS
Once you go through all keys, the display will show CLRPROD then NO. You can use the left and right arrow keys to toggle between YES and NO. Choose YES to reset your product count or NO to save the cook counts that have already been completed.
Display: Press:
Then press the P key.
The display will show GLOBAL X. This is the total product count of all keys combined. Press the P key again.
Display: Press:
CLRGLOBL then NO will be displayed. You can use the left and right arrow keys to toggle between YES and NO.Choose YES to reset your total product count or NO to save the total cook counts that have already been completed.
Display: Press:
Then press the P key.
7

| keatingofchicago.com8
TOTALX10 is displayed, then a number. Press the P key again.
Display: Press:
TO EXIT PRODUCT COUNTS
COUNTS will be displayed. Press the up arrow key.
Display: Press:
EXIT will be displayed. Press the P key. The controller will exit counts mode.
Display: Press:
PRODUCT KEY PROGRAMMING
NOTE: 10 button controllers have a single, dual-purpose display that will alternate information.
For example: then:
Some controllers may have different options listed. Depending on the model, you can either press the P key to change all programmable settings or you can scroll using the arrow keys to any of the specifi c options.
RECIPE 1724 - STORE EMPLOYEE
ENTER PROGRAMMING MODE:Press and hold the P key for 3 seconds. Press the down arrow key. Press the P key.

1-800-KEATING |
MERIDIAN® CONTROLLER
9
Type in 1 7 2 4 using the Press the P key. All product Program a Product Keyproduct keys. Press the P key. key LEDS will light up. Press the product key you want to program. Press the P key.
Press the P key. Set Product Display Mode Set Cook Time NAME will be displayed then Actual set time will be the actual product name. Use displayed. To change, press the up and down arrow keys toggle clear to change the to scroll through the library. time to zero. Type in a new Press the P key to lock in time using the product your choice. keys. Press the P key.
Set Cook TemperatureActual set temperature will be Set Timing Modedisplayed. To change, press Use the left and/or right arrowtoggle clear to change the keys to choose Straight, Flextemperature to zero. Type in or SENSITIVITY. Press the P key.a new temperature using the product keys. Press the P key.

| keatingofchicago.com
NOTE: Some models have up to 3 action alarms.
On some models, each product key can be programmed up to 10 stages. If no additional stages are required at this point, set the time to zero. Press the P key to continue to Action Alarm.
Set Action Alarm Set Action Alarm NameActual alarm time 1 will be ALMNAME1 will be displayed,displayed. To change, press toggle then the actual action alarmclear to change the time to zero. name. Use the up and downType in a new time using the arrow keys to scroll throughproduct keys. Press the P key. the library. Press the P key to either go to next action alarm name, or continue through programming.
Set Hold Time Exit Programming ModeActual hold time will be displayed Press the up arrow key.To change, press toggle clear tochange the time to zero. Typein a new time using the productkeys. Press the P key.
10

1-800-KEATING |
MERIDIAN® CONTROLLER
NOTE: Not all features are available on all models.
Press the P key. Either press another product key Press the P key. to program and repeat the programming instructions, or exit by pressing the up arrow key.
Press the up arrow key. Press the P key. Press the up arrow key two times.
Press the P key.
11
| keatingofchicago.com
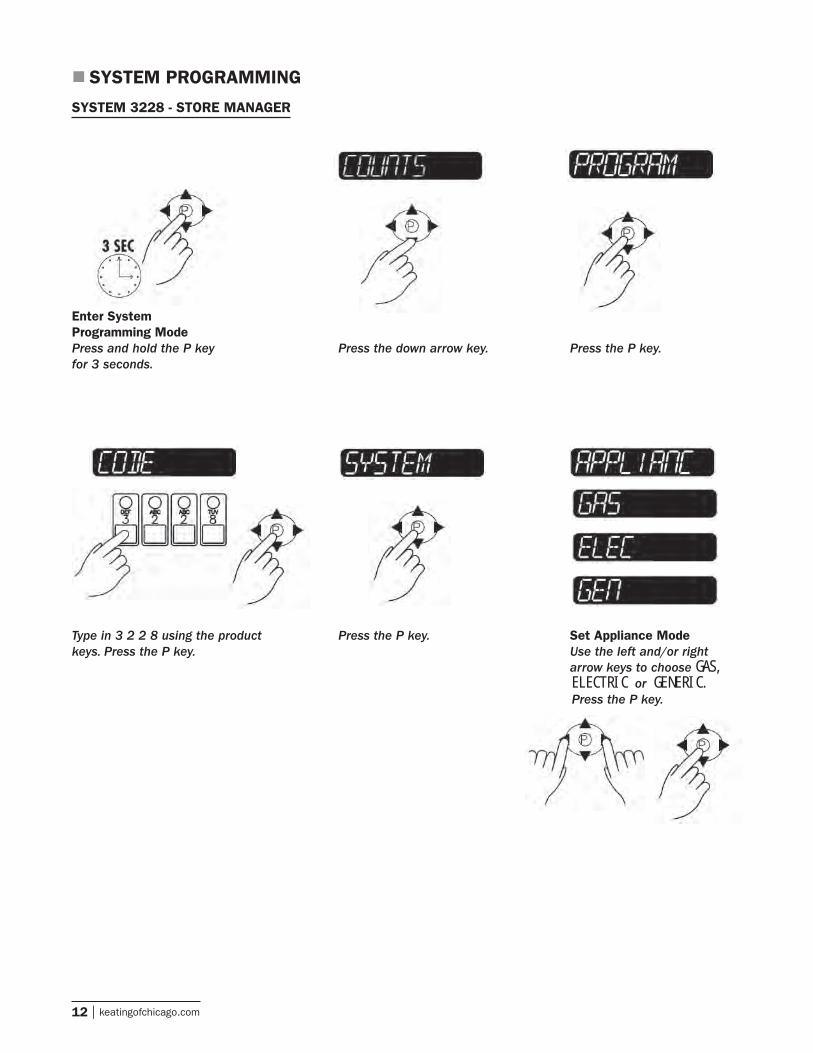
SYSTEM PROGRAMMING
SYSTEM 3228 - STORE MANAGER
Enter System Programming Mode Press and hold the P key Press the down arrow key. Press the P key.for 3 seconds.
Type in 3 2 2 8 using the product Press the P key. Set Appliance Modekeys. Press the P key. Use the left and/or right arrow keys to choose GAS, ELECTRIC or GENERIC. Press the P key.
12

1-800-KEATING |
MERIDIAN® CONTROLLER
Set the Control Type Set Temperature Scale Set Preheat ModeUse the left and/or right Use the left and/or right Use the left and/or rightarrow keys to choose arrow keys to choose arrow keys to chooseTemperature or Time Fahrenheit (F) or Celsius (C). YES or NO. Press the P key.Control. Press the P key. Press the P key.
Cook Time Unit Exit System Programming ModeUse the left and/or right Press the up arrow key.arrow keys to choose Minutes/Seconds or Hours/Minutes.Press the P key.
Press the P key.
13

| keatingofchicago.com14
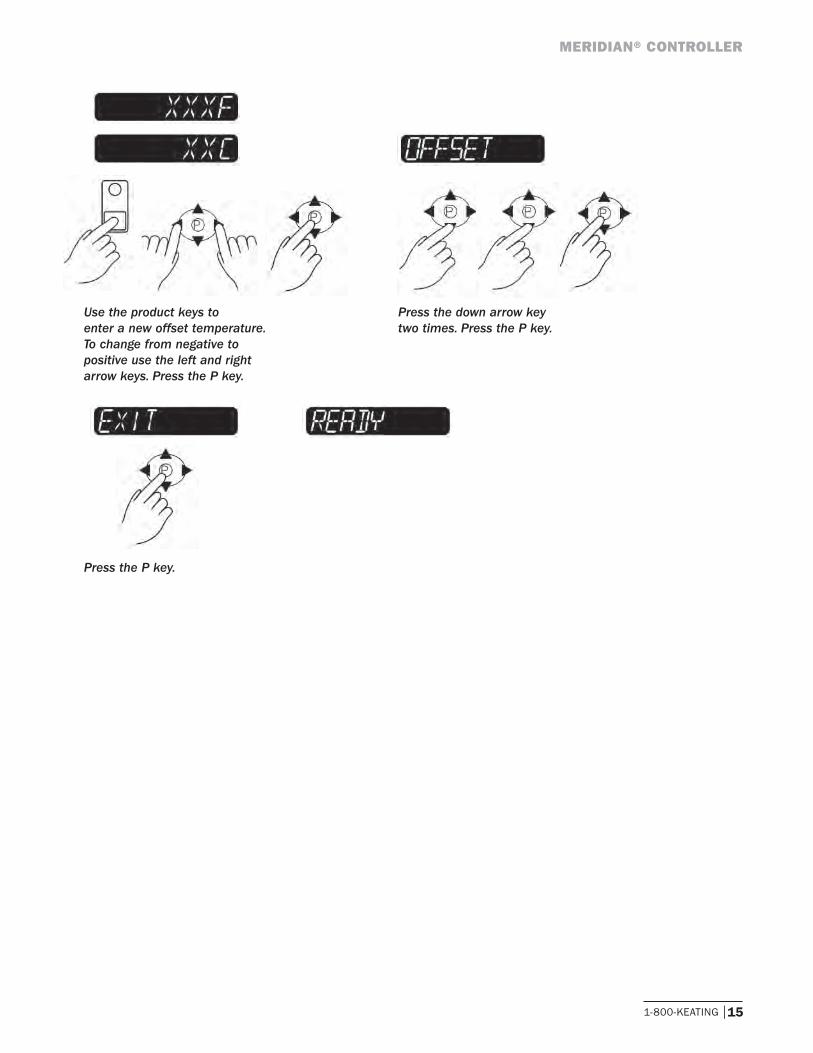
OFFSET PROGRAMMINGNOTE: Offset Temperature can be set from 20 to -20F (-6.6 to -28.8C).
SYSTEM 3228 - STORE MANAGER
Enter Offset Programming Mode Press and hold the P key Press the down arrow key. Press the P key.for 3 seconds.
Type in 3 2 2 8 using the product Press the down arrow key Press the P key.keys. Press the P key. until OFFSET is displayed.
1-800-KEATING |
MERIDIAN® CONTROLLER
15
Use the product keys to Press the down arrow keyenter a new offset temperature. two times. Press the P key. To change from negative to positive use the left and rightarrow keys. Press the P key.
Press the P key.

| keatingofchicago.com16
PROGRAMMING CUSTOM PRODUCT and ACTION ALARM NAMES TO LIBRARY
SYSTEM 3228 - STORE MANAGER
Enter Library Programming Mode Press and hold the P key Press the down arrow key. Press the P key.for 3 seconds.
Type in 3 2 2 8 using the product Press the down arrow key Choose either PRODLiBRkeys. Press the P key. to select either PRODLiBR (Product Library) or or ALRMLIBR. ALRMLIBR (Action Alarm Library) by pressing the P key.

1-800-KEATING |
MERIDIAN® CONTROLLER
A fl ashing dash will be Continue spelling the TO SAVE WORD, press thedisplayed. Press the SCAN word. When done, press P key again. To modify orkey and use the product the P key. cancel, see next step.keys to spell a new word. Press the right arrow key toadvance to the next characterposition.
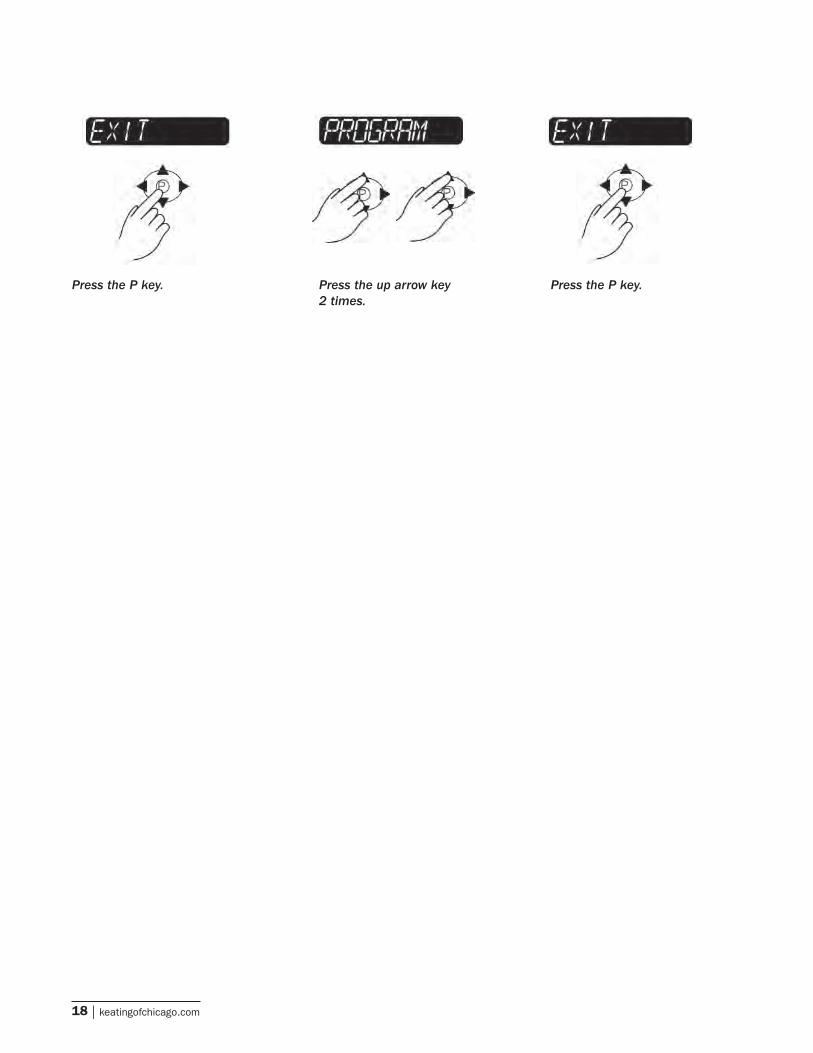
TO CANCEL OR MODIFY WORD, Press the P key after you EXIT LIBRARY PROGRAMMING.press the left or right arrow keys. have selected either Press the up or down arrow CANCEL or MODIFY. keys until display reads EXIT.
17
| keatingofchicago.com
Press the P key. Press the up arrow key Press the P key. 2 times.
18

1-800-KEATING |
MERIDIAN® CONTROLLER
19
SERVICE DIAGNOSISThe following diagnosis is only to be used as a guide to qualifi ed service personnel. Keating recommends that you use a qualifi ed & licensed service company. (Equipment still under warranty requires it.)
NOTE: To correctly and quickly diagnose the system, the chart below should be followed in sequential order.
TROUBLE SHOOTING CHART
PROBLEM PROBABLE CAUSE SOLUTIONNo power a. Circuit breaker OFF.
b. Appliance not plugged in.
c. Defective 24VAC transformer.
a. Check and reset.
b. Plug in cord.
c. Replace transformer. Replace controller.
No sound a. Inoperable speaker. a. Replace controller.
Button problem a. Frozen key.
b. Inoperable key.
a. Unplug controller. Hold down the TOGGLE/CLEAR key as you plug controller back in.
b. Replace controller.
PROBE is displayed a. Defective temperature probe.
b. Probe not plugged in.
a. Replace temperature probe.
b. Plug in probe.
Reading wrong temperature a. Defective temperature probe. a. Replace temperature probe.
Not heating a. Defective element, relay, contractor or gas valve.
b. Defective controller.
a. Replace defective part.
b. Replace controller.
WARRANTY STATEMENT
Keating’s warranty begins with the date of installation. Keating of Chicago, Inc. provides a limited one-year war-ranty for its products (except probes and hoses for which the period is 90 days). A copy of the exact provisions of this warranty and the other terms and conditions of sale are available upon request.


SERVICE INFORMATION:If you have a service related question call 1-800-KEATING.Please state the nature of the call; it will ensure speaking with the appropriate person.
KEATING OF CHICAGO, INC.8901 West 50th StreetMcCook, IL 60525-6001
PLEASE COMPLETE AND MAIL AT ONCE–WARRANTY IS NOT IN EFFECT UNTIL CARD IS RETURNED, OR COMPLETE THE WARRANTY CARD ON OUR WEBSITE FOR YOUR CONVENIENCE.
COMPANY:
ADDRESS:
CITY: STATE: ZIP CODE:
DEALER NAME:
DATE OF PURCHASE: INVOICE #:
SERIAL #: MODEL:
I HAVE READ THE INSTALLATION AND OPERATING INSTRUCTIONS.
SIGNED: DATE:
Have your serial and model number available when ordering parts.
As continuous product improvement occurs, specifi cations may be changed without notice.
KEATING LIMITED WARRANTY CARD
FRYER GRIDDLE CUSTOM PASTAFILTER SYSTEM TOP-SIDE COOKER HOTPLATE
1-800-KEATINGPHONE: 708-246-3000FAX: 708-246-3100
Serving Those Who Serve the Very Best®