microsoft® office excel® 2007 training - lamission.edu office 2007 excel... · shown here is a...
TRANSCRIPT

Microsoft® Office
Excel 2007 Training
Created & Hosted by:
Hagop (Jack) Hadjinian I.A., Information Technology
Get up to speed
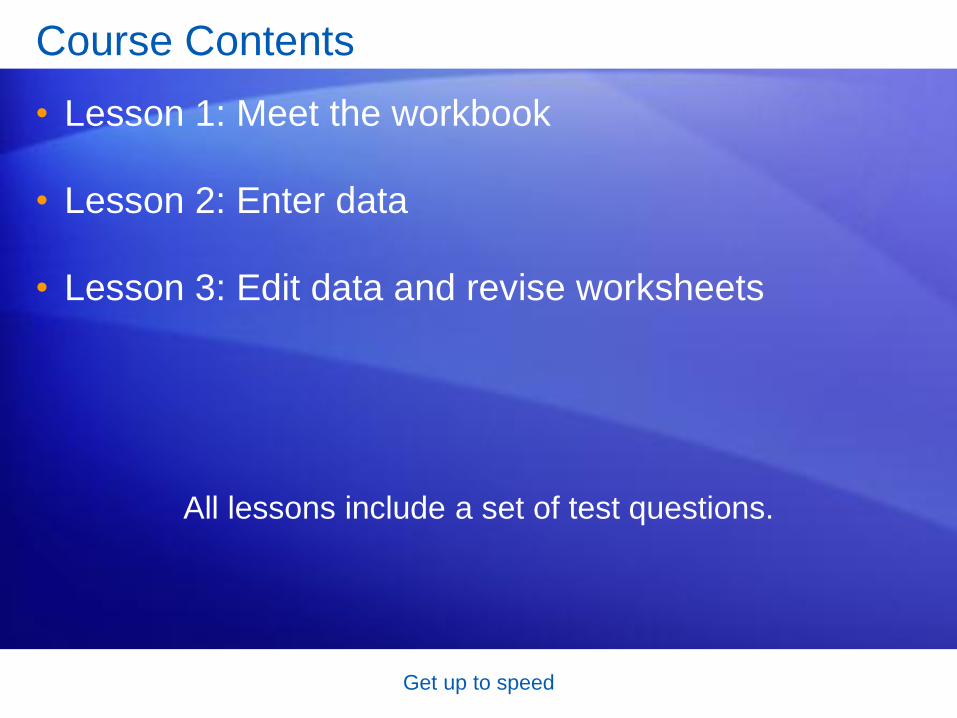
Course Contents
• Lesson 1: Meet the workbook
• Lesson 2: Enter data
• Lesson 3: Edit data and revise worksheets
All lessons include a set of test questions.

Lesson 1
Meet the workbook

Create your first workbook
Meet the workbook
When you start Excel,
you’re faced with a big
empty grid made up of
columns, rows, and
cells.
If you’re new to Excel, you may wonder what to do
next.
So this course will start by helping you get comfortable
with some Excel basics that will guide you when you
enter data in Excel.

Create your first workbook
The Ribbon
The band at the top of
the Excel 2007
window is called the
Ribbon.
The Ribbon is made up of different tabs, each of which
is related to specific kinds of work that people do in
Excel.
You click the tabs at the top of the Ribbon to see the
different commands on each tab.

Create your first workbook
The Ribbon
The Home tab, first on
the left, contains the
everyday commands
that people use most.
1
2
The Ribbon spans the top of the Excel window.
Commands on the Ribbon are organized in small related
groups. For example, commands to work with the
contents of cells are grouped together in the Editing
group, and commands to work with cells themselves are
in the Cells group.
The picture illustrates
Home tab commands
on the Ribbon.

Create your first workbook
Workbooks and worksheets
When you start Excel,
you open a file that’s
called a workbook.
Each new workbook
comes with three
worksheets into
which you enter data.
1 The first workbook you’ll open is called Book1. This title
appears in the bar at the top of the window until you
save the workbook with your own title.
Shown here is a blank worksheet in a new workbook.

Create your first workbook
Workbooks and worksheets
When you start Excel,
you open a file that’s
called a workbook.
Each new workbook
comes with three
worksheets into
which you enter data.
2 Sheet tabs appear at the bottom of the window. It’s a
good idea to rename the sheet tabs to make the
information on each sheet easier to identify.
Shown here is a blank worksheet in a new workbook.

Create your first workbook
Workbooks and worksheets
You may also be
wondering how to
create a new
workbook.
1. Click the Microsoft Office Button in the upper-
left portion of the window.
Here’s how.
2. Click New.
3. In the New Workbook window, click Blank
Workbook.

Create your first workbook
Columns, rows, and cells
Worksheets are
divided into columns,
rows, and cells.
That’s the grid you
see when you open up
a workbook.
1 Columns go from top to bottom on the worksheet,
vertically. Each column has an alphabetical heading at
the top.
Rows go across the worksheet, horizontally. Each row
also has a heading. Row headings are numbers, from 1
through 1,048,576.
2

Create your first workbook
Columns, rows, and cells
Worksheets are
divided into columns,
rows, and cells.
That’s the grid you
see when you open up
a workbook.
The alphabetical headings on the columns and the
numerical headings on the rows tell you where you are
in a worksheet when you click a cell.
The headings combine to form the cell address. For
example, the cell at the intersection of column A and row
3 is called cell A3. This is also called the cell reference.

Create your first workbook
Cells are where the data goes
Cells are where you
get down to business
and enter data in a
worksheet.
The picture on the left shows what you see when you
open a new workbook.
The first cell in the upper-left corner of the worksheet is
the active cell. It’s outlined in black, indicating that any
data you enter will go there.

Create your first workbook
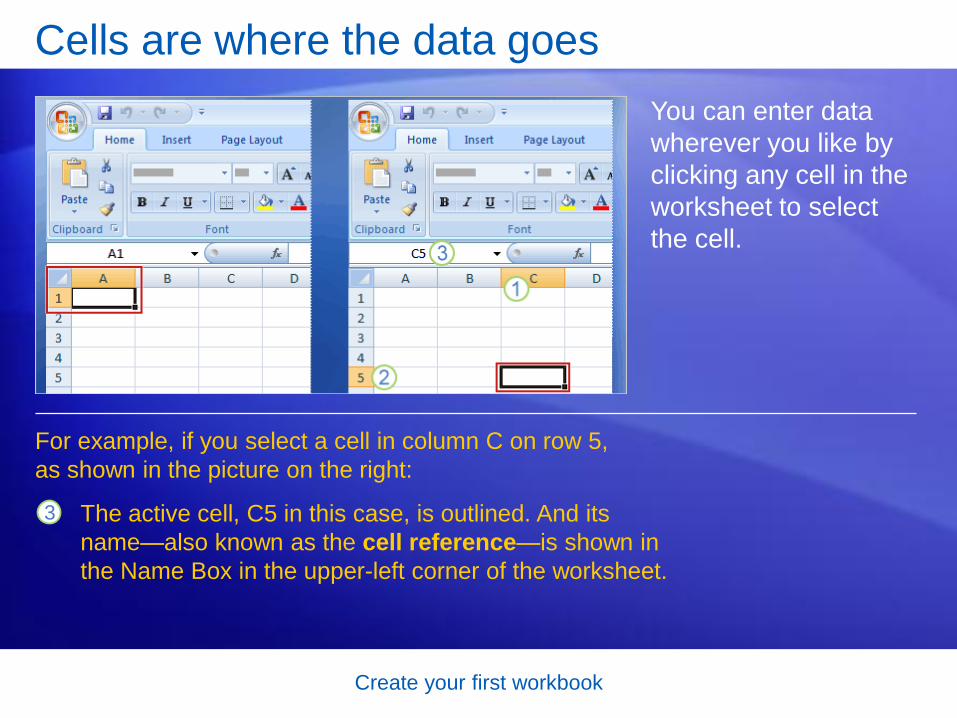
Cells are where the data goes
You can enter data
wherever you like by
clicking any cell in the
worksheet to select
the cell.
When you select any cell, it becomes the active cell. As
described earlier, it becomes outlined in black.
The headings for the column and row in which the cell is
located are also highlighted.

Create your first workbook
Cells are where the data goes
You can enter data
wherever you like by
clicking any cell in the
worksheet to select
the cell.
For example, if you select a cell in column C on row 5,
as shown in the picture on the right:
1
2
Column C is highlighted.
Row 5 is highlighted.
Create your first workbook
Cells are where the data goes
You can enter data
wherever you like by
clicking any cell in the
worksheet to select
the cell.
For example, if you select a cell in column C on row 5,
as shown in the picture on the right:
3 The active cell, C5 in this case, is outlined. And its
name—also known as the cell reference—is shown in
the Name Box in the upper-left corner of the worksheet.

Create your first workbook
Cells are where the data goes
The outlined cell,
highlighted column
and row headings,
and appearance of the
cell reference in the
Name Box make it
easy for you to see
that C5 is the active
cell.
These indicators aren’t too important when you’re right
at the top of the worksheet in the very first few cells.
But when you work farther and farther down or across
the worksheet, they can really help you out.

Create your first workbook
Suggestions for Practice/Review
1. Rename a worksheet tab.
2. Move from one worksheet to another.
3. Add color to worksheet tabs.
4. Add and delete worksheets.
5. Review column headings and use the Name Box.

Create your first workbook
Test 1, question 1
You need a new workbook. How do you create one? (Pick one
answer.)
A. In the Cells group, click Insert, and then click Insert Sheet.
B. Click the Microsoft Office Button, and then click New. In the
New Workbook window, click Blank workbook.
C. In the Cells group, click Insert, and then click Workbook.

Create your first workbook
Test 1, question 1: Answer
B. Click the Microsoft Office Button, and then click New. In the New
Workbook window, click Blank workbook.
Create your first workbook
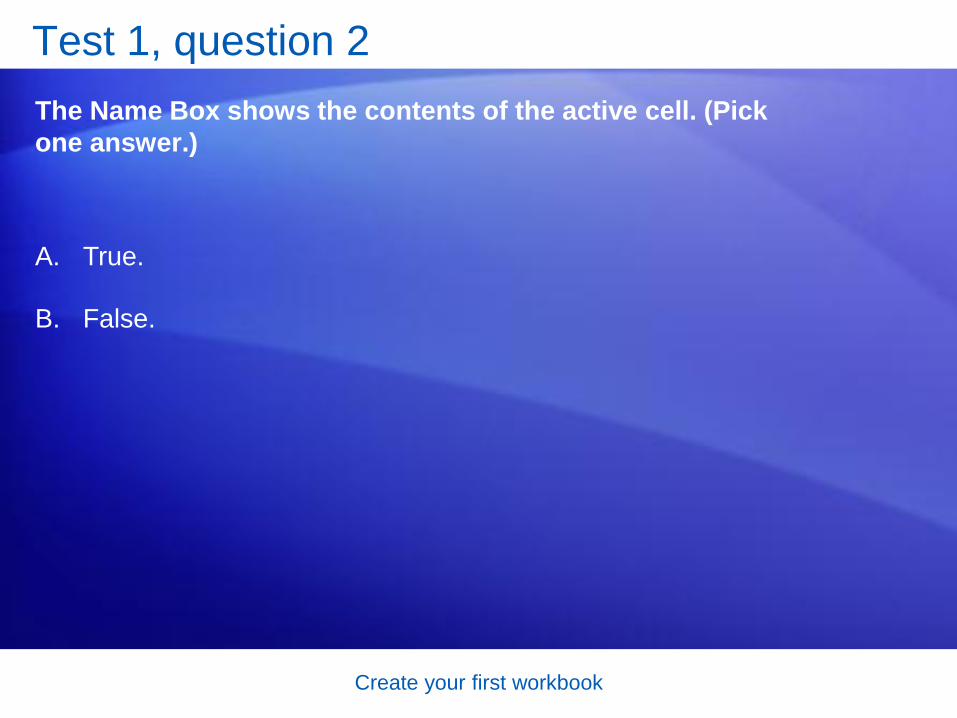
Test 1, question 2
The Name Box shows the contents of the active cell. (Pick
one answer.)
A. True.
B. False.

Create your first workbook
Test 1, question 2: Answer
B. False.
The Name Box gives you the cell reference of the active cell. You can
also use the Name Box to select a cell, by typing that cell reference in
the box.

Create your first workbook
Test 1, question 3
In a new worksheet, you must start by typing in cell A1. (Pick
one answer.)
A. True.
B. False.

Create your first workbook
Test 1, question 3: Answer
B. False.
You’re free to roam and type wherever you want. Click in any cell and
start to type. But don’t make readers scroll to see data that could just as
well start in cell A1 or A2.

Lesson 2
Enter data

Create your first workbook
Enter data
You can use Excel to
enter all sorts of data,
professional or
personal.
You can enter two
basic kinds of data
into worksheet cells:
numbers and text.
So you can use Excel to create budgets, work with
taxes, record student grades or attendance, or list the
products you sell. You can even log daily exercise,
follow your weight loss, or track the cost of your house
remodel. The possibilities really are endless.
Now let’s dive into data entry.

Create your first workbook
Be kind to your readers: start with column titles
When you enter data,
it’s a good idea to start
by entering titles at the
top of each column.
This way, anyone who shares your worksheet can
understand what the data means (and you can
understand it yourself, later on).
You’ll often want to enter row titles too.

Create your first workbook
Be kind to your readers: start with column titles
The worksheet in the
picture shows whether
or not representatives
from particular
companies attended a
series of monthly
business lunches.
It uses column and row titles:
1
2
The column titles are the months of the year, across the
top of the worksheet.
The row titles down the left side are company names.

Create your first workbook
Start typing
Say you’re creating a
list of salespeople
names.
The list will also have
the dates of sales,
with their amounts.
So you’ll need these column titles: Name, Date, and
Amount.

Create your first workbook
Start typing
Say you’re creating a
list of salespeople
names.
The list will also have
the dates of sales,
with their amounts.
1. Type Name in cell A1 and press TAB. Then type Date
in cell B1, press TAB, and type Amount in cell C1.
The picture illustrates the process of typing the
information and moving from cell to cell:

Create your first workbook
Start typing
Say you’re creating a
list of salespeople
names.
The list will also have
the dates of sales,
with their amounts.
2. After typing the column titles, click in cell A2 to begin
typing the salespeople’s names. Type the first name,
and then press ENTER to move the selection down
the column by one cell to cell A3. Then type the next
name, and so on.
The picture illustrates the process of typing the
information and moving from cell to cell:

Create your first workbook
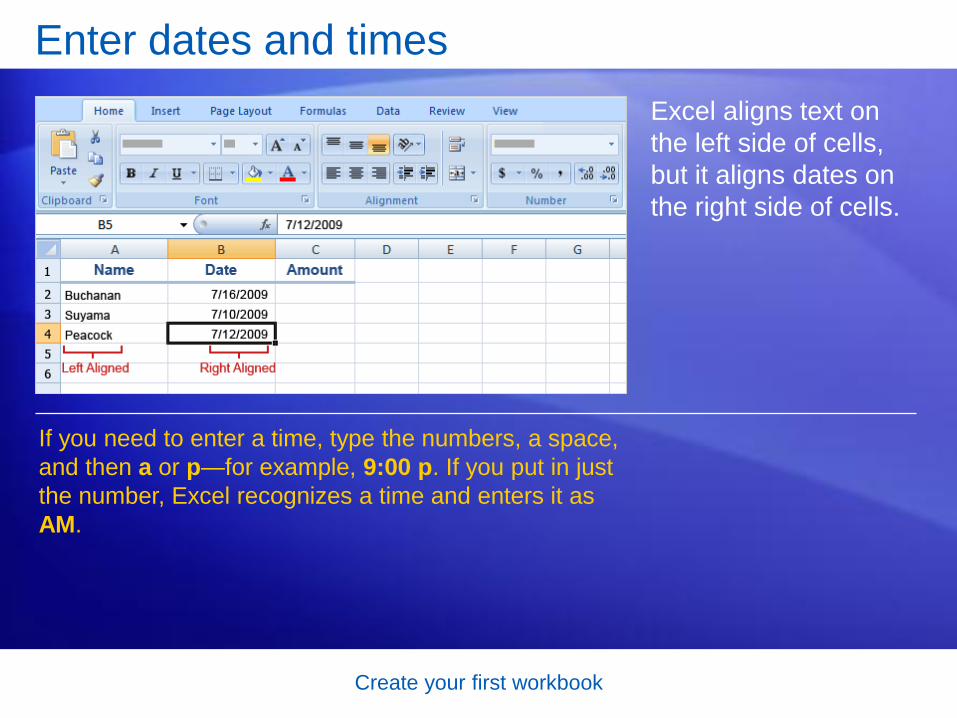
Enter dates and times
Excel aligns text on
the left side of cells,
but it aligns dates on
the right side of cells.
To enter a date in column B, the Date column, you
should use a slash or a hyphen to separate the parts:
7/16/2009 or 16-July-2009. Excel will recognize either as
a date.
Create your first workbook
Enter dates and times
Excel aligns text on
the left side of cells,
but it aligns dates on
the right side of cells.
If you need to enter a time, type the numbers, a space,
and then a or p—for example, 9:00 p. If you put in just
the number, Excel recognizes a time and enters it as
AM.

Create your first workbook
Enter numbers
Excel aligns numbers
on the right side of
cells.
To enter the sales amounts in column C, the Amount
column, you would type the dollar sign ($), followed by
the amount.

Create your first workbook
• To enter fractions, leave a space between the whole number and
the fraction. For example, 1 1/8.
• To enter a fraction only, enter a zero first, for example, 0 1/4. If you
enter 1/4 without the zero, Excel will interpret the number as a date,
January 4.
• If you type (100) to indicate a negative number by parentheses,
Excel will display the number as -100.
Enter numbers
Other numbers and how to enter them
Create your first workbook
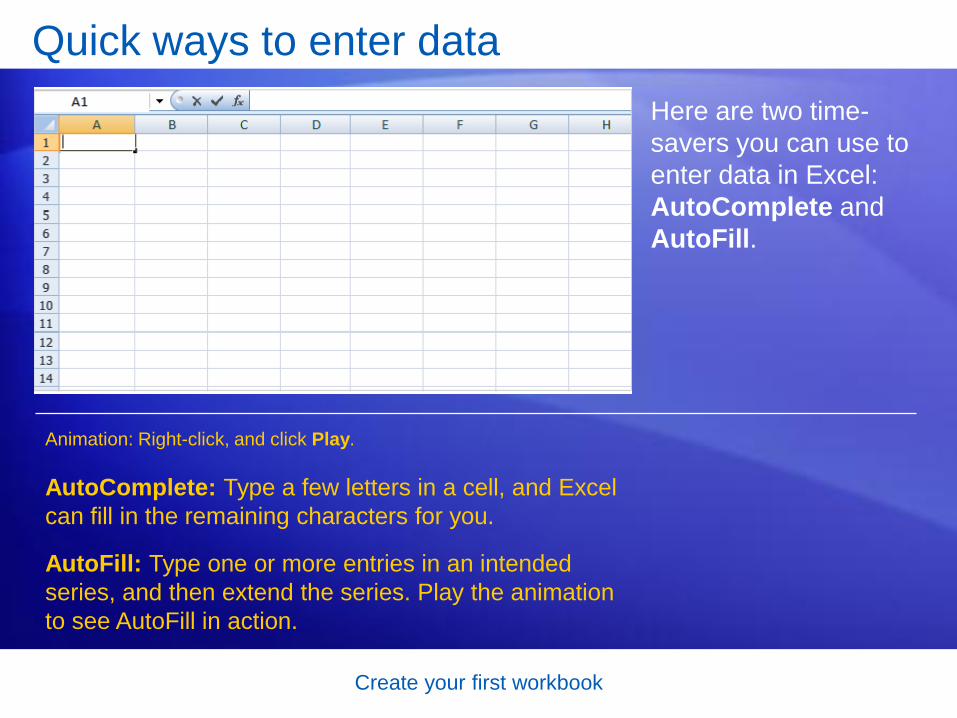
Quick ways to enter data
Here are two time-
savers you can use to
enter data in Excel:
AutoComplete and
AutoFill.
AutoComplete: Type a few letters in a cell, and Excel
can fill in the remaining characters for you.
AutoFill: Type one or more entries in an intended
series, and then extend the series. Play the animation
to see AutoFill in action.
Animation: Right-click, and click Play.

Create your first workbook
Quick ways to enter data
Here are two time-
savers you can use to
enter data in Excel:
AutoComplete and
AutoFill.
AutoComplete: Type a few letters in a cell, and Excel
can fill in the remaining characters for you. Just press
ENTER when you see them added.
AutoFill: Type one or more entries in an intended
series, and then extend the series.

Create your first workbook
Suggestions for Practice/Review
1. Enter data using TAB and ENTER.
2. Fix mistakes as you type.
3. Enter dates and times.
4. Enter numbers.
5. Use AutoFill.
6. Use AutoComplete.

Create your first workbook
Test 2, question 1
Pressing ENTER moves the selection one cell to the right.
(Pick one answer.)
A. True.
B. False.

Create your first workbook
Test 2, question 1: Answer
B. False.
Pressing ENTER moves the selection down. Pressing TAB moves the
selection to the right.

Create your first workbook
Test 2, question 2
To enter the months of the year without typing each month
yourself, you’d use which of the following? (Pick one answer.)
A. AutoComplete.
B. AutoFill.
C. CTRL+ENTER.

Create your first workbook
Test 2, question 2: Answer
B. AutoFill.
Use AutoFill to complete lists that you’ve begun, such as days, weeks,
or times tables.
Create your first workbook
Test 2, question 3
Which of these will Excel recognize as a date? (Pick one
answer.)
A. February 6 1947.
B. 2,6,47.
C. 2-Feb-47.

Create your first workbook
Test 2, question 3: Answer
C. 2-Feb-47.
You use a slash or a hyphen to separate the parts of a date.
Thank You for Coming…
Have a nice day.
If you have any Questions please
stick around.
Microsoft Excel 2007