microsoft visual basic 2012 loop structures chapter six
TRANSCRIPT

Microsoft Visual Basic 2012
Loop Structures
CHAPTER SIX

6
Chapter 6: Loop Structures 2
Objectives
►Add a MenuStrip object►Use the InputBox function►Display data using the ListBox object►Understand the use of counters and
accumulators►Understand the use of compound operators

6
Chapter 6: Loop Structures 3
Objectives
►Repeat a process using a For…Next loop►Repeat a process using a Do loop►Avoid infinite loops►Prime a loop►Validate data

6
Chapter 6: Loop Structures 4
Objectives
►Create a nested loop►Select the best type of loop►Debug using DataTips at breakpoints►Publish a finished application using ClickOnce
technology

6
Chapter 6: Loop Structures 5
Introduction
►A fundamental process in a computer program is to repeat a series of instructions either while a condition is true (or not true) or until a condition is true (or not true)
►The process of repeating a set of instructions while a condition is true or until a condition is true is called looping• Another term for looping is iteration

6
Chapter 6: Loop Structures 6
User Interface Design
►A menu bar is a strip across the top of a window that contains one or more menu names
►A menu is a group of commands, or items, presented in a list

6
Chapter 6: Loop Structures 7
User Interface Design
►With a Windows Form object open in the Visual Studio window, scroll in the Toolbox to display the Menus & Toolbars category. If the category is not open, tap or click the expand icon (the right-pointing triangle) next to the Menus & Toolbars category name. Drag the MenuStrip .NET component to the Windows Form object
►Release the mouse button►With the MenuStrip object selected, scroll in the
Properties window until the (Name) property is visible. Change the MenuStrip object name to mnuFitness
►Tap or click the Type Here box on the menu bar. Type &File to identify the File menu, and then press the ENTER key

6
Chapter 6: Loop Structures 8
User Interface Design
►Tap or click File in the MenuStrip object to select it, scroll in the Properties window to the (Name) property, and then change the name to mnuFile
►To add a menu item to the File menu, tap or click the Type Here box below the File menu name. Type &Clear and then press ENTER to create a new menu item named Clear with C as the hot key
►On the File menu, tap or click Clear to select it, scroll in the Properties window until the (Name) property is visible, and then change the name to mnuClear

6
Chapter 6: Loop Structures 9
User Interface Design

6
Chapter 6: Loop Structures 10
Event Handlers for Menu Items
►In Design view, double-tap or double-click the Exit menu item to open the code window
►Using IntelliSense, enter the Close procedure call to close the window and terminate the application
6
Chapter 6: Loop Structures 11
Inserting Standard Items for a Menu
► Visual Basic 2012 contains an Action Tag that allows you to create a full standard menu bar commonly provided in Windows programs
► Action tags provide a way for you to specify a set of actions, called smart actions, for an object as you design a form
► With a new Windows Form object open, drag the MenuStrip .NET component onto the Windows Form object. Tap or click the Action Tag on the MenuStrip object
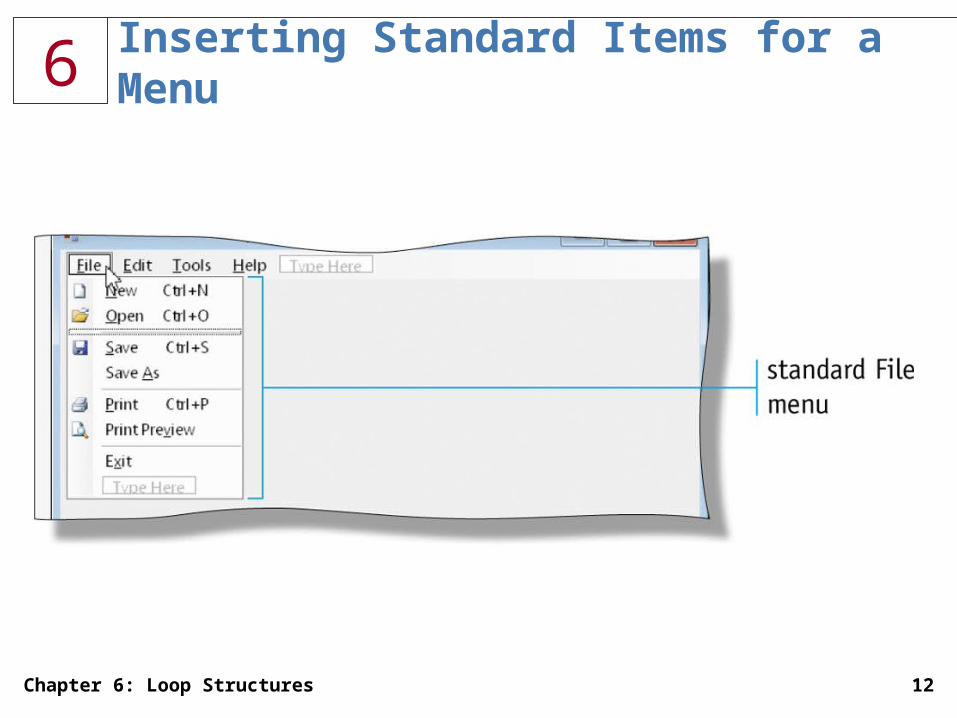
► Tap or click Insert Standard Items on the MenuStrip Tasks menu► Tap or click File on the menu bar to view the individual menu items,
their associated icons, and their shortcut keys
6
Chapter 6: Loop Structures 12
Inserting Standard Items for a Menu

6
Chapter 6: Loop Structures 13
InputBox Function
►The InputBox function displays a dialog box that consists of a message asking for input, an input area, a title, an OK button, and a Cancel button
►When the user enters the text and taps or clicks the OK button, the InputBox function returns this text as a string
►If the user taps or clicks the Cancel button, the function returns a null string ("")

6
Chapter 6: Loop Structures 14
InputBox Function

6
Chapter 6: Loop Structures 15
Creating the InputBox Object for Fitness Challenge Application

6
Chapter 6: Loop Structures 16
Displaying Data Using the ListBox Object
►Drag the ListBox object from the Toolbox to where you want to place the ListBox object on the Windows Form object. When the pointer is in the correct location, release the left mouse button
►With the ListBox object selected, scroll in the Properties window to the (Name) property. Name the ListBox object lstWeightLoss

6
Chapter 6: Loop Structures 17
Displaying Data Using the ListBox Object
6
Chapter 6: Loop Structures 18
Adding ListBox Items During Design
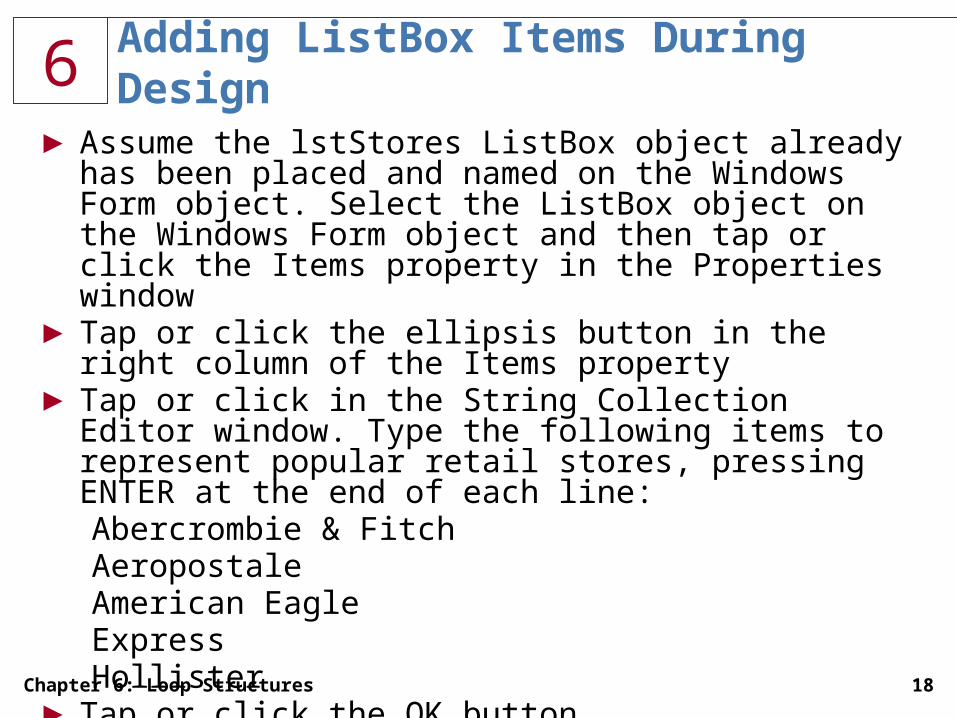
►Assume the lstStores ListBox object already has been placed and named on the Windows Form object. Select the ListBox object on the Windows Form object and then tap or click the Items property in the Properties window
►Tap or click the ellipsis button in the right column of the Items property
►Tap or click in the String Collection Editor window. Type the following items to represent popular retail stores, pressing ENTER at the end of each line:Abercrombie & FitchAeropostaleAmerican EagleExpressHollister
►Tap or click the OK button

6
Chapter 6: Loop Structures 19
Adding ListBox Items During Design

6
Chapter 6: Loop Structures 20
SelectedItem Property

6
Chapter 6: Loop Structures 21
Accumulators, Counters, and Compound Operators
►A variable that contains an accumulated value such as the total of all the weight loss values is called an accumulator
►A variable that always is incremented by a constant value is called a counter

6
Chapter 6: Loop Structures 22
Accumulators, Counters, and Compound Operators
►A compound operator allows you to add, subtract, multiply, divide, use modulus or exponents, or concatenate strings, storing the result in the same variable

6
Chapter 6: Loop Structures 23
Accumulators, Counters, and Compound Operators

6
Chapter 6: Loop Structures 24
Accumulators, Counters, and Compound Operators

6
Chapter 6: Loop Structures 25
Using Loops to Perform Repetitive Tasks
►In the Fitness Challenge application, the user enters weight loss values in an InputBox for up to eight team members
►The repetitive process of entering eight weight loss values can be coded within a loop to simplify the task with fewer lines of code
►Each repetition of the loop is called an iteration

6
Chapter 6: Loop Structures 26
Repeating a Process Using the For…Next Loop
►You can use a For...Next loop when a section of code should be executed an exact number of times

6
Chapter 6: Loop Structures 27
Repeating a Process Using the For…Next Loop

6
Chapter 6: Loop Structures 28
Step Value in a For…Next Loop
►A Step value is the value in a For...Next loop that is added to or subtracted from the beginning value on each iteration of the loop• Default step value is 1• Can be positive or negative, contain decimals,
or include variables and mathematical expressions

6
Chapter 6: Loop Structures 29
Entering the For…Next Loop Code

6
Chapter 6: Loop Structures 30
Repeating a Process Using a Do Loop
►In a Do loop, the body of the loop is executed while or until a condition is true or false
►The Do While loop executes as long as the condition is true
►The Do Until loop executes until the condition becomes true
►A top-controlled loop is tested before the loop is entered• Body might not be executed
►Bottom-controlled loops test the condition at the bottom of the loop• Body executes at least once

6
Chapter 6: Loop Structures 31
Top-Controlled Do While Loops
►A top-controlled Do While loop begins with the keywords Do While. Next, the condition is specified
►The body of the loop contains the instructions that are executed as long as the condition is true
►A loop that does not end is called an infinite loop

6
Chapter 6: Loop Structures 32
Top-Controlled Do While Loops

6
Chapter 6: Loop Structures 33
Entering a Do Loop Using IntelliSense
►In the code window, enter the intScore variable declaration and then press the ENTER key. Type Do While and a space to display the IntelliSense list. Type ints to highlight intScore in the list
►Type < 5 and then press the ENTER key.►Type ints to highlight the intScore variable.
Complete the statement by typing += 1 and then pressing the ENTER key. Press the DELETE key to delete the blank line

6
Chapter 6: Loop Structures 34
Entering a Do Loop Using IntelliSense

6
Chapter 6: Loop Structures 35
Bottom-Controlled Do While Loop
►A bottom-controlled loop works the same way as the top-controlled Do While loop
►The body of the loop is executed before the condition is checked the first time, guaranteeing at least one iteration of a loop will be completed

6
Chapter 6: Loop Structures 36
Bottom-Controlled Do While Loop

6
Chapter 6: Loop Structures 37
Do Until Loops

6
Chapter 6: Loop Structures 38
User Input Loops
►Do loops often are written to end the loop when the user enters a certain value or performs a certain action such as tapping or clicking the Cancel button in an input box

6
Chapter 6: Loop Structures 39
Avoiding Infinite Loops
►An infinite loop is a loop that never ends

6
Chapter 6: Loop Structures 40
Priming the Loop
►Starting a loop with a preset value in the variable(s) tested in the condition is called priming the loop

6
Chapter 6: Loop Structures 41
Validating Data

6
Chapter 6: Loop Structures 42
Creating a Nested Loop
►Any loop can be placed within another loop under the following conditions: • Interior loops must be completely contained
inside the outer loop• Must have a different control variable

6
Chapter 6: Loop Structures 43
Selecting the Best Loop
►Use a Do loop if the number of repetitions is unknown and is based on a condition changing; a For...Next loop is best if the exact number of repetitions is fixed
►If a loop condition must be tested before the body of the loop is executed, use a top-controlled Do While or Do Until loop. If the instructions within a loop must be executed one time regardless of the status of a condition, use a bottom-controlled Do While or Do Until loop
►Use the keyword While if you want to continue execution of the loop while the condition is true. Use the keyword Until if you want to continue execution until the condition is true

6
Chapter 6: Loop Structures 44
Using a DataTip with Breakpoints
►Resolving defects in code is called debugging►A good way to collect information is to pause the
execution of the code where a possible error could occur• Breakpoints are stop points placed in the
code to tell the Visual Studio 2012 debugger where and when to pause the execution of the application
►While in break mode, you can examine the values in all variables that are within the scope of execution through the use of DataTips
6
Chapter 6: Loop Structures 45
Using a DataTip with Breakpoints
►With the application open in the code window, press and hold or right-click line 46, which contains the code where you want to set a breakpoint, and then point to Breakpoint on the shortcut menu
►Tap or click Insert Breakpoint on the submenu►To run and test the program with the breakpoint, tap or
click the Start Debugging button on the Standard toolbar►Tap or click the Enter Weight Loss button. Type 3.4 as
the weight loss amount of the first team member►Tap or click the OK button in the input box

6
Chapter 6: Loop Structures 46
Using a DataTip with Breakpoints
►Point to the variable decWeightLoss on line 46►You can view the value in any other variable
within execution scope by pointing to that variable. To illustrate, point to the variable decTotalWeightLoss on line 46
►Continue the program by tapping or clicking the Continue button on the Standard toolbar. Notice that the Continue button is the same as the Start Debugging button
►Point to the decTotalWeightLoss variable

6
Chapter 6: Loop Structures 47
Using a DataTip with Breakpoints

6
Chapter 6: Loop Structures 48
Using a DataTip with Breakpoints
►To remove a breakpoint, press and hold or right-click the statement containing the breakpoint, and then point to Breakpoint on the shortcut menu
►Tap or click Delete Breakpoint on the Breakpoint submenu

6
Chapter 6: Loop Structures 49
Publishing an Application with ClickOnce Deployment
►After an application is completely debugged and working properly, you can deploy the project
►Deploying a project means placing an executable version of the program on your hard disk, on a Web server, or on a network server
►When programming using Visual Basic 2012, you can create a deployed program by using ClickOnce Deployment
►The deployed version of the program you create can be installed and executed on any computer that has the .NET framework installed
6
Chapter 6: Loop Structures 50
Publishing an Application with ClickOnce Deployment
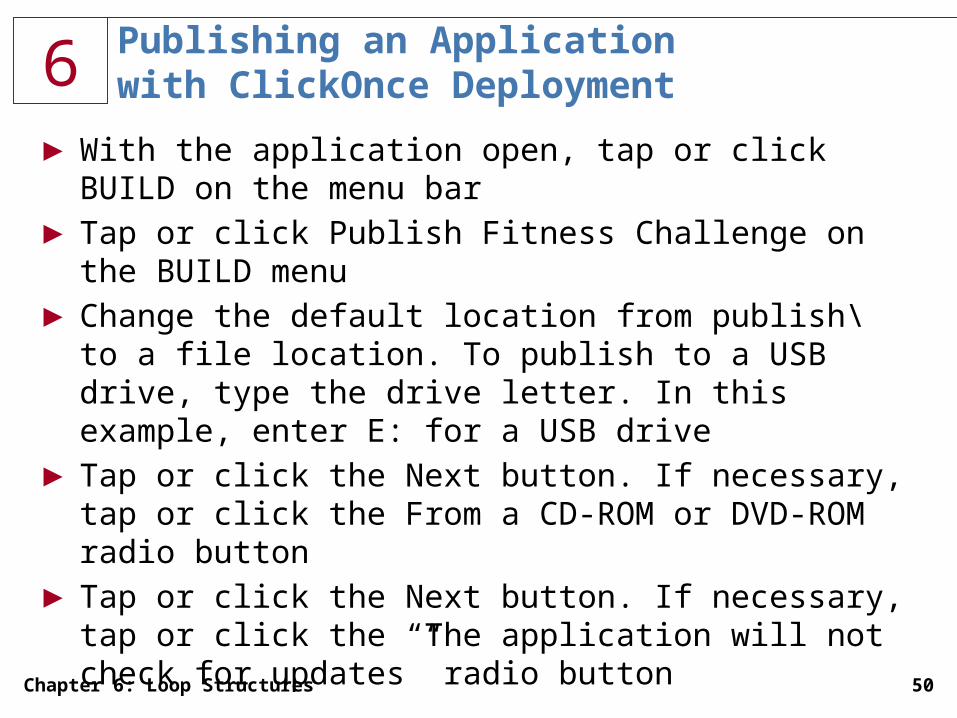
►With the application open, tap or click BUILD on the menu bar
►Tap or click Publish Fitness Challenge on the BUILD menu
►Change the default location from publish\ to a file location. To publish to a USB drive, type the drive letter. In this example, enter E: for a USB drive
►Tap or click the Next button. If necessary, tap or click the From a CD-ROM or DVD-ROM radio button
►Tap or click the Next button. If necessary, tap or click the “The application will not check for updates” radio button

6
Chapter 6: Loop Structures 51
Publishing an Application with ClickOnce Deployment
►Tap or click the Next button►Tap or click the Finish button►To view the finished result, minimize the Visual Studio
window and then open the Search charm. Type Computer in the Search box. Double-tap or double-click the USB drive icon to view the published installation folder
►To install the application, double-tap or double-click the setup file
►After installation, the program runs. To run the installed application again, open the Search charm, type Fitness, and then click the Fitness Challenge icon

6
Chapter 6: Loop Structures 52
Publishing an Application with ClickOnce Deployment

6
Chapter 6: Loop Structures 53
Program Design
6
Chapter 6: Loop Structures 54
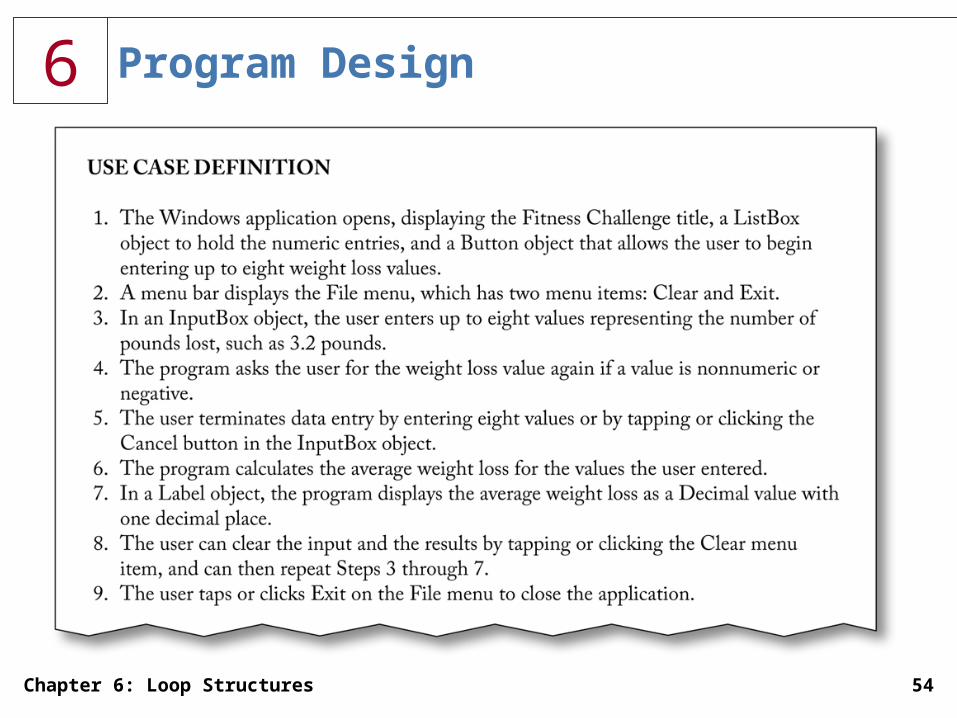
Program Design

6
Chapter 6: Loop Structures 55
Event Planning Document

6
Chapter 6: Loop Structures 56
Summary
►Add a MenuStrip object►Use the InputBox function►Display data using the ListBox object►Understand the use of counters and
accumulators►Understand the use of compound operators

6
Chapter 6: Loop Structures 57
Summary
►Repeat a process using a For…Next loop►Repeat a process using a Do loop►Avoid infinite loops►Prime a loop►Validate data

6
Chapter 6: Loop Structures 58
Summary
►Create a nested loop►Select the best type of loop►Debug using DataTips at breakpoints►Publish a finished application using ClickOnce
technology

Microsoft Visual Basic 2012
Loop Structures
CHAPTER SIX COMPLETE