mini beany - marshalls
TRANSCRIPT
Mini Beany
1. Excavationa. Sufficient material should be excavated to accommodate
Top and Base Units, concrete bedding and rear concrete haunch.
b. Any ‘soft spots’ or poorly compacted formation should be made good.
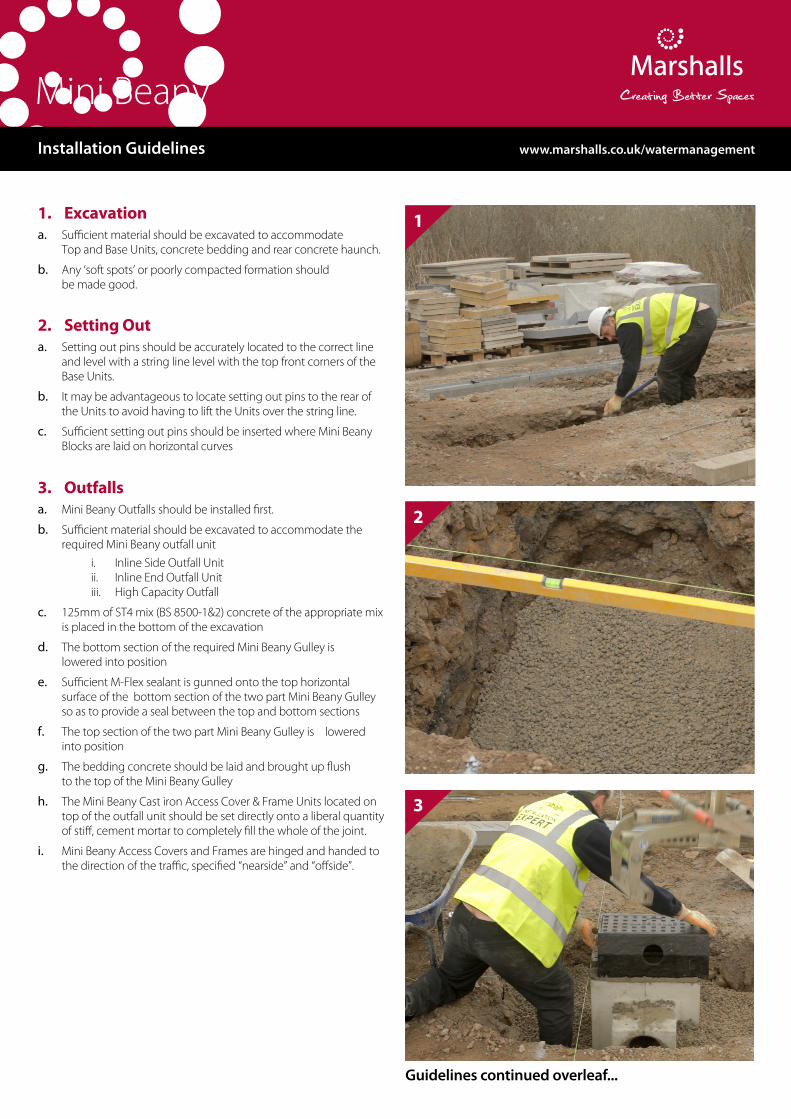
2. Setting Outa. Setting out pins should be accurately located to the correct line
and level with a string line level with the top front corners of the Base Units.
b. It may be advantageous to locate setting out pins to the rear of the Units to avoid having to lift the Units over the string line.
c. Sufficient setting out pins should be inserted where Mini Beany Blocks are laid on horizontal curves
3. Outfalls a. Mini Beany Outfalls should be installed first.
b. Sufficient material should be excavated to accommodate the required Mini Beany outfall unit
i. Inline Side Outfall Unit ii. Inline End Outfall Unit iii. High Capacity Outfall
c. 125mm of ST4 mix (BS 8500-1&2) concrete of the appropriate mix is placed in the bottom of the excavation
d. The bottom section of the required Mini Beany Gulley is lowered into position
e. Sufficient M-Flex sealant is gunned onto the top horizontal surface of the bottom section of the two part Mini Beany Gulley so as to provide a seal between the top and bottom sections
f. The top section of the two part Mini Beany Gulley is lowered into position
g. The bedding concrete should be laid and brought up flush to the top of the Mini Beany Gulley
h. The Mini Beany Cast iron Access Cover & Frame Units located on top of the outfall unit should be set directly onto a liberal quantity of stiff, cement mortar to completely fill the whole of the joint.
i. Mini Beany Access Covers and Frames are hinged and handed to the direction of the traffic, specified “nearside” and “offside”.
11
2
3
Guidelines continued overleaf...
Installation Guidelines www.marshalls.co.uk/watermanagement
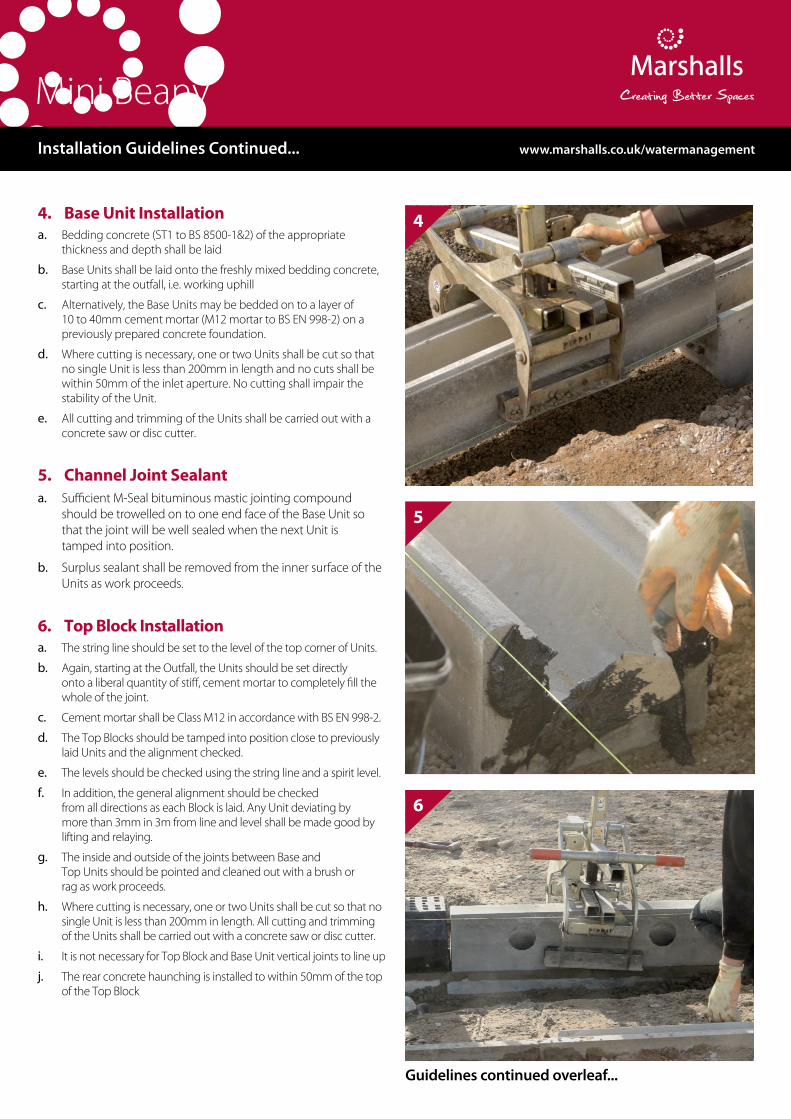
5. Channel Joint Sealanta. Sufficient M-Seal bituminous mastic jointing compound
should be trowelled on to one end face of the Base Unit so that the joint will be well sealed when the next Unit is tamped into position.
b. Surplus sealant shall be removed from the inner surface of the Units as work proceeds.
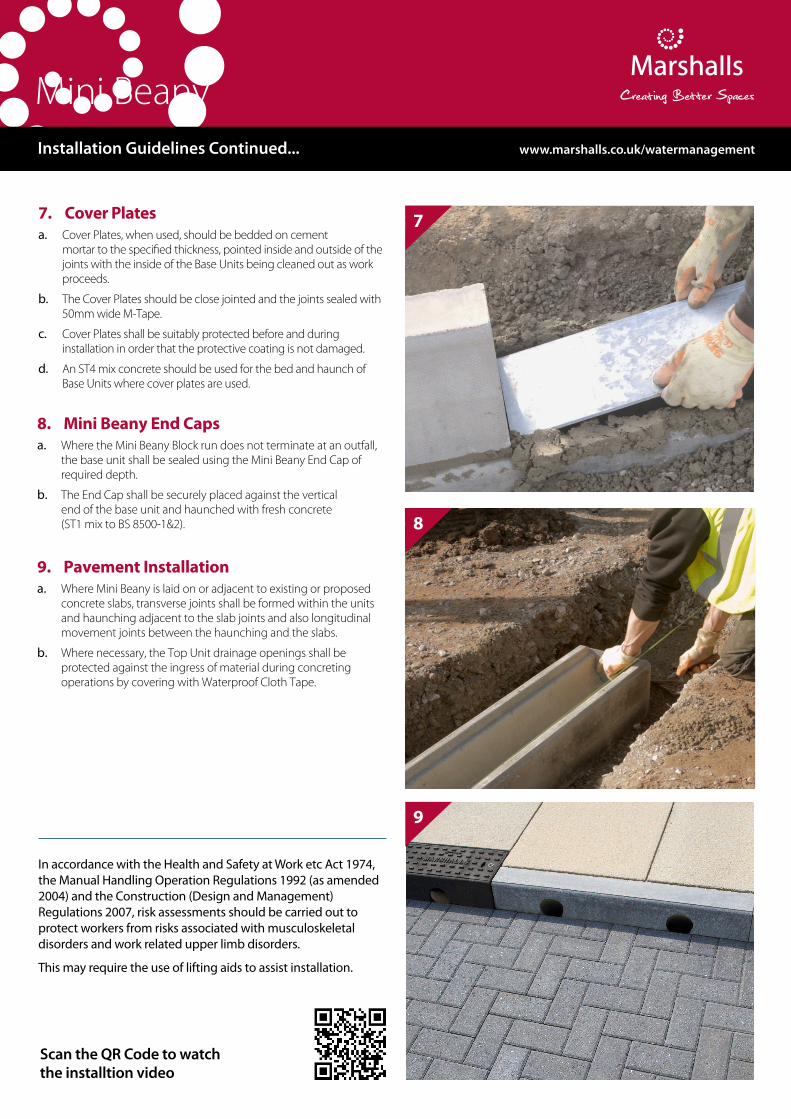
6. Top Block Installationa. The string line should be set to the level of the top corner of Units.
b. Again, starting at the Outfall, the Units should be set directly onto a liberal quantity of stiff, cement mortar to completely fill the whole of the joint.
c. Cement mortar shall be Class M12 in accordance with BS EN 998-2.
d. The Top Blocks should be tamped into position close to previously laid Units and the alignment checked.
e. The levels should be checked using the string line and a spirit level.
f. In addition, the general alignment should be checked from all directions as each Block is laid. Any Unit deviating by more than 3mm in 3m from line and level shall be made good by lifting and relaying.
g. The inside and outside of the joints between Base and Top Units should be pointed and cleaned out with a brush or rag as work proceeds.
h. Where cutting is necessary, one or two Units shall be cut so that no single Unit is less than 200mm in length. All cutting and trimming of the Units shall be carried out with a concrete saw or disc cutter.
i. It is not necessary for Top Block and Base Unit vertical joints to line up
j. The rear concrete haunching is installed to within 50mm of the top of the Top Block
4. Base Unit Installationa. Bedding concrete (ST1 to BS 8500-1&2) of the appropriate
thickness and depth shall be laid
b. Base Units shall be laid onto the freshly mixed bedding concrete, starting at the outfall, i.e. working uphill
c. Alternatively, the Base Units may be bedded on to a layer of 10 to 40mm cement mortar (M12 mortar to BS EN 998-2) on a previously prepared concrete foundation.
d. Where cutting is necessary, one or two Units shall be cut so that no single Unit is less than 200mm in length and no cuts shall be within 50mm of the inlet aperture. No cutting shall impair the stability of the Unit.
e. All cutting and trimming of the Units shall be carried out with a concrete saw or disc cutter.
Mini Beany
14
5
6
Guidelines continued overleaf...
Installation Guidelines Continued... www.marshalls.co.uk/watermanagement
7. Cover Platesa. Cover Plates, when used, should be bedded on cement
mortar to the specified thickness, pointed inside and outside of the joints with the inside of the Base Units being cleaned out as work proceeds.
b. The Cover Plates should be close jointed and the joints sealed with 50mm wide M-Tape.
c. Cover Plates shall be suitably protected before and during installation in order that the protective coating is not damaged.
d. An ST4 mix concrete should be used for the bed and haunch of Base Units where cover plates are used.
Mini Beany
8. Mini Beany End Capsa. Where the Mini Beany Block run does not terminate at an outfall,
the base unit shall be sealed using the Mini Beany End Cap of required depth.
b. The End Cap shall be securely placed against the vertical end of the base unit and haunched with fresh concrete (ST1 mix to BS 8500-1&2).
9. Pavement Installationa. Where Mini Beany is laid on or adjacent to existing or proposed
concrete slabs, transverse joints shall be formed within the units and haunching adjacent to the slab joints and also longitudinal movement joints between the haunching and the slabs.
b. Where necessary, the Top Unit drainage openings shall be protected against the ingress of material during concreting operations by covering with Waterproof Cloth Tape.
17
8
9
Installation Guidelines Continued... www.marshalls.co.uk/watermanagement
In accordance with the Health and Safety at Work etc Act 1974, the Manual Handling Operation Regulations 1992 (as amended 2004) and the Construction (Design and Management) Regulations 2007, risk assessments should be carried out to protect workers from risks associated with musculoskeletal disorders and work related upper limb disorders.
This may require the use of lifting aids to assist installation.
Scan the QR Code to watch the installtion video