mini thermal receipt printer - adafruit industries · mini thermal receipt printer ... test page...
TRANSCRIPT

Mini Thermal Receipt PrinterCreated by Phillip Burgess
Last updated on 2018-03-06 12:47:05 AM UTC

2346999
101010111415151719202122222323232426
2730303131313131
323333363637
Guide Contents
Guide ContentsOverviewPowerFirst TestArduino CodeFor Product #597For Product #2751For Product #2752For Product #2753Connect to ArduinoInstall LibraryPrinting TextBitmap PrintingWindowsMac and LinuxBarcode PrintingCircuitPythonLibrary InstallationFirmware Version and Baud RateUsage
Create ThermalPrinter ClassInitialize ThermalPrinterTest Page PrintPrinter FontsPrint Barcodes
Check PaperDownloadsFirmware ChangerTroubleshooting!
I'm not getting it to work!I'm having difficulty getting a printoutMy Arduino sketch used to work, but doesn't compile now!My sketch compiles, but the output is different than before.
Hacking!Parts and Tools NeededProcedureCode ChangesPrinting Huge ImagesOther Things to Know
© Adafruit Industries https://learn.adafruit.com/mini-thermal-receipt-printer Page 2 of 38

Overview
Add a mini printer to any microcontroller project with this very cute thermal printer. Also known as receipt printers,they’re what you see at the ATM or grocery store. Now you can embed a little printer of your own into an enclosure.This printer is ideal for interfacing with a microcontroller, you simply need a 3.3V to 5V TTL serial output from yourmicrocontroller to print text, barcodes, bitmap graphics, even a QR code!
This printer uses very common 2.25" wide thermal paper, available in the Adafruit shop or any office or stationerysupply store. Up to 50 feet of paper can fit in the bay. You will also need a 5 Volt to 9 Volt regulated DC power supplythat can provide 1.5 Amps or more during high-current printing — our 5V 2A power supply will work very nicely.
You can pick up a thermal printer pack including printer, paper, power supply and terminal-block adapter in theAdafruit shop!
Of course, we wouldn't leave you with a datasheet and a “good luck!” — this tutorial and matching Arduino librarydemonstrate the following:
Printing with small, medium and large textBold, underline and inverted textVariable line spacingLeft, center and right justificationBarcodes in the following standard formats: UPC A, UPC E, EAN13, EAN8, CODE39, I25, CODEBAR, CODE93,CODE128, CODE11 and MSI - with adjustable barcode heightCustom monochrome bitmap graphicsHow to print a QR code
© Adafruit Industries https://learn.adafruit.com/mini-thermal-receipt-printer Page 3 of 38

PowerThese printers use a thermal head to heat the special receipt paper and draw images and text. That makes the printervery small — there's no moving ink head — but it means they require a lot of power. This printer in particular requires 5to 9 Volts, 1.5 Amps current! That means you will need a fairly beefy supply and you cannot run it off of USB power. Anexternal adapter is required!
We suggest using the 5V 2A power supply in our shop. It’s got plenty of power to keep the printer happy and you canalso use it to run some microcontrollers or sensors off of the remaining 500 mA current that is not required by theprinter.
A quick way to power the printer is by just using a 2.1mm jack adapter, which you can attach to the printer’s red/blackwires:
© Adafruit Industries https://learn.adafruit.com/mini-thermal-receipt-printer Page 4 of 38

© Adafruit Industries https://learn.adafruit.com/mini-thermal-receipt-printer Page 5 of 38

First TestThe first test you should do is to just make sure that the printer is running and you have the power wired up right.
First up, pull the little plastic tab up top to open up the paper holder. Then insert a roll of 57.5mm (2 1/4 inches) thermalpaper into the bay as shown below.
For Product ID #597 "Mini Thermal Printer" The optimal length of the paper will be 50 feet (about 15 meters) sotry to pick up that size. Sometimes if you buy paper from an office supply shop, its a little longer, around 80 or 85feet in which case you'll need to remove paper from the roll until its 1.5"/40mm in diameter and fits easily.For Product #2751 "Tiny Thermal Printer" The optimal length of the paper will be 33 feet (about 10 meters) so tryto pick up that size. For Proudct #2752 "Nano Thermal Printer" The optimal length of the paper will be 16 feet (about 5 meters) so tryto pick up that size. For our Thermal Printer guts kit, there's no paper bay so you can use any size.
Make sure that the paper doesn't bind or stick in the bay, it should rotate freely.
As previously described, power the printer using a 5V to 9V 1.5A or higher power supply, such as wiring up a 2.1mmDC power jack:
© Adafruit Industries https://learn.adafruit.com/mini-thermal-receipt-printer Page 6 of 38

Hold down the button on the top of the printer (or on the control board) while plugging in the power. You should see areceipt print out showing the font table and some diagnostics.
If you don't get a printout, check that the paper is inserted correctly and not binding, that the power is correctly wired,power supply is plugged in, etc. Then try again, holding down the button when connecting power.
Note the baud rate on the test page. This may be 19200 or 9600. We'll need this number later:
The Green or Red LED could be blinking when the printer is powered. It will not necessarily be on steady!
© Adafruit Industries https://learn.adafruit.com/mini-thermal-receipt-printer Page 7 of 38

© Adafruit Industries https://learn.adafruit.com/mini-thermal-receipt-printer Page 8 of 38

Arduino CodeTo send data to the printer, we will use a 5V TTL serial connection. This is not the same as the 10V RS232 serial from acomputer’s 9-pin serial port — don’t connect the printer directly to a standard PC port or you may damage it. It’spossible to use something like an FTDI cable to talk to the printer, but we’re going to assume that nearly everyone willwant to use it with a microcontroller. This tutorial shows how to wire it up to an Arduino, and our example code isArduino-compatible. Any microcontroller that can output TTL serial will work, with suitable adaptation to the code.
To start, we’ll connect to the data cable of the printer. An easy way to connect is to simply press 22AWG or so wires ofmatching colors into the plug, then use those to extend the connection to an Arduino.
For Product #597
The "Mini Thermal Printer"s data cable has three wires
black = GROUNDyellow = data IN to the printergreen = data OUT of the printer
On the power cable, connect red to 5-9VDC power and black to power ground
For Product #2751
The "Tiny Thermal Printer"s data cable has five wires
black = GROUNDgreen = data IN to the printer - Opposite of the Mini Thermal printer!yellow = data OUT of the printer - Opposite of the Mini Thermal printer!
leave red and blue not connected to anything
© Adafruit Industries https://learn.adafruit.com/mini-thermal-receipt-printer Page 9 of 38

On the power cable, connect red to 5-9VDC power and black to power ground
For Product #2752
The "Nano Thermal Printer"s data cable has five wires and no power cable
black = GROUNDblue = data IN to the printer (labeled RX on the PCB)green = data OUT of the printer (labeled TX on the PCB)red = 5-9VDC power (connect the ground of the power plug to the same ground as data above)yellow = DTR, not used at this time, skip!
For Product #2753
The "Thermal Printer Guts"s data cable has five wires and no power cable
This cable may not have colors in which case look for the text on the connector. Its, sadly, covered when you plug inthe cable
VH = 5-9VDC power (connect the ground of the power plug to the same ground as data above)GND = GROUNDlabeled RX on the PCB = data IN to the printerlabeled TX on the PCB = data OUT of the printerDTR, not used at this time, skip!
Connect to Arduino
At the Arduino end, the Data OUT wire connects to digital pin 5, Data In goes to digital pin 6 and Ground to any ofthe GND pins. You can change the digital pins later, but to match the example code, stick to this for now!
Note the colors of the wires below don't necessarily match the colors of the data cable, so double check thein and out designation for your product, they're all different!
© Adafruit Industries https://learn.adafruit.com/mini-thermal-receipt-printer Page 10 of 38

Install Library
Now its time to download the Arduino library code.
Go to the Arduino Library manager under Sketch -> Include Library -> Manage Libraries...
From within the manager install Adafruit Thermal Printer library
© Adafruit Industries https://learn.adafruit.com/mini-thermal-receipt-printer Page 11 of 38

We also have a great tutorial on Arduino library installation at:http://learn.adafruit.com/adafruit-all-about-arduino-libraries-install-use
After installing the library, restart the Arduino IDE.
You should now be able to access the sample code by navigating through menus in this order:File→Sketchbook→Libraries→Adafruit_Thermal→A_printertest
If your printer test page shows 'BAUDRATE: 9600', you'll need to make a small change to the library sourcecode. Using a text editor (Notepad, etc.) open the file Adafruit_Thermal.cpp and change this line:
to this:
Some printers arrive from the factory set for 19200 baud, but a few may be set to 9600. This will not negatively impactthe performance of your unit! The speed of the paper through the printer is already much less than this and you willnot see any difference…it's strictly a data protocol issue of getting the microcontroller and printer communicating.
OK upload the sketch (with baudrate change if necessary) to the Arduino. You should see the printer print out the
#define BAUDRATE 19200
#define BAUDRATE 9600
© Adafruit Industries https://learn.adafruit.com/mini-thermal-receipt-printer Page 12 of 38

example receipt which includes all the capabilities of the library.
If this does not work, first check that the printer and Arduino are both powered, and that the data in, out and groundwires are properly connected to the Arduino.
© Adafruit Industries https://learn.adafruit.com/mini-thermal-receipt-printer Page 13 of 38

Printing Text
The thermal printer has a few handy things it can do, most of which are in the A_printertest sketch. These are shownin the image above. In order, starting from the top:
Inverted text: this is invoked by calling inverseOn() — you will get text that’s white-on-black instead of black-on-white. inverseOff() turns this off.Double height: this makes text thats extra tall, call doubleHeightOn() — likewise, turn off with doubleHeightOff()Left/Center/Right justified: this aligns text to the left or right edge of the page, or centered. You can set thealignment by calling justify('R') (for right-justified), justify('C') (for centered) or justify('L') (for left-justified). Left-justified is the default state.Bold text: makes it stand out a bit more, enable with boldOn() and turn off with boldOff()Underlined text: makes it stand out a bit more, enable with underlineOn() and turn off with underlineOff()Large/Medium/Small text: by default we use small, medium is twice as tall, large is twice as wide/tall. Set the sizewith setSize('L'), setSize('M') or setSize('S')Line spacing: you can change the space between lines of text by calling setLineHeight() where numpix is thenumber of pixels. The minimum is 24 (no extra space between lines), the default spacing is 32, and double-spaced text would be 64.
Look through the source of the A_printertest sketch to see these used in context.
© Adafruit Industries https://learn.adafruit.com/mini-thermal-receipt-printer Page 14 of 38

Bitmap PrintingThis printer can print out bitmaps, which can add a touch of class to a receipt with your logo or similar.
The first step is to get the logo prepared. The printer can only do monochrome (1-bit) images, and the maximum width is384 pixels. We suggest starting with a small bitmap (100 pixels or less on each side) and then experimenting to get thesize and look you want.
A few steps are required to prepare an image for printing. For Windows users, there’s a nice graphical user interfacefor this. For Mac and Linux, different tools are used…not as visually slick, but they do the job well.
Windows
Use an image editing program to save your image as a 1-bit BMP — in Windows, the built-in Paint program will suffice.
Download, install and run LCD Assistant. This program is for Windows only but does a really fantastic job! Load theBMP file you previously generated (in Paint, etc.). The file must be in BMP format — the software won’t read PNG, GIF,etc. Then a couple of settings need to be adjusted…
First, in the “Byte orientation” section of the settings, select “Horizontal” (item A in the image above).
Second (item B above), you may need to change the Width setting. Because this software (and the thermal printer)handle images in horizontal groups of eight pixels, if the image width is not a multiple of 8, it will be truncated(cropped) to the nearest smaller 8-pixel boundary. For example, with the 75 pixel wide image above, the output will becropped to only 72 pixels wide, losing some data from the right edge. To avoid this, increase this number to the next
These barcode printers shouldn't be confused with a LaserJet - they're not good at printing heavy/denseimages with lots of black or they might stick and stall!
© Adafruit Industries https://learn.adafruit.com/mini-thermal-receipt-printer Page 15 of 38

multiple of 8 (that would be 80 for the example above), and the output will be padded with blank pixels to cover thegap. Remember the number you use here, you’ll need it later.
The image height does not need to be adjusted this way, only width.
Set the table name to something short but descriptive (e.g. “adalogo” above), then select Save Output from the Filemenu. Give the file a similarly brief but descriptive name, ending in “.h” (e.g. “adalogo.h”).
To get this file into your Arduino sketch, select “Add File…” from the Sketch menu. This will add a new tab to your code.Your original code is still there under the leftmost tab.
A couple of small changes are now needed in both tabs. First, at the top of the file containing the new table data,change “const unsigned char” to “static const uint8_t PROGMEM” as shown below:
Next, in the tab containing the main body of your code, add an “include” statement to reference the new file:
Check the A_printertest example sketch if you’re not sure how to include the code properly.
You can now output the image by calling printBitmap(width, height, tablename), where width and height are thedimensions of the image in pixels (if you changed the image width to a multiple of 8 as previously described, use thatnumber, not the original image size), and tablename is the name of the array in the new tab (e.g. “adalogo” above).
#include "adalogo.h"
© Adafruit Industries https://learn.adafruit.com/mini-thermal-receipt-printer Page 16 of 38

Having a graphical user interface is nice, but some of these extra steps can be confusing and error-prone. If you prefer,the technique below for Mac and Linux works in Windows as well.
Mac and Linux
The conversion tool for Mac and Linux doesn’t include a fancy GUI, but it works well and avoids several steps (andpotential mis-steps). The source image doesn’t need to be in BMP format — most image formats can be read natively —and the output can be added to a sketch with no further editing. It works for Windows as well, if you’d rather use thismethod.
First, if you don’t already have the Processing language installed, download it from processing.org. Processing looksalmost exactly like the Arduino IDE, but it’s for writing code for your normal computer, not a microcontroller. This canbe a little confusing to first-timers, so if something doesn’t seem to compile, make sure you’re running code in the rightenvironment: Arduino for for the Arduino board, Processing for your computer.
The Adafruit_Thermal library folder that you previously downloaded contains a sub-folder called processing. Insidethat is a sketch called bitmapImageConvert.pde. Load this into Processing and press RUN (the triangle button).
You’ll be prompted to select an image using the system’s standard file selection dialog. The program runs for just abrief instant, and will create a new file alongside the original image file. For example, if you selected an image called“adalogo.png”, there will be a new file called “adalogo.h” in the same location. This file contains code to add to yourArduino sketch. You shouldn’t need to edit this file unless you want to change the variable names within.
To get this file into your Arduino sketch, select “Add File…” from the Sketch menu. This will add a new tab to your code.Your original code is still there under the leftmost tab.
Next, in the tab containing the main body of your code, add an “include” statement to reference the new file:
This code runs in Processing 2.x, the latest version of Processing available from their website. Don't use theolder Processing 1.5.x version!
© Adafruit Industries https://learn.adafruit.com/mini-thermal-receipt-printer Page 17 of 38

Check the A_printertest example sketch if you’re not sure how to include the code properly.
If the source image was called adalogo.png, then the resulting .h file (adalogo.h) will contain three values calledadalogo_width, adalogo_height and adalogo_data, which can be passed directly and in-order to the printBitmap()function, like this:
#include "adalogo.h"
printBitmap(adalogo_width, adalogo_height, adalogo_data);
© Adafruit Industries https://learn.adafruit.com/mini-thermal-receipt-printer Page 18 of 38

Barcode PrintingThermal printers are really good at printing barcodes! This printer supports 11 different codes - UPC A, UPC E, EAN13,EAN8, CODE39, I25, CODEBAR, CODE93, CODE128, CODE11 and MSI. It only supports linear (1-D) barcodes, andcan’t generate 2-D barcodes like QR codes (although there is a hack you can do, see below!) Barcodes are generated“on the fly,” which is nice — you can customize the height and data included quite easily.
You can make a barcode by calling printBarcode("barcodedata", BARCODETYPE), where the first string is the data toencode (e.g. a UPC code) and BARCODETYPE can be UPC_A, UPC_E, EAN13, EAN8, CODE39, I25, CODEBAR,CODE93, CODE128, CODE11 or MSI.
Some barcodes are very restricted — you can only put in 12 numbers, no characters. Others are very flexible and takenearly any character input. Please check out the wikipedia list detailing kinds of barcodes to pick the right one for yourapplication.
The available range of barcodes varies with the printer firmware revision. Check Adafruit_Thermal.h for a list of codes.
It’s also possible to print QR codes, if you’re willing to pre-generate them. This might be handy if you want to, let’s say,include a URL on the receipt and the URL doesn’t change. You can generate QR codes at many sites including thisone. Use the smallest QR code size. The image will be in PNG format, so if you’re using the Windows LCD Assistanttool you’ll need to convert it to BMP first (Windows Paint works for this). Then you can convert and embed this in yourArduino sketch as previously described.
© Adafruit Industries https://learn.adafruit.com/mini-thermal-receipt-printer Page 19 of 38

CircuitPythonIt's easy to use the thermal printer with CircuitPython and the Adafruit CircuitPython Thermal Printer module. Thismodule allows you to easily write Python code that controls the printer, like printing text and barcodes (note right nowbitmap printing is not supported by CircuitPython code).
First wire up a thermal printer to your board with a serial connection exactly as shown on the previous pages forArduino. Be sure to supply a power supply to the printer which can provide 5-9V at about 1.5 to 2 amps of current.
Remember too there are two ways to wire the printer, the simplest is just to connect the TX of your board to the RX ofthe printer--this allows you to print anything but not check the paper status:
Printer power positive (red wire) to 5-9V power supply positive.Printer power ground (black wire next to red) to power supply negative / ground.Printer RX (yellow) to board serial TX.Printer ground (black wire next to yellow) to board ground / GND.
A more advanced option is to connect the printer's TX pin to your board's serial RX pin. However be very careful toensure your board supports a 5 volt serial input! Many boards, like the Feather M0, do not support a 5V serial inputand will be damaged! You can however create a simple voltage divider with a 2.2KΩ and 3.3KΩ resistor circuit toknock the printer's 5V output down to a safer 3.3V level:
© Adafruit Industries https://learn.adafruit.com/mini-thermal-receipt-printer Page 20 of 38

Printer power positive (red wire) to 5-9V DC power supply positive.Printer power ground (black wire next to red) to power supply negative / ground.Printer RX (yellow) to board serial TX.Printer ground (black wire next to yellow) to board ground / GND.Printer TX to one side of a 2.2KΩ resistor.One side of a 3.3 kilo-ohm resistor to the opposite side of the 2.2KΩ resistor. Other side of the 3.3KΩ resistor toboard ground / GND.Board RX to the junction of the 3.3 kilo-ohm and 2.2 kilo-ohm resistor (i.e. output of the voltage divider).
Library Installation
Next you'll need to install the Adafruit CircuitPython Thermal Printer library on your CircuitPython board.
irst make sure you are running the latest version of Adafruit CircuitPython for your board.
Next you'll need to install the necessary libraries to use the hardware--carefully follow the steps to find and install theselibraries from Adafruit's CircuitPython library bundle. Our introduction guide has a great page on how to install thelibrary bundle for both express and non-express boards.
Again be very careful connecting the printer TX (green wire) to your board! As mentioned above you candamage your board if it does not support 5 volt inputs. When in doubt, leave the green wire disconnected!You can still print without the green wire, you only lose the ability to read if paper is present.
© Adafruit Industries https://learn.adafruit.com/mini-thermal-receipt-printer Page 21 of 38

Remember for non-express boards like the, you'll need to manually install the necessary libraries from the bundle:
adafruit_thermal_printer
You can also download the adafruit_thermal_printer folder from its releases page on Github.
Before continuing make sure your board's lib folder or root filesystem has the adafruit_thermal_printer folder copiedover.
Next connect to the board's serial REPL so you are at the CircuitPython >>> prompt.
Firmware Version and Baud Rate
Before you can use the printer module you must determine the firmware version and baud rate of the printer. This iseasy to find out by printing a test page from the printer as described on the first test page, hold the printer button aspower is applied. Print out the test page and take note of these values printed at the bottom:
Baudrate - Remember this value, typically 19200 or 9600.Version - Take note of this value too, it's a value like 2.2, 2.64, 2.68, etc. You will use the version to pick theappropriate module for interacting with the printer.
Usage
To demonstrate the usage of the sensor we'll initialize it and print some text from the REPL.
First you must import the necessary modules to initialize the hardware serial connection to the printer:
© Adafruit Industries https://learn.adafruit.com/mini-thermal-receipt-printer Page 22 of 38

Notice the baud rate of the serial connection is specified with the baudrate keyword. For most printers they'll use arate of 19200 baud, however other printers might be configured to use a different rate like 9600 baud. Use the baudrate you saw printed on the test page of your printer!
Also be aware CircuitPython currently requires bi-direction UART connections so even if you don't have the board RXpin hooked up (as recommended) you must keep the RX pin disconnected and ignore using it in your project.
Create ThermalPrinter Class
Next you'll need to import the thermal printer module and call a function to get the right class depending on theversion of your printer firmware. Be sure you've found the exact version number for your printer by following thesteps mentioned above and on the previous test page!
Notice you call the get_printer_class function from within the adafruit_thermal_printer module. You must pass thisfunction the version of the thermal printer that you're using and it will internally find the right class to import and use inyour code. In this example we're specifying a printer with version 2.69 firmware, but be sure to specify your printer'sversion!
The result is a class which you can immediately initialize:
Initialize ThermalPrinter
Now construct an instance of the ThermalPrinter class:
Notice you must pass in the serial UART connection that was previously constructed.
Be aware it will take from a half to even 5 seconds for the printer to be created and initialize itself and warm up. Youcan optionally specify auto_warm_up=False as a keyword and manually call the warm_up function to control when thiswarm-up time occurs if needed in your application (or you are confused why your code takes so long to start up).
Test Page Print
Now you're ready to print!
Try printing a full test page with the test_page function:
You should see the printer test page print out.
import boardimport busiouart = busio.UART(board.TX, board.RX, baudrate=19200)
import adafruit_thermal_printerThermalPrinter = adafruit_thermal_printer.get_printer_class(2.69)
printer = ThermalPrinter(uart)
printer.test_page()
© Adafruit Industries https://learn.adafruit.com/mini-thermal-receipt-printer Page 23 of 38

You can advance the paper forward a number of lines with the feed function, try feeding 2 lines to make some space:
Now print a small line of text with the print function and feed a few lines to move it out of the printer to read:
Printer Fonts
There are a few properties you can use to adjust how text is printed. Each of these can be set to a True value toenable, or a False value to disable:
bold - Print bold text.inverse - Print inverted (white on black) text.upside_down - Print upside down text (might not work on all versions of printers).double_height - Double height size text.double_width - Double width size text.strike - Strike-through text (again might not work on all versions of printers).
Try turning on bold text and printing a line:
printer.feed(2)
printer.print('Hello from CircuitPython!')printer.feed(2)
printer.bold = True # Turn on boldprinter.print('This is bold text!')printer.bold = False # Turn off bold# Feed lines to make visible:printer.feed(2)
© Adafruit Industries https://learn.adafruit.com/mini-thermal-receipt-printer Page 24 of 38

There are a few properties you can set to special values to further control text printing:
underline - This controls underline printing and can be None (off), adafruit_thermal_printer.UNDERLINE_THIN , oradafruit_thermal_printer.UNDERLINE_THICK .size - This controls the size of text and can be adafruit_thermal_printer.SIZE_SMALL ,adafruit_thermal_printer.SIZE_MEDIUM , or adafruit_thermal_printer.SIZE_LARGE . The default is small.justify - This controls the justification or location of printed text and can be adafruit_thermal_printer.JUSTIFY_LEFT ,adafruit_thermal_printer.JUSTIFY_CENTER , or adafruit_thermal_printer.JUSTIFY_RIGHT . The default is justify left.
For example to print thick underlined, medium text, with center justification:
printer.underline = adafruit_thermal_printer.UNDERLINE_THICKprinter.size = adafruit_thermal_printer.SIZE_MEDIUMprinter.justify = adafruit_thermal_printer.JUSTIFY_CENTERprinter.print('Medium center!')# Reset back to normal printing:printer.underline = Noneprinter.size = adafruit_thermal_printer.SIZE_SMALLprinter.justify = adafruit_thermal_printer.JUSTIFY_LEFT# Feed lines to make visible:printer.feed(2)
© Adafruit Industries https://learn.adafruit.com/mini-thermal-receipt-printer Page 25 of 38

Print Barcodes
Finally you can print a barcode with the print_barcode function. Each printer supports a different type and format ofbarcode so consult the product sheet in the downloads section for each type. However here's an example of printinga UPC A barcode with value '123456789012':
The first parameter to print_barcode is a string that defines the barcode value (this varies depending on the type ofbarcode, a UPC A code is 13 digits). The second parameter is the type of the barcode, which again is dependent onthe printer firmware. Typical values you might use include:
printer.UPC_A
printer.UPC_E
printer.EAN13
printer.EAN8
printer.CODE39
printer.print_barcode('123456789012', printer.UPC_A)printer.feed(2)
© Adafruit Industries https://learn.adafruit.com/mini-thermal-receipt-printer Page 26 of 38

printer.ITF
printer.CODABAR
printer.CODE93
printer.CODE128
Check Paper
If you've connected the RX pin of your board to the printer TX (again be very careful to make sure your boardsupports a 5V serial RX--many don't!) you can query paper status with the has_paper function that returns True orFalse if there is paper present:
That's all there is to using the thermal printer with CircuitPython!
A complete demo of the usage is in the simpletest.py demo in the library:
printer.has_paper()
# Simple demo of printer functionality.# Author: Tony DiColaimport boardimport busio
import adafruit_thermal_printer
# Pick which version thermal printer class to use depending on the version of# your printer. Hold the button on the printer as it's powered on and it will# print a test page that displays the firmware version, like 2.64, 2.68, etc.# Use this version in the get_printer_class function below.ThermalPrinter = adafruit_thermal_printer.get_printer_class(2.69)
# Define RX and TX pins for the board's serial port connected to the printer.# Only the TX pin needs to be configued, and note to take care NOT to connect# the RX pin if your board doesn't support 5V inputs. If RX is left unconnected# the only loss in functionality is checking if the printer has paper--all other# functions of the printer will work.RX = board.RXTX = board.TX
# Create a serial connection for the printer. You must use the same baud rate# as your printer is configured (print a test page by holding the button# during power-up and it will show the baud rate). Most printers use 19200.uart = busio.UART(TX, RX, baudrate=19200)
# Create the printer instance.printer = ThermalPrinter(uart, auto_warm_up=False)
# Initialize the printer. Note this will take a few seconds for the printer# to warm up and be ready to accept commands (hence calling it explicitly vs.# automatically in the initializer with the default auto_warm_up=True).
© Adafruit Industries https://learn.adafruit.com/mini-thermal-receipt-printer Page 27 of 38
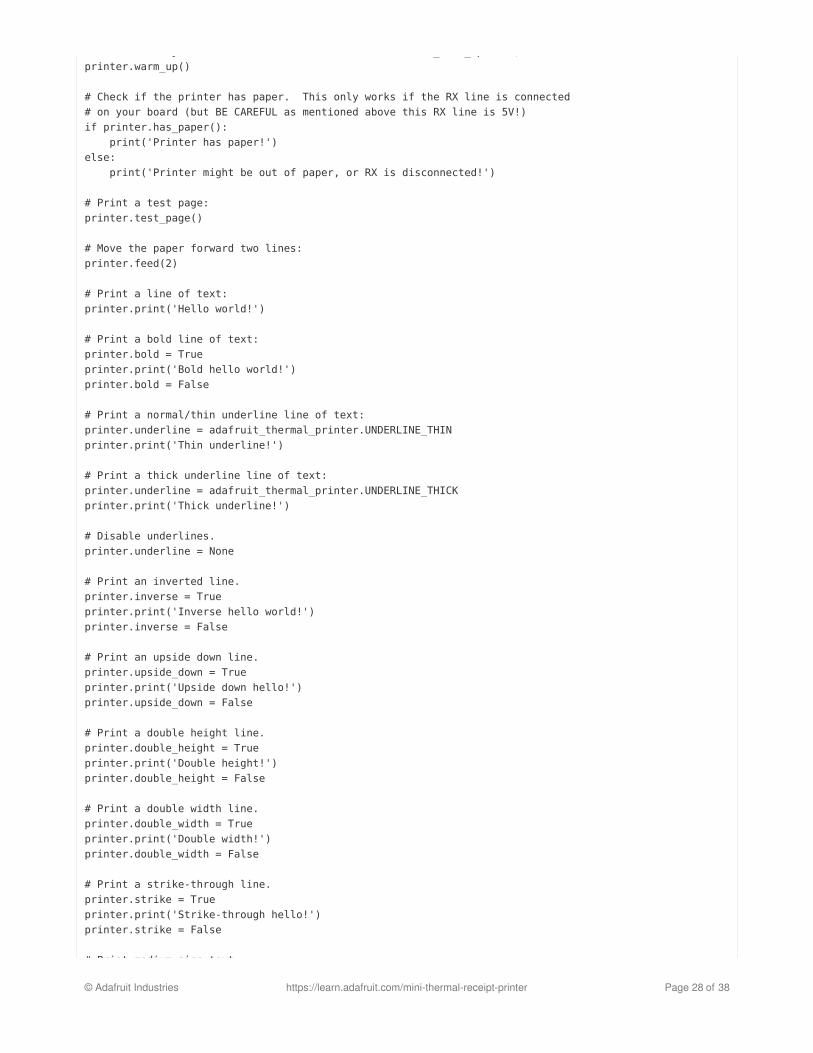
# automatically in the initializer with the default auto_warm_up=True).printer.warm_up()
# Check if the printer has paper. This only works if the RX line is connected# on your board (but BE CAREFUL as mentioned above this RX line is 5V!)if printer.has_paper(): print('Printer has paper!')else: print('Printer might be out of paper, or RX is disconnected!')
# Print a test page:printer.test_page()
# Move the paper forward two lines:printer.feed(2)
# Print a line of text:printer.print('Hello world!')
# Print a bold line of text:printer.bold = Trueprinter.print('Bold hello world!')printer.bold = False
# Print a normal/thin underline line of text:printer.underline = adafruit_thermal_printer.UNDERLINE_THINprinter.print('Thin underline!')
# Print a thick underline line of text:printer.underline = adafruit_thermal_printer.UNDERLINE_THICKprinter.print('Thick underline!')
# Disable underlines.printer.underline = None
# Print an inverted line.printer.inverse = Trueprinter.print('Inverse hello world!')printer.inverse = False
# Print an upside down line.printer.upside_down = Trueprinter.print('Upside down hello!')printer.upside_down = False
# Print a double height line.printer.double_height = Trueprinter.print('Double height!')printer.double_height = False
# Print a double width line.printer.double_width = Trueprinter.print('Double width!')printer.double_width = False
# Print a strike-through line.printer.strike = Trueprinter.print('Strike-through hello!')printer.strike = False
# Print medium size text.
© Adafruit Industries https://learn.adafruit.com/mini-thermal-receipt-printer Page 28 of 38

# Print medium size text.printer.size = adafruit_thermal_printer.SIZE_MEDIUMprinter.print('Medium size text!')
# Print large size text.printer.size = adafruit_thermal_printer.SIZE_LARGEprinter.print('Large size text!')
# Back to normal / small size text.printer.size = adafruit_thermal_printer.SIZE_SMALL
# Print center justified text.printer.justify = adafruit_thermal_printer.JUSTIFY_CENTERprinter.print('Center justified!')
# Print right justified text.printer.justify = adafruit_thermal_printer.JUSTIFY_RIGHTprinter.print('Right justified!')
# Back to left justified / normal text.printer.justify = adafruit_thermal_printer.JUSTIFY_LEFT
# Print a UPC barcode.printer.print('UPCA barcode:')printer.print_barcode('123456789012', printer.UPC_A)
# Feed a few lines to see everything.printer.feed(2)
© Adafruit Industries https://learn.adafruit.com/mini-thermal-receipt-printer Page 29 of 38

Downloads
Adafruit_Thermal library for Arduino.LCD Assistant — optional bitmap conversion utility for Windows.Processing language — needed for bitmap conversion for Mac or Linux (and optionally Windows). DOWNLOADVERSION 1.5.1, not the 2.0 beta.Thermal Printer User Manual.An older version of the Thermal Printer User Manual.Thermal Printer Product Sheet.
Firmware Changer
If you'd like to risk it, you can revert/change the firmware using this tool that is from the manufacturer. We haven't triedit. It's completely utterly unsupported and you may break your printer. We won't replace it if it stops working due to afirmware change!
update_firmware.zip
https://adafru.it/oAA
© Adafruit Industries https://learn.adafruit.com/mini-thermal-receipt-printer Page 30 of 38

Troubleshooting!I'm not getting it to work!
First thing to try is the power up test. You do not need an arduino for this
Make sure the paper is in the bay correctly, it should feed under and up so that the paper comes through the slotwithout bending
Hold down the button on the top, then plug in the printer to power. It should print out a test page
The green LED will not be on solid, it will blink once in a while, that's normal.
I'm having difficulty getting a printout
Make sure the paper is in the bay correctly, it should feed under and up so that the paper comes through the slotwithout bending
Make sure the paper roll is not 'stuck' feeling in the bay, it should rotate easily!
My Arduino sketch used to work, but doesn't compile now!
Some changes have been made to support a broader range of Arduino-like boards. Older code will requireupdating. Fortunately it's just a few lines around the global declarations and the setup() function.
Old syntax:
Adafruit_Thermal printer(RX_PIN, TX_PIN);
New syntax: declare a SoftwareSerial object and pass its address to the Adafruit_Thermal constructor, like so:
SoftwareSerial mySerial(RX_PIN, TX_PIN);
Adafruit_Thermal printer(&mySerial);
Then, in the setup() function:
mySerial.begin(19200);
printer.begin();
My sketch compiles, but the output is different than before.
The printer's features and behavior have changed over various firmware releases.
First, check the PRINTER_FIRMWARE value in Adafruit_Thermal.h, make sure it matches the value at the bottom ofthe printer test page (hold down the paper feed button when connecting power to print out a test page).
Some features just behave a little differently among releases…barcodes, line feeds, etc.…if you were previouslyusing an older library or an older printer, you may need to tweak the code to produce the desired formatting with acurrent setup.
© Adafruit Industries https://learn.adafruit.com/mini-thermal-receipt-printer Page 31 of 38

Hacking!
Look at those huge, razor-sharp image prints! You want some?
The following…
Is an undocumented printer feature and is NOT guaranteed to work.May require modifying your printer — a warranty-voiding operation! Continue at your own risk.
You should only attempt this if all of the following apply:
Have first confirmed that the printer works as expected when operated through conventional procedures.Have a genuine performance bottleneck that cannot be adequately resolved by adjusting the printer timing andthermal settings first.Are comfortable opening things and soldering.
These printers have a limited serial receive buffer. Push bits to the printer faster than it can physically heat dots andfeed paper, and you experience an “overflow” — bitmap images become garbled, text and formatting commands maybe skipped.
The thermal printer library tries to throttle data to the printer at just the right rate. Too fast and an overflow occurs. Tooslow and it wastes your time; the printer isn’t operating at peak throughput. This is an imperfect process…though weuse very conservative timing estimates, the actual speed through the printer is impossible to predict…sometimesoverflows still occur.
Hardware handshaking is a means by which a printer or other device can report to the microcontroller that it’s ready toreceive more data, virtually eliminating buffer overflows while operating at peak throughput…the paper feed stops onlywhen it physically absolutely must. Optimal performance.
A modified printer is not eligible for a refund or exchange.
© Adafruit Industries https://learn.adafruit.com/mini-thermal-receipt-printer Page 32 of 38

It appears that some varieties of these thermal printers support hardware handshaking (e.g. firmware v2.64, 2.68). Thisis barely mentioned in the datasheet, and in fact there isn’t even a physical connection for this on the outside of theprinter. A little surgery is in order…
Parts and Tools Needed
Small Phillips head screwdriverPliersSoldering iron and related paraphernaliaA bit of wire…but ideally a female jumper wire
Procedure
Unplug all cables, turn the printer over and remove the
two small Phillips screws.
Take the back plate off, then remove the two (or
sometimes four) Phillips screws holding the circuit board
in place.
These screws are a little smaller than the back-holding
ones…don’t get them mixed up!
The “Tiny” and “Nano” printers (plus the “Printer Guts”) have an exposed DTR pin — no modification isnecessary! Scroll down to the “Code Changes” section to continue.
© Adafruit Industries https://learn.adafruit.com/mini-thermal-receipt-printer Page 33 of 38

Carefully, so as not to unseat or unplug the connectors,
turn the circuit board over and look for the unpopulated
via labeled “DTR.”
There are some other interesting solder points in here, if
you’re so inclined. “HV” is the raw 5–9 Volts from the
power supply. On the right is a 3.3V pin, though I don’t
know the available current. Conceivably one could bring
these out to reduce overall cabling in a project…or even
install a tiny microcontroller right inside!
Cut an end off a female jumper wire and strip & tin the
end.
This will be hanging out of the printer…so a femalejumper prevents accidental contact with things if you’re
not using the connection. If you only have regular wire,
that’s fine, just be careful not to leave a bare end
dangling.
Solder the wire to the DTR pad. Top, bottom, doesn’t
matter…it’s right up against the serial connection plug,
so use whatever path works best for you, there’s ample
room for routing the wire around either way.
Pedants may note that this isn’t technically a DTR pin, but rather CTS. It’s long-standing thing among printermanufacturers…apparently the misnomer was made decades ago but has stuck for consistency.
© Adafruit Industries https://learn.adafruit.com/mini-thermal-receipt-printer Page 34 of 38

On the back plate, there’s a small metal “finger”
between the serial and power sockets. Using pliers, this
can be bent back to provide an exit route for the DTR
wire.
Screw the controller board back in place (check that
neither of the cables has come unseated), routing the
DTR wire around between the two sockets, then screw
the back on.
Finished with the hardware!
You can then reconnect the power and serial sockets, and wire those up as before.
Use a jumper wire to connect DTR to any available Arduino pin. In our examples, we’ll use digital pin 4.
© Adafruit Industries https://learn.adafruit.com/mini-thermal-receipt-printer Page 35 of 38

The printer electronics operate at 3.3V, so no level shifting is needed with 3.3V boards (Arduino Due, etc.)…this cansafely be connected directly.
Code Changes
Just one line…the Adafruit_Thermal constructor…needs changing. It can accept an optional parameter, a pin number touse for DTR:
This works just as well with a hardware serial port (e.g. Arduino Mega or Due):
No other changes are necessary. Try this with one of the example sketches…you’ll find the printer is suddenly lotsfaster! That’s because the software throttle is no longer used…the printer continually reports its actual “ready” state tothe microcontroller.
Printing Huge Images
The printBitmap() function can output images from an open stream or stored in PROGMEM (flash memory)…asexplained on the “Printing Bitmaps” page.
Although the Arduino Mega has a whopping 256K flash space, a limitation of the AVR microcontroller is that a singlearray can’t exceed 32K…that’s about a 384x680 pixel bitmap image. If you try to embed a larger image in your code,the compiler will report an error.
One workaround might be to break really long images into multiple smaller images, and print these out consecutively
Adafruit_Thermal printer(&mySerial, 4);
Adafruit_Thermal printer(&Serial1, 4);
© Adafruit Industries https://learn.adafruit.com/mini-thermal-receipt-printer Page 36 of 38

without a feed() in between.
Another is to use a non-AVR Arduino-compatible board, such as the 32-bit Arduino Due. This has no problem withmassive arrays. The Chrysler Building image above is 384x1132 pixels!
Other Things to Know
This type of printer fares best with light line art and sometimes dithered photographic images as long as the overall dotdensity is fairly low, like under 50%. Large solid-filled areas exhibit strange streaky artifacts…this isn’t a bug of thelibrary or printer firmware, but just a side-effect of how receipt printers operate, that they can only heat so many dots ata time and have to pull shenanigans to go beyond that, else they jam.
Here are a couple examples from fancy commercial
receipt printers.
Notice in the first one that the “solid black” area isn’t
really solid black…examining it closely, you can see it’s
densely dithered, but not 100% filled.
The second does have solid fills, but limits the total
area. On any given row, only so many pixels are set.
If you try to print a “dense” image and the paper jams (image gets squashed vertically), pass a lower density value toprinter.begin(). Default value is 120. So for example:
DTR support is not a panacaea. Glitches occasionally do still happen…sometimes overflows, sometimes “framingerrors” with serial data. But overall it seems fairly reliable and buttery smooth!
printer.begin(80);
© Adafruit Industries https://learn.adafruit.com/mini-thermal-receipt-printer Page 37 of 38

© Adafruit Industries Last Updated: 2018-03-06 12:47:04 AM UTC Page 38 of 38