module 2 educator’s guide investigation 4
TRANSCRIPT

1
How do waterbodies changeover time?Investigation OverviewStudents explore how water bodies change
in response to changes in weather and climate.
They do experiments to demonstrate the effect of
rising sea level on coastlines. They also use NASA images to examine
dramatic changes in water levels in a river system in the United States and
a lake in Africa.
Time required: Three 45-minute sessions
Materials/ResourcesNASA images (transparency of each and four copies each of Figures 5, 6,
and 7)
Figure 1: Mountainous coastline in California
Figure 2: Flat coastline in the Eastern United States
Figure 3: Greenland
Figure 4: Map of Midwestern flooding
Figure 5: The Mississippi River System in 1988
Figure 6: The Mississippi River System during the 1993 floods
Figure 7: Lake Chad, 1973 and 1997 (Note: hard copies must be in
color)
Figure 8: Grid (one transparency to project and one transparency for
each group of students)
Two preferably clear, rectangular baking pans, any size,
Clay
Water
Sand or soil
Two blocks of ice frozen in a full sandwich-size Ziploc bag
For each group of 2 to 4 students:
• One sheet tracing paper
• A fine black marker
• A sharp pencil
• A sharp light blue crayon
• An atlas (with U.S. landform map)
Log 1: Our coasts
Log 2: Greenland
Log 3: Flooding in the Midwest—Background
Log 4: Flooding in the Midwest
Log 5: Lake Chad is shrinking
Two overhead projectors
NASA background information: DAAS, “Distributed Active Archive Centers”
“Meltdown,” “Ramping Up,” “Eye on the Ocean,” optional
Geography Standards
Standard 7: PhysicalSystems
The physical processes thatshape the patterns of Earth’ssurface
• Explain how physical processes
help to shape features and
patterns on Earth’s surface.
Standard 18: The Uses ofGeography
How to apply geography tointerpret the present and plan forthe future.
• Identify ways in which geographic
conditions change.
Geography SkillsSkill Set 4: Analyze GeographicInformation
• Use texts, photographs, and
documents to observe and interpret
geographic trends and relationships.
• Use simple mathematics to analyze
geographic data.
Skill Set 5: Answer GeographicQuestions
• Use methods of geographic inquiry
to acquire geographic information,
draw conclusions, and make
generalizations.
Module 2 Educator’s Guide Investigation 4

2
Content PreviewLike everything else on Earth, bodies of water change.
NASA monitors such changes using remote sensing.
Water bodies change because of global warming,
erosion, drought, human modifications (e.g., diverting
water and building dams that result in a depletion of
water supplies), and natural events such as floods and
hurricanes. As Earth’s temperature warms and ocean
levels rise, large population concentrations may be
affected. Related climate change and seasonal
differences in precipitation affect water bodies like Lake
Chad in Africa.
Classroom Procedures for Day 1Beginning the Investigation1. Ask students to think about change that they can
see. What changes and why? List their responses
on the chalkboard. (Changes in people, in thelandscape during different seasons, in the positionand phases of the Moon, etc.)
2. Write the phrase “Earth Changes” on the chalk-
board and refer back to the list made in #1. Find
the changes that were described that affect Earth
and discuss how we can find out about changes
that occur at different scales: local, national, and
global. (Written information, aerial photographs,satellite images, etc.) Tell students that part of
NASA’s mission is to monitor changes on Earth to
help us understand changes in our environment.
3. Discuss with the class the ways in which water
bodies may change over time and the reasons for
such changes. Be sure that the following causes
are addressed:
• Warming trends during which ocean water
expands and glaciers melt
• Erosion caused by national forces and human/
environmental modifications
• Drought
• Human modifications such as diverting water,
building dams, depleting water supplies
• Natural disasters, hurricanes, floods
Tell students that this lesson will focus on changes
in water and water bodies and on the impacts of
such changes.
Developing the Investigation4. Project Figure 1 and explain that this NASA image
shows the coast of southern California. Ask
students which ocean borders this coast. (Pacific.)Can they tell if the coast is mountainous or flat?
NASA has helped us see the mountain ranges by
adding shading and color to the image.
5. Project Figure 2 and explain that this is an image
of the east coast of the United States. Ask stu-
dents to identify the ocean in this image. (Atlantic.)If the class has completed Investigation 2 in this
module, they should be able to identify Chesa-
peake Bay.
Ask the students if this coastline is flat or mountain-
ous. How can they tell? The Coastal Plain is a
lighter shade than the Piedmont region (the foot-
hills between the Coastal Plain and the Appala-
chian Mountains). Have a student draw a line on
the transparency marking the western edge of the
Coastal Plain. Have the class identify beaches and
barrier islands.
6. Speculate about how changes in sea level would
affect these two coastlines, and lead students to
realize that the mountainous coast would experi-
ence less flooding because of the higher elevations
and steeper sloping coastline.
7. Do the following experiment to demonstrate how
the change in water level can affect the coastline.
This can be done as a class project or in smaller
groups.
A. Put a layer of clay at the bottom of a baking
pan. Ask students to mold mountains from clay
and to create a coastline of mountains. Arrange
the mountains along half of the clay bottom.
Tell the students that the clay bottom repre-
sents the land that is covered by the ocean.
B. Have a student pour some water into the
bottom of the baking pan. Talk about what will
happen to the shoreline as sea level rises.
Mark a line in the clay mountains to show sea
level after this first application of water. Have
two more students add water to the pan and
make new lines in the clay to show the chang-
ing sea level. Ask students to give reasons
why water level might rise. (Ice caps may meltas Earth warms.)
C. Create a different landscape in the second
baking pan. Have students cover the bottom of
the baking pan with a gently sloping layer of
clay. Add another gently sloping layer of clay in
half of the pan. Ask students to talk about this
landform. Have a student pour water in the
lowest part of the pan. Mark a line in the clay
Module 2 Educator’s Guide Investigation 4

3
coast at the water level. Ask students to
predict what will happen as sea levels rise.
Pour more water into the “ocean” and watch
the flooding when the sea begins to cover the
landscape. Save the two landscapes for
concluding activity for Day 1.
8. Distribute Log 1 and have a student read the
information on coastlines to the class. (This infor-
mation can be read to younger students.) Ask the
following questions.
• What are coastlines? (Where oceans or otherlarge water bodies meet land.)
• What causes coastlines to change? (Force ofwaves and currents, lava entering the sea fromland, depositing of sediment, sea level rising andfalling.)
• How much has the sea level risen in the past
100 years? (30 centimeters.)• What portion of the world’s people live within 80
kilometers of a coast? (More than half.)• How will the rise of sea level affect coastal
cities? (Lowland cities will be flooded.)
Have students work in groups to answer the
questions in Log 1. Each group will:
1) locate a landform map of the United States in
the atlas,
2) identify two cities on mountainous coastlines
and two cities on flat coastlines,
3) assess the impact of a significant rise in sea
level on the region in which each city is located.
It is important to stress that they are looking at
the region rather than the city itself. A city could
be in a mountainous area but still be located
entirely on a narrow and flat coastline.
Then ask each group to report their findings to the
class.
9. Share with students that NASA scientists are
concerned about sea level rising and that
Greenland is being studied to track changes in the
melting ice sheet. Locate Greenland on a map,
then project Figure 3. For grades K–2, discuss the
information in Log 1 while examining this photo,
taken by an astronaut on the Space Shuttle.
For grades 3 and 4, discuss the photo, pointing out
the extent of the ice cover. Make sure students
can tell the difference between the ice and the
clouds. Distribute Log 2 and have students work in
pairs to read the background information and
answer the questions. Share responses.
With all grades, talk about what impact continued
melting of Greenland’s ice sheet could have on
coastal areas.
Concluding the Investigation10. Show the ice in Ziploc bags. Ask students to
predict what would happen to the two coastline
landscapes that they created if some of the ice
melted into the ocean. Take the ice out of the bag
and put it on the clay landscapes. Mark the water
level on the coastline with a line. Have the land-
scapes sit overnight and measure changes in the
sea level at the next class.
Classroom Procedures for Day 2Beginning the Investigation1. Look at the changes in the coastline clay activity and
talk about why it is important to look at images of the
same location over time. Project a transparency of
Figure 4. Explain that the map has been drawn on
a satellite image to give a realistic view of the land.
Have students read the names of the rivers and the
states. Leave the transparency on the screen for
the rest of this activity. Explain that an unusual
amount of rain made these rivers flood their banks in
1993, causing a great deal of damage to the sur-
rounding land. Many farms and towns were flooded,
and many people lost their homes.
Developing the Investigation2. Project Figure 5 and Figure 6 using two projec-
tors. Help students figure out 1) that these are
satellite images taken before and after the flooding,
and 2) that such images can help us calculate the
extent of the flooding and predict the downstream
movement of the floodwaters.
3. Divide the class into groups of four. Give each
group a copy of Log 3 and Log 4 and a hard copy
of Figure 5 and Figure 6. Have students take
turns reading the background information in Log 3,
then have each group discuss the questions in Log4 and come to some agreement on the answers.
Students can take turns recording the answers. Go
over the questions with the class and ask the
groups to share their responses. Question 4
should lead to some speculation about measuring
the width of the flooded area with a ruler and
comparing it with the width of the river channel.
4. Locate the region on a physical map of the United
States. Note the relatively flat landscapes surround-
ing the rivers. Raise questions about what causes
rivers to rise (heavy rainfall) and what types of
landscapes would more easily be flooded (flat land).
Module 2 Educator’s Guide Investigation 4
4
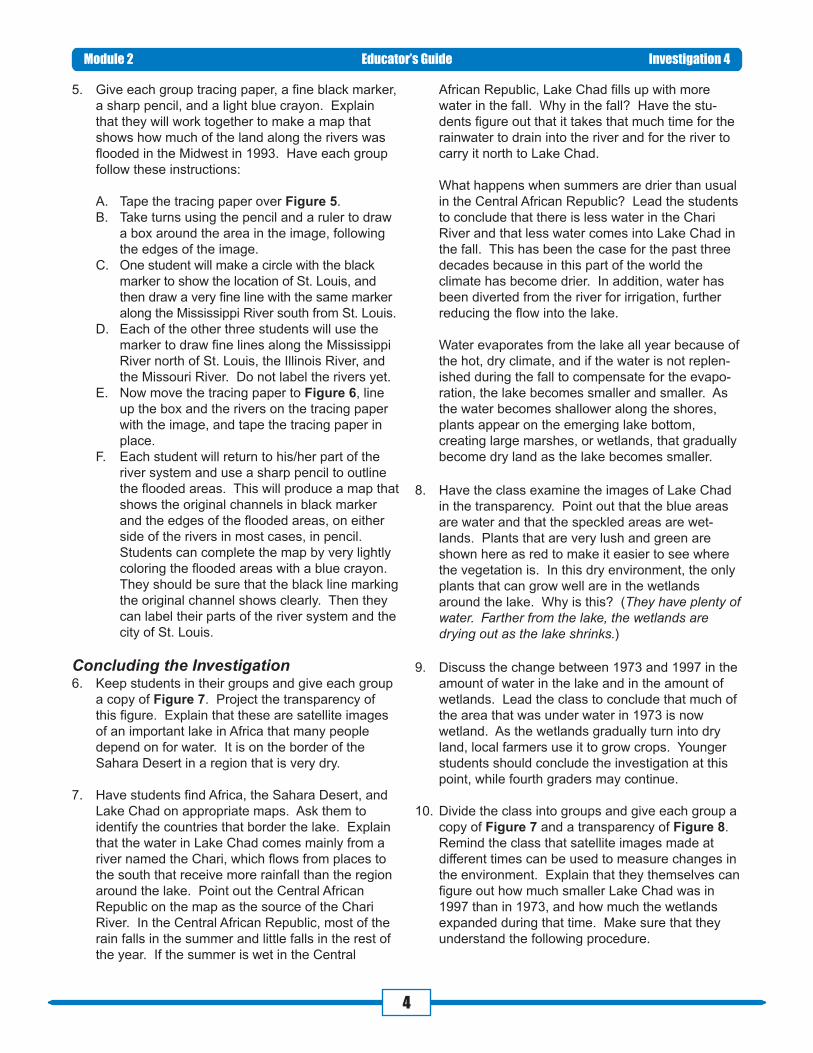
5. Give each group tracing paper, a fine black marker,
a sharp pencil, and a light blue crayon. Explain
that they will work together to make a map that
shows how much of the land along the rivers was
flooded in the Midwest in 1993. Have each group
follow these instructions:
A. Tape the tracing paper over Figure 5.
B. Take turns using the pencil and a ruler to draw
a box around the area in the image, following
the edges of the image.
C. One student will make a circle with the black
marker to show the location of St. Louis, and
then draw a very fine line with the same marker
along the Mississippi River south from St. Louis.
D. Each of the other three students will use the
marker to draw fine lines along the Mississippi
River north of St. Louis, the Illinois River, and
the Missouri River. Do not label the rivers yet.
E. Now move the tracing paper to Figure 6, line
up the box and the rivers on the tracing paper
with the image, and tape the tracing paper in
place.
F. Each student will return to his/her part of the
river system and use a sharp pencil to outline
the flooded areas. This will produce a map that
shows the original channels in black marker
and the edges of the flooded areas, on either
side of the rivers in most cases, in pencil.
Students can complete the map by very lightly
coloring the flooded areas with a blue crayon.
They should be sure that the black line marking
the original channel shows clearly. Then they
can label their parts of the river system and the
city of St. Louis.
Concluding the Investigation6. Keep students in their groups and give each group
a copy of Figure 7. Project the transparency of
this figure. Explain that these are satellite images
of an important lake in Africa that many people
depend on for water. It is on the border of the
Sahara Desert in a region that is very dry.
7. Have students find Africa, the Sahara Desert, and
Lake Chad on appropriate maps. Ask them to
identify the countries that border the lake. Explain
that the water in Lake Chad comes mainly from a
river named the Chari, which flows from places to
the south that receive more rainfall than the region
around the lake. Point out the Central African
Republic on the map as the source of the Chari
River. In the Central African Republic, most of the
rain falls in the summer and little falls in the rest of
the year. If the summer is wet in the Central
African Republic, Lake Chad fills up with more
water in the fall. Why in the fall? Have the stu-
dents figure out that it takes that much time for the
rainwater to drain into the river and for the river to
carry it north to Lake Chad.
What happens when summers are drier than usual
in the Central African Republic? Lead the students
to conclude that there is less water in the Chari
River and that less water comes into Lake Chad in
the fall. This has been the case for the past three
decades because in this part of the world the
climate has become drier. In addition, water has
been diverted from the river for irrigation, further
reducing the flow into the lake.
Water evaporates from the lake all year because of
the hot, dry climate, and if the water is not replen-
ished during the fall to compensate for the evapo-
ration, the lake becomes smaller and smaller. As
the water becomes shallower along the shores,
plants appear on the emerging lake bottom,
creating large marshes, or wetlands, that gradually
become dry land as the lake becomes smaller.
8. Have the class examine the images of Lake Chad
in the transparency. Point out that the blue areas
are water and that the speckled areas are wet-
lands. Plants that are very lush and green are
shown here as red to make it easier to see where
the vegetation is. In this dry environment, the only
plants that can grow well are in the wetlands
around the lake. Why is this? (They have plenty ofwater. Farther from the lake, the wetlands aredrying out as the lake shrinks.)
9. Discuss the change between 1973 and 1997 in the
amount of water in the lake and in the amount of
wetlands. Lead the class to conclude that much of
the area that was under water in 1973 is now
wetland. As the wetlands gradually turn into dry
land, local farmers use it to grow crops. Younger
students should conclude the investigation at this
point, while fourth graders may continue.
10. Divide the class into groups and give each group a
copy of Figure 7 and a transparency of Figure 8.
Remind the class that satellite images made at
different times can be used to measure changes in
the environment. Explain that they themselves can
figure out how much smaller Lake Chad was in
1997 than in 1973, and how much the wetlands
expanded during that time. Make sure that they
understand the following procedure.
Module 2 Educator’s Guide Investigation 4

5
Module 2 Educator’s Guide Investigation 4
Each image contains a square that is 20 kilometers
on each side, or 400 square kilometers. Help
students understand this concept. You can mea-
sure the size of the lake by seeing how many of
these 400 square kilometer squares you can place
on it. The easiest way to do this is to place a grid
of squares over the images. Demonstrate this to
the students by placing the transparency of Figure8 (Grid) over that of Figure 7 (Lake Chad), so that
the grid covers the image of the lake in 1973. Point
out that they can count the number of squares that
are on water. Then move the grid to the 1997
image and show the class that far fewer squares
are on water.
If the area under the square is more water than
wetland, they will count it as water, and if it is more
wetland than water, they will count it as wetland.
11. Distribute Log 5, and help each group to follow the
directions to calculate the change in the size of the
lake and the wetlands. The interpretations will
vary, given the necessarily gross estimates and the
students’ lack of experience interpreting images,
but the final conclusion should be that there was a
drastic reduction in the surface area of the lake.
This is a useful measuring procedure that can be
refined as students are able to handle more
complex interpretations.
BackgroundGlaciated terrainGlaciers are large masses of ice that are usually
200 meters or more thick. Because they move so
slowly, you cannot see them move, but these big heavy
masses flow and shape the landscape. There are two
types of glaciers, valley glaciers and continental
glaciers. Valley glaciers form high in mountains, filling
in narrow mountain valleys and widening them as the
ice moves slowly downhill. If a valley glacier reaches
the sea, parts may break off and form icebergs.
A continental glacier is a thick dome of ice that covers a
large area, the size of part of a continent. Continental
glaciers are also called ice caps or ice sheets. The
weight of the ice causes it to flow very slowly from
where it is deepest toward the margins of the ice sheet.
When continental glaciers melt, they leave behind
altered landscapes. The moving ice takes with it soil,
rocks, boulders, and anything else that it can pry loose
and move across the landscape. All this loose material
is deposited as the ice stops moving and begins to melt
near the margins of the ice sheet. In mountainous
areas, continental glaciers erode the mountain slopes
in much the same way valley glaciers do.
Evaluation/Key*Log 2: Greenland1. 1/5
2. By comparing older and newer satellite images.
3. It causes the sea level to rise.
*Log 5: Lake Chad is shrinkingNote that there are no “correct” answers. They will vary
depending on how the squares are initially positioned
and how the vegetation is interpreted.
Additional Resourceshttp://southport.jpl.nasa.gov/pio/srl/sirc/srl-patagonia.gif
Patagonia
http://sdcd.gsfc.nasa.gov/GLACIER.BAY/glacierbay.story.html
Glacial changes, work done by NASA geographer,
Dorothy Hall
http://www.nasm.edu/ceps/RPIF/LANDSAT/LIMG/24_37.gif
Landsat image north of Vicksburg, Mississippi, showing
Mississippi River floodplain
http://observe.ivv.nasa.gov/ Educator’s guide to Earth—Theever-changing planet, images of Earth to identify and
illustrate ways that Earth changes
http://www.nasm.si.edu/earthtoday/quakelg.htm Western
Hemisphere quake zone
Make It Work! Rivers: World Book, Chicago, 1996
Make It Work! Oceans: World Books, Chicago, 1997CD-ROM, Visit to the Ocean Planet, NASA educational product

6
The coast is where the ocean meets land. Coastlines are always changing their
shape. They are being worn away in some places and built up in others. Coasts can
wear away due to the force of waves and currents. Coasts can build up when sediment
(sand, gravel, etc.) is carried from one spot to another. They can also be built up when
lava enters the sea from land.
Coastlines also change as the sea level rises and falls. Average sea level has risen
about 30 centimeters in the last 100 years. Earth’s atmosphere has warmed up slightly,
causing some of the ice in the polar regions to melt. Meltwater has returned to the
oceans, and sea level has risen. Another reason for the rising sea level is that the
oceans are also warmer, and as the water becomes warmer it expands.
More than half of the people in the world live within 80 kilometers of a coast. Many
large cities are near the coast. London, New York, and New Orleans are examples.
What will happen to these coastal cities if sea levels continue to rise?
1. Look in your atlas and find two large U.S. cities that are on flat coastlines and two
that are on mountainous coastlines.
2. Name the cities and the oceans that they border.
Flat Coastlines:
City 1: _________________________ Ocean________________________
City 2: _________________________ Ocean ________________________
Mountainous Coastlines:
City 3: _________________________ Ocean________________________
City 4: _________________________ Ocean ________________________
3. Think about how the region around each city would be affected by a rise in sea level
of several feet. Which two regions would have the most widespread flooding?
The regions around and .
Write a sentence to explain your answer.
Module 2, Investigation 4: Log 1Our coasts
1

72
Module 2, Investigation 4: Log 2Greenland
In much of the world, sea level is
slowly rising. One important reason for
this seems to be that some of the world’s
ice is melting and adding water to the
oceans.
Most of our planet’s ice is found in thick
sheets that cover the land in places where
the climate is cold. The largest ice sheets
are in Antarctica and Greenland. If these
ice sheets melt, they will add so much
water to the oceans that most of the
world’s coastlines will be flooded.
About 4/5 of Greenland is covered by
ice that is up to 3,000 meters thick. Some
of the ice always melts in the summer. But
summers are short there, and winters are
long. During the winter, the falling snow
packs down to form new ice. If the
amount of ice that melts in the summer is
the same as the amount of ice that forms
in the winter, the ice sheet stays about the
same size. If the amount of ice that melts
is greater than the amount that forms each
year, the ice sheet shrinks.
NASA scientists discovered that some
of the ice along Greenland’s coastline
disappeared during the last few years.
How did they find this out? They com-
pared satellite images from 1993 with
images from 1999. By measuring the
changes in the ice sheet, they could tell
how much of the ice had melted.
Does this mean that the ice will con-
tinue to melt? We cannot be sure yet. But
the scientists will continue to compare new
satellite images with older ones. Over
time, they will see if the ice sheet keeps
melting. If it does, the images will help
them figure out how fast it has been melt-
ing. Then they can use that information to
predict how fast the ice will melt in the
future.
Use the information about Greenland’s ice sheet to answer these questions.
1. If 4/5 of Greenland is covered by ice, how much is not covered by ice?
2. How can scientists tell if the ice sheet is melting?
3. Why is it important to know if Greenland’s ice sheet is melting?
○ ○ ○ ○ ○ ○ ○ ○ ○ ○ ○ ○ ○ ○ ○ ○ ○ ○ ○ ○ ○ ○ ○ ○ ○ ○ ○ ○ ○ ○ ○ ○ ○ ○ ○ ○ ○ ○ ○ ○ ○ ○ ○ ○ ○ ○ ○ ○ ○

8
Directions: Read this information to learn more about river flooding. Answer the questions on Log 4.
You will share this information with the class.
3
Module 2, Investigation 4: Log 3Flooding in the Midwest—Background
Satellite images were used to help
people during serious flooding in 1993. In
the Midwest, heavy rains caused the
waters of the Mississippi, Missouri, Illinois,
and several smaller rivers to overflow their
banks. Communities and farms along the
rivers were in danger of being flooded.
Officials in the city of St. Louis, Mis-
souri, needed a plan to evacuate people
and property as the waters of the Missis-
sippi River rose toward the top of the river
bank. Mr. Lee Blackmore, who worked for
the city, used satellite images and maps to
help plan the evacuation.
“The water is rising fast,” said the
frantic voice on the telephone. “Can you
help with the evacuation? We’re losing
our race against the river.” Mr. Blackmore
went to work. He knew the city was run-
ning out of time and that homes and busi-
nesses along the river would soon be
flooded.
The St. Louis police department had
been ordered to start evacuating neighbor-
hoods that might be in danger. But these
areas had seldom flooded, so many resi-
dents remained in their homes, believing
they were safe.
Mr. Blackmore helped make a map
from satellite images of the flooding. It
clearly showed the police where the flood
waters were rising fast. The successful
evacuation began within four hours after
Mr. Blackmore received the call for help.
Many people were affected by the flood
waters, but no lives were lost.
Figure 5 shows the St. Louis area
during the dry summer of 1988. The river,
in black, is narrow and runs in its normal
channel. Vegetation is in green; dry soil
and urban areas are shown as red and
brown. Figure 6 shows the river system in
full flood in July 1993.
Can you see just where the river went
over the banks?
http://observe.ivv.nasa.gov/nasa/exhibits/flood/flood_2.html

9
Directions: Look at your two images very carefully. How are they different? Read the
information about the images and answer the following questions.
1. Titles of the images
Figure 5
Figure 6
2. In which year was each image made? Figure 5 Figure 6
3. What changes can you see in Figure 6?
4. How could you measure these changes?
5. What could happen to people, animals, and the rest of the environment because of
these changes?
6. Why do you think the changes occurred?
7. Look at a map to find the location of your images. Which states are shown in the
images?
8. Which two rivers join in the Mississippi River just north of St. Louis?
4
Module 2, Investigation 4: Log 4Flooding in the Midwest

105
Module 2, Investigation 4: Log 5Lake Chad is shrinking
Directions: Your group will use satellite images of Lake Chad to figure out how the lake changed in
size between 1973 and 1997.
Place the grid (Figure 8) over the 1973 satellite image of Lake Chad (Figure 7). Take turns counting the
number of squares that are on water in each numbered row. If the square falls partly on water and partly
on wetland or dry land, use the following rule: If more than half of the square is on water, count it as
water. If less than half the square is on water, do not count it as water. Remember that wetland is not
water!
Take turns placing this information on the tally sheet below. Then do the same for the 1997 image.
1. How many water squares did you count in 1973? In 1997?
2. Each square represents 400 square kilometers. How many square kilometers
was Lake Chad in 1973? In 1997?
3. How much smaller was Lake Chad in 1997 than in 1973?
square kilometers
Tally Sheet(Row)
1973 Image 1997 Image
1
2
3
4
56
78
91011
1213
14
15

116
Module 2, Investigation 4: Figure 1Mountainous coastline in California
Source: http://visibleearth.nasa.gov/cgi-bin/viewrecord?7546

127
Module 2, Investigation 4: Figure 2Flat coastline in the Eastern United States
Source: http://visibleearth.nasa.gov/data/ev51/ev5144_S2000277172549_md.jpg

138
Module 2, Investigation 4: Figure 3Greenland
Source: earth.jsc.nasa.gov/photoinfo.cgi?PHOTO+STS045-152-105

149
Mod
ule
2, In
vest
igat
ion
4: F
igur
e 4
Map
of M
idw
este
rn fl
oodi
ng
Sourc
e: h
ttp://o
bserv
e.ivv.
nasa.g
ov/n
asa/e
xhib
its/flo
od/flo
od_2.h
tml

1510
Module 2, Investigation 4: Figure 5The Mississippi River System in 1988
Source: http://observe.ivv.nasa.gov/nasa/gallery/world/graphics/flood1.jpg

1611
Module 2, Investigation 4: Figure 6The Mississippi River System during the 1993 floods
Source: http://observe.ivv.nasa.gov/nasa/gallery/world/graphics/flood2.jpg

17
Image 1:January 1973
Image 2:January 1997
Source: http://www.gsfc.nasa.gov/gsfc/earth/environ/lakechad/chad.htm
12
Module 2, Investigation 4: Figure 7Lake Chad, 1973 and 1997

1813
Module 2, Investigation 4: Figure 8Grid
20 km
12
3
4
56
7
89
10
1112
1314
15