module 5 complete
TRANSCRIPT
MODULE 5 MCA-204 Object Oriented Programming and C++ ADMN 2009-‘10
Dept of Computer Science And Applications, SJCET, Palai 148
MODULE 5
CONSOLE I/O OPERATIONS
C++ supports two complete I/O systems: the one inherited from C and the
object-oriented I/O system defined by C++ (hereafter called simply the C++ I/O
system). Like C-based I/O, C++'s I/O system is fully integrated. The different aspects
of C++'s I/O system, such as console I/O and disk I/O, are actually just different
perspectives on the same mechanism.
5.1 C++ STREAMS
Like the C-based I/O system, the C++ I/O system operates through streams. A
stream is a logical device that either produces or consumes information. A stream is
linked to a physical device by the I/O system. All streams behave in the same way
even though the actual physical devices they are connected to may differ substantially.
Because all streams behave the same, the same I/O functions can operate on virtually
any type of physical device. For example, you can use the same function that writes to
a file to write to the printer or to the screen. The advantage to this approach is that you
need learn only one I/O system.
5.2 THE C++ STREAM CLASSES
As mentioned, Standard C++ provides support for its I/O system in
<iostream>. In this header, a rather complicated set of class hierarchies is defined
that supports I/O operations. The I/O classes begin with a system of template classes.
Once a template class has been defined, specific instances of it can be created. As it
relates to the I/O library, Standard C++ creates two specializations of the I/O template
classes: one for 8-bit characters and another for wide characters. The C++ I/O system
is built upon two related but different template class hierarchies. The first is derived
from the low-level I/O class called basic_streambuf. This class supplies the basic,
low-level input and output operations, and provides the underlying support for the
entire C++ I/O system. Unless you are doing advanced I/O programming, you will not
need to use basic_streambuf directly. The class hierarchy that you will most
commonly be working with is derived from basic_ios. This is a high-level I/O class
that provides formatting, error checking, and status information related to stream I/O.
(A base class for basic_ios is called ios_base, which defines several nontemplate
traits used by basic_ios.) basic_ios is used as a base for several derived classes,
including basic_istream, basic_ostream, and basic_iostream. These classes are used
to create streams capable of input, output, and input/output, respectively.
As explained, the I/O library creates two specializations of the template class
hierarchies just described: one for 8-bit characters and one for wide characters. Here is
MODULE 5 MCA-204 Object Oriented Programming and C++ ADMN 2009-‘10
Dept of Computer Science And Applications, SJCET, Palai 149
a list of the mapping of template class names to their character and wide-character
versions.
5.3 UNFORMATTED I/O OPERATIONS
Operators >> and <<
We have used the objects cin and cout(pre-defined in the iostream file) for the
input and output of data of various types. This has been made possible by overloading
the operators >> and << to recognize all the basic C++ types. The >>operator is
overloaded in the istream class and <<is overloaded in the ostream class.The
following is the general format for reading data from the keyboard:
cin>>variable1>>variable>>…..>>variableN
variable1,variable2,…are valid C++ variable names that have been declared
already.This statement will cause the computer to stop the execution and look for
input data from the keyboard.The input data for this statement would be:
data1 data2 ……dataN
The input data are separated by white spaces and should match the type of
variable in the cin list. Spaces, newlines and tabs will be skipped.
The operator >> reads the data character by character and assigns it to the
indicated location. The reading for a variable will be terminated at the encounter of a
white space or a character that does not match the desination type. For example,
consider the following code
int code;
cin>>code;
Suppose the following data is given as input:
4258D
The operator will read the characters upto 8 and the value 4258n is assigned to
code. The character D remains in the inputstream and will be input to the next cin
statement. The general form for displaying data on the screen is:
cout<<item1<<item2<<….<<itemN
The items item1 through itemN may be variables or constants of any basic
type.
5.3.1 PUT() AND GET() FUNCTIONS
The classes istrem and ostream define two member functions get() and put()
respectively to handle the single character input/output operations. There are two
types of get() functions .We can use both get(char*) and get(void) prototypes to fetch
a character including thye blank space, tab and the newline character. The get(char*)
version assigns the input character to its argument and the get(void) version returns
the input character.
MODULE 5 MCA-204 Object Oriented Programming and C++ ADMN 2009-‘10
Dept of Computer Science And Applications, SJCET, Palai 150
Since these functions are members of the input/output stream classes,we must
invoke them using an appropriate object.
Example:
char c;
cin.get(c );//get a character fron keyboard and assign it to c
while(c!=‘\n‘)
{
cout<<c;//display the character on screen
cin.get(c);//get another character
}
This code reads and displays a line of text.Remember, the operator >> can also
be used to read a character but it will skip the white spaces and newline character. The
above while loop will not work properly if the statement
cin>.c;
is used in place of
cin.get(c);
The get(void) version is used as follows:
………..
char c;
c=cin.get();//cin.get(c); replaced
………..
………..
The value returned by the function get() is assigned to the variable c.
The function put(), a member of ostream class, can be used to output a line of
text,character by character . For example,
cout.put(‗x‘);
displays the character x and
cout.put(ch);
displays the value of variable ch.
The variable ch must contain a character value. We can also use a number as an
argument to the function put(). For example,
cout.put(68);
Displays the character D. This statement will convert the int value 68 to a char
value and display the character whose ASCII value is 68.
The following segment of a program reads a line of text from the keyboard and
displays it on the screen.
char c;
cin.get(c);//read a character
while(c!=‘\n‘)
{
MODULE 5 MCA-204 Object Oriented Programming and C++ ADMN 2009-‘10
Dept of Computer Science And Applications, SJCET, Palai 151
cout.put(c);
cin.get(c);
}
5.3.2 GETLINE() AND WRITE() FUNCTIONS
We can read display a line of text more efficiently using the line-oriented
input/output functions getline() and write(). The getline() function reads a whole line
of text that ends with a newline character(transmitted by the RETURN key).This
function can be invoked by using the object cin as follows:
cin.getline(line,size);
This function call invokes the function getline() which reads character input
into the variable line.The reading is terminated as soon as either the new line character
‗\n‘ is encountered or size-1 characters are read (whichever occurs first).The newline
character is read but not saved. Instead, it is replaced by the null character .For
example ,consider the following code:
char name[20];
cin.getline(name,20);
Assume that we have given the following input through the keyboard:
Bjarne Stroustrup<press RETURN>
This input will be read correctly and assigned to the character array name .Let
us suppose the input is as follows:
Object Oriented Programming <press RETURN>
In this case, the input will be terminated after reading the following 19
characters:
Object Oriented Pro
Remember, the two blank spaces contained in the string are also taken into
account.
We can also read strings using the operator >> as follows:
cin>>name;
But remember cin can read strings that do not contain white spaces. This means
that cin can read just one word and not a series of words such as ―Bjarne Stroustrup‖.
But it can read the following string correctly:
Bjarne_Stroustrup
After reading the string, cin automatically adds the terminating null character to
the character array.
The write() function displays an entire line and has the following form:
cout.write(line,size)
The first argument line represents the name of the string to be displayed and the
second argument size indicates the number of characters to display. Note that it does
not stop displaying the characters automatically when the null character is
MODULE 5 MCA-204 Object Oriented Programming and C++ ADMN 2009-‘10
Dept of Computer Science And Applications, SJCET, Palai 152
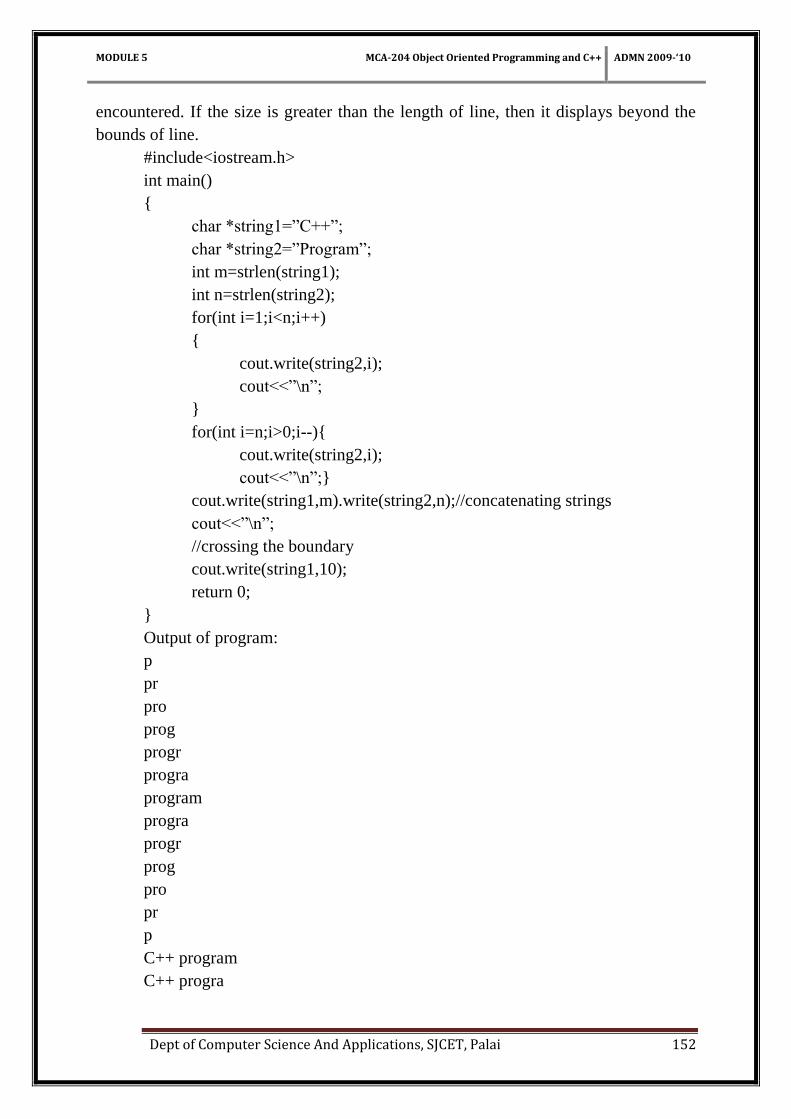
encountered. If the size is greater than the length of line, then it displays beyond the
bounds of line.
#include<iostream.h>
int main()
{
char *string1=‖C++‖;
char *string2=‖Program‖;
int m=strlen(string1);
int n=strlen(string2);
for(int i=1;i<n;i++)
{
cout.write(string2,i);
cout<<‖\n‖;
}
for(int i=n;i>0;i--){
cout.write(string2,i);
cout<<‖\n‖;}
cout.write(string1,m).write(string2,n);//concatenating strings
cout<<‖\n‖;
//crossing the boundary
cout.write(string1,10);
return 0;
}
Output of program:
p
pr
pro
prog
progr
progra
program
progra
progr
prog
pro
pr
p
C++ program
C++ progra
MODULE 5 MCA-204 Object Oriented Programming and C++ ADMN 2009-‘10
Dept of Computer Science And Applications, SJCET, Palai 153
The last line of the output indicates that the statement
cout.write(string1,10);
Displays more characters than what is contained in string1.
It is possible to concatenate two strings using the write() function.The
statement
cout.write(string1,m).write(string2,n);
is equivalent to the following two statements:
cout.write(string1,m);
cout.write(string2,n);
5.4 FORMATTED CONSOLE I/O OPERATIONS
C++ supports a number of features that could be used for formatting the output. These
features include:
ios class functions and flags.
Manipulators.
User-defined output functions.
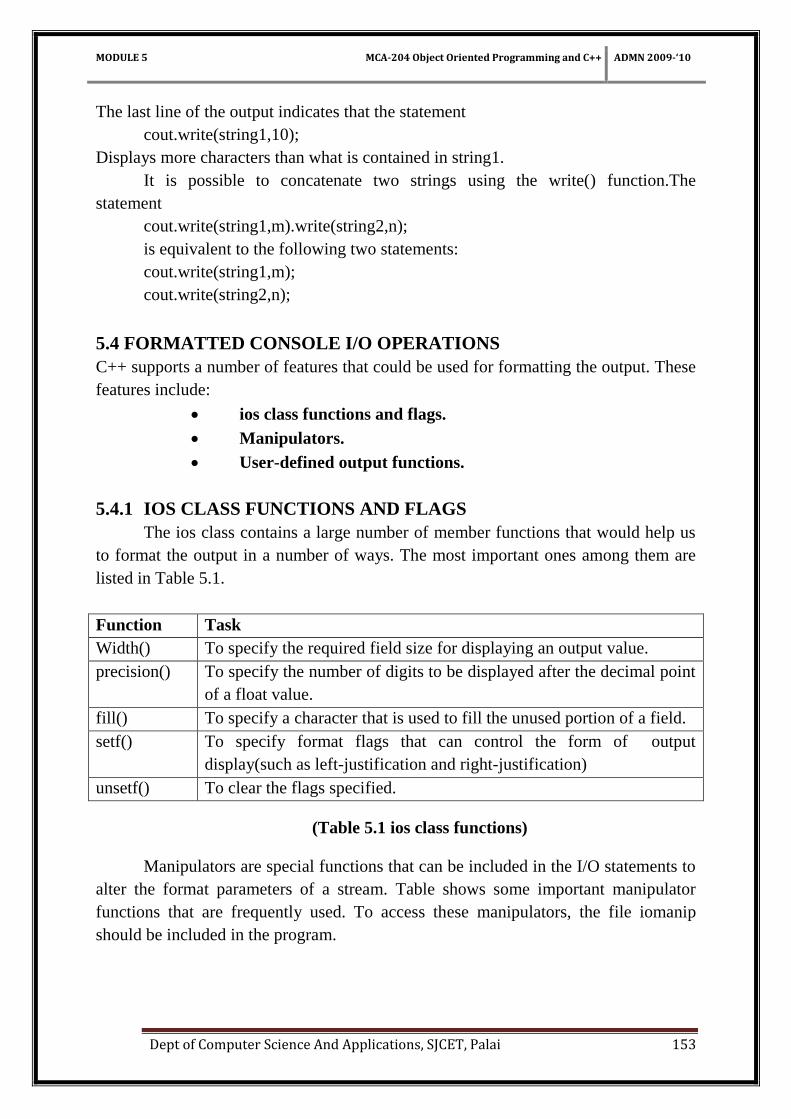
5.4.1 IOS CLASS FUNCTIONS AND FLAGS
The ios class contains a large number of member functions that would help us
to format the output in a number of ways. The most important ones among them are
listed in Table 5.1.
Function Task
Width() To specify the required field size for displaying an output value.
precision() To specify the number of digits to be displayed after the decimal point
of a float value.
fill() To specify a character that is used to fill the unused portion of a field.
setf() To specify format flags that can control the form of output
display(such as left-justification and right-justification)
unsetf() To clear the flags specified.
(Table 5.1 ios class functions)
Manipulators are special functions that can be included in the I/O statements to
alter the format parameters of a stream. Table shows some important manipulator
functions that are frequently used. To access these manipulators, the file iomanip
should be included in the program.
MODULE 5 MCA-204 Object Oriented Programming and C++ ADMN 2009-‘10
Dept of Computer Science And Applications, SJCET, Palai 154
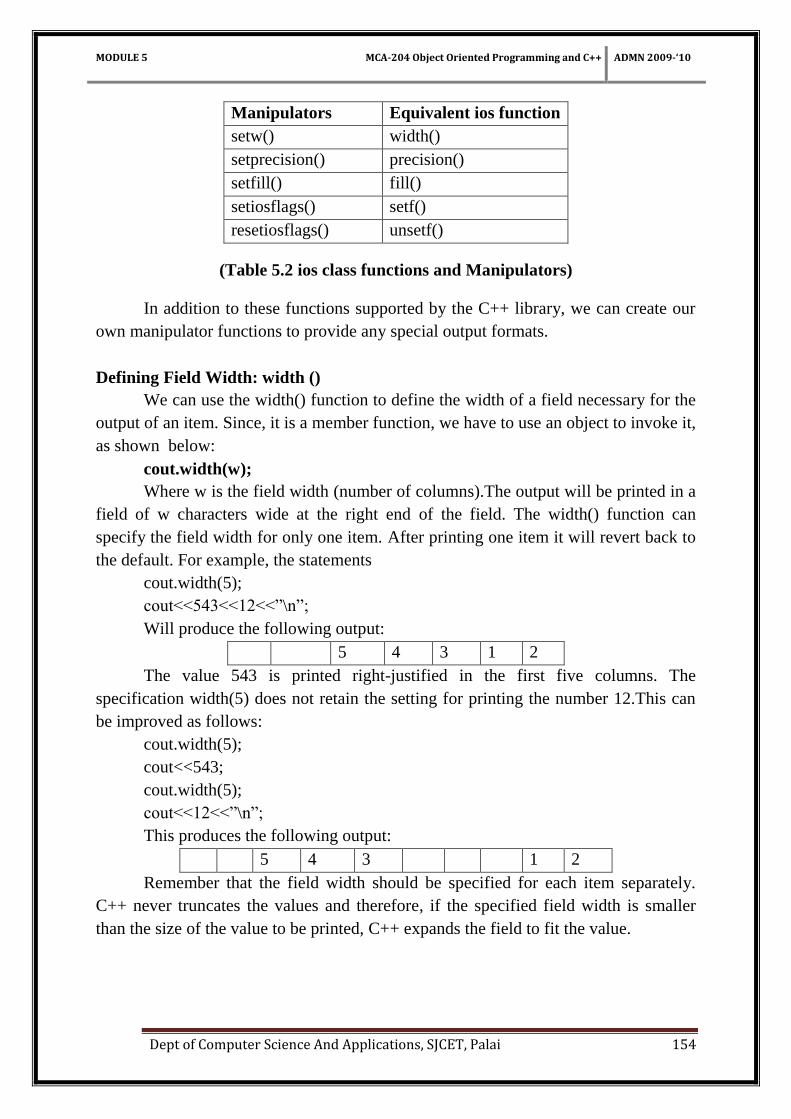
Manipulators Equivalent ios function
setw() width()
setprecision() precision()
setfill() fill()
setiosflags() setf()
resetiosflags() unsetf()
(Table 5.2 ios class functions and Manipulators)
In addition to these functions supported by the C++ library, we can create our
own manipulator functions to provide any special output formats.
Defining Field Width: width ()
We can use the width() function to define the width of a field necessary for the
output of an item. Since, it is a member function, we have to use an object to invoke it,
as shown below:
cout.width(w);
Where w is the field width (number of columns).The output will be printed in a
field of w characters wide at the right end of the field. The width() function can
specify the field width for only one item. After printing one item it will revert back to
the default. For example, the statements
cout.width(5);
cout<<543<<12<<‖\n‖;
Will produce the following output:
5 4 3 1 2
The value 543 is printed right-justified in the first five columns. The
specification width(5) does not retain the setting for printing the number 12.This can
be improved as follows:
cout.width(5);
cout<<543;
cout.width(5);
cout<<12<<‖\n‖;
This produces the following output:
5 4 3 1 2
Remember that the field width should be specified for each item separately.
C++ never truncates the values and therefore, if the specified field width is smaller
than the size of the value to be printed, C++ expands the field to fit the value.
MODULE 5 MCA-204 Object Oriented Programming and C++ ADMN 2009-‘10
Dept of Computer Science And Applications, SJCET, Palai 155
Setting Precision:precision()
By default, the floating numbers are printed with six digits after the decimal
point. However, we can specify the number of digits to be displayed after the decimal
point while printing the floating-point numbers. This can be done by using the
precision() member function as follows:
cout.precision(d);
Where d is the number of digits to the right of the decimal point. For example
,the statements
cout.precision(3);
cout<<sqrt(2)<<‖\n‖;
cout<<3.14159<<‖\n‖;
cout<<2.50032<<‖\n‖;
will produce the following output:
1.141(truncated)
3.142(rounded to the nearest cent)
2.5(no trailing zeros)
Not that, unlike the function width(),precision() retains the setting in effect
until it is reset. That is why we have declared only one statement for the precision
setting which is used by all the three outputs.
We can set different values to different precision as follows:
cout.precision(3);
cout<<sqrt(2)<<‖\n‖;
cout.precision(5);//reset the precision
cout<<3.14159<<‖\n‖;
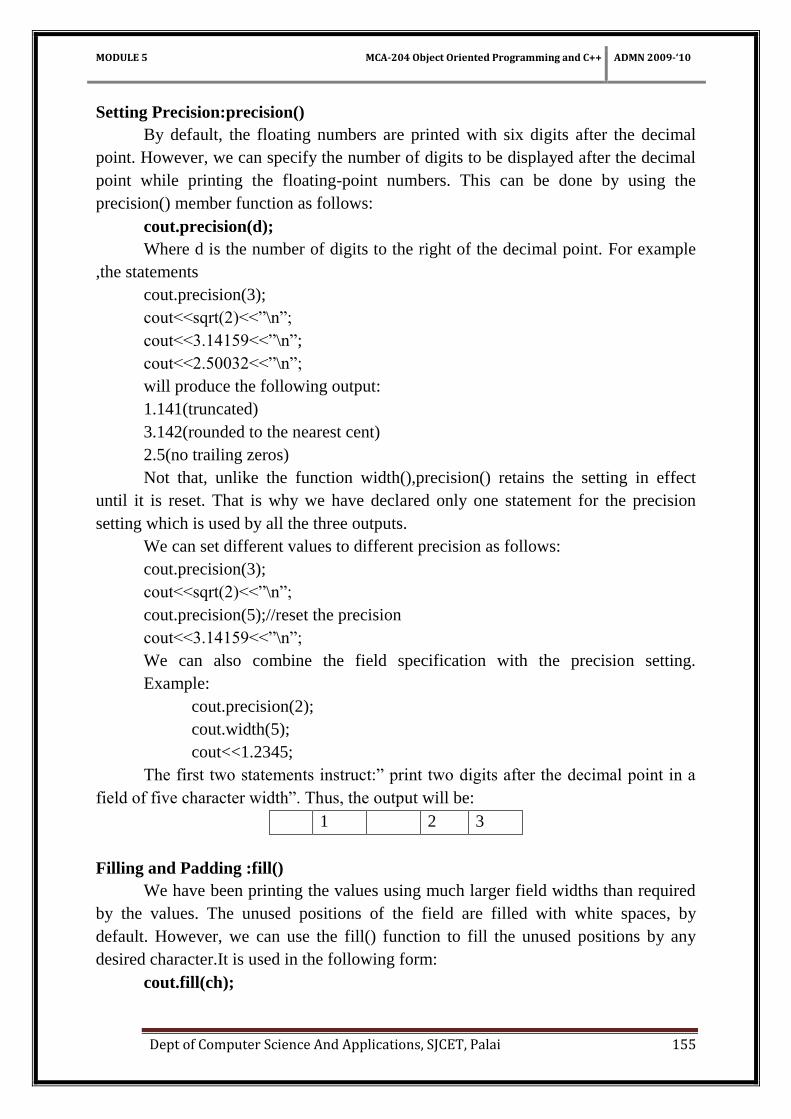
We can also combine the field specification with the precision setting.
Example:
cout.precision(2);
cout.width(5);
cout<<1.2345;
The first two statements instruct:‖ print two digits after the decimal point in a
field of five character width‖. Thus, the output will be:
1 2 3
Filling and Padding :fill()
We have been printing the values using much larger field widths than required
by the values. The unused positions of the field are filled with white spaces, by
default. However, we can use the fill() function to fill the unused positions by any
desired character.It is used in the following form:
cout.fill(ch);
MODULE 5 MCA-204 Object Oriented Programming and C++ ADMN 2009-‘10
Dept of Computer Science And Applications, SJCET, Palai 156
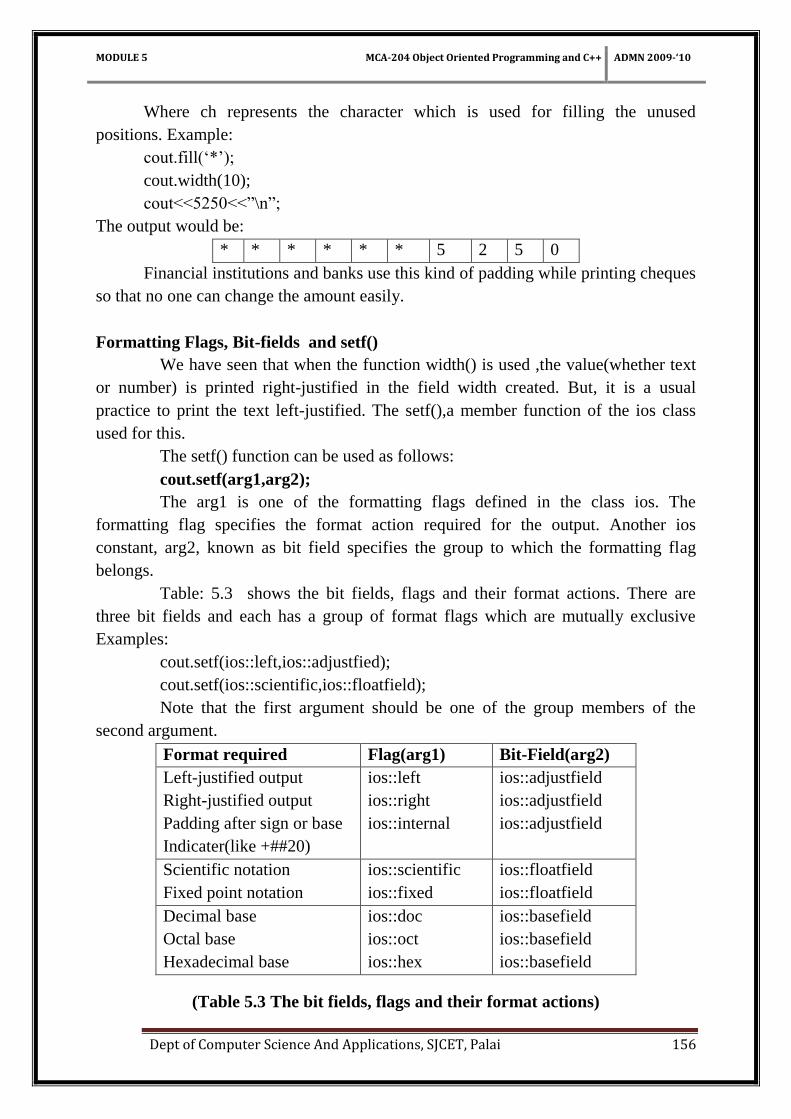
Where ch represents the character which is used for filling the unused
positions. Example:
cout.fill(‗*‘);
cout.width(10);
cout<<5250<<‖\n‖;
The output would be:
* * * * * * 5 2 5 0
Financial institutions and banks use this kind of padding while printing cheques
so that no one can change the amount easily.
Formatting Flags, Bit-fields and setf()
We have seen that when the function width() is used ,the value(whether text
or number) is printed right-justified in the field width created. But, it is a usual
practice to print the text left-justified. The setf(),a member function of the ios class
used for this.
The setf() function can be used as follows:
cout.setf(arg1,arg2);
The arg1 is one of the formatting flags defined in the class ios. The
formatting flag specifies the format action required for the output. Another ios
constant, arg2, known as bit field specifies the group to which the formatting flag
belongs.
Table: 5.3 shows the bit fields, flags and their format actions. There are
three bit fields and each has a group of format flags which are mutually exclusive
Examples:
cout.setf(ios::left,ios::adjustfied);
cout.setf(ios::scientific,ios::floatfield);
Note that the first argument should be one of the group members of the
second argument.
Format required Flag(arg1) Bit-Field(arg2)
Left-justified output
Right-justified output
Padding after sign or base
Indicater(like +##20)
ios::left
ios::right
ios::internal
ios::adjustfield
ios::adjustfield
ios::adjustfield
Scientific notation
Fixed point notation
ios::scientific
ios::fixed
ios::floatfield
ios::floatfield
Decimal base
Octal base
Hexadecimal base
ios::doc
ios::oct
ios::hex
ios::basefield
ios::basefield
ios::basefield
(Table 5.3 The bit fields, flags and their format actions)

MODULE 5 MCA-204 Object Oriented Programming and C++ ADMN 2009-‘10
Dept of Computer Science And Applications, SJCET, Palai 157
Consider the following segment of code:
cout.filll(‗*‘);
cout.setf(ios::left,ios::adjustfield);
cout.width(15);
cout<<‖TABLE1‖<<‖\n‖;
This will produce the following output:
T A B L E 1 * * * * * * * *
The statements
cout.fill(‗*‘);
cout.precision(3);
cout.setf(ios::internal,ios::adjustfield);
cout.setf(ios::scientific,ios::floatfield);
cout.width(15);
cout<<-12.34567<<‖\n‖;
Will produce the following output:
Displaying Trailing Zeros And Plus Sign
If we print the numbers 10.75, 25.00 and 15.50 using a field width of, say,
eight positions, with two digits precision, and then the output will be as follows:
1 0 . 7 5
2 5
1 5 . 5
Note that the trailing zeros in the second and third items have been truncated.
Certain situations, such as a list of prices of items or the salary statement of
employees, require trailing zeros to be shown. The above output would look better if
they are printed as follows:
10.75
25.00
15.50
The setf() can be used with the flag ios::showpoint as a single argument to
achieve this form of output. For example,
cout.setf(ios::showpoint);//display trailing zeros
- * * * * * 1 . 2 3 5 e + 0 1
MODULE 5 MCA-204 Object Oriented Programming and C++ ADMN 2009-‘10
Dept of Computer Science And Applications, SJCET, Palai 158
Would cause cout to display trailing zeros and trailing decimal point. Under
default precision, the value 3.25 will be displayed as 3.250000. Remember, the default
precision assumes a precision of six digits.
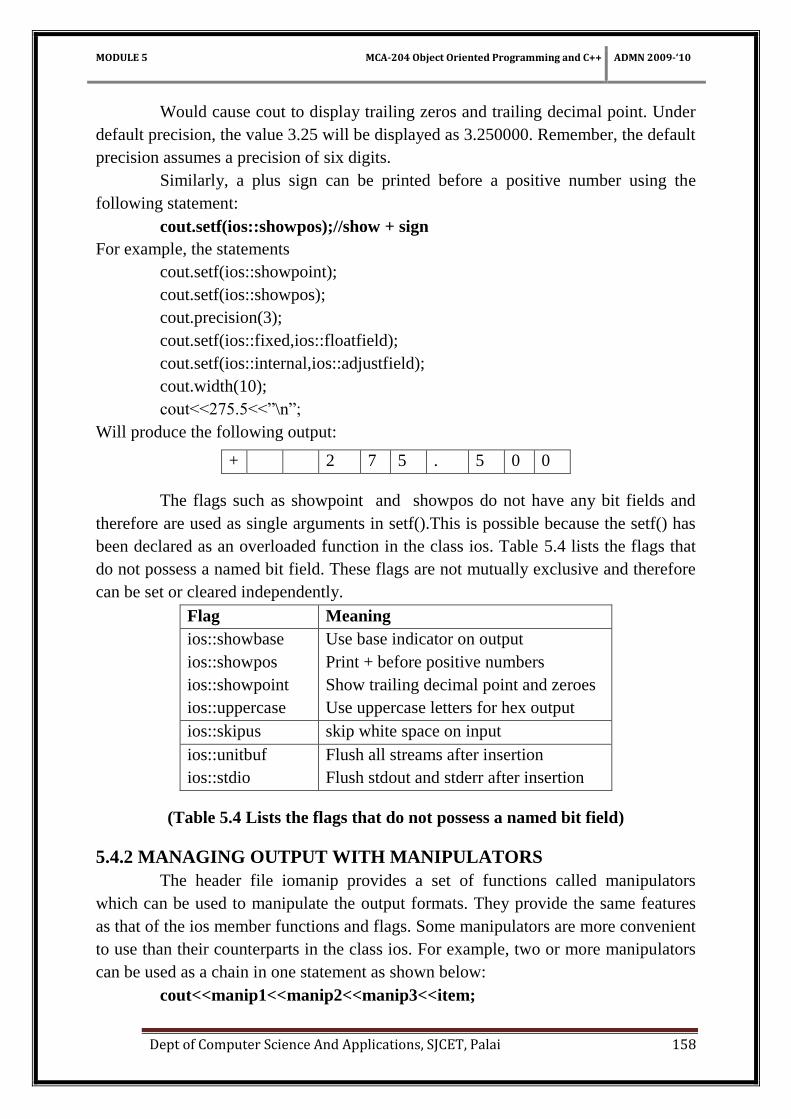
Similarly, a plus sign can be printed before a positive number using the
following statement:
cout.setf(ios::showpos);//show + sign
For example, the statements
cout.setf(ios::showpoint);
cout.setf(ios::showpos);
cout.precision(3);
cout.setf(ios::fixed,ios::floatfield);
cout.setf(ios::internal,ios::adjustfield);
cout.width(10);
cout<<275.5<<‖\n‖;
Will produce the following output:
The flags such as showpoint and showpos do not have any bit fields and
therefore are used as single arguments in setf().This is possible because the setf() has
been declared as an overloaded function in the class ios. Table 5.4 lists the flags that
do not possess a named bit field. These flags are not mutually exclusive and therefore
can be set or cleared independently.
Flag Meaning
ios::showbase
ios::showpos
ios::showpoint
ios::uppercase
Use base indicator on output
Print + before positive numbers
Show trailing decimal point and zeroes
Use uppercase letters for hex output
ios::skipus skip white space on input
ios::unitbuf
ios::stdio
Flush all streams after insertion
Flush stdout and stderr after insertion
(Table 5.4 Lists the flags that do not possess a named bit field)
5.4.2 MANAGING OUTPUT WITH MANIPULATORS
The header file iomanip provides a set of functions called manipulators
which can be used to manipulate the output formats. They provide the same features
as that of the ios member functions and flags. Some manipulators are more convenient
to use than their counterparts in the class ios. For example, two or more manipulators
can be used as a chain in one statement as shown below:
cout<<manip1<<manip2<<manip3<<item;
+ 2 7 5 . 5 0 0
MODULE 5 MCA-204 Object Oriented Programming and C++ ADMN 2009-‘10
Dept of Computer Science And Applications, SJCET, Palai 159
cout<<manip1<<item1<<manip2<<item2;
This kind of concatenation is useful when we want to display several
columns of output.
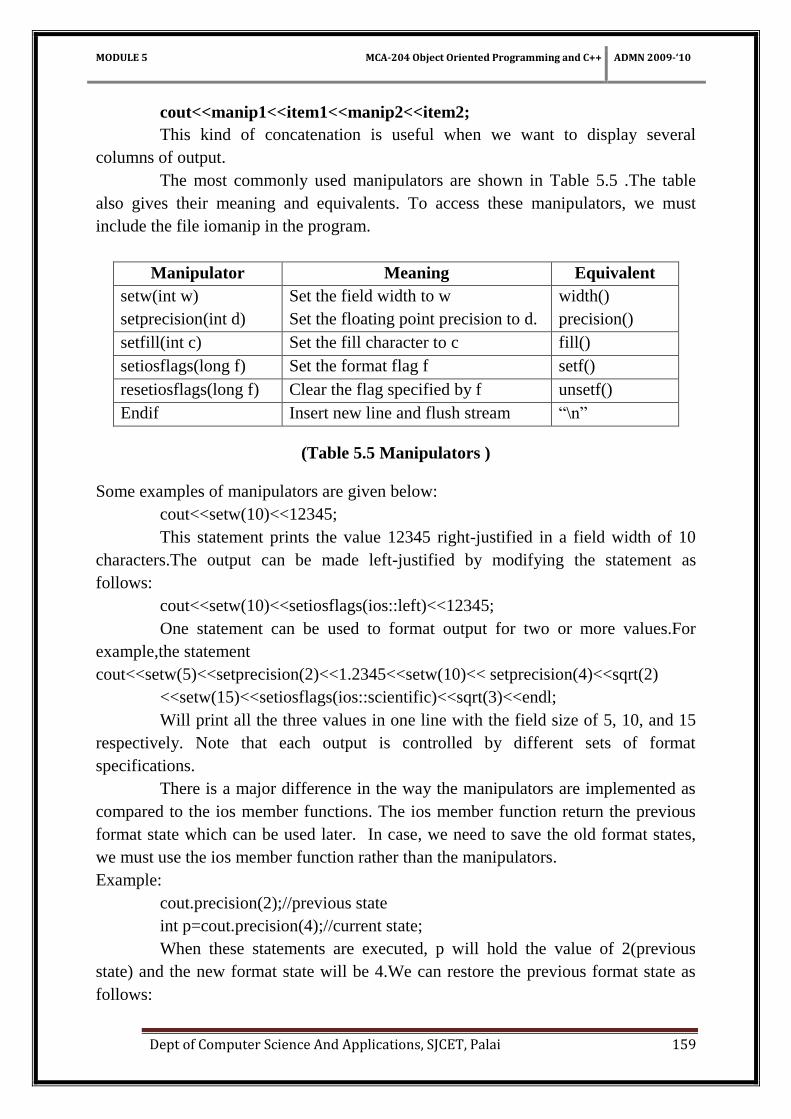
The most commonly used manipulators are shown in Table 5.5 .The table
also gives their meaning and equivalents. To access these manipulators, we must
include the file iomanip in the program.
Manipulator Meaning Equivalent
setw(int w)
setprecision(int d)
Set the field width to w
Set the floating point precision to d.
width()
precision()
setfill(int c) Set the fill character to c fill()
setiosflags(long f) Set the format flag f setf()
resetiosflags(long f) Clear the flag specified by f unsetf()
Endif Insert new line and flush stream ―\n‖
(Table 5.5 Manipulators )
Some examples of manipulators are given below:
cout<<setw(10)<<12345;
This statement prints the value 12345 right-justified in a field width of 10
characters.The output can be made left-justified by modifying the statement as
follows:
cout<<setw(10)<<setiosflags(ios::left)<<12345;
One statement can be used to format output for two or more values.For
example,the statement
cout<<setw(5)<<setprecision(2)<<1.2345<<setw(10)<< setprecision(4)<<sqrt(2)
<<setw(15)<<setiosflags(ios::scientific)<<sqrt(3)<<endl;
Will print all the three values in one line with the field size of 5, 10, and 15
respectively. Note that each output is controlled by different sets of format
specifications.
There is a major difference in the way the manipulators are implemented as
compared to the ios member functions. The ios member function return the previous
format state which can be used later. In case, we need to save the old format states,
we must use the ios member function rather than the manipulators.
Example:
cout.precision(2);//previous state
int p=cout.precision(4);//current state;
When these statements are executed, p will hold the value of 2(previous
state) and the new format state will be 4.We can restore the previous format state as
follows:
MODULE 5 MCA-204 Object Oriented Programming and C++ ADMN 2009-‘10
Dept of Computer Science And Applications, SJCET, Palai 160
cout.precision(p)//p=2
5.4.3 DESIGNING OUR OWN MANIPULATORS
We can design our own manipulators for certain special purpose.The general
form for creating a manipulator without any arguments is:
ostream & manipulator(ostream & output)
{
…………
…………(code)
…………
return output
}
Here the manipulator is the name of the manipulator under creation.The
following function defines a manipulator called unit that dispalys‖inches‖:
ostream & unit(ostream &output)
{
output<<‖inches‖;
return output;
}
The statement
cout<<36<<unit;
Will produce the following output
16 inches
We can also create manipulators that could represent a sequence of
operations. Example:
ostream & show(ostream & output)
{
output.setf(ios::showpoint);
output.setf(ios::showpos);
output<<setw(10);
return output;
}
This function defines a manipulator called show that turns on the flags
showpoint and showpos declared in the class ios and sets the field width to 10.
Program illustrates the creation and use of the user-defined manipulators.
The program creates two manipulators called currency and form which are used in the
main program.
#include<iostream.h>
#include<iomanip.h>
ostream & currency(ostream & output)
MODULE 5 MCA-204 Object Oriented Programming and C++ ADMN 2009-‘10
Dept of Computer Science And Applications, SJCET, Palai 161
{
output<<‖Rs‖;
return output;
}
ostream& form(ostream & output)
{
output.setf(ios::showpos);
output.setf(ios::showpoint);
output.fill(‗*‘);
output.precision(2);
output<<setiosflags(ios::fixed)<<setw(10);
return output;
}
int main()
{
cout<<currency <<form<<7864.5;
return 0;
}
The output of Program would be:
Rs**+7864.50
Note that form represents a complex set of format functions and
manipulators.
5.5 OVERLOADING << AND>> OPERATOR
The << and the >> operators are overloaded in C++ to perform I/O operations
on C++'s built-in types. You can also overload these operators so that they perform I/O
operations on types that you create.
In C++, the << output operator is referred to as the insertion operator because it
inserts characters into a stream. Likewise, the >> input operator is called the
extraction operator because it extracts characters from a stream. The functions that
overload the insertion and extraction operators are generally called inserters and
extractors, respectively.
Creating Our Own Inserters:
All inserter functions have this general form:
ostream &operator<<(ostream &stream, class_type &obj)
{
// body of inserter
return stream;
}
MODULE 5 MCA-204 Object Oriented Programming and C++ ADMN 2009-‘10
Dept of Computer Science And Applications, SJCET, Palai 162
Notice that the function returns a reference to a stream of type ostream., which
is an output stream (ostream is a class derived from ios that supports output.)
Creating Our Own Extractors:
Extractors are the complement of inserters. The general form of an extractor
function is
istream &operator>>(istream &stream, class_type &obj)
{
// body of extractor
return stream;
}
Extractors return a reference to a stream of type istream, which is an input
stream. The first parameter must also be a reference to a stream of type istream.
Example:
Program to overloading << and >> as a non-member function
#include<conio.h>
#include<iostream.h>
class vector
{
int v[10];
public:
vector();
vector(int *x);
friend istream & operator >> (istream &input,vector &b);
friend ostream & operator << (ostream &output,vector &b);
};
vector::vector()
{
for(int i=0;i<5;i++)
v[i]=0;
}
vector::vector(int* x)
{
for(int i=0;i<5;i++)
v[i]=x[i];
}
istream & operator >> (istream &input,vector &b)
{
for(int i=0;i<5;i++)
input>>b.v[i];
return input;
MODULE 5 MCA-204 Object Oriented Programming and C++ ADMN 2009-‘10
Dept of Computer Science And Applications, SJCET, Palai 163
}
ostream & operator<<(ostream &output,vector &b)
{
output<<"("<<b.v[0];
for(int i=1;i<5;i++)
output<<";"<<b.v[i];
output<<")";
return(output);
}
void main()
{
clrscr();
vector vec;
cout<<"\nEnter the elements for vector: ";
cin>>vec;
cout<<"\nElements are";
cout<<vec;
getch();
}
Output:
Enter the elements for vector: 1 2 3 4 5
Elements are (1;2;3;4;5)
5.6 DISK I/O OPERATIONS
Many real – life problems handle large volumes of data and, in such situations,
we need to use some devices such as floppy disk or hard disk to store the data. The
data is stored in these devices using the concept of files. A file is a collection of
related data stored in a particular area on disk. Programs can be designed to perform
the read and write operations on these files.
A program typically involves either or both of the following kinds of data
communication:
1. Data transfer between the console unit and the program.
2. Data transfer between the program and a disk file.
The I/O system of C++ handles file operations which are very much similar to
the console input and output operations. It uses file streams as an interface between
the programs and the files. The stream that supplies data to the program is known as
input stream and the one that receives data from the program is known as output
MODULE 5 MCA-204 Object Oriented Programming and C++ ADMN 2009-‘10
Dept of Computer Science And Applications, SJCET, Palai 164
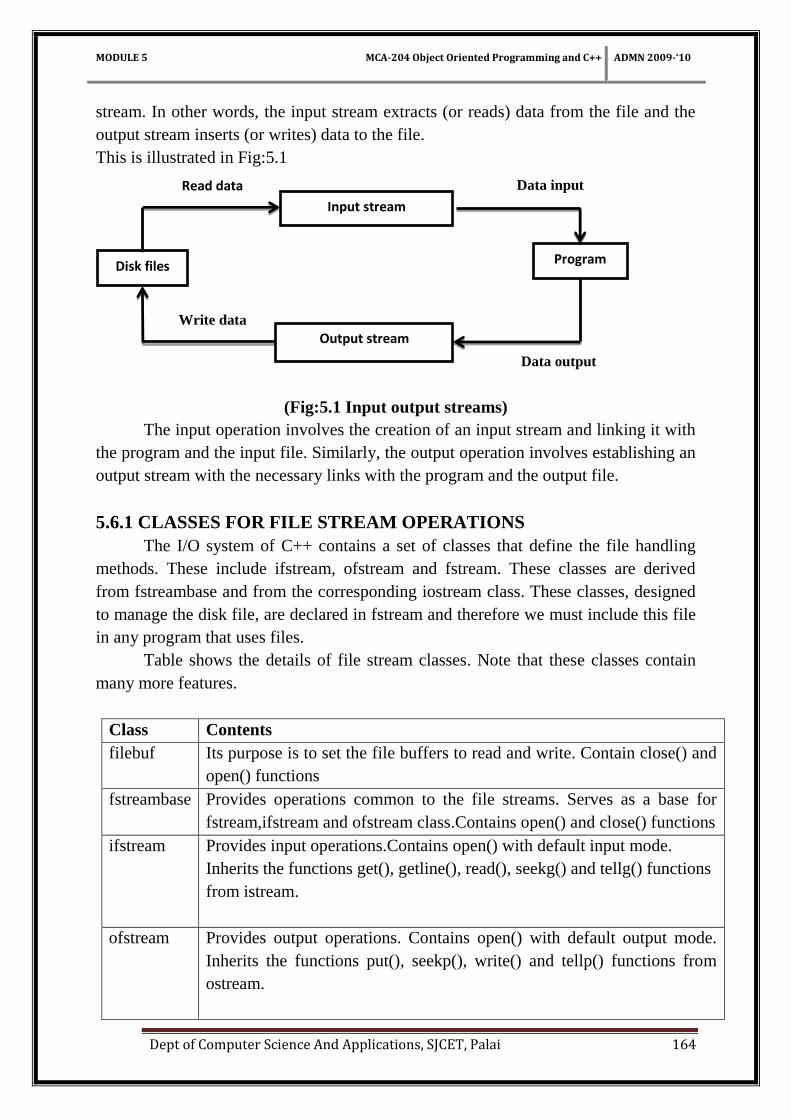
stream. In other words, the input stream extracts (or reads) data from the file and the
output stream inserts (or writes) data to the file.
This is illustrated in Fig:5.1
(Fig:5.1 Input output streams)
The input operation involves the creation of an input stream and linking it with
the program and the input file. Similarly, the output operation involves establishing an
output stream with the necessary links with the program and the output file.
5.6.1 CLASSES FOR FILE STREAM OPERATIONS
The I/O system of C++ contains a set of classes that define the file handling
methods. These include ifstream, ofstream and fstream. These classes are derived
from fstreambase and from the corresponding iostream class. These classes, designed
to manage the disk file, are declared in fstream and therefore we must include this file
in any program that uses files.
Table shows the details of file stream classes. Note that these classes contain
many more features.
Class Contents
filebuf Its purpose is to set the file buffers to read and write. Contain close() and
open() functions
fstreambase Provides operations common to the file streams. Serves as a base for
fstream,ifstream and ofstream class.Contains open() and close() functions
ifstream Provides input operations.Contains open() with default input mode.
Inherits the functions get(), getline(), read(), seekg() and tellg() functions
from istream.
ofstream Provides output operations. Contains open() with default output mode.
Inherits the functions put(), seekp(), write() and tellp() functions from
ostream.
Input stream
Output stream
Disk files Program
Read data Data input
Data output
Write data

MODULE 5 MCA-204 Object Oriented Programming and C++ ADMN 2009-‘10
Dept of Computer Science And Applications, SJCET, Palai 165
fstream Provides support for simultaneous input and output operations. Contains
open() with default input mode. Inherits all the functions from istream
and ostream classes through iostream
(Table 5.6 File stream classes )
5.7 OPENING AND CLOSING A FILE
If we want to use a disk file, we need to decide the following things about the
file and its intended use:
1. Suitable name for the file.
2. Data type and structure.
3. Purpose.
4. Opening method.
The filename is a string of characters that make up a valid filename for the
operating system. It may contain two parts, a primary name and an optional period
with extension.
For opening a file, we must first create a file stream and then link it to the
filename. A file stream can be defined using the classes ifstream, ofstream and fstream
that are contained in the header file fstream. The class to be used depends upon the
purpose, that is, whether we want to read data from the file or write data to it. A file
can be opened in two ways:
1. Using the constructor function of the class.
2. Using the member function open() of the class.
The first method is useful when we use only one file in the stream. The second
method is used when we want to manage multiple files using one stream.
5.7.1 OPENING FILES USING CONSTRUCTOR
We know that a constructor is used to initialize an object while it is being
created. Here, a filename is used to initialize the file stream object. This involves the
following steps.
1. Create a file stream object to manage the stream using the appropriate class.
That is to say, the class ofstram is used to create the output stream and the class
ifstream to create the input stream.
2. Initialize the file object with the desired filename.
For example, the following statement opens a file named ―results‖ for output:
Ofstream outfile(―results‖);//output only
This creates outfile as an ofstream object that manages the output stream. This
object can be any valid C++ name such as o_file, myfile or fout. This statement also
opens the file results and attaches it to the output stream outfile. This is illustrated in
MODULE 5 MCA-204 Object Oriented Programming and C++ ADMN 2009-‘10
Dept of Computer Science And Applications, SJCET, Palai 166
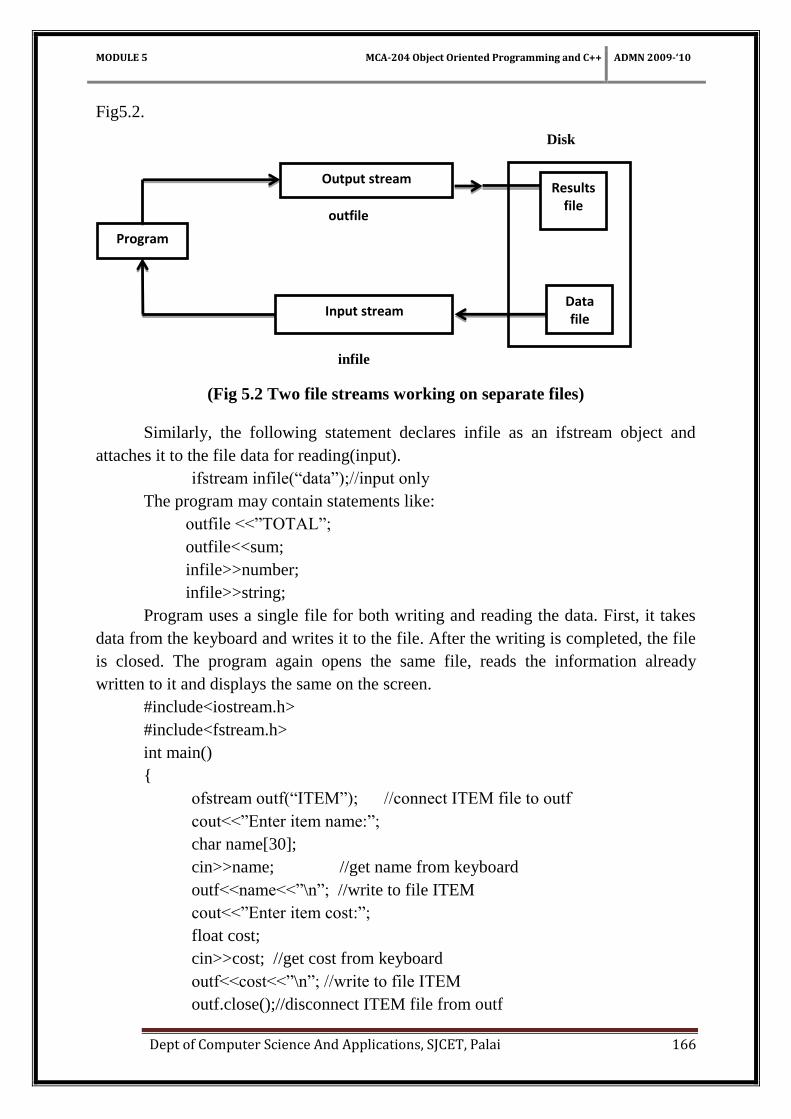
Fig5.2.
(Fig 5.2 Two file streams working on separate files)
Similarly, the following statement declares infile as an ifstream object and
attaches it to the file data for reading(input).
ifstream infile(―data‖);//input only
The program may contain statements like:
outfile <<‖TOTAL‖;
outfile<<sum;
infile>>number;
infile>>string;
Program uses a single file for both writing and reading the data. First, it takes
data from the keyboard and writes it to the file. After the writing is completed, the file
is closed. The program again opens the same file, reads the information already
written to it and displays the same on the screen.
#include<iostream.h>
#include<fstream.h>
int main()
{
ofstream outf(―ITEM‖); //connect ITEM file to outf
cout<<‖Enter item name:‖;
char name[30];
cin>>name; //get name from keyboard
outf<<name<<‖\n‖; //write to file ITEM
cout<<‖Enter item cost:‖;
float cost;
cin>>cost; //get cost from keyboard
outf<<cost<<‖\n‖; //write to file ITEM
outf.close();//disconnect ITEM file from outf
Output stream
Input stream
Program
Disk
Results file
Data file
outfile
infile
MODULE 5 MCA-204 Object Oriented Programming and C++ ADMN 2009-‘10
Dept of Computer Science And Applications, SJCET, Palai 167
ifstream inf(―ITEM‖);// connect ITEM file to inf
inf>>name;//read name from file ITEM
inf>>cost;//read cost from file ITEM
cout<<‖\n‖;
cout<<‖Item name:‖<<name<<‖\n‖;
cout<<‖Item cost:‖<<cost<<‖\n‖;
inf.close();//disconnect ITEM file from inf
return 0;
}
The output of program would be:
Enter item name:CD-ROM
Enter item cost:250
Item name:CD-ROM
Item cost:250
5.7.2 OPENING FILES USING OPEN()
As stated earlier, the function open() can be used to open multiple files that use
the same stream object. For example, we may want to process a set of files
sequentially. In such cases, we may create a single stream object and use it to open
each file in turn. This is done as follows:
file-stream-class stream-object;
stream-object.open(―filename‖);
Example:
ofstream outfile; //Create stream (for output)
outfile.open(―DATA1‖); //Connect stream to DATA1
……………
outfile.close(); //Disconnect stream from DATA1
outfile.open(―DATA2‖); //Connect stream to DATA2
……………
outfile.close(); //Disconnect stream from DATA2
……………
The above program segment opens two files in sequence for writing the data.
Note that the first file is closed before opening the second one. This is necessary
because a stream can be connected to only one file at a time.
#include<iostream.h>
#include<fstream.h>
int main()
{
ofstream fout; //create output stream
fout.open(―country‖); //connect ―country‖ to it
MODULE 5 MCA-204 Object Oriented Programming and C++ ADMN 2009-‘10
Dept of Computer Science And Applications, SJCET, Palai 168
fout<<‖USA\n‖;
fout<<‖UNITED KINGDOM\n‖;
fout<<‖SOUTH KOREA\n‖;
fout.close(); //disconnect ―country‖ and
fout.open(―capital‖);//connect ―capital‖
fout<<‖WASHINGTON\n‖;
fout<<‖LONDON\n‖;
fout<<‖SEOUL\n‖;
fout.close();//disconnect ―capital‖
const int N=80;//size of line
char line[N];
ifstream fin;//create input stream
fin.open(―country‖);//connect ―country‖ to it
cout<<‖contents of country file\n‖;
while(fin)//check end-of-file
{
fin.getline(line,N);//read a line
cout<<line;//display it
}
fin.close();//disconnect ―country‖ and
fin.open(―capital‖);//connect ―capital‖
cout<<‖contents of capital file\n‖;
while(fin)
{
fin.getline(line,N);
cout<<line;
}
fin.close();
return 0;
}
The output of Program:
contents of country file
USA
UNITED KINGDOM
SOUTH KOREA
contents of capital file
WASHINGTON
LONDON
SEOUL
MODULE 5 MCA-204 Object Oriented Programming and C++ ADMN 2009-‘10
Dept of Computer Science And Applications, SJCET, Palai 169
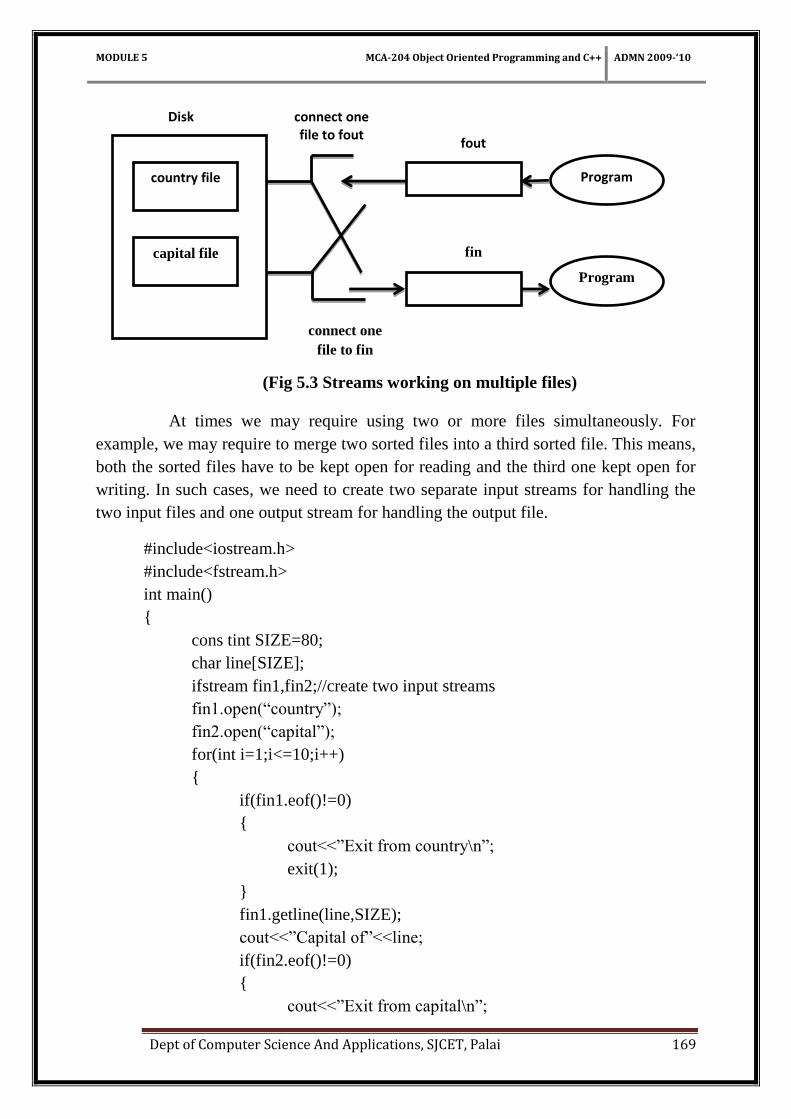
(Fig 5.3 Streams working on multiple files)
At times we may require using two or more files simultaneously. For
example, we may require to merge two sorted files into a third sorted file. This means,
both the sorted files have to be kept open for reading and the third one kept open for
writing. In such cases, we need to create two separate input streams for handling the
two input files and one output stream for handling the output file.
#include<iostream.h>
#include<fstream.h>
int main()
{
cons tint SIZE=80;
char line[SIZE];
ifstream fin1,fin2;//create two input streams
fin1.open(―country‖);
fin2.open(―capital‖);
for(int i=1;i<=10;i++)
{
if(fin1.eof()!=0)
{
cout<<‖Exit from country\n‖;
exit(1);
}
fin1.getline(line,SIZE);
cout<<‖Capital of‖<<line;
if(fin2.eof()!=0)
{
cout<<‖Exit from capital\n‖;
country file
capital file
Program
fout
fin
Program
connect one file to fout
connect one
file to fin
Disk
MODULE 5 MCA-204 Object Oriented Programming and C++ ADMN 2009-‘10
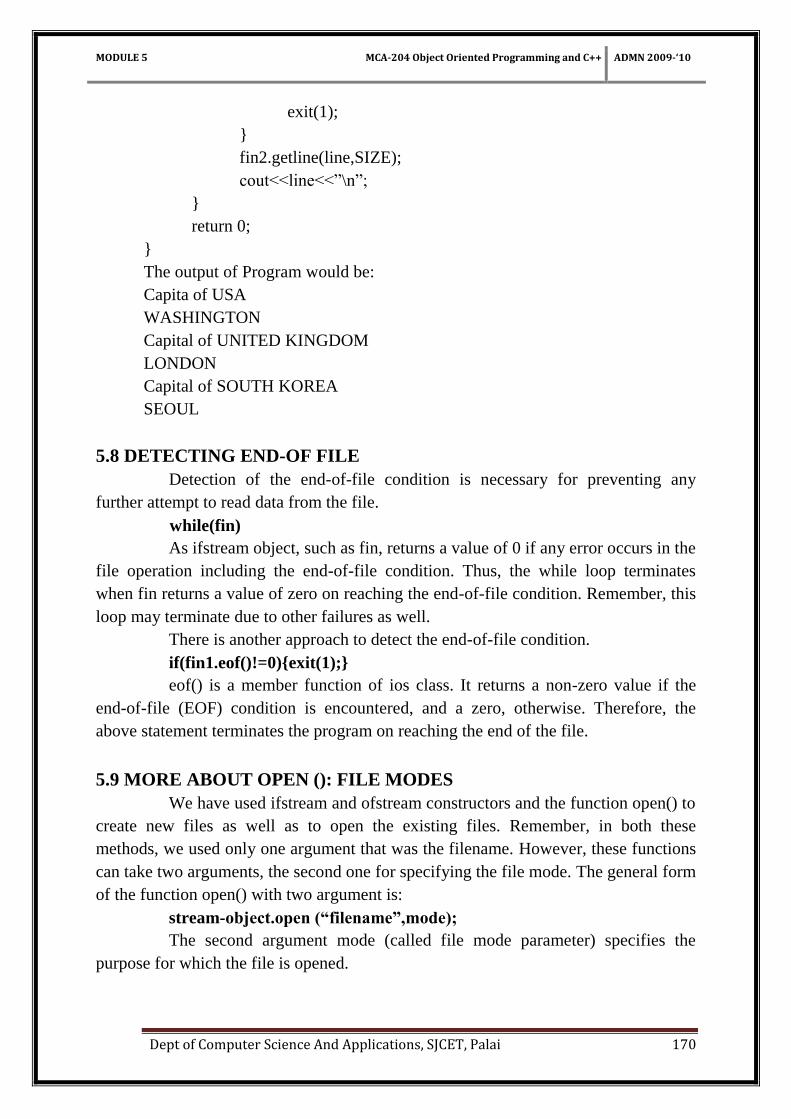
Dept of Computer Science And Applications, SJCET, Palai 170
exit(1);
}
fin2.getline(line,SIZE);
cout<<line<<‖\n‖;
}
return 0;
}
The output of Program would be:
Capita of USA
WASHINGTON
Capital of UNITED KINGDOM
LONDON
Capital of SOUTH KOREA
SEOUL
5.8 DETECTING END-OF FILE
Detection of the end-of-file condition is necessary for preventing any
further attempt to read data from the file.
while(fin)
As ifstream object, such as fin, returns a value of 0 if any error occurs in the
file operation including the end-of-file condition. Thus, the while loop terminates
when fin returns a value of zero on reaching the end-of-file condition. Remember, this
loop may terminate due to other failures as well.
There is another approach to detect the end-of-file condition.
if(fin1.eof()!=0){exit(1);}
eof() is a member function of ios class. It returns a non-zero value if the
end-of-file (EOF) condition is encountered, and a zero, otherwise. Therefore, the
above statement terminates the program on reaching the end of the file.
5.9 MORE ABOUT OPEN (): FILE MODES
We have used ifstream and ofstream constructors and the function open() to
create new files as well as to open the existing files. Remember, in both these
methods, we used only one argument that was the filename. However, these functions
can take two arguments, the second one for specifying the file mode. The general form
of the function open() with two argument is:
stream-object.open (“filename”,mode);
The second argument mode (called file mode parameter) specifies the
purpose for which the file is opened.
MODULE 5 MCA-204 Object Oriented Programming and C++ ADMN 2009-‘10
Dept of Computer Science And Applications, SJCET, Palai 171
The prototype of these class member functions contains default values for
the second argument and therefore they use the default values in the absence of the
actual values. The default values are as follows:
ios::in for ifstream functions meaning open for reading only.
ios::out for ofstream functions meaning open for writing only.
The file mode parameter can take one (or more) of such constrants defined
in the class ios.
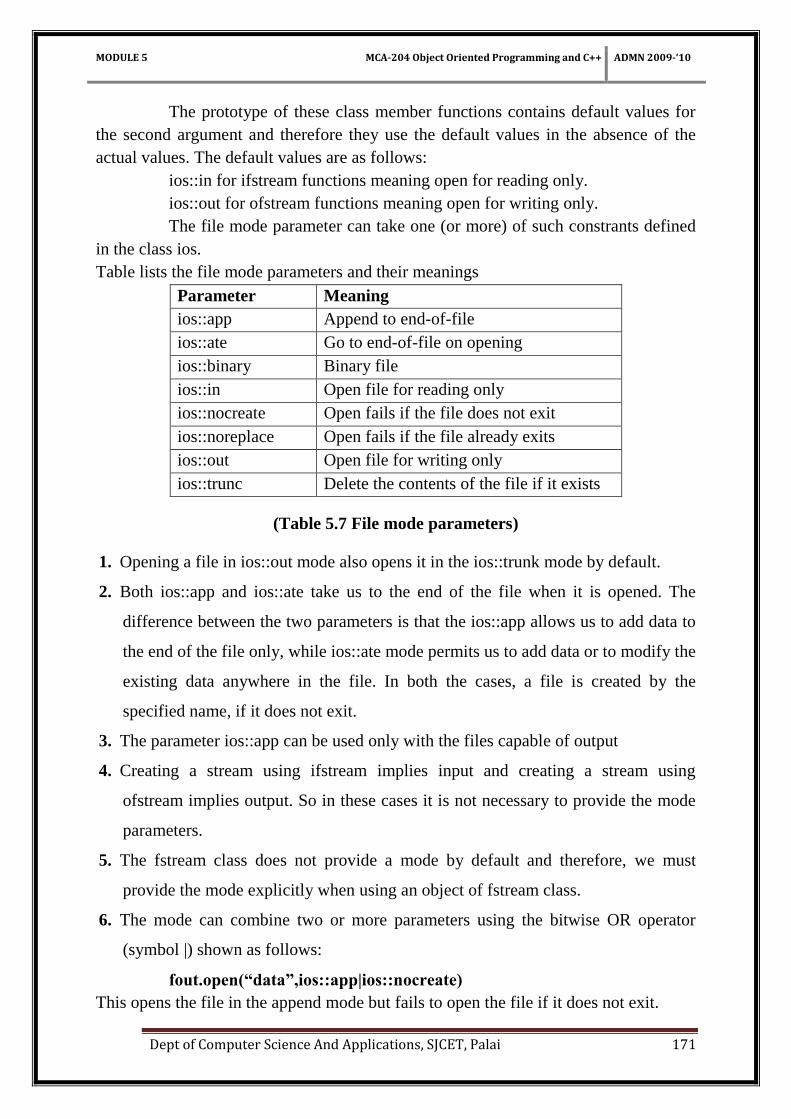
Table lists the file mode parameters and their meanings
Parameter Meaning
ios::app Append to end-of-file
ios::ate Go to end-of-file on opening
ios::binary Binary file
ios::in Open file for reading only
ios::nocreate Open fails if the file does not exit
ios::noreplace Open fails if the file already exits
ios::out Open file for writing only
ios::trunc Delete the contents of the file if it exists
(Table 5.7 File mode parameters)
1. Opening a file in ios::out mode also opens it in the ios::trunk mode by default.
2. Both ios::app and ios::ate take us to the end of the file when it is opened. The
difference between the two parameters is that the ios::app allows us to add data to
the end of the file only, while ios::ate mode permits us to add data or to modify the
existing data anywhere in the file. In both the cases, a file is created by the
specified name, if it does not exit.
3. The parameter ios::app can be used only with the files capable of output
4. Creating a stream using ifstream implies input and creating a stream using
ofstream implies output. So in these cases it is not necessary to provide the mode
parameters.
5. The fstream class does not provide a mode by default and therefore, we must
provide the mode explicitly when using an object of fstream class.
6. The mode can combine two or more parameters using the bitwise OR operator
(symbol |) shown as follows:
fout.open(“data”,ios::app|ios::nocreate)
This opens the file in the append mode but fails to open the file if it does not exit.
MODULE 5 MCA-204 Object Oriented Programming and C++ ADMN 2009-‘10
Dept of Computer Science And Applications, SJCET, Palai 172
5.10 FILE POINTERS
Each file object has associated with it two integer values called the get pointer
and the put pointer. These are also called the current get position and the current put
position, or—if it‘s clear which one is meant—simply the current position. These
values specify the byte number in the file where writing or reading will take place.
(The term pointer in this context should not be confused with normal C++ pointers
used as address variables.) Often you want to start reading an existing file at the
beginning and continue until the end. When writing, you may want to start at the
beginning, deleting any existing contents, or at the end, in which case you can open
the file with the ios::app mode specifier. These are the default actions, so no
manipulation of the file pointers is necessary. However, there are times when you
must take control of the file pointers yourself so that you can read from and write to
Streams and Files an arbitrary location in the file. The seekg() and tellg() functions
allow you to set and examine the get pointer, and the seekp() and tellp() functions
perform these same actions on the put pointer.
5.10.1 FUNCTIONS FOR MANIPULATION OF FILE POINTERS
The file stream classes support the following functions to manage a file poiner:
seekg() Moves get pointer(input)to a specified location.
seekp() Moves put pointer(output) to a specified location.
tellg() Gives the current position of the get pointer.
tellp() Gives the current position of the put pointer.
For example, the statement
infile.seekg(10);
Moves the file pointer to the byte number 10. Remember, the bytes in a file are
numbered beginning from zero. Therefore, the pointer will be pointing to the 11th
byte
in the file.
Consider the following statements:
ofstream fileout;
fileout.open(―hello‖,ios::app);
int p=fileout.tellp();
On execution of these statements ,the output pointer is moved to the end of the
file‖hello‖and the value of p will represent the number of bytes in the file.
Specifying the Offset
The seekg() function can be used in two ways. We‘ve seen the first, where the
single argument represents the position from the start of the file. You can also use it
with two arguments,
MODULE 5 MCA-204 Object Oriented Programming and C++ ADMN 2009-‘10
Dept of Computer Science And Applications, SJCET, Palai 173
seekg(offset,refposition);
seekp(offset,refposition);
Where the first argument represents an offset from a particular location in the
file, and the second specifies the location from which the offset is measured. There are
three possibilities for the second argument:
ios::beg is the beginning of the file,
ios::cur is the current pointer position, and
ios::end is the end of the file.
The statement
seekp(-10, ios::end);
for example, will set the put pointer to 10 bytes before the end of the file
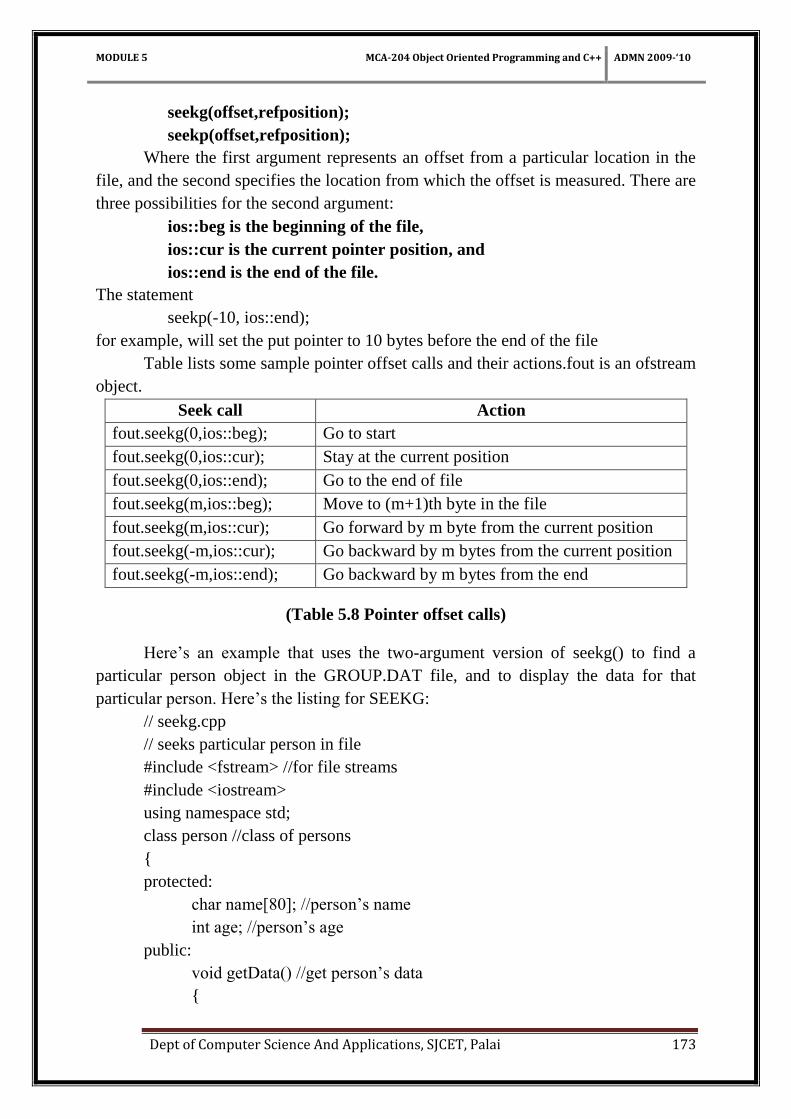
Table lists some sample pointer offset calls and their actions.fout is an ofstream
object.
Seek call Action
fout.seekg(0,ios::beg); Go to start
fout.seekg(0,ios::cur); Stay at the current position
fout.seekg(0,ios::end); Go to the end of file
fout.seekg(m,ios::beg); Move to (m+1)th byte in the file
fout.seekg(m,ios::cur); Go forward by m byte from the current position
fout.seekg(-m,ios::cur); Go backward by m bytes from the current position
fout.seekg(-m,ios::end); Go backward by m bytes from the end
(Table 5.8 Pointer offset calls)
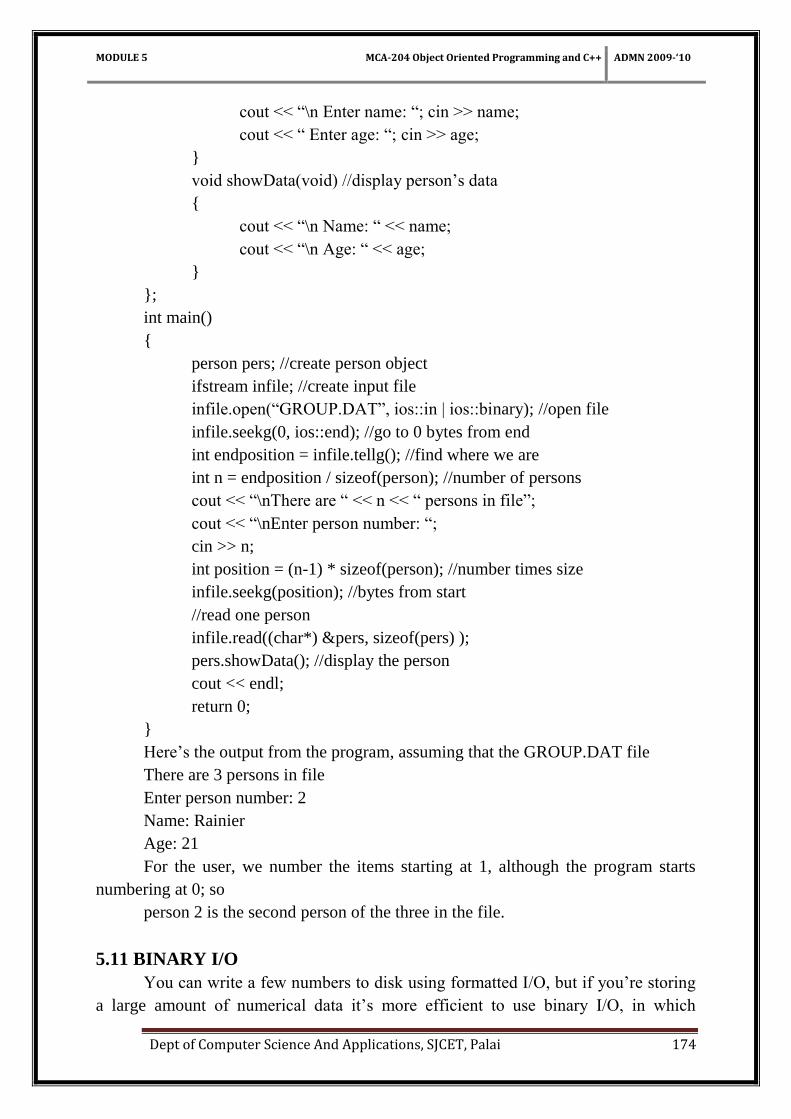
Here‘s an example that uses the two-argument version of seekg() to find a
particular person object in the GROUP.DAT file, and to display the data for that
particular person. Here‘s the listing for SEEKG:
// seekg.cpp
// seeks particular person in file
#include <fstream> //for file streams
#include <iostream>
using namespace std;
class person //class of persons
{
protected:
char name[80]; //person‘s name
int age; //person‘s age
public:
void getData() //get person‘s data
{
MODULE 5 MCA-204 Object Oriented Programming and C++ ADMN 2009-‘10
Dept of Computer Science And Applications, SJCET, Palai 174
cout << ―\n Enter name: ―; cin >> name;
cout << ― Enter age: ―; cin >> age;
}
void showData(void) //display person‘s data
{
cout << ―\n Name: ― << name;
cout << ―\n Age: ― << age;
}
};
int main()
{
person pers; //create person object
ifstream infile; //create input file
infile.open(―GROUP.DAT‖, ios::in | ios::binary); //open file
infile.seekg(0, ios::end); //go to 0 bytes from end
int endposition = infile.tellg(); //find where we are
int n = endposition / sizeof(person); //number of persons
cout << ―\nThere are ― << n << ― persons in file‖;
cout << ―\nEnter person number: ―;
cin >> n;
int position = (n-1) * sizeof(person); //number times size
infile.seekg(position); //bytes from start
//read one person
infile.read((char*) &pers, sizeof(pers) );
pers.showData(); //display the person
cout << endl;
return 0;
}
Here‘s the output from the program, assuming that the GROUP.DAT file
There are 3 persons in file
Enter person number: 2
Name: Rainier
Age: 21
For the user, we number the items starting at 1, although the program starts
numbering at 0; so
person 2 is the second person of the three in the file.
5.11 BINARY I/O
You can write a few numbers to disk using formatted I/O, but if you‘re storing
a large amount of numerical data it‘s more efficient to use binary I/O, in which
MODULE 5 MCA-204 Object Oriented Programming and C++ ADMN 2009-‘10
Dept of Computer Science And Applications, SJCET, Palai 175
numbers are stored as they are in the computer‘s RAM memory, rather than as strings
of characters. In binary I/O an int is stored in 4 bytes, whereas its text version might
be ―12345‖, requiring 5 bytes. Similarly, a float is always stored in 4 bytes, while its
formatted version might be ―6.02314e13‖, requiring10 bytes.
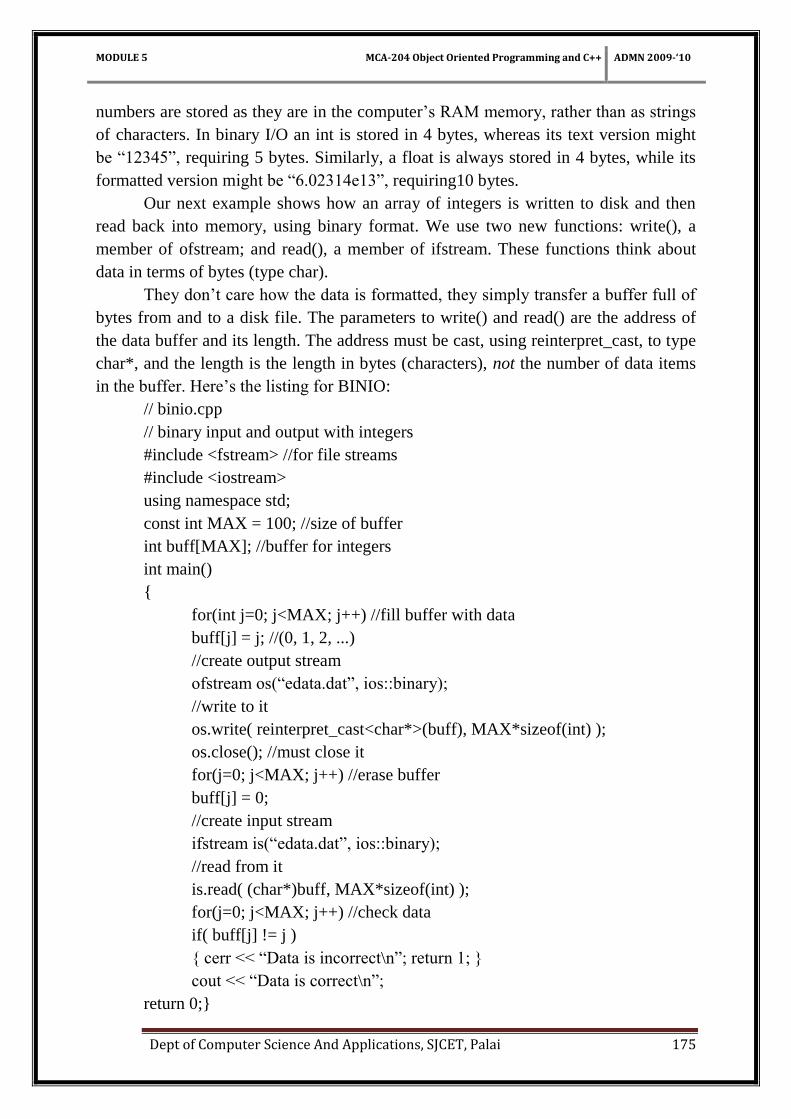
Our next example shows how an array of integers is written to disk and then
read back into memory, using binary format. We use two new functions: write(), a
member of ofstream; and read(), a member of ifstream. These functions think about
data in terms of bytes (type char).
They don‘t care how the data is formatted, they simply transfer a buffer full of
bytes from and to a disk file. The parameters to write() and read() are the address of
the data buffer and its length. The address must be cast, using reinterpret_cast, to type
char*, and the length is the length in bytes (characters), not the number of data items
in the buffer. Here‘s the listing for BINIO:
// binio.cpp
// binary input and output with integers
#include <fstream> //for file streams
#include <iostream>
using namespace std;
const int MAX = 100; //size of buffer
int buff[MAX]; //buffer for integers
int main()
{
for(int j=0; j<MAX; j++) //fill buffer with data
buff[j] = j; //(0, 1, 2, ...)
//create output stream
ofstream os(―edata.dat‖, ios::binary);
//write to it
os.write( reinterpret_cast<char*>(buff), MAX*sizeof(int) );
os.close(); //must close it
for(j=0; j<MAX; j++) //erase buffer
buff[j] = 0;
//create input stream
ifstream is(―edata.dat‖, ios::binary);
//read from it
is.read( (char*)buff, MAX*sizeof(int) );
for(j=0; j<MAX; j++) //check data
if( buff[j] != j )
{ cerr << ―Data is incorrect\n‖; return 1; }
cout << ―Data is correct\n‖;
return 0;}
MODULE 5 MCA-204 Object Oriented Programming and C++ ADMN 2009-‘10
Dept of Computer Science And Applications, SJCET, Palai 176
You must use the ios::binary argument in the second parameter to write() and
read() when working with binary data. This is because the default, text mode, takes
some liberties with the data. For example, in text mode the ‗\n‘ character is expanded
into two bytes—a carriagereturn and a linefeed—before being stored to disk. This
makes a formatted text file more readable by DOS-based utilities such as TYPE, but it
causes confusion when it is applied to binary data, since every byte that happens to
have the ASCII value 10 is translated into 2 bytes. The ios::binary argument is an
example of a mode bit.
5.12 OBJECT I/O
Since C++ is an object-oriented language, it‘s reasonable to wonder how
objects can be written to and read from disk.
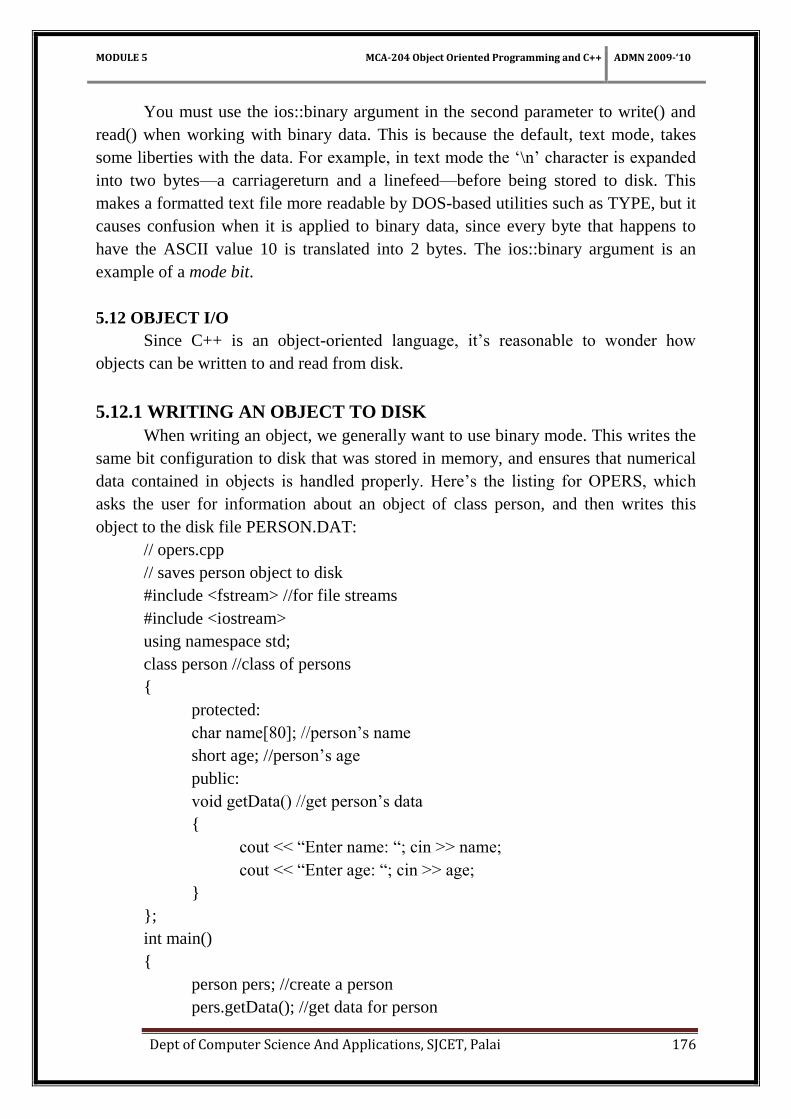
5.12.1 WRITING AN OBJECT TO DISK
When writing an object, we generally want to use binary mode. This writes the
same bit configuration to disk that was stored in memory, and ensures that numerical
data contained in objects is handled properly. Here‘s the listing for OPERS, which
asks the user for information about an object of class person, and then writes this
object to the disk file PERSON.DAT:
// opers.cpp
// saves person object to disk
#include <fstream> //for file streams
#include <iostream>
using namespace std;
class person //class of persons
{
protected:
char name[80]; //person‘s name
short age; //person‘s age
public:
void getData() //get person‘s data
{
cout << ―Enter name: ―; cin >> name;
cout << ―Enter age: ―; cin >> age;
}
};
int main()
{
person pers; //create a person
pers.getData(); //get data for person
MODULE 5 MCA-204 Object Oriented Programming and C++ ADMN 2009-‘10
Dept of Computer Science And Applications, SJCET, Palai 177
//create ofstream object
ofstream outfile(―PERSON.DAT‖, ios::binary);
//write to it
outfile.write((char *)&pers, sizeof(pers));
return 0;
}
The getData() member function of person is called to prompt the user for
information, which it places in the pers object. Here‘s some sample interaction:
Enter name: Coleridge
Enter age: 62
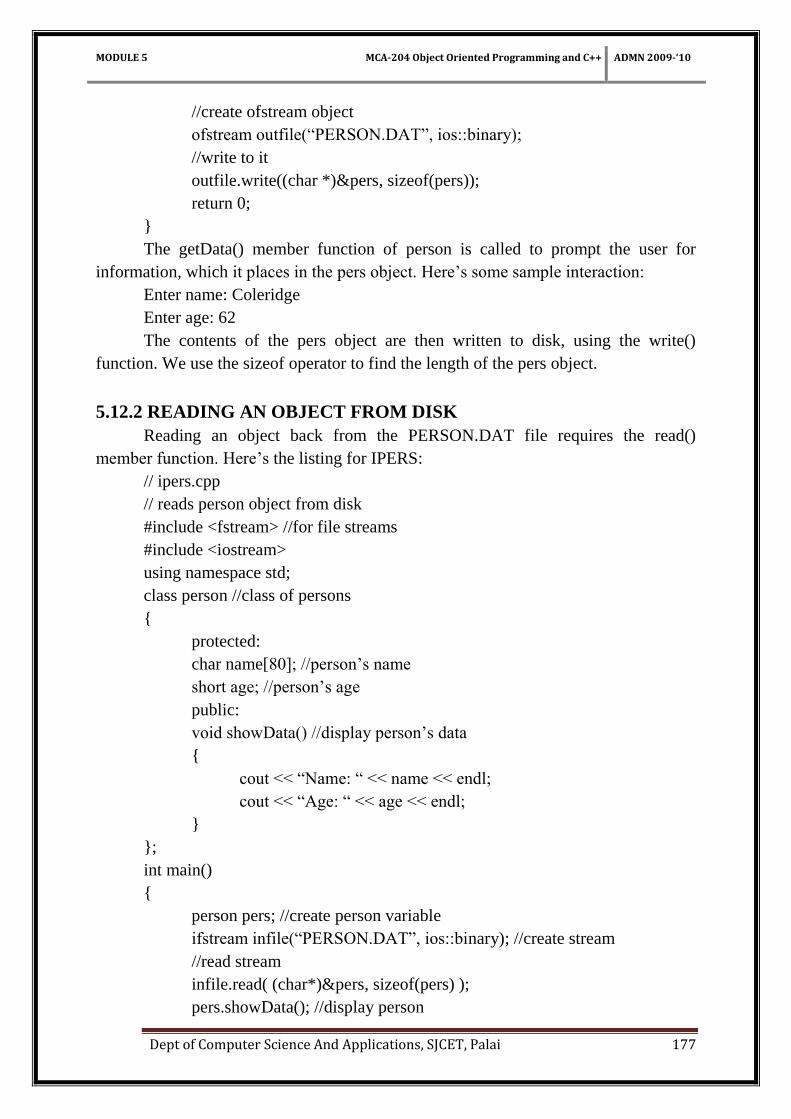
The contents of the pers object are then written to disk, using the write()
function. We use the sizeof operator to find the length of the pers object.
5.12.2 READING AN OBJECT FROM DISK
Reading an object back from the PERSON.DAT file requires the read()
member function. Here‘s the listing for IPERS:
// ipers.cpp
// reads person object from disk
#include <fstream> //for file streams
#include <iostream>
using namespace std;
class person //class of persons
{
protected:
char name[80]; //person‘s name
short age; //person‘s age
public:
void showData() //display person‘s data
{
cout << ―Name: ― << name << endl;
cout << ―Age: ― << age << endl;
}
};
int main()
{
person pers; //create person variable
ifstream infile(―PERSON.DAT‖, ios::binary); //create stream
//read stream
infile.read( (char*)&pers, sizeof(pers) );
pers.showData(); //display person
MODULE 5 MCA-204 Object Oriented Programming and C++ ADMN 2009-‘10
Dept of Computer Science And Applications, SJCET, Palai 178
return 0;
}
The output from IPERS reflects whatever data the OPERS program placed in
the PERSON.DAT file:
Name: Coleridge
Age: 62
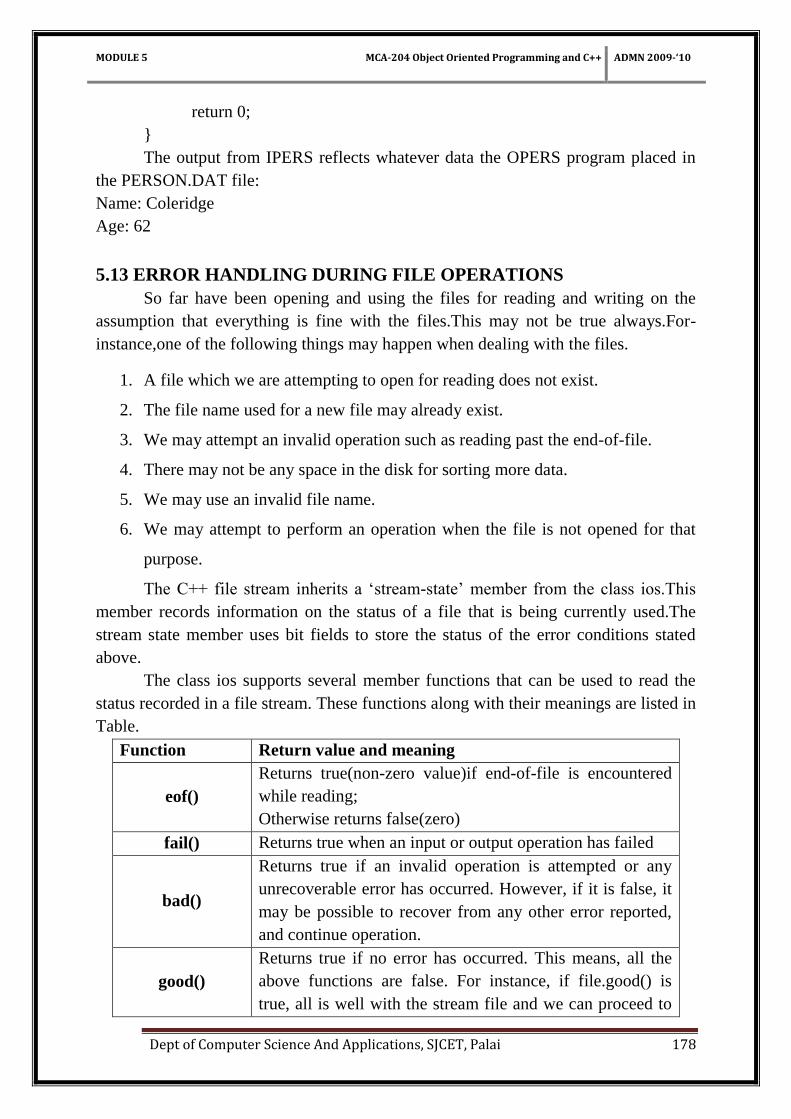
5.13 ERROR HANDLING DURING FILE OPERATIONS
So far have been opening and using the files for reading and writing on the
assumption that everything is fine with the files.This may not be true always.For-
instance,one of the following things may happen when dealing with the files.
1. A file which we are attempting to open for reading does not exist.
2. The file name used for a new file may already exist.
3. We may attempt an invalid operation such as reading past the end-of-file.
4. There may not be any space in the disk for sorting more data.
5. We may use an invalid file name.
6. We may attempt to perform an operation when the file is not opened for that
purpose.
The C++ file stream inherits a ‗stream-state‘ member from the class ios.This
member records information on the status of a file that is being currently used.The
stream state member uses bit fields to store the status of the error conditions stated
above.
The class ios supports several member functions that can be used to read the
status recorded in a file stream. These functions along with their meanings are listed in
Table.
Function Return value and meaning
eof()
Returns true(non-zero value)if end-of-file is encountered
while reading;
Otherwise returns false(zero)
fail() Returns true when an input or output operation has failed
bad()
Returns true if an invalid operation is attempted or any
unrecoverable error has occurred. However, if it is false, it
may be possible to recover from any other error reported,
and continue operation.
good()
Returns true if no error has occurred. This means, all the
above functions are false. For instance, if file.good() is
true, all is well with the stream file and we can proceed to
MODULE 5 MCA-204 Object Oriented Programming and C++ ADMN 2009-‘10
Dept of Computer Science And Applications, SJCET, Palai 179
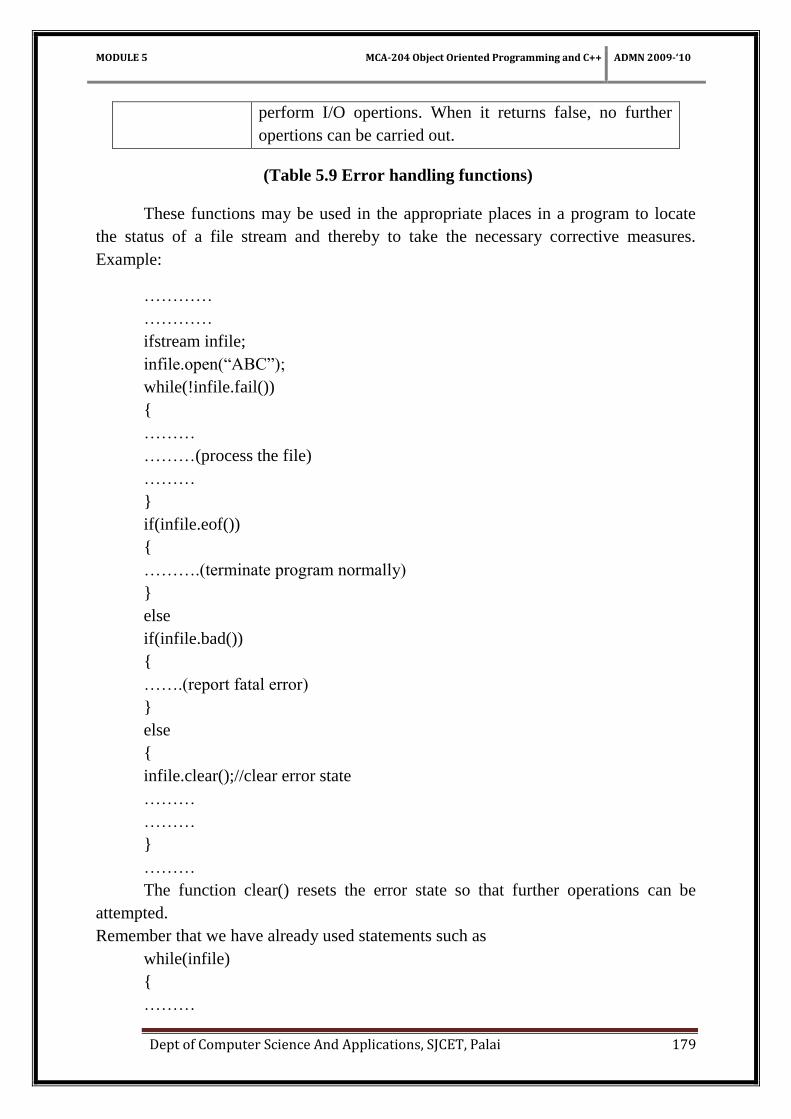
perform I/O opertions. When it returns false, no further
opertions can be carried out.
(Table 5.9 Error handling functions)
These functions may be used in the appropriate places in a program to locate
the status of a file stream and thereby to take the necessary corrective measures.
Example:
…………
…………
ifstream infile;
infile.open(―ABC‖);
while(!infile.fail())
{
………
………(process the file)
………
}
if(infile.eof())
{
……….(terminate program normally)
}
else
if(infile.bad())
{
…….(report fatal error)
}
else
{
infile.clear();//clear error state
………
………
}
………
The function clear() resets the error state so that further operations can be
attempted.
Remember that we have already used statements such as
while(infile)
{
………
MODULE 5 MCA-204 Object Oriented Programming and C++ ADMN 2009-‘10
Dept of Computer Science And Applications, SJCET, Palai 180
………
}
and
while(infile.read(……))
{
…….
…….
}
Here, infile becomes false (zero)when end of the file is reached (and eof()
becomes true).
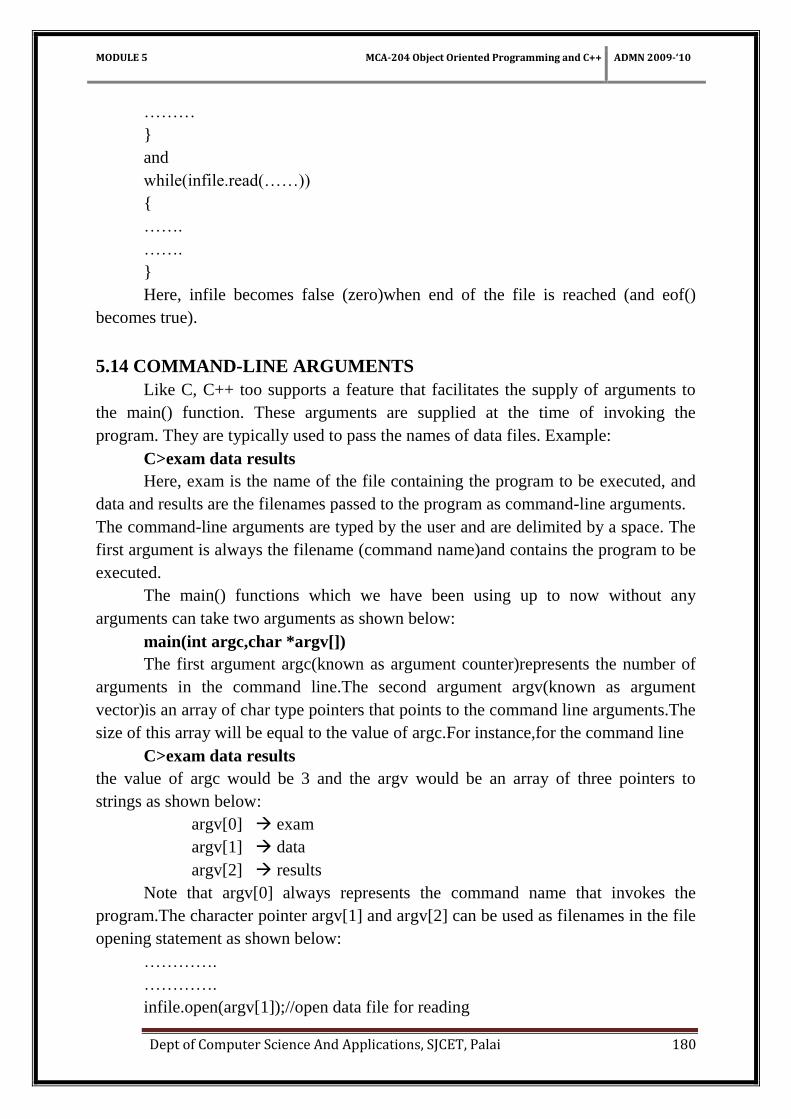
5.14 COMMAND-LINE ARGUMENTS
Like C, C++ too supports a feature that facilitates the supply of arguments to
the main() function. These arguments are supplied at the time of invoking the
program. They are typically used to pass the names of data files. Example:
C>exam data results
Here, exam is the name of the file containing the program to be executed, and
data and results are the filenames passed to the program as command-line arguments.
The command-line arguments are typed by the user and are delimited by a space. The
first argument is always the filename (command name)and contains the program to be
executed.
The main() functions which we have been using up to now without any
arguments can take two arguments as shown below:
main(int argc,char *argv[])
The first argument argc(known as argument counter)represents the number of
arguments in the command line.The second argument argv(known as argument
vector)is an array of char type pointers that points to the command line arguments.The
size of this array will be equal to the value of argc.For instance,for the command line
C>exam data results
the value of argc would be 3 and the argv would be an array of three pointers to
strings as shown below:
argv[0] exam
argv[1] data
argv[2] results
Note that argv[0] always represents the command name that invokes the
program.The character pointer argv[1] and argv[2] can be used as filenames in the file
opening statement as shown below:
………….
………….
infile.open(argv[1]);//open data file for reading
MODULE 5 MCA-204 Object Oriented Programming and C++ ADMN 2009-‘10
Dept of Computer Science And Applications, SJCET, Palai 181
………….
………….
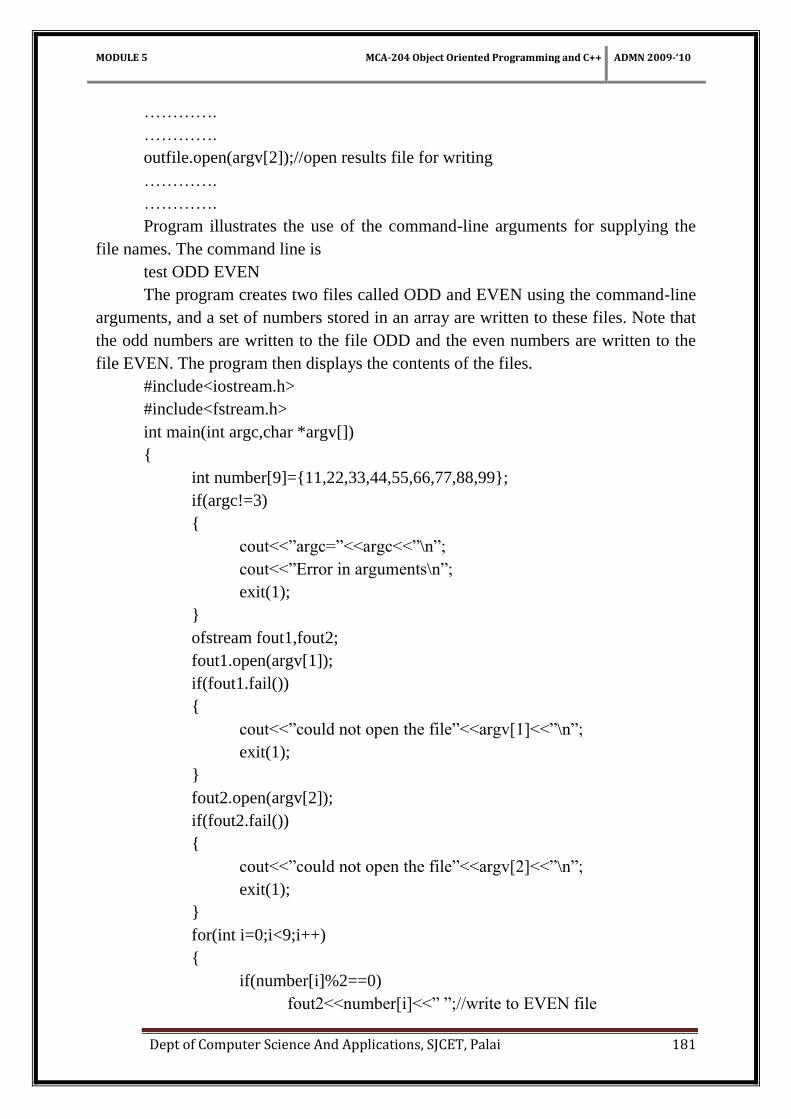
outfile.open(argv[2]);//open results file for writing
………….
………….
Program illustrates the use of the command-line arguments for supplying the
file names. The command line is
test ODD EVEN
The program creates two files called ODD and EVEN using the command-line
arguments, and a set of numbers stored in an array are written to these files. Note that
the odd numbers are written to the file ODD and the even numbers are written to the
file EVEN. The program then displays the contents of the files.
#include<iostream.h>
#include<fstream.h>
int main(int argc,char *argv[])
{
int number[9]={11,22,33,44,55,66,77,88,99};
if(argc!=3)
{
cout<<‖argc=‖<<argc<<‖\n‖;
cout<<‖Error in arguments\n‖;
exit(1);
}
ofstream fout1,fout2;
fout1.open(argv[1]);
if(fout1.fail())
{
cout<<‖could not open the file‖<<argv[1]<<‖\n‖;
exit(1);
}
fout2.open(argv[2]);
if(fout2.fail())
{
cout<<‖could not open the file‖<<argv[2]<<‖\n‖;
exit(1);
}
for(int i=0;i<9;i++)
{
if(number[i]%2==0)
fout2<<number[i]<<‖ ‖;//write to EVEN file
MODULE 5 MCA-204 Object Oriented Programming and C++ ADMN 2009-‘10
Dept of Computer Science And Applications, SJCET, Palai 182
else
fout1<<number[i]<<‖ ‖;//write to ODD file
}
fout1.close();
fout2.close();
ifstream fin;
char ch;
for(i=1;i<argc;i++)
{
fin.open(argv[i]);
cout<<‖Contents of ―<<argv[i]<<‖\n‖;
do
{
fin.get(ch);//read a value
cout<<ch;//display it
}
while(fin);
cout<<‖\n\n‖;
fin.close();
}
return 0;
}
The output of program would be
contents of ODD
11 33 55 77 99
contents of EVEN
22 44 66 88
5.15 TEMPLATES
The template is one of C++'s most sophisticated and high-powered features.
Although not part of the original specification for C++, it was added several years ago
and is supported by all modern C++ compilers. Using templates, it is possible to
create generic functions and classes. In a generic function or class, the type of data
upon which the function or class operates is specified as a parameter. Thus, you can
use one function or class with several different types of data without having to
explicitly recode specific versions for each data type.
MODULE 5 MCA-204 Object Oriented Programming and C++ ADMN 2009-‘10
Dept of Computer Science And Applications, SJCET, Palai 183
5.15.1 GENERIC FUNCTIONS
A generic function defines a general set of operations that will be applied to
various types of data. The type of data that the function will operate upon is passed to
it as a parameter. Through a generic function, a single general procedure can be
applied to a wide range of data. As you probably know, many algorithms are logically
the same no matter what type of data is being operated upon. By creating a generic
function, you can define the nature of the algorithm, independent of any data. Once
you have done this, the compiler will automatically generate the correct code for the
type of data that is actually used when you execute the function. In essence, when you
create a generic function you are creating a function that can automatically overload
itself. A generic function is created using the keyword template. The normal meaning
of the word "template" accurately reflects its use in C++. It is used to create a template
(or framework) that describes what a function will do, leaving it to the compiler to fill
in the details as needed. The general form of a template function definition is shown
here:
template <class Ttype> ret-type func-name(parameter list)
{
// body of function
}
Here, Ttype is a placeholder name for a data type used by the function. This
name may be used within the function definition. However, it is only a placeholder
that the compiler will automatically replace with an actual data type when it creates a
specific version of the function. Although the use of the keyword class to specify a
generic type in a template declaration is traditional, you may also use the keyword
typename. The following example creates a generic function that swaps the values of
the two variables with which it is called. Because the general process of exchanging
two values is independent of the type of the variables, it is a good candidate for being
made into a generic function.
// Function template example.
#include <iostream>
using namespace std;
// This is a function template.
template <class X> void swapargs(X &a, X &b)
{
X temp;
temp = a;
a = b;
b = temp;
}
MODULE 5 MCA-204 Object Oriented Programming and C++ ADMN 2009-‘10
Dept of Computer Science And Applications, SJCET, Palai 184
int main()
{
int i=10, j=20;
double x=10.1, y=23.3;
char a='x', b='z';
cout << "Original i, j: " << i << ' ' << j << '\n';
cout << "Original x, y: " << x << ' ' << y << '\n';
cout << "Original a, b: " << a << ' ' << b << '\n';
swapargs(i, j); // swap integers
swapargs(x, y); // swap floats
swapargs(a, b); // swap chars
cout << "Swapped i, j: " << i << ' ' << j << '\n';
cout << "Swapped x, y: " << x << ' ' << y << '\n';
cout << "Swapped a, b: " << a << ' ' << b << '\n';
return 0;
}
Let's look closely at this program. The line: template <class X> void
swapargs(X &a, X &b) tells the compiler two things: that a template is being created
and that a generic definition is beginning. Here, X is a generic type that is used as a
placeholder. After the template portion, the function swapargs() is declared, using X
as the data type of the values that will be swapped. In main() , the swapargs()
function is called using three different types of data: ints, doubles, and chars.
Because swapargs() is a generic function, the compiler automatically creates three
versions of swapargs() : one that will exchange integer values, one that will exchange
floating-point values, and one that will swap characters. Here are some important
terms related to templates. First, a generic function (that is, a function definition
preceded by a template statement) is also called a template function. When the
compiler creates a specific version of this function, it is said to have created a
specialization. This is also called a generated function. The act of generating a
function is referred to as instantiating it. Put differently, a generated function is a
specific instance of a template function. Since C++ does not recognize end-of-line as a
statement terminator, the template clause of a generic function definition does not
have to be on the same line as the function's name. The following example shows
another common way to format the swapargs() function.
template <class X>
void swapargs(X &a, X &b)
{
X temp;
temp = a;
a = b;
MODULE 5 MCA-204 Object Oriented Programming and C++ ADMN 2009-‘10
Dept of Computer Science And Applications, SJCET, Palai 185
b = temp;
}
If you use this form, it is important to understand that no other statements can
occur between the template statement and the start of the generic function definition.
For example, the fragment shown next will not compile.
// This will not compile.
template <class X>
int i; // this is an error
void swapargs(X &a, X &b)
{
X temp;
temp = a;
a = b;
b = temp;
}
As the comments imply, the template specification must directly precede the
function definition.
5.15.2 A FUNCTION WITH TWO GENERIC TYPES
You can define more than one generic data type in the template statement by
using a comma-separated list. For example, this program creates a template function
that has two generic types.
#include <iostream>
using namespace std;
template <class type1, class type2>
void myfunc(type1 x, type2 y)
{
cout << x << ' ' << y << '\n';
}
int main()
{
myfunc(10, "I like C++");
myfunc(98.6, 19L);
return 0;
}
In this example, the placeholder types type1 and type2 are replaced by the
compiler with the data types int and char *, and double and long, respectively, when
the compiler generates the specific instances of myfunc() within main() .
MODULE 5 MCA-204 Object Oriented Programming and C++ ADMN 2009-‘10
Dept of Computer Science And Applications, SJCET, Palai 186
When you create a template function, you are, in essence, allowing the
compiler to generate as many different versions of that function as are necessary for
handling the various ways that your program calls the function.
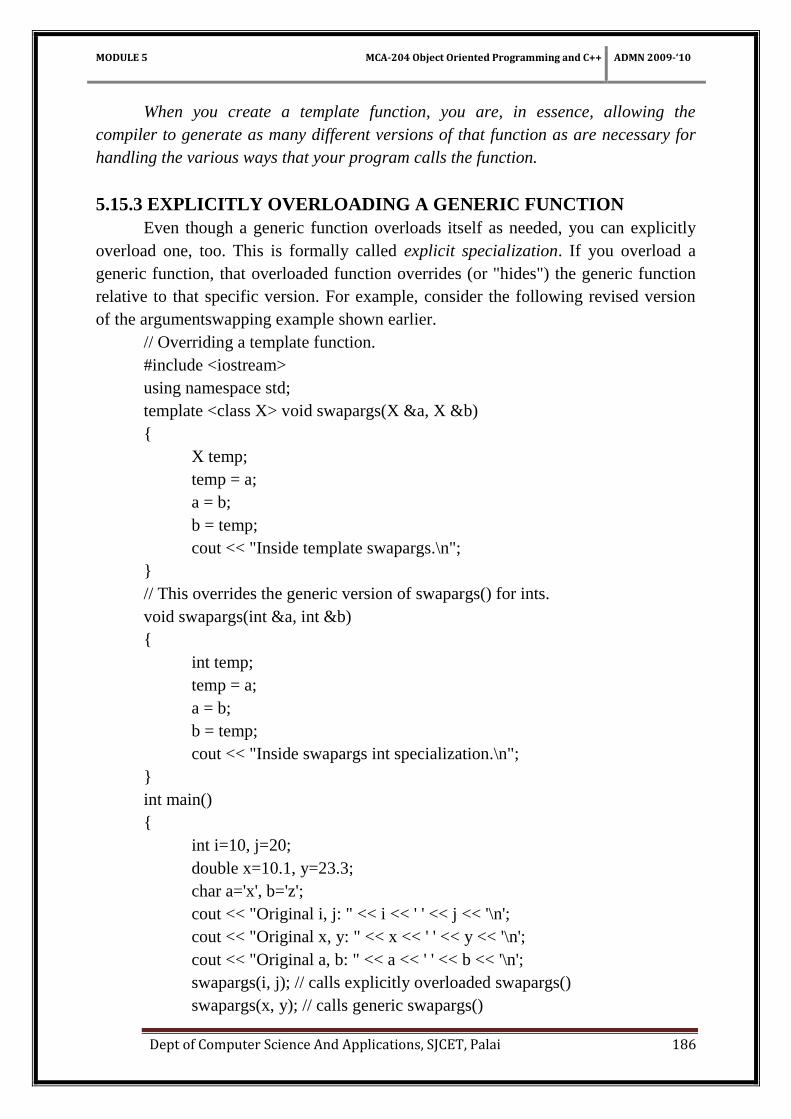
5.15.3 EXPLICITLY OVERLOADING A GENERIC FUNCTION
Even though a generic function overloads itself as needed, you can explicitly
overload one, too. This is formally called explicit specialization. If you overload a
generic function, that overloaded function overrides (or "hides") the generic function
relative to that specific version. For example, consider the following revised version
of the argumentswapping example shown earlier.
// Overriding a template function.
#include <iostream>
using namespace std;Remember
template <class X> void swapargs(X &a, X &b)
{
X temp;
temp = a;
a = b;
b = temp;
cout << "Inside template swapargs.\n";
}
// This overrides the generic version of swapargs() for ints.
void swapargs(int &a, int &b)
{
int temp;
temp = a;
a = b;
b = temp;
cout << "Inside swapargs int specialization.\n";
}
int main()
{
int i=10, j=20;
double x=10.1, y=23.3;
char a='x', b='z';
cout << "Original i, j: " << i << ' ' << j << '\n';
cout << "Original x, y: " << x << ' ' << y << '\n';
cout << "Original a, b: " << a << ' ' << b << '\n';
swapargs(i, j); // calls explicitly overloaded swapargs()
swapargs(x, y); // calls generic swapargs()
MODULE 5 MCA-204 Object Oriented Programming and C++ ADMN 2009-‘10
Dept of Computer Science And Applications, SJCET, Palai 187
swapargs(a, b); // calls generic swapargs()
cout << "Swapped i, j: " << i << ' ' << j << '\n';
cout << "Swapped x, y: " << x << ' ' << y << '\n';
cout << "Swapped a, b: " << a << ' ' << b << '\n';
return 0;
}
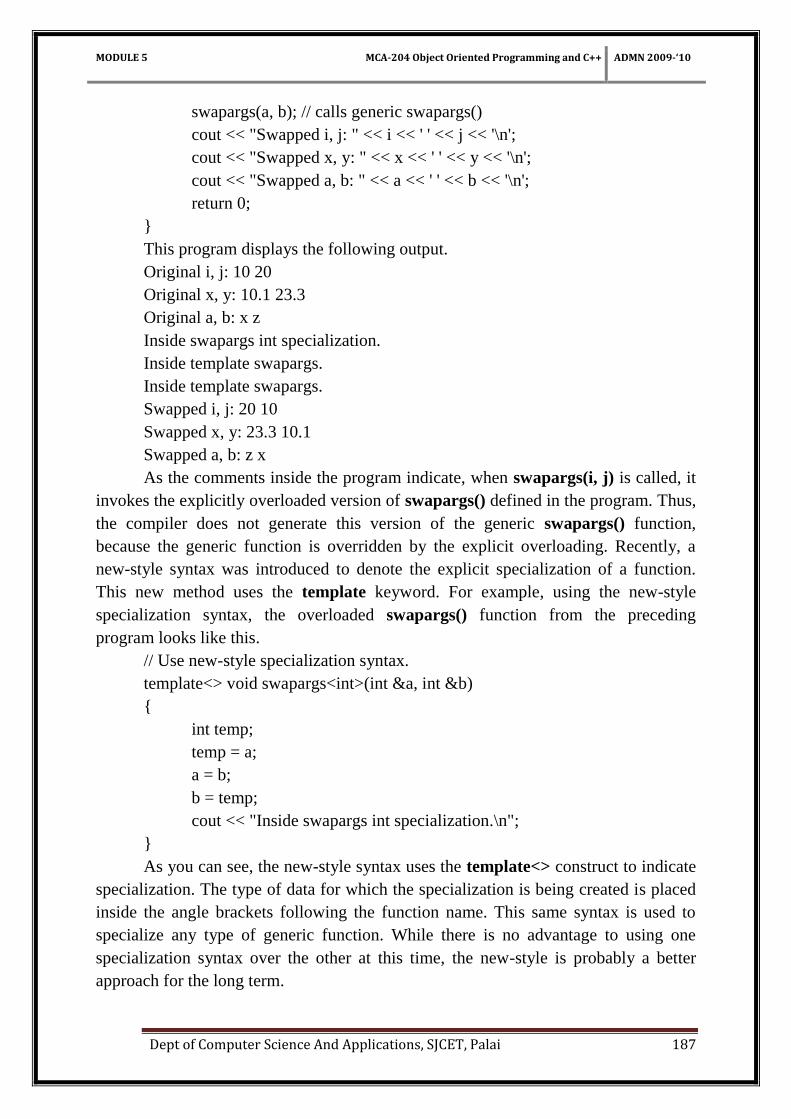
This program displays the following output.
Original i, j: 10 20
Original x, y: 10.1 23.3
Original a, b: x z
Inside swapargs int specialization.
Inside template swapargs.
Inside template swapargs.
Swapped i, j: 20 10
Swapped x, y: 23.3 10.1
Swapped a, b: z x
As the comments inside the program indicate, when swapargs(i, j) is called, it
invokes the explicitly overloaded version of swapargs() defined in the program. Thus,
the compiler does not generate this version of the generic swapargs() function,
because the generic function is overridden by the explicit overloading. Recently, a
new-style syntax was introduced to denote the explicit specialization of a function.
This new method uses the template keyword. For example, using the new-style
specialization syntax, the overloaded swapargs() function from the preceding
program looks like this.
// Use new-style specialization syntax.
template<> void swapargs<int>(int &a, int &b)
{
int temp;
temp = a;
a = b;
b = temp;
cout << "Inside swapargs int specialization.\n";
}
As you can see, the new-style syntax uses the template<> construct to indicate
specialization. The type of data for which the specialization is being created is placed
inside the angle brackets following the function name. This same syntax is used to
specialize any type of generic function. While there is no advantage to using one
specialization syntax over the other at this time, the new-style is probably a better
approach for the long term.
MODULE 5 MCA-204 Object Oriented Programming and C++ ADMN 2009-‘10
Dept of Computer Science And Applications, SJCET, Palai 188
Explicit specialization of a template allows you to tailor a version of a generic
function to accommodate a unique situation—perhaps to take advantage of some
performance boost that applies to only one type of data, for example. However, as a
general rule, if you need to have different versions of a function for different data
types, you should use overloaded functions rather than templates.
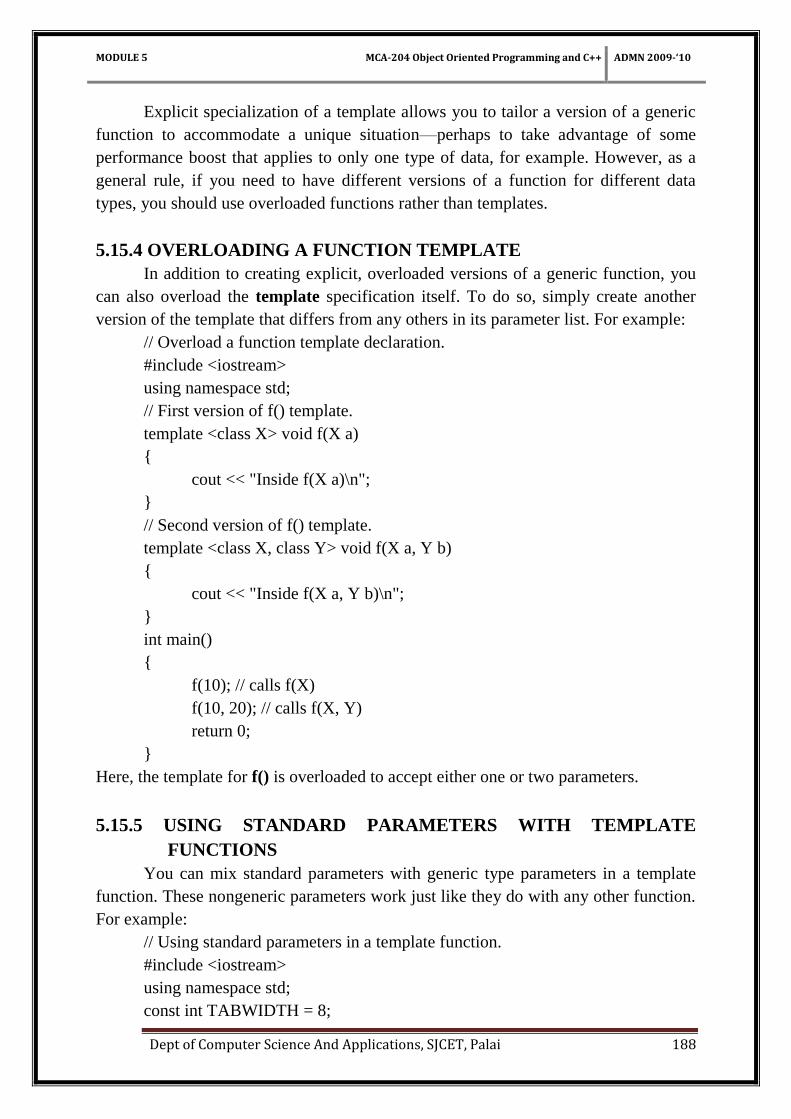
5.15.4 OVERLOADING A FUNCTION TEMPLATE
In addition to creating explicit, overloaded versions of a generic function, you
can also overload the template specification itself. To do so, simply create another
version of the template that differs from any others in its parameter list. For example:
// Overload a function template declaration.
#include <iostream>
using namespace std;
// First version of f() template.
template <class X> void f(X a)
{
cout << "Inside f(X a)\n";
}
// Second version of f() template.
template <class X, class Y> void f(X a, Y b)
{
cout << "Inside f(X a, Y b)\n";
}
int main()
{
f(10); // calls f(X)
f(10, 20); // calls f(X, Y)
return 0;
}
Here, the template for f() is overloaded to accept either one or two parameters.
5.15.5 USING STANDARD PARAMETERS WITH TEMPLATE
FUNCTIONS
You can mix standard parameters with generic type parameters in a template
function. These nongeneric parameters work just like they do with any other function.
For example:
// Using standard parameters in a template function.
#include <iostream>
using namespace std;
const int TABWIDTH = 8;
MODULE 5 MCA-204 Object Oriented Programming and C++ ADMN 2009-‘10
Dept of Computer Science And Applications, SJCET, Palai 189
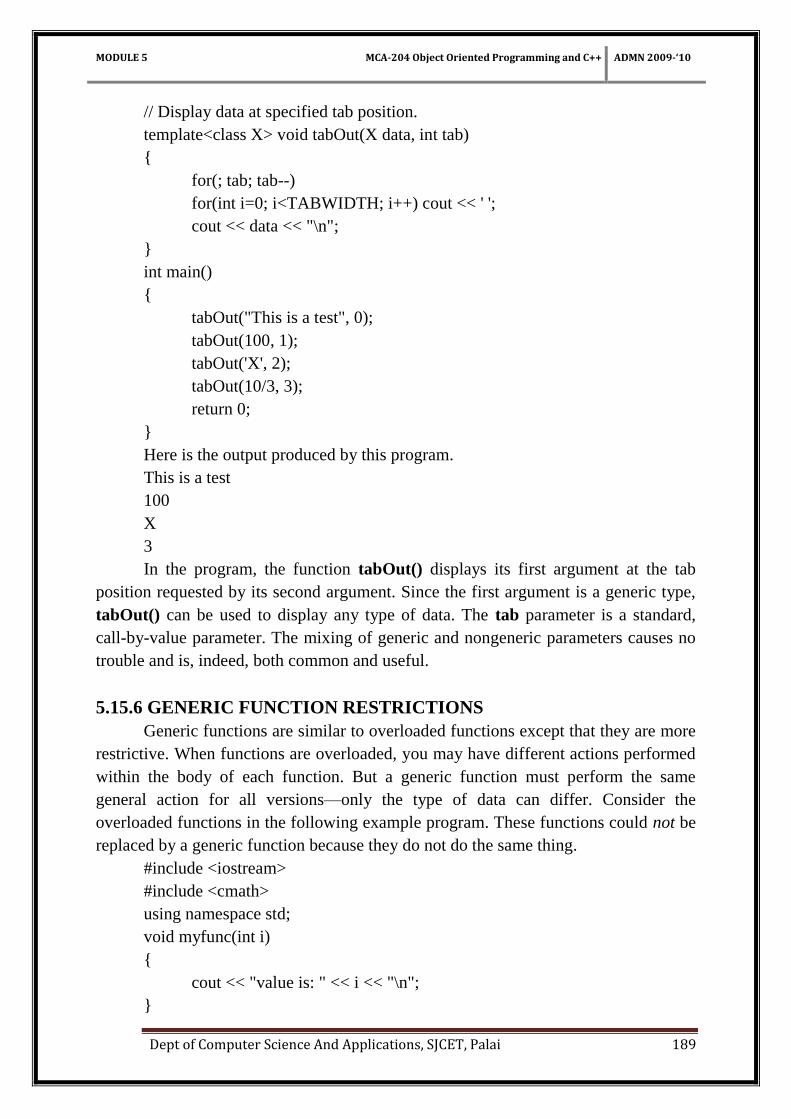
// Display data at specified tab position.
template<class X> void tabOut(X data, int tab)
{
for(; tab; tab--)
for(int i=0; i<TABWIDTH; i++) cout << ' ';
cout << data << "\n";
}
int main()
{
tabOut("This is a test", 0);
tabOut(100, 1);
tabOut('X', 2);
tabOut(10/3, 3);
return 0;
}
Here is the output produced by this program.
This is a test
100
X
3
In the program, the function tabOut() displays its first argument at the tab
position requested by its second argument. Since the first argument is a generic type,
tabOut() can be used to display any type of data. The tab parameter is a standard,
call-by-value parameter. The mixing of generic and nongeneric parameters causes no
trouble and is, indeed, both common and useful.
5.15.6 GENERIC FUNCTION RESTRICTIONS
Generic functions are similar to overloaded functions except that they are more
restrictive. When functions are overloaded, you may have different actions performed
within the body of each function. But a generic function must perform the same
general action for all versions—only the type of data can differ. Consider the
overloaded functions in the following example program. These functions could not be
replaced by a generic function because they do not do the same thing.
#include <iostream>
#include <cmath>
using namespace std;
void myfunc(int i)
{
cout << "value is: " << i << "\n";
}
MODULE 5 MCA-204 Object Oriented Programming and C++ ADMN 2009-‘10
Dept of Computer Science And Applications, SJCET, Palai 190
void myfunc(double d)
{
double intpart;
double fracpart;
fracpart = modf(d, &intpart);
cout << "Fractional part: " << fracpart;
cout << "\n";
cout << "Integer part: " << intpart;
}
int main()
{
myfunc(1);
myfunc(12.2);
return 0;
}
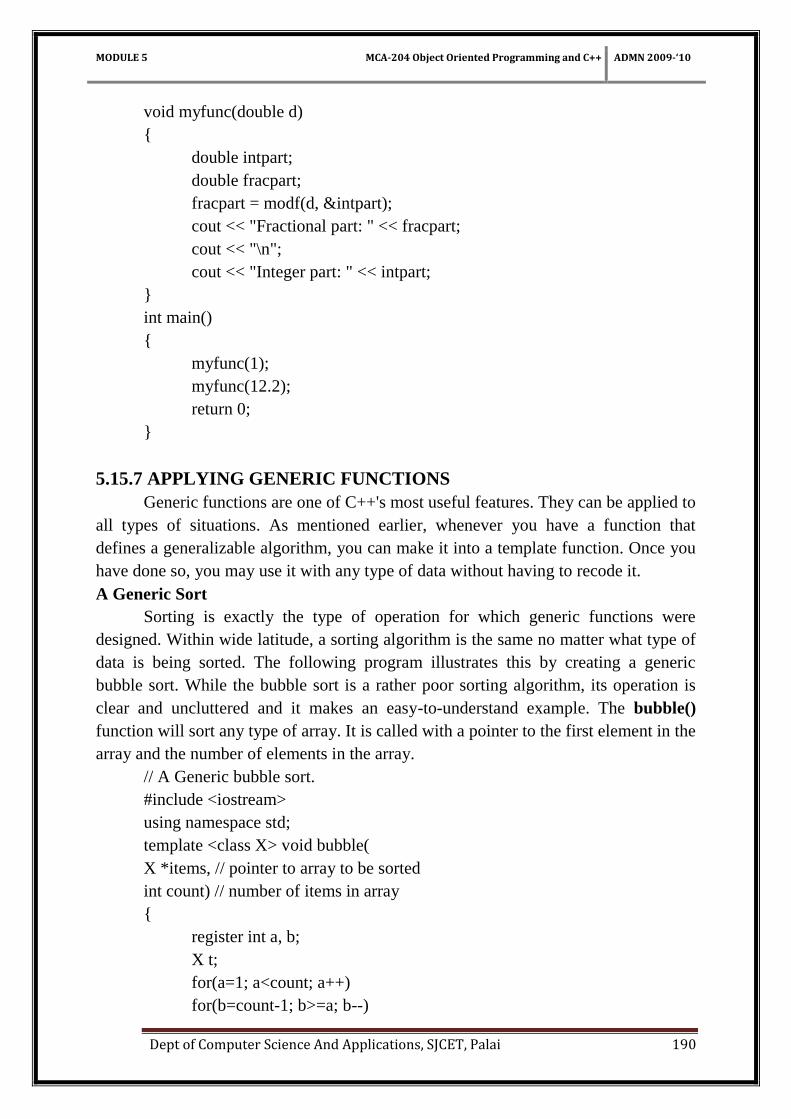
5.15.7 APPLYING GENERIC FUNCTIONS
Generic functions are one of C++'s most useful features. They can be applied to
all types of situations. As mentioned earlier, whenever you have a function that
defines a generalizable algorithm, you can make it into a template function. Once you
have done so, you may use it with any type of data without having to recode it.
A Generic Sort
Sorting is exactly the type of operation for which generic functions were
designed. Within wide latitude, a sorting algorithm is the same no matter what type of
data is being sorted. The following program illustrates this by creating a generic
bubble sort. While the bubble sort is a rather poor sorting algorithm, its operation is
clear and uncluttered and it makes an easy-to-understand example. The bubble()
function will sort any type of array. It is called with a pointer to the first element in the
array and the number of elements in the array.
// A Generic bubble sort.
#include <iostream>
using namespace std;
template <class X> void bubble(
X *items, // pointer to array to be sorted
int count) // number of items in array
{
register int a, b;
X t;
for(a=1; a<count; a++)
for(b=count-1; b>=a; b--)
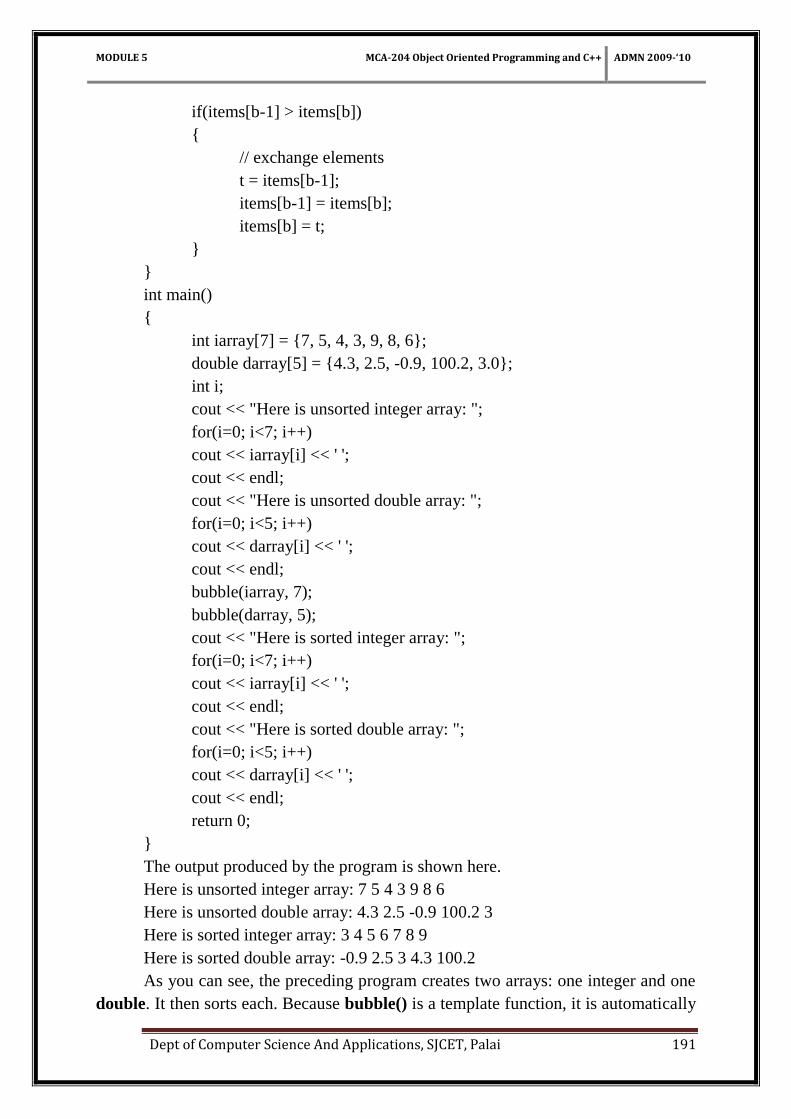
MODULE 5 MCA-204 Object Oriented Programming and C++ ADMN 2009-‘10
Dept of Computer Science And Applications, SJCET, Palai 191
if(items[b-1] > items[b])
{
// exchange elements
t = items[b-1];
items[b-1] = items[b];
items[b] = t;
}
}
int main()
{
int iarray[7] = {7, 5, 4, 3, 9, 8, 6};
double darray[5] = {4.3, 2.5, -0.9, 100.2, 3.0};
int i;
cout << "Here is unsorted integer array: ";
for(i=0; i<7; i++)
cout << iarray[i] << ' ';
cout << endl;
cout << "Here is unsorted double array: ";
for(i=0; i<5; i++)
cout << darray[i] << ' ';
cout << endl;
bubble(iarray, 7);
bubble(darray, 5);
cout << "Here is sorted integer array: ";
for(i=0; i<7; i++)
cout << iarray[i] << ' ';
cout << endl;
cout << "Here is sorted double array: ";
for(i=0; i<5; i++)
cout << darray[i] << ' ';
cout << endl;
return 0;
}
The output produced by the program is shown here.
Here is unsorted integer array: 7 5 4 3 9 8 6
Here is unsorted double array: 4.3 2.5 -0.9 100.2 3
Here is sorted integer array: 3 4 5 6 7 8 9
Here is sorted double array: -0.9 2.5 3 4.3 100.2
As you can see, the preceding program creates two arrays: one integer and one
double. It then sorts each. Because bubble() is a template function, it is automatically
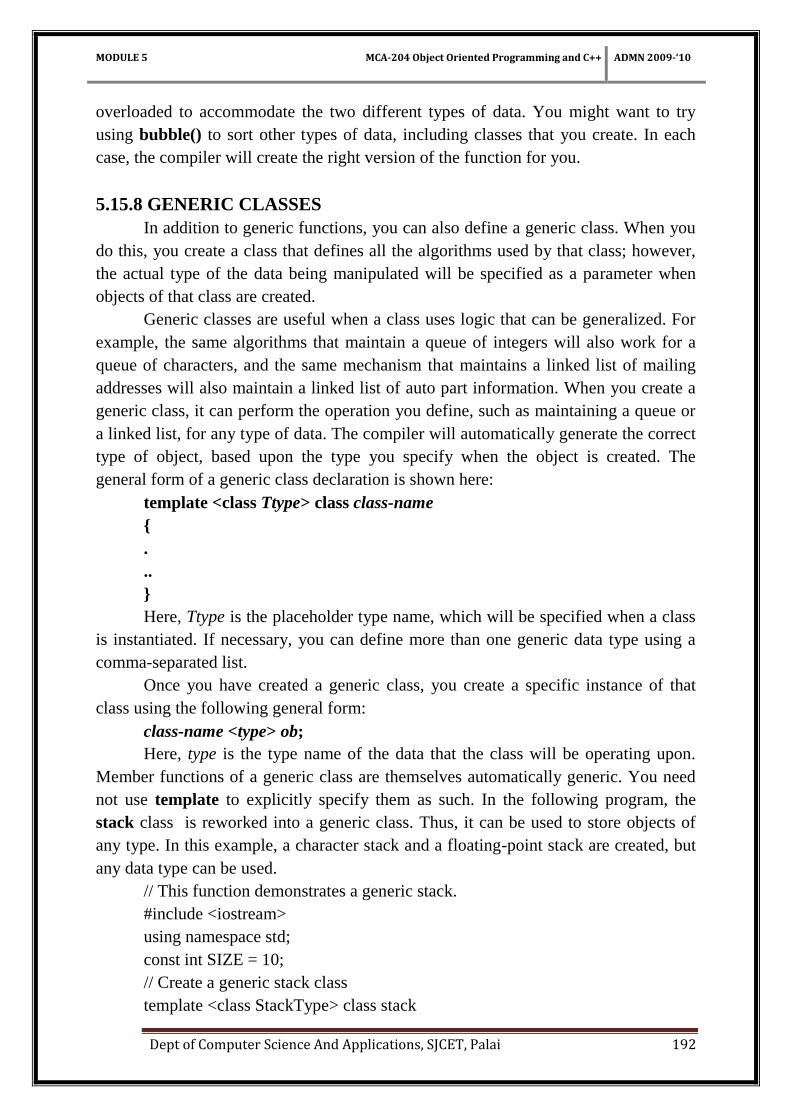
MODULE 5 MCA-204 Object Oriented Programming and C++ ADMN 2009-‘10
Dept of Computer Science And Applications, SJCET, Palai 192
overloaded to accommodate the two different types of data. You might want to try
using bubble() to sort other types of data, including classes that you create. In each
case, the compiler will create the right version of the function for you.
5.15.8 GENERIC CLASSES
In addition to generic functions, you can also define a generic class. When you
do this, you create a class that defines all the algorithms used by that class; however,
the actual type of the data being manipulated will be specified as a parameter when
objects of that class are created.
Generic classes are useful when a class uses logic that can be generalized. For
example, the same algorithms that maintain a queue of integers will also work for a
queue of characters, and the same mechanism that maintains a linked list of mailing
addresses will also maintain a linked list of auto part information. When you create a
generic class, it can perform the operation you define, such as maintaining a queue or
a linked list, for any type of data. The compiler will automatically generate the correct
type of object, based upon the type you specify when the object is created. The
general form of a generic class declaration is shown here:
template <class Ttype> class class-name
{
.
..
}
Here, Ttype is the placeholder type name, which will be specified when a class
is instantiated. If necessary, you can define more than one generic data type using a
comma-separated list.
Once you have created a generic class, you create a specific instance of that
class using the following general form:
class-name <type> ob;
Here, type is the type name of the data that the class will be operating upon.
Member functions of a generic class are themselves automatically generic. You need
not use template to explicitly specify them as such. In the following program, the
stack class is reworked into a generic class. Thus, it can be used to store objects of
any type. In this example, a character stack and a floating-point stack are created, but
any data type can be used.
// This function demonstrates a generic stack.
#include <iostream>
using namespace std;
const int SIZE = 10;
// Create a generic stack class
template <class StackType> class stack
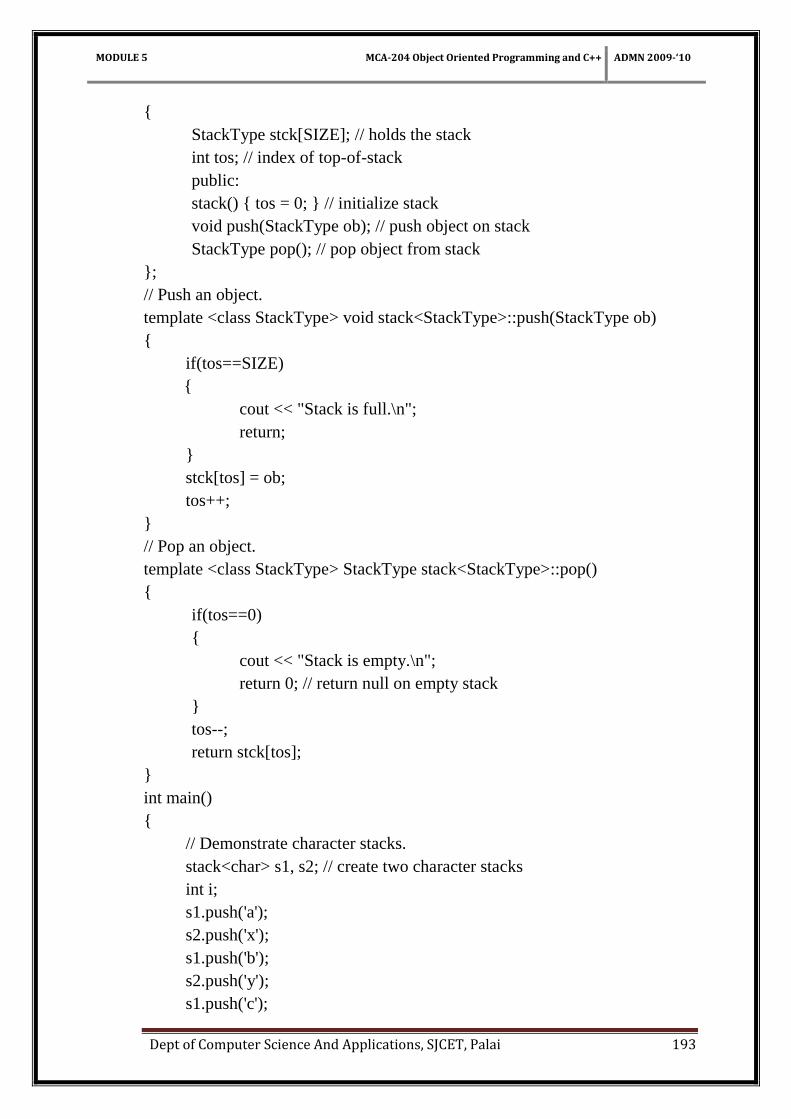
MODULE 5 MCA-204 Object Oriented Programming and C++ ADMN 2009-‘10
Dept of Computer Science And Applications, SJCET, Palai 193
{
StackType stck[SIZE]; // holds the stack
int tos; // index of top-of-stack
public:
stack() { tos = 0; } // initialize stack
void push(StackType ob); // push object on stack
StackType pop(); // pop object from stack
};
// Push an object.
template <class StackType> void stack<StackType>::push(StackType ob)
{
if(tos==SIZE)
{
cout << "Stack is full.\n";
return;
}
stck[tos] = ob;
tos++;
}
// Pop an object.
template <class StackType> StackType stack<StackType>::pop()
{
if(tos==0)
{
cout << "Stack is empty.\n";
return 0; // return null on empty stack
}
tos--;
return stck[tos];
}
int main()
{
// Demonstrate character stacks.
stack<char> s1, s2; // create two character stacks
int i;
s1.push('a');
s2.push('x');
s1.push('b');
s2.push('y');
s1.push('c');
MODULE 5 MCA-204 Object Oriented Programming and C++ ADMN 2009-‘10
Dept of Computer Science And Applications, SJCET, Palai 194
s2.push('z');
for(i=0; i<3; i++) cout << "Pop s1: " << s1.pop() << "\n";
for(i=0; i<3; i++) cout << "Pop s2: " << s2.pop() << "\n";
// demonstrate double stacks
stack<double> ds1, ds2; // create two double stacks
ds1.push(1.1);
ds2.push(2.2);
ds1.push(3.3);
ds2.push(4.4);
ds1.push(5.5);
ds2.push(6.6);
for(i=0; i<3; i++) cout << "Pop ds1: " << ds1.pop() << "\n";
for(i=0; i<3; i++) cout << "Pop ds2: " << ds2.pop() << "\n";
return 0;
}
As you can see, the declaration of a generic class is similar to that of a generic
function. The actual type of data stored by the stack is generic in the class declaration.
It is not until an object of the stack is declared that the actual data type is determined.
When a specific instance of stack is declared, the compiler automatically generates all
the functions and variables necessary for handling the actual data. In this example,
two different types of stacks are declared. Two are integer stacks. Two are stacks of
doubles. Pay special attention to these declarations:
stack<char> s1, s2; // create two character stacks
stack<double> ds1, ds2; // create two double stacks
Notice how the desired data type is passed inside the angle brackets. By
changing the type of data specified when stack objects are created, you can change
the type of data stored in that stack. For example, by using the following declaration,
you can create another stack that stores character pointers.
stack<char *> chrptrQ;
You can also create stacks to store data types that you create. For example, if
you want to use the following structure to store address information,
struct addr
{
char name[40];
char street[40];
char city[30];
char state[3];
char zip[12];
};

MODULE 5 MCA-204 Object Oriented Programming and C++ ADMN 2009-‘10
Dept of Computer Science And Applications, SJCET, Palai 195
then to use stack to generate a stack that will store objects of type addr, use a
declaration like this:
stack<addr> obj;
As the stack class illustrates, generic functions and classes are powerful tools
that you can use to maximize your programming efforts, because they allow you to
define the general form of an object that can then be used with any type of data. You
are saved from the tedium of creating separate implementations for each data type
with which you want the algorithm to work. The compiler automatically creates the
specific versions of the class for you.
5.15.9 AN EXAMPLE WITH TWO GENERIC DATA TYPES
A template class can have more than one generic data type. Simply declare all
the data types required by the class in a comma-separated list within the template
specification. For example, the following short example creates a class that uses two
generic data types.
/* This example uses two generic data types in a
class definition.
*/
#include <iostream>
using namespace std;
template <class Type1, class Type2> class myclass
{
Type1 i;
Type2 j;
public:
myclass(Type1 a, Type2 b) { i = a; j = b; }
void show() { cout << i << ' ' << j << '\n'; }
};
int main()
{
myclass<int, double> ob1(10, 0.23);
myclass<char, char *> ob2('X', "Templates add power.");
ob1.show(); // show int, double
ob2.show(); // show char, char *
return 0;
}
This program produces the following output:
10 0.23
X Templates add power.
MODULE 5 MCA-204 Object Oriented Programming and C++ ADMN 2009-‘10
Dept of Computer Science And Applications, SJCET, Palai 196
The program declares two types of objects. ob1 uses int and double data. ob2
uses a character and a character pointer. For both cases, the compiler automatically
generates the appropriate data and functions to accommodate the way the objects are
created.
5.15.10 THE TYPENAME AND EXPORT KEYWORDS
Recently, two keywords were added to C++ that relate specifically to
templates: typename and export. Both play specialized roles in C++ programming.
Each is briefly examined.
The typename keyword has two uses. First, as mentioned earlier, it can be
substituted for the keyword class in a template declaration. For example, the
swapargs() template function could be specified like this:
template <typename X> void swapargs(X &a, X &b)
{
X temp;
temp = a;
a = b;
b = temp;
}
Here, typename specifies the generic type X. There is no difference between using
class and using typename in this context. The second use of typename is to inform
the compiler that a name used in a template declaration is a type name rather than an
object name. For example,
typename X::Name someObject;
ensures that X::Name is treated as a type name.
The export keyword can precede a template declaration. It allows other files
to use a template declared in a different file by specifying only its declaration rather
than duplicating its entire definition.
5.15.11 THE POWER OF TEMPLATES
Templates help you achieve one of the most elusive goals in programming: the
creation of reusable code. Through the use of template classes you can create
frameworks that can be applied over and over again to a variety of programming
situations. For example, consider the stack class. it could only be used to store integer
values. Even though the underlying algorithms could be used to store any type of data,
the hard-coding of the data type into the stack class severely limited its application.
However, by making stack into a generic class, it can create a stack for any type of
data. Generic functions and classes provide a powerful tool that you can use to
amplify your programming efforts. Once you have written and debugged a template
class, you have a solid software component that you can use with confidence in a
MODULE 5 MCA-204 Object Oriented Programming and C++ ADMN 2009-‘10
Dept of Computer Science And Applications, SJCET, Palai 197
variety of different situations. You are saved from the tedium of creating separate
implementations for each data type with which you want the class to work. While it is
true that the template syntax can seem a bit intimidating at first, the rewards are well
worth the time it takes to become comfortable with it. Template functions and classes
are already becoming commonplace in programming, and this trend is expected to
continue. For example, the STL (Standard Template Library) defined by C++ is, as its
name implies, built upon templates. One last point: although templates add a layer of
abstraction, they still ultimately compile down to the same, high-performance object
code that you have come to expect from C++.
5.16 EXCEPTION HANDLING
Exception handling allows you to manage run-time errors in an orderly fashion.
Using exception handling, your program can automatically invoke an error-handling
routine when an error occurs. The principal advantage of exception handling is that it
automates much of the error-handling code that previously had to be coded "by hand"
in any large program.
5.16.1 EXCEPTION HANDLING FUNDAMENTALS
Exceptions are of two kinds, namely, synchronous exceptions and
asynchronous exceptions. Errors such as ―out-of-range index‖ and ―over-flow‖ belong
to the synchronous type exceptions. The errors that are caused by events beyond the
control of the program (such as keyboard interrupts) are called asynchronous
exceptions. The proposed exception handling mechanism in C++ is designed to handle
only synchronous exceptions.
The purpose of the exception handling mechanism is to provide means to detect
and report an ―exceptional circumstance‖ so that appropriate action can be taken. The
mechanism suggests a separate error handling code that performs the following tasks:
1. Find the problem (Hit the exception).
2. Inform that an error has occurred (Throw the exception).
3. Receive the error information (Catch the exception).
4. Take corrective actions (Handle the exception).
The error handling code basically consists of two segments, one to detect errors
and to throw exceptions, and the other to catch the exceptions and to take appropriate
actions.
C++ exception handling is built upon three keywords: try, catch, and throw.
In the most general terms, program statements that you want to monitor for exceptions
are contained in a try block. If an exception (i.e., an error) occurs within the try
block, it is thrown (using throw). The exception is caught, using catch, and
processed. The following discussion elaborates upon this general description. Code
MODULE 5 MCA-204 Object Oriented Programming and C++ ADMN 2009-‘10
Dept of Computer Science And Applications, SJCET, Palai 198
that you want to monitor for exceptions must have been executed from within a try
block. (Functions called from within a try block may also throw an exception.)
Exceptions that can be thrown by the monitored code are caught by a catch statement,
which immediately follows the try statement in which the exception was thrown. The
general form of try and catch are shown here.
try {
// try block
}
catch (type1 arg) {
// catch block
}
catch (type2 arg) {
// catch block
}
catch (type3 arg) {
// catch block
}
..
.
catch (typeN arg) {
// catch block
}
The try can be as short as a few statements within one function or as all-
encompassing as enclosing the main() function code within a try block (which
effectively causes the entire program to be monitored). When an exception is thrown,
it is caught by its corresponding catch statement, which processes the exception.
There can be more than one catch statement associated with a try. Which catch
statement is used is determined by the type of the exception.
That is, if the data type specified by a catch matches that of the exception, then
that catch statement is executed (and all others are bypassed). When an exception is
caught, arg will receive its value. Any type of data may be caught, including classes
that you create. If no exception is thrown (that is, no error occurs within the try
block), then no catch statement is executed.
The general form of the throw statement is shown here:
throw exception;
throw generates the exception specified by exception. If this exception is to be
caught, then throw must be executed either from within a try block itself, or from any
function called from within the try block (directly or indirectly).
If you throw an exception for which there is no applicable catch statement, an
abnormal program termination may occur. Throwing an unhandled exception causes
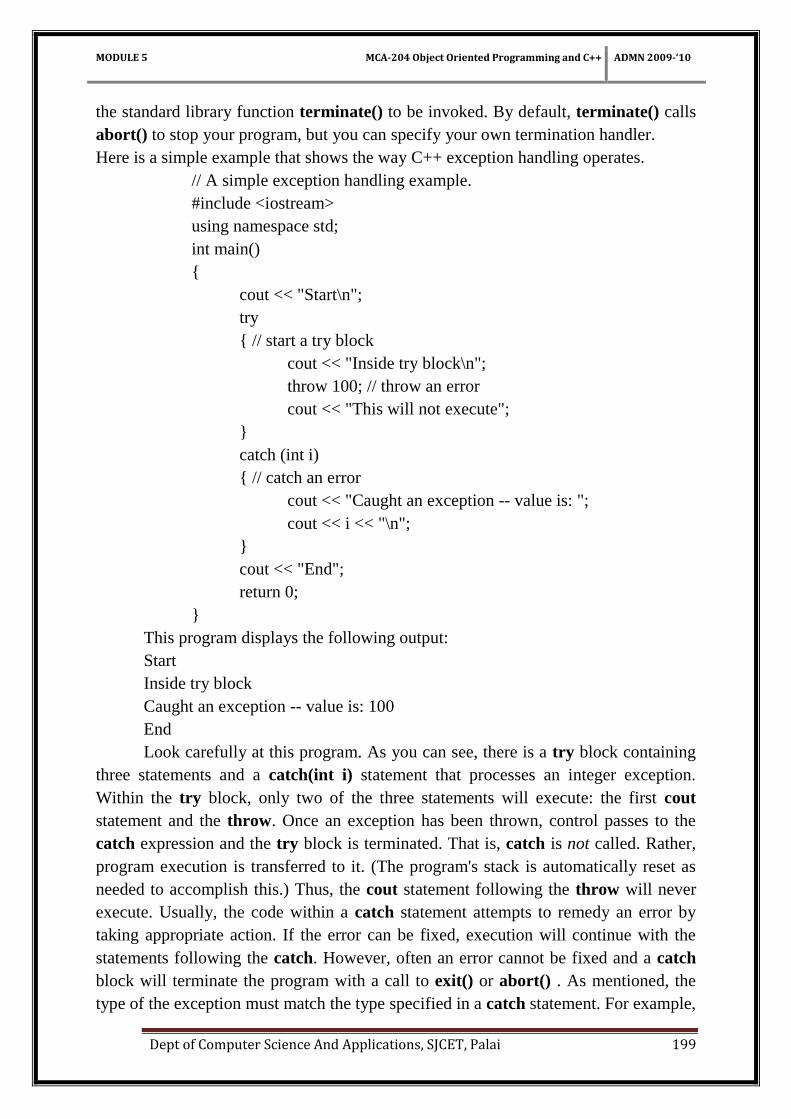
MODULE 5 MCA-204 Object Oriented Programming and C++ ADMN 2009-‘10
Dept of Computer Science And Applications, SJCET, Palai 199
the standard library function terminate() to be invoked. By default, terminate() calls
abort() to stop your program, but you can specify your own termination handler.
Here is a simple example that shows the way C++ exception handling operates.
// A simple exception handling example.
#include <iostream>
using namespace std;
int main()
{
cout << "Start\n";
try
{ // start a try block
cout << "Inside try block\n";
throw 100; // throw an error
cout << "This will not execute";
}
catch (int i)
{ // catch an error
cout << "Caught an exception -- value is: ";
cout << i << "\n";
}
cout << "End";
return 0;
}
This program displays the following output:
Start
Inside try block
Caught an exception -- value is: 100
End
Look carefully at this program. As you can see, there is a try block containing
three statements and a catch(int i) statement that processes an integer exception.
Within the try block, only two of the three statements will execute: the first cout
statement and the throw. Once an exception has been thrown, control passes to the
catch expression and the try block is terminated. That is, catch is not called. Rather,
program execution is transferred to it. (The program's stack is automatically reset as
needed to accomplish this.) Thus, the cout statement following the throw will never
execute. Usually, the code within a catch statement attempts to remedy an error by
taking appropriate action. If the error can be fixed, execution will continue with the
statements following the catch. However, often an error cannot be fixed and a catch
block will terminate the program with a call to exit() or abort() . As mentioned, the
type of the exception must match the type specified in a catch statement. For example,
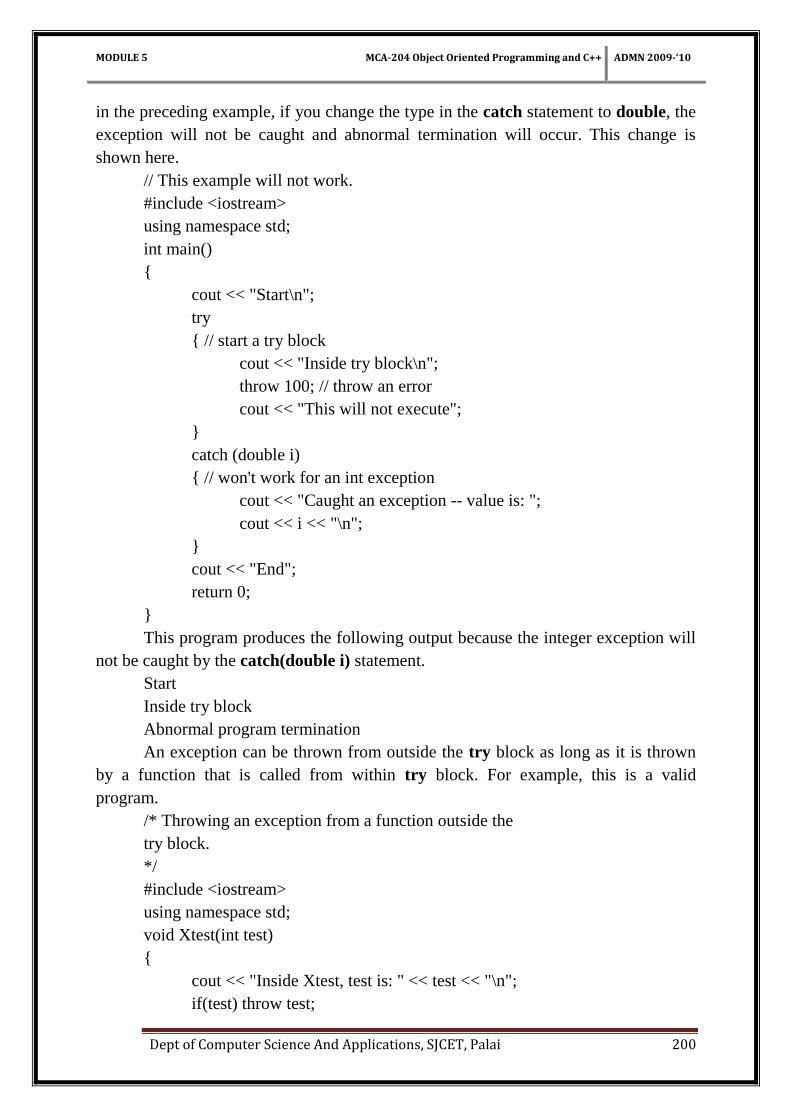
MODULE 5 MCA-204 Object Oriented Programming and C++ ADMN 2009-‘10
Dept of Computer Science And Applications, SJCET, Palai 200
in the preceding example, if you change the type in the catch statement to double, the
exception will not be caught and abnormal termination will occur. This change is
shown here.
// This example will not work.
#include <iostream>
using namespace std;
int main()
{
cout << "Start\n";
try
{ // start a try block
cout << "Inside try block\n";
throw 100; // throw an error
cout << "This will not execute";
}
catch (double i)
{ // won't work for an int exception
cout << "Caught an exception -- value is: ";
cout << i << "\n";
}
cout << "End";
return 0;
}
This program produces the following output because the integer exception will
not be caught by the catch(double i) statement.
Start
Inside try block
Abnormal program termination
An exception can be thrown from outside the try block as long as it is thrown
by a function that is called from within try block. For example, this is a valid
program.
/* Throwing an exception from a function outside the
try block.
*/
#include <iostream>
using namespace std;
void Xtest(int test)
{
cout << "Inside Xtest, test is: " << test << "\n";
if(test) throw test;
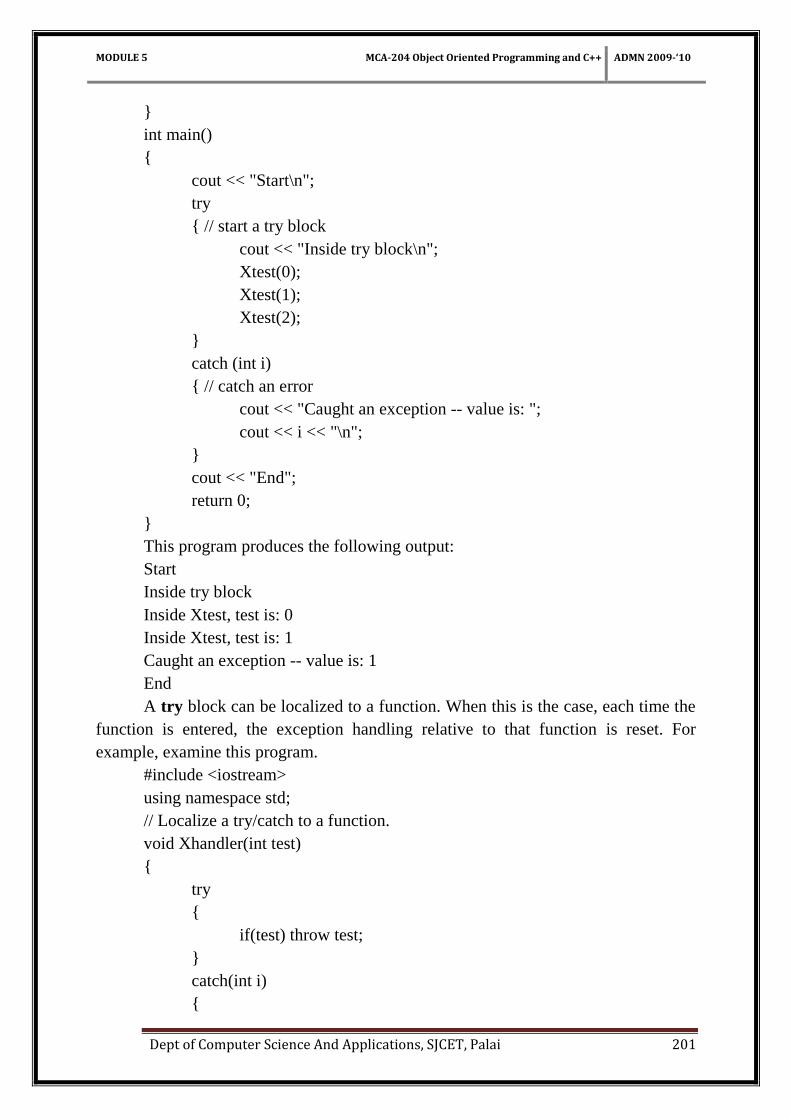
MODULE 5 MCA-204 Object Oriented Programming and C++ ADMN 2009-‘10
Dept of Computer Science And Applications, SJCET, Palai 201
}
int main()
{
cout << "Start\n";
try
{ // start a try block
cout << "Inside try block\n";
Xtest(0);
Xtest(1);
Xtest(2);
}
catch (int i)
{ // catch an error
cout << "Caught an exception -- value is: ";
cout << i << "\n";
}
cout << "End";
return 0;
}
This program produces the following output:
Start
Inside try block
Inside Xtest, test is: 0
Inside Xtest, test is: 1
Caught an exception -- value is: 1
End
A try block can be localized to a function. When this is the case, each time the
function is entered, the exception handling relative to that function is reset. For
example, examine this program.
#include <iostream>
using namespace std;
// Localize a try/catch to a function.
void Xhandler(int test)
{
try
{
if(test) throw test;
}
catch(int i)
{

MODULE 5 MCA-204 Object Oriented Programming and C++ ADMN 2009-‘10
Dept of Computer Science And Applications, SJCET, Palai 202
cout << "Caught Exception #: " << i << '\n';
}
}
int main()
{
cout << "Start\n";
Xhandler(1);
Xhandler(2);
Xhandler(0);
Xhandler(3);
cout << "End";
return 0;
}
This program displays this output:
Start
Caught Exception #: 1
Caught Exception #: 2
Caught Exception #: 3
End
As you can see, three exceptions are thrown. After each exception, the function
returns. When the function is called again, the exception handling is reset. It is
important to understand that the code associated with a catch statement will be
executed only if it catches an exception. Otherwise, execution simply bypasses the
catch altogether. (That is, execution never flows into a catch statement.)
For example, in the following program, no exception is thrown, so the catch
statement does not execute.
#include <iostream>
using namespace std;
int main()
{
cout << "Start\n";
try
{ // start a try block
cout << "Inside try block\n";
cout << "Still inside try block\n";
}
catch (int i)
{ // catch an error
cout << "Caught an exception -- value is: ";
cout << i << "\n";
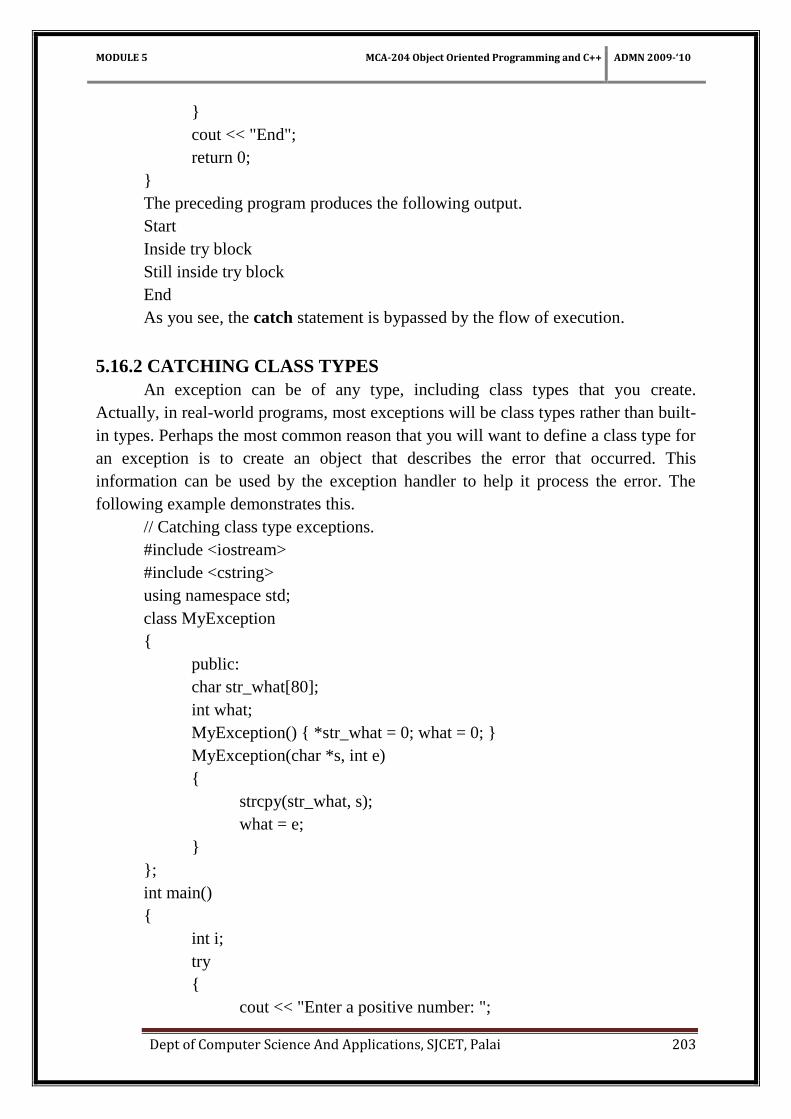
MODULE 5 MCA-204 Object Oriented Programming and C++ ADMN 2009-‘10
Dept of Computer Science And Applications, SJCET, Palai 203
}
cout << "End";
return 0;
}
The preceding program produces the following output.
Start
Inside try block
Still inside try block
End
As you see, the catch statement is bypassed by the flow of execution.
5.16.2 CATCHING CLASS TYPES
An exception can be of any type, including class types that you create.
Actually, in real-world programs, most exceptions will be class types rather than built-
in types. Perhaps the most common reason that you will want to define a class type for
an exception is to create an object that describes the error that occurred. This
information can be used by the exception handler to help it process the error. The
following example demonstrates this.
// Catching class type exceptions.
#include <iostream>
#include <cstring>
using namespace std;
class MyException
{
public:
char str_what[80];
int what;
MyException() { *str_what = 0; what = 0; }
MyException(char *s, int e)
{
strcpy(str_what, s);
what = e;
}
};
int main()
{
int i;
try
{
cout << "Enter a positive number: ";
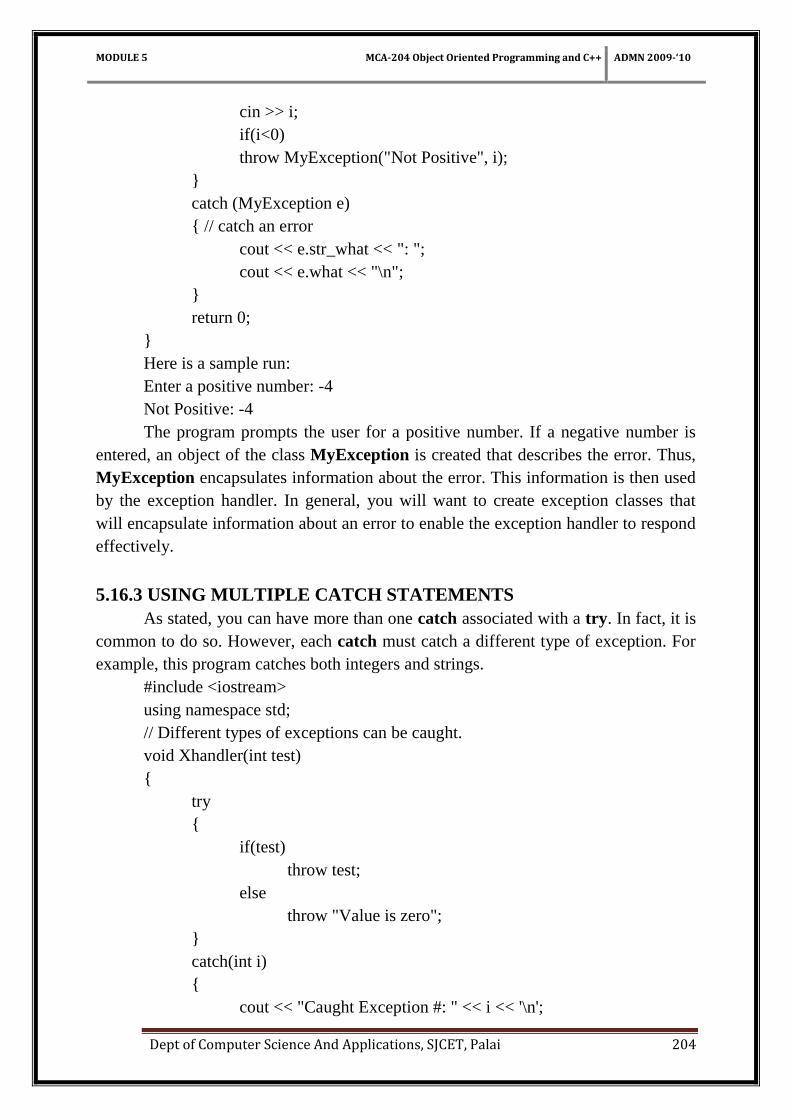
MODULE 5 MCA-204 Object Oriented Programming and C++ ADMN 2009-‘10
Dept of Computer Science And Applications, SJCET, Palai 204
cin >> i;
if(i<0)
throw MyException("Not Positive", i);
}
catch (MyException e)
{ // catch an error
cout << e.str_what << ": ";
cout << e.what << "\n";
}
return 0;
}
Here is a sample run:
Enter a positive number: -4
Not Positive: -4
The program prompts the user for a positive number. If a negative number is
entered, an object of the class MyException is created that describes the error. Thus,
MyException encapsulates information about the error. This information is then used
by the exception handler. In general, you will want to create exception classes that
will encapsulate information about an error to enable the exception handler to respond
effectively.
5.16.3 USING MULTIPLE CATCH STATEMENTS
As stated, you can have more than one catch associated with a try. In fact, it is
common to do so. However, each catch must catch a different type of exception. For
example, this program catches both integers and strings.
#include <iostream>
using namespace std;
// Different types of exceptions can be caught.
void Xhandler(int test)
{
try
{
if(test)
throw test;
else
throw "Value is zero";
}
catch(int i)
{
cout << "Caught Exception #: " << i << '\n';
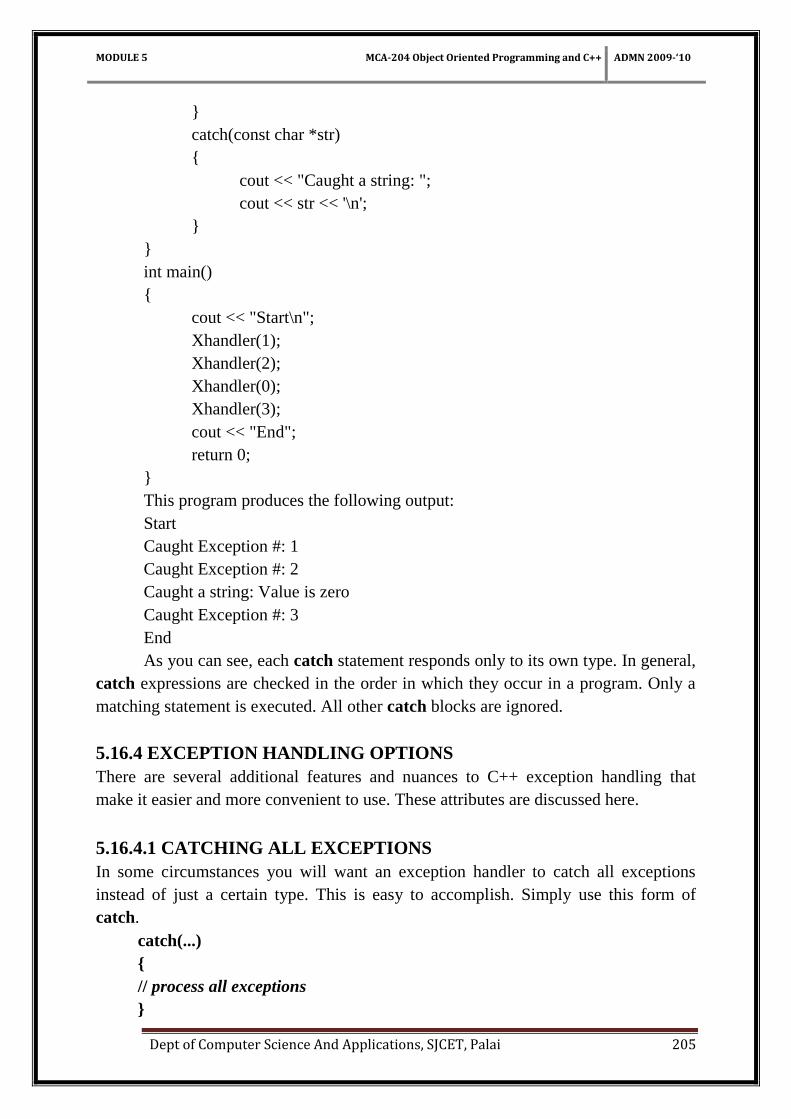
MODULE 5 MCA-204 Object Oriented Programming and C++ ADMN 2009-‘10
Dept of Computer Science And Applications, SJCET, Palai 205
}
catch(const char *str)
{
cout << "Caught a string: ";
cout << str << '\n';
}
}
int main()
{
cout << "Start\n";
Xhandler(1);
Xhandler(2);
Xhandler(0);
Xhandler(3);
cout << "End";
return 0;
}
This program produces the following output:
Start
Caught Exception #: 1
Caught Exception #: 2
Caught a string: Value is zero
Caught Exception #: 3
End
As you can see, each catch statement responds only to its own type. In general,
catch expressions are checked in the order in which they occur in a program. Only a
matching statement is executed. All other catch blocks are ignored.
5.16.4 EXCEPTION HANDLING OPTIONS
There are several additional features and nuances to C++ exception handling that
make it easier and more convenient to use. These attributes are discussed here.
5.16.4.1 CATCHING ALL EXCEPTIONS
In some circumstances you will want an exception handler to catch all exceptions
instead of just a certain type. This is easy to accomplish. Simply use this form of
catch.
catch(...)
{
// process all exceptions
}
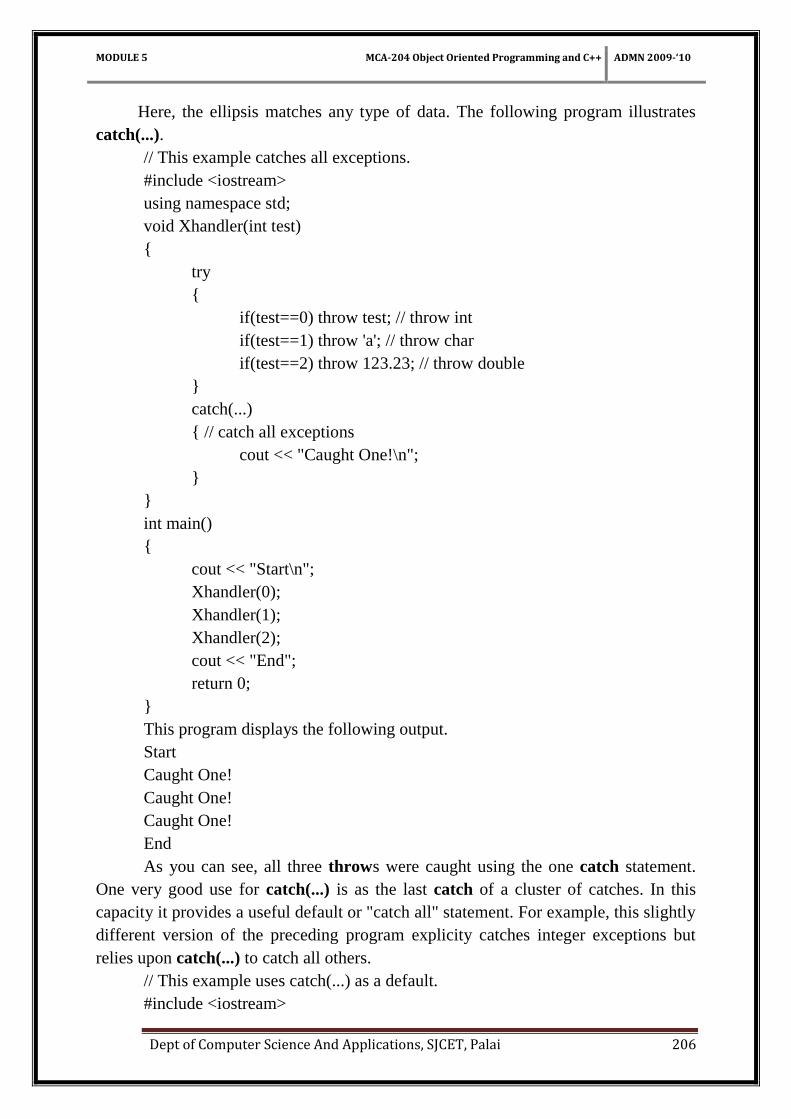
MODULE 5 MCA-204 Object Oriented Programming and C++ ADMN 2009-‘10
Dept of Computer Science And Applications, SJCET, Palai 206
Here, the ellipsis matches any type of data. The following program illustrates
catch(...).
// This example catches all exceptions.
#include <iostream>
using namespace std;
void Xhandler(int test)
{
try
{
if(test==0) throw test; // throw int
if(test==1) throw 'a'; // throw char
if(test==2) throw 123.23; // throw double
}
catch(...)
{ // catch all exceptions
cout << "Caught One!\n";
}
}
int main()
{
cout << "Start\n";
Xhandler(0);
Xhandler(1);
Xhandler(2);
cout << "End";
return 0;
}
This program displays the following output.
Start
Caught One!
Caught One!
Caught One!
End
As you can see, all three throws were caught using the one catch statement.
One very good use for catch(...) is as the last catch of a cluster of catches. In this
capacity it provides a useful default or "catch all" statement. For example, this slightly
different version of the preceding program explicity catches integer exceptions but
relies upon catch(...) to catch all others.
// This example uses catch(...) as a default.
#include <iostream>
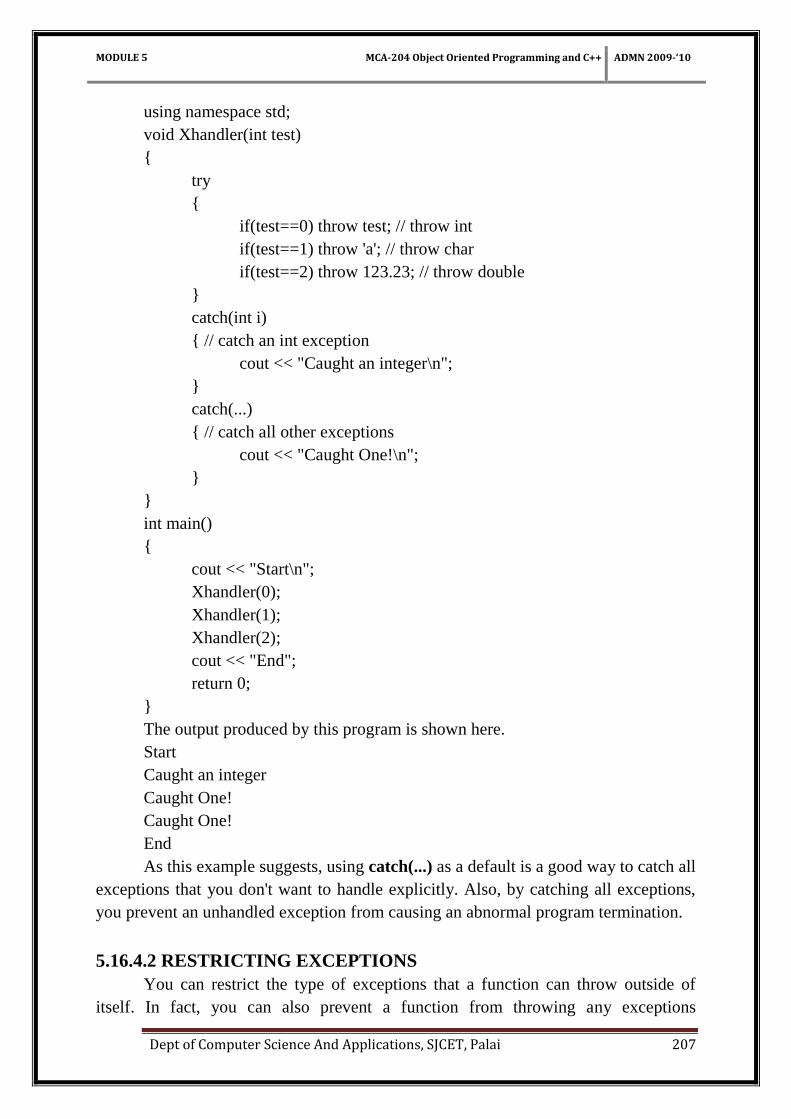
MODULE 5 MCA-204 Object Oriented Programming and C++ ADMN 2009-‘10
Dept of Computer Science And Applications, SJCET, Palai 207
using namespace std;
void Xhandler(int test)
{
try
{
if(test==0) throw test; // throw int
if(test==1) throw 'a'; // throw char
if(test==2) throw 123.23; // throw double
}
catch(int i)
{ // catch an int exception
cout << "Caught an integer\n";
}
catch(...)
{ // catch all other exceptions
cout << "Caught One!\n";
}
}
int main()
{
cout << "Start\n";
Xhandler(0);
Xhandler(1);
Xhandler(2);
cout << "End";
return 0;
}
The output produced by this program is shown here.
Start
Caught an integer
Caught One!
Caught One!
End
As this example suggests, using catch(...) as a default is a good way to catch all
exceptions that you don't want to handle explicitly. Also, by catching all exceptions,
you prevent an unhandled exception from causing an abnormal program termination.
5.16.4.2 RESTRICTING EXCEPTIONS
You can restrict the type of exceptions that a function can throw outside of
itself. In fact, you can also prevent a function from throwing any exceptions
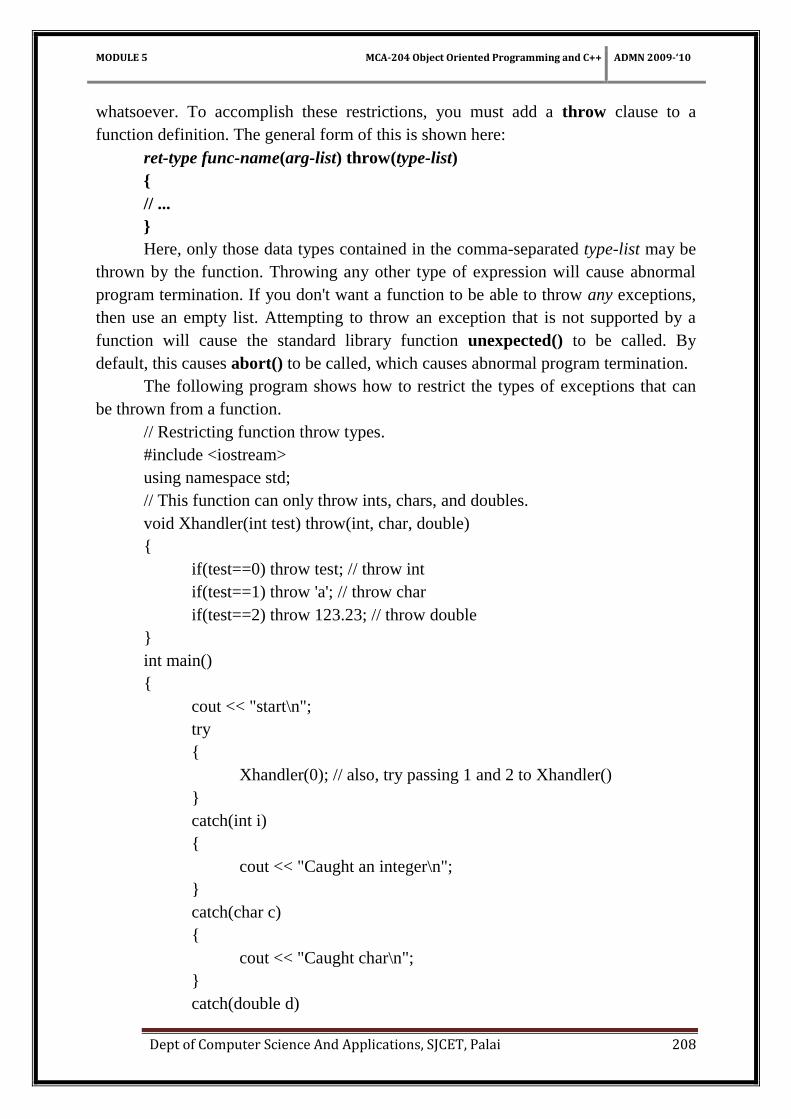
MODULE 5 MCA-204 Object Oriented Programming and C++ ADMN 2009-‘10
Dept of Computer Science And Applications, SJCET, Palai 208
whatsoever. To accomplish these restrictions, you must add a throw clause to a
function definition. The general form of this is shown here:
ret-type func-name(arg-list) throw(type-list)
{
// ...
}
Here, only those data types contained in the comma-separated type-list may be
thrown by the function. Throwing any other type of expression will cause abnormal
program termination. If you don't want a function to be able to throw any exceptions,
then use an empty list. Attempting to throw an exception that is not supported by a
function will cause the standard library function unexpected() to be called. By
default, this causes abort() to be called, which causes abnormal program termination.
The following program shows how to restrict the types of exceptions that can
be thrown from a function.
// Restricting function throw types.
#include <iostream>
using namespace std;
// This function can only throw ints, chars, and doubles.
void Xhandler(int test) throw(int, char, double)
{
if(test==0) throw test; // throw int
if(test==1) throw 'a'; // throw char
if(test==2) throw 123.23; // throw double
}
int main()
{
cout << "start\n";
try
{
Xhandler(0); // also, try passing 1 and 2 to Xhandler()
}
catch(int i)
{
cout << "Caught an integer\n";
}
catch(char c)
{
cout << "Caught char\n";
}
catch(double d)
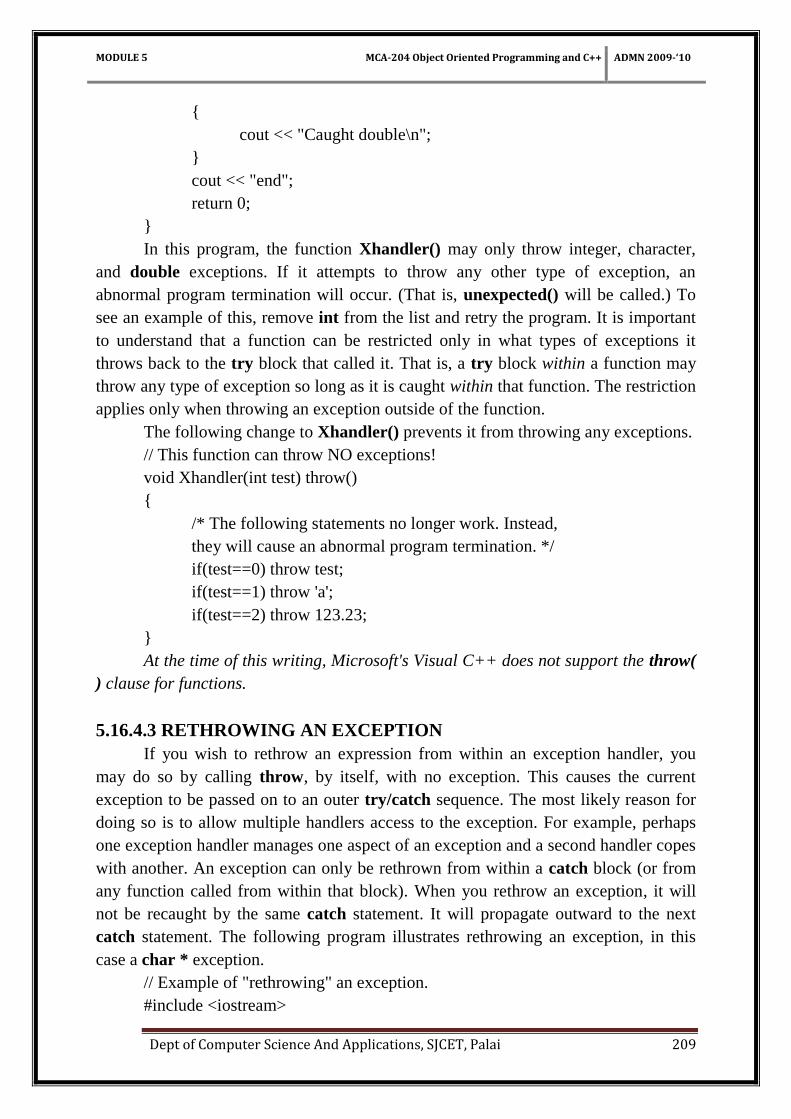
MODULE 5 MCA-204 Object Oriented Programming and C++ ADMN 2009-‘10
Dept of Computer Science And Applications, SJCET, Palai 209
{
cout << "Caught double\n";
}
cout << "end";
return 0;
}
In this program, the function Xhandler() may only throw integer, character,
and double exceptions. If it attempts to throw any other type of exception, an
abnormal program termination will occur. (That is, unexpected() will be called.) To
see an example of this, remove int from the list and retry the program. It is important
to understand that a function can be restricted only in what types of exceptions it
throws back to the try block that called it. That is, a try block within a function may
throw any type of exception so long as it is caught within that function. The restriction
applies only when throwing an exception outside of the function.
The following change to Xhandler() prevents it from throwing any exceptions.
// This function can throw NO exceptions!
void Xhandler(int test) throw()
{
/* The following statements no longer work. Instead,
they will cause an abnormal program termination. */
if(test==0) throw test;
if(test==1) throw 'a';
if(test==2) throw 123.23;
}
At the time of this writing, Microsoft's Visual C++ does not support the throw(
) clause for functions.
5.16.4.3 RETHROWING AN EXCEPTION
If you wish to rethrow an expression from within an exception handler, you
may do so by calling throw, by itself, with no exception. This causes the current
exception to be passed on to an outer try/catch sequence. The most likely reason for
doing so is to allow multiple handlers access to the exception. For example, perhaps
one exception handler manages one aspect of an exception and a second handler copes
with another. An exception can only be rethrown from within a catch block (or from
any function called from within that block). When you rethrow an exception, it will
not be recaught by the same catch statement. It will propagate outward to the next
catch statement. The following program illustrates rethrowing an exception, in this
case a char * exception.
// Example of "rethrowing" an exception.
#include <iostream>
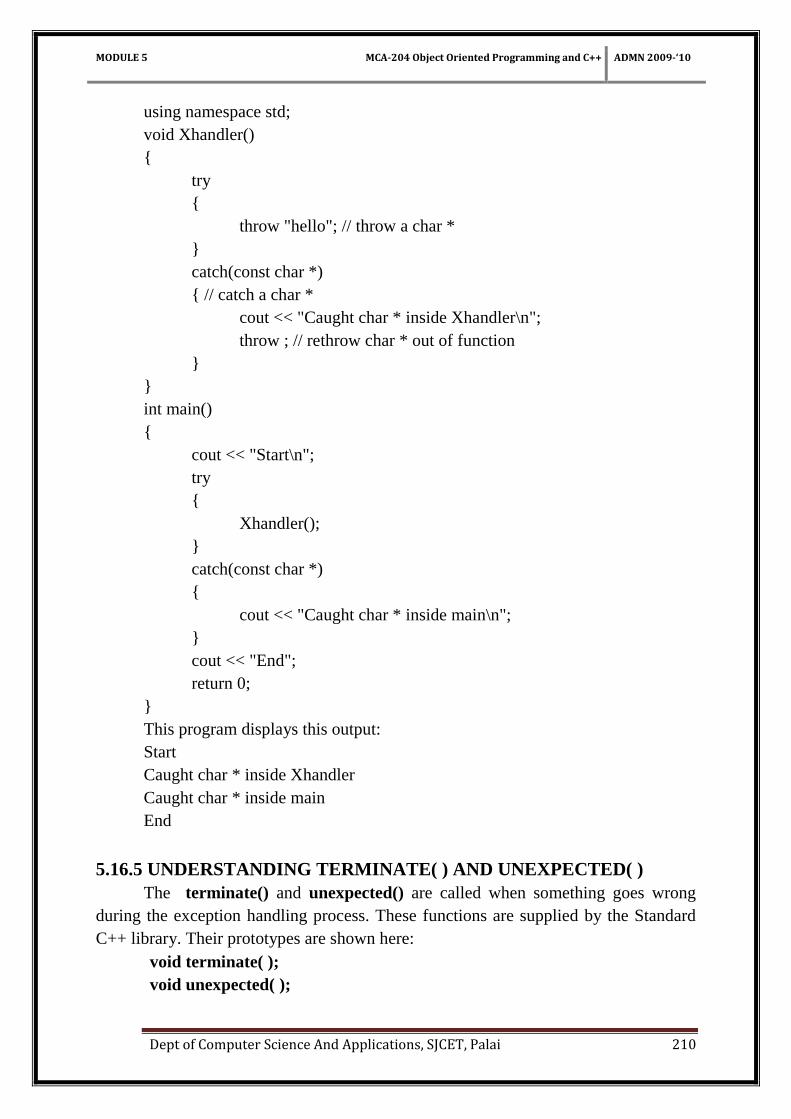
MODULE 5 MCA-204 Object Oriented Programming and C++ ADMN 2009-‘10
Dept of Computer Science And Applications, SJCET, Palai 210
using namespace std;
void Xhandler()
{
try
{
throw "hello"; // throw a char *
}
catch(const char *)
{ // catch a char *
cout << "Caught char * inside Xhandler\n";
throw ; // rethrow char * out of function
}
}
int main()
{
cout << "Start\n";
try
{
Xhandler();
}
catch(const char *)
{
cout << "Caught char * inside main\n";
}
cout << "End";
return 0;
}
This program displays this output:
Start
Caught char * inside Xhandler
Caught char * inside main
End
5.16.5 UNDERSTANDING TERMINATE( ) AND UNEXPECTED( )
The terminate() and unexpected() are called when something goes wrong
during the exception handling process. These functions are supplied by the Standard
C++ library. Their prototypes are shown here:
void terminate( );
void unexpected( );
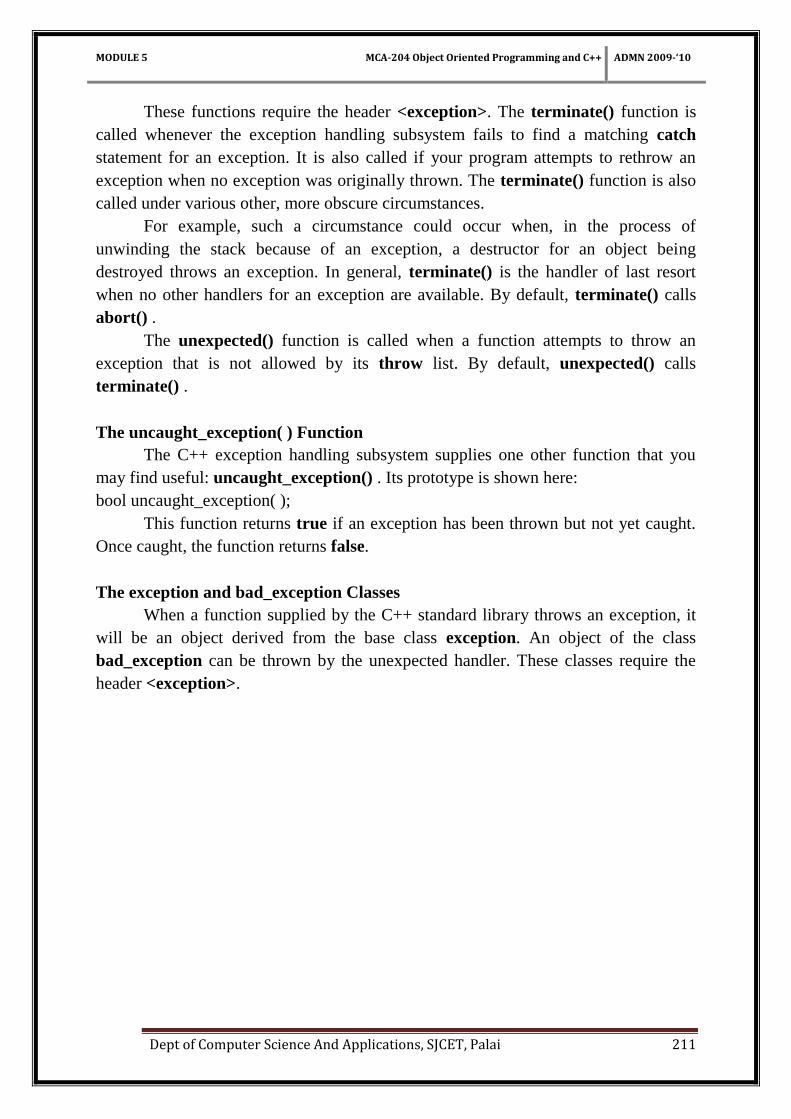
MODULE 5 MCA-204 Object Oriented Programming and C++ ADMN 2009-‘10
Dept of Computer Science And Applications, SJCET, Palai 211
These functions require the header <exception>. The terminate() function is
called whenever the exception handling subsystem fails to find a matching catch
statement for an exception. It is also called if your program attempts to rethrow an
exception when no exception was originally thrown. The terminate() function is also
called under various other, more obscure circumstances.
For example, such a circumstance could occur when, in the process of
unwinding the stack because of an exception, a destructor for an object being
destroyed throws an exception. In general, terminate() is the handler of last resort
when no other handlers for an exception are available. By default, terminate() calls
abort() .
The unexpected() function is called when a function attempts to throw an
exception that is not allowed by its throw list. By default, unexpected() calls
terminate() .
The uncaught_exception( ) Function
The C++ exception handling subsystem supplies one other function that you
may find useful: uncaught_exception() . Its prototype is shown here:
bool uncaught_exception( );
This function returns true if an exception has been thrown but not yet caught.
Once caught, the function returns false.
The exception and bad_exception Classes
When a function supplied by the C++ standard library throws an exception, it
will be an object derived from the base class exception. An object of the class
bad_exception can be thrown by the unexpected handler. These classes require the
header <exception>.