moldovan greenhouse design manual - …gshort.com/sites/default/files/pdf/moldovan greenhouse...
TRANSCRIPT

MOLDOVAN GREENHOUSE DESIGN MANUAL
BY GREGG D. SHORT P.E . CONSULTING GREENHOUSE ENGINEER
GSHORT.COM, LLC 13962 GEARHART RD.
BURBANK, OH 44214 USA [email protected]
FOR DAI/USAID
2 Introduction | Copyright DAI/USAID 2012 by Gregg D. Short, P.E.
CONTENTS
Introduction ............................................................................................................................................... 4
The Plant micro-climate ........................................................................................................................ 4
Plant Physiology 101 ............................................................................................................................. 4
Controllability ......................................................................................................................................... 4
Order of greenhouse improvements ..................................................................................................... 5
Step 1: The Cold frame .......................................................................................................................... 6
Step 2: Plant Support ............................................................................................................................. 6
Step 3: Irrigation ..................................................................................................................................... 7
Step 4: The High Tunnel ........................................................................................................................ 7
Step 4: Rollup sidewall curtains ........................................................................................................... 7
Step 6: Commit to long life, high quality, wide plastic covers ........................................................ 8
Step 7: IR Film (Single layer) ................................................................................................................ 9
Step 8: Double layer film, air inflated ................................................................................................. 9
Step 9: Basic Heating.............................................................................................................................. 9
Step 10: HAF fans ................................................................................................................................. 10
Step 11: Exterior Shade Cloth ............................................................................................................. 10
Basis for a Moldovan Greenhouse ..................................................................................................... 11
Step 12: Computer Controls ............................................................................................................... 11
Step 13: Automatic roll-up doors ....................................................................................................... 12
Step 14: Gutter Connected Greenhouses .......................................................................................... 12
Step 15: Fan & Pad Cooling or Roof vents & Fog ............................................................................ 12
Step16: Advanced Heating ................................................................................................................. 13
Step 17: CO2 Enrichment .................................................................................................................... 13
Step 18: Fertigation/ Hydroponics .................................................................................................... 13
Step 19: Insect Screening ..................................................................................................................... 13
Step 20: Interior Shade/ Energy Curtain .......................................................................................... 14
Step 21: Glass or Acrylic covers ......................................................................................................... 14
Step 22: Grow Lights ............................................................................................................................ 14
Step 23: Robots ...................................................................................................................................... 15
Best Practices for Sizing and Installing Greenhouse Structures & Equipment .......................... 16
The Greenhouse Frame ....................................................................................................................... 16
Arch Shapes .......................................................................................................................................... 16
Copyright DAI/USAID 2012 by Gregg D. Short, P.E. | Introduction 3
Frame Materials .................................................................................................................................... 17
Footers & Concrete ............................................................................................................................... 18
Insulation ............................................................................................................................................... 18
Irrigation ................................................................................................................................................ 18
Rollup Sidewalls ................................................................................................................................... 19
Cover ...................................................................................................................................................... 21
Air Inflation Fans ................................................................................................................................ 23
Heater Sizing......................................................................................................................................... 24
HAF Fans ............................................................................................................................................... 25
Exhaust Fans Fan Sizing ...................................................................................................................... 26
Evaporative Pad System Design ........................................................................................................ 26
Three Sample Greenhouse Designs for Moldova ............................................................................ 27
Sample Design One: 4.5 m x 18 m Ground to Ground Greenhouse ............................................. 27
Sample Design Two: 9 m x 40.5 m Ground to Ground Greenhouse ............................................ 28
Sample Design Three: Fan and Pad Cooled Gutter Connect Greenhouse .................................. 29
4 Introduction | Copyright DAI/USAID 2012 by Gregg D. Short, P.E.
INTRODUCTION
Greenhouses come in a wide variety of sizes, shapes, equipment levels and costs. To maximize the profit from the greenhouse we need to consider both costs and production. On the production side, we want to create an environment that will result in the highest produce quality and plant production during a time when the market price is high. We also need to create the environment at the lowest possible capital and operating cost. To achieve this goal, a correctly operating greenhouse will improve the plant microclimate relative to the natural weather. Extreme differences, between the inside and outside environment, will require more equipment and operating costs.
THE PLANT MICRO-CLIMATE
The plant micro-climate is the area directly around the plant. Since a plant cannot move around to find its best environment, it must grow with the environment that is provided to it. It is important to focus on the environment of the plant, and NOT the environment of the greenhouse. While they are linked together, in many cases substantial savings or growth increases can be made by optimizing the plant environment. For example, the air in the roof could be plus or minus 10 deg. C relative to the plants leaf temperature, but the plant only cares about its leaf temperature.
Plant Physiology 101
Pay very close attention to plant transpiration! Transpiration is the movement of water vapor from the undersides of the leaves. Transpiration serves two purposes for the plant, cooling and nutrient movement. Similar to sweating, transpiration acts to cool the plant leaves. If the solar and greenhouse temperature cause the plant to transpire at a rate greater than what the roots can provide to the leaves, (due to dry conditions, cold soil or an undersized root system) then the plant has to stop growth to keep from wilting. Transpiration also allows nutrients to move from the roots to the growing points of the plant. The rate of transpiration changes based on (leaf) temperature, air humidity (at the underside of the leaf), and air speed (over the leaf.)
CONTROLLABILITY
Controllability refers to the ability to gradually change the inside greenhouse environment without stressing the plants, while the outside environment may be quickly changing. Many current Moldovan greenhouse designs fail to deploy even simple systems that enable good control. Often-times in the spring, we want to gradually introduce cold outside air into a warm greenhouse, and not dump the cold air directly on the plant.
If it takes too long to adjust the ventilation in the morning or evening, there is a tendency for the greenhouse manager to just fully open or close all the greenhouse vents. This will result in less
Copyright DAI/USAID 2012 by Gregg D. Short, P.E. | Order of greenhouse improvements 5
than ideal plant and fruit temperatures, and lost growing opportunities. Another example is if we want to provide some heat, but the wood burner first overheats the greenhouse, and then under heats the greenhouse as the fire diminishes and takes a person to fire the heater through the night.
All these over/under control times quickly add up to lost energy and less than ideal plant conditions. This poor control translates into slower growth, poor quality fruit, higher expenses, and less time available to manage the plants. Many fairly simple and inexpensive control systems can make a huge difference in controlling the greenhouse. Focusing on the timeframes of most difficult control such as the first stages of ventilation or heating will have the quickest payback. Larger greenhouses are cheaper to control (per plant) since most of this equipment is one or two per greenhouse zone.
In the steps below, ways to improve controllability is taken into account. The simplest and cheapest control improvement method is to utilize roll-up side curtains. Manually controlled curtains are extremely easy to build and operate. At a later date, they can be motorized (~$250-$900 depending on size and type) and automatically computer controlled (~$500) for even greater control. More details on these roll-up side curtains are explained later in the manual.
The use of a wood or biomass fired hot water boiler, with a large volume, sealed combustion chamber is the next easiest area to improve greenhouse control. By using a sealed combustion chamber with a combustion air blower, the amount of heat generated from the boiler can be adjusted using a (water) thermostat. The large mass of fuel will just smolder when the combustion blower is not running. The mass of hot water also acts to slow down rapid temperature swings in the greenhouse environment. A large centrally located boiler can be used to service a number of separated greenhouses or zones, each with their own water pump. This water pump only runs when there is a call for heat (from a thermostat) in that greenhouse.
ORDER OF GREENHOUSE IMPROVEMENTS
There is a logical progression from simple cold frame structures to highly advanced robotized greenhouses. While a Dutch style, fully automated greenhouse probably isn’t relevant to Moldova, there are a vast number of investment steps before that point. Laid out below are these steps. Many of the steps of improvement can be achieved in a slightly different order; especially ones close in order to each other. Commercial growers of greenhouse produce worldwide, commonly use polyethylene covered, galvanized steel & aluminum structures for their low cost and high production levels. These structures are also most relevant to Moldovan climate and economic constrains.
Many tomato production greenhouses in Moldova tend to be at the Step 3 level (see below). Low height, single layer polyethylene covered, unheated structures create problematic growing conditions. The small interior volume coupled with poor methods of ventilation control, result in quickly changing greenhouse environments. These quick changes of temperature and humidity stress the plant and tomato fruit, resulting in lower production and poor quality fruit.
6 Order of greenhouse improvements | Copyright DAI/USAID 2012 by Gregg D. Short, P.E.
In Moldova, a number of greenhouses are used for seedling production, both for field production and to supply the tomato production greenhouses. These seedling production houses are typically heated to some degree. A very common system is to use a wood stove with a stack down the center of the bay as a simple heat exchanger. These suffer from uneven heating and are inefficient since they heat the air above the plants, and not the plant roots. Many are insulated with a second layer of polyethylene hung from the bottom of the truss in the form of a heat curtain. While this system does save some energy, it causes other problems in controlling the greenhouse environment, and is less efficient than an air inflated double layer cover.
STEP 1: THE COLD FRAME
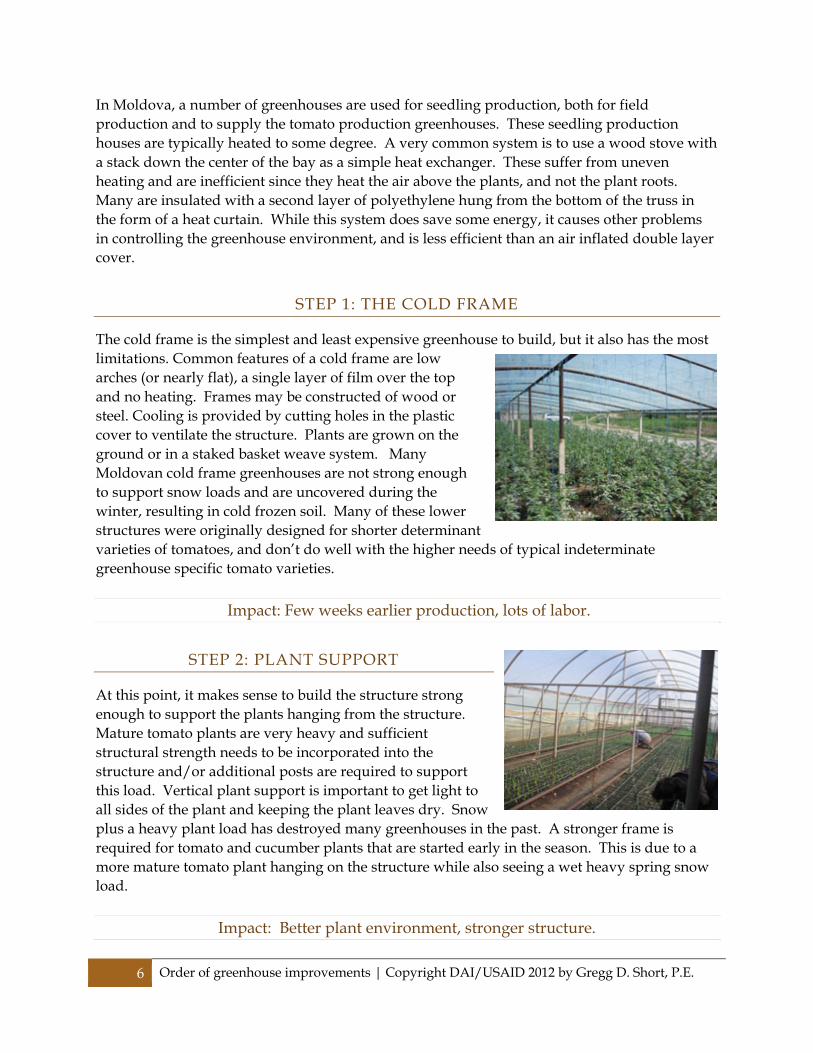
The cold frame is the simplest and least expensive greenhouse to build, but it also has the most limitations. Common features of a cold frame are low arches (or nearly flat), a single layer of film over the top and no heating. Frames may be constructed of wood or steel. Cooling is provided by cutting holes in the plastic cover to ventilate the structure. Plants are grown on the ground or in a staked basket weave system. Many Moldovan cold frame greenhouses are not strong enough to support snow loads and are uncovered during the winter, resulting in cold frozen soil. Many of these lower structures were originally designed for shorter determinant varieties of tomatoes, and don’t do well with the higher needs of typical indeterminate greenhouse specific tomato varieties.
Impact: Few weeks earlier production, lots of labor.
STEP 2: PLANT SUPPORT
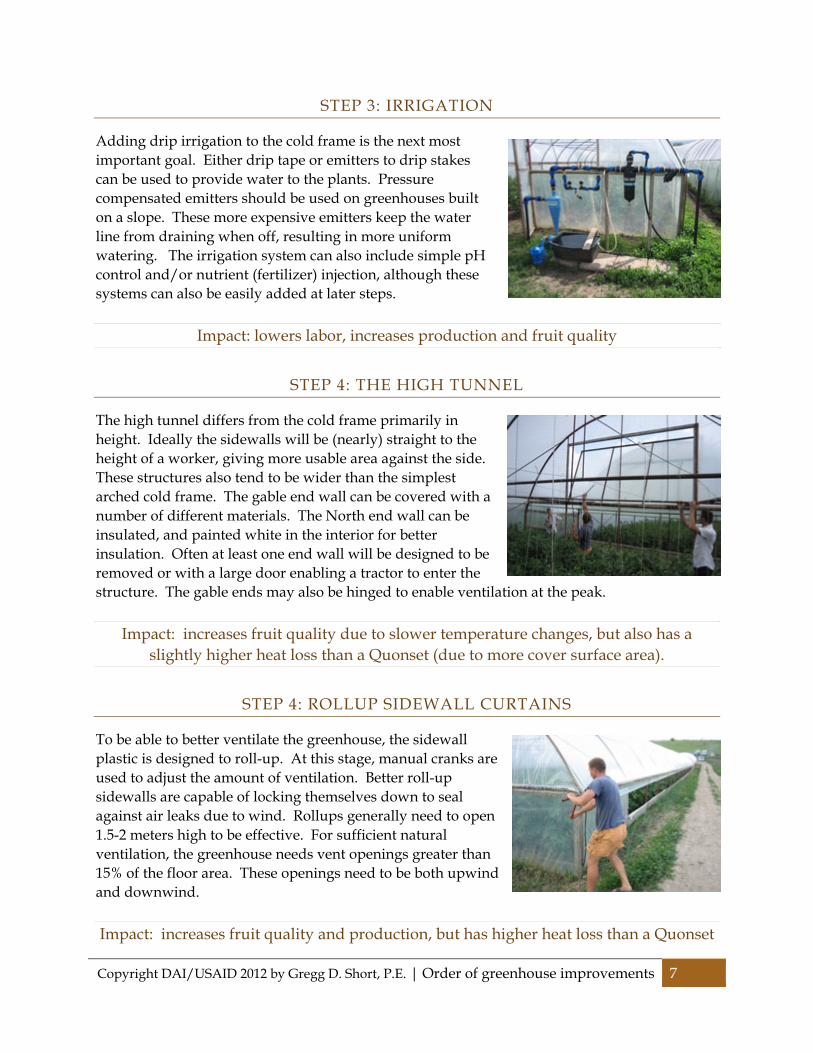
At this point, it makes sense to build the structure strong enough to support the plants hanging from the structure. Mature tomato plants are very heavy and sufficient structural strength needs to be incorporated into the structure and/or additional posts are required to support this load. Vertical plant support is important to get light to all sides of the plant and keeping the plant leaves dry. Snow plus a heavy plant load has destroyed many greenhouses in the past. A stronger frame is required for tomato and cucumber plants that are started early in the season. This is due to a more mature tomato plant hanging on the structure while also seeing a wet heavy spring snow load.
Impact: Better plant environment, stronger structure.
Copyright DAI/USAID 2012 by Gregg D. Short, P.E. | Order of greenhouse improvements 7
STEP 3: IRRIGATION
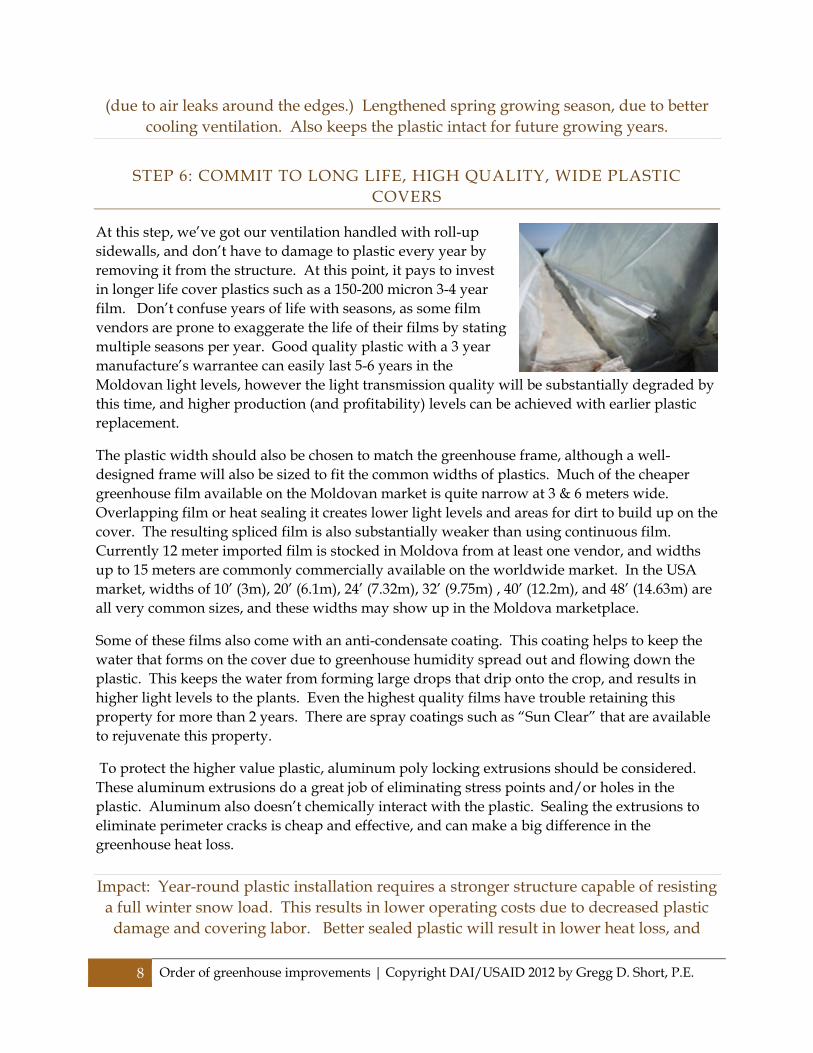
Adding drip irrigation to the cold frame is the next most important goal. Either drip tape or emitters to drip stakes can be used to provide water to the plants. Pressure compensated emitters should be used on greenhouses built on a slope. These more expensive emitters keep the water line from draining when off, resulting in more uniform watering. The irrigation system can also include simple pH control and/or nutrient (fertilizer) injection, although these systems can also be easily added at later steps.
Impact: lowers labor, increases production and fruit quality
STEP 4: THE HIGH TUNNEL
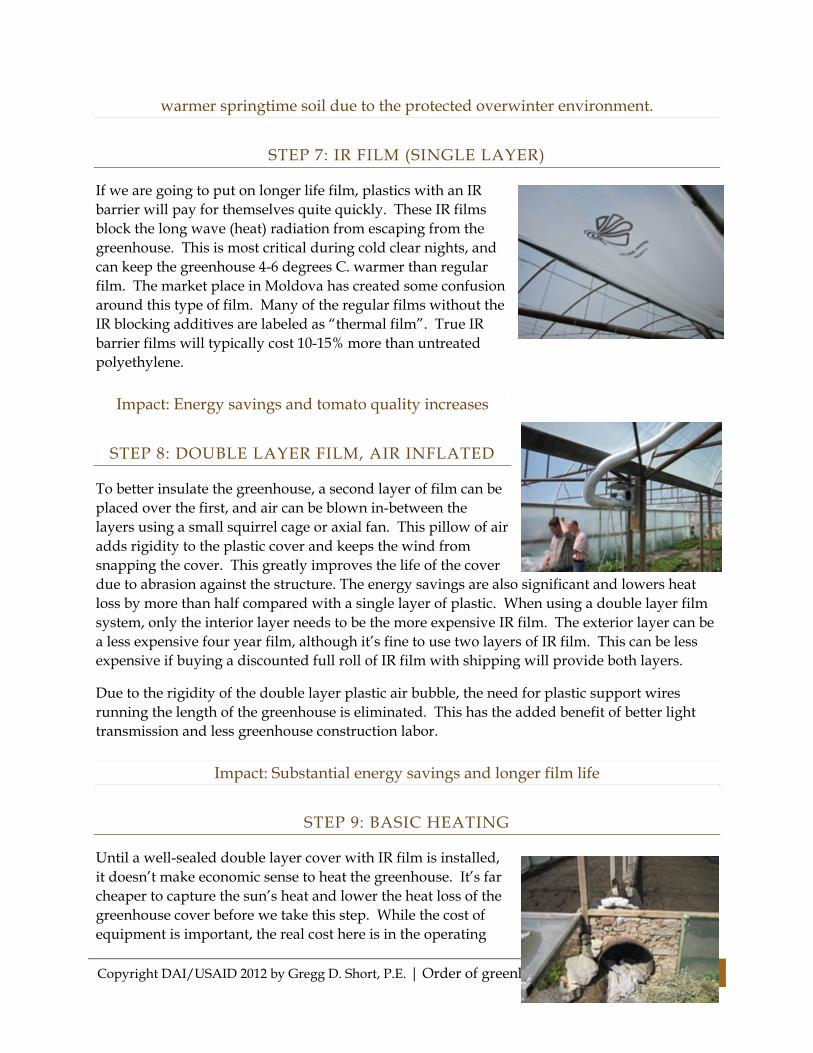
The high tunnel differs from the cold frame primarily in height. Ideally the sidewalls will be (nearly) straight to the height of a worker, giving more usable area against the side. These structures also tend to be wider than the simplest arched cold frame. The gable end wall can be covered with a number of different materials. The North end wall can be insulated, and painted white in the interior for better insulation. Often at least one end wall will be designed to be removed or with a large door enabling a tractor to enter the structure. The gable ends may also be hinged to enable ventilation at the peak.
Impact: increases fruit quality due to slower temperature changes, but also has a slightly higher heat loss than a Quonset (due to more cover surface area).
STEP 4: ROLLUP SIDEWALL CURTAINS
To be able to better ventilate the greenhouse, the sidewall plastic is designed to roll-up. At this stage, manual cranks are used to adjust the amount of ventilation. Better roll-up sidewalls are capable of locking themselves down to seal against air leaks due to wind. Rollups generally need to open 1.5-2 meters high to be effective. For sufficient natural ventilation, the greenhouse needs vent openings greater than 15% of the floor area. These openings need to be both upwind and downwind.
Impact: increases fruit quality and production, but has higher heat loss than a Quonset
8 Order of greenhouse improvements | Copyright DAI/USAID 2012 by Gregg D. Short, P.E.
(due to air leaks around the edges.) Lengthened spring growing season, due to better cooling ventilation. Also keeps the plastic intact for future growing years.
STEP 6: COMMIT TO LONG LIFE, HIGH QUALITY, WIDE PLASTIC COVERS
At this step, we’ve got our ventilation handled with roll-up sidewalls, and don’t have to damage to plastic every year by removing it from the structure. At this point, it pays to invest in longer life cover plastics such as a 150-200 micron 3-4 year film. Don’t confuse years of life with seasons, as some film vendors are prone to exaggerate the life of their films by stating multiple seasons per year. Good quality plastic with a 3 year manufacture’s warrantee can easily last 5-6 years in the Moldovan light levels, however the light transmission quality will be substantially degraded by this time, and higher production (and profitability) levels can be achieved with earlier plastic replacement.
The plastic width should also be chosen to match the greenhouse frame, although a well-designed frame will also be sized to fit the common widths of plastics. Much of the cheaper greenhouse film available on the Moldovan market is quite narrow at 3 & 6 meters wide. Overlapping film or heat sealing it creates lower light levels and areas for dirt to build up on the cover. The resulting spliced film is also substantially weaker than using continuous film. Currently 12 meter imported film is stocked in Moldova from at least one vendor, and widths up to 15 meters are commonly commercially available on the worldwide market. In the USA market, widths of 10’ (3m), 20’ (6.1m), 24’ (7.32m), 32’ (9.75m) , 40’ (12.2m), and 48’ (14.63m) are all very common sizes, and these widths may show up in the Moldova marketplace.
Some of these films also come with an anti-condensate coating. This coating helps to keep the water that forms on the cover due to greenhouse humidity spread out and flowing down the plastic. This keeps the water from forming large drops that drip onto the crop, and results in higher light levels to the plants. Even the highest quality films have trouble retaining this property for more than 2 years. There are spray coatings such as “Sun Clear” that are available to rejuvenate this property.
To protect the higher value plastic, aluminum poly locking extrusions should be considered. These aluminum extrusions do a great job of eliminating stress points and/or holes in the plastic. Aluminum also doesn’t chemically interact with the plastic. Sealing the extrusions to eliminate perimeter cracks is cheap and effective, and can make a big difference in the greenhouse heat loss.
Impact: Year-round plastic installation requires a stronger structure capable of resisting a full winter snow load. This results in lower operating costs due to decreased plastic
damage and covering labor. Better sealed plastic will result in lower heat loss, and
Copyright DAI/USAID 2012 by Gregg D. Short, P.E. | Order of greenhouse improvements 9
warmer springtime soil due to the protected overwinter environment.
STEP 7: IR FILM (SINGLE LAYER)
If we are going to put on longer life film, plastics with an IR barrier will pay for themselves quite quickly. These IR films block the long wave (heat) radiation from escaping from the greenhouse. This is most critical during cold clear nights, and can keep the greenhouse 4-6 degrees C. warmer than regular film. The market place in Moldova has created some confusion around this type of film. Many of the regular films without the IR blocking additives are labeled as “thermal film”. True IR barrier films will typically cost 10-15% more than untreated polyethylene.
Impact: Energy savings and tomato quality increases
STEP 8: DOUBLE LAYER FILM, AIR INFLATED
To better insulate the greenhouse, a second layer of film can be placed over the first, and air can be blown in-between the layers using a small squirrel cage or axial fan. This pillow of air adds rigidity to the plastic cover and keeps the wind from snapping the cover. This greatly improves the life of the cover due to abrasion against the structure. The energy savings are also significant and lowers heat loss by more than half compared with a single layer of plastic. When using a double layer film system, only the interior layer needs to be the more expensive IR film. The exterior layer can be a less expensive four year film, although it’s fine to use two layers of IR film. This can be less expensive if buying a discounted full roll of IR film with shipping will provide both layers.
Due to the rigidity of the double layer plastic air bubble, the need for plastic support wires running the length of the greenhouse is eliminated. This has the added benefit of better light transmission and less greenhouse construction labor.
Impact: Substantial energy savings and longer film life
STEP 9: BASIC HEATING
Until a well-sealed double layer cover with IR film is installed, it doesn’t make economic sense to heat the greenhouse. It’s far cheaper to capture the sun’s heat and lower the heat loss of the greenhouse cover before we take this step. While the cost of equipment is important, the real cost here is in the operating
10 Order of greenhouse improvements | Copyright DAI/USAID 2012 by Gregg D. Short, P.E.
expenses. Basic inexpensive heating is typically hot air style (gas) unit heaters or possibly a wood fired burner but is also the least efficient way to heat a greenhouse.
For seedling production greenhouses, hot water bottom heat tubes under the seedlings are the ideal way to provide heat to these greenhouses. The hot water source can be a conventional gas boiler or wood fired unit. The efficiency and uniformity of these systems is substantially better than heating the air. Typically, extra runs of tubing along the sidewall will help to keep the air temperature warm enough during the coldest growing times. If the plants are started very early in spring or late winter, additional backup air heat may be required to keep from overheating the plant roots.
While direct fired heaters sound good with theoretical 100% efficiency, they suffer from three main problems. Because they are using heated air for combustion, less oxygen is available inside the greenhouse. In a well-sealed greenhouse, the heaters can deplete the oxygen and starve the heater, resulting in off gasses including ethylene. Tomato plants are extremely sensitive to ethylene. This means that you have to ventilate the greenhouse to be able to run the heater, letting all that warm air out. While they create CO2 for the plants, the biggest heat load comes at night, when the plants need Oxygen, not CO2. The final issue with direct fired heaters is that a large part of the combustion gases is water vapor. This water vapor either has to be ventilated, or it will condensate and drip on the plants, causing disease issues. All of this ventilation means that the true efficiency is closer to standard unit heaters.
All sources of heat should use outside air for combustion. The colder outside air has a higher oxygen level and is denser. This results in higher efficiency combustion and also doesn’t send the already heated air up the flue pipe.
Impact: Much longer growing season, but can also greatly increase operating expenses.
STEP 10: HAF FANS
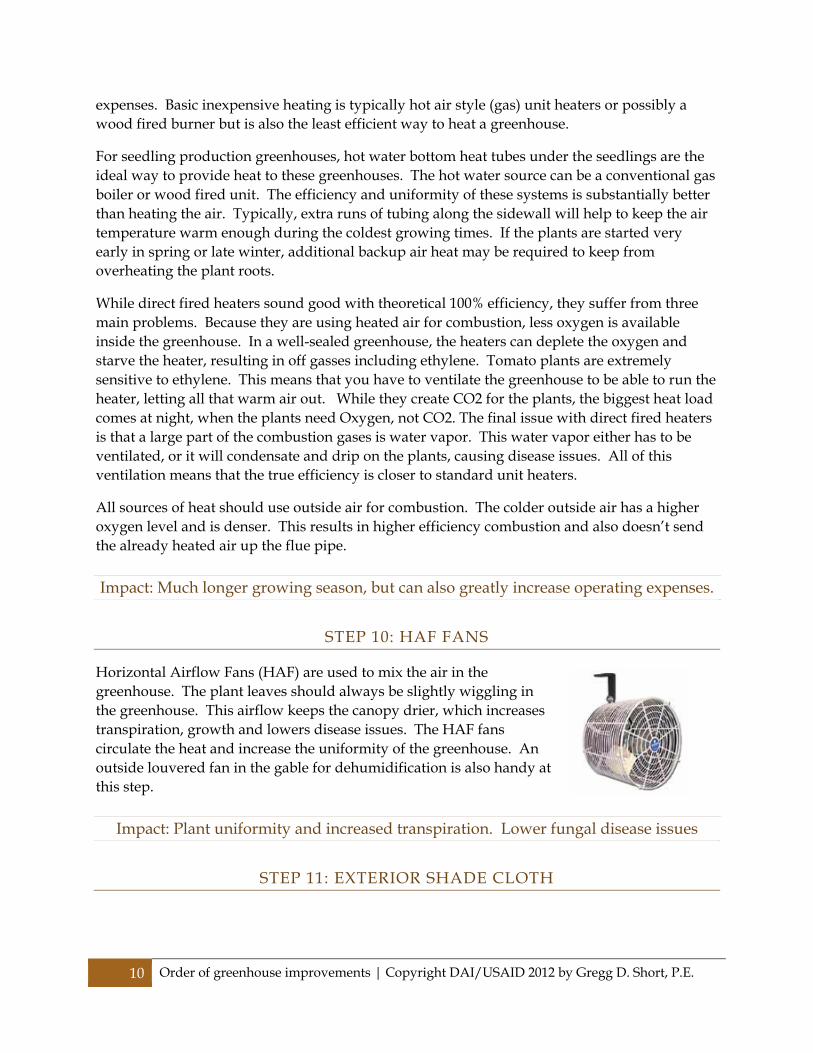
Horizontal Airflow Fans (HAF) are used to mix the air in the greenhouse. The plant leaves should always be slightly wiggling in the greenhouse. This airflow keeps the canopy drier, which increases transpiration, growth and lowers disease issues. The HAF fans circulate the heat and increase the uniformity of the greenhouse. An outside louvered fan in the gable for dehumidification is also handy at this step.
Impact: Plant uniformity and increased transpiration. Lower fungal disease issues
STEP 11: EXTERIOR SHADE CLOTH
Copyright DAI/USAID 2012 by Gregg D. Short, P.E. | Order of greenhouse improvements 11
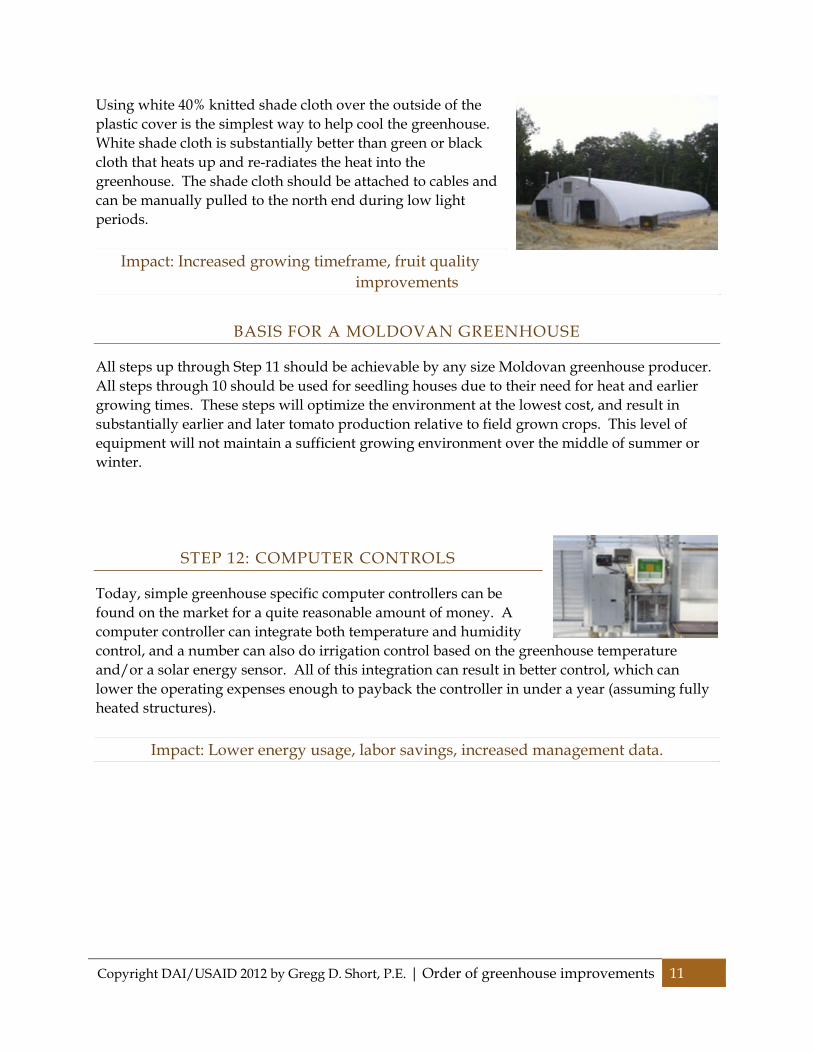
Using white 40% knitted shade cloth over the outside of the plastic cover is the simplest way to help cool the greenhouse. White shade cloth is substantially better than green or black cloth that heats up and re-radiates the heat into the greenhouse. The shade cloth should be attached to cables and can be manually pulled to the north end during low light periods.
Impact: Increased growing timeframe, fruit quality improvements
BASIS FOR A MOLDOVAN GREENHOUSE
All steps up through Step 11 should be achievable by any size Moldovan greenhouse producer. All steps through 10 should be used for seedling houses due to their need for heat and earlier growing times. These steps will optimize the environment at the lowest cost, and result in substantially earlier and later tomato production relative to field grown crops. This level of equipment will not maintain a sufficient growing environment over the middle of summer or winter.
STEP 12: COMPUTER CONTROLS
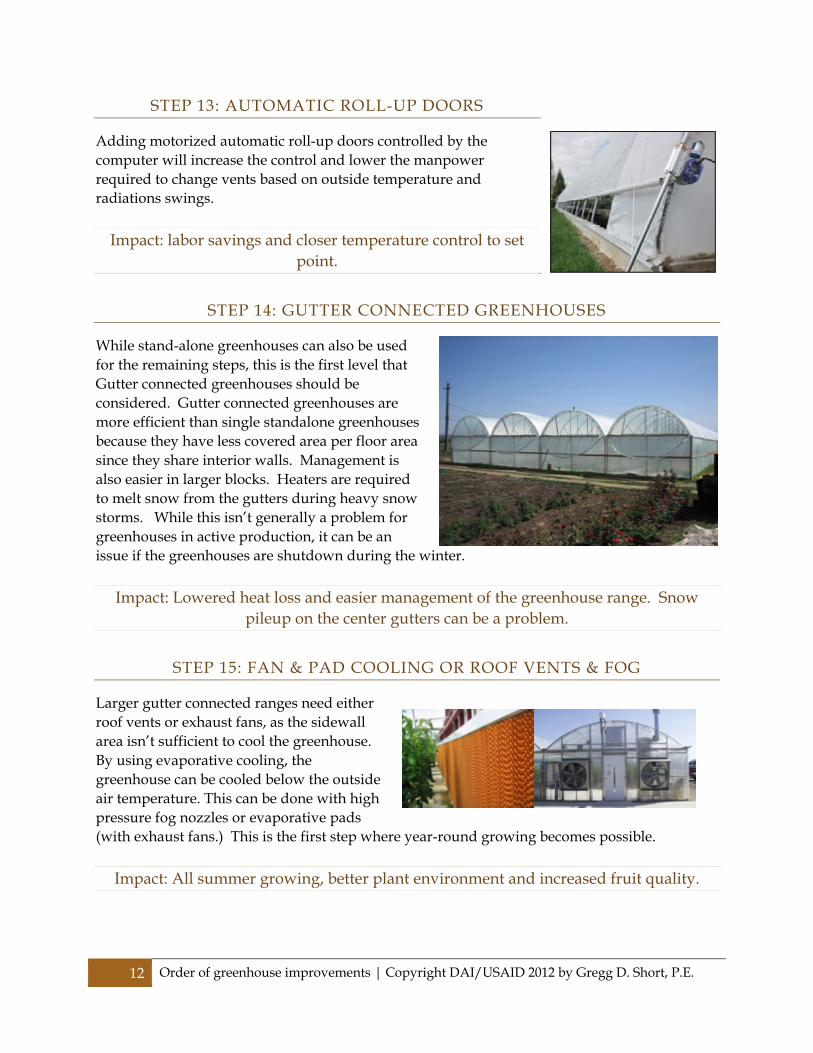
Today, simple greenhouse specific computer controllers can be found on the market for a quite reasonable amount of money. A computer controller can integrate both temperature and humidity control, and a number can also do irrigation control based on the greenhouse temperature and/or a solar energy sensor. All of this integration can result in better control, which can lower the operating expenses enough to payback the controller in under a year (assuming fully heated structures).
Impact: Lower energy usage, labor savings, increased management data.
12 Order of greenhouse improvements | Copyright DAI/USAID 2012 by Gregg D. Short, P.E.
STEP 13: AUTOMATIC ROLL-UP DOORS
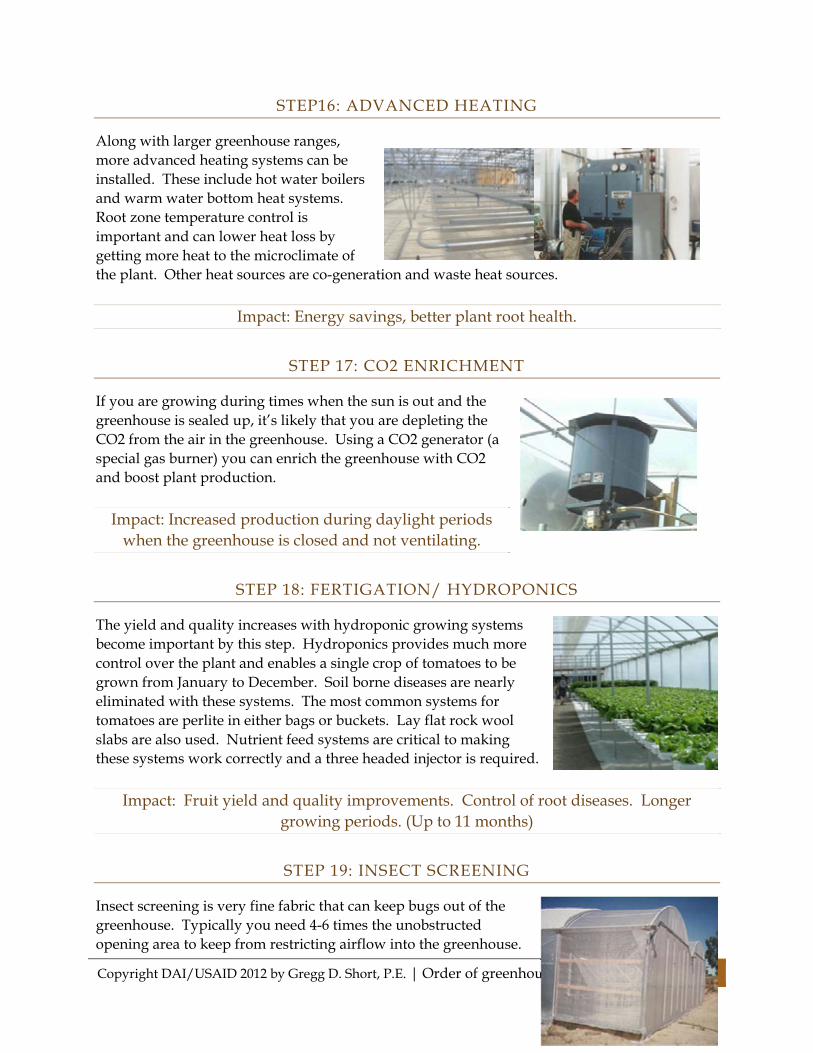
Adding motorized automatic roll-up doors controlled by the computer will increase the control and lower the manpower required to change vents based on outside temperature and radiations swings.
Impact: labor savings and closer temperature control to set point.
STEP 14: GUTTER CONNECTED GREENHOUSES
While stand-alone greenhouses can also be used for the remaining steps, this is the first level that Gutter connected greenhouses should be considered. Gutter connected greenhouses are more efficient than single standalone greenhouses because they have less covered area per floor area since they share interior walls. Management is also easier in larger blocks. Heaters are required to melt snow from the gutters during heavy snow storms. While this isn’t generally a problem for greenhouses in active production, it can be an issue if the greenhouses are shutdown during the winter.
Impact: Lowered heat loss and easier management of the greenhouse range. Snow pileup on the center gutters can be a problem.
STEP 15: FAN & PAD COOLING OR ROOF VENTS & FOG
Larger gutter connected ranges need either roof vents or exhaust fans, as the sidewall area isn’t sufficient to cool the greenhouse. By using evaporative cooling, the greenhouse can be cooled below the outside air temperature. This can be done with high pressure fog nozzles or evaporative pads (with exhaust fans.) This is the first step where year-round growing becomes possible.
Impact: All summer growing, better plant environment and increased fruit quality.
Copyright DAI/USAID 2012 by Gregg D. Short, P.E. | Order of greenhouse improvements 13
STEP16: ADVANCED HEATING
Along with larger greenhouse ranges, more advanced heating systems can be installed. These include hot water boilers and warm water bottom heat systems. Root zone temperature control is important and can lower heat loss by getting more heat to the microclimate of the plant. Other heat sources are co-generation and waste heat sources.
Impact: Energy savings, better plant root health.
STEP 17: CO2 ENRICHMENT
If you are growing during times when the sun is out and the greenhouse is sealed up, it’s likely that you are depleting the CO2 from the air in the greenhouse. Using a CO2 generator (a special gas burner) you can enrich the greenhouse with CO2 and boost plant production.
Impact: Increased production during daylight periods when the greenhouse is closed and not ventilating.
STEP 18: FERTIGATION/ HYDROPONICS
The yield and quality increases with hydroponic growing systems become important by this step. Hydroponics provides much more control over the plant and enables a single crop of tomatoes to be grown from January to December. Soil borne diseases are nearly eliminated with these systems. The most common systems for tomatoes are perlite in either bags or buckets. Lay flat rock wool slabs are also used. Nutrient feed systems are critical to making these systems work correctly and a three headed injector is required.
Impact: Fruit yield and quality improvements. Control of root diseases. Longer growing periods. (Up to 11 months)
STEP 19: INSECT SCREENING
Insect screening is very fine fabric that can keep bugs out of the greenhouse. Typically you need 4-6 times the unobstructed opening area to keep from restricting airflow into the greenhouse.
14 Order of greenhouse improvements | Copyright DAI/USAID 2012 by Gregg D. Short, P.E.
These systems work a lot better with Exhaust fans than natural ventilation. This step could also be as low as Step 7 or 8 depending on the local insect pressure and any pesticide free or Organic certification used to sell the crop.
Impact: Fruit yield and quality improvements. Lowered production costs due to less spraying.
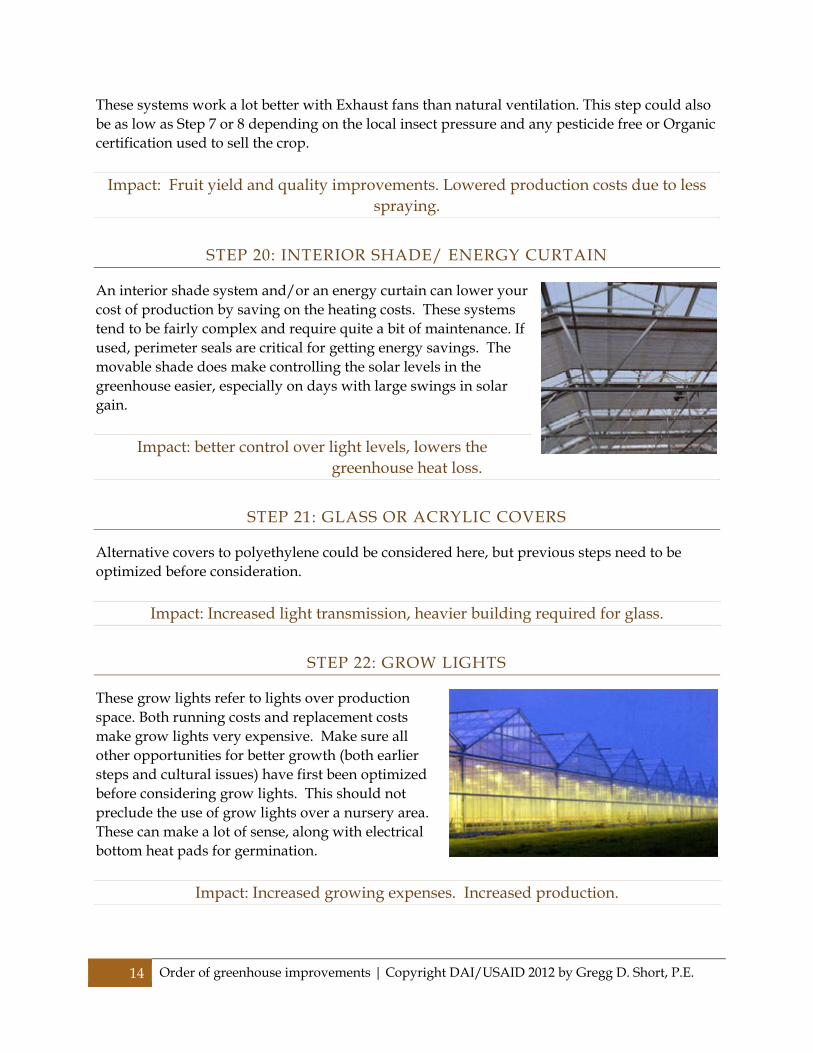
STEP 20: INTERIOR SHADE/ ENERGY CURTAIN
An interior shade system and/or an energy curtain can lower your cost of production by saving on the heating costs. These systems tend to be fairly complex and require quite a bit of maintenance. If used, perimeter seals are critical for getting energy savings. The movable shade does make controlling the solar levels in the greenhouse easier, especially on days with large swings in solar gain.
Impact: better control over light levels, lowers the greenhouse heat loss.
STEP 21: GLASS OR ACRYLIC COVERS
Alternative covers to polyethylene could be considered here, but previous steps need to be optimized before consideration.
Impact: Increased light transmission, heavier building required for glass.
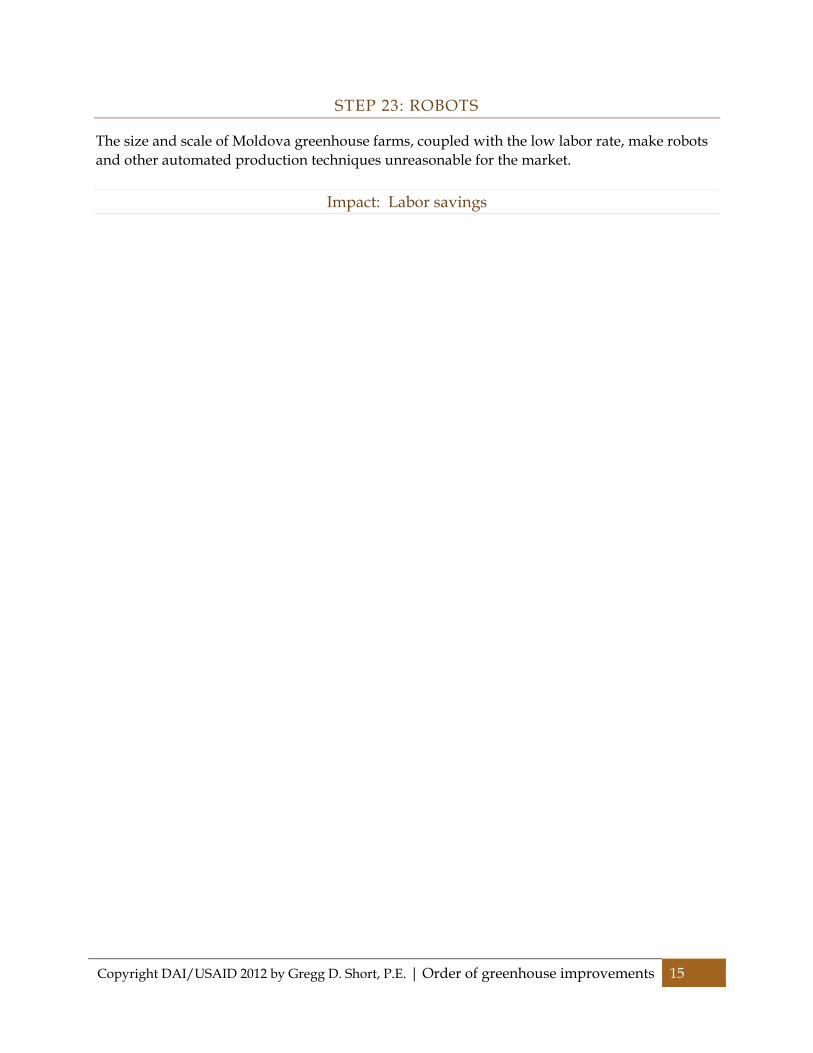
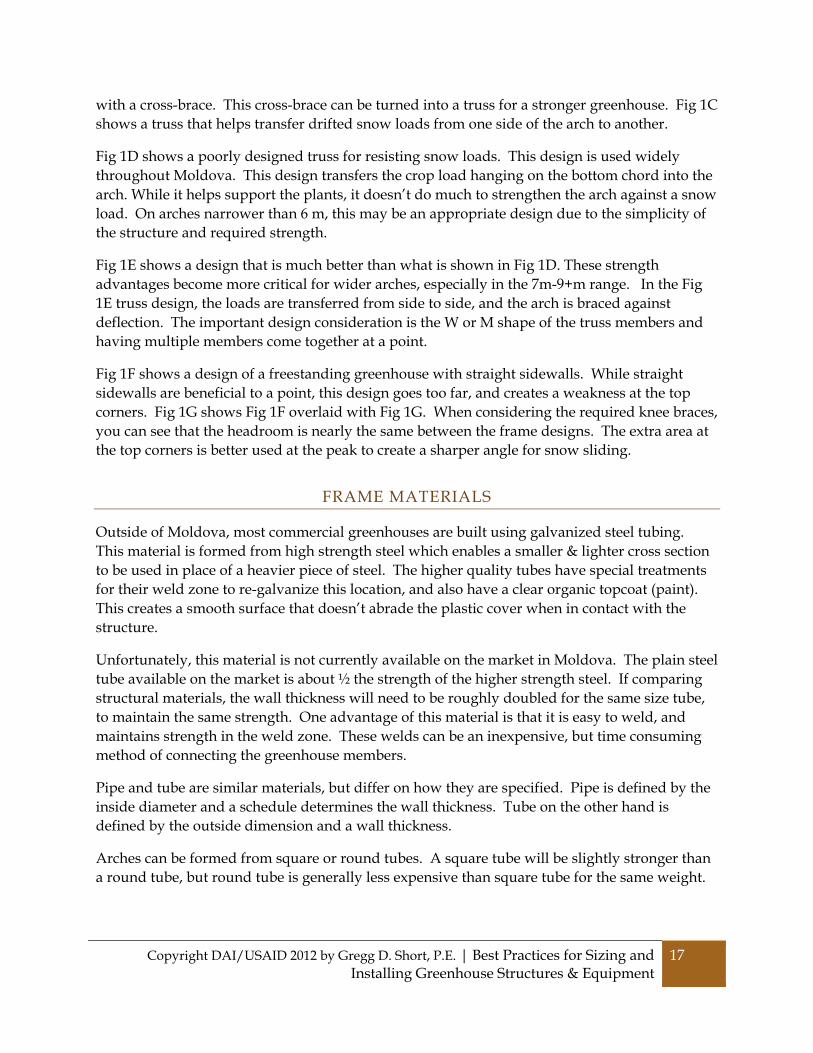
STEP 22: GROW LIGHTS
These grow lights refer to lights over production space. Both running costs and replacement costs make grow lights very expensive. Make sure all other opportunities for better growth (both earlier steps and cultural issues) have first been optimized before considering grow lights. This should not preclude the use of grow lights over a nursery area. These can make a lot of sense, along with electrical bottom heat pads for germination.
Impact: Increased growing expenses. Increased production.
Copyright DAI/USAID 2012 by Gregg D. Short, P.E. | Order of greenhouse improvements 15
STEP 23: ROBOTS
The size and scale of Moldova greenhouse farms, coupled with the low labor rate, make robots and other automated production techniques unreasonable for the market.
Impact: Labor savings
16 Best Practices for Sizing and Installing Greenhouse Structures & Equipment | Copyright DAI/USAID 2012 by Gregg D. Short, P.E.
BEST PRACTICES FOR SIZING AND INSTALLING GREENHOUSE STRUCTURES & EQUIPMENT
THE GREENHOUSE FRAME
The optimal greenhouse frame size is largely determined by the length of the steel available and the standard widths and lengths of the polyethylene plastic cover. The size is also constrained by the ventilation method. If only sidewall natural ventilation is used, then the range can’t get too large, or the center will not ventilate. Roof vents can be used to create extremely large ranges, but these add additional costs and complexity to the structure. If exhaust fans are used, the greenhouse length should be about 40m to optimize costs and ventilation rates.
The strength of the frame is a critical design element. If designed correctly, the cost differences between a strong frame that can hold the plastic in a wind storm or durning a heavy snow fall vs. one that fails just once during it’s life is negligable. Having a greenhouse that you don’t have to worry about is a great deal of relief, and can generate substantial savings over it’s life. There are substantial advantages to keeping the plastic on year-round. A covered greenhouse will have a much higher ground temperature than one that has been uncovered during the winter, giving the grower a head start.
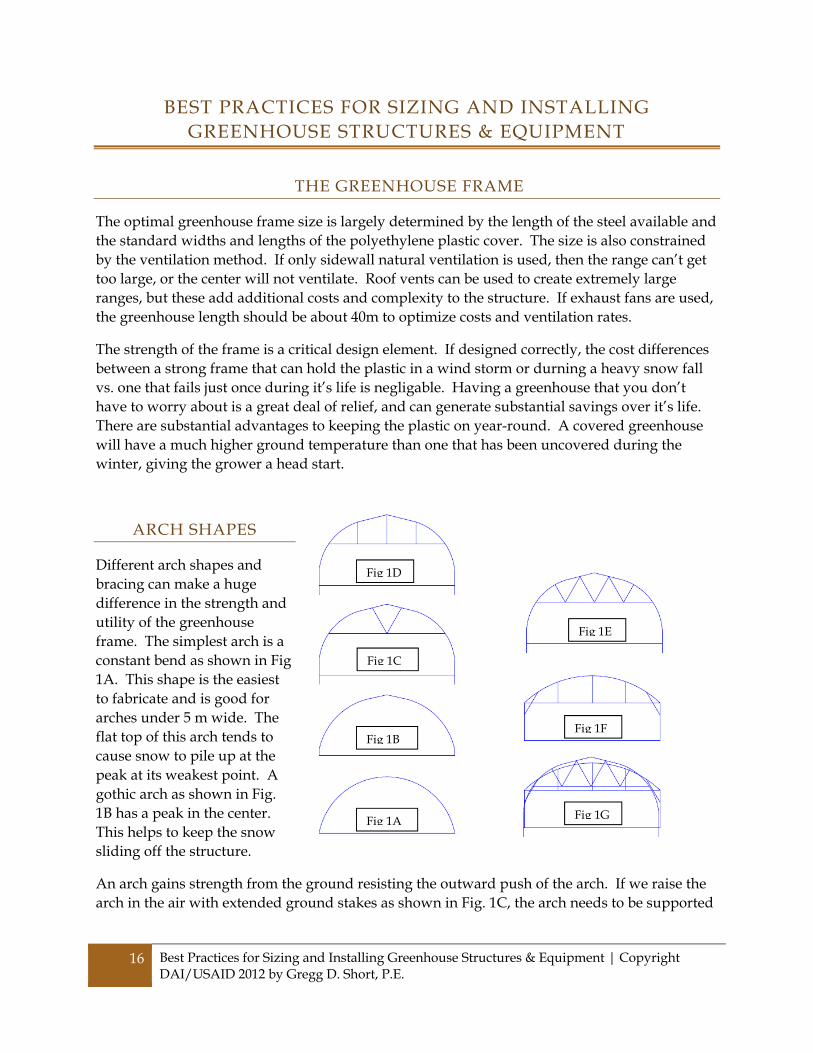
ARCH SHAPES
Different arch shapes and bracing can make a huge difference in the strength and utility of the greenhouse frame. The simplest arch is a constant bend as shown in Fig 1A. This shape is the easiest to fabricate and is good for arches under 5 m wide. The flat top of this arch tends to cause snow to pile up at the peak at its weakest point. A gothic arch as shown in Fig. 1B has a peak in the center. This helps to keep the snow sliding off the structure.
An arch gains strength from the ground resisting the outward push of the arch. If we raise the arch in the air with extended ground stakes as shown in Fig. 1C, the arch needs to be supported
Fig 1A
Fig 1B
Fig 1D
Fig 1C
Fig 1E
Fig 1G
Fig 1F
Copyright DAI/USAID 2012 by Gregg D. Short, P.E. | Best Practices for Sizing and Installing Greenhouse Structures & Equipment
17
with a cross-brace. This cross-brace can be turned into a truss for a stronger greenhouse. Fig 1C shows a truss that helps transfer drifted snow loads from one side of the arch to another.
Fig 1D shows a poorly designed truss for resisting snow loads. This design is used widely throughout Moldova. This design transfers the crop load hanging on the bottom chord into the arch. While it helps support the plants, it doesn’t do much to strengthen the arch against a snow load. On arches narrower than 6 m, this may be an appropriate design due to the simplicity of the structure and required strength.
Fig 1E shows a design that is much better than what is shown in Fig 1D. These strength advantages become more critical for wider arches, especially in the 7m-9+m range. In the Fig 1E truss design, the loads are transferred from side to side, and the arch is braced against deflection. The important design consideration is the W or M shape of the truss members and having multiple members come together at a point.
Fig 1F shows a design of a freestanding greenhouse with straight sidewalls. While straight sidewalls are beneficial to a point, this design goes too far, and creates a weakness at the top corners. Fig 1G shows Fig 1F overlaid with Fig 1G. When considering the required knee braces, you can see that the headroom is nearly the same between the frame designs. The extra area at the top corners is better used at the peak to create a sharper angle for snow sliding.
FRAME MATERIALS
Outside of Moldova, most commercial greenhouses are built using galvanized steel tubing. This material is formed from high strength steel which enables a smaller & lighter cross section to be used in place of a heavier piece of steel. The higher quality tubes have special treatments for their weld zone to re-galvanize this location, and also have a clear organic topcoat (paint). This creates a smooth surface that doesn’t abrade the plastic cover when in contact with the structure.
Unfortunately, this material is not currently available on the market in Moldova. The plain steel tube available on the market is about ½ the strength of the higher strength steel. If comparing structural materials, the wall thickness will need to be roughly doubled for the same size tube, to maintain the same strength. One advantage of this material is that it is easy to weld, and maintains strength in the weld zone. These welds can be an inexpensive, but time consuming method of connecting the greenhouse members.
Pipe and tube are similar materials, but differ on how they are specified. Pipe is defined by the inside diameter and a schedule determines the wall thickness. Tube on the other hand is defined by the outside dimension and a wall thickness.
Arches can be formed from square or round tubes. A square tube will be slightly stronger than a round tube, but round tube is generally less expensive than square tube for the same weight.
18 Best Practices for Sizing and Installing Greenhouse Structures & Equipment | Copyright DAI/USAID 2012 by Gregg D. Short, P.E.
All of the untreated steel should be painted, but this is crucial in locations that contact the polyethylene cover. Rough steel will act to greatly diminish the life of the cover. Aluminized tape (used to seal ducts) can also be used to protect the cover from rough spots.
FOOTERS & CONCRETE
All posts should be mounted in concrete footers extending below the frost line. The footer needs to be a larger diameter for taller posts to resist the tendency for the arches to push out the posts. Bigger greenhouses need concrete to hold them down in windstorms as well. A long 9m wide arched greenhouse can have as much lift as an airliner wing in a wind storm! To keep the structure from blowing away, sufficient mass needs to be attached to the ground.
INSULATION
For energy savings on heated greenhouses, the North end wall can be insulated and covered with solid material. The best insulation for greenhouse use is extruded polystyrene. The inside of the wall should be painted white, so the light reflects back into the crop.
Perimeter insulation is recommended anytime bottom heat is used in a greenhouse. This insulation can be trenched into the ground vertically, or placed horizontally. 100mm thick by .5 m to 1 m wide insulation is ideal. This insulation results in warmer ground temperature around the perimeter of the greenhouse, and can be beneficial even when not heating the greenhouse, especially if growing in the ground.
IRRIGATION
Irrigation tape is commonly used in Moldova, both in the field and in the greenhouse. On greenhouses with any substantial slope (1% or more), drip tape should not be used. In these greenhouses, pressure compensated, leak free emitters should be used. These pressure compensated emitters allow each plant to receive the same amount of water and/or nutrient. In these emitters is a check valve that keeps the water from draining out of the low end at the end of an irrigation event. While these emitters are more expensive than drip tape, they have a multiyear life and are a minor expense relative to losing the last few plants in a row due to over irrigation. If forced to use drip tape in a sloped greenhouse, you can run the drip tape past the end of the row and put the tape inside a pipe that can then be drained out of the greenhouse
Copyright DAI/USAID 2012 by Gregg D. Short, P.E. | Best Practices for Sizing and Installing Greenhouse Structures & Equipment
19
ROLLUP SIDEWALLS
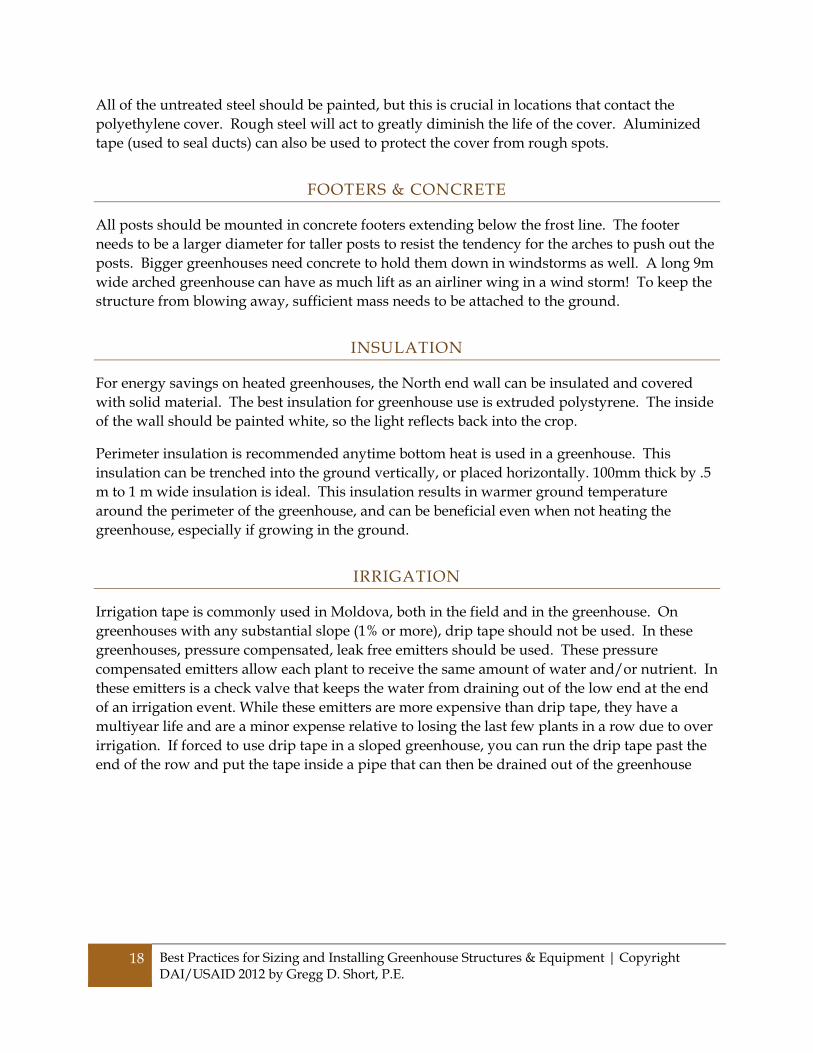
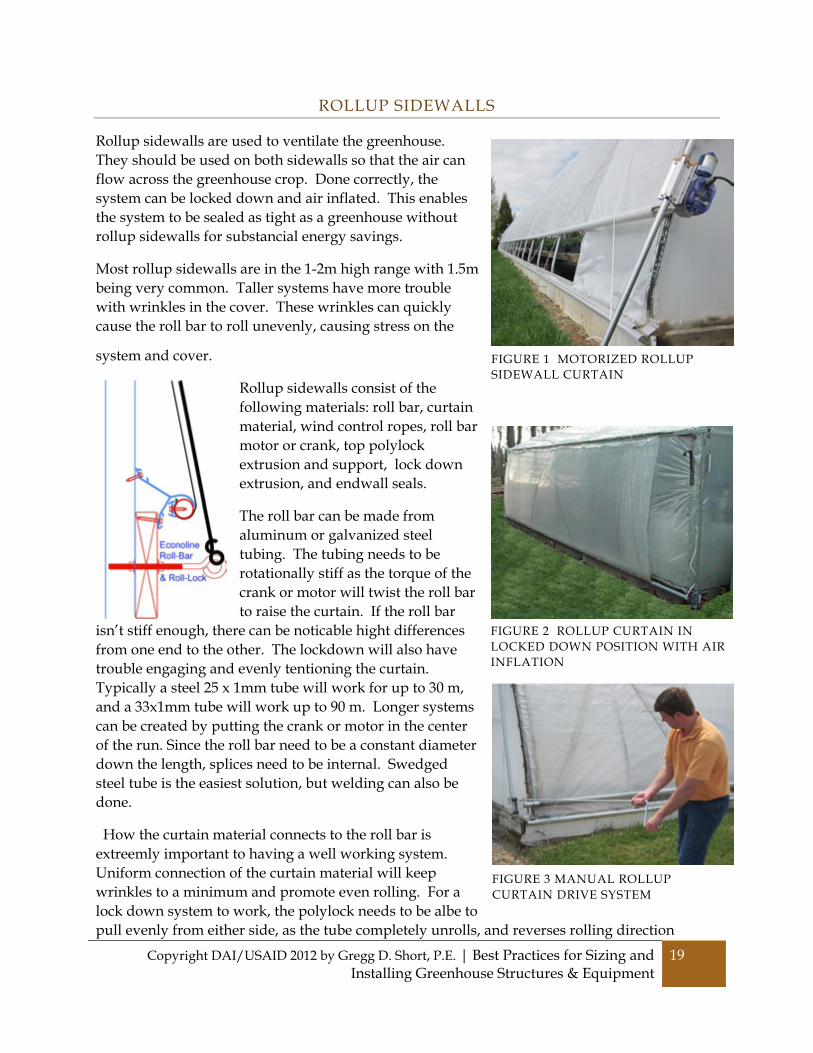
Rollup sidewalls are used to ventilate the greenhouse. They should be used on both sidewalls so that the air can flow across the greenhouse crop. Done correctly, the system can be locked down and air inflated. This enables the system to be sealed as tight as a greenhouse without rollup sidewalls for substancial energy savings.
Most rollup sidewalls are in the 1-2m high range with 1.5m being very common. Taller systems have more trouble with wrinkles in the cover. These wrinkles can quickly cause the roll bar to roll unevenly, causing stress on the
system and cover.
Rollup sidewalls consist of the following materials: roll bar, curtain material, wind control ropes, roll bar motor or crank, top polylock extrusion and support, lock down extrusion, and endwall seals.
The roll bar can be made from aluminum or galvanized steel tubing. The tubing needs to be rotationally stiff as the torque of the crank or motor will twist the roll bar to raise the curtain. If the roll bar
isn’t stiff enough, there can be noticable hight differences from one end to the other. The lockdown will also have trouble engaging and evenly tentioning the curtain. Typically a steel 25 x 1mm tube will work for up to 30 m, and a 33x1mm tube will work up to 90 m. Longer systems can be created by putting the crank or motor in the center of the run. Since the roll bar need to be a constant diameter down the length, splices need to be internal. Swedged steel tube is the easiest solution, but welding can also be done.
How the curtain material connects to the roll bar is extreemly important to having a well working system. Uniform connection of the curtain material will keep wrinkles to a minimum and promote even rolling. For a lock down system to work, the polylock needs to be albe to pull evenly from either side, as the tube completely unrolls, and reverses rolling direction
FIGURE 1 MOTORIZED ROLLUP SIDEWALL CURTAIN
FIGURE 2 ROLLUP CURTAIN IN LOCKED DOWN POSITION WITH AIR INFLATION
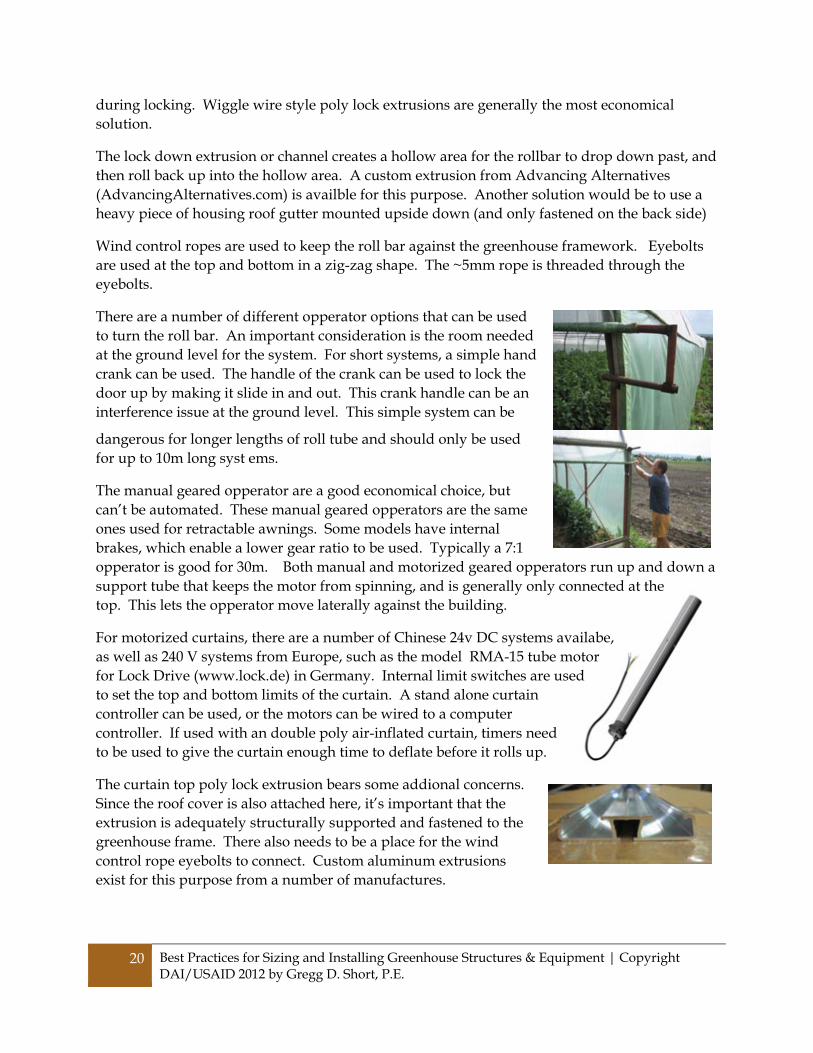
FIGURE 3 MANUAL ROLLUP CURTAIN DRIVE SYSTEM
20 Best Practices for Sizing and Installing Greenhouse Structures & Equipment | Copyright DAI/USAID 2012 by Gregg D. Short, P.E.
during locking. Wiggle wire style poly lock extrusions are generally the most economical solution.
The lock down extrusion or channel creates a hollow area for the rollbar to drop down past, and then roll back up into the hollow area. A custom extrusion from Advancing Alternatives (AdvancingAlternatives.com) is availble for this purpose. Another solution would be to use a heavy piece of housing roof gutter mounted upside down (and only fastened on the back side)
Wind control ropes are used to keep the roll bar against the greenhouse framework. Eyebolts are used at the top and bottom in a zig-zag shape. The ~5mm rope is threaded through the eyebolts.
There are a number of different opperator options that can be used to turn the roll bar. An important consideration is the room needed at the ground level for the system. For short systems, a simple hand crank can be used. The handle of the crank can be used to lock the door up by making it slide in and out. This crank handle can be an interference issue at the ground level. This simple system can be
dangerous for longer lengths of roll tube and should only be used for up to 10m long syst ems.
The manual geared opperator are a good economical choice, but can’t be automated. These manual geared opperators are the same ones used for retractable awnings. Some models have internal brakes, which enable a lower gear ratio to be used. Typically a 7:1 opperator is good for 30m. Both manual and motorized geared opperators run up and down a support tube that keeps the motor from spinning, and is generally only connected at the top. This lets the opperator move laterally against the building.
For motorized curtains, there are a number of Chinese 24v DC systems availabe, as well as 240 V systems from Europe, such as the model RMA-15 tube motor for Lock Drive (www.lock.de) in Germany. Internal limit switches are used to set the top and bottom limits of the curtain. A stand alone curtain controller can be used, or the motors can be wired to a computer controller. If used with an double poly air-inflated curtain, timers need to be used to give the curtain enough time to deflate before it rolls up.
The curtain top poly lock extrusion bears some addional concerns. Since the roof cover is also attached here, it’s important that the extrusion is adequately structurally supported and fastened to the greenhouse frame. There also needs to be a place for the wind control rope eyebolts to connect. Custom aluminum extrusions exist for this purpose from a number of manufactures.
Copyright DAI/USAID 2012 by Gregg D. Short, P.E. | Best Practices for Sizing and Installing Greenhouse Structures & Equipment
21
COVER
See also the descriptions of step types 6-8 regarding coverings for greenhouses.
FROM HTTP://WWW.GINEGAR.COM (A PLASTIC FILM MANUFACTURER)
DIFFUSED LIGHT AND THE PLANT AS A MACHINE WHICH TRANSFORMS CO2 AND WATER INTO DRY MATTER
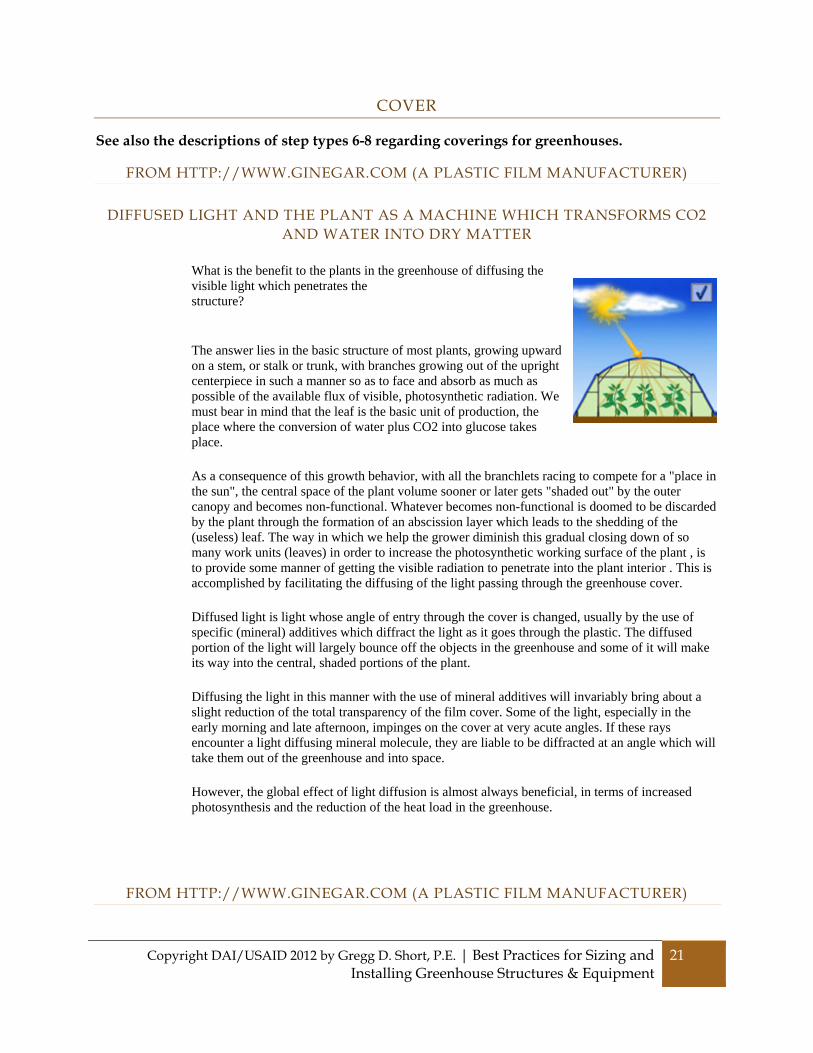
What is the benefit to the plants in the greenhouse of diffusing the visible light which penetrates the structure?
The answer lies in the basic structure of most plants, growing upward on a stem, or stalk or trunk, with branches growing out of the upright centerpiece in such a manner so as to face and absorb as much as possible of the available flux of visible, photosynthetic radiation. We must bear in mind that the leaf is the basic unit of production, the place where the conversion of water plus CO2 into glucose takes place.
As a consequence of this growth behavior, with all the branchlets racing to compete for a "place in the sun", the central space of the plant volume sooner or later gets "shaded out" by the outer canopy and becomes non-functional. Whatever becomes non-functional is doomed to be discarded by the plant through the formation of an abscission layer which leads to the shedding of the (useless) leaf. The way in which we help the grower diminish this gradual closing down of so many work units (leaves) in order to increase the photosynthetic working surface of the plant , is to provide some manner of getting the visible radiation to penetrate into the plant interior . This is accomplished by facilitating the diffusing of the light passing through the greenhouse cover.
Diffused light is light whose angle of entry through the cover is changed, usually by the use of specific (mineral) additives which diffract the light as it goes through the plastic. The diffused portion of the light will largely bounce off the objects in the greenhouse and some of it will make its way into the central, shaded portions of the plant.
Diffusing the light in this manner with the use of mineral additives will invariably bring about a slight reduction of the total transparency of the film cover. Some of the light, especially in the early morning and late afternoon, impinges on the cover at very acute angles. If these rays encounter a light diffusing mineral molecule, they are liable to be diffracted at an angle which will take them out of the greenhouse and into space.
However, the global effect of light diffusion is almost always beneficial, in terms of increased photosynthesis and the reduction of the heat load in the greenhouse.
FROM HTTP://WWW.GINEGAR.COM (A PLASTIC FILM MANUFACTURER)
22 Best Practices for Sizing and Installing Greenhouse Structures & Equipment | Copyright DAI/USAID 2012 by Gregg D. Short, P.E.
THERMICITY IN A FILM COVER- THE EFFECT ON PLANT TEMPERATURE
At first glance we assume that the main benefit from the use of thermal films is the effect on the air temperature of the greenhouse, which is the criterion most frequently measured in order to determine whether the film is doing its job. The truth lies elsewhere, without underestimating the importance of nocturnal greenhouse air temperature. Of prime importance is the maintenance of optimal temperatures of the plants we are growing in the greenhouse. If the air is warm at night it will impart some of its energy to the plants which it envelopes. But air, by its very nature, carries relatively little energy because its mass is so small. So there are limits to how much the air in the greenhouse can warm up plants rapidly losing energy (heat) through radiation and convection. However, the plants are losing energy (heat) chiefly through radiation to the atmosphere and this radiation activity is strongly influenced by the type of greenhouse cover they "see" above them. The equation describing the heat flux out of the plants includes the plant temperature to the fourth power and the "sky" temperature to the fourth power. The equation is: Q=ε A δ (Ta 4th – Tb 4th) where ε= emissivity (0.9) A= leaf area and δ= Boltzmann Constant Q= radiation heat flux 3.3x 10 -22nd cal/deg.K In other words, plants in a greenhouse covered with a thermal film which is absorbing heat radiation and is relatively warm will (theoretically, at least) be warmer than they would be were they exposed to the sky above with no plastic (or glass) cover or with a non-thermal cover. The warming should be beneficial to the plants not only by virtue of the positive effects of the optimal temperatures on their growth and development. Another important , perhaps the most important, benefit is the fact that condensation of moisture in the greenhouse will occur on the plant surface only as a "last resort" after the moisture has condensed on other, colder surfaces
Copyright DAI/USAID 2012 by Gregg D. Short, P.E. | Best Practices for Sizing and Installing Greenhouse Structures & Equipment
23
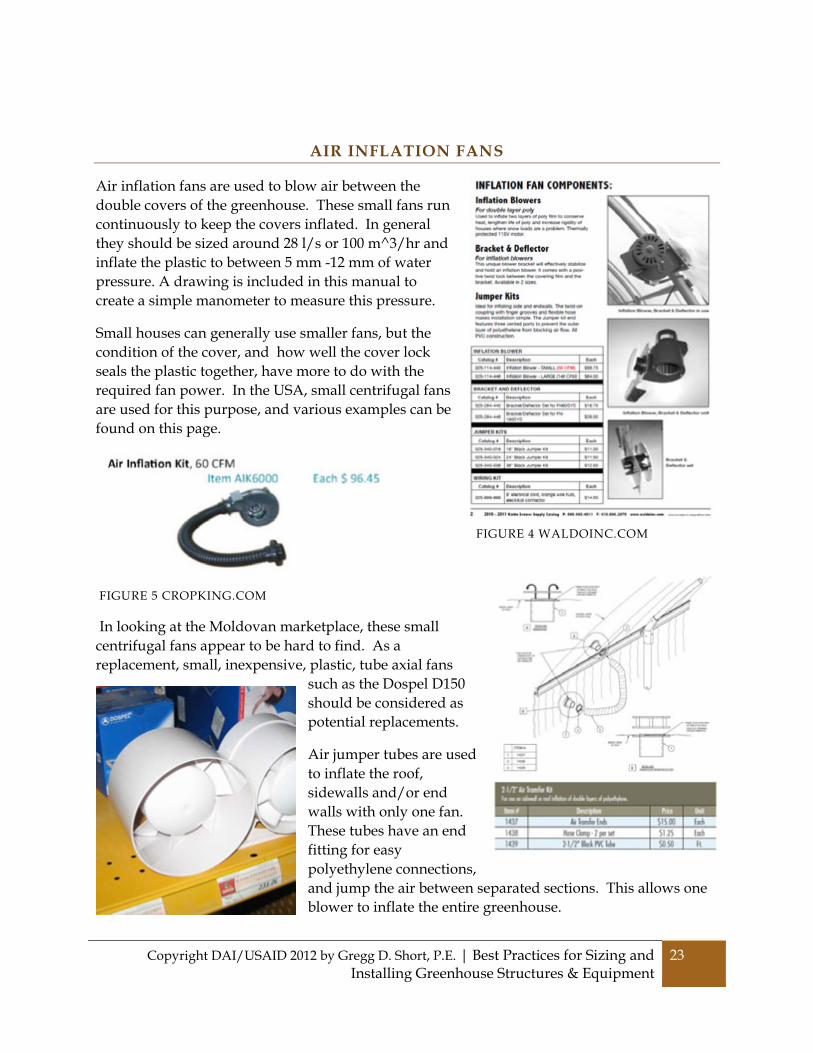
AIR INFLATION FANS
Air inflation fans are used to blow air between the double covers of the greenhouse. These small fans run continuously to keep the covers inflated. In general they should be sized around 28 l/s or 100 m^3/hr and inflate the plastic to between 5 mm -12 mm of water pressure. A drawing is included in this manual to create a simple manometer to measure this pressure.
Small houses can generally use smaller fans, but the condition of the cover, and how well the cover lock seals the plastic together, have more to do with the required fan power. In the USA, small centrifugal fans are used for this purpose, and various examples can be found on this page.
FIGURE 5 CROPKING.COM
In looking at the Moldovan marketplace, these small centrifugal fans appear to be hard to find. As a replacement, small, inexpensive, plastic, tube axial fans
such as the Dospel D150 should be considered as potential replacements.
Air jumper tubes are used to inflate the roof, sidewalls and/or end walls with only one fan. These tubes have an end fitting for easy polyethylene connections, and jump the air between separated sections. This allows one blower to inflate the entire greenhouse.
FIGURE 4 WALDOINC.COM
24 Best Practices for Sizing and Installing Greenhouse Structures & Equipment | Copyright DAI/USAID 2012 by Gregg D. Short, P.E.
HEATER SIZING
To size heaters for a greenhouse, we first need to make an estimate of the heat loss of the greenhouse. While more specific estimates can be determined, a simplified method is to assume the vast majority of the heat loss is though the cover via conduction. We will then take a 125% of that figure to estimate other losses via air exchanges, perimeter losses, and radiation.
The other variable we need to size the heaters is the expected temperature difference between what we want to keep the interior of the greenhouse and the outside temperature. This maximum heat loss occurs at night, so solar heating doesn’t impact the calculations. This figure can be found from historical weather records, and/or experience and risks that the grower wishes to take based on lower inside air temperatures than optimal.
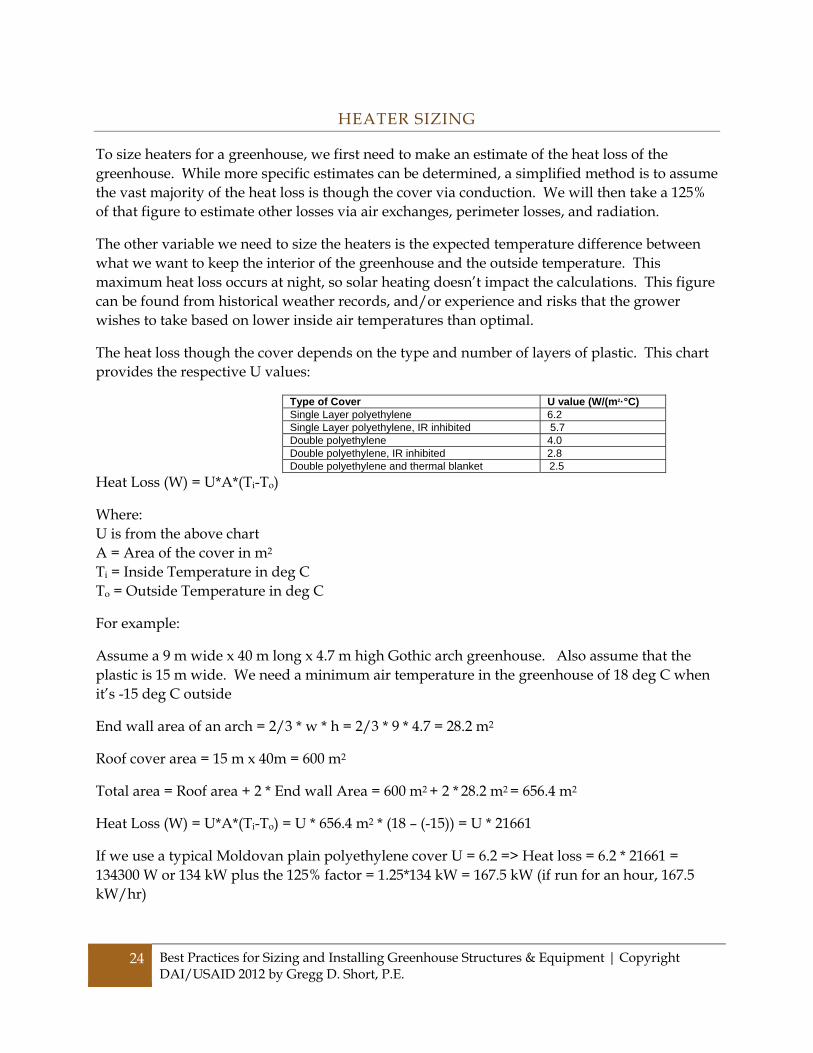
The heat loss though the cover depends on the type and number of layers of plastic. This chart provides the respective U values:
Type of Cover U value (W/(m2·°C) Single Layer polyethylene 6.2 Single Layer polyethylene, IR inhibited 5.7 Double polyethylene 4.0 Double polyethylene, IR inhibited 2.8 Double polyethylene and thermal blanket 2.5
Heat Loss (W) = U*A*(Ti-To)
Where: U is from the above chart A = Area of the cover in m2
Ti = Inside Temperature in deg C To = Outside Temperature in deg C
For example:
Assume a 9 m wide x 40 m long x 4.7 m high Gothic arch greenhouse. Also assume that the plastic is 15 m wide. We need a minimum air temperature in the greenhouse of 18 deg C when it’s -15 deg C outside
End wall area of an arch = 2/3 * w * h = 2/3 * 9 * 4.7 = 28.2 m2
Roof cover area = 15 m x 40m = 600 m2
Total area = Roof area + 2 * End wall Area = 600 m2 + 2 * 28.2 m2 = 656.4 m2
Heat Loss (W) = U*A*(Ti-To) = U * 656.4 m2 * (18 – (-15)) = U * 21661
If we use a typical Moldovan plain polyethylene cover U = 6.2 => Heat loss = 6.2 * 21661 = 134300 W or 134 kW plus the 125% factor = 1.25*134 kW = 167.5 kW (if run for an hour, 167.5 kW/hr)
Copyright DAI/USAID 2012 by Gregg D. Short, P.E. | Best Practices for Sizing and Installing Greenhouse Structures & Equipment
25
Using a double layer IR coated polyethylene cover U = 2.8 => Heat loss = 2.8 * 21661 = 60650 W or 60.7 kW plus the 125% factor = 1.25*60.7 kW = 75.9kW (if run for an hour, 75.9 kW/hr)
The double IR film has over ½ the heat loss of the single layer plastic! This cover change not only affects the heater size, but also the amount of fuel used by the heater.
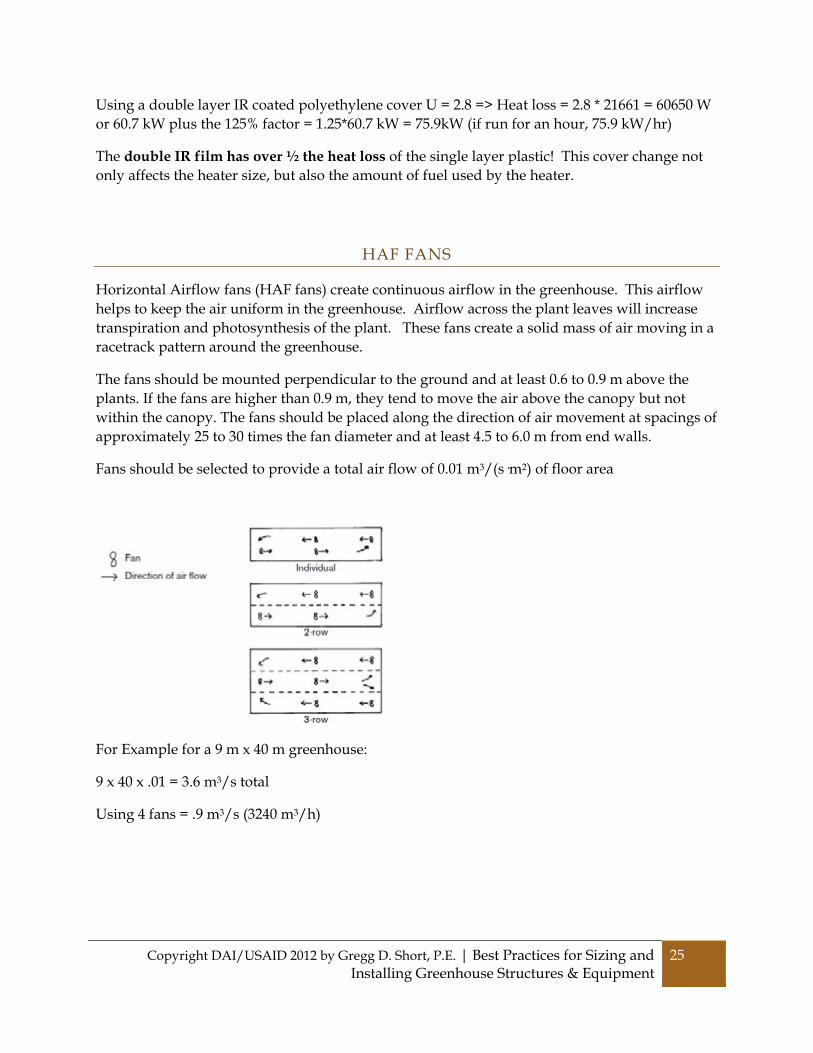
HAF FANS
Horizontal Airflow fans (HAF fans) create continuous airflow in the greenhouse. This airflow helps to keep the air uniform in the greenhouse. Airflow across the plant leaves will increase transpiration and photosynthesis of the plant. These fans create a solid mass of air moving in a racetrack pattern around the greenhouse.
The fans should be mounted perpendicular to the ground and at least 0.6 to 0.9 m above the plants. If the fans are higher than 0.9 m, they tend to move the air above the canopy but not within the canopy. The fans should be placed along the direction of air movement at spacings of approximately 25 to 30 times the fan diameter and at least 4.5 to 6.0 m from end walls.
Fans should be selected to provide a total air flow of 0.01 m3/(s·m2) of floor area
For Example for a 9 m x 40 m greenhouse:
9 x 40 x .01 = 3.6 m3/s total
Using 4 fans = .9 m3/s (3240 m3/h)
26 Best Practices for Sizing and Installing Greenhouse Structures & Equipment | Copyright DAI/USAID 2012 by Gregg D. Short, P.E.
EXHAUST FANS FAN SIZING
Both Naturally Vented and Fan Vented Greenhouses are designed for one air exchange per minute. Find the volume of the house in cubic meters divided by 60 (min/sec.) That needs to be equal (or less than) the total m3/s of all the fans. Short houses (<15m) will need more than one air exchange per minute.
For example:
Assume a 9 m wide x 40 m long x 4.7 m high Gothic arch greenhouse.
Cross section area of an arch = 2/3 w * h = 2/3 9 * 4.7 = 28.2 m2
Volume = 28.2 * 40 = 1128 m3
Fan Capacity (one air exchange per minute) = 1128 m3/min / 60 sec/min = 18.8 m3/s total or 9.4 m3/s per 2 fans.
EVAPORATIVE PAD SYSTEM DESIGN
First find the exhaust fan volume in (m3/s). The pads should extend the width of the greenhouse growing area. Max pad airspeed for corrugated cellulose through the pad area:
100 mm (4 in.) thick use 1.27 m/s 150 mm (6 in.) thick use 1.78 m/s
Fan Volume/ (Pad Width * Pad airspeed) = Min Height of Pad
For example, assume a 9 m wide x 40 m long x 4.7 m high Gothic arch greenhouse.
Fan capacity= 18.8 m3/s total
Assume 8 m wide pad system w/ 150 mm pad thickness (1.78 m/s)
Pad Height = 18.8 m3/s / (8 m *1.78 m/s)
Pad Height = 1.32 m
Copyright DAI/USAID 2012 by Gregg D. Short, P.E. | Three Sample Greenhouse Designs for Moldova
27
THREE SAMPLE GREENHOUSE DESIGNS FOR MOLDOVA
Attached to this engineering report are A1 sized engineered drawings of three different designs of greenhouses appropriate to Moldova. These greenhouses are sized and arraigned to mostly utilize and optimize materials on hand in Moldova. A greenhouse manufacturer buying custom steel can easily produce different sizes of greenhouse. These three designs were optimized to use commonly available 6 m long steel tubing. They are also sized to use either 6 m or 12 m wide plastic, which are both available and stocked by Moldavian manufacturers and distributors. If other widths of plastic appear on the market, then other sizes of greenhouses may be relevant to match the different plastic widths.
All of these designs are strong enough for the plastic to be installed all year-round. Any shade cloth or insect screening should be removed during the winter months. Some caution should be made during extreme snow events, particularly warm, wet spring snows. Clearing the snow around the greenhouse can help keep the plastic from being punctured by ice. Strongly consider minimal heating of the greenhouse if freezing rain is stuck to the cover, and a heavy snow is expected. This will loosen the frozen ice from the cover, and allow the snow to slide off the greenhouse.
The length of the greenhouses can easily be changed to fit the available land. An exception to this is the fan cooled gutter connect greenhouse. It should not be made any longer, but can be made shorter. Common cover lengths should be considered to minimize waste.
The two ground to ground greenhouse designs will both start you at Step 4 and can easily be improved to Step 11 or higher depending on equipment and plastic cover choices. The gutter connect greenhouse is designed to start at Step 15, as it is Fan and Pad cooled. It also shows options to Step 19.
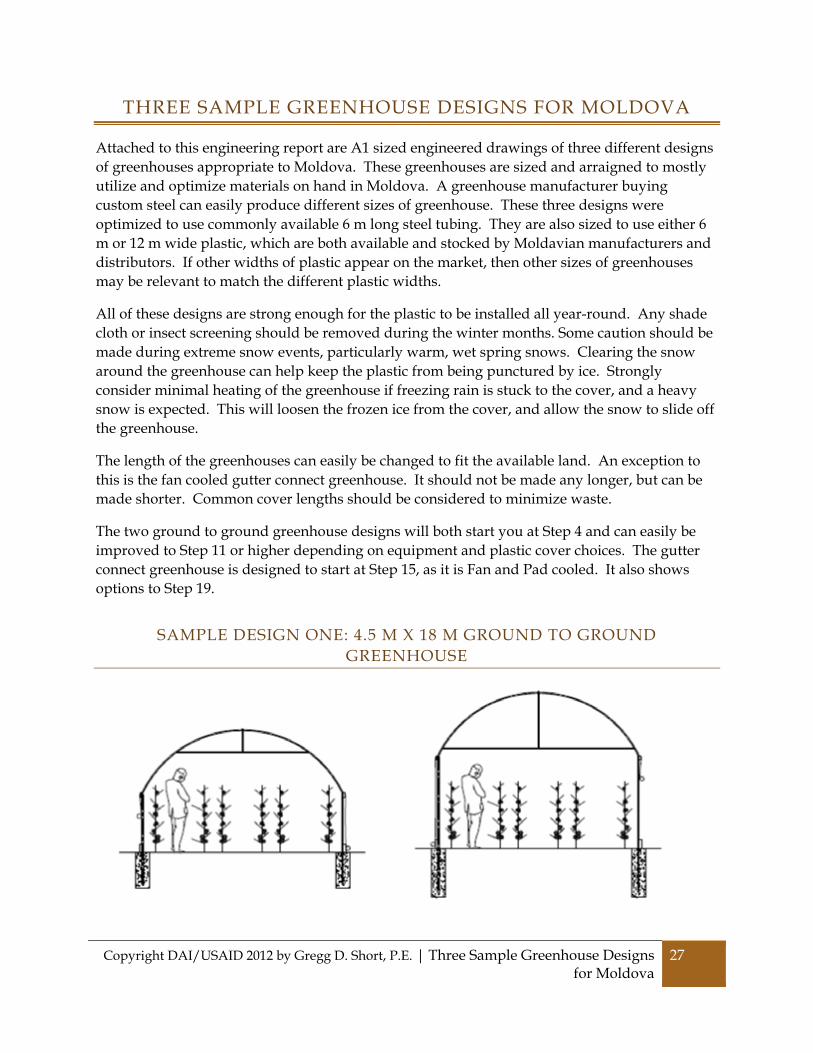
SAMPLE DESIGN ONE: 4.5 M X 18 M GROUND TO GROUND GREENHOUSE
28 Three Sample Greenhouse Designs for Moldova | Copyright DAI/USAID 2012 by Gregg D. Short, P.E.
Design one can be built with 2 m long ground stakes or higher 3 m long ground stakes. The arch is formed on a constant bend with sharper bends at the very end to insert into the ground stakes. The web members are welded to the inside of the arch, and a single continuous purlin runs down the ridge. This simple vertical member truss design is fine for this narrow house.
The roof and ends of this design should be able to be double covered with a single 6 m x 50 m roll of plastic. The rollup sidewalls can be covered with a single layer, or a double layer of plastic. This plastic can be slit to width from wider rolls. If the roof is covered with a single layer of plastic, then lengthwise support wires should be run under the plastic. If an air inflated double layer is used, these wires should not be used.
See the roll up section for more details on how to install a rollup wall. If using the higher 3 m ground stake design, it is probably preferable to add a fixed skirt at the bottom of the rollup door and keep the open-able section to around 1.5 m. This 4.5 m wide house is narrow enough that fixed gable ends should still sufficiently ventilate the greenhouse.
This design on a shorter house would be perfect for the home gardener.
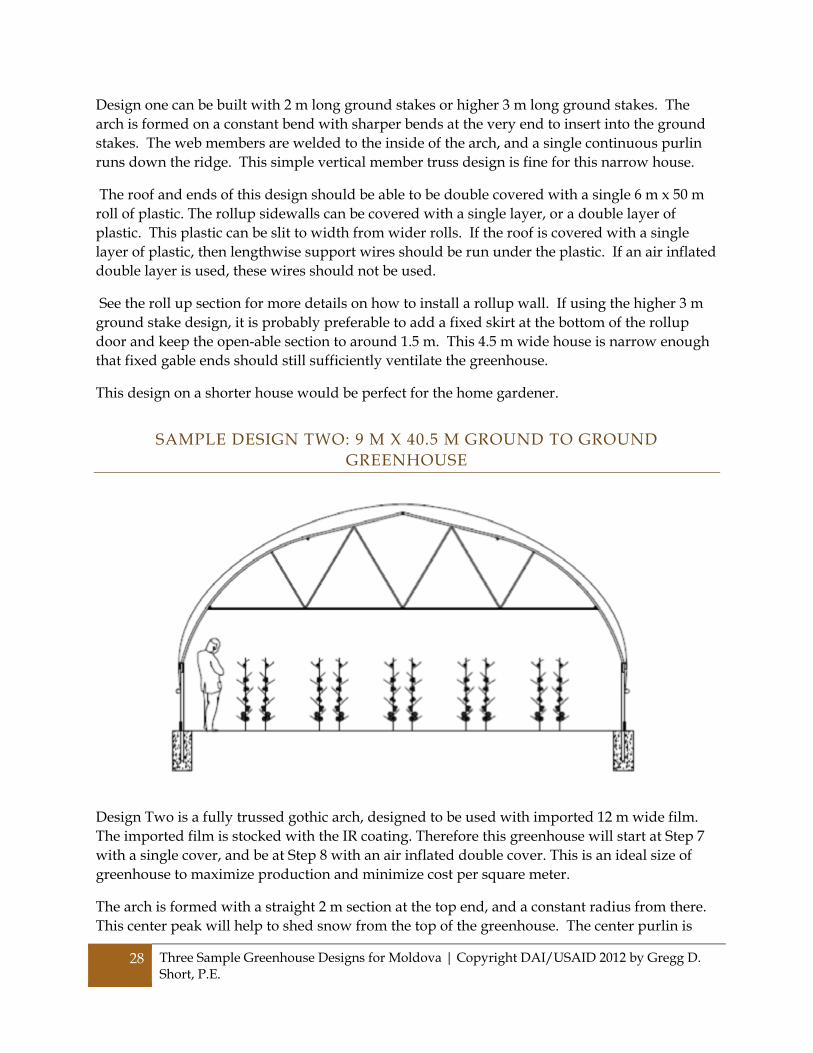
SAMPLE DESIGN TWO: 9 M X 40.5 M GROUND TO GROUND GREENHOUSE
Design Two is a fully trussed gothic arch, designed to be used with imported 12 m wide film. The imported film is stocked with the IR coating. Therefore this greenhouse will start at Step 7 with a single cover, and be at Step 8 with an air inflated double cover. This is an ideal size of greenhouse to maximize production and minimize cost per square meter.
The arch is formed with a straight 2 m section at the top end, and a constant radius from there. This center peak will help to shed snow from the top of the greenhouse. The center purlin is
Copyright DAI/USAID 2012 by Gregg D. Short, P.E. | Three Sample Greenhouse Designs for Moldova
29
welded to the arch halves, and care should be taken to make this area smooth for the plastic. Arch trusses can be welded on the ground, but care should be taken to make sure that the spacing at the bottom will match the ground stakes. Once welded, the truss will be very stiff! In general, it’s better to slightly push the ends of arch together when placing it in the ground stakes, to pre-tension it against a snow load.
This house is designed to be covered with two rolls of 12 m x 50 m plastic plus rollup sidewall plastic. The rollup sidewalls can be covered with a single layer, or a double layer of plastic. This plastic can be slit to width from wider rolls. If the roof is covered with a single layer of plastic, then lengthwise support wires should be run under the plastic. If an air inflated double layer is used, these wires should not be used.
See the roll up section for more details on how to install a rollup wall. This 9 m wide house is high and wide enough that gable ends vents should be used to help ventilate the peak of the greenhouse. Center hinged vents can be used in the gable. This design is easier to control in a wind storm than a bottom hinged vent. A rope or chain loop should be attached to both sides of the vent and anchored to the first truss. This will allow the vent to be held open at any amount regardless of wind conditions. Care should be taken to design and install flashings, seals and/or brushes for these vents as a lot of heat can be lost from them if they seal poorly to the greenhouse frame.
While not shown, another option to ventilate the peak area is to install a small exhaust fan on one end and an inlet shutter on the other end. This fan can be run on a thermostat and/or humidistat and be used as the first level of cooling. This can eliminate a substantial amount of labor in the early spring when conditions are quickly changing.
This greenhouse frame is designed to be tough and take most everything a Moldovan winter can throw at it, but it also assumes that there will not be a substantial plant load on the structure at the same time as a snow load. If earlier (fully heated) production is planned (for example, expecting a fully loaded tomato plant hanging on the structure in March-April), then an additional support post should be installed in the center of the bay as shown on the print.
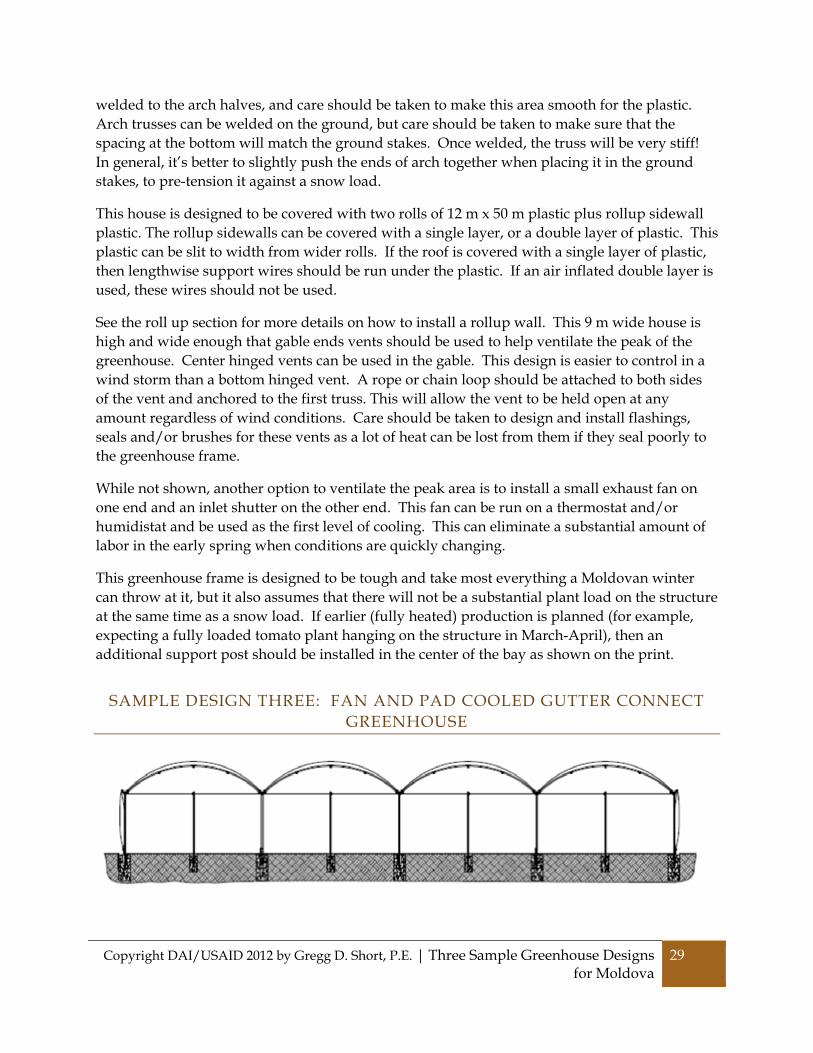
SAMPLE DESIGN THREE: FAN AND PAD COOLED GUTTER CONNECT GREENHOUSE
30 Three Sample Greenhouse Designs for Moldova | Copyright DAI/USAID 2012 by Gregg D. Short, P.E.
This greenhouse is different than the other two in a number of ways. Commercial gutter connect greenhouses use the gutter as a structural member. This gutter is not available on the Moldovan market and will need to be imported. Consideration has been made to this need, and a gutter connect system from CropKing, Lodi, OH (cropking.com) has been shown in the drawings. This greenhouse is also fan and pad cooled. When used with shade cloth, this design will enable successful growing and production throughout the warmest summer months.
This aluminum gutter has the advantage that its connections are slipped on the gutter extrusion and therefore can be adjusted to many different arch and post spacings including typical metric spacings of the steel members. The post and arch connectors can also be modified to use different types, shapes and sizes of steel (or other materials). The system is bolted together with galvanized bolts and nuts. The system doesn’t need welding, but holes need to be drilled or punched (preferably with a simple jig on a drill press) in the steel members.
The sample design shows a four bay layout 18 m x 40.5 m with arch spacing on 1.5 m and post spacing on 3 m. It is typical for gutter connected greenhouses to have an intermediate arch (or two in some designs) between the column posts. A common width of bay for this design in the USA is 6.7 m, using 7.32 m wide plastic. Since this plastic width isn’t known to be available in the Moldova marketplace, the spacing of 4.5m, using a 6m plastic was chosen for the sample design. If even wider plastic (12m) and bay widths (~11m) are used, then the arch will have to be supported with a post at each arch. Special brackets or weldments may also be needed to transfer the arch loads directly to the posts at this width depending on design loads and member spacing. A trussed arch design would also need to be used at this width.
The bottom chord ties the tops of the posts together. The ends of the chord can be collapsed or used in the full round. In either case they should both be mounted on the same side of the post, to keep from applying torsion to the post.
This greenhouse is shown as a four bay, but could easily be expanded to 20+ bays, but at some point (around 10 bays or so) an interior partition wall should be installed to contain disease outbreaks. At some point, a fire break should also be made between zones. These large zones assume the use of fan and pad cooling. The exhaust fans also require reliable electricity (and a backup generator) at the site.
If the gutter connect greenhouse is naturally ventilated with full height roll-up sidewalls all the way around the perimeter, then a 6 bay (4.5 m wide) would be the limit of good cooling. This assumes that roof vents are not installed, but these tend to be pretty complex and expensive for most Moldovan greenhouse operations.
With the larger area of a gutter connect, many more areas of automation become economically feasible, and it’s easier to jump up a few more steps on the Greenhouse complexity and productivity scale. In particular, a simple greenhouse controller would be a wise investment for this greenhouse. A greenhouse controller in a heated greenhouse can have a payback in less than a year just in heating savings, due to tighter controlled conditions!