motion sensor faucet
TRANSCRIPT
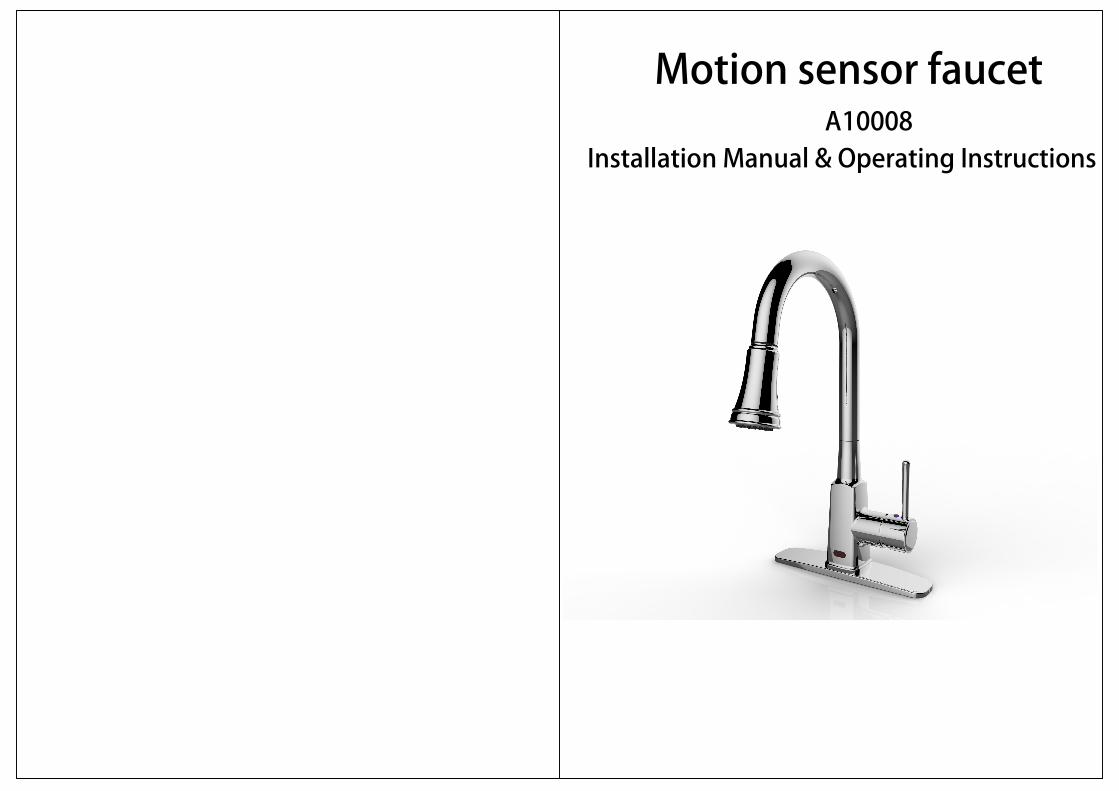
Motion sensor faucetA10008
Installation Manual & Operating Instructions
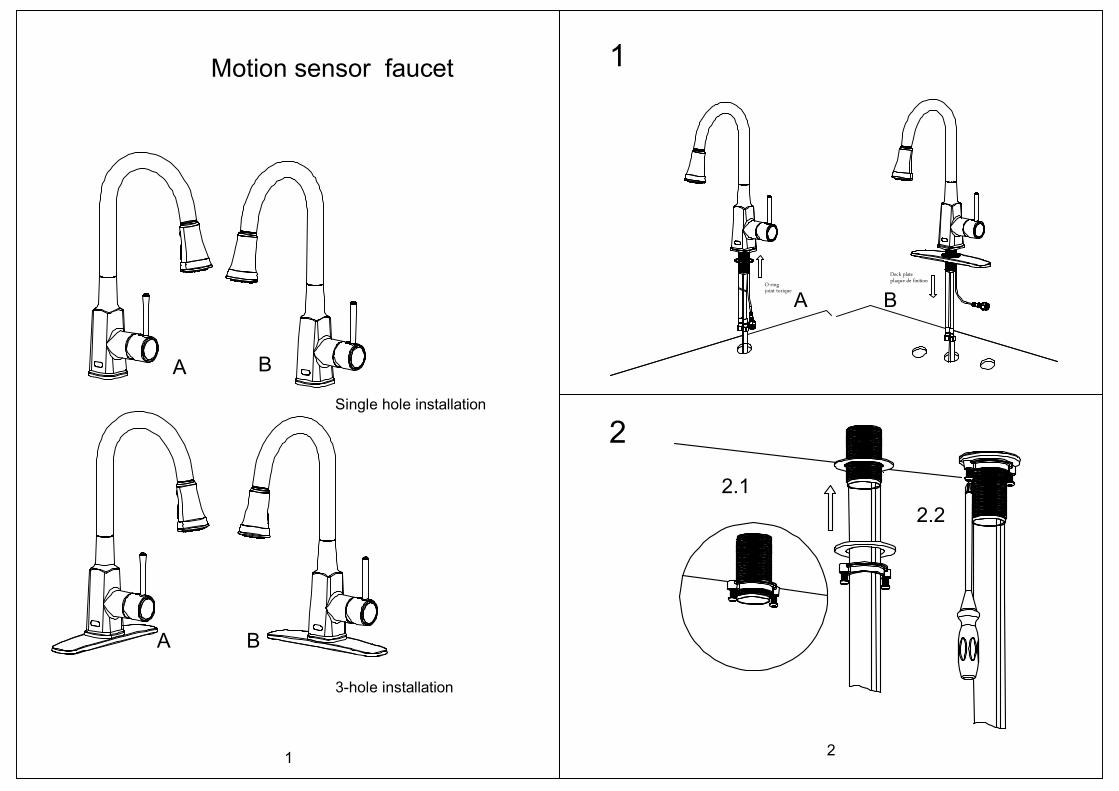
Single hole installation
3-hole installation
Motion sensor faucet
1
A B
A B
1
2
2.1
2.2
2
O-ringjoint torique
Deck plateplaque de finition
A B
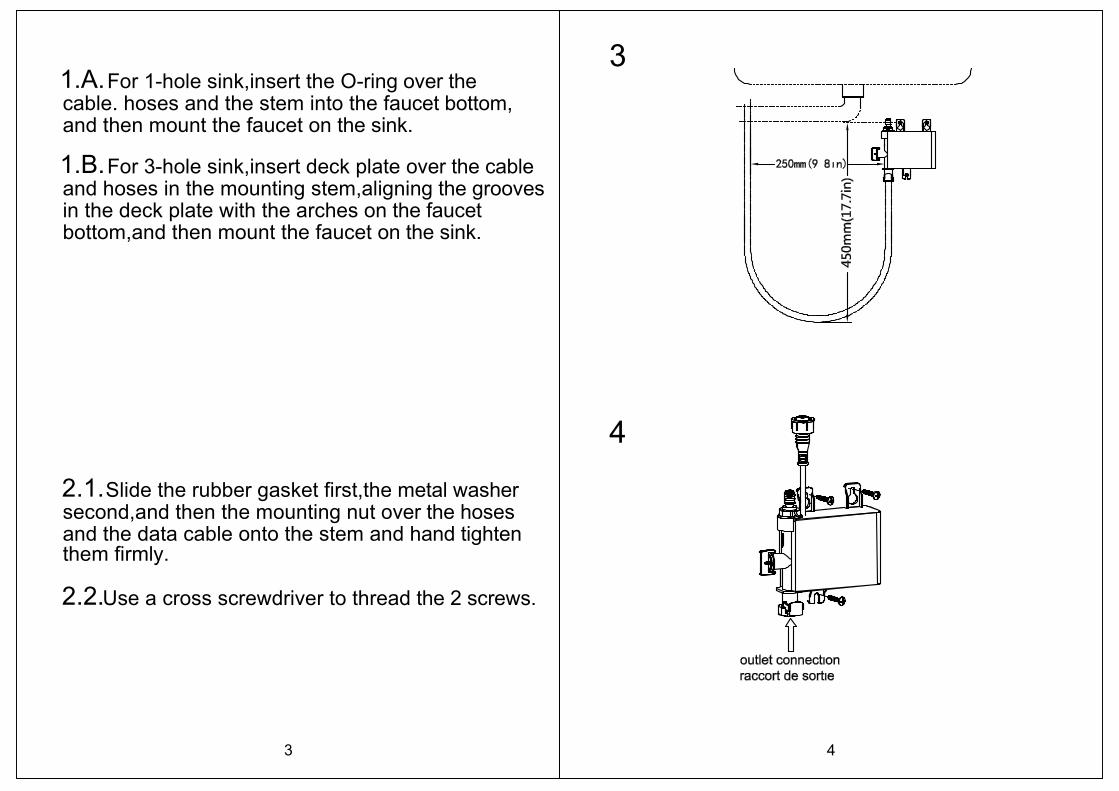
3
For 1-hole sink,insert the O-ring over thecable. hoses and the stem into the faucet bottom,and then mount the faucet on the sink.
1.A.
For 3-hole sink,insert deck plate over the cableand hoses in the mounting stem,aligning the groovesin the deck plate with the arches on the faucet
1.B.
bottom,and then mount the faucet on the sink.
Slide the rubber gasket first,the metal washersecond,and then the mounting nut over the hosesand the data cable onto the stem and hand tighten
2.1.
Use a cross screwdriver to thread the 2 screws.2.2.
them firmly.
3
4
4
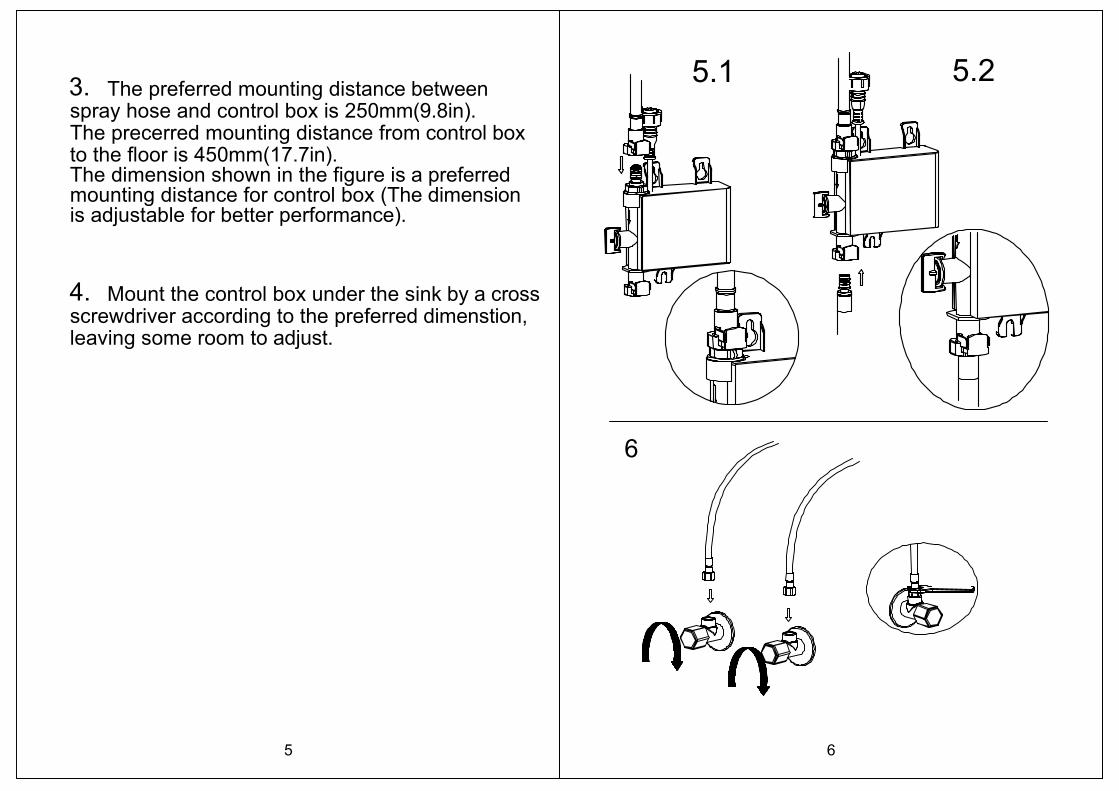
5
The preferred mounting distance betweenspray hose and control box is 250mm(9.8in).3.
The precerred mounting distance from control boxto the floor is 450mm(17.7in).The dimension shown in the figure is a preferredmounting distance for control box (The dimensionis adjustable for better performance).
Mount the control box under the sink by a crossscrewdriver according to the preferred dimenstion,4.
leaving some room to adjust.
6
5.1 5.2
6
7
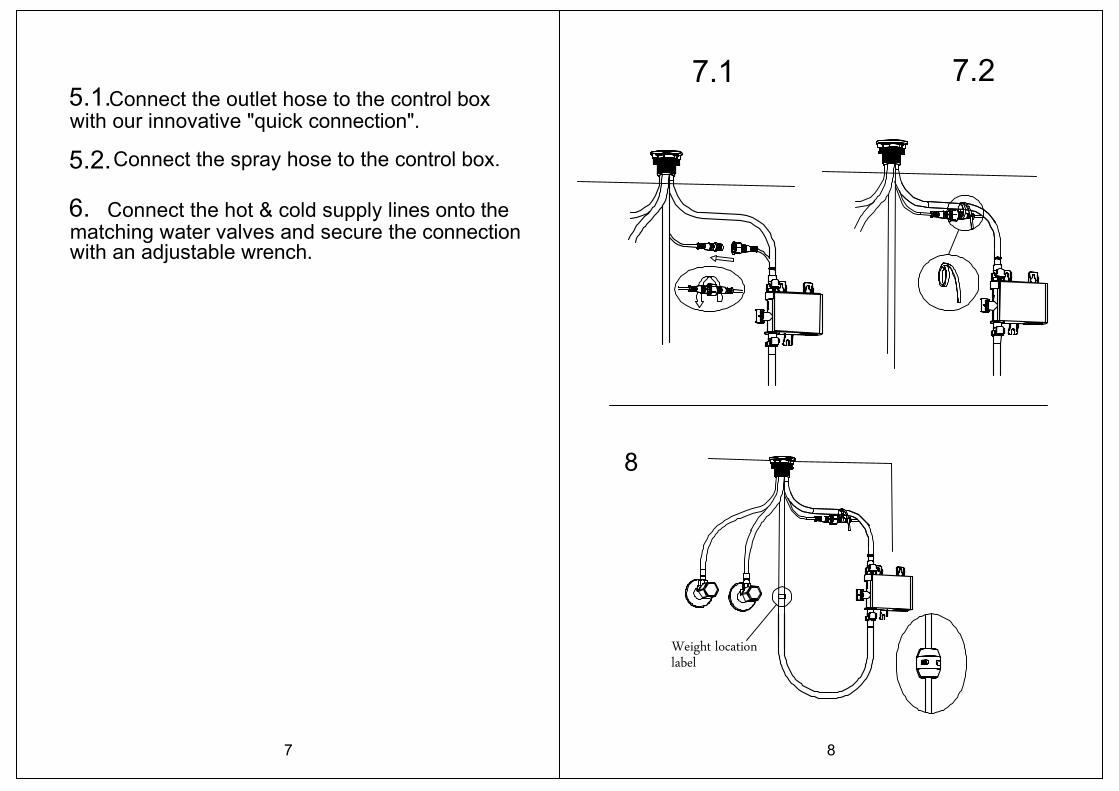
Connect the outlet hose to the control boxwith our innovative "quick connection".5.1.
Connect the spray hose to the control box.
Connect the hot & cold supply lines onto thematching water valves and secure the connection6.
5.2.
with an adjustable wrench.
8
7.1 7.2
8
Weight locationlabel

9
Connect the data cables and secure themhand tight.7.1.
Tie the data cables together with the outlet
Install the counterweight on the pulldown hoseat the marked position(it should be placed on the 8.
7.2.
line); and secure it with a cross screwdriver.
hose by using a zip tie.Do not include the pulldownhose in the zip tie.
10
9
10
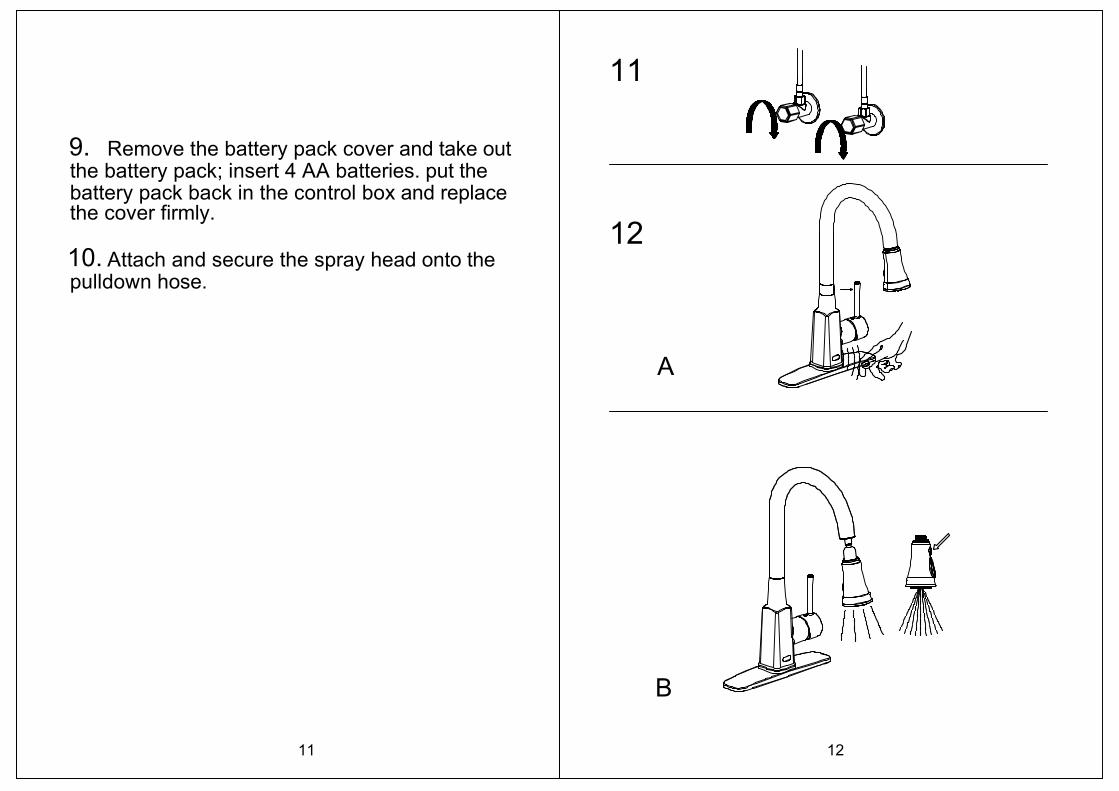
Remove the battery pack cover and take outthe battery pack; insert 4 AA batteries. put the9.
battery pack back in the control box and replace
11
Attach and secure the spray head onto thepulldown hose.10.
the cover firmly.
11
12
12
A
B
13
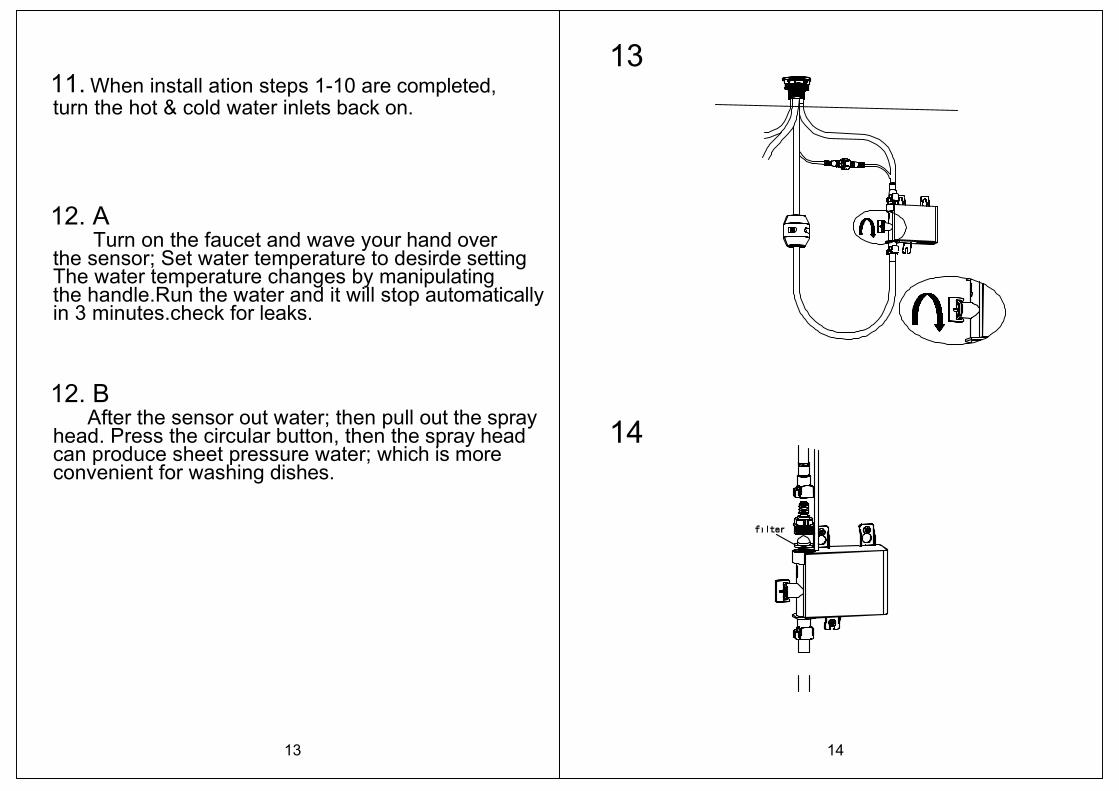
When install ation steps 1-10 are completed,turn the hot & cold water inlets back on.11.
Turn on the faucet and wave your hand over12. A
the sensor; Set water temperature to desirde settingThe water temperature changes by manipulatingthe handle.Run the water and it will stop automaticallyin 3 minutes.check for leaks.
After the sensor out water; then pull out the spray12. B
head. Press the circular button, then the spray head can produce sheet pressure water; which is more convenient for washing dishes.
13
14
14
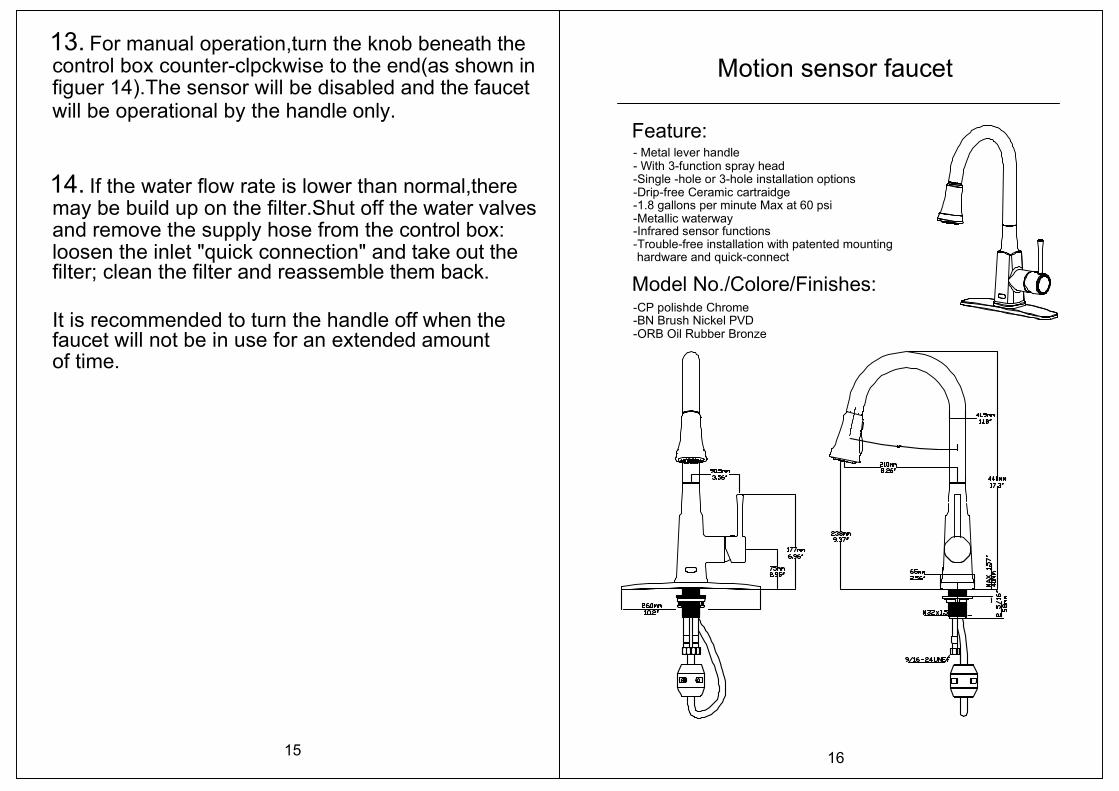
For manual operation,turn the knob beneath thecontrol box counter-clpckwise to the end(as shown infiguer 14).The sensor will be disabled and the faucet
13.
If the water flow rate is lower than normal,theremay be build up on the filter.Shut off the water valvesand remove the supply hose from the control box:
14.
loosen the inlet "quick connection" and take out the
15
will be operational by the handle only.
filter; clean the filter and reassemble them back.
It is recommended to turn the handle off when thefaucet will not be in use for an extended amount of time.
Motion sensor faucet
Feature:- Metal lever handle- With 3-function spray head-Single -hole or 3-hole installation options-Drip-free Ceramic cartraidge-1.8 gallons per minute Max at 60 psi-Metallic waterway
-Trouble-free installation with patented mounting hardware and quick-connect
Model No./Colore/Finishes:-CP polishde Chrome-BN Brush Nickel PVD-ORB Oil Rubber Bronze
16
-Infrared sensor functions