neck manual - american massage therapy association — home
TRANSCRIPT

1
Copyright 2012 Ben E. Benjamin PhD and the Benjamin Institute. No portion of these materials may be reproduced without written permission.
Neck Manual
Anatomy of Relevant Structures
Spinal Structure
� Vertebrae
� Spinous & Transverse Processes
� Vertebral & Basilar Arteries
� Zygapophysial Joints
� Intervertebral Discs
Vertebrae
The vertebral bodies comprise the boney building blocks of the spine. They have two major
functions. First, to bear the weight of the body, and second, to protect the spinal cord and nerves
within the spinal canal. The vertebrae are stacked one on top of another with the intervertebral
discs between them. Together, the vertebral bodies act as a support system to hold up the spine.
The spine supports about half of the body’s weight, with the other half supported by the muscles.
There are five major areas of the spine: cervical, thoracic, lumbar, sacral and coccygeal. The
shape and function of the vertebrae differ slightly from area to area. The cervical region is the
upper-most portion of the spine, and includes seven vertebrae. The top two vertebrae are unique.
The first cervical vertebra (the atlas) is in the shape of a ring. It is the only vertebra in the spine
that does not have a vertebral body. The second cervical vertebra (the axis) also has a unique
shape. Extending upward from the body of the axis is a small, tooth-like, bony projection known
as the odontoid process. It acts as a post that the atlas pivots around. At least 50% of the
rotation in the neck occurs at this pivot joint.
Like the rest of the spine, the next five vertebrae have one disc and two pairs of zygapophysial
joints, one superior and one inferior. Unlike the rest of the spine, the vertebrae in the cervical
spine contain openings in each transverse process for the arteries to carry blood to the brain. The
vertebral artery runs through the transverse foramen. When the circulation in these vertebral
arteries is interfered with or compromised, many uncomfortable and dangerous symptoms can
occur.
Spinous Processes
The spinous process is a broad, projection of bone at the back of a vertebra with two tuberosities
to which muscles and ligaments are attached. They are often split, or bifid, in this region of the
spine, allowing for a greater surface area for muscle and ligament attachments.

2
Copyright 2012 Ben E. Benjamin PhD and the Benjamin Institute. No portion of these materials may be reproduced without written permission.
Transverse Processes
The transverse processes are bony protrusions on either side of each vertebra. They are small
and slender, but are larger and extend farther out from the midline than you might think. The
cervical transverse processes, each with two tuberosities, provide attachment sites for many
muscles and ligaments of the neck. The ligaments that attach the spinous and transverse
processes to each other are the source of many chronic injuries in the neck region.
Vertebral and Basilar Arteries
The vertebral arteries are key blood vessels that carry blood from the heart to the brain. These
two arteries, one on each side of the body, run up the back of the neck and then join together
inside the skull to form the basilar artery. The basilar artery, in turn, supplies blood to both the
cerebrum and the cerebellum. The cerebrum is the largest portion of the brain. It controls and
integrates motor, sensory, and higher mental functions, such as thought, memory, and emotion.
The cerebellum is the second largest portion of the brain. It is located just above the brainstem at
the base of the skull, and controls reflexes, balance, and certain aspects of movement and
coordination.
Zygapophysial Joints
The zygapophysial joints are often referred to as “facet joints.” Although this common name is
easier to pronounce, it is anatomically incorrect. The word “facet” refers to the articular
cartilage surface in many small joints throughout the body, such as the phalanges and
costovertebral joints. Zygapophysial joints are true synovial joints. In addition to articular
cartilage, they contain a joint capsule and a synovial membrane.
Each vertebra has two sets of zygapophysial joints - one for articulating with the vertebra above,
and one with the vertebra below. In association with the spinal discs, these joints allow for
movement between the individual vertebrae of the spine. The primary movements permitted by
the zygapophysial joints are flexion and extension of the spine. Their joint capsules serve to
limit side-flexion and rotation. Their capsular ligaments protect the posterior portions of the
discs from excess flexion and torsion forces.
Intervertebral Discs
The intervertebral discs make up one-fourth of the length of the spinal column. There are no
discs between the atlas and the axis, or between the vertebrae that form the coccyx. Above and
below each disc is a thin layer of cartilage, known as a vertebral end plate, which attaches the
disc to the adjacent vertebrae. Because discs have no direct blood supply, their only sources of
nourishment are the nutrients that diffuse across these end plates.
Intervertebral discs act as the spine's shock-absorbing system. They provide cushioning to
protect the vertebrae, the brain, and the nerves. The discs also allow for motion in the spine.

3
Copyright 2012 Ben E. Benjamin PhD and the Benjamin Institute. No portion of these materials may be reproduced without written permission.
Individual disc movement is very limited, but with their combined motion we can bend a
considerable distance.
Intervertebral discs are composed of two parts: the annulus fibrosis and the nucleus pulposus.
Both are made up of water, collagen, and proteoglycan (or PG) molecules.
The annulus fibrosis consists mainly of collagen fibers. These fibers are arranged in concentric
sheets, forming a strong outer ring that connects to the vertebral end plates and encloses the
nucleus pulposus. The nucleus pulposus consists mainly of PG molecules, which form a water-
rich gel that resists compression. PG molecules are important because they attract and retain
water, and a high water content is critical to proper disc functioning.
The amount of water in the nucleus gradually decreases throughout the day. This is because
whenever we stand or sit, a gravitational compression force is exerted on the vertebrae. As a
result of this compression, water diffuses from the discs into the vertebral bodies — making us a
little shorter at the end of each day. While we sleep, the water diffuses back into the discs, and
we awake at our normal height.
Nerves
� Spinal Cord
� Spinal Nerves
� Nerve Roots
� Nerve Trunks
Spinal Cord
The spinal cord consists of a bundle of nerves running down the central canal of the spine, from
the brain to the lumbar region. The spinal cord actually ends at L1, or in some cases L2. After
this point, the individual nerves continue without the cord covering them. They look a lot like a
horse’s tail, and so they are called the cauda equina, which means horse’s tail in Latin.
All nerves going to the trunk and the extremities originate within the spinal cord. At each
vertebra, small bundles of nerves branch off, transmitting nerve impulses to and from various
parts of the body. Spinal cord injuries occur when a traumatic event causes damage to individual
cells within the spinal cord or a complete rupture of nerves within the cord.
Spinal Nerves
Nerves are the body’s communication system. The spinal nerves carry messages from the brain
through the spinal cord to the rest of the body. There are eight pairs of spinal nerves in the
cervical region. Most of these cervical nerves exit the spine above the vertebra they are named
for. The one exception is the C8 nerve, which exits below the C7 vertebra and above T1.

4
Copyright 2012 Ben E. Benjamin PhD and the Benjamin Institute. No portion of these materials may be reproduced without written permission.
As these nerves exit the spine, they travel through small openings between the vertebrae, which
are called the intervertebral foramen. Then they branch off into motor nerves (which control our
movement) and sensory nerves (which communicate the sensations we feel). The nerves in
different areas of the spinal cord connect to different parts of the body. The nerves of the
cervical spine go to the upper back, upper chest, arms, and hands. The nerves of the thoracic
spine go to the lower chest and abdomen. And the nerves of the lumbar spine go to the pelvis
and legs. Whenever your body gets hurt in some way, your nerves signal the brain about the
injury. Damage to the nerves themselves can cause pain, tingling, numbness, or weakness.
Nerve Roots
The nerve root is the first half-inch or so of a nerve as it exits the spinal cord. It’s enclosed in a
tapering sleeve of dura mater, the tough fibrous membrane that encases the spinal cord. This is
the portion of the nerve that commonly causes pain when compressed by a protruding disc.
Nerve Trunks
The nerve trunk is the portion of a nerve that extends beyond the dural sleeve. It begins about a
half-inch from the spinal cord. Pressure on a nerve trunk causes no pain, only distal paresthesia,
which is the sensation of pins-and-needles. The paresthesia occurs in the area of the body that
receives signals from that nerve. The location of the paresthesia will tell you which nerve is
affected, but will not tell you where on the nerve the pressure is occurring. This is because
pressure exerted at any point along the nerve trunk will cause roughly the same symptoms.
Ligaments
Now let’s take a look at the ligaments in the neck. These fall into four major categories:
� Nuchal Ligament
� Supraspinous Ligaments
� Interspinous Ligament
� Intertransverse Ligament
Supraspinous Ligaments
The supraspinous ligaments, sometimes referred to as the supraspinal ligaments in the literature,
run from the tip of one spinous process to the next, attaching the cervical vertebrae to one
another. You can easily palpate these ligaments both on the posterior surface of the spinous
processes and in-between the spinous processes. Together, they function as one continuous
structure, yet with individual segments that can each sustain an injury. The supraspinous
ligaments continue all the way down the spine to the sacrum. At the top of the spine, the
supraspinous ligaments are interwoven with fibers of the nuchal ligament.

5
Copyright 2012 Ben E. Benjamin PhD and the Benjamin Institute. No portion of these materials may be reproduced without written permission.
Nuchal Ligament
The nuchal ligament, often referred to as the ligamentum nuchae, is a broad, fibrous, roughly
triangular tissue at the center of the back of the neck. It goes from the external occipital
protuberance, along the tips of the spinous processes of the cervical vertebrae, down to the tip of
the C7 spinous process.
Interspinous Ligaments
The interspinous ligaments lie deep to the supraspinous ligaments. They comprise the next layer
of ligament tissue, attaching the deeper surfaces of the spinous processes to each other. These
ligaments run from the base of one spinous process-to-another and can be one to two inches in
depth, depending upon the size of the person. Because they are so deep, they cannot be directly
treated manually.
Intertransverse Ligaments
The intertransverse ligaments attach adjacent transverse processes to one another. Their function
is to provide support and to limit side-flexion and rotation. They are often the cause of severe
and persistent neck, head, and upper back pain. These ligaments are located fairly superficially
and can be palpated with some practice.
Muscles
� Sternocleidomastoids
� Trapezius
� Occipitofrontalis Muscle
� Suboccipitals
� Scalenes
� Splenius Capitus & Splenius Cervicis
� Erector Spinae Group
� Levator Scapula Muscles
Sternocleidomastoids
The sternocleidomastoid muscles divide both sides of the neck into anterior and posterior
triangles. They originate from two heads. The sternal head begins at the anterior surface of
manubrium (the upper part of the sternum). The clavicular head originates at the superior
surface of the medial third of the clavicle. As they move diagonally up the neck, these muscles
insert primarily at the mastoid process portion of the temporal bone. They are the primary
movers in head rotation, and they also assist in side-flexion and extension of the neck.

6
Copyright 2012 Ben E. Benjamin PhD and the Benjamin Institute. No portion of these materials may be reproduced without written permission.
Trapezius
The trapezius is the large superficial muscle of the neck and upper back. It is named for the
geometrical shape it resembles: the trapezium, or trapezoid. The trapezius has many attachments
and performs multiple actions. Its attachments extend from the occipital protuberance down the
nuchal ligament to the spinous process at C7 and all the way down to T12. It inserts into the
lateral third of the clavicle and the acromion process, and also into the spine of the scapula. Its
muscle fibers at the neck run downward and laterally toward the arm, and the fibers from the
vertebrae run upward and toward the shoulder.
The trapezius muscle elevates, retracts, adducts, and rotates the scapula. The superior fibers
elevate the scapula, the middle fibers retract it, and the inferior fibers depress it. When the
superior and inferior fibers work together, they rotate the scapula.
Occipitofrontalis Muscle
The superficial occipital muscles at the back of the skull are part of the occipitofrontalis muscle.
The frontalis part of this muscle of the forehead attaches to the epicranial aponeurosis which
covers the skull. This is a fascial sheet that covers the head and connects these two parts of this
unique structure. The occipital muscle attaches at the other end of this aponeurosis to the
occipital bones. These, along with the suboccipital muscles, are very important components of
working with neck pain and neck injuries.
Suboccipitals
There are four suboccipital muscles, the rectus capitis posterior major and minor, and the oblique
capitis inferior and superior. These muscles are attached to the occipital bones, the atlas, and the
axis, and they assist in rotation and side-flexion of the head. The suboccipitals are often injured
and are frequently implicated in neck pain and headaches.
Scalenes
The scalene muscles are located on each side of the neck, attaching to the upper transverse
processes and the first two ribs. Studies have found that their configuration can vary greatly
from person to person. The scalenes side-flex the neck and assist in rotation. They also assist in
breathing by raising or fixing the first two ribs.
Splenius Capitis & Splenius Cervicis
The splenius capitis and splenius cervicis are the powerful muscles at the back of your neck.
They extend and rotate the head. When the neck is tense, these muscle are often in chronic
contraction. The splenius capitis muscles are attached at the lower portion of the nuchal
ligament, the spines of the C7 vertebra, and the first three thoracic vertebrae. They insert at the
mastoid process and the occipital bone. The splenius cervicis muscles originate at the spinous

7
Copyright 2012 Ben E. Benjamin PhD and the Benjamin Institute. No portion of these materials may be reproduced without written permission.
processes of T3 to T6 and insert at the transverse processes of C1 to C3.
Levator Scapula Muscles
The levator scapula muscle originates at the transverse processes of the upper three or four
cervical vertebrae and attaches at the superior aspect of the medial border of the scapula. Its
primary function is to raise the shoulders. Pain felt in the region of the levator scapula, at the
medial border of the scapula, is relatively common. However, such pain typically does not mean
that this muscle is injured.
8
Copyright 2012 Ben E. Benjamin PhD and the Benjamin Institute. No portion of these materials may be reproduced without written permission.
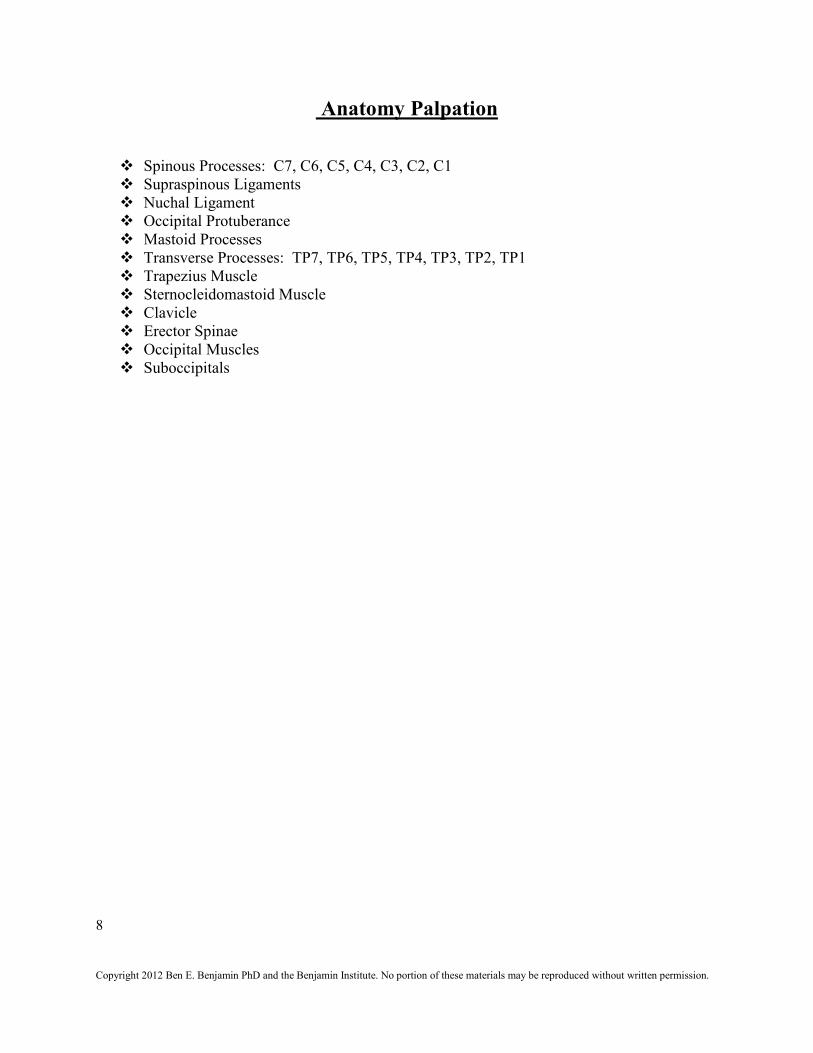
Anatomy Palpation
� Spinous Processes: C7, C6, C5, C4, C3, C2, C1
� Supraspinous Ligaments
� Nuchal Ligament
� Occipital Protuberance
� Mastoid Processes
� Transverse Processes: TP7, TP6, TP5, TP4, TP3, TP2, TP1
� Trapezius Muscle
� Sternocleidomastoid Muscle
� Clavicle
� Erector Spinae
� Occipital Muscles
� Suboccipitals

9
Copyright 2012 Ben E. Benjamin PhD and the Benjamin Institute. No portion of these materials may be reproduced without written permission.
Assessment Tools
Assessment Tests
Assessment is a systematic method of gathering information to help you make the best possible
decisions. Diagnosis is assigning a name or label to a certain group of pain phenomena or other
symptoms. When you assign a name to a pain condition, you have given a diagnosis. Gathering
information about someone’s condition to determine how best to proceed or whether you should
proceed is assessment, not diagnosis.
Indicators
� Pain
� Limitation of Movement
� Weakness
� Unusual Sensations or Loss of Sensation
� End Feel
� Abnormal Reflexes
General Principles
� Watch the Client’s Face
� Normalize the Pain
� Be Careful When Testing in Extension
� Take Up the Slack and Jerk Lightly
� Go Gently at First
� Ask “Does it hurt? If so, where?”
Testing Principles
� Movements that Create Pain
� Locations of Referred Pain
� Range of Motion
� Weakness
� Unusual Sensations or Loss of Sensation
� Reflex Abnormalities

10
Copyright 2012 Ben E. Benjamin PhD and the Benjamin Institute. No portion of these materials may be reproduced without written permission.
Assessment Tests
Neck Tests - Soft Tissue
Pain and Limitation:
1. Active Rotation Right
2. Active Rotation Left
3. Active Side Flexion Right
4. Active Side Flexion Left
5. Active Flexion
6. Active Extension
7. Passive Rotation Right
8. Passive Rotation Left
9. Passive Side Flexion Right
10. Passive Side Flexion Left
11. Passive Flexion
12. Passive Extension
Neck Tests—Neurological
Weakness:
13. Resisted Rotation Right
14. Resisted Rotation Left
15. Resisted Side Flexion Right
16. Resisted Side Flexion Left
17. Resisted Flexion
18. Resisted Extension
19. Resisted Shoulder Raises
20. Resisted Abduction
21. Resisted Adduction
22. Resisted Lateral Rotation
23. Resisted Medial Rotation
24. Resisted Flexion
25. Resisted Extension
26. Resisted Wrist Extension
27. Resisted Wrist Flexion
28. Resisted Radial Deviation
29. Resisted Ulnar Deviation of the Wrist
30. Resisted Extension of the Thumb

11
Copyright 2012 Ben E. Benjamin PhD and the Benjamin Institute. No portion of these materials may be reproduced without written permission.
31. Resisted Adduction of the Thumb
32. Resisted Adduction of the 4th and 5th Digits
Quality of Reflex:
33. Brachioradialis Jerk
34. Biceps Jerk
35. Triceps Jerk
Cord Pressure:
36. Knee Jerk
37. Ankle Jerk
38. Babinski
39. Ankle Clonus (presence or absence of “beats”)
40. Knee Clonus
Pain:
41. Ligament Palpation
Neck Tests
1-2. Active Rotations (ability to move, range of motion)
3-4. Active Side Flexions (ability to move, range of motion)
5-6. Active Flexion/Extension (ability to move, range of motion)
7-8. Passive Rotations (ligaments and discs)
9-10. Passive Side Flexions (ligaments and discs)
11-12. Passive Flexion/Extension (ligaments and discs)
13-14. Resisted Rotations (SCM, other rotator muscles of the neck)
15-16. Resisted Side Flexions (scalene muscles of the neck)
17-18. Resisted Flexion/Extension (suboccipital and erector spinae muscles)
19. Resisted Shoulder Raises (C2,3,4)
20. Resisted Adduction (C7)
21. Resisted Abduction (C5)
22. Resisted Lateral Rotation (C5)
23. Resisted Medial Rotation (C5)
24. Resisted Flexion (biceps C5,6; brachialis C6)
25. Resisted Extension (C7)
26. Resisted Wrist Extension (C6)
27. Resisted Wrist Flexion (C7)
28. Resisted Radial Deviation (C7)
29. Resisted Ulnar Deviation/Wrist (C8)
30. Resisted Extension/Thumb (C8)

12
Copyright 2012 Ben E. Benjamin PhD and the Benjamin Institute. No portion of these materials may be reproduced without written permission.
31. Resisted Adduction/Thumb (C8)
32. Resisted Adduction of 4th & 5th Digits (T1)
33. Brachioradialis Jerk (C6)
34. Biceps Jerk (C5,6)
35. Triceps Jerk (C7)
36. Knee Jerk (spinal cord pressure)
37. Ankle Jerk (spinal cord pressure)
38. Babinski (spinal cord pressure)
39. Ankle Clonis (spinal cord pressure)
40. Knee Clonis (spinal cord pressure)
41. Ligament Palpation (supraspinous, intertransverse and pelvic ligaments)
Palpation of the Supraspinous Ligament:
For the ligament palpation, just do one or two friction strokes through the supraspinous
ligaments at each level starting at C7 and going up to the occipital protuberance.
Palpation of the Intertransverse Ligament:
Then, perform one or two friction strokes on each of the intertransverse ligaments beginning at
TP7 and going up to TP1, just inferior to the mastoid process.
Palpation of the Sub-occipital Muscles:
Perform a brief friction stroke at the base of the occiput, beginning about an inch lateral to the
edge of the occipital protuberance and work your way laterally across the base of the occiput on
both the right and left sides.
General principles for testing the neck:
o Ask the client to do movements by himself first (active tests)
o Watch the client’s face
o Be careful when testing in extension
o Take up the slack and jerk lightly
o Go gently at first…
o Then, if no pain, go harder
o Questions to ask: Does it hurt? Where?
• Tension in the neck—its effect on healing
• Poor alignment—a cause of injury and slow or limited recovery

13
Copyright 2012 Ben E. Benjamin PhD and the Benjamin Institute. No portion of these materials may be reproduced without written permission.
Neck Test Descriptions
1–2. Active Rotations
Ask the client to rotate their head as far as possible to the right, and then to the left. After each
test, ask if there is pan. Note whether there is limitation of movement; normal range is 90
degrees in each direction.
3–4. Active Side Flexion
Ask the client to tilt their ear toward their shoulder (while not raising the shoulder). Note any
limitation and ask whether there is pain.

14
Copyright 2012 Ben E. Benjamin PhD and the Benjamin Institute. No portion of these materials may be reproduced without written permission.
5. Active Flexion
Ask the client to drop their chin gently toward their chest, looking down toward the floor and
touching chin to chest if possible. (In addition to any pain, note whether the client’s chin touched
the chest; this is normal range.)
6. Active Extension
Ask the client to look up at the ceiling, tilting the head as far back as possible without pain. A
full range of motion is a 90-degree tilt, ending with the face parallel to the ceiling. (Note that
many people tend to look up at the ceiling by moving only their eyes. If your client does this, ask
them to try to look up further, stopping only if there is pain or discomfort.)

15
Copyright 2012 Ben E. Benjamin PhD and the Benjamin Institute. No portion of these materials may be reproduced without written permission.
7-8. Passive Rotation
Stand at the person’s right side and ask the client to turn their head to the right. Place your left
forearm on the left scapula to stabilize the upper body, and place left your palm on the side of the
head, with your fingers around the ear but not covering it. Then place your right hand on the
client’s left cheek and gently rotate the neck to the end of range, taking up all the slack. Stop if
there is any pain of discomfort. If there is absolutely no discomfort, give a very gentle
jerk/overpressure (a slight motion, moving through less than a half-inch of space). Note any
limitation of movement and the location of any pain. Now repeat the test on the other side.
9-10. Passive Side Flexion
Stand behind the client and ask them to tilt their head to the right, trying to bring the ear to the
shoulder. Place your left hand on the left shoulder and your right hand on the left side of the head
above the ear. Stretch to the end of range. If there is no pain, give a slight jerk. Note whether
there is limitation, and note the location of any pain. Now repeat on the other side. If there is
only a slight stretching sensation and it is the same on both sides, the test result is negative.

16
Copyright 2012 Ben E. Benjamin PhD and the Benjamin Institute. No portion of these materials may be reproduced without written permission.
11. Passive Flexion
Ask the client to lower the chin toward the chest, with the weight of the head hanging down. If
there is no pain, place your middle and index fingers on the back of the head and gently stretch it
further. If there is still no pain, give a very slight jerk, using only two fingers to ensure that you
do it gently. In most individuals under 40, the chin should reach the chest.
12. Passive Extension
Ask the client to look up at the ceiling, extending the neck as far as possible by him- or herself. If
there is no pain, place one or two fingers on the forehead and the other hand on the upper back
for support. Gently press the head into further extension, and if there is still no pain, give an
added gentle jerk. Take note of any pain or limitation.

17
Copyright 2012 Ben E. Benjamin PhD and the Benjamin Institute. No portion of these materials may be reproduced without written permission.
13–14. Resisted Rotations (C1 and C2)
Stand behind the client and place one hand on each side of the head, just above the ears at the
temples. Hold your hands firmly in place and ask the client to try to turn the head forcefully to
the right, while you prevent it from moving. If the person is quite strong, you may have to slide
your right hand slightly forward for better leverage. Repeat the test with the client turning to the
left.
15-16. Resisted Side Flexion
Place your right hand on the client’s right shoulder to stabilize the upper body, and place your
left hand on the left side of the head, just above the ear. Then ask the client to bring the head
toward the left shoulder as you resist the movement isometrically. Repeat on the other side.

18
Copyright 2012 Ben E. Benjamin PhD and the Benjamin Institute. No portion of these materials may be reproduced without written permission.
17. Resisted Flexion
Place one hand on the client’s upper back for stabilization, and place your other hand on the
forehead. Now ask the client to forcefully try to lower the head toward the chest. As the client
presses the head down, offer resistance with your hand to make sure it doesn’t move.
18. Resisted Extension
Standing at the client’s side, place one hand on the upper chest and the other hand on the back of
the head. Now ask the client to push the head backward into your hand as you offer resistance,
preventing any movement.

19
Copyright 2012 Ben E. Benjamin PhD and the Benjamin Institute. No portion of these materials may be reproduced without written permission.
19. Resisted Shoulder Raise (C2, C3, C4)
Stand behind the client. Ask her to raise the shoulders and hold them steady. Place one hand on
top of each shoulder and try to force the shoulders down as the client tries to keep her shoulders
up.
20. Resisted Abduction (C5)
Place one hand on the outside of the client’s elbow and the other hand around the waist on the
opposite side of the body to stabilize the trunk. Now, ask the client to press out forcefully as you
hold the arm near her side.

20
Copyright 2012 Ben E. Benjamin PhD and the Benjamin Institute. No portion of these materials may be reproduced without written permission.
21. Resisted adduction (C7)
Hold one of the client’s arms by the wrist about one foot away from the side of her torso, with
the elbow straight. Place your other hand or fist on the client’s nearest hip bone to stabilize her.
Now, ask her to pull the arm in toward the body.
22. Resisted lateral rotation (C5)
Place one hand on the client’s upper arm just above the elbow and press the upper arm into the
body to stabilize it. With the client’s forearm bent at a right angle and extending forward from
the trunk, place your other hand on the outside of her wrist. Now, ask her to push outward
toward you while you resist the push. This test is done at 90º (the angle of the arm and the trunk,
not the angle of the elbow) first, but may also be done at 30º and 135º for more precise testing.

21
Copyright 2012 Ben E. Benjamin PhD and the Benjamin Institute. No portion of these materials may be reproduced without written permission.
23. Resisted Medial Rotation (C5)
Starting from the same position as in the previous test, place your fingers on the inner portion of
the wrist with the client’s arm bent at a 90º angle and in front of her. Now, ask the client to pull
the wrist toward the stomach while you pull outward. Be sure to keep her upper arm against her
body to stabilize the shoulder.
24. Resisted Flexion (C5 and C6)
There is less need to stabilize in this test and the following test. Starting from the same position
as in the last two tests, place one or both hands above the wrist and ask the subject to push up
while you push down.

22
Copyright 2012 Ben E. Benjamin PhD and the Benjamin Institute. No portion of these materials may be reproduced without written permission.
25. Resisted Extension (C7)
Place one or both of your hands under the client’s wrist as she holds the arm in the same position
as in the last three tests. Now, ask her to push down forcefully as you resist.
26. Resisted Wrist Extension (C6)
Ask the client to hold her arm out in front of her, extending the hand as if she were a traffic cop
saying “Stop.” Place one of your hands under the client’s wrist to support it and wrap the fingers
of your other hand around the back of her hand just below the fingers. Now, ask the client to
hold the hand position while you try to pull the hand forward.

23
Copyright 2012 Ben E. Benjamin PhD and the Benjamin Institute. No portion of these materials may be reproduced without written permission.
27. Resisted Wrist Flexion (C7)
Ask the client to hold the arm out in front of her, flexing the hand (or fist) downward. Place one
of your hands over her wrist to support it and wrap the fingers of your other hand under her fist.
Now, ask the client to hold the hand position while you try to pull the hand forward.
28. Resisted Radial Deviation (C7)
Ask the client to hold the arm out in front of her, radially deviate the wrist with the palm down,
and hold it there. Now, grasp the lateral part of her forearm with your lateral hand and grasp the
thumb side of her hand with your other hand. Try to forcefully move her hand laterally as she
resists you.

24
Copyright 2012 Ben E. Benjamin PhD and the Benjamin Institute. No portion of these materials may be reproduced without written permission.
29. Resisted Ulnar Deviation of the Wrist (C8)
Stand in front of the client and ask her to hold her hand in front of her, palm down. Now, grasp
the medial part of her forearm with one hand to stabilize the arm and grasp the lateral portion of
her hand with your other hand. Ask her to side flex her wrist (ulnar deviation) and hold it there.
Now, forcefully try to bring her wrist medially as she resists you.
30. Resisted Extension of the Thumb (C8)
Ask the client to extend her hand as if she were going to shake your hand. Now, ask her to her
thumb up as you grasp it with your thumb and try to press it down. Wrap your thumb around the
most distal joint; don’t press down at the tip of the thumb.

25
Copyright 2012 Ben E. Benjamin PhD and the Benjamin Institute. No portion of these materials may be reproduced without written permission.
31. Resisted Adduction of the Thumb (C8)
Ask the client to hold her hand in front of her, palm down, with the fingers and thumb together.
Now, grasp her thumb between your thumb and index fingers and hold the lateral part of her
hand with your other hand to stabilize it as you try to pull her thumb away from her index finger.
32. Resisted Adduction of the 4th and 5
th Digits (T1)
Ask the client to hold her hand in front of her, and place one of your fingers between her 4th and
5th digits. Now ask her to squeeze your finger by drawing her fingers together, with the palm still
facing the floor.

26
Copyright 2012 Ben E. Benjamin PhD and the Benjamin Institute. No portion of these materials may be reproduced without written permission.
33. Brachioradialis Jerk (C6)
Stand facing the client and cradle her left forearm with your left hand, supporting the client’s
elbow with your left hand, supporting the client’s elbow with the palm of your left hand. Now,
holding a reflex hammer in your right hand, hit the brachioradialis muscle to test the reflex.
34. Biceps Jerk (C5 and C6)
Stand facing the client and cradle her left forearm with your left hand, supporting the client’s
elbow with the palm of your left hand. Now, place your left thumb on the client’s biceps tendon
as it crosses the elbow joint. Holding the reflex hammer in your right hand, hit your own thumb
between your 1st and 2
nd thumb joints and look for the reflex.

27
Copyright 2012 Ben E. Benjamin PhD and the Benjamin Institute. No portion of these materials may be reproduced without written permission.
35. Triceps Jerk (C7)
Stand facing the client and cradle her left forearm with your left hand, supporting the client’s
elbow with the palm of your left hand. Now, place your left thumb on the client’s biceps tendon
as it crosses the elbow joint. Holding the reflex hammer in your right hand, hit the triceps muscle
a few inches above the elbow and look for the reflex.
36. Knee Jerk
With the client lying on the table and you standing at his right side, place your left hand under
the left knee and bend the leg about 30 degrees. Make sure he’s relaxed. Holding the reflex
hammer in your right hand, strike the patella tendon below the kneecap and watch for the reflex.
Now, reach across to the other knee and repeat, remaining on the same side of the table. If you’re
left-handed, do the entire test from the other side of the table.

28
Copyright 2012 Ben E. Benjamin PhD and the Benjamin Institute. No portion of these materials may be reproduced without written permission.
37. Ankle Jerk
With the client lying supine on the table, stand at the foot of the table and gently place her foot in
passive dorsiflexion (be sure she’s not holding her foot in that position). With the reflex hammer
in your free hand, strike the Achilles tendon forcefully and watch for the reflex. Repeat on the
other side; you can use the same hand position if you position yourself slightly differently.
38. Babinski
With the client lying on his back, place one hand over the ankle to hold it in place. Place the
handle end of your reflex hammer or a fingernail on the bottom of the foot, just in front of the
heel. Now, with moderate force, scrape the sole of the foot and watch for the big toe to turn
down. A positive test will show the big toe curl into dorsiflexion; this indicates cord pressure.

29
Copyright 2012 Ben E. Benjamin PhD and the Benjamin Institute. No portion of these materials may be reproduced without written permission.
39. Ankle Clonus
Stand at the side of the client’s feet. Place one hand above the ankle and press it gently into the
table. Now, place your other hand on the ball of her foot and forcefully push it into dorsiflexion.
Count the number of involuntary beats. One or two are fine; three means spinal cord pressure.
Repeat on the other ankle.
40. Knee Clonus
The client lies supine. Place your hand above the knee, grasping the lowest portion of the thigh
with your thumb and forefingers. Your hand should be facing her foot. Keeping your hand
relaxed, suddenly grip and press simultaneously downwards and footward, and watch for the
involuntary beats of the kneecap.

30
Copyright 2012 Ben E. Benjamin PhD and the Benjamin Institute. No portion of these materials may be reproduced without written permission.
41. Ligament Palpation
With the client lying on her back and you sitting at the head of the table, run the tip of your
finger across each ligament in succession (nuchal, then intertransverse) to check for tenderness.
Palpation of the Supraspinous Ligament:
For the ligament palpation, just do one or two friction strokes through the supraspinous
ligaments at each level starting at C7 and going up to the occipital protuberance.
Palpation of the Intertransverse Ligament:
Then, perform one or two friction strokes on each of the intertransverse ligaments beginning at
TP7 and going up to TP1, just inferior to the mastoid process.
Palpation of the Sub-occipital Muscles:
Perform a brief friction stroke at the base of the occiput, beginning about an inch lateral to the
edge of the occipital protuberance and work your way laterally across the base of the occiput on
both the right and left sides.

31
Copyright 2012 Ben E. Benjamin PhD and the Benjamin Institute. No portion of these materials may be reproduced without written permission.
Taking a Cervical History
The history not only gives you an indication of what may be injured, what caused the injury, and
how severe it is, but also provides some insight into who this person is and how they must be
treated for the therapy to be as effective as possible.
Why are you here?
There may be one reason the person has come to see you or there may be several. People will
often tell you only their most pressing concern and leave out the others.
Are there any other areas of pain in your body?
This gives the client an opening to tell you about any other secondary issues of concern. These
may or may not be related to the neck pain. Frequently the person does not give you all of the
relevant information at this point.
Have you seen a physician about this problem?
This is a very important question. When clients have not already seen a doctor for their pain
problem, I always send them to one. Particularly for a client with cervical pain, there are a
number of serious medical issues to be considered that are beyond the knowledge base and scope
of practice of a massage therapist or body worker. Cervical pain is also often associated with
headache pain, which is a symptom of several different diseases. To practice safely and
responsibly, have every client see a doctor. If you have a professional relationship with a
particular physician that you can talk with, that’s even better.
If yes, what was the diagnosis?
Getting a working diagnosis from a physician protects both you and the client. You can assess
what you think is happening in order to guide what you do in your treatment sessions, but you
cannot offer a diagnosis. Only a doctor can legally do that.
In many cases, the client will have had a radiological test such as an X-ray or an MRI. In reality,
most common injuries will NOT be detected by these tests. However, there are several
conditions in the cervical region that can be observed on a radiological test. These include:
� Disc erosion
� Fractures of the lumbar vertebrae
� The formation of an osteophyte, or bone spur
� An abnormal curve of the cervical spine
� A misalignment of the vertebral joints

32
Copyright 2012 Ben E. Benjamin PhD and the Benjamin Institute. No portion of these materials may be reproduced without written permission.
How old are you?
Different cervical conditions are associated with different age groups.
What do you do for a living?
Here you are looking for clues as to possible causes of pain or reasons why the pain has not
abated. For example, a computer programmer, typist, dentist, or house painter may perform
repetitive actions that help explain why the injury occurred or why it has not gotten better.
What do you eat for breakfast, lunch, and dinner?
What do you snack on?
Do you drink coffee or eat sweets on a daily basis?
A person’s diet has a strong impact on their overall health and their ability to heal efficiently.
Clients with poor dietary habits may benefit greatly from seeing a health professional who
specializes in nutrition.
How much water do you drink each day?
A person who does not drink an adequate amount of water may be dehydrated without even
knowing it. Often, people who are dehydrated have lost a sense of thirst and don’t feel thirsty.
Each person’s need for water is different, but the average is 6-8 glasses of water per day. Soup,
juice, lemonade, soda, tea, and coffee don’t count as water.
Do you exercise regularly? If yes, how frequently?
What types of exercise do you do?
If a person does not exercise, find out why. Is it because of the pain they’re in? If the client
never exercised regularly, this person needs some education about how to stay healthy. If the
client over-exercises and continually gets hurt, the person needs to learn how to exercise within
the body’s limits.
When did your pain first occur?
Did the pain come and then go away and return at a later date? Or the frequency of painful
episodes might have increased over time. Different injuries are associated with different time
lines.

33
Copyright 2012 Ben E. Benjamin PhD and the Benjamin Institute. No portion of these materials may be reproduced without written permission.
Was your pain precipitated by an accident?
If so, describe the accident.
The type of accident gives you another piece of important information. If it was a motor vehicle
accident, the type of impact will often explain the type of injury the client has. Pain can also be
precipitated by sleeping in an awkward position.
Did the pain come on slowly or suddenly?
The onset of pain gives you information about causation. When a pain comes on suddenly, it is
usually associated with a specific incident. When it comes on slowly, it may have more to do
with wear and tear, poor alignment, faulty movement habits, or misuse of the body during sports
or a work activity. In some cases, a series of mini-traumas gradually increase the person’s
vulnerability over time, and then one specific incident acts as the final straw that brings on the
pain.
Where is your pain exactly?
Have the person point to the precise area or areas of pain, using just one finger if possible.
Notice which part of the neck the person points to, and notice the pattern of any referred pain.
This may help you to understand which structures are injured. Sometimes clients come in
thinking that they have an upper back, shoulder, or arm injury when in reality they have a neck
injury referring pain to those areas. The more trouble the person has in pointing to the location
of the pain, the more likely it is that the pain is being referred.
Is the pain there all the time?
“All the time” means all day and night and in all positions. If the pain is there all the time, the
injury is quite severe and it’s possible that a disc is impinging on a nerve or that a joint is
inflamed. Pain that comes and goes is generally less serious and less depleting.
Are the pains sharp and intense or dull and achy?
If the pain is sharp, the injured tissue is severely inflamed, and therefore you must go very
slowly and gently when performing the testing procedures, the palpation, and the hands-on
treatment. Sharp pain in the neck generally indicates either a disc injury or a severe ligament
injury.
If the pain in the neck is nagging, dull, or achy, this is usually a sign of a less severe ligament
injury or adhesive scar tissue in the occipital muscles at the base of the skull. Multiple mild
injuries to the ligaments of the neck will cause dull and achy pain that comes and goes.

34
Copyright 2012 Ben E. Benjamin PhD and the Benjamin Institute. No portion of these materials may be reproduced without written permission.
What brings your pain on?
This question lets you know what positions or activities exacerbate the injury, and in some cases,
what the cause may have been. If the pain increases during sleep or just lying down, check to
see what position the person sleeps in. A person may also experience pain while sitting in a
chair or in the car. In some cases of neck pain, a client will report that a particular treatment
modality actually makes the pain worse. During the treatment process, you always want the
client to be as comfortable as possible.
What makes your pain better?
Common answers include rest, lying down, standing, exercise, medication, massage therapy, and
other treatment modalities. If the answer is rest or lying down, this tells you that whatever is
inflamed can be temporarily relieved in a fairly short period of time. If the answer is standing,
that means it feels better to have the neck in natural slight extension or what could be called the
neutral position. This indicates that the person would do better sitting at the edge of a firm chair
with good posture than sitting on a couch or in an easy chair, where the neck is slightly flexed
forwards. If the person can exercise without pain, this is good sign that you can build on - in
your treatment plan.
It’s also important to know whether the client is taking anti-inflammatory or pain-killing
medication on a regular basis. During the assessment tests, the client’s symptoms may be quite
muted by the medication. Take this into account as you assess the severity of the injury.
Is your pain getting better, getting worse, or staying the same?
The answer to this question will help you determine the severity of the injury and the pattern of
healing. If the pain is getting better, you want to be sure that the person continues to do
whatever it is that has been facilitating the healing process. In such cases, your treatment should
accelerate what is occurring already. If the pain is increasing, it is important to discover what is
making it worse and change that if possible. If the pain has remained the same for a period of
time, this indicates that further intervention is needed to jumpstart the healing process.
Does a cough make it worse?
If a cough makes the pain worse, this indicates a fairly severe problem in either a ligament or a
disc. Coughing or sneezing creates a lot of pressure and stress throughout the neck. Look
carefully at the disc indicators and check for a very sensitive, inflamed ligament. It is also
possible that the client has both of these simultaneously.
Does a deep breath make it worse?
If breathing deeply creates pressure and therefore pain in the neck, this indicates that the injury is
extremely severe. You need to tread carefully and gently as you proceed.

35
Copyright 2012 Ben E. Benjamin PhD and the Benjamin Institute. No portion of these materials may be reproduced without written permission.
Does it spread up to your head or down your arm or upper back?
This question gives you information in three areas: the severity of the injury, the referred pain
pattern, and the possibility of multiple injuries. The more severe the injury is, the farther the
referred pain will extend. If the injury is mild, the pain might be limited to the neck or referred
just to the top of the shoulder. If it is more severe, the pain may extend down to the base of the
medial scapula or down the arm below the elbow, and possibly into the hand. The pattern of the
referred pain gives you an indication as to which structure is injured.
Have you had any treatment for your pain?
If so, what?
Did it help you?
You want to know about any treatments that have failed and any that have worked. Ask if it was
a positive or negative experience. If it was a negative experience, ask about what the experience
was like. This will help you to avoid repeating an error that was made previously.
Have you ever had a massage or bodywork session?
Did they seek that treatment for their present problem? If mistakes that were made previously
you want to avoid them. Inquire as to whether that treatment was helpful or made things worse.
Find out what will assure the clients comfort during your treatment.
Do you have any numbness or numb-like sensations?
If so, where?
The answers to these questions will indicate the seriousness of the injury and the type of
structures that may be involved. Actual numbness is generally caused by disc compression,
while numb-like sensations are generally caused by injuries to ligaments and other soft tissue.
Do you experience any pins and needles, tingling, or other unusual sensations?
If so, where?
These sensations can give you information about the structures that may be injured or other
complicating conditions. It’s also helpful to get an understanding of how this client experiences
pain or discomfort. Understanding the descriptive language of your clients helps you to
communicate more effectively with each person.
Do you have any aches and pains anywhere else in your body?
This is an important question to ask to get the overall picture of the person’s musculo-skeletal
health. Remember that you asked this question in another form at the beginning of the history.
The person is likely to give you more information now, after having some time to become

36
Copyright 2012 Ben E. Benjamin PhD and the Benjamin Institute. No portion of these materials may be reproduced without written permission.
comfortable with you and to focus on the details of their pain. Many people have more than one
injury in their body. They may have already explored several different modalities and given up
trying, or they may think there’s nothing anyone can do to get rid of their pain. The person may
also tell you that they have pain in many parts of their body, but didn’t think it was relevant.

37
Copyright 2012 Ben E. Benjamin PhD and the Benjamin Institute. No portion of these materials may be reproduced without written permission.
Do you smoke?
Regular smoking significantly diminishes a person’s healing capacity.
Are you allergic to anything?
Allergies are sometimes an indication of a nutritional deficit. If the client is allergic to many
things, it may be wise to use a non-allergenic oil during the treatment.
Are there any other medical conditions I should be aware of?
This is a broad question that does not pry but gives the person an opening to provide you with
additional information that could prove relevant.
Are you taking any medications?
If the client is taking medications that diminish pain sensations, you will have to take that into
account during both the assessment and the treatment. This question may also give you
information about other physical or emotional conditions that the client neglected to tell you
about.
Is there anything else that might be important for me to know that I didn’t ask you about?
At times there is useful information that isn’t covered by the preceding list of questions.

38
Copyright 2012 Ben E. Benjamin PhD and the Benjamin Institute. No portion of these materials may be reproduced without written permission.
Subtleties in Testing
Neck or Scapula Pain on Resisted Abduction or Other Resisted Tests
When we do resisted abduction, we’re testing for weakness caused by a C5 nerve root
compression. This test should not produce pain in the neck or shoulder area, but occasionally it
does. This can cause confusion for practitioners. Keep in mind that whenever we test any
muscle, as many as 20 or 30 other muscles may come into play to stabilize the body. When
clients perform resisted abduction, they’ll be using the muscles of the head, neck, trunk, and legs
to stabilize themselves. Sometimes in the act of stabilizing they put undue pressure on another
structure, which causes pain.
Side-Flexion Tests
When side-flexion is performed on a normal neck, there is often a pleasant feeling of stretch.
This is quite different from an uncomfortable or painful stretching sensation. Sometimes clients
are not sure which type of stretch they’re feeling — especially when they have been in pain for
some time. It is often useful to compare side-flexion to the right and left to see if one is pleasant
and one is uncomfortable. This will help you determine whether the test result is positive or
negative.
Pain on Rotation - Level by Level
If you perform the rotation tests with the head in slight flexion, you are putting more stress on
the ligaments of C1 through C3. If you perform the rotation tests with the head in the normal
anatomical position, the greatest stress is placed on C4 and C5. If you perform the rotation tests
with the head in slight extension, you are putting more stress on the ligaments of C5 through C7.
Weakness at Most or All Levels is Just Disuse/General Dysfunction
Remember the distinction between specific weakness, which is caused by a disc lesion, and
generalized weakness, which is caused by disuse. Most people who are in a great deal of neck
pain restrict their movement and stop exercising because it exacerbates their pain. If you don't
use a muscle for two weeks, you lose 25% of its strength. If you don't use a muscle for three
months, you may lose 50% of its strength. So if weakness is just in one segment (indicating a
disc lesion), tests associated with one specific nerve will show weakness, and the other test
results will be normal. If all the tests indicate weakness, this may be because the person has not
exercised or used his or her body normally for quite some time.

39
Copyright 2012 Ben E. Benjamin PhD and the Benjamin Institute. No portion of these materials may be reproduced without written permission.
If You See Fear During the Assessment Exam, Be Very Careful
Many clients have had the experience of being tested by a health care practitioner only to go
home with increased pain for several days. In addition, individuals with severe neck injuries will
avoid certain movements because somewhere inside they know that movement would be very,
very painful. This fear comes up frequently in neck testing when you ask clients to look at the
ceiling or rotate the head to one side. I always tell clients to let me know immediately if they
become afraid when I ask them to do something during the assessment process. If I see that kind
of fear when I ask a person to look up at the ceiling, I often skip that test and go on to the next
one, marking it in my mind as a positive test finding. If I feel it's really important to do the test, I
might do it with the person lying down and only moving a quarter of an inch at a time.
Whenever you see fear during your assessment testing, go slowly, be very careful, and ask your
client about any apprehension they might be feeling.
Mid-Back Pain on Flexion
If neck flexion causes pain in the mid-back, it could be for at least two reasons. It could be a
referred pain from the neck to the mid-back, which is quite common. However, it could also
indicate an injury to the ligaments in the thoracic spine. Here is a quick test for injury to the
thoracic ligaments. Have the client sit on the edge of a stool or chair with their legs together and
their arms folded over their chest. Tell the person that you are going to lock their knees with
your knees to stabilize them during the test. Now gently grasp both shoulders and rotate the
thoracic spine in both directions. When there is a thoracic ligament injury, this test causes pain
in the thoracic region. There’s also an alternative way to do this test, which is especially good
for people who are shorter than their clients. Have the client sit on the table. Stand to the
client’s side, pressing your lateral thigh against the side of their lateral knee, and rotate the
thoracic spine to that side. Then walk around and repeat this on the other side.
Shooting Pain at the Back of the Eye or Pain in the Teeth
Whenever anyone has pain — especially shooting pain — in the eye region, send that person to
an eye doctor immediately. Likewise, when there is pain in the teeth or gums, be sure the client
has checked with a dentist to make certain there is not a dental problem. Pain in both of these
locations can also be caused by strains of cervical supraspinous or intertransverse ligaments. A
ligament lesion at C2 can cause shooting pain at the back of the eye, and a lesion at C5 can cause
pain in the teeth. This can often be verified with your hands. If a C2 ligament is to blame for a
client’s eye pain, performing cross-fiber friction on that structure will re-create the pain.
Similarly, performing cross-fiber friction on a C5 ligament may re-create a client’s tooth pain.

40
Copyright 2012 Ben E. Benjamin PhD and the Benjamin Institute. No portion of these materials may be reproduced without written permission.
Dizziness and Altered Vision
Some clients with neck pain will exhibit dizziness, or altered vision especially when looking up.
Any client with such a symptom should see a physician soon. It may indicate compression of
one of the vertebral arteries as it moves toward the basilar artery and the brain. Distortions in
neck alignment can be a major contributor to diminished circulation in the vertebral arteries.
Extreme Pain And/Or Limitation of Movement in Neck Flexion or Extension
If a client has extreme pain and/or limitation of movement in neck flexion or extension, be sure
to have the person see a physician before you attempt to treat them. These symptoms can
indicate a very serious condition, such as pressure on the spinal cord. Slight cord pressure can
develop over time even without an accident, and any amount of cord pressure can cause
movement to be severely limited. Ligaments of the neck may loosen and stretch over time,
allowing the disc matter to protrude posteriorly — which affects the function of the spinal cord.
If the spinal cord is being compressed, there will be more than three beats of clonus in the foot
and possibly the knee, and the Babinski test will be positive, the great toe will curl up into
extension. Extreme pain on neck flexion or extension may also be caused by a very superficial
but severe ligament injury. This may occur in a supraspinatus ligament anywhere from C4 to
C7, but is more likely to be a strain of the intertransverse ligament at C7.

41
Copyright 2012 Ben E. Benjamin PhD and the Benjamin Institute. No portion of these materials may be reproduced without written permission.
Integration: Cervical Concepts and Theory
Referred Pain in the Neck
Neck injuries frequently cause what we call “referred pain” — pain that is felt at some distance
from the site of the injury. As you do the neck tests, the client feels pain in the arm, hand, upper
back, or shoulder, as well as in the neck.
The principles of orthopedic medicine teach us that referred pain generally follows four laws:
1. Pain Refers Distally
Referred pain from soft tissue injuries is usually felt distally (i.e., out toward the periphery of the
body). In the case of cervical injuries, pain can be referred to the face, head, shoulders, chest,
upper back, and scapula region, as well as into the arm and hand.
2. Referred Pain Does Not Cross the Midline
An injury on the right side of the neck will refer pain into the right arm and hand, but not into the
left arm or hand. If the injury is precisely in the midline of the supraspinous ligament, pain can
be referred to both sides because fibers on both sides of the spine are injured.
3. Pain is Referred Within a Dermatome
During embryonic development, the human body is made up of 32 segments, or dermatomes.
The brain remembers these segments and refers pain within their boundaries. The fifth, sixth,
and seventh cervical dermatome segments all extend into the arm. Therefore, many neck injuries
refer pain into the arm.
4. The Severity of an Injury in the Low Back is Directly Proportional to the Distance the
Pain Refers
Therefore, a severe cervical injury might refer pain to the hand, while a less severe injury might
refer pain only to the upper arm.

42
Copyright 2012 Ben E. Benjamin PhD and the Benjamin Institute. No portion of these materials may be reproduced without written permission.
Areas of referred pain in the cervical area.

43
Copyright 2012 Ben E. Benjamin PhD and the Benjamin Institute. No portion of these materials may be reproduced without written permission.
Cervical Referred Pain Sites
Injuries to the neck can refer pain to the:
• Head
(including teeth, jaw, gums)
• Throat
• Shoulders
• Arms
• Hands
• Scapular area
• Upper back
• Upper chest
The X-Ray Mystique
• Age (If you are older you are more vulnerable)
• Fracture
• Neoplastic erosion (cancer)
• Natural curve or reverse curve
• Quality of movement at the vertebral joint (smooth? uneven?)
• Osteophytic formation
• Disc erosion — MRI or Myelogram with dye shows disc
Scar Tissue
• Adhesive car tissue in the ligaments and fascia of the neck cause the most chronic neck pain
• It’s very common to have post-traumatic adhesions at the occipital and suboccipital
attachments as well as in the ligaments and fascia in the neck

44
Copyright 2012 Ben E. Benjamin PhD and the Benjamin Institute. No portion of these materials may be reproduced without written permission.
The Pathophysiology of Scar Tissue
(The following is for reference)
Whenever we sustain an injury, our body must compensate for the damage. The ideal would be
regeneration: the creation of new tissues that are identical to the old ones. However, in the
human body, only a few types of tissue can truly replace themselves after an injury, and this only
if the damage is not too severe.
For most cervical injuries, instead of regenerating, the body undertakes a complex healing
process that results in scar tissue. Scar tissue is a necessary and useful end product of the healing
process. Without it, even minor damage to any body part would permanently debilitate our
body. Scar tissue makes it possible for injured structures to maintain their integrity and continue
to perform their functions.
Nevertheless, scar tissue is never an exact replica of the damaged tissue it is trying to replace.
Even when it develops normally, it is generally denser and weaker than the tissue it replaces.
Problems during the healing process can lead to the growth of abnormal adhesive scar tissue.
Internal adhesions occur when scar tissue fibers develop inside an injured structure and link too
densely with one another in random, unaligned patterns. This occurs frequently in the cervical
region and is the cause of the chronic nature of neck pain. External adhesions may form as layers
of scar tissue grow outward from the injured area and attach themselves to nearby, healthy
structures.
The three phases of the body’s response to an injury clarify how scar tissue forms, what role it
plays in the healing process, and why that process sometimes goes awry.
The Acute Phase
Beginning at the moment of injury and lasting for approximately four days, the body undertakes
a phenomenal number of activities geared toward restoring the integrity of its tissues. In this
acute phase, blood and lymph from torn vessels coagulate to seal off the injured area and help
prevent the spread of infection. Intact vessels at and near the site of the injury dilate so that the
body can deliver extra fluids and chemicals. This influx results in a gel-like substance collecting
within and around the injured tissues. The gel contains binding factors that help to hold the
injured tissues together.
In most cases, we experience inflammation — redness, heat, and swelling — as a result of these
processes. Although inflammation is a normal part of healing, problems can arise if the internal
swelling is excessive or lasts longer than necessary. In such cases, the gel becomes clogged with
its binding factors, leading to the formation of abnormally dense scar tissue and/or adhesions
between structures in the next healing phase, the rebuilding phase.

45
Copyright 2012 Ben E. Benjamin PhD and the Benjamin Institute. No portion of these materials may be reproduced without written permission.
Another critical process that occurs in the acute phase is infection control. First, a specialized
type of white blood cells attacks and digests the bacteria, reducing the chance of infection. Soon
this job is taken over by other white blood cells, called macrophages, which digest not only
bacteria, but also any dead tissue left behind from the injury. Macrophaages are also responsible
for letting the body know how many repair cells, known as fibroblasts, will be needed during the
next phases of healing. If infection and prolonged inflammation cause the macrophages to be
overly active, an excessive number of fibroblasts will be called to the injury site. This, again,
will lead to the formation of abnormal adhesive scar tissue.
The last major component of the acute phase is the laying down of new, fragile capillaries to
replace the injured blood vessels. These begin to restore blood flow to the injured tissues in the
affected area.
To support the healing process in the acute phase, it’s important to monitor three vital processes
that occur during this time: inflammation, infection control, and blood vessel re-growth. Apply
ice, compression, elevate and rest, or the RICE protocol, to prevent inflammation and swelling
from becoming excessive or lasting too long. Therapeutic massage may assist the movement of
fluid surrounding the injured tissues so that swelling is kept to a minimum. The person should
see a physician if there are any signs of infection — such as fever, increased inflammation, or
pus. Gentle movement is important but excessive movement of the injured area should be
avoided during the acute phase to help keep the new capillaries intact.
The Rebuilding Phase
The period from about four days to three or four weeks after an injury is known as the rebuilding
phase. During this phase, the most important process is the production of collagen by the
fibroblasts. In general, the collagen protein forms fibrils that connect with one another into
fibers of various patterns, creating connective tissues throughout the body.
During the rebuilding phase, fibroblasts produce Type III collagen; Type I collagen, the primary
component of scar tissue, forms later. Type I collagen is stronger than Type III, but neither of
these collagens has the full strength of the tissues they replace.
The fibroblasts also pour lubricating substances into the fluid around the injured tissues. This
lubricant helps the collagen fibers travel throughout the area to reach and rebuild the tissues.
Within this fluid, the collagen fibers meet, line up, and form bonds with one another. For scar
tissue to form normally, the proportions of collagen fibers and lubricating fluid must be just
right. In a perfect scenario, this results in good, strong scar tissue without adhesions.
However, if extreme inflammation and swelling summoned too many fibroblasts and caused
excessive binding factors in the injured tissues during the acute phase, these precursors will lead
to the formation of internally adhesive scar tissue, and sometimes to external adhesions as well,
in the rebuilding phase.

46
Copyright 2012 Ben E. Benjamin PhD and the Benjamin Institute. No portion of these materials may be reproduced without written permission.
Having too little lubricating fluid is also a problem. Without enough fluid around them, the
collagen fibers are unable to move easily through the injured area. Instead of lining up in
parallel and binding normally, the fibers pile up haphazardly and form excessively dense
connections with one another. The result is thickened scar tissue with internal adhesions.
During the rebuilding phase, it is vitally important to allow gentle movement of the injured
region. Immobilizing the area at this time causes the lubricating fluid to be lost which prevents
the collagen fibers from being able to disperse. This significantly contributes to the growth of
abnormal scar tissue. Regularly performed mobilization of the area through a full and gentle
range of motion — whether actively through exercise or passively with the help of a trained
therapist — helps to maintain the fluid level. Additionally, the application of massage and
friction therapy helps the collagen fibers to move, align, and join in a normal fashion.
The Remodeling Phase
Starting in the late rebuilding phase and continuing for six months or even a year after the injury,
the body works to remodel the rebuilt tissues into as close an approximation of the original
tissues as possible. Under normal conditions during this phase, the rate at which new collagen
fibers are formed at the injury site slows down and becomes equal to the rate at which old
collagen fibers are broken up and removed. The amount of scar tissue achieves a steady state
and the scarring process stops. However, since new collagen is constantly replacing old, there
are continuing opportunities for the scar to adapt to its surroundings.
Various factors affect how the remodeling collagen fibers line up with one another, and whether
the resulting scar tissue develops densely, loosely, outside its original boundaries, or with
adhesions. For our purposes, the most important factor is the amount of tensile-force or pulling-
tension that is applied to the tissue during scar remodeling. This force can be applied either
through mild stretching or contracting movements.
Scar tissue is less flexible than the tissue it replaces. However, properly formed scar tissue does
not interfere with normal movement. In the presence of a full range of motion, with the
application of appropriate tensile forces, the collagen fibers arrange themselves in an elongated
formation, rather than a dense conglomeration. These long fibers are not capable of movement
by themselves, but they can fold in on themselves when the surrounding healthy tissue shortens
and lengthens as it extends. In this way, the elongated scar tissue mimics the movement of
normal tissue. Evidence suggests that movement and tensile forces also result in a stronger scar.
To achieve optimal results, movement and tensile forces must be applied in the correct
alignment. When movement and exercise are not done in proper alignment, haphazardly
growing scar tissue adheres to adjoining tissues. Later, when normal movement is attempted, the
adhesions repeatedly tear, re-form, and then tear again, causing chronic, recurring pain.
There are also other interventions that can facilitate the formation of healthy scar tissue. Some
medical procedures are available from skilled physicians to help proliferate—that is, regenerate

47
Copyright 2012 Ben E. Benjamin PhD and the Benjamin Institute. No portion of these materials may be reproduced without written permission.
and replicate—tissues that suffer from laxity and chronic re-injury. A common and usually
effective technique is cross-fiber friction. When applied by a skilled orthopedic massage
therapist, friction therapy helps break apart old adhesive scar tissue and helps the new tissue
develop in the correct alignment.

48
Copyright 2012 Ben E. Benjamin PhD and the Benjamin Institute. No portion of these materials may be reproduced without written permission.
Testing:
• Major indicators (MI)—the primary assessment findings:
o Movements that create pain
o Locations of referred pain
o Weakness
o Pins and needles
o Cutaneous analgesia (“numblike”)
o Cutaneous anesthesia (numb; rare in cervical lesions)
o Reflexes
• Resisted tests, in this part of the body, test mainly for weakness and rarely for
muscular/tendinous pain
• Passive tests test for pain and limitation in ligaments, joints, disc injuries

49
Copyright 2012 Ben E. Benjamin PhD and the Benjamin Institute. No portion of these materials may be reproduced without written permission.
Myofascial Therapy
The ligaments of the neck are encased in a fascial covering. Sometimes this fascia is injured
along with the ligaments and must be addressed in treatment. Begin with the myofascial work,
then do friction therapy, and then end with massage therapy. To assess whether scar tissue
adhesions in the fascia are contributing to a person’s pain, try performing just a few strokes of
the fascial separations.
Supraspinous Fascial Separation
First you’ll be working on the superficial fascial covering of the nuchal and supraspinous
ligaments. It is easiest and best to perform this technique with the person lying supine. Place
both of your middle or index fingers at the base of the neck on the supraspinous ligament, just
below the C7 spinous process. If you are more comfortable using one finger, place your other
hand at the side of the head to stabilize it. Use the pads of your fingers to apply a medium
pressure directly to the ligament, pressing on the central portion of the spinous process. Let your
fingers sink into the tissue, exerting an anterior and superior pressure. Remain there for 30 to 60
seconds or so, without moving, and then slowly move your hand toward the top of the neck.
Move slowly and deliberately, working in the direction of the fibers. It may take you a minute to
several minutes to travel the few inches from the base of the neck to the base of the skull
depending on the resistance you meet. If there is discomfort in any segment of the ligament
there will be some resistance. Also, have the client tell you if there is any discomfort. If there is
resistance or pain of any kind, move even more slowly. Repeat this technique a few times. If the
fascia in this area is restricted or injured, your stroke may feel a little painful. If there is
extensive injury to the fascia, the movement can be very painful. In such cases, go ahead to the
next movement in this protocol, where you’ll be working transversely, and use a tiny bit of
lubricant if needed to minimize the drag along the skin and fascia.
Working transversely is generally less uncomfortable than working longitudinally. Here you’re
stroking across the fascia horizontally, both to the right and to the left. Start by reaching under
the person’s neck with your right hand so you can access the left side of the spinous process.
Begin at the base of the neck. Place your middle or index finger firmly on the ligament, between
the outer edges of the C6 and C7 vertebrae. Now use the fingers of your left hand to stabilize the
skin. This prevents the skin from moving as you slowly pull to the right. Let your working
finger slowly sink in to the tissue and then begin the motion toward the right, moving
transversely through the fascial covering. After you reach the other side of the vertebra, switch
hands and perform a fascial stretch in the opposite direction. If this causes too much discomfort,
use a minute amount of moisturizing cream. After you’ve performed several longitudinal and
horizontal strokes on the superficial fascial layer, you can begin to work on the deeper layers of
fascia. Sink your fingers into the fascia a little deeper and remain there for 30 to 60 seconds
before you begin any actual movement over the tissue. This time, exert a little more pressure as
you move, and be aware of any resistance you encounter in the tissue. Whenever you notice
some resistance, wait in that spot while maintaining the same level of traction without force until
the barrier softens and permits easier movement.

50
Copyright 2012 Ben E. Benjamin PhD and the Benjamin Institute. No portion of these materials may be reproduced without written permission.
Intertransverse and Scalene Fascial Separation
This technique can be performed with the thumb, middle finger, or index finger. Use whichever
hand position and fingers are comfortable for you. Begin just beneath the mastoid process. Take
a few moments to let your finger or thumb sink into the tissue. Use the other hand to gently
support the head on the opposite side. Then press medially, toward the spine, as you begin your
descent toward the shoulder. Whenever you feel a restriction, wait in that area, keeping your
pressure constant, until you feel the tissue give way. Then continue your slow movement
downward along the line of the transverse processes. You are working on the fascial coverings
of both the scalenes and the intertransverse ligaments. When you reach the base of the neck,
begin again, this time starting at the base of the neck and moving upward toward the skull. After
you’ve performed several of these strokes, or after you feel the tissue resistance has sufficiently
diminished, move on to horizontal fascial separation across the intertransverse ligaments.
Place your finger or thumb anterior to the transverse process, sink in, and move posteriorly. You
may need to support the skin with the other hand in order to do this. Repeat this at every level.
Then perform the same stroke from the posterior to the anterior aspect at each level. This is
easier to do with the pads of your fingers than your thumb. Use the other hand underneath to
support the skin if necessary. Ask how the person is experiencing each movement. One
particular direction of fascial stretch may be more useful than another.
SCM Fascial Separation
Rotate the head away from the side you are working on. Support and stabilize the head with one
hand, and work with the other. You can use your thumb or the tips of your fingers, whichever
you prefer. Begin behind the mastoid process at the major attachment of the sternocleidomastoid
muscle. Sink into the fascial covering of the tendinous attachment before you begin to move.
Then move slowly along the muscle in the direction of the sternoclavicular joint. If there are
restrictions contributing to the person's neck problem, this technique will be slightly
uncomfortable at various places along way. As you encounter a restriction, the movement will
start to feel sticky, and it will be difficult to continue. Wait at that point, applying the same
amount of pressure, until the restriction gives way. Then continue your slow movement
downward. This movement can easily be performed at the posterior and middle sections of the
muscle. To reach the medial portion of the muscle without accidentally applying pressure to the
trachea, use your fingertips and apply your pressure laterally as you move down toward the
clavicular attachment.
Upper Trapezius Fascial Separation
Apply pressure with your middle three fingers at the base of the posterior neck on the trapezius
muscles. Sink into the tissue and slowly move up the neck toward the occiput, pausing wherever
you feel a restriction. This is a particularly pleasant motion for the client, unless there are
restrictions. You can do both sides simultaneously if there are minimal restrictions. Move
posterior and lateral to cover the entire area, depending on the size of the person.

51
Copyright 2012 Ben E. Benjamin PhD and the Benjamin Institute. No portion of these materials may be reproduced without written permission.

52
Copyright 2012 Ben E. Benjamin PhD and the Benjamin Institute. No portion of these materials may be reproduced without written permission.
General Concepts: Disc & Ligament Injuries
Lesion
Lesion is a general medical term for an injury or dysfunction in any tissue.
Nerve Root Lesion
A nerve root lesion, or radiculopathy, is what the general population refers to as a pinched nerve.
This condition is usually caused by compression of the root of the nerve by a damaged,
protruding disc. If so, the patterns of pain and limitation that emerge on testing are distinctly
asymmetrical, because discs can only bulge one way at a time. So, for example, if active rotation
is painful & limited on one side, it shouldn’t be on the other. One-sided pain that switches sides
over time—this week it hurts on the left, last week it hurt on the right—won’t be from a disc
lesion. The accompanying signs of paresis, etc. (see below) often won’t appear for some time
after the appearance of pain & limitation.
Neuropathy
Neuropathy means abnormal functioning or a pathology of a nerve or nerves. One type of
neuropathy is neuritis, in which a nerve becomes inflamed for no apparent reason. Neuritis
results in weakness that lasts from three weeks to six months, and then resolves by itself.
Radiculopathy—pathology of the nerve root, usually caused by compression. (Radical = root;
opathy = patholgy.)
But don’t forget—it’s quite possible that if the person you’re examining has a disc lesion, he
might have ligament lesions too...
Segmental Weakness
Segmental weakness is laxity in the ligaments that attach two of the vertebrae at a particular level
- for example at C4 to C5. This makes that particular spinal joint unstable, and makes it more
likely that a sudden movement will “yank” the ligament and cause damage.
Post-traumatic Adhesions
Post-traumatic adhesions are bands of fibrous scar tissue that develop in an injured area. They
commonly occur after a whiplash accident at the tenoperiosteal junctions of the occipital
muscles, at the base of the skull. People often experience this injury as an occipital headache.

53
Copyright 2012 Ben E. Benjamin PhD and the Benjamin Institute. No portion of these materials may be reproduced without written permission.
Paresis
Paresis is the technical term for motor weakness. There are two distinct categories of weakness:
specific and generalized.
Paresthesia
Paresthesia is the medical term for a feeling of pins and needles, or tingling. This often occurs
when there is pressure on a nerve trunk or an artery.
Cutaneous Analgesia
Cutaneous analgesia is the medical term for a “numblike” sensation. This is much more
common than complete numbness. Often clients will report that an arm is numb, when in reality
it is numb-like. When you touch the arm, they’ll be able to feel it. If the arm were actually
numb, the person would feel nothing at all.
Cutaneous Anesthesia
Cutaneous anesthesia is complete numbness, or lack of sensation. This does not usually occur in
the neck, but it does sometimes happen in the arm or hand. When a client reports numbness,
confirm it by trying to touch the area with a brush or a finger to see whether there’s really no
sensation or just diminished or altered sensation.
Specific Weakness
In specific weakness, an impingement of a particular nerve causes atrophy and subsequent
weakness in all the muscles controlled by that nerve. Specific weakness does not develop until
some time after the appearance of pain & limitation. It usually takes at least three months of
atrophy for arm or hand weakness to become noticeable.
Generalized Weakness
In contrast to specific weakness, which affects a limited subset of muscles, generalized weakness
affects many different muscle groups. During an assessment, this will manifest as weakness on a
variety of resisted tests. Here the cause is disuse, rather than nerve root compression.
Generalized weakness is relatively common in clients with cervical injuries. As everyday
physical activities begin to cause pain, people tend to significantly limit their movements which
causes many different muscles to atrophy.
Ligament Laxity
When a ligament is lax, it is longer than it should be. Sometimes it is congenital - a person may

54
Copyright 2012 Ben E. Benjamin PhD and the Benjamin Institute. No portion of these materials may be reproduced without written permission.
be born with ligaments that are too long. Alternatively, a severe injury can stretch the ligament,
or a series of chronic ligament injuries may cause the formation of scar tissue that stretches over
time.
Cancer
If a client has cancer, the assessment tests might yield some unusual results. You might find
bilateral weakness, so that when you test for strength, both the right and left sides are weak, or
there might be many roots that show weakness. This would be a rare finding for a nerve root
injury.
In a medical setting, you might hear technical terminology related to cancer. Neoplastic erosion
is a hole in a bone caused by cancer. When cancer spreads from one site to another, the growths
at the new location are called secondary deposits.
Zygapopheseal Syndrome (Facet Syndrome)
The proper name for the joints commonly called facet joints is zygapopheseal joints. These are
small synovial joints, and - like other synovial joints - they can become inflamed.
Whiplash
This term describes a forward and backward motion of the head. It is not a clinical finding
identifying any specific damage. Whiplash commonly occurs in motor vehicle accidents, but can
occur in other circumstances as well. A number of different injuries can result from a whiplash
incident: discs can rupture, muscles and ligaments can strain or tear, and bones can fracture.
Ligament lesions are the most common result of whiplash incidents.

55
Copyright 2012 Ben E. Benjamin PhD and the Benjamin Institute. No portion of these materials may be reproduced without written permission.
Predisposing Factors
Predisposing factors, such as poor nutrition and lack of exercise, can make a person more
vulnerable to injury. Keep them in mind not only when taking the history, but also while you’re
treating the client.
Poor Alignment and Postural Habits
Poor alignment and postural habits can have a profound effect on the health of the neck. These
make the neck much more vulnerable to injury and complicates the recovery process. If your
client has poor habits of posture or movement, it’s important to address these to facilitate the
healing process and prevent further injuries. Alexander Technique teachers or Feldenkrais
practitioners may be helpful in this regard.
Stress
Continual stress adversely affects our immune system, our nervous system, and the soft tissues
throughout our body. When we’re stressed, our muscles can become continually constricted —
therefore diminishing our blood circulation, flexibility, and endurance. People in distress also
have accidents more frequently.
Chronic Muscle Tension
If an individual is chronically under stress, this often translates into chronic muscle contractions
in the neck area. This tension is particularly acute at the occipital and suboccipital region, in the
sternocleidomastoid muscles that rotate the head, and in the muscles of the anterior neck and
jaw. Following an injury, chronic muscle tension in the neck restricts circulation and increases
the healing time.
Muscle tension can also make certain injuries more likely to occur. In particular, there is an
important link between muscle tension and ligament sprains. It is normal for the spaces between
the intervertebral discs to narrow somewhat with age, as the discs harden over time. Often,
however, excess tension in the erector spinae muscles causes these spaces to narrow prematurely.
If these muscles are chronically tense, they constantly exert a compression force even greater
than that of gravity, and therefore squeeze the vertebrae more forcefully together. Such
unnatural compression leaves the supporting ligaments that surround the discs in a routinely
slackened state. If a ligament goes slack for any significant period of time, it begins to weaken
and atrophy. When a weakened ligament is repeatedly called upon to perform quick, sudden
actions, it will stretch or tear slightly.
Sleep position
Sleep is intended to be a time of healing, restoration, and recovery. High levels of stress can
prevent the occurrence of the deepest phase of sleep, known as Stage 4, or Delta sleep. In

56
Copyright 2012 Ben E. Benjamin PhD and the Benjamin Institute. No portion of these materials may be reproduced without written permission.
addition to the quality of a person’s sleep, sleeping positions can also have a profound effect on
the health of the neck. A person’s sleeping position can cause excess rotation, excess flexion, or
excess side flexion of the neck for extended periods of time.
Poor Nutrition
Another factor that can make a person vulnerable to injury and slow the healing process is
inadequate nutrition. It’s important for our clients to understand the importance of drinking an
adequate amount of water and eating balanced meals throughout the day.
Lack of Exercise
When people don’t exercise regularly, their vulnerability to injury is greatly increased. Exercise
helps to maintain our cardiovascular health, build our strength and flexibility, and preserve the
health of our joints.

57
Copyright 2012 Ben E. Benjamin PhD and the Benjamin Institute. No portion of these materials may be reproduced without written permission.
Neck Theory and Integration – Injury Profiles Part 1
To effectively assess injuries in the cervical region, it’s essential to be able to discriminate
between a ligament lesion and nerve root compression caused by injury to a disc. Nerve root
compression is the cause of fewer than 5% of cervical injuries. The overwhelming majority of
neck injuries involve the ligaments.
Differentiating a Ligament Injury from a Disc Injury/Nerve Root Compression
Ligament Injury Disc Injury/Nerve Root
Compression Slow, achy, diffuse pain
Proximal pain
Pain referred within dermatome (some
exceptions)
Pain that switches sides
Pain on right and/or left
Pain that comes and goes
Fast-moving, hot, sharp, electric pain
Distal pain
Pain referred within dermatome
Pain on one side only
Constant pain
Numb-like sensations
No loss of sensation
Tingling sensations
Confirmed numbness
Diminished or loss of sensation
Pins and needles sensations
No specific weakness Weakness in one segment
Normal reflexes
Diminished or absent reflexes
Limitation of movement caused by pain
Soft or spongy end feel
Asymmetrical limitation of movement
caused by involuntary muscle spasm in
reaction to pain
Hard end feel
Local and referred pain on palpation of
ligaments.
No pain on palpation unless ligaments are
also injured.

58
Copyright 2012 Ben E. Benjamin PhD and the Benjamin Institute. No portion of these materials may be reproduced without written permission.
Both ligament and disc injuries cause pain, but the quality of the pain is different. Nerve root
lesions tend to cause ‘hot,’ ‘sharp,’ ‘electric,’ fast-moving pain. Ligament lesions tend to evoke
a slower, achier, more diffuse kind of pain.
A second difference between disc and ligament lesions relates to the part of the relevant
dermatome to which the pain is referred. Disc lesions often create referred pain felt only in the
distal part of the dermatome - with no pain in the proximal part. Ligament lesions, on the other
hand, tend to create referred pain felt in the proximal part of the dermatome but not in the distal
part. This is not definitive, but it’s a useful aid in making the disc-versus-ligament distinction.
Pain is almost always referred within a single dermatome. However, orthopedic physicians have
noted occasional exceptions in cases of ligament injury. Another factor differentiating ligament
lesions from disc lesions is the lateral distribution of pain. If the pain switches sides or occurs on
both sides, it is likely to be caused by a ligament strain. With a disc lesion, the pain is almost
always on one side only. In addition, pain caused by nerve compression tends to be fairly
constant. With a ligament injury, the pain usually comes and goes.
If a ligament is injured, there may be some numb-like sensation, but not complete numbness.
The person can tell when they are being touched. With a disc lesion, actual numbness may occur
in a circumscribed area of the skin. An injured disc may also produce a feeling of pins and
needles that is reasonably constant or frequent. An injured ligament may produce odd tingling
sensations that come and go.
Symptoms of weakness and changes in reflexes are some of the most important factors
distinguishing ligament lesions from disc lesions. If there is a disc compression, weakness will
occur at only one level of the spine. These muscles will be noticeably atrophied as well. In
cases of ligament injury, you won’t see this type of specific weakness. If the person’s muscles
are weak, it will be a generalized weakness due to disuse. With a ligament injury, you also
won’t see any reflex changes in the arm. If a disc is injured, there may be diminished or absent
reflexes in the arm.
Another telling feature of an injury is the type of limitation of motion it causes. When a disc
lesion is present, an asymmetrical pattern of limitation results. In each case, moving in one
direction - and not the other - causes pressure on a disc, and therefore on a nerve. When the head
starts moving in that direction, an involuntary muscle spasm occurs to prevent this from
happening. The resulting end feel is rock hard. In contrast, the limitation caused by a ligament
sprain is not asymmetrical, and is caused by avoidance of pain rather than by a muscle spasm.
The full range of motion will generally still be available, although it may be very uncomfortable
to accomplish. The feeling at the end of the movement will be soft and spongy, not hard.
Always keep in mind that it’s quite possible - and in fact likely - that a person who has a disc
lesion will have ligament lesions also. The ligaments are part of the structure that holds the discs
in place. At times the ligament injuries may be producing more of the pain than the disc injury.

59
Copyright 2012 Ben E. Benjamin PhD and the Benjamin Institute. No portion of these materials may be reproduced without written permission.
Injury Profiles
Ligament Injuries
The most important thing to note about ligament injuries in the neck is that they are extremely
common. Ligament injuries often lead to chronic pain due to poorly formed adhesive scar tissue.
This has much less integrity and uniformity of structure than the original tissue it replaces, and is
therefore vulnerable to being re-torn again and again, causing increasing pain. Hands-on friction
therapy can help eliminate adhesive scar tissue and prevent it from re-forming.
Two commonly injured neck ligaments are at C5 and C7. The ligament injured most often is the
C5 supraspinous ligament, which attaches the spinous processes of the C5 and C6 vertebrae.
The other commonly injured neck ligament is the C7 intertransverse ligament (or TP7 ligament),
which attaches the transverse processes of the C6 and C7 vertebrae. Remember that some clients
have both disc lesions and ligament lesions.
This chart shows referred pain patterns for the supraspinous ligaments.
C1 Top of head
C2
Forehead
Temples
Behind eyes
C3
Temples
Side of neck and throat
C4
Neck
Top of shoulder
Upper chest
Upper scapular area
C5
Neck
Upper scapular area
Lateral aspect of arm to root of thumb
C6
Neck
Upper scapular area
Lateral, anterior aspects of arm
Radial aspect of hand to thumb and index finger

60
Copyright 2012 Ben E. Benjamin PhD and the Benjamin Institute. No portion of these materials may be reproduced without written permission.
C7
Neck
Scapular area
Pectoral area
Posterior arm to middle three fingers
C8
Lower scapula
Posterior and inner upper arm
Inner forearm
Ulnar aspect of hand
Last three fingers
This second chart outlines the unique referred pain patterns caused by the cervical intertransverse
ligaments.
C2–3, C3–4
Side of neck
Upper deltoid
Top of shoulder
Temporal area
Sternocleidomastoid
C4–5
Upper arm
Lower arm to root of thumb
C5–6
Upper arm
Lower arm to thumb and index finger
C6–7
Chest
Lateral upper arm
Medial border of scapula
C7–T1
Medial border of scapula
Posterior scapula

61
Copyright 2012 Ben E. Benjamin PhD and the Benjamin Institute. No portion of these materials may be reproduced without written permission.
Finally, here are the referred pain patterns that may be caused by the nuchal ligament or thoracic
ligaments.
Nuchal ligament Upper back (bilateral) in the shape of a coat hanger
Thoracic ligaments
T1 and T2 injuries may cause pain in the arm and scapular area
T3–T8 may also cause scapular area pain
Pain down the arm with neck rotation
Assessment Profiles of Specific Ligament Injuries
When analyzing the results of orthopedic tests, we make a distinction between Major Indicators,
Auxiliary Indicators, and Minor Indicators. Major indicators, also called major signs, provide
the most important data about an injury. Auxiliary indicators are helpful in steering you toward
the correct conclusion, but are not as definitive as major indicators. Minor indicators, or minor
signs, are test results that are potentially confusing.
Upper Cervical Ligament Injuries - C1 through C3
� Major Indicators:
� One or both passive rotations of the neck are painful and may be limited by pain
� Passive flexion and/or passive extension are painful and may be limited by pain
� Pain is felt in the upper neck and head
� Minor Indicator:
� One or both side flexions are painful
Injuries to the supraspinous and intertransverse ligaments at C1, C2, and C3 all cause pain in the
upper portion of the neck and refer pain into the head only. These injuries are also associated
with headache pain. People typically think of headaches as being related to stress and tension or
a genetic predisposition, so a headache caused by cervical ligament injuries may not be properly
treated. Even in cases where excessive stress and genetic factors are contributing to a headache,
ligament lesions may be making it worse. When you apply cross-fiber friction to a sprained
ligament, this may cause referred pain in the areas where the person typically experiences
headaches.

62
Copyright 2012 Ben E. Benjamin PhD and the Benjamin Institute. No portion of these materials may be reproduced without written permission.
Ligament Injuries - C4 to C6
� Major Indicators:
� One or both passive rotations of the neck are painful and may be limited by pain
� Passive flexion and/or Passive extension are painful and may be limited by pain
� Pain is felt in the middle and lower neck
� Minor Indicator:
� One or both side flexions are painful
For the ligaments from C4 to C6, the test results are similar to those we discussed for C1 to C3.
The only difference is the location where the pain is felt. Injuries to the supraspinous and
intertransverse ligaments at C4, C5, and C6 all cause pain in the middle and lower portion of the
neck. They also refer pain into the lower face, anterior neck, upper back, shoulders, arms, hands,
and fingers.
Injury to the Intertransverse Ligament, or TP7 – C7
� Major Indicators:
� One or both passive rotations of the neck are painful and may be limited by pain
� Passive extension is painful and may be limited by pain
� Auxilliary Indicator:
� One or both side flexions are painful.
When this injury is present pain is felt on one side of the lower neck, frequently radiating down
to the medial border of the scapula. The pain from this injury may last for several hours, a week,
several months or years. The client may experience a line of pain down the medial border of the
scapula, a pain the size of a quarter toward the inferior medial border of the scapula, or a burning
pain in the scapula region. Many clients and therapists incorrectly believe these symptoms are
caused by a strained rhomboid muscle. If they were caused by a muscle, a resisted test of the
rhomboid would reproduce the pain, and a passive neck test would not. This injury is also often
misunderstood as a pinched nerve in the neck. This does occur but infrequently.
Nerve Root Compression
Nerve root compression causes fewer than 5% of cervical injuries. These display in three
different categories of symptoms: weakness, reflex changes, and diminished sensation. Keep in
mind the time frames in which these symptoms tend to appear. Changes in reflexes may occur
suddenly or develop slowly over time, depending on the circumstances. Sudden changes may be

63
Copyright 2012 Ben E. Benjamin PhD and the Benjamin Institute. No portion of these materials may be reproduced without written permission.
due to an accident or other severe trauma, while slow progression may be due to a disc
protrusion that develops over a long period of time. Weakness develops as the result of muscle
atrophy, which occurs gradually over time. It usually takes at least three months of atrophy for
arm or hand weakness to become noticeable. The loss of sensation appears in two basic stages:
The sensation of light touch (tested with a brush) diminishes first. The pain and sensation of
deep touch (tested with a pin) diminishes second. Likewise, on recovery, the sensation of deep
touch and pain returns before the sensation of light touch.
Table of Root Lesion Symptoms
Root Weakness Reflex Changes Diminished
Sensation
C1 Neck rotation (very rare)
N/A N/A
C2 Neck rotation (very rare)
N/A Mid-neck
C3 Shoulder shrug/traps (very rare)
N/A Cheek
C4 Shoulder shrug
N/A Point of shoulder
C5 Biceps
Subscapularis
Supraspinatus
Infraspinatus
Deltoid
Brachioradialis
Biceps Upper arm
C6 Biceps
Extensor Carpi Radialis
Brachioradialis
Biceps
Forearm
Thumb
Second and third
digits
C7 Triceps,
Flexor Carpi Radialis
Triceps Middle three digits
C8 Flexor Digitorum
Extensor Pollicis
Adductor Pollicis
Flexor Carpi Ulnaris
Extensor Carpi Ulnaris
N/A Third, fourth, and
fifth digits
T1 4-5th Interosseus
N/A N/A

64
Copyright 2012 Ben E. Benjamin PhD and the Benjamin Institute. No portion of these materials may be reproduced without written permission.
There is no disc between the occiput and CI, and no disc between C1 and C2, so if there is an
issue at C1 or C2, it is not due to a disc. However, problems with resisted movement of the neck
may provide evidence of a serious disease process. Therefore, anyone with extremely weak neck
rotation should see a physician immediately. Information about disc lesions comes primarily
from testing the areas innervated from C5 through T1 — the shoulder, elbow, wrist, and hand.
Other Injuries and Conditions: Injury Conditions Part 2
Osteophytic Root Pain
� Major Indicators:
� Increasing weakness, usually at one level of the spine
� Usually over 50
� Treatment:
� Drilling out the osteophyte
In cases of osteophytic root pain, a piece of bone grows into the intervertebral foramen and
slowly exerts pressure on a nerve root. Occasionally this condition causes considerable neck
pain, but usually there is no pain or the pain is very slight — and it rarely refers pain into the
arm. The main complaint is increasing weakness at one level, for example at C7 or C5.
Bone Cancer at C1, C2, C3 (Malignancy, Secondary Deposits)
� Major Indicators:
� Rapidly increasing stiffness and pain coming on over a few months
� Gross limitation of active movements in most directions
� Spasms of the neck muscles when attempting passive testing
� Pain and weakness on resisted neck tests
When there is bone cancer in the cervical spine, pain and stiffness increase rapidly over just a
few months. There is gross limitation of active movements of the neck in multiple directions.
When cancer attacks the upper three cervical vertebrae, the signs are not as clear as when they
attack the lower vertebrae, because C1, C2, and C3 do not innervate muscles that can easily be
tested.

65
Copyright 2012 Ben E. Benjamin PhD and the Benjamin Institute. No portion of these materials may be reproduced without written permission.
Bone Cancer at C4, C5, C6, C7 (Malignancy, Secondary Deposits)
� Major Indicators:
� Rapid onset
� Active, passive, and resisted tests limited and painful
� Two or three nerve roots affected at once
� Gross bilateral (arm) weakness
When cancer attacks the lower four cervical vertebrae, the signs are clear because you can easily
test the C4, C5, C6, and C7 nerve roots with specific resisted movements. The onset of the
weakness is very rapid, and it occurs simultaneously on multiple levels. This weakness is also
bilateral, affecting both sides of the body. Note that these symptoms differ markedly from those
caused by a bulging disc. Nerve compression due to a disc lesion affects only one side of the
body, at only one level.
Cervical Rib
The term “cervical rib” refers to an abnormally long transverse process at C7. Having a cervical
rib does not necessarily produce any symptoms. When there is trouble, the characteristic signs
of this condition include numbness and pins and needles in the arm and hand. An X-ray will
definitively establish the presence of a cervical rib.
Basilar Syndrome
� Major Indicators:
� Vertigo (dizziness) when the neck is in extension
� Dizziness when bending or standing suddenly
� Pins and needles in the face (on occasion)
� Dizziness and arm weakness on Special Test
� Treatment:
� Surgery to drill out the osteophyte
� Manipulative therapy to correct the subluxation
You may recall from the anatomy section that the vertebral and basilar arteries are key blood

66
Copyright 2012 Ben E. Benjamin PhD and the Benjamin Institute. No portion of these materials may be reproduced without written permission.
vessels that carry blood from the heart to the brain. The two vertebral arteries — one on each
side of the body — run through the transverse foramen of the neck, and then join together inside
the skull to form the basilar artery. The basilar artery then makes a right-angle turn before
running up to the brain. In a normal person, when the head is rotated, two-thirds of the blood on
one side of the neck is cut off. A cervical injury may cause further occlusion, so that even less
blood reaches the brain. The most common culprits are osteophytes growing in such a way that
they compress the vertebral arteries. This condition may also be caused by a bone subluxation.
Basilar syndrome is more likely to develop in elderly people than in younger individuals.
If you suspect a client is suffering from basilar syndrome, you can perform a special test to
confirm the presence of this condition. Ask the client to close his or her eyes and hold both arms
out in front of the body, while holding the head in active rotation for one minute. If basilar
syndrome is present, the person will get dizzy and start to sway. The arms will become weak and
begin to waver or drop.
Headache from neck injuries
Types of headaches:
• Ligament injury headache (not simply related to stress)—for example, C3–4 can refer pain to
temples; C2 can refer pain to top of head. To discriminate, it’s helpful to see whether friction
to sprained ligaments refers pain to areas where headaches have occurred.
• Tension/migraine headaches. Often related to stress & compensation for neck ligament
injuries. Can involve many different head & neck muscles, particularly suboccipitals.
Spinal Cord Injuries
The term “spinal cord injury” refers to damage to the spinal cord that results in a loss of function,
including the ability to move and to feel sensation. In most cases, the spinal cord is not actually
severed, but the nerve cells within the cord are damaged. Spinal cord injuries occur most
frequently in the cervical region. A person can “break their neck” or “break their back” and not
sustain a spinal cord injury. In these cases the vertebrae around the spinal cord are damaged, but
the spinal cord itself is not affected.
The effects of spinal cord injury depend on the type of injury and the level at which it occurs.
With a complete injury, no functioning remains below the level of the injury; there is no
sensation and no voluntary movement. Both sides of the body are equally affected. With an
incomplete injury, there is some functioning below the level of the injury. A person with an
incomplete injury may be able to move one limb more than another, may feel sensation in a body
part that cannot be moved, or may have more functioning on one side of the body than the other.

67
Copyright 2012 Ben E. Benjamin PhD and the Benjamin Institute. No portion of these materials may be reproduced without written permission.
In most cases, spinal cord injuries cause severe pain, weakness, and tingling in the upper arms or
in all four limbs. Muscle atrophy proceeds very rapidly. These injuries may also cause a variety
of other symptoms.
Torticollis
Torticollis is an involuntary twisting of the neck that places the head in an unnatural position.
There are four primary types of torticollis. Some are painful and some are not.
Spasmodic Torticollis
In spasmodic torticollis, the person’s head is fixed in a rotated and slightly tilted position. The
client or therapist can use their hand to forcefully bring the head back to a neutral position, but
then an overpowering involuntary force slowly turns it back to the same side again. The cause is
unknown.
Spinal Cord Pressure
♦ Clonis refers to involuntary movement of the foot or knee after a sustained sharp
pressure is applied. The presence of three or more beats indicates that there is
pressure on the spinal cord, which interferes with its natural inhibiting function.
♦ The Babinski test involves stroking the underside of the sole of the foot along the
outside edge. If this stimulation causes the big toe to go into extension
involuntarily, the test is positive, indicating that there is spinal cord pressure.

68
Copyright 2012 Ben E. Benjamin PhD and the Benjamin Institute. No portion of these materials may be reproduced without written permission.
Treatment Techniques
Principles of Friction Therapy to the Neck
Cross-fiber friction therapy is a very precise form of injury treatment that is remarkably effective
in treating most muscle, tendon, and ligament injuries. It was developed by Dr. James Cyriax, a
British physician who has since become known as the “father of orthopedic medicine.”
Frictioning addresses the problem of adhesive scar tissue formation in muscles, tendons, and
ligaments, which is the cause of a great deal of chronic pain. In a healthy healing process, scar
tissue serves as the biological glue that holds the torn fibers together in proper alignment.
However, in many cases, this process goes awry.
Adhesive scar tissue builds up in an indiscriminate fashion, so the resulting tissue has much less
integrity and uniformity of structure than the original tissue it replaces. Friction therapy breaks
down poorly formed scar tissue and prevents its return. It also promotes the formation of
properly aligned and mobile tissue, encouraging normal healing to occur. In addition, by
introducing a mild, controlled trauma at the injury site, frictioning increases the blood supply to
areas that normally have very little circulation.
Don’t Over-treat
Always err on the side of caution, so you don’t over-treat. It’s very easy to over-treat someone
when you’re frictioning the spinal ligaments. Work very lightly during the first treatment to see
how the person responds, then use that information to guide your future treatments, where you
may be able to use more pressure.
Be sure to tell your client that the area you treated might be a little sore for a day or two, but the
discomfort shouldn’t last more than 48 hours. At the second appointment, find out how the client
felt after the initial treatment. If the post-treatment soreness lasted longer than 48 hours, or if the
client simply can’t tolerate the soreness, cut back on the pressure and/or the duration of the
treatment.

69
Copyright 2012 Ben E. Benjamin PhD and the Benjamin Institute. No portion of these materials may be reproduced without written permission.
Guidelines for Frictioning the Cervical Spine
� Use no lubricants
� Keep your friction strokes perpendicular to the fibers of the injured tissue
� Apply pressure in one direction only
� Alternate the direction of pressure as often as needed for your own comfort
� Work on one side at a time
� Use varied finger positions
� Keep your fingernails very short
� Alternate hands often
� Move your whole hand
� Make sure the skin moves with you
� Press the structure against the bone
� Be sure the client is comfortable

70
Copyright 2012 Ben E. Benjamin PhD and the Benjamin Institute. No portion of these materials may be reproduced without written permission.
Friction Treatment Protocol
Frequency
When clients are receiving friction therapy in the cervical region, it’s best if they come two or
three times per week. Consistent treatment aids the healing process. As recovery proceeds, you
can lessen the frequency of your sessions.
Duration
With this treatment, a recent injury takes about 4–6 weeks to heal, and a long-standing injury
takes about 8–12 weeks.
The actual healing time will vary depending on several factors:
1) How long the injury has been present
2) Whether the person is repeatedly re-injuring the low back
3) The client's general health
Ideally, you’d begin treatment 48 to 72 hours after a traumatic injury. Thirty seconds to one
minute of gentle frictioning at each site should be adequate. However, you generally won't see
clients who are that recently injured. In most cases there are multiple neck injuries, so you’ll be
doing friction for 5 to 10 minutes at first, and eventually increasing to 20 or even 30 minutes in
each session.
Pacing
Typically, 5 to 15 neck ligaments are injured simultaneously. After you’ve frictioned a ligament
for a few minutes, move on to the next one. The neck is often too sensitive to tolerate too much
work on one segment. As you progress, slowly work more deeply.
It’s important to avoid over-treating with friction therapy - particularly when you’re working in
the cervical region. Some clients can tolerate only very light pressure at first, and you may have
to work for a long time using barely any force. Educate your clients so they can help guide your
work. Before you begin, explain that the process of breaking up scar tissue is somewhat
uncomfortable, but should not cause acute pain.
Check in frequently with the client to be sure you’re using the optimal amount of pressure -
especially if you suspect the person may be reluctant to tell you to 'lighten up'. If the client feels
more than a slight discomfort or a mildly annoying sensation, you need to proceed more gently.
While you’re working, also be alert for any nonverbal cues of discomfort. Observe your client's

71
Copyright 2012 Ben E. Benjamin PhD and the Benjamin Institute. No portion of these materials may be reproduced without written permission.
face and breathing during the frictioning. If the client says everything is fine but constantly
grimaces throughout the treatment, decrease your pressure. Also be aware of your own level of
comfort. Because this work is so precise and repetitive, you may find yourself getting tired and
sore at first. Build up your hands by frictioning for short periods at first, and by exercising with
clay or a squeeze ball.
Post-friction Guidelines
After you’ve completed a session of friction therapy, fully massage the cervical area, both supine
and prone. This helps to enhance circulation in the cervical region. At the end of the
appointment, remember to mention that the area you treated may be sore for up to 48 hours. If
the client tolerates ice well, using ice on the area will often mitigate the soreness. Check in at the
next appointment to find out how the client felt after the treatment. If soreness lasted for more
than two days, or if the client simply can’t tolerate the soreness, cut back on the pressure and
duration of the friction part of your treatment.

72
Copyright 2012 Ben E. Benjamin PhD and the Benjamin Institute. No portion of these materials may be reproduced without written permission.
Friction Therapy
Friction Therapy Techniques
Supraspinous Ligament Friction
Sitting at the head of the table with the client lying supine, place your hands under the neck. Use
your middle or index finger to palpate the spinous processes. Feel their shape, depth, and
alignment. You can start frictioning at the top of the neck or at the base of the neck. In this
example, begin at the base of the neck. Place your right middle or index finger just above C7 on
the ligament that runs between C6 and C7. Lightly touch the center of the ligament with your
fingertip and move the skin to the left as far as you can. This allows you to friction the ligament
without dragging your finger across the skin. Now exert an anterior pressure and pull to the
right, allowing your finger to friction transversely through the ligament for a distance of three
quarters of an inch to an inch, depending on the mobility of the skin. Then return to the original
position on the other side of the vertebra where you began. Use no pressure on the return
movement. Depending on the individual you’re working on, you may or may not feel a
“snapping” sensation as you move across the ligament. The ligament will be elusive at first. It
feels like a flat, thin nylon cord. Continue this action for a minute or two. Be sure to check in
with your practice client about the pressure. Switch hands and pull across the ligament in the
opposite direction. Again, you may or may not feel a ‘snap’ as you go over the ligament
structure. After working for a couple of minutes on this ligament, move to the next one and
repeat the same procedure. Work your way up or down one by one, frictioning each ligament.
Stop at the tender ligaments for slightly longer periods of time. If all the supraspinous ligaments
are injured, you might work for ten or even fifteen minutes on these ligaments alone.
Supraspinous Ligament Tilted-head Friction
In this technique, you will be working on the lateral edges of the supraspinous ligament. To get
to that part of the ligament, tilt the client’s head to one side. In this example, start by tilting the
head to the right. In this position, the ligament on the left lateral edge is more accessible. Slide
your right hand under the neck to the left side, and place your fingertip at the very outer edge of
the ligament. Friction for a minute or so, stroking toward the right, and then work your way up
or down the vertebrae one by one. These are very precise small movements that move through
no more than a half to a quarter inch of space. It’s like polishing the tiny edge of a spoon. When
you’re finished with this side of the neck, switch hands to work on the opposite side.
Intertransverse Ligament Friction
Support the head gently with one hand and place the tip of your thumb (fist position) or index
finger on the uppermost transverse process. Apply pressure toward the midline and slowly
friction in an anterior-to-posterior direction, always taking the skin with you. Use whichever

73
Copyright 2012 Ben E. Benjamin PhD and the Benjamin Institute. No portion of these materials may be reproduced without written permission.
finger is most comfortable for you, and switch hands and fingers frequently so they don’t
become strained. Gradually work your way down, frictioning each ligament. Friction both the
upper edge of the transverse process (which works the ligament attachment above) and the lower
edge (which works the ligament attached to the transverse process below).
One variation of this technique that’s more restful for the hand is to reach under the neck and use
the middle or index finger to friction the ligaments on the opposite side. This works better for
some practitioners. Another variation is to tilt the head away from the side you’re working on.
This gives you better access to the ligaments. Generally, you’ll perform intertransverse ligament
friction for several levels, and then repeat the same technique on the opposite side. If the
transverse processes are very tender, you might alternate between right and left at each level. If
there is not much discomfort, you might work all the way down before switching to the other
side. Work on each tender structure for one to two minutes, depending on the client’s tolerance.
If many ligaments are injured, which is often the case, spend less time on each of the structures
and keep coming back to them. This may be easier for the client to tolerate until the pain
diminishes. Remember to make your movements very, very small. Watch the clients face and
check in frequently about the level of discomfort, so that you don’t get carried away.
There are also other structures in this area that occasionally get inflamed - the capsules of the
zygapophyseal joints. These are the hard surfaces you’ll feel just posterior to the transverse
processes. If any of the capsules are tender to the touch, work there for a while as well, using the
same types of small movements.
TP7 Ligament Friction
The TP7 ligament is one of the most commonly injured structures in the neck. To begin the
friction technique for this ligament, support your thumb with your index finger curled beneath it,
and push the trapezius back out of the way. Then press medially and inferiorly until you feel a
hard protuberance. When you find the transverse process, place your thumb tip on it. Now
work your way to the back of the process and friction in an anterior-to-posterior direction. Move
in a diagonal line, while pressing slightly toward the midline. Friction on one side for a few
minutes, and then move to the other side. As you friction the TP7 ligament, the client may feel a
referred pain in the medial border of the scapula. On rare occasions, pain will be referred to the
upper scapula or even the temple. When you feel comfortable finding the TP and frictioning the
ligament with some ease, try the lateral aspect of the same ligament. To find the lateral portion
of this intertransverse ligament, move laterally about a quarter inch to the lateral edge of the TP
and friction there in an anterior to posterior direction. The lateral portion of this TP7 ligament
refers pain to the top of the shoulder between the neck and acromio-clavicular joint. When
you’re comfortable with that, you can move to the anterior edge which refers pain down the
chest. Here the friction will be in a medial to lateral direction.

74
Copyright 2012 Ben E. Benjamin PhD and the Benjamin Institute. No portion of these materials may be reproduced without written permission.
TP7 Ligament Friction, Prone
This variation is easier for some practitioners. Ask the client to lie face-down, and place your
middle or index finger on the C7 spinous process. Then move laterally over the edge of the
trapezius, and pull the trapezius back out of the way. Now press your finger medially and
inferiorly to find the transverse process of the seventh cervical vertebra. Once you find it, move
to the posterior portion of the process. Friction in an anterior-to-posterior direction, moving on a
slight diagonal toward the lower spine.
Occipital Muscles Friction
Gently cradle the head with one hand, and work with the index and middle fingers of the other
hand. Brace your finger with the thumb, making your pressure more effective and easier on your
own joints. Now place your fingertip at the occipital region, just lateral to the external occipital
protuberance. Exert pressure anteriorly and move your finger first medially, then laterally,
applying pressure in one direction only. The medial movement stretches the skin so you can
bring it with you when you friction. The second movement is where the pressure is applied.
After doing this in one spot for a minute or so, move laterally a quarter to a half-inch and do it
again. Continue moving out until you reach the edge of the occipital region and then repeat,
applying your pressure in the opposite direction. This time, straighten the skin laterally and
apply pressure medially. Then change hands and work on the other side.
The best way to master this material is to have a private tutorial with one of my teachers after
learning the hands on techniques. If you live in or near Albuquerque (NM), Boston (MA),
Chicago (IL), Olympia (WA), Salt Lake City (UT), Seattle (WA), Washington, DC, or
Barcelona, Spain, contact one of my instructors through my office and take a private tutorial.

75
Copyright 2012 Ben E. Benjamin PhD and the Benjamin Institute. No portion of these materials may be reproduced without written permission.
Neck Ligament Exercise
Lie supine with the neck supported by a pillow and slowly rotate the head so that the cheek
moves towards the shoulder. Be sure to rotate the neck slowly without force. Twenty-five
rotations should be performed, right and left, two to three times a day. This movement is a
combination of rotation, flexion and side bending. These combine to stretch the lower cervical
intertransverse ligaments, tearing unwanted scar tissue and preventing it from forming adhesions.
If there is pain while doing the exercise, it should be discontinued until recovery is sufficient to
do it without pain. If a slight pulling sensation is felt, that’s OK.

76
Copyright 2012 Ben E. Benjamin PhD and the Benjamin Institute. No portion of these materials may be reproduced without written permission.
Neck Tests
Name:
Date:
1-2. Active rotations
3-4. Active side flexions
5-6. Active flexion/extension
7-8. Passive rotations
9-10. Passive side flexions
11-12. Passive flexion/extension
13-14. Resisted rotations
15-16. Resisted side flexions
17-18. Resisted flexion/extension
19. Resisted shoulder raises (C2,3,4)
20. Resisted adduction (C7)
21. Resisted abduction (C5)
22. Resisted lateral rotation (C5)
23. Resisted medial rotation (C5)
24. Resisted flexion (C5,6; brachialis C6)
25. Resisted extension (C7)
26. Resisted wrist extension (C6)
27. Resisted wrist flexion (C7)

77
Copyright 2012 Ben E. Benjamin PhD and the Benjamin Institute. No portion of these materials may be reproduced without written permission.
Neck tests (continued)
28. Resisted radial deviation (C7)
29. Resisted ulnar deviation/wrist (C8)
30 Resisted extension/thumb (C8)
31. Resisted adduction/thumb (C8)
32. Resisted adduction of 4th & 5th digits (T1)
33. Brachioradialis jerk (C6)
34. Biceps jerk (C5,6)
35. Triceps jerk (C7)
36. Knee jerk
37. Ankle jerk
38. Babinski
39. Ankle clonis
40. Ligament palpation
Nuchal: Intertransverse (left and right):
Occiput–C2 C1–2 C1–2
C2–3 C2–3 C2–3
C3–4 C3–4 C3–4
C4–5 C4–5 C4–5
C5–6 C5–6 C5–6
C6–7 C6–7 C6–7
C7–T1 C7–T1 C7–T1

78
Copyright 2012 Ben E. Benjamin PhD and the Benjamin Institute. No portion of these materials may be reproduced without written permission.
Neck History
Client Name:
Address:
Phone:
Ref:
Age:
Occupation:
Date:
Diet: Breakfast Lunch Dinner Snacks Coffee Sweets
Water Intake: ___ Cups daily
Exercise Regularly:
HISTORY:
Why are you here?
When did it first occur?
Was it precipitated by an accident? - Yes No
Did it come on slowly or suddenly? – suddenly slowly
Where is your pain exactly?
Is it there all the time? - Yes No
Are the pains sharp or achy?
What brings it on?
Sleep, reading, typing, sitting, standing, walking
What makes it better? - rest
Is your pain getting better, worse or is it the same?

79
Copyright 2012 Ben E. Benjamin PhD and the Benjamin Institute. No portion of these materials may be reproduced without written permission.
Does a cough make it worse? - Yes No
Does a deep breath make it worse? - Yes No
Does it spread up to your head
or down your arm or upper back ?- Yes No
Have you had any treatment for your pain? - Yes No
If so, what?
Did it help you? - Yes No
Do you have any numbness or
numblike sensations? - Yes No
If so, where?
Do you have any aches and pains anywhere else in your body?
Do you smoke? - Yes No
Are you allergic to anything? - Yes No
Are there any other medical conditions I should be aware of? –
Are you taking any medications? - Yes No

80
Copyright 2012 Ben E. Benjamin PhD and the Benjamin Institute. No portion of these materials may be reproduced without written permission.
The Benjamin Institute Product Price List
Books Cost Are You Tense? 30.00 Listen to Your Pain 20.00 Exercise w/o Injury 15.00 Ethics of Touch 28.00 Video Price List Cost The Low Back 350.00 The Neck 350.00 The Low Back and Neck 600.00 The Knee 300.00 The Low Back, Neck and Knee 850.00 Common Injuries Series 250.00 Available individually: 60.00
Subscapularis, Tennis Elbow, Lateral Ankle Sprain, Patella Tendinitis Achilles Tendinitis
Essential Principles 60.00 Low Back, Neck, Knee, Common Injuries and the Essential Principles (All 19 DVDs) $995.00 Achieving Success 55.00 Taking Care of Yourself 55.00 The Neck Relaxer 35.00 Assessment and Treatment Fees Private Evaluation with Dr Benjamin 250.00 ½ Hour Private Treatment session 150.00 1 Hour Private Treatment session 300.00 Continuing Education CE’s Each Set 75.00 2 or more Sets 50.00
Single programs ……………………………………………………………………….20.00

81
Copyright 2012 Ben E. Benjamin PhD and the Benjamin Institute. No portion of these materials may be reproduced without written permission.
BEN E. BENJAMIN
ORTHOPEDIC MASSAGE ADVANCED TRAINING PROGRAM
A G R E E M E N T
I understand that this course on the assessment and treatment of injuries is
for qualified professionals and is part of the Benjamin Advanced Training
Program.
I further understand that this course contains trade secrets, copyright
materials, specially designed course materials gathered over years of work
that are for my use as a student only and in no event shall these written or
video taped materials be used or shared with any individual or company for
any commercial means.
I also understand that this course does not qualify me to teach similar courses
in the assessment and treatment of injuries and I will not attempt to do so.
I also understand that only those who have successfully completed the
Benjamin Advanced Training Teacher Training Program will be certified to
teach this material.
I further agree that in addition to all rights and remedies accruing to Ben E.
Benjamin, Ph.D. in the event that I breach this Agreement in whole or in part,
this Agreement will be enforceable by injunction in courts of law.
This agreement is signed as a sealed instrument.
DATE ________________ SIGNATURE _________________________
PRINTED NAME______________________________________________