neptune instructions
TRANSCRIPT

Instruction Manual
Customer Care
Web: www.finisinc.com/support
Facebook: www.facebook.com/FINISinc
Twitter: www.twitter.com/FINISswim
You Tube: www.youtube.com/FINISswim
Download Multilingual Instruction Manuals:www.finisinc.com/support/
Technical Support
USA Toll Free: 800.388.7404Europe: 359.2.936. 86.36
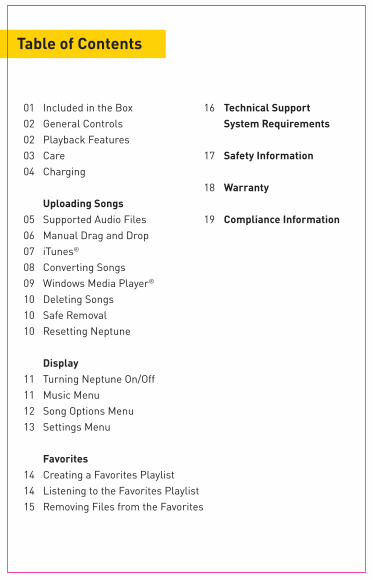
Table of Contents
01 02 0203 04
0506070809101010
11111213
141415
16
17
18
19
Included in the Box General Controls Playback FeaturesCareCharging
Uploading SongsSupported Audio FilesManual Drag and DropiTunes®
Converting SongsWindows Media Player®
Deleting SongsSafe RemovalResetting Neptune
DisplayTurning Neptune On/OffMusic Menu Song Options MenuSettings Menu
FavoritesCreating a Favorites PlaylistListening to the Favorites PlaylistRemoving Files from the Favorites
Technical Support System Requirements
Safety Information
Warranty
Compliance Information
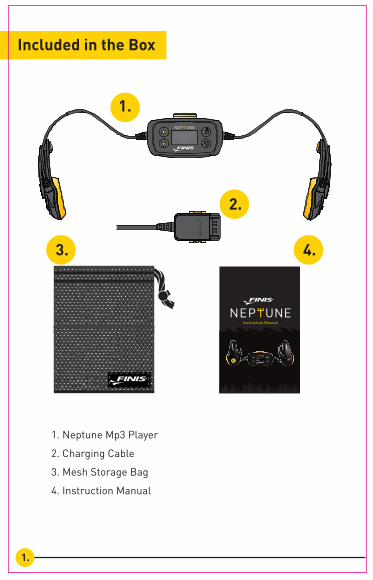
Included in the Box
1.
2.
4.3.
1. Neptune Mp3 Player
2. Charging Cable
3. Mesh Storage Bag
4. Instruction Manual
Instruction Manual
1.
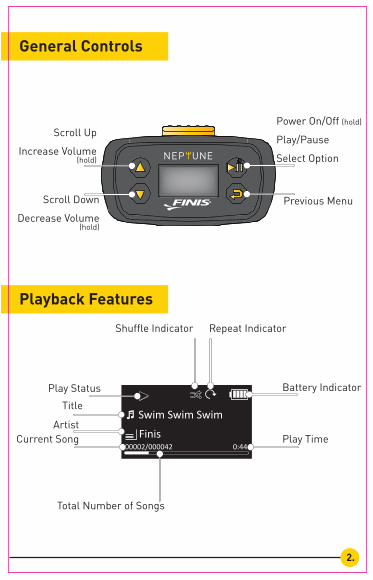
General Controls
Playback Features
Scroll Down
Decrease Volume (hold)
Previous Menu
Play Status
Title
ArtistCurrent Song
Total Number of Songs
Shuffle Indicator Repeat Indicator
Battery Indicator
Play Time
Power On/Off (hold)
Play/Pause
Select Option
Scroll Up
Increase Volume(hold)
0:4400002/000042Finis
Swim Swim Swim
2.
3.
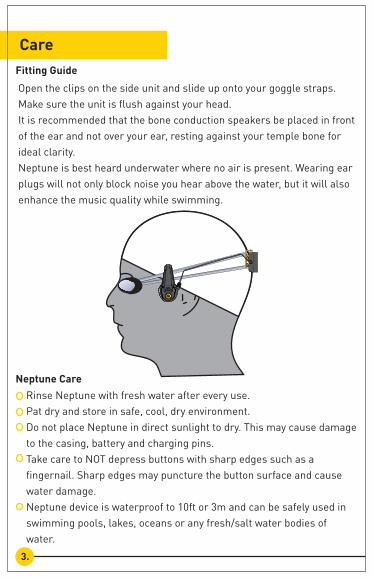
CareFitting Guide
Open the clips on the side unit and slide up onto your goggle straps. Make sure the unit is flush against your head.It is recommended that the bone conduction speakers be placed in front of the ear and not over your ear, resting against your temple bone for ideal clarity. Neptune is best heard underwater where no air is present. Wearing ear plugs will not only block noise you hear above the water, but it will also enhance the music quality while swimming.
Neptune CareRinse Neptune with fresh water after every use.Pat dry and store in safe, cool, dry environment.Do not place Neptune in direct sunlight to dry. This may cause damage to the casing, battery and charging pins. Take care to NOT depress buttons with sharp edges such as a fingernail. Sharp edges may puncture the button surface and cause water damage.Neptune device is waterproof to 10ft or 3m and can be safely used in swimming pools, lakes, oceans or any fresh/salt water bodies of water.

4.
Battery Full
Charging
Charging Icons
You can charge and upload songs to Neptune using the included charging cable.
Plug the charging cable directly into the bottom of the back unit. Plug the USB directly in to the computer’s USB port. The computer automatically recognizes the device. The display will read ‘USB Connected’ when the device is charging. The battery icon will also show a progression to show the device is charging.Total charge time is 3 hours. When the device is charged the display will read ‘Battery Full’. The rechargaeble Lithium-Ion battery lasts up to 8 hours. Don’t have a computer? The Neptune is compatible with a USB wall charger (sold separately).
‘USB Connected’ and the device is charging
The device is now fully chargedBattery Full
The device is charging via a USB wall charger
USB Connected

5.
Uploading Songs
Supported Audio Files
SONG TYPE HOW TO UPLOAD SONGS
Non Protected MP3, AAC and WMA Drag and Drop directly onto the drive
Purchased AAC Files from iTunes® Convert to MP3 files in iTunes®, then drag and drop directly on the drive
Protected MP3, AAC and WMA Not Compatible*View song properties to check if song is protected
The storage capacity of Neptune is 4GB or around 1000 songs.
Tip: If the Neptune is freezing or running slow, there may be non-compatible songs on the device. With the Neptune plugged into the computer, open up the “FINIS” drive and make sure the ‘Type’ column is visible to view the song types. Delete any non-compatible songs off of the “FINIS” Drive.
The Neptune allows for non protected MP3, AAC and WMA files to be directly dragged and dropped onto the “FINIS” drive. Purchased AAC files must be converted to MP3 files in iTunes® before they can be transferred to the “FINIS” drive. Please see the below table for supported audio files and how to upload the songs to the Neptune.
6.
Uploading Songs
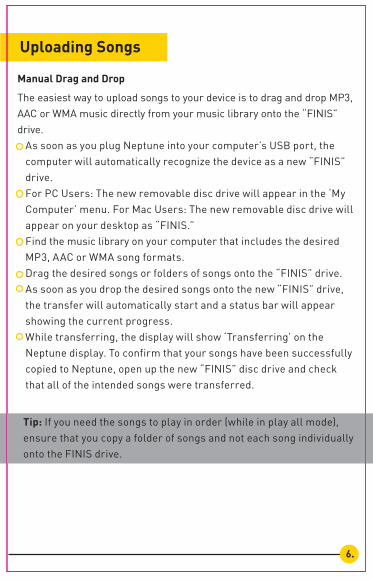
Manual Drag and Drop
The easiest way to upload songs to your device is to drag and drop MP3, AAC or WMA music directly from your music library onto the “FINIS” drive.
As soon as you plug Neptune into your computer’s USB port, the computer will automatically recognize the device as a new “FINIS” drive.For PC Users: The new removable disc drive will appear in the ‘My Computer’ menu. For Mac Users: The new removable disc drive will appear on your desktop as “FINIS.” Find the music library on your computer that includes the desired MP3, AAC or WMA song formats.Drag the desired songs or folders of songs onto the “FINIS” drive.As soon as you drop the desired songs onto the new “FINIS” drive, the transfer will automatically start and a status bar will appear showing the current progress.While transferring, the display will show ‘Transferring’ on the Neptune display. To confirm that your songs have been successfully copied to Neptune, open up the new “FINIS” disc drive and check that all of the intended songs were transferred.
Tip: If you need the songs to play in order (while in play all mode), ensure that you copy a folder of songs and not each song individually onto the FINIS drive.
Uploading Songs
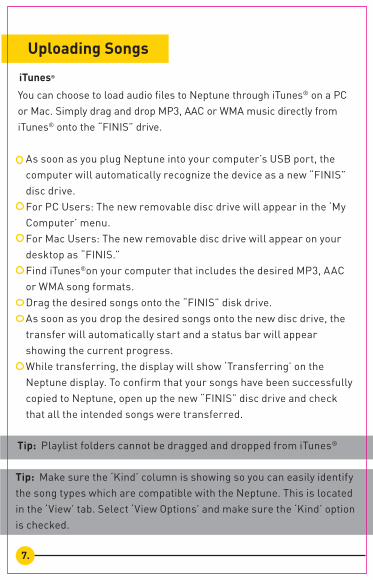
iTunes®
You can choose to load audio files to Neptune through iTunes® on a PC or Mac. Simply drag and drop MP3, AAC or WMA music directly from iTunes® onto the “FINIS” drive.
As soon as you plug Neptune into your computer’s USB port, the computer will automatically recognize the device as a new “FINIS” disc drive.For PC Users: The new removable disc drive will appear in the ‘My Computer’ menu. For Mac Users: The new removable disc drive will appear on your desktop as “FINIS.” Find iTunes®on your computer that includes the desired MP3, AAC or WMA song formats.Drag the desired songs onto the “FINIS” disk drive.As soon as you drop the desired songs onto the new disc drive, the transfer will automatically start and a status bar will appear showing the current progress.While transferring, the display will show ‘Transferring’ on the Neptune display. To confirm that your songs have been successfully copied to Neptune, open up the new “FINIS” disc drive and check that all the intended songs were transferred.
Tip: Playlist folders cannot be dragged and dropped from iTunes®
Tip: Make sure the ‘Kind’ column is showing so you can easily identify the song types which are compatible with the Neptune. This is located in the ‘View’ tab. Select ‘View Options’ and make sure the ‘Kind’ option is checked.
7.

Uploading Songs
Converting Songs in iTunes® - PC
With the iTunes® program open, left click your Main Music Library so it is highlighted.Once highlighted, go to your ‘Edit’ tab (located at the top left of the screen) and select ‘Preferences’.Under the ‘General’ tab select the ‘Import Settings’ button.Change your ‘Import Using’ options from AAC encoder to MP3 encoder.Left click OK to exit ‘Import Settings’ and another OK to exit ‘Preferences’.To convert the desired track, right click and select ‘Create MP3 Version’.You will notice that a second copy of that song will be created as a MPEG audio file. You can now drag the MPEG files to the “FINIS” drive.
8.
Converting Songs in iTunes® - Mac
With the iTunes program open, click your Main Music Library so it is highlighted.Once highlighted, go to your ‘iTunes’ tab (located at the top left of the screen) and select ‘Preferences’.Under the ‘General’ tab select the ‘Import Settings’ button.Change your ‘Import Using’ options from AAC encoder to MP3 encoder.Click OK to exit ‘Import Settings’ and another OK to exit ‘Preferences’Click the desired track you wish to convert. Once highlighted go to the ‘Advanced’ Menu and select ‘Create MP3 Version’.You will notice that a second copy of that song will be created as a MPEG audio file. You can now drag the MPEG files to the “FINIS” drive.

Uploading Song Icons
Uploading Songs
Windows Media Player® for PC
You can choose to load audio files to Neptune through the Windows Media Player program on a PC. With Neptune plugged into your computer, the new disk drive will automatically recognize in the Windows Media Player menu.
Open the Windows Media Player music library.Plug in Neptune, the new “FINIS” disc drive will automatically be recognized in the ‘Sync’ tab.Select the desired songs or playlists you want to upload to the device.Drag them onto the new “FINIS” disk drive. Press the ‘Start Sync’ button as soon as all the songs are setup for transfer.You will be able to watch the progress of the transfer and be notified upon completion.
Please note: After loading songs using Window Media Player, an automated .xml document will appear on “FINIS” disk drive. Do not delete the .xml document unless removing all of the songs from the player.
‘USB Connected’ USB Connected
Transferring songs to the device Transferring
9.
Uploading Songs
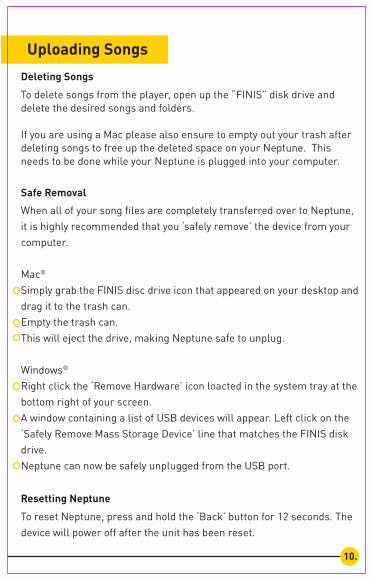
Safe Removal
Deleting Songs
When all of your song files are completely transferred over to Neptune, it is highly recommended that you ‘safely remove’ the device from your computer.
Mac®
Simply grab the FINIS disc drive icon that appeared on your desktop and drag it to the trash can.Empty the trash can. This will eject the drive, making Neptune safe to unplug.
Windows®
Right click the ‘Remove Hardware’ icon loacted in the system tray at the bottom right of your screen. A window containing a list of USB devices will appear. Left click on the ‘Safely Remove Mass Storage Device’ line that matches the FINIS disk drive.Neptune can now be safely unplugged from the USB port.
To delete songs from the player, open up the “FINIS” disk drive and delete the desired songs and folders.
If you are using a Mac please also ensure to empty out your trash after deleting songs to free up the deleted space on your Neptune. This needs to be done while your Neptune is plugged into your computer.
Resetting Neptune
To reset Neptune, press and hold the ‘Back’ button for 12 seconds. The device will power off after the unit has been reset.
10.
11.
Display
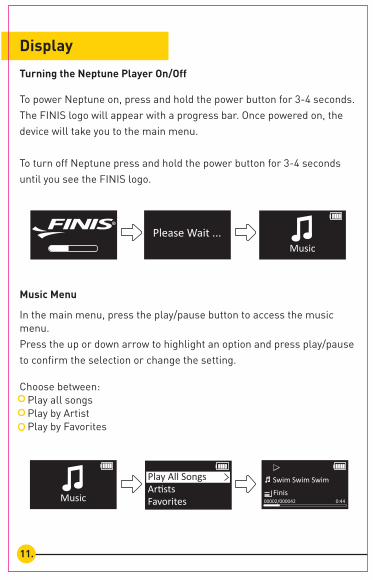
Turning the Neptune Player On/Off
To power Neptune on, press and hold the power button for 3-4 seconds. The FINIS logo will appear with a progress bar. Once powered on, the device will take you to the main menu.
To turn off Neptune press and hold the power button for 3-4 seconds until you see the FINIS logo.
Music Menu
In the main menu, press the play/pause button to access the music menu.Press the up or down arrow to highlight an option and press play/pause to confirm the selection or change the setting.
Choose between: Play all songs Play by Artist Play by Favorites
Please Wait ...Music
Music FavoritesArtistsPlay All Songs
0:4400002/000042Finis
Swim Swim Swim
12.
Display
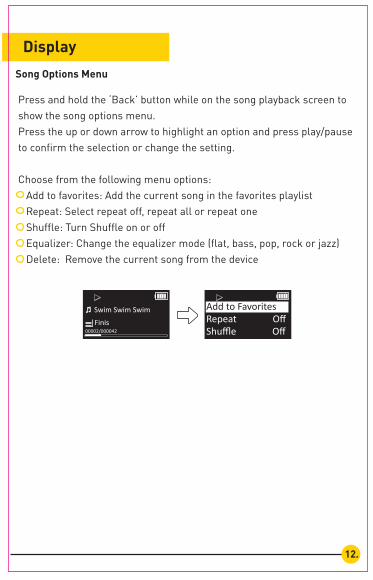
Song Options Menu
Press and hold the ‘Back’ button while on the song playback screen to show the song options menu. Press the up or down arrow to highlight an option and press play/pause to confirm the selection or change the setting.
Choose from the following menu options: Add to favorites: Add the current song in the favorites playlist Repeat: Select repeat off, repeat all or repeat one Shuffle: Turn Shuffle on or off Equalizer: Change the equalizer mode (flat, bass, pop, rock or jazz) Delete: Remove the current song from the device
0:4400002/000042Finis
Swim Swim Swim
Shuffle OffRepeat OffAdd to Favorites
Display
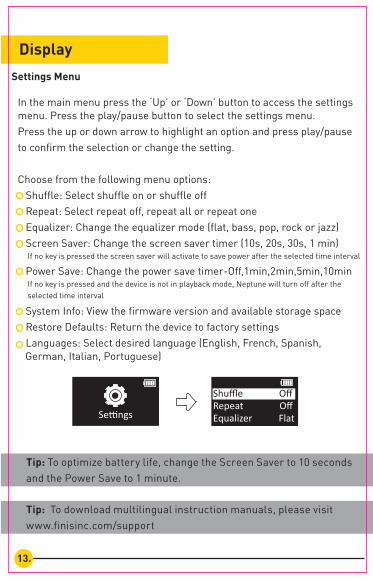
Settings Menu
In the main menu press the ‘Up’ or ‘Down’ button to access the settings menu. Press the play/pause button to select the settings menu. Press the up or down arrow to highlight an option and press play/pause to confirm the selection or change the setting.
Choose from the following menu options: Shuffle: Select shuffle on or shuffle off Repeat: Select repeat off, repeat all or repeat one Equalizer: Change the equalizer mode (flat, bass, pop, rock or jazz) Screen Saver: Change the screen saver timer (10s, 20s, 30s, 1 min) If no key is pressed the screen saver will activate to save power after the selected time interval
Power Save: Change the power save timer-Off,1min,2min,5min,10min If no key is pressed and the device is not in playback mode, Neptune will turn off after the
System Info: View the firmware version and available storage space Restore Defaults: Return the device to factory settings Languages: Select desired language (English, French, Spanish,
German, Italian, Portuguese)
selected time interval
Settings Equalizer FlatRepeat OffShuffle Off
13.
Tip: To optimize battery life, change the Screen Saver to 10 seconds and the Power Save to 1 minute.
Tip: To download multilingual instruction manuals, please visit www.finisinc.com/support
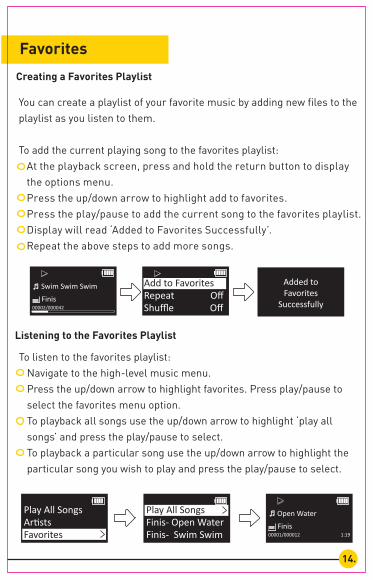
Listening to the Favorites Playlist
To listen to the favorites playlist: Navigate to the high-level music menu. Press the up/down arrow to highlight favorites. Press play/pause to select the favorites menu option. To playback all songs use the up/down arrow to highlight ‘play all songs’ and press the play/pause to select.To playback a particular song use the up/down arrow to highlight the particular song you wish to play and press the play/pause to select.
Finis- Swim Swim Finis- Open WaterPlay All Songs
FavoritesArtistsPlay All Songs
00001/000012Finis
Open Water
Creating a Favorites Playlist
You can create a playlist of your favorite music by adding new files to the playlist as you listen to them.
To add the current playing song to the favorites playlist:At the playback screen, press and hold the return button to display the options menu.Press the up/down arrow to highlight add to favorites.Press the play/pause to add the current song to the favorites playlist.Display will read ‘Added to Favorites Successfully’.Repeat the above steps to add more songs.
Favorites
0:4400002/000042Finis
Swim Swim Swim
Shuffle OffRepeat OffAdd to Favorites
Added to Favorites
Successfully
14.
Favorites
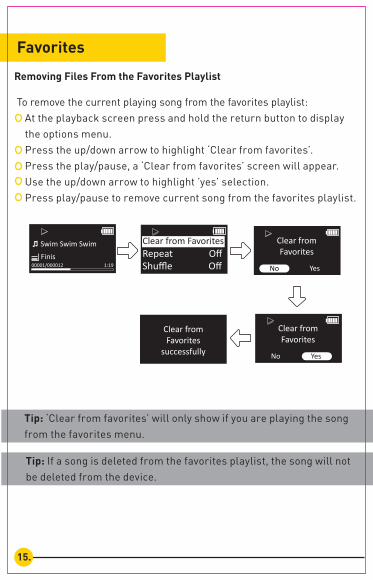
Removing Files From the Favorites Playlist
To remove the current playing song from the favorites playlist:At the playback screen press and hold the return button to display the options menu.Press the up/down arrow to highlight ‘Clear from favorites’.Press the play/pause, a ‘Clear from favorites’ screen will appear.Use the up/down arrow to highlight ’yes’ selection.Press play/pause to remove current song from the favorites playlist.
00001/000012Finis
Swim Swim Swim
Shuffle OffRepeat OffClear from Favorites
Clear fromFavorites
successfully
Clear fromFavorites
No Yes
Clear fromFavorites
No Yes
15.
Tip: ‘Clear from favorites’ will only show if you are playing the song from the favorites menu.
Tip: If a song is deleted from the favorites playlist, the song will not be deleted from the device.
To listen to the favorites playlist: Navigate to the high-level music menu. Press the up/down arrow to highlight favorites. Press play/pause to select the favorites menu option. To playback all songs use the up/down arrow to highlight ‘play all songs’ and press the play/pause to select.To playback a particular song use the up/down arrow to highlight the particular song you wish to play and press the play/pause to select.
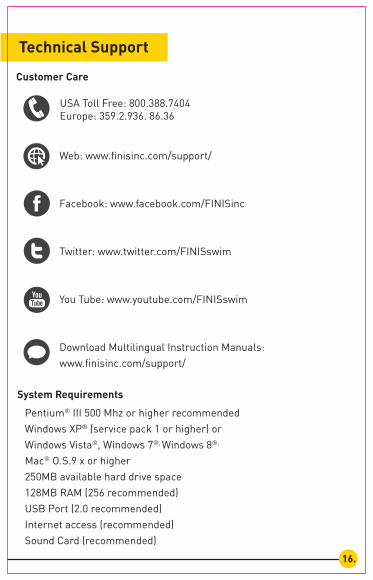
Customer Care
Web: www.finisinc.com/support/
Facebook: www.facebook.com/FINISinc
Twitter: www.twitter.com/FINISswim
You Tube: www.youtube.com/FINISswim
Download Multilingual Instruction Manuals:www.finisinc.com/support/
Technical Support
16.
System Requirements
Pentium® III 500 Mhz or higher recommendedWindows XP® (service pack 1 or higher) orWindows Vista®, Windows 7®, Windows 8®,
Mac® O.S.9 x or higher250MB available hard drive space128MB RAM (256 recommended)USB Port (2.0 recommended)Internet access (recommended)Sound Card (recommended)
USA Toll Free: 800.388.7404Europe: 359.2.936. 86.36
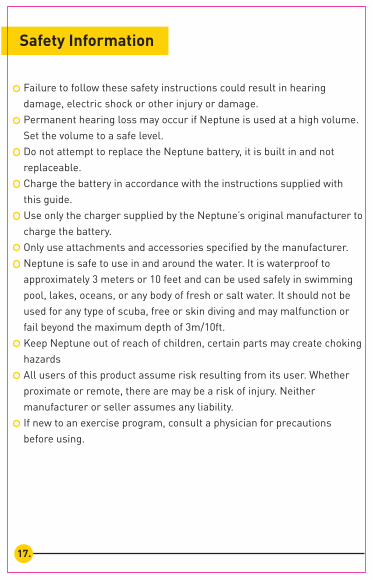
Safety Information
Failure to follow these safety instructions could result in hearing damage, electric shock or other injury or damage. Permanent hearing loss may occur if Neptune is used at a high volume. Set the volume to a safe level.Do not attempt to replace the Neptune battery, it is built in and not replaceable.Charge the battery in accordance with the instructions supplied with this guide.Use only the charger supplied by the Neptune’s original manufacturer to charge the battery. Only use attachments and accessories specified by the manufacturer.Neptune is safe to use in and around the water. It is waterproof to approximately 3 meters or 10 feet and can be used safely in swimming pool, lakes, oceans, or any body of fresh or salt water. It should not be used for any type of scuba, free or skin diving and may malfunction or fail beyond the maximum depth of 3m/10ft.Keep Neptune out of reach of children, certain parts may create choking hazardsAll users of this product assume risk resulting from its user. Whether proximate or remote, there are may be a risk of injury. Neither manufacturer or seller assumes any liability. If new to an exercise program, consult a physician for precautions before using.
17.
Warranty
One Year Limited Warranty
Neptune is warranted by FINIS to be free of defects in materials of workmanship, under normal use, for 1 year from the purchase date.The limited warranty excludes damage resulting from improper care of handling, accidents, modifications, unauthorized repairs, normal wear or other causes which are not defects in materials and workmanship. If there is a covered defect, we will repair or replace the product free of charge or issue a refund at FINIS’ discretion.
Please visit www.finisinc.com for more information.
18.
Compliance InformationFCC Information
United StatesThis device complies with part 15 of the FCC rules. Operation is subject to the following two conditions (1) this device may not cause harmful interference, and (2) this device must accept any interference received including interference that may cause undesired operation.
FCC WARNING: any changes or modifications not expressly approved by the party responsible for compliance could void the user’s authority to operate this equipment under FCC regulations.
Note: This equipment has been tested and found to comply with the limits for a Class B digital device, pursuant to part 15 of the FCC Rules. These limits are designed to provide reasonable protection against harmful interference in a residential installation. This equipment generates, uses and can radiate radio frequency energy and, if not installed and used in accordance with the instructions, may cause harmful interference to radio communications. However, there is no guarantee that interference will not occur in a particular installation. If this equipment does cause harmful interference to radio or television reception, which can be determined by turning the equipment off and on, the user is encouraged to try to correct the interference by one or more of the following measures:
Reorient or relocate the receiving antenna.Increase the separation between the equipment and receiver.Connect the equipment into an outlet on a circuit different from that to which the receiver is connected.Consult the dealer or an experienced radio/TV technician for help.
19.
Industry Canada StatementThis device complies with Industry Canada license- exempt RSS standard(s). Operation is subject to the following two conditions: (1) this device may not cause interference, and (2) this device must accept any interference, including interference that may cause undesired operation of the device.This Class B digital apparatus complies with Canadian ICES-003.
EU (European Union): Declaration of Conformity with Regard to the EU Directive 1995/5/EC.
This symbol means that according to local laws and regulations your product should be disposed of separately from household waste. When this product reaches its end of life, take it to a collection point designated by local authorities. Some collection points accept products for free. The separate collection and recycling of your product at the time of disposal will help conserve natural resources and ensure that it is recycled in a manner that protects human health and the environment.
Compliance Information
20.

www.finisinc.com