nexus 4 guidebook 121212
TRANSCRIPT

8/13/2019 Nexus 4 Guidebook 121212
http://slidepdf.com/reader/full/nexus-4-guidebook-121212 1/235
For AndroidTM mobile technologyplatform 4.2

8/13/2019 Nexus 4 Guidebook 121212
http://slidepdf.com/reader/full/nexus-4-guidebook-121212 2/235
NEXUS 4 GUIDEBOOK ii
Copyright © 2012 Google Inc. All rights reserved.
Edition 1.2.
Google, Android, Gmail, Google Maps, Chrome,Nexus 4, Google Play, YouTube, Google+, and other
trademarks are property of Google Inc. A list of
Google trademarks is available at http://www.
google.com/permissions/guidelines.html. LG and
the LG logo are trademarks of LG electronics Inc.
All other marks and trademarks are properties of
their respective owners.
The content of this guidebook may differ in some
details from the product or its software. For bestresults, make sure you’re running the latest Android
system update. To check, go to Settings > System >
About phone > System updates.
All information in this guidebook is subject tochange without notice.
For online help and support, visit support.google.
com/nexus.

8/13/2019 Nexus 4 Guidebook 121212
http://slidepdf.com/reader/full/nexus-4-guidebook-121212 3/235

8/13/2019 Nexus 4 Guidebook 121212
http://slidepdf.com/reader/full/nexus-4-guidebook-121212 4/235
NEXUS 4 GUIDEBOOK iv
Table of contents
Part One: Using Nexus 4
1. Get started 2
Insert a SIM card 2
Charge the battery 4
Get around 7
Browse & organize yourHome screens 10
Touch & type 14
Type text by speaking 16
Why use a Google Account? 18
What’s New in Android 20
2. Explore your phone 24
Swipe up for Google Now 24
Swipe down for notications& settings 27
Relax with Google Play 31

8/13/2019 Nexus 4 Guidebook 121212
http://slidepdf.com/reader/full/nexus-4-guidebook-121212 5/235
NEXUS 4 GUIDEBOOK v
Use & customize the lock screen 35
Try Face Unlock 38
Share content with Android Beam 39Change the wallpaper 41
Take a screenshot 42
Connect to keyboards, mice,
& other devices 43
3. Use the Phone app 47
Make a phone call 47
Answer or divert calls 49Work with the Call log 51
Place an Internet (SIP) call 52
Listen to your voicemail 54
4. Use the keyboard 59
Enter & edit text 59
Try Gesture Typing 63
Use keyboard dictionaries 65

8/13/2019 Nexus 4 Guidebook 121212
http://slidepdf.com/reader/full/nexus-4-guidebook-121212 6/235
NEXUS 4 GUIDEBOOK vi
5. Try some apps 66
Use All Apps 66
Start Gmail 68
Find People 69
Manage your Calendar 71
Open & use Clock 73
Manage downloads 75
6. Use Google Now & Search 77
About Google Now 77
Use Google Now 83
Turn off Google Now 86
Control location access,
reporting, & history 87Search & Voice Actions basics 92
Search tips & tricks 95
Use Voice Actions 97
Voice Actions commands 99
Google Now Card list 102
About Gmail Cards 114

8/13/2019 Nexus 4 Guidebook 121212
http://slidepdf.com/reader/full/nexus-4-guidebook-121212 7/235
NEXUS 4 GUIDEBOOK vii
About the Location History card 115
About the Stocks card 116
Search settings 117Privacy & accounts 120
7. Accessibility 122
Accessibility overview 122Accessibility gestures forAndroid 4.2 (Jelly Bean) 124
Set up your phone 127
Use magnication gestures 130Use TalkBack 131
Change TalkBack settings 132
Use Explore by Touch with TalkBack 134
Navigate the Home screen 136
Try Google Play 140
Use Gmail 144
Browse Chrome 148Use the lock screen 151
Accessibility settings 152

8/13/2019 Nexus 4 Guidebook 121212
http://slidepdf.com/reader/full/nexus-4-guidebook-121212 8/235
NEXUS 4 GUIDEBOOK viii
Part Two: Adjusting settings
8. Wireless & network settings 156
Connect to Wi-Fi networks 156
Connect to Bluetooth devices 163
Optimize data usage 168
Control airplane mode &other network settings 174
Connect to virtual private networks 176
9. Device settings179
Change sound settings 179
Set up Daydream 180
Use Wireless Display 182
Transfer les through USB 183
Extend battery life 185
Manage memory usage 187

8/13/2019 Nexus 4 Guidebook 121212
http://slidepdf.com/reader/full/nexus-4-guidebook-121212 9/235
NEXUS 4 GUIDEBOOK ix
10. Security settings 192
Security on Android 192
Manage security settings 193
Protect against harmful apps 195
Set screen lock 197
Encrypt your data 200
Work with certicates 203
11. Personal, account, &system settings 208
Manage location access 208
Change backup & reset options 211
Add or remove accounts 214
Congure sync options 216
Appendix: Hardware reference 220
What’s in the box 220
Nexus 4 222Specs 224

8/13/2019 Nexus 4 Guidebook 121212
http://slidepdf.com/reader/full/nexus-4-guidebook-121212 10/235
Part One
Using
Nexus 4

8/13/2019 Nexus 4 Guidebook 121212
http://slidepdf.com/reader/full/nexus-4-guidebook-121212 11/235
GET STARTED 2
1
Get started
Insert a SIM cardBefore you start using your phone, you mayneed to insert your Micro SIM card. If no cardis installed, the message “No SIM card” ap-
pears on the phone’s lock screen.

8/13/2019 Nexus 4 Guidebook 121212
http://slidepdf.com/reader/full/nexus-4-guidebook-121212 12/235
GET STARTED 3
The SIM card tray is located on the left sideof the phone below the volume button. Theeject button is a small hole just above the
tray door. To install a new Micro SIM card:
1. Insert the SIM ejection tool that comeswith the phone (or a thin pin) into the ejectbutton hole, and push rmly but gently un-
til the tray pops out.2. Remove the tray and place the micro SIM
card inside it, with the contacts out andthe angled corner to the right. There isonly one possible way to t the card snug-
ly into the tray.3. Carefully reposition the tray in the slot
and push it gently back into the phone.
TIP: Your phone’s IMEI identicationnumber is on the SIM card tray. Youmay need this number later to identifyyour phone for service purposes. Writedown the IMEI number or take a photoof the label on the product box.

8/13/2019 Nexus 4 Guidebook 121212
http://slidepdf.com/reader/full/nexus-4-guidebook-121212 13/235
GET STARTED 4
Charge the battery
Your battery will not be fully charged when
you rst unpack your Nexus 4. It’s a goodidea to fully charge the battery as soon asyou get a chance.
If you’re using the travel adapter that comes
with the phone, connect one end of the datacable to the charger port at the bottom ofthe phone, and the other end to the traveladapter. Then connect the travel adapter toa power outlet.

8/13/2019 Nexus 4 Guidebook 121212
http://slidepdf.com/reader/full/nexus-4-guidebook-121212 14/235
GET STARTED 5
• The travel adapter varies by countryor region.
• Use only the travel adapter and Mi-cro USB cable that come with yourNexus 4. Using a different traveladapter or cable may damage yourphone.
• The input voltage range betweenthe wall outlet and this travel adapt-er is AC 100V–240V, and the traveladapter’s output voltage is DC 5V,2A.
• Charging your phone through a USBcable attached to another device,such as a laptop computer, takeslonger than charging with a traveladapter.
• Nexus 4’s battery can’t be removed.Don’t attempt to open the phone.

8/13/2019 Nexus 4 Guidebook 121212
http://slidepdf.com/reader/full/nexus-4-guidebook-121212 15/235
GET STARTED 6
IMPORTANT: If you use a wireless char-ger, you must use an approved model
and only as directed. The Nexus 4 trav-el adapter may not generate enoughcurrent to power a wireless charger.
DO NOT throw the battery inmunicipal waste. The symbolof the crossed out wheeledbin indicates that the batteryshould not be placed in mu-nicipal waste.
Set up your phone
The rst time you turn on the phone, you’llsee a Welcome screen.
• To choose a different language, touch themenu.
• To continue, touch Start and follow theinstructions.
When prompted, sign in using the email ad-

8/13/2019 Nexus 4 Guidebook 121212
http://slidepdf.com/reader/full/nexus-4-guidebook-121212 16/235
GET STARTED 7
dress and password for your Google Ac-count. If you don’t have one yet, create one.
An email address that you use for any of thefollowing counts as a Google Account:
• Gmail• YouTube
• Google Apps• AdWords• Any other Google product
When you sign in with a Google Account, all
the email, contacts, Calendar events, andother data associated with that account areautomatically synced with your phone.
If you have multiple Google Accounts, you
can add the others later.
Get around
Every Home screen shows the Favorites tray:another quick way to get to your apps:

8/13/2019 Nexus 4 Guidebook 121212
http://slidepdf.com/reader/full/nexus-4-guidebook-121212 17/235
GET STARTED 8
At the bottom of every Nexus 4 screen, nomatter what you’re doing, you’ll always ndthese three navigation buttons:
Back
Opens the previous screen youwere working in, even if it was ina different app. Once you back
up to the Home screen, youcan’t go back any further in yourhistory.
Home
Opens Home. If you’re view-ing a left or right Home screen,opens the central Home screen.To open Google Now, swipe up.Google Now gives just what youneed to know, right when youneed it.
8/13/2019 Nexus 4 Guidebook 121212
http://slidepdf.com/reader/full/nexus-4-guidebook-121212 18/235
GET STARTED 9
Recent apps
Opens a list of thumbnail images
of apps you’ve worked with re-cently. To open an app, touch it.To remove a thumbnail from thelist, swipe it left or right.
If you don’t use these buttons often, theymay shrink to dots or fade away, dependingon the current app. To bring them back, touchtheir location.
On the All Apps screen avail-able from the Favorites tray,notice the Settings icon. Thisbrings you to the Settingsscreens for your phone, whereyou can adjust things like net-work, sound, and account set-tings, among many others.
Settings
8/13/2019 Nexus 4 Guidebook 121212
http://slidepdf.com/reader/full/nexus-4-guidebook-121212 19/235
GET STARTED 10
TIP: You can use Quick Settings to tog-gle Wi-Fi, change display brightness,
and more. To open Quick Settings,swipe down with two ngers from thetop of any screen. Or, swipe down withone nger to pull down the noticationshade, and touch the Quick Settings
icon at the top right.
At the top of the screen you’ll nd GoogleSearch, which lets you search your phone
or the Internet. Touch Google to type yoursearch terms, or the Microphone icon tospeak them; you can also say “Google” andyour query to activate a voice search.
Browse & organize your Homescreens
Browse Home screens
To move between Home screens, swipe leftor right.

8/13/2019 Nexus 4 Guidebook 121212
http://slidepdf.com/reader/full/nexus-4-guidebook-121212 20/235
GET STARTED 11
The My Library widget displays apps, music,movies, magazines, books, and games youalready have – including free content that
comes with your Nexus 4:

8/13/2019 Nexus 4 Guidebook 121212
http://slidepdf.com/reader/full/nexus-4-guidebook-121212 21/235
GET STARTED 12
When you’re ready to shop for more, try thesuggestions in one of the Play Recommenda-tions widgets:
To resize a widget, touch & hold, then let go
and drag the blue dots. To remove it, touch &hold, then drag it to the Remove icon at thetop of the screen.

8/13/2019 Nexus 4 Guidebook 121212
http://slidepdf.com/reader/full/nexus-4-guidebook-121212 22/235
GET STARTED 13
Organize Home screens
To add an app or widget to a Home screen:
1. Go to the Home screen where you want toplace the app or widget.
2. Touch the All Apps icon.3. Swipe right, if necessary, to nd the app
or widget you want.4. Touch & hold the app or widget until the
Home screen appears, slide it into place,and lift your nger.
To move an app or widget icon to a differentlocation on a Home screen:
1. Touch & hold the icon.2. Slide your nger to the new position.
To move between Home screens, slide to-ward the edge of the screen.To bump another icon out of the way, slideslowly into it.
3. Lift your nger.
The icon drops into its new position.

8/13/2019 Nexus 4 Guidebook 121212
http://slidepdf.com/reader/full/nexus-4-guidebook-121212 23/235
GET STARTED 14
To combine two icons in a folder, slide onequickly over the other.
To open a folder, touch it. To rename a folder,touch its name.
Touch & type
To select or activate something, touch it.
To type something, such as a name, pass-word, or search terms, just touch where youwant to type. A keyboard pops up that letsyou type into the eld.
Other common gestures include:
• Touch & hold. Touch & hold an item on the
8/13/2019 Nexus 4 Guidebook 121212
http://slidepdf.com/reader/full/nexus-4-guidebook-121212 24/235
GET STARTED 15
screen by touching it and not lifting yournger until an action occurs.
• Drag. Touch & hold an item for a moment
and then, without lifting your nger, moveyour nger on the screen until you reachthe target position. For example, you canmove apps around on the Home screen.
• Swipe or slide. Quickly move your nger
across the surface of the screen, with-out pausing when you rst touch (so youdon’t drag something instead). For exam-ple, you can slide a Home screen left orright to view the other Home screens.
• Double-tap. Tap quickly twice on a web-page, map, or other screen to zoom. Forexample, double-tap a picture in Chrometo zoom in, and double-tap again to zoom
out.• Pinch. In some apps (such as Maps,Chrome, and Gallery), you can zoom inand out by placing two ngers on thescreen at once and pinching them togeth-
er (to zoom out) or spreading them apart(to zoom in).

8/13/2019 Nexus 4 Guidebook 121212
http://slidepdf.com/reader/full/nexus-4-guidebook-121212 25/235
GET STARTED 16
• Rotate the screen. The orientation ofmost screens rotates with your phone asyou turn it. To lock or unlock the screen’s
vertical orientation, swipe down with twongers from the top of any screen andtouch the Rotation icon in Quick Settings.
To change your phone’s noti-
cation sounds, volumes, andmore, go to Settings > De-
vice > Sound.
To change your phone’s bright-
ness, font size, and more, goto Settings > Device >
Display.
Settings
Type text by speaking
You can speak to enter text in most placesthat you can enter text with the onscreen
keyboard.
1. Touch a text eld, or a location in textyou’ve already entered in a text eld.
8/13/2019 Nexus 4 Guidebook 121212
http://slidepdf.com/reader/full/nexus-4-guidebook-121212 26/235
GET STARTED 17
2. Touch the Microphone key on the on-screen keyboard.
3. When you see the microphone image,
speak what you want to type.
Say “comma,” “period,” “question mark,” “ex-clamation mark,” or “exclamation point” toenter punctuation.
When you pause, what you spoke is tran-scribed by the speech-recognition serviceand entered in the text eld, underlined. Youcan touch the Delete key to erase the under-
lined text. If you start typing or entering moretext by speaking, the underline disappears.
To improve processing of your voice input,Google may record a few seconds of ambient
background noise in temporary memory atany time. This recording remains on the de-vice only fleetingly and is not sent to Google.

8/13/2019 Nexus 4 Guidebook 121212
http://slidepdf.com/reader/full/nexus-4-guidebook-121212 27/235
GET STARTED 18
To change your phone’s speechsettings, go to Settings > Per-
sonal > Language & input.
Settings
Why use a Google Account?
A Google Account lets you organize and ac-cess your personal information from anycomputer or mobile device:
• Use Google Play. Google Play brings to-gether all your favorite content in oneplace: movies, TV shows, books, music,magazines, apps, and more. When yousign in with your Google Account, you can
reach any of this content from any of yourdevices – as long as you have a networkconnection. You can also shop for more inthe Google Play store.
• Synchronize and back up everything.
Whether you draft an email, add an eventto your calendar, or add a friend’s ad-dress, your work gets backed up continu-

8/13/2019 Nexus 4 Guidebook 121212
http://slidepdf.com/reader/full/nexus-4-guidebook-121212 28/235
8/13/2019 Nexus 4 Guidebook 121212
http://slidepdf.com/reader/full/nexus-4-guidebook-121212 29/235
GET STARTED 20
What’s New in Android
Whether you’re new to Android or an avid
user, check out some of the new features inAndroid 4.1 and 4.2 (Jelly Bean). For a com-prehensive list of all changes since Android4.0, see Android 4.1, Jelly Bean and Android 4.2: A new flavor of Jelly Bean.
• Gesture Typing (Android 4.2) Instead of typing each letter, use Ges-ture Typing to input a word without liftingyour nger. You don’t need to worry about
spaces because they’re added automati-cally for you.
Glide your nger over the letters you want
to type, and lift it after each word.
• Google Play widgets New widgets on your Home screens dis-play recently used apps, music, movies,books, or games you already have – in-
cluding preloaded content that comeswith your device. Other widgets offer sug-gestions for browsing Google Play.

8/13/2019 Nexus 4 Guidebook 121212
http://slidepdf.com/reader/full/nexus-4-guidebook-121212 30/235
GET STARTED 21
Touch a widget to access its content on
Google Play. Touch & hold a widget to re-size it or remove it.
• Quick Settings (Android 4.2) Use Quick Settings to easily access Wi-Fi settings, manage display brightness,open the main Settings menu, and more.
Swipe down with two ngers from the top
right corner of any screen to open Quick
Settings, then touch one of the boxes toopen a specic setting.
• Expandable notications Expandable notications were introducedin Android 4.1, including the option to per-form actions from the notication itself.
In Android 4.2, you can expand notica-tions more easily with a swipe of yournger.
Swipe down the notication shade from
the top of the screen, then glide your
nger down the notications to expandthem. Touch an icon inside a noticationto handle a task directly.

8/13/2019 Nexus 4 Guidebook 121212
http://slidepdf.com/reader/full/nexus-4-guidebook-121212 31/235
GET STARTED 22
• Rearrange Home screens Slide an icon slowly to move other iconsor widgets gently aside.
Touch & hold an icon and slide slowly to
the location of your choice. Slide an icon
quickly over another to create a folder.
• Screen magnication (Android 4.2) Users with visual impairments can enterfull-screen magnication by triple-tap-ping the screen.
Go to Settings > System > Accessibility >
Magnifcation gestures to turn on screenmagnication.
• Google Now Google Now shows you information at
just the right time, such as today’s weath-er before you start your day, how muchtrafc to expect before you leave for work,and even your favorite team’s score whilethey’re playing.
Swipe up from the bottom center of any

8/13/2019 Nexus 4 Guidebook 121212
http://slidepdf.com/reader/full/nexus-4-guidebook-121212 32/235
GET STARTED 23
screen, or touch the Google Search bar on
any Home screen.
• Say “Google” to searchWhen the Google Now screen is open,you can say “Google” to activate a voicesearch.
Open Google Now, then say “Google” and
your query to search.

8/13/2019 Nexus 4 Guidebook 121212
http://slidepdf.com/reader/full/nexus-4-guidebook-121212 33/235
EXPLORE YOUR PHONE 24
2
Explore yourphone
Swipe up for Google Now
Google Now is about getting you just theright information, at just the right time.
It tells you today’s weather before you startyour day, how much trafc to expect before
you leave for work, and even your favoriteteam’s score while they’re playing.
All of this happens automatically. GoogleNow intelligently brings you the information
you want to see, when you want to see it. Nodigging required.
For example, here’s a Google Now card that

8/13/2019 Nexus 4 Guidebook 121212
http://slidepdf.com/reader/full/nexus-4-guidebook-121212 34/235
EXPLORE YOUR PHONE 25
appears when you’re about to start yourcommute home:
Give it a try! Swipe your nger up from thebottom of any screen, or touch the GoogleSearch bar at the top of the screen.
When you want to see more cards, touch
Show more cards at the bottom of thescreen. When you don’t need them any more,swipe them out of the way.
You’re in control
When you decide to use Google Now, you’returning on location reporting and location

8/13/2019 Nexus 4 Guidebook 121212
http://slidepdf.com/reader/full/nexus-4-guidebook-121212 35/235
EXPLORE YOUR PHONE 26
history. Google Now also uses locationinformation provided by Google’s locationservice and GPS, if those are currently turned
on.
Google Now also uses data that you mayhave stored in other Google products. Forexample, if you have searches stored in your
Web History, Google Now can show cardsbased on sports scores, flight status, andso on.
Similarly, Google Now can use data that you
may have stored in third-party products thatyou allow Google to access. For example,your phone’s synced calendar may includeentries from non-Google calendar products.If you have such an entry for a dentist
appointment that includes the dentist’saddress, Google Now can check trafc andsuggest when to leave.
You’re in control. You can choose exactly
which cards you’d like to see, adjust thedetails of what they display, and adjust yourprivacy settings.

8/13/2019 Nexus 4 Guidebook 121212
http://slidepdf.com/reader/full/nexus-4-guidebook-121212 36/235
EXPLORE YOUR PHONE 27
For more information about Google Now andyour location information, see “Chapter 5, Use Google Now & Search.”
Swipe down for notications &settings
Notications alert you to the arrival of newmessages, calendar events, and alarms,as well as ongoing events, such as videodownloads.
When a notication arrives, its icon appearsat the top of the screen. Icons for pendingnotications appear on the left, and systemicons showing things like Wi-Fi signal or bat-tery strength on the right:
8/13/2019 Nexus 4 Guidebook 121212
http://slidepdf.com/reader/full/nexus-4-guidebook-121212 37/235
EXPLORE YOUR PHONE 28
To open the notication shade, swipe downfrom the top left corner of any screen.
Certain notications can be expanded toshow more information, such as email pre-views or calendar events. The one at the topis always expanded when possible.
To open the related app, touch the notica-tion icon on the left. Some notications alsoallow you to take specic actions by touch-ing icons within the notication. For ex-ample, Calendar notications allow you to
Snooze (remind you later) or send email toother guests.
When you’re nished with a notication, justswipe it away. To dismiss all notications,
touch the Dismiss icon at the top right of thenotication shade.
You can perform these actions from the no-tication shade:

8/13/2019 Nexus 4 Guidebook 121212
http://slidepdf.com/reader/full/nexus-4-guidebook-121212 38/235
EXPLORE YOUR PHONE 29

8/13/2019 Nexus 4 Guidebook 121212
http://slidepdf.com/reader/full/nexus-4-guidebook-121212 39/235
EXPLORE YOUR PHONE 30
Quick Settings
Use Quick Settings to easily toggle Wi-Fi,
manage display brightness, open the mainSettings menu, and more. To open Quick Set-tings, swipe down from the top right cornerof any screen:

8/13/2019 Nexus 4 Guidebook 121212
http://slidepdf.com/reader/full/nexus-4-guidebook-121212 40/235
EXPLORE YOUR PHONE 31
Relax with Google Play
Google Play brings together all your favorite
content in one place – movies, TV shows,books, music, magazines, apps, and more –so you can reach it from any of your devices.
Use Google Play widgets
These widgets are available on your Homescreens:
• My Library. Displays your most recentlyused music, books, and so on. Touch anyof the images to see your content – plusfree gifts from Google.
• Recommended on Play. Suggests music,
movies, and other content that may inter-est you. Touch the suggestion to learnmore about it.
• Recommended apps. Recommends appsthat you can add to your Home screen.
Touch the recommendation to learn moreabout it.

8/13/2019 Nexus 4 Guidebook 121212
http://slidepdf.com/reader/full/nexus-4-guidebook-121212 41/235
EXPLORE YOUR PHONE 32
All Google Play recommendation widgetswork the same way:
To resize a widget, touch & hold, then let goand drag the blue dots. To remove it, touch &
hold, then drag it to the Remove icon at thetop of the screen.
To add another Play widget, touch theAll Apps icon, then Widgets, and swipe from
right to left until you see the one you want.Then touch & hold, and let go in the Homescreen location you want.

8/13/2019 Nexus 4 Guidebook 121212
http://slidepdf.com/reader/full/nexus-4-guidebook-121212 42/235
EXPLORE YOUR PHONE 33
Shop on Google Play
To open the Google Play Store
app, touch the Play Store iconin your Favorites tray on everyHome screen.
Most things you purchase on
Google Play are available fromyour computer as well as fromany of your Android mobile de-vices. (Android apps are oneexception – they run only on
Android devices.)
Play Store
Sign in to play.google.com to get your enter-tainment from anywhere.
Find your content
If you purchased on Google Play in the past,you’ll automatically have access to this con-
tent on your Nexus 4 — just make sure you’resigned in using the same account that youused to purchase it.

8/13/2019 Nexus 4 Guidebook 121212
http://slidepdf.com/reader/full/nexus-4-guidebook-121212 43/235
EXPLORE YOUR PHONE 34
You can get to your content using any ofthe Google Play icons in your Favorites tray,including Books, Magazines, Movies, and
Music.
Or, touch the Play Store icon to openGoogle Play, and then go to one of the mainsections, such as Apps, Music, and so on.
When you touch the Menu icon in anysection, the rst item in the menu is alwayssomething like My Apps or My Music, whichwill bring you your content for that section ofGoogle Play.
You can quickly access your content thisway, from the Google Play Store app, evenif you originally purchased it on Google Playusing a different phone or phone. If you get a
new device, all your media will automaticallybe waiting for you here when you turn on andsign in.
Google Play settingsTo adjust your Google Play settings, switchaccounts, or get help, choose the option

8/13/2019 Nexus 4 Guidebook 121212
http://slidepdf.com/reader/full/nexus-4-guidebook-121212 44/235
EXPLORE YOUR PHONE 35
you want from the Menu in the top rightcorner.
The Google Play Settings screen lets youcontrol when you’re notied about updatesto apps and games, clear your search histo-ry, and enable user controls. To lter Androidapps based on maturity level or require a PIN
before completing any purchase, touch Con-
tent ltering or Set or change PIN.
Google Play support
For more detailed information about GooglePlay, including phone and email support op-tions, visit support.google.com/googleplay.
Use & customize the lockscreen
You can add widgets to the top of the lockscreen and swipe between them. Lockscreen widgets let you scan recent Gmail

8/13/2019 Nexus 4 Guidebook 121212
http://slidepdf.com/reader/full/nexus-4-guidebook-121212 45/235

8/13/2019 Nexus 4 Guidebook 121212
http://slidepdf.com/reader/full/nexus-4-guidebook-121212 46/235

8/13/2019 Nexus 4 Guidebook 121212
http://slidepdf.com/reader/full/nexus-4-guidebook-121212 47/235
EXPLORE YOUR PHONE 38
Reorder lock screen widgets
1. Touch & hold a widget.
2. Drag the widget and release it in the loca-tion of your choice.
Remove a lock screen widget
Touch & hold the widget, then drag it onto theRemove icon.
Try Face Unlock You can set an automatic screen lock foryour phone. After you set a lock, the screenlocks when the display goes to sleep or when
you press the Power button.
You can set locks of different strengths us-ing lock settings:
1. Go to Settings > Personal > Security
> Screen lock .2. Touch the type of lock you’d like to use.

8/13/2019 Nexus 4 Guidebook 121212
http://slidepdf.com/reader/full/nexus-4-guidebook-121212 48/235
EXPLORE YOUR PHONE 39
Face Unlock is one of the options available.After you’ve set it up, you can unlock yourphone simply by looking at it. Although Face
Unlock is not very secure, it can be conve-nient and fun to use.
TIP: After you set up Face Unlock, lookunder Settings > Personal > Security for two additional settings: Improve
face matching and Liveness check .Use these to make Face Unlock more
reliable and secure.
Share content with AndroidBeam
You can beam a web page, a video, or othercontent from your screen to another device
by bringing the devices together (typicallyback to back).

8/13/2019 Nexus 4 Guidebook 121212
http://slidepdf.com/reader/full/nexus-4-guidebook-121212 49/235
EXPLORE YOUR PHONE 40
Before you begin: Make sure both devicesare unlocked, support Near Field Communi-cation (NFC), and have both NFC and Android
Beam turned on.
1. Open a screen that contains somethingyou’d like to share, such as a webpage,YouTube video, or place page in Maps.
2. Move the back of your phone toward theback of the other device.When the devices connect, you hear asound, the image on your screen reducesin size, and you see the message Touch
to beam.3. Touch your screen anywhere.
Your friend’s device displays the trans-ferred content. Or, if the necessary appisn’t installed, Google Play opens to ascreen where your friend can downloadthe app.

8/13/2019 Nexus 4 Guidebook 121212
http://slidepdf.com/reader/full/nexus-4-guidebook-121212 50/235
EXPLORE YOUR PHONE 41
TIP: When you touch another deviceto the back of your Nexus 4, make sure
it’s near the “u” in “nexus” to success-fully beam content.
To turn on NFC, go to Settings
> Wireless & networks > More> NFC.
To turn on Android Beam, go toSettings > Wireless & networks
> More > Android Beam.
Settings
Change the wallpaper
To change the wallpaper that’s displayed onyour Home screens:
1. Touch & hold anywhere on a Home screenthat’s not occupied.
A list of options appears.2. Touch a wallpaper source:
Gallery. Choose from pictures that you’ve

8/13/2019 Nexus 4 Guidebook 121212
http://slidepdf.com/reader/full/nexus-4-guidebook-121212 51/235
EXPLORE YOUR PHONE 42
synced with your phone.Live Wallpapers. Choose from a scrollinglist of animated wallpapers.
Wallpapers. Choose from thumbnails ofdefault images, or touch a thumbnail fora larger version.You can download additional wallpaperson Google Play.
3. To set a wallpaper, touch Set wallpaper or, for Gallery images, determine the crop-ping and touch Crop.
To change your phone’s wall-paper, go to Settings > Device
> Display > Wallpaper.
Settings
Take a screenshot
You can easily take a screenshot on yourphone that you can save in your Gallery orshare with others:

8/13/2019 Nexus 4 Guidebook 121212
http://slidepdf.com/reader/full/nexus-4-guidebook-121212 52/235
EXPLORE YOUR PHONE 43
1. Make sure the image you want to captureis displayed on the screen.
2. Press the Power and Volume down but-
tons simultaneously.
The screenshot is automatically saved inyour Gallery.
TIP: To easily share your screenshotvia Gmail, Google+, and more, swipedown the notication shade and touch
the Share icon next to the previewof y
our screenshot.
Connect to keyboards, mice, &other devices
You can connect a keyboard, mouse, or evena joystick or other input device to your phone
via Bluetooth and use it just as you wouldwith a PC. USB is not supported for connect-ing Nexus 4 to such devices.

8/13/2019 Nexus 4 Guidebook 121212
http://slidepdf.com/reader/full/nexus-4-guidebook-121212 53/235
EXPLORE YOUR PHONE 44
IMPORTANT: Continuous use of amouse via Bluetooth will cause a
signicant additional drain on yourbattery.
You pair and connect Bluetooth input de-
vices to your phone in the same way as anyother Bluetooth device.
Keyboards
In addition to entering text, you can use yourkeyboard to navigate your phone’s features:
• Use the arrow keys to select items onscreen.
• Pressing Return when an item is selectedis equivalent to touching that item.
• Pressing Escape is equivalent to touch-ing Back.
• Press Tab or Shift-Tab to move from eldto eld in a form or other screen with mul-tiple text elds.

8/13/2019 Nexus 4 Guidebook 121212
http://slidepdf.com/reader/full/nexus-4-guidebook-121212 54/235
EXPLORE YOUR PHONE 45
Mice
When you connect a mouse to your phone
via Bluetooth and move the mouse, an ar-row-shaped cursor appears, just as on acomputer:
• Use the mouse to move the cursor.
• Clicking, pressing, and dragging with themouse button is equivalent to touching,touching & holding, and dragging withyour nger.
• Only one mouse button is supported.
• If your mouse has a trackball or scrollwheel, you can use it to scroll both verti-cally and horizontally.
Other input devices
You can connect joysticks, gamepads, andother input devices to your phone via Blue-tooth. If they work without special drivers or
adapters on your PC, they will likely work withyour phone. However, games and other appsmust be designed to support any special

8/13/2019 Nexus 4 Guidebook 121212
http://slidepdf.com/reader/full/nexus-4-guidebook-121212 55/235
EXPLORE YOUR PHONE 46
features of an input device, such as dedi-cated buttons or other controls, to take fulladvantage of them.

8/13/2019 Nexus 4 Guidebook 121212
http://slidepdf.com/reader/full/nexus-4-guidebook-121212 56/235
USE THE PHONE APP 47
3
Use thePhone app
Make a phone call
You can place calls from the Phone app ,the People app , or other apps or widgetsthat display contact information. Whereveryou see a phone number, you can usuallytouch it to dial.
To dial using the Phone app:
1. Touch the Phone icon on a Home orAll Apps screen.
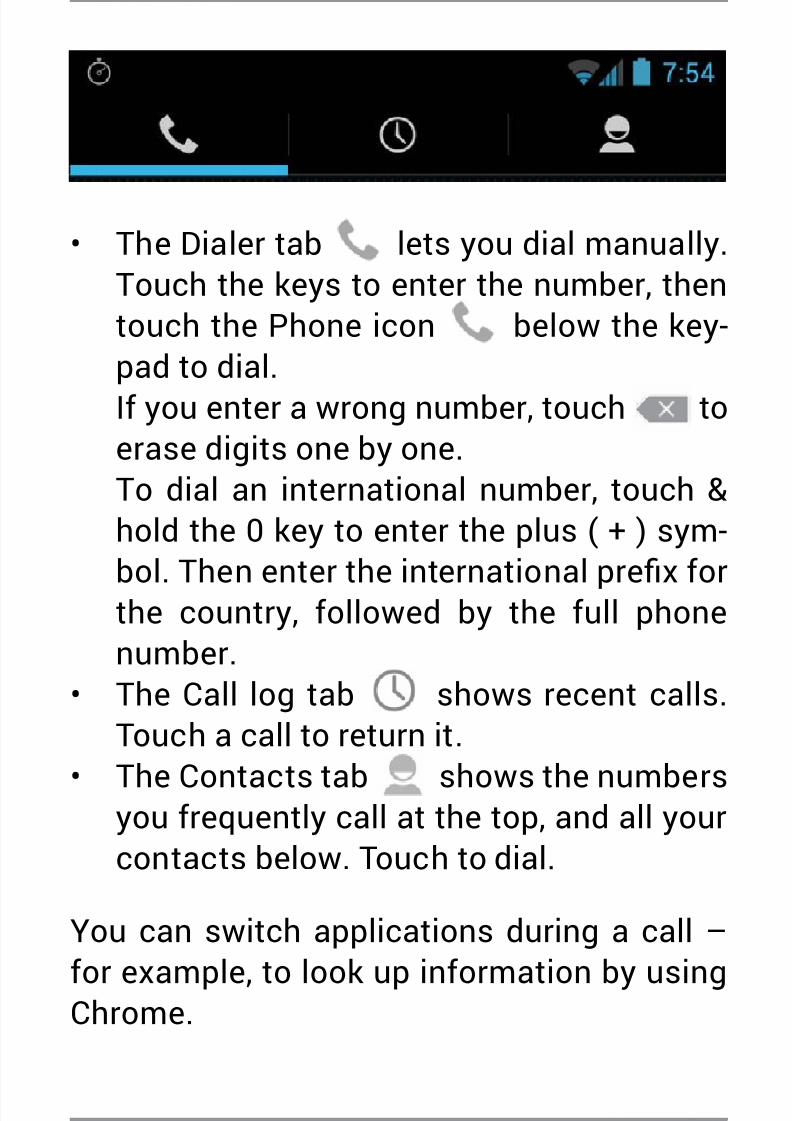
Notice the three tabs at the top of the phone.You can make calls from any of them.
8/13/2019 Nexus 4 Guidebook 121212
http://slidepdf.com/reader/full/nexus-4-guidebook-121212 57/235
USE THE PHONE APP 48
• The Dialer tab lets you dial manually.Touch the keys to enter the number, thentouch the Phone icon below the key-pad to dial.If you enter a wrong number, touch toerase digits one by one.To dial an international number, touch &hold the 0 key to enter the plus ( + ) sym-
bol. Then enter the international prex forthe country, followed by the full phonenumber.
• The Call log tab shows recent calls.Touch a call to return it.
• The Contacts tab shows the numbersyou frequently call at the top, and all yourcontacts below. Touch to dial.
You can switch applications during a call –
for example, to look up information by usingChrome.

8/13/2019 Nexus 4 Guidebook 121212
http://slidepdf.com/reader/full/nexus-4-guidebook-121212 58/235
USE THE PHONE APP 49
To return to the Phone app while a call is inprogress:
1. Swipe down from the top of the screen toreveal your notications.
2. Touch the green phone icon.
To end a call in progress, touch the End Call
icon at the bottom of the screen.
Answer or divert calls
When you receive a phone call, the Incom-ing Call screen opens, displaying the callerID and any additional information about thecaller that you’ve entered in People.
All incoming calls are recorded in the Phoneapp’s Call log tab. If you miss a call, you re-ceive a notication.
To silence the ringer before answering the
call, press the Volume Down button on theside of your phone.

8/13/2019 Nexus 4 Guidebook 121212
http://slidepdf.com/reader/full/nexus-4-guidebook-121212 59/235
USE THE PHONE APP 50
When a call arrives, touch the white phoneicon and slide over one of these icons:
Answer call
Start talking to the caller.
Send to voicemail
Direct the caller to leave a voice-mail message.
Send a message
Opens a list of quick text re-sponses. Touch one to send it tothe caller immediately.
TIP: To edit text responses from withinthe Phone app, touch Menu icon >
Settings > Quick responses.

8/13/2019 Nexus 4 Guidebook 121212
http://slidepdf.com/reader/full/nexus-4-guidebook-121212 60/235
USE THE PHONE APP 51
Work with the Call log
The Call log is a list of all the calls you’ve
placed, received, or missed. It provides aconvenient way to redial a number, return acall, or add a number to your Contacts.
Within the Phone app , the Call log is un-
der the middle tab . Touch a number formore information a
bout the call, or touch thephone icon beside it to call back.
Arrow icons beside a call indicate the type of
call. Multiple arrows indicate multiple calls:
• Missed incoming call• Received incoming call• Outgoing call
While viewing details for a call:
• Touch the number to call it.• Touch to send a text message.
• Touch t
he Contacts icon to view con-tact details.

8/13/2019 Nexus 4 Guidebook 121212
http://slidepdf.com/reader/full/nexus-4-guidebook-121212 61/235
USE THE PHONE APP 52
• Touch to add a new People card forthe caller.
To clear the Call log:
1. Touch the Menu icon.2. Touch Clear Call Log.
Place an Internet (SIP) call
You can place calls over the Internet whenconnected to a Wi-Fi network, rather than
over your mobile network. To do so, you mustrst congure your phone to use an Internetcalling account.
After you set up the account, placing an In-
ternet call is no different than placing anyother call. However, you must be connectedto a Wi-Fi network. When you’re making anInternet call, the phone displays Internet Callnear the top of the screen.
Internet calling is based on the Session Ini-
8/13/2019 Nexus 4 Guidebook 121212
http://slidepdf.com/reader/full/nexus-4-guidebook-121212 62/235
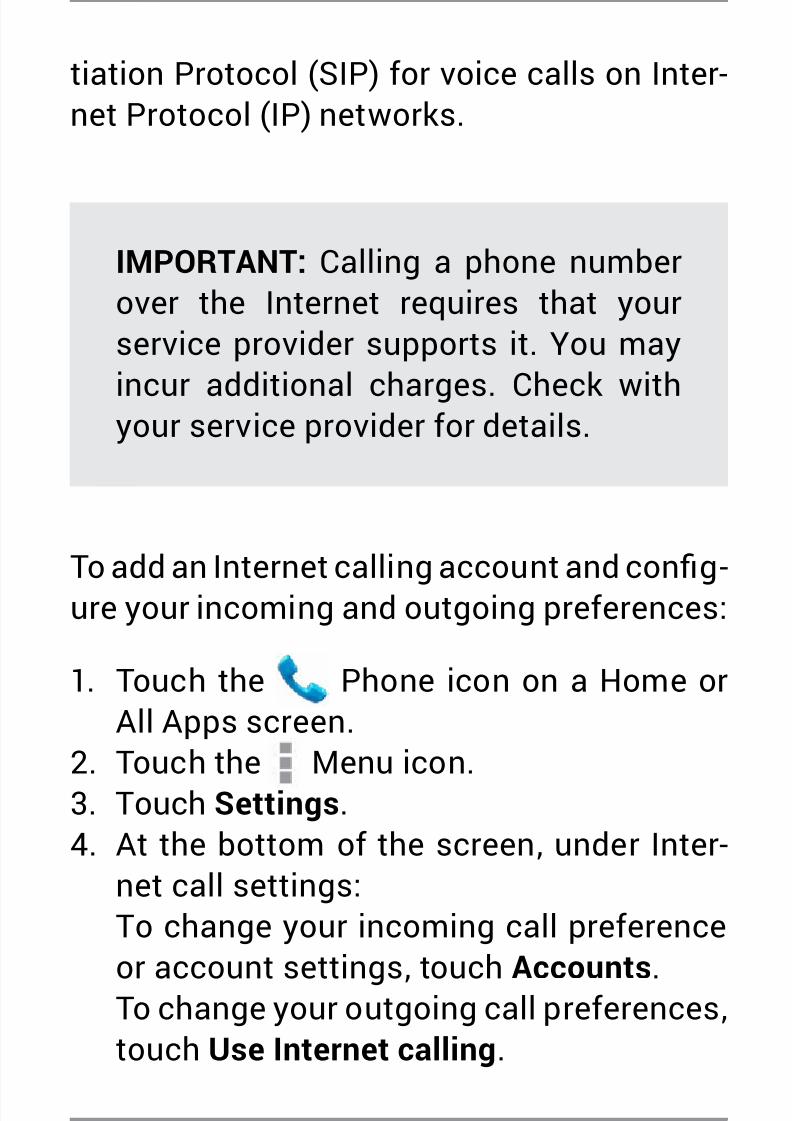
USE THE PHONE APP 53
tiation Protocol (SIP) for voice calls on Inter-net Protocol (IP) networks.
IMPORTANT: Calling a phone numberover the Internet requires that yourservice provider supports it. You may
incur additional charges. Check withyour service provider for details.
To add an Internet calling account and cong-ure your incoming and outgoing preferences:
1. Touch the Phone icon on a Home orAll Apps screen.
2. Touch the Menu icon.3. Touch Settings.4. At the bottom of the screen, under Inter-
net call settings:To change your incoming call preference
or account settings, touch Accounts.To change your outgoing call preferences,touch Use Internet calling.

8/13/2019 Nexus 4 Guidebook 121212
http://slidepdf.com/reader/full/nexus-4-guidebook-121212 63/235
USE THE PHONE APP 54
You’ll also want to add SIP addresses for thecontacts you want to call this way. To do so:
1. Touch the contact’s info in the Calllog tab.
2. Touch to go to the contact’s card.3. Touch the Menu icon, then Edit.4. Scroll to the bottom of the screen, touch
Add another eld, and then Internet call.5. Touch the Internet call eld and type the
number.
Listen to your voicemailWhen you have a new voicemail message,the voicemail icon appears in the Statusarea at the top left of your screen.
To read your voicemail:
1. Swipe down from the top of the screen toview your notications.
The voicemail notication displays thenumber of unread messages and a num-ber to dial.

8/13/2019 Nexus 4 Guidebook 121212
http://slidepdf.com/reader/full/nexus-4-guidebook-121212 64/235
USE THE PHONE APP 55
2. Touch New voicemail.Your phone dials the voicemail message.Follow the instructions to retrieve your
messages.
To change your voicemail service or othersettings:
1. Touch the Phone icon on a Home orAll Apps screen.
2. Touch Menu, then Settings.3. Touch the voicemail setting you want to
change, or dial the number listed to ac-
cess other voicemail settings.
Options during a call
During a call, you can
• Answer another incoming call: You seethe Incoming Call screen, displaying thecaller ID and any additional information
about the caller that you’ve entered inPeople. As with any incoming call, touchthe white phone icon and slide to answer,

8/13/2019 Nexus 4 Guidebook 121212
http://slidepdf.com/reader/full/nexus-4-guidebook-121212 65/235
USE THE PHONE APP 56
respond with a text message, or send thecall to voicemail.If you answer, the rst call will be put on
hold. If you respond with a message orsend to voicemail, you return to the rstcall.
• Adjust the volume: Use the volume but-tons on the side of the phone.
During a call, you can also use buttons nearthe bottom of the screen to
Switch to the dialer, for example toenter a code.

8/13/2019 Nexus 4 Guidebook 121212
http://slidepdf.com/reader/full/nexus-4-guidebook-121212 66/235

8/13/2019 Nexus 4 Guidebook 121212
http://slidepdf.com/reader/full/nexus-4-guidebook-121212 67/235
USE THE PHONE APP 58
Switch to another call in progress.
Make another call separately fromthe rst call, which is put on hold.
Merge separate calls as a single
conference call.

8/13/2019 Nexus 4 Guidebook 121212
http://slidepdf.com/reader/full/nexus-4-guidebook-121212 68/235
USE THE KEYBOARD 59
4
Use thekeyboard
Enter & edit text
You can enter text using the onscreen key-board. Some apps open it automatically. Inothers, you open it by touching where youwant to type.

8/13/2019 Nexus 4 Guidebook 121212
http://slidepdf.com/reader/full/nexus-4-guidebook-121212 69/235
USE THE KEYBOARD 60
To make the keyboard go away, touch themodied Back button below it.

8/13/2019 Nexus 4 Guidebook 121212
http://slidepdf.com/reader/full/nexus-4-guidebook-121212 70/235
USE THE KEYBOARD 61
Basic editing
• Move the insertion point. Touch where
you want to type.The cursor blinks in the new position, anda blue tab appears below it. Drag the tabto move the cursor.
• Select text. Touch & hold or double-tap
within the text.The nearest word highlights, with a tab ateach end of the selection. Drag the tabs tochange the selection.The tab disappears after a few moments.
To make it reappear, touch the text again.• Delete text. Touch to delete selected
text or the characters before the cursor.• Type capital letters. Touch the Shift key
once to switch to capital letters for oneletter.Or touch & hold Shift key while youtype. When you release the key, the lower-case letters reappear.
• Turn caps lock on. Double-tap or touch& hold Shift key, so it changes to. Touch Shift key again to return to
lowercase.

8/13/2019 Nexus 4 Guidebook 121212
http://slidepdf.com/reader/full/nexus-4-guidebook-121212 71/235
USE THE KEYBOARD 62
• Cut, copy, paste. Select the text you wantto manipulate. Then touch Cut,Copy or Paste button:
Use next-word suggestions
1. Touch the location where you want to in-put text.
2. Start typing out a word. When the wordyou want is displayed in a list above thekeyboard, touch it.
3. Continue to touch one of the three op-tions as your phone predicts words you
may want. If you don’t want any of the op-tions, type the next word without usingthe space bar.

8/13/2019 Nexus 4 Guidebook 121212
http://slidepdf.com/reader/full/nexus-4-guidebook-121212 72/235
USE THE KEYBOARD 63
Your phone will continue to suggestwords as you type.
To change your phone’s key-board and input methods, goto Settings > Personal > Lan-
guage & input.
To turn next-word sugges-tions on or off, go to Settings
> Personal > Language & in-
put > Keyboard & input meth-
ods > Android keyboard. Touch
the Settings icon, then checkthe box next to Next-word
suggestions.
Settings
Try Gesture Typing
To input a word using Gesture Typing:
1. Touch the location where you want to type
to open the keyboard.2. Slide your nger slowly across the letters
of the word you want to input.

8/13/2019 Nexus 4 Guidebook 121212
http://slidepdf.com/reader/full/nexus-4-guidebook-121212 73/235
USE THE KEYBOARD 64
3. Release your nger when the word youwant is displayed in the floating previewor in the middle of the suggestion strip. To
select one of the other words in the sug-gestion strip, touch it.
If the word you want isn’t shown while usingGesture Typing, you can type it out manually.
Use Gesture Typing without space bar
When you use Gesture Typing, there’s no
need to use the space bar — just continue toslide over the words you want.
To change Gesture Typing set-tings, go to Settings > Lan-
guage & input > Keyboard &input methods > Android key-
board. Then touch Settings and look under Gesture Typing.
Settings

8/13/2019 Nexus 4 Guidebook 121212
http://slidepdf.com/reader/full/nexus-4-guidebook-121212 74/235
USE THE KEYBOARD 65
Use keyboard dictionaries
To manage keyboard dictionaries, go to Set-
tings > Personal > Language & input.
Personal dictionary
You can add your own words to your person-al dictionary so that your phone remembersthem. Touch the Add icon to add a word orphrase, as well as a shortcut to easily usethat word or phrase.
Add-on dictionaries
1. Touch the Settings icon next to Android
keyboard.2. Touch Add-on dictionaries.You’ll see dictionaries for other languag-es that you can download to your device.
3. Touch the dictionary you want, then touch
Install.

8/13/2019 Nexus 4 Guidebook 121212
http://slidepdf.com/reader/full/nexus-4-guidebook-121212 75/235
TRY SOME APPS 66
5
Try some apps
Use All AppsTo see all your apps, touch All Apps in theFavorites tray on any Home screen.
This is where you can see all your apps, in-cluding those downloaded on Google Play.You can move app icons to any of your Homescreens.
From All Apps, you can:
• Move between screens. Swipe left orright.
• Open an app. Touch its icon.
• Place an app icon on a Home screen. Touch & hold the app icon, slide your n-ger, and lift your nger to drop the icon inplace.

8/13/2019 Nexus 4 Guidebook 121212
http://slidepdf.com/reader/full/nexus-4-guidebook-121212 76/235
TRY SOME APPS 67
• Browse widgets. Touch the Widgets tab atthe top of any All Apps screen.
• Get more apps. Touch the Play Store icon
in the list of app icons, or the Shop icon atthe upper right.
To remove an app icon from the Homescreen, touch & hold it, slide your nger to-
ward the top of the screen, and drop the appover the Remove icon .
To view info about an app from an All Appscreen, touch & hold it, slide your nger to-
ward the top of the screen, and drop the appover the App Info icon .
Most apps include a Menu icon near thetop or bottom of the screen that lets you con-
trol the app’s settings.

8/13/2019 Nexus 4 Guidebook 121212
http://slidepdf.com/reader/full/nexus-4-guidebook-121212 77/235
TRY SOME APPS 68
Start Gmail
Use the Gmail app to read andwrite email from any mobiledevice or browser. To openit, touch the Gmail icon on aHome or All Apps screen.Gmail
But Gmail isn’t just about email. You can useyour Gmail account to sign in to all Googleapps and services, including these and manymore:
• Google Now, for getting just the right in-formation at just the right time
• Calendar• People, for keeping track of your contacts
• Google Drive, for working with docu-ments, spreadsheets, or drawings
While you’re reading a message:
• Touch the icons and menu along the top of
the screen to archive, throw away, label, orperform other actions on that message.

8/13/2019 Nexus 4 Guidebook 121212
http://slidepdf.com/reader/full/nexus-4-guidebook-121212 78/235
TRY SOME APPS 69
• Swipe left or right to read the previous ornext conversation.
To organize your email, check the box besidea message to select it. Then use the iconsand menu along the top of the screen to man-age the selected messages.
To change your settings, add an account, orget help, touch the Menu icon.
No matter where you are within Gmail, youcan always get back to the Inbox by touching
the Gmail icon at the top of the screen.
Find People
The People app gives you quickaccess to everyone you wantto reach. To open it, touch thePeople icon on a Home or AllApps screen.
People

8/13/2019 Nexus 4 Guidebook 121212
http://slidepdf.com/reader/full/nexus-4-guidebook-121212 79/235
TRY SOME APPS 70
When you rst turn on your phone and signinto a Google Account, any existing contactsfrom that account are synced with your Peo-
ple app. After that, all your contacts stay insync automatically on your phone, anotherdevice, or a Web browser.
If you use Exchange, you can also sync that
contact information with People.
All your People information is available fromGmail, Google Talk, and other apps. As youadd contacts from different sources, they’re
synced automatically across all the placesyou need them.
When you open the People app, you can:
• View all contacts, favorites, or groups. Choose from the top left of the screen.• Read details. Touch a name to see details
for a contact or group.• View recent activity. When viewing a
contact, swipe to the right to see recentupdates.
• Edit details. While viewing a contact,

8/13/2019 Nexus 4 Guidebook 121212
http://slidepdf.com/reader/full/nexus-4-guidebook-121212 80/235
TRY SOME APPS 71
touch icons at the top of the screen orthe Menu icon to search contacts, adda contact, edit or share contact details,
delete a contact, and so on. You can alsotouch the star beside the contact’s nameto add that contact to your Favorites list.
• Change your settings. While viewing themain list screen, touch the Menu icon
to import or export contacts, choose dis-play options for the Groups and All tabs,and add or edit accounts.
Manage your Calendar
Use the Calendar app to viewand edit your schedule. To
open it, touch the Calendaricon on a Home or All Appsscreen.Calendar
When you rst set up your phone, you con-
gured it to use an existing Google Account(such as Gmail), or you created a new one.The rst time you open the Calendar app on

8/13/2019 Nexus 4 Guidebook 121212
http://slidepdf.com/reader/full/nexus-4-guidebook-121212 81/235
TRY SOME APPS 72
your phone, it displays any existing calendarevents from that Google Account on the web.
As you edit events from any mobile device orweb browser, they’re synced automaticallyacross all the places you need them.
To change the Calendar view, choose Day,
Week , Month, or Agenda from the top of thescreen.
From any of these views, you can:
• Read or edit event details. Touch an eventto view its details.
• Manage events and calendars. Touchicons across the top of the screen orMenu to search or create events, return to
today, or adjust settings.
To email everyone who’s invited to an event,you have two options:
• Open the event from the Calendar app atany time and touch Email guests.
• When a notication of the event arrives just before the meeting starts, swipe

8/13/2019 Nexus 4 Guidebook 121212
http://slidepdf.com/reader/full/nexus-4-guidebook-121212 82/235
TRY SOME APPS 73
down the notication shade. Then swipeusing one nger to expand the notica-tion if necessary, and touch Email guests.
Open & use Clock
To open the Clock, touch the Clock icon from
a Home or All Apps screen.
Set an alarm
1. Touch the Alarm Clock icon in the lowerleft corner of the screen.2. Touch the Add icon to add a new alarm.3. Select the time you want, then touch OK .
Any existing alarms will show in the mainClock screen. To turn one On or Off, slide theswitch.
You can also add a label to an alarm and
change the ringtone. To change these op-tions for a single alarm, touch the arrow un-derneath the On/Off switch.

8/13/2019 Nexus 4 Guidebook 121212
http://slidepdf.com/reader/full/nexus-4-guidebook-121212 83/235
TRY SOME APPS 74
Set a timer
1. Touch the Timer icon in the top left corner
of the screen.2. Enter the time you want, then touch Start.
When the timer is going, you can add an ad-ditional minute, pause the timer, or delete the
current timer.
The timer beeps when the time is up. It keepsbeeping until you touch Stop.
Use the stopwatch
1. Touch the Stopwatch icon in the top rightcorner of the screen.
2. Touch Start to start the stopwatch.
If you want to pause the stopwatch, touchStop. You can also add laps while the stop-watch is running by touching the icon to theleft of the stopwatch.
To share your results, touch the Share icon toshare via Google+, Gmail, and more.

8/13/2019 Nexus 4 Guidebook 121212
http://slidepdf.com/reader/full/nexus-4-guidebook-121212 84/235
TRY SOME APPS 75
View your Clock
To view the current date and time, touch the
Clock icon at the top center of the screen.
Manage downloads
To manage most downloads,touch the Downloads icon onthe All Apps screen. Moviesand some other content thatyou download don’t show up in
the Downloads app.
Downloads
Google Play streams your purchases andrentals from Google servers while you’replaying them. They don’t occupy permanent
storage space. However, you can pin (down-load) books, movies, and other content in or-der to access it offline.
In addition to downloading content from
Google Play, you can download les fromGmail or other sources. Use the Downloads

8/13/2019 Nexus 4 Guidebook 121212
http://slidepdf.com/reader/full/nexus-4-guidebook-121212 85/235
TRY SOME APPS 76
app to view, reopen, or delete what you down-load in this way.
From the Downloads app:
• Touch an item to open it.• Touch headings for earlier downloads to
view them.
• Check items you want to share. Thentouch the Share icon and choose asharing m
ethod from the list.• Check items you want to delete. Then
touch the Trash icon.
• At the bo
ttom of the screen, touch Sortby size or Sort by date to switch back andforth.
When your phone is connected to a comput-
er, look in the Download directory to viewles available in the Downloads app. You canview and copy les from this directory.

8/13/2019 Nexus 4 Guidebook 121212
http://slidepdf.com/reader/full/nexus-4-guidebook-121212 86/235
USE GOOGLE NOW & SEARCH 77
6
Use GoogleNow & Search
About Google Now
Google Now gives you just the right informa-tion at just the right time. Swipe up from thebottom of your phone to get commute trafcbefore work, popular nearby places, your fa-vorite team’s current score, and more.
You can turn Google Now on or off at anytime. Swipe up the same way and touchMenu > Settings > Google Now. If the key-board’s covering the menu, touch the modi-
ed Back button to lower it.
After you decide to start using Google Now,

8/13/2019 Nexus 4 Guidebook 121212
http://slidepdf.com/reader/full/nexus-4-guidebook-121212 87/235
8/13/2019 Nexus 4 Guidebook 121212
http://slidepdf.com/reader/full/nexus-4-guidebook-121212 88/235
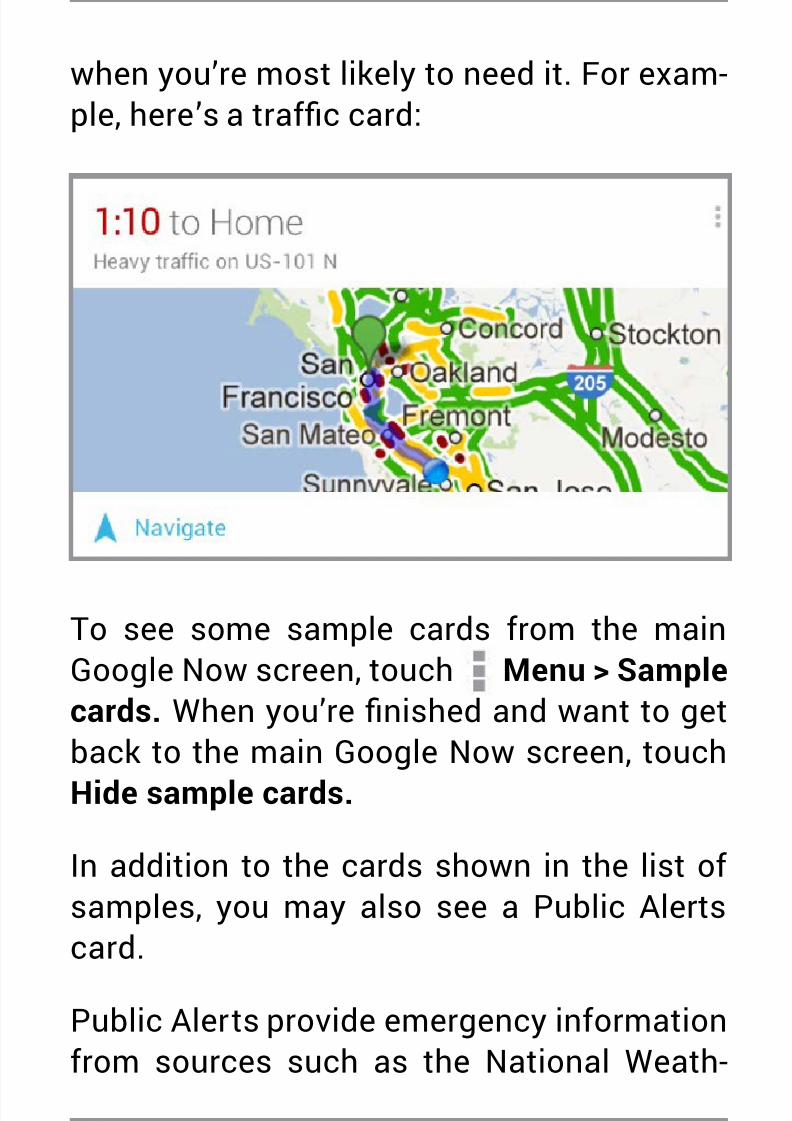
USE GOOGLE NOW & SEARCH 79
when you’re most likely to need it. For exam-ple, here’s a trafc card:
To see some sample cards from the mainGoogle Now screen, touch Menu > Sample
cards. When you’re nished and want to getback to the main Google Now screen, touch
Hide sample cards.
In addition to the cards shown in the list ofsamples, you may also see a Public Alertscard.
Public Alerts provide emergency informationfrom sources such as the National Weath-
8/13/2019 Nexus 4 Guidebook 121212
http://slidepdf.com/reader/full/nexus-4-guidebook-121212 89/235
USE GOOGLE NOW & SEARCH 80
er Service and the U.S. Geological Survey.Coverage is currently provided by a limitednumber of key partners, only in the United
States (excepting U.S. Geological Surveyearthquake alerts). Google can’t guaranteethat you’ll see every relevant alert. However,Google Now attempts to show you what’simportant when you need it, in the hope that
such alerts are a useful additional sourceof information. To learn more, visit support.google.com/publicalerts.
About location access, reporting, &history
Location access settings determine whetheryour phone can use your current location.
When location access is turned on, appscan use it to give you more relevant informa-tion, such as nearby restaurants or commutetrafc.
To turn off location access for all apps, go toSettings > Personal > Location access. If youprefer, you can turn off location access by

8/13/2019 Nexus 4 Guidebook 121212
http://slidepdf.com/reader/full/nexus-4-guidebook-121212 90/235
USE GOOGLE NOW & SEARCH 81
Google apps while still permitting its use bynon-Google apps – just go to Settings > Ac-
counts > Google > Location settings.
Location reporting refers your phone’s abil-ity to report your current location for the pur-pose of recording your location history.
Location history refers to your phone’s abilityto store your past locations, including homeand work.
When you decide to use Google Now, you’ll
start reporting your location and turn on yourlocation history. Google won’t share thisinformation with other users or marketerswithout your permission.
If you opted in to location history in the past,Google Now uses your previously recordedlocations as well as ongoing details whenmaking suggestions. Turning off locationhistory pauses the collection of location in-
formation, but doesn’t delete your history. Tomanage or delete your location details, visithttp://google.com/locationhistory.

8/13/2019 Nexus 4 Guidebook 121212
http://slidepdf.com/reader/full/nexus-4-guidebook-121212 91/235
USE GOOGLE NOW & SEARCH 82
Along with location history, Google Nowuses Google’s location service and GPS. Tomanage these settings from the Google Now
screen, touch Menu > Settings > Privacyand accounts > Location services.
For more details, see “Control location ac-cess, reporting, & history.”
About Web History & other data
Google Now uses data from multiple sources
to help predict what you need. For example,if you have a synced calendar entry for adentist appointment, Google Now can checktrafc and suggest when to leave. And if youhave relevant searches saved in your Web
History, such as for your favorite sports teamor for upcoming flights, Google Now can alsoshow cards for sports scores, flight status,and more.
To manage your Web History, visit google.com/history. You can delete or pause yourWeb History and still use Google Now, but
8/13/2019 Nexus 4 Guidebook 121212
http://slidepdf.com/reader/full/nexus-4-guidebook-121212 92/235
USE GOOGLE NOW & SEARCH 83
certain kinds of information, such as flightdetails, won’t show up.
Use Google Now
To view the Google Now cards that are wait-ing for you at any particular time, swipe up
from the bottom of your phone, or touchGoogle on any Home screen.
Google Now displays cards when they’remost likely to be useful and relevant based
on the current time and your current loca-tion. To expand that search and get addition-al ones, touch Show more cards at the bot-tom of the main Google Now screen.
When you’re nished with a card, just swipeit away to dismiss it from the Google Nowscreen. Don’t worry – it appears again whena new update is available.

8/13/2019 Nexus 4 Guidebook 121212
http://slidepdf.com/reader/full/nexus-4-guidebook-121212 93/235

8/13/2019 Nexus 4 Guidebook 121212
http://slidepdf.com/reader/full/nexus-4-guidebook-121212 94/235
USE GOOGLE NOW & SEARCH 85
Adjust notications
When a card has a new update, you’ll receive
a notication at the top of your screen. Youcan pull down the notications shade toopen the card or dismiss the notication.
Most notications for Google Now cards can
be turned off or set to low or standard prior-ity. Low priority notications appear at thebottom of the notications shade withoutany additional signal. Standard noticationsappear like the others, in chronological order,
and you can set vibration and a ringtone toaccompany them.
To set notications to low or standard prior-ity for an individual card that supports both
options:
• Touch Menu > Settings when the cardappears.
OR
• From the lower right corner of the GoogleNow screen, touch Menu > Settings >

8/13/2019 Nexus 4 Guidebook 121212
http://slidepdf.com/reader/full/nexus-4-guidebook-121212 95/235

8/13/2019 Nexus 4 Guidebook 121212
http://slidepdf.com/reader/full/nexus-4-guidebook-121212 96/235
USE GOOGLE NOW & SEARCH 87
history. If you do, check Also turn off Lo-
cation history.
Turning off location history may affect
the way other Google products work.4. Touch Turn off .
Turning off Google Now and location historydoesn’t delete existing history or turn off lo-
cation reporting. For more information, seethe next section, “Control location access,reporting & history.”
Control location access,reporting, & history
This section describes how to set your homeand work addresses and manage other loca-
tion-related features used by Google Now.
Dene home & work
As you use Google Now, you may be asked
to conrm your home or work address to getcommute trafc information, travel help, and

8/13/2019 Nexus 4 Guidebook 121212
http://slidepdf.com/reader/full/nexus-4-guidebook-121212 97/235

8/13/2019 Nexus 4 Guidebook 121212
http://slidepdf.com/reader/full/nexus-4-guidebook-121212 98/235
USE GOOGLE NOW & SEARCH 89
Turn off location reporting & history
To turn off both location reporting and loca-
tion history for your phone:1. Go to Settings > Google > Maps &
Latitude.This brings you to the Location settings screen for Google Maps.
2. To turn off location reporting, touch Lo-
cation reporting > Do not update your
location.3. To turn off location history, uncheck En-
able location history.
Delete location history details
Even if you turn off both location reportingand location history, your previously record-ed history is still available to Google servicessuch as Google Now.
To delete location history details, followthese steps from a desktop computer:

8/13/2019 Nexus 4 Guidebook 121212
http://slidepdf.com/reader/full/nexus-4-guidebook-121212 99/235
USE GOOGLE NOW & SEARCH 90
1. Open a web browser and make sure you’resigned in with the account whose loca-tion history you want to manage.
2. Visit http://google.com/locationhistory. A page appears that allows you to viewyour location history for any date.
3. To delete all your recorded location his-tory, click Delete all history.
Alternatively, from this screen you candelete a portion of your location historystarting from a date you choose in thecalendar.
4. Click OK.
Turn off location access for your phone
Even when location reporting and location
history are turned off, Google can periodical-ly report data for use by various apps fromsources such as Wi-Fi, mobile networks, andGPS to determine your precise location atany given time.
To turn off access to precise location infor-mation for your phone, go to Settings

8/13/2019 Nexus 4 Guidebook 121212
http://slidepdf.com/reader/full/nexus-4-guidebook-121212 100/235
USE GOOGLE NOW & SEARCH 91
> Personal > Location access and slide theswitch to Off.
IMPORTANT: Turning off location ac-cess for your phone also turns it off forGoogle Now, other Google apps, andthird-party apps. That means that noapps can receive your precise locationinformation and many useful featureswill be disabled.
To keep location access on, you must keepGPS satellites, Wi-Fi & mobile network loca-
tion, or both settings checked.
If you prefer, you can turn off location accessby Google apps while still permitting its useby non-Google apps – just go to Settings >
Accounts > Google > Location settings.
For more information about location accesssettings, see “Control location access, re-porting, & history.”

8/13/2019 Nexus 4 Guidebook 121212
http://slidepdf.com/reader/full/nexus-4-guidebook-121212 101/235
USE GOOGLE NOW & SEARCH 92
Search & Voice Actions basics
To use Google Search, touch Google on any
Home screen or swipe up from the bottom ofyour phone.
You can use Voice Actions with GoogleSearch to get directions, send messages,
and perform a number of other commontasks.
Voice Search & Voice Actions
You can initiate a Voice Search or Voice Ac-tion in several ways:
• Touch the Microphone icon in the
Google Chrome omnibox.• Touch the Microphone icon on theHome screen or Google Now screen andspeak.
• Touch Google on the Home screen and
say “Google”.• When you’re viewing the Google Now

8/13/2019 Nexus 4 Guidebook 121212
http://slidepdf.com/reader/full/nexus-4-guidebook-121212 102/235
USE GOOGLE NOW & SEARCH 93
screen, you don’t have to touch anything.Just say “Google.”
Next, speak the terms to search for or theVoice Action to perform. For more details onVoice Actions, see “Use Voice Actions.”
The ability to trigger a search or action by
saying “Google” is called hotword detection. To turn it off or on, start from the Google Nowscreen and touch Menu > Settings > Voice >
Hotword detection.
IMPORTANT: To detect when you say“Google” to launch Voice Search orVoice Actions, Google analyzes soundpicked up by your phone’s microphonein intervals of a few seconds or less.The sound is immediately discardedafter analysis and is not stored on thedevice or sent to Google.
For more information about Voice Actions,

8/13/2019 Nexus 4 Guidebook 121212
http://slidepdf.com/reader/full/nexus-4-guidebook-121212 103/235

8/13/2019 Nexus 4 Guidebook 121212
http://slidepdf.com/reader/full/nexus-4-guidebook-121212 104/235
USE GOOGLE NOW & SEARCH 95
Search tips & tricks
What you
want
What to type
or say
Examples
Sports
information
[team’s name] San Francisco
Giants
Pictures Pictures of
[topic]
images of
[topic]
Pictures of San
Francisco
Images of cats
Convert mea-
surements
[original mea-
surement]
in [new mea-
surement]
30 degrees
Celsius in Fahr-
enheit
Movie show-
times
Movie
Movie [loca-
tion]
[movie name]
Movie
Movie Chicago
The Horse’s
Mouth

8/13/2019 Nexus 4 Guidebook 121212
http://slidepdf.com/reader/full/nexus-4-guidebook-121212 105/235
USE GOOGLE NOW & SEARCH 96
Word deni-
tion
Dene [word] Dene cam-
panile
Weather fore-
cast
Weather
Weather [loca-
tion]
Weather
WeatherDetroit
Identify anarea code
Area code[###]
Area code 215
Identify zip
code
Zip code
[#####]
Zip code 46202
Time Time
Time [loca-
tion]
Time
Time in London
Flight infor-
mation
[Airline] [flight
number]
American air-
lines flight 390
Translation Translate to
[language][phrase]
Translate to
Spanish, Whereis the Palace
Hotel?’

8/13/2019 Nexus 4 Guidebook 121212
http://slidepdf.com/reader/full/nexus-4-guidebook-121212 106/235
USE GOOGLE NOW & SEARCH 97
Calculator [A math
phrase]
75 divided by 6
Food [Type of food]
[Type of food]
in [location]
Mexican food
Mexican food in
Urbana, Illinois
Use Voice Actions
You can use Voice Actions with GoogleSearch to get directions, send messages,
and perform a number of other commontasks.
You initiate a Voice Action the same way youinitiate a voice search, by touching a Mi-
crophone icon in a search box or the Chromeomnibox, or by saying “Google” when theGoogle Now screen is open. For details, see“Search & Voice Actions basics.”
Next, speak the Voice Action you want to use.Here are some typical examples:
8/13/2019 Nexus 4 Guidebook 121212
http://slidepdf.com/reader/full/nexus-4-guidebook-121212 107/235
USE GOOGLE NOW & SEARCH 98
• “Set alarm for 8:30 a.m.”• “Send email to Marcus Foster. Subject:
Coming tonight? Message: Hope to see
you later.”• “Navigate to Mike’s Bikes in Palo Alto.”
As you speak, Voice Search analyzes yourspeech and initiates the action.
If Voice Search doesn’t understand you, itlists a set of possible meanings. Just touchthe one you want.
Some Voice Actions, such as “send email”and “note to self,” open a panel that promptsyou to complete the action by speaking ortyping more information.
• Touch any text already entered in the pan-el to add or edit the text by typing.To speak text instead of typing, rst touchthe Microphone key near the bottomright of the onscreen keyboard.
• Touch underlined words or phrases ordrag across multiple words to view a list

8/13/2019 Nexus 4 Guidebook 121212
http://slidepdf.com/reader/full/nexus-4-guidebook-121212 108/235
USE GOOGLE NOW & SEARCH 99
of alternate transcriptions, or to edit byspeaking or typing.When condent that the transcription
is accurate, Voice Search displays tran-scribed words as regular text. Words orphrases for which it has provided alter-nate transcriptions are underlined.
• Touch a button at the bottom of the win-
dow to add any optional elds (you canalso speak the name and content of any ofthese elds in your original voice action).
• When you’re done, touch the button ap-propriate to complete the action, such asSend.
Voice Actions commands
You can search and control your phone withthe following Voice Action commands. For de-tails, see “Use Voice Actions.”

8/13/2019 Nexus 4 Guidebook 121212
http://slidepdf.com/reader/full/nexus-4-guidebook-121212 109/235
USE GOOGLE NOW & SEARCH 100
Say Followed by Examples
Words youwant to search
for
“bike shoes”
“Map of ” Address,
name,business
name, type of
business, or
other location
“Map of
Golden GatePark, San
Francisco.”
“Directions to”
or “Navigate
to”
Address,
name,
business
name, type
of business,
or otherdestination
“Directions to
1299 Colusa
Avenue,
Berkeley,
California”
or
“Navigate
to Union
Square, San
Francisco.”

8/13/2019 Nexus 4 Guidebook 121212
http://slidepdf.com/reader/full/nexus-4-guidebook-121212 110/235

8/13/2019 Nexus 4 Guidebook 121212
http://slidepdf.com/reader/full/nexus-4-guidebook-121212 111/235
USE GOOGLE NOW & SEARCH 102
“Set alarm” “Time” or “for”
& time, such
as “10:45 a.m.”
or “20 minutesfrom now,” “La-
bel” & name of
alarm
“Set alarm
for 7:45 p.m.,
label, switch
the laundry”
“Listen to” Words tosearch You-
Tube for, such
as the name of
a song, artist,
or album.
“Listen to:Smells Like
Teen Spirit”
Google Now Card list
Cards are displayed when you’re most likelyto need them. Most are based on informa-tion available to your Google account, suchas your current location, recent searches, orcalendar entries.
Gmail cards display information based onrecent conrmation messages in the Gmail

8/13/2019 Nexus 4 Guidebook 121212
http://slidepdf.com/reader/full/nexus-4-guidebook-121212 112/235
USE GOOGLE NOW & SEARCH 103
account you’ve selected for use with Goog-le Now. For more details, see “About Gmail Cards.”
Travel cards appear when you’re away fromhome.
BirthdaysDisplays aninterestingfact aboutyour birthdateon your
birthday.

8/13/2019 Nexus 4 Guidebook 121212
http://slidepdf.com/reader/full/nexus-4-guidebook-121212 113/235
USE GOOGLE NOW & SEARCH 104
ConcertsShown beforeyour favorite
artists giveconcerts nearyou.
FlightsShownbefore flightsthat you’vesearched for.

8/13/2019 Nexus 4 Guidebook 121212
http://slidepdf.com/reader/full/nexus-4-guidebook-121212 114/235
USE GOOGLE NOW & SEARCH 105
Gmail: EventbookingsShown before
an eventbookingconrmed byGmail.
Gmail: FlightsShown
before flightsconrmed byGmail.
8/13/2019 Nexus 4 Guidebook 121212
http://slidepdf.com/reader/full/nexus-4-guidebook-121212 115/235
USE GOOGLE NOW & SEARCH 106
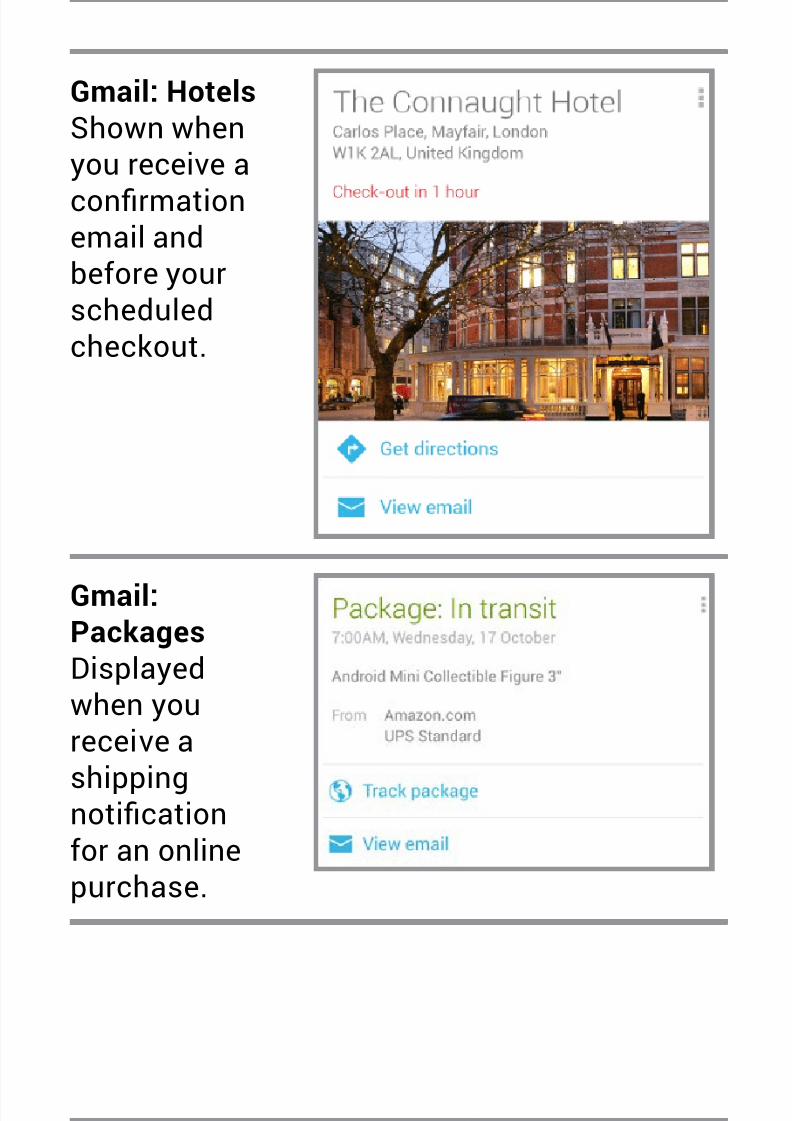
Gmail: HotelsShown whenyou receive a
conrmationemail andbefore yourscheduledcheckout.
Gmail:PackagesDisplayedwhen youreceive a
shippingnoticationfor an onlinepurchase.

8/13/2019 Nexus 4 Guidebook 121212
http://slidepdf.com/reader/full/nexus-4-guidebook-121212 116/235
USE GOOGLE NOW & SEARCH 107
Gmail:RestaurantsShown before
a restaurantreservationconrmed byGmail.
LocationhistoryShows a roughapproximationof how far
you walkedor cycledduring the pastmonth.

8/13/2019 Nexus 4 Guidebook 121212
http://slidepdf.com/reader/full/nexus-4-guidebook-121212 117/235
8/13/2019 Nexus 4 Guidebook 121212
http://slidepdf.com/reader/full/nexus-4-guidebook-121212 118/235
USE GOOGLE NOW & SEARCH 109
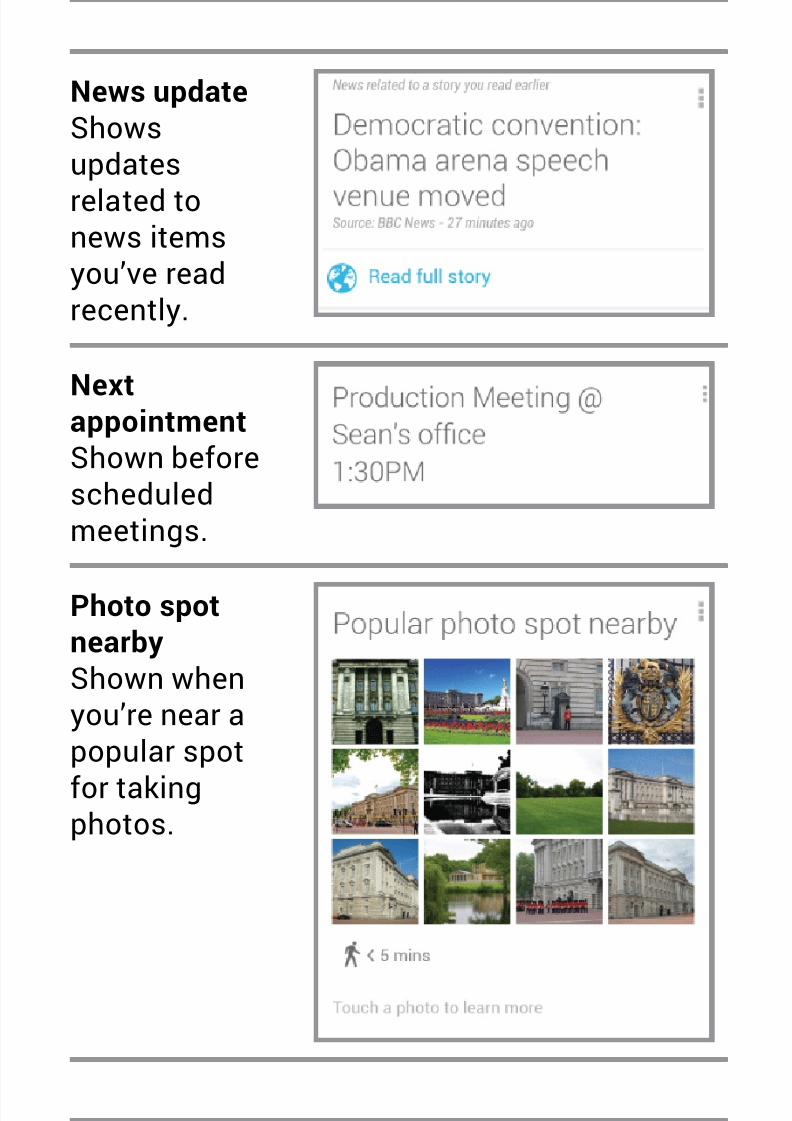
News updateShowsupdates
related tonews itemsyou’ve readrecently.
NextappointmentShown beforescheduledmeetings.
Photo spotnearbyShown whenyou’re near apopular spot
for takingphotos.

8/13/2019 Nexus 4 Guidebook 121212
http://slidepdf.com/reader/full/nexus-4-guidebook-121212 119/235
USE GOOGLE NOW & SEARCH 110
PlacesShows nearbybusinesses
and otherplaces ofpotentialinterest.
Public alertsGives publicadvisoriesfor yourlocation from
the NationalWeatherService, U.S.GeologicalSurvey,
and similarservices.

8/13/2019 Nexus 4 Guidebook 121212
http://slidepdf.com/reader/full/nexus-4-guidebook-121212 120/235
USE GOOGLE NOW & SEARCH 111
PublictransportShown with
relevantscheduleswhen you’renear a trainstation, bus
stop, or otherpublic transitstop.
Sports
Shown forteams thatinterest youbefore, during,or after agame.

8/13/2019 Nexus 4 Guidebook 121212
http://slidepdf.com/reader/full/nexus-4-guidebook-121212 121/235
USE GOOGLE NOW & SEARCH 112
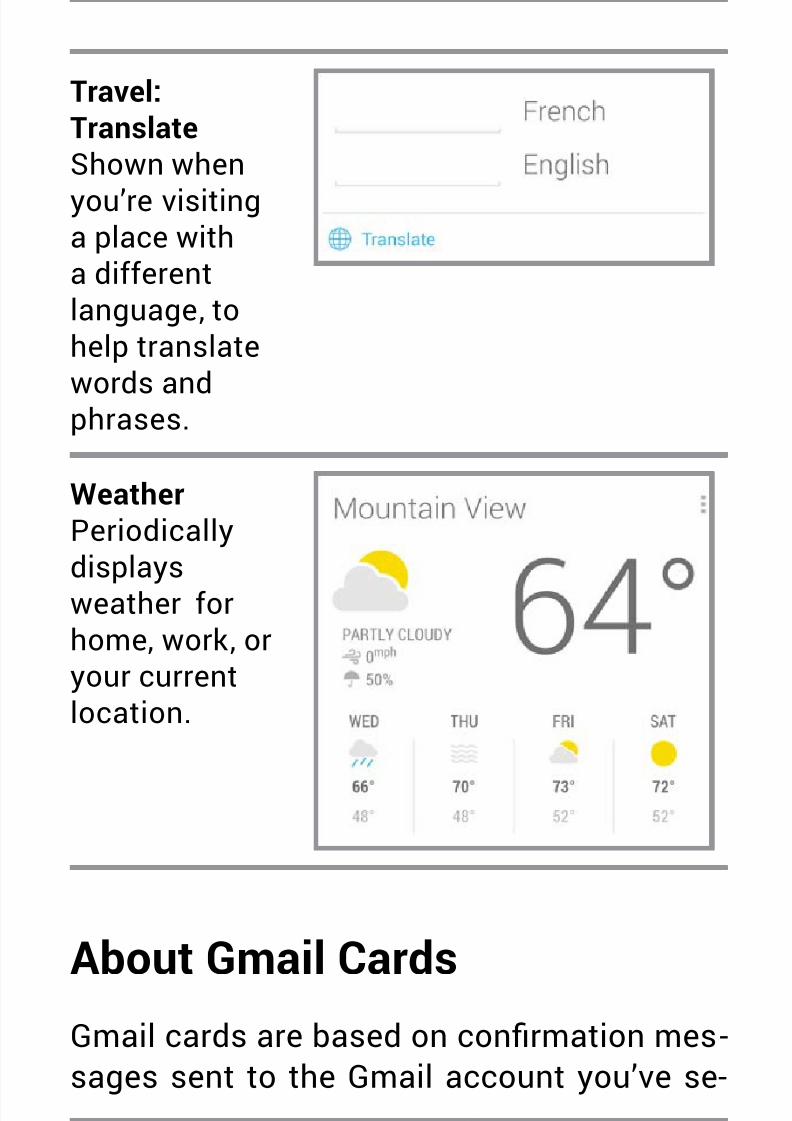
StocksShownperiodically for
stocks you’retracking. Formore details,see AboutStocks card.
TrafcShown beforeyour usualcommutetimes.
Travel:CurrencyShows thelatest currencyconversion
information foryour location.

8/13/2019 Nexus 4 Guidebook 121212
http://slidepdf.com/reader/full/nexus-4-guidebook-121212 122/235
USE GOOGLE NOW & SEARCH 113
Travel: NearbyattractionsShown when
you’re nearwell-knownattractions,such asrestaurants,
museums,cafes, andso on.
Travel: Timeback homeShownperiodicallywhen you’re
in a differenttime zone thanusual.
8/13/2019 Nexus 4 Guidebook 121212
http://slidepdf.com/reader/full/nexus-4-guidebook-121212 123/235

8/13/2019 Nexus 4 Guidebook 121212
http://slidepdf.com/reader/full/nexus-4-guidebook-121212 124/235

8/13/2019 Nexus 4 Guidebook 121212
http://slidepdf.com/reader/full/nexus-4-guidebook-121212 125/235

8/13/2019 Nexus 4 Guidebook 121212
http://slidepdf.com/reader/full/nexus-4-guidebook-121212 126/235
USE GOOGLE NOW & SEARCH 117
To change Stock card settings from the mainGoogle Now screen ,go to Settings < Google
Now < Stocks.
Search settings
To view Google Search settings, including
those for Google Now, scroll to the bottom ofthe Google Now screen and touch Menu
> Settings.
The rst three types of settings are de -
scribed here. For Privacy and accounts, seethe next section.
Google Now
Google Now settings let you turn GoogleNow on or off. If you turn it on, you’re takenthrough a brief introduction and given thechance to opt in.
While Google Now is on, you can also setyour preferences for individual Google Now

8/13/2019 Nexus 4 Guidebook 121212
http://slidepdf.com/reader/full/nexus-4-guidebook-121212 127/235
USE GOOGLE NOW & SEARCH 118
cards and related notications from theGoogle Now settings screen.
Options for each card vary. Most include aNotications section that lets you controlhow you’re informed when a card changes.Typically, you can choose between Off, Lowpriority, or Standard notications.
Low priority notications appear at the bot-tom of the notications shade without anyadditional signal. Standard notications ap-pear like the others, in chronological order,
and you can set vibration and a ringtone.
To set the ringtone and vibrate options forstandard notications, go to touch Menu > Settings > Google Now and look at the end
of the list.
Voice settings
Voice settings control different aspects ofspeech input and output when you search byvoice or use voice actions:
8/13/2019 Nexus 4 Guidebook 121212
http://slidepdf.com/reader/full/nexus-4-guidebook-121212 128/235
USE GOOGLE NOW & SEARCH 119
• Language. The language you select herefor Voice Search input and output can bedifferent from the language displayed by
your phone.• Speech output. To turn on speech output
only when you’ve got a headset attachedto your phone, select Hands-free only.
• Block offensive words. Check to ensure
that search results with offensive lan-guage are blocked.
• Hotword detection. When this is checked,you can say “Google” when viewing theGoogle Now screen rather than touchingthe Microphone icon to initiate a voicesearch or action.
• Download offline speech recognition.
Check to select one or more additional
languages for speech recognition whenyou don’t have a network connection.

8/13/2019 Nexus 4 Guidebook 121212
http://slidepdf.com/reader/full/nexus-4-guidebook-121212 129/235
8/13/2019 Nexus 4 Guidebook 121212
http://slidepdf.com/reader/full/nexus-4-guidebook-121212 130/235
8/13/2019 Nexus 4 Guidebook 121212
http://slidepdf.com/reader/full/nexus-4-guidebook-121212 131/235

8/13/2019 Nexus 4 Guidebook 121212
http://slidepdf.com/reader/full/nexus-4-guidebook-121212 132/235
ACCESSIBILITY 123
increasing the text size, changing the speedat which text is spoken, and more.
Users with low vision
If you have low vision and don’t plan to useExplore by Touch, go to support.google.
com/nexus to see Help content formattedfor sighted users. You can make reading andnavigating this material easier by increasingthe text size – just go to Settings > Accessi-
bility, and check the Large text option.
Related Settings
• To view Accessibility settings, go to Set-
tings > Accessibility.• To control sound feedback and other Talk-
Back behaviors, go to Settings > Accessi-
bility > TalkBack and touch Settings at thetop right corner of the screen.

8/13/2019 Nexus 4 Guidebook 121212
http://slidepdf.com/reader/full/nexus-4-guidebook-121212 133/235
ACCESSIBILITY 124
Accessibility gestures forAndroid 4.2 (Jelly Bean)
When TalkBack and Explore by Touch areturned on, you can use simple gestures tonavigate your Nexus 4:
• Drag one nger. Explore your screen and
hear audible feedback for what is beingtouched.
• Double-tap anywhere on the screen.Opens or activates the item that you lasttouched.
• Swipe up or down using two ngers.Scroll within lists.
• Swipe left or right using two ngers.Change pages and screens.
• Swipe right (or down) using one nger.Move to the next item.• Swipe left (or up) using one nger. Move
to the previous item.• Swipe down then up using a single mo-
tion. Transition to the next reading levelwhen reading blocks of text, then swiperight to read forward or left to go back.

8/13/2019 Nexus 4 Guidebook 121212
http://slidepdf.com/reader/full/nexus-4-guidebook-121212 134/235
ACCESSIBILITY 125
• Swipe up then down using a single mo-
tion. Transition to the previous readinglevel when reading blocks of text, then
swipe right to read forward or left to goback.
• Swipe right then left using a single mo-
tion. Move to the next page.• Swipe left then right using a single mo-
tion. Move to the previous page.
While you’re exploring with one nger, youcan use another nger to double-tap to openan app, widget, and so on.
IMPORTANT: The way these gesturesare interpreted is specic to Talk-Back. Other accessibility services mayuse the same gestures for differentactions.

8/13/2019 Nexus 4 Guidebook 121212
http://slidepdf.com/reader/full/nexus-4-guidebook-121212 135/235
ACCESSIBILITY 126
Shortcut gestures in TalkBack
Note: These gestures work only when Ex-
plore by Touch is turned on.
TalkBack has shortcut gestures to help youget to your Home screen, go back, and more.To try these shortcuts, swipe using a single
motion:
• Up then right: Open continuous readingmenu
• Up then left: Home button
• Down then right: Open global contextmenu
• Down then left: Back button• Right then down: Open notications• Left then up: Recent apps button
You can modify your shortcut gestures andthe corresponding actions in TalkBack by go-ing to Settings > Accessibility > TalkBack >
Settings > Manage shortcut gestures.
8/13/2019 Nexus 4 Guidebook 121212
http://slidepdf.com/reader/full/nexus-4-guidebook-121212 136/235
ACCESSIBILITY 127
Set up your phone
Your Nexus 4 has the following hardware:
• Power button/lock key. The Power buttonis located on the right side of your phone.
• Volume. The Volume key is directly underthe Power button.
• Front-facing camera. The camera is locat-ed at the top center of your screen.
• Micro USB port. The USB is at the bottomof your phone.
• Headset jack. The headset jack is in the
lower right side at the bottom of yourphone.
• SIM tray. The SIM tray is located on thelower left side of your phone (availableonly for Nexus 4 with mobile data).
When you turn on your phone for the rsttime, you’ll arrive at a Welcome screen.
• To turn on TalkBack and Explore by Touch,
place two ngers slightly apart on yourscreen. You’ll hear spoken feedback whenyour phone recognizes the gesture. Keep

8/13/2019 Nexus 4 Guidebook 121212
http://slidepdf.com/reader/full/nexus-4-guidebook-121212 137/235
ACCESSIBILITY 128
holding your ngers for two more sec-onds to enable TalkBack and Explore byTouch. After turning on these features,
the Explore by Touch tutorial starts, giv-ing you a chance to experience navigatingon Android. When you’ve completed thetutorial, the phone displays the Welcomescreen again.
• To choose a different language, swiperight and double-tap the menu.
• To nish setting up your phone, swiperight and double-tap Start towards thecenter of the screen.
A series of screens takes you through thesetup process. When prompted, you can signin using the email address and password foryour Google Account. When you sign in witha Google Account, all the email, contacts,Calendar events, and other data associatedwith that account are automatically syncedwith your phone. If you have multiple Google
Accounts, you’ll be able to add the otherslater.

8/13/2019 Nexus 4 Guidebook 121212
http://slidepdf.com/reader/full/nexus-4-guidebook-121212 138/235

8/13/2019 Nexus 4 Guidebook 121212
http://slidepdf.com/reader/full/nexus-4-guidebook-121212 139/235
ACCESSIBILITY 130
Use magnication gestures
When this feature is turned on, you can mag-
nify your screen by triple-tapping. (For userswith low vision)
Note: Triple-tap for magnication works ev-erywhere except for the keyboard and navi-
gation buttons.
Magnify: Triple-tap & hold.
Magnify & pan: Triple-tap & hold, then drag
your nger.
Toggle magnication in or out: Triple tap &release.
While you’re zoomed in, you can:
Pan: Drag two or more ngers across thescreen.
Adjust zoom level: Pinch or expand usingtwo or more ngers.

8/13/2019 Nexus 4 Guidebook 121212
http://slidepdf.com/reader/full/nexus-4-guidebook-121212 140/235

8/13/2019 Nexus 4 Guidebook 121212
http://slidepdf.com/reader/full/nexus-4-guidebook-121212 141/235
ACCESSIBILITY 132
and alerts you of notications and otheroccurrences.
If you also enabled Explore by Touch, movingyour nger around the screen triggers a de -scription of each item it touches. Double-tapto activate the last spoken item, and swipewith two ngers to perform swiping actions
that normally require just one nger.
Change TalkBack settings
To modify TalkBack settings, go to Settings> Accessibility > TalkBack , then double-tapSettings in the top right corner.
When to speak
• Speech volume. You can set this as a per-centage of media volume.
• Use pitch changes. Check to speak key-board feedback at a lower pitch.
• Speak when screen is off. Check to turnon spoken feedback when the screen isoff.

8/13/2019 Nexus 4 Guidebook 121212
http://slidepdf.com/reader/full/nexus-4-guidebook-121212 142/235
ACCESSIBILITY 133
Feedback settings
• Sound feedback. Check to control naviga-
tion sounds.• Sound volume. Available when Sound
feedback is checked. You can set this as apercentage of media volume.
Touch exploration
• Launch “Explore by touch” tutorial.
• Manage shortcut gestures. Allows you toassign the operations that different ges-
tures trigger.
Control speed of Text-to-Speech
To control the speed of TalkBack’s speech,go to Settings > Accessibility > Text-to-
speech output > Speech rate.
Manage TalkBack volume
To change the volume settings for TalkBack,go to Settings > Sound > Volumes. Use the

8/13/2019 Nexus 4 Guidebook 121212
http://slidepdf.com/reader/full/nexus-4-guidebook-121212 143/235
ACCESSIBILITY 134
slider for Music, video, games, & other media to change the volume level.
You can also use the volume control on theright side of your phone when you hear spo-ken feedback.
Enhance web accessibilityIn order to have full accessibility support forproducts such as Gmail and Chrome, you’llneed to turn on the Enhance web accessibil-
ity option. Go to Settings > Accessibility >Enhance web accessibility, and double-tapAllow. This allows apps to install scripts thatmake web content more accessible.
Use Explore by Touch withTalkBack
When TalkBack is turned on, you have the op-
tion to use the Explore by Touch feature. Ex-plore by Touch allows you to drag your nger

8/13/2019 Nexus 4 Guidebook 121212
http://slidepdf.com/reader/full/nexus-4-guidebook-121212 144/235
ACCESSIBILITY 135
slowly over your screen and describes eachitem that your nger touches.
TalkBack must be turned on for Explore byTouch to be available. When you turn on Talk-Back for the rst time, you’ll receive a promptto turn on Explore by Touch.
IMPORTANT: If you chose not to turnon Explore by Touch when you turnedon TalkBack, you can switch it on later.
Go to Settings > Accessibility > Talk-Back > Settings, then check Explore by
touch. You can use the same checkboxto turn it off at any time.
Each action you take with your nger alertsyou with spoken feedback, as well as sound(if enabled).
To navigate your phone using Explore byTouch, you can:

8/13/2019 Nexus 4 Guidebook 121212
http://slidepdf.com/reader/full/nexus-4-guidebook-121212 145/235

8/13/2019 Nexus 4 Guidebook 121212
http://slidepdf.com/reader/full/nexus-4-guidebook-121212 146/235
ACCESSIBILITY 137
phone, you can always get back to the mainHome screen or return to previous screens:
• Back. Opens the previous screen youwere working in, even if it was in a differ-ent app. Once you back up to the Homescreen, you can’t go back any further inyour history.
• Home. Opens Home. If you’re on a left orright Home screen, this button opens thecentral Home screen.
• Recent apps. Opens a list of thumbnail im-ages of apps you’ve worked with recently.
To open an app, touch and double-tap. Toremove a thumbnail from the list, use twongers to swipe it left or right.
After a short time without getting used,
these buttons may shrink to dots or fadeaway, depending on the current app. To bringthem back, double-tap in their approximatelocation.
You can use easy gestures to activate theNavigation buttons and access your notica-tions. Swipe with a single motion:

8/13/2019 Nexus 4 Guidebook 121212
http://slidepdf.com/reader/full/nexus-4-guidebook-121212 147/235
ACCESSIBILITY 138
• Up then right: Open continuous readingmenu
• Up then left: Home button
• Down then right: Open global contextmenu
• Down then left: Back button• Right then down: Open notications• Left then up: Recent apps button
Just above the Navigation buttons in por-trait mode, or on the right side of the screenin landscape mode, you’ll nd the Favoritestray. The apps you keep in the tray are avail-
able on every Home screen.
The Apps icon in the center is permanent.Find it and double-tap to reveal all your appsand widgets.
Your Home screen can hold app and widgeticons, plus folders.
• To open an app, folder, or widget, nd its
icon and double-tap.• To see additional Home screens, swipe

8/13/2019 Nexus 4 Guidebook 121212
http://slidepdf.com/reader/full/nexus-4-guidebook-121212 148/235
ACCESSIBILITY 139
left then right or right then left in a singlemotion, or left or right using two ngers.
At the top of the screen, you’ll nd the sta -tus bar:
• Status icons on the left tell you whichapps have sent you notications—for ex-
ample, that a message has arrived, or it’stime for a meeting. If you have TalkBackor another accessibility service running,it will speak the notication when it rstappears.
To nd your notications, use two ngersto pull down the notication shade fromthe top of the screen, or swipe up thenright using a single motion.
• System icons on the right display the cur-
rent wireless and network connectionstrength, battery level, time, and more.
Google Search, just below the status andsystem icons, lets you search your phone or
the Internet. Find Search and double-tap totype your search terms, or Voice Search tospeak them.
8/13/2019 Nexus 4 Guidebook 121212
http://slidepdf.com/reader/full/nexus-4-guidebook-121212 149/235
ACCESSIBILITY 140
To nd your notications, use two ngers topull down the notication shade from the topleft side of the screen, or swipe up then right
using a single motion.
You can also use the Quick Settings menu toeasily open settings for Wi-Fi, Bluetooth, andmore. To open Quick Settings, use three n-
gers to pull down the menu from the top rightside of the screen.
Try Google Play
Note: These instructions assume that youhave turned on TalkBack and Explore byTouch.
Google Play brings together all your favoritecontent in one place – movies, books, mu-sic, magazines, apps, and more – so you canreach it from any of your devices.

8/13/2019 Nexus 4 Guidebook 121212
http://slidepdf.com/reader/full/nexus-4-guidebook-121212 150/235
ACCESSIBILITY 141
Use Google Play widgets
These widgets are available on your Home
screens:
• Recommended on Play: Suggests music,movies, and other content that may inter-est you. Find the suggestion and double-
tap to learn more about it.• Recommended apps: Recommends apps
that you can add to your Home screen.Find the recommendation and double-tapto learn more about it.
To remove a widget, double-tap & hold on thesecond tap, then drag it to the Remove iconat the top of the screen.
To add another Google Play widget, nd theApps icon and double-tap, then Widgets, andswipe left until you nd the one you want.Then double-tap & hold on the second tap,and let go in the Home screen location you
want.

8/13/2019 Nexus 4 Guidebook 121212
http://slidepdf.com/reader/full/nexus-4-guidebook-121212 151/235
ACCESSIBILITY 142
Shop on Google Play
To open the Google Play Store app, nd and
double-tap the Play Store icon in your Favor-ites tray on every Home screen.
Most things you purchase on Google Play areavailable from your computer as well as from
any of your Android mobile devices. (Androidapps are one exception – they run only onAndroid devices.) Sign in to play.google.com to get your entertainment from anywhere.
Find your content
If you purchased from Google Play in thepast, you’ll automatically have access to this
content on your Nexus 4 – just make sureyou’re signed in using the same account thatyou used to purchase it.
You can get to your content using any of the
Google Play icons in your Favorites tray, in-cluding Books, Magazines, Movies, and Mu-sic. (Note: To read magazines in text mode,

8/13/2019 Nexus 4 Guidebook 121212
http://slidepdf.com/reader/full/nexus-4-guidebook-121212 152/235
ACCESSIBILITY 143
visit Reading in text mode at the end of this
article.)
Or, nd the Play Store icon and double-tap toopen Google Play. In the top right corner, tothe left of the Menu and Search icons, you’llnd a My Library icon corresponding to thesection of Google Play you’re currently view-
ing. For example, while browsing the Movies& TV section, you’ll nd the Google Play Mov-ies app icon, which will take you to My Mov-ies & TV.
You can quickly access your content thisway, from the Google Play Store app, evenif you originally purchased it on Google Playusing a different phone or phone. If you get anew device, all your media will automatically
be waiting for you here when you power onand sign in.
Google Play Settings
To adjust your Google Play settings, switch

8/13/2019 Nexus 4 Guidebook 121212
http://slidepdf.com/reader/full/nexus-4-guidebook-121212 153/235
ACCESSIBILITY 144
accounts, or get help, choose the option youwant from the Menu at the top right.
The Google Play Settings screen lets youcontrol when you’re notied about updatesto apps and games, clear your search his-tory, and enable user controls. To lter An-droid apps based on maturity level or to re-
quire a PIN before completing any purchase,nd and double-tap Content ltering or Set
or change PIN.
For more detailed information about Google
Play, visit support.google.com/googleplay.
Use Gmail
Note: These instructions assume that youhave turned on TalkBack, Explore by Touch,and Enhanced Web Accessibility.
Read your messages
• From a Home or Apps screen, nd the

8/13/2019 Nexus 4 Guidebook 121212
http://slidepdf.com/reader/full/nexus-4-guidebook-121212 154/235
ACCESSIBILITY 145
Gmail app and double-tap to open it.Gmail opens to your Inbox.
To hear the subject lines of your conversa-tions, swipe right or down. When you nd aconversation you want to hear:
• Double-tap to open it. If you have chosen
to allow enhanced web accessibility, youcan touch once to hear a conversation.
• To navigate back to your Inbox, nd theGmail icon at the top of the screen anddouble-tap.
ORUsing the Navigation buttons at the bot-tom of the screen, nd and double-tap theBack button, or swipe down then left us-ing a single motion.
Compose and send a message
1. From a conversation list, nd the Com-pose icon at the top of the screen anddouble-tap.
2. To use the keyboard to ll in the To, Sub-
ject, and Compose email elds, slide your
8/13/2019 Nexus 4 Guidebook 121212
http://slidepdf.com/reader/full/nexus-4-guidebook-121212 155/235
ACCESSIBILITY 146
nger across the keyboard and lift yournger on the chosen key to input text.
3. Find and double-tap the Send icon in the
main action bar at the top of the screen tosend your message.
Search your Inbox
1. From a conversation list, nd the Searchicon in the action bar at the top of thescreen and double-tap.
2. To use the keyboard to edit the Search
mail eld, slide your nger across the key-board and lift your nger on the chosenkey to input text.
3. As you type, suggestions appear belowthe Search eld. Find a suggestion and
double-tap to search for it immediately.4. To search, nd and double-tap the Search
key on the right side of the second row ofthe keyboard.

8/13/2019 Nexus 4 Guidebook 121212
http://slidepdf.com/reader/full/nexus-4-guidebook-121212 156/235
ACCESSIBILITY 147
Gmail settings
You can change a number of settings for
Gmail from any Gmail screen.
• Find and double-tap More options at thetop right corner of the screen, then ndand double-tap Settings.
General settings apply to all Gmail accounts.Other settings apply only to a specicaccount.
More Gmail help
To get more detailed Help while reading yourconversations, composing a message, andso on, nd and double-tap More options inthe top right corner of the screen, then ndand double-tap Help. Note that the contentyou’ll nd covers general Gmail behavior, butnot accessibility features like TalkBack and
Explore by Touch.

8/13/2019 Nexus 4 Guidebook 121212
http://slidepdf.com/reader/full/nexus-4-guidebook-121212 157/235
ACCESSIBILITY 148
Browse Chrome
These instructions assume that you have
turned on TalkBack, Explore by Touch, andEnhanced Web Accessibility.
• From a Home or Apps screen, nd theChrome icon and double-tap to open it.
Chrome opens to display your homepage orthe most recent page you were browsing.
The web address (URL) of the current page
is located at the top of the screen in the ad-dress box (also called the omnibox ).
To edit or input a web address, you can:
1. Swipe right to nd the omnibox at the topof the screen, and double-tap to edit.2. Slide your nger across the onscreen key-
board and release a key to input text.3. As you type, a list of matching sugges-
tions appears. You can keep on typing ornd a suggestion and double-tap to openthe page.

8/13/2019 Nexus 4 Guidebook 121212
http://slidepdf.com/reader/full/nexus-4-guidebook-121212 158/235
ACCESSIBILITY 149
4. To search for the contents of the omni-box or open a specic web address itcontains, nd and double-tap the Go key
on the right side in the second row of thekeyboard.
To navigate within a webpage, you can:
• Navigate forward and backward. Swipeleft to right to move forward and right toleft to go backward.
• Scroll. Slide two ngers in any direction.• Receive spoken feedback. Touch any-
where on the screen to hear the contentsof the webpage.
• Change the reading level. Swipe downthen up using a single motion to transi-tion to the next reading level when read-
ing blocks of text, or swipe up then downusing a single motion to go back to theprevious reading level.
• Zoom. To zoom out, touch the screen withtwo ngers and pinch them together. Tozoom in, spread them apart. Ascendingand descending tones alert you whenzooming in or out.
8/13/2019 Nexus 4 Guidebook 121212
http://slidepdf.com/reader/full/nexus-4-guidebook-121212 159/235
ACCESSIBILITY 150
To customize web page zooming, go to More
options > Settings > Accessibility.
You can also browse in Incognito mode. Toopen an Incognito tab, nd and double-tapMore options > New Incognito tab. To togglebetween standard tabs and Incognito tabs,nd and double-tap the Toggle tabs switcher,
or nd and double-tap the Incognito tabs (orNon-Incognito tabs) button at the top rightcorner.
Adjust text size on webpages (for low-vision users)
1. Touch Menu > Settings > Accessibility.2. Drag the slider under to adjust the text
size scaling. In the “Preview” box, you cansee how it will look on webpages.
Force enable zoom
On some sites designed for mobile devices,you can’t to zoom in or out. Choosing “Force

8/13/2019 Nexus 4 Guidebook 121212
http://slidepdf.com/reader/full/nexus-4-guidebook-121212 160/235
ACCESSIBILITY 151
enable zoom” will allow you to zoom in or outon those sites.
More Chrome Help
To get more detailed Help while navigating awebpage, working with tabs, and so on, go to
the Chrome Help Center. Note that the con-tent you’ll nd does not cover accessibilityfeatures like TalkBack and Explore by Touch.
Use the lock screen
About the lock screen
Your phone’s lock screen is enabled if any ofthe following occurs:
• The phone goes to sleep (and it locksautomatically).
• The screen turns off after a specied time-out (depending on your display settings).

8/13/2019 Nexus 4 Guidebook 121212
http://slidepdf.com/reader/full/nexus-4-guidebook-121212 161/235
ACCESSIBILITY 152
• You force your screen to turn off andthe phone to lock by pressing the powerbutton.
Unlock your phone
1. Hold the screen in portrait mode and turn
it on by pressing the Power button on theright side of your phone.2. Touch the lower center of the screen.3. Slide your nger all the way across the
screen to the right. You’ll receive spoken
feedback that the phone is unlocked ifyou do this successfully.
Accessibility settings
To modify your phone’s Accessibility set-tings, go to Settings > Accessibility.
A list of options appears:
• TalkBack. Controls spoken feedback forvisually impaired users.

8/13/2019 Nexus 4 Guidebook 121212
http://slidepdf.com/reader/full/nexus-4-guidebook-121212 162/235
ACCESSIBILITY 153
• Magnication gestures. Turn on to zoomin and out as well as magnify what’s un-der your nger. (For users with low vision)
• Large text. Check to increase the text sizeon all your phone’s screens. (For users
with low vision)This option changes the font size to thelargest available. For more ne-grained
control over font size, go to Settings >Display > Font size. Note that this settingdoes not apply to the Google Chrome app– it has its own text scaling control.
• Auto-rotate screen. Check to have thescreen rotate automatically when youchange the phone’s orientation.
• Speak passwords. Check to get spokenfeedback while typing passwords.
If this option is not checked, you will needa headset to hear the letters you type forpasswords.
• Text-to-Speech output. Lets you specifytext-to-speech engine details and speech
rate.• Touch & hold delay. Lets you adjust the
delay required for the phone to notice

8/13/2019 Nexus 4 Guidebook 121212
http://slidepdf.com/reader/full/nexus-4-guidebook-121212 163/235
ACCESSIBILITY 154
that you’re touching and holding an item(for example, to move an app to a Homescreen).
• Enhance web accessibility. Enable thisoption to have ChromeVox provide spokenfeedback as you browse and interact withweb sites and apps.To make sure specialized accessibility
apps work correctly on your phone, besure to turn on this option.

8/13/2019 Nexus 4 Guidebook 121212
http://slidepdf.com/reader/full/nexus-4-guidebook-121212 164/235
Part Two
Adjusting
settings

8/13/2019 Nexus 4 Guidebook 121212
http://slidepdf.com/reader/full/nexus-4-guidebook-121212 165/235
WIRELESS & NETWORK SETTINGS 156
8
Wireless& networksettings
Connect to Wi-Fi networks
Turn Wi-Fi on & connect to a Wi-Fi
network
If you’re adding a Wi-Fi network when rstsetting up your phone, Wi-Fi is turned onautomatically.
1. Touch Settings > Wireless & networks
> Wi-Fi.

8/13/2019 Nexus 4 Guidebook 121212
http://slidepdf.com/reader/full/nexus-4-guidebook-121212 166/235
WIRELESS & NETWORK SETTINGS 157
2. Slide the Wi-Fi switch to the On position.The phone scans for available Wi-Fi net-works and displays the names of those
it nds. Secured networks are indicatedwith a Lock icon. If the phone nds a net-work that you connected to previously, itconnects to it.
3. Touch a network name to see more de-
tails or connect to it, and type a passwordif necessary.Or, if your Wi-Fi router supports Wi-Fi Pro-tected Setup, touch the WPS icon onyour phone, and then touch the same but-ton on your router.
To modify a network’s settings, touch & holdthe network name.

8/13/2019 Nexus 4 Guidebook 121212
http://slidepdf.com/reader/full/nexus-4-guidebook-121212 167/235
WIRELESS & NETWORK SETTINGS 158
TIP: To extend the life of your batterybetween charges, turn off Wi-Fi when
you’re not using it. You can also setyour phone to disconnect automati-cally from Wi-Fi networks when it’ssleeping.
Add a Wi-Fi network
You can add a Wi-Fi network so that your
phone will remember it, along with any secu-rity credentials, and connect to it automati-cally when it’s in range. You must also add aWi-Fi network if the network does not broad-cast its name (SSID), or to add a Wi-Fi net-work when you are out of range.
To join a secured network, you rst need tolearn security details from the network’sadministrator.

8/13/2019 Nexus 4 Guidebook 121212
http://slidepdf.com/reader/full/nexus-4-guidebook-121212 168/235
WIRELESS & NETWORK SETTINGS 159
1. Turn on Wi-Fi, if it’s not already on.2. Touch the Plus icon at the top of the
screen.
3. Enter the SSID (name) of the network. Ifnecessary, enter security or other net-work conguration details.
4. Touch Save.
The information about the network is saved.Your phone will connect to this network au-tomatically the next time you come withinrange.
Forget a Wi-Fi network
You can make the phone forget about the de-tails of a Wi-Fi network that you added—for
example, if you don’t want the phone to con-nect to it automatically or if it’s a networkthat you no longer use.
1. Turn on Wi-Fi, if it’s not already on.
2. In the Wi-Fi settings screen, touch thename of the network.
3. Touch Forget in the dialog that opens.

8/13/2019 Nexus 4 Guidebook 121212
http://slidepdf.com/reader/full/nexus-4-guidebook-121212 169/235
8/13/2019 Nexus 4 Guidebook 121212
http://slidepdf.com/reader/full/nexus-4-guidebook-121212 170/235
WIRELESS & NETWORK SETTINGS 161
The proxy settings apply only to the Wi-Finetwork you modied. To change the proxysettings for other Wi-Fi networks, modify
them individually.
Set Wi-Fi notications, disconnectpolicy, & other advanced options
To work with advanced Wi-Fi settings:
1. Turn on Wi-Fi, if it’s not already on.2. In the Wi-Fi settings screen, touch
Menu > Advanced.
These are the settings you can adjust:
• Network notication. By default, whenWi-Fi is on, you receive notications inthe Status bar when your phone detectsan open Wi-Fi network. Uncheck this op-tion to turn off notications.
• Keep Wi-Fi during sleep. To conserve mo-
bile data usage, your phone stays con-nected to Wi-Fi when the screen goes tosleep. Touch this option to change this

8/13/2019 Nexus 4 Guidebook 121212
http://slidepdf.com/reader/full/nexus-4-guidebook-121212 171/235
WIRELESS & NETWORK SETTINGS 162
default behavior: either to stay connectedto Wi-Fi only when the phone is connect-ed to a charger (when battery life isn’t a
problem), or never to stay connected toWi-Fi during sleep.
• Avoid poor connections: Check to au-tomatically avoid using networks witha low-quality or intermittent Internet
connection.• Wi-Fi optimization: Check to minimize
battery usage when Wi-Fi is on.
This screen also displays the following
information:
• MAC address. The Media Access Control(MAC) address of your phone when con-nected to a Wi-Fi network.
• IP address. The Internet Protocol (IP) ad-dress assigned to the phone by the Wi-Finetwork you are connected to (unless youused the IP settings to assign it a staticIP address).

8/13/2019 Nexus 4 Guidebook 121212
http://slidepdf.com/reader/full/nexus-4-guidebook-121212 172/235

8/13/2019 Nexus 4 Guidebook 121212
http://slidepdf.com/reader/full/nexus-4-guidebook-121212 173/235
WIRELESS & NETWORK SETTINGS 164
TIP: To extend the life of your batterybetween charges, turn off Bluetooth
when you’re not using it. You may alsobe required to turn Bluetooth off insome locations. Bluetooth is turnedoff when you switch to Airplane mode.
System bar icons in the top right corner ofthe screen indicate Bluetooth status.
Turn Bluetooth on or off
1. Touch Settings > Wireless & networks.2. Slide the Bluetooth switch on or off.
Change your phone’s Bluetooth name
Your phone has a generic Bluetooth nameby default, which is visible to other Blue-
tooth devices when you connect them. You
8/13/2019 Nexus 4 Guidebook 121212
http://slidepdf.com/reader/full/nexus-4-guidebook-121212 174/235

8/13/2019 Nexus 4 Guidebook 121212
http://slidepdf.com/reader/full/nexus-4-guidebook-121212 175/235
WIRELESS & NETWORK SETTINGS 166
and displays the IDs of all available Blue-tooth devices in range.
3. If your phone stops scanning before your
Bluetooth device is ready, touch Searchfor devices.
4. Touch the ID of the Bluetooth device in thelist to pair with it.
5. Follow the instructions to complete the
pairing. If you’re prompted to enter a pass-code, try entering 0000 or 1234 (the mostcommon passcodes), or consult the docu-mentation that came with the device.
If the pairing is successful, your phone con-nects to the device.
Connect to a Bluetooth device
Once you’ve paired with a Bluetooth device,you can connect to it manually—for example,to switch devices or to reconnect after it isback in range.
1. Under Settings > Wireless & networks >
8/13/2019 Nexus 4 Guidebook 121212
http://slidepdf.com/reader/full/nexus-4-guidebook-121212 176/235
WIRELESS & NETWORK SETTINGS 167
Bluetooth, make sure Bluetooth is turnedon.
2. In the list of devices, touch a paired but
unconnected device.When the phone and the device are con-nected, the device is displayed as con-nected in the list.
Congure or unpair a Bluetooth device
Some Bluetooth devices have multiple pro-les. Proles can includes the ability to
transmit your conversations, play music instereo, or transfer les or other data. You canselect which proles you want to use withyour phone. You can also change the nameof the Bluetooth device as it appears on your
phone.
1. Under Settings > Wireless & net-
works > Bluetooth, make sure Bluetoothis turned on.
2. In the Bluetooth settings, touch the Set-tings icon beside the connected Blue-

8/13/2019 Nexus 4 Guidebook 121212
http://slidepdf.com/reader/full/nexus-4-guidebook-121212 177/235
WIRELESS & NETWORK SETTINGS 168
tooth device you want to congure.A screen opens that allows you to changethe device’s name, unpair it, or select pro-
les. Touch the Back button when you’renished.
Optimize data usage
Data usage refers to the amount of data up-loaded or downloaded by your device duringa given period. Depending on the device andyour wireless plan, you may be charged ad-
ditional fees when your data usage exceedsyour plan’s limit.
To monitor your data usage, go to Set-
tings > Wireless & networks > Data usage.

8/13/2019 Nexus 4 Guidebook 121212
http://slidepdf.com/reader/full/nexus-4-guidebook-121212 178/235
WIRELESS & NETWORK SETTINGS 169
Warning: The usage displayed on thedata usage settings screen is mea-
sured by your phone. Your carrier’sdata usage accounting may differ.Usage in excess of your carrier plan’sdata limits can result in steep overagecharges. The settings described here
can help you track your usage, but arenot guaranteed to prevent additionalcharges.
Data usage settings allow you to:
• Set the data usage level at which you’ll re-ceive a warning.
• Set a data usage limit.
• View or restrict data usage by app.• Identify mobile hotspots and restrict
background downloads that may result inextra charges.
To view mobile hotspot settings, touchMenu > Mobile hotspots.

8/13/2019 Nexus 4 Guidebook 121212
http://slidepdf.com/reader/full/nexus-4-guidebook-121212 179/235
WIRELESS & NETWORK SETTINGS 170
By default, when you open the data usagesettings screen you see the settings for mo-bile data: that is, the data network or net-
works provided by your carrier.
It’s possible to show Wi-Fi data usage set-tings in a separate tab. To do so, touch theMenu icon , then Show Wi-Fi usage.
Near the top of the screen, note the on-offswitch for mobile data. The instructions thatfollow assume that this switch is turned on.If it’s off, you won’t be able to use mobile data
at all and many features of your phone andapps won’t work correctly.
Just below the on-off switch, note the datausage cycle. Touch it to choose a different
cycle. This date range is the period of timefor which the graph displays data usage.
The vertical white lines on the graph show aperiod of time within the data usage cycle.
This range determines the usage amountdisplayed just below the graph. Drag lines tochange the period.

8/13/2019 Nexus 4 Guidebook 121212
http://slidepdf.com/reader/full/nexus-4-guidebook-121212 180/235
WIRELESS & NETWORK SETTINGS 171
Set auto-sync
You can also conserve data usage by sync-
ing your apps manually, only when you needthe data, rather than relying on auto-sync.To turn auto-sync off or on, touch Menu > Auto-sync data.
Set data usage warning
Drag the orange line by its right side to thelevel where you want to receive a warning.
When your data usage reaches this level,you’ll receive a notication.
Set data usage limit
1. Check Set mobile data limit.A dialog appears that describes the limityou’re setting.
2. Read the message. If you’re willing to pro-ceed, touch OK .The red line at the top of the graph acti-vates, so you can drag it up or down.

8/13/2019 Nexus 4 Guidebook 121212
http://slidepdf.com/reader/full/nexus-4-guidebook-121212 181/235
8/13/2019 Nexus 4 Guidebook 121212
http://slidepdf.com/reader/full/nexus-4-guidebook-121212 182/235
WIRELESS & NETWORK SETTINGS 173
data usage. If more than one is displayed,you can switch between them by touchingtabs at the top of the screen.
2. Scroll down to nd the app whose data us-age you want to view.The blue bar for each app indicates itstotal data usage for the cycle displayedabove the main graph, near the top of the
screen.3. To see more details for an app, touch its
name.The main graph switches to show just thisapp’s data usage for the specied cycle.Below the main graph, a pie chart breaksout foreground versus background datausage for this app.
4. To stop background data usage for this
app, check Restrict background data.5. Read the message that appears. If you’rewilling to proceed, touch OK .
8/13/2019 Nexus 4 Guidebook 121212
http://slidepdf.com/reader/full/nexus-4-guidebook-121212 183/235
WIRELESS & NETWORK SETTINGS 174
Advanced data usage settings
Two other settings available from the Menu
icon can have dramatic effects—but maysometimes be useful:
• Data roaming can result in steep addition-al charges. However, in some locations
this may be the only way to connect to theInternet.
• Restrict background data affects all yourapps across all available networks, andmay cause some features to stop work-
ing. This is an extreme step that shouldbe used with caution.
Control airplane mode & othernetwork settings
These settings are available under Settings >
Wireless & networks > More.
• Airplane mode. Check to turn off all datatransmission from the phone.
8/13/2019 Nexus 4 Guidebook 121212
http://slidepdf.com/reader/full/nexus-4-guidebook-121212 184/235
WIRELESS & NETWORK SETTINGS 175
• VPN. Touch to adjust settings for access-ing a secured local network from outsidethat network. See “Connect to virtual pri-
vate networks”.• NFC. Check to turn on Near Field Commu-
nication (NFC) feature (required for An-droid Beam).
• Android Beam. Touch to turn Android
Beam off or on. When NFC is checked andAndroid Beam is on, you can touch yourphone to other devices to exchange webpages, contact info, and other data. See“Share content with Android Beam.”
• Mobile networks. Touch to adjust set-tings that control your phone’s connec-tions with mobile data networks.
• Cell broadcasts. Touch to adjust settings
for emergency alerts. Note that thesealerts provided through your wireless car-rier are independent of the public alertsavailable through Google Now.

8/13/2019 Nexus 4 Guidebook 121212
http://slidepdf.com/reader/full/nexus-4-guidebook-121212 185/235
WIRELESS & NETWORK SETTINGS 176
Connect to virtual privatenetworks
Virtual private networks (VPNs) allow entryinto secured local networks from the out-side. Corporations, schools, and other insti-tutions use VPNs to grant access to local
network resources when people are not oncampus or connected to a wireless network.
To congure VPN access, you must rst ob -tain the details from your network admin-istrator. Depending on your organization’ssolution, you may need to obtain a VPN app,either from your administrator or on GooglePlay.
The VPN settings screen al-lows you to add VPN networksand adjust their settings. Toview this screen and performthe tasks described here, go to
Settings > Wireless & networks> More > VPN.
Settings
8/13/2019 Nexus 4 Guidebook 121212
http://slidepdf.com/reader/full/nexus-4-guidebook-121212 186/235
WIRELESS & NETWORK SETTINGS 177
Add a VPN
1. From the VPN screen, touch Add VPN
prole.2. In the form that appears, ll in the in-
formation provided by your networkadministrator
3. Touch Save.
The VPN is added to the list on the VPNscreen.
Connect to or disconnect from a VPN1. From the VPN screen, touch the name of
the VPN.2. In the dialog that opens, enter any re-
quested credentials.3. Touch Connect.
When you’re connected to a VPN, a Statusicon and notication are displayed continu-
ously. To disconnect, touch the noticationfor the VPN connection.

8/13/2019 Nexus 4 Guidebook 121212
http://slidepdf.com/reader/full/nexus-4-guidebook-121212 187/235

8/13/2019 Nexus 4 Guidebook 121212
http://slidepdf.com/reader/full/nexus-4-guidebook-121212 188/235
DEVICE SETTINGS 179
9
Device settings
Change sound settingsTo customize the sounds your phone makes,go to Settings > Device > Sound:
• Volumes sets the master volume sepa-rately for music, notications, and alarms.You can still use the physical volume con-trol on the phone to raise or lower volumeof whatever sound is currently playing.
• Default notication announces the arrivalof notications unless you specify a dif-ferent sound in an individual app.
• Touch sounds give audible feedbackwhen you touch active icons or buttons
on the screen.• Screen lock sound is triggered when you
unlock the screen.

8/13/2019 Nexus 4 Guidebook 121212
http://slidepdf.com/reader/full/nexus-4-guidebook-121212 189/235
DEVICE SETTINGS 180
Set up Daydream
When Daydream is on, your phone displays
photos, colors, and more while it is chargingor docked.
Turn on Daydream
1. Go to Settings > Device > Display.2. Touch Daydream.3. Slide the switch to On.
To decide if your phone sleeps while docked,charging, or both, touch When to daydream.
You can choose what your phone displayswhen Daydream is on:
• Clock displays the phone’s digital or ana-log clock. You can change the clock styleor select the Night mode option by touch-ing the Settings icon next to Clock.
• Colors shows changing colors on thescreen.

8/13/2019 Nexus 4 Guidebook 121212
http://slidepdf.com/reader/full/nexus-4-guidebook-121212 190/235
DEVICE SETTINGS 181
• Currents displays snippets from the Cur-rents app. You can touch one to open it orswipe it away to hide it.
• Photo Frame presents a slideshow ofphotos on your phone or Google+ ac-count. Touch the Settings icon next toPhoto Frame to control what photos aredisplayed.
• Photo Table scatters photos on yourphone or Google+ account across yourscreen. Touch & hold an image to moveit around the screen, or swipe it away tohide it. Touch the Settings icon next toPhoto Table to control what photos aredisplayed.
Time to sleep
You can choose the amount of time yourphone is inactive before Daydream starts.
1. Go to Settings > Device > Display.
2. Touch Sleep.3. Touch one of the options.

8/13/2019 Nexus 4 Guidebook 121212
http://slidepdf.com/reader/full/nexus-4-guidebook-121212 191/235
DEVICE SETTINGS 182
Turn off Daydream
1. Go to Settings > Device > Display.
2. Touch Daydream.3. Slide the switch to Off .
Use Wireless Display
Nexus 4 supports the Miracast protocolfor wireless display. You can connect yourphone via Wi-Fi to a variety of displays andother devices that support Miracast, even
when a standard Wi-Fi network isn’t avail-able. For example, you can use Wireless Dis-play to show your phone’s screen on a TVequipped with a certied Miracast adapter.
For more information, see the documenta-tion that comes with the Miracast-certieddevice you wish to connect to your phone.

8/13/2019 Nexus 4 Guidebook 121212
http://slidepdf.com/reader/full/nexus-4-guidebook-121212 192/235
DEVICE SETTINGS 183
Transfer les through USB
You can use a USB cable to transfer music,
pictures, and other les from your phoneto a computer and vice versa. This connec-tion uses the MTP protocol, which is sup-ported by most recent versions of Windowsbut not by Mac OS X. For le transfer to Mac
OS X, you use the free Android File Transferapplication.
Windows transfer
1. Connect your phone to the USB port onyour computer. Its USB storage is mount-ed as a drive and appears on your com-puter screen.
2. Copy les back and forth as you would us-ing any other external device.
3. When you nish, eject the phone fromwithin Windows before unplugging theUSB cable.
8/13/2019 Nexus 4 Guidebook 121212
http://slidepdf.com/reader/full/nexus-4-guidebook-121212 193/235
DEVICE SETTINGS 184
Mac OS transfer
1. Install Android File Transfer from www.
android.com/letransfer, and follow theinstructions there. (If you are using An-droid File Transfer for the rst time, dou -ble-click it to open it. After the rst con-nection, it opens automatically whenever
you connect.)2. Connect your phone to your computer with
a USB cable. Android File Transfer starts,if it’s not already running, and opens awindow that displays the contents of your
phone, along with storage space detailsat the bottom of the window.
3. Work with this window much as you do inthe Finder window: open and close fold-ers, create new folders, and drag les to orfrom it and other Finder windows.
4. Disconnect the USB cable when younish.
Related settings
To change your phone’s USB connection op-
8/13/2019 Nexus 4 Guidebook 121212
http://slidepdf.com/reader/full/nexus-4-guidebook-121212 194/235

8/13/2019 Nexus 4 Guidebook 121212
http://slidepdf.com/reader/full/nexus-4-guidebook-121212 195/235

8/13/2019 Nexus 4 Guidebook 121212
http://slidepdf.com/reader/full/nexus-4-guidebook-121212 196/235
DEVICE SETTINGS 187
WARNING: If you stop some apps orservices, your device may not work
correctly.
Battery status (charging, discharging) andlevel (as a percentage of fully charged) are
displayed at the top of the screen.
The discharge graph shows battery levelover time since you last charged the device,and how long you’ve been running on battery
power.
Manage memory usage
You typically don’t need to worry about man-aging apps beyond installing, opening, andusing them. But there may be times whenyou want to know more about what’s hap-pening behind the scenes in order to bettermanage your storage.
8/13/2019 Nexus 4 Guidebook 121212
http://slidepdf.com/reader/full/nexus-4-guidebook-121212 197/235
DEVICE SETTINGS 188
IMPORTANT: Android manages andcarefully guards the portion of inter-
nal storage where the system, apps,and most data for those apps arestored, because this area may containyour private information. It’s not pos-sible to view this portion of internal
storage when you connect your de-vice to a computer with a USB cable.The other portion of internal storage,where music, downloaded les, and soon are stored, remains visible for your
convenience.
You’re able to optimize your memory usage
by:
• Uninstalling apps you don’t use.• Deleting downloaded les or les you cre-
ated and copying them over to a computer
via USB.• Removing content from Google Play

8/13/2019 Nexus 4 Guidebook 121212
http://slidepdf.com/reader/full/nexus-4-guidebook-121212 198/235
DEVICE SETTINGS 189
that’s saved for offline use and streamingit via a Wi-Fi or mobile network.
Use the Apps screen
The Apps screen allows you toadjust several aspects of the
way your device uses memory.To view these settings, go toSettings > Device > Apps.Settings
You’ll see three tabs at the top of the screen,
each displaying a list of apps or theircomponents:
• Downloaded. Displays apps you’ve down-loaded on Google Play or other sources.
• Running. Displays all apps, processes,and services that are currently runningor that have cached processes, and howmuch RAM they are using.The graph at the bottom of the Running
tab shows the total RAM in use and theamount free. At the top right of the screen,touch Show cached processes or Show

8/13/2019 Nexus 4 Guidebook 121212
http://slidepdf.com/reader/full/nexus-4-guidebook-121212 199/235
DEVICE SETTINGS 190
running services to switch back and forth.• All. Displays all apps that came with An-
droid and all apps you downloaded on
Google Play or other sources.
To switch the order of the lists displayed inthe Downloaded or All tabs, touch Menu >Sort by name or Sort by size.
To view details about an app or other itemlisted under any tab, touch its name. Theinformation and controls available varyamong different types of apps, but common-
ly include:
• Force stop button. Stops an app that ismisbehaving. Stopping an app, process,or service may cause your device to stop
working correctly. You may need to re-start your device after doing this.
• Uninstall button. Deletes the app and allof its data and settings.
• Disable button. Prevents the app from
running, but does not uninstall it. This op-tion is available for some apps and servic-es that can’t be uninstalled.
8/13/2019 Nexus 4 Guidebook 121212
http://slidepdf.com/reader/full/nexus-4-guidebook-121212 200/235
DEVICE SETTINGS 191
• Clear data button. Delete an app’s set-tings and other data without removing theapp itself.
• Clear cache button. If the app stores datain a temporary area of the phone’s mem-ory, lists how much information is stored,and includes a button for clearing it.
• Launch by default. If you have congured
an app to launch certain le types by de -fault, you can clear that setting here.
• Permissions. Lists the kinds of informa-tion about your phone and data the apphas access to.

8/13/2019 Nexus 4 Guidebook 121212
http://slidepdf.com/reader/full/nexus-4-guidebook-121212 201/235
SECURITY SETTINGS 192
10
Securitysettings
Security on Android
Android takes a multi-layered approach tosecurity:
Prevent. Apps in Google Play are scannedcontinuously to block harmful apps and pol-
icy violators. You can also choose to haveapps installed from other sources veried.
Control. App “sandboxes” keep apps fromaccessing other parts of your phone’s oper-
ating system, or each other, unless you givepermission at installation. Screen lock and

8/13/2019 Nexus 4 Guidebook 121212
http://slidepdf.com/reader/full/nexus-4-guidebook-121212 202/235
SECURITY SETTINGS 193
encryption help prevent unauthorized ac-cess to the entire phone.
Defend. Once identied, dangerous apps canbe removed remotely.
This chapter includes information about theverify apps feature (used both for prevention
and defense), screen lock, encryption, andother security features of your phone.
Manage security settings
You can manage the security settings foryour phone by going to Settings > Personal
> Security.
• Screen security. Manage screen lock op-tions, such as using the Power button tolock your screen.
• Encryption. Encrypt the data on yourphone.
• SIM card lock. Set up a PIN to lock yourphone’s SIM card.

8/13/2019 Nexus 4 Guidebook 121212
http://slidepdf.com/reader/full/nexus-4-guidebook-121212 203/235
SECURITY SETTINGS 194
• Passwords. Make passwords visible,which helps you to enter a password thatis more complex and secure.
• Device administration. Manage deviceadministrators, allow apps to be in-stalled from sources other than the PlayStore, and choose to verify apps from allsources.
• Credential storage. Manage, install, orclear certicates on your phone.
TIP: Touch Owner info under ScreenSecurity to enter information that’sdisplayed on the lock screen. This isuseful in case you lose or misplaceyour phone.

8/13/2019 Nexus 4 Guidebook 121212
http://slidepdf.com/reader/full/nexus-4-guidebook-121212 204/235
SECURITY SETTINGS 195
Protect against harmful apps
About verifying apps
Some apps can harm you or your phone. Youcan choose to verify apps in order to help pre-vent harmful software from being installed
on your phone.
If you attempt to install an app from anysource while app verication is turned on,your phone may send information identifying
the app to Google.
If the app is harmful, Google may warn younot to install it, or it may block the installa-tion completely.
8/13/2019 Nexus 4 Guidebook 121212
http://slidepdf.com/reader/full/nexus-4-guidebook-121212 205/235
SECURITY SETTINGS 196
IMPORTANT: When you verify apps,Google receives log information, URLs
related to the app, and general infor-mation about the device, such as theDevice ID, version of the operatingsystem, IP address, and one or morecookies.
Control app verication
App verication is turned on by default, butno data is sent to Google unless you agree toallow this when asked in the dialog that ap-pears prior to installing the rst app from an
unknown source.
To control app verication, go to Settings >
Security > Verify apps.
If you attempt to install an app that may beunsafe, you may see one of the followingdialogs:
8/13/2019 Nexus 4 Guidebook 121212
http://slidepdf.com/reader/full/nexus-4-guidebook-121212 206/235
SECURITY SETTINGS 197
• Installing this app may harm your phone.
The app may be harmful to your phoneand personal information.
• Installation has been blocked. The app isharmful and can’t be installed.
Turn off app verication
To stop verifying apps at any time, go to Set-
tings > Security > Verify apps, then uncheckthe box.
Set screen lock
You can lock your screen for additional secu-rity. After you set a lock, the screen is locked
after the display goes to sleep.
If your phone’s playing music when thescreen locks, you can continue listening orpause the selection without unlocking.
To adjust your lock settings:

8/13/2019 Nexus 4 Guidebook 121212
http://slidepdf.com/reader/full/nexus-4-guidebook-121212 207/235
SECURITY SETTINGS 198
1. Go to Settings > Personal > Security
> Screen lock.
2. Touch the type of lock you want and fol-
low the onscreen instructions.
To change the screen lock that’s currentlyset, enter the pattern, PIN, or password to ac-cess the lock options.
You can choose among these lock options,listed in approximate order of strength:
• Slide provides no protection, but lets
you get to the Home screen quickly, oropen Camera and start taking picturesimmediately.
• Face Unlock lets you unlock your phoneby looking at it. This is the least secure
lock option.
8/13/2019 Nexus 4 Guidebook 121212
http://slidepdf.com/reader/full/nexus-4-guidebook-121212 208/235
SECURITY SETTINGS 199
TIP: Face Unlock lets you un-lock your phone by looking at the
screen. After you set it up, look un-der Settings > Personal > Security for two additional settings: Improve
face matching and Liveness check. Use these to make Face Unlock
more reliable and secure.
• Pattern lets you draw a simple patternwith your nger to unlock the phone. This
is slightly more secure than Face Unlock.• PIN requires four or more numbers. Lon-
ger PINs tend to be more secure.• Password requires four or more letters or
numbers. This is the most secure option,
as long as you create a strong password.
Password tips: For best security, specify apassword that is
• A least 8 characters long.• Contains a mixture of numbers, letters,
and special symbols.

8/13/2019 Nexus 4 Guidebook 121212
http://slidepdf.com/reader/full/nexus-4-guidebook-121212 209/235
SECURITY SETTINGS 200
• Doesn’t contain any recognizable wordsor phrases.
To change when your phonegoes to sleep, go to Settings >
Device > Display > Sleep.
To see your passwords when
you input them, go to Settings> Personal > Security > Make
passwords visible.
Settings
Encrypt your data
You can encrypt all your data: Google Ac-counts, app data, music and other media,downloaded information, and so on. If you
do, you must enter a numeric PIN or pass-word each time you turn on your phone. Notethat this is the same PIN or password thatyou use to unlock your phone without en-cryption, and can’t be set independently.

8/13/2019 Nexus 4 Guidebook 121212
http://slidepdf.com/reader/full/nexus-4-guidebook-121212 210/235
SECURITY SETTINGS 201
Warning: Encryption is irreversible.The only way to revert is to perform
a factory data reset, which erases allyour data.
Encryption provides additional protectionin case your phone is stolen, and may berequired or recommended in some organi-zations. Consult your system administratorbefore turning it on. In many cases the PIN or
password you set for encryption is controlledby the system administrator.
Before turning on encryption, prepare asfollows:
1. Set a lock screen PIN or password.2. Charge the battery.3. Plug in your phone.4. Schedule an hour or more for the encryp-
tion process: you must not interrupt it oryou will lose some or all of your data.

8/13/2019 Nexus 4 Guidebook 121212
http://slidepdf.com/reader/full/nexus-4-guidebook-121212 211/235
SECURITY SETTINGS 202
When you’re ready to turn on encryption:
1. Touch Settings > Personal > Security >
Encryption > Encrypt phone.2. Read the information about encryption
carefully.The Encrypt phone button is dimmedif your battery’s not charged or your
phone’s not plugged in. If you changeyour mind about encrypting your phone,touch the Back button.
Warning: If you interrupt the en-cryption process, you will lose data.
3. Touch Encrypt phone.
4. Enter your lock screen PIN or passwordand touch Continue.
5. Touch Encrypt phone again.
The encryption process starts and displays
its progress. Encryption can take an hour ormore, during which time your phone may re-start several times.

8/13/2019 Nexus 4 Guidebook 121212
http://slidepdf.com/reader/full/nexus-4-guidebook-121212 212/235
SECURITY SETTINGS 203
When encryption is complete, you’re prompt-ed to enter your PIN or password.
Subsequently, you must enter your PIN orpassword each time you power on yourphone, to decrypt it.
Work with certicatesYou can use digital certicates to identifyyour device for a variety of purposes, includ-ing VPN or Wi-Fi network access as well as
authentication to servers by apps such asEmail or Chrome. To use a certicate to iden-tify your device, you must obtain it with helpfrom your system administrator, and install itin your device’s trusted credential storage .
Android supports DER-encoded X.509 cer-ticates, saved in les with a .crt or .cer leextension. If your certicate le has a .der orother extension, you must change it to .crt or
.cer or you won’t be able to install it.
Android also supports X.509 certicates

8/13/2019 Nexus 4 Guidebook 121212
http://slidepdf.com/reader/full/nexus-4-guidebook-121212 213/235

8/13/2019 Nexus 4 Guidebook 121212
http://slidepdf.com/reader/full/nexus-4-guidebook-121212 214/235

8/13/2019 Nexus 4 Guidebook 121212
http://slidepdf.com/reader/full/nexus-4-guidebook-121212 215/235
SECURITY SETTINGS 206
IMPORTANT: Apps such as Email thatsupport certicates allow you to in-
stall certicates directly from withinthe app. For details, see the Help orother instructions that come with eachapp.
Work with CA certicates
If a certicate authority (CA) certicate gets
compromised, or for some other reason yourorganization doesn’t want to trust it, you candisable or remove it. To do so, follow thesesteps:
1. Touch Settings > Personal > Security> Credential storage >Trusted credentials. The trusted credentials screen has twotabs:System displays certicate authority(CA) certicates that are permanently in-stalled in the ROM of your phone.User displays any CA certicates that you

8/13/2019 Nexus 4 Guidebook 121212
http://slidepdf.com/reader/full/nexus-4-guidebook-121212 216/235
SECURITY SETTINGS 207
have installed yourself, for example in theprocess of installing a client certicate.
2. To examine the details of CA certicate,
touch its name.A scrolling screen displays the details.
3. To remove or disable a CA certicate,scroll down to the bottom of the de-tails screen and touch either Disable for
system certicates or Remove for usercerticates.When you disable a system CA certicate,the button at the bottom of its detailsscreen changes to Enable, so you canenable the certicate again if necessary.When you remove a user-installed CA cer-ticate, it is gone permanently and mustbe re-installed if you want it back.
4. In the conrmation dialog that appears,touch OK .

8/13/2019 Nexus 4 Guidebook 121212
http://slidepdf.com/reader/full/nexus-4-guidebook-121212 217/235
PERSONAL, SETTINGS 208
11
Personal,account,& system
settingsManage location access
You can let your phone access GPS, Wi-Finetworks, and mobile networks to estimateyour location. Apps that have your permis-sion can use this information to deliver lo-
cation-based services, such as the ability tocheck in, view commute trafc, or nd nearbyrestaurants.
8/13/2019 Nexus 4 Guidebook 121212
http://slidepdf.com/reader/full/nexus-4-guidebook-121212 218/235
PERSONAL, SETTINGS 209
For your phone
To control what location information your
phone can use, go to Settings > Personal >Location access.
When the Access to my location switch at thetop of the screen is On , you can select either
or both of these checkboxes:
• GPS satellites. Just like a GPS device inyour car, lets your phone calculate yourlocation based on satellite signals.
• Wi-Fi & mobile network location. Letsyour phone use Google’s location serviceto help estimate your location faster, withor without help from GPS.
When the switch is Off, your phone can’t ndyour precise location or share it with anyapps.
8/13/2019 Nexus 4 Guidebook 121212
http://slidepdf.com/reader/full/nexus-4-guidebook-121212 219/235

8/13/2019 Nexus 4 Guidebook 121212
http://slidepdf.com/reader/full/nexus-4-guidebook-121212 220/235
PERSONAL, SETTINGS 211
IMPORTANT: When you turn Location settings off, non-Google apps and
Google’s location service will continueto receive your location. To changethese settings, go to Settings > Per-
sonal > Location access.
Change backup & reset options
To view the settings described here, go toSettings > Backup & reset.
You can back up settings and other data as-sociated with one or more of your Google Ac-
counts. If you need to replace or factory resetyour device, you can restore your data for anyaccounts that were previously backed up.
These options are available:
• Back up my data. If you check this option,a wide variety of your personal data isbacked up automatically, including your

8/13/2019 Nexus 4 Guidebook 121212
http://slidepdf.com/reader/full/nexus-4-guidebook-121212 221/235
PERSONAL, SETTINGS 212
Wi-Fi passwords, Chrome bookmarks, alist of the apps you’ve installed on GooglePlay, the words you’ve added to the dic-
tionary used by the onscreen keyboard,and most of your customized settings.Some third-party apps may also take ad-vantage of this feature, so you can restoreyour data if you reinstall an app.
If you uncheck this option, your datastops getting backed up, and any existingbackups are deleted from Google servers.
• Backup account. Displays the Google Ac-counts whose information gets backedup. You must sign in with one or more ofthese accounts on a new or reset deviceto retrieve the associated information.To add a new account, touch Backup ac-
count > Add account.• Automatic restore. Check this option torestore settings and other data when youreinstall an app. This feature requires thatyou are backing up your data with your
Google Account and that the app is usingthe backup service.

8/13/2019 Nexus 4 Guidebook 121212
http://slidepdf.com/reader/full/nexus-4-guidebook-121212 222/235
PERSONAL, SETTINGS 213
• Factory data reset. Touch this option,then Reset phone to erase all your person-al data from internal storage, including
information about your Google Account,any other accounts, your system and appsettings, any downloaded applications,and your music, photos, videos, and otherles.
After resetting your phone, you’ll need tore-enter the same information requestedwhen you rst set up your phone. If you’vebeen backing up your data to a Google ac-count, an option during the setup processallows you to restore it.
Some third-party apps also make use of thebackup service, so if you reinstall one, its set-tings and data are restored.
8/13/2019 Nexus 4 Guidebook 121212
http://slidepdf.com/reader/full/nexus-4-guidebook-121212 223/235
PERSONAL, SETTINGS 214
Add or remove accounts
Add an account
To add some accounts, you may need to ob-tain details from system administrator aboutthe service to which the account connects.
For example, you may need to know the ac-count’s domain or server address.
1. Go to Settings > Accounts > Add account.
2. Touch the kind of account to add.
3. Follow the on-screen instructions.
Most accounts require a username and pass-word, but the details depend on the kind ofaccount and the conguration of the service
you’re connecting to.
Depending on the kind of account, you maybe asked to congure what kinds of data youwant to sync, name the account, and other
details.

8/13/2019 Nexus 4 Guidebook 121212
http://slidepdf.com/reader/full/nexus-4-guidebook-121212 224/235
PERSONAL, SETTINGS 215
When you’re nished, the account is added inone of two places:
• Google Accounts show up under Settings> Accounts > Google.
• Other accounts show up under Settings >
Accounts.
Remove an account
You can remove any account and all informa-tion associated with it from your device, in-cluding email, contacts, settings, and so on.
To remove a Google account, touch its nameunder Settings > Accounts or Settings > Ac-
counts >Google, then Menu > Remove
account.
For any other type of account go, to Settings
> Accounts > account-name and look for theRemove option.

8/13/2019 Nexus 4 Guidebook 121212
http://slidepdf.com/reader/full/nexus-4-guidebook-121212 225/235
PERSONAL, SETTINGS 216
Congure sync options
To reach sync settings for Google accounts,
start from Settings > Accounts > Google.
You can congure synchronization optionsfor any of your apps. You can also decidewhat kinds of data to synchronize for each
account.
For some accounts, syncing is two-direc-tional; changes that you make to the infor-mation on your device are made to the copy
of that information on the web. Your GoogleAccount works this way. Other accounts sup-port only one-way sync: the information onyour mobile device is read-only.
Some apps, such as Gmail and Calendar,have separate synchronization settingsthat provide more ne-grained control. Forexample, to control message syncing in theGmail app, ensure you’re viewing your Inbox,
then touch Menu > Label settings > Syncmessages.

8/13/2019 Nexus 4 Guidebook 121212
http://slidepdf.com/reader/full/nexus-4-guidebook-121212 226/235
PERSONAL, SETTINGS 217
Congure auto-sync for all apps
To control Anto-sync for all apps that use it,
open Settings > Data usage > Menu andcheck or uncheck Auto-sync data.
If you turn off Auto-sync, you need to syncmanually to collect messages, email, and
other recent information, and won’t receivenotications when updates occur. For exam-ple, changes that you make in your Peopleapp are automatically made to your Googlecontacts on the web.
If this option is not checked, you may be ableto use an app’s tools to sync data manually.You can also sync manually to collect mes-sages, email, and other recent information.
Leaving Auto-sync off can help extend yourbattery life, but will prevent you from receiv-ing notications when updates occur.

8/13/2019 Nexus 4 Guidebook 121212
http://slidepdf.com/reader/full/nexus-4-guidebook-121212 227/235
PERSONAL, SETTINGS 218
Congure Google Account syncsettings
To adjust a single Google Account’s syncsettings:
1. Go to Settings > Personal > Accounts >
Google.
indicates that some or all of an ac-count’s information is congured
to sync automatically.indicates that none of an account’sinformation is congured to sync
automatically.2. Touch the account whose sync settings
you want to change.3. The Sync Settings screen opens, display-
ing a list of the kinds of information theaccount can sync.
4. Check or uncheck items as needed.
Unchecking an option does not remove theinformation from your device; it simply stopsit from being kept in sync with the version onthe web.
8/13/2019 Nexus 4 Guidebook 121212
http://slidepdf.com/reader/full/nexus-4-guidebook-121212 228/235
PERSONAL, SETTINGS 219
Sync a Google Account manually
1. Go to Settings > Accounts > Google.
2. Touch the account whose data you wantto sync.
3. Touch Menu > Sync now.

8/13/2019 Nexus 4 Guidebook 121212
http://slidepdf.com/reader/full/nexus-4-guidebook-121212 229/235
APPENDIX 220
Appendix:Hardware reference
What’s in the box

8/13/2019 Nexus 4 Guidebook 121212
http://slidepdf.com/reader/full/nexus-4-guidebook-121212 230/235
APPENDIX 221
This Quick Start Guide and a Safety & War-ranty booklet are also included.
• If any item is damaged or missing, contactyour point of purchase for assistance.
• Use only approved accessories.• Accessories may vary by country or
region.

8/13/2019 Nexus 4 Guidebook 121212
http://slidepdf.com/reader/full/nexus-4-guidebook-121212 231/235
APPENDIX 222
Nexus 4

8/13/2019 Nexus 4 Guidebook 121212
http://slidepdf.com/reader/full/nexus-4-guidebook-121212 232/235
APPENDIX 223

8/13/2019 Nexus 4 Guidebook 121212
http://slidepdf.com/reader/full/nexus-4-guidebook-121212 233/235
APPENDIX 224
Specs
Screen 4.7” diagonal
1280x768 pixel resolution (320
ppi)
WXGA IPS
Corning® Gorilla® Glass 2
Size 133.9 x 68.7 x 9.1mm
Weight 139g
Cameras 8 MP (main)
1.3 MP (front)
Memory 8GB or 16GB (actual formattedcapacity will be less)
2GB RAM
CPU Qualcomm Snapdragon™ S4 Pro
1.5GHz

8/13/2019 Nexus 4 Guidebook 121212
http://slidepdf.com/reader/full/nexus-4-guidebook-121212 234/235
APPENDIX 225
Sensors Microphone
Accelerometer
Compass
Ambient light
Barometer
Gyroscope
GPS
Network Unlocked GSM/UMTS/HSPA+
GSM/EDGE/GPRS (850, 900,
1800, 1900 MHz)
3G (850, 900, 1700, 1900, 2100
MHz)
HSPA+ 42
Wireless Wireless charging compatible
Wi-Fi (802.11 a/b/g/n)
NFC (Android Beam)
Bluetooth

8/13/2019 Nexus 4 Guidebook 121212
http://slidepdf.com/reader/full/nexus-4-guidebook-121212 235/235
Connectivity Micro USB
SlimPort HDMI
3.5mm headphone jack
Battery 2,100 mAh
Standby: up to 250 hours