object-oriented programming concepts-15cs45 4 module oops notes.pdfobject-oriented programming...
TRANSCRIPT
Object-Oriented Programming Concepts-15CS45
Chethan Raj C, Assistant Professor Dept. of CSE Page 1
Chethan Raj C
Assistant Professor
Dept. of CSE
Module 04 Contents
1. Multi Threaded Programming
2. Multi Threaded Programming
3. What are threads
4. How to make the classes threadable
5. Extending threads
6. Implementing runnable
7. Synchronization
8. Changing state of the thread
9. Bounded buffer problems
10. readwrite problem
11. producer consumer problems.
12. Event Handling
13. Two event handling mechanisms
14. The delegation event model
15. Event classes; Sources of events
16. Event listener interfaces
17. Using the delegation event model
18. Adapter classes
19. Inner classes.
Object-Oriented Programming Concepts-15CS45
Chethan Raj C, Assistant Professor Dept. of CSE Page 2
Multi Threaded Programming
Java provides the inbuilt support that multithreaded programming. A multithreaded programming
contains two or more parts that can run concurrently. Each part of such program is called thread and
each thread defines the separate path of execution.
Threads
Thread in Java is an independent path of execution which is used to run two task in parallel. When
two Threads run in parallel that is called multi-threading in Java. Java is multithreaded from the
start and excellent support of Thread at language level e.g. java.lang.Thread class, synchronized
keyword, volatile and final keyword makes writing concurrent programs easier in Java than any
other programming language e.g. C++. Being multi-threaded is also a reason of Java's popularity
and being number one programming language. On the other hand if your program divides a task
between two threads it also brings lot of programming challenges and issues related to
synchronization, deadlock, thread-safety and race conditions.
When a Java program starts up, one thread begins running immediately. This is usually called the
main thread of our program, because it is the one that is executed when our program begins.
Thread is a class in Java but also a way to execute something in parallel independently in Java".
Thread in Java requires a task which is executed by this thread independently and that task can be
either Runnable or Callable
Properties :
Main Thread is the thread from which other “child” threads will be spawned(created) .Often, it must
be the last thread to finish execution because it performs various shutdown actions
Creating a thread
Java defines two ways by which a thread can be created.
1 By implementing the Runnable interface.
2 By extending the Thread class.
When user extend Thread class, we cannot override setName() and getName() functions, because
they are declared final in Thread class.
While using sleep(), always handle the exception it throws
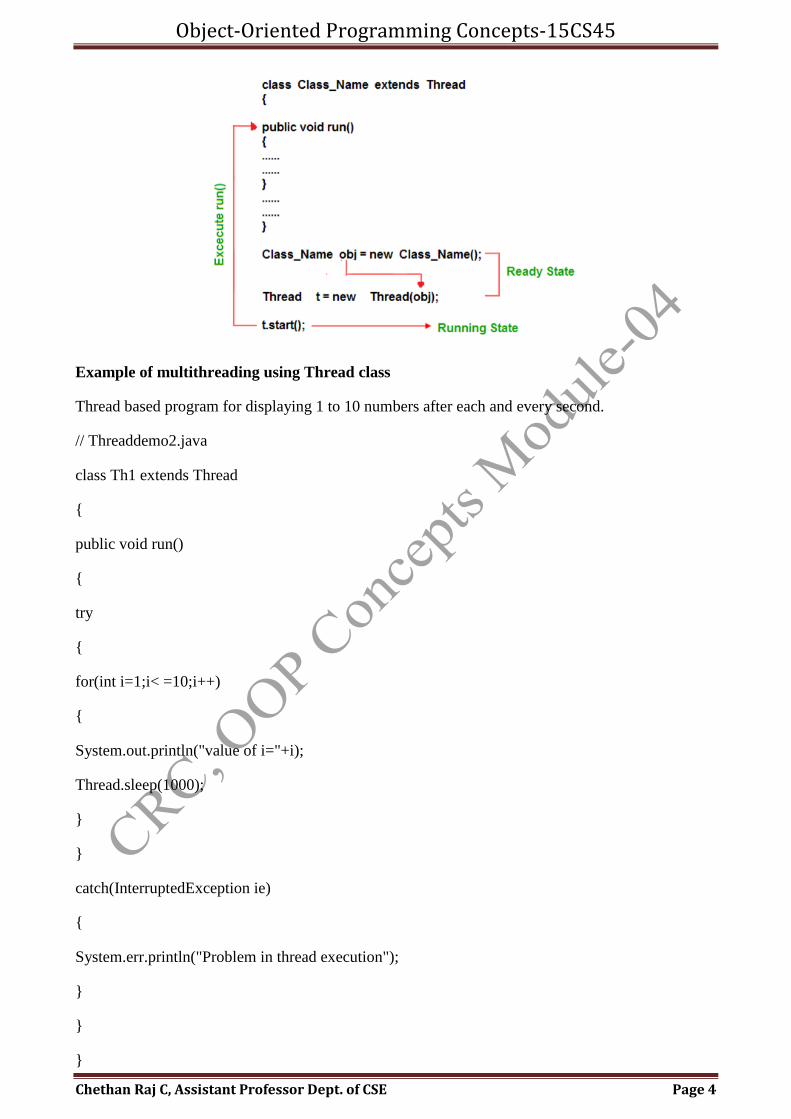
Extending threads; (Using thread class)
To create a thread is to create a new class that extends Thread, then override the run() method and
then to create an instance of that class. The run() method is what is executed by the thread after you
call start(). Here is an example of creating a Java Thread subclass:
public class MyClass extends Thread
{
public void run()
{
Object-Oriented Programming Concepts-15CS45
Chethan Raj C, Assistant Professor Dept. of CSE Page 3
System.out.println("MyClass running");
}
}
To create and start the above thread you can do like this:
MyClass t1 = new MyClass ();
T1.start();
When the run() method executes it will print out the text “MyClass running“.
As shown above only two threads: the main thread and one child thread. However, our program can
affect as many threads as it needs
In java language multithreading program can be created for extending threads by following below
rules.
Process:
1.Create any user defined class and make that one as a derived class of thread class.
class Class_Name extends Thread
{
........
}
2.Override run() method of Thread class (It contains the logic of perform any operation)
3.Create an object for user-defined thread class and attached that object to predefined thread class
object.
Class_Name obj=new Class_Name Thread t=new Thread(obj);
4. Call start() method of thread class to execute run() method.
5. Save the program with filename.java
Object-Oriented Programming Concepts-15CS45
Chethan Raj C, Assistant Professor Dept. of CSE Page 4
Example of multithreading using Thread class
Thread based program for displaying 1 to 10 numbers after each and every second.
// Threaddemo2.java
class Th1 extends Thread
{
public void run()
{
try
{
for(int i=1;i< =10;i++)
{
System.out.println("value of i="+i);
Thread.sleep(1000);
}
}
catch(InterruptedException ie)
{
System.err.println("Problem in thread execution");
}
}
}
Object-Oriented Programming Concepts-15CS45
Chethan Raj C, Assistant Professor Dept. of CSE Page 5
class Threaddemo2
{
public static void main(String args[])
{
Th1 t1=new Th1();
System.out.println("Execution status of t1 before start="+t1.isAlive());
t1.start();
System.out.println("Execution status of t1 before start="+t1.isAlive());
try
{
Thread.sleep(5000);
}
catch(InterruptedException ie)
{
System.out.println("Problem in thread execution");
}
System.out.println("Execution status of t1 during execution="+t1.isAlive());
try
{
Thread.sleep(5001);
}
catch(InterruptedException ie)
{
System.out.println("problem in thread execution");
}
System.out.println("Execution status of t1 after completation="+t1.isAlive());
}
}
Object-Oriented Programming Concepts-15CS45
Chethan Raj C, Assistant Professor Dept. of CSE Page 6
Output
Execution status of t1 before start=false //new state
Execution status of t1 after start=true //ready state
1
2
3
4
5
6
Execution status of t1 during execution=true //running state
7
8
9
10
Execution status of t1 after completation=false //halted state
Example:
A new thread is created by creating a new class that extends Thread, and then create an instance of
that class. The extending class must override the method run(), which is the entry point of the new
thread (user defined). To begin the execution of the new thread, it must call start() method. Inside
the run() method, you'll write the code, which is considered as the functionality of the thread. The
run() method can call other method of the same class or other class using their objects. It is an entry
point of the thread. As the run() method returns (exit or terminate) the thread ends.
class NewThreadDemo extends Thread
{
public NewThreadDemo()
{
super("User Define Thread");
System.out.println("New userdefined child thread created " + this);
start();
}
public void run()
Object-Oriented Programming Concepts-15CS45
Chethan Raj C, Assistant Professor Dept. of CSE Page 7
{
try
{
for(int i = 1; i <=10; i++)
{
System.out.println("UserDefined Child Thread: " + i);
Thread.sleep(500);
}
}
catch (InterruptedException e)
{
System.out.println("UseDefine Child interrupted.");
}
System.out.println("Exiting UserDeinfed child thread.");
}
}
class ThreadDemo
{
public static void main(String args[])
{
new NewThreadDemo();
try
{
for(int i = 1; i <10; i++)
{
System.out.println("Main Thread: " + i);
Thread.sleep(500);
}
Object-Oriented Programming Concepts-15CS45
Chethan Raj C, Assistant Professor Dept. of CSE Page 8
}
catch (InterruptedException e)
{
System.out.println("Main thread interrupted.");
}
System.out.println("Main thread exiting.");
}
}
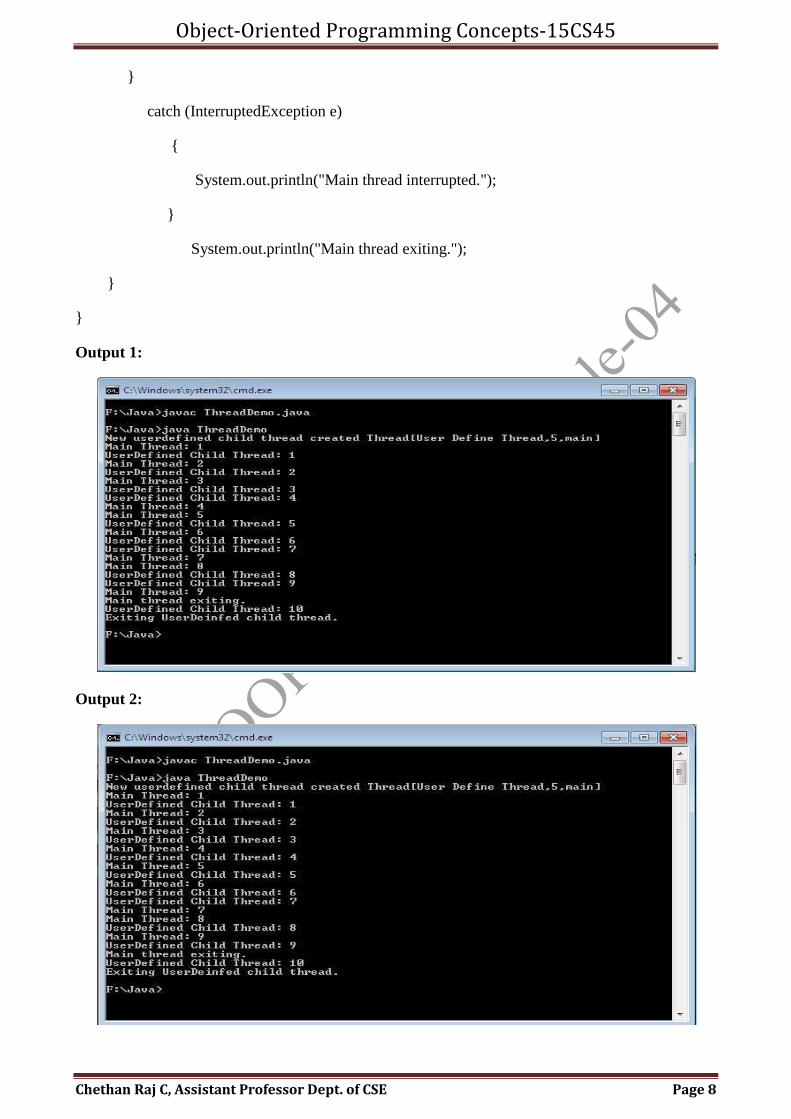
Output 1:
Output 2:

Object-Oriented Programming Concepts-15CS45
Chethan Raj C, Assistant Professor Dept. of CSE Page 9
There are two output of the same thread code. Because it is not always sure that a thread executes in
the same manner. The output can be same or vary every time. The super() inside the
NewThreadDemo constructor invokes the following form of Thread constructor:
public Thread(String thread_Name)
The extending class must override run() method which is the entry point of new thread.
class MyThread extends Thread
{
public void run()
{
System.out.println("concurrent thread started running..");
}
}
classMyThreadDemo
{
public static void main( String args[] )
{
MyThread mt = new MyThread();
mt.start();
}
}
output
concurrent thread started running..
In this case user must override the run() and then use the start() method to run the thread. Also,
when user create MyThread class object, Thread class constructor will also be invoked, as it is the
super class, hence MyThread class object acts as Thread class object.
Implementing runnable
The easiest way to create a thread is to create a class that implements the Runnable interface. To
implement Runnable interface, a class need only implement a single method called run( ), which is
declared like this:
public void run( )
Inside run( ), we will define the code that constitutes the new thread
Object-Oriented Programming Concepts-15CS45
Chethan Raj C, Assistant Professor Dept. of CSE Page 10
Example:
public class MyClass implements Runnable
{
public void run()
{
System.out.println("MyClass running");
}
}
To execute the run() method by a thread, pass an instance of MyClass to a Thread in its
constructor(A constructor in Java is a block of code similar to a method that’s called when an
instance of an object is created). Here is how that is done:
Thread t1 = new Thread(new MyClass ());
t1.start();
When the thread is started it will call the run() method of the MyClass instance instead of executing
its own run() method. The above example would print out the text “MyClass running“.
Runnable is one of the predefined interface in java.lang package, which is containing only one
method and whose prototype is " Public abstract void run "
The run() method of thread class defined with null body and run() method of Runnable interface
belongs to abstract. Industry is highly recommended to override abstract run() method of Runnable
interface but not recommended to override null body run() method of thread class.
In some of the circumstance if one derived class is extending some type of predefined class along
with thread class which is not possible because java programming never supports multiple
inheritance. To avoid this multiple inheritance problem, rather than extending thread class we
implement Runnable interface.
Process: Rules to create the thread using Runnable interface
• Create any user defined class and implements runnable interface within that
• Override run() method within the user defined class.
• call start() method to execute run() method of thread class
• Save the program with classname.java
class Class_Name implement Runnable
{
public void run()
{
Object-Oriented Programming Concepts-15CS45
Chethan Raj C, Assistant Professor Dept. of CSE Page 11
........
}
}
Class_Name obj=new Class_name();
Thread t=new Thread();
t.start();
Note: While implementing runnable interface it is very mandatory to attach user defined thread
class object reference to predefined thread class object reference. It is optional while creating thread
by extending Thread class.
The Runnable interface should be implemented by any class whose instances are intended to be
executed by a thread. Runnable interface have only one method named run().
public void run(): is used to perform action for a thread.
Starting a thread:
start() method of Thread class is used to start a newly created thread. It performs following tasks:
A new thread starts(with new callstack).
The thread moves from New state to the Runnable state.
When the thread gets a chance to execute, its target run() method will run.
class Multi3 implements Runnable
{
public void run()
{
System.out.println("thread is running...");
}
public static void main(String args[])
{
Multi3 m1=new Multi3();
Thread t1 =new Thread(m1);
t1.start();
}
}

Object-Oriented Programming Concepts-15CS45
Chethan Raj C, Assistant Professor Dept. of CSE Page 12
Output: thread is running...
Runnable represent a task in Java which is executed by Thread. java.lang.Runnable is an interface
and defines only one method called run(). When a Thread is started in Java by using Thread.start()
method it calls run() method of Runnable task which was passed to Thread during creation. Code
written inside run() method is executed by this newly created thread. i,e start() method internally
calls run() method.
Ex:
Creating Multiple Threads
class MyThread implements Runnable
{
String name;
Thread t;
MyThread String thread)
{
name = threadname;
t = new Thread(this, name);
System.out.println("New thread: " + t);
t.start();
}
public void run()
{
try {
for(int i = 5; i > 0; i--)
{
System.out.println(name + ": " + i);
Thread.sleep(1000);
}
}
catch (InterruptedException e)
{
System.out.println(name + "Interrupted");
Object-Oriented Programming Concepts-15CS45
Chethan Raj C, Assistant Professor Dept. of CSE Page 13
}
System.out.println(name + " exiting.");
}
}
class MultiThread
{
public static void main(String args[])
{
new MyThread("One");
new MyThread("Two");
new NewThread("Three");
try {
Thread.sleep(10000);
}
catch (InterruptedException e)
{
System.out.println("Main thread Interrupted");
}
System.out.println("Main thread exiting.");
}
}
The output from this program is shown here:
New thread: Thread[One,5,main]
New thread: Thread[Two,5,main]
New thread: Thread[Three,5,main]
One: 5
Two: 5
Three: 5
One: 4
Object-Oriented Programming Concepts-15CS45
Chethan Raj C, Assistant Professor Dept. of CSE Page 14
Two: 4
Three: 4
One: 3
Three: 3
Two: 3
One: 2
Three: 2
Two: 2
One: 1
Three: 1
Two: 1
One exiting.
Two exiting.
Three exiting.
Main thread exiting.
Thread Process:
The easiest way to create a thread is to create a class that implements the runnable interface.
After implementing runnable interface , the class needs to implement the run() method, which is of
form,
public void run()
run() method introduces a concurrent thread into your program. This thread will end when run()
method terminates.
User must specify the code that the thread will execute inside run() method.
run() method can call other methods, can use other classes and declare variables just like any other
normal method.
class MyThread implements Runnable
{
public void run()
{
System.out.println("concurrent thread started running..");
Object-Oriented Programming Concepts-15CS45
Chethan Raj C, Assistant Professor Dept. of CSE Page 15
}
}
class MyThreadDemo
{
public static void main( String args[] )
{
MyThread mt = new MyThread();
Thread t = new Thread(mt);
t.start();
}
}
output
concurrent thread started running..
To call the run() method, start() method is used. On calling start(), a new stack is provided to the
thread and run() method is called to introduce the new thread into the program.
Note: If you are implementing Runnable interface in your class, then you need to explicitly create a
Thread class object and need to pass the Runnable interface implemented class object as a
parameter in its constructor.
The thread cannot be started twice. If user try to do so, IllegalThreadStateException will be
thrown.
public static void main( String args[] )
{
MyThread mt = new MyThread();
mt.start();
mt.start(); //Exception thrown
}
When a thread is in running state, and you try to start it again, or any method try to invoke that
thread again using start() method, exception is thrown.
Start vs run:
when program calls start() method a new Thread is created and code inside run() method is
executed in new Thread while if you call run() method directly no new Thread is created and code
inside run() will execute on current Thread. Most of the time calling run() is bug or programming
Object-Oriented Programming Concepts-15CS45
Chethan Raj C, Assistant Professor Dept. of CSE Page 16
mistake because caller has intention of calling start() to create new thread and this error can be
detect by many static code coverage tools like findbugs. If user want to perform time consuming
task than always call start() method otherwise your main thread will stuck while performing time
consuming task if user call run() method directly. Another difference between start vs run in Java
thread is that user can not call start() method twice on thread object. once started, second call of
start() will throw IllegalStateException in Java while you can call run() method twice.
Java Thread Benefits
1. Java Threads are lightweight compared to processes, it takes less time and resource to create
a thread.
2. Threads share their parent process data and code
3. Context switching between threads is usually less expensive than between processes.
4. Thread intercommunication is relatively easy than process communication.
Thread class properties
Thread class contains constant data members, constructors, predefined methods.
Constant data members(Thread Priority)
Every thread has a priority that helps the operating system determine the order in which threads are
scheduled for execution. In java thread priority ranges between 1 to 10,
Though user cannot control the thread. The Thread Scheduler decides which thread is chosen to run,
but user can recommend the order in which threads are scheduled to run. Usually threads with
higher priority will be allocated processor time to execute before threads with lower priority, but
this behaviour is not guaranteed. User program logic should never depend on thread priorities, the
reason being is user cannot fully control the order of thread execution but user can only influence it
by setting priorities.
On most JVM implementations Java threads are mapped to native OS threads hence user should
consider threading capabilities of the OS platform in which our multi-threaded program runs.
Controlling thread behavior using priorities may be different platform to platform. If application
portability is important, we should not rely on thread priorities.
MIN-PRIORITY (a constant of 1)
MAX-PRIORITY (a constant of 10)
By default every thread is given a NORM-PRIORITY(5). The main thread always have NORM-
PRIORITY.
Note: Thread priorities cannot guarantee that a higher priority thread will always be executed first
than the lower priority thread. The selection of the threads for execution depends upon the thread
scheduler which is platform dependent.
Thread Scheduler(part of JVM) handles the context switching of threads with same priority. The
priority of thread lies between 1 to 10. Default priority of each thread is NORM_PRIORITY, which
is 5.
Object-Oriented Programming Concepts-15CS45
Chethan Raj C, Assistant Professor Dept. of CSE Page 17
Thread priority can be defined as:
MAX_PRIORITY: It represent the minimum priority that a thread can have whose values is 10.
Syntax: public static final int MAX-PRIORITY=10
NORM_PRIORITY: It represent the default priority that is assigned to a thread.
Syntax: public static final int NORM-PRIORITY=5
MIN_PRIORITY: It represents the minimum priority that a thread can have.
Syntax: public static final int MIN-PRIORITY=0
Syntax of setting thread priority
Thread.setPriority(Priority value);
Example of setting thread priority
//ThreadDemo.java
class Pattern
{
int A=0;
int B=0;
boolean running=true;
public void CountA()
{
while(running)
A++;
}
public void CountB()
{
while(running)
B++;
}
public void Stop()
{
running = false;
Object-Oriented Programming Concepts-15CS45
Chethan Raj C, Assistant Professor Dept. of CSE Page 18
}
public void Show()
{
System.out.print("\n\tA : " + A);
System.out.print("\n\tB : " + B);
}
}
class ThreadA extends Thread
{
Pattern P;
ThreadA(Pattern P)
{
this.P = P;
}
public void run()
{
P.CountA();
}
}
class ThreadB extends Thread
{
Pattern P;
ThreadB(Pattern P)
{
this.P = P;
}
public void run()
{
P.CountB();
Object-Oriented Programming Concepts-15CS45
Chethan Raj C, Assistant Professor Dept. of CSE Page 19
}
}
class ThreadDemo
{
public static void main(String arg[])
{
Pattern P = new Pattern();
ThreadA t1 = new ThreadA(P); //Statement 1
ThreadB t2 = new ThreadB(P); //Statement 2
t1.setPriority(Thread.MAX_PRIORITY);
t2.setPriority(Thread.MIN_PRIORITY);
t1.start();
t2.start();
try
{
Thread.sleep(10000);
}
catch (Exception e)
{
System.out.println("\n\tError.....");
}
P.Stop();
P.Show();
}
}
Output 1:
CountA : 514282053
CountB : 351280945
Output 2:
Object-Oriented Programming Concepts-15CS45
Chethan Raj C, Assistant Professor Dept. of CSE Page 20
CountA : 459446959
CountB : 293012252
Output 3:
CountA : 487615809
CountB : 561171867
Output 4:
CountA : 663687852
CountB : 516291820
The output shows that most of the time higher priority thread gets the higher execution time.
In the above example, we have defined a common class Pattern and pass the object P of Pattern
class to the derived classes such as ThreadA, ThreadB as shown in statement 1 and 2.
Pattern class has two methods CountA() and CountB(), which will increment the value of A and B
respectively.
ThreadA will invoke CountA() method of Pattern class.
ThreadB will invoke CountB() method of Pattern class.
After starting two child threads, we have blocked the main thread for 10000 milliseconds(10
seconds) so that infinite loop inside CountA() and CountB() methods will get enough time to
execute.
After 10 seconds we have stopped the child threads and displayed the value of A and B.
Constructors of Thread class
Thread class provide constructors and methods to create and perform operations on a thread.Thread
class extends Object class and implements Runnable interface.
Commonly used Constructors of Thread class:
1 Thread()
2 Thread(String name)
3 Thread(Runnable r)/ Thread(object)
4 Thread(Runnable r,String name)/ Thread(object, String name)
Thread()
Which will be execute to set the predefined name for newly created thread, these names are
generally in the form of thread -0, thread -1, ....
Syntax
Thread t=new Thread();
Thread(String name)
Object-Oriented Programming Concepts-15CS45
Chethan Raj C, Assistant Professor Dept. of CSE Page 21
This can be used to provide user defined name for newly created thread.
Syntax
Thread t=new Thread("newthread");
Thread(object)
This can be used to provide default name for newly created user defined thread.
Syntax
UserdefinedThreadclass obj=new UserdefinedThreadclass();
Thread t=new Thread("obj");
object, String name
This will be used to provide user defined name for the newly created user defined thread.
Syntax
UserdefinedThreadclass obj=new UserdefinedThreadclass();
Thread t=new Thread(object, "secondthread");
Example of priority of a Thread:
class TestMultiPriority1 extends Thread
{
public void run()
{
System.out.println("running thread name is:"+Thread.currentThread().getName());
System.out.println("running thread priority is:"+Thread.currentThread().getPriority());
}
public static void main(String args[])
{
TestMultiPriority1 m1=new TestMultiPriority1();
TestMultiPriority1 m2=new TestMultiPriority1();
m1.setPriority(Thread.MIN_PRIORITY);
m2.setPriority(Thread.MAX_PRIORITY);
m1.start();
m2.start();
Object-Oriented Programming Concepts-15CS45
Chethan Raj C, Assistant Professor Dept. of CSE Page 22
}
}
Output
running thread name is:Thread-0
running thread priority is:10
running thread name is:Thread-1
running thread priority is:1
Thread methods
Java’s multithreading system is built upon the Thread class, its methods, and its companion
interface,Runnable. To create a new thread, user program will either extend Thread or implement
the Runnable interface.
User can create new thread, either by extending Thread class or by implementing Runnable
interface. Thread class also defines many methods for managing threads. Some of them are,
Method Description
setName() to give thread a name
getName() return thread's name
getPriority() return thread's priority
isAlive() checks if thread is still running or not
join() Wait for a thread to end
run() Entry point for a thread
sleep() suspend thread for a specified time
start() start a thread by calling run() method
The methods of Thread class such as:
• getPriority()
• setPriority()
• getName()
• setName()
• isDeamon()
• run()
• start()
• sleep()
• suspend()
• resume()
Object-Oriented Programming Concepts-15CS45
Chethan Raj C, Assistant Professor Dept. of CSE Page 23
• stop()
• isAlive()
• currentThread()
• join()
• getState()
• yield()
sleep() method
stop() method
yield() method
yield() : Thread Scheduler is responsible for releasing and occupying the thread, we can't tell which
thread will execute first and which thread will execute second. Even we can't guess when JVM will
release the current thread and occupy the other thread. The yield() method can be used to explicitly
release the control from current thread.
stop() : The stop() can be used to abort the thread.
sleep() : The sleep() can be used to block the thread for specific number of milliseconds. We must
put sleep() method in try-catch block, b'coz the sleep() method throws an exception, which should
be caught otherwise program will not compile.
Joining threads
Which can be used to combined more than one thread into a single group signature is public final
void join()throws InterruptedException
try
{
t.join();
t2.join();
.....
.....
}
Sometimes one thread needs to know when other thread is terminating. In java, isAlive() and join()
are two different methods that are used to check whether a thread has finished its execution or not.
Which is return true if the thread is in ready or running or waiting state and return false if the thread
is in new or dead state.
Thread t=new Thread();
t.isAlive();final boolean isAlive()
Object-Oriented Programming Concepts-15CS45
Chethan Raj C, Assistant Professor Dept. of CSE Page 24
But, join() method is used more commonly than isAlive(). This method waits until the thread on
which it is called terminates.
final void join() throws InterruptedException
Using join() method, we tell our thread to wait until the specified thread completes its execution.
There are overloaded versions of join() method, which allows us to specify time for which you want
to wait for the specified thread to terminate.
final void join(long milliseconds) throws InterruptedException
The main thread must always be the last thread to finish its execution. Therefore, we can use Thread
join() method to ensure that all the threads created by the program has been terminated before the
execution of the main thread.
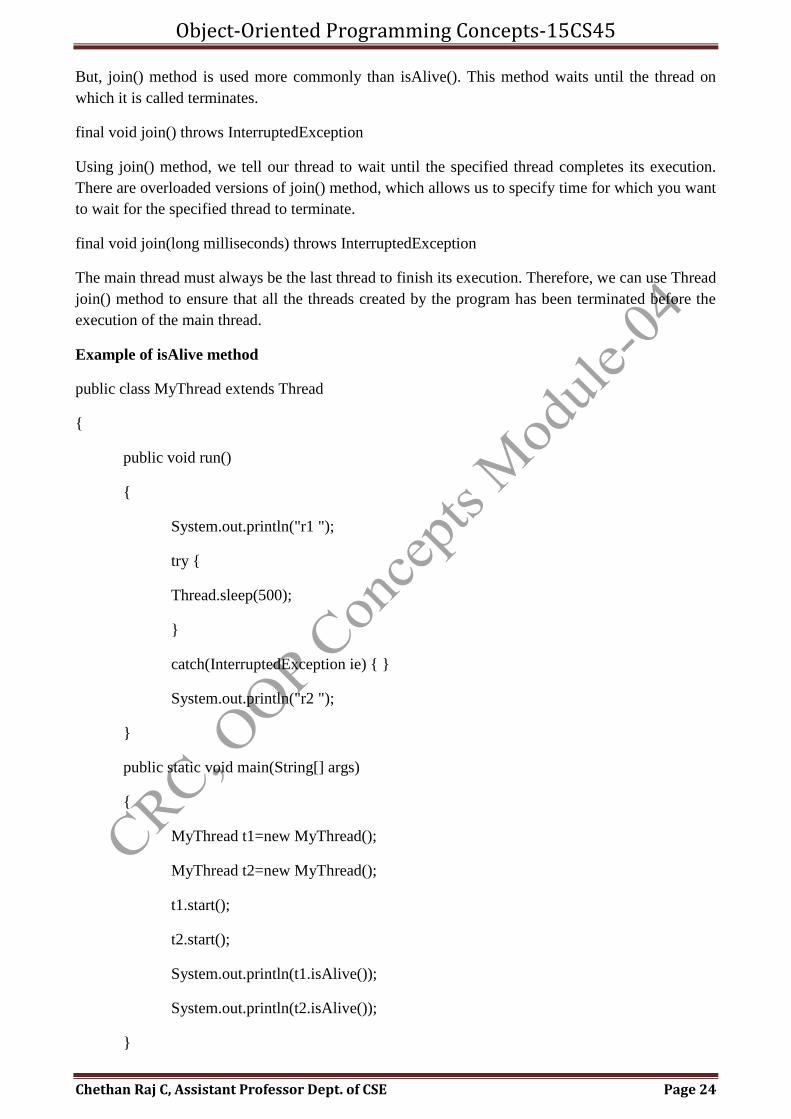
Example of isAlive method
public class MyThread extends Thread
{
public void run()
{
System.out.println("r1 ");
try {
Thread.sleep(500);
}
catch(InterruptedException ie) { }
System.out.println("r2 ");
}
public static void main(String[] args)
{
MyThread t1=new MyThread();
MyThread t2=new MyThread();
t1.start();
t2.start();
System.out.println(t1.isAlive());
System.out.println(t2.isAlive());
}
Object-Oriented Programming Concepts-15CS45
Chethan Raj C, Assistant Professor Dept. of CSE Page 25
}
output
r1
true
true
r1
r2
r2
Example of thread without join() method
public class MyThread extends Thread
{
public void run()
{
System.out.println("r1 ");
try {
Thread.sleep(500);
}
catch(InterruptedException ie){ }
System.out.println("r2 ");
}
public static void main(String[] args)
{
MyThread t1=new MyThread();
MyThread t2=new MyThread();
t1.start();
t2.start();
}
}
output
Object-Oriented Programming Concepts-15CS45
Chethan Raj C, Assistant Professor Dept. of CSE Page 26
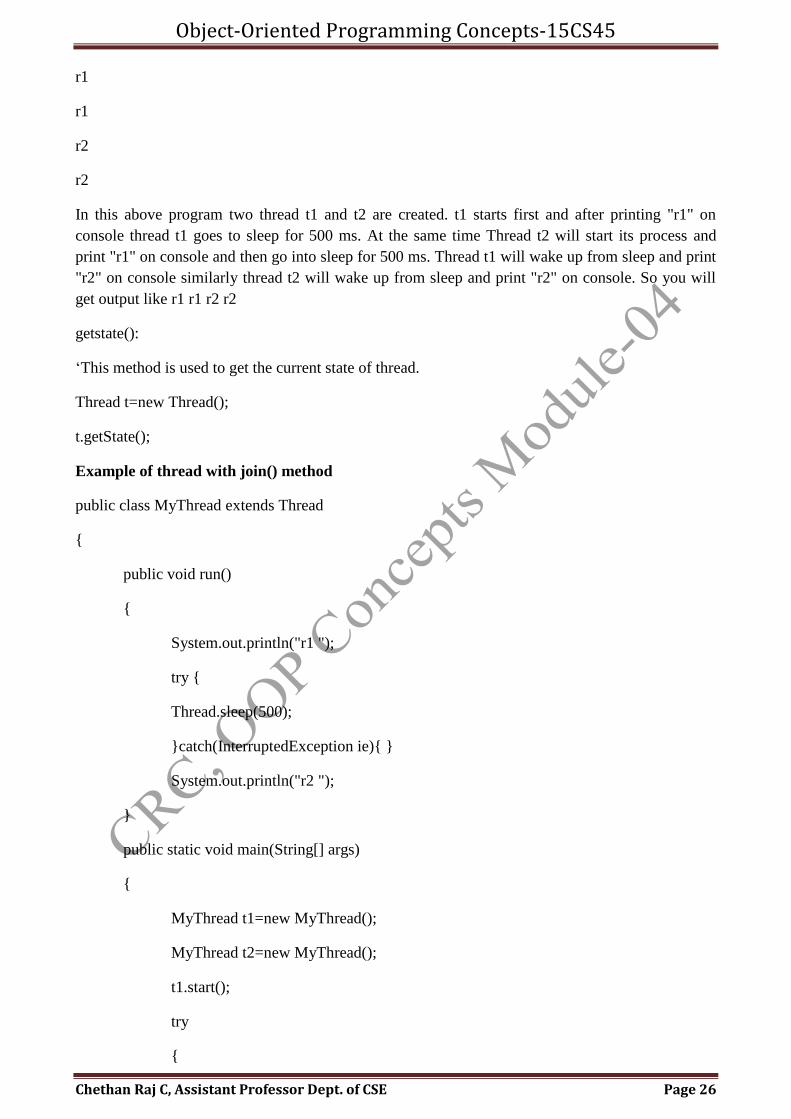
r1
r1
r2
r2
In this above program two thread t1 and t2 are created. t1 starts first and after printing "r1" on
console thread t1 goes to sleep for 500 ms. At the same time Thread t2 will start its process and
print "r1" on console and then go into sleep for 500 ms. Thread t1 will wake up from sleep and print
"r2" on console similarly thread t2 will wake up from sleep and print "r2" on console. So you will
get output like r1 r1 r2 r2
getstate():
‘This method is used to get the current state of thread.
Thread t=new Thread();
t.getState();
Example of thread with join() method
public class MyThread extends Thread
{
public void run()
{
System.out.println("r1 ");
try {
Thread.sleep(500);
}catch(InterruptedException ie){ }
System.out.println("r2 ");
}
public static void main(String[] args)
{
MyThread t1=new MyThread();
MyThread t2=new MyThread();
t1.start();
try
{
Object-Oriented Programming Concepts-15CS45
Chethan Raj C, Assistant Professor Dept. of CSE Page 27
t1.join(); //Waiting for t1 to finish
}
catch(InterruptedException ie)
{
}
t2.start();
}
}
output
r1
r2
r1
r2
In the above program join() method on thread t1 ensures that t1 finishes it process before thread t2
starts.
Specifying time with join()
If in the above program, we specify time while using join() with t1, then t1 will execute for that
time, and then t2 will join it.
t1.join(1500);
The above syntax specify that, initially t1 will execute for 1.5 seconds, after which t2 will join it.
Difference between wait() and sleep()
wait() sleep()
called from synchronised block no such requirement
monitor is released monitor is not released
gets awake when notify() or notifyAll()
method is called.
does not get awake when notify() or
notifyAll() method is called
not a static method static method
Object-Oriented Programming Concepts-15CS45
Chethan Raj C, Assistant Professor Dept. of CSE Page 28
The difference between sleep() and suspend()
Sleep() can be used to convert running state to waiting state and automatically thread convert from
waiting state to running state once the given time period is completed. Where as suspend() can be
used to convert running state thread to waiting state but it will never return back to running state
automatically.
stop()
This method is used to convert running state thread to dead state.
Thread t=new Thread();
t.stop();
currentThread()
Used to get the current thread detail like thread name thread group name and priority
Thread t=new Thread();
t.currentThread();
Note:
• The default thread name is thread-0, (if it is a main thread default name is main)
• The default thread group name is main
• Default thread priority is "5" is normal priority.
run()
Which contains the main business logic that can be executed by multiple threads simultaneously in
every user defined thread class run method should be overridden.
public Class_Name extends Thread
{
public void run()
{
.....
.....
}
}
start()
Used to convert ready state thread to running state.
Thread t=new Thread();
Object-Oriented Programming Concepts-15CS45
Chethan Raj C, Assistant Professor Dept. of CSE Page 29
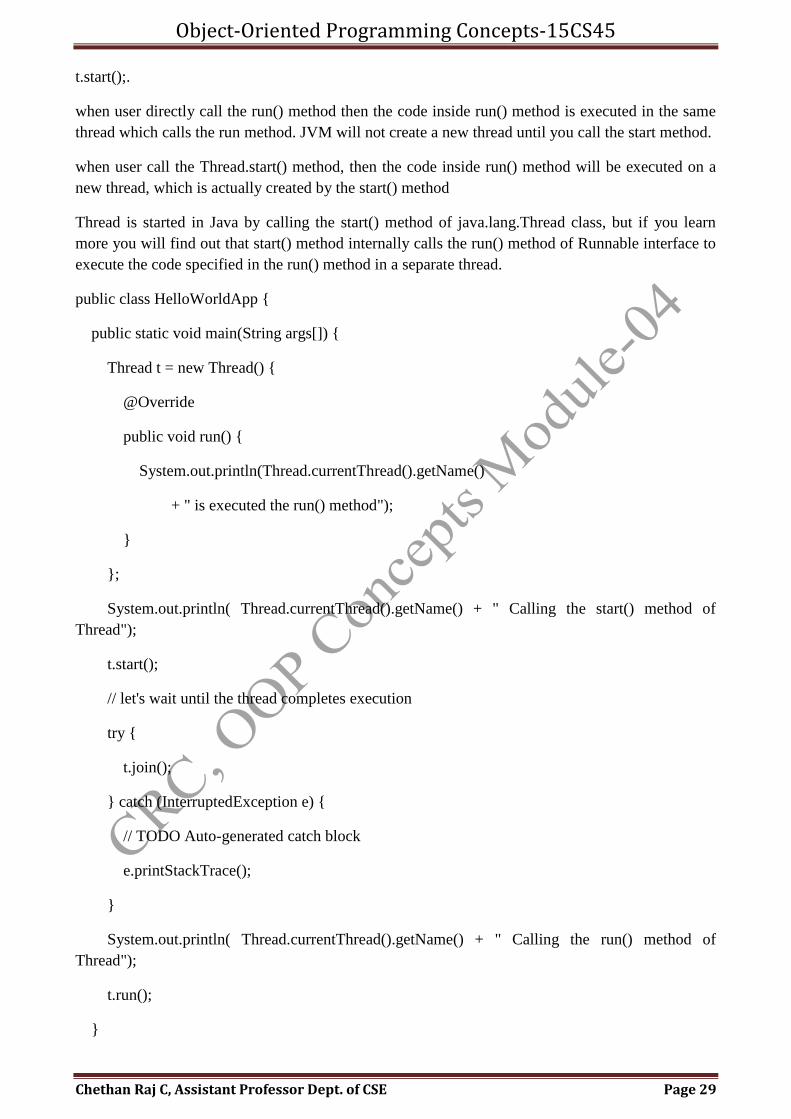
t.start();.
when user directly call the run() method then the code inside run() method is executed in the same
thread which calls the run method. JVM will not create a new thread until you call the start method.
when user call the Thread.start() method, then the code inside run() method will be executed on a
new thread, which is actually created by the start() method
Thread is started in Java by calling the start() method of java.lang.Thread class, but if you learn
more you will find out that start() method internally calls the run() method of Runnable interface to
execute the code specified in the run() method in a separate thread.
public class HelloWorldApp {
public static void main(String args[]) {
Thread t = new Thread() {
@Override
public void run() {
System.out.println(Thread.currentThread().getName()
+ " is executed the run() method");
}
};
System.out.println( Thread.currentThread().getName() + " Calling the start() method of
Thread");
t.start();
// let's wait until the thread completes execution
try {
t.join();
} catch (InterruptedException e) {
// TODO Auto-generated catch block
e.printStackTrace();
}
System.out.println( Thread.currentThread().getName() + " Calling the run() method of
Thread");
t.run();
}
Object-Oriented Programming Concepts-15CS45
Chethan Raj C, Assistant Professor Dept. of CSE Page 30
}
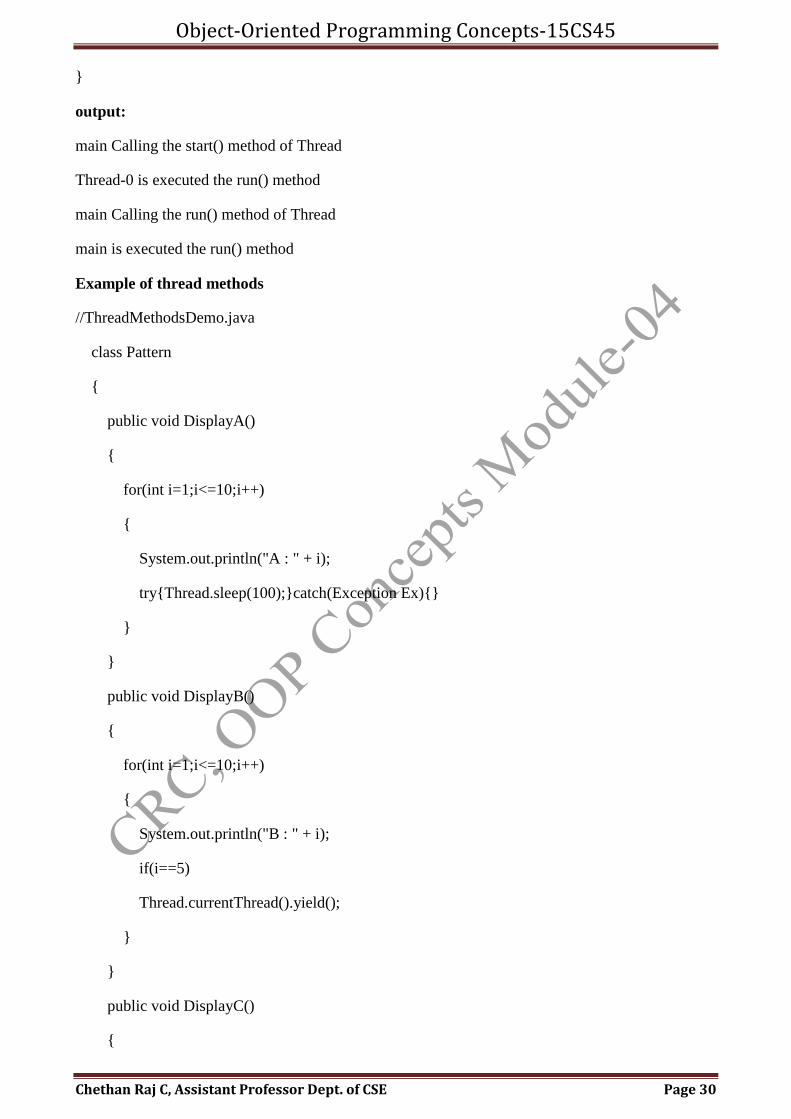
output:
main Calling the start() method of Thread
Thread-0 is executed the run() method
main Calling the run() method of Thread
main is executed the run() method
Example of thread methods
//ThreadMethodsDemo.java
class Pattern
{
public void DisplayA()
{
for(int i=1;i<=10;i++)
{
System.out.println("A : " + i);
try{Thread.sleep(100);}catch(Exception Ex){}
}
}
public void DisplayB()
{
for(int i=1;i<=10;i++)
{
System.out.println("B : " + i);
if(i==5)
Thread.currentThread().yield();
}
}
public void DisplayC()
{
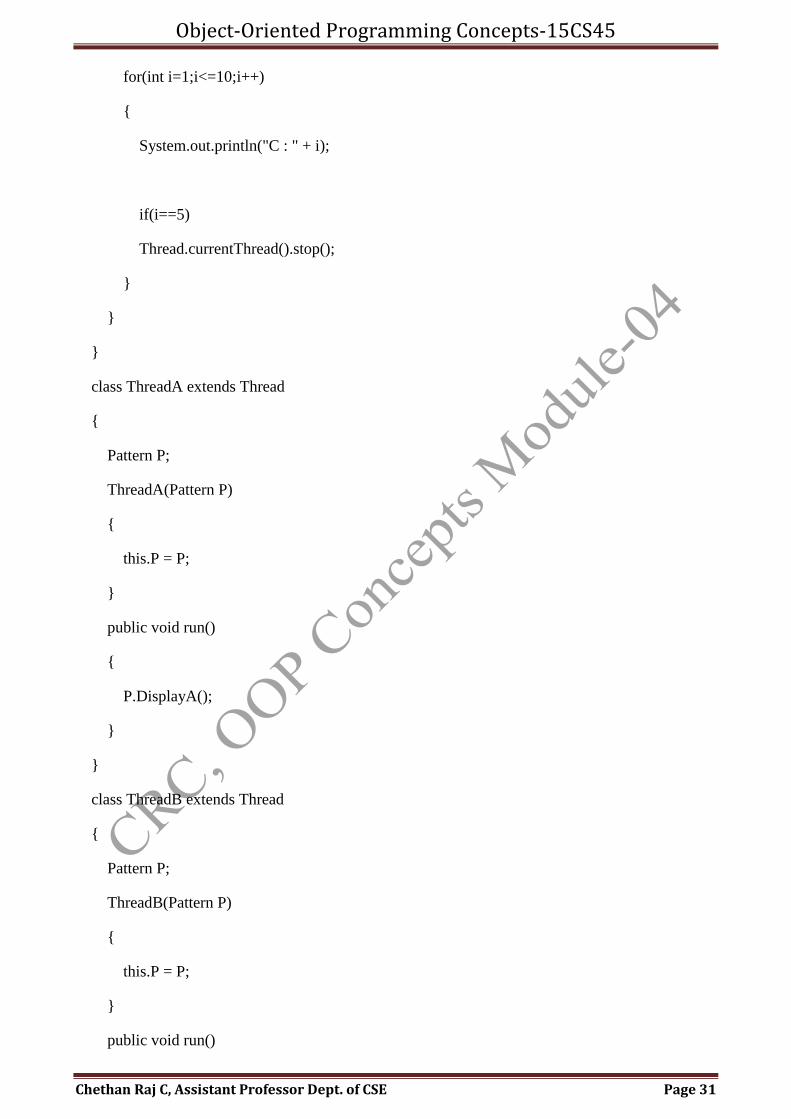
Object-Oriented Programming Concepts-15CS45
Chethan Raj C, Assistant Professor Dept. of CSE Page 31
for(int i=1;i<=10;i++)
{
System.out.println("C : " + i);
if(i==5)
Thread.currentThread().stop();
}
}
}
class ThreadA extends Thread
{
Pattern P;
ThreadA(Pattern P)
{
this.P = P;
}
public void run()
{
P.DisplayA();
}
}
class ThreadB extends Thread
{
Pattern P;
ThreadB(Pattern P)
{
this.P = P;
}
public void run()
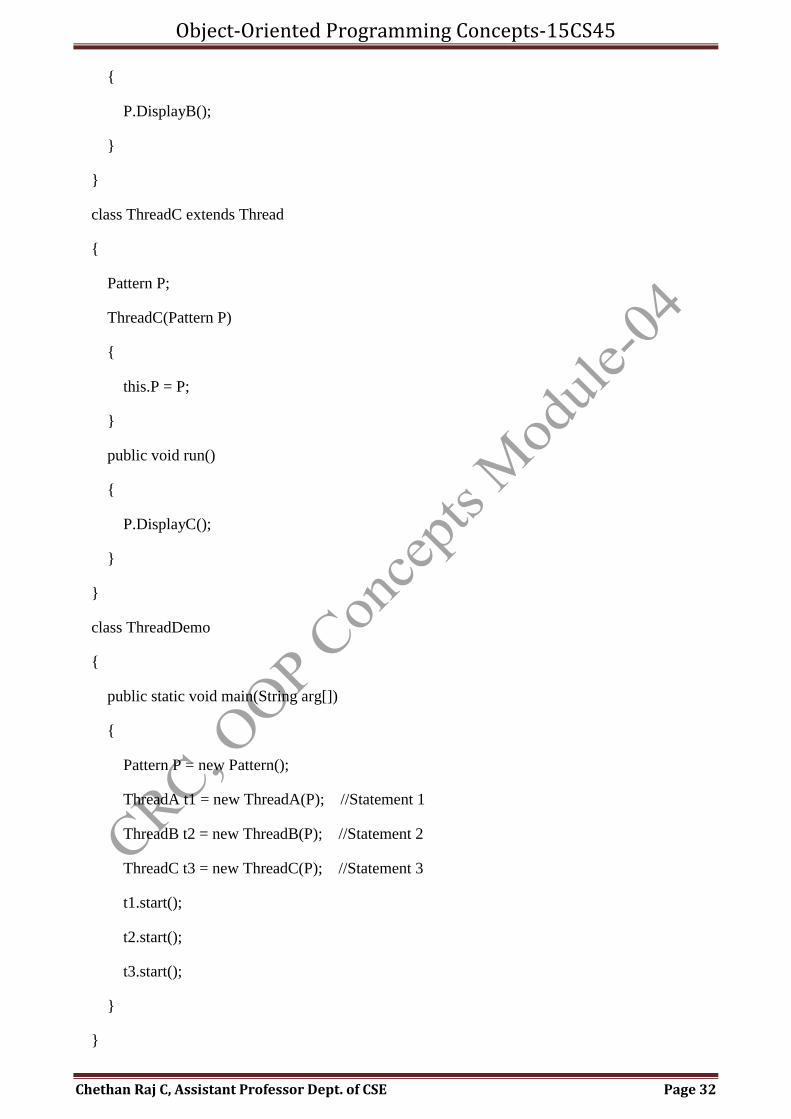
Object-Oriented Programming Concepts-15CS45
Chethan Raj C, Assistant Professor Dept. of CSE Page 32
{
P.DisplayB();
}
}
class ThreadC extends Thread
{
Pattern P;
ThreadC(Pattern P)
{
this.P = P;
}
public void run()
{
P.DisplayC();
}
}
class ThreadDemo
{
public static void main(String arg[])
{
Pattern P = new Pattern();
ThreadA t1 = new ThreadA(P); //Statement 1
ThreadB t2 = new ThreadB(P); //Statement 2
ThreadC t3 = new ThreadC(P); //Statement 3
t1.start();
t2.start();
t3.start();
}
}
Object-Oriented Programming Concepts-15CS45
Chethan Raj C, Assistant Professor Dept. of CSE Page 33
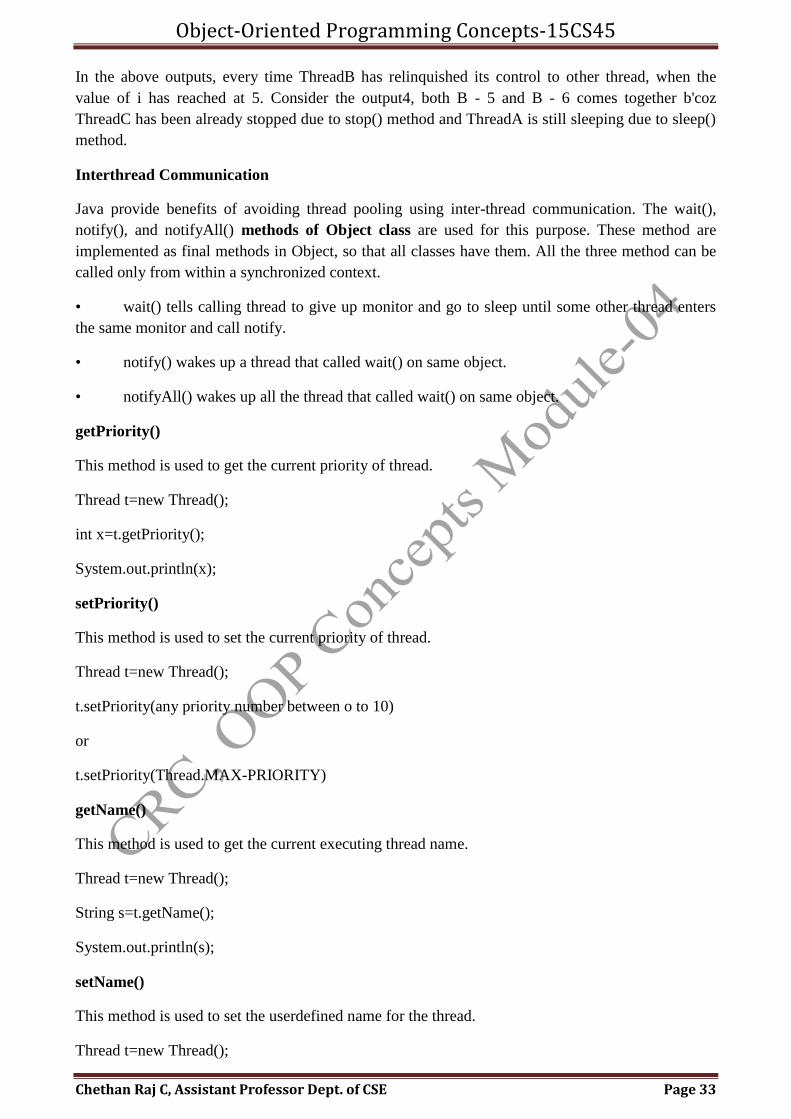
In the above outputs, every time ThreadB has relinquished its control to other thread, when the
value of i has reached at 5. Consider the output4, both B - 5 and B - 6 comes together b'coz
ThreadC has been already stopped due to stop() method and ThreadA is still sleeping due to sleep()
method.
Interthread Communication
Java provide benefits of avoiding thread pooling using inter-thread communication. The wait(),
notify(), and notifyAll() methods of Object class are used for this purpose. These method are
implemented as final methods in Object, so that all classes have them. All the three method can be
called only from within a synchronized context.
• wait() tells calling thread to give up monitor and go to sleep until some other thread enters
the same monitor and call notify.
• notify() wakes up a thread that called wait() on same object.
• notifyAll() wakes up all the thread that called wait() on same object.
getPriority()
This method is used to get the current priority of thread.
Thread t=new Thread();
int x=t.getPriority();
System.out.println(x);
setPriority()
This method is used to set the current priority of thread.
Thread t=new Thread();
t.setPriority(any priority number between o to 10)
or
t.setPriority(Thread.MAX-PRIORITY)
getName()
This method is used to get the current executing thread name.
Thread t=new Thread();
String s=t.getName();
System.out.println(s);
setName()
This method is used to set the userdefined name for the thread.
Thread t=new Thread();
Object-Oriented Programming Concepts-15CS45
Chethan Raj C, Assistant Professor Dept. of CSE Page 34
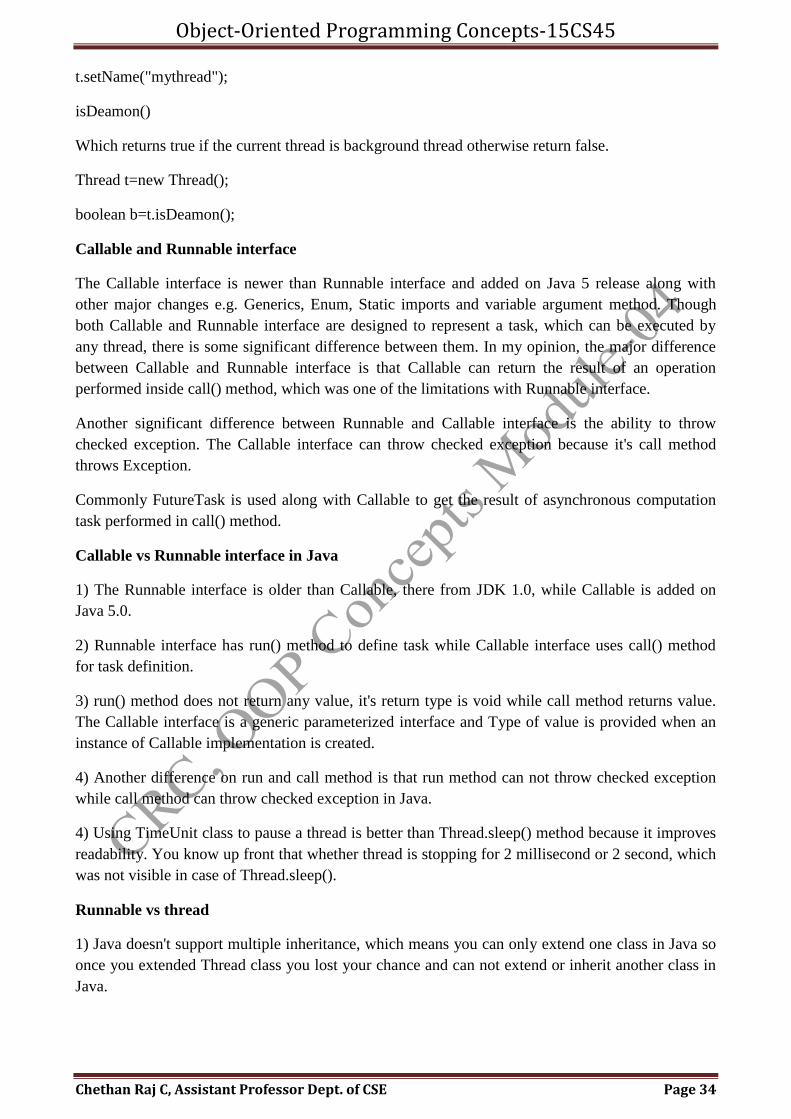
t.setName("mythread");
isDeamon()
Which returns true if the current thread is background thread otherwise return false.
Thread t=new Thread();
boolean b=t.isDeamon();
Callable and Runnable interface
The Callable interface is newer than Runnable interface and added on Java 5 release along with
other major changes e.g. Generics, Enum, Static imports and variable argument method. Though
both Callable and Runnable interface are designed to represent a task, which can be executed by
any thread, there is some significant difference between them. In my opinion, the major difference
between Callable and Runnable interface is that Callable can return the result of an operation
performed inside call() method, which was one of the limitations with Runnable interface.
Another significant difference between Runnable and Callable interface is the ability to throw
checked exception. The Callable interface can throw checked exception because it's call method
throws Exception.
Commonly FutureTask is used along with Callable to get the result of asynchronous computation
task performed in call() method.
Callable vs Runnable interface in Java
1) The Runnable interface is older than Callable, there from JDK 1.0, while Callable is added on
Java 5.0.
2) Runnable interface has run() method to define task while Callable interface uses call() method
for task definition.
3) run() method does not return any value, it's return type is void while call method returns value.
The Callable interface is a generic parameterized interface and Type of value is provided when an
instance of Callable implementation is created.
4) Another difference on run and call method is that run method can not throw checked exception
while call method can throw checked exception in Java.
4) Using TimeUnit class to pause a thread is better than Thread.sleep() method because it improves
readability. You know up front that whether thread is stopping for 2 millisecond or 2 second, which
was not visible in case of Thread.sleep().
Runnable vs thread
1) Java doesn't support multiple inheritance, which means you can only extend one class in Java so
once you extended Thread class you lost your chance and can not extend or inherit another class in
Java.
Object-Oriented Programming Concepts-15CS45
Chethan Raj C, Assistant Professor Dept. of CSE Page 35
2) In Object oriented programming extending a class generally means adding new functionality,
modifying or improving behaviors. If we are not making any modification on Thread than use
Runnable interface instead.
3) Runnable interface represent a Task which can be executed by either plain Thread or Executors
or any other means. so logical separation of Task as Runnable than Thread is good design decision.
4) Separating task as Runnable means we can reuse the task and also has liberty to execute it from
different means. since you can not restart a Thread once it completes. again Runnable vs Thread for
task, Runnable is winner.
5) Java designer recognizes this and that's why Executors accept Runnable as Task and they have
worker thread which executes those task.
6) Inheriting all Thread methods are additional overhead just for representing a Task which can can
be done easily with Runnable.
Wait and Sleep, Yield in Java
Out of three methods which can be used to pause a thread in Java, sleep() and yield() methods are
defined in thread class while wait() is defined in the Object class.
The key difference between wait() and sleep() is that former is used for inter-thread communication
while later is used to introduced to pause the current thread for a short duration.
when a thread calls the wait() method, it releases the monitor or lock it was holding on that object,
but when a thread calls the sleep() method, it never releases the monitor even if it is holding.
Yield:
Yield will keep the currently executing thread into temporarily pass and allows other threads to
execute.
Though wait, notify and notifyAll are related to threads they are not defined in java.lang.Thread
class, instead they are defined in the Object class.
User must call the wait(), notify() and notifyAll() methods from a synchronized context in Java i.e.
inside synchronized method or a synchronized block. The thread must hold the lock on the object it
is going to call the wait() or notify() method and that is acquired when it enter into a synchronized
context.
If user call it without holding a lock then they will throw IllegalMonitorStateException in Java. If
you are curious why is this restriction in place then check this article to learn more.
You must call wait() method from inside a loop, don't call with an if block because a thread can
sporadically awake from the wait state without being notified by another party. If you use if block
then this could result in a bug
The yield is different than wait() and sleep(), it just releases the CPU hold by Thread to give another
thread an opportunity to run though it's not guaranteed who will get the CPU. It totally depends
upon thread scheduler and it's even possible that the thread which calls the yield() method gets the
CPU again. Hence, it's not reliable to depend upon yield() method.
Object-Oriented Programming Concepts-15CS45
Chethan Raj C, Assistant Professor Dept. of CSE Page 36
yield() method pauses the currently executing thread temporarily for giving a chance to the
remaining waiting threads of the same priority to execute. If there is no waiting thread or all the
waiting threads have a lower priority then the same thread will continue its execution. The yielded
thread when it will get the chance for execution is decided by the thread scheduler whose behavior
is vendor dependent. Yield method doesn’t guarantee that current thread will pause or stop but it
guarantee that CPU will be relinquished by current Thread as a result of a call to Thread.yield()
method in java.
Sleep method in Java has two variants one which takes millisecond as sleeping time while other
which takes both mill and nanosecond for sleeping duration.
sleep(long millis)
or
sleep(long millis,int nanos)
It causes the currently executing thread to sleep for the specified number of milliseconds plus the
specified number of nanoseconds.
1) Thread.sleep() method is used to pause the execution, relinquish the CPU and return it to thread
scheduler.
2) Thread.The sleep() method is a static method and always puts the current thread to sleep.
3) Java has two variants of sleep method in Thread class one with one argument which takes
milliseconds as the duration of sleep and another method with two arguments one is millisecond
and other is the nanosecond.
4) Unlike wait() method in Java, sleep() method of Thread class doesn't relinquish the lock it has
acquired.
5) sleep() method throws Interrupted Exception if another thread interrupts a sleeping thread in
java.
6) With sleep() in Java it's not guaranteed that when sleeping thread woke up it will definitely get
CPU, instead it will go to Runnable state and fight for CPU with other thread.
7) There is a misconception about sleep method in Java that calling t.sleep() will put Thread "t" into
sleeping state, that's not true because Thread.sleep method is a static method it always put the
current thread into Sleeping state and not thread "t".
The wait() method release the acquired monitor when thread is waiting while Thread.sleep() method
keeps the lock or monitor even if thread is waiting. Also, wait for method in Java should be called
from synchronized method or block while there is no such requirement for sleep() method.
Another difference is Thread.sleep() method is a static method and applies on current thread, while
wait() is an instance specific method and only got wake up if some other thread calls notify method
on same object. also, in the case of sleep, sleeping thread immediately goes to Runnable state after
waking up while in the case of wait, waiting for a thread first acquires the lock and then goes into
Runnable state. So based upon your need, if you want to pause a thread for specified duration then
use sleep() method and if you want to implement inter-thread communication use wait method.
Object-Oriented Programming Concepts-15CS45
Chethan Raj C, Assistant Professor Dept. of CSE Page 37
The list of difference between wait and sleep in Java :
1) wait is called from synchronized context only while sleep can be called without synchronized
block. see Why to wait and notify needs to call from synchronized method for more detail.
2) waiting thread can be awake by calling notify and notifyAll while sleeping thread can not be
awakened by calling notify method.
3) wait is normally done on condition, Thread wait until a condition is true while sleep is just to put
your thread on sleep.
4) wait for release lock on an object while waiting while sleep doesn’t release lock while waiting.
5) The wait() method is called on an Object on which the synchronized block is locked, while sleep
is called on the Thread.
Sleep is used to change running state thread to ready state based on time period it is a static method
should be called with class reference.
public static final sleep(long milisecond)throws InterruptedException
{
try
{
Thread.sleep(3000);
}
catch(InterruptedException ie)
{
........
........
}
}
Once the given time period is completed thread state automatically change from waiting to running
state.
suspend()
Used to convert running state thread to waiting state, which will never come back to running state
automatically.
Thread t=new Thread();
t.suspend();
Object-Oriented Programming Concepts-15CS45
Chethan Raj C, Assistant Professor Dept. of CSE Page 38
resume()
Used to change the suspended thread state(waiting state) to ready state.
Thread t=new Thread();
t.resume();
Note: Without using suspend() method resume() method can not be use.
Differences between notify and notifyAll method in Java :
1. First and main difference between notify() and notifyAll() method is that, if multiple threads is
waiting on any lock in Java, notify method send notification to only one of waiting thread while
notifyAll informs all threads waiting on that lock.
2. If you use notify method , It's not guaranteed that, which thread will be informed, but if you use
notifyAll since all thread will be notified, they will compete for lock and the lucky thread which
gets lock will continue. In a way, notifyAll method is safer because it sends notification to all
threads, so if any thread misses the notification, there are other threads to do the job, while in the
case of notify() method if the notified thread misses the notification then it could create subtle, hard
to debug issues.
3. The notifyAll can drain more CPU cycles than notify itself but if you really want to sure that your
notification doesn't get wasted by any reason, use notifyAll. Since wait method is called from the
loop and they check condition even after waking up, calling notifyAll won't lead any side effect,
instead it ensures that notification is not dropped.
Main difference between notify() and notifyAll() is that in case of notify() only one of the waiting
thread gets a notification but in case of notifyAll() all thread get notification.
The wait, notify, and notifyAll methods are used for inter-thread communication in Java. wait()
allows a thread to check for a condition, and wait if the condition doesn't meet, while notifying()
and notifyAll() method informs waiting for a thread for rechecking condition, after changing the
state of a shared variable. One good example of how to wait and notify method works is Producer
consumer problem, where one thread produces and wait if the bucket is full; and another thread
consumes and waits if the bucket is empty. Both Producer and Consumer thread, notify each other
as well. Producer thread notifies consumer thread after inserting an item in the shared queue, while
consumer thread notifies producer, after consuming item from the queue. Though Both notify() and
notifyAll() are used to notify waiting for threads, waiting on shared queue object, but there are
some subtle differences between notify and notifyAll in Java.
When we use notify(), only one of the sleeping thread will get a notification, while in the case of
notifyAll(), all sleeping thread on that object will get notified.
Synchronization
Multithreading introduces an asynchronous behaviour to programs hence there must be a
synchronous is needed for the program.
Synchronization means to control the access of multiple threads to a shared resource.
Object-Oriented Programming Concepts-15CS45
Chethan Raj C, Assistant Professor Dept. of CSE Page 39
Synchronization in java is the capability to control the access of multiple threads to any shared
resource.
Java Synchronization is better option to allow only one thread to access the shared resource.
Thread Synchronization
Synchronization in java is the capability to control the access of multiple threads to any shared
resource. Java Synchronization is better option where user want to allow only one thread to access
the shared resource.
Whenever multiple threads are trying to use same resource than they may be chance to of getting
wrong output, to overcome this problem thread synchronization can be used.
Definition: Allowing only one thread at a time to utilized the same resource out of multiple threads
by using monitor is known as thread synchronization or thread safe. Monitor can hold only one
thread, once thread enters a monitor all the threads must wait until the thread exits the monitor.
Monitor protect the shared resource from being manipulated by more than one thread at a time.
There are two types of thread synchronization mutual exclusive and inter-thread communication.
1. Mutual Exclusive
i. Synchronized method.
ii. Synchronized block.
iii. static synchronization.
2. Cooperation (Inter-thread communication in java)
The synchronization is mainly used to
1. To prevent thread interference.
2. To prevent consistency problem.
Note: synchronized is a keyword (access modifier in java)
Mutual Exclusive
Mutual Exclusive helps keep threads from interfering with one another while sharing data. This can
be done by three ways in java:
1.By synchronized method
2.By synchronized block
3.By static synchronization
Concept of Lock in Java
Synchronization is built around an internal entity known as the lock or monitor. Every object has an
lock associated with it. By convention, a thread that needs consistent access to an object's fields has
to acquire the object's lock before accessing them, and then release the lock when it's done with
completion of execution .
Object-Oriented Programming Concepts-15CS45
Chethan Raj C, Assistant Professor Dept. of CSE Page 40
From Java 5 the package java.util.concurrent.locks contains several lock implementations.
The problem without Synchronization
In this example, there is no synchronization, so output is inconsistent.
class Table
{
void printTable(int n)
{ //method not synchronized
for(int i=1;i<=5;i++)
{
System.out.println(n*i);
try
{
Thread.sleep(400);
}
catch(Exception e)
{
System.out.println(e);
}
}
}
}
class MyThread1 extends Thread
{
Table t;
MyThread1(Table t)
{
this.t=t;
}
public void run()
Object-Oriented Programming Concepts-15CS45
Chethan Raj C, Assistant Professor Dept. of CSE Page 41
{
t.printTable(5);
}
}
class MyThread2 extends Thread
{
Table t;
MyThread2(Table t)
{
this.t=t;
}
public void run()
{
t.printTable(100);
}
}
class TestSynchronization1
{
public static void main(String args[])
{
Table obj = new Table();//only one object
MyThread1 t1=new MyThread1(obj);
MyThread2 t2=new MyThread2(obj);
t1.start();
t2.start();
}
}
Output:
5
Object-Oriented Programming Concepts-15CS45
Chethan Raj C, Assistant Professor Dept. of CSE Page 42
100
10
200
15
300
20
400
25
500
Java synchronized method
If user declare any method as synchronized, it is known as synchronized method.
Synchronized method is used to lock an object for any shared resource.
When a thread invokes a synchronized method, it automatically acquires the lock for that object and
releases it when the thread completes its task.
//example of java synchronized method
class Table
{
synchronized void printTable(int n)
{//synchronized method
for(int i=1;i<=5;i++)
{
System.out.println(n*i);
try
{
Thread.sleep(400);
}
catch(Exception e)
{
System.out.println(e);
}
Object-Oriented Programming Concepts-15CS45
Chethan Raj C, Assistant Professor Dept. of CSE Page 43
}
}
}
class MyThread1 extends Thread
{
Table t;
MyThread1(Table t)
{
this.t=t;
}
public void run()
{
t.printTable(5);
}
}
class MyThread2 extends Thread
{
Table t;
MyThread2(Table t)
{
this.t=t;
}
public void run()
{
t.printTable(100);
}
}
public class TestSynchronization2
{
Object-Oriented Programming Concepts-15CS45
Chethan Raj C, Assistant Professor Dept. of CSE Page 44
public static void main(String args[])
{
Table obj = new Table();//only one object
MyThread1 t1=new MyThread1(obj);
MyThread2 t2=new MyThread2(obj);
t1.start();
t2.start();
}
}
Output: 5
10
15
20
25
100
200
300
400
500
Synchronized block
Synchronized block can be used to perform synchronization on any specific resource of the method.
Suppose user have 50 lines of code in the method, but user want to synchronize only 5 lines, then
user can use synchronized block.
If user put all the codes of the method in the synchronized block, it will work same as the
synchronized method.
The Synchronized block
i. Synchronized block is used to lock an object for any shared resource.
ii. Scope of synchronized block is smaller than the method.
Syntax to use synchronized block
synchronized (object reference expression)
Object-Oriented Programming Concepts-15CS45
Chethan Raj C, Assistant Professor Dept. of CSE Page 45
{
//code block
}
Example of synchronized block
//Program of synchronized block
class Table
{
void printTable(int n)
{
synchronized(this)
{//synchronized block
for(int i=1;i<=5;i++)
{
System.out.println(n*i);
try
{
Thread.sleep(400);
}
catch(Exception e)
{
System.out.println(e);
}
}
}
}//end of the method
}
class MyThread1 extends Thread
{
Table t;

Object-Oriented Programming Concepts-15CS45
Chethan Raj C, Assistant Professor Dept. of CSE Page 46
MyThread1(Table t)
{
this.t=t;
}
public void run()
{
t.printTable(5);
}
}
class MyThread2 extends Thread
{
Table t;
MyThread2(Table t)
{
this.t=t;
}
public void run()
{
t.printTable(100);
}
}
public class TestSynchronizedBlock1
{
public static void main(String args[])
{
Table obj = new Table();//only one object
MyThread1 t1=new MyThread1(obj);
MyThread2 t2=new MyThread2(obj);
t1.start();
Object-Oriented Programming Concepts-15CS45
Chethan Raj C, Assistant Professor Dept. of CSE Page 47
t2.start();
}
}
Output:
5
10
15
20
25
100
200
300
400
500
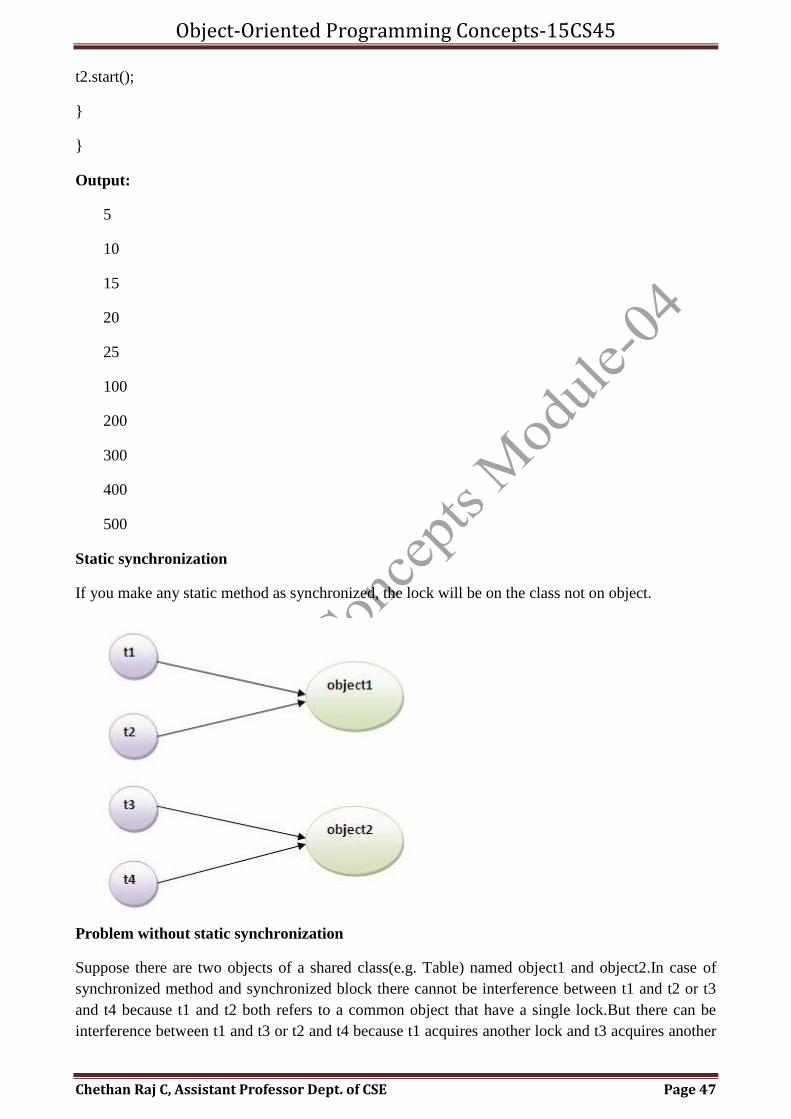
Static synchronization
If you make any static method as synchronized, the lock will be on the class not on object.
Problem without static synchronization
Suppose there are two objects of a shared class(e.g. Table) named object1 and object2.In case of
synchronized method and synchronized block there cannot be interference between t1 and t2 or t3
and t4 because t1 and t2 both refers to a common object that have a single lock.But there can be
interference between t1 and t3 or t2 and t4 because t1 acquires another lock and t3 acquires another
Object-Oriented Programming Concepts-15CS45
Chethan Raj C, Assistant Professor Dept. of CSE Page 48
lock.I want no interference between t1 and t3 or t2 and t4.Static synchronization solves this
problem.
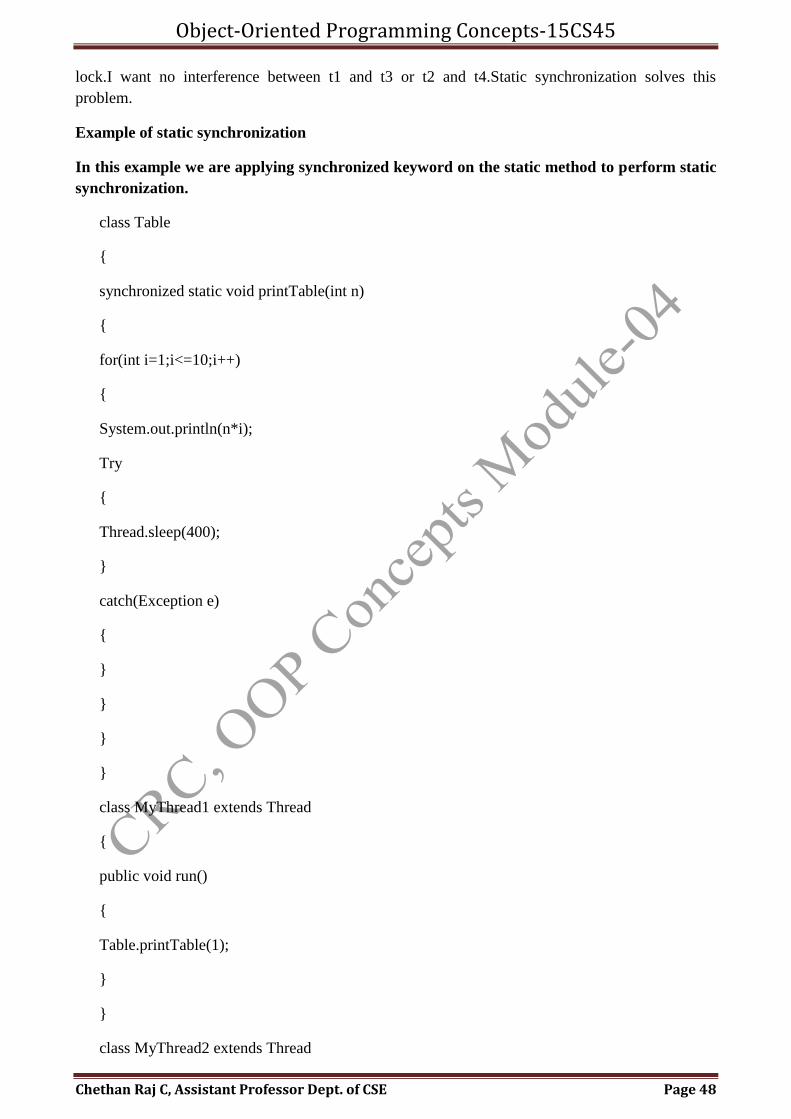
Example of static synchronization
In this example we are applying synchronized keyword on the static method to perform static
synchronization.
class Table
{
synchronized static void printTable(int n)
{
for(int i=1;i<=10;i++)
{
System.out.println(n*i);
Try
{
Thread.sleep(400);
}
catch(Exception e)
{
}
}
}
}
class MyThread1 extends Thread
{
public void run()
{
Table.printTable(1);
}
}
class MyThread2 extends Thread
Object-Oriented Programming Concepts-15CS45
Chethan Raj C, Assistant Professor Dept. of CSE Page 49
{
public void run()
{
Table.printTable(10);
}
}
class MyThread3 extends Thread
{
public void run()
{
Table.printTable(100);
}
}
class MyThread4 extends Thread
{
public void run()
{
Table.printTable(1000);
}
}
public class TestSynchronization4
{
public static void main(String t[])
{
MyThread1 t1=new MyThread1();
MyThread2 t2=new MyThread2();
MyThread3 t3=new MyThread3();
MyThread4 t4=new MyThread4();
t1.start();
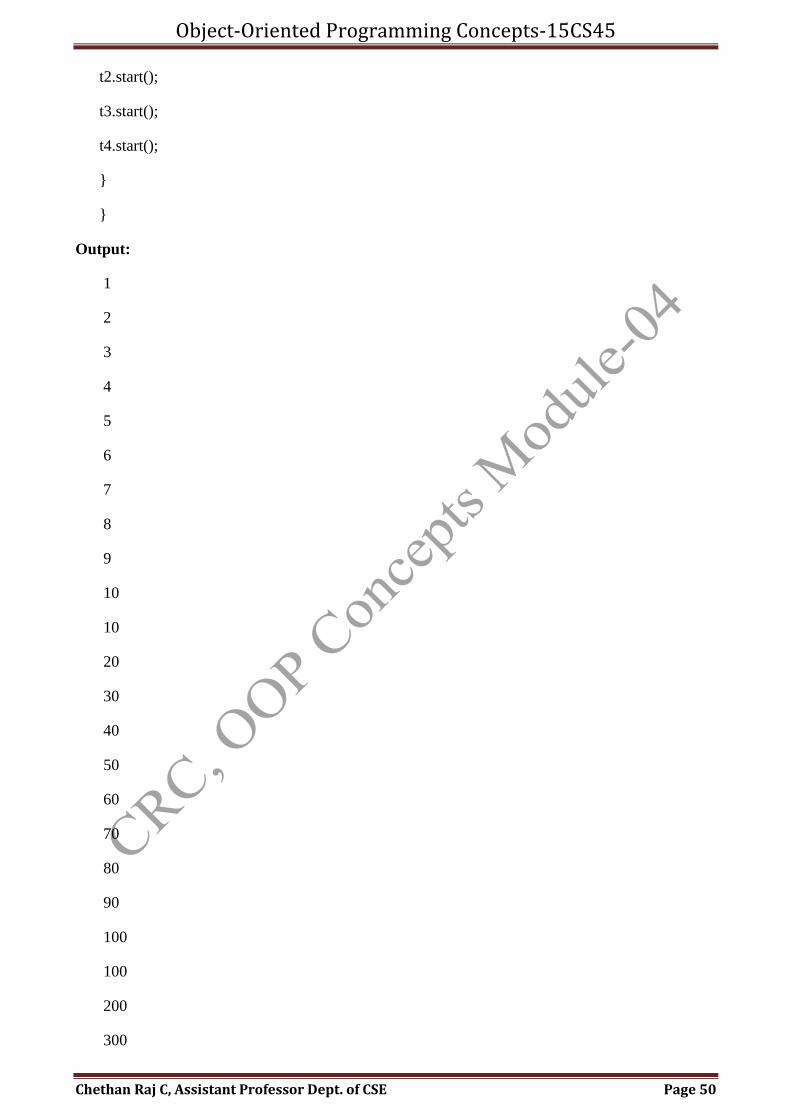
Object-Oriented Programming Concepts-15CS45
Chethan Raj C, Assistant Professor Dept. of CSE Page 50
t2.start();
t3.start();
t4.start();
}
}
Output:
1
2
3
4
5
6
7
8
9
10
10
20
30
40
50
60
70
80
90
100
100
200
300
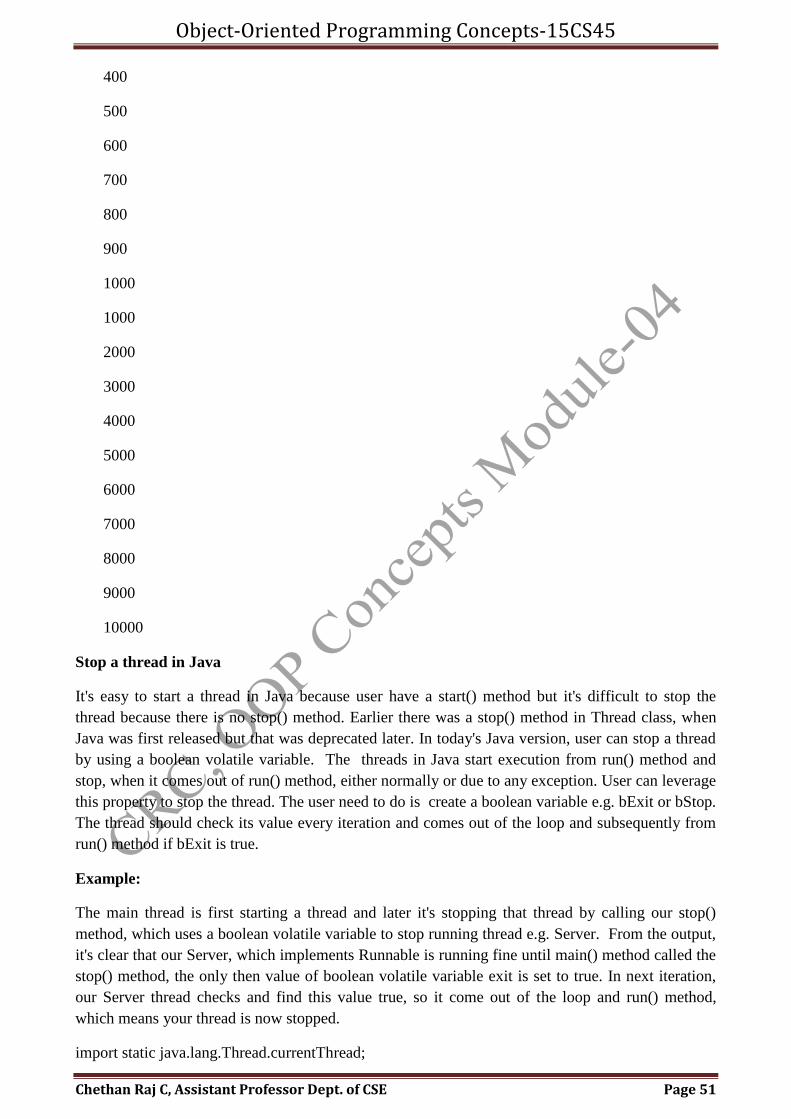
Object-Oriented Programming Concepts-15CS45
Chethan Raj C, Assistant Professor Dept. of CSE Page 51
400
500
600
700
800
900
1000
1000
2000
3000
4000
5000
6000
7000
8000
9000
10000
Stop a thread in Java
It's easy to start a thread in Java because user have a start() method but it's difficult to stop the
thread because there is no stop() method. Earlier there was a stop() method in Thread class, when
Java was first released but that was deprecated later. In today's Java version, user can stop a thread
by using a boolean volatile variable. The threads in Java start execution from run() method and
stop, when it comes out of run() method, either normally or due to any exception. User can leverage
this property to stop the thread. The user need to do is create a boolean variable e.g. bExit or bStop.
The thread should check its value every iteration and comes out of the loop and subsequently from
run() method if bExit is true.
Example:
The main thread is first starting a thread and later it's stopping that thread by calling our stop()
method, which uses a boolean volatile variable to stop running thread e.g. Server. From the output,
it's clear that our Server, which implements Runnable is running fine until main() method called the
stop() method, the only then value of boolean volatile variable exit is set to true. In next iteration,
our Server thread checks and find this value true, so it come out of the loop and run() method,
which means your thread is now stopped.
import static java.lang.Thread.currentThread;
Object-Oriented Programming Concepts-15CS45
Chethan Raj C, Assistant Professor Dept. of CSE Page 52
import java.util.concurrent.TimeUnit;
/* Java Program to demonstrate how to stop a thread in Java. There is a stop() method in
Thread class but its deprecated because of deadlock and other issue, but its easy to write *
user own stop() method to stop a thread in Java. * * @author CRC */
public class ThreadStopDemo
{
public static void main(String args[]) throws InterruptedException
{
Server myServer = new Server();
Thread t1 = new Thread(myServer, "T1");
t1.start(); //Now, let's stop our Server thread
System.out.println(currentThread().getName() + " is stopping Server thread");
myServer.stop(); //Let's wait to see server thread stopped TimeUnit.MILLISECONDS.sleep(200);
System.out.println(currentThread().getName() + " is finished now");
}
}
class Server implements Runnable
{
private volatile boolean exit = false;
public void run()
{
while(!exit)
{
System.out.println("Server is running.....");
}
System.out.println("Server is stopped....");
}
public void stop()
{
exit = true;
Object-Oriented Programming Concepts-15CS45
Chethan Raj C, Assistant Professor Dept. of CSE Page 53
}
}
Output
Server is running..... .
Server is running.....
Server is running.....
Server is running.....
Server is running.....
Server is running.....
Server is running.....
Server is running.....
Server is running.....
Server is running.....
main is stopping
Server thread
Server is running.....
Server is stopped....
main is finished now
Process:
1) Please ensure that boolean variable which is used to stop the thread is volatile, otherwise, in the
worst case your thread may not stop and run infinitely, because, in the absence of any
synchronization instruction e.g. volatile modifier here, the compiler is free to cache the value of
boolean variable exit, which means even if the main thread makes it true, Server will always see it
false, thus running infinitely. This concept is often tested in Java interviews as well.
2) It's always better to check for a boolean variable in your while loop, it could be your game loop
or main server loop used to process request.
3) It's good to provide a method to stop the server, which does nothing but change the value of
boolean variable.
Changing state of the thread;
The multithreading is the most important aspect of the Java. Every Java program runs in a single
thread called ‘main’ thread. From within this main thread, multiple threads are spawned and each
executes concurrently and each thread will have its own stack. A thread will undergo various stages
during its lifecycle.
Object-Oriented Programming Concepts-15CS45
Chethan Raj C, Assistant Professor Dept. of CSE Page 54
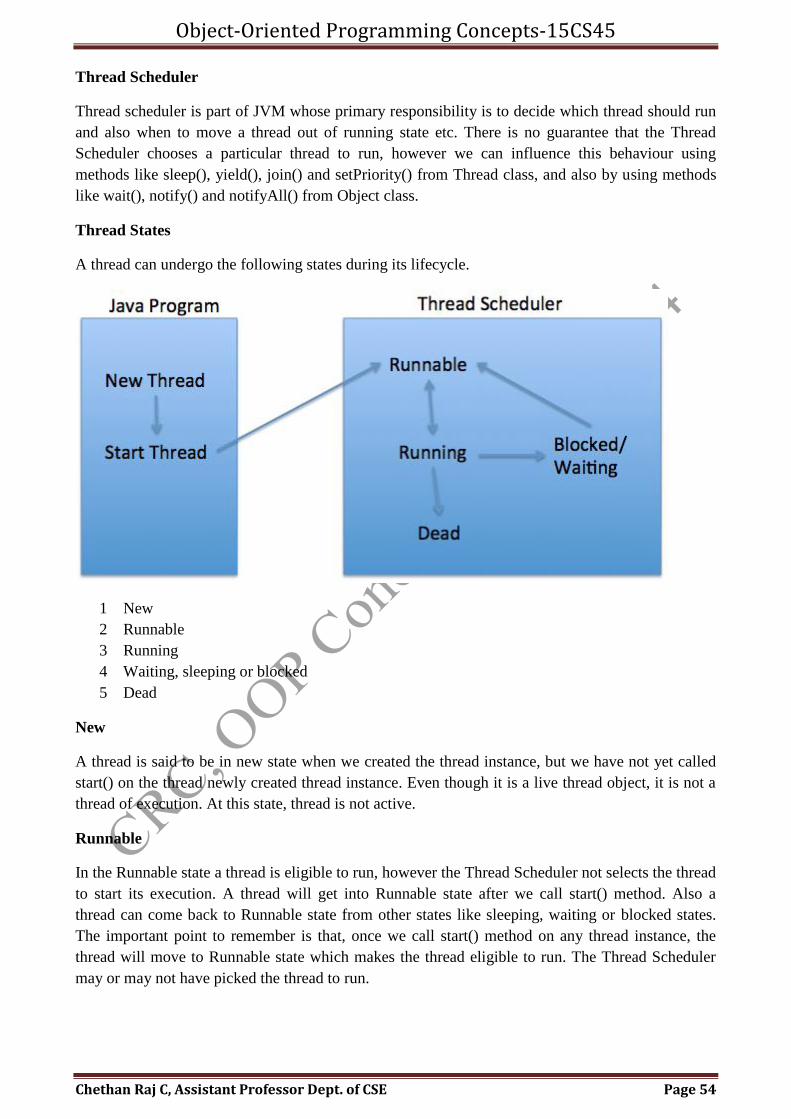
Thread Scheduler
Thread scheduler is part of JVM whose primary responsibility is to decide which thread should run
and also when to move a thread out of running state etc. There is no guarantee that the Thread
Scheduler chooses a particular thread to run, however we can influence this behaviour using
methods like sleep(), yield(), join() and setPriority() from Thread class, and also by using methods
like wait(), notify() and notifyAll() from Object class.
Thread States
A thread can undergo the following states during its lifecycle.
1 New
2 Runnable
3 Running
4 Waiting, sleeping or blocked
5 Dead
New
A thread is said to be in new state when we created the thread instance, but we have not yet called
start() on the thread newly created thread instance. Even though it is a live thread object, it is not a
thread of execution. At this state, thread is not active.
Runnable
In the Runnable state a thread is eligible to run, however the Thread Scheduler not selects the thread
to start its execution. A thread will get into Runnable state after we call start() method. Also a
thread can come back to Runnable state from other states like sleeping, waiting or blocked states.
The important point to remember is that, once we call start() method on any thread instance, the
thread will move to Runnable state which makes the thread eligible to run. The Thread Scheduler
may or may not have picked the thread to run.
Object-Oriented Programming Concepts-15CS45
Chethan Raj C, Assistant Professor Dept. of CSE Page 55
Running
Once the Thread Scheduler selects a thread to run from the runnable thread pool, the thread starts
execution. This is the state we call a thread is in Running state and thread becomes thread of
execution.
Waiting, sleeping or blocked
A thread is not eligible to run if it is in waiting, sleeping or blocked state. But the thread is alive,
and it is not in runnable state. A thread can transition back to runnable state when particular event
occurs. Thread can move into waiting, sleeping or blocked state for various reasons like waiting for
I/O, or call to sleep() method is invoked explicitly to put the thread into sleep etc. Once the I/O is
available or sleep period expires the thread can move back to Runnable state. From this point the
thread becomes eligible to run again, however Thread Scheduler ultimately decides which runnable
thread becomes thread of execution.
Dead
A thread is considered dead once its run() method completed execution. Although a thread’s run()
method completed execution it is still a Thread object, but this Thread object is not a thread of
execution. Once the thread completes its run() method and dead, it cannot be brought back to thread
of execution or even to runnable state. Invoking start() method on a dead thread causes runtime
exception.
Every thread moves through several states from its creation to its termination. The possible states of
a thread are: NEW, RUNNABLE, WAITING, BLOCKED and TERMINATED. Immediately after
the creation of a thread, it will be in the NEW state. After the start( ) method of the Thread class is
executed, it will move to the RUNNABLE state. When the thread completes its execution, it will
move to the TERMINATED stage.
If a thread is instructed to wait, it moves to the WAITING state. When the waiting is over, the
thread once again moves to the RUNNABLE state. You can obtain the current state of a thread by
calling the getState( ) method defined by Thread. It returns a value of type Thread.State that
indicates the state of the thread at the time at which the call was made. State is an enumeration
defined by Thread. Given a Thread instance, you can use getState( ) to obtain the state of a thread.
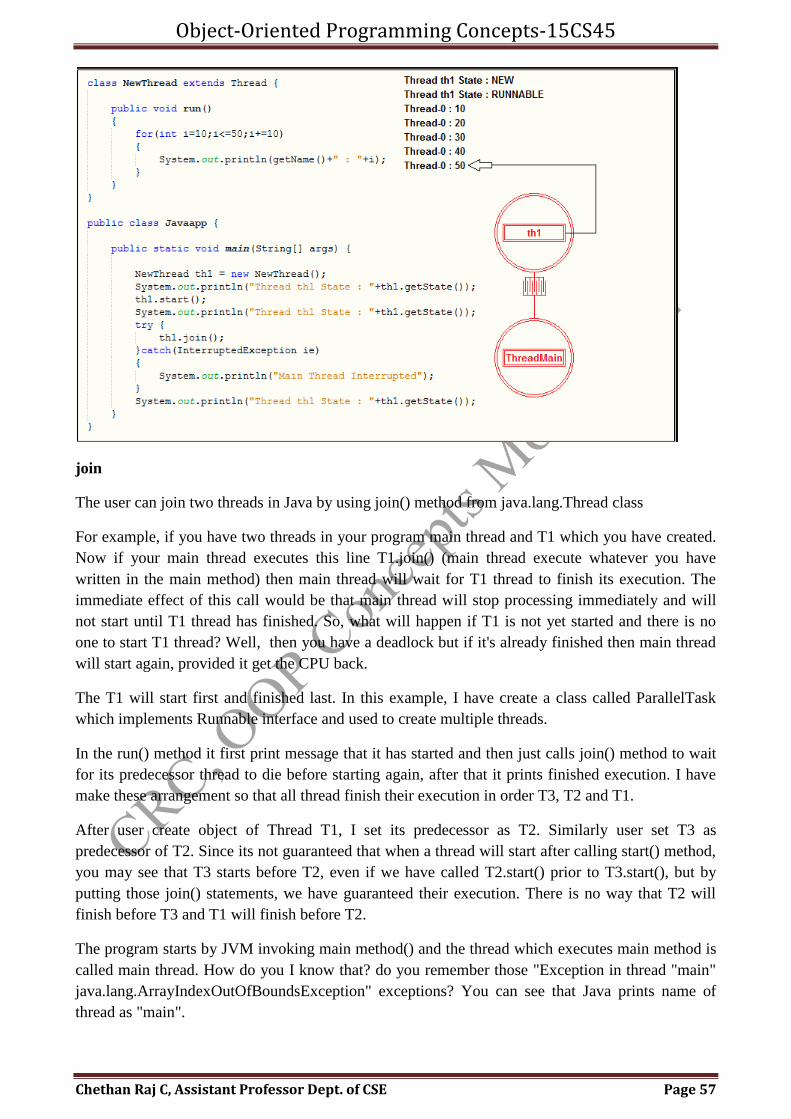
Program
class NewThread extends Thread
{
public void run()
{
for(int i=10;i<=50;i+=10)
{
System.out.println(getName()+" : "+i);
}

Object-Oriented Programming Concepts-15CS45
Chethan Raj C, Assistant Professor Dept. of CSE Page 56
}
}
public class Javaapp
{
public static void main(String[] args)
{
NewThread th1 = new NewThread();
System.out.println("Thread th1 State : "+th1.getState());
th1.start();
System.out.println("Thread th1 State : "+th1.getState());
try
{
th1.join();
}
catch(InterruptedException ie)
{
System.out.println("Main Thread Interrupted");
}
System.out.println("Thread th1 State : "+th1.getState());
}
}
Output:
Object-Oriented Programming Concepts-15CS45
Chethan Raj C, Assistant Professor Dept. of CSE Page 57
join
The user can join two threads in Java by using join() method from java.lang.Thread class
For example, if you have two threads in your program main thread and T1 which you have created.
Now if your main thread executes this line T1.join() (main thread execute whatever you have
written in the main method) then main thread will wait for T1 thread to finish its execution. The
immediate effect of this call would be that main thread will stop processing immediately and will
not start until T1 thread has finished. So, what will happen if T1 is not yet started and there is no
one to start T1 thread? Well, then you have a deadlock but if it's already finished then main thread
will start again, provided it get the CPU back.
The T1 will start first and finished last. In this example, I have create a class called ParallelTask
which implements Runnable interface and used to create multiple threads.
In the run() method it first print message that it has started and then just calls join() method to wait
for its predecessor thread to die before starting again, after that it prints finished execution. I have
make these arrangement so that all thread finish their execution in order T3, T2 and T1.
After user create object of Thread T1, I set its predecessor as T2. Similarly user set T3 as
predecessor of T2. Since its not guaranteed that when a thread will start after calling start() method,
you may see that T3 starts before T2, even if we have called T2.start() prior to T3.start(), but by
putting those join() statements, we have guaranteed their execution. There is no way that T2 will
finish before T3 and T1 will finish before T2.
The program starts by JVM invoking main method() and the thread which executes main method is
called main thread. How do you I know that? do you remember those "Exception in thread "main"
java.lang.ArrayIndexOutOfBoundsException" exceptions? You can see that Java prints name of
thread as "main".
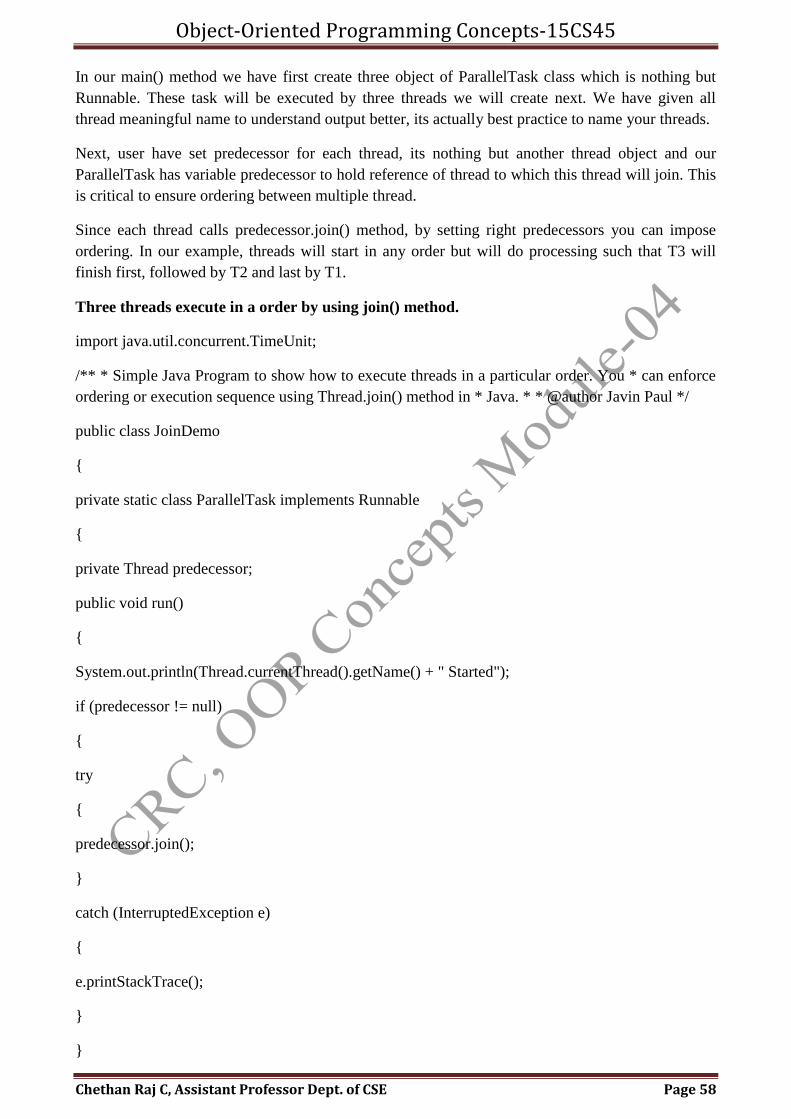
Object-Oriented Programming Concepts-15CS45
Chethan Raj C, Assistant Professor Dept. of CSE Page 58
In our main() method we have first create three object of ParallelTask class which is nothing but
Runnable. These task will be executed by three threads we will create next. We have given all
thread meaningful name to understand output better, its actually best practice to name your threads.
Next, user have set predecessor for each thread, its nothing but another thread object and our
ParallelTask has variable predecessor to hold reference of thread to which this thread will join. This
is critical to ensure ordering between multiple thread.
Since each thread calls predecessor.join() method, by setting right predecessors you can impose
ordering. In our example, threads will start in any order but will do processing such that T3 will
finish first, followed by T2 and last by T1.
Three threads execute in a order by using join() method.
import java.util.concurrent.TimeUnit;
/** * Simple Java Program to show how to execute threads in a particular order. You * can enforce
ordering or execution sequence using Thread.join() method in * Java. * * @author Javin Paul */
public class JoinDemo
{
private static class ParallelTask implements Runnable
{
private Thread predecessor;
public void run()
{
System.out.println(Thread.currentThread().getName() + " Started");
if (predecessor != null)
{
try
{
predecessor.join();
}
catch (InterruptedException e)
{
e.printStackTrace();
}
}
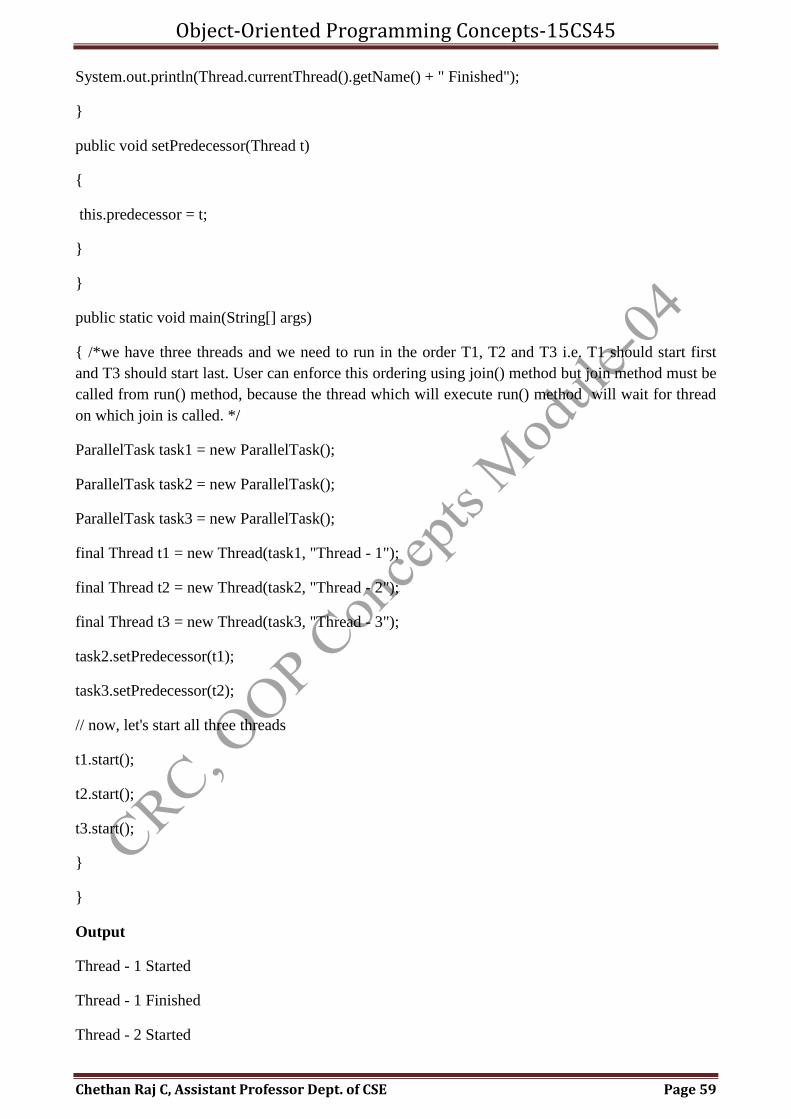
Object-Oriented Programming Concepts-15CS45
Chethan Raj C, Assistant Professor Dept. of CSE Page 59
System.out.println(Thread.currentThread().getName() + " Finished");
}
public void setPredecessor(Thread t)
{
this.predecessor = t;
}
}
public static void main(String[] args)
{ /*we have three threads and we need to run in the order T1, T2 and T3 i.e. T1 should start first
and T3 should start last. User can enforce this ordering using join() method but join method must be
called from run() method, because the thread which will execute run() method will wait for thread
on which join is called. */
ParallelTask task1 = new ParallelTask();
ParallelTask task2 = new ParallelTask();
ParallelTask task3 = new ParallelTask();
final Thread t1 = new Thread(task1, "Thread - 1");
final Thread t2 = new Thread(task2, "Thread - 2");
final Thread t3 = new Thread(task3, "Thread - 3");
task2.setPredecessor(t1);
task3.setPredecessor(t2);
// now, let's start all three threads
t1.start();
t2.start();
t3.start();
}
}
Output
Thread - 1 Started
Thread - 1 Finished
Thread - 2 Started
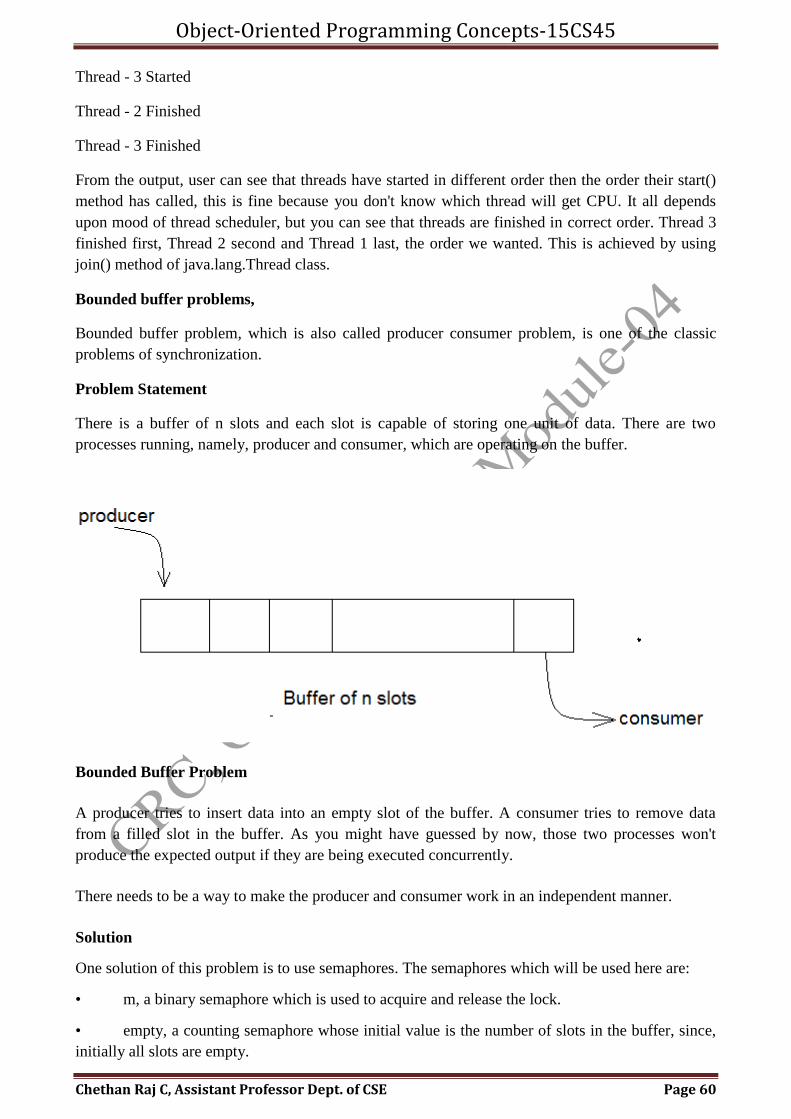
Object-Oriented Programming Concepts-15CS45
Chethan Raj C, Assistant Professor Dept. of CSE Page 60
Thread - 3 Started
Thread - 2 Finished
Thread - 3 Finished
From the output, user can see that threads have started in different order then the order their start()
method has called, this is fine because you don't know which thread will get CPU. It all depends
upon mood of thread scheduler, but you can see that threads are finished in correct order. Thread 3
finished first, Thread 2 second and Thread 1 last, the order we wanted. This is achieved by using
join() method of java.lang.Thread class.
Bounded buffer problems,
Bounded buffer problem, which is also called producer consumer problem, is one of the classic
problems of synchronization.
Problem Statement
There is a buffer of n slots and each slot is capable of storing one unit of data. There are two
processes running, namely, producer and consumer, which are operating on the buffer.
Bounded Buffer Problem
A producer tries to insert data into an empty slot of the buffer. A consumer tries to remove data
from a filled slot in the buffer. As you might have guessed by now, those two processes won't
produce the expected output if they are being executed concurrently.
There needs to be a way to make the producer and consumer work in an independent manner.
Solution
One solution of this problem is to use semaphores. The semaphores which will be used here are:
• m, a binary semaphore which is used to acquire and release the lock.
• empty, a counting semaphore whose initial value is the number of slots in the buffer, since,
initially all slots are empty.
Object-Oriented Programming Concepts-15CS45
Chethan Raj C, Assistant Professor Dept. of CSE Page 61
• full, a counting semaphore whose initial value is 0.
At any instant, the current value of empty represents the number of empty slots in the buffer and
full represents the number of occupied slots in the buffer.
The Producer Operation
The pseudocode of the producer function looks like this:
do
{
// wait until empty > 0 and then decrement 'empty'
wait(empty);
// acquire lock
wait(mutex);
/* perform the insert operation in a slot */
// release lock
signal(mutex);
// increment 'full'
signal(full);
}
while(TRUE)
• Looking at the above code for a producer, we can see that a producer first waits until there is
atleast one empty slot.
• Then it decrements the empty semaphore because, there will now be one less empty slot,
since the producer is going to insert data in one of those slots.
• Then, it acquires lock on the buffer, so that the consumer cannot access the buffer until
producer completes its operation.
• After performing the insert operation, the lock is released and the value of full is
incremented because the producer has just filled a slot in the buffer.
The Consumer Operation
The pseudocode for the consumer function looks like this:
do
{
// wait until full > 0 and then decrement 'full'
Object-Oriented Programming Concepts-15CS45
Chethan Raj C, Assistant Professor Dept. of CSE Page 62
wait(full);
// acquire the lock
wait(mutex);
/* perform the remove operation in a slot */
// release the lock
signal(mutex);
// increment 'empty'
signal(empty);
}
while(TRUE);
• The consumer waits until there is atleast one full slot in the buffer.
• Then it decrements the full semaphore because the number of occupied slots will be
decreased by one, after the consumer completes its operation.
• After that, the consumer acquires lock on the buffer.
• Following that, the consumer completes the removal operation so that the data from one of
the full slots is removed.
• Then, the consumer releases the lock.
• Finally, the empty semaphore is incremented by 1, because the consumer has just removed
data from an occupied slot, thus making it empty.
Ex:
The two threads, in and out. The in thread reads and existing file and puts the content into the
buffer. The out thread reads from the buffer and writes to a new file.
public class Buffer
{
private final int MaxBuffSize;
private char[] store;
private int BufferStart, BufferEnd, BufferSize;
public Buffer(int size)
{
MaxBuffSize = size;
BufferEnd = -1;
Object-Oriented Programming Concepts-15CS45
Chethan Raj C, Assistant Professor Dept. of CSE Page 63
BufferStart = 0;
BufferSize = 0;
store = new char[MaxBuffSize];
}
public synchronized void insert(char ch)
{
try
{
while (BufferSize == MaxBuffSize)
{
wait();
}
BufferEnd = (BufferEnd + 1) % MaxBuffSize;
store[BufferEnd] = ch;
BufferSize++;
notifyAll();
}
catch (InterruptedException e)
{
Thread.currentThread().interrupt();
}
}
public synchronized char delete()
{
try
{
while (BufferSize == 0)
{
wait();
Object-Oriented Programming Concepts-15CS45
Chethan Raj C, Assistant Professor Dept. of CSE Page 64
}
char ch = store[BufferStart];
BufferStart = (BufferStart + 1) % MaxBuffSize;
BufferSize--;
notifyAll();
return ch;
}
catch (InterruptedException e)
{
Thread.currentThread().interrupt();
return ’i’;
}
}
}
class Consumer extends Thread
{
private final Buffer buffer;
public Consumer(Buffer b)
{
buffer = b;
}
public void run()
{
while (!Thread.currentThread().isInterrupted())
{
char c = buffer.delete();
System.out.print(c);
}
}
Object-Oriented Programming Concepts-15CS45
Chethan Raj C, Assistant Professor Dept. of CSE Page 65
}
class Producer extends Thread
{
private final Buffer buffer;
private InputStreamReader in =
new InputStreamReader(System.in);
public Producer(Buffer b)
{
buffer = b;
}
public void run()
{
try
{
while (!Thread.currentThread().isInterrupted())
{
int c = in.read();
if (c == -1) break; // -1 is eof
buffer.insert((char)c);
}
} catch (IOException e) {}
}
}
class BoundedBuffer
{
public static void main(String[] args)
{
System.out.println("program starting");
Buffer buffer = new Buffer(5); // buffer has size 5
Object-Oriented Programming Concepts-15CS45
Chethan Raj C, Assistant Professor Dept. of CSE Page 66
Producer prod = new Producer(buffer);
Consumer cons = new Consumer(buffer);
prod.start();
cons.start();
try {
prod.join();
cons.interrupt();
} catch (InterruptedException e) {}
System.out.println("End of Program");
}
}
producer consumer problems.
In computing, the producer–consumer problem (also known as the bounded-buffer problem) is a
classic example of a multi-process synchronization problem. The problem describes two processes,
the producer and the consumer, which share a common, fixed-size buffer used as a queue.
The producer’s job is to generate data, put it into the buffer, and start again.
At the same time, the consumer is consuming the data (i.e. removing it from the buffer), one
piece at a time.
Problem
To make sure that the producer won’t try to add data into the buffer if it’s full and that the consumer
won’t try to remove data from an empty buffer.
Solution
The producer is to either go to sleep or discard data if the buffer is full. The next time the consumer
removes an item from the buffer, it notifies the producer, who starts to fill the buffer again. In the
same way, the consumer can go to sleep if it finds the buffer to be empty. The next time the
producer puts data into the buffer, it wakes up the sleeping consumer.
An inadequate solution could result in a deadlock where both processes are waiting to be awakened
Producer Consumer Problem is a classical concurrency problem and in fact it is one of the
concurrency design pattern. In last article we have seen solving Producer Consumer problem in
Java using blocking Queue but one of my reader emailed me and requested code example and
explanation of solving Producer Consumer problem in Java with wait and notify method as well,
Since its often asked as one of the top coding question in Java. In this Java tutorial, I have put the
code example of wait notify version of earlier producer consumer concurrency design pattern. You
can see this is much longer code with explicit handling blocking conditions like when shared queue
is full and when queue is empty. Since we have replaced BlockingQueue with Vector we need to
Object-Oriented Programming Concepts-15CS45
Chethan Raj C, Assistant Professor Dept. of CSE Page 67
implement blocking using wait and notify and that's why we have introduced produce(int i) and
consume() method. If you see I have kept consumer thread little slow by allowing it to sleep for 50
Milli second to give an opportunity to producer to fill the queue, which helps to understand that
Producer thread is also waiting when Queue is full.
import java.util.Vector;
import java.util.logging.Level;
import java.util.logging.Logger;
/* Java program to solve Producer Consumer problem using wait and notify method in Java.
Producer Consumer is also a popular concurrency design pattern @author crc */
public class ProducerConsumerSolution {
public static void main(String args[]) {
Vector sharedQueue = new Vector();
int size = 4;
Thread prodThread = new Thread(new Producer(sharedQueue, size), "Producer");
Thread consThread = new Thread(new Consumer(sharedQueue, size), "Consumer");
prodThread.start();
consThread.start();
}
}
class Producer implements Runnable {
private final Vector sharedQueue;
private final int SIZE;
public Producer(Vector sharedQueue, int size) {
this.sharedQueue = sharedQueue;
this.SIZE = size;
}
public void run() {
for (int i = 0; i < 7; i++) {
System.out.println("Produced: " + i);
try {
produce(i);
Object-Oriented Programming Concepts-15CS45
Chethan Raj C, Assistant Professor Dept. of CSE Page 68
} catch (InterruptedException ex) {
Logger.getLogger(Producer.class.getName()).log(Level.SEVERE, null, ex);
}
}
}
private void produce(int i) throws InterruptedException {
//wait if queue is full
while (sharedQueue.size() == SIZE) {
synchronized (sharedQueue) {
System.out.println("Queue is full " + Thread.currentThread().getName()
+ " is waiting , size: " + sharedQueue.size());
sharedQueue.wait();
}
}
//producing element and notify consumers
synchronized (sharedQueue) {
sharedQueue.add(i);
sharedQueue.notifyAll();
}
}
}
class Consumer implements Runnable {
private final Vector sharedQueue;
private final int SIZE;
public Consumer(Vector sharedQueue, int size) {
this.sharedQueue = sharedQueue;
this.SIZE = size;
}
Object-Oriented Programming Concepts-15CS45
Chethan Raj C, Assistant Professor Dept. of CSE Page 69
public void run() {
while (true) {
try {
System.out.println("Consumed: " + consume());
Thread.sleep(50);
} catch (InterruptedException ex) {
Logger.getLogger(Consumer.class.getName()).log(Level.SEVERE, null, ex);
}
}
}
private int consume() throws InterruptedException {
//wait if queue is empty
while (sharedQueue.isEmpty()) {
synchronized (sharedQueue) {
System.out.println("Queue is empty " + Thread.currentThread().getName()
+ " is waiting , size: " + sharedQueue.size());
sharedQueue.wait();
}
}
//Otherwise consume element and notify waiting producer
synchronized (sharedQueue) {
sharedQueue.notifyAll();
return (Integer) sharedQueue.remove(0);
}
}
}
Output:
Produced: 0
Object-Oriented Programming Concepts-15CS45
Chethan Raj C, Assistant Professor Dept. of CSE Page 70
Queue is empty Consumer is waiting , size: 0
Produced: 1
Consumed: 0
Produced: 2
Produced: 3
Produced: 4
Produced: 5
Queue is full Producer is waiting , size: 4
Consumed: 1
Produced: 6
Queue is full Producer is waiting , size: 4
Consumed: 2
Consumed: 3
Consumed: 4
Consumed: 5
Consumed: 6
Queue is empty Consumer is waiting , size: 0
Read write Problem:
The conditions for getting read and write access to the resource:
Read Access : If no threads are writing, and no threads have requested write access.
Write Access : If no threads are reading or writing.
An object is shared among may threads, each belonging to one of two classes:
– Readers: read data, never modify it
– Writers: read data and modify it
If a thread wants to read the resource, it is okay as long as no threads are writing to it, and no
threads have requested write access to the resource. By up-prioritizing write-access requests we
assume that write requests are more important than read-requests. Besides, if reads are what
happens most often, and we did not up-prioritize writes, starvation could occur. Threads requesting
write access would be blocked until all readers had unlocked the ReadWriteLock. If new threads
were constantly granted read access the thread waiting for write access would remain blocked
indefinately, resulting in starvation. Therefore a thread can only be granted read access if no thread
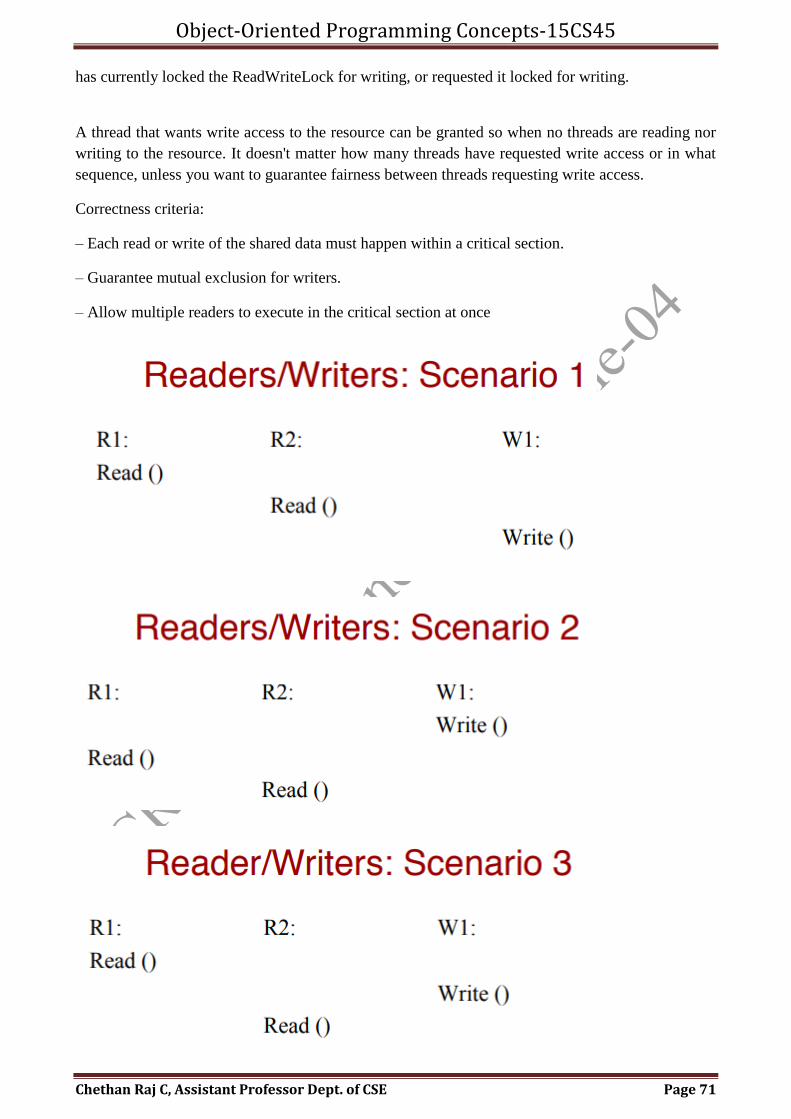
Object-Oriented Programming Concepts-15CS45
Chethan Raj C, Assistant Professor Dept. of CSE Page 71
has currently locked the ReadWriteLock for writing, or requested it locked for writing.
A thread that wants write access to the resource can be granted so when no threads are reading nor
writing to the resource. It doesn't matter how many threads have requested write access or in what
sequence, unless you want to guarantee fairness between threads requesting write access.
Correctness criteria:
– Each read or write of the shared data must happen within a critical section.
– Guarantee mutual exclusion for writers.
– Allow multiple readers to execute in the critical section at once

Object-Oriented Programming Concepts-15CS45
Chethan Raj C, Assistant Professor Dept. of CSE Page 72
Readers/Writers Solution:
• Implementation notes:
1. The first reader blocks if there is a writer; any other readers who try to enter block on mutex.
2. The last reader to exit signals a waiting writer.
3. When a writer exits, if there is both a reader and writer waiting, which goes next depends on the
scheduler.
4. If a writer exits and a reader goes next, then all readers that are waiting will fall through (at least
one is waiting on wrt and zero or more can be waiting on mutex).
5. Alternative desirable semantics:
– Let a writer enter its critical section as soon as possible.
Event Handling:
Any program that uses GUI (graphical user interface) such as Java application written for windows,
is event driven. Event describes the change in state of any object. For Example : Pressing a button,
Entering a character in Textbox, Clicking or Dragging a mouse, etc.
When an action takes place, an event is generated. The generated event and all the information
about it such as time of its occurrence, type of event, etc. are sent to the appropriate event handling
code provided within the program. This code determines how the allocated event will be handled so
that an appropriate response can be sent to the user.
AWT (Abstract Window Toolkit)
Java AWT is an Application programming interface (API) to develop GUI or window-based
applications in java.
Java AWT components are platform-dependent i.e. components are displayed according to the view
of operating system. AWT is heavyweight i.e. its components are using the resources of OS.
The java.awt package provides classes for AWT api such as TextField, Label, TextArea,
RadioButton, CheckBox, Choice, List etc.
Java AWT Hierarchy
The hierarchy of Java AWT classes are given below.

Object-Oriented Programming Concepts-15CS45
Chethan Raj C, Assistant Professor Dept. of CSE Page 73
In AWT components, we came to know every component (except Panel and Label) generates
events when interacted by the user like clicking over a button or pressing enter key in a text field
etc. Listeners handle the events. Let us know the style (or design pattern) Java follows to handle the
events.
Events in any programming language specifies the external effects that happens and user
application behaves according to that event. For example, an application produce an output when a
user inputs some data, or the data received from the network or it may be something else. In Java
when you works with the AWT components like button, textbox, etc (except panel, label ) generates
an event. This event is handled by the listener. Event listener listens the event generated on
components and performs the corresponding action.
Event Handling Model
The model for event processing in version 1.0 of the AWT is based on inheritance. In order for a
program to catch and process GUI events, it must subclass GUI components and override either
action() or handleEvent() methods. Returning "true" from one of these methods consumes the event
so it is not processed further; otherwise the event is propagated sequentially up the GUI hierarchy
until either it is consumed or the root of the hierarchy is reached. The result of this model is that
programs have essentially two choices for structuring their event-handling code:
1. Each individual component can be subclassed to specifically handle its target events. The
result of this is a plethora of classes.
2. All events for an entire hierarchy (or subset thereof) can be handled by a particular
container; the result is that the container's overridden action() or handleEvent() method must
contain a complex conditional statement in order to process the events.
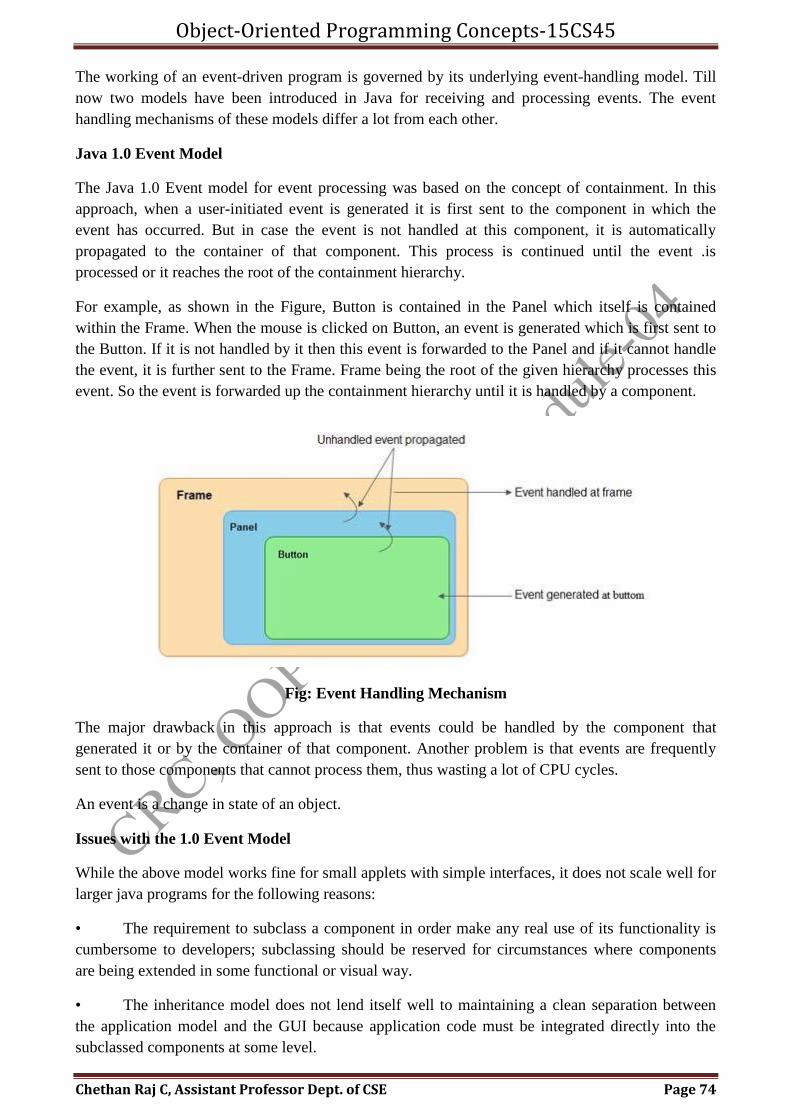
Object-Oriented Programming Concepts-15CS45
Chethan Raj C, Assistant Professor Dept. of CSE Page 74
The working of an event-driven program is governed by its underlying event-handling model. Till
now two models have been introduced in Java for receiving and processing events. The event
handling mechanisms of these models differ a lot from each other.
Java 1.0 Event Model
The Java 1.0 Event model for event processing was based on the concept of containment. In this
approach, when a user-initiated event is generated it is first sent to the component in which the
event has occurred. But in case the event is not handled at this component, it is automatically
propagated to the container of that component. This process is continued until the event .is
processed or it reaches the root of the containment hierarchy.
For example, as shown in the Figure, Button is contained in the Panel which itself is contained
within the Frame. When the mouse is clicked on Button, an event is generated which is first sent to
the Button. If it is not handled by it then this event is forwarded to the Panel and if it cannot handle
the event, it is further sent to the Frame. Frame being the root of the given hierarchy processes this
event. So the event is forwarded up the containment hierarchy until it is handled by a component.
Fig: Event Handling Mechanism
The major drawback in this approach is that events could be handled by the component that
generated it or by the container of that component. Another problem is that events are frequently
sent to those components that cannot process them, thus wasting a lot of CPU cycles.
An event is a change in state of an object.
Issues with the 1.0 Event Model
While the above model works fine for small applets with simple interfaces, it does not scale well for
larger java programs for the following reasons:
• The requirement to subclass a component in order make any real use of its functionality is
cumbersome to developers; subclassing should be reserved for circumstances where components
are being extended in some functional or visual way.
• The inheritance model does not lend itself well to maintaining a clean separation between
the application model and the GUI because application code must be integrated directly into the
subclassed components at some level.
Object-Oriented Programming Concepts-15CS45
Chethan Raj C, Assistant Professor Dept. of CSE Page 75
• Since ALL event types are filtered through the same methods, the logic to process the
different event types (and possibly the event targets in approach #2) is complex and error-prone. It
is not uncommon for programs to have perplexing bugs that are the result of returning an incorrect
result (true or false) from the handleEvent() method. This becomes an even greater problem as new
event types are added to the AWT; if the logic of existing handleEvent() methods isn't set up to deal
properly with unknown types, programs could potentially break in very unpredictable ways.
• There is no filtering of events. Events are always delivered to components regardless of
whether the components actually handle them or not. This is a general performance problem,
particularly with high-frequency type events such as mouse moves.
• For many components, the action() method passes a String parameter which is equivalent to
either the label of the component (Button, MenuItem) or the item selected (List, Choice). For
programs which use approach #2, this often leads to poor coding and unwieldy string-compare logic
that doesn't localize well.
Two event handling mechanisms;
An event is propagated from a "Source" object to a "Listener" object by invoking a method on the
listener and passing in the instance of the event subclass which defines the event type generated.
A Listener is an object that implements a specific EventListener interface extended from the generic
java.util.EventListener. An EventListener interface defines one or more methods which are to be
invoked by the event source in response to each specific event type handled by the interface.
An Event Source is an object which originates or "fires" events. The source defines the set of events
it emits by providing a set of set<EventType>Listener (for single-cast) and/or
add<EventType>Listener (for mult-cast) methods which are used to register specific listeners for
those events.
In an AWT program, the event source is typically a GUI component and the listener is commonly
an "adapter" object which implements the appropriate listener (or set of listeners) in order for an
application to control the flow/handling of events. The listener object could also be another AWT
component which implements one or more listener interfaces for the purpose of hooking GUI
objects up to each other.
The delegation event model;
The JDK1.1 will introduce a new delegation-based event model in AWT in order to:
Resolve the problems mentioned previously
Provide a more robust framework to support more complex java programs.
Design Goals
The primary design goals of the new model in the AWT are the following:
Simple and easy to learn
Support a clean separation between application and GUI code
Object-Oriented Programming Concepts-15CS45
Chethan Raj C, Assistant Professor Dept. of CSE Page 76
Facilitate the creation of robust event handling code which is less error-prone (strong
compile-time checking)
Flexible enough to enable varied application models for event flow and propagation
For visual tool builders, enable run-time discovery of both events that a component
generates as well as the events it may observe
Support backward binary compatibility with the old model
Note: These goals are described from the particular perspective of the AWT. Since this model has
also been designed to accommodate the JavaBeans architecture, the design goals from the
JavaBeans perspective are described in the "Events" section of the JavaBeans Specification and
may vary slightly from these goals.
An event is a change in state of an object.
In Java event handling may comprised the following four classes (Components):
• Event Sources : . A source generates an Event and send it to one or more listeners
registered with the source. Once event is received by the listener, they process the event and then
return. Events are supported by a number of Java packages, like java.util, java.awt and
java.awt.event .Event source is an object that generates an event. Event sources are components,
subclasses of java.awt.Component, capable to generate events. The event source can be a button,
TextField or a Frameetc
• Sources for generating an event may be the components. In Java java.awt.Component
specifies the components that may or may not generate events. These components classes are the
subclass of the above class. These event sources may be the button, combobox, textbox etc.
• Event Classes : Event Classes in Java are the classes defined for almost all the components
that may generate events. These events classes are named by giving the specific name such as for
the component source button the event class is ActionEvent. Following are the list of Event Classes.
o ActionEvent : Button, TextField, List, Menu
o WindowEvent : Frame
o ItemEvent : Checkbox, List
o AdjustmentEvent : Scrollbar
o MouseEvent : Mouse
o KeyEvent : Keyboard
Almost every event source generates an event and is named by some Java class. For example, the
event generated by button is known as ActionEvent and that of Checkbox is known as ItemEvent.
All the events are listed in java.awt.event package.
Following list gives a few components and their corresponding listeners.
COMPONENT EVENT IT GENERATES
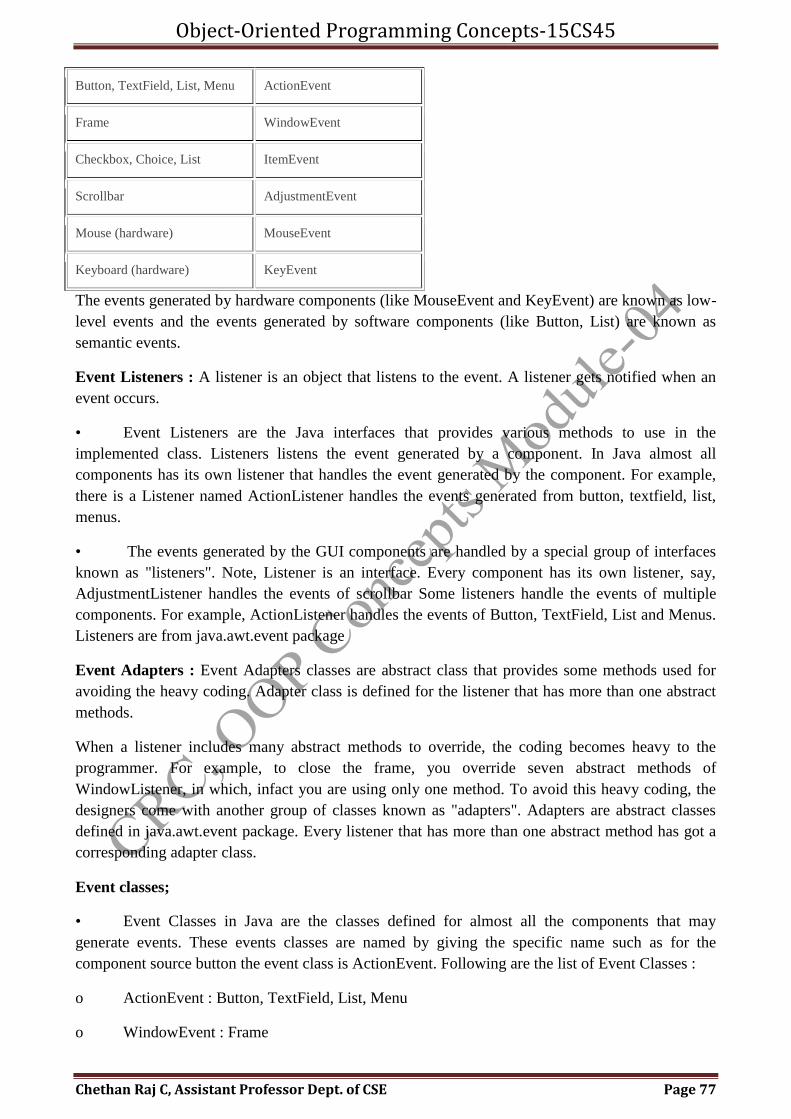
Object-Oriented Programming Concepts-15CS45
Chethan Raj C, Assistant Professor Dept. of CSE Page 77
Button, TextField, List, Menu ActionEvent
Frame WindowEvent
Checkbox, Choice, List ItemEvent
Scrollbar AdjustmentEvent
Mouse (hardware) MouseEvent
Keyboard (hardware) KeyEvent
The events generated by hardware components (like MouseEvent and KeyEvent) are known as low-
level events and the events generated by software components (like Button, List) are known as
semantic events.
Event Listeners : A listener is an object that listens to the event. A listener gets notified when an
event occurs.
• Event Listeners are the Java interfaces that provides various methods to use in the
implemented class. Listeners listens the event generated by a component. In Java almost all
components has its own listener that handles the event generated by the component. For example,
there is a Listener named ActionListener handles the events generated from button, textfield, list,
menus.
• The events generated by the GUI components are handled by a special group of interfaces
known as "listeners". Note, Listener is an interface. Every component has its own listener, say,
AdjustmentListener handles the events of scrollbar Some listeners handle the events of multiple
components. For example, ActionListener handles the events of Button, TextField, List and Menus.
Listeners are from java.awt.event package
Event Adapters : Event Adapters classes are abstract class that provides some methods used for
avoiding the heavy coding. Adapter class is defined for the listener that has more than one abstract
methods.
When a listener includes many abstract methods to override, the coding becomes heavy to the
programmer. For example, to close the frame, you override seven abstract methods of
WindowListener, in which, infact you are using only one method. To avoid this heavy coding, the
designers come with another group of classes known as "adapters". Adapters are abstract classes
defined in java.awt.event package. Every listener that has more than one abstract method has got a
corresponding adapter class.
Event classes;
• Event Classes in Java are the classes defined for almost all the components that may
generate events. These events classes are named by giving the specific name such as for the
component source button the event class is ActionEvent. Following are the list of Event Classes :
o ActionEvent : Button, TextField, List, Menu
o WindowEvent : Frame
Object-Oriented Programming Concepts-15CS45
Chethan Raj C, Assistant Professor Dept. of CSE Page 78
o ItemEvent : Checkbox, List
o AdjustmentEvent : Scrollbar
o MouseEvent : Mouse
o KeyEvent : Keyboard
There are many types of events that are generated by AWT Application. These events are used to
make the application more effective and efficient. Generally, there are twelve types of event are
used in Java AWT. These are as follows :
1. ActionEvent
2. AdjustmentEvent
3. ComponentEvent
4. ContainerEvent
5. FocusEvent
6. InputEvent
7. ItemEvent
8. KeyEvent
9. MouseEvent
10. PaintEvent
11. TextEvent
12. WindowEvent
1. ActionEvent: This is the ActionEvent class extends from the AWTEvent class. It indicates
the component-defined events occurred i.e. the event generated by the component like Button,
Checkboxes etc. The generated event is passed to every EventListener objects that receives such
types of events using the addActionListener()method of the object.
2. AdjustmentEvent: This is the AdjustmentEvent class extends from the AWTEvent class.
When the Adjustable Value is changed then the event is generated.
3. ComponentEvent: ComponentEvent class also extends from the AWTEvent class. This class
creates the low-level event which indicates if the object moved, changed and it's states (visibility of
the object). This class only performs the notification about the state of the object. The
ComponentEvent class performs like root class for other component-level events.
4. ContainerEvent: The ContainerEvent class extends from the ComponentEvent class. This is
a low-level event which is generated when container's contents changes because of addition or
removal of a components.
5. FocusEvent: The FocusEvent class also extends from the ComponentEvent class. This class
indicates about the focus where the focus has gained or lost by the object. The generated event is
Object-Oriented Programming Concepts-15CS45
Chethan Raj C, Assistant Professor Dept. of CSE Page 79
passed to every objects that is registered to receive such type of events using the addFocusListener()
method of the object.
6. InputEvent: The InputEvent class also extends from the ComponentEvent class. This event
class handles all the component-level input events. This class acts as a root class for all component-
level input events.
7. ItemEvent: The ItemEvent class extends from the AWTEvent class. The ItemEvent class
handles all the indication about the selection of the object i.e. whether selected or not. The
generated event is passed to every ItemListener objects that is registered to receive such types of
event using the addItemListener() method of the object.
8. KeyEvent: KeyEvent class extends from the InputEvent class. The KeyEvent class handles
all the indication related to the key operation in the application if you press any key for any
purposes of the object then the generated event gives the information about the pressed key. This
type of events check whether the pressed key left key or right key, 'A' or 'a' etc.
9. MouseEvent: MouseEvent class also extends from the InputEvent class. The
MouseEventclass handle all events generated during the mouse operation for the object. That
contains the information whether mouse is clicked or not if clicked then checks the pressed key is
left or right.
10. PaintEvent: PaintEvent class also extends from the ComponentEvent class. The PaintEvent
class only ensures that the paint() or update() are serialized along with the other events delivered
from the event queue.
11. TextEvent: TextEvent class extends from the AWTEvent class. TextEvent is generated
when the text of the object is changed. The generated events are passed to every TextListener object
which is registered to receive such type of events using the addTextListener() method of the object.
12. WindowEvent :WindowEvent class extends from the ComponentEvent class. If the window
or the frame of your application is changed (Opened, closed, activated, deactivated or any other
events are generated), WindowEvent is generated.
Container
The Container is a component in AWT that can contain another components like buttons, textfields,
labels etc. The classes that extends Container class are known as container such as Frame, Dialog
and Panel.
Window
The window is the container that have no borders and menu bars. You must use frame, dialog or
another window for creating a window.
Panel
The Panel is the container that doesn't contain title bar and menu bars. It can have other components
like button, textfield etc.
Frame
Object-Oriented Programming Concepts-15CS45
Chethan Raj C, Assistant Professor Dept. of CSE Page 80
The Frame is the container that contain title bar and can have menu bars. It can have other
components like button, textfield etc.
Useful Methods of Component class
Method Description
public void add(Component c) inserts a component on this component.
public void setSize(intwidth,int height) sets the size (width and height) of the
component.
public void setLayout(LayoutManager m) defines the layout manager for the component.
public void setVisible(boolean status) changes the visibility of the component, by
default false.
Event Process
Events are supported by many packages are java.util, java.awt,java.awt.even. Handle events in Java
awt. Events are the integral part of the java platform. You can see the concepts related to the event
handling through the example and use methods through which you can implement the event driven
application.
For any event to occur, the objects registers themselves aslisteners. No event takes place if there is
no listener i.e. nothing happens when an event takes place if there is no listener. No matter how
many listeners there are, each and every listener is capable of processing an event. For example, a
SimpleButtonEvent applet registers itself as the listener for the button's action events that creates a
Button instance.
ActionListener can be implemented by any Class including Applet. One point to remember here is
that all the listeners are always notified. Moreover, you can also call AWTEvent.consume() method
whenever you don't want an event to be processed further. There is another method which is used
by a listener to check for the consumption. The method is isConsumed() method. The processing of
the events gets stopped with the consumption of the events by the system once a listener is notified.
Consumption only works for InputEvent and its subclasses. Moreover, if you don't want any input
from the user through keyboard then you can use consume() method for the KeyEvent.
The step by step procedure of Event handling is as follow:
1. When anything interesting happens then the subclasses of AWT Event are generated by the
component.
2. Any class can act like a Listener class permitted by the Event sources. For example,
addActionListener()method is used for any action to be performed, where Action is the event type.
There is another method by which you can remove the listener class which is removeXXXListener()
method, where XXX is the event type.
3. A listener type has to be implemented for an event handling such as ActionListener.
Object-Oriented Programming Concepts-15CS45
Chethan Raj C, Assistant Professor Dept. of CSE Page 81
4. There are some special type of listener types as well for which you need to implement
multiple methods like key Events. There are three methods which are required to be implemented
for Key events and to register them i.e.one for key release, key typed and one for key press. There
are some special classes as well which are known as adapters that are used to implement the listener
interfaces and stub out all the methods. these adapter classes can be sub classed and and can
override the necessary method.
AWT Event
Most of the times every event-type has Listener interface as Events subclass the AWTEvent class.
However,PaintEvent and InputEvent don't have the Listener interface because only the paint()
method can be overridenwithPaintEvent etc.
Low-level Events
A low-level input or window operation is represented by the Low-level events. Types of Low-level
events aremouse movement, window opening, a key press etc. For example, three events are
generated by typing the letter 'A' on the Keyboard one for releasing, one for pressing, and one for
typing. The different type of low-level events andoperations that generate each event are show
below in the form of a table.
FocusEvent Used for Getting/losing focus.
MouseEvent Used for entering, exiting, clicking, dragging, moving, pressing, or releasing.
ContainerEvent Used for Adding/removing component.
KeyEvent Used for releasing, pressing, or typing (both) a key.
WindowEvent Used for opening, deactivating, closing, Iconifying, deiconifying, really closed.
ComponentEvent Used for moving, resizing, hiding, showing.
Semantic Events
The interaction with GUI component is represented by the Semantic events like changing the text of
a text field, selecting a button etc. The different events generated by different components is shown
below.
ItemEvent Used for state changed.
ActionEvent Used for do the command.
TextEvent Used for text changed.
AdjustmentEvent Used for value adjusted.
Sources of events;
A source is an object that generates an event. This occurs when the internal state of that object
changes in some way. Sources may generates more than one type of event. A source must register
listeners in order for the listeners to receive notifications about a specific type of event. Each type of
event has its own registration method.
Object-Oriented Programming Concepts-15CS45
Chethan Raj C, Assistant Professor Dept. of CSE Page 82
Hereis the general form:
public void addTypeListener (TypeListener e1 )
Here, TypeListener is the name of the event and e1 is a reference to the event listener. For
example:- the method that registers a keyword event listener is called addKeyListener(). The
method that registers a mouse motion listener is calledaddMouseMotionListener().
When an event occurs, all registered listeners are notified and receive a copy of the event object.
This is known as multicasting the event. In all cases,notifications are sent only to listeners that
registers to receive them.
Some sources may allow only one listener to register.
The general form of such a method is this:
public void addTypeListener (TypeListener e1 )
Throws java.util.TooManyListenerException
Here, TypeListener is the name of the event and el is a reference to the event listener. When such
once event occurs, the required listener is notified. This is known as unicasting the event.
A source must also provide a method that allows a listener to unregister an interest in a specific type
of event.
The general form of such method is this:
public void removeTypeListener (TypeListener e1 )
Here, Type is the name of the event and e1 is a reference to the event listener. For example:- to
remove a keyword listener, we would call removeKeyListener().
The methods that add or remove listeners are provided by the sources that generates events. For
example:- the component class provides methods to add and remove keyboard and mouse event
listener.
Event listener interfaces;
• Event listener: An event listener is an object which receives notification when an event occurs. As
already mentioned, only registered listeners can receive notifications from sources about specific
types of events. The role of event listener is to receive these notifications and process them.
A listener an object that is notified when an event occurs.
It has two majorrequirements- First, inmust have been registered with one or more source to receive
notifications about specific type of events. Second, it must implement methods to receive and
process these notifications.
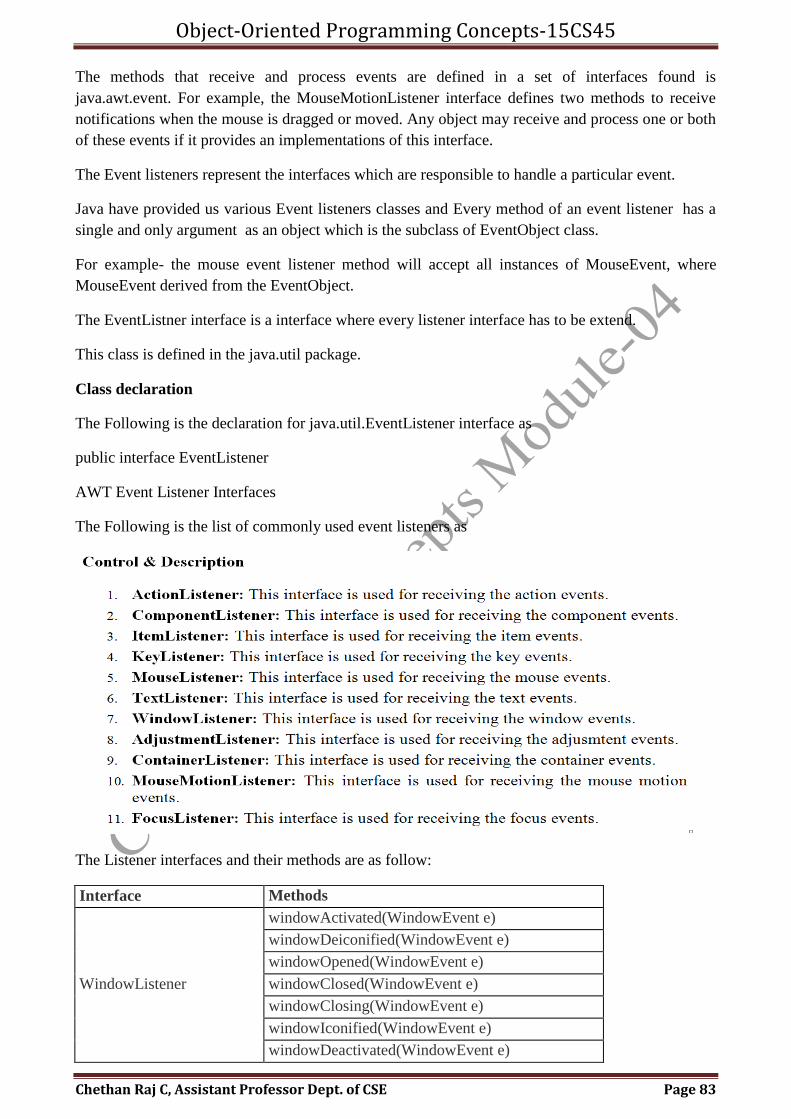
Object-Oriented Programming Concepts-15CS45
Chethan Raj C, Assistant Professor Dept. of CSE Page 83
The methods that receive and process events are defined in a set of interfaces found is
java.awt.event. For example, the MouseMotionListener interface defines two methods to receive
notifications when the mouse is dragged or moved. Any object may receive and process one or both
of these events if it provides an implementations of this interface.
The Event listeners represent the interfaces which are responsible to handle a particular event.
Java have provided us various Event listeners classes and Every method of an event listener has a
single and only argument as an object which is the subclass of EventObject class.
For example- the mouse event listener method will accept all instances of MouseEvent, where
MouseEvent derived from the EventObject.
The EventListner interface is a interface where every listener interface has to be extend.
This class is defined in the java.util package.
Class declaration
The Following is the declaration for java.util.EventListener interface as
public interface EventListener
AWT Event Listener Interfaces
The Following is the list of commonly used event listeners as
The Listener interfaces and their methods are as follow:
Interface Methods
WindowListener
windowActivated(WindowEvent e)
windowDeiconified(WindowEvent e)
windowOpened(WindowEvent e)
windowClosed(WindowEvent e)
windowClosing(WindowEvent e)
windowIconified(WindowEvent e)
windowDeactivated(WindowEvent e)
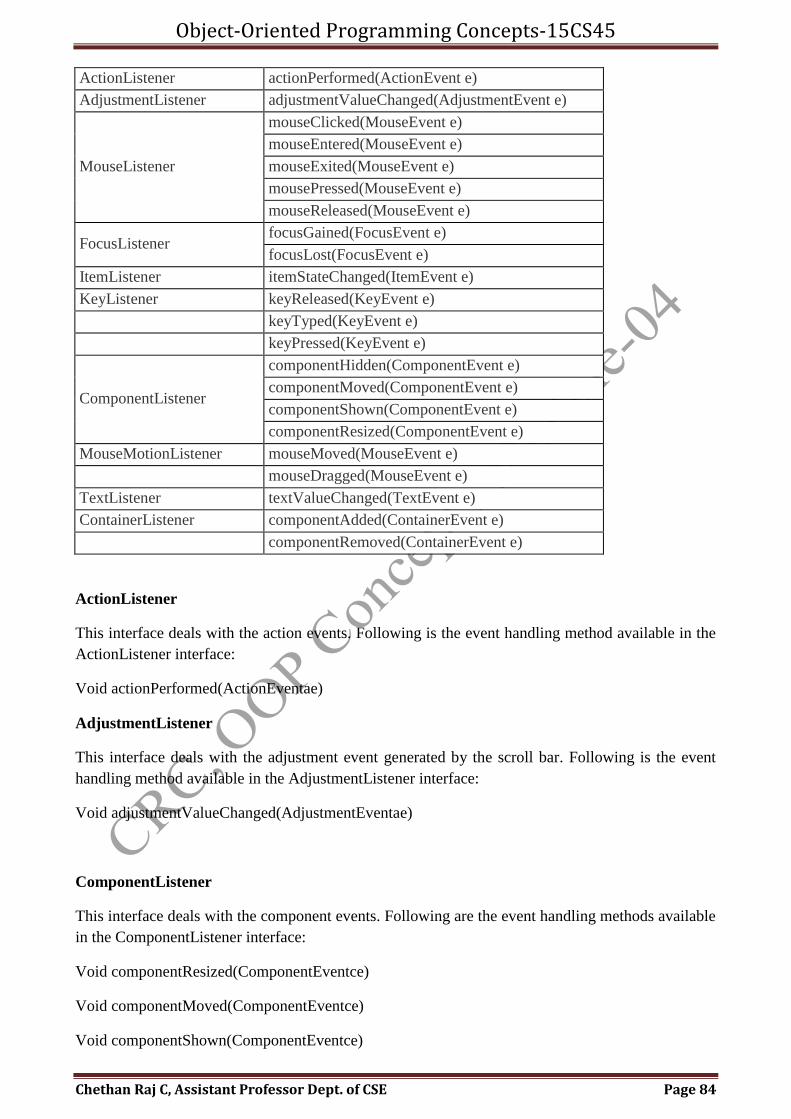
Object-Oriented Programming Concepts-15CS45
Chethan Raj C, Assistant Professor Dept. of CSE Page 84
ActionListener actionPerformed(ActionEvent e)
AdjustmentListener adjustmentValueChanged(AdjustmentEvent e)
MouseListener
mouseClicked(MouseEvent e)
mouseEntered(MouseEvent e)
mouseExited(MouseEvent e)
mousePressed(MouseEvent e)
mouseReleased(MouseEvent e)
FocusListener focusGained(FocusEvent e)
focusLost(FocusEvent e)
ItemListener itemStateChanged(ItemEvent e)
KeyListener keyReleased(KeyEvent e)
keyTyped(KeyEvent e)
keyPressed(KeyEvent e)
ComponentListener
componentHidden(ComponentEvent e)
componentMoved(ComponentEvent e)
componentShown(ComponentEvent e)
componentResized(ComponentEvent e)
MouseMotionListener mouseMoved(MouseEvent e)
mouseDragged(MouseEvent e)
TextListener textValueChanged(TextEvent e)
ContainerListener componentAdded(ContainerEvent e)
componentRemoved(ContainerEvent e)
ActionListener
This interface deals with the action events. Following is the event handling method available in the
ActionListener interface:
Void actionPerformed(ActionEventae)
AdjustmentListener
This interface deals with the adjustment event generated by the scroll bar. Following is the event
handling method available in the AdjustmentListener interface:
Void adjustmentValueChanged(AdjustmentEventae)
ComponentListener
This interface deals with the component events. Following are the event handling methods available
in the ComponentListener interface:
Void componentResized(ComponentEventce)
Void componentMoved(ComponentEventce)
Void componentShown(ComponentEventce)
Object-Oriented Programming Concepts-15CS45
Chethan Raj C, Assistant Professor Dept. of CSE Page 85
Void componentHidden(ComponentEventce)
ContainerListener
This interface deals with the events that can be generated on containers. Following are the event
handling methods available in the ContainerListener interface:
Void componentAdded(ContainerEventce)
Void componentRemoved(ContainerEventce)
FocusListener
This interface deals with focus events that can be generated on different components or containers.
Following are the event handling methods available in the FocusListener interface:
Void focusGained(FocusEventfe)
Void focusLost(FocusEventfe)
ItemListener
This interface deals with the item event. Following is the event handling method available in the
ItemListener interface:
Void itemStateChanged(ItemEventie)
KeyListener
This interface deals with the key events. Following are the event handling methods available in the
KeyListener interface:
Void keyPressed(KeyEventke)
Void keyReleased(KeyEventke)
Void keyTyped(KeyEventke)
MouseListener
This interface deals with five of the mouse events. Following are the event handling methods
available in the MouseListener interface:
Void mouseClicked(MouseEvent me)
Void mousePressed(MouseEvent me)
Void mouseReleased(MouseEvent me)
Void mouseEntered(MouseEvent me)
Void mouseExited(MouseEvent me)
MouseMotionListener
Object-Oriented Programming Concepts-15CS45
Chethan Raj C, Assistant Professor Dept. of CSE Page 86
This interface deals with two of the mouse events. Following are the event handling methods
available in the MouseMotionListener interface:
Void mouseMoved(MouseEvent me)
Void mouseDragged(MouseEvent me)
MouseWheelListener
This interface deals with the mouse wheel event. Following is the event handling method available
in the MouseWheelListener interface:
Void mouseWheelMoved(MouseWheelEventmwe)
TextListener
This interface deals with the text events. Following is the event handling method available in the
TextListener interface:
Void textValueChanged(TextEventte)
WindowFocusListener
This interface deals with the window focus events. Following are the event handling methods
available in the WindowFocusListener interface:
Void windowGainedFocus(WindowEvent we)
Void windowLostFocus(WindowEvent we)
WindowListener
This interface deals with seven of the window events. Following are the event handling methods
available in the WindowListener interface:
Void windowActivated(WindowEvent we)
Void windowDeactivated(WindowEvent we)
Void windowIconified(WindowEvent we)
Void windowDeiconified(WindowEvent we)
Void windowOpened(WindowEvent we)
Void windowClosed(WindowEvent we)
Void windowClosing(WindowEvent we)
some listeners handle the events of a few components, generally every component event is handled
by a separate listener. For example, the ActionListener handles the events of Button, TextField, List
and Menu. But these types are very rare.
Table giving list of few Java AWT Listeners and components whose events the listeners can handle.
Object-Oriented Programming Concepts-15CS45
Chethan Raj C, Assistant Professor Dept. of CSE Page 87
LISTENER INTERFACE COMPONENT
WindowListener Frame
ActionListener Button, TextField, List, Menu
ItemListener Checkbox, Choice, List
AdjustmentListener Scrollbar
MouseListener Mouse (stable)
MouseMotionListener Mouse (moving)
KeyListener Keyboard
Java ActionListener Interface
The Java ActionListener is notified whenever you click on the button or menu item. It is notified
against ActionEvent. The ActionListener interface is found in java.awt.event package. It has only
one method: actionPerformed().
actionPerformed() method
The actionPerformed() method is invoked automatically whenever you click on the registered
component.
1. public abstract void actionPerformed(ActionEvent e);
Java ActionListener Example: On Button click
importjava.awt.*;
importjava.awt.event.*;
public class ActionListenerExample {
public static void main(String[] args) {
Frame f=new Frame("ActionListener Example");
finalTextFieldtf=new TextField();
tf.setBounds(50,50, 150,20);
Button b=new Button("Click Here");
b.setBounds(50,100,60,30);
b.addActionListener(new ActionListener(){
public void actionPerformed(ActionEvent e){
Object-Oriented Programming Concepts-15CS45
Chethan Raj C, Assistant Professor Dept. of CSE Page 88
tf.setText("Welcome to Java.");
}
}
f.add(b);f.add(tf);
f.setSize(400,400);
f.setLayout(null);
f.setVisible(true);
}
}
Java MouseListener Interface
The Java MouseListener is notified whenever you change the state of mouse. It is notified against
MouseEvent. The MouseListener interface is found in java.awt.event package. It has five methods.
Methods of MouseListener interface
The signature of 5 methods found in MouseListener interface are given below:
public abstract void mouseClicked(MouseEvent e);
public abstract void mouseEntered(MouseEvent e);
public abstract void mouseExited(MouseEvent e);
public abstract void mousePressed(MouseEvent e);
public abstract void mouseReleased(MouseEvent e);
Java MouseListener Example
importjava.awt.*;
importjava.awt.event.*;
public class MouseListenerExample extends Frame implements MouseListener{
Label l;
MouseListenerExample(){
addMouseListener(this);
l=new Label();
l.setBounds(20,50,100,20);
add(l);
Object-Oriented Programming Concepts-15CS45
Chethan Raj C, Assistant Professor Dept. of CSE Page 89
setSize(300,300);
setLayout(null);
setVisible(true);
}
public void mouseClicked(MouseEvent e) {
l.setText("Mouse Clicked");
}
public void mouseEntered(MouseEvent e) {
l.setText("Mouse Entered");
}
public void mouseExited(MouseEvent e) {
l.setText("Mouse Exited");
}
public void mousePressed(MouseEvent e) {
l.setText("Mouse Pressed");
}
public void mouseReleased(MouseEvent e) {
l.setText("Mouse Released");
}
public static void main(String[] args) {
newMouseListenerExample();
}
}
Java MouseMotionListener Interface
The Java MouseMotionListener is notified whenever you move or drag mouse. It is notified against
MouseEvent. The MouseMotionListener interface is found in java.awt.event package. It has two
methods.
Methods of MouseMotionListener interface
Object-Oriented Programming Concepts-15CS45
Chethan Raj C, Assistant Professor Dept. of CSE Page 90
The signature of 2 methods found in MouseMotionListener interface are given below:
1. public abstract void mouseDragged(MouseEvent e);
2. public abstract void mouseMoved(MouseEvent e);
Java MouseMotionListener Example
import java.awt.*;
import java.awt.event.*;
public class MouseMotionListenerExample extends Frame implements MouseMotionListener{
MouseMotionListenerExample(){
addMouseMotionListener(this);
setSize(300,300);
setLayout(null);
setVisible(true);
}
public void mouseDragged(MouseEvent e) {
Graphics g=getGraphics();
g.setColor(Color.BLUE);
g.fillOval(e.getX(),e.getY(),20,20);
}
public void mouseMoved(MouseEvent e) {}
public static void main(String[] args) {
newMouseMotionListenerExample();
}
}
Java ItemListener Interface
The Java ItemListener is notified whenever you click on the checkbox. It is notified against
ItemEvent. The ItemListener interface is found in java.awt.event package. It has only one method:
itemStateChanged().
itemStateChanged() method
Object-Oriented Programming Concepts-15CS45
Chethan Raj C, Assistant Professor Dept. of CSE Page 91
The itemStateChanged() method is invoked automatically whenever you click or unclick on the
registered checkbox component.
1. public abstract void itemStateChanged(ItemEvent e);
Java ItemListener Example
import java.awt.*;
import java.awt.event.*;
public class ItemListenerExample implements ItemListener{
Checkbox checkBox1,checkBox2;
Label label;
ItemListenerExample(){
Frame f= new Frame("CheckBox Example");
label = new Label();
label.setAlignment(Label.CENTER);
label.setSize(400,100);
checkBox1 = new Checkbox("C++");
checkBox1.setBounds(100,100, 50,50);
checkBox2 = new Checkbox("Java");
checkBox2.setBounds(100,150, 50,50);
f.add(checkBox1); f.add(checkBox2); f.add(label);
checkBox1.addItemListener(this);
checkBox2.addItemListener(this);
f.setSize(400,400);
f.setLayout(null);
f.setVisible(true);
}
public void itemStateChanged(ItemEvent e) {
if(e.getSource()==checkBox1)
label.setText("C++ Checkbox: "
+ (e.getStateChange()==1?"checked":"unchecked"));
if(e.getSource()==checkBox2)
Object-Oriented Programming Concepts-15CS45
Chethan Raj C, Assistant Professor Dept. of CSE Page 92
label.setText("Java Checkbox: "
+ (e.getStateChange()==1?"checked":"unchecked"));
}
public static void main(String args[])
{
newItemListenerExample();
}
}
Java KeyListener Interface
The Java KeyListener is notified whenever you change the state of key. It is notified against
KeyEvent. The KeyListener interface is found in java.awt.event package. It has three methods.
Methods of KeyListener interface
The signature of 3 methods found in KeyListener interface are given below:
1. public abstract void keyPressed(KeyEvent e);
2. public abstract void keyReleased(KeyEvent e);
3. public abstract void keyTyped(KeyEvent e);
Java KeyListener Example
import java.awt.*;
import java.awt.event.*;
public class KeyListenerExample extends Frame implements KeyListener{
Label l;
TextArea area;
KeyListenerExample(){
l=new Label();
l.setBounds(20,50,100,20);
area=new TextArea();
area.setBounds(20,80,300, 300);
area.addKeyListener(this);
add(l);add(area);
setSize(400,400);
Object-Oriented Programming Concepts-15CS45
Chethan Raj C, Assistant Professor Dept. of CSE Page 93
setLayout(null);
setVisible(true);
}
public void keyPressed(KeyEvent e) {
l.setText("Key Pressed");
}
public void keyReleased(KeyEvent e) {
l.setText("Key Released");
}
public void keyTyped(KeyEvent e) {
l.setText("Key Typed");
}
public static void main(String[] args) {
newKeyListenerExample();
}
}
Java KeyListener Example 2: Count Words & Characters
importjava.awt.*;
importjava.awt.event.*;
public class KeyListenerExample extends Frame implements KeyListener{
Label l;
TextArea area;
KeyListenerExample(){
l=new Label();
l.setBounds(20,50,200,20);
area=new TextArea();
area.setBounds(20,80,300, 300);
area.addKeyListener(this);
Object-Oriented Programming Concepts-15CS45
Chethan Raj C, Assistant Professor Dept. of CSE Page 94
add(l);add(area);
setSize(400,400);
setLayout(null);
setVisible(true);
}
public void keyPressed(KeyEvent e) {}
public void keyReleased(KeyEvent e) {
String text=area.getText();
String words[]=text.split("\\s");
l.setText("Words: "+words.length+" Characters:"+text.length());
}
public void keyTyped(KeyEvent e) {}
public static void main(String[] args) {
newKeyListenerExample();
}
}
Java WindowListener Interface
The Java WindowListener is notified whenever user change the state of window. It is notified
against WindowEvent. The WindowListener interface is found in java.awt.event package.
The signature of 7 methods found in WindowListener interface are given below:
1. public abstract void windowActivated(WindowEvent e);
2. public abstract void windowClosed(WindowEvent e);
3. public abstract void windowClosing(WindowEvent e);
4. public abstract void windowDeactivated(WindowEvent e);
5. public abstract void windowDeiconified(WindowEvent e);
6. public abstract void windowIconified(WindowEvent e);
7 public abstract void windowOpened(WindowEvent e);
Java WindowListener Example
import java.awt.*;
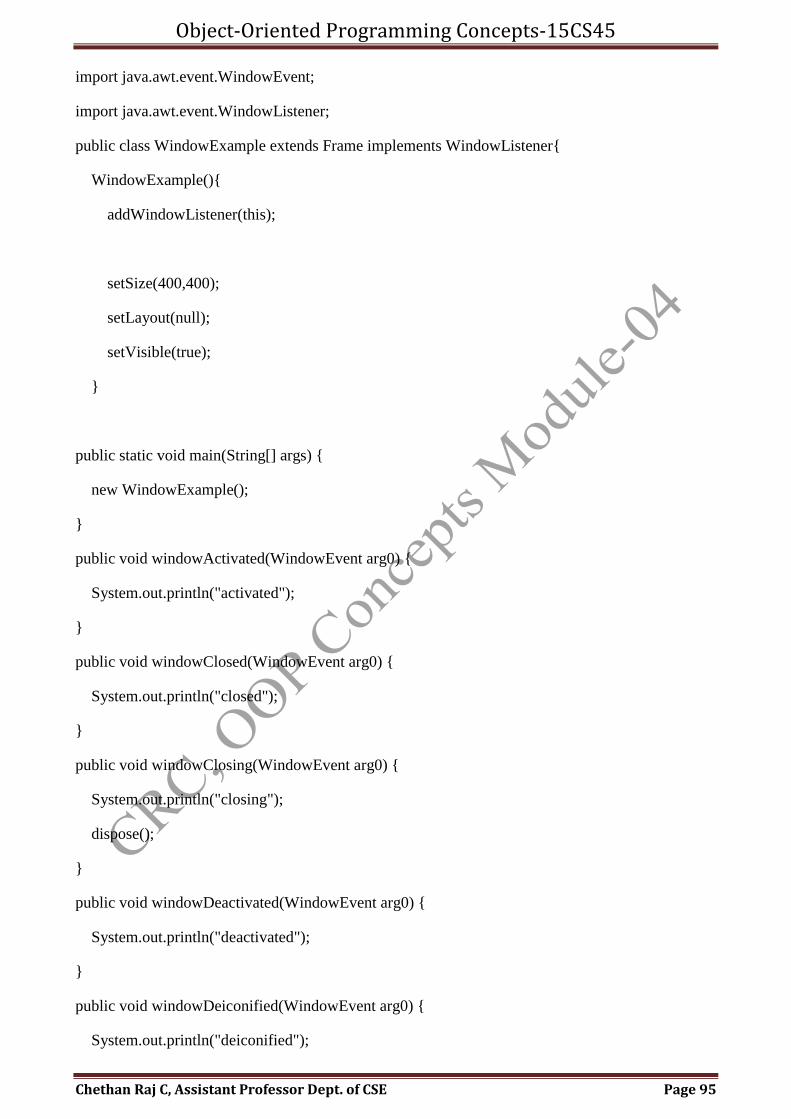
Object-Oriented Programming Concepts-15CS45
Chethan Raj C, Assistant Professor Dept. of CSE Page 95
import java.awt.event.WindowEvent;
import java.awt.event.WindowListener;
public class WindowExample extends Frame implements WindowListener{
WindowExample(){
addWindowListener(this);
setSize(400,400);
setLayout(null);
setVisible(true);
}
public static void main(String[] args) {
new WindowExample();
}
public void windowActivated(WindowEvent arg0) {
System.out.println("activated");
}
public void windowClosed(WindowEvent arg0) {
System.out.println("closed");
}
public void windowClosing(WindowEvent arg0) {
System.out.println("closing");
dispose();
}
public void windowDeactivated(WindowEvent arg0) {
System.out.println("deactivated");
}
public void windowDeiconified(WindowEvent arg0) {
System.out.println("deiconified");
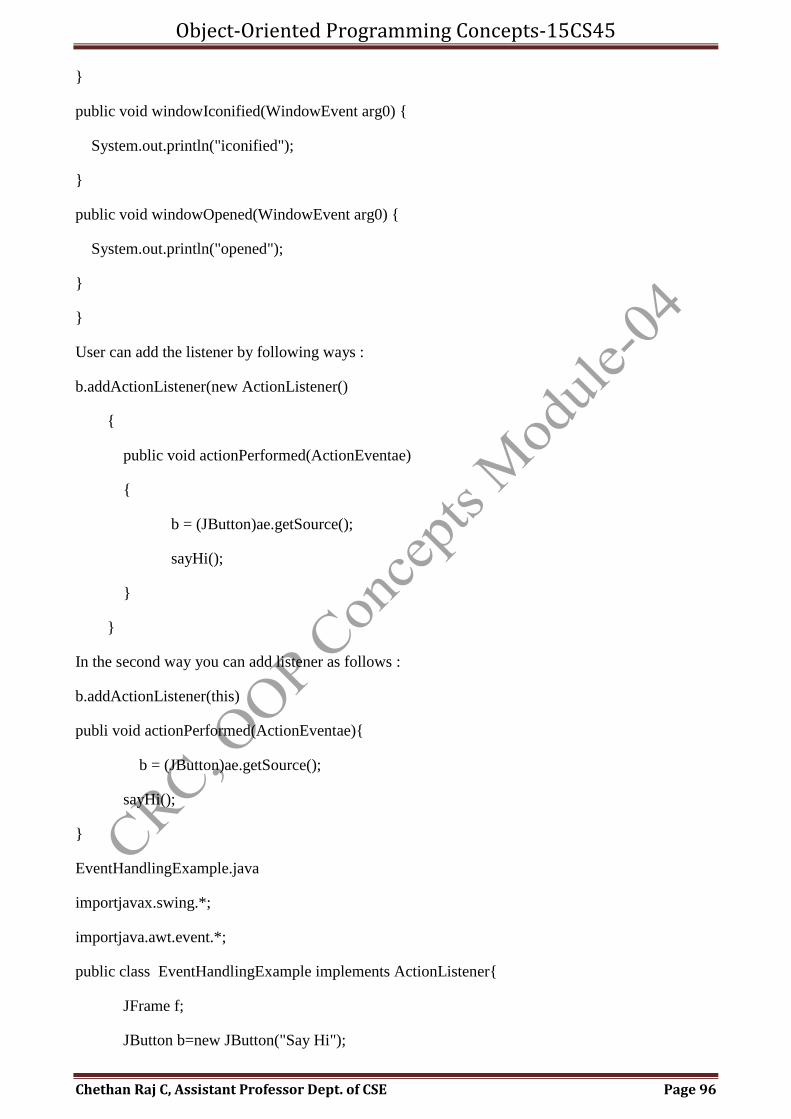
Object-Oriented Programming Concepts-15CS45
Chethan Raj C, Assistant Professor Dept. of CSE Page 96
}
public void windowIconified(WindowEvent arg0) {
System.out.println("iconified");
}
public void windowOpened(WindowEvent arg0) {
System.out.println("opened");
}
}
User can add the listener by following ways :
b.addActionListener(new ActionListener()
{
public void actionPerformed(ActionEventae)
{
b = (JButton)ae.getSource();
sayHi();
}
}
In the second way you can add listener as follows :
b.addActionListener(this)
publi void actionPerformed(ActionEventae){
b = (JButton)ae.getSource();
sayHi();
}
EventHandlingExample.java
importjavax.swing.*;
importjava.awt.event.*;
public class EventHandlingExample implements ActionListener{
JFrame f;
JButton b=new JButton("Say Hi");
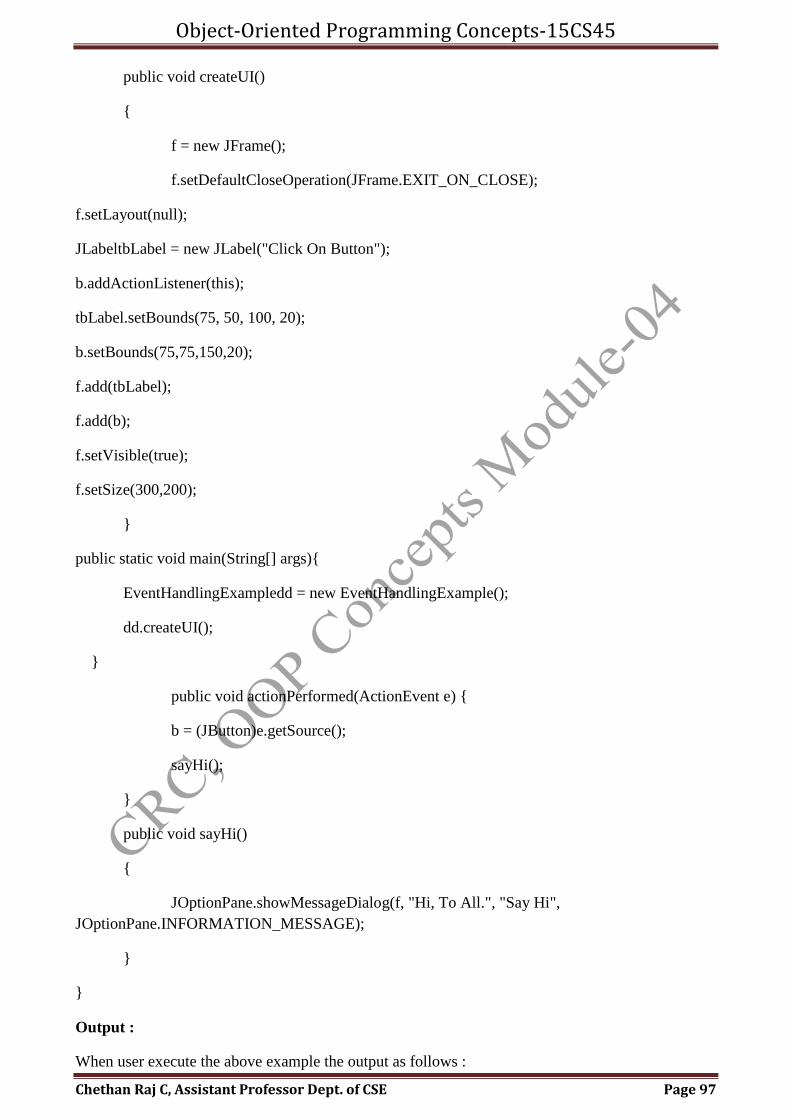
Object-Oriented Programming Concepts-15CS45
Chethan Raj C, Assistant Professor Dept. of CSE Page 97
public void createUI()
{
f = new JFrame();
f.setDefaultCloseOperation(JFrame.EXIT_ON_CLOSE);
f.setLayout(null);
JLabeltbLabel = new JLabel("Click On Button");
b.addActionListener(this);
tbLabel.setBounds(75, 50, 100, 20);
b.setBounds(75,75,150,20);
f.add(tbLabel);
f.add(b);
f.setVisible(true);
f.setSize(300,200);
}
public static void main(String[] args){
EventHandlingExampledd = new EventHandlingExample();
dd.createUI();
}
public void actionPerformed(ActionEvent e) {
b = (JButton)e.getSource();
sayHi();
}
public void sayHi()
{
JOptionPane.showMessageDialog(f, "Hi, To All.", "Say Hi",
JOptionPane.INFORMATION_MESSAGE);
}
}
Output :
When user execute the above example the output as follows :
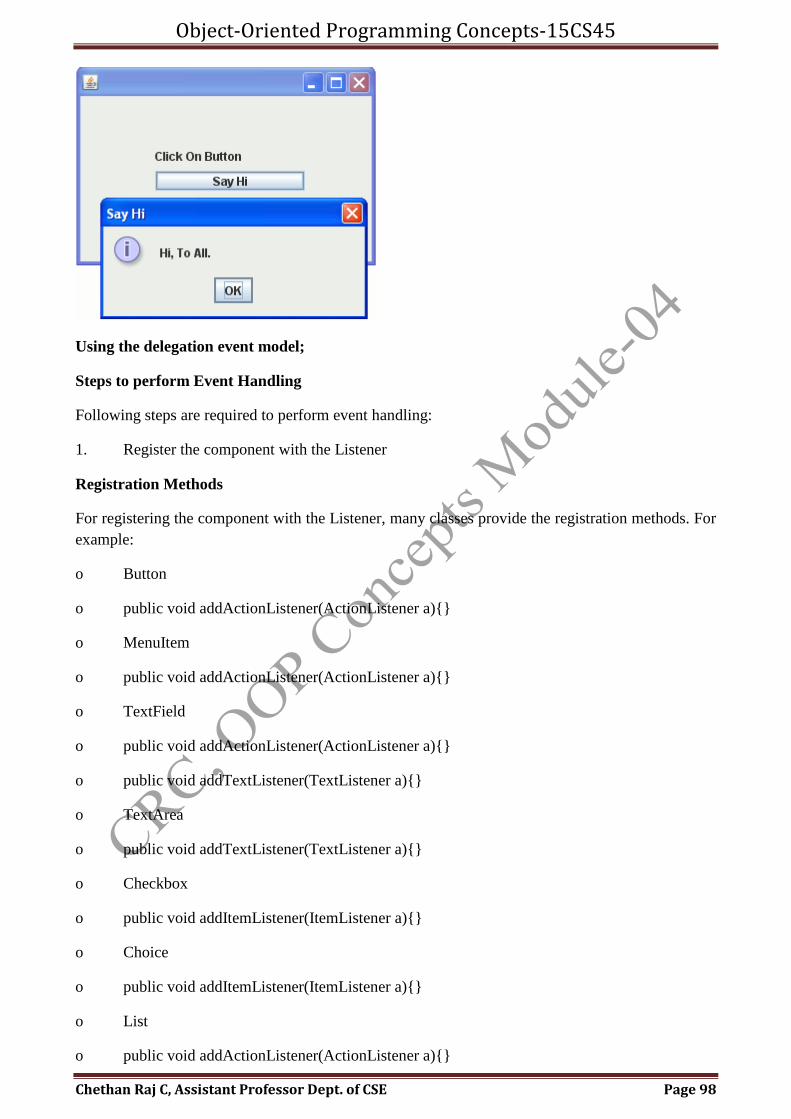
Object-Oriented Programming Concepts-15CS45
Chethan Raj C, Assistant Professor Dept. of CSE Page 98
Using the delegation event model;
Steps to perform Event Handling
Following steps are required to perform event handling:
1. Register the component with the Listener
Registration Methods
For registering the component with the Listener, many classes provide the registration methods. For
example:
o Button
o public void addActionListener(ActionListener a){}
o MenuItem
o public void addActionListener(ActionListener a){}
o TextField
o public void addActionListener(ActionListener a){}
o public void addTextListener(TextListener a){}
o TextArea
o public void addTextListener(TextListener a){}
o Checkbox
o public void addItemListener(ItemListener a){}
o Choice
o public void addItemListener(ItemListener a){}
o List
o public void addActionListener(ActionListener a){}
Object-Oriented Programming Concepts-15CS45
Chethan Raj C, Assistant Professor Dept. of CSE Page 99
o public void addItemListener(ItemListener a){}
Inner classes.
An inner class is a class which is defined inside another class. The inner class can access all the
members of an outer class, but vice-versa is not true. The mouse event handling program which was
simplified using adapter classes can further be simplified using inner classes.
The inner classes in event handling
An inner class is a class which is defined inside another class. The inner class can access all the
members of an outer class, but vice-versa is not true. The mouse event handling program which was
simplified using adapter classes can further be simplified using inner classes.
Following is a Java program which handles the mouse click event using inner class and adapter
class:
import javax.swing.*;
importjava.awt.*;
import java.awt.event.*;
public class MyApplet extends JApplet
{
JLabel label;
public void init()
{
setSize(600,300);
setLayout(new FlowLayout());
label = new JLabel();
add(label);
addMouseListener(new MyAdapter());
}
classMyAdapter extends MouseAdapter
{
public void mouseClicked(MouseEvent me)
{
label.setText(“Mouse is clicked”);
}
Object-Oriented Programming Concepts-15CS45
Chethan Raj C, Assistant Professor Dept. of CSE Page 100
}
}
In the above example, the class MyAdapter is the inner class which has been declared inside the
outer class MyApplet.
Java inner class event handling by implementing ActionListener
import java.awt.*;
import java.awt.event.*;
class AEvent extends Frame implements ActionListener
{
TextField tf;
AEvent()
{
//create components
tf=new TextField();
tf.setBounds(60,50,170,20);
Button b=new Button("click me");
b.setBounds(100,120,80,30);
//register listener
b.addActionListener(this);//passing current instance
//add components and set size, layout and visibility
add(b);add(tf);
setSize(300,300);
setLayout(null);
setVisible(true);
}
public void actionPerformed(ActionEvent e)
{
tf.setText("Welcome");
}
public static void main(String args[])
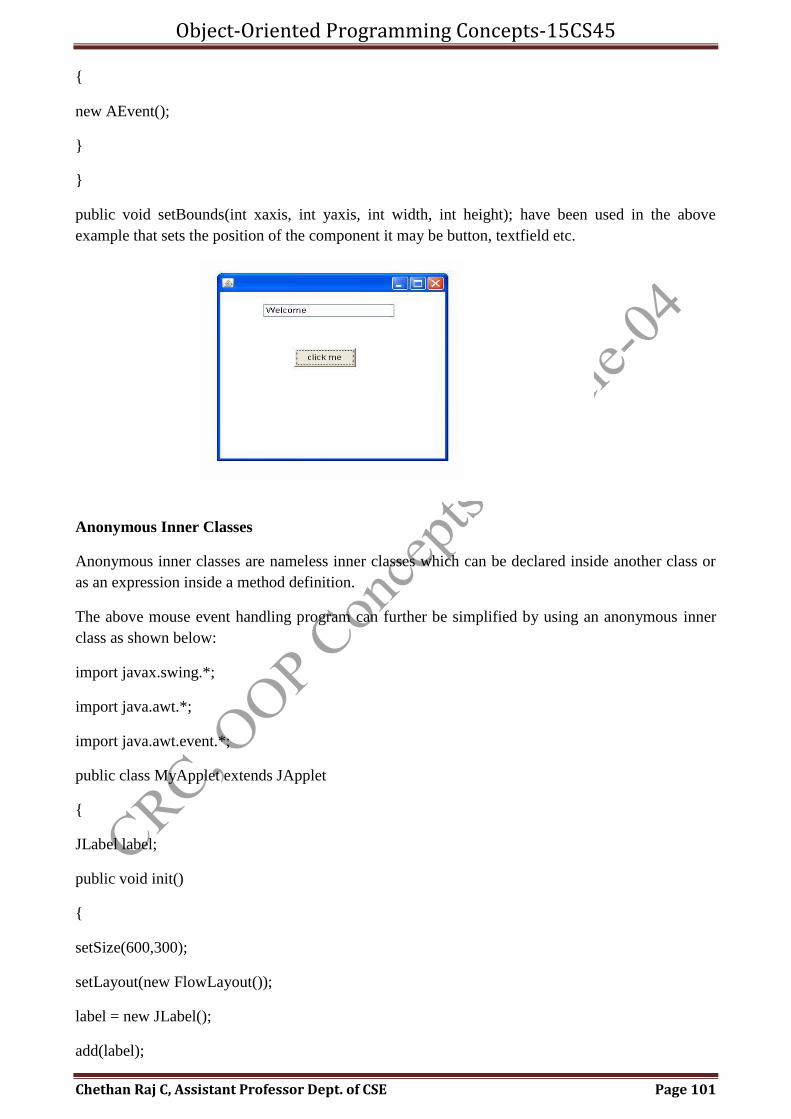
Object-Oriented Programming Concepts-15CS45
Chethan Raj C, Assistant Professor Dept. of CSE Page 101
{
new AEvent();
}
}
public void setBounds(int xaxis, int yaxis, int width, int height); have been used in the above
example that sets the position of the component it may be button, textfield etc.
Anonymous Inner Classes
Anonymous inner classes are nameless inner classes which can be declared inside another class or
as an expression inside a method definition.
The above mouse event handling program can further be simplified by using an anonymous inner
class as shown below:
import javax.swing.*;
import java.awt.*;
import java.awt.event.*;
public class MyApplet extends JApplet
{
JLabel label;
public void init()
{
setSize(600,300);
setLayout(new FlowLayout());
label = new JLabel();
add(label);
Object-Oriented Programming Concepts-15CS45
Chethan Raj C, Assistant Professor Dept. of CSE Page 102
addMouseListener(new MouseAdapter()
{
public void mouseClicked(MouseEvent me)
{
label.setText(“Mouse is clicked”);
}
}
}
}
In the above program, the syntax new MouseAdapter() {…} says to the compiler that the code
written in between the braces represents an anonymous inner class and it extends the class
MouseAdapter.
Whenever the line addMouseListener… executes, Java run-time system automatically creates the
instance of anonymous inner class.
Anonymous Inner class with Listeners Adapters
Anonymous inner classes is to make event handling simpler and easier. With inner classes, forget
the laborious days of implementing listeners and extending adapters classes. Now the code comes
right at the place of linking the listener with the component in the constructor itself.
Two programs are given (using Anonymous Inner class with Listeners Adapters) one on window
closing and one on button event handling using anonymous inner classes.
In the following program, frame is closed using anonymous inner class of WindowListener
import java.awt.*;
import java.awt.event.*;
public class SimpleFrameClosing extends Frame // No implements WindowListener
{ // to close the Frame
Public SimpleFrameClosing()
{
addWindowListener(new WindowAdapter()
{
public void windowClosing(WindowEvent e)
{
System.out.println("Thank U, Window is Now Closed");
Object-Oriented Programming Concepts-15CS45
Chethan Raj C, Assistant Professor Dept. of CSE Page 103
System.exit(0);
}
}
setSize(300, 300);
setVisible(true);
}
public static void main(String args[])
{
newSimpleFrameClosing();
}
}
addWindowListener() is a method of class Window inherited by Frame. Here "new
WindowAdapter()" is an anonymous class of WindowAdapter.
Anonymous inner class with Listener
In the following code, button event handling is done with anonymous inner class of ActionListener.
import java.awt.*;
import java.awt.event.*;
public class AdapterWithAnonymous extends Frame // No implements ActionListener
{
Button btn;
Public AdapterWithAnonymous()
{
setLayout(new FlowLayout());
btn = new Button("Click for Red");
add(btn);
btn.addActionListener(new ActionListener()
{
public void actionPerformed(ActionEvent e)
{
System.out.println("Your click is Successful");
Object-Oriented Programming Concepts-15CS45
Chethan Raj C, Assistant Professor Dept. of CSE Page 104
setBackground(Color.red);
}
}
setSize(300, 300);
setVisible(true);
}
public static void main(String args[])
{
newAdapterWithAnonymous();
}
}
addActionListener() is a method of class Button. Here "new ActionListener()" is an anonymous
inner class of ActionListener. The event handling code comes in the constructor itself.
PopupMenu
A PopupMenu is similar to a Menu as it contains MenuItem objects. The Pop-up Menu can be
popped over any component while generating the appropriate mouse event rather than letting it
appear at the top of a Frame. Menu class can only be added to a Frame and not to the Applet. To
add it to the Applet need to use the Swing component set.
import java.awt.*;
import java.awt.event.*;
class PopupMenuExample
{
PopupMenuExample(){
final Frame f= new Frame("PopupMenu Example");
final PopupMenu popupmenu = new PopupMenu("Edit");
MenuItem cut = new MenuItem("Cut");
cut.setActionCommand("Cut");
MenuItem copy = new MenuItem("Copy");
copy.setActionCommand("Copy");
MenuItem paste = new MenuItem("Paste");
paste.setActionCommand("Paste");
Object-Oriented Programming Concepts-15CS45
Chethan Raj C, Assistant Professor Dept. of CSE Page 105
popupmenu.add(cut);
popupmenu.add(copy);
popupmenu.add(paste);
f.addMouseListener(new MouseAdapter() {
public void mouseClicked(MouseEvent e) {
popupmenu.show(f , e.getX(), e.getY());
}
});
f.add(popupmenu);
f.setSize(400,400);
f.setLayout(null);
f.setVisible(true);
}
public static void main(String args[])
{
new PopupMenuExample();
}
}
Object-Oriented Programming Concepts-15CS45
Chethan Raj C, Assistant Professor Dept. of CSE Page 106
Menus
User can also develop an application with a Menu. As a name indicates a Menu consists of Menu
objects. These Menu objects comprise of MenuItem objects which can be selected by the user with
a click of a mouse. A MenuItem may be a String, checkbox, separator, menu etc.
Following are the steps to to add menus to any Frame:
1. User need to create a MenuBar first with the help of the following method.
MenuBarmb = new MenuBar();
2. Then user need to create a Menu using Menu m = new Menu("File");.
3. Now the MenuItem options can be added to the Menu from top to bottom, using the following
methods.
mi.add(new MenuItem("Open"));
mi.add(new CheckboxMenuItem("Type here"));
4. Now user can add the Menu to the MenuBar from left to right using mi.add(m);.
5. Finally, user need to add the MenuBar to the Frame by calling the setMenuBar() method.
The program code given below, creates an application window with a menu bar.
Object-Oriented Programming Concepts-15CS45
Chethan Raj C, Assistant Professor Dept. of CSE Page 107
To create menus, the java.awt package comes with mainly four classes – MenuBar, Menu,
MenuItem and CheckboxMenuItem. All these four classes are not AWT components as they are not
subclasses of java.awt.Component class. Infact, they are subclasses of java.awt.MenuComponent
which is is no way connected in the hierarchy with Component class.
MenuBar: MenuBar holds the menus. MenuBar is added to frame with setMenuBar() method.
Implicitly, the menu bar is added to the north (top) of the frame. MenuBar cannot be added to other
sides like south and west etc.
Menu: Menu holds the menu items. Menu is added to frame with add() method. A sub-menu can be
added to Menu.
MenuItem: MenuItem displays the actual option user can select. Menu items are added to menu
with method addMenuItem(). A dull-colored line can be added in between menu items with
addSeparator() method. The dull-colored line groups (or separates from other) menu items with
similar functionality like cut, copy and paste.
CheckboxMenuItem: It differs from MenuItem in that it appears along with a checkbox. The
selection can be done with checkbox selected.
Following is a simple Menus Java program with just two menus added with few menu items. User
selection is displayed at DOS prompt.
import java.awt.*;
import java.awt.event.*;
public class SimpleMenuExample extends Frame implements ActionListener
{
Menu states, cities;
public SimpleMenuExample()
{
MenuBar mb = new MenuBar(); // begin with creating menu bar
setMenuBar(mb); // add menu bar to frame
states = new Menu("Indian States"); // create menus
cities = new Menu("Indian Cities");
mb.add(states); // add menus to menu bar
mb.add(cities);
states.addActionListener(this); // link with ActionListener for event handling
cities.addActionListener(this);
states.add(new MenuItem("Himachal Pradesh"));
Object-Oriented Programming Concepts-15CS45
Chethan Raj C, Assistant Professor Dept. of CSE Page 108
states.add(new MenuItem("Rajasthan"));
states.add(new MenuItem("West Bengal"));
states.addSeparator();// separates from north Indian states from south Indian
states.add(new MenuItem("Andhra Pradesh"));
states.add(new MenuItem("Tamilnadu"));
states.add(new MenuItem("Karnataka"));
cities.add(new MenuItem("Delhi"));
cities.add(new MenuItem("Jaipur"));
cities.add(new MenuItem("Kolkata"));
cities.addSeparator(); // separates north Indian cities from south Indian
cities.add(new MenuItem("Hyderabad"));
cities.add(new MenuItem("Chennai"));
cities.add(new MenuItem("Bengaluru"));
setTitle("Simple Menu Program"); // frame creation methods
setSize(300, 300);
setVisible(true);
}
public void actionPerformed(ActionEvent e)
{
String str = e.getActionCommand();// know the menu item selected by the user
System.out.println("You selected " + str);
}
public static void main(String args[])
{
new SimpleMenuExample();
}
}
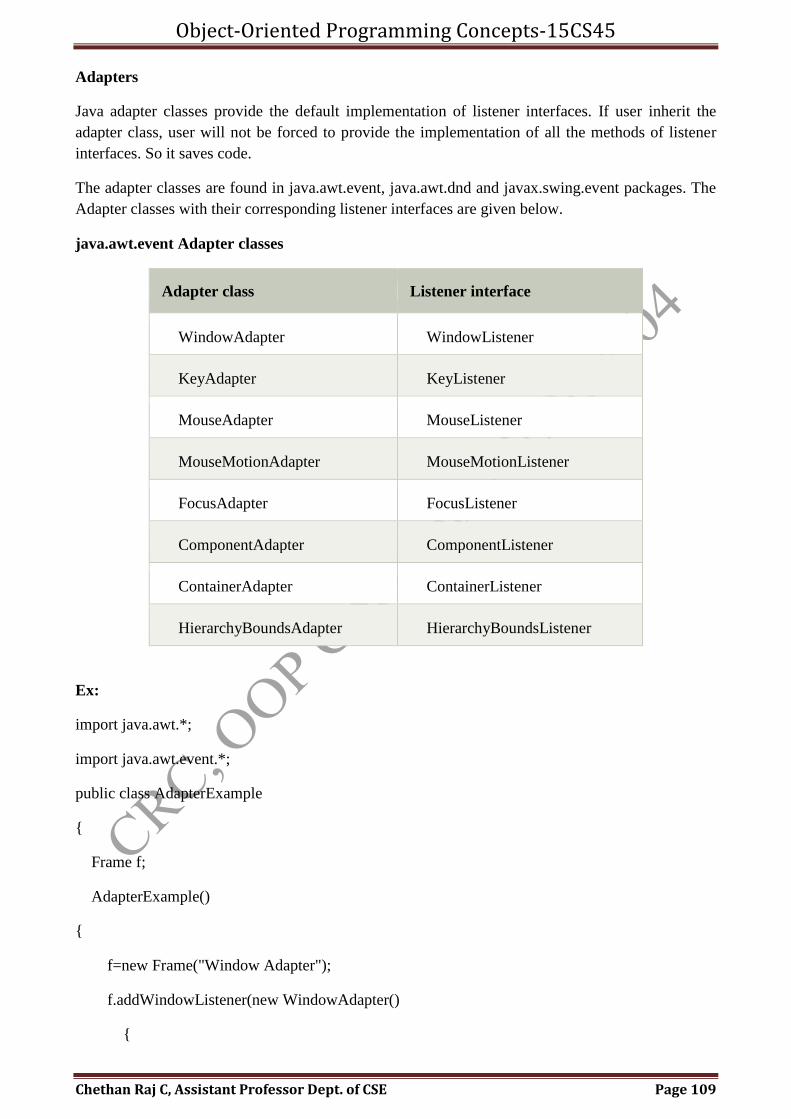
Object-Oriented Programming Concepts-15CS45
Chethan Raj C, Assistant Professor Dept. of CSE Page 109
Adapters
Java adapter classes provide the default implementation of listener interfaces. If user inherit the
adapter class, user will not be forced to provide the implementation of all the methods of listener
interfaces. So it saves code.
The adapter classes are found in java.awt.event, java.awt.dnd and javax.swing.event packages. The
Adapter classes with their corresponding listener interfaces are given below.
java.awt.event Adapter classes
Adapter class Listener interface
WindowAdapter WindowListener
KeyAdapter KeyListener
MouseAdapter MouseListener
MouseMotionAdapter MouseMotionListener
FocusAdapter FocusListener
ComponentAdapter ComponentListener
ContainerAdapter ContainerListener
HierarchyBoundsAdapter HierarchyBoundsListener
Ex:
import java.awt.*;
import java.awt.event.*;
public class AdapterExample
{
Frame f;
AdapterExample()
{
f=new Frame("Window Adapter");
f.addWindowListener(new WindowAdapter()
{
Object-Oriented Programming Concepts-15CS45
Chethan Raj C, Assistant Professor Dept. of CSE Page 110
public void windowClosing(WindowEvent e)
{
f.dispose();
}
});
f.setSize(400,400);
f.setLayout(null);
f.setVisible(true);
}
public static void main(String[] args)
{
new AdapterExample();
}
}
Output:
C:javac AdapterExample.java
C:java AdapterExample
Java MouseAdapter Example
import java.awt.*;
import java.awt.event.*;
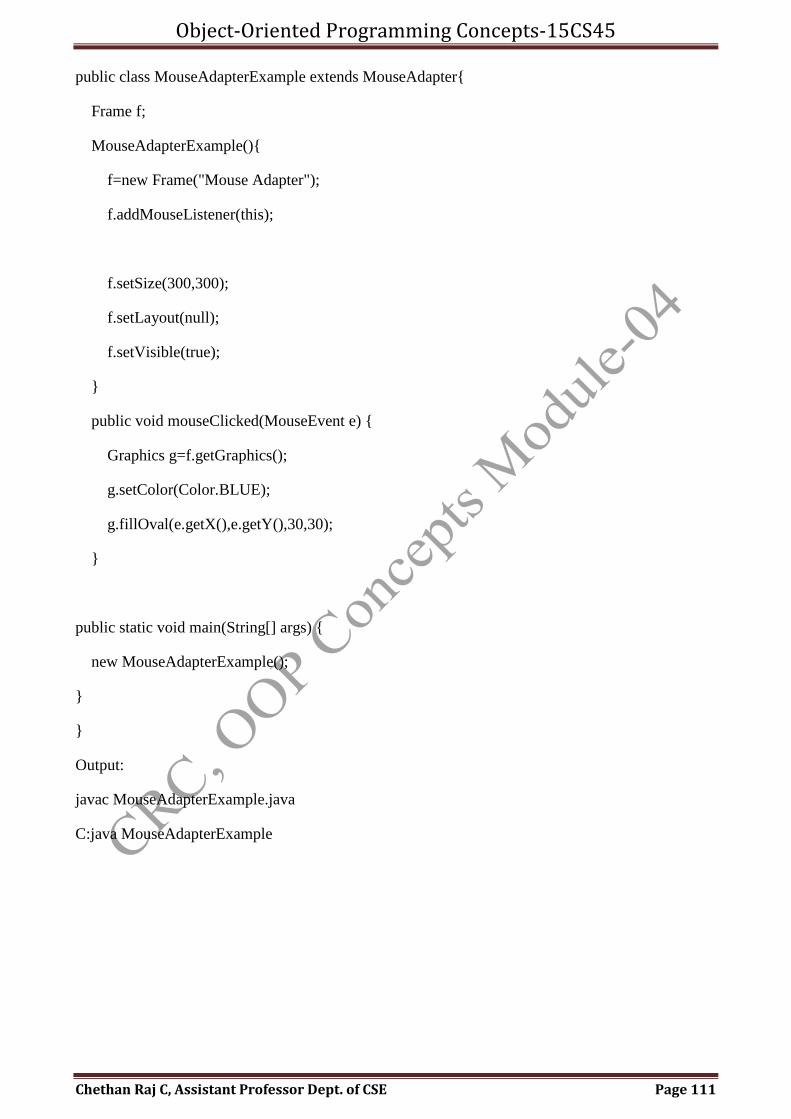
Object-Oriented Programming Concepts-15CS45
Chethan Raj C, Assistant Professor Dept. of CSE Page 111
public class MouseAdapterExample extends MouseAdapter{
Frame f;
MouseAdapterExample(){
f=new Frame("Mouse Adapter");
f.addMouseListener(this);
f.setSize(300,300);
f.setLayout(null);
f.setVisible(true);
}
public void mouseClicked(MouseEvent e) {
Graphics g=f.getGraphics();
g.setColor(Color.BLUE);
g.fillOval(e.getX(),e.getY(),30,30);
}
public static void main(String[] args) {
new MouseAdapterExample();
}
}
Output:
javac MouseAdapterExample.java
C:java MouseAdapterExample
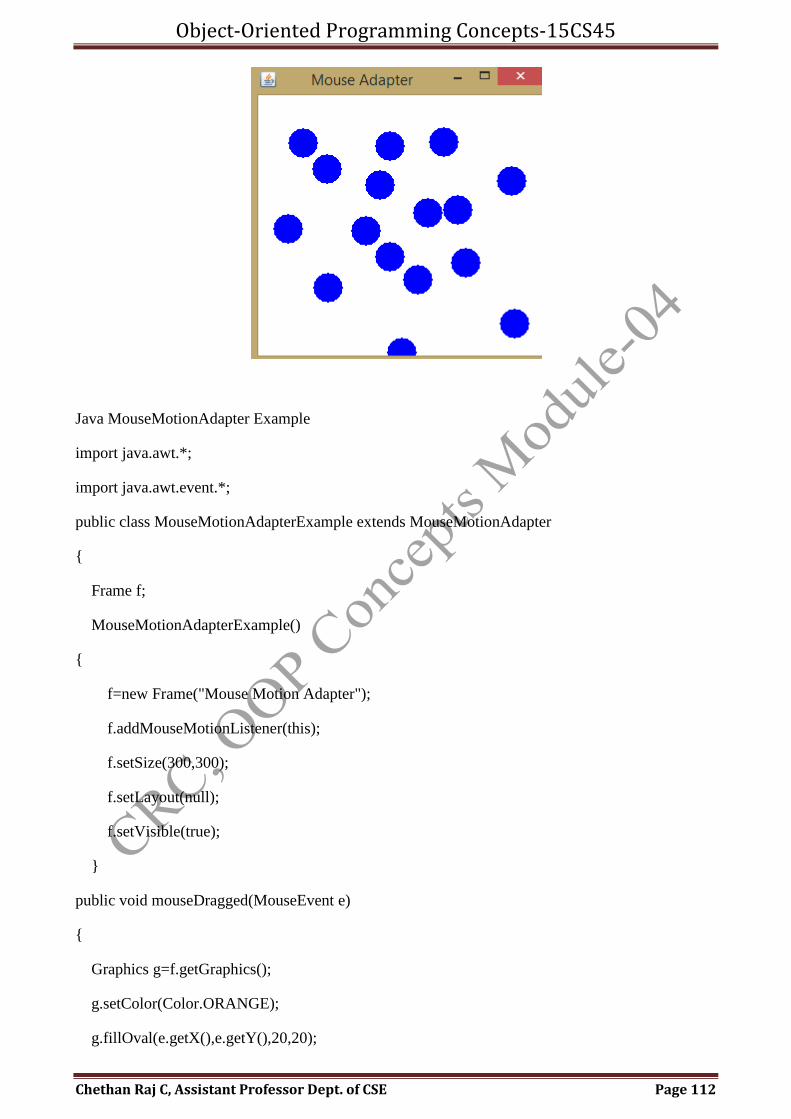
Object-Oriented Programming Concepts-15CS45
Chethan Raj C, Assistant Professor Dept. of CSE Page 112
Java MouseMotionAdapter Example
import java.awt.*;
import java.awt.event.*;
public class MouseMotionAdapterExample extends MouseMotionAdapter
{
Frame f;
MouseMotionAdapterExample()
{
f=new Frame("Mouse Motion Adapter");
f.addMouseMotionListener(this);
f.setSize(300,300);
f.setLayout(null);
f.setVisible(true);
}
public void mouseDragged(MouseEvent e)
{
Graphics g=f.getGraphics();
g.setColor(Color.ORANGE);
g.fillOval(e.getX(),e.getY(),20,20);
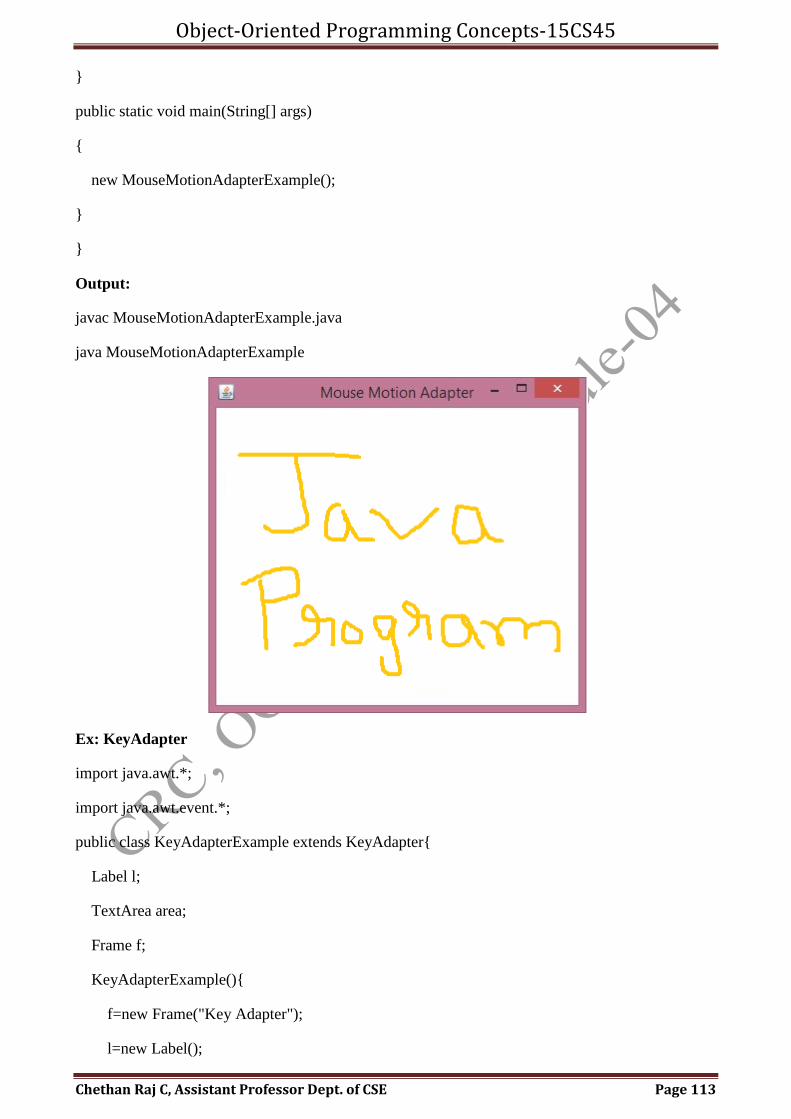
Object-Oriented Programming Concepts-15CS45
Chethan Raj C, Assistant Professor Dept. of CSE Page 113
}
public static void main(String[] args)
{
new MouseMotionAdapterExample();
}
}
Output:
javac MouseMotionAdapterExample.java
java MouseMotionAdapterExample
Ex: KeyAdapter
import java.awt.*;
import java.awt.event.*;
public class KeyAdapterExample extends KeyAdapter{
Label l;
TextArea area;
Frame f;
KeyAdapterExample(){
f=new Frame("Key Adapter");
l=new Label();
Object-Oriented Programming Concepts-15CS45
Chethan Raj C, Assistant Professor Dept. of CSE Page 114
l.setBounds(20,50,200,20);
area=new TextArea();
area.setBounds(20,80,300, 300);
area.addKeyListener(this);
f.add(l);f.add(area);
f.setSize(400,400);
f.setLayout(null);
f.setVisible(true);
}
public void keyReleased(KeyEvent e) {
String text=area.getText();
String words[]=text.split("\\s");
l.setText("Words: "+words.length+" Characters:"+text.length());
}
public static void main(String[] args) {
new KeyAdapterExample();
}
}
Output:
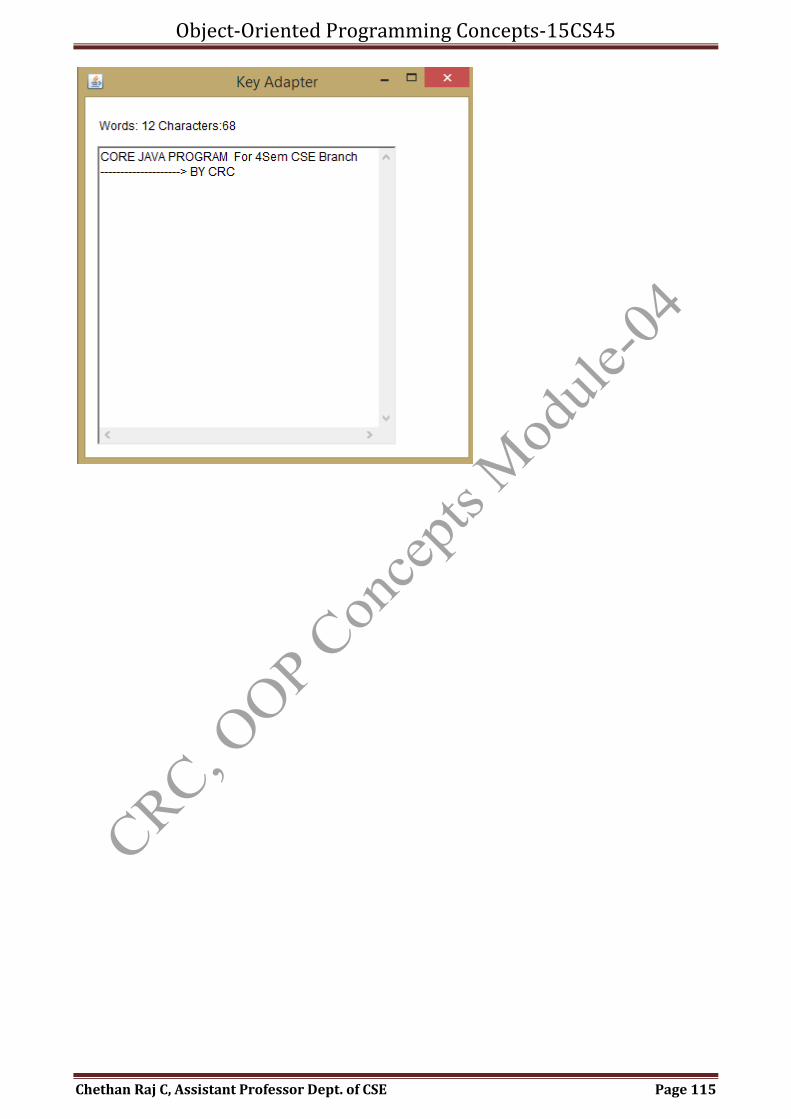
Object-Oriented Programming Concepts-15CS45
Chethan Raj C, Assistant Professor Dept. of CSE Page 115