oit documentation style guide - indian health service€¦ · · 2012-03-12documentation style...
TRANSCRIPT

Secti
Indian Health Service
OIT Standards and Conventions Documentation Style Guide
Version 3.0
March 2012
October 2011 Office of Information Technology (OIT)
Division of Information Resource Management Albuquerque, New Mexico
OIT Standards and Conventions Version 3.0
Documentation Style Guide Document Information March 2012
ii
Document Information
Exceptions to this Procedure None
Automatic Rescission Date This document will be rescinded three years from the date of approval.
Review This document will be reviewed annually to maintain its currency.
Supersedes Version 2.0, dated November 2010
Approval This Standard Operating Procedure (SOP) has been approved for distribution and implementation. These new procedures are effective immediately and will be enforced. Representatives of management will be authorized to conduct periodic quality checks and audits to assure compliance with these procedures. Requests for corrections or changes to any procedures must be sent to the IHS CISO. Exceptions or exemptions to any of these procedures must be submitted in writing to the IHS CISO for approval or disapproval using the appropriate policy waiver form.
Approved by:
Standards and Conventions Committee February 27, 2012
Name Date

OIT Standards and Conventions Version 3.0
Documentation Style Guide Table of Contents March 2012
iii
Table of Contents
1.0 Introduction ...............................................................................................1
2.0 Usability Guidelines .................................................................................2 2.1 Eliminate Superfluous Information .................................................2 2.2 Create Consistent Structures .........................................................2 2.3 Use Modular Information Blocks ....................................................3 2.4 Use Consistent Language .............................................................3 2.5 Use Consistent Typographic Conventions .....................................4 2.6 Consider Translatability .................................................................4
2.6.1 Grammar .....................................................................................4 2.6.2 Gerunds .......................................................................................4
2.7 Consider Cultural Differences ........................................................4
3.0 General ......................................................................................................5 3.1 Compliance with Section 508 Guidelines .......................................5
3.1.1 Styles and Templates ..................................................................5 3.1.2 Carriage Returns (Hard Returns) .................................................5 3.1.3 Color and Backgrounds ...............................................................6 3.1.4 Wingdings ....................................................................................6 3.1.5 Alt Text ........................................................................................7
3.2 Optimizing the Configuration of Microsoft Word 2010....................7 3.2.1 Add Commands to the Quick Access Toolbar .............................7 3.2.2 Show Rulers ................................................................................8 3.2.3 Show Text Boundaries and Field Shading ...................................8 3.2.4 Change AutoCorrect Options.......................................................9 3.2.5 Display Formatting Marks ............................................................9
3.3 Using Word’s Review and Edit Features ..................................... 10 3.3.1 Comments ................................................................................. 10 3.3.2 Track Changes .......................................................................... 10
4.0 Document Conventions ......................................................................... 12 4.1 OIT Document Templates ............................................................ 12
4.1.1 Using an OIT Document Template ............................................ 12 4.1.2 Using Styles in OIT Document Templates ................................. 13 4.1.3 Using Fields in OIT Document Templates ................................. 15
4.2 Page Dimensions......................................................................... 15 4.3 Margins ........................................................................................ 15 4.4 Page Headers and Footers .......................................................... 15 4.5 Page Numbering .......................................................................... 16
5.0 Document Sections ................................................................................ 17 5.1 Order of Sections ......................................................................... 17 5.2 Title Page .................................................................................... 17
5.2.1 Release Dates ........................................................................... 18

OIT Standards and Conventions Version 3.0
Documentation Style Guide Table of Contents March 2012
iv
5.2.2 Version and Patch Number ....................................................... 18 5.3 Table of Contents ........................................................................ 19
5.3.1 Updating the Table of Contents ................................................. 20 5.3.2 Dos and Don’ts .......................................................................... 20
5.4 Preface Section ........................................................................... 20 5.5 Introduction Section ..................................................................... 21 5.6 Appendix Section ......................................................................... 22
5.6.1 Referring to Multiple Appendixes ............................................... 22 5.6.2 Content of Appendixes .............................................................. 22 5.6.3 Appendix Title ............................................................................ 22 5.6.4 Appendix Location ..................................................................... 23 5.6.5 RPMS Rules of Behavior ........................................................... 23
5.7 Glossary Section.......................................................................... 23 5.8 Acronym List Section ................................................................... 23 5.9 Contact Information Section ........................................................ 24
6.0 Section and Page Breaks ....................................................................... 25 6.1 Section Breaks ............................................................................ 25
6.1.1 Deleting a Document Part or Section ........................................ 25 6.1.2 Forcing Odd and Even Start Pages ........................................... 26
6.2 Page Breaks before Section Headings ........................................ 26 6.3 Hard Page Breaks ....................................................................... 27 6.4 Page Breaks in Tables ................................................................. 27
6.4.1 Repeated Header Rows ............................................................ 27 6.4.2 Page Breaks within Table Rows ................................................ 27
7.0 Text Properties ....................................................................................... 29 7.1 Text Alignment ............................................................................. 29 7.2 Text Spacing ................................................................................ 29
7.2.1 Paragraph Spacing .................................................................... 29 7.2.2 List Item Spacing ....................................................................... 30
7.3 Text Font ..................................................................................... 30 7.3.1 Standard Paragraph Text .......................................................... 30 7.3.2 Italic Type .................................................................................. 31 7.3.3 Underlined Type ........................................................................ 31 7.3.4 Bold Type .................................................................................. 31 7.3.5 Heading Font and Alignment ..................................................... 31
7.4 Capitalization ............................................................................... 32 7.4.1 Captions .................................................................................... 32 7.4.2 Window Parts ............................................................................ 33 7.4.3 Key Names ................................................................................ 33 7.4.4 RPMS Package Names and Namespaces ................................ 33 7.4.5 Field Names .............................................................................. 33 7.4.6 File Names ................................................................................ 33 7.4.7 Option Names ............................................................................ 33
7.5 Punctuation .................................................................................. 34

OIT Standards and Conventions Version 3.0
Documentation Style Guide Table of Contents March 2012
v
7.5.1 Brackets .................................................................................... 34 7.5.2 Colon ......................................................................................... 34 7.5.3 Comma ...................................................................................... 34 7.5.4 Ellipsis Points ............................................................................ 35 7.5.5 Hyphen, Dashes, and Minus Sign ............................................. 36 7.5.6 Parentheses .............................................................................. 37 7.5.7 Punctuation after Italicized or Bold Text .................................... 38 7.5.8 Punctuation in Numerals ........................................................... 38 7.5.9 Punctuation Marks Used as Commands ................................... 38 7.5.10 Quotation Marks ........................................................................ 38 7.5.11 Punctuation in Quotation Marks ................................................. 39 7.5.12 Semicolon .................................................................................. 39 7.5.13 Slash ......................................................................................... 39 7.5.14 Space after Periods ................................................................... 39
8.0 Numbers and Numbering ....................................................................... 40 8.1 Numbers in Text .......................................................................... 40 8.2 Fractions ...................................................................................... 40 8.3 Page Numbering .......................................................................... 41 8.4 Figure and Table Numbering ....................................................... 41 8.5 Item/List Numbering ..................................................................... 41 8.6 Heading Numbering ..................................................................... 42
9.0 Abbreviations and Acronyms ................................................................ 43 9.1 Using Abbreviations ..................................................................... 43
9.1.1 Units of Measure ....................................................................... 43 9.1.2 Dos and Don’ts .......................................................................... 43
9.2 Using Acronyms........................................................................... 43 9.2.1 Acronym List .............................................................................. 44 9.2.2 Acronyms in the Glossary .......................................................... 44 9.2.3 Acronyms with Indefinite Articles ............................................... 44
10.0 Grammar ................................................................................................. 45 10.1 Tense ........................................................................................... 45 10.2 Voice ............................................................................................ 45 10.3 Singular and Plural ...................................................................... 46 10.4 Sentence Length and Concise Statements .................................. 46 10.5 Colloquial Language .................................................................... 46 10.6 Split Infinitives .............................................................................. 46 10.7 Adverbs and Adjectives ............................................................... 47 10.8 Contractions ................................................................................ 47 10.9 Gerunds ....................................................................................... 47 10.10 Articles ......................................................................................... 48 10.11 Indefinite Pronouns ...................................................................... 48 10.12 Personal Pronouns ...................................................................... 48 10.13 Guidelines for Specific Words ...................................................... 49

OIT Standards and Conventions Version 3.0
Documentation Style Guide Table of Contents March 2012
vi
10.13.1 May ............................................................................................ 49 10.13.2 That ........................................................................................... 49 10.13.3 There ......................................................................................... 49 10.13.4 User ........................................................................................... 49 10.13.5 When and If ............................................................................... 50
11.0 Writing Instructions ................................................................................ 51 11.1 Referring to Keys and Keystrokes ............................................... 51
11.1.1 Type vs. Enter ........................................................................... 51 11.1.2 Enter Key ................................................................................... 51 11.1.3 Keystrokes ................................................................................. 52 11.1.4 Caret .......................................................................................... 52
11.2 Writing Procedures ...................................................................... 53 11.2.1 Introducing Procedures ............................................................. 53 11.2.2 Using Numbered Steps ............................................................. 53 11.2.3 Describing User Input ................................................................ 53 11.2.4 Describing User Selections........................................................ 54
11.3 Writing Instructions for Roll-and-Scroll Applications .................... 54 11.3.1 Referring to System Prompts..................................................... 54 11.3.2 Responding to Prompts ............................................................. 54 11.3.3 Order of Instructions and Text Capture Blocks .......................... 55 11.3.4 Example of Instructions for Roll-and-Scroll Applications ........... 56
11.4 Writing Instructions for GUI Applications ..................................... 57 11.4.1 Referring to Controls in Windows and Dialog Boxes ................. 58 11.4.2 Referring to Menu Options ........................................................ 58 11.4.3 Instructions for GUI Applications ............................................... 59 11.4.4 Example of Instructions for GUI Applications............................. 59
12.0 Lists and List Items ................................................................................ 62 12.1 Numbered vs. Bulleted Lists ........................................................ 62 12.2 Styles for Lists ............................................................................. 62
12.2.1 Styles for Numbered Lists ......................................................... 62 12.2.2 Styles for Bulleted Lists ............................................................. 62
12.3 Nested Lists ................................................................................. 62 12.4 Paragraph Lists............................................................................ 63 12.5 Introducing Lists and Procedures ................................................ 63 12.6 List items ..................................................................................... 64
12.6.1 Parallel Structure ....................................................................... 64 12.6.2 Punctuation................................................................................ 65 12.6.3 Capitalization ............................................................................. 65 12.6.4 List Items with Introductory Words or Phrases .......................... 65
13.0 Figures, Text Captures, and Tables ...................................................... 67 13.1 General Guidelines ...................................................................... 67
13.1.1 Formatting ................................................................................. 67 13.1.2 Size and Placement ................................................................... 67

OIT Standards and Conventions Version 3.0
Documentation Style Guide Table of Contents March 2012
vii
13.1.3 Captions .................................................................................... 68 13.1.4 In-Text References .................................................................... 71 13.1.5 Alternate Text ............................................................................ 72 13.1.6 Callouts ..................................................................................... 73
13.2 Figures ......................................................................................... 75 13.2.1 Roll-and-Scroll Text Capture Blocks .......................................... 75 13.2.2 GUI/Windows-Based Screen Captures ..................................... 76 13.2.3 Other Images ............................................................................. 77 13.2.4 HHS and IHS Logos .................................................................. 77 13.2.5 Image Accents ........................................................................... 78
13.3 Tables .......................................................................................... 78 13.3.1 Size and Placement of Tables ................................................... 78 13.3.2 Formatting Tables ...................................................................... 79 13.3.3 Color .......................................................................................... 80
14.0 Word Usage ............................................................................................. 81 14.1 General Guidelines ...................................................................... 81 14.2 Humanization of Computers ........................................................ 81 14.3 Latin Terms .................................................................................. 82 14.4 Gender ......................................................................................... 82 14.5 Noun Strings ................................................................................ 82 14.6 Placement of “Only” ..................................................................... 83 14.7 Possessive Form of Nouns Ending In “S” .................................... 83 14.8 Trademarks ................................................................................. 83
15.0 References and Sources ........................................................................ 84 15.1 Computer-Related Content .......................................................... 84 15.2 General Content .......................................................................... 84 15.3 IHS/RPMS Content ...................................................................... 84
Glossary ........................................................................................................... 121
Acronym List ................................................................................................... 122
OIT Standards and Conventions Version 3.0
Documentation Style Guide Record of Changes March 2012
viii
Record of Changes
Change No. Date Subject Section
001 February 27, 2012 Replaced references to “Microsoft Office 2003” with “Microsoft Office 2010.”
Multiple
002 February 27, 2012 Corrected numerous instances to replace plural forms with singular forms.
Multiple
003 February 27, 2012 Replaced “12 points” with “12 points of spacing.”
3.1.2.1
004 February 27, 2012 Replaced “can” with “may.” 3.1.2.1
005 February 27, 2012 Rewrote section, “Optimizing the Configuration of Microsoft Word…” to match the Office 2010 GUI.
3.2
006 February 27, 2012 Rewrote section, “Using Word’s Review and Edit Features” to match the Office 2010 GUI.
3.3
007 February 27, 2012 Replaced “headers” with “page headers.” Multiple
008 February 27, 2012 Updated template location from P: drive to SDocK SharePoint site.
4.1
009 February 27, 2012 Replaced “footers” with “page footers.” Multiple
010 February 27, 2012 Update template use instructions to reflect SharePoint use and match the Office 2010 GUI.
4.1.1
011 February 27, 2012 Added, “the default style of the following paragraph” to the list of settings controlled by the template.
4.1.2
012 February 27, 2012 Changed the instructions describing how to apply a style to an existing document to match the Office 2010 GUI.
4.1.2
013 February 27, 2012 Added a figure and a description of Toolbar Buttons to avoid using when formatting a document.
4.1.2
014 February 27, 2012 Replaced “Headers and Footers” with “Page Headers and Footers.”
4.4

OIT Standards and Conventions Version 3.0
Documentation Style Guide Record of Changes March 2012
ix
Change No. Date Subject Section
015 February 27, 2012 Added instructions on removing “dummy text,” deleting optional document parts, and annotating mandatory headings when not applicable,
5.1
016 February 27, 2012 Expanded explanation of what elements are included in each OPT RPMS document template.
5.2
017 February 27, 2012 Replaced “the name of the month and the four-digit year” with, “the full name of the month (no abbreviations), followed by a space, followed by the four-digit year.”
5.2.1
018 February 27, 2012 Expanded the Note that describes the page footer.
5.2.1
019 February 27, 2012 Expanded the Note that describes the page header.
5.2.2
020 February 27, 2012 Replaced “This field compiles text” with, “This field compiles text of specific styles.”
5.3
021 February 27, 2012 Added the bullet, “A correctly formatted heading using the style SectionNoTOC.”
5.3
022 February 27, 2012 Added the Note, “As part of the front matter of the document, the Table of Contents is not listed in the TOC.”
5.3
023 February 27, 2012 Added the section “Dos and Don’ts.” Added the first bullet point cautioning against long section titles.
5.3.2
024 February 27, 2012 Added a sentence stating that the Preface is optional.
5.4
025 February 27, 2012 Replaced, “using the style Preface” with, “using the style SectionNoTOC.”
5.4
026 February 27, 2012 Added a sentence stating that the preface is not listed in the TOC.
5.4
027 February 27, 2012 Added an instruction to not delete the section break following the Preface when the Preface is deleted.
5.4

OIT Standards and Conventions Version 3.0
Documentation Style Guide Record of Changes March 2012
x
Change No. Date Subject Section
028 February 27, 2012 Replaced the bullet, “A correctly formatted heading” with, “A correctly formatted heading using the style Heading 1.”
5.5
029 February 27, 2012 Added the statement, “One or more numbered sections (2.0, 3.0, etc.) typically constitute the remainder of the body of the document. The titles and content of these sections vary by document type. In each RPMS template an attempt is made to describe the contents of each section and to indicate whether a section is required or not. This information is derived from RPMS Programming Standards and Conventions, Appendix E. If differences exist between that document and the template, the referenced document shall take precedence.”
5.5
030 February 27, 2012 Added instructions on formatting appendix headings using the styles Heading 6, Heading 7, Heading 8, and Heading 9.
5.6.3
031 February 27, 2012 Added the statement, “Appendixes are not listed in the TOC.”
5.6.4
032 February 27, 2012 Added instructions clarifying that the ROB is to be the last appendix and that the latest version of the ROB is found in the latest version of the User Manual template.
5.6.5
033 February 27, 2012 Expanded section to more completely describe the Acronym List and how to use it.
5.8
034 February 27, 2012 Rewrote to more completely describe the Contact Information section and how to use it.
5.9
035 February 27, 2012 Updated the list of template-provided section breaks.
6.1
036 February 27, 2012 Added this section to explain exactly how to delete a document part or section without removing necessary section breaks.
6.1.1
037 February 27, 2012 Added the instruction, “or otherwise format existing section breaks.”
6.1.2
038 February 27, 2012 Rewrote to better list those section headings that are preceded by an automatic page break.
6.2
OIT Standards and Conventions Version 3.0
Documentation Style Guide Record of Changes March 2012
xi
Change No. Date Subject Section
039 February 27, 2012 Added, “This property is enabled in all current templates when a new table is first created.” Expanded the instructions for repeating header rows across multiple pages.
6.4.1
040 February 27, 2012 Added the statement, “and are formatted to remain on the same page as the following paragraph.”
7.2.1
041 February 27, 2012 Added “pane,” “panel,” and “dialog” to the list of words not to be capitalized.
7.4.2
042 February 27, 2012 Added the Note about AutoCorrect. 7.5.4
043 February 27, 2012 Added the item, “Avoid constructs like “patient(s),” and “two (2).””
7.5.6
044 February 27, 2012 Added the instruction about using commas in mixed four-and five-digit numerals arranged in columns.
7.5.8
045 February 27, 2012 Added instructions cautioning against the use of the slash character.
7.5.13
046 February 27, 2012 Changed text to reflect the repositioning of the Preface section after the TOC.
8.3
047 February 27, 2012 Rewrote Table Captioning instructions to match those for Figure Captioning. Combined the two into one section.
8.4
048 February 27, 2012 Added description of appendix headings (Heading levels 6 through 9).
8.6
049 February 27, 2012 Added Dos and Don’ts for abbreviations 9.1.2
050 February 27, 2012 Added section on the use of Singular vs. Plural form.
10.3
051 February 27, 2012 Expanded instructions to better describe how to use the Alt and Ctrl keys.
11.1.3
052 February 27, 2012 Added the section describing the use of numbered steps to denote step-by-step instructions.
11.2.2

OIT Standards and Conventions Version 3.0
Documentation Style Guide Record of Changes March 2012
xii
Change No. Date Subject Section
053 February 27, 2012 Added the instruction, “However, do not break long roll-and-scroll text capture blocks into page-size pieces as the natural page break points will change each time the document is updated. Treat the entire block as a single figure.”
13.1.2.2
054 February 27, 2012 Expanded the description of where figure and table captions are to be placed.
13.1.3
055 February 27, 2012 Expanded the instructions for creating a figure caption.
13.1.3.1
056 February 27, 2012 Expanded the instructions for creating a roll-and-scroll text block caption.
13.1.3.2
057 February 27, 2012 Expanded the instructions for creating a table caption.
13.1.3.3
058 February 27, 2012 Added detailed explanations of the notations used in the Template Style table.
Appendix B

OIT Standards and Conventions Version 3.0
Documentation Style Guide Introduction March 2012
1
1.0 Introduction The purpose of this in-house style guide is to make the Resource and Patient Management System (RPMS) documentation produced at the Indian Health Service (IHS) Office of Information Technology (OIT) more consistent over time. While this document will take precedence over external and general style guides, it is by no means the authority on documentation requirements. The RPMS Programming Standards and Conventions (SAC) is the final authority on formal, high-level documentation policy.
This style manual is based on a combination of:
• Internal documentation requirements
• Appendix F of the RPMS Programming Standards and Conventions
• The Chicago Manual of Style (15th edition)
• Microsoft Manual of Style for Technical Publications (3rd edition) If an issue is not addressed in this internal style guide, please consult The Chicago Manual of Style (15th Edition) or the Merriam Webster Collegiate Dictionary (most recent edition).
Because the Internet is also a convenient and cost-effective tool, the following resources can be consulted when further clarification is necessary:
• The Merriam Webster Online Dictionary: http://www.m-w.com/dictionary.htm
• Webopedia, an online dictionary and search engine for computer and Internet technology definitions: http://www.webopedia.com/
When an issue is not addressed in this style guide and there is a disagreement between these online sources and the paper sources listed above, the paper source will overrule the online source.
With v3.0, the terminology and instructions in this manual reflect the layout and menus of Microsoft Office 2010. Readers with older versions of Microsoft Office must adapt the instructions presented in this manual to their own applications.
For questions about the material in this style guide, contact the OIT Documentation Team ([email protected]).
OIT Standards and Conventions Version 3.0
Documentation Style Guide Usability Guidelines March 2012
2
2.0 Usability Guidelines
2.1 Eliminate Superfluous Information Superfluous information creates the following usability issues:
• Increases the amount of text that a reader has to understand
• Increases the time and effort the reader invests to access information
• Takes up space in the reader’s short-term memory
• Drains the reader’s mental resources Superfluous information includes the following:
• Unnecessary adjectives and adverbs
• Information about irrelevant topics
• Personal opinions and humor
• Speculation about future product functions
• Rhetorical questions
2.2 Create Consistent Structures Create documents with repeated structures when possible, using the same hierarchy of sections and the same categories of information in each section. When the hierarchy and structure of the information are repeated throughout the document, users become accustomed to looking for certain types of information in certain places, reducing their uncertainty when approaching documentation.
The structure of a document is like a street map. A street map that is consistent across an entire region is a better navigation tool than one that is inconsistent.
The intrinsic repeated structure of a document should be orderly, logical, and consistent. If the document is an overview, make sure that all topics are covered at the same level of detail. If the document provides detailed, step-by-step instructions for using a particular function, ensure that similarly detailed instructions for all functions are given, or that a logical explanation for the discrepancy is provided (for example, detailed procedures are only included in the overview or reference guide for new functions).

OIT Standards and Conventions Version 3.0
Documentation Style Guide Usability Guidelines March 2012
3
2.3 Use Modular Information Blocks Most readers are searching for a specific piece of information. They do not read technical documentation for enjoyment. To meet the reader’s information requirements, create modular blocks of relevant information about specific topics. Modular information is easier to understand and to update than long passages of unstructured text.
Typically, a modular block of information is a stand-alone entity that contains the following information elements.
• Heading. Make headings expressive. Tell the reader what to expect from a specific type of section or module. When the reader encounters a similar heading, the type of content is already familiar.
• Textual Information. Break textual information into discrete sub-modules of related information grouped into separate paragraphs.
• Integrated Supporting Elements. Information elements that support textual information can include lists, procedures, tables, and graphics.
If each documentation module conveys the correct information to the reader, then the reader performs the correct action. Inconsistent documentation modules can confuse the reader.
Create modules short enough to keep scrolling or page turning to an absolute minimum.
2.4 Use Consistent Language Creative writing teachers tell us to vary our writing style and vocabulary to hold the reader’s interest, but technical documentation requires the opposite: using the same vocabulary for the same purpose throughout a document or set of documentation. When a team of writers is working together, they must seek to achieve a single voice; to the reader is should appear as if the entire document was written by one person.
Repeated use of consistent language builds long-term memory and reduces the demand on short-term memory, allowing the reader to concentrate on the information rather than waste time and mental energy figuring out what is being discussed.
Other language points to consider:
• Words with Latin or Greek roots are harder to understand than equivalent English words. (Exceptions are standard Latin-based terms such as “etc.,” “i.e.,” “e.g.,” and “re:”)
• Do not use non-English words. Some readers will not understand the non-English word, and even those who do will have to pause and think about it.
• Short words are easier to process than long words.

OIT Standards and Conventions Version 3.0
Documentation Style Guide Usability Guidelines March 2012
4
• The active voice is easier to understand than the passive voice. The imperative voice is also acceptable in OIT documentation.
2.5 Use Consistent Typographic Conventions Typographic conventions such as capitalization, punctuation, and emphasis tell readers what to expect. Consistent typographic conventions help to define the structure of a document. Inconsistent typographic conventions confuse and distract the reader.
2.6 Consider Translatability OIT documentation is not formally translated into other languages. However, our reader group is potentially an English as a Second Language (ESL) group. When one reads in a nonnative language, he or she encounters many of the same difficulties a translator would encounter when formally translating a document. Therefore, OIT technical documentation must be translation friendly.
The Microsoft Manual of Style for Technical Publications (MSTP) contains a good discussion of writing for translation. Important elements for ease of translation include bias-free language and minimal use of humor and anthropomorphism.
2.6.1 Grammar The topics addressed in Section 11.0 cover many of the most common causes of translation errors. By following basic grammar guidelines, most situations that cause difficulty for translators and nonnative readers can be avoided. These guidelines also address the needs of readers with limited reading skills, and must be followed regardless of the reader’s native language.
2.6.2 Gerunds A gerund is a noun created by adding –ing to a verb (for example, working). Not all languages use gerunds as nouns, so be aware that a single word in English could be difficult to translate or be mistakenly translated as a phrase.
2.7 Consider Cultural Differences Conventions that are taken for granted in a writer’s native language and culture might not make sense in other cultures. Keep the following guidelines in mind when writing:
• Do not use political or religious references or examples.
• Do not use humor. Humor is typically culturally dependent, and understanding of a joke can vary across race, gender, sexual orientation, religion, social class, etc.
OIT Standards and Conventions Version 3.0
Documentation Style Guide General March 2012
5
3.0 General
3.1 Compliance with Section 508 Guidelines Section 508 of the Rehabilitation Act requires that information provided by Federal agencies be accessible to people with disabilities. The following description appears on the 508 Law page of the Section 508 Web site (http://www.section508.gov/)
In 1998, Congress amended the Rehabilitation Act to require Federal agencies to make their electronic and information technology accessible to people with disabilities. Inaccessible technology interferes with an individual's ability to obtain and use information quickly and easily. Section 508 was enacted to eliminate barriers in information technology, to make available new opportunities for people with disabilities, and to encourage development of technologies that will help achieve these goals. The law applies to all Federal agencies when they develop, procure, maintain, or use electronic and information technology. Under Section 508 (29 U.S.C. § 794d), agencies must give disabled employees and members of the public access to information that is comparable to the access available to others.
3.1.1 Styles and Templates Section 508 guidelines require documents created in Microsoft Word to be formatted by applying styles, rather than using formatting commands (such as Ctrl-B) or the standard toolbar buttons. The use of named styles is required for compliance with Section 508 because it permits more accurate tagging by Adobe Acrobat, allowing screen readers to correctly read the text aloud.
The OIT Documentation Team has created a template for each type of RPMS-related document (user manual, technical manual, installation manual, etc.). For more information about using templates and styles, refer to Section 4.1.
3.1.2 Carriage Returns (Hard Returns)
3.1.2.1 In Microsoft Word Documents carriage returns to add white space in text. Superfluous carriage returns barrage screen readers with empty commands that a nonsighted user must wade through before finding usable text. Use paragraph spacing (the Before and After settings on the Indents and Spacing tab of the Paragraph dialog box) instead. Use 12 points to replace a single hard return, and 18 points to replace two hard returns.

OIT Standards and Conventions Version 3.0
Documentation Style Guide General March 2012
6
Note: An adjustment to paragraph spacing is the only formatting change that may be made to text without applying a style using the Styles pane. Refer to Section 4.1 for more information.
3.1.2.2 In Microsoft PowerPoint Documents Extra carriage returns used to add white space in PowerPoint documents interfere with Section 508 compliance of those documents. Remove all extra carriage returns from text blocks in PowerPoint slides. Soft returns (Shift-Enter) are an acceptable alternative.
3.1.3 Color and Backgrounds Limit the use of color in technical documents as much as possible. The Section 508 guidance, Subpart B, Section 1194.22(c), states that “Web pages shall be designed so that all information conveyed with color is also available without color, for example from context or markup.” For documentation, this standard addresses the needs of colorblind and low-vision individuals.
To make documents Section 508 compliant, remove all watermarks and background elements, such as patterns. Choose high-contrast elements, such as dark type and graphics against a light, plain background. Avoid similar-color combinations in graphics (for example, a bar chart with yellow and light blue bars) and the use of contrasting red and green elements. Minimize the use of color and shading in table cells. If absolutely necessary for clarity, use only a light, neutral gray or tan to shade table heading rows.
3.1.4 Wingdings “Wingdings” is the name of a collection of fonts that render letters as symbols. In technical documents, wingdings are occasionally used in place of common list elements, such as bullets. However, most screen readers cannot identify wingdings, and wingdings cannot be made Section 508 compliant. To make a document compatible with Section 508 guidelines, replace all wingdings with standard fonts and common list items, such as bullets or dashes (see Appendix B: ).
Problem: Apples
Oranges
Pears
OIT Standards and Conventions Version 3.0
Documentation Style Guide General March 2012
7
Problem: > Apples
> Oranges
> Pears
Solution:
• Apples
• Oranges
• Pears
3.1.5 Alt Text For Section 508 compliance, each image and graphic element in a document must have alternate text (“alt text”) associated with it. For more information, refer to Section 13.1.5.
3.2 Optimizing the Configuration of Microsoft Word 2010 Modifying a few settings in Microsoft Word will make it easier to create a Section 508-compliant document.
Many of Word’s functions and features can be accessed using more than one procedure; some settings change the appearance of the Word GUI significantly. The procedures described in this section reflect as much as possible the as-installed configuration of the product.
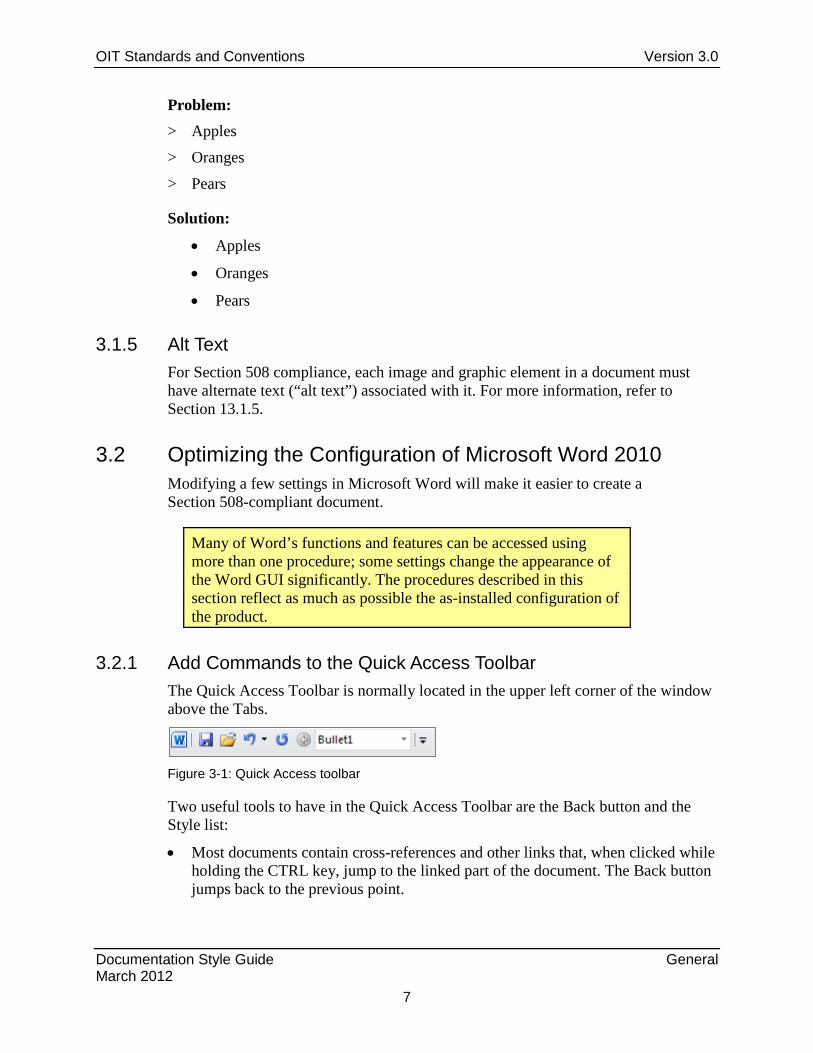
3.2.1 Add Commands to the Quick Access Toolbar The Quick Access Toolbar is normally located in the upper left corner of the window above the Tabs.
Figure 3-1: Quick Access toolbar
Two useful tools to have in the Quick Access Toolbar are the Back button and the Style list:
• Most documents contain cross-references and other links that, when clicked while holding the CTRL key, jump to the linked part of the document. The Back button jumps back to the previous point.

OIT Standards and Conventions Version 3.0
Documentation Style Guide General March 2012
8
• The Style list displays the style associated with the text in which the cursor currently sits. It can also be used to select a style.
To add these two Commands:
1. Select the File tab.
2. Select Options to display the Word Options dialog.
3. Select Quick Access Toolbar.
4. Select All Commands in the Choose Commands From field.
5. In the left-hand column select Back.
6. Click Add>> to move the selection to the right column.
7. In the left-hand column select Style (StyleGalleryClassic).
8. Click Add>> to move the selection to the right column.
9. Click OK to close the dialog.
3.2.2 Show Rulers Rulers provide useful visual clues about the formatting of the current page:
• The Horizontal Ruler (at the top of the page) marks the left and right page margins, the location of any tab stops in the current paragraph, and the amount of indentation (left indent, ‘hanging’ indent, and right indent).
• The Vertical Ruler (along the left edge of the page) marks the top and bottom page margins. When page headers and footers are open for edit it marks the vertical space allotted to each.
To make the Rulers visible, click the ruler icon [ ] at the top of the vertical scroll bar.
3.2.3 Show Text Boundaries and Field Shading Text Boundaries are shown as a non-printing dotted line surrounding the text. The position of these lines usually corresponds to the page margins as seen on the Horizontal and Vertical Rulers. However, the style of a paragraph may modify Text Boundaries.
Field Shading makes locating cross-references easy, and simplifies automating parts of the document. Field Shading does not print.
To make the Text Boundaries visible and turn on Field Shading:
1. Select the File tab.
OIT Standards and Conventions Version 3.0
Documentation Style Guide General March 2012
9
2. Select Options to display the Word Options dialog.
3. Select Advanced.
4. Scroll down to the Show document content heading.
5. Click Show text boundaries.
6. Select Always in the Field shading list.
7. Click OK to close the dialog.
3.2.4 Change AutoCorrect Options Word’s AutoCorrect-Replace Text as you Type feature can correct common misspellings and create special characters automatically. However, certain of these automatic substitutions should be disabled; some are not Section 508-compliant, some do not belong in official documents, and some make erroneous corrections. To change the Replace Text as you Type options:
1. Select the File tab.
2. Select Options to display the Word Options dialog.
3. Select Proofing.
4. Click AutoCorrect Options to display the AutoCorrect: English (U.S.) dialog.
5. In the Replace Text as you Type panel:
a. Select each ‘emoticon’ (smiley) one at a time and click Delete.
b. Select the copyright symbol (c) and click Delete.
c. Select the registered trademark symbol (r) and click Delete.
d. Look for ihs with the correction to his – if found, select it and click Delete.
e. Look for ehr with the correction to her – if found, select it and click Delete.
6. Click OK to close the AutoCorrect: English (U.S.) dialog.
7. Click OK to close the Word Options dialog.
3.2.5 Display Formatting Marks Formatting Marks are non-printing characters that reveal the location of spaces, paragraph breaks, line breaks, hidden text, optional hyphens, and object anchors. The ability to locate these marks is indispensable when attempting to properly format a document for Section 508 compliance. To make Formatting Marks visible:
1. Select the Home tab.

OIT Standards and Conventions Version 3.0
Documentation Style Guide General March 2012
10
2. Click ¶ located in the upper right corner of the Paragraph pane. The button’s background will change to a contrasting color.
3.3 Using Word’s Review and Edit Features Features available on the Review tab can simplify collaborative editing and reviewing of a document by multiple authors, editors, and reviewers.
3.3.1 Comments A Comment is a Word text annotation feature that allows an editor or reviewer to attach a comment or question to document content, presumably to be answered by the author or by another reviewer.
3.3.1.1 Attach a Comment To attach a Comment:
1. Highlight a word or phrase, or place the cursor in the relevant location in the text.
2. Select the Review tab.
3. Select New Comment on the Comments pane. A comment box appears in the extended right margin; the box is connected to the text by a callout.
4. Type the comment in the comment box; when done, click outside the box to return focus to the document text.
3.3.1.2 Delete a Comment All comments must be removed from a document before it is finalized and approved for distribution. To delete a comment:
1. Right-click the comment.
2. Select Delete Comment from the context menu.
3.3.2 Track Changes Track Changes is a Word editing feature that keeps track of and displays any additions, changes, and deletions made to the content of a document while Track Changes was active. It communicates proposed changes to document reviewers, shows the content before and after the change, and allows changes to be easily reversed. The feature also records who made each change, making it easy to contact that editor.

OIT Standards and Conventions Version 3.0
Documentation Style Guide General March 2012
11
3.3.2.1 Activate Track Changes To activate Track Changes:
1. Select the Review tab.
2. Select Track Changes on the Tracking pane. The Track Changes button will change to a contrasting color.
When tracked changes exist in the document, the Display for Review field on the Tracking pane should automatically change to read Final: Show Markup.
Track Changes tracks and displays only those changes made while the feature was active; it does not track and display all changes ever made to the document.
3.3.2.2 View or Print Without Comments and Tracked Changes To view or print a document without showing the comments or tracked changes, select Final in the Display for Review field.
3.3.2.3 Deactivate Track Changes To deactivate Track Changes, click the Track Changes button again (the button color changes to match the background).
3.3.2.4 Resolve Tracked Changes All tracked changes must be accepted or rejected before the document can be finalized and approved for distribution. To resolve a tracked change:
1. Right click the change.
2. Select one of the relevant choices from the context menu:
• Accept Deletion. Removes content that was marked for deletion.
• Reject Deletion. Restores content that was marked for deletion.
• Accept Insertion. Accepts proposed new content.
• Reject Insertion. Rejects (deletes) proposed new content.
Note: The Changes pane of the Review tab contains controls that simplify stepping through and accepting or rejecting Tracked Changes.

OIT Standards and Conventions Version 3.0
Documentation Style Guide Document Conventions March 2012
12
4.0 Document Conventions
4.1 OIT Document Templates The OIT Documentation Team has created a template for each type of RPMS application-related document (user manual, technical manual, installation manual, etc.) that includes the following:
• The page layout and styles to be used for formatting the document text (headings, body text, lists, tables, etc.)
• A correctly formatted title page (cover page)
• Formatted page headers and footers
• A table of contents (TOC)
• Custom document properties
• Information on the specific sections and content typically found in the specific type of document
The OIT document templates can be downloaded from the IHS Software Documentation Kit (SDocK) SharePoint site:
https://workgroups.ihs.gov/sites/RPMS/SQA/Software%20Documentation%20Kit%20SDocK/Forms/AllItems.aspx
Contact the OIT Documentation Team or your information technology (IT) help desk if you are unable to access this SharePoint site.
Note: The use of document templates can be confusing. Guidelines for their use are included here; contact the OIT Documentation Team with any questions or problems.
4.1.1 Using an OIT Document Template Templates are often applied to existing documents using the Templates and Add-Ins dialog box. However, the OIT document templates are designed to be opened separately and used as the basis for new documents, which retains the formatted title page, page headers, page footers, TOC, and custom document properties.
To use an OIT document template, follow these steps:
1. Download the latest version of the template from the SQA SharePoint site to the workstation:
a. Position the cursor over the file name until the box and down arrow appear.
b. Click the down arrow to expand the menu.
OIT Standards and Conventions Version 3.0
Documentation Style Guide Document Conventions March 2012
13
c. Select Send To.
d. Select Download a Copy; the File Copy dialog displays.
e. Click Save; the Save As dialog displays.
f. Navigate to the target folder on the workstation.
g. Click Save.
The OIT document templates are updated as necessary to incorporate new formatting requirements and respond to changes in Microsoft products. The Software Quality Assurance team notifies product teams when this occurs. Check the SDocK site frequently. Do not keep copies of old templates!
2. Open Windows Explore.
3. Navigate to the target folder on the workstation.
4. Double-click to open the template file for the type of document to be created (user manual, installation manual, etc.).
5. Use the Save As command on the File Tab to save the file with a new file name (the name of the document to be created).
6. On the title page, replace “Application Name,” “Namespace,” “#.#,” and “Month Year” with the appropriate text.
7. Type new content directly into each section in the new template-based document, or copy and Paste Special text from an existing document.
Pasting text directly from another document brings the document styles from the source document into the new document. This can create new and hard-to-understand problems in the new document. To prevent this, use the “Paste Special – Unformatted Text” version of the paste command.
4.1.2 Using Styles in OIT Document Templates Each OIT template for an RPMS application-related document includes paragraph styles for several indented levels of headings, body text, and numbered and bulleted lists, as well as character styles for bold, italic, and bold and italic text. Styles for notes and warnings, computer output, tables, table headings and table text, and captions for tables and figures are included as well. These styles are designed to provide a consistent look and feel for all OIT application-related documentation.

OIT Standards and Conventions Version 3.0
Documentation Style Guide Document Conventions March 2012
14
The format for each style contained in a template includes settings for font style and size, indentation (including hanging indentation if appropriate), paragraph spacing, bullet or number style if appropriate, the default style of the following paragraph, and all other settings required to format a document correctly. Do not change these settings in individual documents without the approval of the OIT Documentation Team. Appendix B: gives a brief description of styles used in most RPMS manuals.
Note: For compliance with Section 508 guidelines, a document must contain only formatting applied using these styles. No text should be left in the “Normal” style. When the OIT Documentation Team produces the final 508-compliant version of each application-related document, any styles and formatting not included in the template will be removed and the correct styles from the template will be applied.
To apply a style contained in a document’s template, open the Styles task pane in the Home ribbon. Select the text to format, and then click the correct style name in the Styles task pane.
Do not use quick formatting commands (toolbar buttons or keyboard control sequences) to format RPMS documents. Toolbar Controls to avoid are shown in Figure 4-1.
Figure 4-1: Word 2010 Toolbar Controls that, if used, prevent Section 508 Compliance
Word highlights some of the Toolbar Buttons when styles incorporating these properties are used; this is not a problem. For example, in Figure 4-1, note that the Align Left button in the Paragraph panel is highlighted. This is because the current style includes the paragraph property of Align Left. Likewise, if the current style included bold italic text, the Bold and Italic buttons would also be highlighted. Nevertheless, do not use these Toolbar Buttons to add or remove these properties.
For questions about, or to address problems using templates and styles, contact the OIT Documentation Team.
OIT Standards and Conventions Version 3.0
Documentation Style Guide Document Conventions March 2012
15
4.1.3 Using Fields in OIT Document Templates Fields in Word documents are used to display specific text, and in doing so, depend on other text in the document or in the document’s properties.
OIT templates for RPMS-related documents include various types of fields, including the TOC (Section 5.3) and fields in the page headers and footers that display page numbers, dates, and section titles (refer to Section 4.4 for information on page headers and footers).
In addition, fields for figure and table captions and in-text references to sections and captions can be added as the document is written (refer to Section 8.6 for information on section headings, Section 13.1.3 for information on captions, and Section 2 for information on in-text references).
When document content that affects fields is revised, fields that depend on that content must be updated. Individual fields can be updated when particular content changes, but all fields in the document should be updated as the last step before finalizing a document.
• To update a single field, right-click anywhere in the field and select Update Field from the context menu.
• To update all fields in a document, press Ctrl-A to select the entire document, right-click any highlighted text, and select Update Field from the context menu.
Note: If the document is being edited using Track Changes (revision marks), it will be less confusing to reviewers if the Track Changes feature is turned off before updating any fields.
4.2 Page Dimensions OIT documents use an 8.5-inch by 11-inch page, in portrait orientation whenever possible. All OIT templates for RPMS-related documents include the correct page setup settings.
4.3 Margins OIT documents use one-inch margins on all sides. Certain pages, like externally created flowcharts and graphics, can exceed these margins when necessary. All OIT templates for RPMS-related documents are set up with the correct margins.
4.4 Page Headers and Footers Page headers and footers, with a line separating the page header and the page footer from the document text, are required for all manuals

OIT Standards and Conventions Version 3.0
Documentation Style Guide Document Conventions March 2012
16
Formatted page headers and footers containing the required content are included in all OIT templates for RPMS-related documents. Do not edit the page header or footer directly; no additional editing or formatting should be required. If the page header or footer content is not displayed correctly, contact the OIT Documentation Team for assistance.
Page headers include the package name, the package namespace, and the version number. Page footers include the manual type (“User Manual,” “Installation Manual,” etc.), the page number, the chapter or section name (from the Level 1 heading), and the release month and year.
4.5 Page Numbering Formatted page footers containing correctly formatted page numbers are included in all OIT templates for application-related documents. Do not edit the page footer directly; no additional editing or formatting should be required. If page numbers are not being displayed correctly, contact the OIT Documentation Team for assistance.
The cover or title page of an RPMS document is not numbered, but is assumed to be Page “i.” Front-matter page numbering begins on the first page after the title page with lowercase roman numerals (ii, iii, iv, v, etc.), beginning with “ii.”
The body of the document, beginning with the first page of the Introduction section, is numbered using Arabic numerals.

OIT Standards and Conventions Version 3.0
Documentation Style Guide Document Sections March 2012
17
5.0 Document Sections
5.1 Order of Sections An RPMS-related document produced by OIT contains some or all of the following sections, in the following order:
1. Title page (Section 5.2)
2. Table of contents (Section 5.3)
3. Preface (optional) (Section 5.4)
4. Introduction (Section 5.5)
5. Content
6. Appendixes (one or more, optional) (Section 5.6)
RPMS user manuals must include the RPMS Rules of Behavior (ROB) as one of the appendixes (Section 5.6.5).
7. Glossary (Section 5.7)
8. Acronym list (Section 5.8)
9. Contact information (Section 0)
OIT templates for application-related documents include headings for the appropriate sections in each type of document, and may include dummy text describing the type of content expected in a given section. Remove all dummy text from the final document. Optional document parts may be deleted if not applicable.
Do not delete mandatory headings; if the topic is not applicable, leave the heading in and on the line that follows type Not Applicable followed by a reason.
5.2 Title Page Each OIT RPMS template contains a correctly formatted title page including:
• The IHS and Health and Human Services (HHS) logos, and the words “Resource and Patient Management System” (in the first page header)
• Dummy text for the package name, namespace, version number, and release date
• The type of manual (e.g., “User Manual”)
• OIT’s publication information (in the first page footer)

OIT Standards and Conventions Version 3.0
Documentation Style Guide Document Sections March 2012
18
As described in Section 4.1.1, the correct use of an RPMS template is to save the appropriate template as a new document and then add text to that document. This preserves the title page in the template, making it unnecessary to create a title page from scratch. Be sure to replace the dummy text on the title page with the content for the specific RPMS package.
5.2.1 Release Dates An application’s release date appears on the title page of each document related to the application. Each RPMS template includes the dummy text “Month Year” on the formatted title page.
When creating a document using an RPMS template, replace the dummy text on the title page with the full name of the month (no abbreviations), followed by a space, followed by the four-digit year of the release date. Do not add a comma after the name of the month.
Note: The page footer in each RPMS template includes an automated field that displays the month and year from the title page. Do not edit the footer directly If the release date does not display correctly in the footer, contact the OIT Documentation Team for assistance.
5.2.2 Version and Patch Number The application’s version number (and patch number, if applicable) appears on the title page of each document related to the application. Each RPMS template includes the word “Version” and the dummy text “#.#” on the formatted title page; the RPMS_Addendum template also includes the word “Patch” and the dummy text “#.” When creating a document using an RPMS template, replace the dummy text on the title page with the appropriate version (and patch) number.
Note: The page header in each RPMS template includes an automated field that displays the version (and, in the RPMS-Addendum template, the patch) information from the title page. Do not edit the page header directly. If the version (or patch) number does not display correctly in the header, contact the OIT Documentation Team for assistance.
5.2.2.1 Spelling and Capitalization of “Version” The word “Version” is spelled out and initial capped on the title page and in the page header (e.g., Version 5.0). These instances of the word are included in the RPMS templates and should not be edited.
OIT Standards and Conventions Version 3.0
Documentation Style Guide Document Sections March 2012
19
In running text, the word “version” is abbreviated to a lower case “v” without a space or period when referring to a specific RPMS package. In all other cases, “version” is spelled out in lower case.
Example: In previous versions of the package, the Visit Type could become corrupted. In ERS v3.0, this problem has been corrected.
Only when referencing the title of a third-party software package or a document in running text should the word “Version” be spelled out and initial capped if it appears that way in the referenced material.
5.2.2.2 Spelling and Capitalization of “Patch” In a patch addendum, the word “patch” follows the same rules as the word “version.”
• It is spelled out with an initial cap on the addendum cover and in the page header (e.g., Version 5.0 Patch 1.0).
• It is abbreviated to a lower case “p” without a space or period when referencing the package name in running text.
• It is spelled out in lower case in all other instances in running text. Example: In the previous patch, the Visit Type could become corrupted. In ERS v3.0p1, this problem has been corrected.
5.3 Table of Contents The TOC begins on the first page after the title page. As part of the front matter, the page numbers of the Table of Contents section appear as lowercase roman numerals beginning with “ii.”
A TOC is created by inserting a TOC field in a Word document. This field compiles text of specific styles into a formatted TOC.
Each RPMS template contains a Table of Contents section on the page following the title page, with the following elements:
• A page header that matches the page headers in the rest of the document
• A correctly formatted heading using the style SectionNoTOC
• A correctly formatted TOC field that generates a table of contents from text styled as “Heading 1,” “Heading 2,” “Heading 3,” and “Section”
• A page footer that matches the page footers in the rest of the document and contains a correctly formatted page number
Note: As part of the front matter of the document, the Table of Contents is not listed in the TOC.

OIT Standards and Conventions Version 3.0
Documentation Style Guide Document Sections March 2012
20
5.3.1 Updating the Table of Contents When new content or sections have been added to a document, update the TOC field by right-clicking anywhere in the field (the TOC) and selecting Update Field from the context menu.
• If new sections have been added, select the Update entire table option. Click OK to incorporate the new headings into the TOC.
• If no sections have been added, but content has been added that affects the number of pages in any section, select the Update page numbers only option. Click OK to update just the page numbers in the TOC.
Note: If the document is being edited using Track Changes (revision marks), it will be less confusing to reviewers if the Track Changes feature is turned off before updating the TOC field.
5.3.2 Dos and Don’ts • Do choose section and subsection titles carefully. Long titles will cause the TOC
entry to wrap to a second line, cluttering the TOC and possibly confusing the reader.
• Do not edit text in the TOC directly; no additional editing or formatting should be required after the field has been automatically updated; subsequent automatic updating will overwrite any manual edits. If the TOC does not display correctly, contact the OIT Documentation Team for assistance.
• Do not edit the TOC page header or footer directly. If any element does not display correctly in the page headers or footers of the Table of Contents section, contact the OIT Documentation Team for assistance.
5.4 Preface Section The preface is a brief statement identifying the purpose, scope, and targeted audience of a document. It is optional in RPMS documents.
The preface has historically been a required section located between the title page and the TOC. With the 2010 release of the RPMS Programming Standards and Conventions, which was updated to conform with The Chicago Manual of Style, the preface is now optional.
When a preface is included, it is now located after the TOC. As part of the front matter, the page numbers in the Preface section appear as lowercase roman numerals continuing from the final page number in the Table of Contents section.
Each RPMS template contains a Preface section on the page following the Table of Contents section, with the following elements:

OIT Standards and Conventions Version 3.0
Documentation Style Guide Document Sections March 2012
21
• A correctly formatted heading using the style SectionNoTOC
• A correctly formatted boilerplate paragraph to be replaced with the applicable preface text
• A page header that matches the page headers in the rest of the document
• A page footer that matches the page footers in the rest of the document and contains a correctly formatted page number
Note: Do not edit the header or footer directly; no additional editing or formatting should be required. If any element is not displayed correctly in the headers or footers in the Preface section, contact the OIT Documentation Team for assistance.
As part of the front matter of the document, the Preface is not listed in the TOC.
In some documents, the preface may be replaced with an Acknowledgments section. To ensure that the formatted footer displays the correct section name (“Acknowledgments”), replace the word “Preface” in the section heading with the word “Acknowledgements,” but do not apply a different style to the heading.
If a document will not contain a preface or acknowledgments, remove the entire Preface section. Do not delete the Section Break that separates this section from the Introduction (to see the Section Break, follow the instructions in Section 3.2.5).
5.5 Introduction Section The introduction identifies the topic of a document and describes its primary purpose or function. It sets the stage for the entire document, and provides a broad frame of reference for the reader. The introduction should identify the major topics and issues addressed by the RPMS package. It should convey to the reader the major functions and purposes of the package and how the software accomplishes those objectives. It should not include any technical information.
The Introduction section is located after the Table of Contents section and after the Preface section, if one is present. As the first section in the body of the document, page numbers in the Introduction section appear as Arabic numerals beginning with “1.”
Each RPMS template contains an Introduction section on the page following the Preface section, with the following elements:
• A correctly formatted heading using the style Heading 1
• A page header that matches the page headers in the rest of the document

OIT Standards and Conventions Version 3.0
Documentation Style Guide Document Sections March 2012
22
• A page footer that matches the page footers in the rest of the document and contains a correctly formatted page number
Note: Do not edit the header or footer directly; no additional editing or formatting should be required. If any element is not displayed correctly in the headers or footers in the Introduction section, contact the OIT Documentation Team for assistance.
One or more numbered sections (2.0, 3.0, etc.) typically constitute the remainder of the body of the document. The titles and content of these sections vary by document type. In each RPMS template an attempt is made to describe the contents of each section and to indicate whether a section is required or not. This information is derived from RPMS Programming Standards and Conventions, Appendix E. If differences exist between that document and the template, the referenced document shall take precedence.
5.6 Appendix Section
5.6.1 Referring to Multiple Appendixes Although many dictionaries consider both “appendices” and “appendixes” correct, OIT uses the term “appendixes.”
5.6.2 Content of Appendixes Appendixes are supplemental, and should be used for content such as listings of descriptions or definitions of data elements, sample reports generated by the package, summaries of commands, and lists of supportive reference materials.
Each appendix should be treated as if it were a separate document. This means that acronyms must be redefined on first use in each appendix, and each appendix should include its own list of references, if appropriate.
5.6.3 Appendix Title Each appendix is treated independently and lettered accordingly, beginning with “Appendix A.” An appendix begins with a correctly formatted heading using the style Heading 6.
Section and subsection headings within an appendix use the styles Heading 7, Heading 8, and Heading 9, which append one, two, and three numerals, respectively, to the appendix letter (e.g., A.1, A.2.1, A.3.2.1).

OIT Standards and Conventions Version 3.0
Documentation Style Guide Document Sections March 2012
23
5.6.4 Appendix Location Appendixes are placed after the main content and before the Glossary section. Appendixes are not listed in the TOC.
5.6.5 RPMS Rules of Behavior The RPMS ROB must be included as the last appendix in each RPMS user manual. The user manual template contains the current version of the ROB.
5.7 Glossary Section The Glossary section is reserved for definitions of words and complex terms in the text. It is not a substitute for the acronym list (Section 5.8). The words and terms included in the glossary should reflect those unique to the subject matter.
Create the glossary as follows:
1. Apply the “GlossTerm” style found in RPMS templates to the word or phrase to be defined.
2. Press Enter after the word or phrase.
3. Type the definition of the word or phrase and apply the “bdytxt3” style.
Note: After typing the term in the GlossTerm style, pressing Enter automatically sets the style of the paragraph that follows to bdytxt3 style.
For an example of a Glossary section, see this document’s Glossary on page 121
5.8 Acronym List Section Every acronym and initialism in a technical document should appear in the Acronym List section, which is included after the Glossary section. An acronym list allows readers who have not read the document from beginning to end to find the meaning of an acronym quickly. The acronym list provides only the spelled-out form of the acronym: it is not a substitute for a glossary (Section 5.7).
• Abbreviations are not included in the acronym list.
• List entries alphabetically
• Acronyms are singular, not plural (unless the acronym is always plural)
• For each entry:
− Set the acronym in bdytxt1 style and Bold style − Set the spelled out term in bdytxt1 style
OIT Standards and Conventions Version 3.0
Documentation Style Guide Document Sections March 2012
24
To support the creation of an acronym list, each template includes a table with two columns and hidden gridlines in the Acronym List section:
• List each acronym in the first column, with the corresponding spelled-out term in the second column.
• With the cursor in the bottom right cell, press Tab to add a new row.
• Type the acronyms in any order; when done, use Word’s table sort feature to sort the list in alphabetical order.
For an example of an Acronym List section, see this document’s Acronym List on page 122
5.9 Contact Information Section Each RPMS template includes a properly formatted section listing the IHS OIT Help Desk as the point of contact for RPMS questions and problems.
The point of contact should not be changed in an RPMS manual without the approval of the RPMS Standards and Conventions Committee.
Note: Following the Contact Information section, each template contains a section titled, “Document Set-Up Instructions.” Delete this entire section prior to submitting the document for Section 508 remediation and publication.
OIT Standards and Conventions Version 3.0
Documentation Style Guide Section and Page Breaks March 2012
25
6.0 Section and Page Breaks In general, do not manipulate pagination or page breaks by inserting section breaks or hard page breaks. Explicit page or section breaks in Word documents often create problems when text is edited or rearranged. Rather, use paragraph formatting such as the Keep with next and Keep lines together options, as described in Section 6.3.
6.1 Section Breaks The RPMS templates include section breaks (Next page type) in the following locations:
• Between the Title Page and the TOC
• Between the Preface and the Introduction
• Between the final body section and the first Appendix
• Between the final Appendix and the Glossary section Do not insert additional section breaks unless absolutely necessary.
Note: In very rare circumstances, it may be necessary to insert additional section breaks (such as when inserting a landscape-formatted table or figure in a portrait-oriented document, or in documents with very large sections). Be aware that adding section breaks to a document based on an OIT document template may cause problems with headers and footers. If problems occur, contact the OIT Documentation Team for assistance.
6.1.1 Deleting a Document Part or Section Two parts of a document are optional and may be removed if no content exists: the Preface and the Appendixes. Before removing either of these parts, display the Formatting Marks as described in Section 3.2.5.
The Preface and the TOC share the same Section, consequently, the Preface must be removed without disturbing the Section Break that follows it. To remove the Preface:
1. Place the cursor at the beginning of the heading Preface.
2. Scroll until the last paragraph marker (¶) before the next Section Break is visible.
3. Press and hold Shift and click the paragraph marker to the left of the Section Break. The entire content of the Preface should now be highlighted.
4. Release Shift.
OIT Standards and Conventions Version 3.0
Documentation Style Guide Section and Page Breaks March 2012
26
5. Press Delete.
The Appendixes are in a section separate from the rest of the document, consequently, the Appendixes must be removed along with the Section Break that contains the Section properties (the Section Break at the end of the Section. To remove the Appendixes:
1. Place the cursor at the end of the heading Appendix A:.
2. Scroll until the next Section Break is visible.
3. Press and hold Shift, then click at the right margin of the line containing the notation Section Break (Next Page). The entire content of all appendixes should now be highlighted.
4. Release Shift.
5. Press Delete.
Do not remove the Section Break that separates the appendixes from the final body section. Doing so will create errors in the page footers.
Since the ROB appendix is required in all user manuals, do not delete the appendix section in those documents.
6.1.2 Forcing Odd and Even Start Pages Because all OIT documentation is designed to be viewed onscreen (according to the Paperwork Reduction Act of 1996), extra pages included to start sections specifically on even or odd pages are no longer necessary.
In addition, users who chose to print a paper copy of the manual may not have access to printers that allow double-sided printing. Extra pages added to force odd or even start pages would force users to print unnecessary blank pages.
Do not insert section breaks or otherwise format existing section breaks to force odd or even start pages.
6.2 Page Breaks before Section Headings The following styles in RPMS templates are formatted to insert a page break before the heading:
• Heading 1
• Heading 6 (level 1 appendix heading)
• Section (used for Glossary, Acronyms, and Contact Information sections)
• SectionNoTOC (used for Table of Contents and Preface sections)

OIT Standards and Conventions Version 3.0
Documentation Style Guide Section and Page Breaks March 2012
27
All other heading styles do not include a page break before the heading.
Do not add a section break before a section heading unless directed to do so by the OIT Documentation Team.
6.3 Hard Page Breaks Do not use hard page breaks to keep text together across a natural page break. Instead use the Keep lines together (which keeps selected lines of text together) and/or Keep with next (which keeps selected paragraphs together) settings on the Line and Page Breaks tab of the Paragraph dialog box. These settings allow the text to be broken in the appropriate place, rather than forcing a page break that may not be correct after text is edited and rearranged. Widow/Orphan Control prevents a single header or line of a paragraph from displaying at the bottom of a page.
6.4 Page Breaks in Tables
6.4.1 Repeated Header Rows If a table spans one or more page breaks, the table must be formatted to repeat the header row or rows on each page. This property is enabled in all current templates when a new table is first created.
To repeat one or more header rows:
1. Select the table row or rows
2. Select the Table Tools-Layout tab
3. Select Repeat Header Rows
Because it is impossible to know whether a table will break across pages after a document has been edited or rearranged, the OIT Documentation Team practice is to apply this setting to all tables.
6.4.2 Page Breaks within Table Rows Because a table row or cell that includes a page break can cause problems with screen readers, thus making a document inaccessible, tables must be formatted so that pages cannot break within table rows.
To disallow page breaks within table rows, select the table, and then clear the Allow row to break across pages option on the Row tab of the Table Properties dialog box.

OIT Standards and Conventions Version 3.0
Documentation Style Guide Section and Page Breaks March 2012
28
Because it is impossible to know whether a table will break after a document has been edited or rearranged, OIT Documentation Team practice is to apply this setting to all tables.

OIT Standards and Conventions Version 3.0
Documentation Style Guide Text Properties March 2012
29
7.0 Text Properties
7.1 Text Alignment In most cases, document text is left aligned on a 0.75-inch left margin with no paragraph indents, no hyphenation, and no right justification. The “bdytxt1” style in RPMS templates is formatted correctly for body text throughout each document.
If a separate paragraph appears within a bulleted or numbered list item, it must be indented to the same level as the text in the bullet or numbered list style. The “bdytxt2” style in OIT templates is formatted for use with the “Bullet1” and “ListNum” styles, and the “bdytxt3” style in OIT templates is formatted for use with the “Bullet2” style. (The “bdytxt3” style is also used with the “GlossTerm” style.)
Example:
• The text in the “Bullet1” style is indented at 1 inch from the left margin, so a paragraph appearing within a Bullet1 list item must also be indented at 1 inch.
The “bdytxt2” style is indented at 1 inch, so it can be used as a separate paragraph within a Bullet1 list item.
7.2 Text Spacing The text styles in RPMS templates are formatted to support consistent spacing standards. As described in Section 4.1.1, use the appropriate template for each RPMS document, and apply these styles to text in the document using the Styles pane. For more information or assistance with these procedures, contact the OIT Documentation Team.
7.2.1 Paragraph Spacing The “bdytxt1,” “bdytxt2,” and “bdytxt3” styles for general and indented paragraph text incorporate the correct amount of space after each paragraph. Use one of these styles for all paragraph text in a document, depending on the level of indentation required.
The “Bdytxt1 Leadin,” “Bdytxt2 Leadin,” and “bdytxt3 Leadin” styles have a smaller amount of space after the paragraph and are formatted to remain on the same page as the following paragraph. Use one of these styles for a paragraph that introduces a bulleted or numbered list.
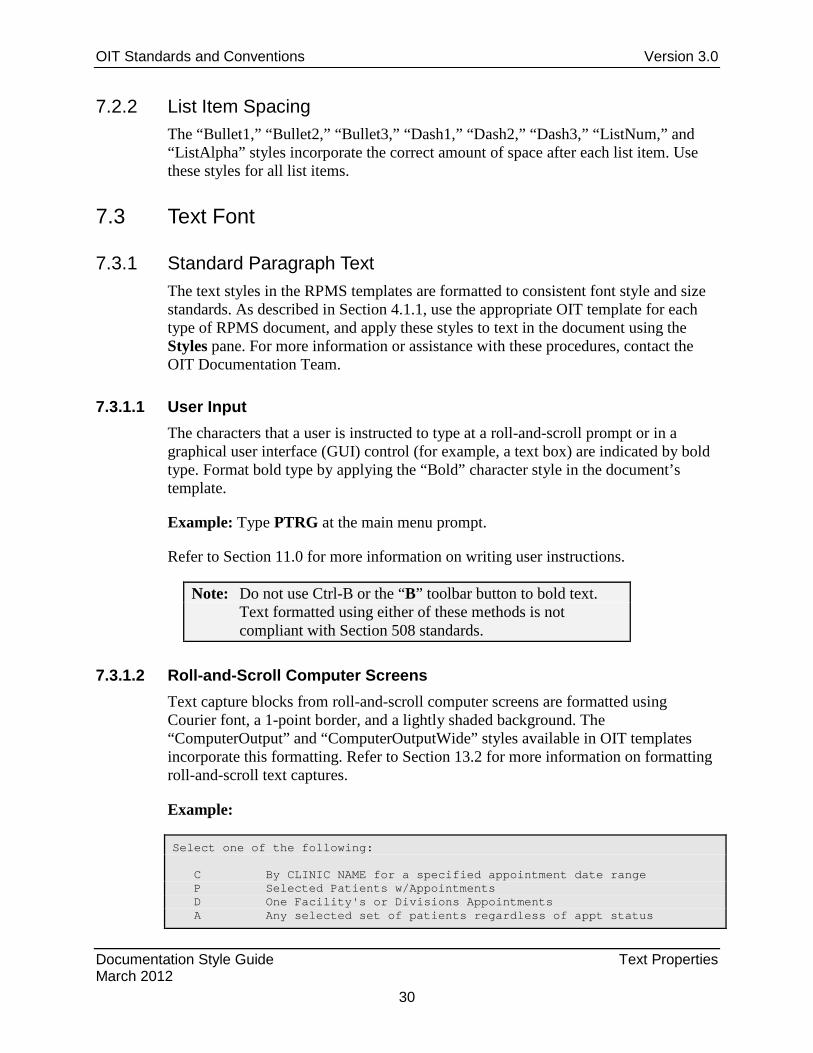
OIT Standards and Conventions Version 3.0
Documentation Style Guide Text Properties March 2012
30
7.2.2 List Item Spacing The “Bullet1,” “Bullet2,” “Bullet3,” “Dash1,” “Dash2,” “Dash3,” “ListNum,” and “ListAlpha” styles incorporate the correct amount of space after each list item. Use these styles for all list items.
7.3 Text Font
7.3.1 Standard Paragraph Text The text styles in the RPMS templates are formatted to consistent font style and size standards. As described in Section 4.1.1, use the appropriate OIT template for each type of RPMS document, and apply these styles to text in the document using the Styles pane. For more information or assistance with these procedures, contact the OIT Documentation Team.
7.3.1.1 User Input The characters that a user is instructed to type at a roll-and-scroll prompt or in a graphical user interface (GUI) control (for example, a text box) are indicated by bold type. Format bold type by applying the “Bold” character style in the document’s template.
Example: Type PTRG at the main menu prompt.
Refer to Section 11.0 for more information on writing user instructions.
Note: Do not use Ctrl-B or the “B” toolbar button to bold text. Text formatted using either of these methods is not compliant with Section 508 standards.
7.3.1.2 Roll-and-Scroll Computer Screens Text capture blocks from roll-and-scroll computer screens are formatted using Courier font, a 1-point border, and a lightly shaded background. The “ComputerOutput” and “ComputerOutputWide” styles available in OIT templates incorporate this formatting. Refer to Section 13.2 for more information on formatting roll-and-scroll text captures.
Example:
Select one of the following: C By CLINIC NAME for a specified appointment date range P Selected Patients w/Appointments D One Facility's or Divisions Appointments A Any selected set of patients regardless of appt status

OIT Standards and Conventions Version 3.0
Documentation Style Guide Text Properties March 2012
31
Create List/Sort by: C// C <Enter>
7.3.2 Italic Type Use italics for small areas of emphasis. Overused italics quickly lose their force.
7.3.3 Underlined Type Underlined text is reserved for identifying hyperlinks.
Do not use underlining for headings or to emphasize particular sections of text. Use the heading styles available in OIT templates, and use italics for emphasis. The “Notes” and “Warning” styles can also be used to highlight appropriate sections of text.
7.3.4 Bold Type Do not use bold type for emphasis.
Use bold type for user input and the names of user interface controls in documentation for GUI applications. Refer to Section 11.0 for more information on writing user instructions.
Bold formatting is also included in the settings for heading styles in the RPMS templates. As with all other styles in the templates, these settings are not to be edited.
Note: Do not use Ctrl-B or the “B” toolbar button to format bold type. Text formatted using either of these methods is not compliant with Section 508 standards.
Example: At the “Home” prompt, type 0;P-OTHER80 and press Enter.
Example: Select a location from the Location list.
7.3.5 Heading Font and Alignment The “Heading 1,” “Heading 2,” “Heading 3,” and “Heading 4” styles in the RPMS templates have been formatted for consistent font, font size, and alignment for each heading level across all RPMS documentation.
All headings and subheadings are placed at the left margin without incremental indentation. Headings are not underlined.

OIT Standards and Conventions Version 3.0
Documentation Style Guide Text Properties March 2012
32
As described in Section 4.1.1, use the appropriate OIT template for each RPMS document, and apply these styles to text in the document using the Styles pane. For more information or assistance with these procedures, contact the OIT Documentation Team.
7.4 Capitalization “Title case” or “title-style capitalization” refers to text in which the first letter of most words is capitalized, such as the titles of books or articles. The rules for title case are described in of The Chicago Manual of Style (15th Edition), Section 8.167
“Sentence case” or “sentence-style capitalization” refers to text in which only the first word of a sentence, and any proper nouns, are capitalized. The rules for sentence-style capitalization are described in Section 8.166 of The Chicago Manual of Style (15th Edition). The term “initial capitals” or “initial caps” refers to text in which only the first word and any proper nouns in a phrase are capitalized.
Section headings are set in title case. Refer to Section 8.6 for more information about headings styles and formatting.
In general, capital letters are used in the following situations:
• All letters in acronyms
• The initial letter of the first word in a list item
• The initial letter of the first word in a callout
• The initial letter of a key name (“Enter,” “Ctrl,” “Shift,” “Alt,” “Tab”)
• The initial letter of a sentence. Avoid starting a sentence with a command name or application name if it has a lowercase initial letter (e.g., “iCare,” etc.).
Ask the point of contact to verify capitalization of all variables, field names, options, keys, file names, etc. that cannot be verified by examining roll-and-scroll text captures.
Do not use capital letters for emphasis; use italics instead.
• Bold is reserved for user input.
• Underlining is reserved for hyperlinks.
7.4.1 Captions Use sentence case capitalization.

OIT Standards and Conventions Version 3.0
Documentation Style Guide Text Properties March 2012
33
7.4.2 Window Parts • For window titles, match the capitalization in the software.
• Do not capitalize the word “window,” “pane,” “panel,” or “dialog.”
• Do not capitalize words such as “field,” “tab,” “panel,” “button,” or “list box.”
• Do not capitalize the names of window types.
7.4.3 Key Names Match capitalization on the keyboard.
7.4.4 RPMS Package Names and Namespaces Use initial caps for RPMS package names. Spell out the full package name at first use, followed by the abbreviation or namespace in parentheses. After a package name has been introduced this way, use the abbreviation or namespace throughout the document. Namespaces are rarely acronyms for the package name.
Example: The Radiology package (RA) can be downloaded. The RA package is…
Always use the word “package” when referring to an RPMS package, but do not capitalize the word “package” unless the entire phrase is initial capped, such as in headings.
7.4.5 Field Names • Match the onscreen capitalization of field names.
• Do not use all capital letters for a field name unless that is how it appears on the screen.
• Ask the point of contact to verify capitalization of all variables, field names, options, keys, file names, etc. that cannot be verified by examining roll-and-scroll text captures.
7.4.6 File Names Ask the point of contact to verify capitalization of all variables, field names, options, keys, file names, etc. that cannot be verified by examining roll-and-scroll text captures.
7.4.7 Option Names • Match the onscreen capitalization of option names.

OIT Standards and Conventions Version 3.0
Documentation Style Guide Text Properties March 2012
34
• Ask the point of contact to verify capitalization of all variables, field names, options, keys, file names, etc. that cannot be verified by examining roll-and-scroll text captures.
• All option names must be followed by the word “option” to distinguish option names from other elements. Do not capitalize the word “option” when it follows the option name.
7.5 Punctuation Use standard American English punctuation rules. Refer to the The Chicago Manual of Style (15th Edition) for punctuation guidelines not addressed in this section.
7.5.1 Brackets Do not use brackets ([ ] or { }) as a substitute for parentheses. Use square brackets ([ ]) within parentheses, if necessary.
7.5.2 Colon • Use a colon (:) following a complete sentence to introduce a list or procedure
(Section 12.5).
• Do not use a colon to introduce a figure or table in the text or to introduce heading titles.
Exceptions to this rule include the use of a colon to separate a figure number from the accompanying description in a caption (e.g., Figure 2-2: Profit graph) or when a heading has two parts (e.g., Appendix A: List of Names). In both of these cases, a single space follows the colon.
7.5.3 Comma • For items in a series, use a serial comma (a comma preceding the “and” or “or”
before the final item) to add clarity.
Problem: Jane, Joe and Barry are in charge of the Radiology package.
Solution: Jane, Joe, and Barry are in charge of the Radiology package.
• Commas are not required in a series whose elements are all joined by conjunctions, unless the elements are long and pauses are helpful.
Example: Was that document written by Jane or Joe or Barry?

OIT Standards and Conventions Version 3.0
Documentation Style Guide Text Properties March 2012
35
Note: Word can check for serial commas. On the File tab, select Options, then Proofing. In the section When correcting spelling and grammar in Word, click Grammar Settings to open the Grammar dialog and select Always in the Comma required before last item list.
7.5.4 Ellipsis Points Word has a special character to create ellipsis points (…); the keyboard shortcut is Ctrl-Alt-period (.).
• Use ellipsis points to indicate the omission of a word, phrase, line, paragraph, or more from a quoted sentence. The ellipsis points must always appear together on the same line.
• Do not use ellipsis points before the first word of a quotation or after the last word of a quotation, unless the sentence as quoted is deliberately incomplete.
Refer to The Chicago Manual of Style (15th Edition), Section 11.51 for more information.
Note: If enabled, Word’s AutoCorrect-Replace Text as you Type feature will replace three typed periods with ellipsis points.
7.5.4.1 In Roll-and-Scroll Documentation Ellipsis points that appear after an option name in RPMS applications indicate that the option has a submenu. In roll-and-scroll text capture blocks, be sure the ellipsis points appear in the text capture.
Examples:
PTRG Patient Registration Menu… SIT Set Default Facility… AGX Data Export Menu…
7.5.4.2 In GUI Documentation Ellipsis points that appear after menu options or on buttons in GUI applications indicate that the option or button opens a dialog box. Do not include the ellipsis points when referring to these options or buttons in user instructions.
Problem: On the Format menu, click Paragraph… to open the Paragraph dialog box.
Solution: On the Format menu, click Paragraph to open the Paragraph dialog box.
OIT Standards and Conventions Version 3.0
Documentation Style Guide Text Properties March 2012
36
7.5.5 Hyphen, Dashes, and Minus Sign The hyphen, the dashes (two distinct types), and the minus sign are separate and unique typographic characters, each formed differently and placed into text in its own unique way.
7.5.5.1 Hyphen The hyphen (Unicode 002D) is typed by pressing the hyphen key (-) located to the right of the zero key (0).
Follow the extensive rules in The Chicago Manual of Style (15th edition), Sections 7.82 through 7.90, to determine whether or not to use a hyphen in a compound word, or consult the Merriam Webster Collegiate Dictionary (most recent edition) or Merriam Webster Online Dictionary (http://www.m-w.com/dictionary.htm).
Note: Many prefixes do not use a hyphen unless the following word is a proper noun, or if omitting the hyphen would cause confusion in the context of the document. The Chicago Manual of Style (15th Edition), Section 7.90, lists general and specific rules for hyphenating words formed using prefixes.
• Do not use a hyphen with an adverb ending in “ly,” or with words that are listed as unhyphenated in the Merriam Webster Collegiate Dictionary.
• Do not use a hyphen to allow a word to break across lines.
7.5.5.2 Em Dash Word has a special character to create an em dash (—, Unicode 2014); the keyboard shortcut is Ctrl-Alt-Num - (“Num -” is the dash on the numeric keypad).
• Follow the guidelines in The Chicago Manual of Style (15th Edition), Sections 6.87 through 6.94, to determine whether or not to use an em dash.
• Do not add a space before or after an em dash.
• In OIT documents, em dashes may be used in place of a comma or parentheses to amplify or explain.
• Do not use an em dash in list items with introductory words or phrases; refer to Section 12.6.4 for the correct way to construct this kind of list.
• Do not use an em dash in section headings.

OIT Standards and Conventions Version 3.0
Documentation Style Guide Text Properties March 2012
37
7.5.5.3 En Dash Word has a special character to create an en dash (–, Unicode 2013); the keyboard shortcut is Ctrl- Num - (“Num -” is the dash on the numeric keypad).
• Use an en dash in ranges of dates, times, and numbers.
• Do not add a space before or after an en dash. Examples: 1989–1995
• Do not use an en dash if the word “from” or “between” precedes the first element in the range. Use the word “to” or “through” instead of the en dash with “from,” and use the word “and” with “between.”
Problem: The application was in use from 1995–2006.
Solution: The application was in use from 1995 to 2006.
Problem: This report was based on data collected between January–December.
Solution: This report was based on data collected between January and December.
Note: The en dash is sometimes mistaken for the minus sign, but the minus sign and the en dash are distinct characters.
7.5.5.4 Minus Sign The minus sign (−) is used to indicate negative numbers and to show mathematical subtraction. A true minus sign (Unicode 2212) is obtained in one of two ways:
• Type 2212 and press Alt-X; the typing is replaced with the minus sign.
• From the Insert tab: a. Place the cursor where the minus sign is wanted.
b. Select Symbol from the Symbols pane on the Insert tab.
c. Select More symbols to display the Symbol dialog.
d. Type 2212 in the Character code field; the view will jump to the minus sign.
e. Click Insert; the dialog closes and the minus sign is placed in the text.
7.5.6 Parentheses • Use parentheses to introduce abbreviations and acronyms that are used later or to
reference other sections or figures.
Example: The Patient Demographic dialog box is displayed (Figure 2-2).

OIT Standards and Conventions Version 3.0
Documentation Style Guide Text Properties March 2012
38
Problem: Use the graphical user interface or GUI to perform the task.
Solution: Use the graphical user interface (GUI) to perform the task.
• Use parentheses ( ) around tangential material. If the material is crucial to the text, parentheses are inappropriate.
• Avoid constructs like “patient(s),” and “two (2).”
7.5.7 Punctuation after Italicized or Bold Text To avoid confusion, punctuation that follows an emphasized item, names of user interface controls, or user input text is not italicized or bolded.
Example: Select the file. Click Open, and then locate the item in the file.
7.5.8 Punctuation in Numerals • Use a comma in numerals of five or more digits.
• Do not use a comma in four-digit numerals. The one exception to these rules is when four- and five-digit numerals are organized in columnar format; in this case, use a comma in both four- and five-digit numerals.
7.5.9 Punctuation Marks Used as Commands Many RPMS packages use punctuation marks as command and navigational responses.
• When a punctuation mark is used as a command, spell out the name of the mark and give a parenthetical example immediately following.
• If the user is expected to type the punctuation mark, set it in bold type within the parentheses.
Examples:
Type a question mark (?) at the “Name” prompt to see a list of options.
Type an ellipsis (…) at the “Replace:” prompt to select all of the existing text for replacement.
Type a caret (^) at the “Device:” prompt.
7.5.10 Quotation Marks • Use quotation marks (“ ”) to indicate material that is taken verbatim from another
source. This does not include boilerplate information or information from previous documentation versions.

OIT Standards and Conventions Version 3.0
Documentation Style Guide Text Properties March 2012
39
• Use quotation marks once when using a familiar word in an unfamiliar context. Do not continue to use quotation marks after the first use of the word.
• When referring to a word itself rather than the concept represented by the word, use either italics or quotation marks to set the word apart from the rest of the text.
Example: Use the serial comma preceding the “and” or “or” before the final item in a series.
• Use quotation marks around prompts in procedure steps for roll-and-scroll applications.
Example: To select the Patient Registration menu, type PTRG at the “Option” prompt.
7.5.11 Punctuation in Quotation Marks • Periods and commas go inside quotation marks.
• Other punctuation (colons, question marks, etc.) go outside quotation marks, unless they are part of the quoted material.
7.5.12 Semicolon • Use a semicolon (;) before a phrase that introduces an explanatory or
summarizing statement.
• Use a semicolon to separate independent clauses joined by conjunctive adverbs, such as “therefore.”
• Use a semicolon to separate items in a series when each item contains one or more commas.
7.5.13 Slash • Do not use a slash (/) as a substitute for “or.”
• Avoid constructs like “and/or,” and “s/he.”
• Do not put a space before or after a slash.
7.5.14 Space after Periods Use one space, not two, after a period at the end of a sentence.

OIT Standards and Conventions Version 3.0
Documentation Style Guide Numbers and Numbering March 2012
40
8.0 Numbers and Numbering
8.1 Numbers in Text The whole numbers zero through nine are spelled out in running text, unless followed by a fraction (Section 8.2). The numbers 10 and above are left as numerals. This rule does not apply to item numbers in numbered lists, page numbers, numbers used as measurements, or in screen captures or roll-and-scroll text captures.
When a number less than 10 and a number of 10 or greater appear in the same sentence, all numbers are expressed as numerals, unless the first word of the sentence is a number.
Example: The company owned 150 trucks, employed 271 people, and rented 7 warehouses.
Spell out numbers in the following situations:
• Common units of time greater than one second, from zero to nine
• Approximations
• Any number that begins a sentence
• Extreme values (such as million), but precede the value with a numeral Use numerals in the following situations:
• Negative numbers
• Percentages, decimals, and measurements
• Units of time smaller than one second
• References to bits and bytes
8.2 Fractions Use numerals for fractions in tables and in units of measurement, but in prose, spell out fractions less than one (e.g., “one-half,” “three-fourths”) using a hyphen.
Do not use a space between a numeral and a related fraction. If a fraction is used in a compound modifier, use numerals and insert a hyphen between the fraction and the unit of measurement.
Problem: You will see ½ of the patient names on the first screen.
Problem: You can set your system to automatically create 1 ½ inch margins.

OIT Standards and Conventions Version 3.0
Documentation Style Guide Numbers and Numbering March 2012
41
Solution: You will see one-half of the patient names on the first screen.
Solution: Set the system to automatically create 1½-inch margins.
Example: He added 5½ to the total.
8.3 Page Numbering The title page of an RPMS document is not numbered. Front-matter page numbering begins on the first page after the title page (the first page of the TOC) with lowercase roman numerals (i, ii, iii, iv, v, etc.) and continues through the end of the Preface. The body of the document is numbered using Arabic numerals beginning on the first page after the end of the Table of Contents or Preface section.
Formatted page footers containing correctly formatted page numbers are included in all RPMS templates.
Note: Do not edit the footer directly. If page numbers do not display correctly, contact the OIT Documentation Team for assistance.
8.4 Figure and Table Numbering Use Word’s Insert Caption dialog box from the context menu to create autonumbered figure and table captions. For more information on captions and the Insert Caption dialog box, refer to Section 13.1.3.
Figures and tables are numbered in the 1-1 format, where the first number corresponds to the top level (Heading 1) section number and the second number corresponds to the order of the figure within that section. The number appears in the caption.
8.5 Item/List Numbering Use a numbered list only if the items must be completed in a particular order or if the numbering is critical to understanding the list or items. If there is no explicit reason to use a numbered list, use a bulleted list instead.
Refer to Section 12.0 for information on structuring numbered and bulleted lists.
OIT Standards and Conventions Version 3.0
Documentation Style Guide Numbers and Numbering March 2012
42
8.6 Heading Numbering The “Heading 1” through “Heading 9” styles in the RPMS templates are configured to support consistent numbering and formatting for five body heading levels and four appendix heading levels.
• Heading levels 1 through 5 are numbered in legal/outline style (1.0, 1.1, 1.1.1, 1.1.1.1, 1.1.1.1.1).
• Heading levels 6 through 9 are numbered in modified legal/outline style (Appendix A, A.1, A.1.1, A.1.1.1).
The headings in this document are numbered and formatted correctly.
As described in Section 4.1.1, use the appropriate template for each document (user manual, technical manual, etc.), and apply these styles to text in the document using the Styles pane. For more information or assistance with these procedures, contact the OIT Documentation Team.

OIT Standards and Conventions Version 3.0
Documentation Style Guide Abbreviations and Acronyms March 2012
43
9.0 Abbreviations and Acronyms An abbreviation is a shortened form of a word or phrase that takes the place of the full word or phrase (e.g., “Dr.,” “Mr.,” “Ms.,” “am,” “pm”).
An acronym is a term composed of the initial letters of a name or phrase that is read as a single word (e.g., “AIDS,” “NATO”).
An initialism is a term composed of the initial letters of a name or phrase that is read as a series of letters (e.g., “BBC,” “ATM”).
In this document, “Acronym” refers to both acronyms and initialisms.
9.1 Using Abbreviations Abbreviations are usually familiar and do not require any explanation. Less familiar abbreviations (e.g., medical terms) should be spelled out at first use.
Abbreviations should only be used in contexts where they are clear to readers. Some are almost never used in spelled-out form, and others, though in common use, are normally spelled out at first occurrence as a courtesy to readers. {The Chicago Manual of Style (15th Edition)}
9.1.1 Units of Measure Do not abbreviate common units of measurement (“in.,” “ft”). Use the word “inches” instead of the inch symbol (″).
9.1.2 Dos and Don’ts To avoid making it difficult for a screen reader to read the text accurately:
• Do spell out medical terms.
• Do not use industry-unique abbreviations (like “pt.” for “patient”) or other “medical shorthand” terminology except when quoting text displayed by RPMS.
• Do not use “w/,” “w/out,” “w/o,” “&,” “+” (instead of “and”), or “thru” in place of “through.”
9.2 Using Acronyms If an acronym appears more than once in a document, the full term is spelled out (and defined, if necessary) on first use, followed by the acronym in parentheses. Acronyms should not be defined in headings at first use. In this situation, they should be spelled out in the heading and defined in the text below. After the first use of the term, use only the acronym without the parenthetical explanation.

OIT Standards and Conventions Version 3.0
Documentation Style Guide Abbreviations and Acronyms March 2012
44
If the term is only used once, it is spelled out and the acronym is not used.
Problem: The OIT headquarters are staffed with competent professionals.
Solution: The Office of Information Technology (OIT) Support Center headquarters are staffed with competent professionals.
Problem: Patient Chart is IHS’s first GUI program.
Solution: Patient Chart is IHS’s first Graphical User Interface (GUI) program.
9.2.1 Acronym List All acronyms and initialisms in the document should appear in alphabetical order in the Acronym List section following the Glossary. Refer to Section 5.8 for more information on the structure of the acronym list.
Do not include abbreviations in the acronym list.
9.2.2 Acronyms in the Glossary Acronyms may also appear in the glossary with a more complete definition if necessary, but do not use the Glossary section as a substitute for the Acronym List.
9.2.3 Acronyms with Indefinite Articles The article used with an acronym (“a” or “an”) depends on the pronunciation of the acronym.
Examples: A North Carolina State University (NCSU) professor; an NCSU professor; a NATO treaty

OIT Standards and Conventions Version 3.0
Documentation Style Guide Grammar March 2012
45
10.0 Grammar
10.1 Tense • Use the present tense in OIT documents. Restrict the use of the future tense to
circumstances that will happen at some future time, such as next year.
• Avoid conditional phrases and past tenses. Problem: The user will type ARMS at the menu.
Solution: Type ARMS at the menu.
Problem: At the Options prompt, type PTRG. The Patient Registration menu will be displayed.
Solution: At the Options prompt, type PTRG. The Patient Registration menu is displayed.
Problem: If you are missing any drives that might have been added to your machine, you may right-click on an empty space and…
Solution: If any drives are missing from the workstation, right-click an open space on the desktop and…
• When describing the steps taken by a user in an example, use the past tense. Example: The user typed ARMS at the menu.
10.2 Voice Make maximum use of the active voice. Whenever possible, rewrite passive voice text to use the active voice.
Problem: The Menu Editor is started from the Main Menu.
Solution: Start the Menu Editor from the Main Menu.
Problem: When you click Find, the Find dialog box is displayed.
Solution: Click Find to display the Find dialog box.
Exceptions: If the sentence does not make sense in the active voice, then use the passive, but limit the occurrences. Using passive voice helps avoid personalization of the application or the computer and prevents bringing the developer or other individuals into the text as subjects.

OIT Standards and Conventions Version 3.0
Documentation Style Guide Grammar March 2012
46
10.3 Singular and Plural To the maximum extent possible, use the singular form. Depending on sentence construction, the use of the plural form might incorrectly imply to the reader that the situation described only occurs in multiples, when such is likely not the case.
Problem: System administrators set system permissions for providers.
Solution: A system administrator sets system permissions for a provider.
Problem: All users must have workstations, user IDs, and passwords.
Solution: Each user must have a workstation, a user ID, and a password.
10.4 Sentence Length and Concise Statements • In general, concise sentences should not exceed 25 words. Express one idea per
sentence and trim unnecessary words.
• Try to keep procedure steps to less than 25 words as well. In general, each procedure step should express a single action; however, instructing the user to press Enter at the end of an entry does not require a separate step.
Problem: If you would like to place a menu item onto the desktop, you can drag and drop from the menu to the desktop and it will place an icon there with all the appropriate properties set for you.
Solution: Drag a menu item from the menu to the desktop. The drag action places an icon with the appropriate properties on the desktop.
10.5 Colloquial Language Do not use colloquial language.
Problem: The Modem Lights Applet is a handy applet that will start your dial up connection.
Solution: The Modem Lights applet starts the dial up connection.
Problem: At times, the QMan application may act brain damaged.
Solution: At times, the QMan application may respond erratically.
10.6 Split Infinitives Adverbs sometimes separate the word “to” from the principal verb. Avoid split infinitives, but do not mutilate a sentence to remove one.

OIT Standards and Conventions Version 3.0
Documentation Style Guide Grammar March 2012
47
Although from about 1850 to 1925 many grammarians stated otherwise, it is now widely acknowledged that adverbs sometimes justifiably separate the to from the principal verb. {The Chicago Manual of Style (15th Edition)}
Example: They expect to more than double their income in the following year.
If the adverb bears the emphasis in a phrase {to boldly go} {to strongly favor}, then leave the split infinitive alone. But if moving the adverb to the end of the phrase doesn’t suggest a different meaning or impair the sound, then it is an acceptable way to avoid splitting the verb. Recasting a sentence just to eliminate a split infinitive or avoid splitting the infinitive can alter the nuance or meaning: for example, it’s best to always get up early (always modifies get up) is not quite the same as it’s always best to get up early (always modifies best). Or an unnatural phrasing can result: it’s best to get up early always. {The Chicago Manual of Style (15th Edition)}
10.7 Adverbs and Adjectives Use adverbs and adjectives sparingly. Adverbs are generally not necessary in technical content; use adjectives only when necessary for descriptive purposes.
• If an adverb is necessary to qualify the function of a component, it should appear as close as possible to the word it modifies to avoid confusion. In all cases, test whether the phrase can stand alone without the adverb.
Words such as “simply,” “obviously,” and “clearly” can appear condescending in some contexts, so be aware of the tone of the document when determining whether such words are used appropriately.
Problem: Simply press Enter when you are finished.
Solution: Press Enter when you are finished.
• If an adjective is necessary to differentiate between items, use the adjective. In all cases, test whether the phrase can stand alone without the adjective.
10.8 Contractions Do not use contractions (e.g., “can’t,” “doesn’t,” “isn’t,” “don’t”). “Cannot” is not a contraction.
10.9 Gerunds Do not use gerunds when they could be mistaken for adjectives.

OIT Standards and Conventions Version 3.0
Documentation Style Guide Grammar March 2012
48
Problem: Clicking Programs opens the Programs menu.
(If the programs are literally clicking, something is wrong with the computer!)
Solution: Click Programs to open the Programs menu.
Exception: Gerunds are appropriate in section headers; for example, “Using the Menu Editor.”
10.10 Articles Do not omit articles.
Problem: Open Main Menu and select item.
Solution: Open the main menu and select an item.
10.11 Indefinite Pronouns Restrict the use of indefinite pronouns such as “it,” “this,” and “those,” especially at the beginning of sentences. When it is necessary to use an indefinite pronoun, clarify the object to which the pronoun refers.
Problem: The Menu Editor is a configuration tool for the Main Menu. This is useful in setting the system to meet system requirements.
Solution: The Menu Editor is a configuration tool for the Main Menu. This tool is useful in setting the system to meet system requirements.
Figures of speech, such as “It is recommended,” are acceptable uses of indefinite pronouns.
10.12 Personal Pronouns In technical documentation, do not use the personal pronouns “I” and “we,” and limit the use of “you,” “he,” “she,” and “they.”
Problem: We recommend this method of moving a symbolic link.
Solution: Use this method to move a symbolic link.
Problem: In this section, we describe the interface.
Solution: This section describes the interface.
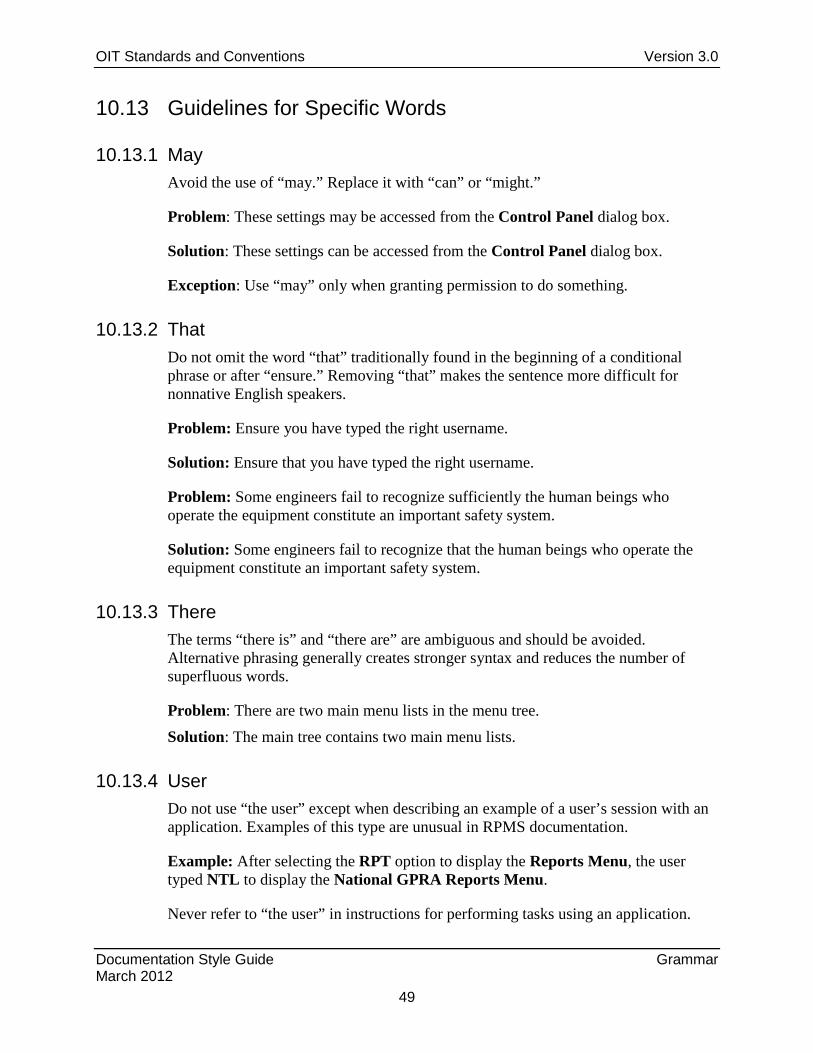
OIT Standards and Conventions Version 3.0
Documentation Style Guide Grammar March 2012
49
10.13 Guidelines for Specific Words
10.13.1 May Avoid the use of “may.” Replace it with “can” or “might.”
Problem: These settings may be accessed from the Control Panel dialog box.
Solution: These settings can be accessed from the Control Panel dialog box.
Exception: Use “may” only when granting permission to do something.
10.13.2 That Do not omit the word “that” traditionally found in the beginning of a conditional phrase or after “ensure.” Removing “that” makes the sentence more difficult for nonnative English speakers.
Problem: Ensure you have typed the right username.
Solution: Ensure that you have typed the right username.
Problem: Some engineers fail to recognize sufficiently the human beings who operate the equipment constitute an important safety system.
Solution: Some engineers fail to recognize that the human beings who operate the equipment constitute an important safety system.
10.13.3 There The terms “there is” and “there are” are ambiguous and should be avoided. Alternative phrasing generally creates stronger syntax and reduces the number of superfluous words.
Problem: There are two main menu lists in the menu tree.
Solution: The main tree contains two main menu lists.
10.13.4 User Do not use “the user” except when describing an example of a user’s session with an application. Examples of this type are unusual in RPMS documentation.
Example: After selecting the RPT option to display the Reports Menu, the user typed NTL to display the National GPRA Reports Menu.
Never refer to “the user” in instructions for performing tasks using an application.

OIT Standards and Conventions Version 3.0
Documentation Style Guide Grammar March 2012
50
Problem: The user clicks Select next to the Provider box to display the Provider window.
Solution: Click Select next to the Provider box to display the Provider window.
10.13.5 When and If Use “when” for an inevitable event and “if” for a conditional event.
For example, “When the prompt is displayed” implies that the prompt is definitely displayed, while “If the prompt is displayed” implies that the prompt might or might not be displayed.

OIT Standards and Conventions Version 3.0
Documentation Style Guide Writing Instructions March 2012
51
11.0 Writing Instructions The RPMS family of applications includes both text-based roll-and-scroll applications and GUI applications. While instructions for both types of application follow the same general principles, there are distinct standards and conventions that apply to each type separately
Sections 11.1 and 11.2 outline general principles applicable to all RPMS documentation. Section 11.3 contains guidelines for documenting roll-and-scroll applications, and Section 11.4 contains guidelines for documenting GUI applications.
11.1 Referring to Keys and Keystrokes
11.1.1 Type vs. Enter When instructing the user to input specific information at a roll-and-scroll prompt or in a GUI text box, always use the word “type” instead of “enter.”
Example: Type the patient’s full name at the “Select Patient Name” prompt.
Use “enter” only when referring to general functions such as data entry.
Example: Use the Patient Registration Menu option to enter patient data into the system.
11.1.2 Enter Key When instructing the user to press the Enter key, use the phrase, “Press Enter.” Always use the word “press” instead of “hit,” “strike,” etc.
Capitalize the key name as it appears on the keyboard. Do not use any additional punctuation or formatting when referring to the Enter key or any other key.
Problem: Press RETURN.
Problem: Hit <Return>.
Problem: Type the patient’s name and press the Return Key.
Solution: Type the patient’s name and press Enter.
Exception: When adding annotations to a roll-and-scroll text capture, the notation “<Enter>” can be used to indicate that the Enter key was pressed. In this case, the notation for the Enter key (<Enter>) should be bolded.
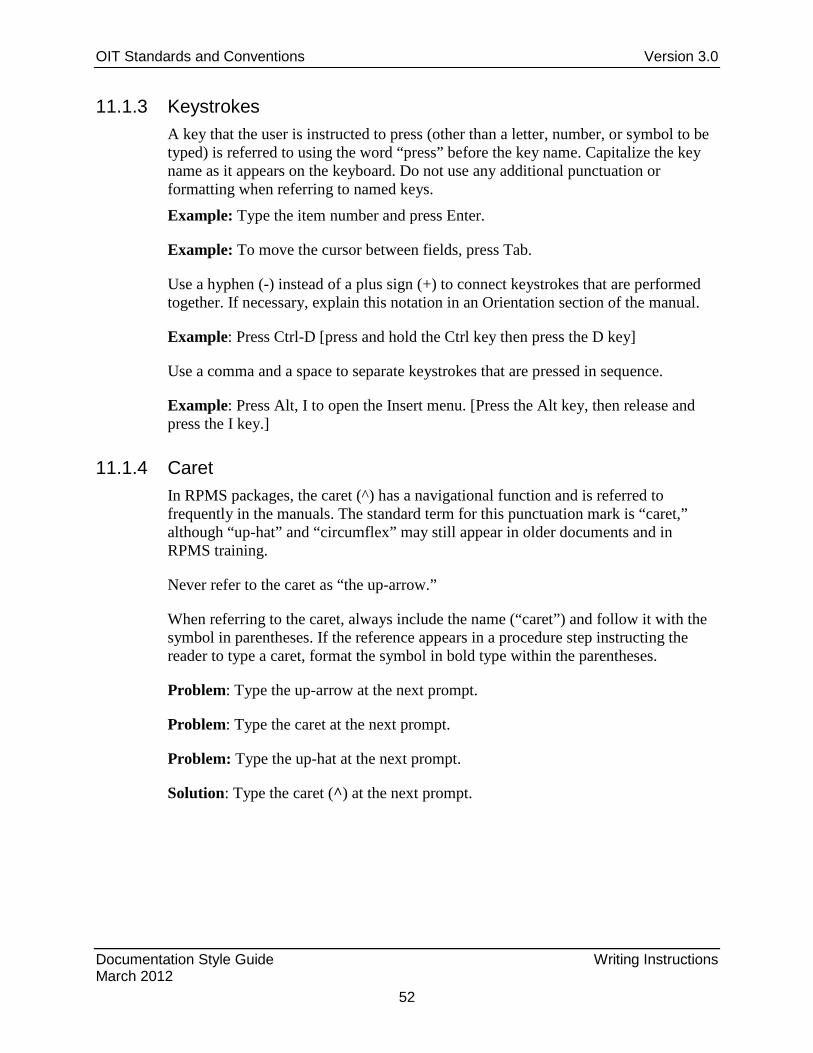
OIT Standards and Conventions Version 3.0
Documentation Style Guide Writing Instructions March 2012
52
11.1.3 Keystrokes A key that the user is instructed to press (other than a letter, number, or symbol to be typed) is referred to using the word “press” before the key name. Capitalize the key name as it appears on the keyboard. Do not use any additional punctuation or formatting when referring to named keys.
Example: Type the item number and press Enter.
Example: To move the cursor between fields, press Tab.
Use a hyphen (-) instead of a plus sign (+) to connect keystrokes that are performed together. If necessary, explain this notation in an Orientation section of the manual.
Example: Press Ctrl-D [press and hold the Ctrl key then press the D key]
Use a comma and a space to separate keystrokes that are pressed in sequence.
Example: Press Alt, I to open the Insert menu. [Press the Alt key, then release and press the I key.]
11.1.4 Caret In RPMS packages, the caret (^) has a navigational function and is referred to frequently in the manuals. The standard term for this punctuation mark is “caret,” although “up-hat” and “circumflex” may still appear in older documents and in RPMS training.
Never refer to the caret as “the up-arrow.”
When referring to the caret, always include the name (“caret”) and follow it with the symbol in parentheses. If the reference appears in a procedure step instructing the reader to type a caret, format the symbol in bold type within the parentheses.
Problem: Type the up-arrow at the next prompt.
Problem: Type the caret at the next prompt.
Problem: Type the up-hat at the next prompt.
Solution: Type the caret (^) at the next prompt.

OIT Standards and Conventions Version 3.0
Documentation Style Guide Writing Instructions March 2012
53
11.2 Writing Procedures
11.2.1 Introducing Procedures To introduce a series of procedural steps, use a complete sentence ending with a colon, and follow the same grammatical pattern for all such introductions in a document.
Refer to Section 12.0 for more information on the structure of lists in procedures.
Example: To print the document, follow these steps:
11.2.2 Using Numbered Steps When a procedure contains more than one instruction, number the steps sequentially by applying the style ListNum to each instruction. To start a new sequence at “1,” right-click the first instruction in the set and select Restart at 1.
When a sequential step encompasses two or more subordinate steps, list the subordinate steps as an ordered list by applying the style ListAlpha to each step.
When a sequential step involves selecting between several options, list the options as an indented bulleted list by applying the style Bullet2 to each option.
Example:
1. Type the patient’s name in the Name field:
a. Type the last name
b. Type a comma (,)
c. Type the first name (without a space after the comma)
2. Type the patient’s address in the appropriate format:
• Street number, space, street name
• “P.O. Box” followed by the box number
11.2.3 Describing User Input Use bold type to indicate those characters that are to be typed at a roll-and-scroll prompt or in a GUI control (for example, a text box). Format bold type by applying the Bold character style.
Example: Type PTRG at the main menu prompt.
Example: Type your user name in the Name box.

OIT Standards and Conventions Version 3.0
Documentation Style Guide Writing Instructions March 2012
54
Note: Do not use Ctrl-B or the “B” toolbar button to indicate user input. Text formatted using either of these methods does not meet Section 508 accessibility requirements.
11.2.4 Describing User Selections Describe selections in the order they are made.
Example: On the File menu, click Open.
Example: In the Open dialog box, select the file to open and then click Open.
Example: To print the report to a file, type Host or HFS at the “Home” prompt, then type the file location and name at the “HOST FILE NAME” prompt.
11.3 Writing Instructions for Roll-and-Scroll Applications
11.3.1 Referring to System Prompts Use double quotes around prompts in instructions and procedure steps. Use single quotes only within double quotes. Do not add quotes around prompts within a roll-and-scroll text capture block.
In instructions and procedure steps, do not edit prompts for grammar, spelling, or capitalization. Prompts must appear in instructions exactly as they appear on the roll-and-scroll screen.
If a prompt ends with a question mark, include the question mark within the quotation marks. However, do not include the ending colon when a prompt is referred to in an instruction or procedure step.
The word “prompt” must follow all references to prompts to distinguish them from other elements. When directing the user to type a response to a prompt, always include the prompt name.
11.3.2 Responding to Prompts In general, instructions should include (1) the action the user should take (“type ZZZ and press Enter”); (2) the location where the action is taken (“at the ‘XXX’ prompt”); and (3) the result or goal of the action (“to display the AAA menu” or “a sorted list of providers is displayed”). The order of these elements depends on the desired structure of the individual procedure step or instruction.
Always include the phrase “press Enter” in the instruction after describing the user input.

OIT Standards and Conventions Version 3.0
Documentation Style Guide Writing Instructions March 2012
55
Example: To display the Patient Registration menu, type RPTG at the “Main Menu” prompt and press Enter.
Example: At the “Main Menu” prompt, type RPTG and press Enter to display the Patient Registration menu.
11.3.2.1 Default Responses to Prompts Prompts in RPMS are often followed by a default response. Default responses appear after the colon or question mark, if present, and are followed by two forward slashes.
In the following example, “C” is the default response to the “Create List/Sort by” prompt.
Select one of the following: C By CLINIC NAME for a specified appointment date range P Selected Patients w/Appointments D One Facility's or Divisions Appointments A Any selected set of patients regardless of appt status Create List/Sort by: C//
Default responses are not uniform throughout RPMS and are not part of the actual prompt. Do not include the default response when referring to a prompt in an instruction or procedure step.
Problem: Type P (Print) at the “Do you want to: B//” prompt.
Solution: To print the report, type P at the “Do you want to” prompt.
The default response to a prompt is accepted by pressing Enter.
Example: At the “Enter the Name of the Community Taxonomy” prompt, press Enter to accept the default taxonomy, or type the name of a taxonomy and press Enter.
11.3.3 Order of Instructions and Text Capture Blocks Instructions for roll-and-scroll applications often include specially formatted text blocks displaying the screen that appears at each step in a procedure.
Whenever possible, place the instruction for responding to a specific system prompt after the text capture block that displays the prompt (Figure 11-1).

OIT Standards and Conventions Version 3.0
Documentation Style Guide Writing Instructions March 2012
56
If an instruction refers to the screen displayed after responding to the prompt, place the instruction before the text capture of the next screen (if available). It is not necessary to refer to the next screen, but if the structure of the instruction allows, the phrase “as shown in the following example” is an acceptable way to do this (Figure 11-1).
Refer to Section 13.2.1 for information about formatting roll-and-scroll text capture blocks.
11.3.4 Example of Instructions for Roll-and-Scroll Applications Figure 11-1 shows the correct order of text capture blocks and user instructions for a roll-and-scroll application, as well as the structure of some typical instructions.
1. At the “Select National GPRA & PART Reports Option” prompt, type SUM and press Enter to display the following information about the National GPRA & PART Clinical Performance Summaries Report.
IHS 2009 National GPRA & PART Report Clinical Performance Summaries This will produce ONLY the clinical performance summaries for the National GPRA & PART Report for the 2009 GPRA year. If you want the detailed information included in the report, including performance measure definitions and number of patients in each denominator and numerator you need to run the GP menu option. You will be asked to provide the community taxonomy to determine which patients will be included. This report will be run for the Report Period July 1, 2008 through June 30, 2009 with a Baseline Year of July 1, 1999 through June 30, 2000. This report will include beneficiary population of American Indian/Alaska Native only. You will NOT be able to export this data to the Area Office; use the GP menu option to export your data to the Area Office. Press enter to continue: <Enter>
Figure 5–3: Running the National GPRA & PART Clinical Performance Summaries Report: report description (Step 1)
2. Press Enter to continue.
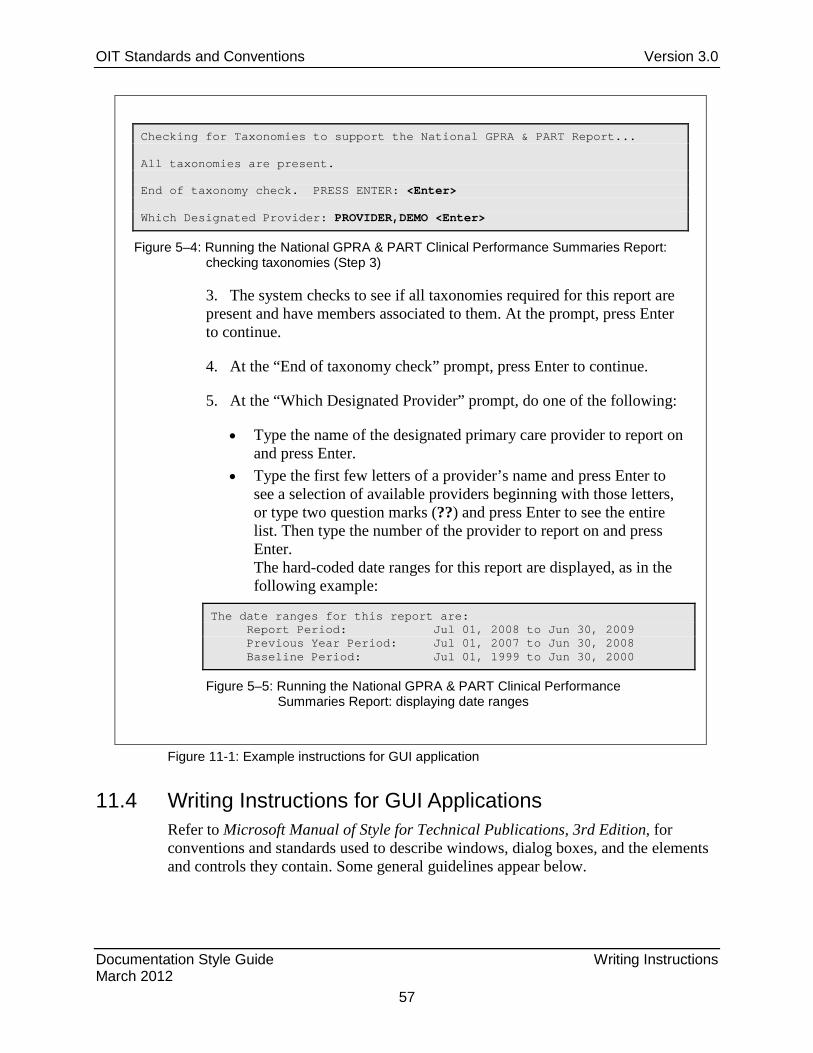
OIT Standards and Conventions Version 3.0
Documentation Style Guide Writing Instructions March 2012
57
Checking for Taxonomies to support the National GPRA & PART Report... All taxonomies are present. End of taxonomy check. PRESS ENTER: <Enter> Which Designated Provider: PROVIDER,DEMO <Enter>
Figure 5–4: Running the National GPRA & PART Clinical Performance Summaries Report: checking taxonomies (Step 3)
3. The system checks to see if all taxonomies required for this report are present and have members associated to them. At the prompt, press Enter to continue.
4. At the “End of taxonomy check” prompt, press Enter to continue.
5. At the “Which Designated Provider” prompt, do one of the following:
• Type the name of the designated primary care provider to report on and press Enter.
• Type the first few letters of a provider’s name and press Enter to see a selection of available providers beginning with those letters, or type two question marks (??) and press Enter to see the entire list. Then type the number of the provider to report on and press Enter. The hard-coded date ranges for this report are displayed, as in the following example:
The date ranges for this report are: Report Period: Jul 01, 2008 to Jun 30, 2009 Previous Year Period: Jul 01, 2007 to Jun 30, 2008 Baseline Period: Jul 01, 1999 to Jun 30, 2000
Figure 5–5: Running the National GPRA & PART Clinical Performance Summaries Report: displaying date ranges
Figure 11-1: Example instructions for GUI application
11.4 Writing Instructions for GUI Applications Refer to Microsoft Manual of Style for Technical Publications, 3rd Edition, for conventions and standards used to describe windows, dialog boxes, and the elements and controls they contain. Some general guidelines appear below.

OIT Standards and Conventions Version 3.0
Documentation Style Guide Writing Instructions March 2012
58
11.4.1 Referring to Controls in Windows and Dialog Boxes • Use bold type when referring to window or dialog box titles; labels (names) of
buttons, lists, text boxes, option buttons (also known as radio buttons), and other controls; menu names and options that can be selected from lists; and any other named element in a window or dialog box.
• Use “click” (not “click on”) for menu commands, command buttons (e.g., the Open button), option buttons, and options in a list.
• When instructing the user to click a button or option button, include the label of the button in the instruction, but do not include the word “button.”
Problem: Click on the Open button.
Solution: Click Open.
• Use “select” and “clear” for checkboxes instead of “check” and “uncheck” or “deselect.” Include the label (name) of the check box and the words “check box” in the instruction.
Example: On the Line and Page Breaks tab of the Paragraph dialog box, select the Keep with next check box to suppress a page break in the selected lines of text.
11.4.2 Referring to Menu Options All menu names and menu option names appear in bold type. When instructing the user to select a menu option, include:
• The name of the top-level menu
• The name of the option to select
• Any subsequent options that must be selected after the first one The order of these elements depends on the structure of the individual instruction.
Example: On the Insert menu, click Break to display the Break dialog box.
Example: To display the Break dialog box, click Break on the Insert menu.
If a menu option has a submenu, instruct the user to “point to” the first menu option (it’s not necessary to “click” a menu option to open a submenu) and to “click” the option in the submenu.
Example: On the Insert menu, point to Reference and then click Caption to display the Caption dialog box.
Example: To add a caption to a figure, point to Reference on the Insert menu and then click Caption.

OIT Standards and Conventions Version 3.0
Documentation Style Guide Writing Instructions March 2012
59
11.4.3 Instructions for GUI Applications In general, instructions should include:
• The action the user should take (“click Open”)
• The location where the action is taken (“in the Open dialog box”; “on the File menu”)
• The result or goal of the action (“the selected file is opened” or “to open a file”)
The order of these elements depends on the desired structure of the individual procedure step or instruction.
Example: In the Facilities window, click Add All to select all sites and add them to the Selected Items list.
Example: To upload the selected files, click Upload Checked Files at the top of the window.
11.4.4 Example of Instructions for GUI Applications Figure 11-2 shows instructions for using window controls in a GUI application, as well as the structure of some commonly used instructions.

OIT Standards and Conventions Version 3.0
Documentation Style Guide Writing Instructions March 2012
60
1. To select a provider for the report, click Select next to the Provider box to display the Provider window.
Figure 5–1: Provider window
Available providers will appear in the Provider list (the left pane).
Note: Although multiple providers can appear simultaneously in the Provider Selected pane, a report can be run for only one provider at a time.

OIT Standards and Conventions Version 3.0
Documentation Style Guide Writing Instructions March 2012
61
2. To locate a specific provider, follow the steps below.
a. To display a list of providers, do one of the following
• To display the entire list of providers, leave both the Begin String and the End String boxes blank.
Note: The entire list of providers may be very long.
• To display a filtered list of providers, follow the instructions in Filtering Lists.
b. In the Number of Records list, select the number of providers to display at one time.
c. Click Search.
d. To view additional providers with the same criteria, click More. (If all providers with the specified criteria are already displayed in the Provider list, the More button is unavailable.)
3. Scroll through the Provider list to locate the provider to use. Click the provider to highlight it, and then click Remove to move it to the Provider Selected list.
To remove a provider from the Provider Selected list, click the provider to highlight it, and then click Add to move it back to the Provider list.
4. Click Save to close the window and save the provider selection.
To close the Provider window without saving the selection, click Close.
Figure 11-2: Example instructions for GUI application

OIT Standards and Conventions Version 3.0
Documentation Style Guide Lists and List Items March 2012
62
12.0 Lists and List Items
12.1 Numbered vs. Bulleted Lists Use a numbered list only if the list items must be read or completed in a particular order (such as steps in a procedure), or if the numbering is critical to understanding the list or items.
Use a bulleted list when there is no explicit reason to use a numbered list.
If a list has only a single item, format it as a standard paragraph instead of a list. The only exception is the case of a procedure with a single step. If a procedure has only a single step, use a bullet instead of a number.
Example:
Closing the application
• To close the application, click Quit.
12.2 Styles for Lists
12.2.1 Styles for Numbered Lists OIT templates for application-related documents include the “ListNum” and “ListAlpha” styles, which use Word’s automatic numbering function. For more information or assistance with the use of styles for numbered lists, contact the OIT Documentation Team.
12.2.2 Styles for Bulleted Lists Templates for RPMS documents contain a series of bullet styles (“Bullet1” through “Bullet3”) and a series of styles with en dashes (“–”) used as bullets (“Dash1” through “Dash3”). The “Bullet1” style is set at the left margin of the “bdytxt1” style, while the “Bullet2” and “Dash1” styles correspond to the “bdytxt2” style.
Do not use open bullets, wingdings, or graphical bullets under any circumstances. Open bullets and wingdings cannot be made Section 508 compliant.
12.3 Nested Lists At times, it is necessary to include sublists within individual list items. Make the sublists bulleted or numbered following the guidelines in Section 12.1.

OIT Standards and Conventions Version 3.0
Documentation Style Guide Lists and List Items March 2012
63
Use the following hierarchy of numbers and letters for ordered lists in general text and for user instructions and procedure steps. Rewrite procedures that require more than two nested levels.
1. xxxx (style = ListNum)
a. xxxxx (style = ListAlpha)
Use the following hierarchy of bullets and dashes for nested bulleted lists.
• xxxx (style = Bullet1)
− xxxx (style = Dash1) • xxxxx (style = Bullet3)
− xxxxx (style = Dash3) Follow all other list guidelines for nested lists. Avoid nesting lists more than three levels whenever possible.
12.4 Paragraph Lists If list items can be incorporated into a sentence, it is unnecessary to format them as a vertical list. In this case, introduce each list item with a number in parentheses.
“Lists may be either run into the text or set vertically, in outline style. Short lists are better run in, and lists that require typographic prominence or are extremely long, or that contain items of several levels should be set vertically.” {The Chicago Manual of Style (15th Edition)}
Separate list items in a paragraph with commas or semicolons. If one or more of the individual list items includes a comma, use semicolons to separate the items.
Example: The application package should include (1) your resume, including your name, phone number, and e-mail address; (2) a cover letter; and (3) the application form, including any attachments.
12.5 Introducing Lists and Procedures Always introduce a list or procedure with a complete sentence followed by a colon.
• Do not introduce a list with a sentence fragment.
• Do not structure a list so that list items form a complete sentence beginning with an introductory fragment. Revise the list or convert it to a paragraph list (Section 12.4).

OIT Standards and Conventions Version 3.0
Documentation Style Guide Lists and List Items March 2012
64
Problem:
In the Properties dialog box, set:
• length.
• height.
• width. In the Properties dialog box, set:
• length,
• height, and
• width. Solution:
In the Properties dialog box, set the following parameters:
• Length
• Height
• Width Refer to Section 12.6.2 for information about periods and other punctuation in list items.
12.6 List items
12.6.1 Parallel Structure All list items should be structured the same way; for example, each item should be an instruction, a single word, a gerund phrase, a complete sentence, etc., depending upon the context. Rewrite items to be parallel in structure if necessary.
Note: In very rare situations, parallel list structure is simply not possible. However, leaving a list with nonparallel list items should be an absolute last resort.
Problem:
The assistant is responsible for the following tasks:
• Feeding elephants
• Washing elephants
• They will also train elephants to stand on a small box

OIT Standards and Conventions Version 3.0
Documentation Style Guide Lists and List Items March 2012
65
Solution:
The assistant is responsible for the following tasks:
• Feeding elephants
• Washing elephants
• Training elephants to stand on a small box
12.6.2 Punctuation List items carry no punctuation unless they consist of complete sentences.
If one item in a list is a complete sentence that stands alone (including an instruction), put a period at the end of every item in the list. However, the preferred approach is to revise the list items to make them parallel (i.e., all items are complete sentences or no items are complete sentences. Refer to Section 12.6.1 for details.)
Examples:
• No complete sentences In the Properties dialog box, set the following parameters:
• Length
• Height
• Width
• All items complete sentences To set parameters in the Properties dialog box, follow these guidelines:
• Set Length to the distance from the front to the back of the item.
• Set Height to the distance from the top to the bottom of the item.
• Set Width to the distance from the left to the right of the item.
12.6.3 Capitalization Capitalize the first letter of the first word in each list item, regardless of whether the item is a complete sentence.
12.6.4 List Items with Introductory Words or Phrases When list items consist of an introductory word or phrase combined with a longer description, the introductory text is capitalized, formatted in bold, and followed with a period. The descriptive text is formatted in default paragraph text, and all other rules for list items apply (parallel structure, capitalization, punctuation).

OIT Standards and Conventions Version 3.0
Documentation Style Guide Lists and List Items March 2012
66
In a list with introductory words or phrases, each item should have the same structure of introductory words.
Examples:
In the Properties dialog box, set the following properties:
• Length. The distance from the front to the back of the item
• Height. The distance from the top to the bottom of the item
• Width. The distance from the right to the left of the item In the Properties dialog box, set the following properties:
• Length. The length is the distance from the front to the back of the item.
• Height. The height is the distance from the top to the bottom of the item.
• Width. The width is the distance from the right to the left of the item.
OIT Standards and Conventions Version 3.0
Documentation Style Guide Figures, Text Captures, and Tables March 2012
67
13.0 Figures, Text Captures, and Tables
13.1 General Guidelines OIT documents can contain a variety of figures and tables with different formatting and style requirements. Documentation for RPMS roll-and-scroll (non-GUI) applications contains text captures of terminal screens, while documentation for GUI applications contains screen captures of application windows.
General guidelines for figures and tables appear in this section, including guidelines for captions, in-text references, and callouts. Specific guidance for tables and different types of figures appears in the sections that follow. Please contact the OIT Documentation Team with questions about figures and tables that are not addressed in this and the following sections.
13.1.1 Formatting Format roll-and-scroll text capture blocks by applying one of the computer output styles (“Computer Output” or “ComputerOutputWide”) available in RPMS templates. For more information, refer to Section 13.2.1.
Most RPMS templates include three “Picture” styles (“Picture,” “PictureIndent,” and “PictureWide”). Apply one of these styles to all figures to ensure proper placement and spacing. For information about formatting figures, refer to Section 13.2.2.2.
13.1.2 Size and Placement Set the dimensions of figures and tables must be sized within the printed margins of the page. Whenever possible, they should match the left margin of the main body text style used in the document (“bdytxt1” in most RPMS templates). This may require resizing table columns or, for images, resizing a graphic file in Visio or another image editing application to maintain the image resolution.
The maximum width of an item that fits between the left margin of “bdytxt1” text and the right margin of the document is 5.8 inches.
Applying one of the computer output styles to a roll-and-scroll text capture block sizes it correctly.
13.1.2.1 Using Landscape-Oriented Pages If a figure or table cannot be made narrow enough for a portrait-oriented page, it is acceptable to place it on a landscape-oriented page.

OIT Standards and Conventions Version 3.0
Documentation Style Guide Figures, Text Captures, and Tables March 2012
68
Note: Inserting a landscape page in a portrait-oriented document is complex and requires adding section breaks and revising headers and footers. If problems occur with this process, contact the OIT Documentation Team for assistance.
13.1.2.2 Location of Figures and Tables A figure or table should be placed after its first reference in the text. Refer to Section 2 for information on in-text references to figures and tables.
Figures and tables should not be placed against each other without text as a buffer, unless they represent consecutive pages of a screen or report and there is no text to place between them. However, do not break long roll-and-scroll text capture blocks into page-size pieces as the natural page break points will change each time the document is updated. Treat the entire block as a single figure.
13.1.3 Captions Every figure and table, including roll-and-scroll text capture blocks, must have a caption. The caption is a brief description of the contents of the figure or table. A figure caption is placed after the corresponding figure, while a table caption is placed before the corresponding table.
Captions consist of the word “Figure” or “Table” followed by the figure or table number, a colon, a single space, and the caption text. Caption text is set in sentence case with no ending period. The number is in the format “1-1” where the first numeral corresponds to the section number and the second numeral corresponds to the figure’s or table’s relative order within the section.
The word “Figure” or “Table” and the figure or table number are automatically generated by Word’s captioning feature. Furthermore, the number is generated as a pair of fields. This ensures that figure and table numbers are ordered correctly if figures or tables are rearranged, added, or deleted, and that in-text references linked using Word’s cross-reference function (Section 13.1.4.1) remain correct as well.
13.1.3.1 Create a Caption for a Figure 1. Right-click anywhere within the figure boundaries. The context menu displays
(Figure 13-1):

OIT Standards and Conventions Version 3.0
Documentation Style Guide Figures, Text Captures, and Tables March 2012
69
Figure 13-1: Figure context menu
2. Select Insert Caption from the context menu. The Caption dialog displays (Figure 13-2):
Figure 13-2: Caption dialog
3. Select Figure from the Label list.
4. Select Below selected item from the Position list.
5. Place the cursor after the figure number; type a colon (:) and a space.
6. Type the text of the caption.
7. Click OK; the dialog is dismissed and the caption appears after the figure.
8. If necessary, left align the caption with the figure using the corresponding Caption style:

OIT Standards and Conventions Version 3.0
Documentation Style Guide Figures, Text Captures, and Tables March 2012
70
• CaptionIndent matches PictureIndent.
• CaptionWide matches PictureWide.
• Caption matches Picture.
13.1.3.2 Create a Caption for a Roll-and-Scroll Block 1. Select the last paragraph in the roll-and-scroll block (place the cursor in the
paragraph and triple-click).
2. From the Captions panel in the References tab, click Insert Caption. The Caption dialog displays (Figure 13-2).
3. Select Figure from the Label list.
4. Select Below selected item from the Position list.
5. Place the cursor after the figure number; type a colon (:) and a space.
6. Type the text of the caption.
7. Click OK; the dialog is dismissed and the caption appears after the block.
8. If necessary, left align the caption with the block using the corresponding Caption style:
• CaptionWide matches ComputerOutputWide.
• Caption matches ComputerOutput.
13.1.3.3 Create a Table Caption 1. Place the cursor in one of the table cells.
2. From the Table panel in the Table Tools-Layout tab, click Select to display the menu.
3. Choose Select Table to select the entire table.
4. Right-click anywhere in the table. The context menu displays (Figure 13-1).
5. Select Insert Caption from the context menu. The Caption dialog displays (Figure 13-2).
6. Select Table from the Label list.
7. Select Above selected item from the Position list.
8. Place the cursor after the table number; type a colon (:) and a space.
9. Type the text of the caption.

OIT Standards and Conventions Version 3.0
Documentation Style Guide Figures, Text Captures, and Tables March 2012
71
10. Click OK; the dialog is dismissed and the caption appears before the table.
11. If necessary, left align the caption with the table using the corresponding Caption style:
• Caption matches all tables created using the Table commands on the Insert tab.
• CaptionWide matches tables that have been modified to align to the page’s left margin.
13.1.3.4 Troubleshooting Captions If the section number and figure number are not present at the Caption dialog, or if they appear separated by a different character:
1. Click Numbering at the Caption dialog to open the Caption Numbering dialog (Figure 13-3):
Figure 13-3: Caption Numbering dialog box showing correct settings
2. Verify that the settings are the same as those shown in Figure 13-3.
3. Click OK.
13.1.4 In-Text References Always introduce a figure or table with a reference in the text before the figure or table appears in the document.
• Do not include the text of the caption in the in-text reference.
• Do not refer to figures or tables by their physical location in the document (e.g., “the figure below”).
• Do not include the word “see” in in-text references unless the reference is outside parentheses and the flow of text requires its inclusion.

OIT Standards and Conventions Version 3.0
Documentation Style Guide Figures, Text Captures, and Tables March 2012
72
13.1.4.1 Inserting a Cross-Reference 1. On the Insert tab, click Cross-reference.
2. In the Reference type list, select the type of cross reference to link to (e.g., Figure or Table).
3. In the Insert reference to list, select Only label and number.
4. Leave the Insert as Hyperlink check box selected.
5. In the For which caption list, select the figure or table to be referenced.
6. Click Insert.
13.1.4.2 Updating a Cross-Reference To update a single cross-reference:
1. Place the cursor within the cross-reference field or highlight the text that contains the cross-reference.
2. Press F9 or right click and select Update Field from the context menu.
13.1.5 Alternate Text To comply with Section 508, every image and graphic element in a document must have alternate text (“alt text”) associated with it.
Alt text in a 508-compliant document provides an equivalent experience of the document for individuals using screen readers or who are otherwise unable to see the detail in images. Be aware of the different needs of the document’s various audience members when composing alt text.
Alt text must be added to:
• Images placed as pictures in Word
• Logos; graphics, charts, and graphs in PowerPoint presentations
• Any other graphic element that is not read as text by a screen reader. This includes inline images of icons in documentation for GUI applications.
To place an image in Word, follow the instruction in Section 13.2.2.2.
To add alt text to a figure, follow these steps:
1. Right-click the figure to display the context menu.
2. Select Format Picture. The Format Picture dialog displays.
3. Select Alt Text from the list in the left pane.
OIT Standards and Conventions Version 3.0
Documentation Style Guide Figures, Text Captures, and Tables March 2012
73
4. Place the cursor in the Description field.
5. Type the alt text.
6. Click Close.
Alt text is not required for roll-and-scroll text capture blocks. Text capture blocks are formatted as text using the styles ComputerOutput or ComputerOutputWide in RPMS templates and can be read as text by a screen reader.
13.1.6 Callouts Callouts are labels used to point out specific features in figures and occasionally in roll-and-scroll text capture blocks. Callouts often appear in a thin border and usually include a line with an arrowhead (a callout line) linking the text box to the specific feature.
Extensive use of callouts is discouraged due to the difficulty of providing sufficiently detailed alt text that describes exactly what the callouts are demonstrating.
Explore ways of using in-document text to describe illustrations and processes.
Use sentence-style capitalization in callout text (Section 7.4), or match the capitalization of the features being called out.
13.1.6.1 Creating Callouts on Figures To create callouts on a figure, export the figure to Visio or other graphic design application. Type the callout text and apply a thin border to the text object. Try to position the callout so it is not covering important information; if possible, position it in a blank area of the figure.
Add callout lines using Visio’s line and arrow features. Refer to Section 13.1.6.3 for guidelines on creating callout lines.
When all callouts have been created, group the figure with the callouts and callout lines as described in Section 13.1.6.4 and save the revised figure as a GIF or TIFF file. Replace the figure in the original document with the new file as described in Section 13.2.2.2.
Note: Do not use the text box function in Word to create callout text boxes. Callouts created in Word’s text boxes cannot be made 508-compliant.

OIT Standards and Conventions Version 3.0
Documentation Style Guide Figures, Text Captures, and Tables March 2012
74
13.1.6.2 Creating Callouts on Roll-and-Scroll Text Capture Blocks Callouts are added to text capture blocks in Visio using the same technique as for figures, which converts the formatted text to a figure. As noted in Section 13.1.5, all figures in 508-compliant documents must include alt text.
For this reason, avoid adding callouts to roll-and-scroll text capture blocks unless it is absolutely necessary. Describe items in paragraph text instead.
Do not use colored text to highlight specific features in text capture blocks. Colored text cannot be made 508-compliant and will be removed when the document is remediated.
13.1.6.3 Callout Lines To visually link callout text with the section of the figure it applies to, use straight horizontal and vertical lines whenever possible; diagonal lines will appear jagged. Straight callout lines may be difficult to see if they closely parallel the lines around the screen capture.
Keep callout lines as simple as possible; try to restrict them to a single straight line. If this is not possible, create two lines that meet at a perpendicular angle. Do not create callout lines that fold back on themselves. Callout lines should have an arrowhead on the end closest to the area that the callout refers to. All arrows should point from the callout text box to the related location in the figure.
13.1.6.4 Grouping Figures with Callouts For compliance with Section 508 standards, figures and text capture blocks with callouts or multiple components must be grouped and saved as a single image file. Use the following steps to perform this task in Visio.
1. In the Word document, draw a selection box around the figure or text capture block, including all callouts, callout lines, and separate components, and copy the selection.
2. Paste all components into a new document in Visio.
3. To group the components, be sure they are all selected and right-click the image. On the context menu, point to Shape, and then click Group.
4. To save the grouped image as a GIF file, follow these steps:
a. Point to Save As on the File menu.
b. Navigate to the folder where the figure is being saved. In the Save as type list, select either Graphics Interchange Format (*.gif) (typically used to save line art) or JPEG Interchange Format (*.jpg) (typically used to save photographic images), and then type the file name in the File name box.

OIT Standards and Conventions Version 3.0
Documentation Style Guide Figures, Text Captures, and Tables March 2012
75
c. Click Save.
5. In the Word document, replace the original figure by deleting the figure and all of its callout components, and then following the instructions in Section 13.2.2.2.
13.2 Figures
13.2.1 Roll-and-Scroll Text Capture Blocks The text in a roll-and-scroll screen can be captured using a variety of methods (PrintScreen, copy and paste, a terminal output capture utility, etc.).
A block of captured text placed in a document must be formatted using the “ComputerOutput” or “ComputerOutputWide” style. These styles convert the font to Courier New and add a shaded background and a box around the captured text (Figure 13-4).
The two styles are formatted with different margins and spacing. Choose the style that best fits the text capture and document.
2009 CRS TAXONOMY UPDATE Jun 05, 2009 16:12:58 Page: 1 of 1 TAXONOMIES TO SUPPORT 2009 NATIONAL GPRA REPORT REPORTING 1) BGP CMS SMOKING CESSATION MEDS DRUGS 2) BGP GPRA ESTIMATED GFR TAX LAB Estimated GFR Lab Tests 3) BGP GPRA FOB TESTS LAB Fecal Occult Blood Lab Tests 4) BGP HIV TEST TAX LAB HIV Screening Lab Tests 5) BGP PAP SMEAR TAX LAB Pap Smear Lab Tests 6) BGP QUANT URINE PROTEIN LAB 7) DM AUDIT HGB A1C TAX LAB Hemoglobin A1C Lab Tests 8) DM AUDIT LDL CHOLESTEROL TAX LAB LDL Cholesterol Lab Tests Enter ?? for more actions >>> S Select Taxonomy to Edit Q Quit D Display a Taxonomy Select Action:+//
Figure 13-4: Example of a roll-and-scroll text capture formatted using the “ComputerOutput” style
A roll-and-scroll text capture block requires a caption like other figures. If the captured text is associated with a procedure step, the caption should refer to the step number. Refer to Section 13.1.3.2 for instructions on creating captions for text capture blocks.
Because text capture blocks are formatted as text and can be read by screen readers, they do not require alt text. However, if callouts are added to a text capture block, the callouts and the text capture block must be exported to Visio and converted to a figure as described in Section 13.1.6.2. When pasted into the document, the resulting figure would require alt text.

OIT Standards and Conventions Version 3.0
Documentation Style Guide Figures, Text Captures, and Tables March 2012
76
Do not edit the text in roll-and-scroll text capture blocks. The text capture displayed in the document must match the screen the user sees exactly, including errors in spelling, punctuation, capitalization, and sentence structure.
Note: Column width and spacing in reports formatted for the roll-and-scroll terminal may not be correct when the reports are formatted as text. This is the only situation where text in text capture blocks should be edited. To avoid problems with tab settings, use spaces rather than tabs to realign the columns.
13.2.1.1 Hard Returns in Roll-and-Scroll Text Capture Blocks Because large numbers of hard returns may interfere with generating a Section 508-compliant PDF, OIT practice is to replace all hard returns within text capture blocks (except the final hard return in the block) with soft returns.
To insert a soft return, press Shift-Enter.
To automate this process using the Find and Replace dialog box, follow these steps:
1. Type ^p (“caret p”) in the Find what box and ^l (“caret l”) in the Replace with box.
2. Position the cursor at the top of the text capture block and click Replace repeatedly until all hard returns except the last one in the block have been replaced.
Do not click Replace All without being certain that only the text in the text capture block is selected; otherwise, all the hard returns in the entire document will be replaced.
13.2.2 GUI/Windows-Based Screen Captures Use a utility like Snagit to capture images of Windows-based screens. For the best combination of resolution and file size, save images in GIF format.
Do not edit screen captures; they must exactly match what the user sees when using the application. If the application was under development while the documentation was being written, check screen captures against the final build of the application. Replace screen captures with updated images if necessary.
For Section 508 compliance, every image in a document must have alt text associated with it. To add alt text to an image, right-click the figure and click Format Picture. On the Web tab, type the alt text in the Alternative Text box.
OIT Standards and Conventions Version 3.0
Documentation Style Guide Figures, Text Captures, and Tables March 2012
77
13.2.2.1 Size of Images The maximum width of an image that fits within the text margins of an OIT document is 5.8 inches. Adjust the size when creating and saving the image, or use the Size tab of the Format Picture dialog box to resize the image after it has been placed in Word. Be sure to adjust both the height and the width by the same percentage to maintain the aspect ratio and avoid distortion.
13.2.2.2 Placing and Formatting an Image in Word 1. Insert a carriage return in the document at the location where the image is to be
placed.
2. Select the carriage return and apply the “Picture” style found in an RPMS template.
3. With the carriage return still selected, point to Picture on the Insert tab, and then click From File.
4. In the Insert Picture dialog box, navigate to the folder where the image is stored. Select the image and then click Insert.
13.2.3 Other Images Use the steps in Section 13.2.2.2 to insert images from other sources into Word documents. Set the size correctly and add alt text to all images.
Before placing an image, be sure it is a single, flattened (grouped) image.
• If an image is composed of multiple smaller images, use the steps in Section 13.1.6.4 to group the components into a single image.
• If an image is composed of multiple layers, use an image processing application to flatten the layers.
13.2.4 HHS and IHS Logos The Department of Health and Human Services (HHS) and Indian Health Service (IHS) logos must be included on the covers of all documentation. These logos should be of equal size and are placed only on the title page.
Each RPMS template contains a correctly formatted title page that includes the IHS and HHS logos correctly placed with the rest of the title page elements.
As described in Section 4.1.1, the correct use of an RPMS template is to save the template as a new document and then add text to that document. This preserves the title page from the template, making it unnecessary to create a title page from scratch.

OIT Standards and Conventions Version 3.0
Documentation Style Guide Figures, Text Captures, and Tables March 2012
78
Be sure to replace the dummy text on the title page with the content for the specific RPMS package and document.
13.2.5 Image Accents Do not use decorative images to convey information types. For example, many older RPMS manuals include a small book-and-pen graphic next to notes. In addition to requiring alt text for every instance, this type of icon is a distraction and unnecessarily enlarges the file.
Use the “notes” and “Warning” styles available in RPMS templates for notes and warnings instead.
Examples:
Note: To format a note, type the note text beginning with the word “Note” followed by a colon and a tab. Apply the “notes” style to the text, and then apply the Bold character style to the word “Note.”
Warning: To format a warning, type the warning text beginning with the word “Warning” followed by a colon and a single space. Apply the “Warning” style to the text, and then apply the Bold character style to the word “Warning.”
13.3 Tables For Section 508 compliance, formatting must be applied to tables so that screen readers can interpret the data correctly.
Avoid merged cells and the use of tables for layout purposes except when creating forms and acronym lists.
13.3.1 Size and Placement of Tables Tables must be sized to fit within the printed margins of the page. Edit the column width if necessary.
While a table may occupy the entire width of the page from margin to margin, it is preferable to position the left border of the table at the left margin of the document’s body text.
• To place a table at the left margin of text formatted using the “bdytxt1” style (found in OIT application-related document templates), type 0.8″ in the Indent from left box on the Table tab of the Table Properties dialog box.

OIT Standards and Conventions Version 3.0
Documentation Style Guide Figures, Text Captures, and Tables March 2012
79
If the columns cannot be made narrow enough to fit the table on a portrait-oriented page, it is acceptable to place it on a landscape-oriented page. Contact the OIT Documentation Team for assistance or information.
Note: Inserting a landscape-oriented page in a portrait-oriented document requires the addition of extra section breaks, but adding section breaks to a document based on an OIT document template may cause problems with headers and footers. If problems occur with this process, contact the OIT Documentation Team for assistance.
13.3.2 Formatting Tables To ensure that the data and the heading row or rows in a table can be interpreted correctly by a screen reader, the table must be tagged by applying the “Table Grid” or “Table Normal” style.
If a table spans one or more page breaks, the heading row or rows must appear at the top of each page.
Table rows must not be allowed to break across pages, because a screen reader cannot associate table data with the correct column or row headings.
13.3.2.1 Other Table Formatting • Format the heading row and table cells with the correct styles in the RPMS
template (TableHeadCtr or TableHeadLeft for heading rows, and TableTextL, TableTextM, or TableText for all other table cells).
Bulleted and numbered list styles for text in table cells (tBullet1, tNumber, etc.) are also available in RPMS templates.
• Set the heading row or rows to repeat if the table breaks across pages.
− Select the rows to repeat on each page. − On the Row tab of the Table Properties dialog box, select the Repeat as
header row at the top of each page check box. • Set all table rows to not break across pages.
− Select the entire table. − On the Row tab of the Table Properties dialog box, clear (uncheck) the
Allow row to break across pages check box.

OIT Standards and Conventions Version 3.0
Documentation Style Guide Figures, Text Captures, and Tables March 2012
80
13.3.3 Color Color is frequently applied to table header rows and other table cells; however, as stated in Section 0, the use of color in 508-compliant documents must be limited or avoided.
The “TableHeadCtr” and “TableHeadLeft” styles available in RPMS document templates use bold type, which is sufficient to set off the header rows in most tables. If absolutely necessary, it’s acceptable to use a very lightly shaded, neutral background for table header rows, but even light shading can cause problems for some colorblind individuals. Use the table header row styles instead whenever possible.

OIT Standards and Conventions Version 3.0
Documentation Style Guide Word Usage March 2012
81
14.0 Word Usage
14.1 General Guidelines • Define new terms that are not listed in a regular dictionary the first time they
appear in the text, and include these terms in the glossary as well.
• Do not use slang or undefined jargon.
• Do not use terms that have several different meanings.
• Use defined terms consistently throughout the documentation. Do not use synonyms.
• Ensure that all spelling is correct.
• Avoid general adjectives that can be misinterpreted. For example, “the user-friendly Windows desktop” could mean that either the desktop is user-friendly or that Windows is user-friendly.
14.2 Humanization of Computers Do not humanize computers or computer interactions. Do not apply emotions, desires, or opinions to software programs or computer systems, and do not apply a sense of location or dimension to a software application. For example, the user cannot be “in” a text editor.
Problem: The machine remembers your choices.
Solution: The machine stores your choices.
Problem: The computer asks for the current site name.
Solution: The computer prompts for the current site name.
Problem: The system tells you what options to choose from.
Solution: The system displays a list of options to choose from.
Problem: The user will be in the text editor.
Solution: Update the text with the text editor function.
Solution: Update the text in the text editor window.
Solution: The text editor application is active.

OIT Standards and Conventions Version 3.0
Documentation Style Guide Word Usage March 2012
82
14.3 Latin Terms Commonly used Latin and Latinate terms such as “i.e.” and “e.g.,” do not appear in italics. Less common terms, such as “a priori,” “et al.,” “pro bono,” and “quid pro quo” should be italicized.
14.4 Gender Use plurals or specific descriptions to avoid “he,” “she,” “he or she,” “s/he,” and “it.” If a plural subject is used to avoid a specific gender, be sure that the entire sentence or statement is in agreement with the plural subject.
Problem: The programmer writes code. He then compiles it.
Solution: The programmer writes code and then compiles it.
Solution: Programmers write code. They then compile it.
If it is not possible to avoid referring to gender, use an appropriate plural or the complete statement “he or she.”
Problem: The system prompts the user for a site name. The user must type the name of their current site.
Solution: The system displays a prompt for a site name. Users must type the name of their current site. Solution: The system prompts the user for a site name. The user must type the name of his or her current site.
Solution: The system prompts the user for a site name. The user must type the name of the current site.
14.5 Noun Strings Avoid noun strings. If a sentence cannot be rewritten to eliminate a noun string, hyphenate the words that are used as adjectives to aid comprehension. Never use a hyphen after an adverb ending in -ly.
Example: UNIX-based workstation, end-user access, newly acquired software
Problem: Underground mine worker safety protection procedures development
Solution: Developing procedures to protect the safety of workers in underground mines.

OIT Standards and Conventions Version 3.0
Documentation Style Guide Word Usage March 2012
83
14.6 Placement of “Only” Place the word “only” with the part of the sentence it modifies.
Problem: We only lack financial backing; we have determination.
Solution: We lack only financial backing; we have determination.
14.7 Possessive Form of Nouns Ending In “S” If a singular noun ends with an “s”, create the possessive form by adding an apostrophe and “s”.
Example: Dr. Seuss’s books
14.8 Trademarks Use trademarked terms as adjectives, not nouns. Mark the first instance of a trademark in the front matter and in the body of the document, and omit the trademark symbol in subsequent mentions.
Example: The Widget (TM) product offers... never Widget offers...
OIT Standards and Conventions Version 3.0
Documentation Style Guide References and Sources March 2012
84
15.0 References and Sources
15.1 Computer-Related Content The following sources were used for computer-related spelling and usage content:
• Microsoft Manual of Style for Technical Publications, 3rd Edition
• http://www.Webopedia.com
• http://www.m-w.com (Merriam Webster Online Dictionary).
15.2 General Content A significant amount of content came from the following sources:
• The Chicago Manual of Style, 15th Edition
• Online style guide created by Scriptorium at
http://www.scriptorium.com/Standards/
• The GNOME Documentation Project Style Guide at http://developer.gnome.org/gdp-style-guide/stable/index.html.en
15.3 IHS/RPMS Content Some IHS RPMS-specific content came from Appendix F of the RPMS Programming Standards and Conventions.
OIT Standards and Conventions Version 3.0
Documentation Style Guide Usage and Terminology March 2012
85
Appendix A: Usage and Terminology This appendix contains definitions of general computer and RPMS-related terms, as well as usage guidelines for these and other frequently misused and misspelled words
Use standard American English spelling rules, referring to the Merriam Webster Collegiate Dictionary (hard copy or online) for words not addressed in this appendix. Refer to the Microsoft Manual of Style for Technical Publications for styles and conventions generally used in documenting user interfaces, and Sections 11.3 and 11.4 of this style guide for specific guidelines for OIT documentation.
A.1 A
A.1.1 Access “Access,” when used as a verb, is usually too general. Use a more specific word instead.
Problem: Access the application.
Solution: Start the application.
A.1.2 Affect “Affect” is generally used as a verb. Refer also to Effect.
Example: Changing weather affects my sinuses.
A.1.3 Allow Avoid using “allow” when referring to software features; “allow” implies permission as opposed to capacity, capability, or functionality. Either rewrite the sentence or use the word “enable.”
Problem: The software allows you to adjust the color of a photo.
Solution: Using the software, adjust the color of a photo.
Solution: This function allows adjustment to the color of a photo.
A.1.4 Among vs. Between Use “between” when referring to two things.
Example: I could not decide between this and that.

OIT Standards and Conventions Version 3.0
Documentation Style Guide Usage and Terminology March 2012
86
Use “among” when referring to three or more things.
Example: I could not decide among all the choices.
A.1.5 Appears (Verb) Do not use “appears” to describe items displayed by the software (windows, lists, menus, etc.) in response to a user action such as clicking a button. Use the phrase “is displayed” instead, or rewrite the sentence.
Problem: Click Add New Measurement. The Add New Measurement dialog box appears.
Solution: Click Add New Measurement. The Add New Measurement dialog box is displayed.
Solution (preferred): Click Add New Measurement to open the Add New Measurement dialog box.
Exception: “Appears” is acceptable when describing the location of a particular feature within a window or screen.
Example: The EHR toolbar always appears at the top of the PATIENT CHART tab.
A.2 B
A.2.1 Backup, Back Up The noun or adjectival form, “backup,” is one word. A “backup” is a copy of a resource made as a precaution in case the original resource is lost. Do not use “backup” as a verb.
The verb form, “back up,” is two words with no hyphen. To “back up” files is to copy them to another location as a precaution in case the original files are lost. Do not use “back up” as a noun or adjective.
A.2.2 Blank When no information is present in a field, refer to the field as “blank.” Do not use “empty” to refer to a field.
A.2.3 Bring Up (Verb) Do not use “bring up.” Use “display” or “open” instead.
Example: Open the Add New Measurement dialog box.

OIT Standards and Conventions Version 3.0
Documentation Style Guide Usage and Terminology March 2012
87
Example: Click New Style to display the New Style dialog box.
A.3 C
A.3.1 Canceled Use “canceled”, not “cancelled”
A.3.2 Cascading Menu (GUI only)
Use “submenu” instead of “cascading menu.”
A.3.3 Cannot “Cannot” is always one word with no apostrophe. It is not a contraction.
A.3.4 Check Box (GUI only)
“Check box” is two words with no hyphen.
In user instructions, use “select,” “click,” or “clear” to describe the action of selecting a check box. Do not use “check” or “uncheck.” Always include the name of the option associated with the check box and the words “check box” to identify this control.
Definition: A square box associated with a user-selectable option. When selected, the box may be filled, checked, contain an “x,” or appear pushed in. Check boxes may be grouped together in a box with a title. In general, more than one check box can be checked at a time. (Refer also to Option Buttons. Note: In some systems, option buttons can be styled to look like check boxes.)
Problem: Check Clear All Change Bars.
Problem: Uncheck the Clear All Change Bars box.
Solution: Select the Clear All Change Bars check box.
Solution: Click the Clear All Change Bars check box.
Solution: Clear the Clear All Change Bars check box.

OIT Standards and Conventions Version 3.0
Documentation Style Guide Usage and Terminology March 2012
88
A.3.5 Choose Avoid using the word “choose.” “Select” is usually more concise.
Example: Select the menu option that best describes the file.
A.3.6 Clear, Clearly Words like “simply,” “obviously,” and “clearly” can seem condescending in some contexts. It’s important to pay attention to the tone of the document and use these words appropriately.
A.3.7 Click (Verb) (GUI only)
“Click” means to press and release the left mouse button once on an item. (Refer also to Right-Click, Double-Click)
Use “click” to describe the action of selecting a control or item in a window with the left mouse button. Do not use the word “on” with “click.” Example: Click New Style to display the New Style dialog box.
Example: Click OK.
Example: To hide a panel, click the panel’s hide button.
A.3.8 Close (GUI only)
“Close” means to remove a window, dialog box, or user interface component from the desktop.
Use in conjunction with “display” and “open.” Do not use “quit” in this context.
Example: To close a window, select Close on the File menu.
Example: Click Cancel to close the dialog box.
A.3.9 Collapse (GUI only)
Closing an open item in a tree structure is referred to as “collapsing” the item. Items in tree structures are typically collapsed by double-clicking the item or by clicking the minus sign (-) or arrow icon beside the item.
Example: To collapse a menu in the menu tree view, click the minus sign (-) beside the menu item.

OIT Standards and Conventions Version 3.0
Documentation Style Guide Usage and Terminology March 2012
89
A.3.10 Comprise vs. Compose “To comprise” means “to be made up of,” “to consist of,” or “to include.”
Example: The United States comprises fifty states.
“To compose” means “to make up, to form the substance of something.”
Example: The United States is composed of fifty states.
The phrase “is comprised of” is incorrect. Use “is composed of” or “consists of” instead.
Problem: The United States is comprised of fifty states.
Solution: The United States consists of fifty states.
A.3.11 Computed Field (RPMS)
A computed field in an RPMS application displays a value generated by performing one or more operations on values in other fields.
A.3.12 Configure vs. Modify “Configuring” is typically a large-scale activity. By contrast, “modifying” is a smaller-scale activity. For example, the term “configure” refers to specifying settings for the entire desktop or for an application such as a database. Refer also to Modify.
Example: To configure the desktop, right-click an open space on the desktop.
Example: Modify the background color through the Properties dialog box.
A.3.13 Contains Use “includes” instead of “contains.”
A.3.14 Context Menu (GUI only)
The context menu is displayed by right-clicking an item. Do not use “right-click menu.”
Problem: Right-click the selected item to display the right-click menu.
Solution: Right-click the selected item to display the context menu.

OIT Standards and Conventions Version 3.0
Documentation Style Guide Usage and Terminology March 2012
90
A.3.15 Co-Pay “Co-pay” is one word, hyphenated.
A.3.16 Criterion/Criteria “Criterion” is singular; “criteria” is plural.
Example: Set the file criteria by right-clicking each criterion individually and selecting the option that best describes the file.
A.3.17 Cross-Reference “Cross-reference” is one word, hyphenated.
A.3.18 Cursor The cursor, which appears as a rectangle or a blinking or solid line, indicates when a response is required and the position where it should be typed. A cursor can appear in both roll-and-scroll and GUI applications.
Do not use “pointer” as a synonym for “cursor.” Refer also to Pointer.
A.4 D
A.4.1 Data (Noun) The word “data” is used as both the plural and singular of the word “datum,” in accordance with accepted usage in the software/computer industry and the argument that a datum (a piece of data) is an abstract and impractical measurement of information.
Except in some academic contexts, “data” is generally treated as a singular noun, even though it refers to multiple pieces of information. In RPMS documentation, use “data” as a singular noun.
Example: Data is stored on tape.
Example: The data is up to date.

OIT Standards and Conventions Version 3.0
Documentation Style Guide Usage and Terminology March 2012
91
A.4.2 Database “Database” is one word with no space or hyphen.
A database is a collection of related information organized in such a way that the information can be easily accessed, updated, and managed. Databases are composed of fields, records, and files:
• Each individual piece of data is stored in a field.
• A collection of fields containing data makes up a record.
• A database file contains a collection of records, each with data in the same collection of fields.
A.4.3 Database Fields A field in a database contains an individual piece of data of a specified data type. A collection of fields containing related pieces of data constitute a database record; the fields in a record generally contain data of several different data types. Refer also to Fields.
RPMS applications use database fields containing nine different data types. Each of the following database field types is defined elsewhere in this section:
• Computed field
• Date field
• Free Text field
• Numeric field
• Pointer to Files field
• Set of Codes field
• Time field
• Word Processing field
A.4.4 Database Files (RPMS)
Database files are a collection of records that store related information (e.g., the RPMS Patient File).
A.4.5 Data Set “Data set” is two words with no hyphen.

OIT Standards and Conventions Version 3.0
Documentation Style Guide Usage and Terminology March 2012
92
A.4.6 Date Field (RPMS)
The Date field accepts only a predefined set of date formats.
A.4.7 Date Range A date range should not be referred to as “a starting and ending date range.” The starting and ending elements are intrinsic to the concept of a “range,” so using the term “date range” is sufficient.
If the starting and ending date elements are important enough to mention, use the phrase “starting and ending dates” or “starting date” and “ending date” and leave out the word “range.”
Problem: The user will be prompted for a starting and ending date range.
Solution: The dialog prompts for a date range.
Solution: The dialog prompts for starting and ending dates.
A.4.8 Delete “Delete” means to remove an item that cannot be restored.
Do not use “remove” to describe deleting an item that that cannot be restored.
A.4.9 Desire The word “desire” is generally not appropriate for technical documentation. Use “want” instead, or rewrite the sentence. (However, the phrase “the desired outcome” is an acceptable use of the word “desire.”)
A.4.10 Desktop “Desktop” is one word with no hyphen. It refers to the background on the computer screen where the windows and icons are displayed.
A.4.11 Desktop Menu The desktop menu is a list of choices displayed when the user right-clicks an open space on the desktop.
OIT Standards and Conventions Version 3.0
Documentation Style Guide Usage and Terminology March 2012
93
A.4.12 Directory A directory is a type of file used to organize other files into a hierarchical structure. Use the term “directory” only when referring to the structure of the file system. Refer also to Folder.
A.4.13 Display (GUI only)
Use “display” to describe opening an item within a window or on the desktop that remains visible until the user explicitly chooses to close the item.
Example: On the Format menu, select Font to display the Edit Font dialog box.
Note: “Display” should never be used as an intransitive verb. It must always have an object.
Problem: The Edit Font dialog box displays.
Solution: Selecting Font on the Format menu displays the Edit Font dialog box.
A.4.14 Double-Click (Verb) (GUI only)
“Double-click” means to press and release the left mouse button on an item twice in rapid succession. (Refer also to Click, Right-Click)
Hyphenate “double-click” when used as a verb. Do not use the word “on” with “double-click.”
Example: Double-click the name of the file to open.
A.4.15 Drag (GUI only)
“Drag” means to click a mouse button on an object, hold the mouse button, and move the mouse to move the object or cursor.
A.4.16 Drop-Down List Box (GUI only)
In user instructions, generally use only “list” or “box” to describe this control, whichever is clearer, and instruct the user to “click” or “select” a list item.
Do not use the words “drop-down” unless absolutely necessary to distinguish a specific control. Hyphenate if used.

OIT Standards and Conventions Version 3.0
Documentation Style Guide Usage and Terminology March 2012
94
Definition: A closed version of a list box with an arrow next to it. Clicking the arrow opens the list and displays the items it contains. After the user selects an item from the list, the list box collapses back to a box displaying the selected item.
A.5 E
A.5.1 Effect “Effect” is generally used as a noun. Refer also to Affect.
Example: One effect of changing weather is aching sinuses.
A.5.2 E-Mail “E-mail” is hyphenated and does not take a capital letter unless the word occurs at the beginning of a sentence.
A.5.3 Empty When no information is present in a field, refer to the field as “blank.” Do not use “empty” to refer to a field.
A.5.4 End User (Noun) “End user” is two words. Do not hyphenate unless used as an adjective.
A.5.5 Enter (Verb) Do not use “enter” when instructing the user to type specific information into a specific field. Use the word “type” instead.
Use “enter” when referring to higher-level or general functions such as data entry.
Example: Use the Patient Registration Menu option to enter patient data into the system.
Example: To add a client, type A in the Patient field.
Example: Type the patient’s full name at the “Select Patient Name” prompt.
OIT Standards and Conventions Version 3.0
Documentation Style Guide Usage and Terminology March 2012
95
A.5.6 Expand (GUI only)
Opening a closed item in a tree structure is referred to as “expanding” the item. Items in tree structures are typically expanded by double-clicking the item or by clicking the plus sign (+) or arrow icon beside the item.
Example: To expand a menu in Outline view, double-click the menu name or click the plus sign (+) next to the menu name.
A.6 F
A.6.1 Fewer vs. Less Use “fewer” when referring to specific numbers and measurements.
Use “less” when referring to general amounts.
Problem: If a customer orders less than 10 CDs...
Solution: If a customer orders fewer than 10 CDs but more than 5, the customer receives a free CD.
Solution: It takes less time to fill orders when using our application.
A.6.2 Field Definition: A field is a location in the interface where users type information to be added to a database or to search the database. Refer also to Database Fields.
In user instructions, do not use the word “field” to refer to roll-and-scroll prompts or GUI text boxes or other controls.
(Roll-and-scroll)
In a roll-and-scroll application, fields on a screen serve the same function as blanks on a form. Each field is associated with a prompt requesting a specific type of data.
In roll-and-scroll instructions, instruct the user to type the required information at the prompt. Section 11.3 contains detailed information.
(GUI)
In a GUI application, dialog boxes and other onscreen forms display fields in the form of text boxes and other controls where the user types or selects specific data. Each field has a label describing the required data.
In GUI instructions, use instructions appropriate to the specific type of control (text box, list box, etc.). Section 11.4 contains detailed information.
OIT Standards and Conventions Version 3.0
Documentation Style Guide Usage and Terminology March 2012
96
A.6.3 FileMan “FileMan” is short for “File Manager.” FileMan is a VA-based utility that works behind the scene for most RPMS packages.
Do not use “File Manager,” “fileman,” or “Fileman” as synonyms.
A.6.4 Folder (GUI only)
A folder is a representation of a directory in a graphical interface.
Use the term “folder” to describe folder icons that represent directories or to describe navigation in a Windows Explorer window. Refer also to Directory.
A.6.5 Follow Up The noun form, “follow-up,” is two words with a hyphen.
Example: This visit was a follow-up after the patient was discharged.
The adjectival form, “follow-up,” is two words with a hyphen.
Example: Record the follow-up visit under the patient’s name.
The verb form, “follow up,” is two words without a hyphen.
Example: Be sure to follow up on this action item.
A.6.6 Free Text Field (RPMS)
The Free Text field accepts numbers, letters, and most of the symbols on the keyboard. Restrictions may apply to the number of characters that can be entered.
“Free Text” is two words, capitalized, with no hyphen when used as the title of a field type.
Example: The Moved to/Tx Elswhere field is a Free Text field. Type the name of the community where the patient has moved or transferred.
When describing the type of information a user should enter in a Free Text field, use “text” instead of “free text.”
Problem: Add free text to indicate the community where the patient has moved or transferred.
Solution: Add text to indicate the community where the patient has moved or transferred.

OIT Standards and Conventions Version 3.0
Documentation Style Guide Usage and Terminology March 2012
97
A.6.7 From…To Use only two examples with “from” and “to.”
Problem: Staff members from doctor to nurse to check-in clerk can easily navigate this system.
Solution: Staff members of all experience levels, from doctor to check-in clerk, can easily navigate this system.
A.7 H
A.7.1 Hardcopy vs. Hard Copy “Hard copy” is two words. It is hyphenated only when used as an adjective.
A.7.2 Hardware Use “hardware” to refer to the machines and physical components linked to a computer.
A.7.3 Healthcare “Healthcare” is one word.
A.7.4 Hit (Verb) Do not use the word “hit.” Use “press” instead of “hit” or “strike.”
Problem: Hit the Enter key.
Solution: Press Enter.
A.7.5 Home Page “Home page” is two words and is not capitalized unless it is used at the beginning of a sentence or in a heading.
A.8 I
A.8.1 Impact Do not use “impact” as a verb. Use “affect” instead.
Problem: This software change could impact your check-in process.
Solution: This software change could affect your check-in process.

OIT Standards and Conventions Version 3.0
Documentation Style Guide Usage and Terminology March 2012
98
A.8.2 Includes Use “includes” instead of “contains.”
A.8.3 Internet The Internet is a global association of networks and computers that share information. “Internet” is a proper noun and is capitalized.
A.8.4 Invoke Use “open” or “start” instead of “invoke.”
Problem: Invoke the screen saver by pressing Esc.
Solution: Start the screen saver by pressing Esc.
A.8.5 Irregardless Do not use “irregardless.” Use “regardless” instead.
While “irregardless” is, in fact, a word, it is not commonly accepted usage and is not appropriate in technical documentation.
A.9 K
A.9.1 Keyboard Shortcut A keyboard shortcut is an action or sequence of actions performed using one or more keystrokes that would otherwise require a mouse or other pointing device. A keyboard shortcut provides a quicker and more convenient way to perform an action than using a mouse to perform the same action.
Do not use “short-cut,” “shortcut,” “short cut,” “shortcut key,” or “keyboard accelerator” as synonyms.
A.10 L
A.10.1 Launch Avoid using “launch.” Use “start” or “open” when appropriate.
Problem: Launch the application by clicking the new desktop icon.
Solution: Start the application by clicking the new desktop icon.

OIT Standards and Conventions Version 3.0
Documentation Style Guide Usage and Terminology March 2012
99
A.10.2 Left Side Use this term to refer to the left side of an item. Do not use “left-hand side.”
A.10.3 Left-Click (Verb) (GUI only)
“Left-click” is hyphenated.
Use this term only to avoid ambiguity when describing an action that could also involve a middle-click or a right-click. Use “click” when the user will only be left-clicking during the procedure.
A.10.4 Left Mouse Button (GUI only)
The left mouse button is the button under the index finger of the right hand on a mouse configured for right-hand use.
A.10.5 List Box (GUI only)
A list box is a box in a GUI application containing a list of items the user can select. The user cannot type a new selection in a list box. Refer also to Drop-Down List Box.
In user instructions, generally use only “list” or “box” to describe this control, whichever is clearer, and instruct the user to “click” or “select” a list item.
Example: In the Wallpaper list, click the background wallpaper of your choice.
A.11 M
A.11.1 MailMan Short for Mail Manager. MailMan is a VA-based utility that facilitates messaging for a number of RPMS packages. Do not use “Mail Manager,” “mailman,” or “Mailman” as synonyms.
A.11.2 Main Window Do not use “main window” unless referring to the process of creating a help file through RoboHelp.

OIT Standards and Conventions Version 3.0
Documentation Style Guide Usage and Terminology March 2012
100
A.11.3 May (Auxiliary Verb) “May” implies permission. Use “can” instead, unless actually discussing permissions that the user has.
A.11.4 Manual (User Manual, Technical Manual) When referring to internal manuals (user manuals, technical manuals, etc.), do not use any capitalization or possessives. When referring to manuals created by other companies that contain the word “manual” in their title, follow the rules for referring to titles.
Problem: Refer to the User’s Manual for more information on this topic.
Solution: Refer to the user manual for more information on this topic.
Solution: Refer to the Microsoft Word Handbook and User Manual for more information on this topic.
A.11.5 Menu A “menu” is a list of options that can be selected at a specific point or location in an application.
(Roll-and-scroll)
Example: To choose a specific task or option, select a menu item from the list by typing the established abbreviation (mnemonic) or synonym at the prompt.
(GUI)
Example: To choose a specific task or option, click a menu name to display a list of options, and then click the option.
A.11.6 Middle-Click (GUI only)
“Middle-click” means to press and release the middle mouse button on an item once. Do not use the word “on” with “middle-click.’
A.11.7 Middle Mouse Button (GUI only)
The middle mouse button is the button under the second finger of the right hand in a mouse configured for right-hand use.

OIT Standards and Conventions Version 3.0
Documentation Style Guide Usage and Terminology March 2012
101
A.11.8 Modify vs. Configure “Modification” is typically a small-scale activity. By contrast, “configuring” is a larger-scale activity. Use the term “modification” to describe changing a specific characteristic or setting. Refer also to Configure.
Example: Modify the background color value through the Properties dialog box.
Example: To configure the desktop, right-click an open space on the desktop.
A.11.9 Multi (prefix) The prefix “multi” does not take a hyphen. See The Chicago Manual of Style (15th Edition) for rules and exceptions.
Problem: multi-media, multi-tasking, multi-user
Solution: multimedia, multitasking, multiuser
A.12 N
A.12.1 Numeric Field (RPMS)
The Numeric field accepts only numbers. Restrictions may apply to the number of characters that can be entered.
A.13 O
A.13.1 Obvious, Obviously Words like “simply,” “obviously,” and “clearly” can seem condescending in some contexts. It’s important to pay attention to the tone of the document and use those words appropriately.
A.13.2 Offsite/Off-Site Use “offsite” as one word with no hyphen.
A.13.3 Onsite/On-Site Use “onsite” as one word with no hyphen.
A.13.4 Online/On-Line Use “online” as one word with no hyphen.

OIT Standards and Conventions Version 3.0
Documentation Style Guide Usage and Terminology March 2012
102
A.13.5 Onscreen/On-Screen Use “onscreen” as one word with no hyphen.
A.13.6 Open (GUI only)
Use “open” to describe opening a user interface component within a window or on the desktop that remains visible until the user explicitly chooses to close the item.
Example: On the Format menu, select Font to open the Edit Font dialog box.
Note: In general, “open” should not be used as an intransitive verb. It should generally have an object.
Problem: On the Format menu, select Font. The Edit Font dialog box opens.
Solution: On the Format menu, select Font to open the Edit Font dialog box.
A.13.7 Option Button (GUI only)
“Option button” is two words with no hyphen. The option button is sometimes called a “radio button,” but use “option button” in OIT documentation.
In user instructions, use “select” or “click” with the name of the option to describe the action of selecting an option button. Do not use the words “button” or “option button” with the name of the option.
Definition: A round button used to select one of a group of mutually exclusive options (only one button in the group can be selected). The selected option button has a filled circle inside it. In some systems, option buttons can be styled to look like check boxes.
Problem: Click the Portrait button.
Problem: Click the Portrait radio button.
Solution: Click Portrait.
Problem: Select the Portrait radio button.
Solution: Select Portrait.

OIT Standards and Conventions Version 3.0
Documentation Style Guide Usage and Terminology March 2012
103
A.14 P
A.14.1 Permission A “permission” is a setting assigned to a file or directory that determines which users are allowed to read, write, and/or execute its contents.
A.14.2 Pick (Verb) Do not use the word “pick.” Use “choose” or “select” to describe selecting menu options.
Problem: Pick the option from the menu.
Solution: Select the option from the menu.
A.14.3 Plug-In (GUI only)
A “plug-in” is a supplementary program that can be added to an application to enhance the application’s functionality.
Do not use “plugin” or “plug in.”
A.14.4 Point To (GUI only)
“Point to” refers to positioning the pointer over a particular object or location without clicking a mouse button. Use “point to” instead of “point at” or “hover.”
Example: On the Insert menu, point to Reference and then click Caption.
A.14.5 Pointer (GUI only)
A “pointer” is a small arrow or other symbol on the screen that is moved with a mouse or other pointing device. A pointer can only appear in a GUI application.
Do not use “cursor” as a synonym for “pointer.” If there is any ambiguity about what the term “pointer” refers to (for example, in developer documentation that also refers to pointer variables), use “mouse pointer.” Refer also to Cursor

OIT Standards and Conventions Version 3.0
Documentation Style Guide Usage and Terminology March 2012
104
A.14.6 Pointer, Pointer to Files Field (RPMS)
A Pointer to Files field in an RPMS database is a field that directs the application to another file for information. This type of field is often referred to simply as “a pointer.”
A.14.7 Policyholder “Policyholder” is one word with no hyphen.
A.14.8 Post (Prefix) The prefix “post” does not take a hyphen. See The Chicago Manual of Style (15th Edition) for rules and exceptions.
A.14.9 Pre (Prefix) The prefix “pre” does not take a hyphen. See The Chicago Manual of Style (15th Edition for rules and exceptions.
Problem: pre-defined
Solution: predefined
A.14.10 Press (Verb) Use “press” for keyboard actions. Do not use “strike” or “hit.”
Use “click” for mouse actions in a GUI.
Example: Press Enter to continue.
Example: Click Apply.
A.14.11 Printout (Noun) As a noun, “printout” is one word with no hyphen.
Do not use “print out” (two words) as a verb. Always use the single word “print” instead.
A.14.12 Printset (Noun) “Printset” is one word with no hyphen.

OIT Standards and Conventions Version 3.0
Documentation Style Guide Usage and Terminology March 2012
105
A.14.13 Privileges Privileges are a set of special permissions granted to a user to perform various operations on a system.
A.14.14 Prompt (Roll-and-scroll)
The prompt is an instruction displayed on the screen of a roll-and-scroll application specifying the type of information required by the application to continue with the current task.
A.14.15 Pull-Down Menu Do not use “pull-down menu.” Use “menu” instead. (All menus are pull-down menus unless they're pop-up menus.) Refer also to Drop-Down List.
A.15 Q
A.15.1 QMan Short for Query Manager, QMan is a VA-based utility that works behind the scene for most RPMS packages.
Do not use “Query Manager,” “qman,” or “Qman” as synonyms.
A.16 R
A.16.1 Re (Prefix) The prefix “re” does not take a hyphen. See The Chicago Manual of Style (15th Edition) for rules and exceptions.
A.16.2 Record(s) (RPMS)
A record consists of a group of database fields. All records have names, such as “Patient Name.” In this case, all data associated with the name of a specific patient is located in the same record.
A.16.3 Remove (GUI only)
Use “remove” to describe removing an item that can be restored.

OIT Standards and Conventions Version 3.0
Documentation Style Guide Usage and Terminology March 2012
106
Do not use “delete” to describe removing an item that can be restored.
A.16.4 Right-Click (GUI only)
“Right-click is two words and is always hyphenated, and means to press and release the right mouse button once on an item.
Use “right-click” to describe the action of selecting a control or item in a window with the right mouse button. Do not use the word “on” with “right-click.” Refer also to Click.
Example: Right-click the selected item to display the context menu.
A.16.5 Right-Click Menu Do not use “right-click menu.” Use “context menu” instead.
A.16.6 Right Mouse Button (GUI only)
The right mouse button is the button under the third finger of the right hand in a mouse configured for right-hand use.
A.16.7 Right Side Use this term to refer to the right side of an item. Do not use “right-hand side.”
A.16.8 Run Use “run” to describe executing a program, script, application, or report from the command line.
Do not use “run” to describe opening an application from a desktop icon or from the Start menu. Use “start” or “open” instead.
A.16.9 Run Time The noun form, “run time,” is two words without a hyphen.
Example: The system will calculate the run time.
The adjectival form, “run-time,” is two words with a hyphen.
Example: Type the run-time calculation at the “Total Time” prompt.

OIT Standards and Conventions Version 3.0
Documentation Style Guide Usage and Terminology March 2012
107
(Note: some software components are called “runtime” components or have the word “runtime” in their names. When discussing one of these components, check the correct spelling of the specific product.)
A.17 S
A.17.1 Screen (GUI)
Use “screen” only to describe the physical panel on the front of the monitor. Always use “window” to describe a part of the GUI interface.
(Roll-and-scroll)
Use “screen” when referring to the window in which an RPMS package is running, because many users are still working with terminals that do not use Windows-style graphical windows.
A.17.2 Screen Capture Use “screen capture” to refer to a graphic image of an application window, a portion of a desktop, or an entire desktop.
Do not use “screen shot,” “screen-shot,” “screenshot,” or “screen grab.”
A.17.3 Scroll Bar “Scroll bar” is two words with no hyphen.
A.17.4 Select (GUI only)
Use “select” to describe marking the object on which an action is to be performed, such as text, one or more desktop icons, a menu, etc.
Selected objects usually appear highlighted. Refer to the item that is selected as the “selection,” “selected text,” “selected menu,” etc.
OIT Standards and Conventions Version 3.0
Documentation Style Guide Usage and Terminology March 2012
108
Do not use “choose” or “highlight” in this context.
A.17.5 Selected/Unselected (GUI only)
Use “selected” or “unselected” to describe the on or off state of a binary choice in a dialog box, such as a check box or option button (Refer also to Check Box, Option Button).
A.17.6 Set of Codes Field (RPMS)
The Set of Codes field usually accepts one or two characters, and is often used when Yes/No responses are required.
A.17.7 Setup, Set Up The noun form, “setup,” is one word.
Example: The setup is complete.
The verb form, “set up,” is two words with no hyphen.
Example: We will set up the email servers after lunch.
The adjectival form, “setup,” is one word.
Example: The setup schedule was attached to my last email.
The hyphenated word, “set-up,” is not used.
A.17.8 Shortcut Key Do not use “shortcut key.” Use “keyboard shortcut” instead.
A.17.9 Show Do not use “show” in the following ways (refer also to Appears, Display, Open):
Problem: Click the Open button. The Open File dialog box shows.
Solution: Click the Open button to display the Open File dialog box.
Problem: The Patients pane shows the patients registered at the site.
Solution: A list of patients registered at the site is displayed in the Patients pane.
Solution: The Patients pane displays a list of patients registered at the site.
OIT Standards and Conventions Version 3.0
Documentation Style Guide Usage and Terminology March 2012
109
Solution: The Patients pane contains a list of patients registered at the site.
A.17.10 Simple, Simply Words like “simply,” “obviously,” and “clearly” can seem condescending in some contexts. It’s important to pay attention to the tone of the document and use these words appropriately.
A.17.11 Single-Click Do not use “single-click.” Use “click” instead. Do not specify the number of clicks unless instructing the user to perform a double-click or a triple-click.
A.17.12 Software “Software” refers to applications that allow users to interact with computer components (hardware). A software program or application is a set of instructions that control what is displayed on the screen, how information is entered, and what the computer does with the information or instructions that are entered.
A.17.13 Stand-Alone “Stand-alone” is hyphenated when used as an adjective. It should not be used as a noun unless quoting documentation for third-party products.
A.17.14 Startup, Start-Up The noun form, “startup,” is one word.
Example: The configuration file is read at startup.
The adjectival form, “startup,” is one word.
Example: The names are in the startup file.
The hyphenated word “start-up” is not used.
Do not use “start up” as a verb. Use “start” as the verb form instead.
Problem: Start up the program by double-clicking the desktop icon.
Solution: Start the program by double-clicking the desktop icon.
A.17.15 Sub (Prefix) The prefix “sub” does not take a hyphen. See The Chicago Manual of Style (15th Edition) for rules and exceptions. (Note: avoid “sub-submenu” unless quoting documentation for third-party products.)

OIT Standards and Conventions Version 3.0
Documentation Style Guide Usage and Terminology March 2012
110
Examples: Submenu, subfile, subrecord
A.17.16 Sync “Sync” is a common abbreviation for “synchronize.” Use “sync” instead of “synch.”
A.17.17 System Administrator A “system administrator” is a user with root privileges on a UNIX system.
This term may have a slightly different meaning to IHS users because many of the RPMS programs are referred to as system; therefore, the owners or managers of a particular package could also be referred to as system administrators. When using this term, be sure to define it in the glossary or the orientation section of the manual.
Avoid using “superuser” or “root” as synonyms.
A.18 T
A.18.1 TaskMan Short for Task Manager, TaskMan is a VA-based utility that manages queues on RPMS systems. Do not use “Task Manager,” “taskman,” or “Taskman” as synonyms.
A.18.2 Their Do not use “their” as a gender-neutral singular pronoun. Instead, rewrite the sentence to make it plural or so that it does not require a pronoun. “His or hers” may also be used to avoid the use of “their,” but use it sparingly. Refer to Section 14.4 for more information on the use of gender in technical documentation.
Problem: When the user looks at their screen, they crash the system.
Solution: Look at the screen to crash the system.
Solution: When users look at their screens, they crash the system.
A.18.3 Time Field (RPMS)
The Time field accepts only a predefined set of time formats.
A.18.4 Toolbar (GUI only)
“Toolbar” is one word with no hyphen.

OIT Standards and Conventions Version 3.0
Documentation Style Guide Usage and Terminology March 2012
111
A.18.5 Triple-Click (GUI only)
Use “triple-click” to describe the action of pressing and releasing the left mouse button on an item three times in rapid succession.
A.18.6 Type Use “type” instead of “enter.” Do not use “type in,” “type out,” or any other variation on the word “type.”
Problem: Enter your name to start the program.
Problem: Type in your name to start the program.
Solution: Type your name to start the program.
A.19 U
A.19.1 UNIX UNIX is a multiuser, multitasking operating system. “UNIX” is a registered trademark of the Open Group.
The Open Group spells “UNIX” in all uppercase, which is the industry standard. Do not use “Unix” or any other nonstandard term unless directly quoting an (inaccurate) interface or other documentation.
A.19.2 Utilize Do not use the word “utilize.” Use “use” instead.
A.19.3 User Name “User name” is two words with no capitalization unless used at the beginning of a sentence or in a heading.
Example: At the “User” prompt, type your user name.
Exception: If the roll-and-scroll or GUI interface shows the term as one word, use one word when directly describing the interface.
Example: Type your user name in the Username box.

OIT Standards and Conventions Version 3.0
Documentation Style Guide Usage and Terminology March 2012
112
A.20 V
A.20.1 Variable Pointer File Field (RPMS)
The Variable Pointer File field performs like the Pointer to File field, with the exception that this field can accept a value from one or more files.
A.21 W
A.21.1 Web (Noun) When “web” is used as a noun to refer to the World Wide Web, it is initial capped (i.e., “Web,” a proper noun).
When “Web” is used as an adjective, it is capitalized and appears as a separate word as in the following examples:
• Web address
• Web browser
• Web page
• Web site
Exceptions: The following words are recognized as exceptions to this rule:
• web-centric
• webcam
• webcast
• webmaster
• webzine
A.21.2 Web Site A “Web site” is a location on the World Wide Web.
“Web site” is two words. The word “Web” is capitalized.
Problem: Download the patch from our website.
Problem: Download the patch from our web site.
Problem: Download the patch from our Website.
OIT Standards and Conventions Version 3.0
Documentation Style Guide Usage and Terminology March 2012
113
Problem: Download the patch from our Web Site.
Solution: Download the patch from our Web site.
A.21.3 Window (GUI only)
Always use “window” to describe a part of the GUI interface. Use “screen” only to describe the physical panel on the front of the monitor.
(Roll-and-scroll)
Use “screen” when referring to the window in which an RPMS package is running, because many users are still working with terminals that do not use Windows-style graphical windows.
A.21.4 Word Processing Field (RPMS)
The Word Processing field allows the user to write, edit, and format text for letters, MailMan messages, etc.
A.21.5 Workaround “Workaround” is one word with no hyphen. This word may sound like slang to the user, so use it sparingly and with the appropriate audience.
A.21.6 Workflow “Workflow” is one word with no hyphen.
A.21.7 World Wide Web The “World Wide Web” is a system of Internet servers that supports linked HTML documents, where clicking on links in HTML documents displays other documents on the World Wide Web.
“World Wide Web” is a proper noun; all three words are capitalized. “World Wide Web” can be shortened to “Web” when clearly referring to the World Wide Web (notice the capital W in “Web”). For most users, this term is also interchangeable with “Internet.” Refer also to Web.

OIT Standards and Conventions Version 3.0
Documentation Style Guide RPMS Template Styles March 2012
114
Appendix B: RPMS Template Styles This appendix contains a list of styles available in RPMS templates. Each entry includes the style name, style type, intended use, and a brief description of each.
Note: Not all styles that might appear in a document’s Styles task pane are listed here.
The notation in parentheses in the first column indicates the type or ‘behavior’ of the style; these duplicate the notation included with each style name on Word’s Styles task pane:
• The pilcrow (¶) indicates that the style is paragraph based and when applied affects the appearance of the entire paragraph.
• The small letter a (a) indicates that the style is character based and when applied affects only those characters in the paragraph to which it was applied.
• The pilcrow followed by the small letter a (¶a) indicates that the style is linked, meaning it is primarily a paragraph style, but can be used as a character style by applying it to selected text only.
If a style’s intended use begins with the word “Automatic” or “Only,” do not use it for any other purpose. Doing so may break important document automation features.
Style and Type Use Description Bdytxt1 (¶a)
For basic body text in RPMS documents
Font: Times New Roman 12 Left Indent: 0.75 Spacing: 12 points after
Bdytxt1 LeadIn (¶)
In place of Bdytxt1 when leading into a figure, table, bulleted list, or numbered list
Font: Times New Roman 12 Left Indent: 0.75 Spacing: 6 points after Paragraph: Keep with next
Bdytxt2 (¶)
To match the text indent of the Bullet1 and ListNum styles – used for additional paragraphs under a first-level list item
Font: Times New Roman 12 Left Indent: 1.0 Spacing: 12 points after
Bdytxt2 LeadIn (¶)
In place of Bdytxt2 when leading into a figure, table, or bulleted list
Font: Times New Roman 12 Left Indent: 1.0 Spacing: 6 points after Paragraph: Keep with next
Bdytxt3 (¶)
To match the text indent of the Bullet2, Dash1, and ListAlpha styles – used for additional paragraphs under a second-level list item
Font: Times New Roman 12 Left Indent: 1.25 Spacing: 12 points after

OIT Standards and Conventions Version 3.0
Documentation Style Guide RPMS Template Styles March 2012
115
Style and Type Use Description Bdytxt3 LeadIn (¶)
In place of Bdytxt3 when leading into a figure, table, or bulleted list
Font: Times New Roman 12 Left Indent: 1.25 Spacing: 6 points after Paragraph: Keep with next
Bdytxt4 (¶)
To match the text indent of the Bullet3 and Dash2, styles – used for additional paragraphs under a third-level list item
Font: Times New Roman 12 Left Indent: 1.5 Spacing: 12 points after
Block Text (¶)
For quoted material more than four lines in length
Font: Times New Roman 12 Left Indent: 1.0 Right Indent: 0.75 Alignment: Justified
Bold (a)
For bold text without modifying the underlying style
Font: bold
BoldItalic (a)
For bold and italic text without modifying the underlying style
Font: bold and italic
Bullet1 (¶a)
For first-level indent in a bulleted list under a Bdytxt1 styled paragraph
Font: Times New Roman 12 Left Text Indent: 1.0 Spacing: 6 points after
Bullet2 (¶)
For first-level indent in a bulleted list under a Bdytxt2 styled paragraph
Font: Times New Roman 12 Left Text Indent: 1.25 Spacing: 6 points after
Bullet3 (¶)
For either: • First-level indent in a bulleted list
under a Bdytxt3 styled paragraph
• Third-level indent in a bulleted list under a Bdytxt1 styled paragraph
Font: Times New Roman 12 Left Text Indent: 1.5 Spacing: 6 points after
Caption (¶)
Automatically assigned by Word to a figure or table caption created using the Insert Caption option
Font: Arial 10 Left Indent: 0.75 Spacing: 3 points before, 12 points after Paragraph: Keep with next (table caption only)
CaptionIndent (¶)
Only for aligning a caption to match the indent of a figure set to PictureIndent style
Font: Arial 10 Left Indent: 1.0 Spacing: 3 points before, 12 points after
CaptionWide (¶)
Only for aligning a caption to match the indent of either: • A figure having the PictureWide
or ComputerOutputWide style • A table aligned with the left page
margin
Font: Arial 10 Spacing: 3 points before, 12 points after

OIT Standards and Conventions Version 3.0
Documentation Style Guide RPMS Template Styles March 2012
116
Style and Type Use Description ComputerOutput (¶)
For RPMS roll-and-scroll screen text capture blocks
Font: Courier New 9 Left Indent: 0.8 Spacing: 6 points before, 6 points after Shading: 10% gray Border: Outline
ComputerOutputWide (¶)
For RPMS roll-and-scroll screen text capture blocks that are too wide for the ComputerOutput style
Font: Courier New 9 Spacing: 6 points before, 6 points after Shading: 10% gray Border: Outline
Contact_info (¶)
Only for body text in the Contact Information section
Font: Arial 11 Left Indent: 0.75 Spacing: 6 points after
CoverInfo (¶)
Only for the ‘publisher’ information in the footer of the cover page of an RPMS manual
Font: Arial 14 Alignment: centered Spacing: 12 points before
Dash1 (¶)
For second-level indent in a bulleted list under a Bdytxt1 styled paragraph
Font: Times New Roman 12 Left Indent: 1.0 Spacing: 3 points after
Dash2 (¶)
For second-level indent in a bulleted list under a Bdytxt2 styled paragraph
Font: Times New Roman 12 Left Indent: 1.25 Spacing: 3 points after
Dash3 (¶)
For either: • Second-level indent in a bulleted
list under a Bdytxt3 styled paragraph
• Fourth-level indent in a bulleted list under a Bdytxt1 styled paragraph
Font: Times New Roman 12 Left Indent: 1.5 Spacing: 3 points after
FollowedHyperlink (a)
Automatic style used by Word to display an Internet address previously visited by the reader
Font: underline Color: violet
Footer (¶)
Only for footer information (manual type, section name, and date)
Font: Arial 11 Spacing: 6 points before Border: solid line before
FooterPageNumber (¶a)
Only to format the page number Font: Times New Roman 12 Alignment: centered Spacing: 3 points before
Footnote Reference (a)
Automatic style used by Word to place a footnote reference number in body text
Font: 10 points superscript
Footnote Text (¶)
Automatic style used by Word to format a footnote at the bottom of the page
Font: Times New Roman 11 Spacing: 12 points after

OIT Standards and Conventions Version 3.0
Documentation Style Guide RPMS Template Styles March 2012
117
Style and Type Use Description GlossTerm (¶)
Only for terms defined in the Glossary
Font: Arial, bold Left Indent: 0.75 Spacing: 6 points before, 3 points after Following Style: bdytxt3
Header (¶)
Only for header information (application name, namespace, and version [and patch] number)
Font: Arial 11 Spacing: 6 points after Border: solid line after
1.0 Heading 1 (¶)
For first-level section headings in the document body
Font: Arial 18, bold Spacing: 20 points before, 6 points after Break: page break before Following Style: bdytxt1
1.1 Heading 2 (¶)
For second-level subsection headings in the document body
Font: Arial 16 Spacing: 18 points before Following Style: bdytxt1
1.1.1 Heading 3 (¶)
For third-level subsection headings in the document body
Font: Arial 14 Spacing: 18 points before Following Style: bdytxt1
1.1.1.1 Heading 4 (¶)
For fourth-level subsection headings in the document body
Font: Arial 12 Spacing: 18 points before Following Style: bdytxt1
1.1.1.1.1 Heading 5 (¶)
For fifth-level subsection headings in the document body
Font: Times New Roman 13, bold, italic Spacing: 3 points after Following Style: bdytxt1
Appendix A: Heading 6 (¶)
For first-level appendix headings Font: Arial 18, bold Spacing: 20 points before, 6 points after Break: page break before Following Style: bdytxt1
A.1 Heading 7 (¶)
For second-level subsection headings in an appendix
Font: Arial 16 Spacing: 18 points before, 6 points after Following Style: bdytxt1
A.1.1 Heading 8 (¶)
For third-level subsection headings in an appendix
Font: Arial 14 Spacing: 18 points before, 6 points after Following Style: bdytxt1
A.1.1.1 Heading 9 (¶)
For fourth-level subsection headings in an appendix
Font: Arial 12 Spacing: 18 points before Following Style: bdytxt1
Hyperlink (a)
Automatic style used by Word to display an Internet address
Font: underline Color: blue
Italic (a)
For italic text without modifying the underlying style
Font: italic
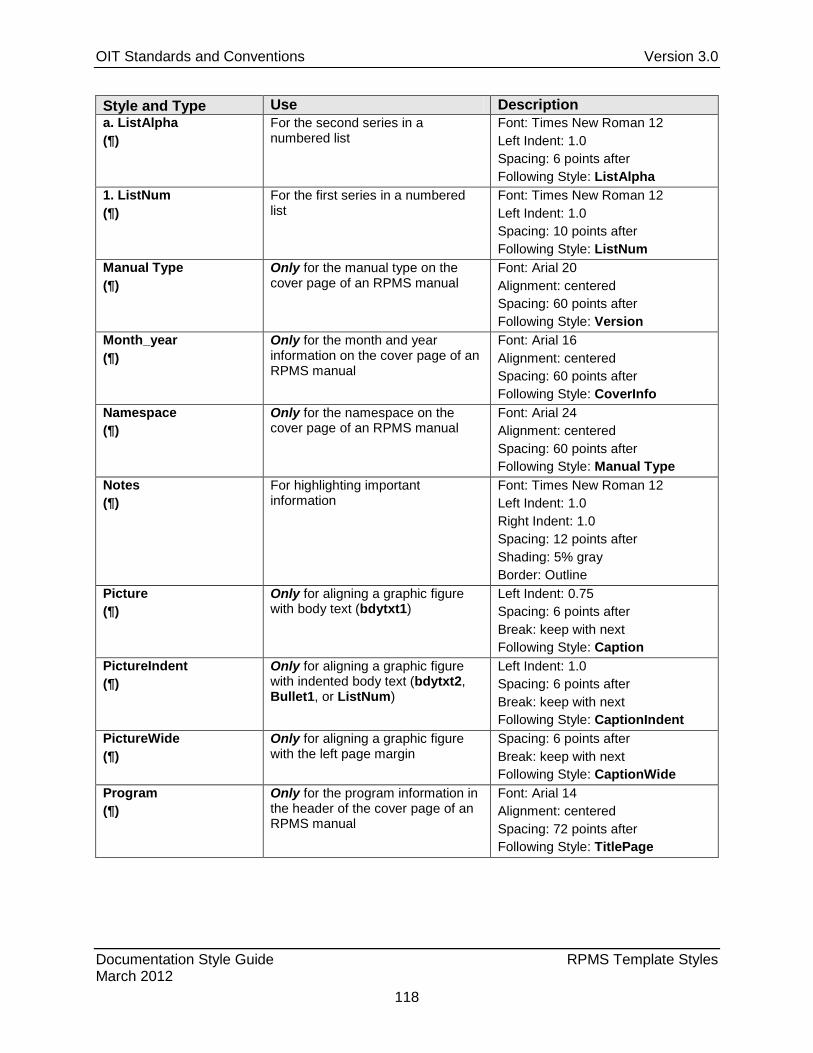
OIT Standards and Conventions Version 3.0
Documentation Style Guide RPMS Template Styles March 2012
118
Style and Type Use Description a. ListAlpha (¶)
For the second series in a numbered list
Font: Times New Roman 12 Left Indent: 1.0 Spacing: 6 points after Following Style: ListAlpha
1. ListNum (¶)
For the first series in a numbered list
Font: Times New Roman 12 Left Indent: 1.0 Spacing: 10 points after Following Style: ListNum
Manual Type (¶)
Only for the manual type on the cover page of an RPMS manual
Font: Arial 20 Alignment: centered Spacing: 60 points after Following Style: Version
Month_year (¶)
Only for the month and year information on the cover page of an RPMS manual
Font: Arial 16 Alignment: centered Spacing: 60 points after Following Style: CoverInfo
Namespace (¶)
Only for the namespace on the cover page of an RPMS manual
Font: Arial 24 Alignment: centered Spacing: 60 points after Following Style: Manual Type
Notes (¶)
For highlighting important information
Font: Times New Roman 12 Left Indent: 1.0 Right Indent: 1.0 Spacing: 12 points after Shading: 5% gray Border: Outline
Picture (¶)
Only for aligning a graphic figure with body text (bdytxt1)
Left Indent: 0.75 Spacing: 6 points after Break: keep with next Following Style: Caption
PictureIndent (¶)
Only for aligning a graphic figure with indented body text (bdytxt2, Bullet1, or ListNum)
Left Indent: 1.0 Spacing: 6 points after Break: keep with next Following Style: CaptionIndent
PictureWide (¶)
Only for aligning a graphic figure with the left page margin
Spacing: 6 points after Break: keep with next Following Style: CaptionWide
Program (¶)
Only for the program information in the header of the cover page of an RPMS manual
Font: Arial 14 Alignment: centered Spacing: 72 points after Following Style: TitlePage
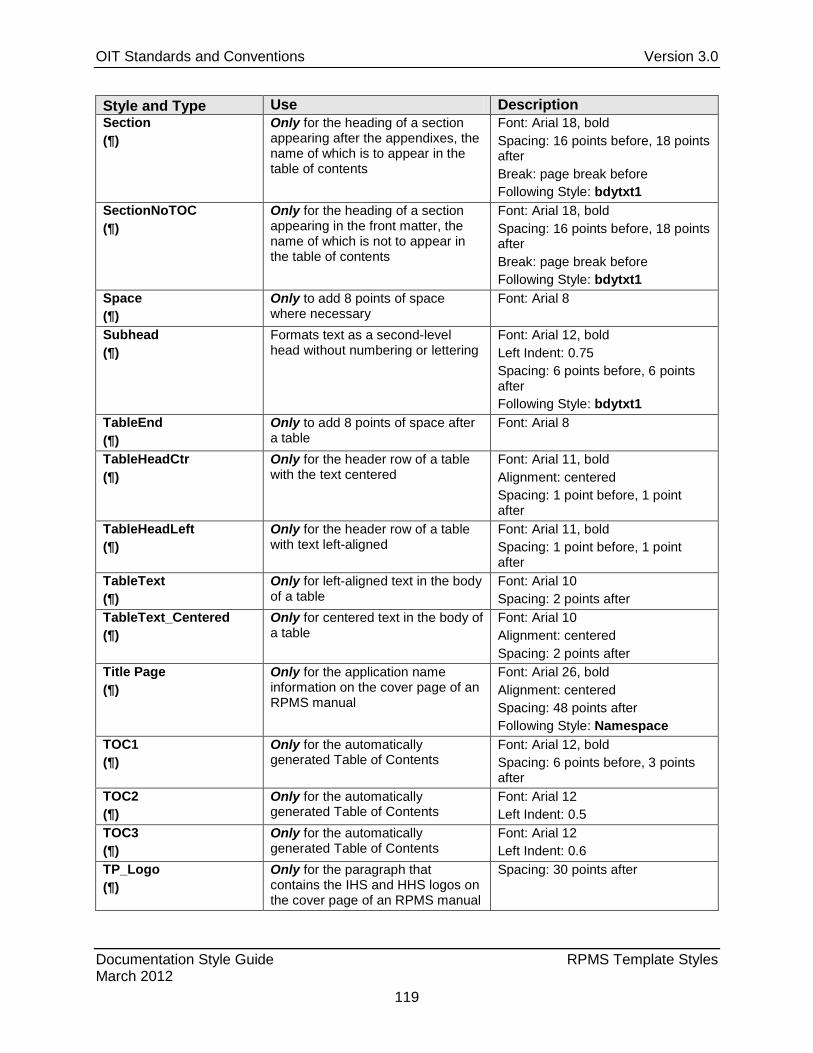
OIT Standards and Conventions Version 3.0
Documentation Style Guide RPMS Template Styles March 2012
119
Style and Type Use Description Section (¶)
Only for the heading of a section appearing after the appendixes, the name of which is to appear in the table of contents
Font: Arial 18, bold Spacing: 16 points before, 18 points after Break: page break before Following Style: bdytxt1
SectionNoTOC (¶)
Only for the heading of a section appearing in the front matter, the name of which is not to appear in the table of contents
Font: Arial 18, bold Spacing: 16 points before, 18 points after Break: page break before Following Style: bdytxt1
Space (¶)
Only to add 8 points of space where necessary
Font: Arial 8
Subhead (¶)
Formats text as a second-level head without numbering or lettering
Font: Arial 12, bold Left Indent: 0.75 Spacing: 6 points before, 6 points after Following Style: bdytxt1
TableEnd (¶)
Only to add 8 points of space after a table
Font: Arial 8
TableHeadCtr (¶)
Only for the header row of a table with the text centered
Font: Arial 11, bold Alignment: centered Spacing: 1 point before, 1 point after
TableHeadLeft (¶)
Only for the header row of a table with text left-aligned
Font: Arial 11, bold Spacing: 1 point before, 1 point after
TableText (¶)
Only for left-aligned text in the body of a table
Font: Arial 10 Spacing: 2 points after
TableText_Centered (¶)
Only for centered text in the body of a table
Font: Arial 10 Alignment: centered Spacing: 2 points after
Title Page (¶)
Only for the application name information on the cover page of an RPMS manual
Font: Arial 26, bold Alignment: centered Spacing: 48 points after Following Style: Namespace
TOC1 (¶)
Only for the automatically generated Table of Contents
Font: Arial 12, bold Spacing: 6 points before, 3 points after
TOC2 (¶)
Only for the automatically generated Table of Contents
Font: Arial 12 Left Indent: 0.5
TOC3 (¶)
Only for the automatically generated Table of Contents
Font: Arial 12 Left Indent: 0.6
TP_Logo (¶)
Only for the paragraph that contains the IHS and HHS logos on the cover page of an RPMS manual
Spacing: 30 points after
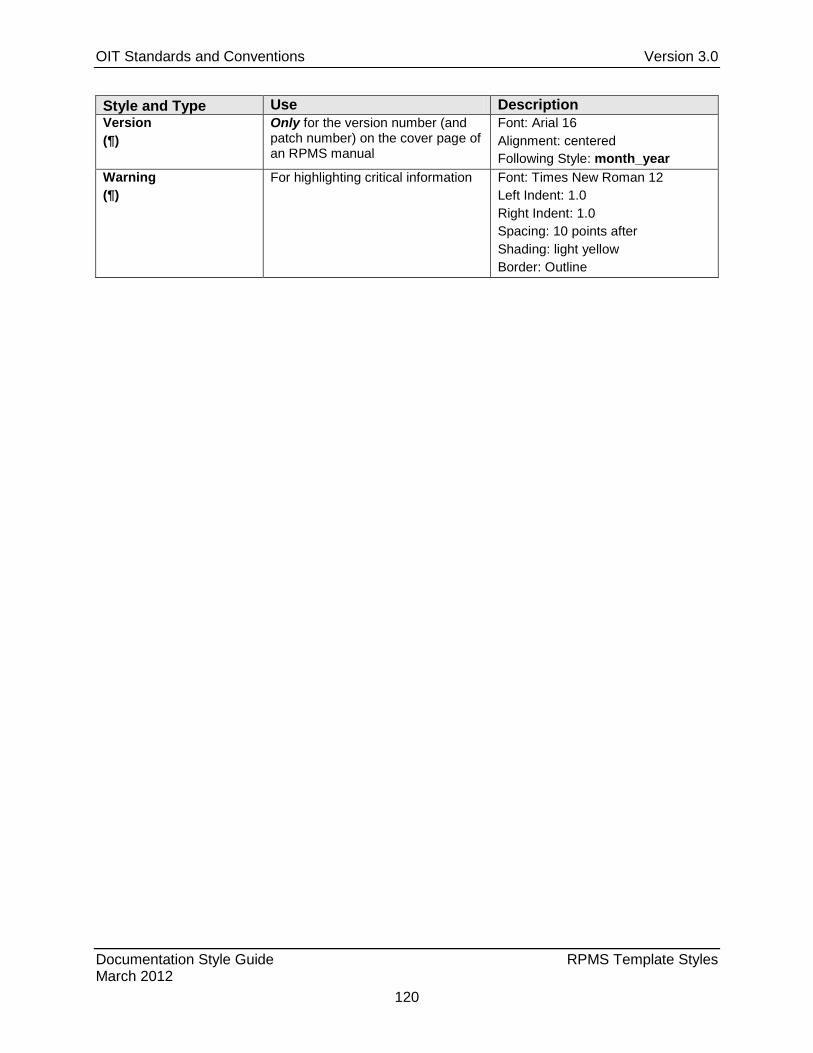
OIT Standards and Conventions Version 3.0
Documentation Style Guide RPMS Template Styles March 2012
120
Style and Type Use Description Version (¶)
Only for the version number (and patch number) on the cover page of an RPMS manual
Font: Arial 16 Alignment: centered Following Style: month_year
Warning (¶)
For highlighting critical information Font: Times New Roman 12 Left Indent: 1.0 Right Indent: 1.0 Spacing: 10 points after Shading: light yellow Border: Outline

OIT Standards and Conventions Version 3.0
Documentation Style Guide Glossary March 2012
121
Glossary
Caret A character (^) that appears as a small inverted “v” and is typed Shift-6. In the context of this document, the caret is a navigation command in many RPMS packages.
Ellipsis (Points) A character (…) having the appearance of three periods and used to indicate the intentional omission of a word, sentence, or whole section from text being quoted.
Gerund A noun created by adding –ing to a verb.
Header The page identification content repeated at the top of a series of pages. Also, a Microsoft Word term describing the function used to format and generate this content. On this page, the text at the top of the page (OIT Standards and Conventions Version 3.0) and the underline constitute the Header.
Heading The title of a section or topic that is typically set in a font style that stands out from the text that follows. In the context of this guide and documents created thereby, Headings in the body matter are numbered and those in the front matter and back matter are not.
Heading x Specific styles included in RPMS document templates for formatting sequentially numbered, hierarchical headings in the body matter of the document:
• Heading 1 through Heading 5 styles create first- through fifth-level headings for body sections.
• Heading 6 through Heading 9 styles create first- through fourth-level headings for appendixes.
Pilcrow A typographical character commonly used to denote an individual paragraph. In Microsoft Word, the pilcrow (¶) is a non-printing format symbol that marks the end of a paragraph; it is also used in Word’s Styles task pane to indicate that a style is paragraph based.
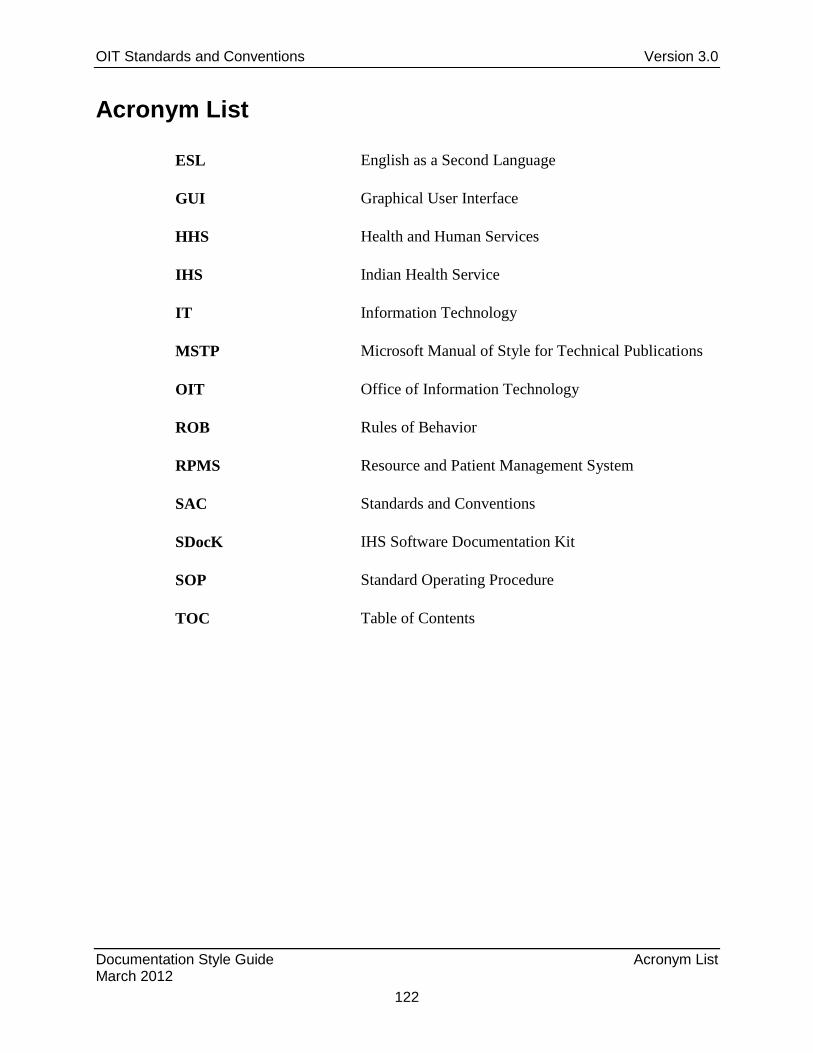
OIT Standards and Conventions Version 3.0
Documentation Style Guide Acronym List March 2012
122
Acronym List
ESL English as a Second Language
GUI Graphical User Interface
HHS Health and Human Services
IHS Indian Health Service
IT Information Technology
MSTP Microsoft Manual of Style for Technical Publications
OIT Office of Information Technology
ROB Rules of Behavior
RPMS Resource and Patient Management System
SAC Standards and Conventions
SDocK IHS Software Documentation Kit
SOP Standard Operating Procedure
TOC Table of Contents