openedge getting started: abl essentials - product documentation
TRANSCRIPT

OPENEDGE®
10PROGRESS
®
OpenEdge Getting Started:ABL Essentials
© 2009 Progress Software Corporation and/or its subsidiaries or affiliates. All rights reserved.
These materials and all Progress® software products are copyrighted and all rights are reserved by Progress Software Corporation. Theinformation in these materials is subject to change without notice, and Progress Software Corporation assumes no responsibility for anyerrors that may appear therein. The references in these materials to specific platforms supported are subject to change.
Actional, Apama, Apama (and Design), Artix, Business Empowerment, DataDirect (and design), DataDirect Connect, DataDirectConnect64, DataDirect Technologies, DataDirect XML Converters, DataDirect XQuery, DataXtend, Dynamic Routing Architecture,EdgeXtend, Empowerment Center, Fathom, IntelliStream, IONA, IONA (and design), Making Software Work Together, Mindreef,ObjectStore, OpenEdge, Orbix, PeerDirect, POSSENET, Powered by Progress, PowerTier, Progress, Progress DataXtend, ProgressDynamics, Progress Business Empowerment, Progress Empowerment Center, Progress Empowerment Program, Progress OpenEdge,Progress Profiles, Progress Results, Progress Software Developers Network, Progress Sonic, ProVision, PS Select, SequeLink, Shadow,SOAPscope, SOAPStation, Sonic, Sonic ESB, SonicMQ, Sonic Orchestration Server, SonicSynergy, SpeedScript, Stylus Studio,Technical Empowerment, WebSpeed, Xcalia (and design), and Your Software, Our Technology–Experience the Connection areregistered trademarks of Progress Software Corporation or one of its affiliates or subsidiaries in the U.S. and/or other countries.AccelEvent, Apama Dashboard Studio, Apama Event Manager, Apama Event Modeler, Apama Event Store, Apama Risk Firewall,AppsAlive, AppServer, ASPen, ASP-in-a-Box, BusinessEdge, Business Making Progress, Cache-Forward, DataDirect Spy, DataDirectSupportLink, Fuse, Fuse Mediation Router, Fuse Message Broker, Fuse Services Framework, Future Proof, GVAC, High PerformanceIntegration, ObjectStore Inspector, ObjectStore Performance Expert, OpenAccess, Orbacus, Pantero, POSSE, ProDataSet, Progress ESPEvent Manager, Progress ESP Event Modeler, Progress Event Engine, Progress RFID, Progress Software Business Making Progress,PSE Pro, SectorAlliance, SeeThinkAct, Shadow z/Services, Shadow z/Direct, Shadow z/Events, Shadow z/Presentation, Shadow Studio,SmartBrowser, SmartComponent, SmartDataBrowser, SmartDataObjects, SmartDataView, SmartDialog, SmartFolder, SmartFrame,SmartObjects, SmartPanel, SmartQuery, SmartViewer, SmartWindow, Sonic Business Integration Suite, Sonic Process Manager, SonicCollaboration Server, Sonic Continuous Availability Architecture, Sonic Database Service, Sonic Workbench, Sonic XML Server,StormGlass, The Brains Behind BAM, WebClient, Who Makes Progress, and Your World. Your SOA. are trademarks or service marksof Progress Software Corporation or one of its affiliates or subsidiaries in the U.S. and other countries. Java and all Java-based marksare trademarks or registered trademarks of Sun Microsystems, Inc. in the U.S. and other countries. Any other trademarks containedherein are the property of their respective owners.
For the latest documentation updates see OpenEdge Product Documentation on PSDN (http://communities.progress.com/pcom/docs/DOC-16074).
December 2009
Last updated with new content: Release 10.2B Product Code: 4496; R10.2B
Third party acknowledgements — See the “Third party acknowledgements” section on page Preface–9.

Contents
Preface . . . . . . . . . . . . . . . . . . . . . . . . . . . . . . . . . . . . . . . . . . . . . . . . . . . . . . . . . . Preface–1
1. Introducing ABL . . . . . . . . . . . . . . . . . . . . . . . . . . . . . . . . . . . . . . . . . . . . . . . . . . 1–1About the sample database. . . . . . . . . . . . . . . . . . . . . . . . . . . . . . . . . . . 1–2
In the beginning . . . FOR EACH CUSTOMER . . . . . . . . . . . . . . . . . . . . . . . . . . . 1–3Starting your OpenEdge session . . . . . . . . . . . . . . . . . . . . . . . . . . . . . . 1–4Writing your first procedure . . . . . . . . . . . . . . . . . . . . . . . . . . . . . . . . . . . 1–6
Basic characteristics of ABL . . . . . . . . . . . . . . . . . . . . . . . . . . . . . . . . . . . . . . . . . 1–9ABL is procedural . . . . . . . . . . . . . . . . . . . . . . . . . . . . . . . . . . . . . . . . . . 1–9ABL is block-structured . . . . . . . . . . . . . . . . . . . . . . . . . . . . . . . . . . . . . . 1–9An ABL procedure consists of statements. . . . . . . . . . . . . . . . . . . . . . . . 1–9ABL combines procedural, database, and user interface statements . . . 1–10
Saving your test procedure . . . . . . . . . . . . . . . . . . . . . . . . . . . . . . . . . . . . . . . . . . 1–11
2. Using Basic ABL Constructs. . . . . . . . . . . . . . . . . . . . . . . . . . . . . . . . . . . . . . . . 2–1Refining the data selection with a WHERE clause . . . . . . . . . . . . . . . . . . . . . . . . 2–2
Comparison operators . . . . . . . . . . . . . . . . . . . . . . . . . . . . . . . . . . . . . . . 2–2Using quotation marks. . . . . . . . . . . . . . . . . . . . . . . . . . . . . . . . . . . . . . . 2–3
Creating nested blocks to display related data . . . . . . . . . . . . . . . . . . . . . . . . . . . 2–4Changing labels and formats . . . . . . . . . . . . . . . . . . . . . . . . . . . . . . . . . . . . . . . . . 2–7Using program variables and data types . . . . . . . . . . . . . . . . . . . . . . . . . . . . . . . . 2–8
Defining formats . . . . . . . . . . . . . . . . . . . . . . . . . . . . . . . . . . . . . . . . . . . 2–9Other variable qualifiers. . . . . . . . . . . . . . . . . . . . . . . . . . . . . . . . . . . . . . 2–10Variable naming conventions . . . . . . . . . . . . . . . . . . . . . . . . . . . . . . . . . 2–11Placement of variable definitions . . . . . . . . . . . . . . . . . . . . . . . . . . . . . . 2–12
Defining an IF-THEN-ELSE decision point . . . . . . . . . . . . . . . . . . . . . . . . . . . . . . 2–13Using the ABL Unknown value . . . . . . . . . . . . . . . . . . . . . . . . . . . . . . . . 2–13Using built-In ABL functions . . . . . . . . . . . . . . . . . . . . . . . . . . . . . . . . . . 2–14ABL Functions . . . . . . . . . . . . . . . . . . . . . . . . . . . . . . . . . . . . . . . . . . . . . 2–16
Putting a calculation into your procedure . . . . . . . . . . . . . . . . . . . . . . . . . . . . . . . 2–20Arithmetic expressions and operands . . . . . . . . . . . . . . . . . . . . . . . . . . . 2–20Arithmetic built-in functions . . . . . . . . . . . . . . . . . . . . . . . . . . . . . . . . . . . 2–23
Getting to online help . . . . . . . . . . . . . . . . . . . . . . . . . . . . . . . . . . . . . . . . . . . . . . . 2–24Saving and compiling your test procedure . . . . . . . . . . . . . . . . . . . . . . . . . . . . . . 2–26

Contents
Conte
3. Running ABL Procedures. . . . . . . . . . . . . . . . . . . . . . . . . . . . . . . . . . . . . . . . . . . 3–1Running a subprocedure . . . . . . . . . . . . . . . . . . . . . . . . . . . . . . . . . . . . . . . . . . . . 3–2Using the Propath . . . . . . . . . . . . . . . . . . . . . . . . . . . . . . . . . . . . . . . . . . . . . . . . . . . 3–3Using external and internal procedures . . . . . . . . . . . . . . . . . . . . . . . . . . . . . . . . . 3–7
Writing internal procedures . . . . . . . . . . . . . . . . . . . . . . . . . . . . . . . . . . . 3–8Assigning a value to a variable. . . . . . . . . . . . . . . . . . . . . . . . . . . . . . . . . 3–8When to use internal and external procedures. . . . . . . . . . . . . . . . . . . . . 3–10
Adding comments to your procedure . . . . . . . . . . . . . . . . . . . . . . . . . . . . . . . . . . . 3–11
4. Procedure Blocks and Data Access . . . . . . . . . . . . . . . . . . . . . . . . . . . . . . . . . . 4–1Blocks and block properties . . . . . . . . . . . . . . . . . . . . . . . . . . . . . . . . . . . . . . . . . . 4–2Procedure block scoping . . . . . . . . . . . . . . . . . . . . . . . . . . . . . . . . . . . . . . . . . . . . 4–3Language statements that define blocks . . . . . . . . . . . . . . . . . . . . . . . . . . . . . . . . 4–6
DO blocks. . . . . . . . . . . . . . . . . . . . . . . . . . . . . . . . . . . . . . . . . . . . . . . . . 4–6FOR blocks . . . . . . . . . . . . . . . . . . . . . . . . . . . . . . . . . . . . . . . . . . . . . . . 4–12REPEAT blocks . . . . . . . . . . . . . . . . . . . . . . . . . . . . . . . . . . . . . . . . . . . . 4–19Data access without looping—the FIND statement . . . . . . . . . . . . . . . . . 4–21
5. Record Buffers and Record Scope . . . . . . . . . . . . . . . . . . . . . . . . . . . . . . . . . . . 5–1Record buffers . . . . . . . . . . . . . . . . . . . . . . . . . . . . . . . . . . . . . . . . . . . . . . . . . . . . 5–2Record scope . . . . . . . . . . . . . . . . . . . . . . . . . . . . . . . . . . . . . . . . . . . . . . . . . . . . . 5–5
Generating a procedure listing file . . . . . . . . . . . . . . . . . . . . . . . . . . . . . . 5–7
6. Using Queries . . . . . . . . . . . . . . . . . . . . . . . . . . . . . . . . . . . . . . . . . . . . . . . . . . . . 6–1Why you use queries in your application . . . . . . . . . . . . . . . . . . . . . . . . . . . . . . . . 6–2
Queries versus block-oriented data access . . . . . . . . . . . . . . . . . . . . . . . 6–2Using queries to share data between procedures . . . . . . . . . . . . . . . . . . 6–3Using queries to populate a browse . . . . . . . . . . . . . . . . . . . . . . . . . . . . 6–4
Defining and using queries . . . . . . . . . . . . . . . . . . . . . . . . . . . . . . . . . . . . . . . . . . . 6–5OPEN and CLOSE QUERY statements. . . . . . . . . . . . . . . . . . . . . . . . . . 6–5GET statements . . . . . . . . . . . . . . . . . . . . . . . . . . . . . . . . . . . . . . . . . . . . 6–7Closing a query . . . . . . . . . . . . . . . . . . . . . . . . . . . . . . . . . . . . . . . . . . . . 6–9Determining the current number of rows in a query . . . . . . . . . . . . . . . . . 6–9Identifying the current row in the query . . . . . . . . . . . . . . . . . . . . . . . . . . 6–14Repositioning a query. . . . . . . . . . . . . . . . . . . . . . . . . . . . . . . . . . . . . . . . 6–16
Summary . . . . . . . . . . . . . . . . . . . . . . . . . . . . . . . . . . . . . . . . . . . . . . . . . . . . . . . . 6–20
7. Defining and Using Temp-tables . . . . . . . . . . . . . . . . . . . . . . . . . . . . . . . . . . . . . 7–1Using temp-tables in your application . . . . . . . . . . . . . . . . . . . . . . . . . . . . . . . . . . 7–2
ABL ProDataSets . . . . . . . . . . . . . . . . . . . . . . . . . . . . . . . . . . . . . . . . . . 7–3ABL work-tables . . . . . . . . . . . . . . . . . . . . . . . . . . . . . . . . . . . . . . . . . . . . 7–3The temporary database for temp-tables . . . . . . . . . . . . . . . . . . . . . . . . . 7–3Defining a temp-table . . . . . . . . . . . . . . . . . . . . . . . . . . . . . . . . . . . . . . . . 7–3
Using a temp-table to summarize data . . . . . . . . . . . . . . . . . . . . . . . . . . . . . . . . . . 7–8Using a temp-table as a parameter . . . . . . . . . . . . . . . . . . . . . . . . . . . . . . . . . . . . 7–11
Temp-table parameter syntax . . . . . . . . . . . . . . . . . . . . . . . . . . . . . . . . . 7–11Passing a temp-table by value . . . . . . . . . . . . . . . . . . . . . . . . . . . . . . . . . 7–12Passing a temp-table by reference. . . . . . . . . . . . . . . . . . . . . . . . . . . . . . 7–12Passing a temp-table parameter by binding. . . . . . . . . . . . . . . . . . . . . . . 7–13Defining a procedure to return Order Lines . . . . . . . . . . . . . . . . . . . . . . . 7–15Using BUFFER-COPY to assign multiple fields . . . . . . . . . . . . . . . . . . . . 7–16
Using include files to duplicate code . . . . . . . . . . . . . . . . . . . . . . . . . . . . . . . . . . . 7–18Adding an Order Line browse to the Customer window . . . . . . . . . . . . . . . . . . . . . 7–20Summary . . . . . . . . . . . . . . . . . . . . . . . . . . . . . . . . . . . . . . . . . . . . . . . . . . . . . . . . 7–24
nts–2
Contents
8. Defining Functions. . . . . . . . . . . . . . . . . . . . . . . . . . . . . . . . . . . . . . . . . . . . . . . . 8–1User-defined functions . . . . . . . . . . . . . . . . . . . . . . . . . . . . . . . . . . . . . . . . . . . . . 8–2Defining a function . . . . . . . . . . . . . . . . . . . . . . . . . . . . . . . . . . . . . . . . . . . . . . . . . 8–3
Making a forward declaration for a function . . . . . . . . . . . . . . . . . . . . . . 8–4Making run-time references with DYNAMIC-FUNCTION . . . . . . . . . . . . 8–7
9. Handling Data and Locking Records . . . . . . . . . . . . . . . . . . . . . . . . . . . . . . . . . 9–1Overview of data handling statements . . . . . . . . . . . . . . . . . . . . . . . . . . . . . . . . . 9–3Record locking in ABL . . . . . . . . . . . . . . . . . . . . . . . . . . . . . . . . . . . . . . . . . . . . . . 9–6
Record locking examples . . . . . . . . . . . . . . . . . . . . . . . . . . . . . . . . . . . . 9–6Making sure you release record locks. . . . . . . . . . . . . . . . . . . . . . . . . . . 9–12Lock table resources . . . . . . . . . . . . . . . . . . . . . . . . . . . . . . . . . . . . . . . . 9–13Optimistic and pessimistic locking strategies . . . . . . . . . . . . . . . . . . . . . 9–13
10. Managing Transactions . . . . . . . . . . . . . . . . . . . . . . . . . . . . . . . . . . . . . . . . . . . . 10–1Controlling the size of a transaction . . . . . . . . . . . . . . . . . . . . . . . . . . . . . . . . . . . 10–2
Making a transaction larger. . . . . . . . . . . . . . . . . . . . . . . . . . . . . . . . . . . 10–4Making a transaction smaller . . . . . . . . . . . . . . . . . . . . . . . . . . . . . . . . . 10–5Transactions and trigger and procedure blocks . . . . . . . . . . . . . . . . . . . 10–6Checking whether a transaction is active . . . . . . . . . . . . . . . . . . . . . . . . 10–6The NO-UNDO keyword on temp-tables and variables . . . . . . . . . . . . . 10–6
Using the UNDO statement . . . . . . . . . . . . . . . . . . . . . . . . . . . . . . . . . . . . . . . . . . 10–8Using the UNDO statement in the sample procedure . . . . . . . . . . . . . . . 10–9Subtransactions . . . . . . . . . . . . . . . . . . . . . . . . . . . . . . . . . . . . . . . . . . . 10–16Transaction mechanics . . . . . . . . . . . . . . . . . . . . . . . . . . . . . . . . . . . . . . 10–19Using the ON phrase on a block header . . . . . . . . . . . . . . . . . . . . . . . . . 10–19Handling the ERROR condition. . . . . . . . . . . . . . . . . . . . . . . . . . . . . . . . 10–20ENDKEY condition . . . . . . . . . . . . . . . . . . . . . . . . . . . . . . . . . . . . . . . . . 10–23STOP condition . . . . . . . . . . . . . . . . . . . . . . . . . . . . . . . . . . . . . . . . . . . . 10–23QUIT condition . . . . . . . . . . . . . . . . . . . . . . . . . . . . . . . . . . . . . . . . . . . . 10–24
Index . . . . . . . . . . . . . . . . . . . . . . . . . . . . . . . . . . . . . . . . . . . . . . . . . . . . . . . . . . . . Index–1
Contents–3
Contents
Conte
Figures
Figure 2–1: Result of running simple sample procedure . . . . . . . . . . . . . . . . . . . . . 2–5Figure 4–1: Result of variable defined in main procedure only . . . . . . . . . . . . . . . . 4–3Figure 4–2: Result of variable defined in both main and subprocedures . . . . . . . . . 4–4Figure 4–3: Result of variable defined in the subprocedure only . . . . . . . . . . . . . . . 4–5Figure 4–4: Example of empty query result . . . . . . . . . . . . . . . . . . . . . . . . . . . . . . . 4–7Figure 4–5: Result of looping with a DO block . . . . . . . . . . . . . . . . . . . . . . . . . . . . . 4–8Figure 4–6: Example of looping with a DO block with initial value set to 1 . . . . . . . 4–9Figure 4–7: Example DO WHILE loop result . . . . . . . . . . . . . . . . . . . . . . . . . . . . . . 4–9Figure 4–8: Joining records from more than one table . . . . . . . . . . . . . . . . . . . . . . . 4–13Figure 4–9: Syntax error message . . . . . . . . . . . . . . . . . . . . . . . . . . . . . . . . . . . . . . 4–14Figure 4–10: Lowest Order number for each Customer . . . . . . . . . . . . . . . . . . . . . . . 4–16Figure 4–11: Orders sorted by OrderDate . . . . . . . . . . . . . . . . . . . . . . . . . . . . . . . . . 4–16Figure 4–12: Earliest Customer Order . . . . . . . . . . . . . . . . . . . . . . . . . . . . . . . . . . . . 4–17Figure 4–13: Specifying a different block . . . . . . . . . . . . . . . . . . . . . . . . . . . . . . . . . . 4–18Figure 4–14: Results of using the INSERT statement . . . . . . . . . . . . . . . . . . . . . . . . 4–20Figure 4–15: Result of a simple FIND procedure . . . . . . . . . . . . . . . . . . . . . . . . . . . . 4–22Figure 4–16: Result of variation on the simple FIND procedure . . . . . . . . . . . . . . . . 4–22Figure 4–17: Result of the simple FIND procedure using PostalCode . . . . . . . . . . . . 4–22Figure 4–18: Result of using the primary index . . . . . . . . . . . . . . . . . . . . . . . . . . . . . 4–24Figure 4–19: Result of using the CountryPost index for record retrieval . . . . . . . . . . 4–25Figure 4–20: Result of forcing index selection . . . . . . . . . . . . . . . . . . . . . . . . . . . . . . 4–26Figure 4–21: Result of unique FIND . . . . . . . . . . . . . . . . . . . . . . . . . . . . . . . . . . . . . . 4–26Figure 4–22: Result of CAN-FIND function procedure . . . . . . . . . . . . . . . . . . . . . . . . 4–28Figure 4–23: Result of CAN-FIND function procedure without FIRST keyword . . . . . 4–28Figure 4–24: CAN-FIND error message . . . . . . . . . . . . . . . . . . . . . . . . . . . . . . . . . . . 4–29Figure 4–25: FIND FIRST Order result . . . . . . . . . . . . . . . . . . . . . . . . . . . . . . . . . . . 4–30Figure 5–1: Comparing zip codes . . . . . . . . . . . . . . . . . . . . . . . . . . . . . . . . . . . . . . 5–4Figure 5–2: Result of record buffer Rule 1 example . . . . . . . . . . . . . . . . . . . . . . . . . 5–6Figure 5–3: Invalid buffer references error message . . . . . . . . . . . . . . . . . . . . . . . . 5–8Figure 5–4: FOR EACH processing error message . . . . . . . . . . . . . . . . . . . . . . . . . 5–9Figure 5–5: Conflicting table reference error message . . . . . . . . . . . . . . . . . . . . . . 5–12Figure 5–6: Customers with CreditLimits over 80000—first result . . . . . . . . . . . . . . 5–13Figure 5–7: Customers with CreditLimits over 80000—next result . . . . . . . . . . . . . 5–13Figure 5–8: Raising buffer scope example result . . . . . . . . . . . . . . . . . . . . . . . . . . . 5–14Figure 5–9: Raising buffer scope example 2 result . . . . . . . . . . . . . . . . . . . . . . . . . 5–15Figure 6–1: Customers and Orders sample window . . . . . . . . . . . . . . . . . . . . . . . . 6–2Figure 6–2: Result of GET statement example . . . . . . . . . . . . . . . . . . . . . . . . . . . . 6–8Figure 6–3: Result of NUM-RESULTS example . . . . . . . . . . . . . . . . . . . . . . . . . . . 6–10Figure 6–4: Result of CURRENT-RESULT-ROW example . . . . . . . . . . . . . . . . . . . 6–14Figure 6–5: Result of RowID example . . . . . . . . . . . . . . . . . . . . . . . . . . . . . . . . . . . 6–18Figure 7–1: First page result of h-InvSummary.p . . . . . . . . . . . . . . . . . . . . . . . . . . . 7–10Figure 8–1: Result of the ConvTemp.p procedure . . . . . . . . . . . . . . . . . . . . . . . . . . 8–5Figure 9–1: Data handling statements . . . . . . . . . . . . . . . . . . . . . . . . . . . . . . . . . . . 9–3Figure 9–2: h-findCustUser1.p procedure . . . . . . . . . . . . . . . . . . . . . . . . . . . . . . . . 9–9Figure 9–3: Result of two sessions running h-findCustUser1.p procedure . . . . . . . 9–10Figure 9–4: SHARE-LOCK status message . . . . . . . . . . . . . . . . . . . . . . . . . . . . . . . 9–10Figure 9–5: EXCLUSIVE-LOCK message . . . . . . . . . . . . . . . . . . . . . . . . . . . . . . . . 9–11Figure 9–6: NO-LOCK error message . . . . . . . . . . . . . . . . . . . . . . . . . . . . . . . . . . . 9–12Figure 10–1: Example of creating and updating Customer records . . . . . . . . . . . . . . 10–7Figure 10–2: Example transaction scope . . . . . . . . . . . . . . . . . . . . . . . . . . . . . . . . . . 10–11Figure 10–3: Order Updates example . . . . . . . . . . . . . . . . . . . . . . . . . . . . . . . . . . . . 10–12Figure 10–4: Order Updates example message . . . . . . . . . . . . . . . . . . . . . . . . . . . . 10–12Figure 10–5: Order Updates example (after Fetch) . . . . . . . . . . . . . . . . . . . . . . . . . . 10–13Figure 10–6: Variation of transaction scope . . . . . . . . . . . . . . . . . . . . . . . . . . . . . . . . 10–15Figure 10–7: Another variation of transaction scope . . . . . . . . . . . . . . . . . . . . . . . . . 10–16
nts–4

Contents
Figure 10–8: Third variation of transaction scope . . . . . . . . . . . . . . . . . . . . . . . . . . . 10–17Figure 10–9: Example subtransaction . . . . . . . . . . . . . . . . . . . . . . . . . . . . . . . . . . . . 10–18Figure 10–10: FIND error message . . . . . . . . . . . . . . . . . . . . . . . . . . . . . . . . . . . . . . 10–20Figure 10–11: Example error message . . . . . . . . . . . . . . . . . . . . . . . . . . . . . . . . . . . . 10–21Figure 10–12: Example information message . . . . . . . . . . . . . . . . . . . . . . . . . . . . . . . 10–21Figure 10–13: Procedure not found error message . . . . . . . . . . . . . . . . . . . . . . . . . . 10–23Figure 10–14: Example message for procedure not found condition . . . . . . . . . . . . . 10–23
Contents–5

Contents
Contents–6
Tables
Table 2–1: Comparison operators . . . . . . . . . . . . . . . . . . . . . . . . . . . . . . . . . . . . . . 2–2Table 2–2: Basic supported data types . . . . . . . . . . . . . . . . . . . . . . . . . . . . . . . . . . 2–8Table 2–3: Common format symbols . . . . . . . . . . . . . . . . . . . . . . . . . . . . . . . . . . . 2–9Table 2–4: Variable qualifiers . . . . . . . . . . . . . . . . . . . . . . . . . . . . . . . . . . . . . . . . . 2–10Table 2–5: Date functions . . . . . . . . . . . . . . . . . . . . . . . . . . . . . . . . . . . . . . . . . . . . 2–17Table 2–6: List functions . . . . . . . . . . . . . . . . . . . . . . . . . . . . . . . . . . . . . . . . . . . . . 2–18Table 2–7: ABL string manipulation functions . . . . . . . . . . . . . . . . . . . . . . . . . . . . . 2–18Table 2–8: Supported arithmetic operands . . . . . . . . . . . . . . . . . . . . . . . . . . . . . . . 2–20Table 2–9: ABL operator precedence . . . . . . . . . . . . . . . . . . . . . . . . . . . . . . . . . . . 2–21Table 2–10: Arithmetic built-in functions . . . . . . . . . . . . . . . . . . . . . . . . . . . . . . . . . . 2–23
Preface
This Preface contains the following sections:
• Purpose
• Audience
• Organization
• Using this manual
• Typographical conventions
• Examples of syntax descriptions
• Example procedures
• OpenEdge messages
• Third party acknowledgements
Preface
Purpose
This book is a comprehensive tour of all the essential elements of ABL (Advanced Business Language). By the time you complete it, you will be competent to build thoroughly modern applications that take advantage of most of the language’s features. And you will use the language to build powerful business application logic, not just the toy demonstration windows you find in other language tutorials. ABL is not a toy. Rather it is a tool for serious developers who have serious business problems to solve.
There are a lot more specifics to many of the language statements, keywords, and options than this book covers. Therefore, you should always refer to the product documentation for more information. Where the language is concerned, you should refer to OpenEdge Development: ABL Reference. This book has a complete description of all ABL methods, attributes, and events as well as an alphabetical listing of all the language keywords. Always look to it for more details on any topic covered in this book.
Audience
This book is written for two different kinds of audiences. The first group consists of existing ABL developers who might have created applications in earlier releases of the product, when many of the more recent extensions to the language were not yet available. These extensions include:
• Statements to define a Graphical User Interface (GUI).
• Event-driven constructs that allow the user of a GUI application to navigate through the code much more flexibly than in an older, top-down, character-mode application, developed in ABL fifteen or twenty years ago. Those older applications are still fully supported. You can compile and run them in the latest releases of the OpenEdge product, but many new language statements and other features have made it possible to build modern applications in ways that were not possible before.
If you are already experienced in ABL, you will find some of the material, especially in the first couple of chapters, familiar. Feel free to skim through those sections quickly, but you should not skip even the first chapters altogether to avoid missing anything—there are changes and enhancements to the language at every level.
The second audience for this book consists of people completely new to ABL. ABL remains by far the most powerful and comprehensive language for developing serious business applications. Combined with the OpenEdge RDBMS™ database and the other components of the OpenEdge™ product family, ABL can support you in building and deploying your applications in ways that are matched by no other environment today. For those of you in this second group, you should take the time to learn enough about the language to understand some of the many ways it can help you in your development work. You probably need to have a background in some other programming language to catch on to ABL quickly, because the material might come at you fast and furious. Despite its many extraordinary and unique features, ABL is a programming language with most of the same constructs common to almost all such languages.
Preface–2

Preface
Organization
Chapter 1, “Introducing ABL”
Provides an introduction to ABL including an overview of its characteristics.
Chapter 2, “Using Basic ABL Constructs”
Describes the basics of writing ABL procedures.
Chapter 3, “Running ABL Procedures”
Describes how you can work with and run different types of ABL procedures.
Chapter 4, “Procedure Blocks and Data Access”
Describes how to integrate data-access logic into procedures using procedure blocks and record scope.
Chapter 5, “Record Buffers and Record Scope”
Expands the discussion on integrating data-access logic into procedures with record buffers and record scope.
Chapter 6, “Using Queries”
Describes how to implement field-level help and a complete online help system.
Chapter 7, “Defining and Using Temp-tables”
Describes how to define and use temp-tables to pass result sets between application modules which is essential when creating distributed applications.
Chapter 8, “Defining Functions”
Describes how to create user-defined functions.
Chapter 9, “Handling Data and Locking Records”
Describes data handling and record locks from the perspective of a distributed application.
Chapter 10, “Managing Transactions”
Describes how to manage database transactions.
Using this manual
OpenEdge provides a special purpose programming language for building business applications. In the documentation, the formal name for this language is ABL (Advanced Business Language). With few exceptions, all keywords of the language appear in all UPPERCASE, using a font that is appropriate to the context. All other alphabetic language content appears in mixed case.
For the latest documentation updates see the OpenEdge Product Documentation page on PSDN: http://communities.progress.com/pcom/docs/DOC-16074.
Preface–3

Preface
References to ABL compiler and run-time features
ABL is both a compiled and an interpreted language that executes in a run-time engine. The documentation refers to this run-time engine as the ABL Virtual Machine (AVM). When the documentation refers to ABL source code compilation, it specifies ABL or the compiler as the actor that manages compile-time features of the language. When the documentation refers to run-time behavior in an executing ABL program, it specifies the AVM as the actor that manages the specified run-time behavior in the program.
For example, these sentences refer to the ABL compiler’s allowance for parameter passing and the AVM’s possible response to that parameter passing at run time: “ABL allows you to pass a dynamic temp-table handle as a static temp-table parameter of a method. However, if at run time the passed dynamic temp-table schema does not match the schema of the static temp-table parameter, the AVM raises an error.” The following sentence refers to run-time actions that the AVM can perform using a particular ABL feature: “The ABL socket object handle allows the AVM to connect with other ABL and non-ABL sessions using TCP/IP sockets.”
References to ABL data types
ABL provides built-in data types, built-in class data types, and user-defined class data types. References to built-in data types follow these rules:
• Like most other keywords, references to specific built-in data types appear in all UPPERCASE, using a font that is appropriate to the context. No uppercase reference ever includes or implies any data type other than itself.
• Wherever integer appears, this is a reference to the INTEGER or INT64 data type.
• Wherever character appears, this is a reference to the CHARACTER, LONGCHAR, or CLOB data type.
• Wherever decimal appears, this is a reference to the DECIMAL data type.
• Wherever numeric appears, this is a reference to the INTEGER, INT64, or DECIMAL data type.
References to built-in class data types appear in mixed case with initial caps, for example, Progress.Lang.Object. References to user-defined class data types appear in mixed case, as specified for a given application example.
Typographical conventions
This manual uses the following typographical conventions:
Convention Description
Bold Bold typeface indicates commands or characters the user types, provides emphasis, or the names of user interface elements.
Italic Italic typeface indicates the title of a document, or signifies new terms.
Preface–4
Preface
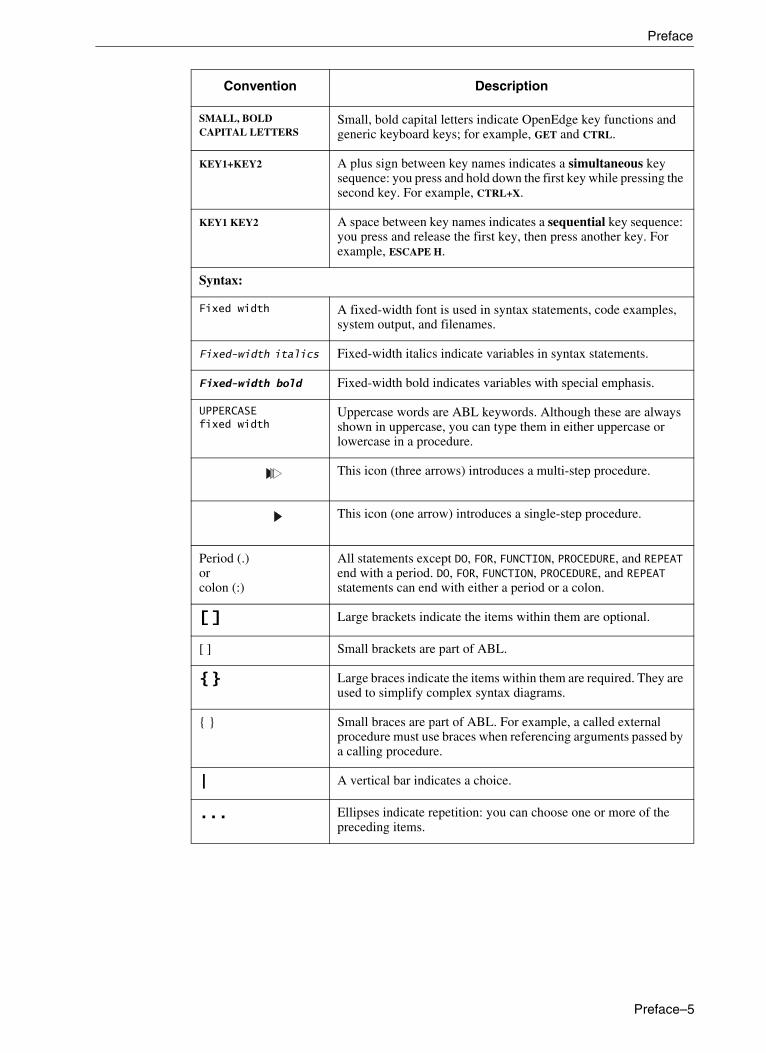
SMALL, BOLD CAPITAL LETTERS
Small, bold capital letters indicate OpenEdge key functions and generic keyboard keys; for example, GET and CTRL.
KEY1+KEY2 A plus sign between key names indicates a simultaneous key sequence: you press and hold down the first key while pressing the second key. For example, CTRL+X.
KEY1 KEY2 A space between key names indicates a sequential key sequence: you press and release the first key, then press another key. For example, ESCAPE H.
Syntax:
Fixed width A fixed-width font is used in syntax statements, code examples, system output, and filenames.
Fixed-width italics Fixed-width italics indicate variables in syntax statements.
Fixed-width bold Fixed-width bold indicates variables with special emphasis.
UPPERCASE fixed width
Uppercase words are ABL keywords. Although these are always shown in uppercase, you can type them in either uppercase or lowercase in a procedure.
This icon (three arrows) introduces a multi-step procedure.
This icon (one arrow) introduces a single-step procedure.
Period (.) or colon (:)
All statements except DO, FOR, FUNCTION, PROCEDURE, and REPEAT end with a period. DO, FOR, FUNCTION, PROCEDURE, and REPEAT statements can end with either a period or a colon.
[ ] Large brackets indicate the items within them are optional.
[ ] Small brackets are part of ABL.
{ } Large braces indicate the items within them are required. They are used to simplify complex syntax diagrams.
{ } Small braces are part of ABL. For example, a called external procedure must use braces when referencing arguments passed by a calling procedure.
| A vertical bar indicates a choice.
... Ellipses indicate repetition: you can choose one or more of the preceding items.
Convention Description
Preface–5

Preface
Examples of syntax descriptions
In this example, ACCUM is a keyword, and aggregate and expression are variables:
FOR is one of the statements that can end with either a period or a colon, as in this example:
In this example, STREAM stream, UNLESS-HIDDEN, and NO-ERROR are optional:
In this example, the outer (small) brackets are part of the language, and the inner (large) brackets denote an optional item:
A called external procedure must use braces when referencing compile-time arguments passed by a calling procedure, as shown in this example:
In this example, EACH, FIRST, and LAST are optional, but you can choose only one of them:
In this example, you must include two expressions, and optionally you can include more. Multiple expressions are separated by commas:
Syntax
ACCUM aggregate expression
FOR EACH Customer NO-LOCK:DISPLAY Customer.Name.
END.
Syntax
DISPLAY [ STREAM stream ] [ UNLESS-HIDDEN ] [ NO-ERROR ]
Syntax
INITIAL [ constant [ , constant ] ]
Syntax
{ &argument-name }
Syntax
PRESELECT [ EACH | FIRST | LAST ] record-phrase
Syntax
MAXIMUM ( expression , expression [ , expression ] ... )
Preface–6
Preface
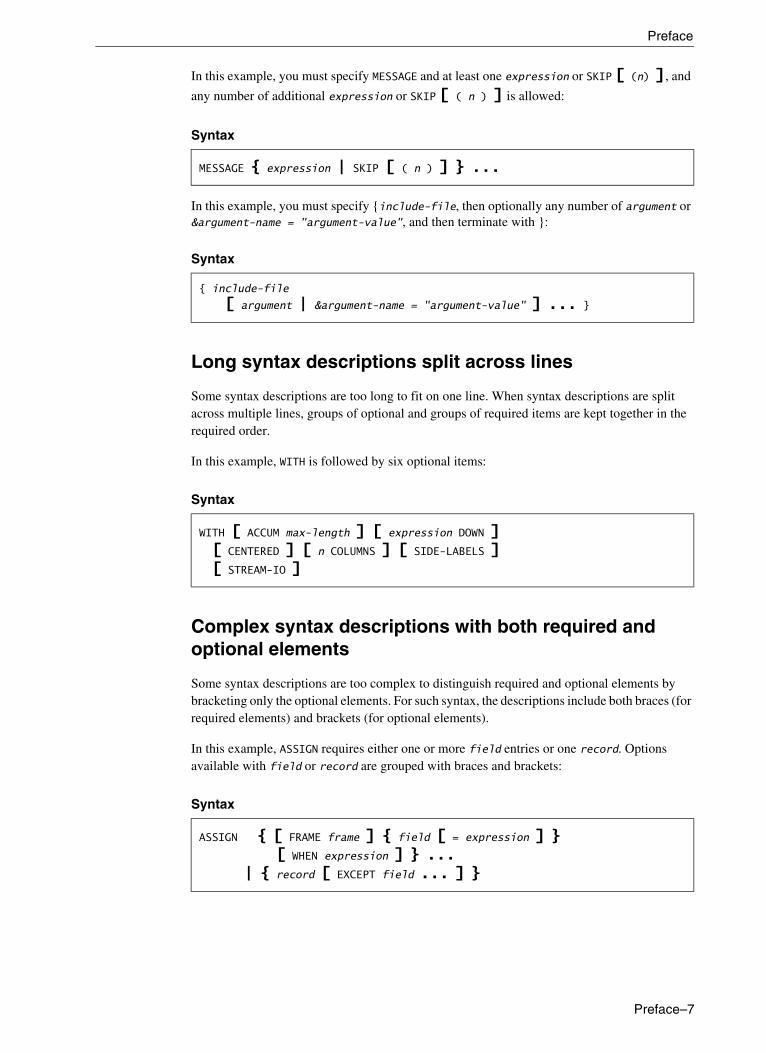
In this example, you must specify MESSAGE and at least one expression or SKIP [ (n) ], and
any number of additional expression or SKIP [ ( n ) ] is allowed:
In this example, you must specify {include-file, then optionally any number of argument or &argument-name = "argument-value", and then terminate with }:
Long syntax descriptions split across lines
Some syntax descriptions are too long to fit on one line. When syntax descriptions are split across multiple lines, groups of optional and groups of required items are kept together in the required order.
In this example, WITH is followed by six optional items:
Complex syntax descriptions with both required and optional elements
Some syntax descriptions are too complex to distinguish required and optional elements by bracketing only the optional elements. For such syntax, the descriptions include both braces (for required elements) and brackets (for optional elements).
In this example, ASSIGN requires either one or more field entries or one record. Options available with field or record are grouped with braces and brackets:
Syntax
MESSAGE { expression | SKIP [ ( n ) ] } ...
Syntax
{ include-file
[ argument | &argument-name = "argument-value" ] ... }
Syntax
WITH [ ACCUM max-length ] [ expression DOWN ] [ CENTERED ] [ n COLUMNS ] [ SIDE-LABELS ][ STREAM-IO ]
Syntax
ASSIGN { [ FRAME frame ] { field [ = expression ] }[ WHEN expression ] } ...
| { record [ EXCEPT field ... ] }
Preface–7

Preface
Example procedures
This manual provides numerous example procedures that illustrate syntax and concepts. You can access the example files and details for installing the examples from the following locations:
• The Documentation and Samples directory (doc_samples) that you received with your product.
• The OpenEdge Documentation page on PSDN:
OpenEdge messages
OpenEdge displays several types of messages to inform you of routine and unusual occurrences:
• Execution messages inform you of errors encountered while OpenEdge is running a procedure; for example, if OpenEdge cannot find a record with a specified index field value.
• Compile messages inform you of errors found while OpenEdge is reading and analyzing a procedure before running it; for example, if a procedure references a table name that is not defined in the database.
• Startup messages inform you of unusual conditions detected while OpenEdge is getting ready to execute; for example, if you entered an invalid startup parameter.
After displaying a message, OpenEdge proceeds in one of several ways:
• Continues execution, subject to the error-processing actions that you specify or that are assumed as part of the procedure. This is the most common action taken after execution messages.
• Returns to the Procedure Editor, so you can correct an error in a procedure. This is the usual action taken after compiler messages.
• Halts processing of a procedure and returns immediately to the Procedure Editor. This does not happen often.
• Terminates the current session.
OpenEdge messages end with a message number in parentheses. In this example, the message number is 200:
If you encounter an error that terminates OpenEdge, note the message number before restarting.
http://communities.progress.com/pcom/docs/DOC-16074
** Unknown table name table. (200)
Preface–8

Preface
Obtaining more information about OpenEdge messages
In Windows platforms, use OpenEdge online help to obtain more information about OpenEdge messages. Many OpenEdge tools include the following Help menu options to provide information about messages:
• Choose Help→ Recent Messages to display detailed descriptions of the most recent OpenEdge message and all other messages returned in the current session.
• Choose Help→ Messages and then type the message number to display a description of a specific OpenEdge message.
• In the Procedure Editor, press the HELP key or F1.
On UNIX platforms, use the OpenEdge pro command to start a single-user mode character OpenEdge client session and view a brief description of a message by providing its number.
To use the pro command to obtain a message description by message number:
1. Start the Procedure Editor:
2. Press F3 to access the menu bar, then choose Help→ Messages.
3. Type the message number and press ENTER. Details about that message number appear.
4. Press F4 to close the message, press F3 to access the Procedure Editor menu, and choose File→ Exit.
Third party acknowledgements
OpenEdge includes AdventNet - Agent Toolkit licensed from AdventNet, Inc. http://www.adventnet.com. All rights to such copyright material rest with AdventNet.
OpenEdge includes ANTLR (Another Tool for Language Recognition) software Copyright © 2003-2006, Terence Parr All rights reserved. Neither the name of the author nor the names of its contributors may be used to endorse or promote products derived from this software without specific prior written permission. Software distributed on an “AS IS” basis, WITHOUT WARRANTY OF ANY KIND, either express or implied. See the License for the specific language governing rights and limitations under the License agreement that accompanies the product.
OpenEdge includes software developed by the Apache Software Foundation (http://www.apache.org/). Copyright © 1999 The Apache Software Foundation. All rights reserved (Xerces C++ Parser (XML) and Xerces2 Java Parser (XML)); Copyright © 1999-2002 The Apache Software Foundation. All rights reserved (Xerces Parser (XML); and Copyright © 2000-2003 The Apache Software Foundation. All rights reserved (Ant). The names “Apache,” “Xerces,” “ANT,” and “Apache Software Foundation” must not be used to endorse or promote products derived from this software without prior written permission. Products derived from this software may not be called “Apache”, nor may “Apache” appear in their name, without
OpenEdge-install-dir/bin/pro
Preface–9

Preface
prior written permission of the Apache Software Foundation. For written permission, please contact [email protected]. Software distributed on an “AS IS” basis, WITHOUT WARRANTY OF ANY KIND, either express or implied. See the License for the specific language governing rights and limitations under the License agreement that accompanies the product.
OpenEdge includes Concurrent Java software Copyright 1994-2000 Sun Microsystems, Inc. All Rights Reserved. -Neither the name of or trademarks of Sun may be used to endorse or promote products including or derived from the Java Software technology without specific prior written permission; and Redistributions of source or binary code must contain the above copyright notice, this notice and the following disclaimers: This software is provided "AS IS," without a warranty of any kind. ALL EXPRESS OR IMPLIED CONDITIONS, REPRESENTATIONS AND WARRANTIES, INCLUDING ANY IMPLIED WARRANTY OF MERCHANTABILITY, FITNESS FOR A PARTICULAR PURPOSE OR NON-INFRINGEMENT, ARE HEREBY EXCLUDED. SUN MICROSYSTEMS, INC. AND ITS LICENSORS SHALL NOT BE LIABLE FOR ANY DAMAGES SUFFERED BY LICENSEE AS A RESULT OF USING, MODIFYING OR DISTRIBUTING THE SOFTWARE OR ITS DERIVATIVES. IN NO EVENT WILL SUN MICROSYSTEMS, INC. OR ITS LICENSORS BE LIABLE FOR ANY LOST REVENUE, PROFIT OR DATA, OR FOR DIRECT, INDIRECT, SPECIAL, CONSEQUENTIAL, INCIDENTAL OR PUNITIVE DAMAGES, HOWEVER CAUSED AND REGARDLESS OF THE THEORY OF LIABILITY, ARISING OUT OF THE USE OF OR INABILITY TO USE SOFTWARE, EVEN IF SUN MICROSYSTEMS, INC. HAS BEEN ADVISED OF THE POSSIBILITY OF SUCH DAMAGES.
OpenEdge includes DataDirect software Copyright © 1991-2007 Progress Software Corporation and/or its subsidiaries or affiliates. All Rights Reserved. (DataDirect Connect for JDBC Type 4 driver); Copyright © 1993-2009 Progress Software Corporation and/or its subsidiaries or affiliates. All Rights Reserved. (DataDirect Connect for JDBC); Copyright © 1988-2007 Progress Software Corporation and/or its subsidiaries or affiliates. All Rights Reserved. (DataDirect Connect for ODBC); and Copyright © 1988-2007 Progress Software Corporation and/or its subsidiaries or affiliates. All Rights Reserved. (DataDirect Connect64 for ODBC).
OpenEdge includes DataDirect Connect for ODBC and DataDirect Connect64 for ODBC software, which include ICU software 1.8 and later - Copyright © 1995-2003 International Business Machines Corporation and others All rights reserved. Permission is hereby granted, free of charge, to any person obtaining a copy of this software and associated documentation files (the "Software"), to deal in the Software without restriction, including without limitation the rights to use, copy, modify, merge, publish, distribute, and/or sell copies of the Software, and to permit persons to whom the Software is furnished to do so, provided that the above copyright notice(s) and this permission notice appear in all copies of the Software and that both the above copyright notice(s) and this permission notice appear in supporting documentation.
OpenEdge includes DataDirect Connect for ODBC and DataDirect Connect64 for ODBC software, which include software developed by the OpenSSL Project for use in the OpenSSL Toolkit (http:/www.openssl.org/). Copyright © 1998-2006 The OpenSSL Project. All rights reserved. And Copyright © 1995-1998 Eric Young ([email protected]). All rights reserved.
OpenEdge includes DataDirect products for the Microsoft SQL Server database which contain a licensed implementation of the Microsoft TDS Protocol.
OpenEdge includes software authored by David M. Gay. Copyright © 1991, 2000, 2001 by Lucent Technologies (dtoa.c); Copyright © 1991, 1996 by Lucent Technologies (g_fmt.c); and
Preface–10
Preface
Copyright © 1991 by Lucent Technologies (rnd_prod.s). Permission to use, copy, modify, and distribute this software for any purpose without fee is hereby granted, provided that this entire notice is included in all copies of any software which is or includes a copy or modification of this software and in all copies of the supporting documentation for such software. THIS SOFTWARE IS BEING PROVIDED "AS IS", WITHOUT ANY EXPRESS OR IMPLIED WARRANTY. IN PARTICULAR, NEITHER THE AUTHOR NOR LUCENT MAKES ANY REPRESENTATION OR WARRANTY OF ANY KIND CONCERNING THE MERCHANTABILITY OF THIS SOFTWARE OR ITS FITNESS FOR ANY PARTICULAR PURPOSE.
OpenEdge includes software authored by David M. Gay. Copyright © 1998-2001 by Lucent Technologies All Rights Reserved (decstrtod.c; strtodg.c); Copyright © 1998, 2000 by Lucent Technologies All Rights Reserved (decstrtof.c; strtord.c); Copyright © 1998 by Lucent Technologies All Rights Reserved (dmisc.c; gdtoa.h; gethex.c; gmisc.c; sum.c); Copyright © 1998, 1999 by Lucent Technologies All Rights Reserved (gdtoa.c; misc.c; smisc.c; ulp.c); Copyright © 1998-2000 by Lucent Technologies All Rights Reserved (gdtoaimp.h); Copyright © 2000 by Lucent Technologies All Rights Reserved (hd_init.c). Full copies of these licenses can be found in the installation directory, in the c:/OpenEdge/licenses folder. Permission to use, copy, modify, and distribute this software and its documentation for any purpose and without fee is hereby granted, provided that the above copyright notice appear in all copies and that both that the copyright notice and this permission notice and warranty disclaimer appear in supporting documentation, and that the name of Lucent or any of its entities not be used in advertising or publicity pertaining to distribution of the software without specific, written prior permission. LUCENT DISCLAIMS ALL WARRANTIES WITH REGARD TO THIS SOFTWARE, INCLUDING ALL IMPLIED WARRANTIES OF MERCHANTABILITY AND FITNESS. IN NO EVENT SHALL LUCENT OR ANY OF ITS ENTITIES BE LIABLE FOR ANY SPECIAL, INDIRECT OR CONSEQUENTIAL DAMAGES OR ANY DAMAGES WHATSOEVER RESULTING FROM LOSS OF USE, DATA OR PROFITS, WHETHER IN AN ACTION OF CONTRACT, NEGLIGENCE OR OTHER TORTIOUS ACTION, ARISING OUT OF OR IN CONNECTION WITH THE USE OR PERFORMANCE OF THIS SOFTWARE.
OpenEdge includes http package software developed by the World Wide Web Consortium. Copyright © 1994-2002 World Wide Web Consortium, (Massachusetts Institute of Technology, European Research Consortium for Informatics and Mathematics, Keio University). All rights reserved. This work is distributed under the W3C® Software License [http://www.w3.org/Consortium/Legal/2002/copyright-software-20021231] in the hope that it will be useful, but WITHOUT ANY WARRANTY; without even the implied warranty of MERCHANTABILITY or FITNESS FOR A PARTICULAR PURPOSE.
OpenEdge includes ICU software 1.8 and later - Copyright © 1995-2003 International Business Machines Corporation and others All rights reserved. Permission is hereby granted, free of charge, to any person obtaining a copy of this software and associated documentation files (the "Software"), to deal in the Software without restriction, including without limitation the rights to use, copy, modify, merge, publish, distribute, and/or sell copies of the Software, and to permit persons to whom the Software is furnished to do so, provided that the above copyright notice(s) and this permission notice appear in all copies of the Software and that both the above copyright notice(s) and this permission notice appear in supporting documentation.
OpenEdge includes Imaging Technology copyrighted by Snowbound Software 1993-2003. www.snowbound.com.
OpenEdge includes Infragistics NetAdvantage for .NET v2009 Vol 2 Copyright © 1996-2009 Infragistics, Inc. All rights reserved.
Preface–11
Preface
OpenEdge includes JSTL software Copyright 1994-2006 Sun Microsystems, Inc. All Rights Reserved. Software distributed on an “AS IS” basis, WITHOUT WARRANTY OF ANY KIND, either express or implied. See the License for the specific language governing rights and limitations under the License agreement that accompanies the product.
OpenEdge includes OpenSSL software developed by the OpenSSL Project for use in the OpenSSL Toolkit (http://www.openssl.org/). Copyright © 1998-2007 The OpenSSL Project. All rights reserved. This product includes cryptographic software written by Eric Young ([email protected]). This product includes software written by Tim Hudson ([email protected]). Copyright © 1995-1998 Eric Young ([email protected]) All rights reserved. The names "OpenSSL Toolkit" and "OpenSSL Project" must not be used to endorse or promote products derived from this software without prior written permission. For written permission, please contact [email protected]. Products derived from this software may not be called "OpenSSL" nor may "OpenSSL" appear in their names without prior written permission of the OpenSSL Project. Software distributed on an "AS IS" basis, WITHOUT WARRANTY OF ANY KIND, either express or implied. See the License for the specific language governing rights and limitations under the License agreement that accompanies the product.
OpenEdge includes Quartz Enterprise Job Scheduler software Copyright © 2001-2003 James House. All rights reserved. Software distributed on an “AS IS” basis, WITHOUT WARRANTY OF ANY KIND, either express or implied. See the License for the specific language governing rights and limitations under the License agreement that accompanies the product. This product uses and includes within its distribution, software developed by the Apache Software Foundation (http://www.apache.org/).
OpenEdge includes code licensed from RSA Security, Inc. Some portions licensed from IBM are available at http://oss.software.ibm.com/icu4j/.
OpenEdge includes the RSA Data Security, Inc. MD5 Message-Digest Algorithm. Copyright ©1991-2, RSA Data Security, Inc. Created 1991. All rights reserved.
OpenEdge includes Sonic software, which includes software developed by Apache Software Foundation (http://www.apache.org/). Copyright © 1999-2000 The Apache Software Foundation. All rights reserved. The names “Ant”, “Axis”, “Xalan,” “FOP,” “The Jakarta Project”, “Tomcat”, “Xerces” and/or “Apache Software Foundation” must not be used to endorse or promote products derived from the Product without prior written permission. Any product derived from the Product may not be called “Apache”, nor may “Apache” appear in their name, without prior written permission. For written permission, please contact [email protected].
OpenEdge includes Sonic software, which includes software Copyright © 1999 CERN - European Organization for Nuclear Research. Permission to use, copy, modify, distribute and sell this software and its documentation for any purpose is hereby granted without fee, provided that the above copyright notice appear in all copies and that both that copyright notice and this permission notice appear in supporting documentation. CERN makes no representations about the suitability of this software for any purpose. It is provided "as is" without expressed or implied warranty.
OpenEdge includes Sonic software, which includes software developed by ExoLab Project (http://www.exolab.org/). Copyright © 2000 Intalio Inc. All rights reserved. The names “Castor” and/or “ExoLab” must not be used to endorse or promote products derived from the Products without prior written permission. For written permission, please contact [email protected]. Exolab, Castor and Intalio are trademarks of Intalio Inc.
Preface–12
Preface
OpenEdge includes Sonic software, which includes software developed by IBM. Copyright © 1995-2003 International Business Machines Corporation and others. All rights reserved. Permission is hereby granted, free of charge, to any person obtaining a copy of this software and associated documentation files (the "Software"), to deal in the Software without restriction, including without limitation the rights to use, copy, modify, merge, publish, distribute, and/or sell copies of the Software, and to permit persons to whom the Software is furnished to do so, provided that the above copyright notice(s) and this permission notice appear in all copies of the Software and that both the above copyright notice(s) and this permission notice appear in supporting documentation. Software distributed on an "AS IS" basis, WITHOUT WARRANTY OF ANY KIND, either express or implied. See the License for the specific language governing rights and limitations under the License agreement that accompanies the product. Except as contained in this notice, the name of a copyright holder shall not be used in advertising or otherwise to promote the sale, use or other dealings in this Software without prior written authorization of the copyright holder.
OpenEdge includes Sonic software, which includes the JMX Technology from Sun Microsystems, Inc. Use and Distribution is subject to the Sun Community Source License available at http://sun.com/software/communitysource.
OpenEdge includes Sonic software, which includes software developed by the ModelObjects Group (http://www.modelobjects.com). Copyright © 2000-2001 ModelObjects Group. All rights reserved. The name “ModelObjects” must not be used to endorse or promote products derived from this software without prior written permission. Products derived from this software may not be called “ModelObjects”, nor may “ModelObjects” appear in their name, without prior written permission. For written permission, please contact [email protected].
OpenEdge includes Sonic software, which includes code licensed from Mort Bay Consulting Pty. Ltd. The Jetty Package is Copyright © 1998 Mort Bay Consulting Pty. Ltd. (Australia) and others.
OpenEdge includes Sonic software, which includes files that are subject to the Netscape Public License Version 1.1 (the “License”); you may not use this file except in compliance with the License. You may obtain a copy of the License at http://www.mozilla.org/NPL/. Software distributed under the License is distributed on an “AS IS” basis, WITHOUT WARRANTY OF ANY KIND, either express or implied. See the License for the specific language governing rights and limitations under the License. The Original Code is Mozilla Communicator client code, released March 31, 1998. The Initial Developer of the Original Code is Netscape Communications Corporation. Portions created by Netscape are Copyright 1998-1999 Netscape Communications Corporation. All Rights Reserved.
OpenEdge includes Sonic software, which includes software developed by the University Corporation for Advanced Internet Development http://www.ucaid.edu Internet2 Project. Copyright © 2002 University Corporation for Advanced Internet Development, Inc. All rights reserved. Neither the name of OpenSAML nor the names of its contributors, nor Internet2, nor the University Corporation for Advanced Internet Development, Inc., nor UCAID may be used to endorse or promote products derived from this software and products derived from this software may not be called OpenSAML, Internet2, UCAID, or the University Corporation for Advanced Internet Development, nor may OpenSAML appear in their name without prior written permission of the University Corporation for Advanced Internet Development. For written permission, please contact [email protected].
OpenEdge includes the UnixWare platform of Perl Runtime authored by Kiem-Phong Vo and David Korn. Copyright © 1991, 1996 by AT&T Labs. Permission to use, copy, modify, and
Preface–13

Preface
distribute this software for any purpose without fee is hereby granted, provided that this entire notice is included in all copies of any software which is or includes a copy or modification of this software and in all copies of the supporting documentation for such software. THIS SOFTWARE IS BEING PROVIDED “AS IS”, WITHOUT ANY EXPRESS OR IMPLIED WARRANTY. IN PARTICULAR, NEITHER THE AUTHORS NOR AT&T LABS MAKE ANY REPRESENTATION OR WARRANTY OF ANY KIND CONCERNING THE MERCHANTABILITY OF THIS SOFTWARE OR ITS FITNESS FOR ANY PARTICULAR PURPOSE.
OpenEdge includes Vermont Views Terminal Handling Package software developed by Vermont Creative Software. Copyright © 1988-1991 by Vermont Creative Software.
OpenEdge includes XML Tools, which includes versions 8.9 of the Saxon XSLT and XQuery Processor from Saxonica Limited (http://www.saxonica.com/) which are available from SourceForge (http://sourceforge.net/projects/saxon/). The Original Code of Saxon comprises all those components which are not explicitly attributed to other parties. The Initial Developer of the Original Code is Michael Kay. Until February 2001 Michael Kay was an employee of International Computers Limited (now part of Fujitsu Limited), and original code developed during that time was released under this license by permission from International Computers Limited. From February 2001 until February 2004 Michael Kay was an employee of Software AG, and code developed during that time was released under this license by permission from Software AG, acting as a "Contributor". Subsequent code has been developed by Saxonica Limited, of which Michael Kay is a Director, again acting as a "Contributor". A small number of modules, or enhancements to modules, have been developed by other individuals (either written especially for Saxon, or incorporated into Saxon having initially been released as part of another open source product). Such contributions are acknowledged individually in comments attached to the relevant code modules. All Rights Reserved. The contents of the Saxon files are subject to the Mozilla Public License Version 1.0 (the "License"); you may not use these files except in compliance with the License. You may obtain a copy of the License at http://www.mozilla.org/MPL/ and a copy of the license can also be found in the installation directory, in the c:/OpenEdge/licenses folder. Software distributed under the License is distributed on an "AS IS" basis, WITHOUT WARRANTY OF ANY KIND, either express or implied. See the License for the specific language governing rights and limitations under the License.
OpenEdge includes XML Tools, which includes Xs3P v1.1.3. The contents of this file are subject to the DSTC Public License (DPL) Version 1.1 (the "License"); you may not use this file except in compliance with the License. A copy of the license can be found in the installation directory, in the c:/OpenEdge/licenses folder. Software distributed under the License is distributed on an "AS IS" basis, WITHOUT WARRANTY OF ANY KIND, either express or implied. See the License for the specific language governing rights and limitations under the License. The Original Code is xs3p. The Initial Developer of the Original Code is DSTC. Portions created by DSTC are Copyright © 2001, 2002 DSTC Pty Ltd. All rights reserved.
OpenEdge includes YAJL software Copyright 2007, Lloyd Hilaiel. Redistribution and use in source and binary forms, with or without modification, are permitted provided that the following conditions are met: 1. Redistributions of source code must retain the above copyright notice, this list of conditions and the following disclaimer. 2. Redistributions in binary form must reproduce the above copyright notice, this list of conditions and the following disclaimer in the documentation and/or other materials provided with the distribution. 3. Neither the name of Lloyd Hilaiel nor the names of its contributors may be used to endorse or promote products derived from this software without specific prior written permission. THIS SOFTWARE IS PROVIDED BY THE AUTHOR ``AS IS'' AND ANY EXPRESS OR IMPLIED
Preface–14

Preface
WARRANTIES, INCLUDING, BUT NOT LIMITED TO, THE IMPLIED WARRANTIES OF MERCHANTABILITY AND FITNESS FOR A PARTICULAR PURPOSE ARE DISCLAIMED. IN NO EVENT SHALL THE AUTHOR BE LIABLE FOR ANY DIRECT, INDIRECT, INCIDENTAL, SPECIAL, EXEMPLARY, OR CONSEQUENTIAL DAMAGES (INCLUDING, BUT NOT LIMITED TO, PROCUREMENT OF SUBSTITUTE GOODS OR SERVICES; LOSS OF USE, DATA, OR PROFITS; OR BUSINESS INTERRUPTION) HOWEVER CAUSED AND ON ANY THEORY OF LIABILITY, WHETHER IN CONTRACT, STRICT LIABILITY, OR TORT (INCLUDING NEGLIGENCE OR OTHERWISE) ARISING IN ANY WAY OUT OF THE USE OF THIS SOFTWARE, EVEN IF ADVISED OF THE POSSIBILITY OF SUCH DAMAGE.
Preface–15

Preface
Preface–16
1Introducing ABL
ABL (Advanced Business Language) is a high-level procedural programming language developed to enable you to build almost all aspects of an enterprise business application, from the user interface to the database access and business logic. ABL is a versatile and extraordinarily powerful tool. Not only can you use it to program applications, but you can build many of the tools that you use to help create and support those applications.
This chapter provides an introduction to ABL, as detailed in the following sections:
• In the beginning . . . FOR EACH CUSTOMER
• Basic characteristics of ABL
• Saving your test procedure
ABL includes powerful statements and keywords that are specialized for building business applications. Single programming statements in ABL can do the work of dozens or possibly hundreds of lines of code in a standard 3GL, such as Visual Basic, Java, or C++. A single ABL statement can bring data all the way from the application database to the user interface, or return a user’s changes back to the database. Other statements let you program with great precision, even down to the level of extracting individual bits from a data stream. This flexibility is what gives ABL its great power as a development language. Most of the development tools you use to develop OpenEdge® applications are themselves written in ABL.
In its first releases in the early 1980s, ABL allowed developers to build character interface applications that ran on a wide variety of hardware platforms, including many varieties of UNIX, DOS, and some other operating systems no longer in use. Early OpenEdge applications were, from the very first, fully portable between platforms so that a developer could simply move application programs from one type of machine or one type of display terminal to another with confidence that they would work correctly.

Introducing ABL
With the increasing presence of Microsoft Windows as a platform for graphical interfaces, ABL evolved to support those interfaces, with all their various visual controls, as well as the event-driven programming constructs needed for a menu-and-mouse-driven application. Today ABL continues to grow, with newer extensions to provide more and more dynamic definition of application components, as well as access to open technologies such as XML, and a host of other constructs to support an open application development and deployment environment.
And all the while, ABL-based applications can be brought from one release to the next largely without change. ABL provides a degree of compatibility and upward migration from one release to the next unmatched (unattempted, really) by any other high-level programming language.
Starting with OpenEdge Release 10.1A, one of the newest enhancements to ABL is the addition of classes. Classes enable you to design and implement entire applications as a collection of related and strongly-typed objects using the principles of object-oriented programming (OOP). For an introduction to OOP, see OpenEdge Development: Object-oriented Programming.
About the sample database
This book uses one of the standard OpenEdge sample databases for its examples, the Sports2000 database. This is a simplified example of a database that might be used in a typical order entry application, with customers, orders, order lines, and other information for keeping track of customers and their orders. Some of the same example procedures and windows you will build are used and extended throughout the book as you are introduced to new programming concepts, but you will not be building a complete sample application. This is largely because, in the course of introducing so many separate language constructs and programming techniques, the book gives you more of a one-of-each experience that would not be typical of a standardized application. Once you’ve worked through the book, you will be able to use what you learn to build many kinds of comprehensive applications.
1–2

In the beginning . . . FOR EACH CUSTOMER
In the beginning . . . FOR EACH CUSTOMER
There’s a prototypical ABL procedure often used as an example, one that couldn’t be simpler, but that shows a lot about the power of the language. It has appeared on coffee mugs and tee shirts for two decades. Here it is:
You can’t get much simpler than that, but it would take hours to explain in detail everything that this little procedure does for you. To summarize:
• Customer is the name of a table in the Sports2000 sample database that you’ll connect to. The FOR EACH statement starts a block of code that opens a query on that database table and returns each record in the table, one at a time, in each iteration of the block.
• Each Customer record is displayed on the screen in turn. The code takes formatting and label information from the database schema definition and uses it to create a default display format for all the fields in the table. DISPLAY Customer means display all the fields in the table.
• As each record is displayed, the display moves down a row to display the next Customer. The effect is more like what you would see in a report rather than a browse or other grid control.
• The block of code—everything from the FOR EACH statement through the END statement—iterates once for each Customer record (hence the syntax FOR EACH). All the code in between (in this case just a DISPLAY statement) is executed for each customer retrieved.
• When the display gets to the bottom of the available display area, it automatically pauses, with a message prompting you to press the space bar to see the next set of rows.
• When you press the space bar, the display clears and a new set of rows appears.
• When the ABL Virtual Machine (AVM) detects the end of the record set (all the Customer records in this case), it terminates the procedure with the message “Procedure complete. Press space bar to continue.”
• If you get tired of looking at customers (there are several hundred in the table), you can press the ESCAPE key to terminate the procedure.
FOR EACH Customer:DISPLAY Customer.
END.
1–3

Introducing ABL
Starting your OpenEdge session
So where do you enter this little piece of code? First, you need to start an OpenEdge session, create and connect to a copy of the sample database the example uses, and then bring up the Procedure Editor.
To start your OpenEdge session:
1. From the Windows desktop Start menu, select the OpenEdge environment, using whatever name you gave to it when you installed it, and under that menu item, select the Client option. For example, select Start→ Programs→ OpenEdge→ Client.
The Procedure Editor window appears. From here you can access all the basic OpenEdge development tools.
Note: Starting with OpenEdge Release 10.1A, you can also access the Procedure Editor from within the OpenEdge Architect development environment (Start→ Programs→ OpenEdge→ OpenEdge Architect).
2. From the main menu, select Tools→ Data Dictionary.
The OpenEdge Data Dictionary Startup dialog box opens. The Data Dictionary is where you define and manage all the tables and fields in your application database. To get you started, you can create your own copy of the Sports2000 database, which is the standard OpenEdge demo database. You need to copy the database so that your test procedures can make changes to it without modifying the version of it in your install directory.
3. In the Dictionary Startup dialog box, select the option to create a new database, then click OK:
The Create Database dialog box appears and prompts you for the name of your copy of the database.
4. Type Sports2000. By default, OpenEdge creates a database named Sports2000 in your working directory. If you’d like the database to be somewhere else, you can click the Files button next to the New Physical Database Name fill-in field to browse the directory structure for the right location for your database.
1–4

In the beginning . . . FOR EACH CUSTOMER
5. After you’ve entered your new database name, select the Start with A Copy of Some Other Database option, and then click the Files button next to the fill-in field:
6. Locate the Sports2000 database in your OpenEdge install directory, then either double-click that entry or click the Open button:
The pathname to the database is filled in when you return to the Create Database dialog box:
7. Click OK to accept this pathname. The Connect Database dialog box appears.
1–5
Introducing ABL
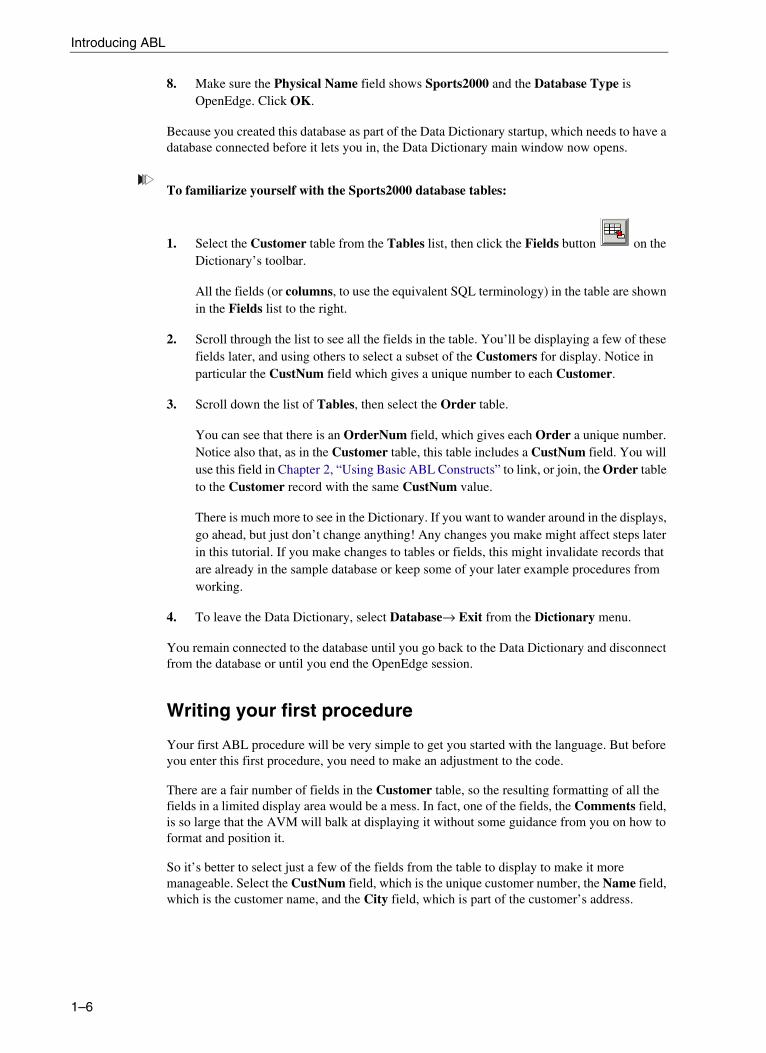
8. Make sure the Physical Name field shows Sports2000 and the Database Type is OpenEdge. Click OK.
Because you created this database as part of the Data Dictionary startup, which needs to have a database connected before it lets you in, the Data Dictionary main window now opens.
To familiarize yourself with the Sports2000 database tables:
1. Select the Customer table from the Tables list, then click the Fields button on the Dictionary’s toolbar.
All the fields (or columns, to use the equivalent SQL terminology) in the table are shown in the Fields list to the right.
2. Scroll through the list to see all the fields in the table. You’ll be displaying a few of these fields later, and using others to select a subset of the Customers for display. Notice in particular the CustNum field which gives a unique number to each Customer.
3. Scroll down the list of Tables, then select the Order table.
You can see that there is an OrderNum field, which gives each Order a unique number. Notice also that, as in the Customer table, this table includes a CustNum field. You will use this field in Chapter 2, “Using Basic ABL Constructs” to link, or join, the Order table to the Customer record with the same CustNum value.
There is much more to see in the Dictionary. If you want to wander around in the displays, go ahead, but just don’t change anything! Any changes you make might affect steps later in this tutorial. If you make changes to tables or fields, this might invalidate records that are already in the sample database or keep some of your later example procedures from working.
4. To leave the Data Dictionary, select Database→ Exit from the Dictionary menu.
You remain connected to the database until you go back to the Data Dictionary and disconnect from the database or until you end the OpenEdge session.
Writing your first procedure
Your first ABL procedure will be very simple to get you started with the language. But before you enter this first procedure, you need to make an adjustment to the code.
There are a fair number of fields in the Customer table, so the resulting formatting of all the fields in a limited display area would be a mess. In fact, one of the fields, the Comments field, is so large that the AVM will balk at displaying it without some guidance from you on how to format and position it.
So it’s better to select just a few of the fields from the table to display to make it more manageable. Select the CustNum field, which is the unique customer number, the Name field, which is the customer name, and the City field, which is part of the customer’s address.
1–6

In the beginning . . . FOR EACH CUSTOMER
In ABL, a list of fields is separated by spaces, so the new procedure becomes:
To enter this procedure in the Procedure Editor:
1. In the Procedure Editor window, type your block of code:
See the “Starting your OpenEdge session” section on page 1–4 for how to start the Procedure Editor.
You might notice the following about this code:
• You can type the table name Customer with an uppercase C, or type it in lower-case, or all in uppercase, or however you wish. ABL is entirely case-insensitive when it comes to both language keywords and database table and field names. Uppercasing the keywords is just a convention to aid in code readability, but you could type for each or For Each as well and it would work just the same.
• Typing CustNum in mixed case is just a convention to aid readability.
• The Customer field Name is the same name as the ABL keyword, NAME. ABL is relatively forgiving in this way: if the ABL compiler, which processes the code you type in, can distinguish between a word that is a field name or table name and one that must be a keyword, it will let you use it that way. It’s a good idea to avoid using keywords as table or field names in your database definition, though. For a list of all ABL keywords, see OpenEdge Development: ABL Reference.
To execute your procedure, press the F2 key on your keyboard (the keyboard shortcut for the RUN command). Alternatively, you can select Compile→ Run from the Procedure Editor menu.
FOR EACH Customer:DISPLAY CustNum Name City.
END.
1–7

Introducing ABL
The Procedure Editor shows the first set of customer numbers, names, and cities:
To see the next pages of Customer numbers, names and cities, press the SPACE BAR a few times. Press ESCAPE to terminate the display. Otherwise, the display terminates after the last page of Customers has been displayed.
This little three-line procedure certainly does a lot for you, but it doesn’t produce an output display that you would put directly into an application. There are many qualifiers to the DISPLAY keyword in the statement that you can use to adjust its behavior and appearance, some of which you’ll see later on in this chapter. Fundamentally, the DISPLAY statement is not intended to produce polished output by itself for a graphical application. There are other statements in the language you can use to define the windows, browses, toolbar buttons, and other features of a complete user interface. You’ll get to know those statements in later chapters.
For the purposes of your introduction to the language, leave the display format as it is, so that you can see how the structure of the language itself is put together. You will complete a little test procedure here that shows you a lot about ABL. After only a few chapters, you’ll be building complete application windows and all the logic that goes on behind them.
1–8

Basic characteristics of ABL
Basic characteristics of ABL
You just wrote about the simplest starting procedure possible. What can you learn from it already?
ABL is procedural
ABL is a procedural programming language. That means that you write sets of language statements that you can save in individual, named procedures. The language statements are usually executed or processed in the order in which they appear in the procedure. In a simple procedure such as this one, the statements are executed as they appear. As you move further into building event-driven applications, where the user has a variety of ways to control the application by clicking buttons or making menu selections, you will learn about how to define trigger code that sets up blocks of statements to be executed later on when a particular action occurs.
ABL is block-structured
An ABL procedure is made up of blocks. The procedure itself is the main block of the procedure. There are a number of ways to define other blocks within the main procedure block. The FOR EACH statement and its matching END statement are one example of a nested block, in this case one that iterates through a set of database records and executes all the code in between for each record in the set. There are other block statements you can use for different purposes. Some of them are also iterating, and cause the block to be executed multiple times. Others simply define a set of statements to be executed together. You’ll learn about all of these in later chapters.
An ABL procedure consists of statements
An ABL procedure is made up of a sequence of language statements. Each statement has one or more ABL keywords, along with other tokens such as database field names or variable names. An ABL statement normally ends with a period. By convention, a statement that defines the beginning of a block, such as your FOR EACH Customer statement, can end with a colon instead. There’s no significance to the end of the line in ABL. A single statement can span multiple lines, and if you wish, there can be multiple statements on a single line. There’s no special syntax needed to break up a statement between lines, but if you have a single element of a statement, such as a quoted string, that is long enough that you need to make it span lines, then end the first line with a tilde character (~).
There must be at least one space (or other white space character such as a tab or new line) in between each token in the statement. ABL is not sensitive to additional white space. You can indent lines of code and put tabs between parts of a statement for readability, and none of this will affect how the statement executes.
ABL is case-insensitive. This means that you can write either an ABL keyword or a reference to a variable name, or database table or field name, in any combination of uppercase and lowercase letters. For a list of all the ABL keywords, you can look through the index in the Help Topics submenu of the Help menu (via any of the OpenEdge development tools).
1–9
Introducing ABL
When you define variables in a procedure, and when you define database tables and fields, you must give them names that begin with a letter. After that, the name can include letters, numeric digits, periods (.), hyphens (-), and underscores (_). When you save your ABL procedure, you give it a name as well, and this follows the same naming rules. Note that, although ABL itself has many hyphenated keywords, you should not use hyphens in database table and field names, as well as procedure and variable names in your application. You should follow this guideline because other programming languages that you might want to combine with ABL procedures often do not allow a hyphen as a character in a procedure or parameter name. And the SQL database access language, which you can also use to manage data in your OpenEdge database using other tools, does not allow hyphens in table and field names.
A good naming convention for all kinds of names in ABL procedures is to use mixed case (as with the CustNum field) to break up a name into multiple words or other identifiable parts. Using capital letters to identify the beginning of each word or subpart within the name improves the readability of your code.
ABL combines procedural, database, and user interface statements
There are three basic kinds of statements in an ABL program: procedural statements, database access statements, and user interface statements. Sometimes individual statements contain elements of all three. Your first simple procedure contains all three types, and illustrates the power of the language.
The FOR EACH statement itself can be considered procedural, because it defines an action within the program, in this case, repeating a block of statements up to the END statement.
But the FOR EACH statement is also a database access statement, because it defines a result set that the FOR EACH block is going to iterate over, in this case, the set of all Customer records in the database. This simple convention of combining procedural logic with database access is a fundamental and enormously powerful feature of ABL. In another language, you would have to define a database query using a syntax that is basically divorced from the procedural language around it, and then have additional statements to control the flow of data into your procedure. In ABL, you can combine all these elements in a way that is very natural, flexible, and efficient, and relates to the way you think about how the program uses the data.
The FOR EACH block is also powerful because it transparently presents each record to your program in turn, so that the rest of the procedural logic can act on it. If you’ve written applications that use the SQL language for data retrieval, you can compare the ABL FOR EACH block with a program in another language containing embedded SQL statements, where the set-based nature of the SQL SELECT statement is not a good match to the record-by-record way in which your program normally wants to interact with the data.
The DISPLAY statement shows that user interface statements are also closely integrated with the rest of the program. ABL contains language statements not only to display data, but also to create, update, and delete records, and to assign individual values. All of these statements are fully integrated with the procedural language. In later chapters, you’ll learn how to build your applications so that the procedures that control the user interface are cleanly separated from the procedures that manage the data and define your business logic.
1–10

Saving your test procedure
Saving your test procedure
Before you move on to extend your first procedure to learn some of the other ABL basics, you should save it out to the operating system. To do this, give your code a procedure name. This follows the same rules as other names, and by convention has a filename extension of .p (for procedure).
To save your procedure in the Procedure Editor, select File→ Save As. Call the procedure h-CustSample.p and save the file to your working directory, or some other directory you’ve created.
Now you are ready to extend your procedure in various ways.
1–11

Introducing ABL
1–12

2Using Basic ABL Constructs
In Chapter 1, “Introducing ABL” you learned some of the basic characteristics of ABL and you created a small test procedure. In this chapter you will extend your test procedure by:
• Refining the data selection with a WHERE clause
• Creating nested blocks to display related data
• Changing labels and formats
• Using program variables and data types
• Defining an IF-THEN-ELSE decision point
• Putting a calculation into your procedure
• Getting to online help
• Saving and compiling your test procedure
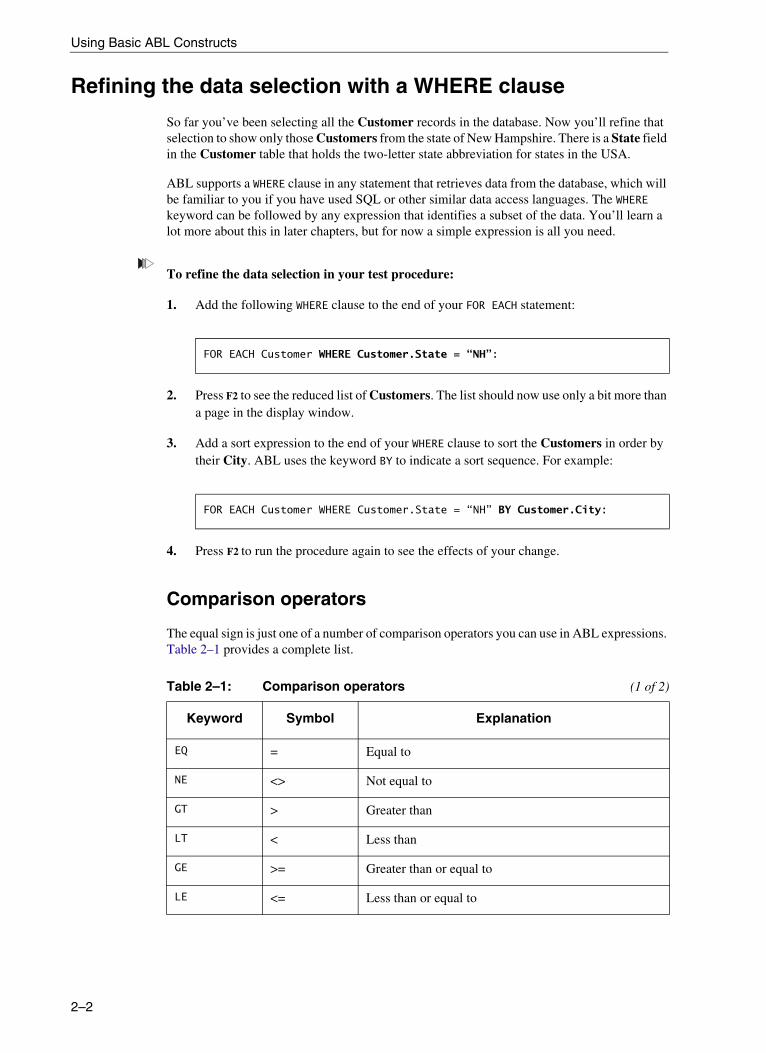
Using Basic ABL Constructs
Refining the data selection with a WHERE clause
So far you’ve been selecting all the Customer records in the database. Now you’ll refine that selection to show only those Customers from the state of New Hampshire. There is a State field in the Customer table that holds the two-letter state abbreviation for states in the USA.
ABL supports a WHERE clause in any statement that retrieves data from the database, which will be familiar to you if you have used SQL or other similar data access languages. The WHERE keyword can be followed by any expression that identifies a subset of the data. You’ll learn a lot more about this in later chapters, but for now a simple expression is all you need.
To refine the data selection in your test procedure:
1. Add the following WHERE clause to the end of your FOR EACH statement:
2. Press F2 to see the reduced list of Customers. The list should now use only a bit more than a page in the display window.
3. Add a sort expression to the end of your WHERE clause to sort the Customers in order by their City. ABL uses the keyword BY to indicate a sort sequence. For example:
4. Press F2 to run the procedure again to see the effects of your change.
Comparison operators
The equal sign is just one of a number of comparison operators you can use in ABL expressions. Table 2–1 provides a complete list.
FOR EACH Customer WHERE Customer.State = “NH”:
FOR EACH Customer WHERE Customer.State = “NH” BY Customer.City:
Table 2–1: Comparison operators (1 of 2)
Keyword Symbol Explanation
EQ = Equal to
NE <> Not equal to
GT > Greater than
LT < Less than
GE >= Greater than or equal to
LE <= Less than or equal to
2–2
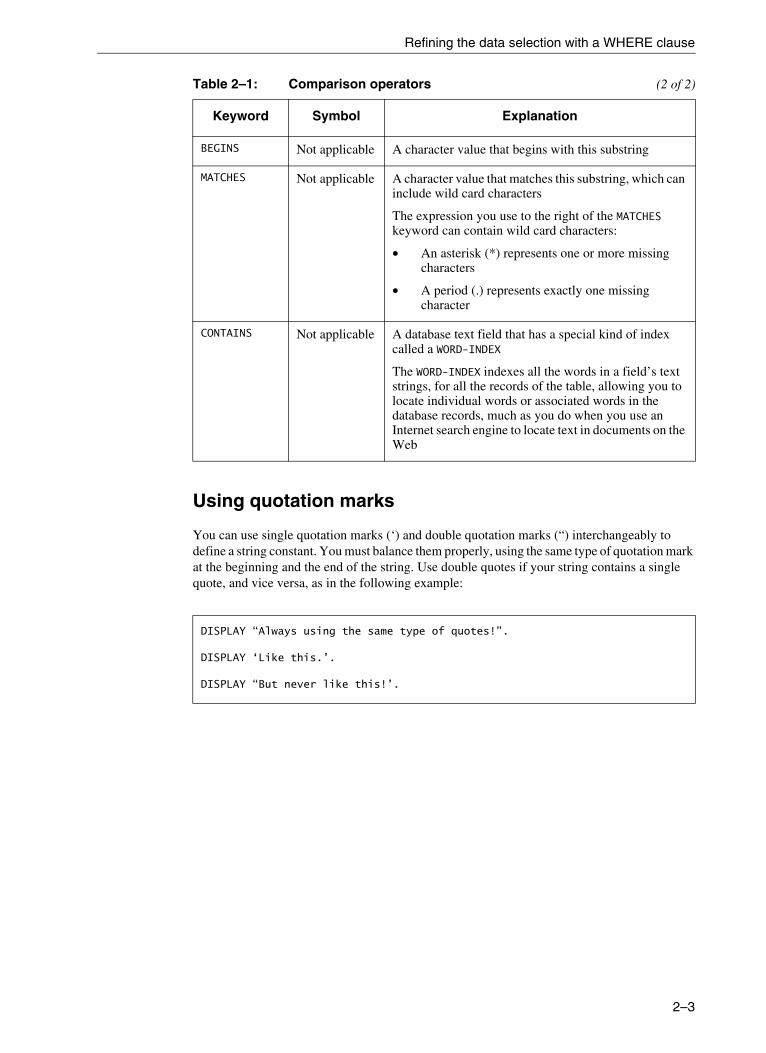
Refining the data selection with a WHERE clause
Using quotation marks
You can use single quotation marks (‘) and double quotation marks (“) interchangeably to define a string constant. You must balance them properly, using the same type of quotation mark at the beginning and the end of the string. Use double quotes if your string contains a single quote, and vice versa, as in the following example:
BEGINS Not applicable A character value that begins with this substring
MATCHES Not applicable A character value that matches this substring, which can include wild card characters
The expression you use to the right of the MATCHES keyword can contain wild card characters:
• An asterisk (*) represents one or more missing characters
• A period (.) represents exactly one missing character
CONTAINS Not applicable A database text field that has a special kind of index called a WORD-INDEX
The WORD-INDEX indexes all the words in a field’s text strings, for all the records of the table, allowing you to locate individual words or associated words in the database records, much as you do when you use an Internet search engine to locate text in documents on the Web
Table 2–1: Comparison operators (2 of 2)
Keyword Symbol Explanation
DISPLAY “Always using the same type of quotes!”.
DISPLAY ‘Like this.’.
DISPLAY “But never like this!’.
2–3
Using Basic ABL Constructs
Creating nested blocks to display related data
To review, the FOR EACH statement in your procedure creates a code block nested inside the implicit main block of the procedure itself. Now you will create a second FOR EACH block, nested inside the first FOR EACH, to display the Order records in the database for each New Hampshire Customer.
To create a nested block, add another FOR EACH block inside the first block, so that your procedure looks like this:
This example shows the code indented so that the new block is visually nested in the outer block, which helps code readability.
First, look at the new FOR EACH statement. The keyword OF is a shorthand for a WHERE clause that joins the two tables together. When you looked at the two tables and their fields in the Dictionary, you saw that both tables have a CustNum field. This is the primary key of the Customer table, which means that each Customer is assigned a unique number for the CustNum field, and this is the primary identifier for the Customer. In the Order table, the OrderNum is the unique Order identifier, and its primary key. The CustNum field in the Order table points back to the Customer the Order is for. It’s a foreign key because it points to a record in another table. To retrieve and display the Orders for a Customer, you have to join the two tables on the CustNum field that they have in common. The full WHERE clause for this join would be: WHERE Customer.CustNum = Order.CustNum. This kind of syntax will be familiar to you if you’ve ever worked with SQL.
The WHERE clause is telling the ABL Virtual Machine (AVM) to select those records where the CustNum field in one table matches the CustNum field in the other. In order to tell the AVM which field is which, both are qualified by the table name, followed by a period.
In ABL, you can use the syntax Order OF Customer as a shorthand for this join if the two tables have one or more like-named fields in common that constitute the join relationship, and those fields are indexed in at least one of the tables (normally they should be indexed in both). You can always use the full WHERE clause syntax instead of the OF phrase if you wish; the effect is the same, and if there is any doubt as to how the tables are related, it makes the relationship your code is using completely clear. In fact, the OF phrase is really one of those beginner shortcuts that makes it easy to write a very simple procedure but which really isn’t good practice in a complex application, because it isn’t clear just from reading the statement which fields are being used to relate the two tables. You should generally be explicit about your field relationships in your applications.
FOR EACH Customer NO-LOCK WHERE Customer.State = “NH” BY Customer.City:DISPLAY Customer.CustNum Customer.Name Customer.City.FOR EACH Order OF Customer NO-LOCK:
DISPLAY Order.OrderNum Order.OrderDate Order.ShipDate.END.
END.
2–4

Creating nested blocks to display related data
These simple nested FOR EACH statements accomplish something that would be a lot of work in other languages. To retrieve the Customers and their Orders separately, as you really want to do, you would have to define two separate queries using embedded SQL syntax, open them, and control them explicitly in your code. This would be a lot of work. For example, the straight forward single SQL query to retrieve the same data would be:
This code would retrieve all the related Customers and Orders into a single two-dimensional table, which is not very useful: all the Customer information would be repeated for each of the Customer’s Orders, and you would have to pull it apart yourself to display the information as header and detail, which is probably what you want. By contrast, when you run your very simple ABL procedure, you get a default display that represents the data properly as master (Customer) and detail (Order) information, as shown in Figure 2–1.
Figure 2–1: Result of running simple sample procedure
The AVM automatically gives you two separate display areas, one for the Customer fields showing one Customer at a time, and one for the Orders of the Customer. These display areas are called frames. You’ll learn more about ABL frames in later chapters.
Unlike in the first example, which displays a whole page of Customers, each time you press the SPACE BAR, the AVM displays just the next Customer and its Orders. Why did the AVM do this? The nested FOR EACH blocks tell the AVM that there are multiple Orders to display for each Customer, so it knows that it doesn’t make sense to display more than one Customer at a time. So it creates a small frame just big enough to display the fields for one Customer, and then separately creates another frame where it can display multiple Orders. The latter frame is called a down frame, because it can display multiple rows of data as it moves down the page. The top frame is actually referred to as a one down frame because it displays only a single row of data at a time.
SELECT Customer.CustNum, Name, City, OrderNum, OrderDate, ShipDate FROMCustomer, Order WHERE Customer.State = “NH” AND Customer.CustNum = Order.CustNum;
2–5

Using Basic ABL Constructs
You can control the size of the frames, how many rows are displayed, and many other attributes, by appending a WITH phrase to your statement.
To see how the WITH phrase can affect your test procedure:
1. Add the words WITH CENTERED to the DISPLAY statement for the Order frame:
2. Run the procedure again. The Order frame is centered in the default display window:
There are lots of frame attributes you can specify here (for a description of frame attributes, read the section on the Frame Phrase in OpenEdge Development: ABL Reference). This book doesn’t tell you much more about frame attributes, either now or later, because you won’t use most of them in your GUI applications. These attributes are designed to help you define frames for a character mode application, where the interface is basically just a series of 24 or 25 lines of 80 characters each. For this kind of display format, a sequence of frames displayed one beneath the other is an appropriate and convenient way to lay out the screen. But in a GUI application, you instead lay out your display using a visual design tool, such as the OpenEdge AppBuilder or OpenEdge Architect, and it generates the code or data needed to create the user interface at run time. This chapter shows you the basics of how ABL works and how it was designed, even though you will do most of your work a different way in your new applications.
FOR EACH Customer NO-LOCK WHERE Customer.State = “NH” BY Customer.City:DISPLAY Customer.CustNum Customer.Name Customer.City.FOR EACH Order OF Customer NO-LOCK:
DISPLAY Order.OrderNum Order.OrderDate Order.ShipDate WITH CENTERED.END.
END.
2–6
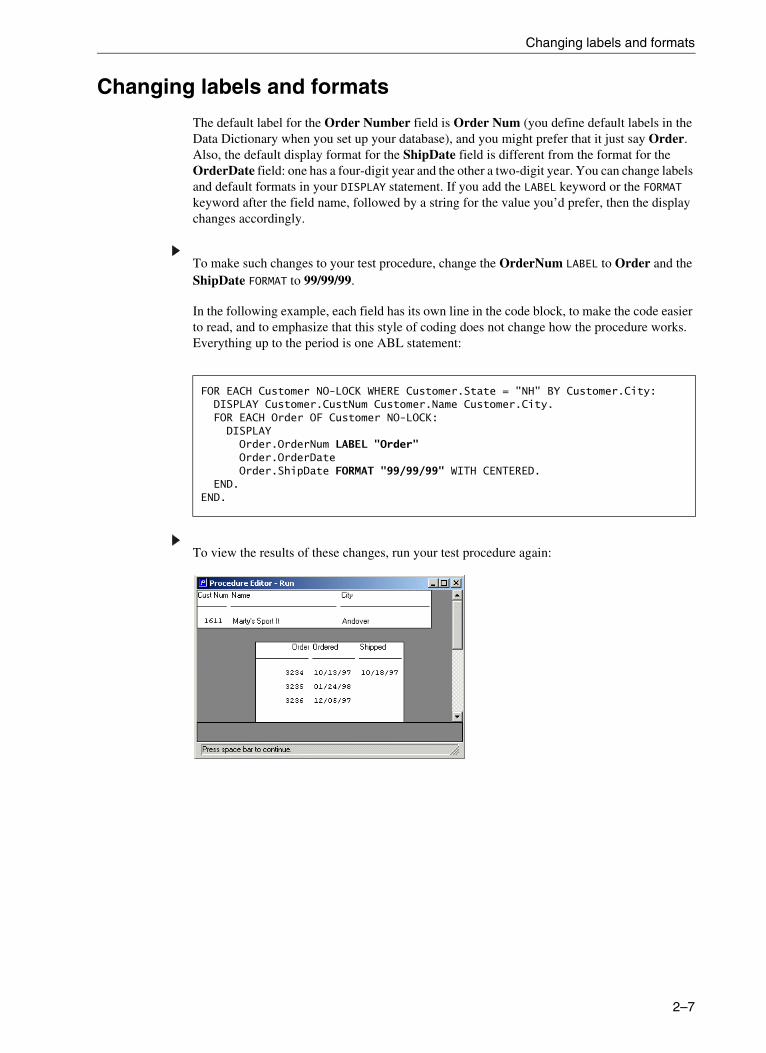
Changing labels and formats
Changing labels and formats
The default label for the Order Number field is Order Num (you define default labels in the Data Dictionary when you set up your database), and you might prefer that it just say Order. Also, the default display format for the ShipDate field is different from the format for the OrderDate field: one has a four-digit year and the other a two-digit year. You can change labels and default formats in your DISPLAY statement. If you add the LABEL keyword or the FORMAT keyword after the field name, followed by a string for the value you’d prefer, then the display changes accordingly.
To make such changes to your test procedure, change the OrderNum LABEL to Order and the ShipDate FORMAT to 99/99/99.
In the following example, each field has its own line in the code block, to make the code easier to read, and to emphasize that this style of coding does not change how the procedure works. Everything up to the period is one ABL statement:
To view the results of these changes, run your test procedure again:
FOR EACH Customer NO-LOCK WHERE Customer.State = "NH" BY Customer.City:DISPLAY Customer.CustNum Customer.Name Customer.City.FOR EACH Order OF Customer NO-LOCK:
DISPLAYOrder.OrderNum LABEL "Order" Order.OrderDateOrder.ShipDate FORMAT "99/99/99" WITH CENTERED.
END.END.
2–7
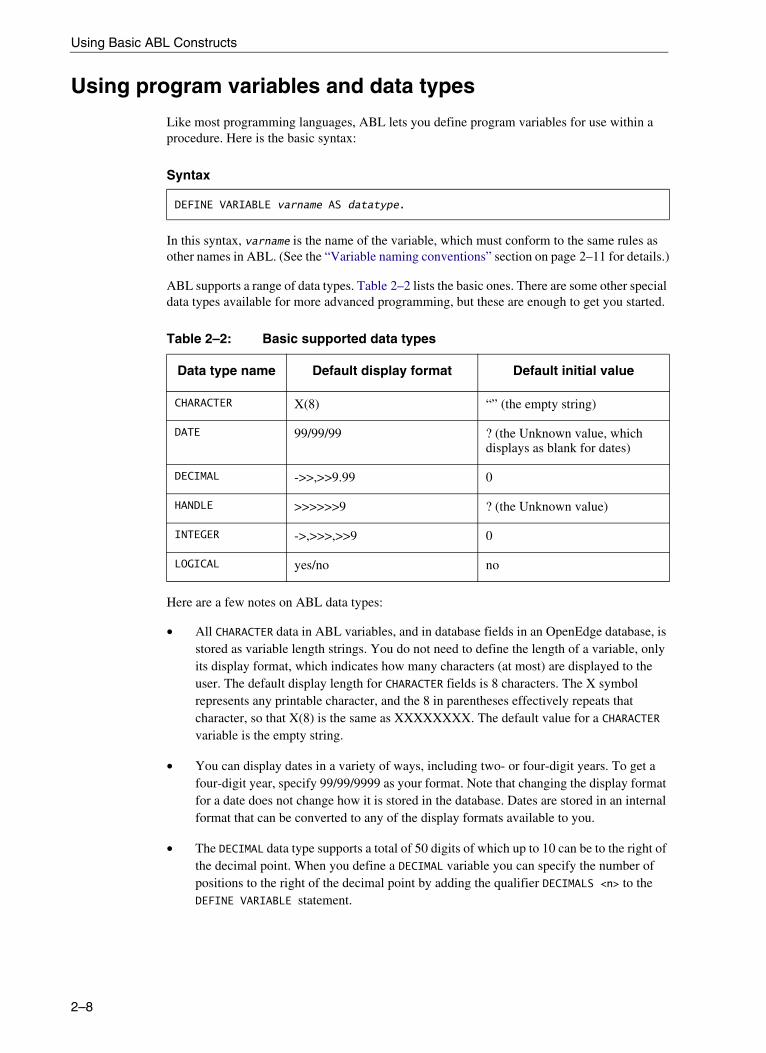
Using Basic ABL Constructs
Using program variables and data types
Like most programming languages, ABL lets you define program variables for use within a procedure. Here is the basic syntax:
In this syntax, varname is the name of the variable, which must conform to the same rules as other names in ABL. (See the “Variable naming conventions” section on page 2–11 for details.)
ABL supports a range of data types. Table 2–2 lists the basic ones. There are some other special data types available for more advanced programming, but these are enough to get you started.
Here are a few notes on ABL data types:
• All CHARACTER data in ABL variables, and in database fields in an OpenEdge database, is stored as variable length strings. You do not need to define the length of a variable, only its display format, which indicates how many characters (at most) are displayed to the user. The default display length for CHARACTER fields is 8 characters. The X symbol represents any printable character, and the 8 in parentheses effectively repeats that character, so that X(8) is the same as XXXXXXXX. The default value for a CHARACTER variable is the empty string.
• You can display dates in a variety of ways, including two- or four-digit years. To get a four-digit year, specify 99/99/9999 as your format. Note that changing the display format for a date does not change how it is stored in the database. Dates are stored in an internal format that can be converted to any of the display formats available to you.
• The DECIMAL data type supports a total of 50 digits of which up to 10 can be to the right of the decimal point. When you define a DECIMAL variable you can specify the number of positions to the right of the decimal point by adding the qualifier DECIMALS <n> to the DEFINE VARIABLE statement.
Syntax
DEFINE VARIABLE varname AS datatype.
Table 2–2: Basic supported data types
Data type name Default display format Default initial value
CHARACTER X(8) “” (the empty string)
DATE 99/99/99 ? (the Unknown value, which displays as blank for dates)
DECIMAL ->>,>>9.99 0
HANDLE >>>>>>9 ? (the Unknown value)
INTEGER ->,>>>,>>9 0
LOGICAL yes/no no
2–8
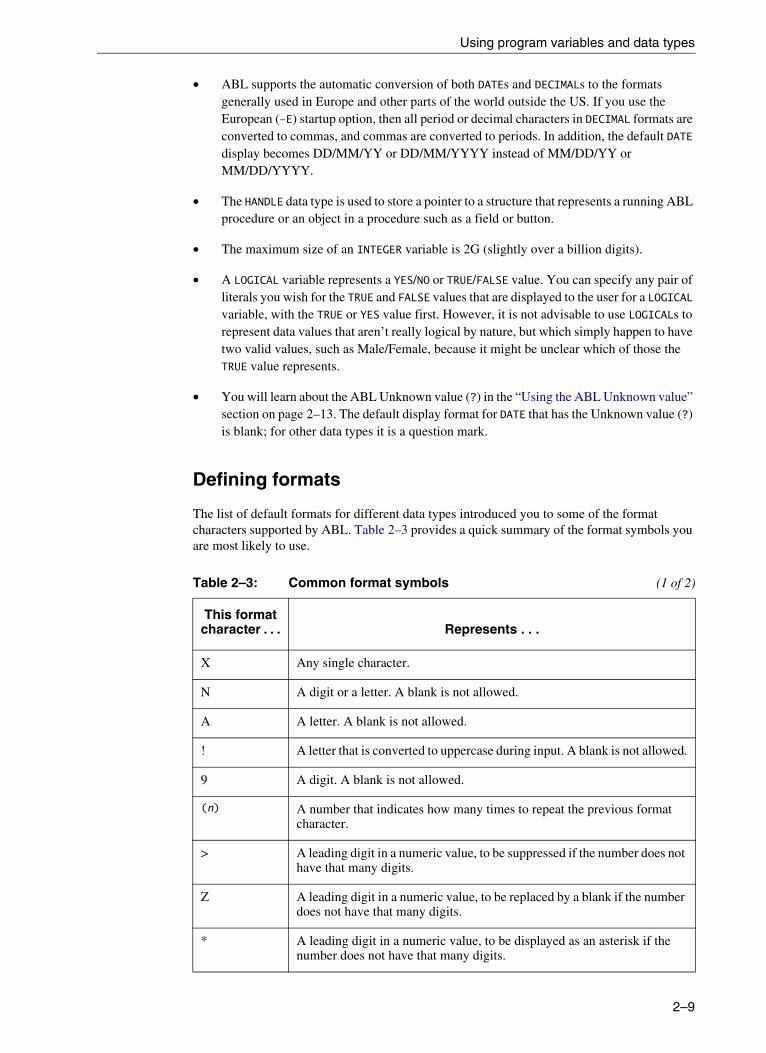
Using program variables and data types
• ABL supports the automatic conversion of both DATEs and DECIMALs to the formats generally used in Europe and other parts of the world outside the US. If you use the European (–E) startup option, then all period or decimal characters in DECIMAL formats are converted to commas, and commas are converted to periods. In addition, the default DATE display becomes DD/MM/YY or DD/MM/YYYY instead of MM/DD/YY or MM/DD/YYYY.
• The HANDLE data type is used to store a pointer to a structure that represents a running ABL procedure or an object in a procedure such as a field or button.
• The maximum size of an INTEGER variable is 2G (slightly over a billion digits).
• A LOGICAL variable represents a YES/NO or TRUE/FALSE value. You can specify any pair of literals you wish for the TRUE and FALSE values that are displayed to the user for a LOGICAL variable, with the TRUE or YES value first. However, it is not advisable to use LOGICALs to represent data values that aren’t really logical by nature, but which simply happen to have two valid values, such as Male/Female, because it might be unclear which of those the TRUE value represents.
• You will learn about the ABL Unknown value (?) in the “Using the ABL Unknown value” section on page 2–13. The default display format for DATE that has the Unknown value (?) is blank; for other data types it is a question mark.
Defining formats
The list of default formats for different data types introduced you to some of the format characters supported by ABL. Table 2–3 provides a quick summary of the format symbols you are most likely to use.
Table 2–3: Common format symbols (1 of 2)
This format character . . . Represents . . .
X Any single character.
N A digit or a letter. A blank is not allowed.
A A letter. A blank is not allowed.
! A letter that is converted to uppercase during input. A blank is not allowed.
9 A digit. A blank is not allowed.
(n) A number that indicates how many times to repeat the previous format character.
> A leading digit in a numeric value, to be suppressed if the number does not have that many digits.
Z A leading digit in a numeric value, to be replaced by a blank if the number does not have that many digits.
* A leading digit in a numeric value, to be displayed as an asterisk if the number does not have that many digits.
2–9

Using Basic ABL Constructs
You can insert other characters as you wish into formats, and they are displayed as literal values. For example, the INTEGER value 1234 with the FORMAT $>,>>>ABC is displayed as $1,234ABC.
Other variable qualifiers
You can qualify a variable definition in a number of ways to modify these defaults. To do this, append one of the keywords listed in Table 2–4 to the end of your variable definition.
:
As an alternative to specifying all of this, you can use the following syntax form to define a variable that is LIKE another variable or database field you’ve previously defined:
, A comma in a numeric value greater than 1,000. This is replaced by a period in European format. It is suppressed if it is preceded by a Z, *, or >, and the number does not have enough digits to require the comma.
. A decimal point in a numeric value. This is replaced by a comma in European format.
+ A sign for a positive or negative number. It is displayed as + for a positive number, and as – for a negative number.
– A sign for a negative number. It is displayed as – for a negative number. For a positive number it is suppressed if it is to the left of the decimal point in the format, and replaced by a blank if it is to the right.
Table 2–3: Common format symbols (2 of 2)
This format character . . . Represents . . .
Table 2–4: Variable qualifiers
Keyword Followed by
INITIAL The variable’s initial value.
DECIMALS The number of decimal places for a DECIMAL variable.
FORMAT The display format of the variable, enclosed in quotation marks.
LABEL The label to display with the variable. (The default is the variable name itself.)
COLUMN-LABEL The label to display with the variable when it is displayed as part of a column of values. (The default is the LABEL if there is one, otherwise the variable name.)
EXTENT An integer constant. This qualifier allows you to define a variable that is a one-based array of values. You can then reference the individual array elements in your code by enclosing the array subscript in square brackets, as in myVar[2] = 5.
DEFINE VARIABLE varname LIKE fieldname.
2–10
Using program variables and data types
In this case it inherits the format, label, initial value, and all other attributes of the other variable or field. This is another strength of ABL. Your application procedures can inherit many field attributes from the database schema, so that a change to the schema is propagated to all your procedures automatically when they are recompiled. You can also modify those schema defaults in individual procedures.
There’s one more keyword that you should almost always use at the end of your variable definitions, and that is NO-UNDO. This keyword has to do with how the AVM manages transactions that update the database. When you define variables in your ABL programs, the AVM places them into two groups:
• Those variables that include the NO-UNDO qualifier are managed by the AVM without transaction support.
• Those variables that don’t have the NO-UNDO qualifier are treated as though they were a database record with those variables as fields. If any of the variable values are modified during the course of a database transaction, and then the transaction is backed out, changes to the variable values made during the transaction are backed out as well, so that they revert to their values before the transaction started. This can be very useful sometimes, but in practice, most variables do not need this special treatment, and because the AVM has to do some extra work to manage them, it is more efficient to get into the habit of appending NO-UNDO to the end of your variable definitions unless the variable is one that should be treated as part of a transaction.
Variable naming conventions
There are no specific naming requirements for variables, but there are some recommended guidelines that will bring your own variables into line with the standards used in the OpenEdge development tools and their support code.
You should begin a variable with a lowercase letter (or sometimes two) to indicate the data type of the variable. This can help those reading your code to understand at a glance how a variable is being used. When you start doing more dynamic programming later on, it is very important to differentiate between a variable that represents a value directly, and one that is a handle to an object that has a value. Here are some recommended data type prefixes:
• c for CHARACTER
• i for INTEGER
• f for DECIMAL (think float)
• d for DATE
• h for HANDLE
• l for LOGICAL
The rest of the name should be in mixed case, where capital letters are used to identify different words or subparts of a name, as in cCustName or iOrderCount.
2–11

Using Basic ABL Constructs
Placement of variable definitions
Where you place variables in your code is important. The AVM performs a single pass through the statements in a procedure to build the intermediary code that it uses to execute the procedure. Because a variable is a definitional element of a procedure and not a statement that is executed in sequence, it does not really matter where the variable definition appears. However, because of the one-pass nature of the ABL syntax analyzer, the definition has to appear before the variable is used in the procedure. By convention, it is usually best for you to define all your variables at the top of a procedure, to aid in readability and to make sure that they’re all defined before they’re used.
For the next change to the test procedure, you will put to work several of the concepts you’ve just learned about. Your code will display a special value for each Order record. This task involves defining a variable with an initial value, writing an IF-THEN construct with a check for the Unknown value (?), and then using one of the many built-in ABL functions to extract a value to display. The displayed value is the ShipDate month of an Order expressed as a three-character abbreviation, such as JAN or FEB.
To build up the list of possible values for the month, you need to define a CHARACTER variable to hold the list. Add the following variable definition to the top of your procedure:
DEFINE VARIABLE cMonthList AS CHARACTER NO-UNDOINITIAL "JAN,FEB,MAR,APR,MAY,JUN,JUL,AUG,SEP,OCT,NOV,DEC".
2–12

Defining an IF-THEN-ELSE decision point
Defining an IF-THEN-ELSE decision point
You will notice when you run your procedure that some of the ship dates are not defined. Some of these Orders apparently have been on hold for a very long time! Let’s construct a statement to branch in the code depending on whether the ShipDate field is defined or not. ABL, like most languages, has an IF-THEN construct for such decision points. It can also have an ELSE branch:
The condition is any expression that evaluates to TRUE or FALSE. Following the THEN keyword, you can place a single ABL statement or a whole set of statements that are all to be executed if the condition is TRUE. The way to represent a block that simply groups a series of statements together that are all executed together is a DO-END block:
If you include the ELSE keyword followed by a statement or a block of statements, that branch is taken if the condition evaluates to FALSE.
Using the ABL Unknown value
Although the ShipDate is displayed as being blank in these cases, the value stored in the database isn’t a blank value, because this is a date, not a character value. If you were to add an expression to your code to compare the ShipDate to a blank value, you would get your very first ABL compiler error:
IF condition THEN { block | statement } [ ELSE { block | statement } ]
IF condition THEN DO:statement...
END.
FOR EACH Customer NO-LOCK WHERE Customer.State = "NH" BY Customer.City:DISPLAY Customer.CustNum Customer.Name Customer.City.FOR EACH Order OF Customer NO-LOCK:
IF Order.ShipDate NE "" THENDISPLAY
Order.OrderNum LABEL "Order" Order.OrderDateOrder.ShipDate FORMAT "99/99/99" WITH CENTERED.
END.END.
2–13

Using Basic ABL Constructs
Whenever you press the F2 key to run your procedure, the AVM performs a syntax validation. If it cannot properly process the code you have written, you get an error such as this one:
In this case, the AVM sees that you are trying to compare a field defined to be a date with a character string constant, and these do not match. To correct this, you need to change the nature of your comparison.
The value stored in the database to represent a value that is not defined is called the Unknown value. In ABL statements you represent the Unknown value with a question mark (?). Note that you do not put quotation marks around the question mark; it acts as a special symbol on its own. It is not equal to any defined value. In ABL, you write a statement that looks as though you are comparing a value to a question mark, such as IF ShipDate = ?, but in fact the statement is asking if the ShipDate has the Unknown value, which means it has no particular value at all. The Unknown value is like the NULL value in SQL, and the expression IF ShipDate = ? is like the SQL expression IF ShipDate IS NULL.
Using built-In ABL functions
To complete this latest change to the procedure, you need to define the statement that checks whether the ShipDate is Unknown, and then picks out the month from the date, using the cMonthList variable you defined just above, and converts it to one of the three-letter abbreviations in the list. Here is the whole statement:
Now take a closer look at the elements in the DISPLAY statement. First there is a new keyword, ENTRY. This is the name of a built-in function in ABL. There are many such functions to do useful jobs for you, to save you the work of writing the code to do it yourself. The ENTRY function takes two arguments, and as you can see, those arguments are enclosed in parentheses. The first is an INTEGER value, which identifies an entry in a comma-separated list of character values. In this case it represents the month of the year, from 1 to 12. The second argument is the list that contains the entry the function is retrieving. In this case it is the variable you just defined.
Looking closer, you can see that the first of the two arguments to the function, MONTH(ShipDate), is itself another function. This function takes an ABL DATE value as an argument, extracts the month number of the date, and returns it. The returned value is an INTEGER from 1 to 12 that the ENTRY function then uses to pick out the right entry from the list of months in cMonthList. So if the month is May, the MONTH function returns 5 and the ENTRY function picks out the fifth entry from the list of months and returns it to the DISPLAY statement.
IF Order.ShipDate NE ? THENDISPLAY ENTRY(MONTH(Order.ShipDate), cMonthList) LABEL "Month".
2–14

Defining an IF-THEN-ELSE decision point
Here are some general observations about built-in functions:
• A function takes a variable number of arguments, depending on what the function requires. Some functions take no arguments at all (for example, the TODAY function, which returns today’s date). Some functions have a variable number of arguments, so that one or more arguments at the end of the argument list are optional. For example, the ENTRY function can have an optional third argument, which is a character string representing a delimiter to use between the values in the list, if you don’t want it to use a comma (,). Because the comma is the default delimiter, it is optional. You can’t leave out arguments from the middle of the list, or specify them in a different order. Each of the arguments must be of the proper data type, depending on what the function expects.
• The arguments to a function can be constant values, variable names, database field names, or any expression involving these which evaluates to a value of the proper data type.
• Each function returns a value of a specific data type.
• You can nest functions to any depth in your code. The result of any function is returned up to the next level in the code.
• You can place functions anywhere within a statement where a value can appear. Because a function returns a value, it can appear only on the right-side of an assignment statement. You can’t use the MONTH function to assign the month value to a date variable, for example, or the ENTRY function to assign the value of an entry in a list. There are ABL statement keywords in some cases to do those kinds of assignments.
• If you are displaying the result of a function or an expression involving a function, you can specify a LABEL or FORMAT for it, just as you can for a variable. The default LABEL for an expression is a text string representing the expression itself. The default format is the default for the function’s data type. In this example you should add the label Month to the expression.
To display the month along with each Order:
1. Add the new statement with the function references into your procedure, inside the block of code that loops through the Orders:
DEFINE VARIABLE cMonthList AS CHARACTER NO-UNDOINITIAL "JAN,FEB,MAR,APR,MAY,JUN,JUL,AUG,SEP,OCT,NOV,DEC".
FOR EACH Customer NO-LOCK WHERE Customer.State = "NH" BY Customer.City:DISPLAY Customer.CustNum Customer.Name Customer.City.FOR EACH Order OF Customer NO-LOCK:
DISPLAY Order.OrderNum LABEL "Order" Order.OrderDateOrder.ShipDate FORMAT "99/99/99" WITH CENTERED.
IF Order.ShipDate NE ? THENDISPLAY ENTRY(MONTH(Order.ShipDate), cMonthList) LABEL "Month".
END.END.
2–15

Using Basic ABL Constructs
2. To see the effect of the new code, rerun the procedure:
Note: Several separate ABL DISPLAY statements contribute to the display of fields in a single line for each Order. This is one of the powerful and flexible characteristics of ABL. ABL can gather together a number of different statements in a procedure, some of which might be executed conditionally, and combine them together into a single operation such as this. This feature is generally not possible with other programming languages.
3. To save your procedure, press F6.
ABL Functions
This section provides a quick summary of some of the most useful functions available to you in ABL:
• Date functions
• List functions
• ABL string manipulation functions
Other sections of the book look at functions that convert data values and otherwise operate as part of data retrieval.
2–16

Defining an IF-THEN-ELSE decision point
Date functions
Table 2–5 describes functions that return or operate on data values.
Functions that convert data are discussed in later chapters. An example of such a function is the STRING function.
To use the STRING function to convert the time into a meaningful display:
1. In the Procedure Editor, select File→ New Procedure Window to open a new procedure window.
2. Enter the following code, which applies the STRING function to the result of the TIME function, along with the formatting characters HH (hour), MM (minute), and SS (second):
3. Press F2. The Procedure Editor window appears:
Table 2–5: Date functions
Function Arguments Returned value
DAY DATE INTEGER — The day of the month
MONTH DATE INTEGER — The month of the year
YEAR DATE INTEGER — The year
WEEKDAY DATE INTEGER — The day of the week, starting with 1 for Sunday
TIME none INTEGER — The number of seconds since midnight
TODAY none DATE — Today’s date
DISPLAY STRING(TIME, “HH:MM:SS”).
2–17

Using Basic ABL Constructs
List functions
The functions described in Table 2–6 operate on lists. All the list functions are one-based, that is, the first element in a list is considered to be element 1, not 0.
ABL string manipulation functions
The functions described in Table 2–7 operate on character strings.
Table 2–6: List functions
Function Arguments Returned value
ENTRY element AS INTEGER,list AS CHARACTER,delimiter AS CHARACTER
CHARACTER — The nth element in a delimited list, where n is the value of the element argument. The delimiter is optional and defaults to comma.
LOOKUP element AS CHARACTER,list AS CHARACTER,delimiter AS CHARACTER
INTEGER — The numeric (one-based) location of the element within the list. The delimiter is optional and defaults to a comma. The function returns 0 if the element is not in the list.
Table 2–7: ABL string manipulation functions (1 of 2)
Function Arguments Returned value
FILL expression AS CHARACTER, repeat-count AS INTEGER
CHARACTER — A character string made up of the expression repeated repeat-count times.
INDEX source AS CHARACTER,target AS CHARACTER,starting-point AS INTEGER
INTEGER — The position of the first occurrence of the target string within the source string, relative to the starting-point. The starting-point is optional and defaults to 1 (the beginning of the string).
LEFT-TRIM string AS CHARACTER,trim-chars AS CHARACTER
CHARACTER — The input string, with the trim-chars removed from the beginning of the string. The trim-chars argument is optional, and defaults to any white space (spaces, tabs, carriage returns, and line feeds).
2–18

Defining an IF-THEN-ELSE decision point
LENGTH string AS CHARACTER,type AS CHARACTER
INTEGER — The number of characters, bytes, or columns in the string. The type is optional and defaults to CHARACTER. Other possible values for this argument are RAW, which makes the function return the number of bytes in the string, and COLUMN, which causes it to return the number of display or print character-columns. These latter two types are useful for manipulating strings that might contain double-byte characters representing characters in non-European languages.
R-INDEX source AS CHARACTER,target AS CHARACTER,starting-point AS INTEGER
INTEGER — The position of the target string within the source string, but with the search starting at the end of the string rather than the beginning. The position, however, is counted starting at the left. This function is useful for returning the right-most (last) occurrence of the source substring. The starting-point is optional and defaults to 1.
REPLACE source AS CHARACTER,from-string AS CHARACTER,to-string AS CHARACTER
CHARACTER — The source string with every occurrence of the from-string replaced by the to-string.
RIGHT-TRIM string AS CHARACTER,trim-chars AS CHARACTER
CHARACTER — The input string with the trim-chars removed from the end of the string. The trim-chars argument is optional and defaults to all white space.
SUBSTRING source AS CHARACTER,position AS INTEGER,length AS INTEGER,type AS CHARACTER
CHARACTER — The substring of the source string beginning at the position. The length is optional and specifies the (maximum) length to return. The default is the remaining length of the string starting at position. The type is also optional and has same values as for the LENGTH function.
TRIM string AS CHARACTER,trim-chars AS CHARACTER
CHARACTER — The input string with the trim-chars removed from both the beginning and the end of the string. The trim-chars argument is optional and defaults to all white space.
Table 2–7: ABL string manipulation functions (2 of 2)
Function Arguments Returned value
2–19
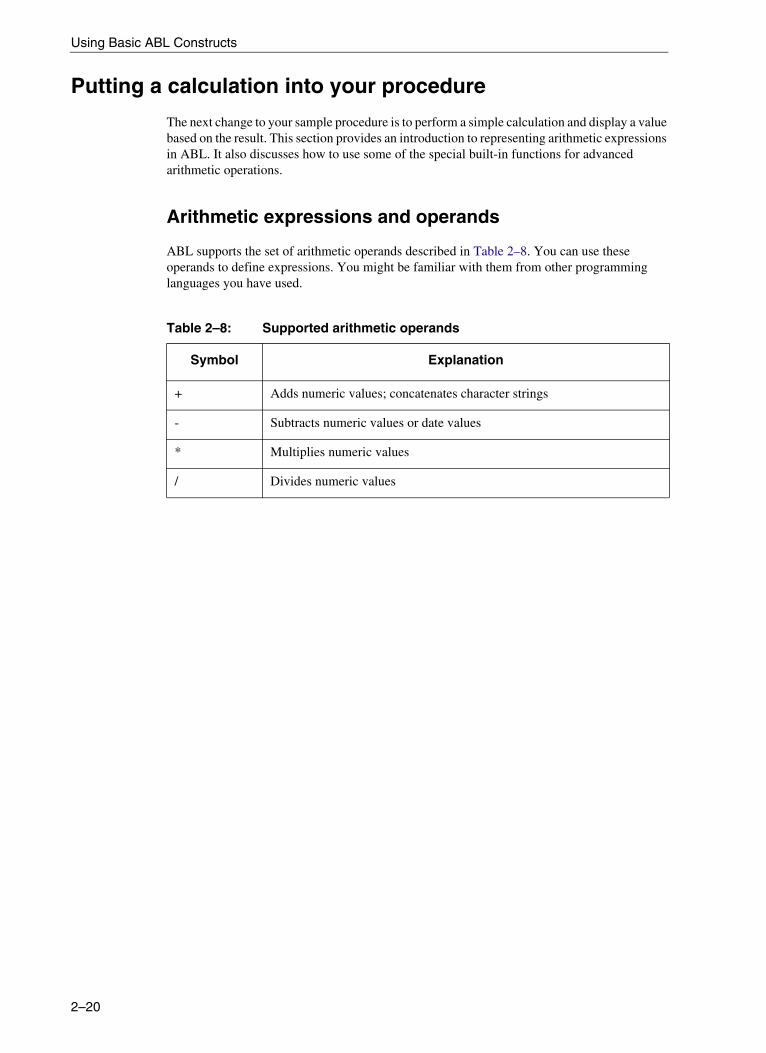
Using Basic ABL Constructs
Putting a calculation into your procedure
The next change to your sample procedure is to perform a simple calculation and display a value based on the result. This section provides an introduction to representing arithmetic expressions in ABL. It also discusses how to use some of the special built-in functions for advanced arithmetic operations.
Arithmetic expressions and operands
ABL supports the set of arithmetic operands described in Table 2–8. You can use these operands to define expressions. You might be familiar with them from other programming languages you have used.
Table 2–8: Supported arithmetic operands
Symbol Explanation
+ Adds numeric values; concatenates character strings
- Subtracts numeric values or date values
* Multiplies numeric values
/ Divides numeric values
2–20

Putting a calculation into your procedure
The AVM evaluates operators of equal precedence from left to right. Otherwise, the AVM evaluates the operator of higher precedence, as shown in Table 2–9. Use parentheses to raise the precedence of a given expression.
There is one special thing you need to know when you are writing expressions involving these operands. Because ABL allows the use of a hyphen as a character in a procedure name, variable name, or database field name, the AVM cannot recognize the difference between a hyphen and a minus sign used for subtraction, which are the same keyboard character. For example, there is no way for the syntax analyzer to tell whether the string ABC-DEF represents a single hyphenated variable or field name, or whether it represent the arithmetic expression ABC minus DEF, involving two fields or variables named ABD and DEF. For this reason, you have to put a space or other white space characters around the “-” character when you use it as a minus sign for subtraction of one number from another. Note that you don’t have to insert a space after a minus sign that precedes a negative number, such as –25. For consistency, the other arithmetic operands also require white space. If you forget to put it in, you’ll get an error, except in the case of the forward slash character. In the case of the slash, if you leave out the white space, the AVM interprets the value as a date! So, for example, 5/6 represents May 6th, not a numeric fraction.
Table 2–9: ABL operator precedence
Precedence(highest to lowest) Operator function Symbol
7 Numeric negative (unary)Numeric positive (unary)
-+
6 Numeric moduloNumeric divisionNumeric multiplication
MODULO/*
5 Date subtractionDatetime subtractionNumeric subtractionDate additionDatetime additionNumeric additionString concatenation
---++++
4 Relational string matchRelational less thanRelational less than or equal toRelational greater thanRelational greater than or equal toRelational equal toRelational not equal toRelational string beginning
MATCHESLT or <LE or <=GT or >GE or >=EQ or =NE or <>BEGINS
3 Logical NOT (unary) NOT
2 Logical AND AND
1 Logical inclusive OR OR
2–21

Using Basic ABL Constructs
To illustrate how to use arithmetic operands in the sample procedure, you need to determine whether the CreditLimit of the Customer is less than twice the outstanding Balance. If this is TRUE, then you must display the ratio of CreditLimit to Balance. Otherwise you display the Orders for the Customer. Add the following code, just in front of the FOR EACH Order OF Customer statement that’s already there:
You can add parentheses to such an expression to make the grouping of terms explicit. Otherwise, the AVM observes the standard rules of precedence. Multiplication and division are performed before addition and subtraction, and all such calculations are performed before a comparison operation.
The expression following the IF keyword compares the CreditLimit field from the current Customer record with two times the value of the Balance field. If the first value is less than the second, then the expression is TRUE and the statement following the THEN keyword is executed, which displays the string expression Credit Ratio: followed by the value of the CreditLimit divided by the Balance.
The ELSE keyword is followed by the entire FOR EACH Order block, so that block of code, which displays all the Orders of the Customer, is skipped if the expression is TRUE, and executed only if it is FALSE.
To see the result of this change, run your procedure again. For a Customer where the ratio is greater than or equal to 2, the Orders display as before. For a Customer where the ratio is less than 2, the new expression is displayed instead:
You might notice a couple of things about this display:
• Because the CreditLimit check is in the block of code where the procedure retrieves and displays Customers, it is displayed in the same frame as the Customer information. You can give names to frames to be more specific about the frame in which to display objects, as well as where in the frame each element is displayed.
• The AVM understands enough about what is going on here to clear and hide the Order frame if it’s not being displayed for the current Customer (because the CreditLimit to Balance ratio is being displayed instead). This is part of the very powerful default behavior of the language.
IF Customer.CreditLimit < 2 * Customer.Balance THENDISPLAY "Credit Ratio:" Customer.CreditLimit / Customer.Balance.
ELSE FOR EACH Order OF Customer:
2–22
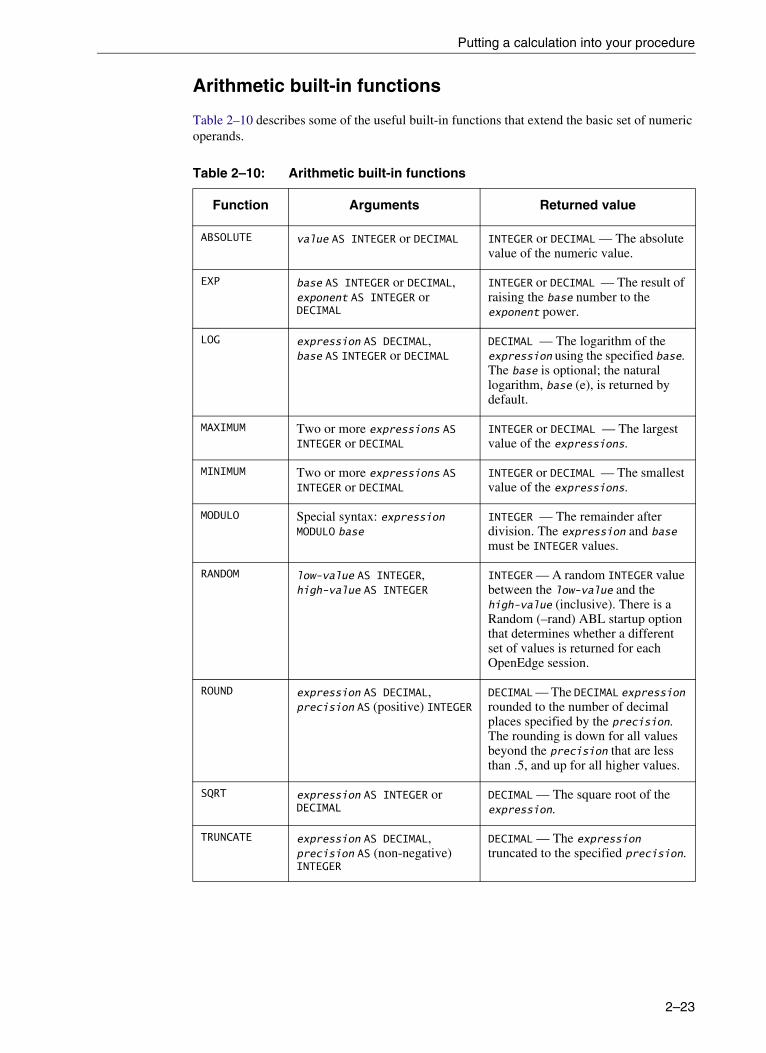
Putting a calculation into your procedure
Arithmetic built-in functions
Table 2–10 describes some of the useful built-in functions that extend the basic set of numeric operands.
Table 2–10: Arithmetic built-in functions
Function Arguments Returned value
ABSOLUTE value AS INTEGER or DECIMAL INTEGER or DECIMAL — The absolute value of the numeric value.
EXP base AS INTEGER or DECIMAL, exponent AS INTEGER or DECIMAL
INTEGER or DECIMAL — The result of raising the base number to the exponent power.
LOG expression AS DECIMAL, base AS INTEGER or DECIMAL
DECIMAL — The logarithm of the expression using the specified base. The base is optional; the natural logarithm, base (e), is returned by default.
MAXIMUM Two or more expressions AS INTEGER or DECIMAL
INTEGER or DECIMAL — The largest value of the expressions.
MINIMUM Two or more expressions AS INTEGER or DECIMAL
INTEGER or DECIMAL — The smallest value of the expressions.
MODULO Special syntax: expression MODULO base
INTEGER — The remainder after division. The expression and base must be INTEGER values.
RANDOM low-value AS INTEGER, high-value AS INTEGER
INTEGER — A random INTEGER value between the low-value and the high-value (inclusive). There is a Random (–rand) ABL startup option that determines whether a different set of values is returned for each OpenEdge session.
ROUND expression AS DECIMAL, precision AS (positive) INTEGER
DECIMAL — The DECIMAL expression rounded to the number of decimal places specified by the precision. The rounding is down for all values beyond the precision that are less than .5, and up for all higher values.
SQRT expression AS INTEGER or DECIMAL
DECIMAL — The square root of the expression.
TRUNCATE expression AS DECIMAL, precision AS (non-negative) INTEGER
DECIMAL — The expression truncated to the specified precision.
2–23

Using Basic ABL Constructs
Getting to online help
You can access the OpenEdge Online Help system at any time just by pressing the F1 key. Help is context-sensitive, so it always tries to come up initialized to a section of the help files that seems relevant to what you’re doing. For example, if you press F1 from within the Editing Options dialog box, you get help on the options in that dialog box:
In an OpenEdge editor, if you highlight one or more keywords in a procedure and press F1, you get help for that type of statement.
To try accessing online help:
1. In your test procedure, highlight the keywords DEFINE VARIABLE, then press F1:
2–24
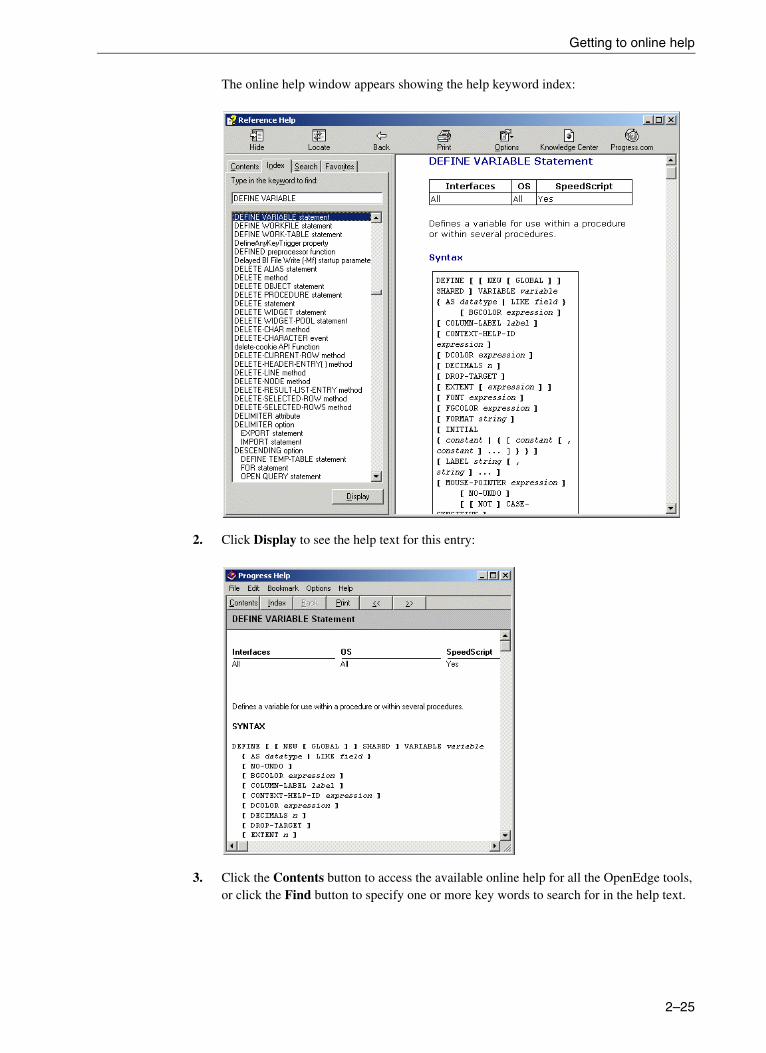
Getting to online help
The online help window appears showing the help keyword index:
2. Click Display to see the help text for this entry:
3. Click the Contents button to access the available online help for all the OpenEdge tools, or click the Find button to specify one or more key words to search for in the help text.
2–25

Using Basic ABL Constructs
Saving and compiling your test procedure
You’ve written your first ABL procedure. As you make changes to it, you should re-save it by selecting File→ Save from the Procedure Editor menu or by just pressing F6.
This section examines what happens when you press the F2 key or select Compile→ Run from the menu to run your procedure:
1. When you tell the AVM to run your procedure in this way, the Procedure Editor creates a temporary file from the ABL code currently in the editor window and then passes this file to the ABL compiler.
2. The compiler performs a syntax analysis of the procedure and stops with one or more error messages if it detects any errors in your ABL statements.
3. If your procedure is error-free, the compiler then translates or compiles your procedure into an intermediate form that is then interpreted by the AVM to execute the statements in the procedure. This intermediate form is called r-code, for run-time code. It is not a binary executable but rather a largely platform-independent set of instructions (independent except for the user interface specifics, that is).
4. The AVM reads and executes the r-code.
This ability to compile and run what is in the editor on the fly makes it easy for you to build and test procedures in an iterative way, making a change as you have done and then simply running the procedure to see the effects. Naturally, you want to save the r-code permanently when you have finished a procedure so that the AVM can skip the compilation step when you run the procedure and simply execute the r-code directly. Generally it is just the compiled r-code that you deploy as your finished application.
To save the source procedure itself, use the standard File→ Save As menu option in the Procedure Editor, which saves the contents of the editor out to disk and gives it a filename with a .p extension.
To compile a procedure that you have saved, you need to use the COMPILE statement in ABL. There’s a COMPILE statement rather than just having a single key to press because the COMPILE statement in fact has a lot of options to it, including where the compiled code is saved, whether a cross-reference file is generated to help you debug your application, and so forth. For now, it is sufficient to know just the simple form of the statement you use to save your compiled procedure.
2–26
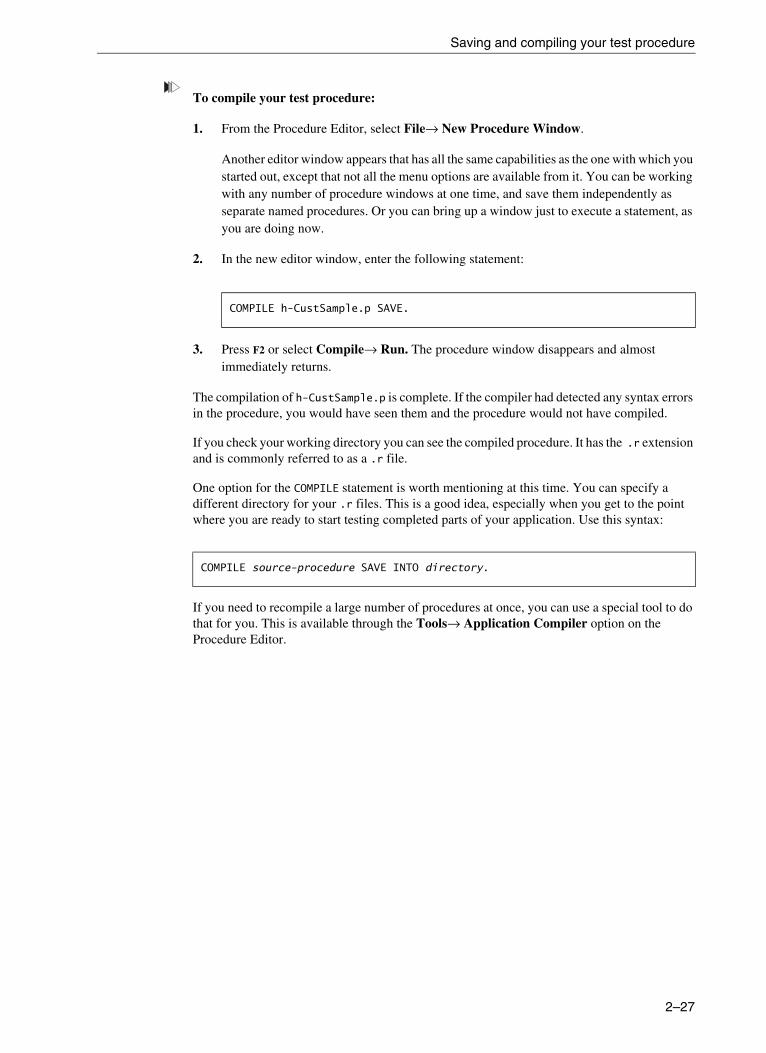
Saving and compiling your test procedure
To compile your test procedure:
1. From the Procedure Editor, select File→ New Procedure Window.
Another editor window appears that has all the same capabilities as the one with which you started out, except that not all the menu options are available from it. You can be working with any number of procedure windows at one time, and save them independently as separate named procedures. Or you can bring up a window just to execute a statement, as you are doing now.
2. In the new editor window, enter the following statement:
3. Press F2 or select Compile→ Run. The procedure window disappears and almost immediately returns.
The compilation of h-CustSample.p is complete. If the compiler had detected any syntax errors in the procedure, you would have seen them and the procedure would not have compiled.
If you check your working directory you can see the compiled procedure. It has the .r extension and is commonly referred to as a .r file.
One option for the COMPILE statement is worth mentioning at this time. You can specify a different directory for your .r files. This is a good idea, especially when you get to the point where you are ready to start testing completed parts of your application. Use this syntax:
If you need to recompile a large number of procedures at once, you can use a special tool to do that for you. This is available through the Tools→ Application Compiler option on the Procedure Editor.
COMPILE h-CustSample.p SAVE.
COMPILE source-procedure SAVE INTO directory.
2–27

Using Basic ABL Constructs
2–28

3Running ABL Procedures
This chapter describes how you can work with and run different types of ABL procedures, as detailed in the following sections:
• Running a subprocedure
• Using the Propath
• Using external and internal procedures
• Adding comments to your procedure

Running ABL Procedures
Running a subprocedure
To run a procedure from within another ABL procedure, you use the RUN statement. Like the COMPILE statement, the RUN statement has a lot of options, some of which you’ll learn about in later chapters. For now, you can use the following simple form of the statement:
If you are running a procedure file like your h-CustSample.p, then the convention is to include the .p extension in the procedure name. For example, if you bring up a new Procedure Window again, you can enter this statement to run the sample procedure you’ve been working on, then press F2:
This is a little different than just pressing the F2 key in the procedure window where you’re editing h-CustSample.p. When you press F2 or select Compile→ Run you are compiling and running the current contents of the Procedure Editor window, which might be different from what you have saved to a named file. You can compile and run a procedure without giving it a name at all. Indeed, that’s what you just did: you created a procedure containing a single RUN statement, and then simply compiled and executed it by pressing F2. This temporary procedure in turn ran the named procedure you had already saved and compiled.
Now, why did you put the .p extension on the RUN statement when you have already saved a compiled .r version of the file out to your directory? When you write an ABL RUN statement with a .p extension on the procedure name, the ABL Virtual Machine (AVM) always looks first for a compiled file of the same name, but with the .r extension. If it finds it, it executes it. If it doesn’t, it passes the source file to the ABL compiler, which compiles it on the fly and then executes it. In this way, your application can be a mix of compiled and uncompiled procedures while you’re developing it. If you always use the .p extension in your RUN statements, then your procedures are always found and executed whether they’ve been compiled or not. By contrast, if you specify the .r extension in a RUN statement, then the AVM looks for only the compiled .r file, and the RUN fails if it isn’t found.
RUN procedure-name [ (parameters) ].
3–2

Using the Propath
Using the Propath
Before you continue on to look at the parameters that you can pass to a RUN statement, you should understand a little about how the AVM searches for procedures. When you type RUN h-CustSample.p, how does the AVM know where to look for it?
The AVM uses its own directory path list, called the Propath, which is stored as part of its initialization (progress.ini) file. When you install OpenEdge, you get a default progress.ini file in the bin subdirectory under your install directory. You can also create a local copy of this file if you want to change its contents.
If you want to look at and maintain your Propath, there’s a tool to do that for you. It’s one of a number of useful tools you can access from the Procedure Editor.
To access these tools from the Procedure Editor, select Tools→ PRO*Tools. The PRO*Tools palette appears:
You can reposition and reshape the PRO*Tools palette.
To retain the palette’s new shape and position permanently:
1. Right-mouse click on the PRO*Tools palette outside the area where icons are displayed. The Menu Bar pop-up menu item appears:
2. Select the Menu Bar pop-up item. A File menu appears at the top of the palette:
3–3

Running ABL Procedures
3. Select File→ Customize. The PRO*Tools Customization dialog box appears:
Using this tool you can add more useful tools of your own to the palette. For now, however, all you need to note is that the Save Current Palette Position and Orientation toggle box lets you save these settings permanently, so that the PRO*Tools palette always comes up the way you want each time you start OpenEdge.
4. Leave the Save Current Palette Position and Orientation toggle box checked on, then click OK.
To view and edit your Propath, click the Propath icon from the PRO*Tools palette.
The Propath Editor shows you a list of all the directories in which the AVM looks, both to find all its own executable files and other supporting files, and to find your application procedures. Here is the default Propath you get when you install the product:
As you can see, the AVM first looks in your current working directory (by default, C:/Program Files/OpenEdge). This is where it expects to find any procedures you have written and are trying to compile or run. After that it looks in the gui directory under your OpenEdge install directory. This is where it expects to find the compiled r-code for all the ABL procedures that support your development and run-time environments. Remember that most of the OpenEdge development tools, including the Procedure Editor, are themselves written in ABL.
3–4

Using the Propath
In the gui directory are a number of procedure libraries, each with a .pl filename extension. These are collections of many .r files, gathered together into individual operating system files. The adecomm.pl file, for example, is a library of many dozens of procedures that are common to the development tools, called the Application Development Environment (ADE). It’s more efficient to store them in a single library because it takes up less space on your disk and it’s faster to search.
Following these procedure library files is the install directory itself. This holds a few startup files as well as the original versions of the sports2000 database and other sample databases shipped with the OpenEdge products.
Next is the bin directory. This is where all the executable files are located, including all the supporting procedures for compiling and running your application, which are not written in ABL. Finally, there are a couple of directories that support building a custom OpenEdge executable.
Do not modify any of the directories below the current directory. If you try to, the AVM resets the Propath, because it recognizes that the tools will stop running if it can’t find all the pieces it needs. But you can add directories above, below, or in place of your current working directory. For example, if you save your r-code into a different directory using the SAVE INTO option on the COMPILE statement, then you must add this directory to your Propath.
When you COMPILE or RUN a procedure, you can specify a partial pathname for it relative to some directory that is in your Propath. For example, if you save something called NextProc.p into a subdirectory called morecode, you can run it using this statement:
Note: You should always use forward slashes in your ABL code, even though the DOS and Windows standard is backslashes. The AVM does the necessary conversions to make the statement work on a PC, but if some of your ABL code is written for another platform, such as UNIX, then it requires the forward slashes.
You can modify your Propath by using the Add, Modify, and Remove buttons in the Propath Editor.
If the AVM is having difficulty locating a procedure that you’ve written, or if you have different versions of a procedure in different directories you can check to see how the AVM searches for a particular procedure.
To verify which file the AVM finds:
1. In the Propath Editor, click the Search button. The Propath File Search dialog box appears:
RUN morecode/NextProc.p.
3–5

Running ABL Procedures
2. Enter the name of the procedure, including the relative pathname if that’s part of your RUN statement. Also include the same filename extension you are using in your code.
3. Click the Search button. the AVM displays all the versions of that file it can find, in the order in which it uses them. Thus the one at the top of the list is always the one the AVM tries to execute. In this example, the display confirms that when you run h-CustSample.p, it chooses the .r file (if there is one) in preference to the source procedure:
If you save your r-code to a different directory (or set of directories) than you use for the source procedures, remember to construct your Propath in such a way that the r-code is found first if it is there, but that the source procedures are also found, at least when you are in development mode, without requiring a special relative pathname in your code to locate them.
In the OpenEdge install directories, for example, all the compiled ABL procedures are under the gui directory. The corresponding source procedures are in an equivalent directory tree, but under an src directory. If you were to add the src directory to your Propath, then the AVM could locate source procedures to compile and execute on the fly as needed. If you were to place the src directory above the gui directory in your Propath, then the AVM would use all the source procedures and compile them on the fly because it finds them first. This would slow down your program execution dramatically. This is just an example of how, as you develop complex applications, you must be careful to arrange your Propath so that the AVM can find the procedures it needs efficiently, without doing a lot of unnecessary searching or running uncompiled procedures.
3–6
Using external and internal procedures
Using external and internal procedures
A separate source procedure, such as h-CustSample.p, is known as an external procedure. This is to distinguish it from another kind of the procedure that you’ll write as the next step in your sample. you can define one or more named entry points within an external procedure file, and these are called internal procedures. You run internal procedures in almost exactly the same way that you run external procedures, except that there is no .p filename extension on the internal procedure.
For your sample, you will run a procedure called calcDays that calculates the number of days between the ShipDate for each Order and today’s date. In order for calcDays to do the calculation, you need to pass the ShipDate to the procedure, and get the count of days back out. ABL supports parameters for its procedures to let you do this. Follow these guidelines:
• In a RUN statement, you specify the parameters to the RUN statement in parentheses, following the procedure name. Use commas to separate multiple parameters.
• An INPUT parameter can be a constant value, an expression, or a variable or field name. An INPUT parameter is made available by value to the procedure you are running. This means that the procedure can use the value, but it cannot modify the value in a way that is visible to the calling procedure.
• An OUTPUT parameter must be a variable or field name. Its value is not passed to the called procedure, but is returned to the calling procedure when the called procedure completes.
• You can also define a parameter as INPUT-OUTPUT. This means that its value is passed in to the procedure, which can modify the value and pass it back when the procedure ends. An INPUT-OUTPUT parameter must also be a field or variable.
For each parameter in the RUN statement, you specify the type of parameter and the parameter itself. The default is INPUT, so you can leave off the type for INPUT parameters. You cannot have optional parameters in an ABL procedure. You must pass in a parameter name or value for each parameter the called procedure defines. They must be in the same order, and they must be of the same data type.
To run the calcDays procedure from your sample procedure:
1. Add the following RUN statement to your h-CustSample.p procedure, inside the FOR EACH Order OF Customer block, just before the END statement. Pass in the ShipDate field from the current Order and get back the calculated number of days, iDays:
2. Following this, still inside the FOR EACH Order block, write another statement to display the value you got back along with the rest of the Order information:
RUN calcDays (INPUT Order.ShipDate, OUTPUT iDays).
DISPLAY iDays LABEL "Days" FORMAT "ZZZ9".
3–7
Running ABL Procedures
Writing internal procedures
Now it’s time to write the calcDays procedure. Put it at the end of h-CustSample.p, following all the code you’ve written so far.
Each internal procedure starts with a header statement, which is just the keyword PROCEDURE followed by the internal procedure name and a colon.
Following this you need to define any parameters the procedure uses. The syntax for this is very similar to the syntax for the DEFINE VARIABLE statement. In place of the keyword VARIABLE, use the keyword PARAMETER, and precede this with the parameter type—INPUT, OUTPUT, or INPUT-OUTPUT. Note that the keyword INPUT is not optional in parameter definitions. Here’s the declaration for the calcDays procedure and its parameters. The parameter names start with the letter p to help identify them, followed by a prefix that identifies the data type as DATE or INTEGER:
Now you can write ABL statements exactly as you can for an external procedure. If you want to have variables in the subprocedure that aren’t needed elsewhere, then define them following the parameter definitions. Otherwise you can refer freely to variables that are defined in the external procedure itself. You’ll take a much closer look at variable scope and other such topics later. Be cautious when you use variables that are defined outside a procedure unless you have a good reason for using them, because they compromise the modularity and reusability of your code. For example, if you pull your procedures apart later and put the calcDays procedure somewhere else, it might break if it has a dependency on something declared outside of it. For this reason, you pass the calculated number of days back as an OUTPUT parameter, even though you could refer to the variable directly.
Assigning a value to a variable
The calcDays procedure just has a single executable statement, but it’s one that demonstrates a couple of key new language concepts—assignment and Unknown value (?).
You’re probably familiar with language statements that assign values by using what looks like an equation, where the value or expression on the right side is assigned to the field or variable on the left. ABL does this too, and uses the same equal sign for the assignment that is used for testing equality in comparisons. However, you can use the keyword EQ only in comparisons, not in assignments.
In this example, you want to subtract the ShipDate (which was passed in as the parameter pdaShip) from today’s date (which, as you have seen, is returned by the built-in function TODAY) and assign the result to the OUTPUT parameter piDays.
PROCEDURE calcDays:DEFINE INPUT PARAMETER pdaShip AS DATE NO-UNDO.DEFINE OUTPUT PARAMETER piDays AS INTEGER NO-UNDO.
3–8

Using external and internal procedures
To make this change in your sample procedure, add the following statement:
This is simple enough, but it won’t work all the time. Remember that some of the Orders have not been shipped, so their ShipDate has the Unknown value (?). If you subtract an Unknown value from TODAY (or use an Unknown value in any other expression), the result of the entire expression is always the Unknown value (?). In this case you want the procedure to return 0. To do this you can use a special compact form of the IF-THEN-ELSE construct as a single ABL expression, appearing on the right side of an assignment. The general syntax for this is:
This syntax is more concise than using a series of statements of the form:
For your purposes you can refine the assignment statement in this way to allow for Unknown values:
Finally, you end each internal procedure with an END PROCEDURE statement. The keyword PROCEDURE is optional, but is always a good idea as it improves the readability of your code:
To see the calculated days displayed, run the procedure once more:
piDays = TODAY - pdaShip.
Syntax
result-value = IF logical-expression THEN value-if-true ELSE value-if-false.
Syntax
IF logical-expression THEN result-value = value-if-true.ELSE result-value = value-if-false.
piDays = IF pdaShip = ? THEN 0 ELSE TODAY - pdaShip.
END PROCEDURE.
3–9
Running ABL Procedures
In summary, you define an internal procedure just as would an external procedure, with the exception that each internal procedure must start with a PROCEDURE header statement and end with its own END PROCEDURE statement. An external procedure uses neither of these.
You RUN an internal procedure just as you would an external procedure, except that there is no filename extension on the procedure name. Here are a couple of important related points.
First, it is possible for you to run an external procedure by naming it in a RUN statement without any filename extension, for example, RUN CustSample. In this case, the AVM searches for these forms of the procedure in this order:
1. An internal procedure named CustSample.
2. An external compiled file named CustSample.r.
3. An external source procedure named h-CustSample.p.
To do this, however, would be considered very bad form. When a person reading ABL code sees a RUN statement with no filename extension, it is natural for that person to expect that it is an internal procedure. There is rarely a good reason for violating this expectation.
Second, and even more exceptional, is that because a period is a valid character in a procedure name, it would be possible to have an internal procedure named, for example, calcDays.p, and to run it under that name. You should never do this. Always avoid confusing yourself or others who read your code.
When to use internal and external procedures
The decision as to when to use a separate external procedure file versus when to make an entry point for an internal procedure in a larger file is largely a matter of style and application organization. It’s a good idea to group together in a single procedure file related small procedures that call one another or that are typically called by multiple other procedures. On the other hand, large procedures that perform complex operations on their own should probably be independent external procedure files. Keep in mind that when you need to run an internal procedure, the AVM first needs to load the entire procedure file that contains it, and this can consume excessive memory if you make your procedure files extremely large.
3–10
Adding comments to your procedure
Adding comments to your procedure
The final step in this exercise is to add some comments to your procedure to make sure you and everyone else can follow what the code does. In ABL you begin a comment with the characters /* and end it with */. A comment can appear anywhere in your procedure where white space can appear (that is, anywhere except in the middle of a name or other token). You can put full-line or multi-line comments at the top of each section of code, and shorter comments to the right of individual lines. Just make sure you use them, and make them meaningful to you and to others. Here’s the final procedure with a few added comments:
h-CustSample.p
/* h-CustSample.p— shows a few things about ABL */
DEFINE VARIABLE cMonthList AS CHARACTER NO-UNDOINITIAL "JAN,FEB,MAR,APR,MAY,JUN,JUL,AUG,SEP,OCT,NOV,DEC".
DEFINE VARIABLE iDays AS INTEGER NO-UNDO.
/* First display each Customer from New Hampshire: */FOR EACH Customer NO-LOCK WHERE Customer.State = "NH" BY Customer.City:DISPLAY Customer.CustNum Customer.Name Customer.City./* Show the Orders unless the Credit Limit is less than twice the balance. */IF Customer.CreditLimit < (2 * Customer.Balance) THEN
DISPLAY "Credit Ratio:" Customer.CreditLimit / Customer.Balance.ELSE FOR EACH Order OF Customer NO-LOCK:
DISPLAYOrder.OrderNum LABEL "Order"Order.OrderDateOrder.ShipDate FORMAT "99/99/99" WITH CENTERED.
/* Show the month as a three-letter abbreviation, along with the number ofdays since the order was shipped. */
IF Order.ShipDate NE ? THENDISPLAY ENTRY(MONTH(Order.ShipDate), cMonthList) LABEL "Month".
RUN calcDays (INPUT Order.ShipDate, OUTPUT iDays).DISPLAY iDays LABEL "Days" FORMAT "ZZZ9".
END.END.
PROCEDURE calcDays:/* This calculates the number of days since the Order was shipped. */ DEFINE INPUT PARAMETER pdaShip AS DATE NO-UNDO.DEFINE OUTPUT PARAMETER piDays AS INTEGER NO-UNDO.
piDays = IF pdaShip = ? THEN 0 ELSE TODAY - pdaShip.END PROCEDURE.
3–11

Running ABL Procedures
3–12
4Procedure Blocks and Data Access
In the first three chapters of this book, you learn about the basic structure of ABL and many of its language constructs. This chapter returns you to writing ABL procedures on your own. These procedures contain some business logic that demonstrates in detail a few of the concepts touched on in the previous chapters.
The important concepts of this chapter are ones you’ve already seen in action and learned something about. Indeed, as discussed with the very simplest ABL procedure—FOR EACH
Customer: DISPLAY Customer.—you can hardly write any ABL code at all without defining blocks and using data access statements.
Nonetheless, this chapter goes into a lot more detail in these areas so that you have a more thorough understanding of these basic building blocks of ABL procedures. This chapter describes:
• All the basic syntax for defining blocks of various kinds in the language, including some that iterate through a set of statements and some that just group them as a common action
• The scoping of blocks and of the variables and objects you define in them and how scoping affects the way your procedures behave
• A variety of ways to access database data and integrate it into your procedures
This chapter includes the following sections:
• Blocks and block properties
• Procedure block scoping
• Language statements that define blocks
Procedure Blocks and Data Access
Blocks and block properties
You saw several different kinds of blocks in the example procedures from the first two chapters. To review them:
• Every procedure itself constitutes a block, even just the simplest RUN statement executed from an editor window.
• Every call to another procedure, whether internal or external, starts another block. An external procedure can contain one or more internal procedures, each of which forms its own block.
• ABL statements such as FOR EACH and DO define the start of a new block.
• A trigger is a block of its own.
4–2
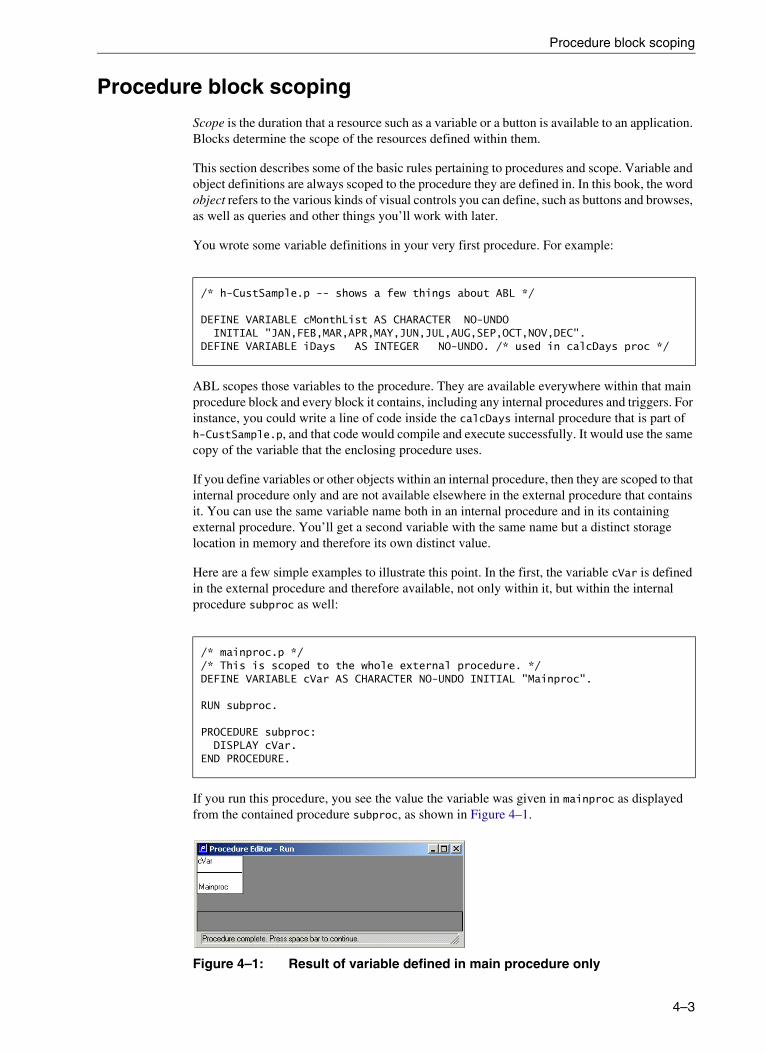
Procedure block scoping
Procedure block scoping
Scope is the duration that a resource such as a variable or a button is available to an application. Blocks determine the scope of the resources defined within them.
This section describes some of the basic rules pertaining to procedures and scope. Variable and object definitions are always scoped to the procedure they are defined in. In this book, the word object refers to the various kinds of visual controls you can define, such as buttons and browses, as well as queries and other things you’ll work with later.
You wrote some variable definitions in your very first procedure. For example:
ABL scopes those variables to the procedure. They are available everywhere within that main procedure block and every block it contains, including any internal procedures and triggers. For instance, you could write a line of code inside the calcDays internal procedure that is part of h-CustSample.p, and that code would compile and execute successfully. It would use the same copy of the variable that the enclosing procedure uses.
If you define variables or other objects within an internal procedure, then they are scoped to that internal procedure only and are not available elsewhere in the external procedure that contains it. You can use the same variable name both in an internal procedure and in its containing external procedure. You’ll get a second variable with the same name but a distinct storage location in memory and therefore its own distinct value.
Here are a few simple examples to illustrate this point. In the first, the variable cVar is defined in the external procedure and therefore available, not only within it, but within the internal procedure subproc as well:
If you run this procedure, you see the value the variable was given in mainproc as displayed from the contained procedure subproc, as shown in Figure 4–1.
Figure 4–1: Result of variable defined in main procedure only
/* h-CustSample.p -- shows a few things about ABL */
DEFINE VARIABLE cMonthList AS CHARACTER NO-UNDOINITIAL "JAN,FEB,MAR,APR,MAY,JUN,JUL,AUG,SEP,OCT,NOV,DEC".
DEFINE VARIABLE iDays AS INTEGER NO-UNDO. /* used in calcDays proc */
/* mainproc.p *//* This is scoped to the whole external procedure. */DEFINE VARIABLE cVar AS CHARACTER NO-UNDO INITIAL "Mainproc".
RUN subproc.
PROCEDURE subproc:DISPLAY cVar.
END PROCEDURE.
4–3

Procedure Blocks and Data Access
By contrast, if you define cVar in the subprocedure as well, it can have its own value:
Run this code and you get the same result you did before, as shown in Figure 4–2.
Figure 4–2: Result of variable defined in both main and subprocedures
You assign a different value to the variable in the subprocedure, but because the subprocedure has its own copy of the variable, that value exists only within the subprocedure. Back in the main procedure, the value Mainproc is not overwritten even after the subprocedure call.
As a third example, if you define a new variable in the internal procedure, it won’t be available in the main procedure at all:
/* mainproc.p */
/* This is scoped to the whole external procedure. */DEFINE VARIABLE cVar AS CHARACTER NO-UNDO INITIAL "Mainproc".
RUN subproc.DISPLAY cVar.
PROCEDURE subproc:DEFINE VARIABLE cVar AS CHARACTER NO-UNDO.cVar = "Subproc".
END PROCEDURE.
/* mainproc.p *//* This is scoped to the whole external procedure. */DEFINE VARIABLE cVar AS CHARACTER NO-UNDO INITIAL "Mainproc".
RUN subproc.DISPLAY cVar cSubVar.
PROCEDURE subproc:DEFINE VARIABLE cVar AS CHARACTER NO-UNDO.DEFINE VARIABLE cSubVar AS CHARACTER NO-UNDO.
ASSIGNcVar = "Subproc"cSubVar = "LocalVal".
END PROCEDURE.
4–4

Procedure block scoping
Here cSubVar is defined only in the internal procedure, so when you try to display it from the main procedure block you get an error, as shown in Figure 4–3.
Figure 4–3: Result of variable defined in the subprocedure only
The main procedure block where the DISPLAY statement is located never heard of cSubVar, because it’s defined with the subproc internal procedure. Even though it’s defined within the same source procedure file, it’s as separate from the main procedure block as it would be if it were in a completely separate external procedure file.
4–5
Procedure Blocks and Data Access
Language statements that define blocks
You’ve seen the FOR EACH block and a simple DO block. This section reviews all the statements that define blocks so that you can then study the differences between them and how each type of block is used.
DO blocks
A DO block is the most basic programming block in ABL. The keyword DO starts a block of statements without doing anything else with those statements except grouping them. You’ve already used the keyword DO as a block header in a couple of ways, including your trigger blocks, such as this trigger on the Next button in h-CustOrderWin1.w:
This block only assures that all the statements are executed together when the event occurs. If you take a closer look at this trigger, you can use another DO block inside it to correct a small error in the program logic.
To see the error in the program logic:
1. Run h-CustOrderWin1.w.
2. Click the Last button to see the last Customer and its Orders.
3. Click the Next button.
DO:GET NEXT CustQuery.
IF AVAILABLE Customer THEN DISPLAY Customer.CustNum Customer.Name Customer.Address Customer.City
Customer.State WITH FRAME CustQuery IN WINDOW CustWin. {&OPEN-BROWSERS-IN-QUERY-CustQuery}END.
4–6

Language statements that define blocks
There is no next Customer, so the Customer record is not changed. The IF AVAILABLE Customer phrase in the Next button trigger assures that nothing happens if there is no Customer to display. However, the preprocessor {&OPEN-BROWSERS-IN-QUERY-CustQuery}, which opens the Order query, isn’t affected by the IF AVAILABLE Customer check, because it’s a separate statement. So the code opens the Order query even if there’s no current Customer, and therefore displays nothing, as shown in Figure 4–4.
Figure 4–4: Example of empty query result
If there’s no Customer you shouldn’t open the Order query, so you need to bring both statements into the code that is executed only when a Customer is available.
To correct the statement that opens the query:
1. Create another DO-END block in the trigger:
Now the statement that opens the query won’t execute either if there’s no Customer. This is another illustration of how to use the DO block as a way to group multiple statements together, so that they all execute together or not at all. As this example illustrates, you can nest DO blocks as much as you wish.
Make sure you indent all the statements in the block properly so that someone reading your code can easily see how the logic is organized. It’s also a good idea to get into the habit of always putting a comment with each END statement to clarify which block it’s ending. When your code gets complex enough that a single set of nested blocks takes up more than a page, you’ll be grateful you did this. It can prevent all sorts of logic errors.
DO:GET NEXT CustQuery.IF AVAILABLE Customer THEN DO:DISPLAY Customer.CustNum Customer.Name Customer.Address Customer.City
Customer.State WITH FRAME CustQuery IN WINDOW CustWin.{&OPEN-BROWSERS-IN-QUERY-CustQuery}
END. /* END DO IF AVAILABLE Customer */END.
4–7
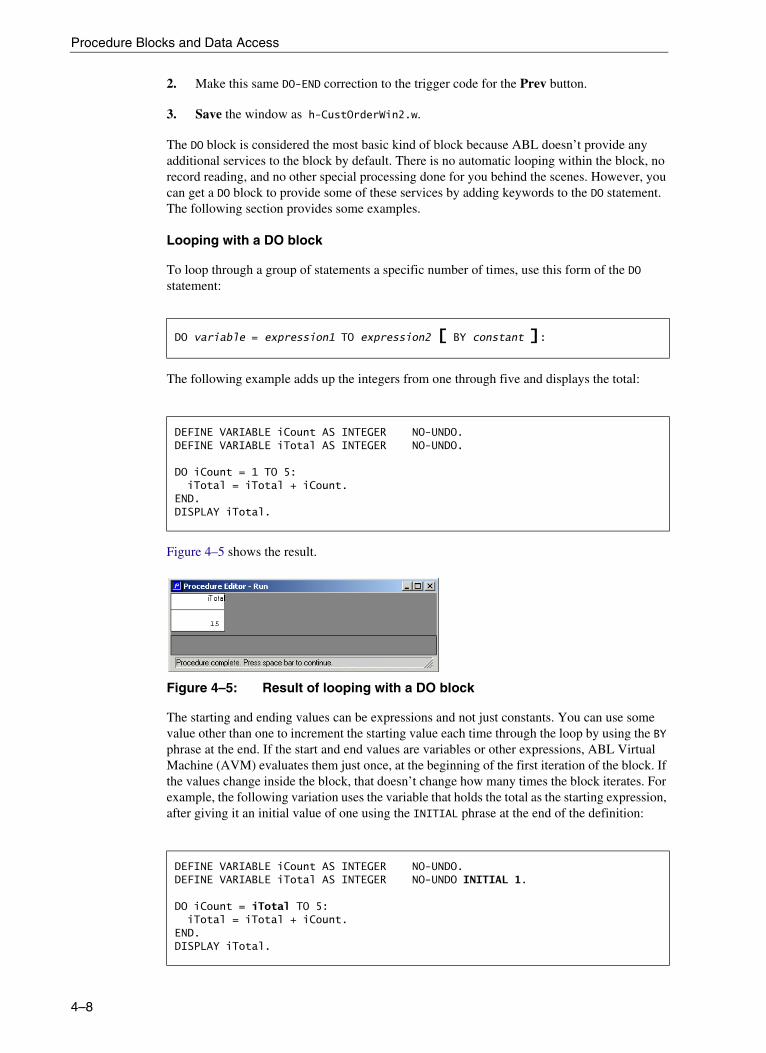
Procedure Blocks and Data Access
2. Make this same DO-END correction to the trigger code for the Prev button.
3. Save the window as h-CustOrderWin2.w.
The DO block is considered the most basic kind of block because ABL doesn’t provide any additional services to the block by default. There is no automatic looping within the block, no record reading, and no other special processing done for you behind the scenes. However, you can get a DO block to provide some of these services by adding keywords to the DO statement. The following section provides some examples.
Looping with a DO block
To loop through a group of statements a specific number of times, use this form of the DO statement:
The following example adds up the integers from one through five and displays the total:
Figure 4–5 shows the result.
Figure 4–5: Result of looping with a DO block
The starting and ending values can be expressions and not just constants. You can use some value other than one to increment the starting value each time through the loop by using the BY phrase at the end. If the start and end values are variables or other expressions, ABL Virtual Machine (AVM) evaluates them just once, at the beginning of the first iteration of the block. If the values change inside the block, that doesn’t change how many times the block iterates. For example, the following variation uses the variable that holds the total as the starting expression, after giving it an initial value of one using the INITIAL phrase at the end of the definition:
DO variable = expression1 TO expression2 [ BY constant ]:
DEFINE VARIABLE iCount AS INTEGER NO-UNDO.DEFINE VARIABLE iTotal AS INTEGER NO-UNDO.
DO iCount = 1 TO 5:iTotal = iTotal + iCount.
END.DISPLAY iTotal.
DEFINE VARIABLE iCount AS INTEGER NO-UNDO.DEFINE VARIABLE iTotal AS INTEGER NO-UNDO INITIAL 1.
DO iCount = iTotal TO 5:iTotal = iTotal + iCount.
END.DISPLAY iTotal.
4–8
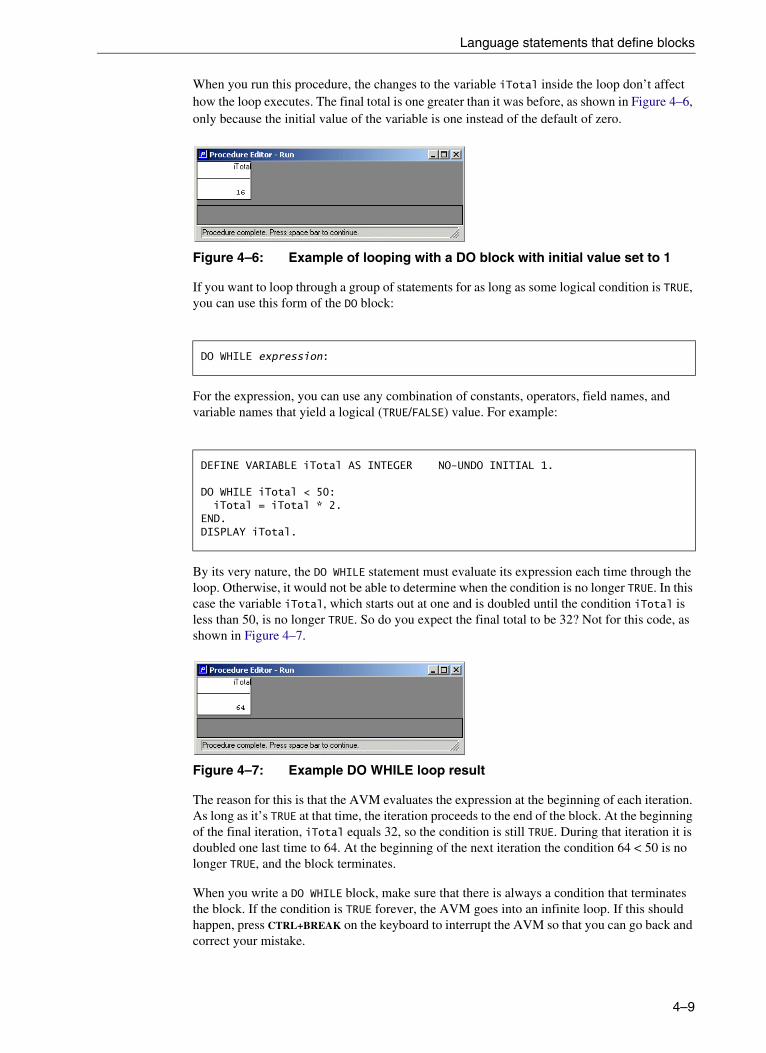
Language statements that define blocks
When you run this procedure, the changes to the variable iTotal inside the loop don’t affect how the loop executes. The final total is one greater than it was before, as shown in Figure 4–6, only because the initial value of the variable is one instead of the default of zero.
Figure 4–6: Example of looping with a DO block with initial value set to 1
If you want to loop through a group of statements for as long as some logical condition is TRUE, you can use this form of the DO block:
For the expression, you can use any combination of constants, operators, field names, and variable names that yield a logical (TRUE/FALSE) value. For example:
By its very nature, the DO WHILE statement must evaluate its expression each time through the loop. Otherwise, it would not be able to determine when the condition is no longer TRUE. In this case the variable iTotal, which starts out at one and is doubled until the condition iTotal is less than 50, is no longer TRUE. So do you expect the final total to be 32? Not for this code, as shown in Figure 4–7.
Figure 4–7: Example DO WHILE loop result
The reason for this is that the AVM evaluates the expression at the beginning of each iteration. As long as it’s TRUE at that time, the iteration proceeds to the end of the block. At the beginning of the final iteration, iTotal equals 32, so the condition is still TRUE. During that iteration it is doubled one last time to 64. At the beginning of the next iteration the condition 64 < 50 is no longer TRUE, and the block terminates.
When you write a DO WHILE block, make sure that there is always a condition that terminates the block. If the condition is TRUE forever, the AVM goes into an infinite loop. If this should happen, press CTRL+BREAK on the keyboard to interrupt the AVM so that you can go back and correct your mistake.
DO WHILE expression:
DEFINE VARIABLE iTotal AS INTEGER NO-UNDO INITIAL 1.
DO WHILE iTotal < 50:iTotal = iTotal * 2.
END.DISPLAY iTotal.
4–9
Procedure Blocks and Data Access
Using a DO block to scope records and frames
You’ll learn more about record scoping in Chapter 5, “Record Buffers and Record Scope” It’s helpful to cover all the syntax forms that can affect it before discussing the meaning of record scope in different situations. For now, you can scope or associate records in one or more tables with a DO block by using the FOR phrase:
Each record names a record you want to work with in the block and scopes it to the block. References within that block to fields the record contains are automatically associated with that record.
You have already seen an example of frame scoping in the code in the enable_UI procedure of h-CustOrderWin2.w and in the button triggers you created based on that code:
You can use the phrase WITH FRAME frame-name and, optionally, IN WINDOW window-name to identify which frame you’re talking about when you display fields or take other actions on objects in frames. If you wish, you can scope all the statements in a DO block with a frame by appending the WITH FRAME phrase to the DO statement itself.
For example, here’s the BtnNext trigger block again with the frame qualifier moved to the DO statement:
Whether you name the frame in individual statements or in the block header, this makes sure that the AVM understands that you want the fields displayed in the frame where you defined them. If you don’t do this, then depending on the context, the AVM might display the fields in a different frame.
DO FOR record [, record ] . . .
DISPLAY Customer.CustNum Customer.Name Customer.Address Customer.City Customer.State WITH FRAME CustQuery IN WINDOW CustWin.
DO:GET NEXT CustQuery.IF AVAILABLE Customer THEN DO WITH FRAME CustQuery:
DISPLAY Customer.CustNum Customer.Name Customer.Address Customer.City Customer.State.
{&OPEN-BROWSERS-IN-QUERY-CustQuery}END.
END.
4–10

Language statements that define blocks
To see the result of not explicitly defining a frame scope:
1. Edit the WITH FRAME phrase out of the BtnNext trigger altogether, so it looks like this:
2. Run the window and click the Next button:
What happened here? Since the DISPLAY statement wasn’t qualified with any indication of where to display the fields, the AVM created a brand new frame, laid out the fields in it, and displayed it on top of the other frame in your window. To keep this from happening, make sure that all statements that deal with frames are always clear about where actions should take place. The AppBuilder, Architect, and the other tools take care of this for you most of the time, but when you add code of your own to procedures, you might need to qualify it with the frame name. Otherwise, the AVM displays objects in the frame that is scoped to the nearest enclosing block that defines a frame. If there is no explicit frame definition, then you get the result you just saw here. the AVM displays the data in an unnamed default frame. Except in the simplest test procedures, like the procedures this book uses to demonstrate the looping syntax, you never want to use the default frame in your applications.
There are other phrases you can use to qualify a DO block, but they mostly deal with transactions and error handling, which is described in Chapter 10, “Managing Transactions”.
DO:GET NEXT CustQuery.IF AVAILABLE Customer THEN DO /* WITH FRAME CustQuery */:
DISPLAY Customer.CustNum Customer.Name Customer.AddressCustomer.City Customer.State.
{&OPEN-BROWSERS-IN-QUERY-CustQuery}END.
END.
4–11
Procedure Blocks and Data Access
FOR blocks
You’re already familiar with starting a block definition with the FOR keyword. You’ve seen the common FOR EACH table-name form, but there are a number of variations on the FOR statement. In contrast to the DO block, every FOR block provides all of the following services for you automatically:
• Loops automatically through all the records that satisfy the record set definition in the block
• Reads the next record from the result set for you as it iterates
• Scopes those records to the block
• Scopes a frame to the block, and you can use the WITH FRAME phrase to specify that frame
• Provides database update services within a transaction
The FOR statement defines the set of records you want the block to iterate through. Typically you use the EACH keyword to specify this set:
When the block begins, the AVM evaluates the expression and retrieves the first record that satisfies it. This record is scoped to the entire block. Each time the block iterates, the AVM retrieves the next matching record and makes it available to the rest of the block. When the set of matching records is exhausted, the AVM automatically terminates the block. You don’t have to add any checks or special syntax to exit the block at this point.
Sorting records by using the BY phrase
As you’ve seen, you can sort the records by using the BY phrase. The default is ascending order, but you cannot use the keyword ASCENDING to indicate this. You’ll get a syntax error, so just leave it out to get ascending order.
To sort in descending order, add the keyword DESCENDING to the BY phrase:
To sort on multiple fields, you can repeat the BY phrase.
Joining tables using multiple FOR phrases
You can use multiple record phrases to join records from more than one table:
FOR EACH Customer NO-LOCK WHERE Customer.State = "NH":DISPLAY Customer.CustNum Customer.Name.
END.
BY field [ DESCENDING ] ...
FOR EACH Customer NO-LOCK WHERE Customer.State = "NH", EACH Order OF Customer NO-LOCK WHERE Order.ShipDate NE ? :DISPLAY Customer.Custnum Customer.Name Order.OrderNum Order.ShipDate.
END.
4–12

Language statements that define blocks
Figure 4–8 shows the result.
Figure 4–8: Joining records from more than one table
There are several things to note about this example:
• The AVM retrieves and joins the tables in the order you specify them in, in effect following your instructions from left to right. In this example, it starts through the set of all Customers where the State field = “NH”. For the first record, it defines a set of Orders with the same CustNum value (represented by the OF syntax in this case). For each matching pair, it establishes that Customer record and its Order record and makes them available to all the rest of the statements in the block. Because there are typically multiple Orders for a Customer, the result is a one-to-many join, where the same Customer remains current for multiple iterations through the block, one for each of its Orders, as the output in Figure 4–8 shows.
• If you change the sequence of the tables in the statement, the AVM might retrieve a very different set of records. For example, using the syntax FOR EACH Order WHERE ShipDate NE ?, EACH Customer OF Order, you would get a list of every Order in the Order table with a ShipDate, plus its (one) matching Customer record. Because there’s just one Customer for each Order, this would result in a one-to-one join with no repeated records.
• The default join you get is called an inner join. In matching up Customers to their Orders, the AVM skips any Customer that has no Orders with a ShipDate because there is no matching pair of records. The alternative to this type of join, called an outer join, doesn’t skip those Customers with no Orders but instead supplies unknown values from a dummy Order when no Order satisfies the criteria. ABL has an OUTER-JOIN keyword, but you can use it only when you define queries of the kind you’ve seen in DEFINE QUERY statements, not in a FOR EACH block. To get the same effect using FOR EACH blocks, you can nest multiple blocks, one to retrieve and display the Customer and another to retrieve and display its Orders. You did this back in the sample procedure in Chapter 2, “Using Basic ABL Constructs.” Generally this is more effective than constructing a query that might involve a one-to-many relationship anyway, because it avoids having duplicated data from the first table in the join.
4–13

Procedure Blocks and Data Access
• You can add a WHERE clause and/or a BY clause to each record phrase if you wish. You should always move each WHERE clause up as close to the front of the statement as possible to minimize the number of records retrieved. For example, the statement FOR EACH Customer, EACH Order OF Customer WHERE State = "NH" AND ShipDate NE ? would yield the same result but retrieve many more records in the process. It would go through the set of all Customers, retrieve each Order for each Customer, and then determine whether the State was “NH” and the ShipDate was not unknown. This code is very inefficient. The way ABL handles data retrieval is different from SQL, where the table selection is done at the beginning of a SELECT statement and the WHERE clause is after the list of tables. The SQL form depends on the presence of an optimizer that turns the statement into the most efficient retrieval possible. The advantage of ABL form is that you have greater control over exactly how the data is retrieved. But with this control comes the responsibility to construct your FOR statements intelligently.
• Because two records, Customer and Order, are scoped to the FOR block, you might need to qualify field names that appear in both of them. If you just write DISPLAY CustNum you get a syntax error when you try to run the procedure, as shown in Figure 4–9.
Figure 4–9: Syntax error message
Alternatives to the EACH keyword
Sometimes you just want a single record from a table. In that case, you can use the FIRST or LAST keyword in place of EACH, or possibly use no qualifier at all. For example, if you want to retrieve Orders and their Customers instead of the other way around, you can leave out the keyword EACH in the Customer phrase, because each Order has only one Customer:
When you use this form, make sure that there is never more than one record satisfying the join. Otherwise, you get a run-time error telling you that there is no unique match.
If you’d like to see just the first Order for each Customer in New Hampshire, you can use the FIRST qualifier to accomplish that:
FOR EACH Order NO-LOCK WHERE Order.ShipDate NE ?, Customer OF Order NO-LOCK:DISPLAY Order.OrderNum Order.ShipDate Customer.Name.
END.
FOR EACH Customer NO-LOCK WHERE Customer.State = "NH", FIRST Order OF Customer NO-LOCK:DISPLAY Customer.CustNum Customer.Name Order.OrderNum Order.OrderDate.
END.
4–14

Language statements that define blocks
Be careful, though. This form might not always yield the result you expect, because you have to consider just what is the first Order of a Customer? The AVM uses an index of the Order table to traverse the rows.
Using indexes to relate and sort data
A database index allows the database manager to retrieve records quickly by looking up only the values of one or more key fields stored in separate database blocks from the records themselves, which then point to the location where the records are stored.
And what are the indexes of the Order table?
To display the Order table indexes:
1. From the Procedure Editor menu, select Tools→ Data Dictionary.
2. Select the Order table from the list of tables, then click the Indexes button:
3. Click the Index Properties button. The Index Properties dialog box appears and shows the properties of the first index, CustOrder:
4–15
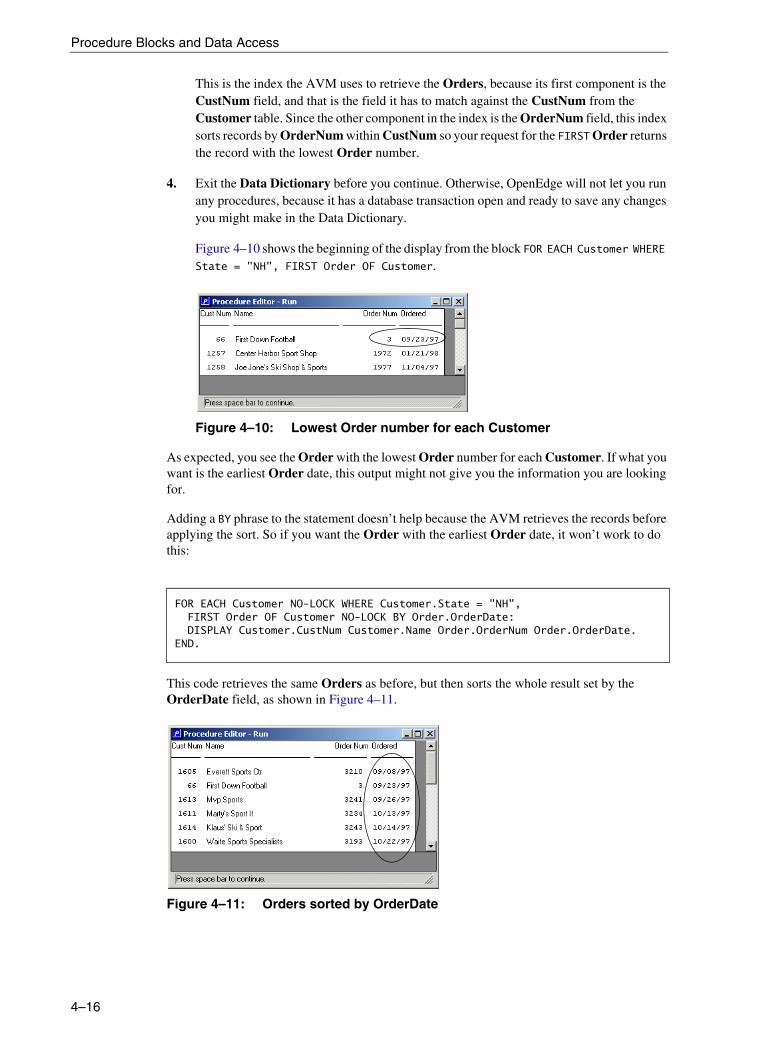
Procedure Blocks and Data Access
This is the index the AVM uses to retrieve the Orders, because its first component is the CustNum field, and that is the field it has to match against the CustNum from the Customer table. Since the other component in the index is the OrderNum field, this index sorts records by OrderNum within CustNum so your request for the FIRST Order returns the record with the lowest Order number.
4. Exit the Data Dictionary before you continue. Otherwise, OpenEdge will not let you run any procedures, because it has a database transaction open and ready to save any changes you might make in the Data Dictionary.
Figure 4–10 shows the beginning of the display from the block FOR EACH Customer WHERE State = "NH", FIRST Order OF Customer.
Figure 4–10: Lowest Order number for each Customer
As expected, you see the Order with the lowest Order number for each Customer. If what you want is the earliest Order date, this output might not give you the information you are looking for.
Adding a BY phrase to the statement doesn’t help because the AVM retrieves the records before applying the sort. So if you want the Order with the earliest Order date, it won’t work to do this:
This code retrieves the same Orders as before, but then sorts the whole result set by the OrderDate field, as shown in Figure 4–11.
Figure 4–11: Orders sorted by OrderDate
FOR EACH Customer NO-LOCK WHERE Customer.State = "NH",FIRST Order OF Customer NO-LOCK BY Order.OrderDate:DISPLAY Customer.CustNum Customer.Name Order.OrderNum Order.OrderDate.
END.
4–16

Language statements that define blocks
Using the USE-INDEX phrase to force a retrieval order
If you look at all the indexes for the Order table in the Data Dictionary, you can see that there is also an index called OrderDate that uses the Order field. You can select the index to use when the default choice is not the one you want. ABL does this by adding a USE-INDEX phrase to the record phrase. This form of the FOR EACH statement is guaranteed to return the earliest OrderDate, even if it’s not the lowest OrderNum:
The result in Figure 4–12 shows that there is indeed an earlier Order for the first of your Customers that doesn’t have the lowest OrderNum.
Figure 4–12: Earliest Customer Order
Using the LEAVE statement to leave a block
Use the USE-INDEX phrase only when necessary. The AVM is extremely effective at choosing the right index, or combination of multiple indexes, to optimize your data retrieval. In fact, there’s an alternative even in the present example that yields the same result without requiring you to know the names and fields in the Order table’s indexes. Take a look at this procedure:
This code uses nested blocks to retrieve the Customers and Orders separately. These nested blocks allow you to sort the Orders for a single Customer BY OrderDate. You have to define the set of all the Customer’s Orders using the FOR EACH phrase so that the BY phrase has the effect of sorting them by OrderDate. But you really only want to see the first one. To do this, you use another one-word ABL statement: LEAVE. The LEAVE statement does exactly what you would expect it to: It leaves the block (specifically the innermost iterating block to the LEAVE statement) after displaying fields from the first of the Customer’s Orders. It does not execute any more statements that might be in the block nor does it loop through any more records that are in its result set. Instead, it moves back to the outer block to retrieve the next Customer.
Because the LEAVE statement looks for an iterating block to leave, it always leaves a FOR block. It leaves a DO block only if the DO statement has a qualifier, such as WHILE, that causes it to iterate. If there is no iterating block, the AVM leaves the entire procedure.
FOR EACH Customer NO-LOCK WHERE Customer.State = "NH", FIRST Order OF Customer NO-LOCK USE-INDEX OrderDate:DISPLAY Customer.CustNum Customer.Name Order.OrderNum Order.OrderDate.
END.
FOR EACH Customer NO-LOCK WHERE Customer.State = "NH" WITH FRAME f:DISPLAY Customer.CustNum Customer.Name.FOR EACH Order OF Customer NO-LOCK BY Order.OrderDate:
DISPLAY Order.OrderNum Order.OrderDate WITH FRAME f.LEAVE.
END. /* FOR EACH Order */END. /* FOR EACH Customer */
4–17

Procedure Blocks and Data Access
Using block headers to identify blocks
If it isn’t clear what block the LEAVE statement applies to, or if you want it to apply to some other enclosing block, you can give a block a name followed by a colon and then specifically leave that block. This variant of the procedure has the same effect as the first one:
Just to see the effect of specifying a different block, you can try this variant:
If you run this code, the AVM leaves the outer FOR EACH Customer block after retrieving the first Order for the first Customer because of the change to the LEAVE statement, as shown in Figure 4–13.
Figure 4–13: Specifying a different block
Using NEXT, STOP, and QUIT to change block behavior
There’s another one-word statement that works much like LEAVE and that is NEXT. As you might expect, this statement skips any remaining statements in the block and proceeds to the next iteration of the block. You can qualify it with a block name the same way you do with LEAVE.
There are two more such statements that have increasingly more drastic consequences: STOP and QUIT.
STOP terminates the current procedure, backs out any active transactions, and returns to the OpenEdge session’s startup procedure or to the Editor. You can intercept a STOP action by including the ON STOP phrase on a block header, which defines an action to take other than the default when the STOP condition occurs.
FOR EACH Customer NO-LOCK WHERE Customer.State = "NH" WITH FRAME f:DISPLAY Customer.CustNum Customer.Name.
OrderBlock:FOR EACH Order OF Customer NO-LOCK BY Order.OrderDate:
DISPLAY Order.OrderNum Order.OrderDate WITH FRAME f.LEAVE OrderBlock.
END. /* FOR EACH Order */END. /* FOR EACH Customer */
CustBlock:FOR EACH Customer NO-LOCK WHERE Customer.State = "NH" WITH FRAME f:
DISPLAY Customer.CustNum Customer.Name.
OrderBlock:FOR EACH Order OF Customer NO-LOCK BY Order.OrderDate:
DISPLAY Order.OrderNum Order.OrderDate WITH FRAME f.LEAVE CustBlock.
END. /* FOR EACH Order */END. /* FOR EACH Customer */
4–18
Language statements that define blocks
QUIT exits from OpenEdge altogether in a run-time environment and returns to the operating system. If you’re running in a development environment, it has a similar effect to STOP and returns to the Editor or to the Desktop. There is also an ON QUIT phrase to intercept the QUIT condition in a block header and define an action to take other than quitting the session.
Qualifying a FOR statement with a frame reference
This most recent example also has an explicit frame reference in it:
Why is this necessary? A FOR EACH block scopes a frame to the block. By default, this is an unnamed frame. Without the specific frame reference, you get two nested frames, one for the Customer and one for its Orders. You saw this already in the sample procedure in Chapter 2, “Using Basic ABL Constructs.”
In this case, that isn’t what you want. Because there’s only one Order of interest for each Customer, you want to display all the fields together in the Customer frame. To get this effect, you have to override the default behavior and tell the AVM to use the frame from the Customer block to display the Order fields. That is what these two references to WITH FRAME f do for you. The AVM just keeps making room for new fields in the frame as it encounters them.
REPEAT blocks
There’s a third kind of iterating block that is in between DO and FOR in its effects, the REPEAT block. It supports just about all the same syntax as a FOR block. You can add a FOR clause for one or more tables to it. You can use a WHILE phrase or the expression TO expression phrase. You can scope a frame to it.
A block that begins with the REPEAT keyword shares these default characteristics with a FOR block:
• It is an iterating block
• It scopes a frame to the block
• It scopes records referenced in the REPEAT statement to the block
• It provides transaction processing if you update records within the block
By contrast, it shares this important property with a DO block: it does not automatically read records as it iterates.
So what is a REPEAT block for? It is useful in cases where you need to process a set of records within a block but you need to navigate through the records yourself, rather than simply proceeding to the next record automatically on each iteration. The sample procedure starting in the “Index cursors” section on page 4–23 shows you an example of where to use the REPEAT block.
FOR EACH Customer NO-LOCK WHERE Customer.State = "NH" WITH FRAME f:DISPLAY Customer.CustNum Customer.Name.FOR EACH Order OF Customer NO-LOCK BY OrderDate:
DISPLAY Order.OrderNum Order.OrderDate WITH FRAME f.LEAVE.
END. /* FOR EACH Order */END. /* FOR EACH Customer */
4–19

Procedure Blocks and Data Access
One of the common ways to use a REPEAT block in older character applications is to repeat a data entry action until the user hits the ESCAPE key to end. Here’s a very simple but powerful example:
You haven’t seen the INSERT statement before and you won’t see much of it again, even though it’s one of the most powerful statements in the language. Figure 4–14 shows what you get from that one simple statement.
Figure 4–14: Results of using the INSERT statement
It’s a complete data entry screen, complete with initial values for fields that have one. The field help displays at the bottom of the window. Inside a REPEAT loop, this lets you create one new Customer record after another until you’re done and you press ESCAPE.
Why won’t you see the INSERT statement again? Because INSERT is one of those statements that mixes up all aspects of ABL, from the user interface to saving the data off into the database. And in a modern GUI application, you need to separate out all those things into separate parts of your application.
Using the PRESELECT keyword to get data in advance
One typical use of the REPEAT block that is still valuable is when you use it with a construct called a PRESELECT. To understand this usage, you need to think a little about what happens when an iterating block like a FOR EACH block begins. The AVM evaluates the record retrieval the FOR EACH statement defines. It then goes out to the database and retrieves the first record of the set of related records that satisfies the statement and makes the record available to the block. When the block iterates, the AVM goes and gets the next record. As long as it’s possible to identify what the first and the next records are by using one or more indexes, The AVM doesn’t bother reading all the records in advance. It just goes out and gets them when the block needs them.
If you specify a BY clause that requires a search of the database that an index can’t satisfy, the AVM has no choice but to retrieve all the records in advance and build up a list in sort order. But this is not ordinarily the case. It’s much more efficient simply to get the records when you need them.
REPEAT:INSERT Customer EXCEPT Customer.Comments WITH 2 COLUMNS.
END.
4–20

Language statements that define blocks
Sometimes, though, you need to force the AVM to get all the records that satisfy the FOR EACH statement in advance, even when the sort order itself doesn’t require it. For example, if it’s possible that you will modify an indexed field in some of the records in such a way that they would appear again later in the retrieval process, you need to make sure that the set of records you’re working with is predetermined. The PRESELECT keyword tells the AVM to build up a list of pointers to all the records that satisfy the selection criteria before it starts iterating through the block. This assures you that each record is accessed only once.
In summary, a REPEAT block does everything a FOR block does, but it does not automatically advance to the next record as it iterates. You should use a REPEAT block in cases where you want to control the record navigation yourself, typically using the FIND statement described in the next section. It provides you with record, frame, and transaction scoping.
Because it provides all these services, a REPEAT block is relatively expensive compared to a DO block. Use the simpler DO block instead of a REPEAT block, unless you need the record-oriented services provided by the REPEAT block.
Data access without looping—the FIND statement
In addition to all of these ways to retrieve and iterate through a set of related records, ABL has a very powerful way to retrieve single records without needing a query or result set definition of any kind. This is the FIND statement.
The FIND statement uses this basic syntax:
Using the FIND statement to fetch a single record from the database is pretty straightforward. This statement reads the first Customer and makes it available to the procedure:
This statement fetches the first Customer in New Hampshire:
It gets more interesting when you FIND the NEXT record or the PREV record. This should immediately lead you to the question: NEXT or PREV relative to what? Even the FIND FIRST statement has to pick a sequence of Customers in which one of them is first. Although it might seem intuitively obvious that Customer 1 is the first Customer, given that the Customers have an integer key identifier, this is the record you get back only because the CustNum index is the primary index for the table (you could verify this by looking in the Data Dictionary). Without any other instructions to go on, and with no WHERE clause to make it use another index, the FIND statement uses the primary index. You can use the USE-INDEX syntax to force the AVM to use a particular index.
Syntax
FIND [ FIRST | NEXT| PREV | LAST ] record [ WHERE ...] [ USE-INDEX index-name ]
FIND FIRST Customer.
FIND FIRST Customer WHERE Customer.State = “NH”.
4–21

Procedure Blocks and Data Access
If you include a WHERE clause, the AVM chooses one or more indexes to optimize locating the record. This might have very counter-intuitive results. For example, here’s a simple procedure with a FIND statement:
Figure 4–15 shows the expected result.
Figure 4–15: Result of a simple FIND procedure
You can see that Customer 1 is in the USA. Here’s a variation of the procedure:
Figure 4–16 shows the not-so-expected result.
Figure 4–16: Result of variation on the simple FIND procedure
What happened here? If Customer 1 is the first Customer, and Customer 1 is in the USA, then why isn’t it the first Customer in the USA? The AVM uses an index in the Country field to locate the first Customer in the USA, because that’s the most efficient way to find it. That index, called the CountryPost index, has the PostalCode as its secondary field. If you rerun this procedure again and ask to see the PostalCode field instead of the Name field, you’ll see why it came up first using that index, as shown in Figure 4–17.
Figure 4–17: Result of the simple FIND procedure using PostalCode
The PostalCode is blank for this Customer, so it sorts first. Even if there is no other field in the index at all, that would only mean that the order of Customers within that index for a given country value would be undetermined. Only if the CustNum field is the next index component could you be sure that Customer 1 would come back as the first Customer in the USA.
FIND FIRST Customer.DISPLAY Customer.CustNum Customer.Name Customer.Country.
FIND FIRST Customer WHERE Customer.Country = "USA".DISPLAY Customer.CustNum Customer.Name Customer.Country.
4–22

Language statements that define blocks
These examples show that you must be careful when using any of the positional keywords (FIRST, NEXT, PREV, and LAST) in a FIND statement to make sure you know how the table is navigated.
Index cursors
To understand better how the AVM navigates through a set of data, you need to understand the concept of index cursors. When you retrieve a record from the database using any of the statements you’ve seen in this chapter, the AVM keeps track of the current record position using an index cursor—a pointer to the record, using the location in the database indexes of the key value used for retrieval.
When you execute the statement FIND FIRST Customer, for example, the AVM sets a pointer to the record for Customer 1 within the CustNum index. If you execute the statement FIND FIRST Customer WHERE Country = “USA”, the AVM points to Customer 1025 through the CountryPost index.
When you execute another FIND statement on the same table using one of the directional keywords, the AVM can go off in any direction from the current index cursor location, depending on the nature of the statement. By default, it reverts to the primary index. Here’s an example that extends the previous one slightly:
Using the FIND statement in a REPEAT block
Notice the use of the REPEAT block to cycle through the remaining Customers. Within that block, you must write a FIND statement to get the next Customer because the REPEAT block itself, unlike the FOR EACH block, does not do the navigation for you. Also, the REPEAT block does not automatically terminate when the end of the Customers is reached, so you need to program the block with these three actions:
1. You must do the FIND with the NO-ERROR qualifier at the end of the statement. This suppresses the error message that you would ordinarily get when there is no next Customer.
2. You must use the AVAILABLE keyword to check for the presence of a Customer and display fields only if it evaluates to TRUE.
3. You must write an ELSE statement to match the IF-THEN statement, to leave the block when there is no Customer available. Otherwise, your block goes into an infinite loop when it reaches the end of the Customer records. And notice that this truly is a separate statement. The IF-THEN statement ends with a period and the ELSE keyword begins a statement of its own.
All of these are actions that the FOR EACH block does for you as it reads through the set of Customers. In the REPEAT block, though, where you’re doing your own navigation, you need to do these things yourself.
FIND FIRST Customer NO-LOCK WHERE Customer.Country = "USA".DISPLAY Customer.CustNum Customer.Name Customer.Country.
REPEAT:FIND NEXT Customer NO-LOCK NO-ERROR.IF AVAILABLE Customer THEN
DISPLAY Customer.CustNum Customer.Name FORMAT "x(20)" Customer.CountryCustomer.PostalCode.
ELSE LEAVE.END.
4–23
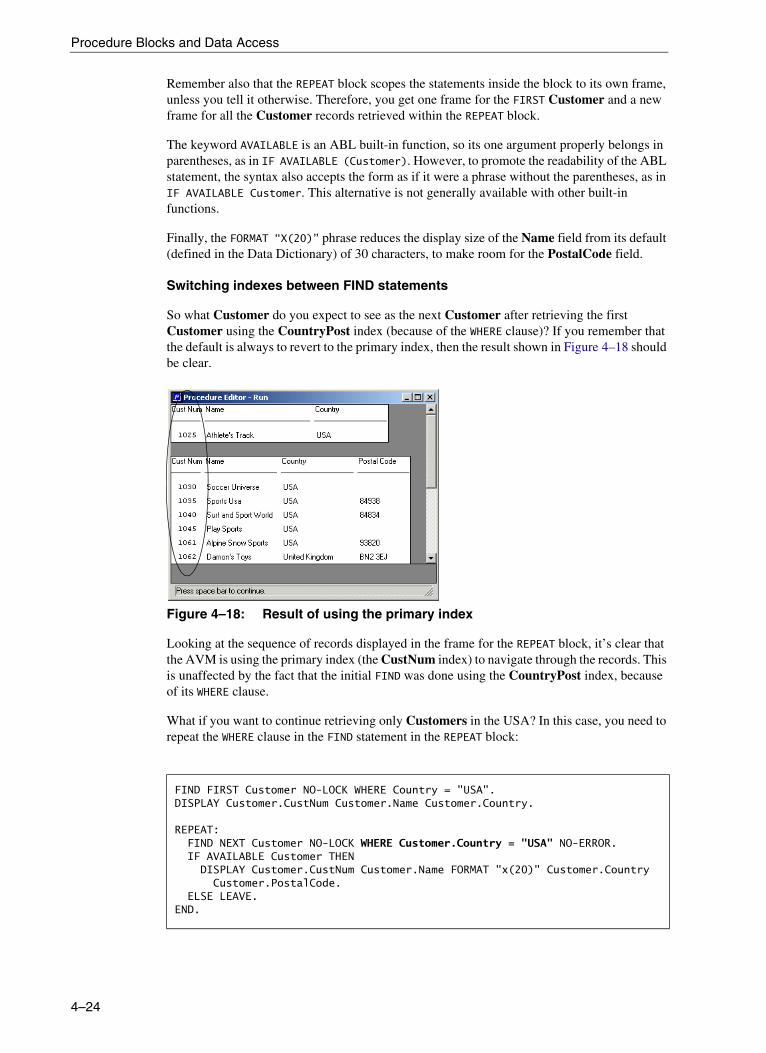
Procedure Blocks and Data Access
Remember also that the REPEAT block scopes the statements inside the block to its own frame, unless you tell it otherwise. Therefore, you get one frame for the FIRST Customer and a new frame for all the Customer records retrieved within the REPEAT block.
The keyword AVAILABLE is an ABL built-in function, so its one argument properly belongs in parentheses, as in IF AVAILABLE (Customer). However, to promote the readability of the ABL statement, the syntax also accepts the form as if it were a phrase without the parentheses, as in IF AVAILABLE Customer. This alternative is not generally available with other built-in functions.
Finally, the FORMAT “X(20)” phrase reduces the display size of the Name field from its default (defined in the Data Dictionary) of 30 characters, to make room for the PostalCode field.
Switching indexes between FIND statements
So what Customer do you expect to see as the next Customer after retrieving the first Customer using the CountryPost index (because of the WHERE clause)? If you remember that the default is always to revert to the primary index, then the result shown in Figure 4–18 should be clear.
Figure 4–18: Result of using the primary index
Looking at the sequence of records displayed in the frame for the REPEAT block, it’s clear that the AVM is using the primary index (the CustNum index) to navigate through the records. This is unaffected by the fact that the initial FIND was done using the CountryPost index, because of its WHERE clause.
What if you want to continue retrieving only Customers in the USA? In this case, you need to repeat the WHERE clause in the FIND statement in the REPEAT block:
FIND FIRST Customer NO-LOCK WHERE Country = "USA".DISPLAY Customer.CustNum Customer.Name Customer.Country.
REPEAT:FIND NEXT Customer NO-LOCK WHERE Customer.Country = "USA" NO-ERROR.IF AVAILABLE Customer THEN
DISPLAY Customer.CustNum Customer.Name FORMAT "x(20)" Customer.CountryCustomer.PostalCode.
ELSE LEAVE.END.
4–24
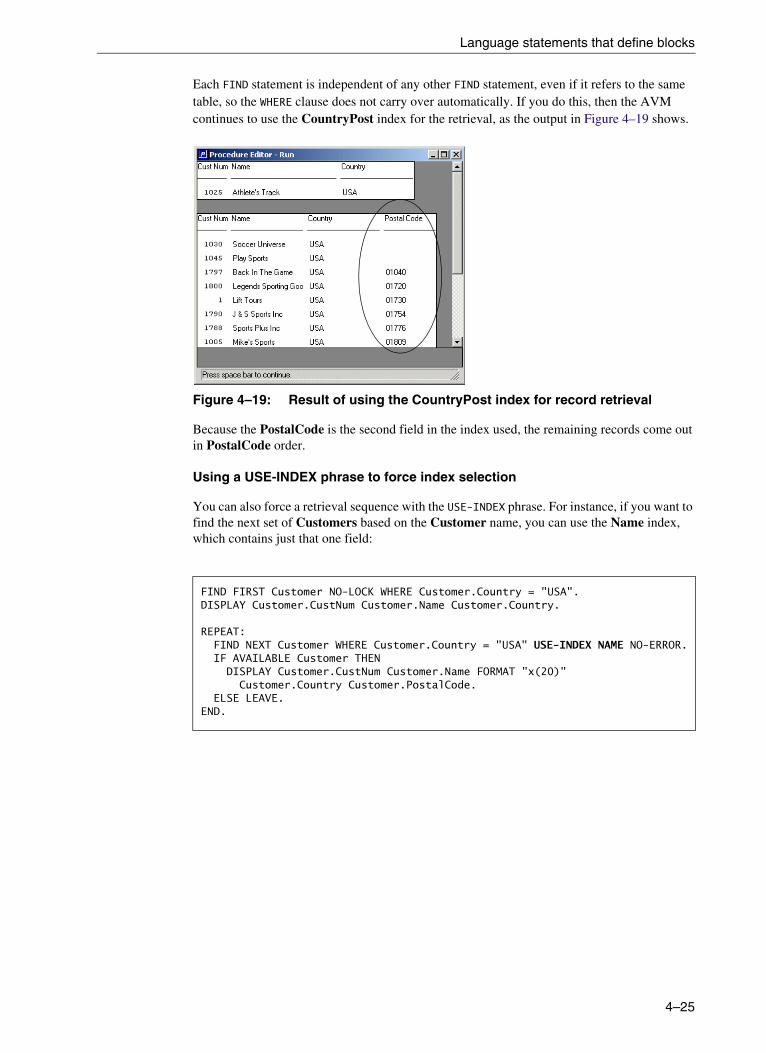
Language statements that define blocks
Each FIND statement is independent of any other FIND statement, even if it refers to the same table, so the WHERE clause does not carry over automatically. If you do this, then the AVM continues to use the CountryPost index for the retrieval, as the output in Figure 4–19 shows.
Figure 4–19: Result of using the CountryPost index for record retrieval
Because the PostalCode is the second field in the index used, the remaining records come out in PostalCode order.
Using a USE-INDEX phrase to force index selection
You can also force a retrieval sequence with the USE-INDEX phrase. For instance, if you want to find the next set of Customers based on the Customer name, you can use the Name index, which contains just that one field:
FIND FIRST Customer NO-LOCK WHERE Customer.Country = "USA".DISPLAY Customer.CustNum Customer.Name Customer.Country.
REPEAT:FIND NEXT Customer WHERE Customer.Country = "USA" USE-INDEX NAME NO-ERROR.IF AVAILABLE Customer THEN
DISPLAY Customer.CustNum Customer.Name FORMAT "x(20)"Customer.Country Customer.PostalCode.
ELSE LEAVE.END.
4–25

Procedure Blocks and Data Access
The output shown in Figure 4–20 confirms that the AVM is walking through the records in Name order, starting with the name of the first Customer in the USA.
Figure 4–20: Result of forcing index selection
This technique can be very valuable in expressing your business logic in your procedures. You might need to identify a record based on one characteristic and then retrieve all other records (or perhaps just one additional record) based on some other characteristic of the record you first retrieved. This is one of the most powerful ways in which ABL lets you define your business logic without the overhead and cumbersome syntax required to deal with all data access in terms of sets.
Doing a unique FIND to retrieve a single record
Very often you just need to retrieve a single record using selection criteria that identify it uniquely. In this case, you can use a FIND statement with no directional qualifier. For example, you can identify a Customer by its Customer number. This is a unique value, so you can use the following FIND statement:
Figure 4–21 shows the result.
Figure 4–21: Result of unique FIND
You need to be sure when you do this that only one record satisfies the selection criteria. Otherwise, you get an error at run time.
FIND Customer WHERE Customer.CustNum = 1025.DISPLAY Customer.CustNum Customer.Name Customer.Country.
4–26

Language statements that define blocks
This is a shorthand for this FIND statement:
You can use this shorthand form if the primary index is a unique index (with no duplication of values), the primary index contains just a single field, and you want to retrieve a record using just that field. You can use this form only when all these conditions are TRUE, so it’s not likely to be one you use frequently. Also, this shorthand form makes it harder to determine your criteria. It can break if the data definitions change (for example, if someone adds another field to the CustNum index), so it’s better to be more specific and use a WHERE clause to identify the record.
Using the CAN-FIND function
Often you need to verify the existence of a record without retrieving it for display or update. For example, your logic might need to identify each Customer that has at least one Order, but you might not care about retrieving any actual Orders. To do this, you can use an alternative to the FIND statement that is more efficient because it only checks index entries wherever possible to determine whether a record exists, without going to the extra work of retrieving the record itself. This alternative is the CAN-FIND built-in function. CAN-FIND takes a single parameter, which can be any record selection phrase. The CAN-FIND function returns TRUE or FALSE depending on whether the record selection phrase identifies exactly one record in the database.
For example, imagine that you want to identify all Customers that placed Orders as early as 1997. You don’t need to retrieve or display the Orders themselves, you just need to know which Customers satisfy this selection criterion. The following simple procedure accomplishes this:
FIND Customer 1025.
FOR EACH Customer NO-LOCK WHERE Customer.Country = "USA":IF CAN-FIND(FIRST Order OF Customer WHERE Order.OrderDate < 1/1/98) THEN DISPLAY Customer.CustNum Customer.Name.
ELSE DISPLAY Customer.CustNum "No 1997 Orders" @ Customer.Name.
END.
4–27
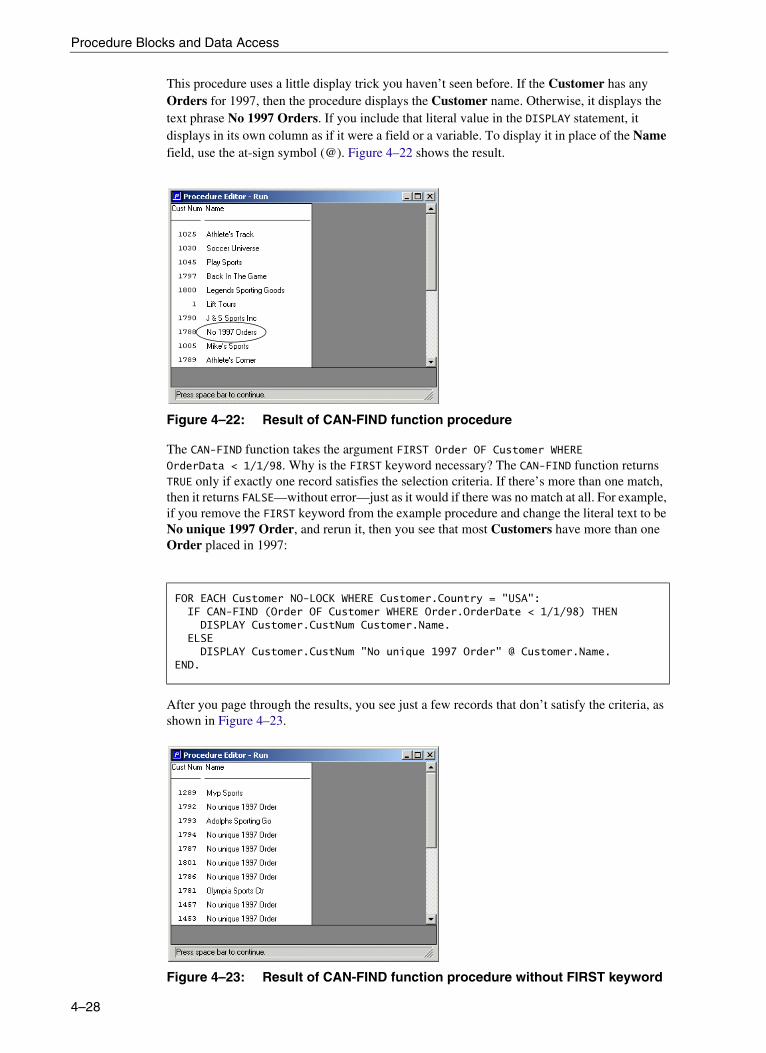
Procedure Blocks and Data Access
This procedure uses a little display trick you haven’t seen before. If the Customer has any Orders for 1997, then the procedure displays the Customer name. Otherwise, it displays the text phrase No 1997 Orders. If you include that literal value in the DISPLAY statement, it displays in its own column as if it were a field or a variable. To display it in place of the Name field, use the at-sign symbol (@). Figure 4–22 shows the result.
Figure 4–22: Result of CAN-FIND function procedure
The CAN-FIND function takes the argument FIRST Order OF Customer WHERE OrderData < 1/1/98. Why is the FIRST keyword necessary? The CAN-FIND function returns TRUE only if exactly one record satisfies the selection criteria. If there’s more than one match, then it returns FALSE—without error—just as it would if there was no match at all. For example, if you remove the FIRST keyword from the example procedure and change the literal text to be No unique 1997 Order, and rerun it, then you see that most Customers have more than one Order placed in 1997:
After you page through the results, you see just a few records that don’t satisfy the criteria, as shown in Figure 4–23.
Figure 4–23: Result of CAN-FIND function procedure without FIRST keyword
FOR EACH Customer NO-LOCK WHERE Customer.Country = "USA":IF CAN-FIND (Order OF Customer WHERE Order.OrderDate < 1/1/98) THEN
DISPLAY Customer.CustNum Customer.Name.ELSE
DISPLAY Customer.CustNum "No unique 1997 Order" @ Customer.Name.END.
4–28
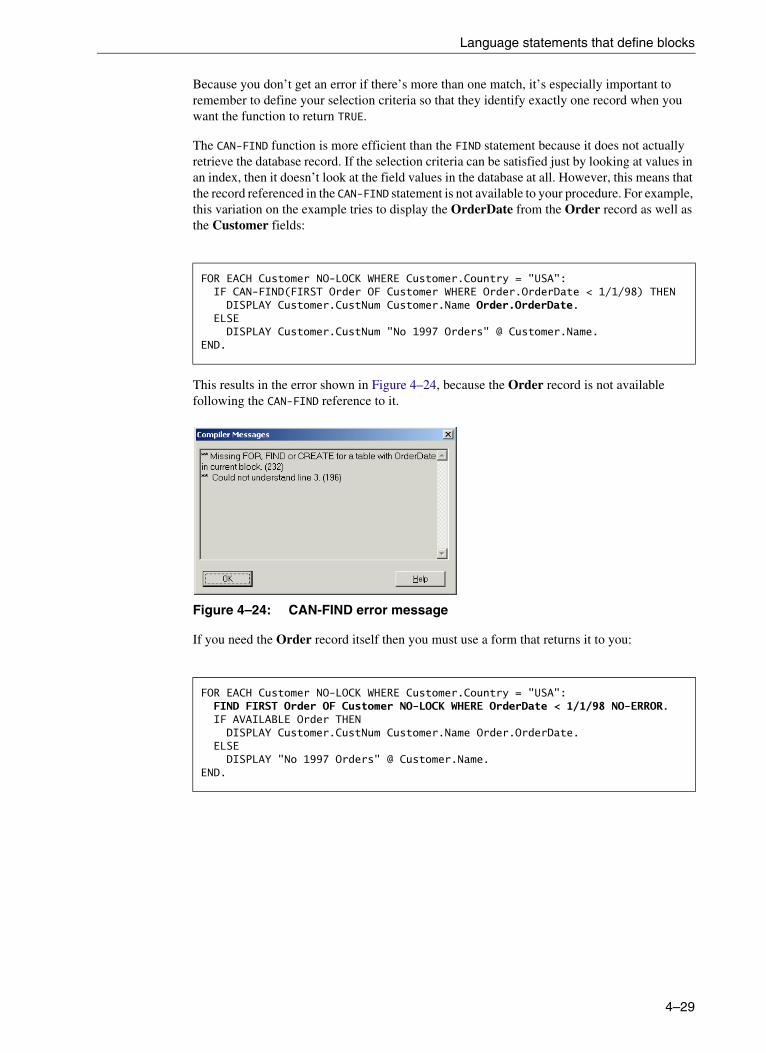
Language statements that define blocks
Because you don’t get an error if there’s more than one match, it’s especially important to remember to define your selection criteria so that they identify exactly one record when you want the function to return TRUE.
The CAN-FIND function is more efficient than the FIND statement because it does not actually retrieve the database record. If the selection criteria can be satisfied just by looking at values in an index, then it doesn’t look at the field values in the database at all. However, this means that the record referenced in the CAN-FIND statement is not available to your procedure. For example, this variation on the example tries to display the OrderDate from the Order record as well as the Customer fields:
This results in the error shown in Figure 4–24, because the Order record is not available following the CAN-FIND reference to it.
Figure 4–24: CAN-FIND error message
If you need the Order record itself then you must use a form that returns it to you:
FOR EACH Customer NO-LOCK WHERE Customer.Country = "USA":IF CAN-FIND(FIRST Order OF Customer WHERE Order.OrderDate < 1/1/98) THEN
DISPLAY Customer.CustNum Customer.Name Order.OrderDate.ELSE
DISPLAY Customer.CustNum "No 1997 Orders" @ Customer.Name.END.
FOR EACH Customer NO-LOCK WHERE Customer.Country = "USA":FIND FIRST Order OF Customer NO-LOCK WHERE OrderDate < 1/1/98 NO-ERROR.IF AVAILABLE Order THEN
DISPLAY Customer.CustNum Customer.Name Order.OrderDate.ELSE
DISPLAY "No 1997 Orders" @ Customer.Name.END.
4–29
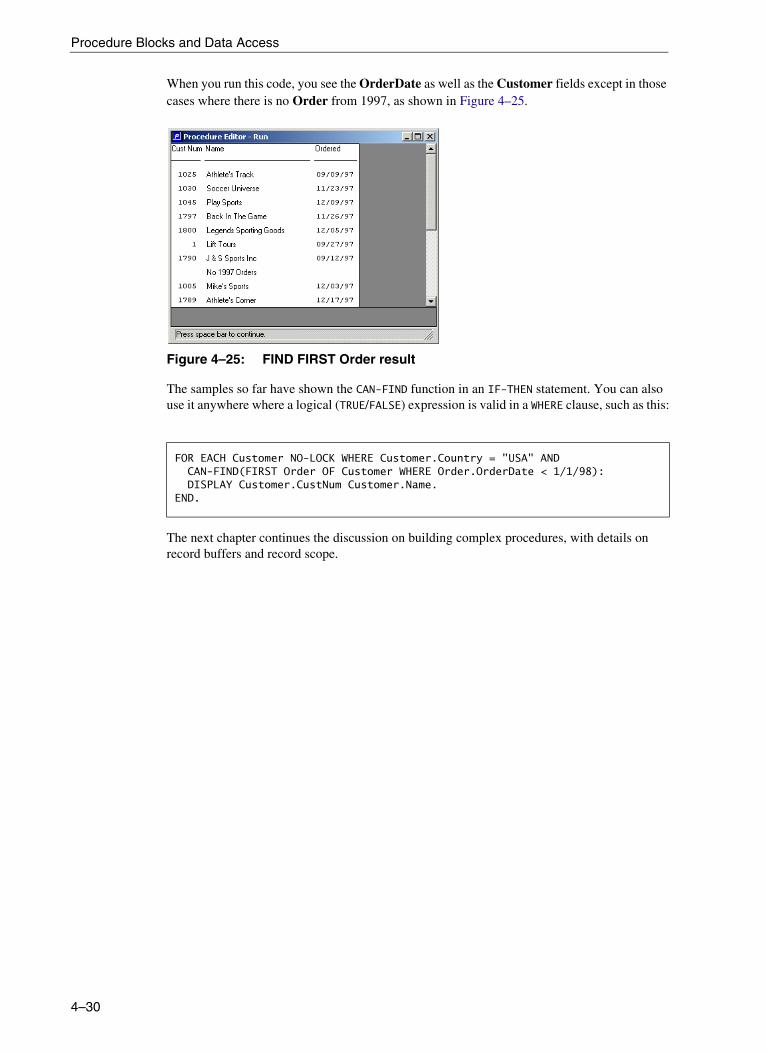
Procedure Blocks and Data Access
When you run this code, you see the OrderDate as well as the Customer fields except in those cases where there is no Order from 1997, as shown in Figure 4–25.
Figure 4–25: FIND FIRST Order result
The samples so far have shown the CAN-FIND function in an IF-THEN statement. You can also use it anywhere where a logical (TRUE/FALSE) expression is valid in a WHERE clause, such as this:
The next chapter continues the discussion on building complex procedures, with details on record buffers and record scope.
FOR EACH Customer NO-LOCK WHERE Customer.Country = "USA" AND CAN-FIND(FIRST Order OF Customer WHERE Order.OrderDate < 1/1/98):DISPLAY Customer.CustNum Customer.Name.
END.
4–30

5Record Buffers and Record Scope
This chapter continues the discussion for how to construct complex ABL procedures. It describes in detail what record buffers are and how they manage data for you.
This chapter includes the following sections:
• Record buffers
• Record scope

Record Buffers and Record Scope
Record buffers
This section discusses more precisely what record buffers do for you.
Whenever you reference a database table in a procedure and the ABL Virtual Machine (AVM) makes a record from that table available for your use, you are using a record buffer. The AVM defines a record buffer for your procedure for each table you reference in a FIND statement, a FOR EACH block, a REPEAT FOR block, or a DO FOR block. The record buffer, by default, has the same name as the database table. This is why, when you use these default record buffers, you can think in terms of accessing database records directly because the name of the buffer is the name of the table the record comes from. Think of the record buffer as a temporary storage area in memory where the AVM manages records as they pass between the database and the statements in your procedures.
You can also define your own record buffers explicitly, though, using this syntax:
There are many places in complex business logic where you need to have two or more different records from the same table available to your code at the same time, for comparison purposes. This is when you might use multiple different buffers with their own names. Here’s one fairly simple example. In the following procedure, which could be used as part of a cleanup effort for the Customer table, you need to see if there are any pairs of Customers in the same city in the US with zip codes that do not match.
Here is the code that gives you these records:
Syntax
DEFINE BUFFER <buffer-name> FOR <table-name>.
DEFINE BUFFER Customer FOR Customer.DEFINE BUFFER OtherCust FOR Customer.
FOR EACH Customer NO-LOCK WHERE Customer.Country = "USA":FIND FIRST OtherCust NO-LOCK
WHERE Customer.State = OtherCust.StateAND Customer.City = OtherCust.CityAND SUBSTRING(Customer.PostalCode, 1,3) NE
SUBSTRING(OtherCust.PostalCode, 1,3)AND Customer.CustNum < OtherCust.CustNum NO-ERROR.
IF AVAILABLE OtherCust THENDISPLAY Customer.CustNum Customer.City FORMAT "x(12)" Customer.State FORMAT "xx"Customer.PostalCode OtherCust.CustNumOtherCust.PostalCode.
END.
5–2

Record buffers
Take a look through this procedure. First, there is a pair of buffer definitions for the Customer table, one called Customer and one called OtherCust. The first definition, DEFINE BUFFER Customer FOR Customer, might seem superfluous because you get a buffer definition automatically when you reference the table name in your procedure. However, there are reasons why it can be a good idea to make all of your buffer definitions explicit like this. First, if you have two explicit buffer definitions up front, it makes it clearer that the purpose of this procedure is to compare pairs of Customer records. You might want to use alternative names for both buffers, such as FirstCust and OtherCust, to make it clear what your procedure is doing. This procedure uses an explicitly defined buffer with the same name as the table just to show that you can do this.
In addition, defining buffers that are explicitly scoped to the current procedure can reduce the chance that your code somehow inherits a buffer definition from another procedure in the calling stack. The defaults that ABL provides can be useful, but in serious business logic being explicit about all your definitions can save you from unexpected errors when the defaults don’t work as expected.
Next the code starts through the set of all Customers in the USA. For each of those Customers, it tries to find another Customer with the same City and State values:
Because you need to compare one Customer with the other, you can’t simply refer to both of them using the name Customer. This is the purpose of the second buffer definition. Because the code is dealing with two different buffers that contain all the same field names, you need to qualify every single field reference to identify which of the two records you’re referring to.
The next part of the WHERE clause compares the two zip codes, which are stored in the PostalCode field:
This procedure assumes that the last two digits of a zip code can be different within a given city, but that the first three digits are always the same. Because the PostalCode field is used for codes outside the US, which are sometimes alphanumeric, it is a character field, so the SUBSTR function extracts the first three characters of each of the two codes and compares them. If they are not equal, then the condition is satisfied.
The last bit of the WHERE clause needs some special explanation:
As the code walks through all the Customers, it finds a record using the Customer buffer and another record using the OtherCust buffer that satisfy the criteria. But later it also finds the same pair of Customers in the opposite order. So to avoid returning each pair of Customers twice, the code returns only the pair where the first CustNum is less than the second.
FOR EACH Customer NO-LOCK WHERE Customer.Country = "USA":FIND FIRST OtherCust NO-LOCK
WHERE Customer.State = OtherCust.StateAND Customer.City = OtherCust.City . . .
AND SUBSTRING(Customer.PostalCode, 1,3) NE SUBSTRING(OtherCust.PostalCode, 1,3) ...
...AND Customer.CustNum < OtherCust.CustNum NO-ERROR.
5–3
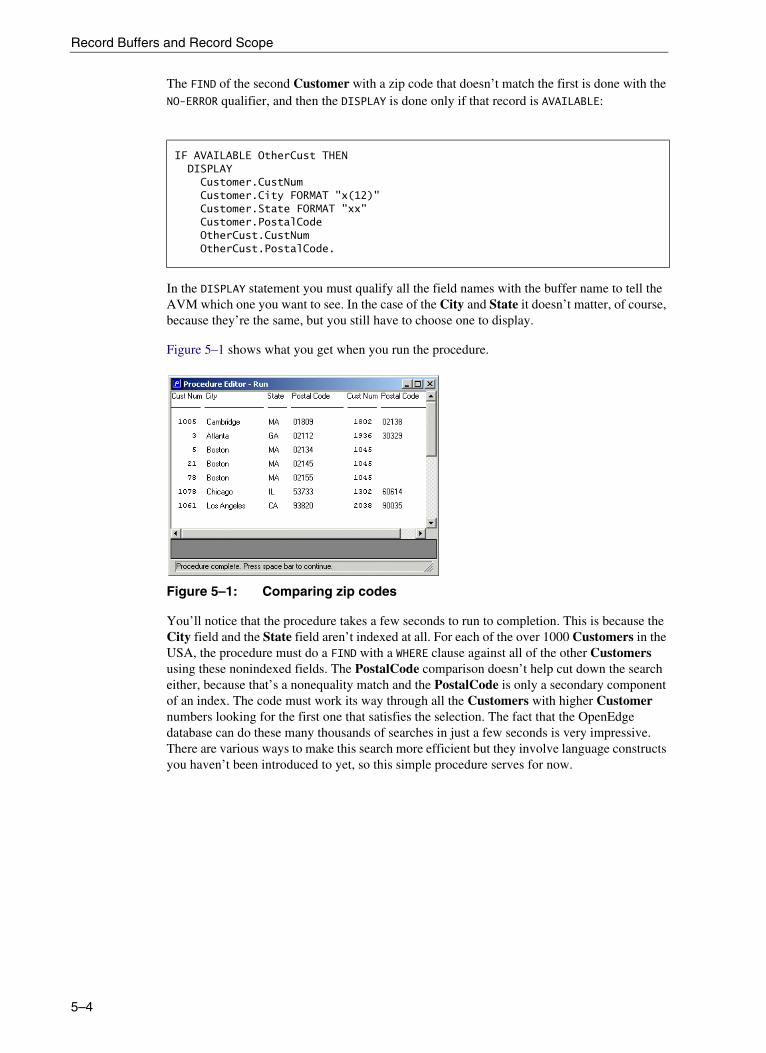
Record Buffers and Record Scope
The FIND of the second Customer with a zip code that doesn’t match the first is done with the NO-ERROR qualifier, and then the DISPLAY is done only if that record is AVAILABLE:
In the DISPLAY statement you must qualify all the field names with the buffer name to tell the AVM which one you want to see. In the case of the City and State it doesn’t matter, of course, because they’re the same, but you still have to choose one to display.
Figure 5–1 shows what you get when you run the procedure.
Figure 5–1: Comparing zip codes
You’ll notice that the procedure takes a few seconds to run to completion. This is because the City field and the State field aren’t indexed at all. For each of the over 1000 Customers in the USA, the procedure must do a FIND with a WHERE clause against all of the other Customers using these nonindexed fields. The PostalCode comparison doesn’t help cut down the search either, because that’s a nonequality match and the PostalCode is only a secondary component of an index. The code must work its way through all the Customers with higher Customer numbers looking for the first one that satisfies the selection. The fact that the OpenEdge database can do these many thousands of searches in just a few seconds is very impressive. There are various ways to make this search more efficient but they involve language constructs you haven’t been introduced to yet, so this simple procedure serves for now.
IF AVAILABLE OtherCust THENDISPLAY
Customer.CustNum Customer.City FORMAT "x(12)" Customer.State FORMAT "xx"Customer.PostalCode OtherCust.CustNumOtherCust.PostalCode.
5–4

Record scope
Record scope
All the elements in an ABL procedure have a scope. That is, ABL defines the portion of the application in which you can refer to the element. The buffers the AVM uses for database records are no exception. In this section, you’ll look at how record scope affects statements that read database records. The update-related actions include determining when in a procedure a record gets written back to the database and when it clears a record from a buffer and reads in another one. Remember that a reference to a database record is always a reference to a buffer where that record is held in memory for you, and all buffers are treated the same, whether you define them explicitly or they are provided for you by default.
There are some rules ABL uses to define just how record scope is determined. The rules might seem a bit complex at first, but they are just the result of applying some common-sense principles to the way a procedure is organized. To understand the rules, you first need to learn a few terms.
If you reference a buffer in the header of a REPEAT FOR or DO FOR block, this is called a strong-scoped reference. Any reference to the buffer within the block is a strong-scoped reference. What does this mean? The term strong-scoped means that you have made a very explicit reference to the scope of the buffer by naming it in the block header. You have told the AVM that the block applies to that buffer and is being used to manage that buffer. By providing you with a buffer scoped to that block, the AVM is really just following your instructions.
On the other hand, if you reference a buffer in the header of a FOR EACH or PRESELECT EACH block, this is called a weak-scoped reference. Any reference to the buffer within the block is a weak-scoped reference.
Why this difference? Keep in mind that a REPEAT block or a DO block does not automatically iterate through a set of records. You can execute many kinds of statements within these blocks, and if you want to retrieve a record in one of them, you have to use a FIND statement to do it. This is why naming the buffer in the block header is called strong scoping.
By contrast, a FOR EACH block or a PRESELECT EACH block must name the buffers it uses, because the block automatically iterates through the set of records the block header defines. For this reason, because you really don’t have any choice except to name the buffer in the block header, the AVM treats this as a weak reference. the AVM recognizes that the buffer is used in that block, but it doesn’t treat it as though it can only be used within that block. You’ll see how the difference affects your procedures in the next section.
The third type of buffer reference is called a free reference. Any other reference to a buffer other than the kinds already described is a free reference. Generally, this means references in FIND statements. These are called free references because they aren’t tied to a particular block of code. They just occur in a single statement in your procedure.
The following sections describe the rules that determine how the AVM treats record buffers that are used in different kinds of buffer references.
5–5
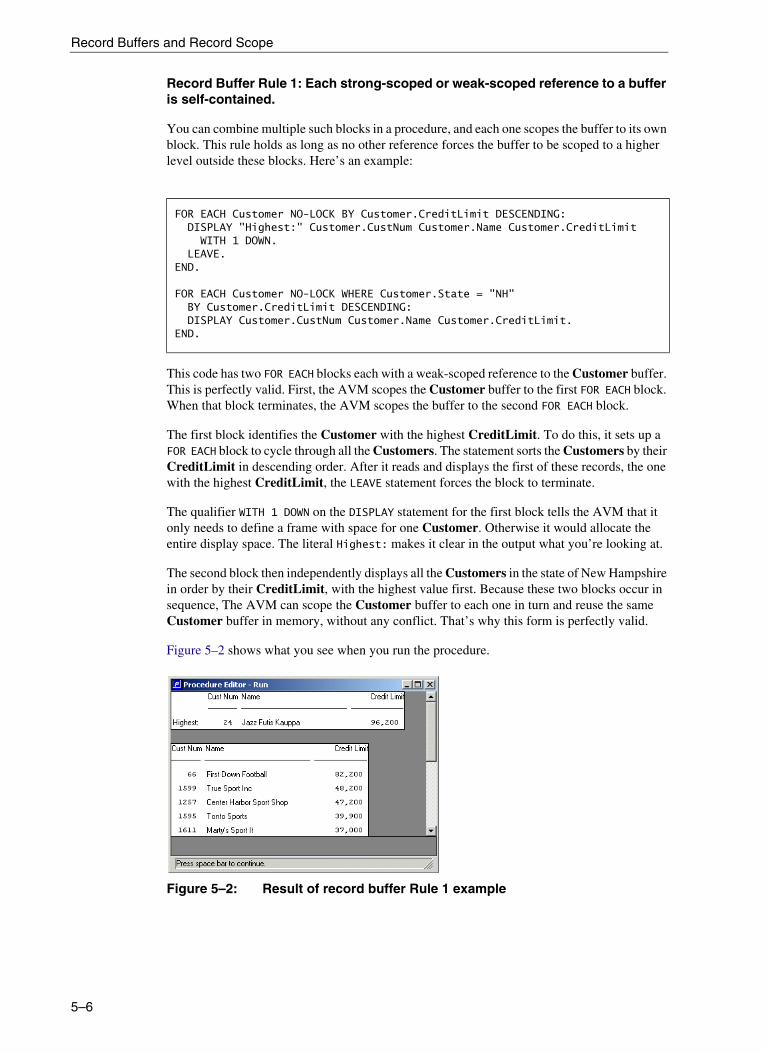
Record Buffers and Record Scope
Record Buffer Rule 1: Each strong-scoped or weak-scoped reference to a buffer is self-contained.
You can combine multiple such blocks in a procedure, and each one scopes the buffer to its own block. This rule holds as long as no other reference forces the buffer to be scoped to a higher level outside these blocks. Here’s an example:
This code has two FOR EACH blocks each with a weak-scoped reference to the Customer buffer. This is perfectly valid. First, the AVM scopes the Customer buffer to the first FOR EACH block. When that block terminates, the AVM scopes the buffer to the second FOR EACH block.
The first block identifies the Customer with the highest CreditLimit. To do this, it sets up a FOR EACH block to cycle through all the Customers. The statement sorts the Customers by their CreditLimit in descending order. After it reads and displays the first of these records, the one with the highest CreditLimit, the LEAVE statement forces the block to terminate.
The qualifier WITH 1 DOWN on the DISPLAY statement for the first block tells the AVM that it only needs to define a frame with space for one Customer. Otherwise it would allocate the entire display space. The literal Highest: makes it clear in the output what you’re looking at.
The second block then independently displays all the Customers in the state of New Hampshire in order by their CreditLimit, with the highest value first. Because these two blocks occur in sequence, The AVM can scope the Customer buffer to each one in turn and reuse the same Customer buffer in memory, without any conflict. That’s why this form is perfectly valid.
Figure 5–2 shows what you see when you run the procedure.
Figure 5–2: Result of record buffer Rule 1 example
FOR EACH Customer NO-LOCK BY Customer.CreditLimit DESCENDING:DISPLAY "Highest:" Customer.CustNum Customer.Name Customer.CreditLimit
WITH 1 DOWN.LEAVE.
END.
FOR EACH Customer NO-LOCK WHERE Customer.State = "NH" BY Customer.CreditLimit DESCENDING:DISPLAY Customer.CustNum Customer.Name Customer.CreditLimit.
END.
5–6
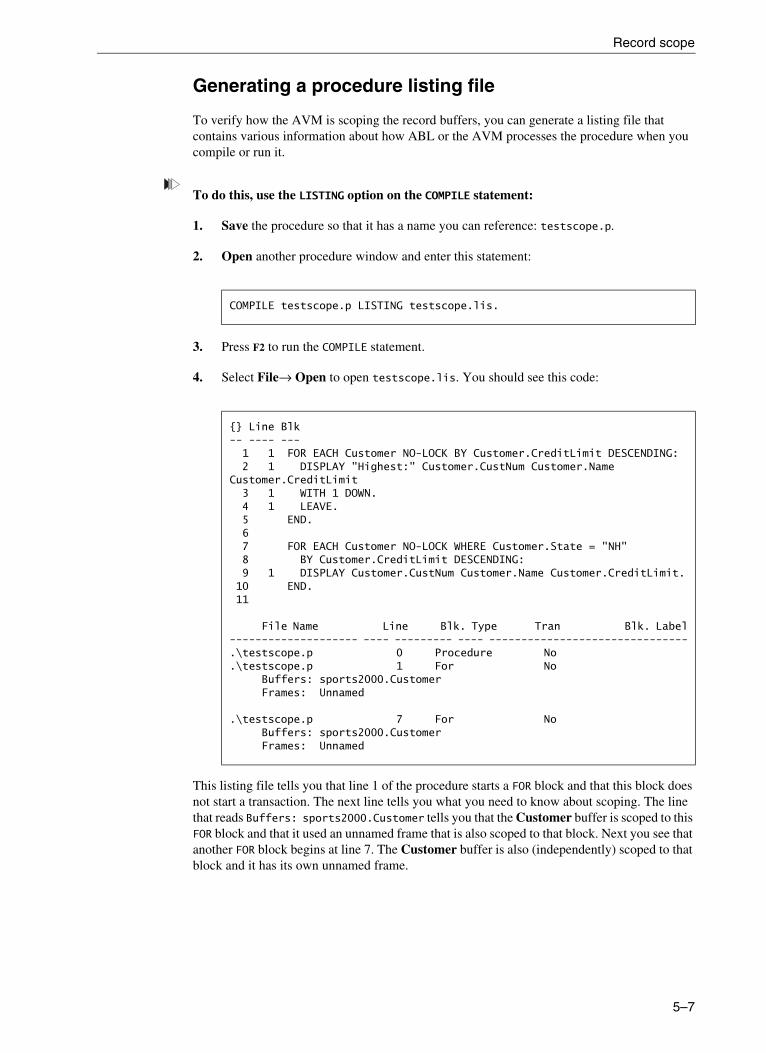
Record scope
Generating a procedure listing file
To verify how the AVM is scoping the record buffers, you can generate a listing file that contains various information about how ABL or the AVM processes the procedure when you compile or run it.
To do this, use the LISTING option on the COMPILE statement:
1. Save the procedure so that it has a name you can reference: testscope.p.
2. Open another procedure window and enter this statement:
3. Press F2 to run the COMPILE statement.
4. Select File→ Open to open testscope.lis. You should see this code:
This listing file tells you that line 1 of the procedure starts a FOR block and that this block does not start a transaction. The next line tells you what you need to know about scoping. The line that reads Buffers: sports2000.Customer tells you that the Customer buffer is scoped to this FOR block and that it used an unnamed frame that is also scoped to that block. Next you see that another FOR block begins at line 7. The Customer buffer is also (independently) scoped to that block and it has its own unnamed frame.
COMPILE testscope.p LISTING testscope.lis.
{} Line Blk-- ---- ---1 1 FOR EACH Customer NO-LOCK BY Customer.CreditLimit DESCENDING:2 1 DISPLAY "Highest:" Customer.CustNum Customer.Name
Customer.CreditLimit 3 1 WITH 1 DOWN.4 1 LEAVE.5 END.6 7 FOR EACH Customer NO-LOCK WHERE Customer.State = "NH" 8 BY Customer.CreditLimit DESCENDING:9 1 DISPLAY Customer.CustNum Customer.Name Customer.CreditLimit.10 END.11
File Name Line Blk. Type Tran Blk. Label-------------------- ---- --------- ---- -------------------------------.\testscope.p 0 Procedure No .\testscope.p 1 For No
Buffers: sports2000.CustomerFrames: Unnamed
.\testscope.p 7 For No Buffers: sports2000.CustomerFrames: Unnamed
5–7
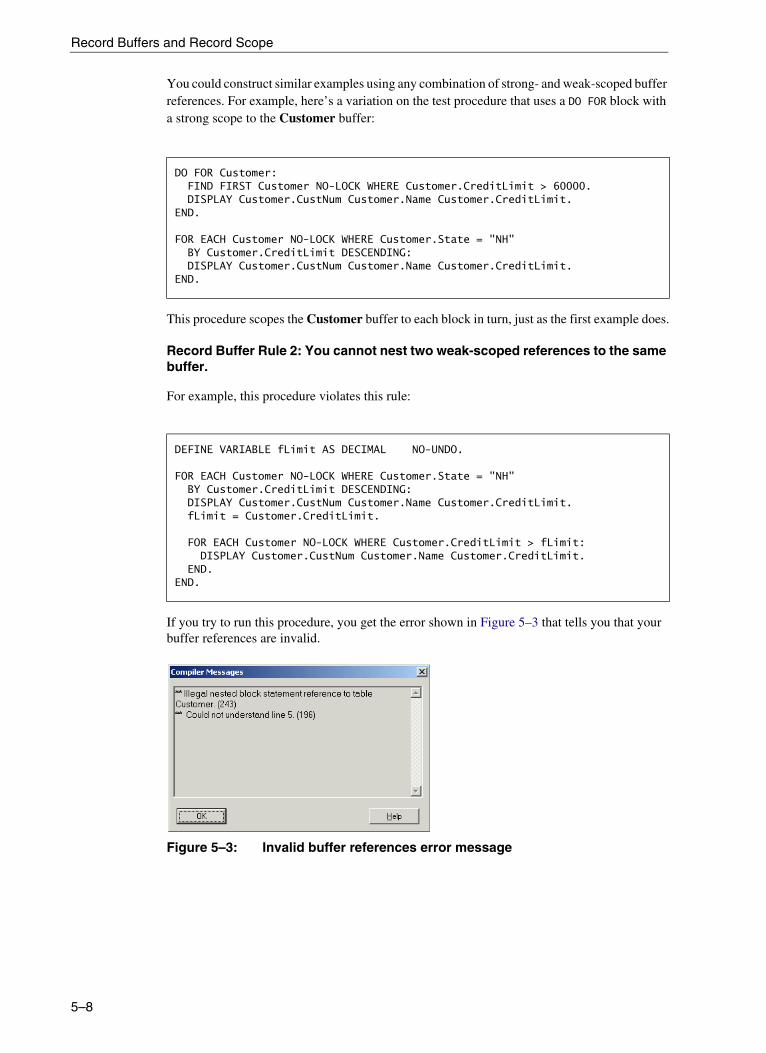
Record Buffers and Record Scope
You could construct similar examples using any combination of strong- and weak-scoped buffer references. For example, here’s a variation on the test procedure that uses a DO FOR block with a strong scope to the Customer buffer:
This procedure scopes the Customer buffer to each block in turn, just as the first example does.
Record Buffer Rule 2: You cannot nest two weak-scoped references to the same buffer.
For example, this procedure violates this rule:
If you try to run this procedure, you get the error shown in Figure 5–3 that tells you that your buffer references are invalid.
Figure 5–3: Invalid buffer references error message
DO FOR Customer:FIND FIRST Customer NO-LOCK WHERE Customer.CreditLimit > 60000.DISPLAY Customer.CustNum Customer.Name Customer.CreditLimit.
END.
FOR EACH Customer NO-LOCK WHERE Customer.State = "NH" BY Customer.CreditLimit DESCENDING:DISPLAY Customer.CustNum Customer.Name Customer.CreditLimit.
END.
DEFINE VARIABLE fLimit AS DECIMAL NO-UNDO.
FOR EACH Customer NO-LOCK WHERE Customer.State = "NH" BY Customer.CreditLimit DESCENDING:DISPLAY Customer.CustNum Customer.Name Customer.CreditLimit.fLimit = Customer.CreditLimit.
FOR EACH Customer NO-LOCK WHERE Customer.CreditLimit > fLimit:DISPLAY Customer.CustNum Customer.Name Customer.CreditLimit.
END.END.
5–8
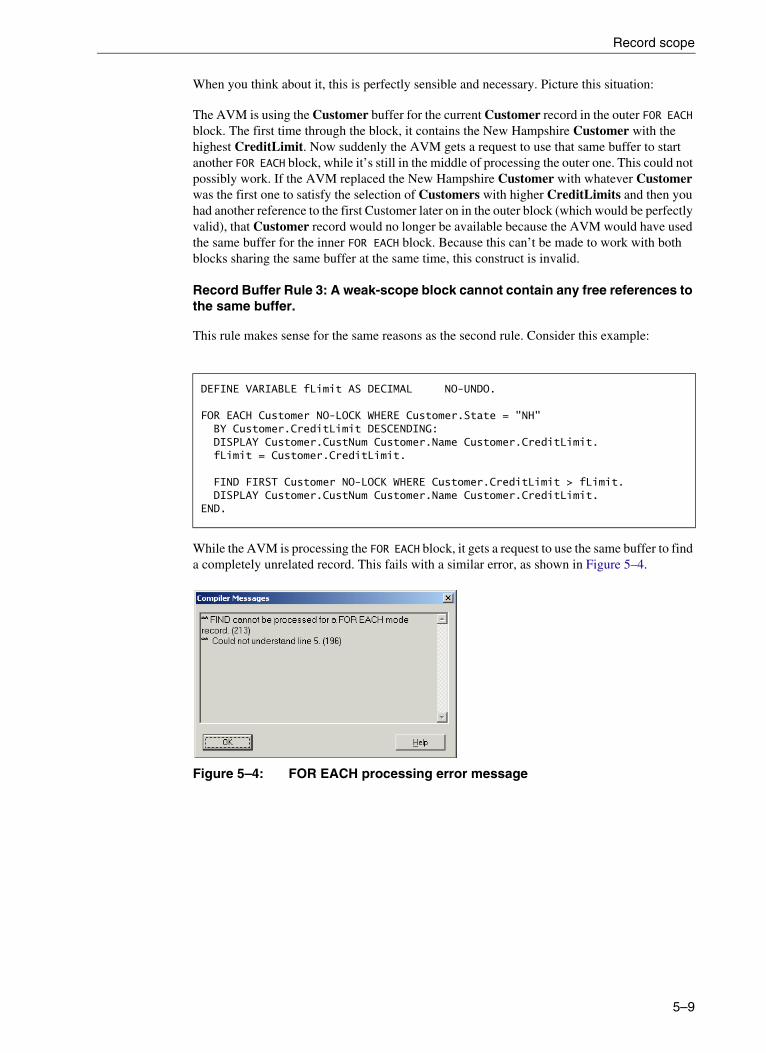
Record scope
When you think about it, this is perfectly sensible and necessary. Picture this situation:
The AVM is using the Customer buffer for the current Customer record in the outer FOR EACH block. The first time through the block, it contains the New Hampshire Customer with the highest CreditLimit. Now suddenly the AVM gets a request to use that same buffer to start another FOR EACH block, while it’s still in the middle of processing the outer one. This could not possibly work. If the AVM replaced the New Hampshire Customer with whatever Customer was the first one to satisfy the selection of Customers with higher CreditLimits and then you had another reference to the first Customer later on in the outer block (which would be perfectly valid), that Customer record would no longer be available because the AVM would have used the same buffer for the inner FOR EACH block. Because this can’t be made to work with both blocks sharing the same buffer at the same time, this construct is invalid.
Record Buffer Rule 3: A weak-scope block cannot contain any free references to the same buffer.
This rule makes sense for the same reasons as the second rule. Consider this example:
While the AVM is processing the FOR EACH block, it gets a request to use the same buffer to find a completely unrelated record. This fails with a similar error, as shown in Figure 5–4.
Figure 5–4: FOR EACH processing error message
DEFINE VARIABLE fLimit AS DECIMAL NO-UNDO.
FOR EACH Customer NO-LOCK WHERE Customer.State = "NH" BY Customer.CreditLimit DESCENDING:DISPLAY Customer.CustNum Customer.Name Customer.CreditLimit.fLimit = Customer.CreditLimit.
FIND FIRST Customer NO-LOCK WHERE Customer.CreditLimit > fLimit.DISPLAY Customer.CustNum Customer.Name Customer.CreditLimit.
END.
5–9
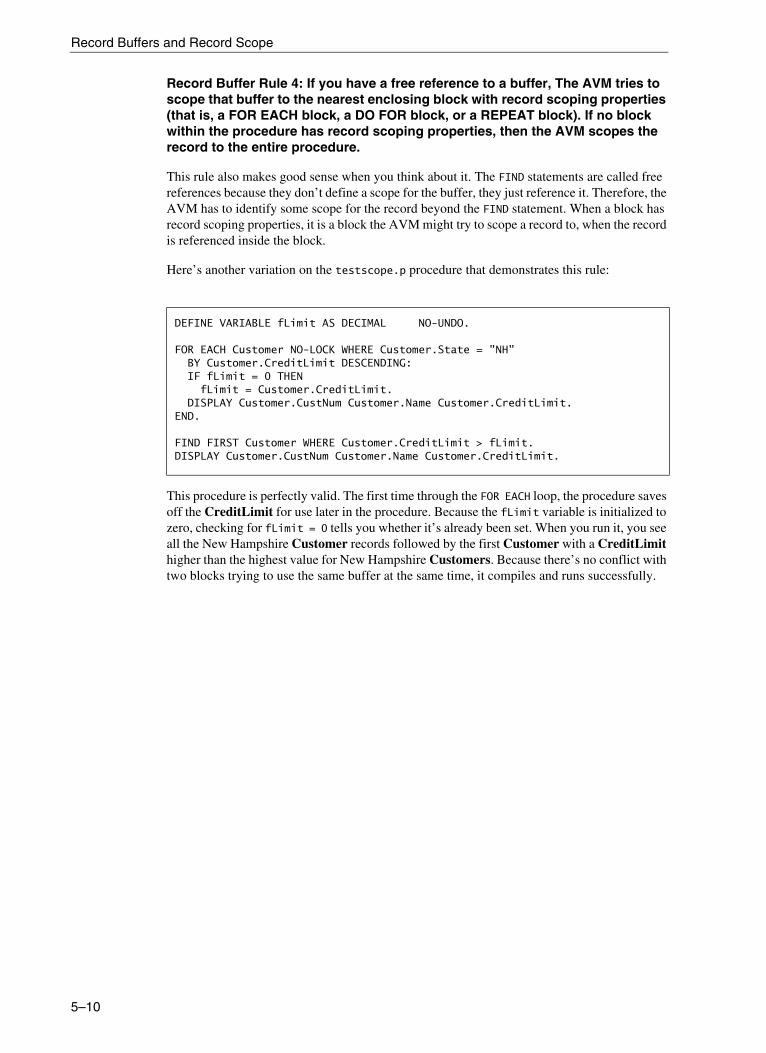
Record Buffers and Record Scope
Record Buffer Rule 4: If you have a free reference to a buffer, The AVM tries to scope that buffer to the nearest enclosing block with record scoping properties (that is, a FOR EACH block, a DO FOR block, or a REPEAT block). If no block within the procedure has record scoping properties, then the AVM scopes the record to the entire procedure.
This rule also makes good sense when you think about it. The FIND statements are called free references because they don’t define a scope for the buffer, they just reference it. Therefore, the AVM has to identify some scope for the record beyond the FIND statement. When a block has record scoping properties, it is a block the AVM might try to scope a record to, when the record is referenced inside the block.
Here’s another variation on the testscope.p procedure that demonstrates this rule:
This procedure is perfectly valid. The first time through the FOR EACH loop, the procedure saves off the CreditLimit for use later in the procedure. Because the fLimit variable is initialized to zero, checking for fLimit = 0 tells you whether it’s already been set. When you run it, you see all the New Hampshire Customer records followed by the first Customer with a CreditLimit higher than the highest value for New Hampshire Customers. Because there’s no conflict with two blocks trying to use the same buffer at the same time, it compiles and runs successfully.
DEFINE VARIABLE fLimit AS DECIMAL NO-UNDO.
FOR EACH Customer NO-LOCK WHERE Customer.State = "NH" BY Customer.CreditLimit DESCENDING:IF fLimit = 0 THEN
fLimit = Customer.CreditLimit.DISPLAY Customer.CustNum Customer.Name Customer.CreditLimit.
END.
FIND FIRST Customer WHERE Customer.CreditLimit > fLimit.DISPLAY Customer.CustNum Customer.Name Customer.CreditLimit.
5–10

Record scope
But the rule that the AVM raises the scope in this situation is a critically important one. In complex procedures, the combination of buffer references you use might force the AVM to scope a record buffer higher in the procedure than you expect. Though this normally does not have a visible effect when you’re just reading records, when you get to the discussion of transactions this rule becomes much more important. If you generate another listing file for this procedure, you see the effect of the FIND statement:
This tells you that the Customer buffer is scoped at line 0, that is, to the procedure itself. There’s no reference to the Customer buffer in the information for the FOR block at line 3 because the AVM has already scoped the buffer higher than that block.
Next is the rule concerning combining FIND statements with strong-scoped, rather than weak-scoped references.
{} Line Blk-- ---- ---
1 DEFINE VARIABLE fLimit AS DECIMAL NO-UNDO.2 3 1 FOR EACH Customer NO-LOCK WHERE Customer.State = "NH" 4 1 BY Customer.CreditLimit DESCENDING:5 1 IF fLimit = 0 THEN6 1 fLimit = Customer.CreditLimit.7 1 DISPLAY Customer.CustNum Customer.Name Customer.CreditLimit.8 END.9
10 FIND FIRST Customer WHERE Customer.CreditLimit > fLimit.11 DISPLAY Customer.CustNum Customer.Name Customer.CreditLimit.12
File Name Line Blk. Type Tran Blk. Label -------------------- ---- --------- ---- --------------------------------.\testscope.p 0 Procedure No
Buffers: sports2000.CustomerFrames: Unnamed
.\testscope.p 3 For NoFrames: Unnamed
5–11
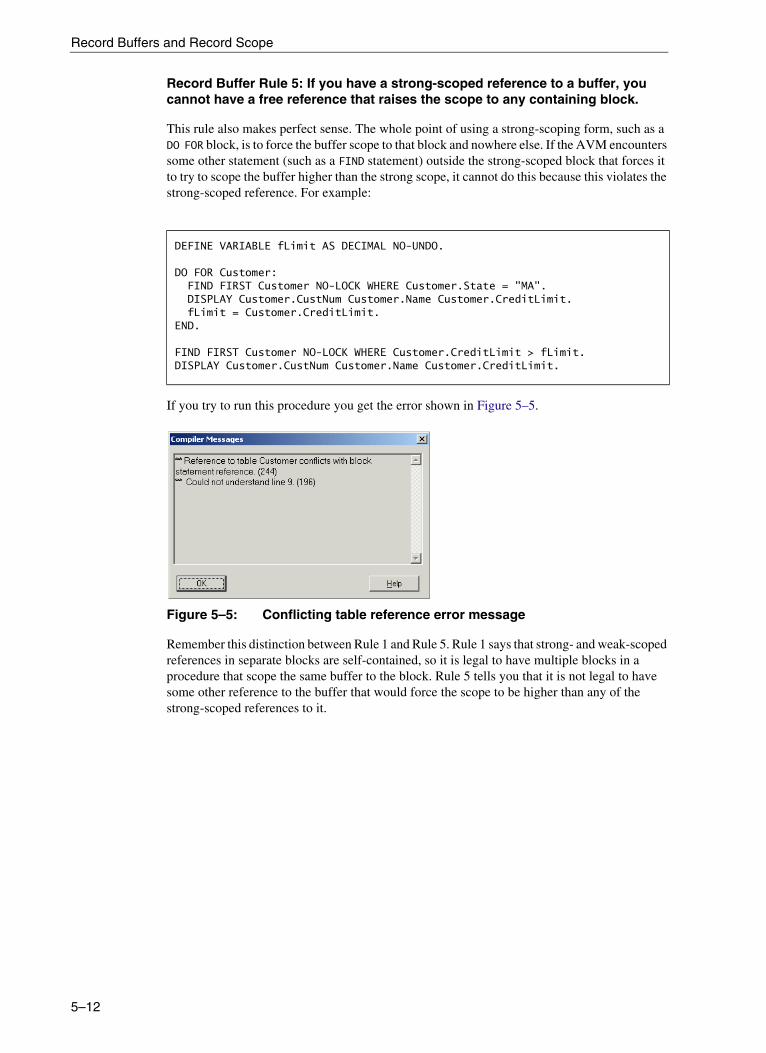
Record Buffers and Record Scope
Record Buffer Rule 5: If you have a strong-scoped reference to a buffer, you cannot have a free reference that raises the scope to any containing block.
This rule also makes perfect sense. The whole point of using a strong-scoping form, such as a DO FOR block, is to force the buffer scope to that block and nowhere else. If the AVM encounters some other statement (such as a FIND statement) outside the strong-scoped block that forces it to try to scope the buffer higher than the strong scope, it cannot do this because this violates the strong-scoped reference. For example:
If you try to run this procedure you get the error shown in Figure 5–5.
Figure 5–5: Conflicting table reference error message
Remember this distinction between Rule 1 and Rule 5. Rule 1 says that strong- and weak-scoped references in separate blocks are self-contained, so it is legal to have multiple blocks in a procedure that scope the same buffer to the block. Rule 5 tells you that it is not legal to have some other reference to the buffer that would force the scope to be higher than any of the strong-scoped references to it.
DEFINE VARIABLE fLimit AS DECIMAL NO-UNDO.
DO FOR Customer:FIND FIRST Customer NO-LOCK WHERE Customer.State = "MA".DISPLAY Customer.CustNum Customer.Name Customer.CreditLimit.fLimit = Customer.CreditLimit.
END.
FIND FIRST Customer NO-LOCK WHERE Customer.CreditLimit > fLimit.DISPLAY Customer.CustNum Customer.Name Customer.CreditLimit.
5–12
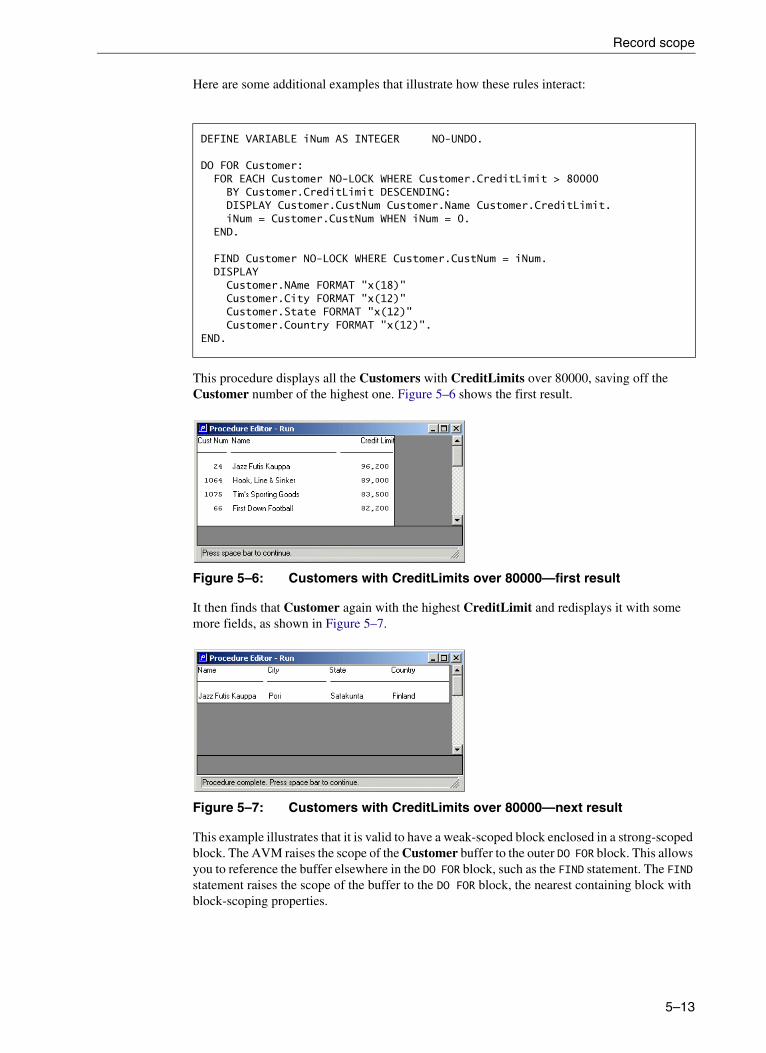
Record scope
Here are some additional examples that illustrate how these rules interact:
This procedure displays all the Customers with CreditLimits over 80000, saving off the Customer number of the highest one. Figure 5–6 shows the first result.
Figure 5–6: Customers with CreditLimits over 80000—first result
It then finds that Customer again with the highest CreditLimit and redisplays it with some more fields, as shown in Figure 5–7.
Figure 5–7: Customers with CreditLimits over 80000—next result
This example illustrates that it is valid to have a weak-scoped block enclosed in a strong-scoped block. The AVM raises the scope of the Customer buffer to the outer DO FOR block. This allows you to reference the buffer elsewhere in the DO FOR block, such as the FIND statement. The FIND statement raises the scope of the buffer to the DO FOR block, the nearest containing block with block-scoping properties.
DEFINE VARIABLE iNum AS INTEGER NO-UNDO.
DO FOR Customer:FOR EACH Customer NO-LOCK WHERE Customer.CreditLimit > 80000
BY Customer.CreditLimit DESCENDING:DISPLAY Customer.CustNum Customer.Name Customer.CreditLimit.iNum = Customer.CustNum WHEN iNum = 0.
END.
FIND Customer NO-LOCK WHERE Customer.CustNum = iNum.DISPLAY
Customer.NAme FORMAT "x(18)" Customer.City FORMAT "x(12)" Customer.State FORMAT "x(12)"Customer.Country FORMAT "x(12)".
END.
5–13

Record Buffers and Record Scope
This example illustrates raising the buffer scope:
As it processes the procedure, the AVM encounters the FIND statement and tentatively scopes the Customer buffer to the REPEAT block. The REPEAT block by itself does not force a buffer scope without a FOR phrase attached to it but it does have the record-scoping property, so it is the nearest containing block for the FIND statement. This block cycles through Customers in Name order and leaves the block when it gets to the first one starting with D. But after that block ends, the AVM finds a free reference to the Customer buffer in the DISPLAY statement. This forces the AVM to raise the scope of the buffer outside the REPEAT block. Since there is no available enclosing block to scope the buffer to, the AVM scopes it to the procedure. Thus, the Customer buffer from the REPEAT block is available after that block ends to display fields from the record, as shown in Figure 5–8.
Figure 5–8: Raising buffer scope example result
This next procedure has two free references, each within its own REPEAT block:
REPEAT:FIND NEXT Customer NO-LOCK USE-INDEX NAME.IF NAME < "D" THEN NEXT.ELSE LEAVE.
END.
DISPLAY Customer.CustNum Customer.Name.
REPEAT:FIND NEXT Customer NO-LOCK USE-INDEX NAME.IF Customer.Name BEGINS "D" THEN DO:
DISPLAY Customer.CustNum Customer.Name WITH FRAME D.LEAVE.
END.END.
REPEAT:FIND NEXT Customer NO-LOCK USE-INDEX NAME.IF NAME BEGINS "E" THEN DO:
DISPLAY Customer.CustNum Customer.Name WITH FRAME E.LEAVE.
END.END.
5–14
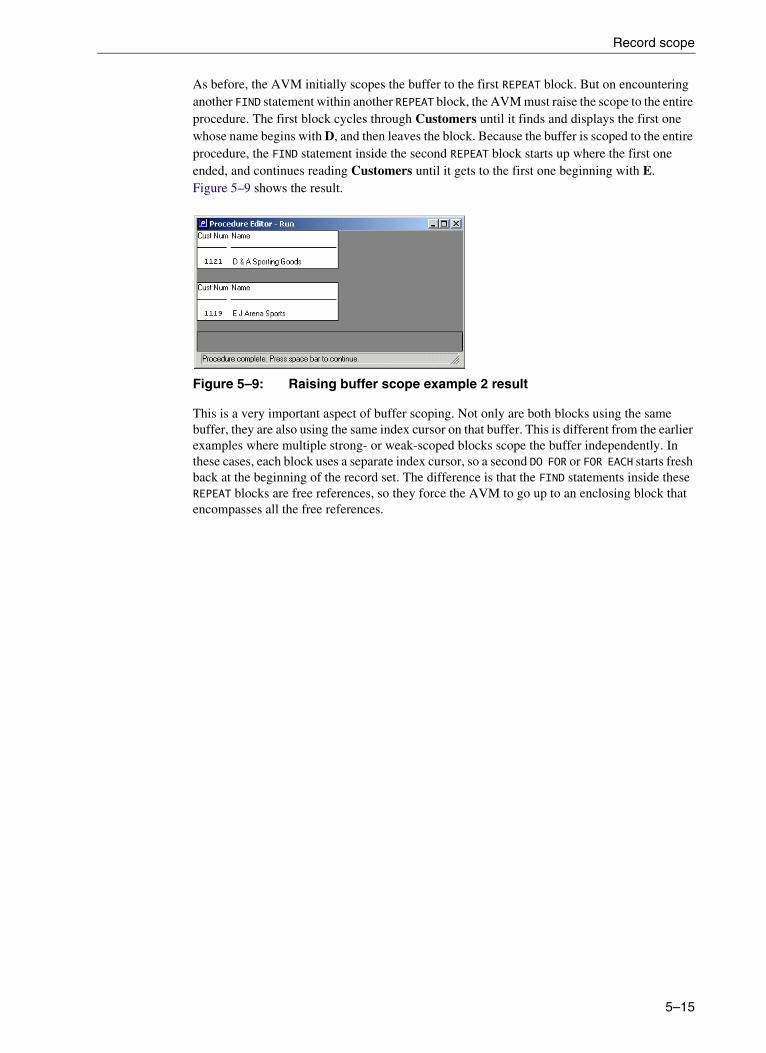
Record scope
As before, the AVM initially scopes the buffer to the first REPEAT block. But on encountering another FIND statement within another REPEAT block, the AVM must raise the scope to the entire procedure. The first block cycles through Customers until it finds and displays the first one whose name begins with D, and then leaves the block. Because the buffer is scoped to the entire procedure, the FIND statement inside the second REPEAT block starts up where the first one ended, and continues reading Customers until it gets to the first one beginning with E. Figure 5–9 shows the result.
Figure 5–9: Raising buffer scope example 2 result
This is a very important aspect of buffer scoping. Not only are both blocks using the same buffer, they are also using the same index cursor on that buffer. This is different from the earlier examples where multiple strong- or weak-scoped blocks scope the buffer independently. In these cases, each block uses a separate index cursor, so a second DO FOR or FOR EACH starts fresh back at the beginning of the record set. The difference is that the FIND statements inside these REPEAT blocks are free references, so they force the AVM to go up to an enclosing block that encompasses all the free references.
5–15

Record Buffers and Record Scope
5–16

6Using Queries
The programming syntax you have learned so far uses blocks of ABL code to define and iterate through a set of records. ABL defines an alternative to this form of data access called a query. This chapter discusses why these different forms exist and how you can use queries in ways that are distinct from how you would use a result set in a FOR EACH block. This chapter includes the following sections:
• Why you use queries in your application
• Defining and using queries

Using Queries
Why you use queries in your application
The first question to answer about queries is why ABL has them at all. For many years, ABL did not support queries, and developers wrote very powerful and complete applications without them. So, before you go into the details of how to define and use queries, you’ll learn the differences between queries and the block-oriented data access language you’ve used so far.
Queries versus block-oriented data access
The first and most obvious characteristic of queries is precisely that they are not block-oriented. The language statements you’ve used in the last few chapters are all tied to blocks of ABL code. You define a result set inside a block beginning with DO, FOR, or REPEAT. The result set is generally scoped to the block where it is defined. The term result set denotes the set of rows that satisfy a query.
You learned which of the block types iterate through the result set automatically and which require you to explicitly find the next record.
Even the FIND statement itself, although it does not define a block, is subject to the same rules of record scoping. You’ve learned how the presence of record-oriented blocks like a FOR EACH block and FIND statements together define the scope of a record buffer within a procedure.
These are among the most powerful features in ABL. They help give it its unique flexibility and strength for defining complex business logic in a way that ties data access statements closely to the logic that uses the data.
However, there are times when you don’t want your data access tied to the nested blocks of ABL logic in your procedures. Earlier chapters briefly discussed the notion of event-driven applications. Think about the procedure h-CustOrderWin1.w, for instance. When you run this, a Customer and its Orders are displayed for you, as shown in Figure 6–1.
Figure 6–1: Customers and Orders sample window
6–2
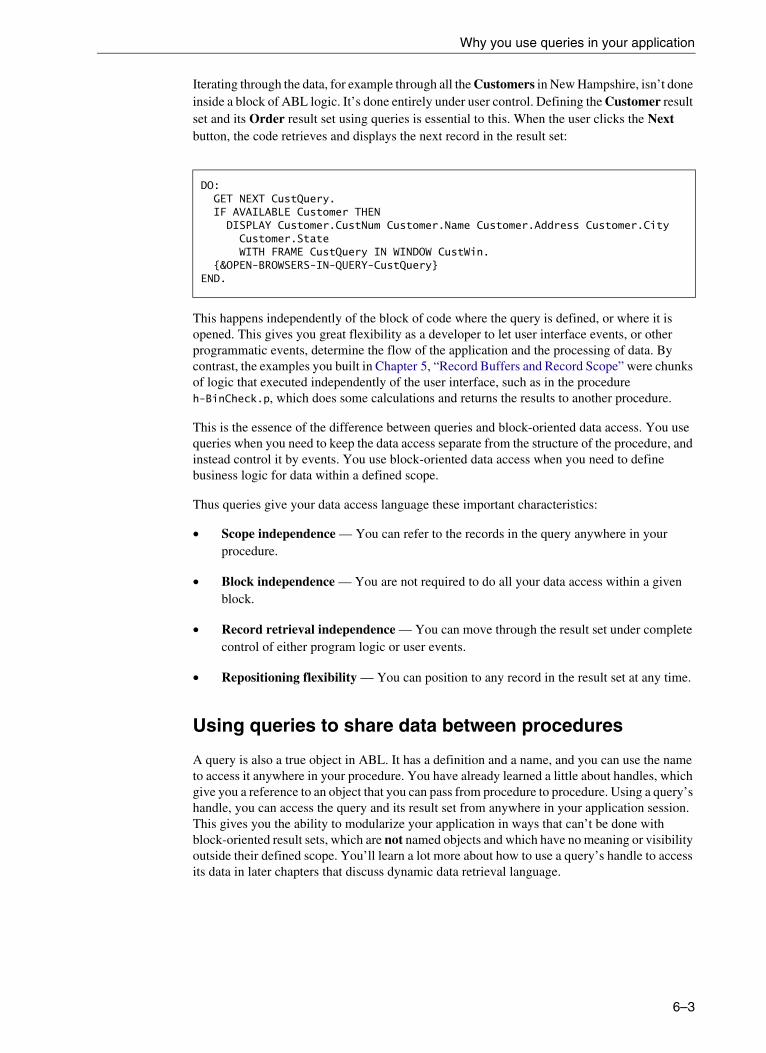
Why you use queries in your application
Iterating through the data, for example through all the Customers in New Hampshire, isn’t done inside a block of ABL logic. It’s done entirely under user control. Defining the Customer result set and its Order result set using queries is essential to this. When the user clicks the Next button, the code retrieves and displays the next record in the result set:
This happens independently of the block of code where the query is defined, or where it is opened. This gives you great flexibility as a developer to let user interface events, or other programmatic events, determine the flow of the application and the processing of data. By contrast, the examples you built in Chapter 5, “Record Buffers and Record Scope” were chunks of logic that executed independently of the user interface, such as in the procedure h-BinCheck.p, which does some calculations and returns the results to another procedure.
This is the essence of the difference between queries and block-oriented data access. You use queries when you need to keep the data access separate from the structure of the procedure, and instead control it by events. You use block-oriented data access when you need to define business logic for data within a defined scope.
Thus queries give your data access language these important characteristics:
• Scope independence — You can refer to the records in the query anywhere in your procedure.
• Block independence — You are not required to do all your data access within a given block.
• Record retrieval independence — You can move through the result set under complete control of either program logic or user events.
• Repositioning flexibility — You can position to any record in the result set at any time.
Using queries to share data between procedures
A query is also a true object in ABL. It has a definition and a name, and you can use the name to access it anywhere in your procedure. You have already learned a little about handles, which give you a reference to an object that you can pass from procedure to procedure. Using a query’s handle, you can access the query and its result set from anywhere in your application session. This gives you the ability to modularize your application in ways that can’t be done with block-oriented result sets, which are not named objects and which have no meaning or visibility outside their defined scope. You’ll learn a lot more about how to use a query’s handle to access its data in later chapters that discuss dynamic data retrieval language.
DO:GET NEXT CustQuery.IF AVAILABLE Customer THEN
DISPLAY Customer.CustNum Customer.Name Customer.Address Customer.City Customer.State WITH FRAME CustQuery IN WINDOW CustWin.
{&OPEN-BROWSERS-IN-QUERY-CustQuery}END.
6–3

Using Queries
Using queries to populate a browse
A query is the basis for the data definition for a browse object. You can’t populate a browse with the data from a FOR EACH block, only from a query. The browse gives you a viewport into the query. The repositioning you can do by selecting a record in the browse or scrolling through its contents reflects the repositioning that you can do programmatically through the query. In fact, selecting a row in a browse automatically repositions the query to that row, making it the current row in the buffers the query uses.
6–4
Defining and using queries
Defining and using queries
There is a DEFINE statement for a query as for other ABL objects. This is the general syntax:
The statement gives the query a name and, in turn, names the buffer or buffers that the query uses. In the simplest case, the buffers are database table names. But you can also use other buffers you’ve defined as alternatives to table names or, as you’ll learn later in this chapter, buffers for temp-tables.
If you want to reposition within the result set without using the GET FIRST, NEXT, PREV, and LAST statements, you need to define the query as SCROLLING. You’ll learn later in this section how to reposition within the result set of a scrolling query. You must also define a query that is going to be associated with a browse as SCROLLING. There is a slight performance cost to using the SCROLLING option, so you should leave it off if you are not using the capabilities it enables.
You don’t actually specify the exact data selection statement for the buffers and the tables they represent until you open the query. At that time, you can describe the joins between tables and any other parts of a WHERE clause that filter the data from the tables. As with other DEFINE statements, nothing actually happens when the ABL Virtual Machine (AVM) encounters the DEFINE QUERY statement. No data is retrieved. the AVM simply registers the query name and sets up storage and a handle for the query itself as an object.
OPEN and CLOSE QUERY statements
To get a query to retrieve data, you need to open it. When you open it, you specify the name of the query and a FOR EACH statement that references the buffers you named in the query definition, in the same order. If the query is already open, the AVM closes the current open query and then reopens it. This is the general syntax:
The syntax of the record-phrase is generally the same as the syntax for FOR EACH statements. If you use the PRESELECT EACH phrase instead of the FOR EACH phrase, all records that satisfy the query are selected and their row identifiers pre-cached, just as for a PRESELECT phrase in an ordinary data retrieval block. However, there are special cases for the record phrase in a query:
• The first record phrase must specify EACH, and not FIRST, because the query is intended to retrieve a set of records. It is, however, valid to specify a WHERE clause in the record-phrase for the table that resulted in only a single record being selected, so a query can certainly have only one record in its result set. The record-phrase for any other buffers in the query can use the FIRST keyword instead of EACH if that is appropriate.
• You cannot use the CAN-FIND keyword in a query definition. Doing so results in a compile-time error.
Syntax
DEFINE QUERY query-name FOR buffer [ , ...] [ SCROLLING ].
Syntax
OPEN QUERY query-name [ FOR | PRESELECT ] EACH record-phrase [ , ...][ BREAK ][ BY phrase ].
6–5

Using Queries
• Queries support the use of an outer join between tables, using the OUTER-JOIN keyword, as explained below. FOR EACH statements outside of a query do not support the use of OUTER-JOIN.
Using an outer join in a query
An outer join between tables is a join that does not discard records in the first table that have no corresponding record in the second table. For example, consider this query definition:
As the AVM retrieves records to satisfy this query, it first retrieves a Customer record and then the first Order record with the same CustNum field. When you do a NEXT operation on the query, the AVM locates the next Order for that Customer (if there is one), and replaces the contents of the Order buffer with the new Order. If there are no more Orders for the Customer, then the AVM retrieves the next Customer and its first Order.
The question is: What happens to a Customer that has no Orders at all? The Customer does not appear in the result set for the query. The same is true for a FOR EACH block with the same record phrase. This is simply because the record phrase asks for Customers and the Orders that match them, and if there is no matching Order, then the Customer by itself does not satisfy the record phrase.
In many cases this is not the behavior you want. You want to see the Customer data regardless of whether it has any Orders or not. In this case, you can include the OUTER-JOIN keyword in the OPEN QUERY statement:
Now the AVM retrieves Customers even if they have no Orders. When the Customer has no Orders, the values for all fields in the Order buffer have the Unknown value (?).
Sorting the query results
You can specify a BY phrase on your OPEN QUERY statement just as you can in a FOR EACH block. In this case, the AVM either uses an index to satisfy the sort order if possible or, if no index can allow the AVM to retrieve the data in the proper order, preselects and sorts all the query results before any data is made available to the application.
Over a series of query iterations, you might want to do some work based on whether the value of a certain field changes. This field defines a break group. For example, you might be accumulating some value, such as a total. In this example, the BREAK option is used to define Customer.State as the break group:
DEFINE QUERY CustOrd FOR Customer, Order.
OPEN QUERY CustOrd FOR EACH Customer, EACH Order OF Customer.
DEFINE QUERY CustOrd FOR Customer, Order.
OPEN QUERY CustOrd FOR EACH Customer, EACH Order OF Customer OUTER-JOIN.
OPEN QUERY CustOrd FOR EACH Customer BREAK BY Customer.State NO-LOCK.
6–6
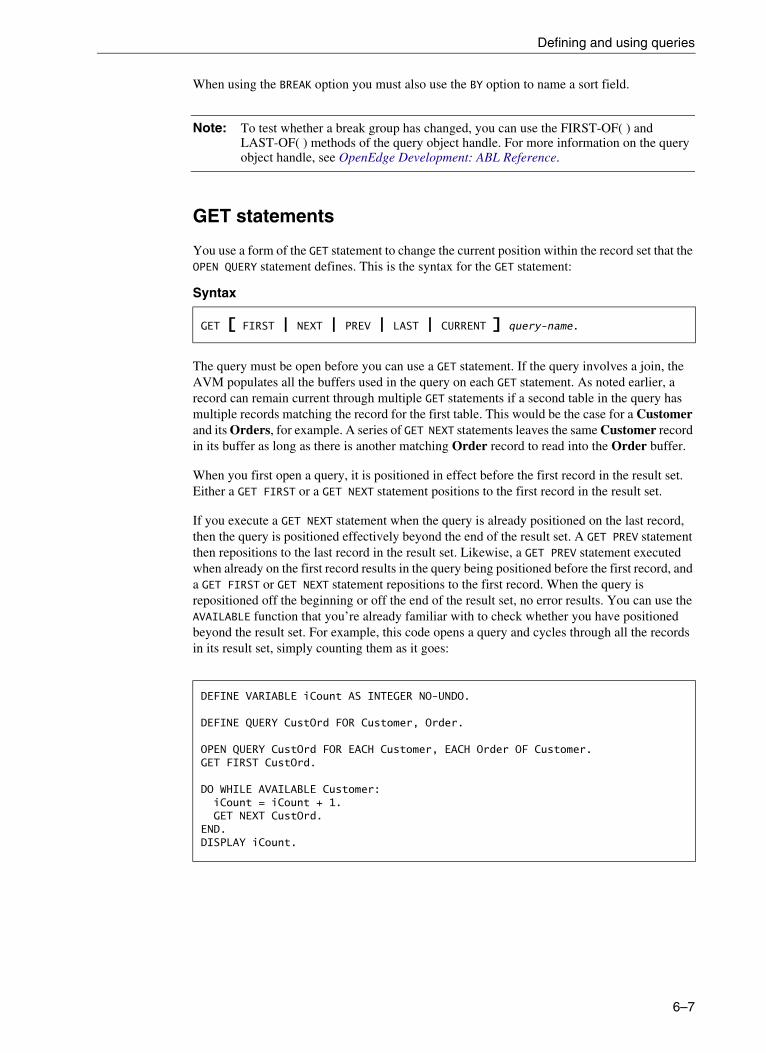
Defining and using queries
When using the BREAK option you must also use the BY option to name a sort field.
Note: To test whether a break group has changed, you can use the FIRST-OF( ) and LAST-OF( ) methods of the query object handle. For more information on the query object handle, see OpenEdge Development: ABL Reference.
GET statements
You use a form of the GET statement to change the current position within the record set that the OPEN QUERY statement defines. This is the syntax for the GET statement:
The query must be open before you can use a GET statement. If the query involves a join, the AVM populates all the buffers used in the query on each GET statement. As noted earlier, a record can remain current through multiple GET statements if a second table in the query has multiple records matching the record for the first table. This would be the case for a Customer and its Orders, for example. A series of GET NEXT statements leaves the same Customer record in its buffer as long as there is another matching Order record to read into the Order buffer.
When you first open a query, it is positioned in effect before the first record in the result set. Either a GET FIRST or a GET NEXT statement positions to the first record in the result set.
If you execute a GET NEXT statement when the query is already positioned on the last record, then the query is positioned effectively beyond the end of the result set. A GET PREV statement then repositions to the last record in the result set. Likewise, a GET PREV statement executed when already on the first record results in the query being positioned before the first record, and a GET FIRST or GET NEXT statement repositions to the first record. When the query is repositioned off the beginning or off the end of the result set, no error results. You can use the AVAILABLE function that you’re already familiar with to check whether you have positioned beyond the result set. For example, this code opens a query and cycles through all the records in its result set, simply counting them as it goes:
Syntax
GET [ FIRST | NEXT | PREV | LAST | CURRENT ] query-name.
DEFINE VARIABLE iCount AS INTEGER NO-UNDO.
DEFINE QUERY CustOrd FOR Customer, Order.
OPEN QUERY CustOrd FOR EACH Customer, EACH Order OF Customer.GET FIRST CustOrd.
DO WHILE AVAILABLE Customer:iCount = iCount + 1.GET NEXT CustOrd.
END.DISPLAY iCount.
6–7
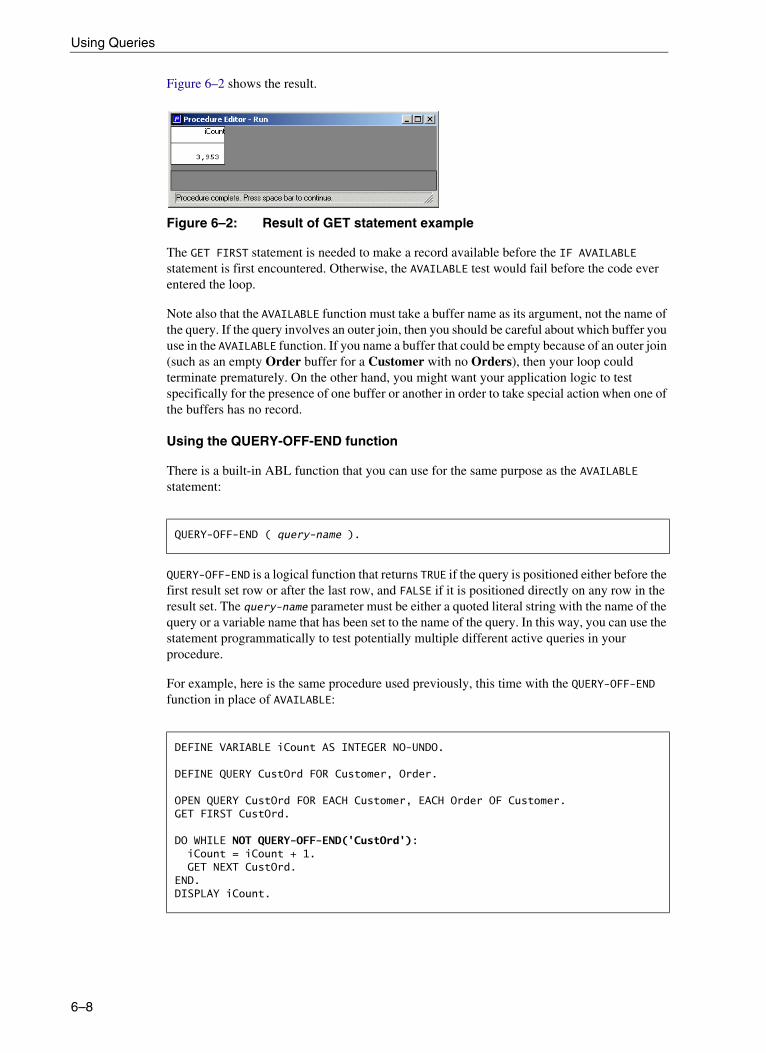
Using Queries
Figure 6–2 shows the result.
Figure 6–2: Result of GET statement example
The GET FIRST statement is needed to make a record available before the IF AVAILABLE statement is first encountered. Otherwise, the AVAILABLE test would fail before the code ever entered the loop.
Note also that the AVAILABLE function must take a buffer name as its argument, not the name of the query. If the query involves an outer join, then you should be careful about which buffer you use in the AVAILABLE function. If you name a buffer that could be empty because of an outer join (such as an empty Order buffer for a Customer with no Orders), then your loop could terminate prematurely. On the other hand, you might want your application logic to test specifically for the presence of one buffer or another in order to take special action when one of the buffers has no record.
Using the QUERY-OFF-END function
There is a built-in ABL function that you can use for the same purpose as the AVAILABLE statement:
QUERY-OFF-END is a logical function that returns TRUE if the query is positioned either before the first result set row or after the last row, and FALSE if it is positioned directly on any row in the result set. The query-name parameter must be either a quoted literal string with the name of the query or a variable name that has been set to the name of the query. In this way, you can use the statement programmatically to test potentially multiple different active queries in your procedure.
For example, here is the same procedure used previously, this time with the QUERY-OFF-END function in place of AVAILABLE:
QUERY-OFF-END ( query-name ).
DEFINE VARIABLE iCount AS INTEGER NO-UNDO.
DEFINE QUERY CustOrd FOR Customer, Order.
OPEN QUERY CustOrd FOR EACH Customer, EACH Order OF Customer.GET FIRST CustOrd.
DO WHILE NOT QUERY-OFF-END('CustOrd'):iCount = iCount + 1.GET NEXT CustOrd.
END.DISPLAY iCount.
6–8

Defining and using queries
The difference between QUERY-OFF-END and AVAILABLE is simply that AVAILABLE requires a buffer name as a parameter, whereas QUERY-OFF-END requires a query name. If you use the AVAILABLE function with the name of the first buffer in the query, it is equivalent to using QUERY-OFF-END with the query name. Just for stylistic reasons, it is more appropriate to use the QUERY-OFF-END function in most cases, since it is the position of the query and not the presence of a record in a particular buffer that you’re really interested in. By contrast, if you really want to test for the presence of a record, especially when your query does an outer join that might not always retrieve a record into every buffer, then use the AVAILABLE function.
Closing a query
Use this statement to close a query that is no longer needed:
An OPEN QUERY statement automatically closes a query if it was previously open. For this reason, it isn’t essential to execute a CLOSE QUERY statement just before reopening a query. However, you should explicitly close a query when you are done with it and you are not immediately reopening it. This frees the system resources used by the query. After you close the query you cannot reference it again (with a GET statement, for instance). However, if there are records still in the buffer or buffers used by the query, they are still available after the query is closed unless your application has specifically released them.
Determining the current number of rows in a query
You can use the NUM-RESULTS function to determine how many rows there are in the current results list:
This INTEGER function returns the number of rows currently in the query’s results list. As with the QUERY-OFF-END function, the query-name is an expression, which can be either the quoted name of the query or a variable containing the name.
The phrase “currently in the query’s results list” requires some explanation. The results list is a list of the row identifiers of all rows that satisfy the query, and that have already been retrieved.
The AVM normally builds up the results list as you walk through the query using the GET statement. Therefore, when you first open a query with a FOR EACH clause in the OPEN QUERY statement, the results list is empty and the NUM-RESULTS function returns zero.
CLOSE QUERY query-name.
NUM-RESULTS ( query-name )
6–9

Using Queries
As you move through the query using the GET NEXT statement, the AVM adds each new row’s identifier to the results list and increments the value returned by NUM-RESULTS. For example, this example retrieves all the Customers in the state of Louisiana using a query. For each row, it displays the Customer Number, Name, and the value of NUM-RESULTS:
When you run the procedure, you see the value of NUM-RESULTS change as each new row is retrieved, as shown in Figure 6–3.
Figure 6–3: Result of NUM-RESULTS example
Using a DOWN frame and the DOWN WITH statement
As a small digression, it is necessary to explain a couple of statements in this example that you haven’t seen before. They illustrate one of the key characteristics of queries: there’s no built-in block scoping or iteration in a query. First, here’s the new phrase on the DISPLAY statement:
You learned a little about down frames in Chapter 2, “Using Basic ABL Constructs.” A down frame is a frame that can display more than one row of data, each showing the same fields for a different record in a report-like format. In the examples you wrote in earlier chapters, you didn’t have to specify the DOWN phrase to indicate the number of rows to give the frame. The AVM gave you a down frame with a default number of rows automatically.
DEFINE QUERY CustQuery FOR Customer.
OPEN QUERY CustQuery FOR EACH Customer WHERE Customer.State = "LA".GET FIRST CustQuery.
DO WHILE NOT QUERY-OFF-END("CustQuery"):DISPLAY Customer.CustNum Customer.Name
NUM-RESULTS("CustQuery") LABEL "Rows"WITH FRAME CustFrame 15 DOWN.
GET NEXT CustQuery.DOWN WITH FRAME CustFrame.
END.
WITH FRAME CustFrame 15 DOWN.
6–10
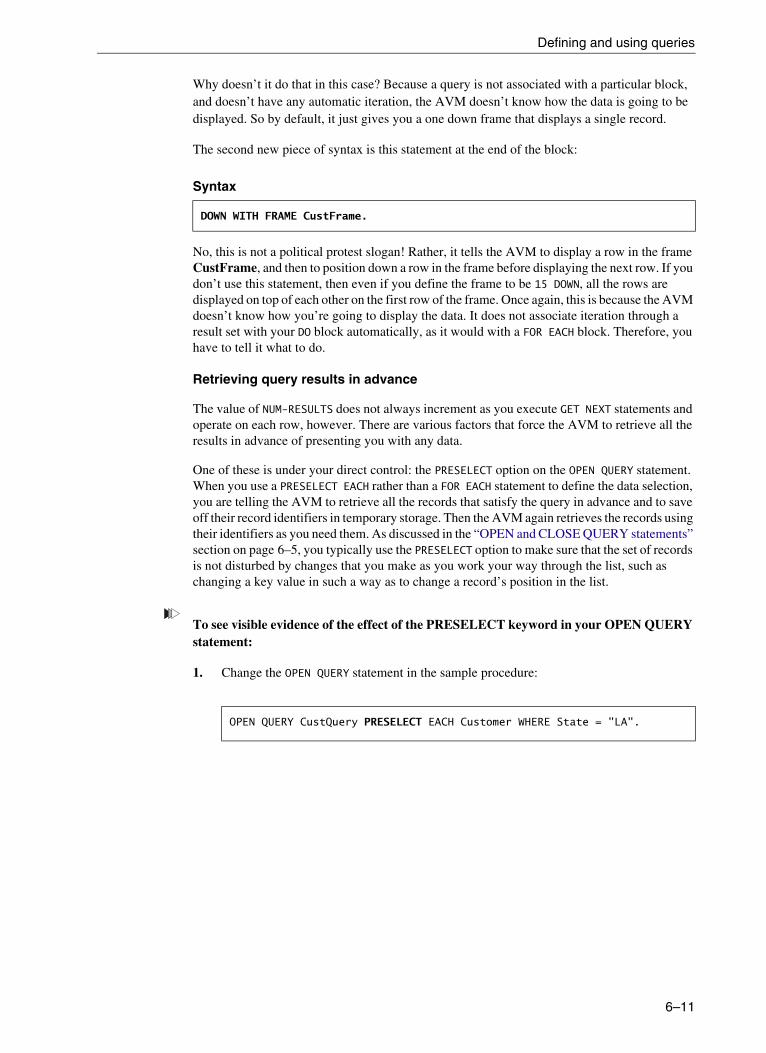
Defining and using queries
Why doesn’t it do that in this case? Because a query is not associated with a particular block, and doesn’t have any automatic iteration, the AVM doesn’t know how the data is going to be displayed. So by default, it just gives you a one down frame that displays a single record.
The second new piece of syntax is this statement at the end of the block:
No, this is not a political protest slogan! Rather, it tells the AVM to display a row in the frame CustFrame, and then to position down a row in the frame before displaying the next row. If you don’t use this statement, then even if you define the frame to be 15 DOWN, all the rows are displayed on top of each other on the first row of the frame. Once again, this is because the AVM doesn’t know how you’re going to display the data. It does not associate iteration through a result set with your DO block automatically, as it would with a FOR EACH block. Therefore, you have to tell it what to do.
Retrieving query results in advance
The value of NUM-RESULTS does not always increment as you execute GET NEXT statements and operate on each row, however. There are various factors that force the AVM to retrieve all the results in advance of presenting you with any data.
One of these is under your direct control: the PRESELECT option on the OPEN QUERY statement. When you use a PRESELECT EACH rather than a FOR EACH statement to define the data selection, you are telling the AVM to retrieve all the records that satisfy the query in advance and to save off their record identifiers in temporary storage. Then the AVM again retrieves the records using their identifiers as you need them. As discussed in the “OPEN and CLOSE QUERY statements” section on page 6–5, you typically use the PRESELECT option to make sure that the set of records is not disturbed by changes that you make as you work your way through the list, such as changing a key value in such a way as to change a record’s position in the list.
To see visible evidence of the effect of the PRESELECT keyword in your OPEN QUERY statement:
1. Change the OPEN QUERY statement in the sample procedure:
Syntax
DOWN WITH FRAME CustFrame.
OPEN QUERY CustQuery PRESELECT EACH Customer WHERE State = "LA".
6–11

Using Queries
2. Run the procedure again to see the different value of NUM-RESULTS:
All the records are pre-retrieved. Therefore, the value of NUM-RESULTS is the same no matter what record you are positioned to. This means that you could use the PRESELECT option to display, or otherwise make use of, the total number of records in the results list before displaying or processing all the data.
Another factor that can force the AVM to pre-retrieve all the data is a sort that cannot be satisfied using an index.
To see an example of pre-retrieved data:
1. Change the OPEN QUERY statement back to use a FOR EACH block and then try sorting the data in the query by the Customer Name:
OPEN QUERY CustQuery FOR EACH Customer WHERE Customer.State = "LA" BY Customer.Name.
6–12
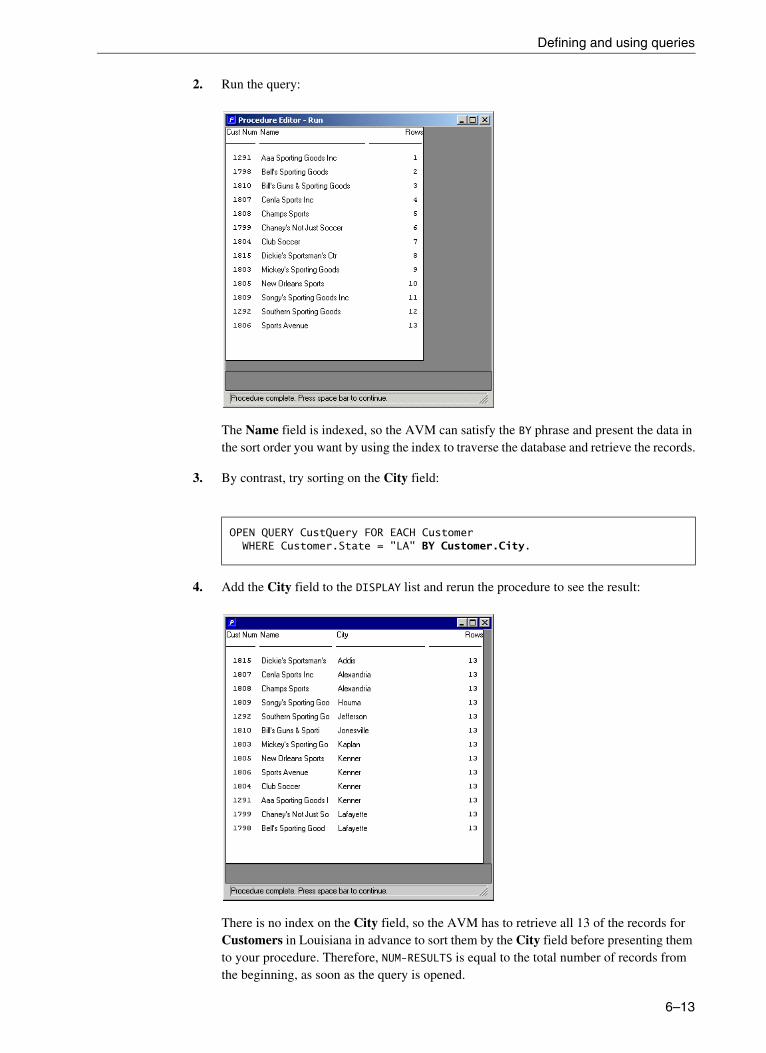
Defining and using queries
2. Run the query:
The Name field is indexed, so the AVM can satisfy the BY phrase and present the data in the sort order you want by using the index to traverse the database and retrieve the records.
3. By contrast, try sorting on the City field:
4. Add the City field to the DISPLAY list and rerun the procedure to see the result:
There is no index on the City field, so the AVM has to retrieve all 13 of the records for Customers in Louisiana in advance to sort them by the City field before presenting them to your procedure. Therefore, NUM-RESULTS is equal to the total number of records from the beginning, as soon as the query is opened.
OPEN QUERY CustQuery FOR EACH Customer WHERE Customer.State = "LA" BY Customer.City.
6–13
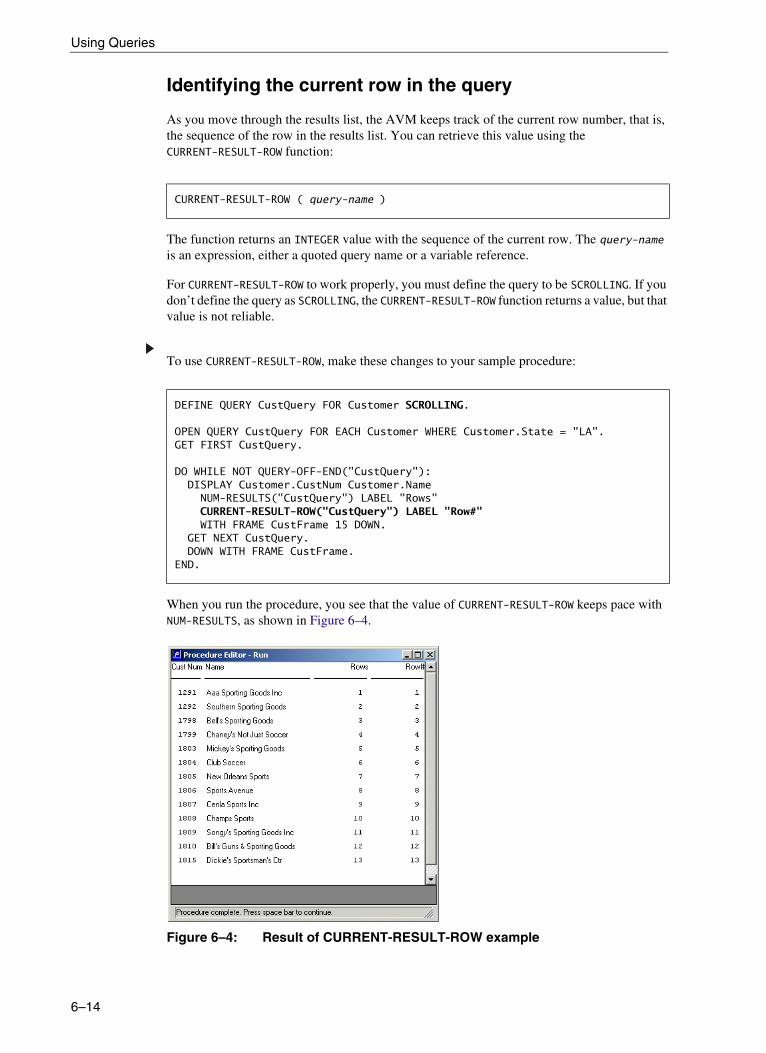
Using Queries
Identifying the current row in the query
As you move through the results list, the AVM keeps track of the current row number, that is, the sequence of the row in the results list. You can retrieve this value using the CURRENT-RESULT-ROW function:
The function returns an INTEGER value with the sequence of the current row. The query-name is an expression, either a quoted query name or a variable reference.
For CURRENT-RESULT-ROW to work properly, you must define the query to be SCROLLING. If you don’t define the query as SCROLLING, the CURRENT-RESULT-ROW function returns a value, but that value is not reliable.
To use CURRENT-RESULT-ROW, make these changes to your sample procedure:
When you run the procedure, you see that the value of CURRENT-RESULT-ROW keeps pace with NUM-RESULTS, as shown in Figure 6–4.
Figure 6–4: Result of CURRENT-RESULT-ROW example
CURRENT-RESULT-ROW ( query-name )
DEFINE QUERY CustQuery FOR Customer SCROLLING.
OPEN QUERY CustQuery FOR EACH Customer WHERE Customer.State = "LA".GET FIRST CustQuery.
DO WHILE NOT QUERY-OFF-END("CustQuery"):DISPLAY Customer.CustNum Customer.Name
NUM-RESULTS("CustQuery") LABEL "Rows"CURRENT-RESULT-ROW("CustQuery") LABEL "Row#"WITH FRAME CustFrame 15 DOWN.
GET NEXT CustQuery.DOWN WITH FRAME CustFrame.
END.
6–14
Defining and using queries
This is not always the case, of course. If you use the PRESELECT option or a nonindexed sort to retrieve the data, then NUM-RESULTS is always 13, as you have seen. But the value of CURRENT-RESULT-ROW changes from 1 to 13 just as it does above.
You can use the CURRENT-RESULT-ROW function to save off a pointer to reposition to a specific row. See the “Using a RowID to identify a record” section on page 6–17 for information on how to identify a record.
Here are a few special cases for CURRENT-RESULT-ROW:
• If the query is empty, the function returns the Unknown value (?).
• If the query is explicitly positioned before the first row, for example by executing a GET FIRST followed by a GET PREV, then the function returns the value 1.
• If the query is explicitly positioned after the last row, for example by executing a GET LAST followed by a GET NEXT, then the function returns the value one more than the number of rows in the results list.
Using INDEXED-REPOSITION to improve query performance
If you anticipate jumping around in the result set using statements such as GET LAST, you should add another option to the end of your OPEN QUERY statement: the INDEXED-REPOSITION keyword. If you do this, your DEFINE QUERY statement must also specify the SCROLLING keyword.
If you don’t open the query with INDEXED-REPOSITION, then the AVM retrieves all records in sequence in order to satisfy a request such as GET LAST. This can be very costly. If you do use INDEXED-REPOSITION, the AVM uses indexes, if possible, to jump directly to a requested row, greatly improving performance in some cases. There are side effects to doing this, however, in terms of the integrity of the results list, as discussed in the “INDEXED-REPOSITION and field lists” section on page 6–15.
INDEXED-REPOSITION and field lists
When you define a query with the FIELDS phrase, make sure that you include (in the list of fields) the index that the query will use when you open the query with the INDEXED-REPOSITION keyword. Otherwise, you will get an error when the query is re-opened and it attempts to reposition on a field that it cannot find.
Factors that invalidate CURRENT-RESULT-ROW and NUM-RESULTS
Under some circumstances, when you open your query with the INDEXED-REPOSITION keyword, the value of CURRENT-RESULT-ROW or NUM-RESULTS becomes invalid. As explained in the “Determining the current number of rows in a query” section on page 6–9, the results list holds the row identifiers for those rows that satisfy the query and that have already been retrieved.
6–15

Using Queries
Thirteen rows satisfy the query for Customers in Louisiana, so the value of these two functions goes as high as 13 for that query. When you do a PRESELECT or a nonindexed sort, all the rows have already been retrieved before any data is presented to you, so NUM-RESULTS is 13 at the beginning of the DISPLAY loop. Normally, the AVM adds the identifiers for all the rows it retrieves to the results list, but there are circumstances where this is not the case. If you execute a GET LAST statement on a query, and your OPEN QUERY statement does not use a PRESELECT or a sort that forces records to be pre-retrieved, the AVM jumps directly to the last record using a database index, without cycling through all the records in between. In this case, it has no way of knowing how many records would have been retrieved between the first one and the last one, and it cannot maintain a contiguous results list of all rows that satisfy the query. For this reason, the AVM flushes and reinitializes the results list when you jump forward or backward in the query. So after a GET LAST statement, NUM-RESULTS returns 1 (because the GET LAST statement has retrieved one row) and CURRENT-RESULT-ROW is unknown (because there is no way to know where that row would fit into the full results list).
Repositioning a query
Often you need to reposition a query other than to the first, last, next, or previous row. You might need to jump to a row based on data the user entered or return to a row that you previously saved off. Or you might want to jump forward or backward a specific number of rows to simulate paging through the query. You can do all these things with the REPOSITION statement, which has this syntax:
The query-name in this case is not an expression. It can only be an unquoted query name, not a variable.
If you specify the TO ROW option followed by an integer expression, the query repositions to that sequential position within the results list. If you have previously saved off that position using the CURRENT-RESULT-ROW function, you can use the value that function returned as the value in the TO ROW phrase to reposition to that row.
If you use the FORWARDS or BACKWARDS phrase, you can jump forward or backward any number of rows, specified by the n integer expression. You can use the FORWARD or BACKWARD keywords instead of FORWARDS or BACKWARDS.
The last of the REPOSITION options requires an explanation of an ABL data construct you haven’t seen before.
Syntax
REPOSITION query-name
{ |TO ROW row-number|FORWARDS n|BACKWARDS n|TO ROWID buffer-1-rowid [, . . .] [ NO-ERROR ]
}
6–16

Defining and using queries
Using a RowID to identify a record
Every record in every table of a database has a unique row identifier.
Note: The row identifier is only unique within a single storage area of a database. Since an entire database table must be allocated to a single storage area, this effectively makes the identifier unique at least within that table. A discussion of database constructs such as storage areas is beyond the scope of this book.
The identifier is called a RowID. There is both a ROWID data type that allows you to store a row identifier in a procedure variable and a ROWID function to return the identifier of a record from its record buffer.
Generally, you should consider a RowID to be a special data type without being concerned about its storage format. The RowID is (among other things) designed to be valid, not just for the OpenEdge database, but for all the different databases you can access from OpenEdge using OpenEdge DataServers, which provide access from OpenEdge to database types such as Oracle and Microsoft SQLServer.
In fact, you can’t display a RowID directly in an ABL procedure. If you try to, you get an error. You can see a RowID by converting it to a CHARACTER type using the STRING function. For instance, here is a procedure that shows you the RowIDs of the rows that satisfy the sample query you’ve been working with:
DEFINE QUERY CustQuery FOR Customer SCROLLING.
OPEN QUERY CustQuery FOR EACH Customer WHERE Customer.State = "LA".GET FIRST CustQuery.
DO WHILE NOT QUERY-OFF-END("CustQuery"):DISPLAY Customer.CustNum Customer.Name
CURRENT-RESULT-ROW("CustQuery") LABEL "Row#"STRING(ROWID(Customer)) FORMAT "x(12)" LABEL "RowId"WITH FRAME CustFrame 15 DOWN.
GET NEXT CustQuery.DOWN WITH FRAME CustFrame.
END.
6–17
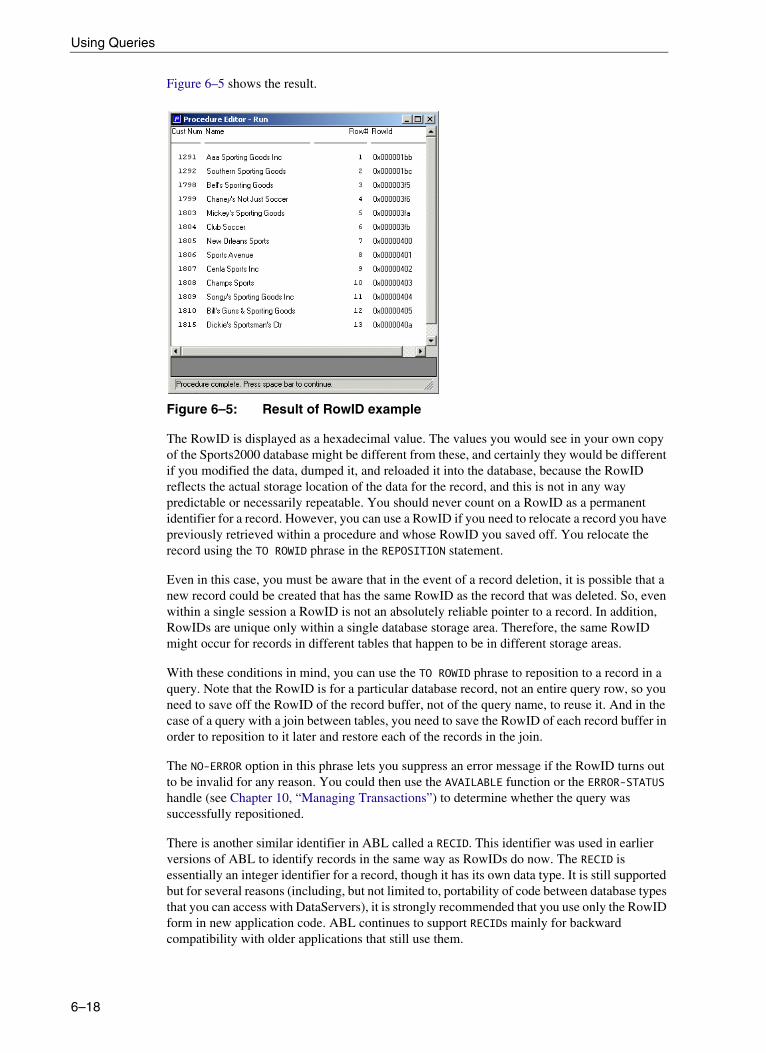
Using Queries
Figure 6–5 shows the result.
Figure 6–5: Result of RowID example
The RowID is displayed as a hexadecimal value. The values you would see in your own copy of the Sports2000 database might be different from these, and certainly they would be different if you modified the data, dumped it, and reloaded it into the database, because the RowID reflects the actual storage location of the data for the record, and this is not in any way predictable or necessarily repeatable. You should never count on a RowID as a permanent identifier for a record. However, you can use a RowID if you need to relocate a record you have previously retrieved within a procedure and whose RowID you saved off. You relocate the record using the TO ROWID phrase in the REPOSITION statement.
Even in this case, you must be aware that in the event of a record deletion, it is possible that a new record could be created that has the same RowID as the record that was deleted. So, even within a single session a RowID is not an absolutely reliable pointer to a record. In addition, RowIDs are unique only within a single database storage area. Therefore, the same RowID might occur for records in different tables that happen to be in different storage areas.
With these conditions in mind, you can use the TO ROWID phrase to reposition to a record in a query. Note that the RowID is for a particular database record, not an entire query row, so you need to save off the RowID of the record buffer, not of the query name, to reuse it. And in the case of a query with a join between tables, you need to save the RowID of each record buffer in order to reposition to it later and restore each of the records in the join.
The NO-ERROR option in this phrase lets you suppress an error message if the RowID turns out to be invalid for any reason. You could then use the AVAILABLE function or the ERROR-STATUS handle (see Chapter 10, “Managing Transactions”) to determine whether the query was successfully repositioned.
There is another similar identifier in ABL called a RECID. This identifier was used in earlier versions of ABL to identify records in the same way as RowIDs do now. The RECID is essentially an integer identifier for a record, though it has its own data type. It is still supported but for several reasons (including, but not limited to, portability of code between database types that you can access with DataServers), it is strongly recommended that you use only the RowID form in new application code. ABL continues to support RECIDs mainly for backward compatibility with older applications that still use them.
6–18

Defining and using queries
Positioning details with the REPOSITION statement
So if you execute a REPOSITION statement that repositions TO ROW 5 or FORWARDS 10 or TO ROWID rRow, then your procedure is positioned to that row so that you can display it or otherwise use it, right? Well, not exactly. When you use the REPOSITION statement, the AVM positions the query in between records, so that you then have to execute a GET NEXT or GET PREV statement to position on a row so that you can actually use it. Here are some of the specifics:
• When you execute a REPOSITION statement that uses the TO ROWID or TO ROW phrase, the query is positioned before the record requested. You then need to execute a GET NEXT statement to make the row you want available.
• When you execute a REPOSITION query-name BACKWARDS statement, the query is positioned between records, and you need to execute a GET NEXT statement to make the row you intend available. For example, if the query is positioned to row 6 of a query results list and you execute a REPOSITION query-name BACKWARDS 2, then the query is positioned effectively between results list rows 3 and 4, and a GET NEXT statement makes row 4 available. A GET PREV statement makes row 3 available.
• When you execute a REPOSITION statement with the FORWARDS phrase, you are actually positioned beyond the record you might expect. For example, if you are on row 6 and issue a statement with FORWARDS 2, then the query is positioned between row 8 and row 9, and you need to then execute a GET PREV statement to make row 8 available or a GET NEXT statement to make row 9 available.
• After executing a REPOSITON statement that involves a multi-table join, the bottom-most buffer will not be available, as is the case for a query built on a single table. You then need to execute a GET NEXT statement to make the row you want available. The availability of non-bottom level buffers following the REPOSITION, however, is undetermined. That is, non-bottom level buffers may or may not be available.
Note as well that there is only one way for the AVM to know which row is five rows ahead of the current row, or five rows behind it, or the fifth row of the result set, and that is to walk through the query row by row until it gets to the one you want. If the row in question has already been retrieved and is in the results list, then the AVM can reposition to the row you want very quickly using the results list. Therefore, the REPOSITION statement with any of the options TO ROW, FORWARDS, or BACKWARDS maintains the integrity of the results list and the functions that use it. The REPOSITION TO ROWID statement also maintains the integrity of the list if the row you want has already been retrieved and the results list has not been flushed since you retrieved it, because the AVM can scan the results list to locate the RowID.
6–19

Using Queries
Summary
This ends the discussion of using queries in your application. In this chapter, you’ve learned how to define and use queries and what the differences are between queries and other ABL data access statements.
Chapter 7, “Defining and Using Temp-tables,” discusses how to define and use temp-tables. At the end of the next chapter, you will be using queries and temp-tables together.
6–20

7Defining and Using Temp-tables
Another important ABL construct is the temporary table (temp-table). A temp-table gives you nearly all the features of a database table, and you can use a temp-table in your procedures almost anywhere you could reference a database table. However, temp-tables are not persistent. They aren’t stored anywhere permanently. They are also private to your own OpenEdge® session, the data you define in them can’t be seen by any other users. You can define sets of data using temp-tables that don’t correspond to tables and fields stored in your application database, which gives you great flexibility in how you use them. You can also use a temp-table to pass a whole set of data from one procedure to another, or even from one OpenEdge session to another. Together, queries and temp-tables provide much of the basis for how data is passed from one application module to another. They are essential to creating distributed applications, with data and business logic on a server machine and many independent client sessions running the user interface of the application. By the time you complete this chapter, you’ll understand how to use these features in your applications.
This chapter includes the following sections:
• Using temp-tables in your application
• Using a temp-table to summarize data
• Using a temp-table as a parameter
• Using include files to duplicate code
• Adding an Order Line browse to the Customer window

Defining and Using Temp-tables
Using temp-tables in your application
Temp-tables are effectively database tables that reside in client memory with potential overflow to disk on the client machine. (The point at which the overflow occurs is based on the setting of the Buffer Size for Temporary Tables (-Bt) startup parameter.) You use temp-tables when you need temporary storage for multiple rows of data during a session, and when you need to pass data between OpenEdge sessions on different machines, such as between a server and a client using the OpenEdge AppServer™. Temp-tables exist only for the duration of the procedure that defines them or, at most, for the duration of a OpenEdge session. Note that the temporary database is managed entirely on the ABL client, with no database server involvement. (For AppServers, this means that the temporary database resides on the AppServer.)
A temp-table is private, visible only to the session that creates it or receives it as a parameter passed from another session. But because temp-tables use the same support code that actual database tables use, you can take advantage of almost all database features that don’t require persistence of data and multi-user access to data, for example defining indexes for fields in the temp-table.
Temp-tables are a wonderfully useful construct in ABL, and you can apply them for a many different kinds of programming problems. Fundamentally, you can think of them as providing two basic capabilities:
1. Temp-tables allow you to define a table within a session that does not map to any single database table. A temp-table can be based on a database table, to which you can add fields that represent calculations or fields from other tables or any other type of data source. Or you can define a temp-table that is not related in any way to any database table, that is used for example to store calculations requiring a two-dimensional table of data that is then used in a report or in some other way.
2. Temp-tables allow you to pass data between OpenEdge sessions. When you begin to build distributed applications, which you can do with your own AppServer statements in ABL, you allow your application to be divided between procedures that are on the same machine with your application database and procedures that execute on a client machine that produces the user interface and interacts with the user. You use the OpenEdge AppServer product to communicate between client OpenEdge sessions and server sessions. When a client procedure needs to get data from the server, it runs an ABL procedure on the server that returns data as an OUTPUT parameter, or that accepts updates from the client as an INPUT parameter. You define these parameters as temp-tables that you pass between the sessions. You cannot pass record buffers as parameters between sessions, so whether you need to pass a single row or many rows together, you do this in the form of a temp-table as a parameter.
Because the client session is sending and receiving only temp-tables and not dealing directly with database records, your client sessions can run without a database connection of any kind, which makes it easier to build flexible and efficient distributed applications. Temp-tables are therefore a fundamental part of any distributed application. Writing your own ABL statements to use the OpenEdge AppServer is beyond the scope of this book, but in this chapter you’ll write a procedure that passes a temp-table as a parameter to a user interface program, so that you can begin to get a feel for what it means to design your procedures for this kind of separation of user interface from database access and business logic.
7–2

Using temp-tables in your application
ABL ProDataSets
ABL ProDataSets are ABL objects that extend the capabilities of temp-tables. They were introduced in OpenEdge Release 10.0A. In essence, a ProDataSet is an “in-memory database” that is filled with a set of related records in potentially multiple temp-tables. It is important to have a solid understanding of temp-tables and how you can use them before you work with ProDataSets. The discussion of ProDataSets is beyond the scope of this book. See OpenEdge Development: ProDataSets for a detailed discussion of these powerful objects.
ABL work-tables
Before you proceed, you should know that there is a variation on the temp-table supported in ABL called a work-table. You use a DEFINE WORK-TABLE statement to define one. This is an older feature that predates temp-tables and lacks some of their features. Most important, a work-table is memory-bound, and you must make sure your session has enough memory to hold all of the records you create in it. In addition, you cannot create indexes on work-tables. You also cannot pass a work-table as a parameter between procedures. Although you could use a work-table for an operation that needed to define a small set of temporary records that don’t need a lot of memory and don’t need an index, it is better to think of work-tables as being fully superseded by temp-tables. You should use the newer temp-tables for all of your temporary data storage needs.
The temporary database for temp-tables
The temporary database for temp-tables is largely invisible to you. You can design and use temp-tables as if they were entirely memory resident, even though the ABL Virtual Machine (AVM) automatically flushes temp-table records to disk when this is necessary. The temp-table database is stored in whatever you have designated as your temporary directory. By default, this is your working directory, but you can change this by specifying a temporary directory with the –T startup option to your OpenEdge session. If you need to adjust the amount of buffer space that the AVM uses in memory before it writes temp-tables to disk, you can use the –Bt startup option to set this size. You can learn more about these and other startup options in OpenEdge Deployment: Startup Command and Parameter Reference.
Defining a temp-table
You define a temp-table using the DEFINE TEMP-TABLE statement. There are two basic ways to define the fields and indexes in the table. You can make the temp-table LIKE some single database table (or even like another temp-table that you’ve already defined), which gives it all the fields and indexes from the other table, or you can define fields and indexes individually. You can also do both, so that in a single statement you can define a temp-table to be LIKE another table but also to have additional fields and indexes.
7–3
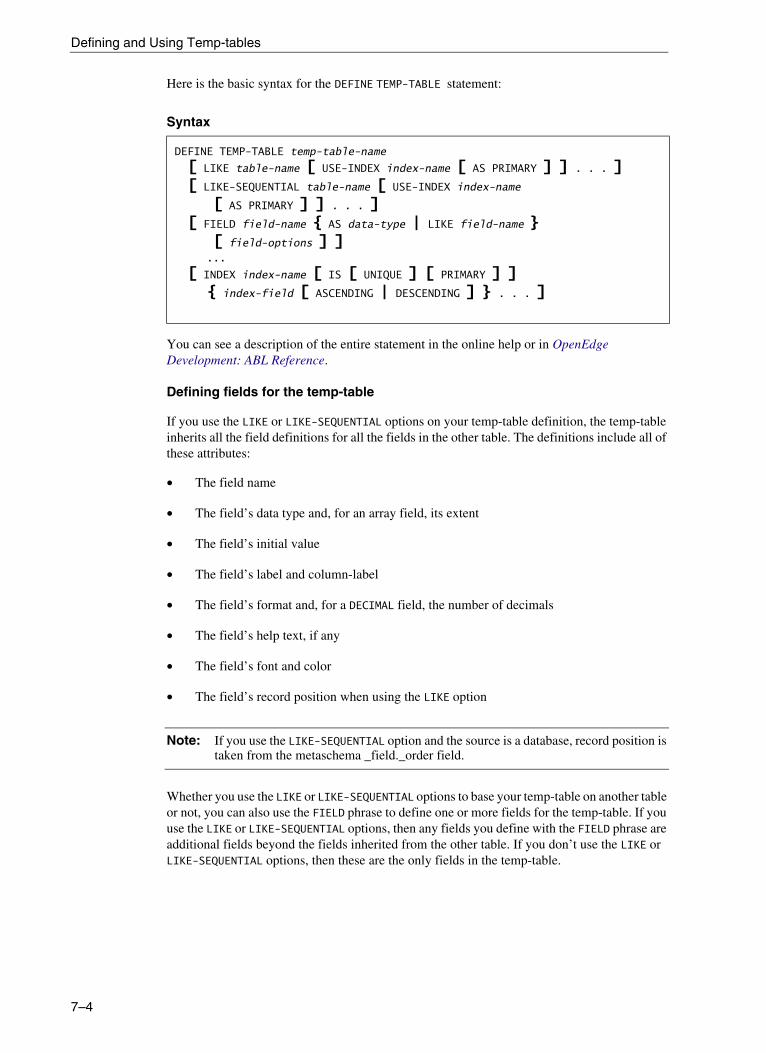
Defining and Using Temp-tables
Here is the basic syntax for the DEFINE TEMP-TABLE statement:
You can see a description of the entire statement in the online help or in OpenEdge Development: ABL Reference.
Defining fields for the temp-table
If you use the LIKE or LIKE-SEQUENTIAL options on your temp-table definition, the temp-table inherits all the field definitions for all the fields in the other table. The definitions include all of these attributes:
• The field name
• The field’s data type and, for an array field, its extent
• The field’s initial value
• The field’s label and column-label
• The field’s format and, for a DECIMAL field, the number of decimals
• The field’s help text, if any
• The field’s font and color
• The field’s record position when using the LIKE option
Note: If you use the LIKE-SEQUENTIAL option and the source is a database, record position is taken from the metaschema _field._order field.
Whether you use the LIKE or LIKE-SEQUENTIAL options to base your temp-table on another table or not, you can also use the FIELD phrase to define one or more fields for the temp-table. If you use the LIKE or LIKE-SEQUENTIAL options, then any fields you define with the FIELD phrase are additional fields beyond the fields inherited from the other table. If you don’t use the LIKE or LIKE-SEQUENTIAL options, then these are the only fields in the temp-table.
Syntax
DEFINE TEMP-TABLE temp-table-name
[ LIKE table-name [ USE-INDEX index-name [ AS PRIMARY ] ] . . . ][ LIKE-SEQUENTIAL table-name [ USE-INDEX index-name
[ AS PRIMARY ] ] . . . ][ FIELD field-name { AS data-type | LIKE field-name }
[ field-options ] ]...
[ INDEX index-name [ IS [ UNIQUE ] [ PRIMARY ] ]{ index-field [ ASCENDING | DESCENDING ] } . . . ]
7–4

Using temp-tables in your application
For fields you define individually with the FIELD phrase, you must specify at least the field name and data type, or use the LIKE phrase to define the field to be LIKE a field from another table. If you use the LIKE phrase on an individual field, your field inherits all of its attributes by default. You can override any of the field attributes of an inherited field except for the name, data type, and array extent, by using the appropriate keywords such as LABEL, FORMAT, and INITIAL. You can find a complete description of these keywords under the Field Options topic in the online help. You can also define the same attributes for fields that aren’t inherited from another table using the same keywords on the FIELD phrase.
You can use the FIELD phrase for one of three purposes:
• If you want to base your temp-table on another table, but you don’t want all of its fields or you want to change some of the field attributes, including even the field names, then you can name the individual fields using the FIELD phrase rather than making the whole table LIKE or LIKE-SEQUENTIAL the other table. You then specify each field to be LIKE a field from the other table, possibly with a different name or modified attributes.
If you only need to change certain display attributes of some of the fields, but otherwise want to use all the fields from the other table, you can use the LIKE or LIKE-SEQUENTIAL options on the temp-table definition to base it on the other table. You then modify the field attributes in the definition of the browse or frame fields where they are displayed. This makes your temp-table definition simpler than if you explicitly named each field just to change a few attributes of some of the fields.
• If you want to base your temp-table on another table, but you want some additional fields from one or more other tables as well, then you can define the temp-table to be LIKE or LIKE-SEQUENTIAL the other table, and then add FIELD phrases for each field that comes from another related table. You can use the LIKE keyword on these additional fields to inherit their database attributes as well.
• If you need fields in your table that are not based at all on specific database fields, then you define them with the FIELD phrase. Again, you can do this whether the basic temp-table definition is LIKE or LIKE-SEQUENTIAL another table or not.
You can define temp-tables with all the ABL data types that you can use for database fields (CHARACTER, DATE, DECIMAL, INTEGER, LOGICAL, RECID, CLOB, BLOB, and RAW). Note that CLOBs and BLOBs were introduced to ABL in OpenEdge Release 10.0A.
In addition, you can define a temp-table field to be of type ROWID, which is something you can’t do with fields in database tables. You could use such a field to store the RowID of a record you read from a database, in order to use the RowID to relocate the record later in the procedure.
Defining indexes for the temp-table
If you use the LIKE other-table option or LIKE-SEQUENTIAL other-table option for the temp-table, your temp-table is based on the other table you name. In this case, the following index rules apply:
• If you don’t specify any index information in the DEFINE TEMP-TABLE statement, the temp-table inherits all the index layouts defined for the other table.
7–5
Defining and Using Temp-tables
• If you specify one or more USE-INDEX options, the temp-table inherits only the indexes you name. If one of those indexes is the primary index of the other table, it becomes the primary index of the temp-table, unless you explicitly specify AS PRIMARY for another index you define.
• If you specify one or more INDEX options in the definition, then the temp-table inherits only those indexes from the other table that you have named in a USE-INDEX phrase.
The primary index is the one the AVM uses by default to access and order records. The AVM determines the primary index in this way:
• If you specify AS PRIMARY in a USE-INDEX phrase for an index inherited from the other table, then that is the primary index.
• If you specify IS PRIMARY on an INDEX definition specific to the temp-table, then that becomes the primary index.
• If you inherit the primary index from the other table, then that becomes the primary index for the temp-table.
• The first index you specify in the temp-table definition, if any, becomes the primary index.
• If you don’t specify any index information at all, then the AVM creates a default primary index that sorts the records in the order in which they’re created.
If you do not use the LIKE or LIKE-SEQUENTIAL options to use another table as the basis for your temp-table, then your temp-table only has indexes if you define them with the INDEX phrase in the definition.
You should use the same considerations you would use for a database table in determining what indexes, if any, to define or inherit for a temp-table. On the one hand, there is a small cost to creating index entries on update that could become measurable if you have multiple indexes with multiple fields, or if you are creating large numbers of records in a performance-intensive situation where many records are created between user actions. You shouldn’t create or use indexes your procedure won’t need.
On the other hand, if you know that you need to access the records in the temp-table based on specific field values, then you should create or inherit the right indexes to let the AVM locate the records you need without having to read through the whole temp-table to find them. The OpenEdge database is tremendously efficient and you might find that it can locate specific records in your table based on nonindexed field values so quickly that you hardly notice the lack of an index for those fields. However, it is a good idea to define one or more indexes if your temp-table is going to have more than a handful of records and if you know which fields will be used to locate, filter, or sort records in the table. If your code doesn’t need to access the records in the temp-table in any order other than the order in which they were created, then you don’t need an index other than the default index the AVM gives you automatically.
Temp-table scope
Generally speaking, the scope of a temp-table is the procedure in which it’s defined. In fact, you can only define a temp-table at the level of the whole procedure, not within an internal procedure. When the procedure terminates, any temp-tables defined in it are emptied and deleted. Likewise, a temp-table is visible only within the procedure that defines it. If that procedure passes the temp-table by value to another procedure, the other procedure has to have its own definition of the temp-table, and it obtains a copy of the temp-table when it receives it as an INPUT parameter.
7–6

Using temp-tables in your application
Alternately, you can use optional syntax to share a temp-table reference between procedures. This is discussed in the “Using a temp-table as a parameter” section on page 7–11.
There are several other aspects of temp-table scope that are beyond the scope of this book:
• It is possible to send a temp-table to another procedure that has no prior definition of the temp-table, but instead receives the definition along with the temp-table data. This involves the use of dynamic temp-tables.
• There are keywords to define a temp-table to be SHARED between procedures, and also to make the scope and visibility of the temp-table GLOBAL to the entire session. You need to think about the relationship between different procedures in an OpenEdge application to understand properly when you should and should not use shared or global objects such as temp-tables.
• You can pass the handle to a temp-table from one procedure to another within a session, to avoid actually copying the temp-table between procedures. For the purposes of this introduction to temp-tables, think of them as being statically defined and scoped to a single procedure.
Temp-table buffers
When you reference a database table in an ABL procedure, ABL provides you with a default buffer with the same name as the table. In this way, when you write a statement, such as FIND FIRST Customer, you are actually referring to a buffer with the name Customer. You can, of course, define additional buffers explicitly that have different names from the database table.
The same is true of temp-tables. When you define a temp-table, ABL provides you with a default buffer of the same name. Just as for database tables, you can define additional buffers with other names if you like. When you refer to the temp-table name in a statement such as FIND FIRST ttCust, you are referring to the default buffer for the temp-table just as you would be for a database table.
There is a temp-table attribute, DEFAULT-BUFFER-HANDLE, that returns the handle of the default buffer.
Note: With the changes made in Release 10.1B to provide support for expanded keys and temp-tables, the default block size for temp-tables has increased from a 1KB block size to a 4KB block size on all platforms. If you are creating very small temp-tables, you might notice a performance degradation with this change. You can set the default block size for a temp-table using the Temporary Table Database Block Size (-tmpbsize) startup parameter. For example, specifying "-tmpbsize 1" would create temp-tables with a 1KB block size. For more information about the Temporary Table Database Block Size startup parameter, see OpenEdge Deployment: Startup Command and Parameter Reference.
7–7

Defining and Using Temp-tables
Using a temp-table to summarize data
The beginning of this chapter notes two basic purposes for temp-tables: first, to define a table unlike any single database table for data summary or other uses; and second, to pass a set of data as a parameter between procedures. In this section, you’ll work through an example of the first kind. You’ll write a procedure that defines a temp-table and uses it to total invoice amounts for each Customer, and at the same time to count the number of Invoices for each Customer and identify which one has the highest amount. The finished procedure is saved as h-InvSummary.p.
In addition to the Customer table you’re familiar with, the example uses the Invoice table in the Sports2000 database. The Invoice table holds information for each Invoice a Customer has been sent for each Order. It has a join to the Customer table and to the Order table, along with the date and amount of the Invoice and other information.
First is the statement to define the temp-table itself:
The procedure creates one record in the temp-table for each Customer, summarizing its Invoices. As you can see, the temp-table has these fields:
• A Customer Number field derived from that field in the Invoice table.
• A Customer Name field derived from that field in the Customer table. Later you’ll use the Customer Number to retrieve the Customer record so that you can add the name to the invoice information.
• A count of the number of Invoices for the Customer.
• A total of the Invoices for the Customer.
• The amount of the largest Invoice for the Customer.
• The number of the Invoice with the largest amount for the Customer.
The field definitions define or override the field label and default format in some cases, using phrases attached to the FIELD definition. By default, the right-justified label for a numeric field extends somewhat to the right of the data, which in the case of the InvTotal and MaxAmount fields doesn’t look quite right, so the extra spaces in their labels correct that.
The temp-table also has two indexes. The first orders the records by Customer Number. This index is useful because the code finds records based on that value to accumulate the Invoice total and other values. This is the primary index for the temp-table, so if you display or otherwise iterate through the temp-table records without any other specific sort, they appear in Customer Number order.
The second index is by the Invoice Total. This index is useful because the procedure uses it as the sort order for the final display of all the records.
/* h-InvSummary.p -- Build a summary report of customer invoices. */
DEFINE TEMP-TABLE ttInvoice FIELD iCustNum LIKE Invoice.CustNum LABEL "Cust#" FORMAT "ZZ9"FIELD cCustName LIKE Customer.NAME FORMAT "X(20)"FIELD iNumInvs AS INTEGER LABEL "# Inv's" FORMAT "Z9"FIELD dInvTotal AS DECIMAL LABEL "Inv Total " FORMAT ">>,>>9.99"FIELD dMaxAmount AS DECIMAL LABEL "Max Amount " FORMAT ">>,>>9.99"FIELD iInvNum LIKE Invoice.InvoiceNum LABEL "Inv#" FORMAT "ZZ9"INDEX idxCustNum IS PRIMARY iCustNumINDEX idxInvTotal dInvTotal.
7–8

Using a temp-table to summarize data
The first executable code begins a FOR EACH block that joins each Invoice record to its Customer record. The OF phrase uses the CustNum field that the two tables have in common to join them. The FIND statement checks to see whether there is already a temp-table record for the Customer. If there isn’t, it uses the CREATE statement to create one. This statement creates a new record either in a database table or, as you see here, in a temp-table. That new record holds the initial values of the fields in the table until you set them to other values.
After the new record is created, the code sets the key value (the iCustNum field) and saves off the Customer Name from that table. The ASSIGN statement lets you make multiple field assignments at once and is more efficient than a series of statements that do one field assignment each:
Next, the code compares the Amount of the current Invoice with the dMaxAmount field in the temp-table record (which is initially 0 for each newly created record). If the current Amount is larger than that value, it’s replaced with the new Amount and the Invoice number is saved off in the iInvNum field. In this way, the temp-table records wind up holding the highest Invoice Amount for the Customer after it has cycled through all the Invoices:
Still in the FOR EACH loop, the code next increments the Invoice total for the Customer and the count of the number of Invoices for the Customer:
Now the procedure has finished cycling through all of the Invoices, and it can take the summary data in the temp-table and display it, in this case with the Customer with the highest Invoice Total first:
/* Retrieve each invoice along with its Customer record, to get the Name. */FOR EACH Invoice, Customer OF Invoice:FIND FIRST ttInvoice WHERE ttInvoice.iCustNum = Invoice.CustNum NO-ERROR./* If there isn't already a temp-table record for the Customer, create it
and save the Customer # and Name. */IF NOT AVAILABLE ttInvoice THEN DO:
CREATE ttInvoice.ASSIGN
ttInvoice.iCustNum = Invoice.CustNumttInvoice.cCustName = Customer.Name.
END.
/* Save off the Invoice amount if it's a new high for this Customer. */IF Invoice.Amount > dMaxAmount THEN
ASSIGN dMaxAmount = Invoice.AmountiInvNum = Invoice.InvoiceNum.
/* Increment the Invoice total and Invoice count for the Customer. */ASSIGN ttInvoice.dInvTotal = ttInvoice.dInvTotal + Invoice.Amount
ttInvoice.iNumInvs = ttInvoice.iNumInvs + 1.END. /* END FOR EACH Invoice & Customer */
/* Now display the results in descending order by invoice total. */FOR EACH ttInvoice BY dInvTotal DESCENDING:DISPLAY iCustNum cCustName iNumInvs dInvTotal iInvNum dMaxAmount.
END.
7–9

Defining and Using Temp-tables
Figure 7–1 shows the first page of the output report you should see when you run the procedure.
Figure 7–1: First page result of h-InvSummary.p
Using the temp-table made it easy to accumulate different kinds of summary data and to combine information from different database tables together in a single report. You could easily display this data in different ways, for example sorted by different fields, without having to again retrieve it from the database.
7–10
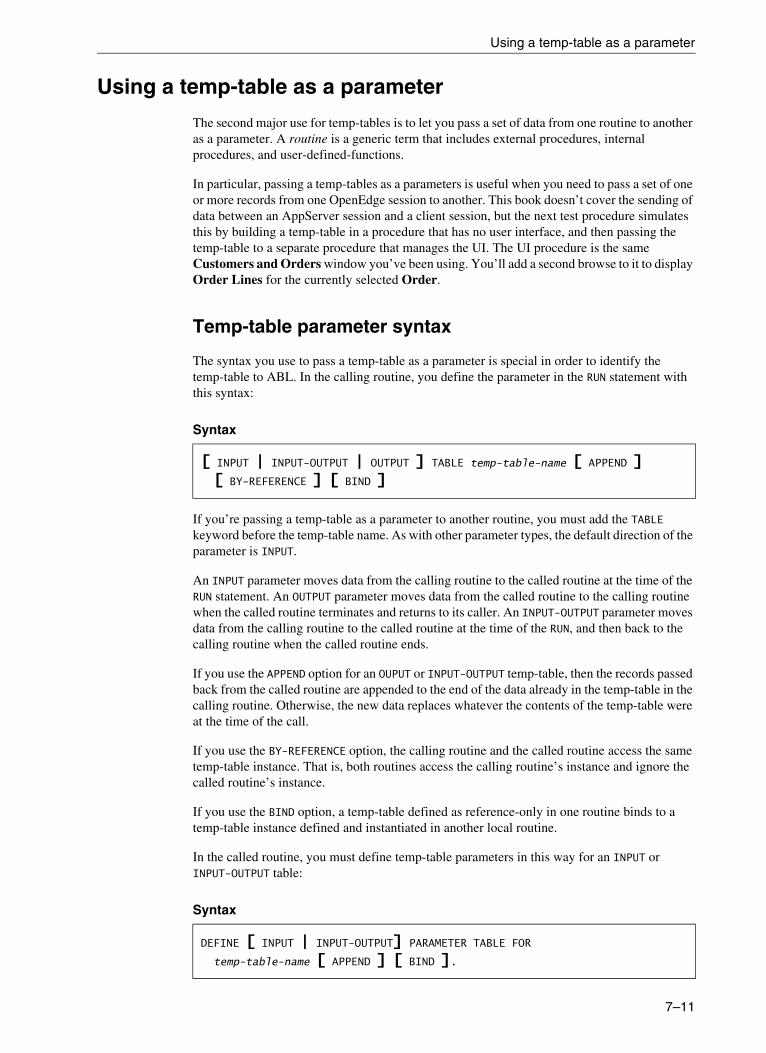
Using a temp-table as a parameter
Using a temp-table as a parameter
The second major use for temp-tables is to let you pass a set of data from one routine to another as a parameter. A routine is a generic term that includes external procedures, internal procedures, and user-defined-functions.
In particular, passing a temp-tables as a parameters is useful when you need to pass a set of one or more records from one OpenEdge session to another. This book doesn’t cover the sending of data between an AppServer session and a client session, but the next test procedure simulates this by building a temp-table in a procedure that has no user interface, and then passing the temp-table to a separate procedure that manages the UI. The UI procedure is the same Customers and Orders window you’ve been using. You’ll add a second browse to it to display Order Lines for the currently selected Order.
Temp-table parameter syntax
The syntax you use to pass a temp-table as a parameter is special in order to identify the temp-table to ABL. In the calling routine, you define the parameter in the RUN statement with this syntax:
If you’re passing a temp-table as a parameter to another routine, you must add the TABLE keyword before the temp-table name. As with other parameter types, the default direction of the parameter is INPUT.
An INPUT parameter moves data from the calling routine to the called routine at the time of the RUN statement. An OUTPUT parameter moves data from the called routine to the calling routine when the called routine terminates and returns to its caller. An INPUT-OUTPUT parameter moves data from the calling routine to the called routine at the time of the RUN, and then back to the calling routine when the called routine ends.
If you use the APPEND option for an OUPUT or INPUT-OUTPUT temp-table, then the records passed back from the called routine are appended to the end of the data already in the temp-table in the calling routine. Otherwise, the new data replaces whatever the contents of the temp-table were at the time of the call.
If you use the BY-REFERENCE option, the calling routine and the called routine access the same temp-table instance. That is, both routines access the calling routine’s instance and ignore the called routine’s instance.
If you use the BIND option, a temp-table defined as reference-only in one routine binds to a temp-table instance defined and instantiated in another local routine.
In the called routine, you must define temp-table parameters in this way for an INPUT or INPUT-OUTPUT table:
Syntax
[ INPUT | INPUT-OUTPUT | OUTPUT ] TABLE temp-table-name [ APPEND ] [ BY-REFERENCE ] [ BIND ]
Syntax
DEFINE [ INPUT | INPUT-OUTPUT] PARAMETER TABLE FORtemp-table-name [ APPEND ] [ BIND ].
7–11
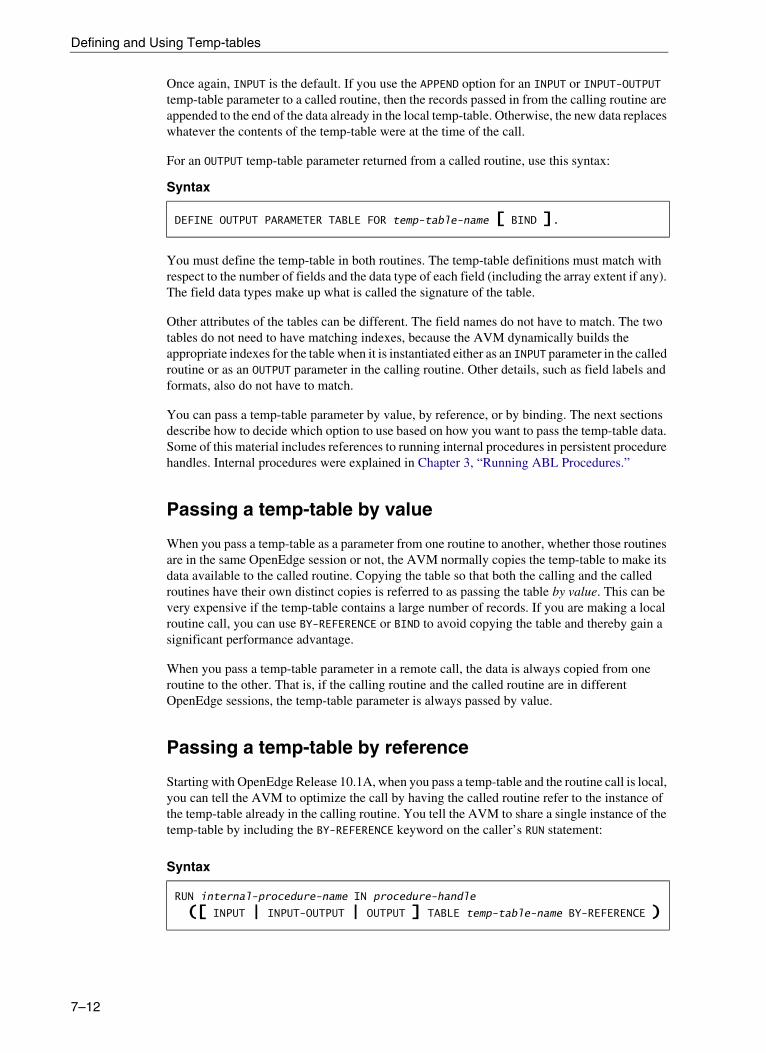
Defining and Using Temp-tables
Once again, INPUT is the default. If you use the APPEND option for an INPUT or INPUT-OUTPUT temp-table parameter to a called routine, then the records passed in from the calling routine are appended to the end of the data already in the local temp-table. Otherwise, the new data replaces whatever the contents of the temp-table were at the time of the call.
For an OUTPUT temp-table parameter returned from a called routine, use this syntax:
You must define the temp-table in both routines. The temp-table definitions must match with respect to the number of fields and the data type of each field (including the array extent if any). The field data types make up what is called the signature of the table.
Other attributes of the tables can be different. The field names do not have to match. The two tables do not need to have matching indexes, because the AVM dynamically builds the appropriate indexes for the table when it is instantiated either as an INPUT parameter in the called routine or as an OUTPUT parameter in the calling routine. Other details, such as field labels and formats, also do not have to match.
You can pass a temp-table parameter by value, by reference, or by binding. The next sections describe how to decide which option to use based on how you want to pass the temp-table data. Some of this material includes references to running internal procedures in persistent procedure handles. Internal procedures were explained in Chapter 3, “Running ABL Procedures.”
Passing a temp-table by value
When you pass a temp-table as a parameter from one routine to another, whether those routines are in the same OpenEdge session or not, the AVM normally copies the temp-table to make its data available to the called routine. Copying the table so that both the calling and the called routines have their own distinct copies is referred to as passing the table by value. This can be very expensive if the temp-table contains a large number of records. If you are making a local routine call, you can use BY-REFERENCE or BIND to avoid copying the table and thereby gain a significant performance advantage.
When you pass a temp-table parameter in a remote call, the data is always copied from one routine to the other. That is, if the calling routine and the called routine are in different OpenEdge sessions, the temp-table parameter is always passed by value.
Passing a temp-table by reference
Starting with OpenEdge Release 10.1A, when you pass a temp-table and the routine call is local, you can tell the AVM to optimize the call by having the called routine refer to the instance of the temp-table already in the calling routine. You tell the AVM to share a single instance of the temp-table by including the BY-REFERENCE keyword on the caller’s RUN statement:
Syntax
DEFINE OUTPUT PARAMETER TABLE FOR temp-table-name [ BIND ].
Syntax
RUN internal-procedure-name IN procedure-handle
([ INPUT | INPUT-OUTPUT | OUTPUT ] TABLE temp-table-name BY-REFERENCE )
7–12

Using a temp-table as a parameter
Passing the caller’s temp-table BY-REFERENCE saves all the overhead of copying the temp-table definition and data. If the call is remote, then the AVM ignores the BY-REFERENCE keyword and passes the temp-table by value, as it must in that case.
You can only specify BY-REFERENCE on an internal procedure or user-defined function call, not on a RUN of an external procedure. When you pass a temp-table parameter by reference, the called routine’s temp-table definition is bound to the calling routine’s temp-table only for the duration of the call.
To pass a temp-table by reference, in the calling routine, use the BY-REFERENCE keyword in the RUN statement that defines the temp-table parameter. There is no special syntax required in the called routine. However, since the calling routine’s temp-table instance is substituted for the called routine’s temp-table, only the definition of the temp-table is required by the called routine. In other words, the same temp-table is defined in both routines but only one is actually used. If the called routine’s temp-table is not directly used to hold its own data anywhere within the routine, you can save the overhead of allocating it by including the REFERENCE-ONLY keyword on its definition:
This keyword tells ABL to use the definition for compiler references to the table and its fields but not to instantiate it at run time. Any reference to the temp-table, except where it is passed in from another routine BY-REFERENCE, results in a runtime error.
Passing a temp-table parameter by binding
Starting with OpenEdge Release 10.1A, you can also save the overhead of copying a temp-table’s definition and data on a local call by using the BIND keyword. You use this keyword in both the calling and called routines to tell the AVM to bind both temp-table references to the same temp-table instance. In the calling routine, you add the keyword to the parameter in the RUN statement, instead of the BY-REFERENCE keyword:
In the called routine, you specify the keyword as part of the parameter definition:
The most basic case where you would want to use the BIND keyword is when you want to use the called routine’s temp-table instance instead of the calling routine’s instance. For example, you may have a routine in your application that has a cache of useful data, such as all Item values for use in entering an Order, which it has retrieved from the database and stored in a temp-table. Other routines running in the same session might want access to this data, for example to display the list of Items in a selection list.
DEFINE TEMP-TABLE temp-table-name REFERENCE-ONLY.
RUN internal-procedure-name IN procedure-handle
([ INPUT | INPUT-OUTPUT | OUTPUT ] TABLE temp-table-name BIND ).
DEFINE [ INPUT | INPUT-OUTPUT | OUTPUT ] PARAMETER TABLE FOR temp-table-name BIND.
7–13

Defining and Using Temp-tables
To save the overhead of copying the temp-table to all the other routines that want to share its data, you can bind the callers to the called routine’s temp-table cache.
To pass a temp-table by binding from the called routine to the calling routine:
1. In the calling routine, define the temp-table as REFERENCE-ONLY. This tells the AVM not to instantiate the caller’s temp-table when the routine is first run.
2. In the calling routine, specify the BIND keyword in the RUN statement that uses the temp-table parameter. This tells the AVM to bind both ends of the call to the same temp-table instance.
3. In the called routine, define the temp-table parameter with the BIND keyword. This confirms to the AVM that both ends of the call are to refer to the same instance. You must always specify BIND on both ends of the call.
4. Define the temp-table parameters in both routines as OUTPUT. This tells the AVM to use the called routine’s temp-table instance and change all references within the caller to point to it.
To pass a temp-table by binding from the calling routine to the called routine:
1. In the called routine, define the temp-table as REFERENCE-ONLY.
2. In the called routine, define the temp-table parameter with the BIND keyword.
3. In the calling routine, specify the BIND keyword in the RUN statement that uses the temp-table parameter.
4. Make sure that the parameter mode matches in both routines. That is, they must both be defined as INPUT-OUTPUT or both be defined as INPUT parameters.
You can use the BIND syntax to change the scope of the temp-table that is passed from caller to called routine. When you use BY-REFERENCE in an internal procedure call, as was described earlier, the scope of the temp-table is limited to that one call. That is, the AVM changes the temp-table references (within the internal procedure you run) to refer back to the caller. When the internal procedure completes and returns to the caller, the association ends. In some exceptional cases, you might want to bind the caller’s temp-table to the called routine for their mutual lifetime.
7–14

Using a temp-table as a parameter
Table 7–1 describes how to decide between passing a temp-table as a parameter using the BY-REFERENCE keyword versus using BIND. This table refers only to those calls that always or sometimes occur between routines in the same session. If you know that the call will always be to routines in different sessions, you should just pass the temp-table parameter by value.
Defining a procedure to return Order Lines
This section discusses a procedure that retrieves the Order Lines from the database. This sample procedure is called h-fetchOlines.p. It takes the current Order Number as an INPUT parameter. It then defines a temp-table with the fields from the OrderLine table plus the Item Name and the total Weight for the quantity ordered. Finally, it defines an OUTPUT parameter to return the set of Order Lines as a temp-table to the caller:
Notice that you must define the temp-table before you use it in a parameter definition.
Using the INPUT parameter that passed in the Order Number, the code retrieves all the Order Lines for that Order. For each one, it creates a temp-table record.
Table 7–1: Passing a temp-table by reference versus by binding
If you want to use this routine’s
temp-table data. . .
And you want the binding of the two temp-tables to last
until . . .Then do this in the calling routine . . .
And do this in the called routine . . .
Calling The call ends. Define the temp-table.
In the RUN statement, specify the temp-table parameter with the BY-REFERENCE modifier.
Define the temp-table as REFERENCE-ONLY.
Define the temp-table parameter.
The procedure that contains the calling routine ends or is deleted.
Define the temp-table.
In the RUN statement, specify the temp-table parameter with the BIND modifier.
Define the temp-table as REFERENCE-ONLY.
Define the temp-table parameter with BIND.
Called The procedure that contains the called routine ends or is deleted.
Define the temp-table as REFERENCE-ONLY.
In the RUN statement, specify the temp-table parameter with the BIND modifier and as OUTPUT mode.1
1. The temp-table parameter must be an OUTPUT parameter for the first call involving the temp-table so that the calling routine’s REFERENCE-ONLY table can point to a valid instantiated table. In subsequent calls, the parameter can be passed as INPUT.
Define the temp-table.
Define the temp-table parameter with BIND and as OUTPUT mode.1
/* h-fetchOlines.p -- retrieve all orderlines for an Order and return them ina temp-table. */DEFINE TEMP-TABLE ttOline LIKE OrderLine
FIELD ItemName LIKE ITEM.ItemNameFIELD TotalWeight AS DECIMAL LABEL "Tot.Wgt." .
DEFINE INPUT PARAMETER piOrderNum AS INTEGER NO-UNDO.DEFINE OUTPUT PARAMETER TABLE FOR ttOline.
7–15
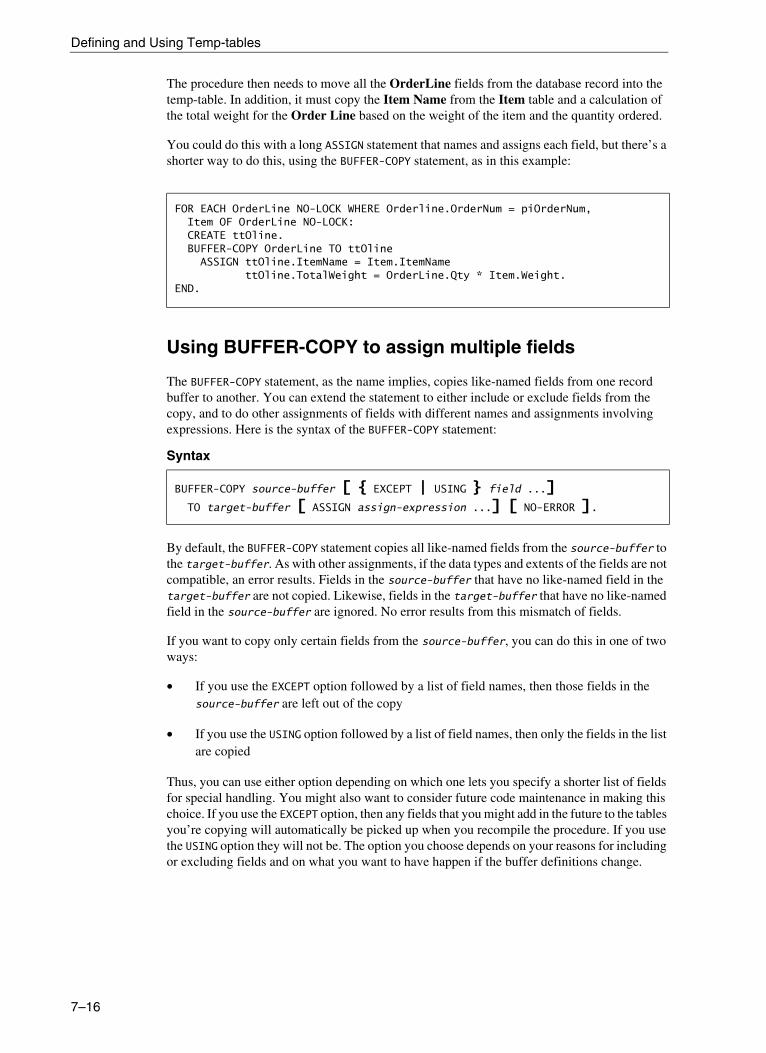
Defining and Using Temp-tables
The procedure then needs to move all the OrderLine fields from the database record into the temp-table. In addition, it must copy the Item Name from the Item table and a calculation of the total weight for the Order Line based on the weight of the item and the quantity ordered.
You could do this with a long ASSIGN statement that names and assigns each field, but there’s a shorter way to do this, using the BUFFER-COPY statement, as in this example:
Using BUFFER-COPY to assign multiple fields
The BUFFER-COPY statement, as the name implies, copies like-named fields from one record buffer to another. You can extend the statement to either include or exclude fields from the copy, and to do other assignments of fields with different names and assignments involving expressions. Here is the syntax of the BUFFER-COPY statement:
By default, the BUFFER-COPY statement copies all like-named fields from the source-buffer to the target-buffer. As with other assignments, if the data types and extents of the fields are not compatible, an error results. Fields in the source-buffer that have no like-named field in the target-buffer are not copied. Likewise, fields in the target-buffer that have no like-named field in the source-buffer are ignored. No error results from this mismatch of fields.
If you want to copy only certain fields from the source-buffer, you can do this in one of two ways:
• If you use the EXCEPT option followed by a list of field names, then those fields in the source-buffer are left out of the copy
• If you use the USING option followed by a list of field names, then only the fields in the list are copied
Thus, you can use either option depending on which one lets you specify a shorter list of fields for special handling. You might also want to consider future code maintenance in making this choice. If you use the EXCEPT option, then any fields that you might add in the future to the tables you’re copying will automatically be picked up when you recompile the procedure. If you use the USING option they will not be. The option you choose depends on your reasons for including or excluding fields and on what you want to have happen if the buffer definitions change.
FOR EACH OrderLine NO-LOCK WHERE Orderline.OrderNum = piOrderNum, Item OF OrderLine NO-LOCK:CREATE ttOline.BUFFER-COPY OrderLine TO ttOline
ASSIGN ttOline.ItemName = Item.ItemNamettOline.TotalWeight = OrderLine.Qty * Item.Weight.
END.
Syntax
BUFFER-COPY source-buffer [ { EXCEPT | USING } field ...]TO target-buffer [ ASSIGN assign-expression ...] [ NO-ERROR ].
7–16

Using a temp-table as a parameter
In addition to like-named fields, you can do any other kind of assignment from the source-buffer to the target-buffer using an ASSIGN statement. As with the ASSIGN statements you’ve seen in examples so far, this is basically a list of assignments with the target field on the left side of an equal sign and the source field on the right. You can also include a WHEN phrase in an assignment to define a logical expression that determines whether the assignment is done. For more information, see the section for the ASSIGN statement in the online help or in OpenEdge Development: ABL Reference.
As with other statements, the NO-ERROR keyword suppresses any error messages that might result from improper assignment and lets you query the ERROR-STATUS handle afterwards instead.
7–17

Defining and Using Temp-tables
Using include files to duplicate code
Now it’s time for another digression to introduce you to a powerful feature of ABL that will be helpful in completing the temp-table example. You might have noticed that to pass a temp-table from one procedure to another, you need to have an equivalent temp-table definition in both procedures. So the next thing you have to do in the Customers and Orders window is define the same temp-table as you just did in h-fetchOlines.p so you can use it as an INPUT parameter to the RUN statement to that procedure. Surely there must be a better way to duplicate code than retyping it or coping and pasting it?
ABL provides a mechanism for just this purpose, called an include file. An include file is a source procedure that is included in another procedure file to form a complete procedure that you can then compile. Using include files saves you from having to copy and paste code from one procedure to another when you need the same definition or other code in multiple places. More important, it can also save you from many maintenance headaches when you need to change the duplicated code. Rather than having to identify all the places where the code exists and change every one of them consistently, you just have to change the one include file and recompile the procedures that use it.
Having said this, it’s important to make an observation about include files in an OpenEdge application. In later chapters, you learn how to use dynamic language constructs to allow the same procedure to work many different ways. For example, you can use them to manage a query on different tables or with different WHERE clauses that are defined dynamically at run time or to build a window that can display fields and a browse for many different tables, with all the objects defined dynamically, so their attributes can be changed at run time. This limits the need for include files in many cases.
In earlier applications, written before these dynamic features existed, ABL developers used include files to pass in, for example, the name of a table or a list of fields or a WHERE clause for a FOR EACH statement. In this way, the same procedure could be compiled many different ways to do similar jobs. With dynamic programming, you can often modify the same kinds of procedure attributes at run time, allowing a single compiled procedure to handle all the cases that you need, without creating many different .r files for all the different cases, or compiling and running procedures on the fly during program execution. For that reason, once you’ve learned about dynamic programming, if you find yourself doing extraordinarily complex or clever things with include files in a new application, you should consider whether you could do the same job more easily and more effectively with dynamic language constructs that are part of the language for exactly this purpose.
With these disclaimers aside, it’s still valuable to know about include files and when you might use them. If nothing else, you’ll find many include file references in existing ABL code.
The syntax for an include file is extremely simple. You merely place the include filename, enclosed in braces ( { } ) into your procedure exactly where you want the code it contains to be inserted. This can be anywhere at all in your procedure. An include file can contain a complete statement, a whole set of statements, a partial statement, a single keyword or name, or even a fraction of a name, depending on what purpose it serves. The only limitation is that ABL always inserts a single space after (but not before) the contents of the include file when it pulls it in during the compilation. This means you could append a partial name or keyword directly to the end of a code fragment in the main procedure, but not to the beginning without a space being inserted.
7–18

Using include files to duplicate code
By convention, include files end in the .i extension, but this is not actually required. If ABL needs a pathname relative to the Propath to locate your include file, then you need to include the pathname within the braces just as you would specify a relative pathname as part of the filename in a RUN statement. (Note that the ABL does not search procedure libraries for include files.)
In the simplest case, an include file just inserts the contents of the file into the procedure that includes it when the main procedure is compiled. You can also define arguments to include files. To add an argument to an include file, place the string {1} into the include file where you want the argument inserted. Then, in each include file reference, add the value of the argument after the name of the include file, separated by a space. For example, in the next section you’ll replace the four button triggers for the First, Next, Prev, and Last buttons with an include file. The code for all of those buttons is the same except for the one keyword in the GET statement FIRST, NEXT, PREV, and LAST. You can write all four triggers with one include file by adding an argument to the include file. If you call it h-ButtonTrig1.i, then the first line of code in h-ButtonTrig1.i is GET {1} CustQuery. And the trigger for the First button becomes {h-ButtonTrig.i FIRST}.
For multiple arguments to an include file, just mark them with placeholders {1}, {2}, and so on. You can also create named arguments that let you determine the arguments you pass into the include file when it becomes part of the compilation. For a complete description of include files and their arguments, see the Include File Reference topic in the online help.
7–19

Defining and Using Temp-tables
Adding an Order Line browse to the Customer window
You’ve completed the h-fetchOlines.p procedure. When it ends, it returns a temp-table with the OrderLines for the Order in it, along with the name and weight total from the Item table.
To use an include file to put the same code in multiple procedures:
1. Open h-fetchOlines.p and copy the temp-table definition.
2. Paste it into a new procedure window and save the procedure as h-ttOline.i:
3. Remove the code from h-fetchOlines.p (or just comment it out to remind you of what the include file replaces), and put in a reference to h-ttOline.i in its place:
Remember that part of the purpose of this exercise is to give you a taste of what it is like to write separate ABL procedures for user interfaces and for data access and update code, so that you can ultimately distribute those procedures between client and server machines in a true enterprise application. In this simple example, both procedures run as part of the same session, but they could run more or less exactly the same in different OpenEdge sessions on completely different machines.
/* h-ttOline.i -- include file to define ttOline temp-table. */DEFINE TEMP-TABLE ttOline LIKE Orderline
FIELD ItemName LIKE ITEM.ItemNameFIELD TotalWeight AS DECIMAL LABEL "Tot.Wgt.".
/* h-fetchOlines.p -- retrieve all orderlines for an Orderand return them in a temp-table. */{h-ttOline.i}
/* DEFINE TEMP-TABLE ttOline LIKE OrderLineFIELD ItemName LIKE ITEM.ItemNameFIELD TotalWeight AS DECIMAL LABEL "Tot.Wgt." . */
DEFINE INPUT PARAMETER piOrderNum AS INTEGER NO-UNDO.DEFINE OUTPUT PARAMETER TABLE FOR ttOline.
FOR EACH OrderLine WHERE Orderline.OrderNum = piOrderNum, Item OF OrderLine:CREATE ttOline.BUFFER-COPY OrderLine TO ttOline
ASSIGN ttOline.ItemName = ITEM.ItemNamettOline.TotalWeight = OrderLine.Qty * ITEM.Weight.
END.
7–20
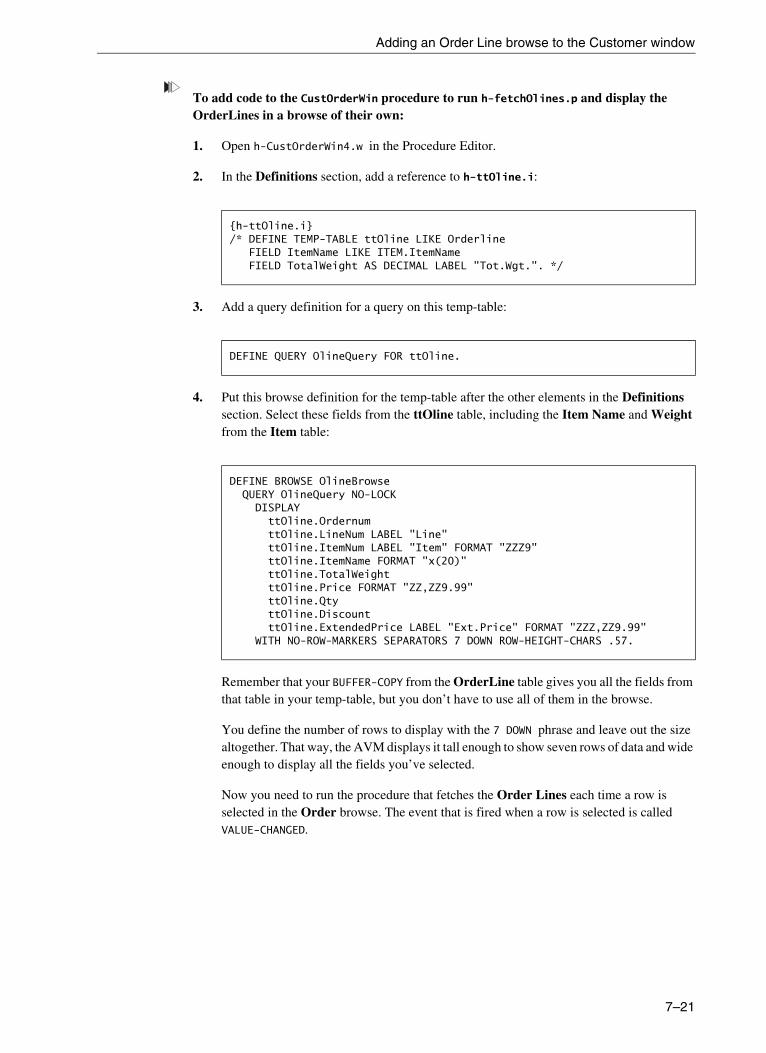
Adding an Order Line browse to the Customer window
To add code to the CustOrderWin procedure to run h-fetchOlines.p and display the OrderLines in a browse of their own:
1. Open h-CustOrderWin4.w in the Procedure Editor.
2. In the Definitions section, add a reference to h-ttOline.i:
3. Add a query definition for a query on this temp-table:
4. Put this browse definition for the temp-table after the other elements in the Definitions section. Select these fields from the ttOline table, including the Item Name and Weight from the Item table:
Remember that your BUFFER-COPY from the OrderLine table gives you all the fields from that table in your temp-table, but you don’t have to use all of them in the browse.
You define the number of rows to display with the 7 DOWN phrase and leave out the size altogether. That way, the AVM displays it tall enough to show seven rows of data and wide enough to display all the fields you’ve selected.
Now you need to run the procedure that fetches the Order Lines each time a row is selected in the Order browse. The event that is fired when a row is selected is called VALUE-CHANGED.
{h-ttOline.i}/* DEFINE TEMP-TABLE ttOline LIKE Orderline
FIELD ItemName LIKE ITEM.ItemNameFIELD TotalWeight AS DECIMAL LABEL "Tot.Wgt.". */
DEFINE QUERY OlineQuery FOR ttOline.
DEFINE BROWSE OlineBrowseQUERY OlineQuery NO-LOCK
DISPLAYttOline.Ordernum ttOline.LineNum LABEL "Line"ttOline.ItemNum LABEL "Item" FORMAT "ZZZ9"ttOline.ItemName FORMAT "x(20)"ttOline.TotalWeightttOline.Price FORMAT "ZZ,ZZ9.99"ttOline.QtyttOline.DiscountttOline.ExtendedPrice LABEL "Ext.Price" FORMAT "ZZZ,ZZ9.99"
WITH NO-ROW-MARKERS SEPARATORS 7 DOWN ROW-HEIGHT-CHARS .57.
7–21
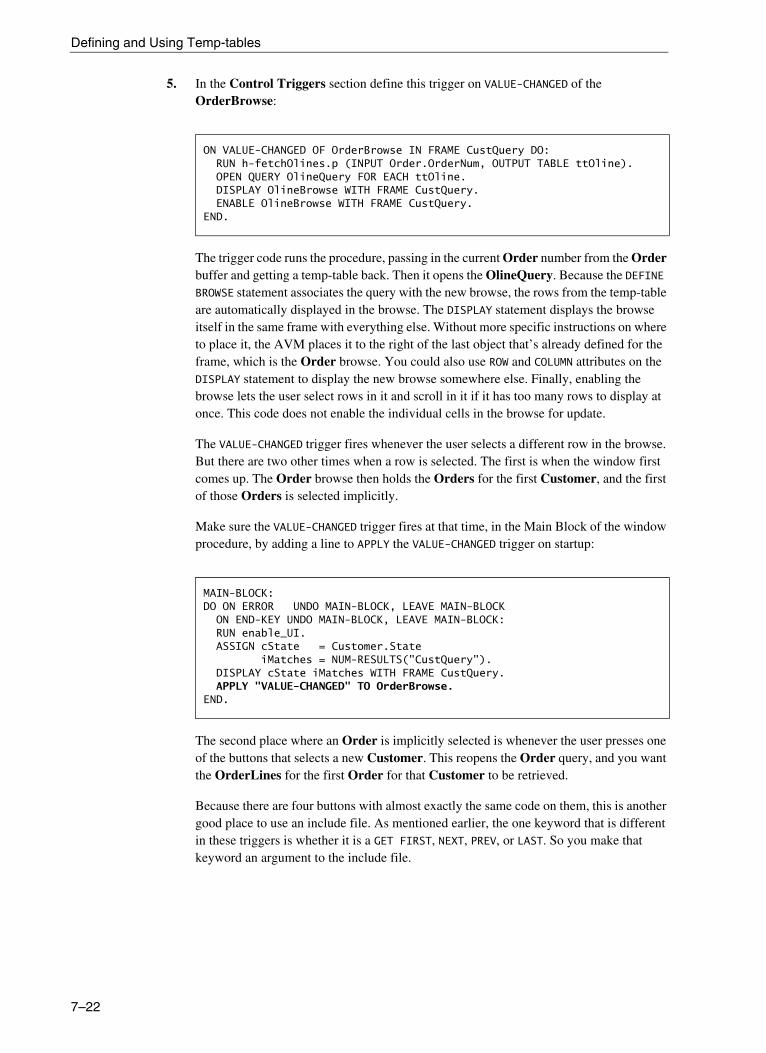
Defining and Using Temp-tables
5. In the Control Triggers section define this trigger on VALUE-CHANGED of the OrderBrowse:
The trigger code runs the procedure, passing in the current Order number from the Order buffer and getting a temp-table back. Then it opens the OlineQuery. Because the DEFINE BROWSE statement associates the query with the new browse, the rows from the temp-table are automatically displayed in the browse. The DISPLAY statement displays the browse itself in the same frame with everything else. Without more specific instructions on where to place it, the AVM places it to the right of the last object that’s already defined for the frame, which is the Order browse. You could also use ROW and COLUMN attributes on the DISPLAY statement to display the new browse somewhere else. Finally, enabling the browse lets the user select rows in it and scroll in it if it has too many rows to display at once. This code does not enable the individual cells in the browse for update.
The VALUE-CHANGED trigger fires whenever the user selects a different row in the browse. But there are two other times when a row is selected. The first is when the window first comes up. The Order browse then holds the Orders for the first Customer, and the first of those Orders is selected implicitly.
Make sure the VALUE-CHANGED trigger fires at that time, in the Main Block of the window procedure, by adding a line to APPLY the VALUE-CHANGED trigger on startup:
The second place where an Order is implicitly selected is whenever the user presses one of the buttons that selects a new Customer. This reopens the Order query, and you want the OrderLines for the first Order for that Customer to be retrieved.
Because there are four buttons with almost exactly the same code on them, this is another good place to use an include file. As mentioned earlier, the one keyword that is different in these triggers is whether it is a GET FIRST, NEXT, PREV, or LAST. So you make that keyword an argument to the include file.
ON VALUE-CHANGED OF OrderBrowse IN FRAME CustQuery DO:RUN h-fetchOlines.p (INPUT Order.OrderNum, OUTPUT TABLE ttOline).OPEN QUERY OlineQuery FOR EACH ttOline.DISPLAY OlineBrowse WITH FRAME CustQuery.ENABLE OlineBrowse WITH FRAME CustQuery.
END.
MAIN-BLOCK:DO ON ERROR UNDO MAIN-BLOCK, LEAVE MAIN-BLOCK
ON END-KEY UNDO MAIN-BLOCK, LEAVE MAIN-BLOCK:RUN enable_UI.ASSIGN cState = Customer.State
iMatches = NUM-RESULTS("CustQuery").DISPLAY cState iMatches WITH FRAME CustQuery.APPLY "VALUE-CHANGED" TO OrderBrowse.
END.
7–22

Adding an Order Line browse to the Customer window
6. Create an include file for the four buttons:
a. Copy the code from the BtnFirst CHOOSE trigger and paste it into a new procedure window.
b. Replace the FIRST keyword with the include file argument marker {1}.
c. Add the same statement as you did in the Main Block to APPLY the VALUE-CHANGED event.
d. Save this code as h-ButtonTrig1.i, as shown:
7. In each of the four CHOOSE triggers, replace the trigger code with a reference to the h-ButtonTrig.i include file, passing in the appropriate GET keyword, as in this BtnFirst trigger:
Now your procedure is ready to retrieve and display OrderLines.
8. Widen the window and its frame substantially by dragging the right edge out further to the right, to make room for the OrderLine browse.
9. Run the window to see the effect of your changes:
/* h-ButtonTrig1.i -- include file for the First/Next/Prev/Last buttons in h-CustOrderWin4.w. */
GET {1} CustQuery.IF AVAILABLE Customer THENDISPLAY Customer.CustNum Customer.Name Customer.Address
Customer.City Customer.State WITH FRAME CustQuery IN WINDOW CustWin.
{&OPEN-BROWSERS-IN-QUERY-CustQuery}APPLY "VALUE-CHANGED" TO OrderBrowse.
{ h-ButtonTrig1.i FIRST }
7–23

Defining and Using Temp-tables
Summary
In this chapter you have learned:
• How to define temp-tables that create result sets that don’t correspond to a single database table, how to pass them as parameters, and how to display their data
• How these temp-table parameters can help you separate out the data access and business logic of your application from the user interface procedures, in preparation for building distributed enterprise applications with ABL
7–24
8Defining Functions
This chapter covers some other important topics concerning how you construct procedures. Specifically, it describes how to define your own functions within your ABL procedures to complement the built-in ABL functions.
This chapter includes the following sections:
• User-defined functions
• Defining a function

Defining Functions
User-defined functions
As you have already seen in the previous chapter’s discussion of INTERNAL-ENTRIES and the GET-SIGNATURE method, there is an alternative to the internal procedure as a named entry point within a procedure file. This is the user-defined function, sometimes referred to as a UDF or simply as a function. You are probably familiar with functions from other programming languages. Fundamentally, a function differs from a procedure in that it returns a value of a specific data type, and therefore can act in place of any other kind of variable or expression that would evaluate to the same data type. This means that you can place functions inside other expressions within a statement or within the WHERE clause of a result set definition. By contrast, you must invoke a procedure, whether external or internal, with a RUN statement. If it needs to return information, you have to use OUTPUT parameters that your code examines after the procedure returns. You should therefore consider defining a function within your application for a named entry point that needs to return a single value and that is convenient to use within larger expressions.
You can also compare user-defined functions with the many built-in functions that are a part of ABL, such as NUM-ENTRIES, ENTRY, and many others that you’ve seen and used. Your functions can provide the same kinds of widely useful behavior as the built-in functions, but specific to your application.
If you use a function in a WHERE clause or other expression in the header of a FOR EACH block, the ABL Virtual Machine (AVM) evaluates the function once, at the time the query with the WHERE clause is opened or the FOR EACH block is entered.
You can perhaps best think of a function as a small piece of code that performs a frequently needed calculation, or that checks a rule or does some common data transformation. In general, this is the best use for functions. However, a function can be a more complex body of code if this is appropriate.
8–2

Defining a function
Defining a function
This is the syntax you use to define the header for a function:
A function always must explicitly return a value of the data type you name. It can take one or more parameters just as a procedure can. Although this means that a function can return OUTPUT parameters or use INPUT-OUTPUT parameters just as a procedure can, you should consider that a function normally takes one or more INPUT parameters, processes their values, and returns its RETURN value as a result. If you find yourself defining a function that has OUTPUT parameters, you should reconsider and probably make it a procedure instead. One of the major features and benefits of a function is that you can embed it in a larger expression and treat its return value just as you would a variable of the same type. If there are OUTPUT parameters, this won’t be the case as you must check their values in separate statements.
The body of the function can contain the same kinds of statements as an internal procedure. Just as with internal procedures, you cannot define a temp-table or any shared object within the function. It has two important additional restrictions as well:
• Within a function, you cannot define any input-blocking statements, such as a WAIT-FOR statement or any statement that prompts the user for input.
• You cannot reference a function within an ABL ASSIGN statement or other ABL updating statement that could cause an index to be updated. The interpreter might not be able to deal with transaction-related code inside the function itself in the middle of the update statement. It is a very good practice to avoid using functions in any code statements that update the database.
A function must contain at least one RETURN statement to return a value of the appropriate data type:
The return-value can be a constant, variable, field, or expression (including possibly even another function reference) that evaluates to the data type the function was defined to return.
A function must end with an END statement. Just as an internal procedure normally ends with an END PROCEDURE statement, it is normal to end a function with an explicit END FUNCTION statement to keep the organization of your procedure file clearer. The FUNCTION keyword is optional in this case but definitely good programming practice.
Although a function must always have a return type and return a value, a reference to the function is free to ignore the return value. That is, an ABL statement can simply consist of a function reference without a return value, much like a RUN statement without the RUN keyword. This might be appropriate if the function returns a TRUE/FALSE value indicating success or failure, and in a particular piece of code, you are not concerned with whether it succeeded or not.
Whether a function takes any parameters or not, you must include parentheses, even if they’re empty, on every function reference in your executable code.
Syntax
FUNCTION function-name [ RETURNS ] datatype [ ( parameters ) ] :
RETURN return-value.
8–3

Defining Functions
Making a forward declaration for a function
If you follow the structural guidelines for a procedure file, you place all your internal entries—internal procedures and user-defined functions—at the end of the file. Normally, you need to reference the functions in your procedure file within the body of the code that comes before their actual implementation, either in the main block or in other internal entries in the file.
The ABL compiler needs to understand how to treat your function when it encounters it in the executable code. In particular, it needs to know the data type to return. It also does you a service by enforcing the rest of the function’s signature—its parameter list—whenever it finds a reference to it. For this reason, the AVM needs to know at least the definition of the function—its return type and parameters—before it encounters a use of the function elsewhere in the procedure. To do this and still leave the actual implementation of the function toward the end of the file, you can provide a forward declaration of the function, also called a prototype, toward the top of the procedure file, before any code that uses the function.
This is the syntax for a forward declaration of a function:
As you can see, the basic definition of the function name, return type, and parameters is the same as you would use in the function header itself. If you provide a forward declaration for a function, the parameter list is optional in the function header (though the RETURNS phrase is not). It’s good practice, though, to provide it in both places.
A function prototype can point to an actual function implementation in one of three places:
• In the beginning of the procedure
• In another procedure
• In a super procedure
Syntax
FUNCTION function-name [ RETURNS ] datatype [ ( parameters ){ FORWARD | [ MAP [ TO ] actual-name ] IN proc-handle | IN SUPER }
8–4

Defining a function
Making a local forward declaration
If you use the FORWARD keyword in the function prototype, then this tells the AVM to expect the actual function implementation later in the same procedure file. This is a simple example of a function that converts temperature measurements in degrees Celsius scale to degrees Fahrenheit:
This procedure executes as follows:
1. The procedure makes a forward declaration of the CtoF conversion function, so that it can be used in the procedure before its implementation code is defined.
2. The function is used inside the REPEAT loop in the DISPLAY statement. Notice that it appears where any DECIMAL expression could appear and is treated the same way.
3. There is the actual implementation of the function, which takes the temperature as measured in degrees Celsius as input and returns the equivalent temperature measurement in degrees Fahrenheit.
Figure 8–1 shows the first page of output from the h-ConvTemp1.p procedure.
Figure 8–1: Result of the ConvTemp.p procedure
You could leave the parameter list out of the function implementation itself, but it is good form to leave it in.
/* h-ConvTemp1.p -- convert temperatures and demonstrate functions. */ DEFINE VARIABLE dTemp AS DECIMAL NO-UNDO.
FUNCTION CtoF RETURNS DECIMAL (INPUT dCelsius AS DECIMAL) FORWARD.
REPEAT dTemp = 0 TO 100:DISPLAY
dTemp LABEL "Celsius"CtoF(dTemp) LABEL "Fahrenheit"WITH FRAME f 10 DOWN.
END.
FUNCTION CtoF RETURNS DECIMAL (INPUT dCelsius AS DECIMAL):RETURN (dCelsius * 1.8) + 32.
END FUNCTION.
8–5
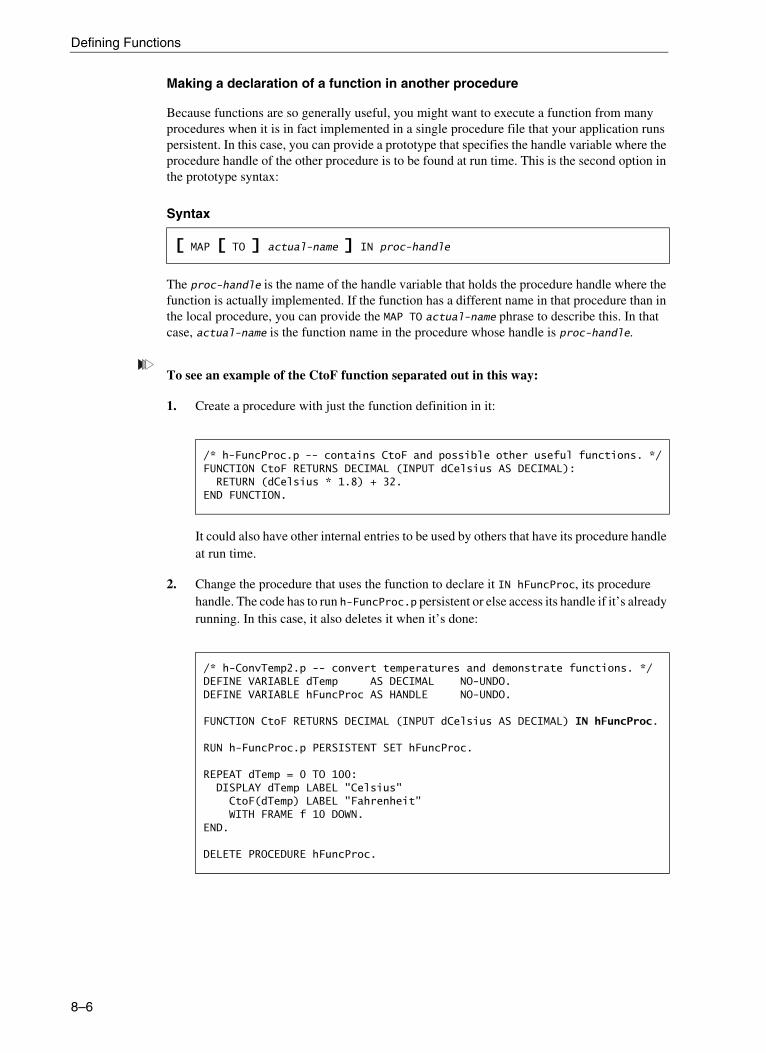
Defining Functions
Making a declaration of a function in another procedure
Because functions are so generally useful, you might want to execute a function from many procedures when it is in fact implemented in a single procedure file that your application runs persistent. In this case, you can provide a prototype that specifies the handle variable where the procedure handle of the other procedure is to be found at run time. This is the second option in the prototype syntax:
The proc-handle is the name of the handle variable that holds the procedure handle where the function is actually implemented. If the function has a different name in that procedure than in the local procedure, you can provide the MAP TO actual-name phrase to describe this. In that case, actual-name is the function name in the procedure whose handle is proc-handle.
To see an example of the CtoF function separated out in this way:
1. Create a procedure with just the function definition in it:
It could also have other internal entries to be used by others that have its procedure handle at run time.
2. Change the procedure that uses the function to declare it IN hFuncProc, its procedure handle. The code has to run h-FuncProc.p persistent or else access its handle if it’s already running. In this case, it also deletes it when it’s done:
Syntax
[ MAP [ TO ] actual-name ] IN proc-handle
/* h-FuncProc.p -- contains CtoF and possible other useful functions. */FUNCTION CtoF RETURNS DECIMAL (INPUT dCelsius AS DECIMAL):
RETURN (dCelsius * 1.8) + 32.END FUNCTION.
/* h-ConvTemp2.p -- convert temperatures and demonstrate functions. */ DEFINE VARIABLE dTemp AS DECIMAL NO-UNDO.DEFINE VARIABLE hFuncProc AS HANDLE NO-UNDO.
FUNCTION CtoF RETURNS DECIMAL (INPUT dCelsius AS DECIMAL) IN hFuncProc.
RUN h-FuncProc.p PERSISTENT SET hFuncProc.
REPEAT dTemp = 0 TO 100:DISPLAY dTemp LABEL "Celsius"
CtoF(dTemp) LABEL "Fahrenheit"WITH FRAME f 10 DOWN.
END.
DELETE PROCEDURE hFuncProc.
8–6

Defining a function
3. Run this variant h-ConvTemp2.p, to get the same result as before. This time here’s the end of the display, just to confirm that you got the arithmetic right:
An externally defined function such as this one can also reside in an entirely different OpenEdge session, connected to the procedure that uses the function using the OpenEdge AppServer. In this case, you declare the function in the same way but use the AppServer-specific ON SERVER phrase on the RUN statement to invoke the function. As with any AppServer call, you can’t pass a buffer as a parameter to such a function. See OpenEdge Application Server: Developing AppServer Applications for more information.
Making a declaration of a function IN SUPER
The third option in the function prototype is to declare that it is found IN SUPER at run time. This means that the function is implemented in a super procedure of the procedure with the declaration.
Making run-time references with DYNAMIC-FUNCTION
ABL lets you construct a reference to a function at run time, using a built-in function called DYNAMIC-FUNCTION. This is the syntax:
Like a function reference itself, the DYNAMIC-FUNCTION function can appear anywhere in your procedure code where an expression of that data type could appear.
The first parameter to DYNAMIC-FUNCTION is the name of the function to invoke. This procedure can be a quoted literal or an expression, such as a variable that evaluates to a valid function name.
Following this, you can optionally include an IN handle phrase to direct the AVM to execute the function in a persistent procedure handle. In this case, the handle must be an actual field or variable name of HANDLE data type, not an expression.
If the function itself takes any parameters, you pass those as additional parameters to DYNAMIC-FUNCTION, in the same form that you would pass them to the function itself.
DYNAMIC-FUNCTION gives you the flexibility to have code that can execute different function names depending on the situation, since the function parameter can be a variable. You might have, for example, several different functions that do parallel work for different categories of data in a loop you’re iterating through. However, that is of perhaps limited value because all the functions you invoke must have the same signature.
Syntax
DYNAMIC-FUNCTION ( function [ IN handle ] [ , parameters ] )
8–7

Defining Functions
The most common use of DYNAMIC-FUNCTION is for one of two other reasons:
• If you want to reference a function without going to the trouble of defining a prototype for it, you can do this with DYNAMIC-FUNCTION. Because the AVM has no way of knowing what the name of the function is or its return type, it cannot look for a prototype for it and therefore does not give you an error as it would if you had a static reference to a function with no prior declaration. By the same token, it cannot provide you with any helpful warnings if your reference to the function is not valid.
• If you want to invoke a function in a number of different persistent procedures, you can easily do this with DYNAMIC-FUNCTION since the procedure handle to run it is part of the function reference, and not defined in the prototype. In this way, you can run a function in different persistent procedure instances depending on the circumstances. If each of those procedures represents an application object (such as a window, frame, browse, or query), then it can be very powerful to invoke the same function in different procedure handles representing those objects.
8–8

9Handling Data and Locking Records
The most important aspect of any enterprise application is updating and maintaining data its database. This book deliberately delays that all-important topic until now so that you have the necessary background in ABL (Advanced Business Language) to understand and manage database updates. In this chapter, you’ll learn about data handling and record locks.
This chapter discusses these topics from the perspective of a distributed application, one where the user interface and the logic that actually update the database are running in different sessions, normally on different machines. You don’t have to run your application in this distributed mode, but you should definitely design it this way, so that as your requirements change, you are prepared to take advantage of multiple user interfaces and other requirements that demand that your application run on different platforms, one where the user interface is running and one or more where the database is directly connected.
This distributed environment affects some of the most basic precepts of how you construct ABL procedures. When the language was first developed, a typical run-time environment was a host-based system with a number of character-screen terminals connected directly to a single computer. Later, this environment was extended to the client/server model, with a network of PCs usually running a graphical interface connected over a network to a server machine where the database was located. In the client/server model, the notion of a direct connection to the database was still maintained across the network so that individual client sessions could run as if they had a local connection to the database, reading and writing individual records directly to and from the database and maintaining locks on records as they were viewed in the client session.
In a distributed application this model changes considerably. There’s no longer a direct connection from a client session to the database. Records are read from the database into temp-tables and passed to the client for display and possible update. The client session can no longer hold locks on records it’s using, so the server-side code needs to verify whether updated records passed back from the client have been modified by another user since they were read. Likewise, the server-side business logic cannot easily hold record locks while the records are being viewed in the client session. All of these considerations have a fundamental impact on how you design your application and how you write your ABL procedures.
Handling Data and Locking Records
To help you understand a bit of the historical perspective of how ABL has evolved, this chapter begins by introducing you to all the update-related statements in the language, and then explains how they are or are not still relevant to the new distributed paradigm.
This chapter includes the following sections:
• Overview of data handling statements
• Record locking in ABL
9–2

Overview of data handling statements
Overview of data handling statements
You have already been introduced to many of the ABL statements that manage data, either by reading records from a data source and making them available to the application in record buffers or by displaying data to the screen and saving changes from the screen. The chart in Figure 9–1 summarizes the scope of each of these statements relative to the four layers of interaction.
Figure 9–1: Data handling statements
From the chart in Figure 9–1, you can see that some single statements span more than one of the following layers in the system:
• A record in a database table or temp-table
• A record in a record buffer
• A record in the screen buffer as the user sees it
• An action by the user on the screen buffer
ASSIGN
CREATE
DELETE
DISPLAY
ENABLE
FIND
FOR EACH
GET
INSERT
RELEASE
SET
UPDATE
StatementDatabase Record
Record Buffer
Screen Buffer User
OPEN QUERY(with BROWSE)
PROMPT-FOR
REPOSITION(with BROWSE)
9–3
Handling Data and Locking Records
This makes these statements very economical (in terms of syntax requirements) in a host-based or client/server system, but problematic in a distributed system where the user and the screen buffer do not exist in the same session with the database. This means that some of these statements are not of great use in a distributed application and, as a result, you rarely (if ever) use them. These include:
• INSERT table-name. — You saw a brief example of this statement in Chapter 4, “Procedure Blocks and Data Access.” As you can see from Figure 9–1, the INSERT statement starts at the database level with the creation of a new record, which the ABL Virtual Machine (AVM) then displays (with its initial values) in the screen buffer. The statement pauses to let the user enter values into the record’s fields, and then saves the record back to the record buffer.
• OPEN QUERY query-name (with a browse on a query against a database table) — There is a direct association between a browse object and its query. When you open the query, records from the underlying table are automatically displayed in the browse.
• SET table-name or field-list. — The SET statement accepts input from the user in the screen buffer for one or more fields and assigns them directly to the record buffer.
• UPDATE table-name or field-list. — The UPDATE statement displays the current values for one or more fields to the screen, accepts changes to those fields from the user, and assigns them back to the record buffer.
Each of these statements is implicitly (if not explicitly) followed by a record RELEASE that actually writes the record with its changes back to the database. The exact timing of that record release is discussed later in the “Making sure you release record locks” section on page 9–12, but this means that these statements carry data all the way from the user to the database. Since this can’t be done in a single session of a distributed application, you won’t generally use these statements with database tables.
When can you still use them? As you’ve already seen, ABL provides the temp-table as a way to present and manage a set of records independent of the database and, in particular, as the way you should pass data from server to client and back. So you could use any of these statements against a temp-table in the client session, because the Database Record layer is, in fact, just the temp-table record in the client session. In particular, opening a query against a client-side temp-table and seeing that query’s data in a related browse is the standard way to present tables of data on the client.
You’ve already seen the following statements in action:
• ASSIGN table-name or field-list. — You can use this statement to assign one or more fields from the screen buffer to the record buffer, for example, on a LEAVE trigger for a field. You can also use it to do multiple programmatic assignments of values in a single statement, as in the ASSIGN field = value field = value . . . statement.
• DISPLAY table-name or field-list. — This statement moves one or more values from a record buffer to the screen buffer. You could use this statement in a client procedure with a temp-table record, or with a list of local variables.
• ENABLE field-list. — This statement enables one or more fields in the screen buffer to allow user input. Its counterpart, DISABLE, disables one or more fields.
• FIND table-name. — This statement locates a single record in the underlying table and moves it into the record buffer. You could use this statement in server-side logic using a database table, or in a client-side procedure using a temp-table.
9–4

Overview of data handling statements
• FOR EACH table-name: — This block header statement iterates through a set of related records in the underlying table and moves each one in turn into the record buffer. You could use this statement in server-side logic on a database table or client-side logic on a temp-table.
• GET query-name. — This statement locates a single record in an open query and moves it into the record buffer.
• REPOSITION (with browse) — The REPOSITION statement on a browsed query moves the new record into the record buffer.
There remain several new statements you’ll learn about in the next chapter. These include:
• CREATE table-name. — This statement creates a new record in a table and makes it available in the record buffer.
• DELETE table-name. — This statement deletes the current record in the record buffer, removing it from the underlying table.
• RELEASE table-name. — This statement explicitly removes a record from the record buffer and releases any lock on the record, making it available for another user.
In addition to these transaction-oriented statements, the PROMPT-FOR statement enables a field in the screen buffer and lets the user enter a value for it. In an event-driven application, you do not normally want the user interface to wait on a single field and force the user to enter a value into that field before doing anything else, so the PROMPT-FOR statement is also not a frequent part of a modern application. The INSERT, SET, and UPDATE statements similarly have their own built-in WAIT-FOR, which demands input into the fields before the user can continue. For this reason, these statements are also of limited usefulness in an event-driven application, even when you are updating records in a client-side temp-table.
9–5

Handling Data and Locking Records
Record locking in ABL
When you read records from a database table, the AVM applies a level of locking to the record that you can control so that you can prevent conflicts where multiple users of the same data are trying to read or modify the same records at the same time. This locking doesn’t apply to temp-tables since they are strictly local to a single ABL session and never shared between sessions.
When you read records using a FIND statement, a FOR EACH block, or the GET statement on a query that isn’t being viewed in a browse, by default the AVM reads each record with a SHARE-LOCK. The SHARE-LOCK means that the AVM marks the record in the database to indicate that your session is using it. Another user (and the general term user here and elsewhere means code in any type of OpenEdge session that is accessing data, whether it’s through an actual user interface or not) can also read the same record in the same way—that’s why this is called a SHARE-LOCK.
You can also specify a keyword on your FIND or FOR EACH statement, or on the OPEN QUERY statement for a query, to read records with a different lock level. If you intend to change a record, you can use the EXCLUSIVE-LOCK keyword. This marks the record as being reserved for your session’s exclusive use where any changes are concerned, including deleting the record. If any other user has a SHARE-LOCK on the record, an attempt to read it with an EXCLUSIVE-LOCK fails. Thus, a SHARE-LOCK assures you that while others can read the same record you have read, they cannot change it out from under you.
Record locking examples
A few simple examples can help illustrate how ABL handles different kinds of locks. When you start the Procedure Editor and connect to the Sports2000 database, you are running in single-user mode, as the only user of the database.
To set up your session to test locking:
1. Exit your session to free up your single-user connection to the Sports2000 database.
2. Make sure your path includes the bin directory under your OpenEdge install directory.
3. From a Windows Command Prompt window, change your directory to your working directory, or wherever your local Sports2000 database is located.
4. Type the command: proserve Sports2000. You should see a series of messages as the server starts up.
5. Restart the Procedure Editor.
6. From the Tools menu, select Database Connections.
7. Click the Connect button.
9–6

Record locking in ABL
8. Type Sports2000 as the Physical Name, then click the Options button:
9. Check on the Multiple Users toggle box so that you connect to the server in multi-user mode:
10. Click OK, then close the Database Connections dialog box:
Now your session is connected to the database server. To test the effects of record locking in a multi-user environment, you need to create a second OpenEdge session.
9–7

Handling Data and Locking Records
To start up another session:
1. Start the Procedure Editor.
2. From the Tools menu, select Data Administration:
3. From the Data Administration menu, select Database, then click Connect.
4. Go through the same sequence of steps as before to connect in multi-user mode to the same Sports2000 database server.
Now you’re ready to test locking conflicts.
Using EXCLUSIVE-LOCKs
Your first test involves using EXCLUSIVE-LOCKs.
To test locking conflicts when using an EXCUSIVE-LOCK:
1. From your first session, create a new procedure window by selecting the File→ New menu item.
2. Enter this code to retrieve the first Customer record with an exclusive lock:
3. From the Desktop in your second session, bring up the Procedure Editor.
4. In the Procedure Editor in your second session, enter the same procedure, but with a message that says User 2 instead of User 1:
9–8
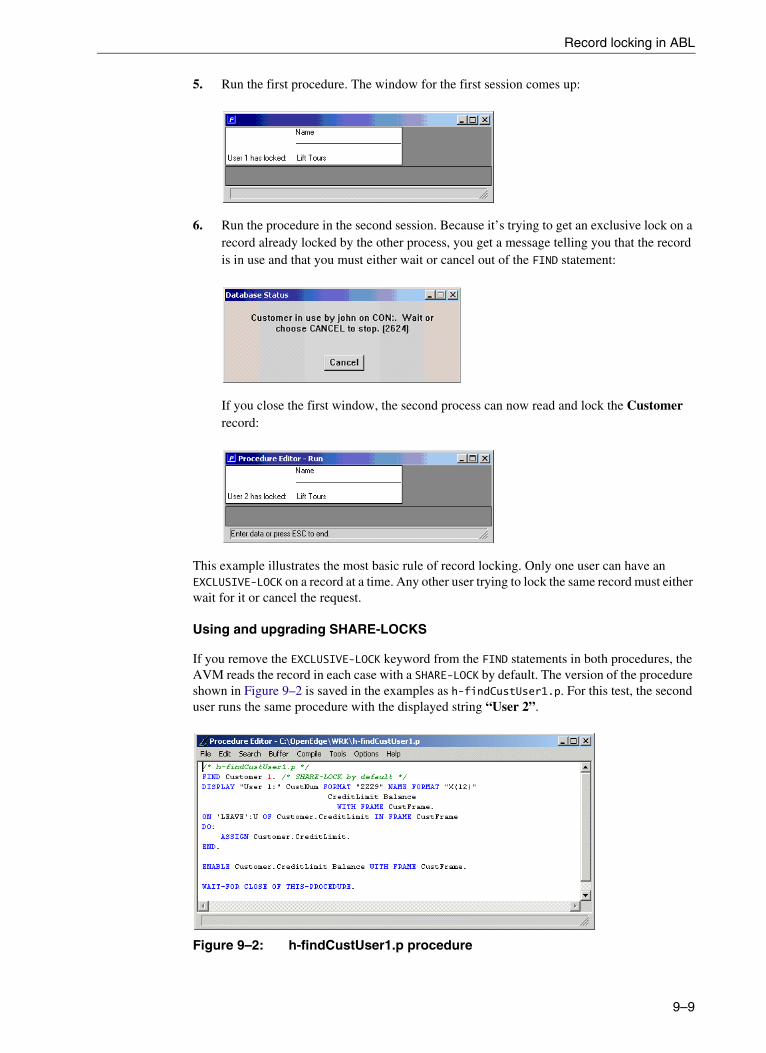
Record locking in ABL
5. Run the first procedure. The window for the first session comes up:
6. Run the procedure in the second session. Because it’s trying to get an exclusive lock on a record already locked by the other process, you get a message telling you that the record is in use and that you must either wait or cancel out of the FIND statement:
If you close the first window, the second process can now read and lock the Customer record:
This example illustrates the most basic rule of record locking. Only one user can have an EXCLUSIVE-LOCK on a record at a time. Any other user trying to lock the same record must either wait for it or cancel the request.
Using and upgrading SHARE-LOCKS
If you remove the EXCLUSIVE-LOCK keyword from the FIND statements in both procedures, the AVM reads the record in each case with a SHARE-LOCK by default. The version of the procedure shown in Figure 9–2 is saved in the examples as h-findCustUser1.p. For this test, the second user runs the same procedure with the displayed string “User 2”.
Figure 9–2: h-findCustUser1.p procedure
9–9
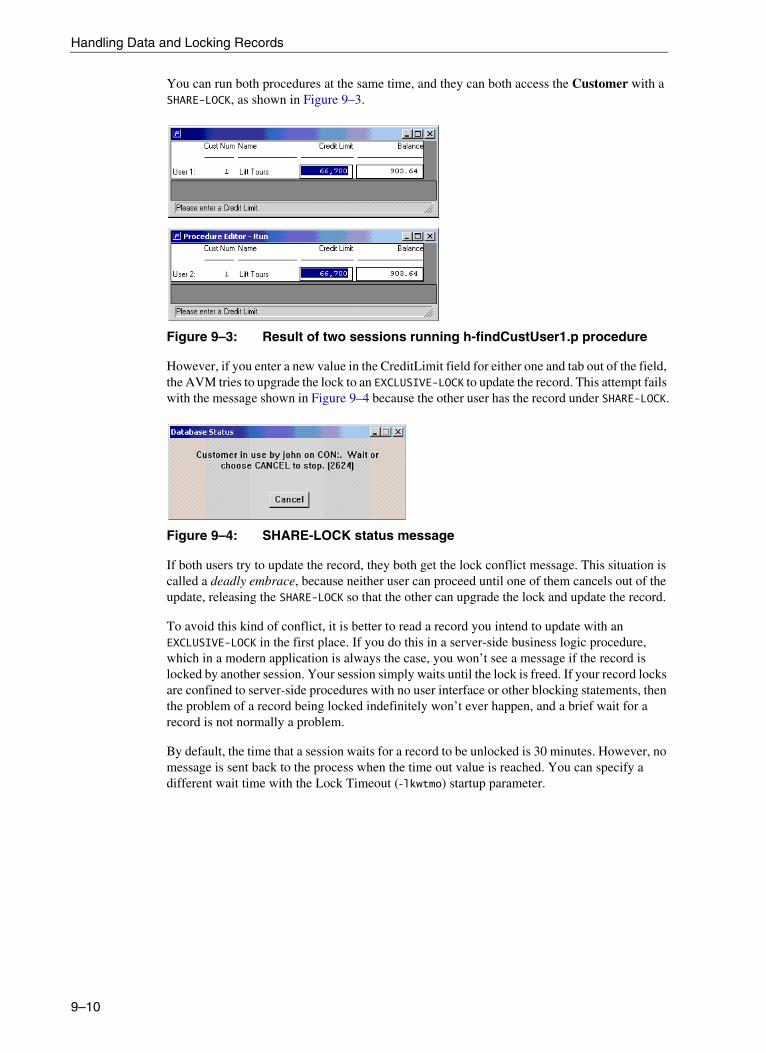
Handling Data and Locking Records
You can run both procedures at the same time, and they can both access the Customer with a SHARE-LOCK, as shown in Figure 9–3.
Figure 9–3: Result of two sessions running h-findCustUser1.p procedure
However, if you enter a new value in the CreditLimit field for either one and tab out of the field, the AVM tries to upgrade the lock to an EXCLUSIVE-LOCK to update the record. This attempt fails with the message shown in Figure 9–4 because the other user has the record under SHARE-LOCK.
Figure 9–4: SHARE-LOCK status message
If both users try to update the record, they both get the lock conflict message. This situation is called a deadly embrace, because neither user can proceed until one of them cancels out of the update, releasing the SHARE-LOCK so that the other can upgrade the lock and update the record.
To avoid this kind of conflict, it is better to read a record you intend to update with an EXCLUSIVE-LOCK in the first place. If you do this in a server-side business logic procedure, which in a modern application is always the case, you won’t see a message if the record is locked by another session. Your session simply waits until the lock is freed. If your record locks are confined to server-side procedures with no user interface or other blocking statements, then the problem of a record being locked indefinitely won’t ever happen, and a brief wait for a record is not normally a problem.
By default, the time that a session waits for a record to be unlocked is 30 minutes. However, no message is sent back to the process when the time out value is reached. You can specify a different wait time with the Lock Timeout (-lkwtmo) startup parameter.
9–10

Record locking in ABL
Using the NO-WAIT Option with the AVAILABLE and LOCKED functions
Just for the record, there are options you can use to make other choices in your procedures in the case of lock contention. If for some reason you do not want your procedure to wait for the release of a lock, you can include the NO-WAIT keyword on the FIND statement or FOR EACH loop. Normally, you should also include the NO-ERROR keyword on the statement to avoid the default “record is locked” message from the AVM. Following the statement, you can use one of two built-in functions to test whether your procedure got the record it wanted. The following variant of the procedure for User 2 uses the AVAILABLE keyword to test for the record, and is saved as h-findCustUser2.p. Because the NO-WAIT option causes the FIND statement in this procedure to fail and execution to continue if the record is already locked by another session, the record is not in the buffer, and the AVAILABLE(Customer) function returns FALSE:
If you run h-findCustUser1.p and h-findCustUser2.p, in that order from different sessions, the second session displays the MESSAGE statement, as shown in Figure 9–5.
Figure 9–5: EXCLUSIVE-LOCK message
This message occurs because h-findCustUser1.p has read the record with a SHARE-LOCK and h-findCustUser2.p has attempted to read it with an EXCLUSIVE-LOCK, which fails.
Alternatively, if you want to distinguish between the case where the record is not available because it has been locked by another user and the case where the record wasn’t found because the selection was invalid in some way, you can use the LOCKED function:
/* h-findCustUser2.p */FIND Customer 1 EXCLUSIVE-LOCK NO-WAIT NO-ERROR.IF NOT AVAILABLE Customer THENMESSAGE "That Customer isn't available for update." VIEW-AS ALERT-BOX.
ELSE DO:DISPLAY
"User 2:" Customer.CustNum FORMAT "ZZZ9" Customer.Name FORMAT "X(12)"Customer.CreditLimit Customer.BalanceWITH FRAME CustFrame.
ON "LEAVE":U OF Customer.CreditLimit IN FRAME CustFrame DO:ASSIGN Customer.CreditLimit.
END.
ENABLE Customer.CreditLimit Customer.Balance WITH FRAME CustFrame.WAIT-FOR CLOSE OF THIS-PROCEDURE.
END.
FIND Customer 1 EXCLUSIVE-LOCK NO-WAIT NO-ERROR.IF LOCKED Customer THENMESSAGE "That Customer isn't available for update." VIEW-AS ALERT-BOX.
ELSE IF NOT AVAILABLE Customer THENMESSAGE "That Customer was not found." VIEW-AS ALERT-BOX.
...
9–11
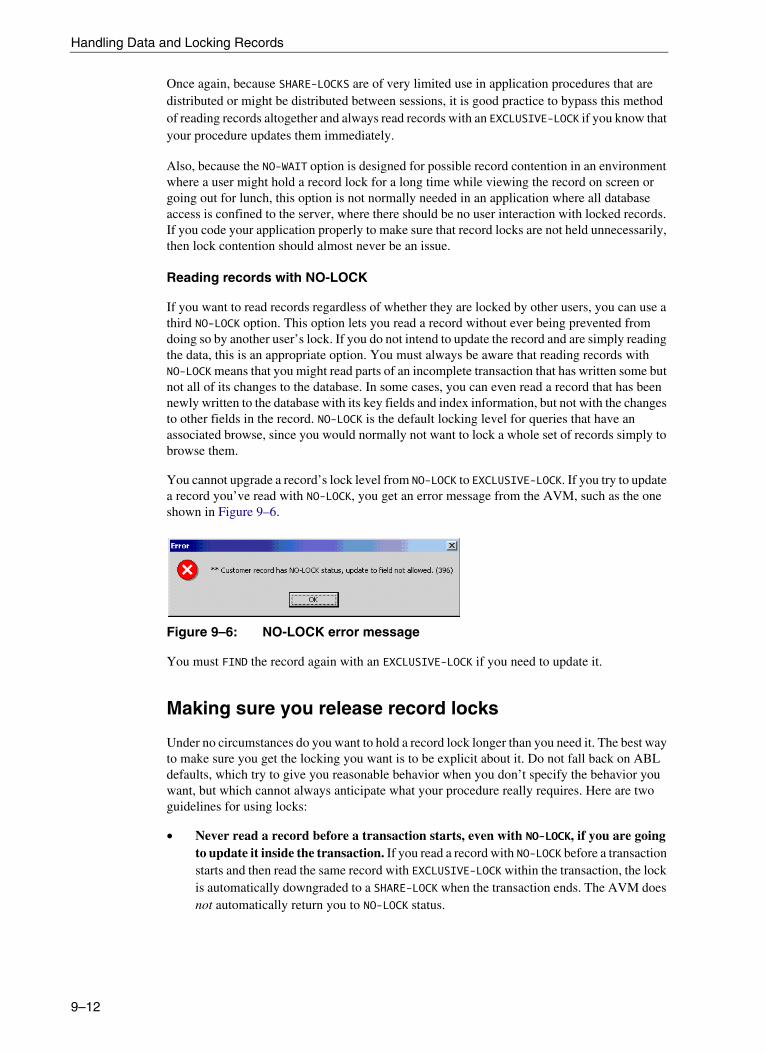
Handling Data and Locking Records
Once again, because SHARE-LOCKS are of very limited use in application procedures that are distributed or might be distributed between sessions, it is good practice to bypass this method of reading records altogether and always read records with an EXCLUSIVE-LOCK if you know that your procedure updates them immediately.
Also, because the NO-WAIT option is designed for possible record contention in an environment where a user might hold a record lock for a long time while viewing the record on screen or going out for lunch, this option is not normally needed in an application where all database access is confined to the server, where there should be no user interaction with locked records. If you code your application properly to make sure that record locks are not held unnecessarily, then lock contention should almost never be an issue.
Reading records with NO-LOCK
If you want to read records regardless of whether they are locked by other users, you can use a third NO-LOCK option. This option lets you read a record without ever being prevented from doing so by another user’s lock. If you do not intend to update the record and are simply reading the data, this is an appropriate option. You must always be aware that reading records with NO-LOCK means that you might read parts of an incomplete transaction that has written some but not all of its changes to the database. In some cases, you can even read a record that has been newly written to the database with its key fields and index information, but not with the changes to other fields in the record. NO-LOCK is the default locking level for queries that have an associated browse, since you would normally not want to lock a whole set of records simply to browse them.
You cannot upgrade a record’s lock level from NO-LOCK to EXCLUSIVE-LOCK. If you try to update a record you’ve read with NO-LOCK, you get an error message from the AVM, such as the one shown in Figure 9–6.
Figure 9–6: NO-LOCK error message
You must FIND the record again with an EXCLUSIVE-LOCK if you need to update it.
Making sure you release record locks
Under no circumstances do you want to hold a record lock longer than you need it. The best way to make sure you get the locking you want is to be explicit about it. Do not fall back on ABL defaults, which try to give you reasonable behavior when you don’t specify the behavior you want, but which cannot always anticipate what your procedure really requires. Here are two guidelines for using locks:
• Never read a record before a transaction starts, even with NO-LOCK, if you are going to update it inside the transaction. If you read a record with NO-LOCK before a transaction starts and then read the same record with EXCLUSIVE-LOCK within the transaction, the lock is automatically downgraded to a SHARE-LOCK when the transaction ends. The AVM does not automatically return you to NO-LOCK status.
9–12

Record locking in ABL
• If you have any doubt at all about when a record goes out of scope or when a lock is released, release the record explicitly when you are done updating it with the RELEASE statement. If you release the record, you know that it is no longer locked, and that you cannot unwittingly have a reference to it after the transaction block that would extend the scope of the lock, or even the transaction.
If you observe these two simple guidelines, your programming will be greatly simplified and much more reliable. Here are a few rules that you simply do not need to worry about if you acquire records only within a transaction and always release them when you are done:
• A SHARE-LOCK is held until the end of the transaction or the record release, whichever is later. If you avoid SHARE-LOCKs and always release records when you’re done updating them, the scary phrase whichever is later does not apply to your procedure.
• An EXCLUSIVE-LOCK is held until transaction end and then converted to a SHARE-LOCK if the record scope is larger than the transaction and the record is still active in any buffer. Again, releasing the record assures you that the use of the record in the transaction does not conflict with a separate use of the same record outside the transaction.
• When the AVM backs out a transaction, it releases locks acquired within a transaction or changes them to SHARE-LOCK if it locked the records prior to the transaction. If you don’t acquire locks or even records outside a transaction, you don’t need to worry about this special case.
Lock table resources
SHARE-LOCKs and EXCLUSIVE-LOCKs use up entries in a lock table maintained by the database manager. The possible number of entries in the lock table defaults to 500. You can change this number using the Lock Table Entries (-L) startup parameter for your OpenEdge session. The AVM stops a program if it attempts to access a record that causes it to overflow the lock table.
Optimistic and pessimistic locking strategies
In a traditional host-based or client/server application, you can enforce what is referred to as a pessimistic locking strategy. This means that your application always obtains an EXCLUSIVE-LOCK when it first reads any record that might be updated, to make sure that no other user tries to update the same record.
In a distributed application, this technique simply can’t work. If you read a single record or a set of records on the server, and pass them to a client session for display and possible update, your server-side session cannot easily hold locks on the records while the client is using them. When the server-side procedure ends and returns the temp-table of records to the client, the server-side record buffers are out of scope and the locks released. In addition, you would not want to maintain record locks for this kind of duration, as it would lead to likely record contention.
Note: It is possible to write server-side code so that one procedure holds record locks while another procedure returns a set of records to the client, but you should normally not do this.
9–13
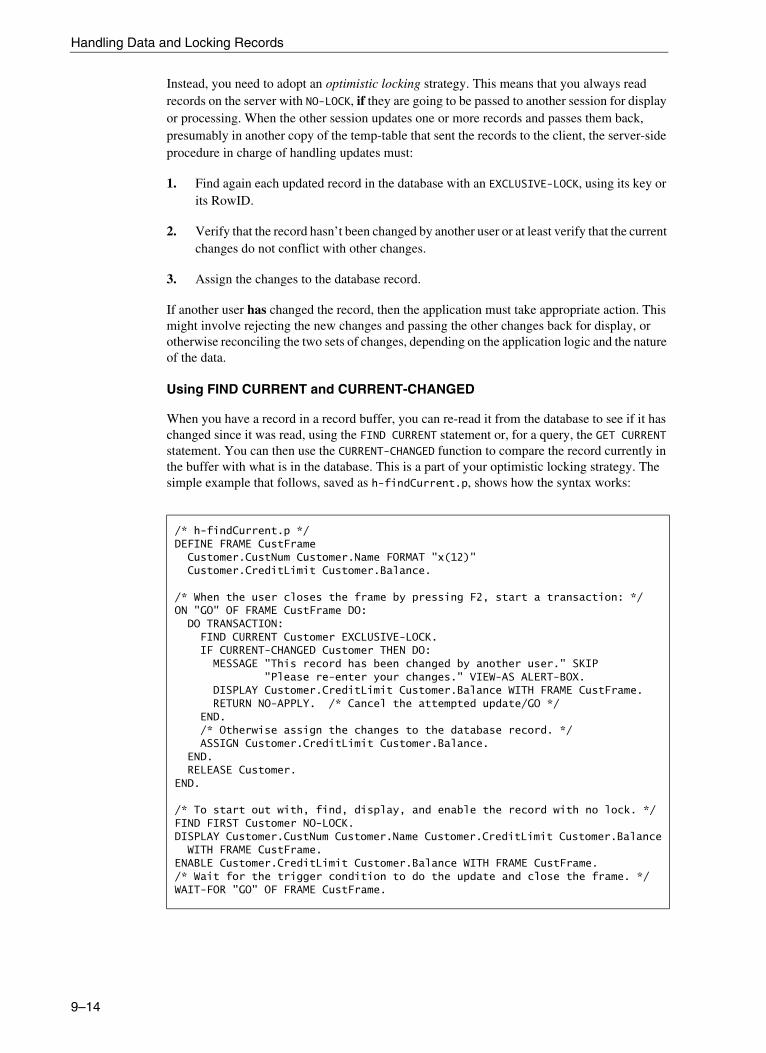
Handling Data and Locking Records
Instead, you need to adopt an optimistic locking strategy. This means that you always read records on the server with NO-LOCK, if they are going to be passed to another session for display or processing. When the other session updates one or more records and passes them back, presumably in another copy of the temp-table that sent the records to the client, the server-side procedure in charge of handling updates must:
1. Find again each updated record in the database with an EXCLUSIVE-LOCK, using its key or its RowID.
2. Verify that the record hasn’t been changed by another user or at least verify that the current changes do not conflict with other changes.
3. Assign the changes to the database record.
If another user has changed the record, then the application must take appropriate action. This might involve rejecting the new changes and passing the other changes back for display, or otherwise reconciling the two sets of changes, depending on the application logic and the nature of the data.
Using FIND CURRENT and CURRENT-CHANGED
When you have a record in a record buffer, you can re-read it from the database to see if it has changed since it was read, using the FIND CURRENT statement or, for a query, the GET CURRENT statement. You can then use the CURRENT-CHANGED function to compare the record currently in the buffer with what is in the database. This is a part of your optimistic locking strategy. The simple example that follows, saved as h-findCurrent.p, shows how the syntax works:
/* h-findCurrent.p */DEFINE FRAME CustFrame
Customer.CustNum Customer.Name FORMAT "x(12)"Customer.CreditLimit Customer.Balance.
/* When the user closes the frame by pressing F2, start a transaction: */ON "GO" OF FRAME CustFrame DO:
DO TRANSACTION:FIND CURRENT Customer EXCLUSIVE-LOCK.IF CURRENT-CHANGED Customer THEN DO:MESSAGE "This record has been changed by another user." SKIP
"Please re-enter your changes." VIEW-AS ALERT-BOX.DISPLAY Customer.CreditLimit Customer.Balance WITH FRAME CustFrame.RETURN NO-APPLY. /* Cancel the attempted update/GO */
END./* Otherwise assign the changes to the database record. */ASSIGN Customer.CreditLimit Customer.Balance.
END.RELEASE Customer.
END.
/* To start out with, find, display, and enable the record with no lock. */FIND FIRST Customer NO-LOCK.DISPLAY Customer.CustNum Customer.Name Customer.CreditLimit Customer.Balance
WITH FRAME CustFrame.ENABLE Customer.CreditLimit Customer.Balance WITH FRAME CustFrame./* Wait for the trigger condition to do the update and close the frame. */WAIT-FOR "GO" OF FRAME CustFrame.
9–14
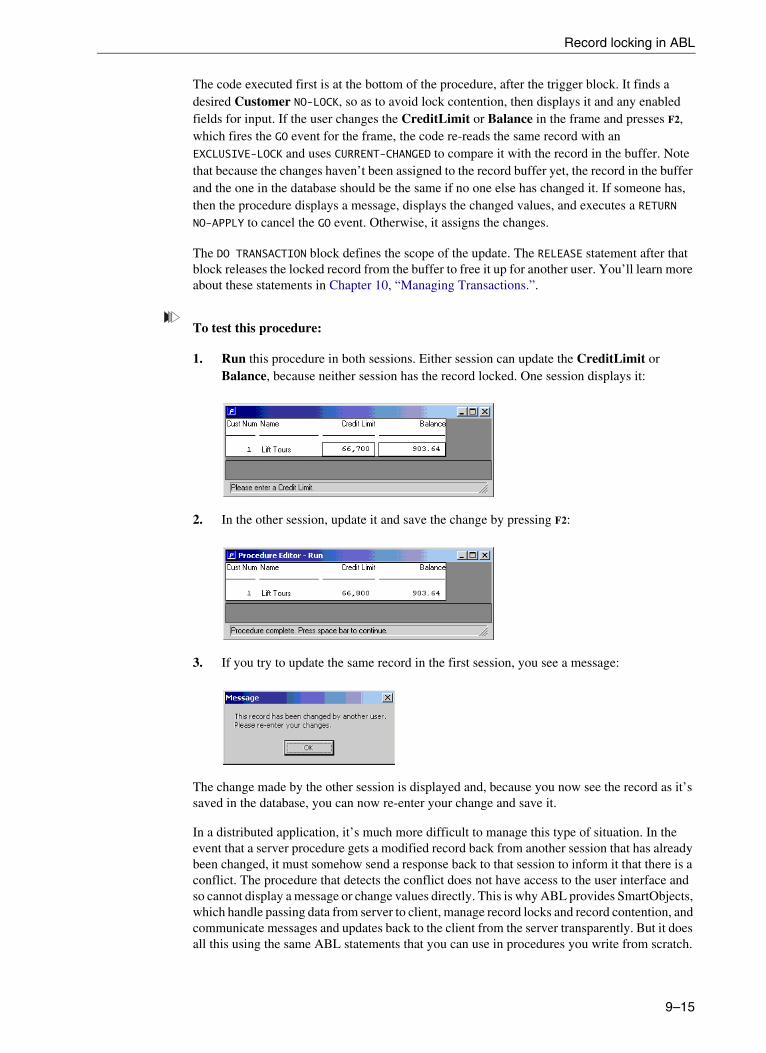
Record locking in ABL
The code executed first is at the bottom of the procedure, after the trigger block. It finds a desired Customer NO-LOCK, so as to avoid lock contention, then displays it and any enabled fields for input. If the user changes the CreditLimit or Balance in the frame and presses F2, which fires the GO event for the frame, the code re-reads the same record with an EXCLUSIVE-LOCK and uses CURRENT-CHANGED to compare it with the record in the buffer. Note that because the changes haven’t been assigned to the record buffer yet, the record in the buffer and the one in the database should be the same if no one else has changed it. If someone has, then the procedure displays a message, displays the changed values, and executes a RETURN NO-APPLY to cancel the GO event. Otherwise, it assigns the changes.
The DO TRANSACTION block defines the scope of the update. The RELEASE statement after that block releases the locked record from the buffer to free it up for another user. You’ll learn more about these statements in Chapter 10, “Managing Transactions.”.
To test this procedure:
1. Run this procedure in both sessions. Either session can update the CreditLimit or Balance, because neither session has the record locked. One session displays it:
2. In the other session, update it and save the change by pressing F2:
3. If you try to update the same record in the first session, you see a message:
The change made by the other session is displayed and, because you now see the record as it’s saved in the database, you can now re-enter your change and save it.
In a distributed application, it’s much more difficult to manage this type of situation. In the event that a server procedure gets a modified record back from another session that has already been changed, it must somehow send a response back to that session to inform it that there is a conflict. The procedure that detects the conflict does not have access to the user interface and so cannot display a message or change values directly. This is why ABL provides SmartObjects, which handle passing data from server to client, manage record locks and record contention, and communicate messages and updates back to the client from the server transparently. But it does all this using the same ABL statements that you can use in procedures you write from scratch.
9–15

Handling Data and Locking Records
9–16

10Managing Transactions
This chapter continues the discussion of database transactions in the following sections:
• Controlling the size of a transaction
• Using the UNDO statement
Note: This chapter describes ABL transactions and related topics and is the primary programming documentation on transactions. One related topic, error handling, is more fully documented in a newer book, OpenEdge Development: Error Handling. In particular, this book describes structured error handling, which uses error objects and CATCH blocks to provide a more comprehensive and flexible error handling model. Structured error handling also provides the ability to pass error objects from an inner block to an outer block using the THROW syntax of an UNDO statement or the ON ERROR phrase.
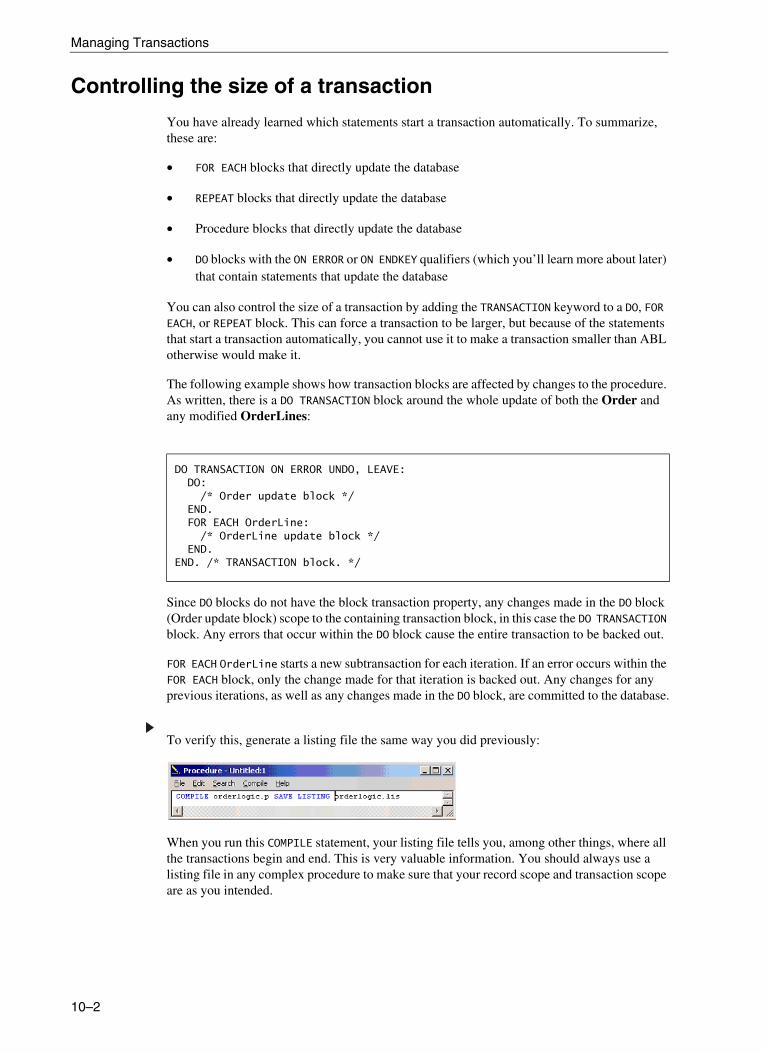
Managing Transactions
Controlling the size of a transaction
You have already learned which statements start a transaction automatically. To summarize, these are:
• FOR EACH blocks that directly update the database
• REPEAT blocks that directly update the database
• Procedure blocks that directly update the database
• DO blocks with the ON ERROR or ON ENDKEY qualifiers (which you’ll learn more about later) that contain statements that update the database
You can also control the size of a transaction by adding the TRANSACTION keyword to a DO, FOR EACH, or REPEAT block. This can force a transaction to be larger, but because of the statements that start a transaction automatically, you cannot use it to make a transaction smaller than ABL otherwise would make it.
The following example shows how transaction blocks are affected by changes to the procedure. As written, there is a DO TRANSACTION block around the whole update of both the Order and any modified OrderLines:
Since DO blocks do not have the block transaction property, any changes made in the DO block (Order update block) scope to the containing transaction block, in this case the DO TRANSACTION block. Any errors that occur within the DO block cause the entire transaction to be backed out.
FOR EACH OrderLine starts a new subtransaction for each iteration. If an error occurs within the FOR EACH block, only the change made for that iteration is backed out. Any changes for any previous iterations, as well as any changes made in the DO block, are committed to the database.
To verify this, generate a listing file the same way you did previously:
When you run this COMPILE statement, your listing file tells you, among other things, where all the transactions begin and end. This is very valuable information. You should always use a listing file in any complex procedure to make sure that your record scope and transaction scope are as you intended.
DO TRANSACTION ON ERROR UNDO, LEAVE:DO:
/* Order update block */END.FOR EACH OrderLine:
/* OrderLine update block */END.
END. /* TRANSACTION block. */
10–2

Controlling the size of a transaction
If you want any error that occurs while updating an OrderLine record to undo the Order updates as well, then FOR EACH OrderLine should be rewritten as follows:
The error will be thrown into the containing DO TRANSACTION block and cause that block to undo, thus undoing the entire transaction.
Taking a look at this listing file, you can see that the DO TRANSACTION block is a top-level block within its procedure, marked with a 1. The DO block inside it, where the Order is actually updated, is block level 2:
Further down, you can see that the FOR EACH block that operates on the OrderLines is also a nested block, at level 2 within the main DO TRANSACTION block:
Now if you look at the end of the file, you see a summary of all the blocks. Here’s an excerpt from that part of the listing. It shows that the procedure blocks for the internal procedures fetchOrder and saveOrder are not transaction blocks:
This is a good thing. You never want your transactions to default to the level of a procedure, because they are likely to be larger than you want them to be. This means that record locks are held longer than necessary and that more records might be involved in a transaction than you intended.
Next you see that the AVM identifies the first DO block at line 144 as a transaction block. This is because it has an explicit TRANSACTION qualifier on it. The nested DO block two lines later is not a transaction block because a DO block by itself does not mark a transaction.
DO TRANSACTION ON ERROR UNDO, LEAVE:DO:
/* Order update block */END.FOR EACH OrderLine ON ERROR UNDO, THROW:
/* OrderLine update block */END.
END. /* TRANSACTION block */
144 1 DO TRANSACTION ON ERROR UNDO, LEAVE:145 1 FIND ttOrder WHERE ttOrder.TransType = "" NO-ERROR.146 1 IF AVAILABLE (tOrder) THEN
/* If this rec is there then the Order was updated on the client. */147 1148 2 DO:
164 2 FOR EACH ttOline WHERE ttOline.TransType = "":165 2 /* Bring the updated version into the other buffer. */
File Name Line Blk. Type Tran Blk. Label -------------------- ---- --------- ---- --------------------------------...ter8\orderlogic.p 82 Procedure No Procedure fetchOrder ...ter8\orderlogic.p 111 For No ...ter8\orderlogic.p 124 Procedure No Procedure saveOrder
Buffers: bUpdateOrdersports2000.Order
10–3

Managing Transactions
The FOR EACH block at line 164 is also marked as a transaction block:
What does this mean? Is this really a separate transaction? The answer is no, because the FOR EACH block is nested inside the larger DO TRANSACTION block. This code tells you that the FOR EACH block would be a transaction block (because this is the nature of FOR EACH blocks that perform updates). However, because it is nested inside a larger transaction, it becomes a subtransaction. The AVM can back out changes made in a subtransaction within a larger transaction when an error occurs, and you can also do this yourself, as described in the “Subtransactions ” section on page 10–16.
Making a transaction larger
In this section, you experiment with increasing the size of a transaction.
To see the effect of removing the DO TRANSACTION block from saveOrder:
1. Comment out the DO TRANSACTION statement and the matching END statement at the end of the procedure.
2. Recompile and generate a new listing file.
3. Take a look at the final section. You can see that, without the DO TRANSACTION block, the entire saveOrder procedure become a transaction block:
...ter8\orderlogic.p 144 Do Yes
...ter8\orderlogic.p 146 Do No
...ter8\orderlogic.p 151 Do No
...ter8\orderlogic.p 156 Do No
...ter8\orderlogic.p 164 For Yes Buffers: sports2000.OrderLine
bUpdateOline
File Name Line Blk. Type Tran Blk. Label -------------------- ---- --------- ---- ------------------------------...ter8\orderlogic.p 82 Procedure No Procedure fetchOrder ...ter8\orderlogic.p 111 For No ...ter8\orderlogic.p 124 Procedure Yes Procedure saveOrder
Buffers: bUpdateOrdersports2000.Order
...ter8\orderlogic.p 146 Do No
...ter8\orderlogic.p 151 Do No
...ter8\orderlogic.p 156 Do No
...ter8\orderlogic.p 164 For Yes Buffers: sports2000.OrderLine
bUpdateOline
10–4

Controlling the size of a transaction
Why did this happen? A DO block by itself, without a TRANSACTION or ON ERROR qualifier, does not start a transaction. Therefore, the AVM has to fall back on the rule that the entire procedure becomes the transaction block. In this particular case, this does not really make a big difference because the update code for Order and OrderLine is essentially the only thing in the procedure. But, as emphasized before, this is a very dangerous practice and you should always avoid it. If you generate a listing file and see that a procedure is a transaction block, you need an explicit transaction within your code. In fact, you should always have explicit transaction blocks in your code and then verify that statements outside that block are not forcing the transaction to be larger than you intend.
Making a transaction smaller
Try one more experiment.
To decrease the size of a transaction, uncomment the DO TRANSACTION statement and its matching END statement. Move the END statement up to just after the end of the DO block for the Order record. Now your procedure structure looks like this:
How does this affect your transactions? Now that you removed the FOR EACH block from the larger transaction, it becomes a true transaction block of its own at block level 1, as the new listing file shows:
This means that the two transaction blocks identified by the listing are now separate and distinct transactions:
DO TRANSACTION ON ERROR UNDO, LEAVE:DO:
/* Order update block */END.
END. /* TRANSACTION block. This used to be at the end of the procedure. */
FOR EACH ttOline:/* OrderLine update block */
END.
166 1 FOR EACH ttOline WHERE ttOline.TransType = "":167 1 /* Bring the updated version into the other buffer. */
File Name Line Blk. Type Tran Blk. Label -------------------- ---- --------- ---- --------------------------------...ter8\orderlogic.p 82 Procedure No Procedure fetchOrder ...ter8\orderlogic.p 111 For No ...ter8\orderlogic.p 124 Procedure No Procedure saveOrder
Buffers: bUpdateOrdersports2000.Order
...ter8\orderlogic.p 144 Do Yes
...ter8\orderlogic.p 146 Do No
...ter8\orderlogic.p 151 Do No
...ter8\orderlogic.p 156 Do No
...ter8\orderlogic.p 166 For Yes Buffers: sports2000.OrderLine
BUpdateOline
10–5
Managing Transactions
If the AVM encounters an error in the update of the Order, it leaves that block and continues on with the OrderLines. If the OrderLines update succeeds, then the newly modified OrderLines are in the database, but the failed Order update is not. Likewise, if the Order block succeeds but there is an error in the OrderLines block, then the Order update is in the database but the OrderLines update is not. You must decide when you put your procedures together how large your updates need to be to maintain your data integrity. In general, you should work to keep your transactions as small as possible so that you do not lock more records or lock records for longer periods of time than is absolutely necessary. But your transactions must be large enough so that related changes that must be committed together either all get into the database or are all rejected.
Transactions and trigger and procedure blocks
If your code starts a transaction in one procedure and then calls another procedure, whether internal or external, the entire subprocedure is contained within the transaction that was started before it was called. If a subprocedure starts a transaction, then it must end within that subprocedure as well, because the beginning and end of the transaction are always the beginning and end of a particular block of code.
Since a database trigger procedure is an external procedure called under special circumstances—in response to an update event elsewhere in the application—it follows the same rule. There is always a transaction active when a database trigger is called (except in the case of the FIND trigger), so the trigger procedure is entirely contained within the larger transaction that caused it to be called.
Trigger blocks beginning with the ON event phrase are treated the same as an internal procedure call. If there is a transaction active when the block is executed in response to the event, then its code is contained within that transaction.
Checking whether a transaction is active
You can use the built-in TRANSACTION function in your procedures to determine whether a transaction is currently active. This LOGICAL function returns TRUE if a transaction is active and FALSE otherwise. You might use this, for example, in a subprocedure that is called from multiple places and which needs to react differently depending on whether its caller started a transaction. (When you have a single procedure, you should not need this function to tell you if a transaction is active!)
The NO-UNDO keyword on temp-tables and variables
You were instructed very early on in this book to define almost all variables using the NO-UNDO keyword. Also, in this chapter’s example, the temp-tables for Customer, Order, and OrderLine are NO-UNDO. Why is this?
When you define variables, the AVM allocates what amounts to a record buffer for them, where each variable becomes a field in the buffer. There are in fact two such buffers, one for variables whose values can be undone when a transaction is rolled back and one for those that can’t. There is extra overhead associated with keeping track of the before-image for each variable that can be undone, and this behavior is rarely needed. If you are modifying a variable inside a transaction block (and it is important for your program logic that sets that variable’s value that it be undone if the transaction is undone), then you should define the variable without the NO-UNDO keyword.
10–6
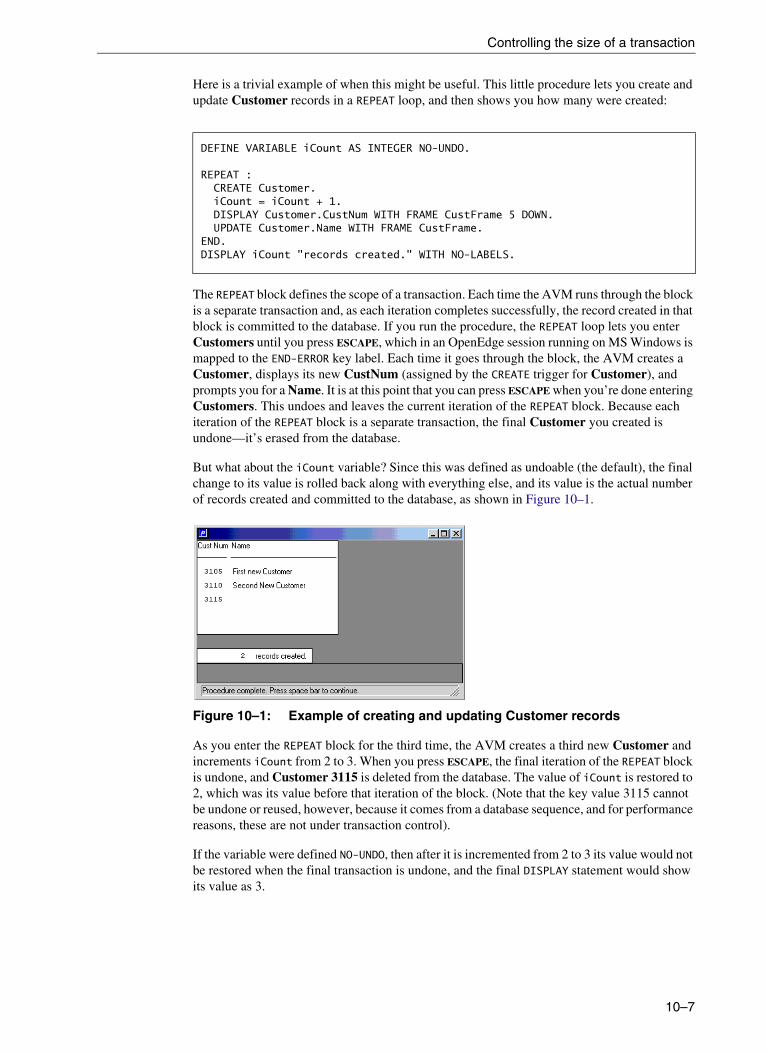
Controlling the size of a transaction
Here is a trivial example of when this might be useful. This little procedure lets you create and update Customer records in a REPEAT loop, and then shows you how many were created:
The REPEAT block defines the scope of a transaction. Each time the AVM runs through the block is a separate transaction and, as each iteration completes successfully, the record created in that block is committed to the database. If you run the procedure, the REPEAT loop lets you enter Customers until you press ESCAPE, which in an OpenEdge session running on MS Windows is mapped to the END-ERROR key label. Each time it goes through the block, the AVM creates a Customer, displays its new CustNum (assigned by the CREATE trigger for Customer), and prompts you for a Name. It is at this point that you can press ESCAPE when you’re done entering Customers. This undoes and leaves the current iteration of the REPEAT block. Because each iteration of the REPEAT block is a separate transaction, the final Customer you created is undone—it’s erased from the database.
But what about the iCount variable? Since this was defined as undoable (the default), the final change to its value is rolled back along with everything else, and its value is the actual number of records created and committed to the database, as shown in Figure 10–1.
Figure 10–1: Example of creating and updating Customer records
As you enter the REPEAT block for the third time, the AVM creates a third new Customer and increments iCount from 2 to 3. When you press ESCAPE, the final iteration of the REPEAT block is undone, and Customer 3115 is deleted from the database. The value of iCount is restored to 2, which was its value before that iteration of the block. (Note that the key value 3115 cannot be undone or reused, however, because it comes from a database sequence, and for performance reasons, these are not under transaction control).
If the variable were defined NO-UNDO, then after it is incremented from 2 to 3 its value would not be restored when the final transaction is undone, and the final DISPLAY statement would show its value as 3.
DEFINE VARIABLE iCount AS INTEGER NO-UNDO.
REPEAT :CREATE Customer.iCount = iCount + 1.DISPLAY Customer.CustNum WITH FRAME CustFrame 5 DOWN.UPDATE Customer.Name WITH FRAME CustFrame.
END.DISPLAY iCount "records created." WITH NO-LABELS.
10–7

Managing Transactions
Relatively few variables need to be undone in this way, so to maximize performance you should define all other variables as NO-UNDO. (The OpenEdge editor macros do this for you when you type DVI, DVC, etc. into the Editor.) So why isn’t NO-UNDO the default? Quite simply, it didn’t at first occur to the developers of the language that most variables should be defined this way, so the first versions of ABL went out with undo variables as the default. Because of the commitment to maintaining the behavior of existing applications, the default has not changed with new releases.
The same consideration applies to temp-tables. Because temp-tables are really database tables that are not stored in a persistent database, they have almost all of the capabilities of true database tables, including the ability to be written to disk temporarily, the ability to have indexes, and the ability to participate in transactions. As with variables, your temp-tables are more efficient if you define them as NO-UNDO so that they are left out of transactions. Consider whenever you define a temp-table whether it really needs to be part of your transactions. If not, include the NO-UNDO keyword in its definition.
10–8

Using the UNDO statement
Using the UNDO statement
The AVM undoes a transaction automatically if it detects an error at the database level, for example, because of a unique key violation. In many cases, your application logic also wants to undo a transaction when you detect a violation of your business logic. The UNDO statement lets you control when to cancel the effects of a transaction on your own. It also lets you define just how much of your procedure logic to undo.
Here is the syntax of the UNDO statement:
In its simplest form, you can use the UNDO keyword as its own statement. In this case, the AVM undoes the innermost containing block with the error property, which can be:
• A FOR block
• A REPEAT block
• A procedure block
• A DO block with the TRANSACTION keyword or ON ERROR phrase
You can change this default by specifying a block label to undo. You can place a block name anywhere in your procedure. The block name must adhere to the same rules as a variable name and it must be followed by a colon. If you use this block name in an UNDO statement, it identifies how far back you want the AVM to undo transactional work.
The default action on an UNDO is to attempt to retry the current block. In ABL, a block of code that prompts the user for field values can be retried; that is, having entered invalid data, the user can re-enter different values. If you are writing well-structured procedures that do not mix user interface elements with database logic, then retrying a block never results in a user entering different values. the AVM recognizes this and changes the action to a NEXT of an iterating block, or a LEAVE of a noniterating block, so this is effectively the default for transactions not involving user interface events.
You can change this default action as well. If you specify LEAVE, you can name the block to leave. This defaults to the block you undo.
If you specify NEXT within an iterating block, then after the UNDO the AVM proceeds to the next iteration of either the block whose label you specify or the block you undo as a default. Use the NEXT option if each iteration of a repeating block is its own transaction (the default) and if you want the AVM to keep trying to apply changes to other records, for example, as the AVM walks through a set of records in a FOR EACH block.
If you specify RETRY, then you can retry either the current block (the default) or the same block you applied the UNDO statement to. Again, in a properly structured application, you do not need to use the RETRY option.
Syntax
UNDO [ label ] [ , LEAVE [ label2 ] |, NEXT [ label2 ] |, RETRY [ label ] | , RETURN [ ERROR | NO-APPLY ] [ return-value ] ]
10–9

Managing Transactions
Finally, you can RETURN out of the current procedure. You can RETURN ERROR, which raises the the AVM error condition, or you can use RETURN NO-APPLY to cancel the effect of the last user-interface event. Once again, this is not an option you would normally use in server-side business logic. The RETURN option can also specify a return-string, which becomes the RETURN-VALUE in the procedure you return to.
You can also specify UNDO as an option on a DO, FOR, or REPEAT block, as you did in your saveOrder example procedure:
Note: In structured error handling, the UNDO statement or the ON ERROR phrase can pass an error as an object from an inner block to an outer block using the THROW syntax. See OpenEdge Development: Error Handling for complete documentation.
Using the UNDO statement in the sample procedure
In this section, you see how the UNDO statement can affect the operation of the saveOrder procedure in orderlogic.p. You’ll try several variations to the business logic, in succession, to illustrate the ways you can control the scope of your transaction and how to react when it fails.
Using UNDO, LEAVE on a block
In this section, you try an example that uses UNDO, LEAVE on a block.
To undo and leave the block that updates the OrderLine table:
1. To make this a transaction block of its own, put the END statement for the DO TRANSACTION block after the Order is updated, as you did in the “Controlling the size of a transaction” section on page 10–2:
This makes the FOR EACH block that follows a separate transaction.
2. Add a new variable definition in saveOrder for an error message to return:
DO TRANSACTION ON ERROR UNDO, LEAVE:
...ELSE DO: /* FIND the updated tt rec and save the changes. */FIND bUpdateOrder WHERE bUpdateOrder.TransType = "U".BUFFER-COPY bUpdateOrder TO Order. /* Save our changes. */
END. /* ELSE DO */END. /* OF AVAILABLE ttOrder */
END. /* DO Transaction */
DEFINE VARIABLE cMessage AS CHARACTER NO-UNDO.
10–10

Using the UNDO statement
3. Add to the FOR EACH block that updates OrderLines the highlighted lines shown:
This code checks to make sure that the ExtendedPrice for an OrderLine is not increased by more than 20%. If this limit is exceeded, then the current iteration of the block is undone and the block is left.
On each iteration, the FOR EACH block makes a ttOline record current. Your code uses the second buffer, bUpdateOline, to locate the updated version of that OrderLine temp-table record. It then finds the OrderLine in the database and copies the updates to it. Next it releases the database record to force its WRITE trigger to fire, which recalculates the ExtendedPrice field. Then it again finds the database record and copies it back into the bUpdateOline buffer to capture the effects of the trigger code, in particular the new ExtendedPrice value. Only now can your program logic compare this to the original value in the ttOline buffer to see if it exceeds the limit. If it does, then you store off a message, then undo and leave the FOR EACH block.
At this point, following the UNDO statement, the whole database change that you wrote out and then read back in is gone—the AVM has restored the database record to its values before the transaction began.
4. Add code so that after leaving the block, you check if you have an error message. If so, your code needs to re-find the OrderLine record with its original values, and copy it back into the bUpdateOline buffer to return to the client for display. It then returns the message as the return value for the procedure:
FOR EACH ttOline WHERE ttOline.TransType = "":.../* Find corresponding bUpdateOline */FIND OrderLine WHERE OrderLine.OrderNum = ttOline.OrderNum AND
OrderLine.LineNum = ttOline.LineNum EXCLUSIVE-LOCK. ...BUFFER-COPY bUpdateOline TO OrderLine. /* Save OrderLine changes. */RELEASE OrderLine.
/* Re-find the db record to capture any changes made by a trigger. */FIND OrderLine WHERE OrderLine.OrderNum = bUpdateOline.OrderNum AND
OrderLine.LineNum = bUpdateOline.LineNum NO-LOCK.BUFFER-COPY OrderLine TO bUpdateOline.IF bUpdateOline.ExtendedPrice >
(ttOline.ExtendedPrice * 1.2) THEN DO:cMessage = "Line " + STRING(OrderLine.LineNum) +
": Can't increase price by more than 20%.".UNDO, LEAVE.
END....
END. /* DO FOR EACH ttOline */
IF cMessage NE "" THEN DO: FIND OrderLine WHERE OrderLine.OrderNum = bUpdateOline.OrderNum AND
OrderLine.LineNum = bUpdateOline.LineNum NO-LOCK.BUFFER-COPY OrderLine TO bUpdateOline.RETURN cMessage.
END.
10–11
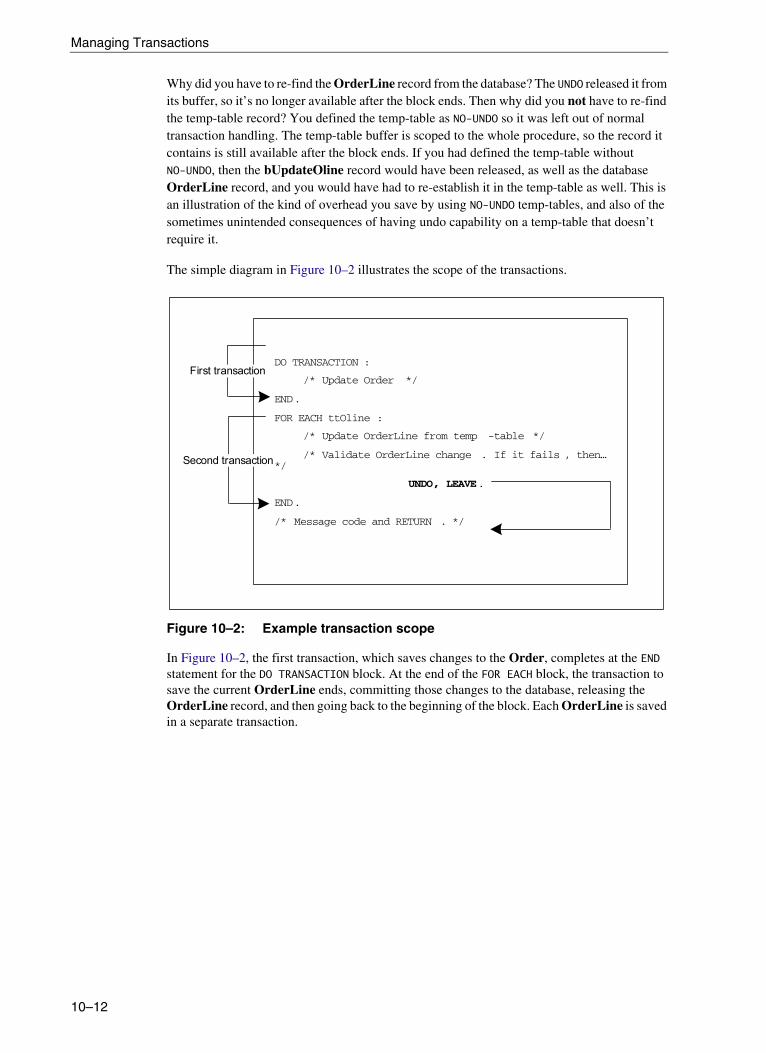
Managing Transactions
Why did you have to re-find the OrderLine record from the database? The UNDO released it from its buffer, so it’s no longer available after the block ends. Then why did you not have to re-find the temp-table record? You defined the temp-table as NO-UNDO so it was left out of normal transaction handling. The temp-table buffer is scoped to the whole procedure, so the record it contains is still available after the block ends. If you had defined the temp-table without NO-UNDO, then the bUpdateOline record would have been released, as well as the database OrderLine record, and you would have had to re-establish it in the temp-table as well. This is an illustration of the kind of overhead you save by using NO-UNDO temp-tables, and also of the sometimes unintended consequences of having undo capability on a temp-table that doesn’t require it.
The simple diagram in Figure 10–2 illustrates the scope of the transactions.
Figure 10–2: Example transaction scope
In Figure 10–2, the first transaction, which saves changes to the Order, completes at the END statement for the DO TRANSACTION block. At the end of the FOR EACH block, the transaction to save the current OrderLine ends, committing those changes to the database, releasing the OrderLine record, and then going back to the beginning of the block. Each OrderLine is saved in a separate transaction.
DO TRANSACTION :
/* Update Order */
END.
FOR EACH ttOline :
/* Update OrderLine from temp -table */
/* Validate OrderLine change . If it fails , then… */
UNDO, LEAVE.
END.
/* Message code and RETURN . */
First transaction
Second transaction
10–12

Using the UNDO statement
The UNDO statement rolls back the transaction for the current OrderLine and leaves the FOR EACH block, which skips any remaining ttOline records. But any previously committed OrderLine changes remain in the database. For example, in Figure 10–3, the user changes the Price for Line 1 from 7.49 to 7.60, for Line 2 from 23.00 to 30.00, and for Line 3 from 13.98 to 13.50.
Figure 10–3: Order Updates example
The first and third changes are valid, but the second one is not. It increases the ExtendedPrice by too much. So when the user clicks Save, the user sees an error message for Line 2, as shown in Figure 10–4.
Figure 10–4: Order Updates example message
But if the user presses the Fetch button to refresh all the OrderLines:
• The change to Line 1 is committed, because it is in its own transaction.
• The change to Line 2 is undone, because it failed the constraint.
• The change to Line 3 is never even applied because the code left the block after the error on Line 2.
10–13

Managing Transactions
Figure 10–5 shows the result.
Figure 10–5: Order Updates example (after Fetch)
This might not be the behavior you want. On the one hand, you might want all OrderLines to be committed together or all undone if any one fails. In another case, you might want to process each OrderLine as a separate transaction, but keep going if one of them fails. Look at both of those cases.
In the first case, you want all the OrderLine updates to either succeed or fail together. If any one fails its validation, all are rolled back.
To commit all OrderLine records together or undo if any one record update fails:
1. Define the transaction scope to be greater than a single iteration of the FOR EACH block by putting a new DO TRANSACTION block around it. Then add a label for that new block to identify how much to undo in your UNDO statement:
2. Change the UNDO statement to undo the entire larger transaction and to leave that outer block as well:
Remember that the default is to undo and leave the innermost block with the error property, the FOR EACH block.
OlineBlock:DO TRANSACTION:
FOR EACH ttOline WHERE ttOline.TransType = "":
UNDO OlineBlock, LEAVE OlineBlock.
10–14
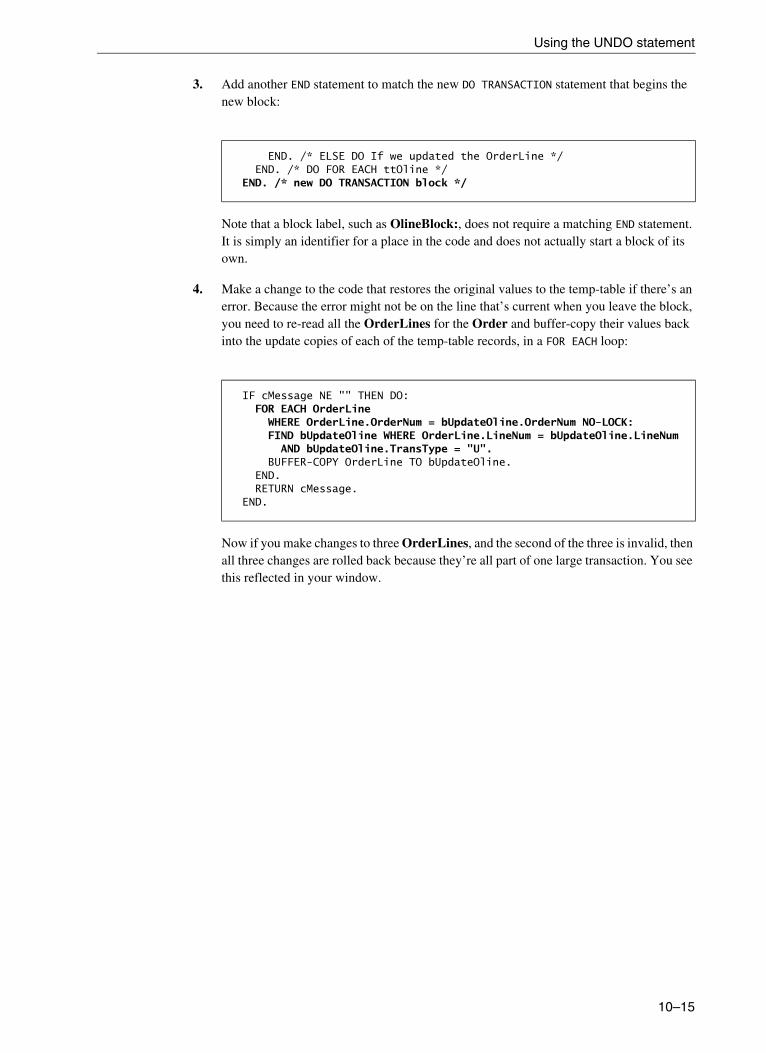
Using the UNDO statement
3. Add another END statement to match the new DO TRANSACTION statement that begins the new block:
Note that a block label, such as OlineBlock:, does not require a matching END statement. It is simply an identifier for a place in the code and does not actually start a block of its own.
4. Make a change to the code that restores the original values to the temp-table if there’s an error. Because the error might not be on the line that’s current when you leave the block, you need to re-read all the OrderLines for the Order and buffer-copy their values back into the update copies of each of the temp-table records, in a FOR EACH loop:
Now if you make changes to three OrderLines, and the second of the three is invalid, then all three changes are rolled back because they’re all part of one large transaction. You see this reflected in your window.
END. /* ELSE DO If we updated the OrderLine */END. /* DO FOR EACH ttOline */
END. /* new DO TRANSACTION block */
IF cMessage NE "" THEN DO: FOR EACH OrderLine
WHERE OrderLine.OrderNum = bUpdateOline.OrderNum NO-LOCK:FIND bUpdateOline WHERE OrderLine.LineNum = bUpdateOline.LineNum
AND bUpdateOline.TransType = "U".BUFFER-COPY OrderLine TO bUpdateOline.
END.RETURN cMessage.
END.
10–15

Managing Transactions
Figure 10–6 shows a sketch of what this variation looks like.
Figure 10–6: Variation of transaction scope
Now look at the second case. You’d like each OrderLine committed independently of the others, and you’d like to keep going if one is invalid. In this case, you can use the NEXT option on the UNDO statement instead of LEAVE. If an error is found, the current transaction is undone and your code continues on to the next ttOline record.
To commit each OrderLine record independently and continue if any one update fails:
1. Remove the OlineBlock block label, along with the DO TRANSACTION block header and its matching END statement, from around the FOR EACH block.
2. Change the UNDO, LEAVE statement to UNDO, NEXT.
Since it is now possible to get errors on more than one OrderLine at a time, you should be prepared to accumulate multiple error messages in your message string.
3. Append each new message to the end of the string by using the plus sign (+) as a concatenation symbol for the character variable (cMessage = cMessage + ...).
4. Put a newline character at the end of each message, using the CHR function to append the ASCII character whose numeric value is 10 to the string:
TransBlock :
DO TRANSACTION :
/* Update Order */
FOR EACH ttOline :
/* Update OrderLine from temp -table */
/* Validate OrderLine change . If it fails , then… */
UNDO TransBlock , LEAVE TransBlock .
END . /* FOR EACH block */
END. /* DO TRANS block */
/* Message code and RETURN . */
only transaction
IF bUpdateOline.ExtendedPrice > (ttOline.ExtendedPrice * 1.2) THEN DO:cMessage = cMessage + "Line " + STRING(OrderLine.LineNum) + ": Can't increase price by more than 20%." + CHR(10).
UNDO, NEXT.END.
10–16

Using the UNDO statement
5. Run the window.
6. Enter a valid price for Line 1 and invalid prices for Lines 2 and 3. You see error messages for both of these:
You can also see that the valid change for Line 1 is kept because you’re back to making each iteration of the FOR EACH block its own transaction.
Figure 10–7 shows a sketch of this variation.
Figure 10–7: Another variation of transaction scope
Subtransactions
You separated the Order update and the OrderLine updates out into two separate transactions by moving the end of the DO TRANSACTION block up after the Order block. Let’s see what happens if you combine the Order and OrderLine updates into a single transaction.
To combine the Order and OrderLine updates into a single transaction:
1. Define a new label for the DO TRANSACTION block:
DO TRANSACTION :
/* Update Order */
END.
FOR EACH ttOline :
/* Update OrderLine from temp -table */
/* Validate OrderLine change . If it fails , then… */
UNDO, NEXT.
END.
/* Message code and RETURN . */
First transaction
Second transaction
TransBlock:DO TRANSACTION ON ERROR UNDO, LEAVE:FIND ttOrder WHERE ttOrder.TransType = "" NO-ERROR.
10–17

Managing Transactions
2. Move this block’s END statement back all the way down to the end of the FOR EACH block, then change the UNDO, LEAVE statement to undo and leave that entire block:
Now the transaction structure looks like the diagram in Figure 10–8.
Figure 10–8: Third variation of transaction scope
If there is an error on any OrderLine, then the whole transaction is backed out, including any change to the Order.
To test what happens when an error occurs during an OrderLine update:
1. Edit one of the fields in the Order, such as the PO, and then make an invalid change to one of its OrderLines.
2. Click Save. You see an error message.
3. Click Fetch to refresh the Order.
The changes you made to the Order have been undone along with changes to the OrderLines. (Note that the code isn’t set up to refresh the Order display if the transaction fails. This is an exercise you can do yourself.)
IF bUpdateOline.ExtendedPrice > (ttOline.ExtendedPrice * 1.2) THEN DO:cMessage = cMessage + "Line " + STRING(OrderLine.LineNum) + ": Can't increase price by more than 20%." + CHR(10).UNDO TransBlock, LEAVE TransBlock.
END. END. /* ELSE DO If we updated the OrderLine */
END. /* DO FOR EACH ttOline */END. /* DO TRANSACTION */
TransBlock :
DO TRANSACTION :
/* Update Order */
FOR EACH ttOline :
/* Update OrderLine from temp -table */
/* Validate OrderLine change . If it fails , then… */
UNDO TransBlock , LEAVE TransBlock .
END . /* FOR EACH block */
END. /* DO TRANS block */
/* Message code and RETURN . */
only transaction
10–18

Using the UNDO statement
But what if you want to undo a portion of a transaction? ABL supports the capability to do this. If your application has multiple nested blocks, each of which would be a transaction block if it stood on its own, then the outermost block is the transaction and all nested transaction blocks within it become subtransactions. A subtransaction block can be:
• A procedure block that is run from a transaction block in another procedure
• Each iteration of a FOR EACH block nested within a transaction block
• Each iteration of a REPEAT block nested within a transaction block
• Each iteration of a DO TRANSACTION, DO ON ERROR, or DO ON ENDKEY block inside a transaction block
If an application error occurs during a subtransaction, all the work done since the beginning of the subtransaction is undone. You can nest subtransactions within other subtransactions. You can use the UNDO statement to programmatically undo a subtransaction.
Note: If a system error occurs, for example from a power outage, then the work done during the entire transaction is undone.
In the sample logic procedure, for example, with the END statement moved to the end, the FOR EACH block is really a subtransaction within the main transaction. An error inside this inner block undoes only the change made in that block. Likewise, if you change the UNDO statement back to UNDO, NEXT, then the Order changes are saved and only the current OrderLine changes are undone, as shown in Figure 10–9.
Figure 10–9: Example subtransaction
Note that a FOR EACH, REPEAT, or procedure block that does not directly contain statements that either modify the database or read records using an EXCLUSIVE-LOCK does not start a transaction on its own. However, if contained inside a transaction block, it does start a subtransaction.
TransBlock :
DO TRANSACTION :
/* Update Order */
FOR EACH ttOline :
/* Update OrderLine from temp -table */
/* Validate OrderLine change . If it fails , then… */
UNDO, NEXT.
END . /* FOR EACH block */
END. /* DO TRANS block */
/* Message code and RETURN . */
only transaction
subtransaction
10–19

Managing Transactions
Transaction mechanics
It’s important to have at least a basic understanding of how ABL handles transactions and subtransactions, although a detailed discussion of this topic is beyond the scope of this book. During a transaction, information on all database activity occurring during that transaction is written to a before-image (or BI) file that is associated with the database and located on the server with the other database files. The information written to the before-image file is coordinated with the timing of the data written to the actual database files. That way, if an error occurs during the transaction, the AVM uses the before-image file to restore the database to the condition it was in before the transaction started. Information written to the before-image file is not buffered. It is written to disk immediately, so that there is minimal loss of information in the event of a system crash.
Space in the before-image file is allocated in units called clusters. The AVM automatically allocates new clusters as needed. After all changes associated with a cluster are committed and written to the database itself, the AVM can reuse the cluster. Therefore, the disk space used by the before-image file depends on several factors including the cluster size, the scope of your transactions, and when physical writes are made to the database files. An action such as creating a huge number of database records in a batch procedure within a single transaction creates an enormous before-image file. You should avoid such actions.
When the AVM encounters a transaction block nested within another transaction block, it starts a subtransaction. All database activity occurring during that subtransaction is written to a local-before-image (or LBI) file. Unlike the database BI file, the AVM maintains one LBI file for each user. If an error occurs during the subtransaction, the AVM uses this local-before-image file to restore the database to the condition it was in before the subtransaction started. In any case where a full transaction is not being backed out, the AVM uses the local-before-image file to back out, not only subtransactions, but also changes to variables not defined as NO-UNDO.
Because the LBI file is not needed for crash recovery, it does not have to be written to disk in the same carefully synchronized fashion as does the before-image information. This minimizes the overhead associated with subtransactions. The LBI file is written using normal buffered I/O. The amount of disk space required for each user’s LBI file depends on the number and size of subtransactions started that are subject to being done. It is advisable that you minimize the use of subtransactions, as well as the scope of your overall transactions, not just to simplify the handling of these files but also to minimize record contention with other users.
Using the ON phrase on a block header
In addition to placing one or more UNDO statements within a transaction, you can also specify the default undo processing as part of the block header of a FOR, REPEAT, or DO block. The default action is to retry the block that was undone or, if there is no user interaction that could change the data, to leave the block.
The UNDO phrase as a part of a block header has the same syntax as the UNDO statement itself. You can specify the action to be LEAVE, NEXT, RETRY (with or without a label), or RETURN ERROR or NO-APPLY.
10–20
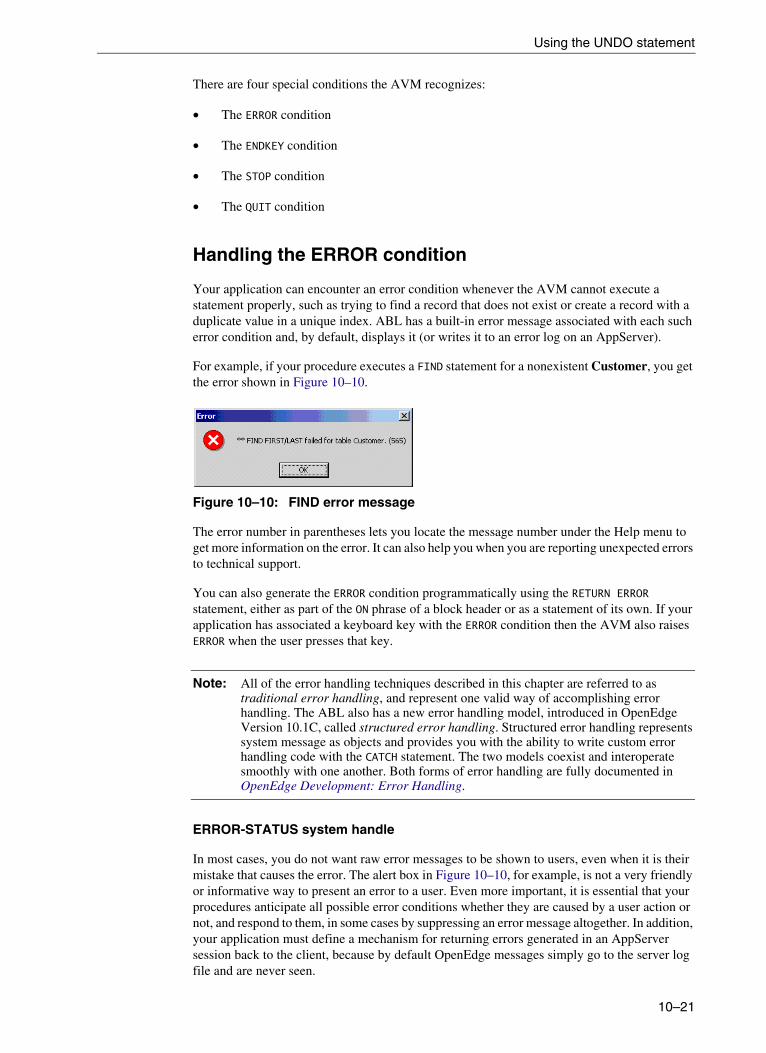
Using the UNDO statement
There are four special conditions the AVM recognizes:
• The ERROR condition
• The ENDKEY condition
• The STOP condition
• The QUIT condition
Handling the ERROR condition
Your application can encounter an error condition whenever the AVM cannot execute a statement properly, such as trying to find a record that does not exist or create a record with a duplicate value in a unique index. ABL has a built-in error message associated with each such error condition and, by default, displays it (or writes it to an error log on an AppServer).
For example, if your procedure executes a FIND statement for a nonexistent Customer, you get the error shown in Figure 10–10.
Figure 10–10: FIND error message
The error number in parentheses lets you locate the message number under the Help menu to get more information on the error. It can also help you when you are reporting unexpected errors to technical support.
You can also generate the ERROR condition programmatically using the RETURN ERROR statement, either as part of the ON phrase of a block header or as a statement of its own. If your application has associated a keyboard key with the ERROR condition then the AVM also raises ERROR when the user presses that key.
Note: All of the error handling techniques described in this chapter are referred to as traditional error handling, and represent one valid way of accomplishing error handling. The ABL also has a new error handling model, introduced in OpenEdge Version 10.1C, called structured error handling. Structured error handling represents system message as objects and provides you with the ability to write custom error handling code with the CATCH statement. The two models coexist and interoperate smoothly with one another. Both forms of error handling are fully documented in OpenEdge Development: Error Handling.
ERROR-STATUS system handle
In most cases, you do not want raw error messages to be shown to users, even when it is their mistake that causes the error. The alert box in Figure 10–10, for example, is not a very friendly or informative way to present an error to a user. Even more important, it is essential that your procedures anticipate all possible error conditions whether they are caused by a user action or not, and respond to them, in some cases by suppressing an error message altogether. In addition, your application must define a mechanism for returning errors generated in an AppServer session back to the client, because by default OpenEdge messages simply go to the server log file and are never seen.
10–21
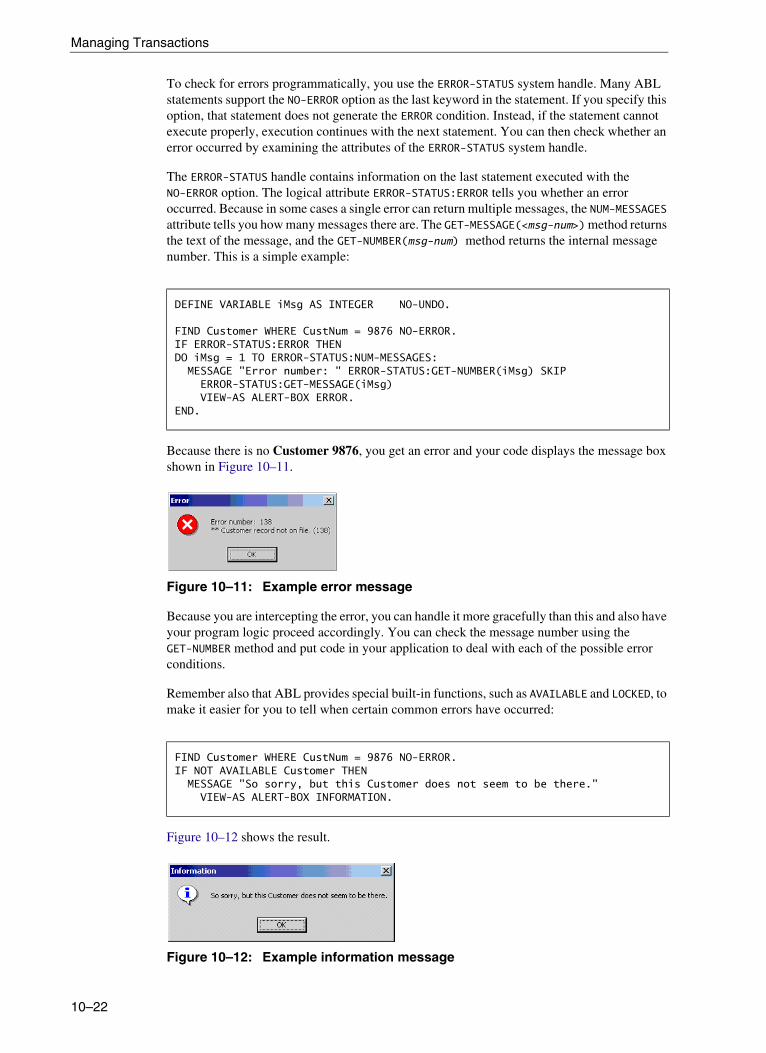
Managing Transactions
To check for errors programmatically, you use the ERROR-STATUS system handle. Many ABL statements support the NO-ERROR option as the last keyword in the statement. If you specify this option, that statement does not generate the ERROR condition. Instead, if the statement cannot execute properly, execution continues with the next statement. You can then check whether an error occurred by examining the attributes of the ERROR-STATUS system handle.
The ERROR-STATUS handle contains information on the last statement executed with the NO-ERROR option. The logical attribute ERROR-STATUS:ERROR tells you whether an error occurred. Because in some cases a single error can return multiple messages, the NUM-MESSAGES attribute tells you how many messages there are. The GET-MESSAGE(<msg-num>) method returns the text of the message, and the GET-NUMBER(msg-num) method returns the internal message number. This is a simple example:
Because there is no Customer 9876, you get an error and your code displays the message box shown in Figure 10–11.
Figure 10–11: Example error message
Because you are intercepting the error, you can handle it more gracefully than this and also have your program logic proceed accordingly. You can check the message number using the GET-NUMBER method and put code in your application to deal with each of the possible error conditions.
Remember also that ABL provides special built-in functions, such as AVAILABLE and LOCKED, to make it easier for you to tell when certain common errors have occurred:
Figure 10–12 shows the result.
Figure 10–12: Example information message
DEFINE VARIABLE iMsg AS INTEGER NO-UNDO.
FIND Customer WHERE CustNum = 9876 NO-ERROR.IF ERROR-STATUS:ERROR THENDO iMsg = 1 TO ERROR-STATUS:NUM-MESSAGES:
MESSAGE "Error number: " ERROR-STATUS:GET-NUMBER(iMsg) SKIPERROR-STATUS:GET-MESSAGE(iMsg)VIEW-AS ALERT-BOX ERROR.
END.
FIND Customer WHERE CustNum = 9876 NO-ERROR.IF NOT AVAILABLE Customer THEN
MESSAGE "So sorry, but this Customer does not seem to be there."VIEW-AS ALERT-BOX INFORMATION.
10–22

Using the UNDO statement
Note that the ERROR-STATUS handle holds only error conditions and messages for the most recently executed statement with the NO-ERROR option. It does not accumulate errors over multiple statements. The ERROR-STATUS remains in effect (and checkable by your code) until the next statement with the NO-ERROR option.
When the ERROR condition occurs anywhere outside of a trigger block, the AVM looks for the closest block with the error property and undoes and retries that block. As discussed earlier, if it is not meaningful to retry the block. the AVM proceeds to the next iteration if it is a repeating block or else leaves the block.
Because this is the default, the following transaction header from the sample saveOrder procedure could simply be DO TRANSACTION: and have the same effect:
Error handling
If an error occurs in a database trigger block, the AVM undoes the trigger block and returns ERROR.
If you use the NO-ERROR option on statements within a block, you are suppressing not only the visible error message but also the ERROR condition itself. Therefore, if you do this, it becomes your responsibility to check for errors and respond to them correctly. This might include issuing an UNDO statement of your own. The ON phrase in the header simply changes the default action for untrapped conditions.
RETURN statement and ON . . . RETURN phrase
In any RETURN statement, whether it returns an ERROR or not, you can return a text string to the calling procedure. This string is accessible in the caller through the RETURN-VALUE built-in function. Thus, a procedure can use a single RETURN statement to raise the ERROR condition in the caller, return a message, or both. This is the syntax of the RETURN statement:
Likewise, the caller can check for the ERROR-STATUS:ERROR condition, or a RETURN-VALUE, or both, depending on the agreement between caller and callee as to how they communicate with one another. The RETURN-VALUE function retains its value even through multiple RETURN statements. Thus, while it is not required, it is advisable always to have a RETURN statement at the end of every procedure, if only to clear the RETURN-VALUE. A simple RETURN statement is the same as RETURN "". If you want to pass the RETURN-VALUE up the call stack, you should do this explicitly using the statement RETURN RETURN-VALUE.
The same is true of the RETURN option as part of the ON phrase in a block header. It can return a return-value, raise ERROR, or both.
DO TRANSACTION ON ERROR UNDO, LEAVE:
Syntax
RETURN [ ERROR ] [ return-value-string ] .
10–23
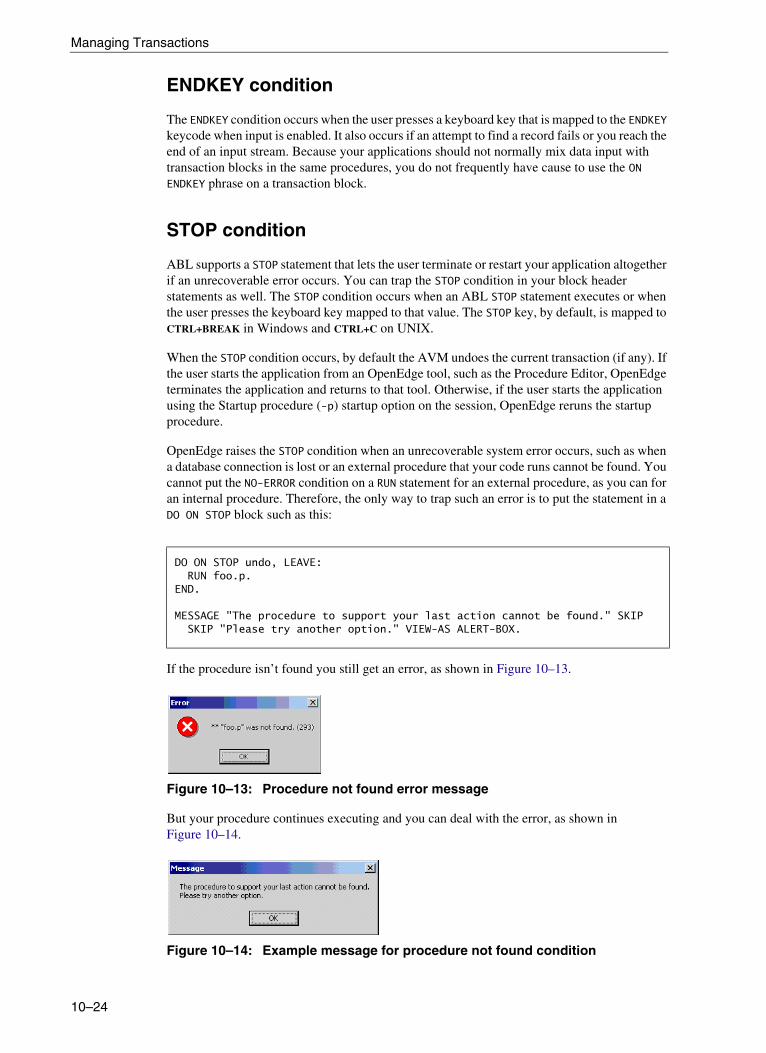
Managing Transactions
ENDKEY condition
The ENDKEY condition occurs when the user presses a keyboard key that is mapped to the ENDKEY keycode when input is enabled. It also occurs if an attempt to find a record fails or you reach the end of an input stream. Because your applications should not normally mix data input with transaction blocks in the same procedures, you do not frequently have cause to use the ON ENDKEY phrase on a transaction block.
STOP condition
ABL supports a STOP statement that lets the user terminate or restart your application altogether if an unrecoverable error occurs. You can trap the STOP condition in your block header statements as well. The STOP condition occurs when an ABL STOP statement executes or when the user presses the keyboard key mapped to that value. The STOP key, by default, is mapped to CTRL+BREAK in Windows and CTRL+C on UNIX.
When the STOP condition occurs, by default the AVM undoes the current transaction (if any). If the user starts the application from an OpenEdge tool, such as the Procedure Editor, OpenEdge terminates the application and returns to that tool. Otherwise, if the user starts the application using the Startup procedure (-p) startup option on the session, OpenEdge reruns the startup procedure.
OpenEdge raises the STOP condition when an unrecoverable system error occurs, such as when a database connection is lost or an external procedure that your code runs cannot be found. You cannot put the NO-ERROR condition on a RUN statement for an external procedure, as you can for an internal procedure. Therefore, the only way to trap such an error is to put the statement in a DO ON STOP block such as this:
If the procedure isn’t found you still get an error, as shown in Figure 10–13.
Figure 10–13: Procedure not found error message
But your procedure continues executing and you can deal with the error, as shown in Figure 10–14.
Figure 10–14: Example message for procedure not found condition
DO ON STOP undo, LEAVE:RUN foo.p.
END.
MESSAGE "The procedure to support your last action cannot be found." SKIPSKIP "Please try another option." VIEW-AS ALERT-BOX.
10–24

Using the UNDO statement
If you anticipate that this might happen, it is better to use the SEARCH function to determine in advance whether the AVM can find the procedure in the current PROPATH:
System and software failures
Following a system hardware or hardware failure that it cannot recover from, the AVM undoes any partially completed transactions for all users. This includes any work done in any complete or incomplete subtransaction encompassed within the uncommitted transaction.
If OpenEdge loses a database connection (for example, because a remote server fails), client processing can still continue. In this case, the following actions occur:
• The AVM raises the STOP condition. For this special instance of the STOP condition, you cannot change the default processing. the AVM ignores any ON STOP phrases.
• The AVM deletes any running persistent procedure instances that reference the disconnected database.
• The AVM undoes executing blocks, beginning with the innermost active block and working outward. It continues to undo blocks until it reaches a level above all references to tables or sequences in the disconnected database.
• The AVM changes to the normal STOP condition. From this point on, the AVM observes any further ON STOP phrases it encounters in your procedures.
The AVM continues to undo blocks until it reaches an ON STOP phrase. If no ON STOP phrase is reached, it undoes all active blocks and restarts the top-level procedure.
QUIT condition
ABL also supports a QUIT statement to terminate the application altogether. The AVM raises the QUIT condition only when it encounters a QUIT statement. The default handling of the QUIT condition differs from STOP in these ways:
• The AVM commits, rather than undoes, the current transaction.
• Even if the user specifies the –p startup option to define the main procedure in your application, it returns to the operating system rather than trying to rerun the startup procedure. In other words, the AVM quits the session unconditionally.
IF SEARCH("foo.p") = ? THENMESSAGE "The procedure to support your last action cannot be found." SKIP
"Please try another option." VIEW-AS ALERT-BOX.ELSE RUN foo.p.
10–25

Managing Transactions
10–26

Index
- Hyphenversus minus sign 2–20
- Minus sign 2–20
Symbols
! Format character 2–9
? (Question mark) 2–13
? (Unknown value) 2–8
@ Symbol 4–28
* Format character 2–9
* Multiplication sign 2–20
/ Division sign 2–20
/* Character (comment) 3–11
+ Plus sign 2–20
~ Tilde 1–9
Numbers
9 format character 2–9
A
A format character 2–9
ABLcompared to SQL 1–10
ABL, history 1–1
Absolute keyword 2–23
Accessingdata 4–1, 4–21online help 2–24PRO*Tools 3–3
Accessing dataqueries 6–2
Addingcomments 3–11
AliasesCMT 3–11
Ambiguous field error 4–14
APPEND optiontemp-tables 7–11
Application Development Tools (ADE) 3–4
Architect 1–4
Arithmetic expressions 2–20
ASCENDING keyword 4–12
Assigningvalues to variables 3–8
Asterisk (*) 2–9, 3–11as wildcard in strings 2–2multiplication sign 2–20
At-sign (@) 4–28
Attributesframes 2–5inheriting 2–10

Index
Index
AVAILABLE functionqueries 6–8
AVAILABLE keyword 4–23
B
-Bt startup parameter 7–3
Back slash (/)division sign 2–20
before 10–19
Before-image (BI) file 10–19
BEGINS keyword 2–2
bin directory 3–5
BIND keyword 7–11
Blanksunknown value 2–9
Block headerON phrase 10–19
Blocksdefining 4–6FOR 4–12identifying 4–18leaving 4–17looping 4–8naming 4–18nested 2–4procedure 4–1REPEAT 4–19scoping 4–3types 4–3
Breakinginfinite loop 4–9
Breaking, lines 1–9
Browsesqueries 6–3
Buffer scoperaising 5–14
BUFFER-COPY statement 7–16
Bufferscreating 5–2defined 5–2index cursors 5–15naming 5–2temp-tables 7–7
Built-in functionsCAN-FIND 4–27
BY phrase 4–12
BY-REFERENCE keyword 7–11
C
Caching data 6–5
calcdays procedure 3–7
Calculationsprocedures 2–20
CAN-FIND function 4–27
CAN-FIND keyword 6–6
Capitalizationkeywords 1–9
Case-sensitivityABL 1–9
CATCH statement 10–1, 10–20
Changingindexes 4–24object formats 2–7object labels 2–7
Character data type 2–8
Character string functions 2–18
CharacteristicsABL 1–9
Checkingsyntax 2–26
classes 1–2
CLOSE QUERY statement 6–9
Closingqueries 6–9
Clusters 10–19
CMT alias 3–11
Codeduplicating 7–18
COLUMN-LABEL keyword 2–10
Columns. See fields.
Comma (,) format character 2–9
Commentsadding 3–11
Comparison operators 2–2
–2

Index
COMPILE statementLISTING option 5–7
Compiled files 3–2location 3–5
Compilingmultiple procedure at once 2–27procedures 1–7, 2–26
Conflicting tables 5–12
Conflictslocking 9–8
Connectingdatabases 1–5
Contains keyword 2–2
Conventionsnaming variables 2–11
Convertingdata 2–17
Copyingmultiple fields 7–16sports2000 database 1–4
Creatinglisting files 5–7
Current rowidentifying 6–14
Current working directorydefault 3–4
CURRENT-CHANGED function 9–14
CURRENT-RESULT-ROW function 6–14
Cursorsindex 4–23, 5–15
Customer table 1–3
CustomizingPRO*Tools palette 3–3
D
Dataaccessing without looping 4–21converting 2–17passing between sessions 7–2retrieving 4–14, 4–17, 6–5retrieving in advance 6–11summarizing 7–8temporary storage 7–2
Data access 4–1queries 6–2
Data administration tool 9–8
Data Dictionaryclosing 1–6indexes 4–15starting 1–4
Data handling statements 9–3
Data typesbasic 2–8formatting 2–9
Database indexesdefined 4–15
Database transactionsmanaging 10–1
Databasesconnecting 1–5copying 1–4sample 1–2sports2000 1–2
DataSets 7–3
DATE data type 2–8
Date functions 2–16
DAY keyword 2–16
Deadly embrace 9–10
Decimal data type 2–8
Decimal point format character 2–9
Decimals keyword 2–10
DEFINE BUFFER statement 5–2
DEFINE work-table statement 7–3
Definingblocks 4–6strings 2–3variables 2–12
DESCENDING keyword 4–12
Desktop. See Application Development Environment (ADE) desktop
Directorycompiled files 3–5
DISPLAY statement 1–8, 2–16
Distributed applicationsdefined 9–1
Division sign (/) 2–20
Index–3

Index
Index
DO blockvs. REPEAT block 4–21
DO blocks 4–6
DO FOR block 5–12
DO WHILE statement 4–9
Double quotation marks 2–3
Down framesdefined 2–5, 6–10
DOWN WITH statement 6–10
Duplicatingcode 7–18
DYNAMIC-FUNCTION function 8–7
E
EACH keyword 4–12alternatives 4–14
EditingPropath 3–4
ELSE keyword 2–22
END PROCEDURE statement 3–9
ENDKEY condition 10–23
ENTRY keyword 2–14, 2–18
EROOR-STATUS system handle 10–20
Error conditionhandling 10–20
error handling 10–1, 10–20
Error messages 5–12FIND 10–20FIND processing 5–9illegal nested block 5–8
Errorssyntax 2–27
ESCAPE key 4–20
European (-e) startup parameter 2–9
Exclamation point (!) 2–9
EXCLUSIVE_LOCK keyword 9–8
EXP keyword 2–23
Expressionsarithmetic 2–20
EXTENT keyword 2–10
External proceduresdefined 3–7
F
Field listsin queries 6–15
Field namesqualifying 2–4
Fieldschanging formats 2–7changing labels 2–7copying multiple 7–16sports2000 database 1–6
Fill keyword 2–18
FIND CURRENT function 9–14
Find processing error 5–9
FIND statement 4–21
Findingprocedures 3–5
FIRST keyword 4–14
FOR blocksvs. DO blocks 4–12
FOR phrase 4–12
FORMAT keyword 2–10
Formatsdata types 2–9
Formattingfields 2–7
Forward declarationsfunction 8–4
Framesattributes 2–5defined 2–5referencing 4–19scoping 4–10
Free referencedefined 5–5
Free referencesFIND statement 5–10
FunctionsABL 2–16arithmetic 2–23built-in 2–14
–4

Index
declaring IN SUPER 8–7defining 8–3externally defined 8–6forward declarations 8–4user-defined 8–2
G
Generatinglisting files 5–7
GET statements 6–7
GLOBAL keywordtemp-tables 7–6
gui directory 3–5
Guidelinesrecord buffers 5–5record locking 9–12
H
HANDLE data type 2–8
Handlesqueries 6–3temp-tables 7–12
Headersblock 4–18
Helponline 2–24
HistoryABL 1–1
Hyphens (-)naming conventions 1–9versus minus sign 2–20
I
Identifyingrows 6–17
IF keyword 2–22
IF-THEN-ELSE phrase 2–13
Improving performancequeries 6–15
Include filesbutton trigger 7–22defined 7–18
Indentation 1–9
Indentingnested blocks 2–4
Index cursorsbuffers 5–15defined 4–23
Index keyword 2–18
Index Properties dialog box 4–15
INDEXED-REPOSITION keyword 6–15
Indexesprimary 4–21sorting data 4–15specifying 4–25switching 4–24temp-tables 7–5
Infinite loopbreaking 4–9
Inheriting, attributes 2–10
INITIAL keyword 2–10
INITIAL phrase 4–8
Initilization file 3–3
Inner joinsdefined 4–13
INPUT parameter 3–7
INPUT-OUTPUT parameters 3–7
INSERT statement 9–4
Insert statement 4–20
INTEGER data type 2–8
Internal proceduresdefined 3–7writing 3–8
Interpreter 1–6, 2–26
J
Joiningtables 2–4, 4–12, 6–6
Joinsinner vs. outer 4–13
K
keysF1 2–24F6 2–16, 2–26
Index–5

Index
Index
KeywordsABL 1–7capitalization 1–9
L
-L startup parameter 9–13
LABEL keyword 2–10
LAST keyword 4–14
LEAVE statement 4–17
LEFT-TRIM keyword 2–18
LENGTH keyword 2–18
LIKE keyword 2–10
LIKE optionDEFINE TEMP-TABLE statement 7–4
Line break 1–9
List functions 2–18
Listing files 5–7
LISTING optionCOMPILE statement 5–7
Local forward declaration 8–5
Local-before-image (LBI) file 10–19
Lock table entries (-l) startup parameter 9–13
Locking conflictstesting 9–8
LOG keyword 2–23
Logical data type 2–8
LOOKUP keyword 2–18
LoopingDO blocks 4–8infinite 4–9
M
MATCHES keyword 2–2
MAXIMUM keyword 2–23
Memoryexcessive usage 3–10
Minimum keyword 2–23
Minus sign (-) 2–20
Minus sign (-) format character 2–10
MODULO keyword 2–23
MONTH keyword 2–16
Multiplication sign (*) 2–20
N
n format character 2–9
Namingbuffers 5–2objects 2–7queries 6–5variables 2–11
Naming conventions 1–9procedures 3–10
Nested blockscreating 2–4error message 5–8
NestingDO blocks 4–7weak-scoped references 5–8
NEXT statement 4–18
NO-ERROR qualifierFIND statement 4–23
NO-UNDO keyword 2–10temp-tables 10–6
NO-WAIT optionAVAILABLE function 9–11LOCKED function 9–11
NUM-RESULTS function 6–9
O
Queriesas objects 6–3
Object-oriented programming 1–2
Objectsdefined 4–3formats 2–7labels 2–7
OF keyword 2–4
ON ERROR phrase, THROW option 10–1, 10–20
ON phraseblock header 10–19
–6

Index
ON RETURN phrase 10–22
One down framesdefined 2–5
One record, retrieving 4–26
Online Helpaccessing 2–24
OPEN QUERY statement 6–5, 9–4
OpenEdge Architect 1–4
Openingqueries 6–5
Operandsarithmetic 2–20
Operatorscomparison 2–2
Optimistic locking strategydefined 9–14
Orderingdata retrieval 4–17
Outer joinsdefined 4–13
OUTER-JOIN keyword 6–6
OUTPUT parameter 3–7
P
Temp-tablesas parameters 7–11
PalettePRO*Tools 3–3
ParametersINPUT 3–7OUTPUT 3–7temp-tables 7–11
Performanceimproving in queries 6–15
Period (.)as wildcard in strings 2–2
Pessimistic locking strategydefined 9–13
Plus sign (+) 2–20
Plus sign (+) format character 2–10
Positioningqueries 6–7
Precaching data 6–5
Preprocessorsquery 4–7
PRESELECT phrasequeries 6–5
Primary index 4–21, 4–24
PRO*Toolsaccessing 3–3
PRO*Tools palettecustomizing 3–3
Procedure blocks 4–1transactions 10–6
Procedure Editorstarting 1–7
PROCEDURE keyword 3–7
PROCEDURE statement 3–9
Procedure windowsmultiple 2–27
Procedurescalculations 2–20compiling 1–7, 2–26finding 3–5internal vs. external 3–10naming conventions 3–10running 1–7, 3–1search order 3–10
ProDataSets 7–3
Program variables 2–8
progress.ini file 3–3
PROMPT-FOR statement 9–5
Propathediting 3–4using 3–3
Prototypes 8–4
Q
Qualifyingvariables 2–10
Queriescharacteristics 6–3closing 6–9current row 6–14defining 6–5empty example 4–7handles 6–3
Index–7

Index
Index
naming 6–5number of rows 6–9opening 6–5populating browses 6–3positioning 6–7repositioning 6–16
Query performance 6–15
QUERY-OFF-END function 6–8
Question mark (?) 2–13
QUIT condition 10–24
QUIT statement 4–18
Quotation marks 2–3
R
Raisingbuffer scope 5–14
Random (-rand) startup parameter 2–23
RANDOM keyword 2–23
RAW keyword 2–18
r-code 2–26
Reading recordsNO-LOCK 9–12
RECID keyword 6–18
Record buffersdefined 5–2
Record lockingguidelines 9–12locking
records 9–6strategies 9–13
Record locksdeadly embrace 9–10releasing 9–12
Record scope 5–5
Recordsretrieving one 4–26scoping 4–10sorting 4–12
REFERENCE-ONLY keyword 7–13
Referencingframes 4–19
Releasingrecord locks 9–12
Renamingobjects 2–7
REPEAT blockvs. DO block 4–21
REPEAT blocks 4–19
REPLACE keyword 2–18
REPOSITION statement 6–19
Repositioningqueries 6–7, 6–16
Resizingfields 4–24
Result setsdefined 6–2retrieving in advance 6–11
Results listdefined 6–9
Retrievingdata 4–17single record 4–26
Retrieving dataqueries 6–5
RETURN statement 10–22
RIGHT-TRIM keyword 2–18
R-INDEX keyword 2–18
ROUND keyword 2–23
Routinedefined 7–11
RowIDdefined 6–17
Rowscurrent 6–14identifying 6–17queries 6–9
Rulesrecord buffers 5–5
RUN statement 3–2
Runningprocedures 1–7, 2–26, 3–1
Run-time interpreter 2–26
Run-time references 8–7
–8
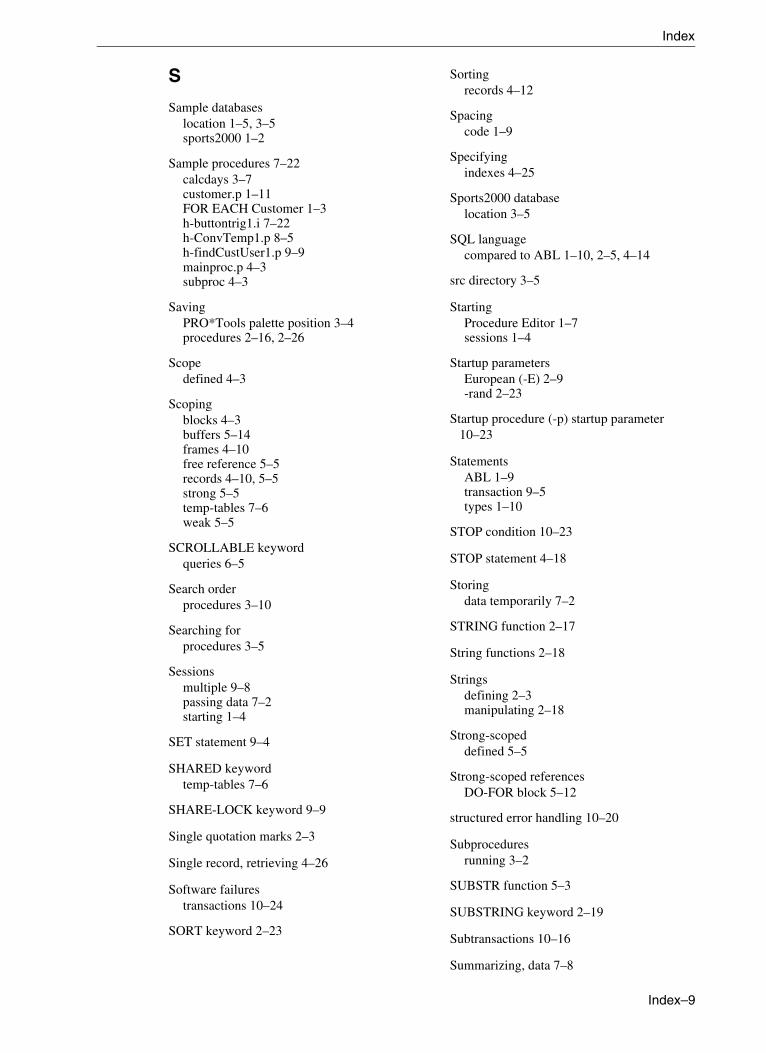
Index
S
Sample databaseslocation 1–5, 3–5sports2000 1–2
Sample procedures 7–22calcdays 3–7customer.p 1–11FOR EACH Customer 1–3h-buttontrig1.i 7–22h-ConvTemp1.p 8–5h-findCustUser1.p 9–9mainproc.p 4–3subproc 4–3
SavingPRO*Tools palette position 3–4procedures 2–16, 2–26
Scopedefined 4–3
Scopingblocks 4–3buffers 5–14frames 4–10free reference 5–5records 4–10, 5–5strong 5–5temp-tables 7–6weak 5–5
SCROLLABLE keywordqueries 6–5
Search orderprocedures 3–10
Searching forprocedures 3–5
Sessionsmultiple 9–8passing data 7–2starting 1–4
SET statement 9–4
SHARED keywordtemp-tables 7–6
SHARE-LOCK keyword 9–9
Single quotation marks 2–3
Single record, retrieving 4–26
Software failurestransactions 10–24
SORT keyword 2–23
Sortingrecords 4–12
Spacingcode 1–9
Specifyingindexes 4–25
Sports2000 databaselocation 3–5
SQL languagecompared to ABL 1–10, 2–5, 4–14
src directory 3–5
StartingProcedure Editor 1–7sessions 1–4
Startup parametersEuropean (-E) 2–9-rand 2–23
Startup procedure (-p) startup parameter 10–23
StatementsABL 1–9transaction 9–5types 1–10
STOP condition 10–23
STOP statement 4–18
Storingdata temporarily 7–2
STRING function 2–17
String functions 2–18
Stringsdefining 2–3manipulating 2–18
Strong-scopeddefined 5–5
Strong-scoped referencesDO-FOR block 5–12
structured error handling 10–20
Subproceduresrunning 3–2
SUBSTR function 5–3
SUBSTRING keyword 2–19
Subtransactions 10–16
Summarizing, data 7–8
Index–9

Index
Index
Switchingindexes 4–24
Symbolsformatting 2–9
Syntaxchecking 2–26validating 2–13
Syntax errors 2–27ambiguous field 4–14
System failurestransactions 10–24
System handlesERROR-STATUS 10–20
T
-T startup parameter 7–3
Tablesjoining 2–4, 4–12
Tables. See also records.
Tabs 1–9
Temporary directory 7–3
Temporary tables. See temp-tables.
Temp-tablesbuffers 7–7creating 7–3defined 7–1handles 7–12indexes 7–5scope 7–6
Test procedures. See sample procedures.
THROW option, ON ERROR phrase 10–1, 10–20
THROW option, UNDO statement 10–1, 10–9, 10–20
Tilde (~) 1–9
TIME keyword 2–16
TODAY keyword 2–16
traditional error handling 10–20
Transaction sizecontrolling 10–2decreasing 10–5increasing 10–4
Transaction statements 9–5
Transactionsmanaging 10–1scope 10–11triggers 10–6
Triggerstransactions 10–6
TRIM keyword 2–19
TRUNCATE keyword 2–23
U
UDF. See User-defined functions.
UNDO statementsyntax 10–8
UNDO statement, THROW option 10–1, 10–9, 10–20
Unique find 4–26
Unique row identifier 6–17
Unknown value 3–8blank 2–9using 2–13
Unknown value (?) 2–8
UPDATE statement 9–4
USE-INDEX phrase 4–17, 4–25
User-defined functions 8–2
V
Validatingsyntax 2–13
Valuesvariables 3–8
Variablesassigning values 3–8defining 2–12naming 2–11program 2–8qualifying 2–10scoping 4–3
W
Weak-scopeddefined 5–5
WEEKDAY keyword 2–16
–10

Index
Wild cardsstrings 2–2
WITH FRAME option 4–10
Word-index keyword 2–2
Work-tables 7–3
X
X format character 2–9
Y
YEAR keyword 2–16
Z
Z format character 2–9
Index–11

Index
Index
–12