openindiana small system server build - jasspa · openindiana small system server build revision...
TRANSCRIPT

OpenIndiana Small System Server BuildVersion 1.25
Jon Green
Jon GreenUnited Kingdomwww.jasspa.com
No Warranty All the information on this documentis published in good faith and for general informa-tion purpose only. Jon Green does not make anywarranties about the completeness, reliability andaccuracy of this information. Any action you takeupon the information you find in this document, isstrictly at your own risk. Jon Green will not be li-able for any losses and/or damages in connectionwith the use of this document.
www.jasspa.comoi_setup v1.25 2015/08/16 11:39:06
OpenIndiana Small System Server Build
Jon Green.United Kingdom
Mail: Read right to left, from the top of the last column and snake between columnsc.ajoas@jmpsno
All the information on this document is published in good faith and for general information purpose only. Jon Greendoes not make any warranties about the completeness, reliability and accuracy of this information. Any action youtake upon the information you find in this document, is strictly at your own risk. Jon Green will not be liable for anylosses and/or damages in connection with the use of this document.
Title: OpenIndiana Small System Server BuildReference: oi_setupVersion v1.25Date: 2015/08/16 11:39:06
Typeset with the TeX Live 2012 LATEX Documentation System.
www.jasspa.comoi_setup v1.25 2015/08/16 11:39:06
ii

OpenIndiana Small System Server BuildRevision History
Revision History
Date Who Description Revision2015/08/16 JG Added notes on postfix 587 submission
Added notes on strengthening DH for Dovecot and Postfix.Added notes on upgrading OI to a later version.
1.25
2014/04/17 JG Minor corrections and additional information. 1.222014/03/21 JG Added information on disabling ipv6. 1.182014/03/15 JG First proof. 1.172014/02/09 JG Reformatted notes into more useful document. 1.92012/09/08 JG OpenIndiana server of notes. 1.0
Table 1: Revision History
www.jasspa.comoi_setup v1.25 2015/08/16 11:39:06
iii

OpenIndiana Small System Server BuildTable of Contents
Contents
1 Background 81.1 Requirements . . . . . . . . . . . . . . . . . . . . . . . . . . . . . . . . . . . . . . . . . . 81.2 Domain Name Provision . . . . . . . . . . . . . . . . . . . . . . . . . . . . . . . . . . . . 81.3 Deciding on a System . . . . . . . . . . . . . . . . . . . . . . . . . . . . . . . . . . . . . . 81.4 Mobile Service Connectivity . . . . . . . . . . . . . . . . . . . . . . . . . . . . . . . . . . 9
2 Hardware 112.1 System Assembly . . . . . . . . . . . . . . . . . . . . . . . . . . . . . . . . . . . . . . . . 122.2 Power On . . . . . . . . . . . . . . . . . . . . . . . . . . . . . . . . . . . . . . . . . . . . 14
3 Architectural Overview 163.1 System Services . . . . . . . . . . . . . . . . . . . . . . . . . . . . . . . . . . . . . . . . . 17
4 OpenIndiana Installation 184.1 Enabling Root Access . . . . . . . . . . . . . . . . . . . . . . . . . . . . . . . . . . . . . . 184.2 Running with root privilege . . . . . . . . . . . . . . . . . . . . . . . . . . . . . . . . . . . 184.3 Package Manager . . . . . . . . . . . . . . . . . . . . . . . . . . . . . . . . . . . . . . . . 194.4 Upgrading OpenIndiana . . . . . . . . . . . . . . . . . . . . . . . . . . . . . . . . . . . . . 19
5 Network Setup 215.1 Static IP Address . . . . . . . . . . . . . . . . . . . . . . . . . . . . . . . . . . . . . . . . 225.2 Network Time . . . . . . . . . . . . . . . . . . . . . . . . . . . . . . . . . . . . . . . . . . 23
5.2.1 Network Time Server . . . . . . . . . . . . . . . . . . . . . . . . . . . . . . . . . . 245.2.2 Disabling ipv6 . . . . . . . . . . . . . . . . . . . . . . . . . . . . . . . . . . . . . 24
5.3 DNS Server . . . . . . . . . . . . . . . . . . . . . . . . . . . . . . . . . . . . . . . . . . . 255.3.1 Manually defining DNS files . . . . . . . . . . . . . . . . . . . . . . . . . . . . . . 285.3.2 Setting up bind . . . . . . . . . . . . . . . . . . . . . . . . . . . . . . . . . . . . . 305.3.3 Bonjour / Zero Configuration Networking . . . . . . . . . . . . . . . . . . . . . . . 315.3.4 mDNS Service . . . . . . . . . . . . . . . . . . . . . . . . . . . . . . . . . . . . . 32
5.4 DHCP Server . . . . . . . . . . . . . . . . . . . . . . . . . . . . . . . . . . . . . . . . . . 335.4.1 DHCP Logging . . . . . . . . . . . . . . . . . . . . . . . . . . . . . . . . . . . . . 34
5.5 Print Server . . . . . . . . . . . . . . . . . . . . . . . . . . . . . . . . . . . . . . . . . . . 355.5.1 AirPrint . . . . . . . . . . . . . . . . . . . . . . . . . . . . . . . . . . . . . . . . . 35
5.6 Samba (SMB Share) . . . . . . . . . . . . . . . . . . . . . . . . . . . . . . . . . . . . . . 365.7 Firewall (IP Filter) . . . . . . . . . . . . . . . . . . . . . . . . . . . . . . . . . . . . . . . 37
6 UPS Protection 416.1 Installing MOXA serial card . . . . . . . . . . . . . . . . . . . . . . . . . . . . . . . . . . 416.2 Installing apcupsd . . . . . . . . . . . . . . . . . . . . . . . . . . . . . . . . . . . . . . . . 426.3 apcupsd logging . . . . . . . . . . . . . . . . . . . . . . . . . . . . . . . . . . . . . . . . . 446.4 apcupsd configuration . . . . . . . . . . . . . . . . . . . . . . . . . . . . . . . . . . . . . . 44
www.jasspa.comoi_setup v1.25 2015/08/16 11:39:06
iv

OpenIndiana Small System Server BuildCONTENTS
6.5 apcupsd starting and stopping . . . . . . . . . . . . . . . . . . . . . . . . . . . . . . . . . . 446.6 apcupsd USB configuration . . . . . . . . . . . . . . . . . . . . . . . . . . . . . . . . . . . 44
7 ZFS File System 45
8 Setting up WAN server 468.1 Zone Preparation . . . . . . . . . . . . . . . . . . . . . . . . . . . . . . . . . . . . . . . . 46
8.1.1 Creating a VNIC . . . . . . . . . . . . . . . . . . . . . . . . . . . . . . . . . . . . 468.2 Zone Creation . . . . . . . . . . . . . . . . . . . . . . . . . . . . . . . . . . . . . . . . . . 478.3 Zone Static IP . . . . . . . . . . . . . . . . . . . . . . . . . . . . . . . . . . . . . . . . . . 48
9 Server Certificate 50
10 E-Mail Service 5110.1 Mail packages . . . . . . . . . . . . . . . . . . . . . . . . . . . . . . . . . . . . . . . . . . 5110.2 Creating user accounts . . . . . . . . . . . . . . . . . . . . . . . . . . . . . . . . . . . . . 5110.3 Setting up Dovecot . . . . . . . . . . . . . . . . . . . . . . . . . . . . . . . . . . . . . . . 52
10.3.1 Starting the service . . . . . . . . . . . . . . . . . . . . . . . . . . . . . . . . . . . 5510.3.2 Log management . . . . . . . . . . . . . . . . . . . . . . . . . . . . . . . . . . . . 55
10.4 Removing Sendmail . . . . . . . . . . . . . . . . . . . . . . . . . . . . . . . . . . . . . . . 5510.5 Postfix local Mailer . . . . . . . . . . . . . . . . . . . . . . . . . . . . . . . . . . . . . . . 5510.6 Global Zone Mailer . . . . . . . . . . . . . . . . . . . . . . . . . . . . . . . . . . . . . . . 5810.7 Postfix SMTPS Mailer . . . . . . . . . . . . . . . . . . . . . . . . . . . . . . . . . . . . . 58
10.7.1 Creating a new postfix-smtps service . . . . . . . . . . . . . . . . . . . . . . . . . 5810.7.2 Creating postfix-smtps configuration files . . . . . . . . . . . . . . . . . . . . . . . 6110.7.3 Setting up SASL authentication . . . . . . . . . . . . . . . . . . . . . . . . . . . . 6110.7.4 Postfix Configuration . . . . . . . . . . . . . . . . . . . . . . . . . . . . . . . . . . 6110.7.5 Starting the service . . . . . . . . . . . . . . . . . . . . . . . . . . . . . . . . . . . 6310.7.6 Postfix version number . . . . . . . . . . . . . . . . . . . . . . . . . . . . . . . . . 63
10.8 fetchmail . . . . . . . . . . . . . . . . . . . . . . . . . . . . . . . . . . . . . . . . . . . . 6310.8.1 Creating a new fetchmail service . . . . . . . . . . . . . . . . . . . . . . . . . . . . 6310.8.2 Creating fetchmail configuration files . . . . . . . . . . . . . . . . . . . . . . . . . 6510.8.3 Starting the service . . . . . . . . . . . . . . . . . . . . . . . . . . . . . . . . . . . 6510.8.4 Managing logs . . . . . . . . . . . . . . . . . . . . . . . . . . . . . . . . . . . . . 6510.8.5 TODO . . . . . . . . . . . . . . . . . . . . . . . . . . . . . . . . . . . . . . . . . 66
11 Web Services 6611.1 Web Server packages . . . . . . . . . . . . . . . . . . . . . . . . . . . . . . . . . . . . . . 6611.2 Creating the file system . . . . . . . . . . . . . . . . . . . . . . . . . . . . . . . . . . . . . 6611.3 Apache . . . . . . . . . . . . . . . . . . . . . . . . . . . . . . . . . . . . . . . . . . . . . 66
11.3.1 PHP support . . . . . . . . . . . . . . . . . . . . . . . . . . . . . . . . . . . . . . 6911.3.2 MySQL support . . . . . . . . . . . . . . . . . . . . . . . . . . . . . . . . . . . . 6911.3.3 HTTPS services . . . . . . . . . . . . . . . . . . . . . . . . . . . . . . . . . . . . 70
www.jasspa.comoi_setup v1.25 2015/08/16 11:39:06
v
OpenIndiana Small System Server BuildCONTENTS
11.3.4 WebDAV . . . . . . . . . . . . . . . . . . . . . . . . . . . . . . . . . . . . . . . . 7211.3.5 Log management . . . . . . . . . . . . . . . . . . . . . . . . . . . . . . . . . . . . 75
12 Calendar and Address Book Services 7612.1 Getting DAViCal and installing . . . . . . . . . . . . . . . . . . . . . . . . . . . . . . . . . 7612.2 Setting up Postgres . . . . . . . . . . . . . . . . . . . . . . . . . . . . . . . . . . . . . . . 7612.3 Initialising the DAViCal Database . . . . . . . . . . . . . . . . . . . . . . . . . . . . . . . 7812.4 Importing an existing DAViCal Database . . . . . . . . . . . . . . . . . . . . . . . . . . . . 7912.5 Remote Server postgres preparation . . . . . . . . . . . . . . . . . . . . . . . . . . . . . . 7912.6 Davical Configuration . . . . . . . . . . . . . . . . . . . . . . . . . . . . . . . . . . . . . . 7912.7 Apache Configuration . . . . . . . . . . . . . . . . . . . . . . . . . . . . . . . . . . . . . . 8012.8 DAViCal User Configuration . . . . . . . . . . . . . . . . . . . . . . . . . . . . . . . . . . 82
13 CVS 8313.1 User Configuration . . . . . . . . . . . . . . . . . . . . . . . . . . . . . . . . . . . . . . . 84
14 Backup 85
15 JASSPA MicroEmacs 91
16 TeXLive 9216.1 TexLive User Setup . . . . . . . . . . . . . . . . . . . . . . . . . . . . . . . . . . . . . . . 93
17 Client Device Configuration 9317.1 Static IP Addresses . . . . . . . . . . . . . . . . . . . . . . . . . . . . . . . . . . . . . . . 93
17.1.1 OSX Lion DNS server priority . . . . . . . . . . . . . . . . . . . . . . . . . . . . . 9417.1.2 OSX Lion DNS Search Domains . . . . . . . . . . . . . . . . . . . . . . . . . . . . 94
17.2 Mail Server . . . . . . . . . . . . . . . . . . . . . . . . . . . . . . . . . . . . . . . . . . . 9517.3 Calendar . . . . . . . . . . . . . . . . . . . . . . . . . . . . . . . . . . . . . . . . . . . . . 9517.4 Addressbook . . . . . . . . . . . . . . . . . . . . . . . . . . . . . . . . . . . . . . . . . . 9517.5 WebDAV . . . . . . . . . . . . . . . . . . . . . . . . . . . . . . . . . . . . . . . . . . . . 9517.6 WebServer . . . . . . . . . . . . . . . . . . . . . . . . . . . . . . . . . . . . . . . . . . . . 9617.7 DAViCal Administrator . . . . . . . . . . . . . . . . . . . . . . . . . . . . . . . . . . . . . 9617.8 Printing . . . . . . . . . . . . . . . . . . . . . . . . . . . . . . . . . . . . . . . . . . . . . 9617.9 CUPs Print Server Administration . . . . . . . . . . . . . . . . . . . . . . . . . . . . . . . 9617.10Samba . . . . . . . . . . . . . . . . . . . . . . . . . . . . . . . . . . . . . . . . . . . . . . 9617.11Samba Administration (SWAT) . . . . . . . . . . . . . . . . . . . . . . . . . . . . . . . . . 9717.12SSH . . . . . . . . . . . . . . . . . . . . . . . . . . . . . . . . . . . . . . . . . . . . . . . 97
18 Conclusion 97
www.jasspa.comoi_setup v1.25 2015/08/16 11:39:06
vi

OpenIndiana Small System Server BuildIntroduction
IntroductionThis document describes setting up a HP Microserver (N40L) using http://www.openindiana.org for a smallbusiness environment with a small number of users. The server provides services as a local server infras-tructure for storage and shared file systems in addition to serving a number of iOS and Android mobiledevices.The purpose of the document was primarily as a reminder to myself as to what was set up, however giventhat I had to search around the web for information then I felt I should perhaps put a little more effort intodocumenting it more thoroughly so that other people in a similar position to myself may benefit.The information provided within the document should be considered to be informative only and I accept noliability for errors and omissions. I am not a professional System Administrator but a software professionaland have administered my own Sun Solaris systems for many years.Thanks to Sun Microsystems of old for releasing a great operating system and to the people behind OpenIn-dian, their contributors, package owners, package maintainers and others that have all put in a huge amountof time and effort to deliver this distribution.Jon Green February 2014
www.jasspa.comoi_setup v1.25 2015/08/16 11:39:06
vii

OpenIndiana Small System Server Build1 Background
1 Background
The company had an existing Solaris 10 (Sparc) infrastructure which had been running for 6 years 24/7which contained all of the company business information providing services to mobile devices. The systemhad proved exceptionally reliable but was end of life and power hungry. Sun (Oracle) equipment now appearsto be out of reach of the small company, commercial licensing is expensive and Oracle appear to have littleinterest in the small business. There are no low powered economical systems in Oracle’s range and I had anuneasy experience dealing with them.
1.1 Requirements
The general requirements of the system are defined as follows:
• System must run 24/7, be available and reliable.
• Data integrity is a paramount requirement; the system will host and store business data in addition toproviding business services for mobile devices.
• Low power requirements. A system running 24/7 then the power requirements must be low. Speed isnot a key requirement.
• System must be secure, security is a concern.
• Provide redundancy and backup solution for critical business data.
• Support LAN services including source control system, file sharing, mail and print services.
• Support WAN services for iOS and Android mobile devices including E-Mail, Address book, Calendar,Web Storage (WebDAV) and HTTP web services.
• System storage minimally defined as 1TB for the storage of existing business critical data, the systemshould provide sufficient expansion for the next 5 years.
• Life expectancy of the system should be 5 years.
• A low cost system is highly desirable, however cost should not significantly compromise any of theaforementioned requirements.
1.2 Domain Name Provision
For this system then the company has a static IPv4 address and global DNS entries for the domain namewww.mydomain.co.uk.The company has a single signed SSL certificate for the domain name www.mydomain.co.uk which will beused for all services.Services provided by www.mydomain.co.uk should be available on the WAN and on the LAN.
1.3 Deciding on a System
The HP N40L was top of the list of base systems, a small low power system which was sold as a completehardware tested unit. My preference was for a complete system where all of the component parts are testedand are known to be working together. The HP N40L offered a large storage capability in addition to ECC
www.jasspa.comoi_setup v1.25 2015/08/16 11:39:06
8

OpenIndiana Small System Server Build1.4 Mobile Service Connectivity
memory in a compact package at a very competitive price. Given speed was not a over-riding priority therewas no other system that came anywhere close to this package which also included Enterprise features.The selection of operating system was a little more difficult. A primary concern was data integrity so anysystem must support ZFS, I would also like some form of Zone support to partition WAN facing services.Obviously my preference was Solaris, but the O/S was out of the question with Oracle having little interestin the low end. This left the O/S options as Linux, FreeBSD, OpenIndiana or Apple. OpenSolaris was closedbecause of licensing when used commercially. Linux was discounted because the ZFS support still lookedimmature and there was no mature next generation file system. Apple looked like it could possibly be acontender (meaning a Apple Server could be used) but Ten’s Complement who were commercially portingZFS at the time had not yet delivered a viable solution. The two remaining contenders were FreeBSD andOpenIndiana, my preference was OpenIndiana as this was essentially Solaris; ZFS and Zones are supportedbut I was not sure how well the whole system would be supported.My final decision then was HP N40L H/W with OpenIndiana O/S. I was a little sceptical whether I was goingto be able to build my desired server configuration and get all of the component S/W and H/W parts to work.At this point in time I had not actively followed the progress of OpenIndiana or Illumos and the only way tofind out what it was like was to build a system; if it failed then I could fall back to FreeBSD.
1.4 Mobile Service Connectivity
Mobile service support was a big requirement for the server and all mobile devices should be supported.Any system should not be reliant on third party services such as Google because of privacy concerns. Theprinciple mobile device was iPad although a few Anroid devices existed. Solaris had been previously usedto provide the principal services as shown in Figure 1.
Figure 1: iPad Services
Mail and Notes are supported with IMAP (dovecot, postfix, fetchmail) and SMTP (postfix, dovecot-sasl) e-mail server. These services are interoperable with computer desktops. Calendar, Reminders and Contactsuse CalDAV and CardDAV protocols and may be supported with DAViCal running on top of an Apache webserver with PHP and Postgres SQL database provision.
www.jasspa.comoi_setup v1.25 2015/08/16 11:39:06
9

OpenIndiana Small System Server Build1.4 Mobile Service Connectivity
The principle iPad office applications (Figure 2) allow documents to be copied via WebDAV services; pro-vided by the Apache web server.
Figure 2: iPad Applications
Within the LAN then Airprint printing services (Figure 3) must be available on existing legacy printersconnected to the LAN.
Figure 3: iPad Printing
CUPS provides the printing services which may be advertised through DNS via sd-dns using bind. For iOS7 then mDNS is additionally required which uses avahi as a bridge between CUPS and the mDNS service.
www.jasspa.comoi_setup v1.25 2015/08/16 11:39:06
10

OpenIndiana Small System Server Build2 Hardware
2 Hardware
Having decided on the HP N40L then I decided to use a Solid State Drive (SDD) for the operating systemthis would not be mirrored as it could be re-generated in the event of a failure. A 2.5" SSD 128GB drive fromCrucial was more than big enough. In the HP N40L the 2.5" drive may sit between the 5.25" CD-ROM drivebay and the HDD drive cage just behind the illuminated HP logo. To fit the SSD then an addition Power-Ycable, SATA power adapter and 1M 90◦ SATA is required. Critical data would be stored on a pair of ZFSmirrored SATA disks, Western Digital 3.5" 3TB Green drives provide this storage.In hindsight I really should have mirrored the operating system disk, the Crucial SSD failed after 9 monthsand was replaced under warranty by Crucial. Whilst the disk allocation meant that no critical data was lostit still took a few days to re-build the system. This has been rectified with a new configuration whereby asecond SSD has been added (OCZ) and the root file system is now mirrored using ZFS, the OCZ disk isconnected by way of the external eSATA connector.My other regret is that I did not re-flash the BIOS in the Microserver with a community improved BIOS,the internal CD SATA and external eSATA operate as legacy IDE devices rather than SATA which seems tocause a problem with re-silvering the disks. In order for a ZFS re-silvering operation to succeed then one ofthe CPUs should be disabled (or run something that consumes 100% CPU).Data backup would be provided by an existing Sun Microsystems DAT 40 SCSI tape drive. An AdaptecUltra320 29320LPE Ultra320 Single Channel Low-Profile PCI Express SCSI Card was selected to controlthe tape drive.An old APC Smart-UPS 620inet was used for the UPS solution and given a new lease of life by replacingthe battery. The Keyspan USB serial adapter (USA-19HS) did not play well with the UPS resulting inintermittent communication errors and was later replaced with a Moxa CP-102EL-DB9M 2-port RS-232low profile PCI Express serial board which proved much more reliable (albeit expensive). The APC USBdevices do work with apcupsd although you need to check the apcupsd site to see which ones are supported.The UPS should be matched to the power of the system (which is low in the case of the HP N40L) otherwisethe UPS becomes power inefficient.The hardware itinerary for the system is defined as follows:
# Manufacturer Part Description1x HP ProLiant Microserver G7 Turion II Neo
N40L 1.5 GHz 2GB 250GBBase server.
1x Crucial T2KIT51272BA1339 8GB Kit (4GBx2), 240-pin DIMM Upgradefor a HP - Compaq Proliant MicroServer Sys-tem
1x Crucial CT128V4SSD2 128GB Crucial v4 SATA 3Gb/s 2.5-inch SSD[Root file system]
1x OCZ VTX4-25SAT3-128G 128GB Vertex 4 SATA 6Gb/s 2.5-inch SSD[Root file system]
2x Western Digital 3TB Green SATA 6Gb/s 64M 3.5" HDD SATA Hard disk drives1x C2G 6in 5.25 Internal Power Y-cable HDD Power cable splitter.2x StarTech 6in 4pin SATA Power Adapter SATA HDD power adapter.1x C2G 1m 180◦ To 90◦ 7 pin Serial ATA (SATA)
CableSATA cable 90◦
1x Unknown 1m eSATA To SATA Cable External to internal SATA cable.1x Adaptec Adaptec Ultra320 29320LPE Ultra320 Single Channel Low-Profile PCI
Express SCSI Card [For SCSI DAT TapeDrive]
Table 2: Hardware Itinerary (continued ...)
www.jasspa.comoi_setup v1.25 2015/08/16 11:39:06
11

OpenIndiana Small System Server Build2.1 System Assembly
# Manufacturer Part Description1x Moxa CP-102EL-DB9M 2-port RS-232 low profile PCI Express serial
board [For APC UPS Serial control]1x APC APC Smart-UPS 620inet UPS Power supply.1x Sun DAT 40 SCSI Tape Drive Existing off-line backup.
Table 2: Hardware Itinerary
A second failure of the replacement Crucial SSD occurred in February 2014 (again after 9 months) this timethe drive remained active but part of the disk could no longer be read or written to without error. The faileddrive was replaced with a Toshiba Q Series SSD 128GB drive. The system was re-configured to place theSSD drives in the 3.5” main drive bays using the “Newer Technology Inc - AdptaDrive”, this is a 2.5” to 3.5”SATA Drive Converter Bracket used to mount the SSD drive in a 3.5” bay. The drives appear to work betterin this position using SATA rather than legacy ATA.
2.1 System Assembly
Using a anti-static wrist band, the system was disassembled, use the HP “Maintenance and Service Guide”(Part No: 615714-006) if you need some more explicit instructions.The system board was removed and the existing RAM removed and replaced with the 2x4GB memoryDIMMs. The RS-232 and SCSI PCIe cards were fitted with their half-height brackets and installed. TheRS-232 card fitted in the PCI Express x1 slot and the SCSI card in the PCI Express x16 slot, as show inFigure 4.
www.jasspa.comoi_setup v1.25 2015/08/16 11:39:06
12

OpenIndiana Small System Server Build2.1 System Assembly
Figure 4: Board fitted with PCI Express cards and upgraded memory
The SSD was mounted between the 5.25" CD-ROM bay and the disk cage, a meter long SATA cable wasrouted round the back of the chassis and connected to the internal SATA connector in the motherboard at thefront of the chassis. Power for the SSD was provided with the Power Y-cable connected to a SATA adapter.A second SSD disk was added later; a eSATA to SATA cable was connected to the external SATA connectoron the back of the unit and fed through the chassis above the PCI slots into the CD-ROM bay where thesecond drive is located as shown in Figure 5.
www.jasspa.comoi_setup v1.25 2015/08/16 11:39:06
13

OpenIndiana Small System Server Build2.2 Power On
Figure 5: Location of SSD Disk in enclosure below the 5.25" slot
The SSD SATA plugs into the main board as shown in Figure 6 and the system board was replaced inside thechassis.The Wstern Digital disks were fitted in the plastic disk carriers and inserted into Slot 1 and Slot 2, the spare250GB disk that was supplied with the unit was placed in Slot 3.To keep the system clean then the door was removed and split in half by removing the door lock. A filterwas inserted as a sandwich between the 2 halves of the door before re-assembly. This should reduce the dustbuild up over time and keep the system clean, any such filter should be replaced periodically to ensure thatthe airflow is not disrupted.
2.2 Power On
The system was completely reassembled and everything was double checked for correct fitting before apply-ing power to the unit. USB keyboard, USB mouse, VGA monitor and ethernet were connected.The BIOS was updated with the HP recommended update using a USB memory stick (there was an advisorynotice from HP supplied with the unit).There are some details on the Web to upgrade the BIOS to perform a faster disk transfer however this BIOSupdate was not installed as it was thought that it compromise the reliability of the system. As mentioned inthe introduction then it would have been better to have installed this BIOS upgrade to get native SATA diskoperation for the CD-ROM and external SATA disk connections.
www.jasspa.comoi_setup v1.25 2015/08/16 11:39:06
14

OpenIndiana Small System Server Build2.2 Power On
Figure 6: SSD SATA cable threaded through chassis to system board
www.jasspa.comoi_setup v1.25 2015/08/16 11:39:06
15

OpenIndiana Small System Server Build3 Architectural Overview
3 Architectural Overview
The system is connected to an ADSL modem which provides the gateway to the Interet. The line is assigneda single static IP address with a domain name registered to it. There is a a single SSL certificate with namewww.mydomain.co.uk.The basic architecture of the network to be constructed is shown in Figure 7. The server comprises twozones, a global zone which provides local services, a separate zone called www provides the WAN facingservices.
Figure 7: Architectural overview of system
The access point for the network is provided by a DSL router with wired and wireless access points. TheDSL router provides a wireless access point which is configured to propagate the local DNS server and notthe WAN DNS server provided by the ISP. Local DNS resolution is required so that our public DNS namecan be resolved locally on the LAN and ensures that all WAN facing services have the same URL on boththe WAN and LAN. DHCP services on the DSL Router are disabled and provided by the local server. TheDSL Router still provides a network bridge between the wired and wireless parts of the local network.
www.jasspa.comoi_setup v1.25 2015/08/16 11:39:06
16

OpenIndiana Small System Server Build3.1 System Services
3.1 System Services
The services required of the server are shown in Table 3 which outlines where the services are running onthe system.
Service Port Scope Zone DescriptionSSH 22 LAN Global Secure sockets for Admin remote login
SMTP 25 LAN www Local Mail submissionDNS 53 LAN Global Domain name services
DHCP 67,68 LAN Global Dynamic host network configurationHTTP 80 LAN www Local Intranet serverNFS 111 LAN Global UNIX file sharingNTP 123 LAN Global Network time servicesSMB 137, 138, 139 LAN Global CIFS/Windows file sharing
HTTPS 443 WAN www Extranet HTTPS serverSMTPS 465 LAN www Global Mail submission (SSL)
submission 587 LAN www Global Mail submission (STARTLS)CUPS 631 LAN Global CUPS administration / IPP Print servicesSWAT 901 LAN Global Samba administrationIMAPS 993 WAN www IMAP Mail services (SSL)
CVS 2401 LAN Global Legacy source control systemMySQL 3306 LAN Global MySQL SQL Server (Limited access)mDNS 5353 LAN Global Bonjour services for iOS Airprint
PostgreSQL 5432 LAN Global Postgres SQL Server (Limited access for CalDAV services)CalAdmin 8008 LAN www CalDAV administrationWebDAV 8081 WAN www HTTPS WebDAV server (SSL)CalDAV 8443 WAN www Calendar services (SSL)
CardDAV 8443 WAN www Address book services (SSL)Table 3: Server services
The order in which the basic services were brought up is as follows:
• Static IP address assignment
• NTP time services.
• DNS server
• DHCP Server
• Other services as required.
• Firewall (ipf)
During installation then the external router (DSL modem) should be secured and all external incoming portsclosed. It is much easier to bring the server up without installing a server firewall in the first instance andensure that all of the services are running. Once everything is running then the firewall rules are appliedto the server and verified to ensure that they are working. Once the server firewall is in place then the theexternal router may be configured to connect the WAN services to the server.
www.jasspa.comoi_setup v1.25 2015/08/16 11:39:06
17

OpenIndiana Small System Server Build4 OpenIndiana Installation
4 OpenIndiana Installation
At the start of the OpenIndiana installation then it is assumed that a LAN network exists and provides DHCPand DNS services.The OpenIndian operating system was downloaded from www.openindia.org. The desktop release was se-lected with Gnome in preference to the server build as both server and desktop services were required.The DVD image was selected and copied to DVD using cdrecord on Solaris. Note writing the DVD usingMicrosoft Windows and an OEM supplied DVD utility failed to write the DVD correctly. The USB imagemay be a better choice?The system was booted from a USB CDROM/DVD device and then installed from the desktop onto the SSDoccupying the whole disk. Installation took in excess of an hour and it may be left to install on its own afterentering the basic system configuration, simply follow the prompts. On completion the DVD drive may beremoved and the system rebooted into OpenIndiana from the hard disk.At this point we now have a fresh install of OpenIndiana with the installation defaults. If you have installedthe root file system on a single disk it may be mirrored later.
4.1 Enabling Root Access
It is useful to be able to login as root from the package updater. The root password is immediately expiredafter installation and you need to choose a new one. To do this:
• Open a Terminal
• Execute "su -" and give the password you chose for your account at installation time. You will beinformed that roots password has expired and are prompted to change it; once it has been changed youcan exit the su session.
You should be able to login/authenticate as root now. This does not allow root to login via ssh.
4.2 Running with root privilege
In order to set up the system then root privilege is required. sudo is generally used to run commands in aprivilege mode by pre-fixing the command with sudo i.e.:
sudo svcadm enable network/physical:default
For a lot of configuration work then it is easier to run as root all of the time by running a new shell, how yourun a root shell will determine the execution path, X-Windows availability etc.
sudo zshhal# svcadm enable network/physical:default
or
hal% sudo su -OpenIndiana (powered by illumos) SunOS 5.11 oi_151a7 October 2012root@hal:~# iduid=0(root) gid=0(root) groups=0(root),1(other),2(bin),3(sys),4(adm),5(uucp),6(mail),7(tty),8(lp),9(nuucp),12(daemon)root@hal:~# echo $PATH/usr/gnu/bin:/usr/bin:/usr/sbin:/sbinroot@hal:~#
www.jasspa.comoi_setup v1.25 2015/08/16 11:39:06
18

OpenIndiana Small System Server Build4.3 Package Manager
Running as root is generally frowned upon because it is considered to be much more dangerous and anyinadvertent mistake could destroy a system. When running as root then always remember that UNIX is notso forgiving and will do as instructed. UNIX is not going to ask you “Are sure?” and executes any commandhowever silly it might be (this is also true for sudo although the accepted theory seems to be when you writesudo you have explicitly asked for privilege and the associated command has been considered).
4.3 Package Manager
The package manager may be run from the desktop or the command line. Root access should be enabled torun the package manager from the desktop otherwise run with root privileges from a shell i.e.% sudo packagemanager
Configure the package manager to pick up additional software that is delivered outside of the OpenIndianarelease. From the Package Manager add the Spec Files Extra repositories:Publisher -> AddURI: http://pkg.openindiana.org/sfeAlias: OpenIndianaSFE
Publisher -> AddURI: http://pkg.openindiana.org/sfe-encumberedAlias: OpenIndianaSFE -Eumbered
These additional repositories contain some useful packages that may be required later.
4.4 Upgrading OpenIndiana
Upgrading a version of OpenIndiana then we need to upgrade the global zone and any other zones. Thefollowing paragraphs show an upgrade from 0.151.1.7 to 0.151.1.9.Login or sudo to root and check what will be upgraded by the system:hal# pfexec pkg image -update -nv
If the result is OK then perform the upgrade in the global zone:hal# pfexec pkg image -update -v
Reboot the system. With the global zone updated then our www zone needs to be updated. Make sure thatthe zone is not running.hal# zoneadm listglobalwwwhal#
This will list all of the currently running zones, if it is not running we can issue the below command to seeall of the zones installed on this system:hal# zoneadm list -iglobalwwwhal#
Now that we know the zone name we must ensure it is not running, to stop the zone do the below, if yourzone is currently not running please skip this command.hal# zoneadm -z www halthal# zoneadm listglobalhal#
www.jasspa.comoi_setup v1.25 2015/08/16 11:39:06
19

OpenIndiana Small System Server Build4.4 Upgrading OpenIndiana
The www zone has now been stopped.This will stop our zone and allow us to make changes to it. Now we need to find the location of the zone onthe system, this is performed as follows:hal# zfs list
Look for the mountpoint which should be something like the below:/zones/<zonename >NAME USED AVAIL REFER MOUNTPOINTrpool 22.9G 75.1G 51K /rpool...rpool/zones/www 1.14G 75.1G 33K /zones/www...
Now update the update the www zone:hal# pkg -R /zones/www/root image -update -v
Packages to install: 5Packages to update: 188
Estimated space available: 74.91 GBEstimated space to be consumed: 1.10 GB
Create boot environment: NoCreate backup boot environment: No
Services to change: 3Rebuild boot archive: No
Changed packages:openindiana.org
compress/xzNone -> 5.0.3 ,5.11 -0.151.1.9:20140117 T204509Z
library/database/gdbmNone -> 1.8.3 ,5.11 -0.151.1.9:20140117 T202525Z
library/desktop/gdk-pixbufNone -> 0.5.11 ,5.11 -0.151.1.9:20140117 T202422Z
system/kernelNone -> 0.5.11 ,5.11 -0.151.1.9:20141210 T124421Z
text/groff/groff -coreNone -> 0.5.11 ,5.11 -0.151.1.9:20140117 T203455Z
SUNWcs0.5.11 ,5.11 -0.151.1.7:20121003 T225133Z -> 0.5.11 ,5.11 -0.151.1.9:20150504 T114725Z
SUNWcsd0.5.11 ,5.11 -0.151.1.7:20121003 T225201Z -> 0.5.11 ,5.11 -0.151.1.9:20140117 T205506Z
compress/bzip21.0.6 ,5.11 -0.151.1.7:20121003 T215018Z -> 1.0.6 ,5.11 -0.151.1.9:20140117 T201710Z
compress/gzip
.....
Services:restart_fmri:
svc:/application/desktop -cache/input -method -cache:defaultsvc:/application/desktop -cache/pixbuf -loaders -installer:defaultsvc:/system/manifest -import:default
DOWNLOAD PKGS FILES XFER (MB)Completed 193/193 8767/8767 151.0/151.0
PHASE ACTIONSRemoval Phase 8797/8797Install Phase 9699/9699Update Phase 8687/8687
www.jasspa.comoi_setup v1.25 2015/08/16 11:39:06
20

OpenIndiana Small System Server Build5 Network Setup
PHASE ITEMSPackage State Update Phase 381/381Package Cache Update Phase 188/188Image State Update Phase 2/2
The following unexpected or editable files and directories weresalvaged while executing the requested package operation; theyhave been moved to the displayed location in the image:
etc/zones -> /zones/www/root/var/pkg/lost+found/etc/zones -20150815 T121106Z
---------------------------------------------------------------------------NOTE: Please review release notes posted at:
http://wiki.openindiana.org/oi/Release+Notes---------------------------------------------------------------------------
hal#
Now finally boot and login into the zone:
hal# zoneadm -z www bootzlogin -C www
When logged in to the zone check the OS version. You should see something similar to the below to confirmthe upgrade of the zone.
hal# uname -aSunOS <zonename > 5.11 oi_151a i86pc i386 i86pc
5 Network Setup
In this section we consider the basic network configuration comprising Static IP address, Network Time,DNS and DHCP services which will be managed by the server in the context of the Global zone (this couldbe another zone if required). Our network and the demands on it are not huge so it was not considerednecessary to create a separate zone for these services.OpenIndiana ships with a DHCP configuration, the first step is to set up static IP addressing. Decide on theIP address allocation that is going to be used in the network. The configuration used in this network is shownin Table 4.
IP Address Description192.168.8.1 ADSL router and gateway192.168.8.2-127 Static IP addressed devices192.168.8.128-159 Available DHCP Addresses192.168.8.200 Main server (hal) the global zone.192.168.8.201 Virtual Machine, zone (www), WAN facing Web and Mail services192.168.8.202-254 Reserved for future use.224.0.0.251 The Bonjour multicast address.
Table 4: Static IP Address Allocation
www.jasspa.comoi_setup v1.25 2015/08/16 11:39:06
21

OpenIndiana Small System Server Build5.1 Static IP Address
5.1 Static IP Address
The first thing to do is to change from dynamic to static IP addressing. We require the server to have anaddress of 192.168.8.200. Refer to the following reference on setting up Solaris 11 which was used in thesetup:http://blog.allanglesit.com/2011/03/solaris-11-network-configuration-basics/Run as root with a shell of your choice
sudo zsh
Disable the network auto magic
hal# svcadm disable network/physical:nwamhal# svcadm enable network/physical:default
Manually set up the networking for the network adapter, this is bge in this system:
hal# ipadm show -ifIFNAME STATE CURRENT PERSISTENTlo0 ok -m-v------46 ---hal# ipadm create -if bge0hal# dladm show -linkLINK CLASS MTU STATE BRIDGE OVERbge0 phys 1500 up -- --hal# ipadm show -ifIFNAME STATE CURRENT PERSISTENTlo0 ok -m-v------46 ---bge0 down bm--------46 -46
Create the address to be assigned to the network adapter:
hal# ipadm create -addr -T static -a 192.168.8.200/24 bge0/v4hal# ipadm show -addrADDROBJ TYPE STATE ADDRlo0/v4 static ok 127.0.0.1/8bge0/v4 static ok 192.168.8.200/24lo0/v6 static ok ::1/128hal# netstat -r
Routing Table: IPv4Destination Gateway Flags Ref Use Interface
-------------------- -------------------- ----- ----- ---------- ---------hal hal UH 2 8 lo0192.168.8.0 192.168.8.200 U 2 0 bge0
Routing Table: IPv6Destination/Mask Gateway Flags Ref Use If
--------------------------- --------------------------- ----- --- ------- -----hal hal UH 2 574 lo0
Add a default route to the gateway:
hal# route -p add default 192.168.8.1add net default: gateway 192.168.8.1add persistent net default: gateway 192.168.8.1hal# netstat -r
Routing Table: IPv4Destination Gateway Flags Ref Use Interface
-------------------- -------------------- ----- ----- ---------- ---------default 192.168.8.1 UG 1 0hal hal UH 2 8 lo0
www.jasspa.comoi_setup v1.25 2015/08/16 11:39:06
22

OpenIndiana Small System Server Build5.2 Network Time
192.168.8.0 192.168.8.200 U 2 0 bge0
Routing Table: IPv6Destination/Mask Gateway Flags Ref Use If
--------------------------- --------------------------- ----- --- ------- -----hal hal UH 2 574 lo0
Set up the name server and edit /etc/resolv.conf. Add the gateway (DSL Router) and/or DNS serversspecified by your ISP.
hal# cat /etc/resolv.confdomain mydomain.co.uksearch mydomain.co.uknameserver 192.168.8.1nameserver 212.23.3.100nameserver 212.23.6.100
Set up the name service switch file /etc/nsswitch.conf for DNS by copying the existing /etc/nsswitch.dnsover the file (assuming that LAPD or NIS are not being used).
hal# cp /etc/nsswitch.dns /etc/nsswitch.conf
Test that names are being resolved.
hal# /usr/sbin/host www.zen.co.ukwww.zen.co.uk is an alias for zen.co.uk.zen.co.uk has address 82.71.140.243zen.co.uk mail is handled by 10 mailcluster.zen.co.uk.
5.2 Network Time
The network time services may now be set up. To set up the client then edit the file /etc/inet/ntp.conf.Add the addresses of the NTP servers, typically the NTP service of your ISP is used in preference followedby local NTP pools i.e.
##ident "@(#)ntp.server 1.1 09/05/17 SMI"
# Use our ISP Server as preferanceserver ntp0.zen.co.uk prefer# Use the UK NTP Pools nextserver 0.uk.pool.ntp.orgserver 1.uk.pool.ntp.orgserver 2.uk.pool.ntp.orgserver 3.uk.pool.ntp.org
# Always configure the drift file. It can take days for ntpd to completely# stabilize and without the drift file, it has to start over on a reboot# of if ntpd restarts.driftfile /var/ntp/ntp.drift
# It is always wise to configure at least the loopstats and peerstats files.# Otherwise when ntpd does something you don’t expect there is no way to# find out why.statsdir /var/ntp/ntpstats/filegen peerstats file peerstats type day enablefilegen loopstats file loopstats type day enable
Enable the NTP daemon
hal# svcadm enable network/ntp
www.jasspa.comoi_setup v1.25 2015/08/16 11:39:06
23
OpenIndiana Small System Server Build5.2 Network Time
Check the running status
hal% svcs -v ntpSTATE NSTATE STIME CTID FMRIonline - Sep_29 60 svc:/network/ntp:default
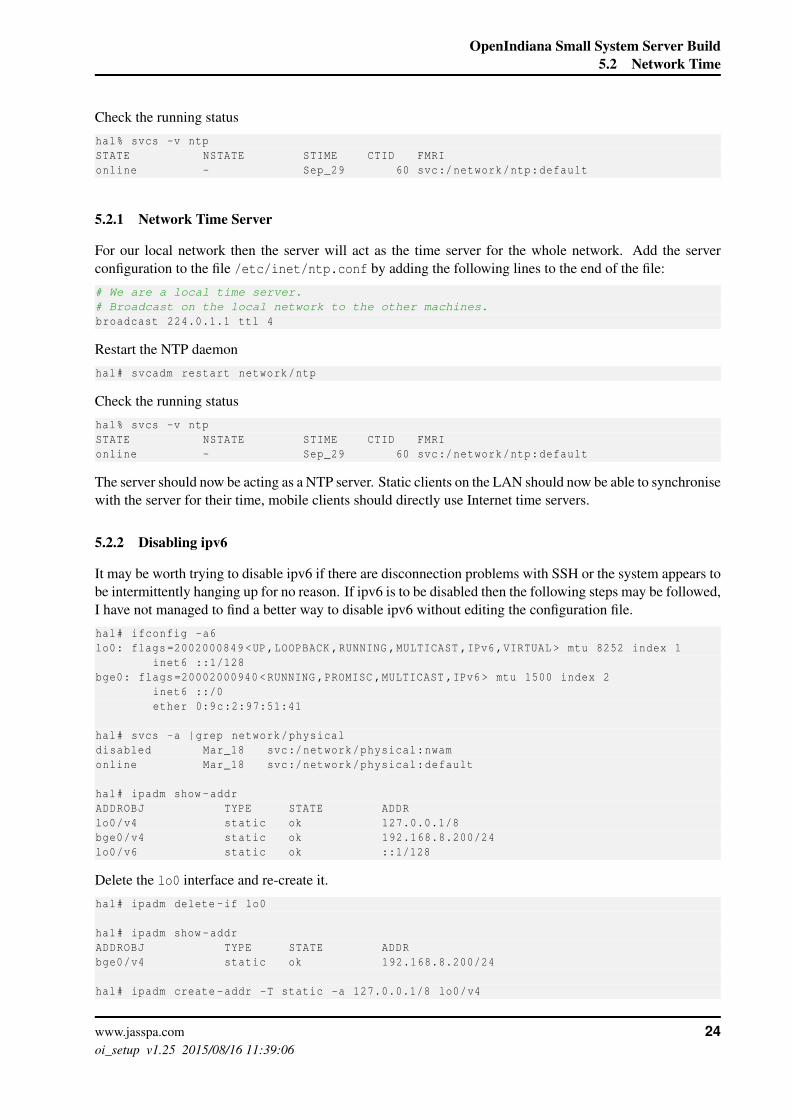
5.2.1 Network Time Server
For our local network then the server will act as the time server for the whole network. Add the serverconfiguration to the file /etc/inet/ntp.conf by adding the following lines to the end of the file:
# We are a local time server.# Broadcast on the local network to the other machines.broadcast 224.0.1.1 ttl 4
Restart the NTP daemon
hal# svcadm restart network/ntp
Check the running status
hal% svcs -v ntpSTATE NSTATE STIME CTID FMRIonline - Sep_29 60 svc:/network/ntp:default
The server should now be acting as a NTP server. Static clients on the LAN should now be able to synchronisewith the server for their time, mobile clients should directly use Internet time servers.
5.2.2 Disabling ipv6
It may be worth trying to disable ipv6 if there are disconnection problems with SSH or the system appears tobe intermittently hanging up for no reason. If ipv6 is to be disabled then the following steps may be followed,I have not managed to find a better way to disable ipv6 without editing the configuration file.
hal# ifconfig -a6lo0: flags=2002000849 <UP,LOOPBACK ,RUNNING ,MULTICAST ,IPv6 ,VIRTUAL > mtu 8252 index 1
inet6 ::1/128bge0: flags=20002000940 <RUNNING ,PROMISC ,MULTICAST ,IPv6 > mtu 1500 index 2
inet6 ::/0ether 0:9c:2:97:51:41
hal# svcs -a |grep network/physicaldisabled Mar_18 svc:/network/physical:nwamonline Mar_18 svc:/network/physical:default
hal# ipadm show -addrADDROBJ TYPE STATE ADDRlo0/v4 static ok 127.0.0.1/8bge0/v4 static ok 192.168.8.200/24lo0/v6 static ok ::1/128
Delete the lo0 interface and re-create it.
hal# ipadm delete -if lo0
hal# ipadm show -addrADDROBJ TYPE STATE ADDRbge0/v4 static ok 192.168.8.200/24
hal# ipadm create -addr -T static -a 127.0.0.1/8 lo0/v4
www.jasspa.comoi_setup v1.25 2015/08/16 11:39:06
24

OpenIndiana Small System Server Build5.3 DNS Server
hal# ipadm show -addrADDROBJ TYPE STATE ADDRbge0/v4 static ok 192.168.8.200/24lo0/v4 static ok 127.0.0.1/8
Edit /etc/ipadm/ipadm.conf and comment out the ipv6 entries which are designated with family=26.
_ifname=bge0;_family=2;#Delete ipv6# _ifname=bge0;_family=26;_ifname=bge0;_aobjname=bge0/v4;_ipv4addr =192.168.8.200 ,;up=yes;_ifname=bge0;_aobjname=bge0/v4;prefixlen=24;_protocol=ipv4;forwarding=on;_ifname=lo0;_family=2;#Delete ipv6# _ifname=lo0;_family=26;_ifname=lo0;_aobjname=lo0/v4;_ipv4addr =127.0.0.1 ,;up=yes;_ifname=lo0;_aobjname=lo0/v4;prefixlen=8;
Reboot the system which should re-start with ipv6 disabled.
hal# ipadm show -ifIFNAME STATE CURRENT PERSISTENTlo0 ok -m-v------4- -4-bge0 ok bm--------4- -4-
hal# routeadm -uhal# routeadm | grep ndp
disabled svc:/network/routing/ndp:default
The /etc/hosts file may be edited to remove the ipv6 entries
## Internet host table##::1 hal hal.local localhost loghost127.0.0.1 hal hal.local localhost loghost hal.mydomain.co.uk
5.3 DNS Server
One of our requirements is to use the same domain name on both the WAN and LAN networks. In orderto do this then the LAN must include a DNS server to resolve the domain name www.mydomain.co.uk to alocal machine.The DNS server provision is provided by bind which is not installed by default. The following link providesthe sequence that was followedhttp://www.logiqwest.com/dataCenter/Demos/RunBooks/DNS/DNSsetup.html. Refer to the next section formore information on defining these files yourself.Install the packages:
hal# pkg install service/network/dns/bind
Create the named information directory, there appears to be some conflicting wisdom as whether this shouldbe created in /var/named or /etc/named. My preference is /etc/named as this is static configurationinformation which is not volatile and /etc is the first place I look for system configuration information.
hal# mkdir -p /etc/named
It is suggested that you use h2n to generate the DNS files. Download h2n fromftp://ftp.hpl.hp.com/pub/h2n/h2n.tar.gz and place in tmp directory
www.jasspa.comoi_setup v1.25 2015/08/16 11:39:06
25

OpenIndiana Small System Server Build5.3 DNS Server
hal# cd /tmphal# wget ftp://ftp.hpl.hp.com/pub/h2n/h2n.tar.gz
Extract the files
hal# tar zxvf h2n.tar.gz
Then change to the /etc/named directory and run the script h2n. Any names in the /etc/hosts file willbe propagated into the bind configuration files so add any adding machines to the hosts file before runningthe script – you can remove these machines once DNS is running as the names will be resolved via the DNSserver.
hal# cd /etc/namedhal# cp /tmp/h2n -2.56/h2n .hal# ./h2n -d mydomain.co.uk -n 192.168.8 -u [email protected]
This generates the files that you can now edit. Now fetch the named.root file from the Internet and copy tothe db.cache file.
hal# wget http://www.internic.net/domain/named.roothal# cp named.root /etc/named/db.cache
The list of files should now look something like this...
hal# lsboot.cacheonly db.192.168.8 conf.cacheonlydb.cache named.boot db.127.0.0db.mydomain named.conf
The files db.192.168.8 and db.mydomain may be edited to add nodes to your network. When editing makesure that you define the same names and IP addresses in both files.File db.192.168.8 will look something like below. For all of the bind files the version field should beupdated whenever the file is changed. In the examples then an integer value representing the calendar day,hour and minute is used in the form YYMMDDhhmm rather than remembering to increment a number.
$ORIGIN 8.168.192.in-addr.arpa.$TTL 86400@ SOA hal.mydomain.co.uk. admin.mydomain.co.uk. (
1208191705 ; Serial7200 ; Refresh (2 hours)120 ; Retry (10 min)604800 ; Expire (1 week)86400 ; Default TTL (1 day))
; Name servers listed as forward lookup; Define the authoritative name server@ IN NS hal.mydomain.co.uk.
; A list of machine names and addresses in reverse200 IN PTR hal.mydomain.co.uk.201 IN PTR www.mydomain.co.uk.; Printers30 IN PTR hplj2200d.mydomain.co.uk.31 IN PTR hpclj2605dn.mydomain.co.uk.
The db.mydomain will look something like below. The sample includes the mail server and Airprint entries
;; dns zone for mydomain.co.uk;; root@sys:~# svcadm restart network/dns/server:default
www.jasspa.comoi_setup v1.25 2015/08/16 11:39:06
26

OpenIndiana Small System Server Build5.3 DNS Server
; root@sys:~# svcadm restart network/dns/client;$ORIGIN mydomain.co.uk.$TTL 86400@ SOA hal.mydomain.co.uk admin.mydomain.co.uk (
1208181701 ; Version7200 ; Refresh (2 hours)120 ; Retry (10 min)604800 ; Expire (1 week)86400) ; Defalt TTL (1 day)
; List the name servers in use. Unresolved entries in other zones; will go to our ISP’s nameserver@ IN NS hal.mydomain.co.uk.; Optional information on the machine type and O/S used for the server.
IN HINFO i386 Solaris;; Domain mailing address.@ IN MX 10 www.mydomain.co.uk.; A list of machine names and address , first is domain@ IN A 192.168.8.200;hal IN A 192.168.8.200www IN A 192.168.8.201; List printers on the networkhplj2200d IN A 192.168.8.30hpclj2605dn IN A 192.168.8.31;; Alias (canonical) namesmail IN CNAME wwwcolour IN CNAME hpclj2605dnmono IN CNAME hplj3015dn;; Set up the name server (hal) and mail server (www)@ IN TXT "v=spfl ip4 :192.168.8.0/28 a mx ~all"www IN TXT "v=spfl a -all";;; Set up DNS records for Airprintlb._dns -sd._udp IN PTR @b._dns -sd._udp IN PTR @dr._dns -sd._udp IN PTR @db._dns -sd._udp IN PTR @cf._dns -sd._udp IN PTR @;; Set up printers for Airprint services_cups._sub._ipp._tcp IN PTR colour._printer._tcp_universal._sub._ipp._tcp IN PTR colour._printer._tcp
_cups._sub._ipp._tcp IN PTR mono._printer._tcp_universal._sub._ipp._tcp IN PTR mono._printer._tcp
colour._printer._tcp IN SRV 0 0 631 hal.mydomain.co.uk.mono._printer._tcp IN SRV 0 0 631 hal.mydomain.co.uk.;; THE FOLLOWING ENTRIES SHOULD BE CONTAINED ON A SINGLE LINE;colour._printer._tcp IN TXT ("txtvers=1" "qtotl=1" "rp=printers/colour"
"adminurl=http://hal:631/ printers/colour" "note=Office printer""ty=HP LaserJet 2605dn" "product=(HP LaserJet 2605dn)" "transparent=t""copies=t" "Duplex=T" "color=t" "pdl=application/octet -stream ,application/pdf,application/postscript ,image/jpeg ,image/png,image/urf"
www.jasspa.comoi_setup v1.25 2015/08/16 11:39:06
27

OpenIndiana Small System Server Build5.3 DNS Server
"printer -type=0x8090DC" "URF=W8,SRGB24 ,CP1,RS600 ,DM3")mono._printer._tcp IN TXT ("txtvers=1" "qtotl=1" "rp=printers/mono"
"adminurl=http://hal:631/ printers/mono" "note=Basement printer""ty=HP LaserJet 3015dn" "product=(HP LaserJet 3015dn)" "transparent=t""copies=t" "Duplex=T" "color=f" "pdl=application/octet -stream ,application/pdf,application/postscript ,image/jpeg ,image/png,image/urf""printer -type=0x829054" "URF=W8,SRGB24 ,CP1,RS600 ,DM3")
Finally the file named.boot should be copied to the /etc directory:
hal# cp /etc/named/named.boot /etc/named.conf
5.3.1 Manually defining DNS files
It is possible to build your own DNS filles without using h2n, this must be performed with a lot of care as itis easy to make mistakes. On this system then the DNS files were subsequently updated as follows:
hal# lsdb.127.0.0 db.192.168.8 db.cachedb.localhost db.mydomian
Where file db.127.0.0 is defined as:
;; Reverse pointers for localhost;$TTL 86400$ORIGIN 0.0.127.in-addr.arpa.@ SOA localhost. root.localhost. (
5 ; Serial increment on each edit.7200 ; refresh (2 hours)600 ; retry (10 min)604800 ; expire (1 week)86400 ; minimum (1 day))
IN NS localhost.1 IN PTR localhost.
File db.192.168.8, db.cache and db.mydomain as defined in the previous section. File db.localhost isdefined as:
;; Loopback/localhost zone file;$TTL 1D$ORIGIN localhost.@ IN SOA @ root (
4 ; Serial increment on each edit.7200 ; refresh (2 hours)600 ; retry (10 min)604800 ; expire (1 week)86400 ; minimum (1 day))
IN NS @IN A 127.0.0.1
The file /etc/named.conf is defined as:
// MASTER and CACHING NAME SERVER for mydomain.co.uk// Changelog:
www.jasspa.comoi_setup v1.25 2015/08/16 11:39:06
28

OpenIndiana Small System Server Build5.3 DNS Server
//// Restart using// % svcadm restart network/dns/server:default// %svcadm restart network/dns/client:default// %svcs -x network/dns/server:default//// Checking// named -checkzone mydomain.co.uk /etc/named/db.mydomain// named -checkzone localhost /etc/named/db.localhost// named -checkconf /etc/named.conf// host -l mydomain.co.uk// host 192.168.8.1options {
// Location of configuration files.directory "/etc/named";
// Version statement - inhibited for securityversion "Not currently available";
// Optional - diable all transfers , slaves allowed in zones clausesallow -transfer {"none"; };
// Closed DNS - permits only local IPs to issue recursive queries.// remove if an Open DNS required to support all users of add additional// range.allow -recursion {
192.168.8.0/24;};
// Forward DNS requests to our ISP.forwarders {
212.23.3.100;212.23.6.100;
};};
// Required zone for recursive queries.zone "." {
type hint;file "db.cache";
};
// Our local zone.zone "mydomain.co.uk" {
type master;file "db.mydomain";allow -update { none; };
};
// Required local host zone.zone "localhost" {
type master;file "db.localhost";allow -update { none; };
};
// Required local host reverse map.zone "0.0.127.in-addr.arpa" {
type master;file "db.127.0.0";allow -update { none; };
www.jasspa.comoi_setup v1.25 2015/08/16 11:39:06
29

OpenIndiana Small System Server Build5.3 DNS Server
};
// Reverse map for class C 182.168.8.0zone "8.168.192.in-addr.arpa" {
type master;file "db.192.168.8";allow -update { none; };
};
5.3.2 Setting up bind
Bind 9 requires a final initial configuration step, otherwise an error is produced when starting the service.Run the following, this only needs to be done once.
hal# rndc -confgen -a
Check the network files /etc/nsswitch.conf which should include DNS entries:
...ipnodes: files dnshosts: files dns...
Create or check the file /etc/defaultdomain
hal# vi /etc/defaultdomainmydomain.co.uk
Execute the domainname command to set the domain as follows:
hal# domainname ‘cat /etc/defaultdomain ‘
Set up the /etc/resolv.conf file, the first is the name of the domain (i.e. mydomain.co.uk)
# Localhostdomain mydomain.co.uknameserver 192.168.8.200# ISP (Zen)nameserver 212.23.3.100nameserver 212.23.6.100# Our Router is last resortnameserver 192.168.8.1
The DNS server and client may now be started:
hal# svcadm enable network/dns/server:defaulthal# svcadm enable network/dns/client:default
Check that the service is running:
hal# svcs -x dns/server:defaultsvc:/network/dns/server:default (BIND DNS server)State: online since Mon Aug 13 17:04:17 2012
See: named(1M)See: /var/svc/log/network -dns-server:default.log
Impact: None.
If there is a problem then the SVC log may be interrogated:
hal# tail /var/svc/log/network -dns-server:default.log[ Aug 13 15:01:19 Disabled. ][ Aug 13 17:03:54 Enabled. ][ Aug 13 17:03:54 Executing start method
www.jasspa.comoi_setup v1.25 2015/08/16 11:39:06
30

OpenIndiana Small System Server Build5.3 DNS Server
("/lib/svc/method/dns-server start default"). ]dns-server: Executing: /usr/sbin/named[ Aug 13 17:03:54 Method "start" exited with status 0. ][ Aug 13 17:04:17 Stopping because service restarting. ][ Aug 13 17:04:17 Executing stop method (:kill). ][ Aug 13 17:04:17 Executing start method("/lib/svc/method/dns-server start default"). ]dns-server: Executing: /usr/sbin/named[ Aug 13 17:04:17 Method "start" exited with status 0. ]
Confirm that the DNS addresses are resolving correctly:
hal# host hal.mydomain.co.ukhal.mydomain.co.uk has address 192.168.8.200
hal# host 192.168.8.201201.8.168.192.in-addr.arpa domain name pointer www.mydomain.co.uk.
hal# host www.mydomain.co.ukwww.mydomain.co.uk has address 192.168.8.201www.mydomain.co.uk mail is handled by 10 www.mydomain.co.uk.
hal# /usr/sbin/dig hal.mydomain.co.uk; <<>> DiG 9.6-ESV-R7-P3 <<>> hal.mydomain.co.uk;; global options: +cmd;; Got answer:;; ->>HEADER <<- opcode: QUERY , status: NOERROR , id: 24174;; flags: qr aa rd ra; QUERY: 1, ANSWER: 1, AUTHORITY: 1, ADDITIONAL: 0
;; QUESTION SECTION:;hal.mydomain.co.uk. IN A
;; ANSWER SECTION:hal.mydomain.co.uk. 86400 IN A 192.168.8.200
;; AUTHORITY SECTION:mydomain.co.uk. 86400 IN NS hal.mydomain.co.uk.
;; Query time: 0 msec;; SERVER: 192.168.8.200#53(192.168.8.200);; WHEN: Sat Feb 15 11:09:40 2014;; MSG SIZE rcvd: 72
If the addresses are failing to resolve then there is a problem in your bind configuration files in /etc/named/.Look at log files and edit the /etc/named/ files to fix the problem, the version field in the files should beupdated when changed. When the edit is complete then restart the DNS services as follows:
hal# svcadm restart network/dns/server:defaulthal# svcadm restart network/dns/client
5.3.3 Bonjour / Zero Configuration Networking
DNS-SD service discovery records may be added to the name server allowing your iOS 5.0 mobile devicesto use the local printers without any configuration. Refer to the following links:http://www.dns-sd.org/ServerSetup.htmlhttp://www.dns-sd.org/ServerStaticSetup.htmlModification of the name service configuration allows legacy both mono and colour laser printers to added tothe name service to allow network printing. The following was appended to file /etc/named/db.mydomain
www.jasspa.comoi_setup v1.25 2015/08/16 11:39:06
31

OpenIndiana Small System Server Build5.3 DNS Server
allowing printing through CUPS (set up later):
; Setup the DNS records for browsing.lb._dns -sd._udp IN PTR @ ; lb = legacy browse domainb._dns -sd._udp IN PTR @ ; b = browse domaindr._dns -sd._udp IN PTR @ ; dr = default reg domaindb._dns -sd._udp IN PTR @ ; db = default browse domaincf._dns -sd._udp IN PTR @ ;
; Set up CUPs for iPad printing_cups._sub._ipp._tcp IN PTR colour._printer._tcp_universal._sub._ipp._tcp IN PTR colour._printer._tcp
colour._printer._tcp IN SRV 0 0 631 hal.mydomain.co.uk.colour._printer._tcp IN TXT ( "txtvers=1" "qtotl=1""rp=printers/colour" "adminurl=http://hal:631/ printers/colour""note=Office printer""ty=HP LaserJet 2605dn" "product=(HP LaserJet 2605dn)""transparent=t" "copies=t" "Duplex=T" "color=t""pdl=application/octet -stream ,application/pdf,application/postscript ,
image/jpeg ,image/png,image/urf,text/plain ,text/html""printer -type=0x8090DC""URF=W8,SRGB24 ,CP1,RS600" )
_cups._sub._ipp._tcp IN PTR mono._printer._tcp_universal._sub._ipp._tcp IN PTR mono._printer._tcp
mono._printer._tcp IN SRV 0 0 631 hal.mydomain.co.uk.mono._printer._tcp IN TXT ( "txtvers=1" "qtotl=1""rp=printers/mono" "adminurl=http://hal:631/ printers/mono""note=Basement printer""ty=HP LaserJet 3015dn" "product=(HP LaserJet 3015dn)""transparent=t" "copies=t" "Duplex=T" "color=f""pdl=application/octet -stream ,application/pdf,application/postscript ,
image/jpeg ,image/png,image/urf,text/plain ,text/html""printer -type=0x829054""URF=W8,SRGB24 ,CP1,RS600" )
Note that the pdl= line should appear on a single line and is not split across lines as shown above. The nameservices should be re-started after editing
hal# svcadm restart network/dns/server:defaulthal# svcadm restart network/dns/client
and printers should become available on the iOS 5.0 device. Note that duplex printing causes problems sowhen printing from the device then ensue that the Duplex option is OFF.
5.3.4 mDNS Service
For iOS 7.0 then DNS-SD service discovery records delivered in DNS are not sufficient and an mDNS serviceshould be set up. The CUPs configuration is covered in more detail later.The mDNS is quite useful for SSH and may be enabled without causing any problems. Edit the /etc-/nsswitch.conf file which should include mdns entries for both hosts and ipnodes:
...# You must also set up the /etc/resolv.conf file for DNS name# server lookup. See resolv.conf(4). For lookup via mdns# svc:/network/dns/multicast:default must also be enabled. See mdnsd(1M)hosts: files dns mdns
www.jasspa.comoi_setup v1.25 2015/08/16 11:39:06
32
OpenIndiana Small System Server Build5.4 DHCP Server
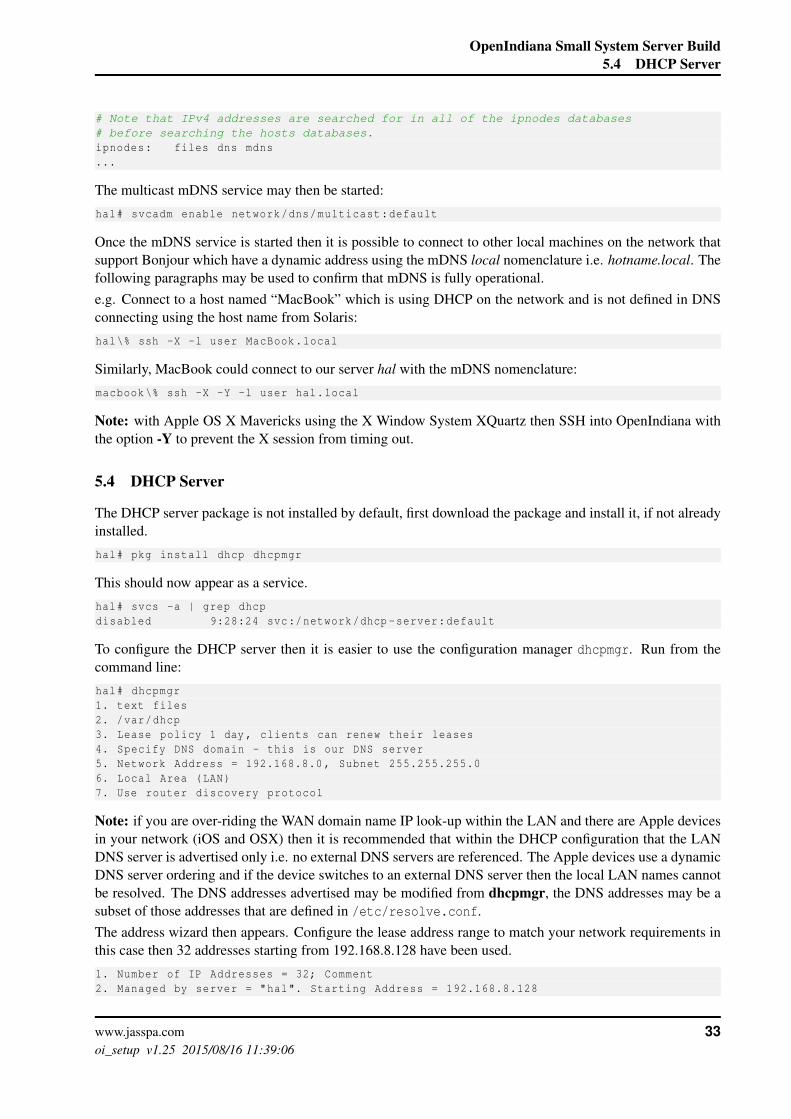
# Note that IPv4 addresses are searched for in all of the ipnodes databases# before searching the hosts databases.ipnodes: files dns mdns...
The multicast mDNS service may then be started:
hal# svcadm enable network/dns/multicast:default
Once the mDNS service is started then it is possible to connect to other local machines on the network thatsupport Bonjour which have a dynamic address using the mDNS local nomenclature i.e. hotname.local. Thefollowing paragraphs may be used to confirm that mDNS is fully operational.e.g. Connect to a host named “MacBook” which is using DHCP on the network and is not defined in DNSconnecting using the host name from Solaris:
hal\% ssh -X -l user MacBook.local
Similarly, MacBook could connect to our server hal with the mDNS nomenclature:
macbook\% ssh -X -Y -l user hal.local
Note: with Apple OS X Mavericks using the X Window System XQuartz then SSH into OpenIndiana withthe option -Y to prevent the X session from timing out.
5.4 DHCP Server
The DHCP server package is not installed by default, first download the package and install it, if not alreadyinstalled.
hal# pkg install dhcp dhcpmgr
This should now appear as a service.
hal# svcs -a | grep dhcpdisabled 9:28:24 svc:/network/dhcp -server:default
To configure the DHCP server then it is easier to use the configuration manager dhcpmgr. Run from thecommand line:
hal# dhcpmgr1. text files2. /var/dhcp3. Lease policy 1 day, clients can renew their leases4. Specify DNS domain - this is our DNS server5. Network Address = 192.168.8.0 , Subnet 255.255.255.06. Local Area (LAN)7. Use router discovery protocol
Note: if you are over-riding the WAN domain name IP look-up within the LAN and there are Apple devicesin your network (iOS and OSX) then it is recommended that within the DHCP configuration that the LANDNS server is advertised only i.e. no external DNS servers are referenced. The Apple devices use a dynamicDNS server ordering and if the device switches to an external DNS server then the local LAN names cannotbe resolved. The DNS addresses advertised may be modified from dhcpmgr, the DNS addresses may be asubset of those addresses that are defined in /etc/resolve.conf.The address wizard then appears. Configure the lease address range to match your network requirements inthis case then 32 addresses starting from 192.168.8.128 have been used.
1. Number of IP Addresses = 32; Comment2. Managed by server = "hal". Starting Address = 192.168.8.128
www.jasspa.comoi_setup v1.25 2015/08/16 11:39:06
33

OpenIndiana Small System Server Build5.4 DHCP Server
3. Confirm addresses (192.168.8.128 -> 192.168.8.159)4. Select lease type (hal)5. Lease type = dyamic
Make sure that "Router" is specified in the DHCP configuration (this field was absent in my case), if omittedthen add with dhcpmgr. You can look at the options selected in file /var/dhcp/SUNWfiles1_dhcptab
hal# cat /var/dhcp/SUNWfiles1_dhcptab# SUNWfiles1_dhcptab## Do NOT edit this file by hand -- use dhtadm(1M) or dhcpmgr(1M) instead#Locale|m|9473040341197127681|: UTCoffst=0:hal|m|6059593298627002369|: Include=Locale:Timeserv =192.168.8.200: LeaseTim =86400:LeaseNeg:DNSdmain="mydomain.co.uk":DNSserv =192.168.8.200:192.168.8.0|m|3646226848309837826|: Subnet =255.255.255.0:RDiscvyF=1:Broadcst =192.168.8.255: Router =192.168.8.1:
If the Router field is absent then restart dhcpmgr and add as follows:
hal# dhcpmgrSelect Macros192.168.8.0 => Edit => PropertiesOption Name: RouterOption Value: 192.168.8.1 (Send back to router).=> Add (Ensure "Notify DHCP server of change" is checked.=> OK.Finished!
Turn off any existing DHCP service that already exists on the network, this may be running on any DSLrouter, then start the DHCP service on the server:
Start the servicehal# svcadm enable dhcp -server:defaulthal# svcs -xv dhcp -server:defaultsvc:/network/dhcp -server:default (DHCP server)State: online since 2 September 2012 09:39:36 BST
See: man -M /usr/share/man -s 1M in.dhcpdSee: /var/svc/log/network -dhcp -server:default.log
Impact: None.
Check that DHCP service is running properly by checking other DHCP enabled devices on the network areable to acquire their leases and are able to connect to the network and resolve addresses. Check that the DNSservices are running correctly.
5.4.1 DHCP Logging
Add DHCP server logging, see OpenIndiana Wiki which is reproduced here.Enable logging on the DHCP server
hal# echo "LOGGING_FACILITY=0" >> /etc/inet/dhcpsvc.confhal# svcadm restart dhcp -server
Add this line to /etc/syslog.conf to enable saving of these messages into a particular file. The two partsmust be separated by TAB characters:
hal# me /etc/syslog.conflocal0.notice /var/log/dhcpsvc
touch the file to create it and restart the syslog:
www.jasspa.comoi_setup v1.25 2015/08/16 11:39:06
34

OpenIndiana Small System Server Build5.5 Print Server
hal# touch /var/log/dhcpsvchal# svcadm restart system -log
Note that syslog does not create log files itself and complains if one is not present at the moment of thedaemon’s startup or restart.Enable log rotation to restrain the disk space requirements:
hal# cat << EOF >> /etc/logadm.conf### Rotate DHCP/ipmon logs/var/log/dhcpsvc -C 4 -s 1m -a ’/usr/sbin/svcadm refresh system -log’EOF
This uses the default log rotation engine logadm called from cron, if you use something else (newsyslog,logrotate.d, etc.) configure that appropriately.
5.5 Print Server
A print server is required for global printing, the print queue is maintained on the server to allow devices toprint. All of the printers in the system are UNIX sympathetic network printers (i.e. they typically supportpostscript). It is considered better to print through a server, especially from mobile devices such as laptopswhen a long print job can be sent to the print server which deals with the request, the client device can ’fireand forget’ and then be shut down if required whilst printing continues.CUPS is used as the print server which needs to be installed. Where Hewlett Packard printers are used thenthere are some HP specific filters provided by print/filter/hplip:
pkg install print/cups print/filter/hplip print/filter/ghostscript \print/cups/system -config -printer
Once installation has completed then edit the CUPS configuration file /etc/cups/cupsd.conf and add alistener for the printer Web Admin interface if you wish to administer remotely, by default it allows localadministration only.
hal# me /etc/cups/cupsd.conf
# Allow for remote accessPort 631 # Listen on the LAN interface , Port 631# Comment out the local interface#Listen localhost:631
Start the cups service(s) as required:
# svcadm enable cups/scheduler:default# svcadm enable cups/in-lpd:default# svcs -a | grep cupslegacy_run Mar_01 lrc:/etc/rc2_d/S89apcupsdonline Mar_01 svc:/application/cups/scheduler:defaultonline Mar_01 svc:/application/cups/in-lpd:default
The print services may then be administered via the web interface with URL localhost:631 to set up theprinters.
5.5.1 AirPrint
To enable AirPrint with iOS 7 then mDNS should be enabled. Within the CUPS administration window thenthe printer should be made sharable. The printer should be exported using mDNS via avahi. The Airprintconfiguration for each printer may be generated with airprint-generate.py which is a python script that
www.jasspa.comoi_setup v1.25 2015/08/16 11:39:06
35

OpenIndiana Small System Server Build5.6 Samba (SMB Share)
interrogates CUPS and generates an Airprint configuration file in /etc/avahi/services. The syntax isrelatively straight forward given that we have already set up the named DNS files.To generate the configuration files then download airprint-generate.py from the web and generate theAirprint files:
hal# mkdir ~/airprinthal# cd ~/airprinthal# wget -O airprint -generate.py --no-check -certificate \https://raw.github.com/tjfontaine/airprint -generate/master/airprint -generate.pyhal# chmod +x airprint -generate.pyhal# ./airprint -generate.py
This will generate a .service file for each printer as follows, this example one is AirPrint-mono.servicefor a HP black and white laser printer which has been heavily edited:
<?xml version="1.0" ?><!DOCTYPE service -group SYSTEM ’avahi -service.dtd’><service -group>
<name replace -wildcards="yes">AirPrint mono @ %h</name><service>
<type>_ipp._tcp</type><subtype>_universal._sub._ipp._tcp</subtype><port>631</port><txt-record>txtvers=1</txt-record><txt-record>qtotal=1</txt-record><txt-record>rp=printers/mono</txt-record><txt-record>ty=HP LaserJet 3015</txt-record>><txt-record>product=(HP LaserJet 3015)</txt-record><txt-record>adminurl=http://hal.mydomain.co.uk:631/printers/mono</txt-record><txt-record>note=Basement</txt-record><txt-record>printer -state=3</txt-record><txt-record>printer -type=0x829054</txt-record><txt-record>Binary=T</txt-record><txt-record>Color=F</txt-record><txt-record>Transparent=T</txt-record><txt-record>Duplex=T</txt-record><txt-record>Copies=t</txt-record><txt-record>pdl=application/pdf,application/postscript ,image/jpeg ,image/urf</txt-record><txt-record>URF=W8,SRGB24 ,CP1,RS600 ,DM3</txt-record>
</service></service -group>
The entries generated by the python script are long and the sd-dns records are short so remove some of thepdl= entries that are cups specific as they are not really needed.Once the files are tweaked and cleaned up then move the .service files to /etc/avahi/service.
hal# mv *.service /etc/avahi/service
Restart the mDNS and avahi services and Airprint should show up on the network.
hal# svcadm restart network/dns/multicast:defaulthal# svcadm restart system/avahi -bridge -dsd:default
5.6 Samba (SMB Share)
SMB file sharing may be performed natively by ZFS in OpenIndiana (See OpenIndia web site for furtherinformation) or the legacy Samba package from the extra repositories may be installed. In this configurationthen we used the legacy Samba.
www.jasspa.comoi_setup v1.25 2015/08/16 11:39:06
36

OpenIndiana Small System Server Build5.7 Firewall (IP Filter)
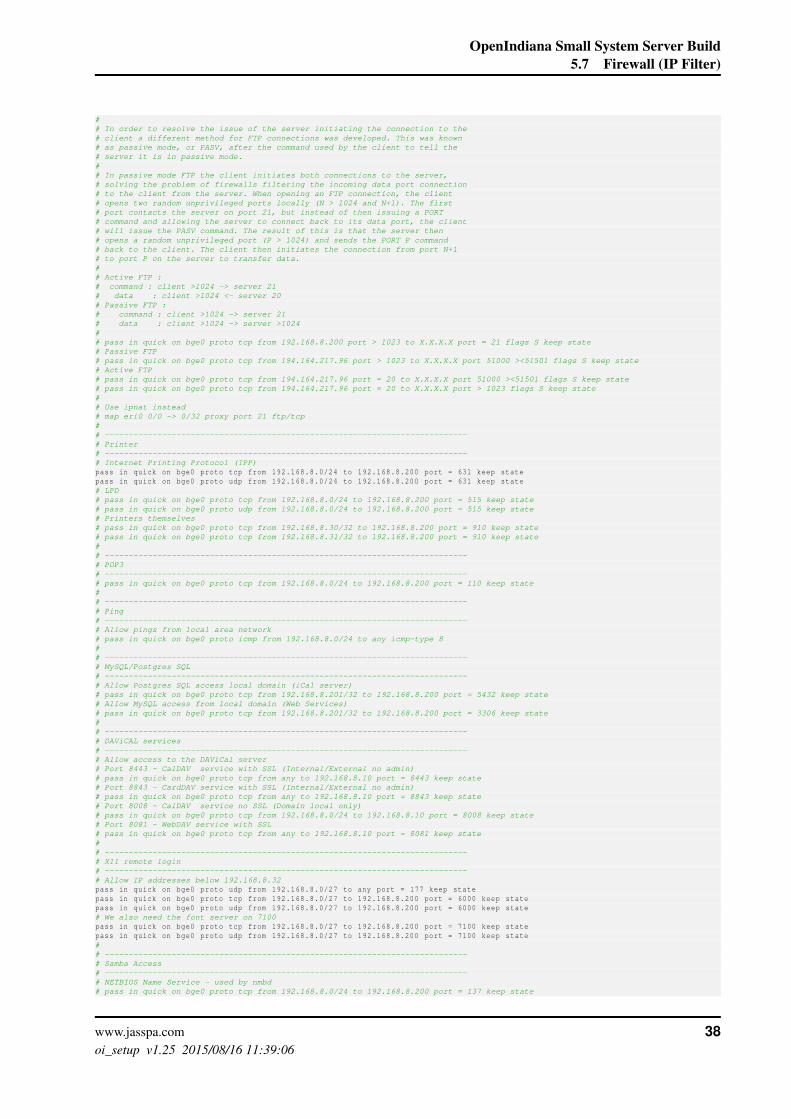
5.7 Firewall (IP Filter)
OpenIndiana includes a IP filter to protect the system, the package ipfilter should be installed, if notalready present.
hal# pkg install ipfilter
Create the file /etc/ipf/ipf.conf in an editor that restricts access to the open ports of the system. The filelooks something like:## ipf.con## IP Filter rules to be loaded during startup## See ipf(4) manpage for more information on# IP Filter rules syntax.# See: http://ist.uwaterloo.ca/security/howto/2005-08-19/# ipf.conf## IP Filter rules to be loaded during startup## See ipf(4) manpage for more information on# IP Filter rules syntax.## To Reload rules:# % ipf -Fa -f /etc/ipf/ipf.conf# To Monitor log:# % ipmon -a# Summary of IPsec rules# % ipfstat -h -i## ----------------------------------------------------------------------------# Outgoing - Allow any outbound traffic from this computer (and the response)# ----------------------------------------------------------------------------pass out quick on bge0 all keep state## ----------------------------------------------------------------------------# Allow loopback traffic# ----------------------------------------------------------------------------pass in quick on lo0 allpass out quick on lo0 all## ----------------------------------------------------------------------------# DNS# ----------------------------------------------------------------------------# Allow DNS from local area networkpass in quick on bge0 proto tcp from 192.168.8.0/24 to 192.168.8.200 port = 53 keep statepass in quick on bge0 proto udp from 192.168.8.0/24 to 192.168.8.200 port = 53 keep state## ----------------------------------------------------------------------------# BOOTP/DHCP Server 0 placed here as may be any address.# ----------------------------------------------------------------------------pass in quick on bge0 proto udp from any port = 68 to any port = 67## ----------------------------------------------------------------------------# block from non-routable addresses# ----------------------------------------------------------------------------block in quick from 10.0.0.0/8block in quick from 172.16.0.0/12# block in quick from 192.168.0.0/16## ----------------------------------------------------------------------------# mDNS# ----------------------------------------------------------------------------# Allow mDNS from local area networkpass in quick on bge0 proto udp from 192.168.8.0/24 to 224.0.0.251 port = 5353## ----------------------------------------------------------------------------# NTP# ----------------------------------------------------------------------------# Allow NTP from local area networkpass in quick on bge0 proto tcp from 192.168.8.0/24 to 192.168.8.200 port = 123 keep statepass in quick on bge0 proto udp from 192.168.8.0/24 to 192.168.8.200 port = 123 keep state## ----------------------------------------------------------------------------# FTP# ----------------------------------------------------------------------------# FTP is a TCP based service exclusively. There is no UDP component to FTP.# FTP is an unusual service in that it utilizes two ports, a ’data’ port and a# ’command’ port (also known as the control port). Traditionally these are# port 21 for the command port and port 20 for the data port. The confusion# begins however, when we find that depending on the mode, the data port is# not always on port 20.## In active mode FTP the client connects from a random unprivileged port (N ># 1024) to the FTP server’s command port, port 21. Then, the client starts# listening to port N+1 and sends the FTP command PORT N+1 to the FTP server.# The server will then connect back to the client’s specified data port from# its local data port, which is port 20.
www.jasspa.comoi_setup v1.25 2015/08/16 11:39:06
37
OpenIndiana Small System Server Build5.7 Firewall (IP Filter)
## In order to resolve the issue of the server initiating the connection to the# client a different method for FTP connections was developed. This was known# as passive mode, or PASV, after the command used by the client to tell the# server it is in passive mode.## In passive mode FTP the client initiates both connections to the server,# solving the problem of firewalls filtering the incoming data port connection# to the client from the server. When opening an FTP connection, the client# opens two random unprivileged ports locally (N > 1024 and N+1). The first# port contacts the server on port 21, but instead of then issuing a PORT# command and allowing the server to connect back to its data port, the client# will issue the PASV command. The result of this is that the server then# opens a random unprivileged port (P > 1024) and sends the PORT P command# back to the client. The client then initiates the connection from port N+1# to port P on the server to transfer data.## Active FTP :# command : client >1024 -> server 21# data : client >1024 <- server 20# Passive FTP :# command : client >1024 -> server 21# data : client >1024 -> server >1024## pass in quick on bge0 proto tcp from 192.168.8.200 port > 1023 to X.X.X.X port = 21 flags S keep state# Passive FTP# pass in quick on bge0 proto tcp from 194.164.217.96 port > 1023 to X.X.X.X port 51000 ><51501 flags S keep state# Active FTP# pass in quick on bge0 proto tcp from 194.164.217.96 port = 20 to X.X.X.X port 51000 ><51501 flags S keep state# pass in quick on bge0 proto tcp from 194.164.217.96 port = 20 to X.X.X.X port > 1023 flags S keep state## Use ipnat instead# map eri0 0/0 -> 0/32 proxy port 21 ftp/tcp## ----------------------------------------------------------------------------# Printer# ----------------------------------------------------------------------------# Internet Printing Protocol (IPP)pass in quick on bge0 proto tcp from 192.168.8.0/24 to 192.168.8.200 port = 631 keep statepass in quick on bge0 proto udp from 192.168.8.0/24 to 192.168.8.200 port = 631 keep state# LPD# pass in quick on bge0 proto tcp from 192.168.8.0/24 to 192.168.8.200 port = 515 keep state# pass in quick on bge0 proto udp from 192.168.8.0/24 to 192.168.8.200 port = 515 keep state# Printers themselves# pass in quick on bge0 proto tcp from 192.168.8.30/32 to 192.168.8.200 port = 910 keep state# pass in quick on bge0 proto tcp from 192.168.8.31/32 to 192.168.8.200 port = 910 keep state## ----------------------------------------------------------------------------# POP3# ----------------------------------------------------------------------------# pass in quick on bge0 proto tcp from 192.168.8.0/24 to 192.168.8.200 port = 110 keep state## ----------------------------------------------------------------------------# Ping# ----------------------------------------------------------------------------# Allow pings from local area network# pass in quick on bge0 proto icmp from 192.168.8.0/24 to any icmp-type 8## ----------------------------------------------------------------------------# MySQL/Postgres SQL# ----------------------------------------------------------------------------# Allow Postgres SQL access local domain (iCal server)# pass in quick on bge0 proto tcp from 192.168.8.201/32 to 192.168.8.200 port = 5432 keep state# Allow MySQL access from local domain (Web Services)# pass in quick on bge0 proto tcp from 192.168.8.201/32 to 192.168.8.200 port = 3306 keep state## ----------------------------------------------------------------------------# DAViCAL services# ----------------------------------------------------------------------------# Allow access to the DAViCal server# Port 8443 - CalDAV service with SSL (Internal/External no admin)# pass in quick on bge0 proto tcp from any to 192.168.8.10 port = 8443 keep state# Port 8843 - CardDAV service with SSL (Internal/External no admin)# pass in quick on bge0 proto tcp from any to 192.168.8.10 port = 8843 keep state# Port 8008 - CalDAV service no SSL (Domain local only)# pass in quick on bge0 proto tcp from 192.168.8.0/24 to 192.168.8.10 port = 8008 keep state# Port 8081 - WebDAV service with SSL# pass in quick on bge0 proto tcp from any to 192.168.8.10 port = 8081 keep state## ----------------------------------------------------------------------------# X11 remote login# ----------------------------------------------------------------------------# Allow IP addresses below 192.168.8.32pass in quick on bge0 proto udp from 192.168.8.0/27 to any port = 177 keep statepass in quick on bge0 proto tcp from 192.168.8.0/27 to 192.168.8.200 port = 6000 keep statepass in quick on bge0 proto udp from 192.168.8.0/27 to 192.168.8.200 port = 6000 keep state# We also need the font server on 7100pass in quick on bge0 proto tcp from 192.168.8.0/27 to 192.168.8.200 port = 7100 keep statepass in quick on bge0 proto udp from 192.168.8.0/27 to 192.168.8.200 port = 7100 keep state## ----------------------------------------------------------------------------# Samba Access# ----------------------------------------------------------------------------# NETBIOS Name Service - used by nmbd# pass in quick on bge0 proto tcp from 192.168.8.0/24 to 192.168.8.200 port = 137 keep state
www.jasspa.comoi_setup v1.25 2015/08/16 11:39:06
38

OpenIndiana Small System Server Build5.7 Firewall (IP Filter)
pass in quick on bge0 proto udp from 192.168.8.0/24 to any port = 137 keep state# NETBIOS Datagram Service - used by nmbd# pass in quick on bge0 proto tcp from 192.168.8.0/24 to 192.168.8.200 port = 138 keep statepass in quick on bge0 proto udp from 192.168.8.0/24 to any port = 138 keep state# NETBIOS Session Service - used by smbdpass in quick on bge0 proto tcp from 192.168.8.0/24 to 192.168.8.200 port = 139 keep state# pass in quick on bge0 proto udp from 192.168.8.0/24 to 192.168.8.0/24 port = 139 keep state# Used by smbdpass in quick on bge0 proto tcp from 192.168.8.0/24 to 192.168.8.200 port = 445 keep state# swatpass in quick on bge0 proto tcp from 192.168.8.0/24 to 192.168.8.200 port = 901 keep state## ----------------------------------------------------------------------------# Mail - Allow inbound mail services (smtp, smtps, submission).# ----------------------------------------------------------------------------# pass in quick on bge0 proto tcp from 192.168.8.0/24 to 192.168.8.200 port = 25# pass in quick proto tcp from 192.168.8.0/24 to port = 465# pass in quick proto tcp from 192.168.8.0/24 to port = 587# imap + SSL/TLS# pass in quick on bge0 proto tcp to 192.168.8.10 port = 993 keep state## ----------------------------------------------------------------------------# SSH - Allow ssh inbound but limit to site only# ----------------------------------------------------------------------------pass in quick on bge0 proto tcp from 192.168.8.0/24 to any port = 22 flags S keep state## ----------------------------------------------------------------------------# CVS - Allow cvs inbound but limit to site only# ----------------------------------------------------------------------------# cvspserverpass in quick on bge0 proto tcp from 192.168.8.0/24 to 192.168.8.200 port = 2401pass in quick on bge0 proto udp from 192.168.8.0/24 to 192.168.8.200 port = 2401## ----------------------------------------------------------------------------# HTTP# ----------------------------------------------------------------------------# pass in quick on bge0 proto tcp from 192.168.8.0/24 to 192.168.8.0/24 port = 80 keep state## ----------------------------------------------------------------------------# HTTPS# ----------------------------------------------------------------------------# Global access# pass in quick on bge0 proto tcp from any to 192.168.8.200 port = 443 keep state# Local access# pass in quick on bge0 proto tcp from 192.168.8.0/24 to 192.168.8.200 port = 443 keep state## ----------------------------------------------------------------------------# SunRay Services# ----------------------------------------------------------------------------# TFTP Server# pass in quick on bge0 proto tcp from 192.168.8.128/25 to any port = 69 keep state# Sunray# pass in quick on bge0 proto tcp from 192.168.8.128/25 to 192.168.8.200 port = 7007 flags S keep state# pass in quick on bge0 proto tcp from 192.168.8.128/25 to 192.168.8.200 port = 7008 flags S keep state# pass in quick on bge0 proto tcp from 192.168.8.128/25 to 192.168.8.200 port = 7009 flags S keep state# pass in quick on bge0 proto udp from 192.168.8.128/25 to any port = 7009 keep state# pass in quick on bge0 proto tcp from 192.168.8.128/25 to 192.168.8.200 port = 7010 flags S keep state# pass in quick on bge0 proto tcp from 192.168.8.128/25 to 192.168.8.200 port = 7011 flags S keep state# pass in quick on bge0 proto tcp from 192.168.8.128/25 to 192.168.8.200 port = 7012 flags S keep state# pass in quick on bge0 proto tcp from 192.168.8.128/25 to 192.168.8.200 port = 7013 flags S keep state# pass in quick on bge0 proto udp from 192.168.8.128/25 to any port = 7013 keep state# pass in quick on bge0 proto udp from 192.168.8.128/25 to any port 40000 >< 42000 keep state## ----------------------------------------------------------------------------# NFS Services - use zsh% rpcinfo -p# ----------------------------------------------------------------------------# rpcbind# pass in quick on bge0 proto tcp from 192.168.8.0/24 to 192.168.8.200 port = 111 flags S keep state# pass in quick on bge0 proto udp from 192.168.8.0/24 to 192.168.8.0/24 port = 111 keep state# nlockmgr# pass in quick on bge0 proto tcp from 192.168.8.0/24 to 192.168.8.200 port = 4045 flags S keep state# pass in quick on bge0 proto udp from 192.168.8.0/24 to 192.168.8.0/24 port = 4045 keep state# nfs# pass in quick on bge0 proto tcp from 192.168.8.0/24 to 192.168.8.200 port = 2049 flags S keep state# pass in quick on bge0 proto udp from 192.168.8.0/24 to 192.168.8.0/24 port = 2049 keep state# nfs miscellaneous ports# pass in quick on bge0 proto tcp from 192.168.8.0/24 to 192.168.8.200 port 32768 >< 33000 flags S keep state# pass in quick on bge0 proto udp from 192.168.8.0/24 to 192.168.8.0/24 port 32768 >< 33000 keep state## ----------------------------------------------------------------------------# SunPCI card - Linux X-server# ----------------------------------------------------------------------------# pass in quick on bge0 proto tcp from 192.168.8.0/24 to 192.168.8.200 port = 6000 flags S keep state## ----------------------------------------------------------------------------# Block everything else# ----------------------------------------------------------------------------block in log on bge0 all
Once the rules are defined then check the ipf SMF service is automatically loaded on any re-start. TheOpenIndiana release is not configured to reload the ipf rules by default and the SMF service may need tobe customised. The /network/ipfilter:default rules for the following properties should be defined as
www.jasspa.comoi_setup v1.25 2015/08/16 11:39:06
39
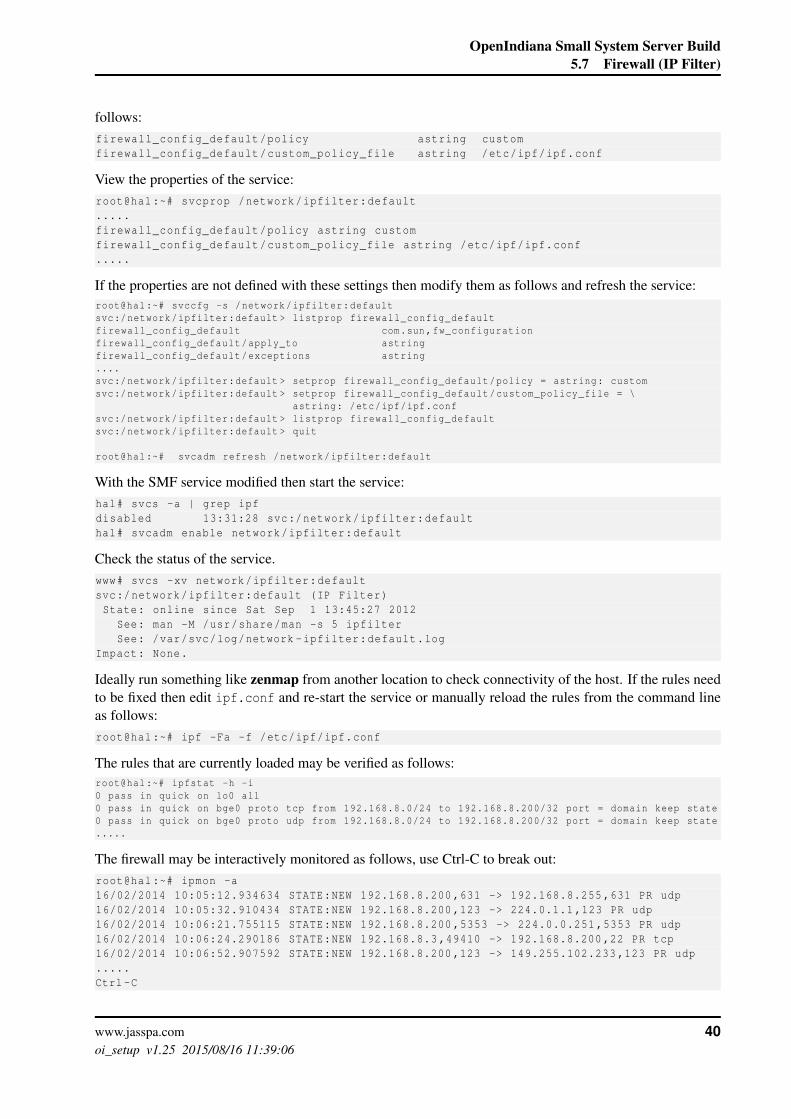
OpenIndiana Small System Server Build5.7 Firewall (IP Filter)
follows:firewall_config_default/policy astring customfirewall_config_default/custom_policy_file astring /etc/ipf/ipf.conf
View the properties of the service:root@hal:~# svcprop /network/ipfilter:default.....firewall_config_default/policy astring customfirewall_config_default/custom_policy_file astring /etc/ipf/ipf.conf.....
If the properties are not defined with these settings then modify them as follows and refresh the service:root@hal:~# svccfg -s /network/ipfilter:defaultsvc:/network/ipfilter:default > listprop firewall_config_defaultfirewall_config_default com.sun,fw_configurationfirewall_config_default/apply_to astringfirewall_config_default/exceptions astring....svc:/network/ipfilter:default > setprop firewall_config_default/policy = astring: customsvc:/network/ipfilter:default > setprop firewall_config_default/custom_policy_file = \
astring: /etc/ipf/ipf.confsvc:/network/ipfilter:default > listprop firewall_config_defaultsvc:/network/ipfilter:default > quit
root@hal:~# svcadm refresh /network/ipfilter:default
With the SMF service modified then start the service:hal# svcs -a | grep ipfdisabled 13:31:28 svc:/network/ipfilter:defaulthal# svcadm enable network/ipfilter:default
Check the status of the service.www# svcs -xv network/ipfilter:defaultsvc:/network/ipfilter:default (IP Filter)State: online since Sat Sep 1 13:45:27 2012
See: man -M /usr/share/man -s 5 ipfilterSee: /var/svc/log/network -ipfilter:default.log
Impact: None.
Ideally run something like zenmap from another location to check connectivity of the host. If the rules needto be fixed then edit ipf.conf and re-start the service or manually reload the rules from the command lineas follows:root@hal:~# ipf -Fa -f /etc/ipf/ipf.conf
The rules that are currently loaded may be verified as follows:root@hal:~# ipfstat -h -i0 pass in quick on lo0 all0 pass in quick on bge0 proto tcp from 192.168.8.0/24 to 192.168.8.200/32 port = domain keep state0 pass in quick on bge0 proto udp from 192.168.8.0/24 to 192.168.8.200/32 port = domain keep state.....
The firewall may be interactively monitored as follows, use Ctrl-C to break out:root@hal:~# ipmon -a16/02/2014 10:05:12.934634 STATE:NEW 192.168.8.200 ,631 -> 192.168.8.255 ,631 PR udp16/02/2014 10:05:32.910434 STATE:NEW 192.168.8.200 ,123 -> 224.0.1.1 ,123 PR udp16/02/2014 10:06:21.755115 STATE:NEW 192.168.8.200 ,5353 -> 224.0.0.251 ,5353 PR udp16/02/2014 10:06:24.290186 STATE:NEW 192.168.8.3 ,49410 -> 192.168.8.200 ,22 PR tcp16/02/2014 10:06:52.907592 STATE:NEW 192.168.8.200 ,123 -> 149.255.102.233 ,123 PR udp.....Ctrl -C
www.jasspa.comoi_setup v1.25 2015/08/16 11:39:06
40

OpenIndiana Small System Server Build6 UPS Protection
6 UPS Protection
For protection against power outage then a APC 620inet UPS has been used which provides a serial commu-nication interface to the server and is used in conjunction with apcupsd. The server does not include a serialinterface by default and a MOXA CP-102EL-DB9M 2-port RS-232 low profile PCI Express serial board hasbeen used. A Keyspan USB-serial adapter was tried but did not play well with the UPS and resulted in alot of intermittent communication disconnections. The MOXA card proved to be much more reliable (albeitexpensive).
6.1 Installing MOXA serial card
Power off the system and install the MOXA serial card, power on and download the Solaris 10 Moxa CP-102E/EL drivers from www.moxa.com.
hal# unzip driv_solaris10_smart_i386_v1.0_build_10081617.zipArchive: driv_solaris10_smart_i386_v1.0_build_10081617.zip
inflating: version.txtinflating: readme.txtinflating: driv_solaris10_smart_i386_v1.0_build_10081617.pkg
hal# pkgadd -d driv_solaris10_smart_i386_v1.0_build_10081617.pkg
The following packages are available:1 MxSIBoard MOXA Smartio/Industio Multiport Serial Board Driver
(x86/x64) v1.0 (Build 10081617)
Select package(s) you wish to process (or ’all’ to processall packages). (default: all) [?,??,q]: all
Processing package instance <MxSIBoard > from</tmp/driv_solaris10_smart_i386_v1.0_build_10081617.pkg>
MOXA Smartio/Industio Multiport Serial Board Driver(x86/x64)v1.0 (Build 10081617)Moxa Inc.
The selected base directory </usr/lib/MxSIBoard > must exist beforeinstallation is attempted.
Do you want this directory created now [y,n,?,q] yUsing </usr/lib/MxSIBoard > as the package base directory.## Processing package information.## Processing system information.## Verifying disk space requirements.## Checking for conflicts with packages already installed.## Checking for setuid/setgid programs.
This package contains scripts which will be executed with super -userpermission during the process of installing this package.
Do you want to continue with the installation of <MxSIBoard > [y,n,?] y
Installing MOXA Smartio/Industio Multiport Serial Board Driveras <MxSIBoard >
## Installing part 1 of 1./usr/lib/MxSIBoard/README/usr/lib/MxSIBoard/amd64/mxsiboard
www.jasspa.comoi_setup v1.25 2015/08/16 11:39:06
41

OpenIndiana Small System Server Build6.2 Installing apcupsd
/usr/lib/MxSIBoard/amd64/mxsieboard/usr/lib/MxSIBoard/i386/mxsiboard/usr/lib/MxSIBoard/i386/mxsieboard/usr/lib/MxSIBoard/initsidrv/usr/lib/MxSIBoard/muestty/usr/lib/MxSIBoard/mxsiboard.ap/usr/lib/MxSIBoard/mxsiboard.conf/usr/lib/MxSIBoard/mxsieboard.conf[ verifying class <none > ]## Executing postinstall script.
The following MOXA Smartio/Industio board(s) have found and installed.
MOXA Smartio/Industio CP -102EL Series (ttyMUE0 -ttyMUE1)
Done.
Installation of <MxSIBoard > was successful.\end{}
Test that the serial board is working correctly
\begin{lstlisting}hal# prtconf -v | grep MOXAvalue=’MOXA Smartio/Industio CP -102EL Series (ttyMUE0 -ttyMUE1)’
hal# stty -a < /dev/ttyMUE0speed 9600 baud; rows 0; columns 0;intr = ^C; quit = ^\; erase = ^?; kill = ^U; eof = ^D; eol = <undef >;eol2 = <undef >; swtch = <undef >; start = ^Q; stop = ^S; susp = ^Z;dsusp = ^Y; rprnt = ^R; werase = ^W; lnext = ^V; flush = ^O;-parenb -parodd cs8 -hupcl -cstopb cread -clocal -crtscts-ignbrk brkint -ignpar -parmrk -inpck -istrip -inlcr -igncr icrnl ixon-ixoff -iuclc -ixany imaxbel opost -olcuc -ocrnl onlcr -onocr -onlret-ofill -ofdel nl0 cr0 tab3 bs0 vt0 ff0 isig icanon iexten echo echoeechok -echonl -noflsh -xcase -tostop -echoprt echoctl echoke
6.2 Installing apcupsd
apcupsd is an excellent open source daemon for controlling APC UPSes which works wonderfully well.Download the latest version of APCUPSD from http://www.apcupsd.org/ and unpack it.
tar zxvf Downloads/apcupsd -3.14.10.tar.gz
Once unpacked then build it locally
cd apcupsd -3.14.10/./configure --enable -usb --with -upstype=usb --with -upscale=usb \--prefix=/usr --sbindir=/sbin --with -log-dir=/var/log/apcupsd
make.......
Once built then install as root
bob@hal:~/apcupsd -3.14.10$ sudo make installsrcsrc/libsrc/driverssrc/drivers/apcsmart
www.jasspa.comoi_setup v1.25 2015/08/16 11:39:06
42

OpenIndiana Small System Server Build6.2 Installing apcupsd
src/drivers/dumbsrc/drivers/netsrc/drivers/pcnetsrc/drivers/usbsrc/drivers/usb/genericsrc/drivers/snmplitesrc/libusbhid
COPY apcupsd => /sbin/apcupsdCOPY apctest => /sbin/apctestCOPY apcaccess => /sbin/apcaccessCOPY smtp => /sbin/smtp
platformsplatforms/etc
MKDIR /etc/opt/apcupsdCOPY apcupsd.conf => /etc/opt/apcupsd/apcupsd.confCOPY changeme => /etc/opt/apcupsd/changemeCOPY commfailure => /etc/opt/apcupsd/commfailureCOPY commok => /etc/opt/apcupsd/commokCOPY offbattery => /etc/opt/apcupsd/offbatteryCOPY onbattery => /etc/opt/apcupsd/onbattery
platforms/sun------------------------------------------------------------Sun distribution installation------------------------------------------------------------COPY apcupsd => /etc/init.d/apcupsdLN //etc/rc0.d/K21apcupsd -> ../init.d/apcupsdLN //etc/rc1.d/S89apcupsd -> ../init.d/apcupsdLN //etc/rc2.d/S89apcupsd -> ../init.d/apcupsd
=================================================apcupsd script installation for Solaris Solaris complete.You should now edit /etc/opt/apcupsd/apcupsd.conf to correspondto your setup then start the apcupsd daemon with:
/etc/init.d/apcupsd start
Thereafter when you reboot , it will be stopped and startedautomatically.=================================================Configuring ugen driver to match APC UPSes...
Driver (ugen) is already installed.
NOTE:"(usbif51d ,class3) already in use" and"Driver (ugen) is already installed"errors may be safely ignored.
=================================================Driver configured. You must PERFORM A RECONFIGUREBOOT "reboot -- -r" before running Apcupsd.=================================================
COPY apccontrol => /etc/opt/apcupsd/apccontroldoc
COPY apcupsd.8 => /usr/share/man/man8/apcupsd.8COPY apcaccess.8 => /usr/share/man/man8/apcaccess.8COPY apctest.8 => /usr/share/man/man8/apctest.8COPY apccontrol.8 => /usr/share/man/man8/apccontrol.8COPY apcupsd.conf.5 => /usr/share/man/man5/apcupsd.conf.5
bob@hal:~/apcupsd -3.14.10$
www.jasspa.comoi_setup v1.25 2015/08/16 11:39:06
43

OpenIndiana Small System Server Build6.3 apcupsd logging
6.3 apcupsd logging
If you require logs then make the logging directory /var/log/apcupsd, the logging directory location wasspecified as part of the build configuration.
mkdir -p /var/log/apcupsd
The apcupsd.conf file defines the location of the event file with variable EVENTSFILE which may be definedas/var/log/apcupsd/apcupsd.events
6.4 apcupsd configuration
Configure apcupsd and edit /etc/opt/apcupsd/apcupsd.conf. With serial communication with theMOXA card connected to the APC u620inet device then the configuration entries are:
UPSTYPE apcsmartDEVICE /dev/ttyMUE0
Edit /sbin/rc0 and add the following at the bottom of the script. This kills power to the UPS.
#see if this is a powerfail situationif [ -f /etc/powerfail ]; then
echoecho "APCUPSD will power off the UPS"echo/etc/opt/apcupsd/apccontrol killpowerechoecho "Please ensure that the UPS has powered off before rebooting"echo "Otherwise , the UPS may cut the power during the reboot!!!"echoexit 0
fi
apcupsd may now be started with the command line:
hal# /etc/init.d/apcupsd start
Check the logs /var/log/apcupsd.log and then run through the power down checks.
6.5 apcupsd starting and stopping
apcupsd may be started and stopped with the following command line:
hal# /etc/init.d/apcupsd stopStopping apcupsd power management ... Failed.hal# /etc/init.d/apcupsd startStarting apcupsd power management ... Done.
6.6 apcupsd USB configuration
This system outlined here is running with serial communication, however it was exercised with a USB APCUPS which was lying around (the UPS was a little too big for the low power consumption of the HP N40Land was swapped out for a smaller UPS).On a HP N40L when the USB is not fully initialised then apcupsd fails and the following appears in the log:
www.jasspa.comoi_setup v1.25 2015/08/16 11:39:06
44

OpenIndiana Small System Server Build7 ZFS File System
2012-08-25 14:06:55 +0100 apcupsd error shutdown completed2012-08-25 14:09:26 +0100 apcupsd FATAL ERROR in generic -usb.c at line 674Cannot find UPS device --For a link to detailed USB trouble shooting information ,please see <http://www.apcupsd.com/support.html >.2012-08-25 14:09:26 +0100 apcupsd error shutdown completed
This seemed to be a problem with the boot up and the USB sub-system was not completely initialised beforethe apcupsd daemon was started. This may be fixed by editing the /etc/init.d/apcupsd script and tocrudely add a 20s delay in the start up sequence. The boot-up time is not considered critical as the systemwill run 24/7 and are expecting an uptime measured in months.
hal# vi /etc/init.d/apcupsd
case "$1" instart)
rm -f ${POWERFAILDIR}/powerfailecho "Starting apcupsd power management waiting for USB ...\c"sleep 20echo "Starting apcupsd power management ...\c"${SBINDIR}/apcupsd || return=" Failed."touch ${LOCKDIR}/apcupsdecho "$return"
;;
7 ZFS File System
At this point in the system build we have been running from the system disk and a basic system is runningwith UPS protection. The system is provisioning basic networking name resolution services including DNS,mDNS and DHCP, the system is firewalled. Printing services are available. The next step is to add the datastorage disks to the system which are used for high capacity data storage.In our system then 2x3TB disks are to be set up as a single mirrored file system (RAID-0), in addition wehave an additional 250GB disk that was shipped with the system we do not really need this disk but it hasbeen left in the system and may be used for more volatile data that we do not mind loosing. Were more disksto be present then we could consider a different RAID configuration.First find the disks in the system:
hal# cfgadm -al satasata0/0::dsk/c3t0d0 disk connected configured oksata0/1::dsk/c3t1d0 disk connected configured oksata0/2::dsk/c3t2d0 disk connected configured ok
to see what the disks are then run format to list them and then quit out of the utility:
hal# sudo formatSearching for disks...done
c3t0d0: configured with capacity of 2794.52GBc3t1d0: configured with capacity of 2794.52GB
AVAILABLE DISK SELECTIONS:0. c3t0d0 <ATA-WDC WD30EZRX -00M-0A80 -2.73TB>
/pci@0 ,0/pci103c ,1609@11/disk@0 ,01. c3t1d0 <ATA-WDC WD30EZRX -00M-0A80 -2.73TB>
/pci@0 ,0/pci103c ,1609@11/disk@1 ,02. c3t2d0 <ATA-VB0250EAVER -HPG7 cyl 30399 alt 2 hd 255 sec 63>
/pci@0 ,0/pci103c ,1609@11/disk@2 ,0
www.jasspa.comoi_setup v1.25 2015/08/16 11:39:06
45

OpenIndiana Small System Server Build8 Setting up WAN server
3. c5d1 <Unknown -Unknown -0001 cyl 15563 alt 2 hd 255 sec 63>/pci@0 ,0/pci-ide@14 ,1/ide@0/cmdk@1 ,0
Specify disk (enter its number):<quit with ^c>
The two 3TB disks c3t0d0 and c3t1d0 will form our disk mirror. Create a new zfs pool with a name of yourchoice, in this case I used tank01 for want of a better name.
hal# zpool create tank01 mirror c3t0d0 c3t1d0
Create some directories with some folders in the pool, depending on the use then some of the file systemsare assigned a specific mount point in the file system.
hal# zfs create tank01/udatahal# zfs set mountpoint=/tv tank01/udatahal# zfs create tank01/mailhal# zfs create tank01/auxhal# zfs set mountpoint=/aux tank01/auxhal# zfs create tank01/cvshal# zfs create tank01/www
Later in zone www we use tank01/mail as the /home directory and tank01/www as the /www directory forApache web services. These file systems are not mounted at any special location in the global zone.The spare 250GB disk may be formatted and mounted with ZFS but will not be mirrored.
8 Setting up WAN server
In this section we consider setting up a separate virtual server called “www” or “www.mydomain.co.uk”which will provide all of the WAN facing services. This is partitioned from the rest of the system. “www”will provide services such as Mail, HTTP web services including Calendar services, Address book, WebDAVand HTTP(S).As a recap then currently in the system we have a single root file system on a SSD disk(s) and 2x3TB HDDand 1x250GB supplied with the system which are mounted. Up to now then everything has been installedand configured on the SSD drive.
8.1 Zone Preparation
The www zone will host the WAN facing services with host name www.mydomain.co.uk. First create a newfile system for zones in the root pool and mount it at the root /zones i.e.
hal# zfs create rpool/zoneshal# zfs set mountpoint=/zones rpool/zoneshal# zfs create rpool/zones/www
Change the permissions so that only root has access.
hal# chmod go-rwx /zones/www
The www zone will be created as a physical zone with a VNIC, this seems to play better with the manuallycreated static IP address (created earlier). Before the zone is created then a VNIC is created for that zone.
8.1.1 Creating a VNIC
From the global zone then create a virtual network, the state of the current network may be interrogated asfollows:
www.jasspa.comoi_setup v1.25 2015/08/16 11:39:06
46

OpenIndiana Small System Server Build8.2 Zone Creation
hal# dladm show -physLINK MEDIA STATE SPEED DUPLEX DEVICEbge0 Ethernet up 1000 full bge0
hal# dladm show -linkLINK CLASS MTU STATE BRIDGE OVERbge0 phys 1500 up -- --
hal# ipadm show -addrADDROBJ TYPE STATE ADDRlo0/v4 static ok 127.0.0.1/8bge0/v4 static ok 192.168.8.200/24lo0/v6 static ok ::1/128
Create the new virtual network for our www zone and connect it to our physical connection.
hal# dladm create -vnic -l bge0 vnic0hal# dladm show -linkLINK CLASS MTU STATE BRIDGE OVERbge0 phys 1500 up -- --vnic0 vnic 1500 up -- bge0
The virtual network now exists in the system, no further configuration is required in the Global zone, theinterface will be configured from within the zone to which it is attached.
8.2 Zone Creation
Create the zone www as root
zonecfg -z wwwzonecfg:www> createzonecfg:www> set zonepath=/zones/wwwzonecfg:www> set autoboot=truezonecfg:www> set ip-type=exclusivezonecfg:www> add netzonecfg:www:net> set physical=vnic0zonecfg:www:net> endzonecfg:www> add fszonecfg:www:fs> set dir=/homezonecfg:www:fs> set special=/tank01/mailzonecfg:www:fs> set type=lofszonecfg:www:fs> endzonecfg:www> add fszonecfg:www:fs> set dir=/wwwzonecfg:www:fs> set special=/tank01/wwwzonecfg:www:fs> set type=lofszonecfg:www:fs> endzonecfg:www> infozonename: wwwzonepath: /zones/wwwbrand: ipkgautoboot: truebootargs:pool:limitpriv:scheduling -class:ip-type: exclusivehostid:fs-allowed:fs:
www.jasspa.comoi_setup v1.25 2015/08/16 11:39:06
47
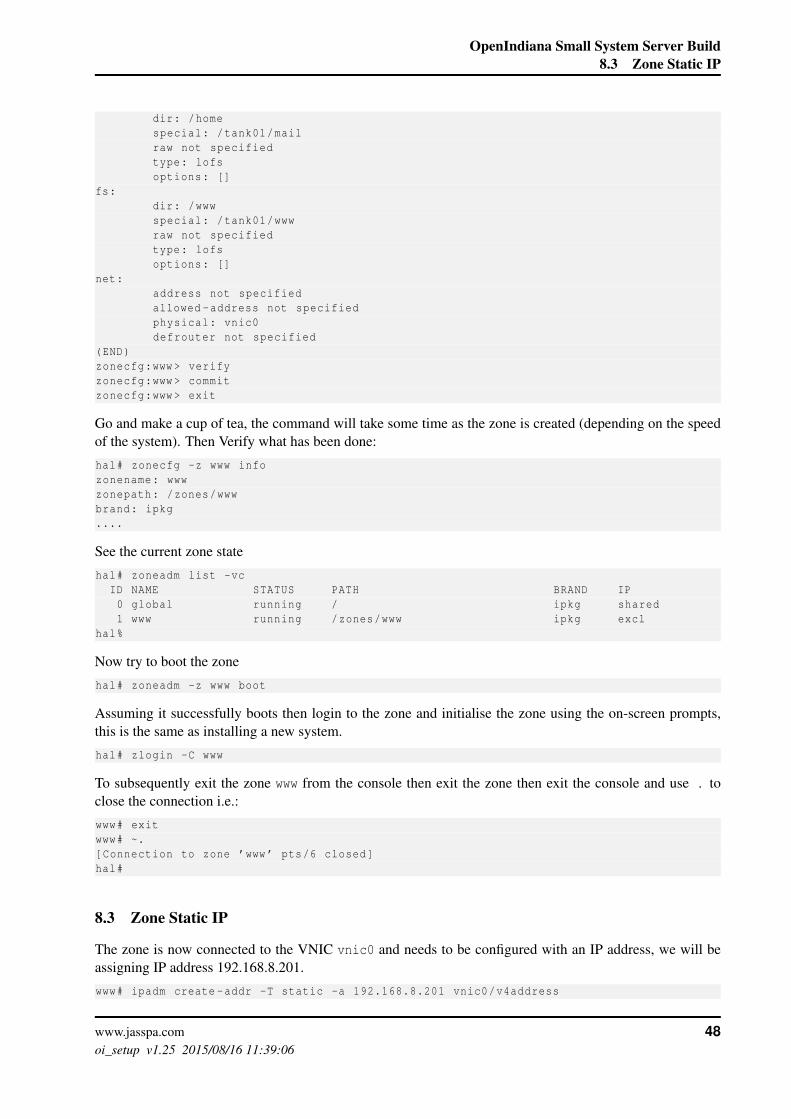
OpenIndiana Small System Server Build8.3 Zone Static IP
dir: /homespecial: /tank01/mailraw not specifiedtype: lofsoptions: []
fs:dir: /wwwspecial: /tank01/wwwraw not specifiedtype: lofsoptions: []
net:address not specifiedallowed -address not specifiedphysical: vnic0defrouter not specified
(END)zonecfg:www> verifyzonecfg:www> commitzonecfg:www> exit
Go and make a cup of tea, the command will take some time as the zone is created (depending on the speedof the system). Then Verify what has been done:
hal# zonecfg -z www infozonename: wwwzonepath: /zones/wwwbrand: ipkg....
See the current zone state
hal# zoneadm list -vcID NAME STATUS PATH BRAND IP0 global running / ipkg shared1 www running /zones/www ipkg excl
hal%
Now try to boot the zone
hal# zoneadm -z www boot
Assuming it successfully boots then login to the zone and initialise the zone using the on-screen prompts,this is the same as installing a new system.
hal# zlogin -C www
To subsequently exit the zone www from the console then exit the zone then exit the console and use . toclose the connection i.e.:
www# exitwww# ~.[Connection to zone ’www’ pts/6 closed]hal#
8.3 Zone Static IP
The zone is now connected to the VNIC vnic0 and needs to be configured with an IP address, we will beassigning IP address 192.168.8.201.
www# ipadm create -addr -T static -a 192.168.8.201 vnic0/v4address
www.jasspa.comoi_setup v1.25 2015/08/16 11:39:06
48

OpenIndiana Small System Server Build8.3 Zone Static IP
Look at the status
www# ipadm show -if vnic0IFNAME STATE CURRENT PERSISTENTvnic0 ok bm--------46 -46
www# ipadm show -addrADDROBJ TYPE STATE ADDRlo0/v4 static ok 127.0.0.1/8vnic0/v4address static ok 192.168.8.201/24lo0/v6 static ok ::1/128vnic1/v4 static disabled 192.168.8.201/24
Enable the interface
www# ifconfig vnic0 inet 192.168.8.201 up
As with the static networking configuration in the globalzone then add the default route and set up thenetwork.
www# route -p add default 192.168.8.1add net default: gateway 192.168.8.1add persistent net default: gateway 192.168.8.1
www# netstat -rRouting Table: IPv4
Destination Gateway Flags Ref Use Interface-------------------- -------------------- ----- ----- ---------- ---------default 192.168.8.1 UG 11 3222256localhost localhost UH 2 19524 lo0192.168.8.0 www U 12 14166533 vnic0
Routing Table: IPv6Destination/Mask Gateway Flags Ref Use If
--------------------------- --------------------------- ----- --- ------- -----localhost localhost UH 2 6748 lo0
Now that the physical network has been setup then configure the routing information. The DNS server willbe our global zone (hal). Check the network files /etc/nsswitch.conf which should include DNS entriesand optionally the mDNS entries:
...ipnodes: files dns mdnshosts: files dns mdns...
Create or check the file /etc/defaultdomain
www# vi /etc/defaultdomainmydomain.co.uk
Execute the domainname command to set the domain as follows:
www# domainname ‘cat /etc/defaultdomain ‘
Set up the /etc/resolv.conf file, the first is the name of the domain (i.e. mydomain.co.uk) and then weuse the global zone hostname to resolve addresses 192.168.8.200:
www# Localhostdomain mydomain.co.uknameserver 192.168.8.200
Enable the DNS client and mDNS services if required:
www.jasspa.comoi_setup v1.25 2015/08/16 11:39:06
49

OpenIndiana Small System Server Build9 Server Certificate
root@www:~# svcadm enable network/dns/client:defaultroot@www:~# svcadm enable network/dns/multicast:defaultroot@www:~# svcs -a | grep dnsdisabled Jan_02 svc:/network/dns/install:defaultonline 13:46:46 svc:/network/dns/multicast:defaultonline 13:56:07 svc:/network/dns/client:default
Test that names are resolving correctly though DNS and mDNS.
9 Server Certificate
We are using a static IP, valid DNS domain name with SSL services and require the system to respondlegitimately to any client so a legitimate SSL certificate is required rather than a self signed root certificate.The trust authority used was Trustico www.trustico.co.uk QuickSSL Premium RN, valid for 36 months, witha single named server with Common Name CN=www.mydomain.co.uk.The certificate location should to be managed making it easier to utilise in the different components. Adirectory at the root level called /CA3yr has been created especially for the certificates, this could have beencreated in /etc and is a personal preference. The directory and all contained files should be readable by rootonly, there should be no write access.The certificates from the trust authority are named according to their content as follows:
File Descriptionca3yr_cert.crt mydomain Certificate.ca3yr_cert.txt Text of mydomain Certificate.ca3yr_cert.key Private RSA key for the certificate.ca3yr_introot.crt Intermediate root certificate(s).ca3yr_introot.txt Text of Intermediate root certificate.ca3yr_ca-bundle.crt Intermediate chain + mydomain excluding root certificate.ca3yr_cert-chain.crt mydomain + intermediate chain + root certificate chain.GeoTrust_Global_CA.cer Root certificate
Table 5: Certificate Naming Convention
The files ca3yr_ca-bundle.crt and ca3yr_cert-chain.crt are created as follows:
www# cat ca3yr_introot.crt ca3yr_cert.crt > ca3yr_ca -bundle.crtwww# cat ca3yr_cert.crt ca3yr_introot.crt GeoTrust_Global_CA.cer > ca3yr_cert -chain.crt
The private certificate may be viewed using openSSL (the .txt version of the files):
openssl x509 -in ca3yr_cert.crt -text -noout
Ensure that ALL files are owned by root, not writable and only readable by root.
www# cd /www# chown -R root:root /CA3yrwww# chmod -R a-w /CA3yrwww# chmod -R go-r /CA3yr
www.jasspa.comoi_setup v1.25 2015/08/16 11:39:06
50

OpenIndiana Small System Server Build10 E-Mail Service
10 E-Mail Service
OpenIndiana installs sendmail by default for our server then we are going to use postfix as the mailer daemonso sendmail will have be removed. Two instances of postfix are required to be running as we need a mailrelay to send mail to our ISP in addition to a SSL protected SMTPS server allowing mail to be sent throughthe server. dovecot is used to provide IMAP services for the mail clients. fetchmail is used to collect mailfrom our ISP through procmail to the mail daemon.On the www server then we will set up some user accounts specifically for E-Mail these are disconnectedfrom regular user accounts on the server and only used for E-Mail, this means that E-Mail accounts maybe provided independently of other services. We previously created a directory in the global zone called/tank01/mail which has been imported into the zone as /home this will be the file system area that isused to hold the user mailboxes. There are lots of different methods that could be used for E-Mail, for thisconfiguration as there are so few users we have not needed to use any sort of network information service(NIS, LDAP etc.). How this is set up will be determined by the individual site requirements.
10.1 Mail packages
Get the new packages that we are going to use for the mail subsystem. The default MTA sendmail will bereplaced by postfix. The “Spec Extra Repositories” need to be declared to the package manager in order toinstall some of these packages.
www# pkg install postfixwww# pkg install fetchmailwww# pkg install dovecotwww# pkg install procmail
10.2 Creating user accounts
Before setting up the mail server then create at least one user account which can be used for testing the mailserver configuration. For this server configuration then we are using a user_id and group_id base of 1000and assigning them manually.
www# groupadd -g 1008 bobwww# useradd -d /home/bob -c "Bob Fullname" -G bob -m -u 1008 bobwww# groupadd -g 1009 alicewww# useradd -d /home/alice -c "Alice Fullname" -G alice -m -u 1009 alice
If you make a mistake then the user account may be deleted with:
www# userdel -r bobwww# groupdel bob
The mail accounts require a password at some stage which may be assigned as follows:
www# passwd bobnewpasswordnewpassword
For each user account then prepare the directory for mail. The /Procmail directory is used for logging. Ifyou do not require this then disable the LOGFILE option in the .procmailrc below. Create the appropriatedirectories and default .procmailrc for each user.
www% mkdir -p /home/bob/Procmailwww% mkdir -p /home/bob/mailwww% cat << EOF >> /home/bob/.procmailrc# It is essential that you set SHELL to a Bourne-type shell if
www.jasspa.comoi_setup v1.25 2015/08/16 11:39:06
51

OpenIndiana Small System Server Build10.3 Setting up Dovecot
# external commands are run from your procmailrc, for example if# you use rc.spamassassin, rc.quarantine, or other advanced recipes.# Setting SHELL should not be needed for the simple sorting recipes in# this step-by-step section, but to be safe and to future proof your# procmailrc, set it anyway! Details are in Check Your $SHELL and $PATH.SHELL=/bin/sh
# Directory for storing procmail configuration and log files# You can name this variable anything you like, for example# PROCMAILDIR, or don’t set it (but then don’t refer to it!)PMDIR=$HOME/Procmail
# LOGFILE should be specified ASAP so everything below it is logged# Put ## before the next line if you want no logging (not recommended)LOGFILE=$PMDIR/procmail.log
# To insert a blank line between each message’s log entry in $LOGFILE,# uncomment the next two lines (this is helpful for debugging)## LOG="## "
# Set VERBOSE to yes when debugging; VERBOSE default is no## VERBOSE=yes
# Replace $HOME/Msgs with the directory where your personal (non-system-spool)# mailboxes reside. Mailboxes in maildir format or served by Courier IMAP are# often in $HOME/Maildir. Mailboxes served by UW IMAP are sometimes in $HOME,# sometimes in $HOME/mail and sometimes elsewhere. MAILDIR default is the value# of $HOME Make sure that $MAILDIR exists and that it is a directory!MAILDIR=$HOME/mail
# The defailt mail dropDEFAULT=$MAILDIR/Inbox
#### End Variables Section; Begin Processing Section ####
# Include standard templates##INCLUDERC=$PMDIR/rc.testing#INCLUDERC=$PMDIR/rc.subscriptions
# Messages that fall through all your procmail recipes are delivered# to your default INBOX. To find out yours, run ’procmail -v’
#### End Processing Section ####EOF
10.3 Setting up Dovecot
Firstly we set up dovecot which will provide the IMAPS service for user mailboxes located on port 993.Create the logging directory for dovecot
www# mkdir -p /var/log/dovecot
Create the dovecot config file. For the postfix SMTPS then a SASL authentication service will be used, thisis configured within the configuration file using a socket on port 12345 (use whatever port you want).
www# edit /etc/dovecot/dovecot.conf
www.jasspa.comoi_setup v1.25 2015/08/16 11:39:06
52

OpenIndiana Small System Server Build10.3 Setting up Dovecot
# Protocols we want to be serving: imap imaps pop3 pop3sprotocols = imap
# Log file to use for error messages, instead of sending them to syslog.log_path = /var/log/dovecot/syslog
# Log file to use for informational and debug messages.info_log_path = /var/log/dovecot/infolog
# PEM encoded X.509 SSL/TLS certificate and private key. They are opened before# dropping root privileges, so keep the key file unreadable by anyone but# root.ssl_cert = </CA3yr/ca3yr_cert -chain.crtssl_key = </CA3yr/ca3yr_cert.key
# How often to regenerate the SSL parameters file.# The value is in hours, 0 disables regeneration entirely.ssl_parameters_regenerate = 168
# SSL ciphers to usessl_cipher_list = ALL:!LOW:!SSLv2:!EXP:!aNULL
# Show protocol level SSL errors.verbose_ssl = no
# Greeting message for clients.login_greeting = Why are you here?
#### Mailbox locations and namespaces##
# Location for users’ mailboxes. This is the same as the old default_mail_env# setting. The default is empty, which means that Dovecot tries to find the# mailboxes automatically. This won’t work if the user doesn’t have any mail# yet, so you should explicitly tell Dovecot the full location.## If you’re using mbox, giving a path to the INBOX file (eg. /var/mail/%u)# isn’t enough. You’ll also need to tell Dovecot where the other mailboxes are# kept. This is called the "root mail directory", and it must be the first# path given in the mail_location setting.## There are a few special variables you can use, eg.:## %u - username# %n - user part in user@domain, same as %u if there’s no domain# %d - domain part in user@domain, empty if there’s no domain# %h - home directory## See doc/wiki/Variables.txt for full list.mail_location = mbox:~/mail:INBOX=~/mail/Inbox
# Valid UID range for users, defaults to 500 and above. This is mostly# to make sure that users can’t log in as daemons or other system users.first_valid_uid = 1000last_valid_uid = 1009
# Valid GID range for users, defaults to non-root/wheel.#first_valid_gid = 1000#last_valid_gid = 1009
www.jasspa.comoi_setup v1.25 2015/08/16 11:39:06
53

OpenIndiana Small System Server Build10.3 Setting up Dovecot
#### IMAP specific settings##
protocol imap {imap_client_workarounds = delay -newmail tb-extra -mailbox -sep
}
#### Authentication processes##
# List of allowed characters in username.auth_username_chars=abcdefghijklmnopqrstuvwxyzABCDEFGHIJKLMNOPQRSTUVWXYZ01234567890.-_@
# More verbose logging. Useful for figuring out why authentication is not working.auth_verbose = no
# Even more verbose logging for debugging purposes. Shows for example SQL queries.auth_debug = no
# Use the PAM password authentication.passdb {
driver = pam}
# Use the password file for user names.userdb {
driver = passwd}
# Plain login requiredauth_mechanisms = login plain
## Imap support.service imap -login {
inet_listener imaps {port = 993ssl = yes
}}
# Add Postfix SASL supportservice auth {# auth_socket_path points to this userdb socket by default. It’s typically# used by dovecot-lda, doveadm, possibly imap process, etc. Users that have# full permissions to this socket are able to get a list of all usernames and# get the results of everyone’s userdb lookups.## The default 0666 mode allows anyone to connect to the socket, but the# userdb lookups will succeed only if the userdb returns an "uid" field that# matches the caller process’s UID. Also if caller’s uid or gid matches the# socket’s uid or gid the lookup succeeds. Anything else causes a failure.## To give the caller full permissions to lookup all users, set the mode to# something else than 0666 and Dovecot lets the kernel enforce the# permissions (e.g. 0777 allows everyone full permissions).unix_listener auth -userdb {}inet_listener {
www.jasspa.comoi_setup v1.25 2015/08/16 11:39:06
54

OpenIndiana Small System Server Build10.4 Removing Sendmail
port = 12345}
}
With the recent security advisory then it is recommended that SSLv3 is disabled and a 2048 DH exchangedis required. The security may be increased further with the following configuration:
ssl_cipher_list = -SSLv3:EECDH+AESGCM:EDH+AESGCM:AES256+EECDH:AES256+EDH:\ECDHE -RSA-AES256 -GCM-SHA384:ECDHE -RSA-AES128 -GCM-SHA256:\DHE-RSA-AES256 -GCM-SHA384:DHE-RSA-AES128 -GCM-SHA256:\ECDHE -RSA-AES256 -SHA384:ECDHE -RSA-AES128 -SHA256:\ECDHE -RSA-AES256 -SHA:ECDHE -RSA-AES128 -SHA:DHE-RSA-AES256 -SHA256:\DHE-RSA-AES128 -SHA256:DHE-RSA-AES256 -SHA:DHE-RSA-AES128 -SHA:\ECDHE -RSA-DES-CBC3 -SHA:EDH-RSA-DES-CBC3 -SHA:AES256 -GCM-SHA384:\AES128 -GCM-SHA256:AES256 -SHA256:AES128 -SHA256:AES256 -SHA:\AES128 -SHA:DES-CBC3 -SHA:TLSv1:HIGH:!LOW:!MEDIUM:!SSLv2:\!EXP:!RC4:!3DES:!aNULL:!eNULL
ssl_prefer_server_ciphers = yes# Set the Diffie Hellman parameter length to 2048 for OSXssl_dh_parameters_length = 2048
10.3.1 Starting the service
Start the IMAPS service.
www# svcs -a | grep dovecotdisabled 11:45:04 svc:/site/dovecot:defaultwww# svcadm enable /site/dovecot:default
Once running then it should be possible to connect to the IMAPS server from a mail client using SSL atwww.mydomain.co.uk:993 using the username and password.
10.3.2 Log management
Manage the dovecot logging files.
www# logadm -w /var/log/dovecot/infolog -C 24 -c -p 1m -t ’$file -%Y-%m-%d’ -z 0www# logadm -w /var/log/dovecot/syslog -C 24 -c -p 1m -t ’$file -%Y-%m-%d’ -z 0
10.4 Removing Sendmail
First remove the existing sendmail installation:
www# svcs -vx sendmail# Disable sendmailwww# svcadm disable svc:/network/smtp:sendmail# Remove the packagewww# pkg uninstall sendmail
10.5 Postfix local Mailer
With sendmail removed then postfix provides the necessary files that are used by the rest of the system tointerface with mail, first restore those commands and set up any mail aliases:
www# cd /usr/libwww# ln -s sendmail.postfix sendmail
www.jasspa.comoi_setup v1.25 2015/08/16 11:39:06
55

OpenIndiana Small System Server Build10.5 Postfix local Mailer
www# cd /usr/binwww# ln -s newaliases.postfix newaliases
www# cp /etc/postfix/alisases /etc/mail/aliaseswww# vi /etc/mail/aliaseswww# newaliases
The exact location of the aliases file may be determined through procmail as follows:www# postconf alias_maps
cd /etc/mail/postconf alias_maps
alias_maps = dbm:/etc/mail/aliases
Whenever the aliases file is modified then always run newaliases.The file /etc/postfix/aliases file will contain something like the following. You should map the rootmail onto the user who will process this mail:## Sample aliases file. Install in the location as specified by the# output from the command "postconf alias_maps". Typical path names# are /etc/aliases or /etc/mail/aliases.## >>>>>>>>>> The program "newaliases" must be run after# >> NOTE >> this file is updated for any changes to# >>>>>>>>>> show through to Postfix.#
# Person who should get root’s mail. Don’t receive mail as root!root: jon
# Basic system aliases -- these MUST be presentMAILER -DAEMON: postmasterpostmaster: root
# General redirections for pseudo accountsbin: rootdaemon: rootnamed: rootnobody: rootuucp: rootwww: rootftp-bugs: rootpostfix: root
# Put your local aliases here.
# Well-known aliasesmanager: rootdumper: rootoperator: rootabuse: postmaster
# trap decode to catch security attacksdecode: root
Edit the postfix configuration file /etc/postfix/main.cf this instance of postfix provides the port 25 mailservices which are used for our local relay which sends external mail to our ISP.www# vi /etc/postfix/main.cf
www.jasspa.comoi_setup v1.25 2015/08/16 11:39:06
56

OpenIndiana Small System Server Build10.5 Postfix local Mailer
View the postfix configuration with postconf -n. The postfix configuration file will be something like thefollowing:
www# postconf -n
inet_interfaces = allinet_protocols = ipv4mail_owner = postfixmailbox_command = /usr/bin/procmail -a "$EXTENSION" \
DEFAULT=$HOME/mail/Inbox MAILDIR=$HOME/mailmailbox_size_limit = 0mailq_path = /usr/bin/mailq.postfixmanpage_directory = /usr/share/manmessage_size_limit = 15728640mydestination = $myhostname , localhost.$mydomain , localhost , $mydomainmydomain = mydomain.co.ukmyhostname = www.mydomain.co.ukmynetworks = 192.168.8.0/24 , 127.0.0.0/8myorigin = $mydomainnewaliases_path = /usr/bin/newaliases.postfixqueue_directory = /var/spool/postfixreadme_directory = /usr/share/doc/SFEpostfix/readmerelay_domains =relayhost = mailhost.myisp.co.uksample_directory = /etc/postfixsendmail_path = /usr/sbin/sendmail.postfixsetgid_group = postfixsmtpd_banner = $myhostname ESMTP $mail_name ($mail_version)unknown_local_recipient_reject_code = 550
Check the master configuration file /etc/postfix/master.cf which should include a SMTP server.
www# vi /etc/postfix/master.cf
This will include something like:
....# ==========================================================================# service type private unpriv chroot wakeup maxproc command + args# (yes) (yes) (yes) (never) (100)# ==========================================================================smtp inet n - n - - smtpd....
Start the mail service
# Find postfixwww# svcs -a |grep postfixdisabled 20:22:42 svc:/site/postfix:default
# Start itwww# svcadm enable svc:/site/postfix:defaultwww# svcs -vx postfixsvc:/site/postfix:default (Postfix Mailserver)State: online since 19 August 2012 13:07:54 BST
See: man -M /usr/share/man -s 1 postfixSee: /var/svc/log/site -postfix:default.log
Impact: None.
The mailer should now be running, confirm its operation by sending some mail to root with the mail com-mand and then reading it.
www.jasspa.comoi_setup v1.25 2015/08/16 11:39:06
57

OpenIndiana Small System Server Build10.6 Global Zone Mailer
10.6 Global Zone Mailer
Repeat the process to swap sendmail for postfix in the global zone. Configure the mail server to relay throughwww by configuring /etc/postfix/main.cf as follows:
www# postconf -nalias_database = dbm:/etc/mail/aliasesalias_maps = dbm:/etc/mail/aliasescommand_directory = /usr/sbinconfig_directory = /etc/postfixdaemon_directory = /usr/lib/postfixdata_directory = /var/lib/postfixdebug_peer_level = 2html_directory = /usr/share/doc/SFEpostfix/htmlinet_protocols = ipv4local_recipient_maps =mail_owner = postfixmailq_path = /usr/bin/mailq.postfixmanpage_directory = /usr/share/manmydomain = mydomain.co.ukmynetworks = 127.0.0.0/8myorigin = $mydomainnewaliases_path = /usr/bin/newaliases.postfixqueue_directory = /var/spool/postfixreadme_directory = /usr/share/doc/SFEpostfix/readmerelay_domains =relayhost = www.mydomain.co.uksample_directory = /etc/postfixsendmail_path = /usr/sbin/sendmail.postfixsetgid_group = postfixunknown_local_recipient_reject_code = 550
Check and start the service as previously described and then check that mail is delivered to the relayhost asrequired.
10.7 Postfix SMTPS Mailer
A second instance of the postfix mailer has to be created in order to provide a SMTPS service. In this serverthen we are configuring SMTP over SSL on port 465 in addition to the submission port 587.
10.7.1 Creating a new postfix-smtps service
Create a new manifest file for our postfix-smtps service. Use the existing postfix manifest file in /var/svc-/manifest/site/postfix.xml.
www# cp /var/svc/manifest/site/postfix.xml /tmp/postfix -smtps.xmlwww# vi /tmp/postfix -smtps.xml
Edit the file and carefully change instances of “postfix” to “postfix-smtps” as follows:
<?xml version="1.0"?><!--## CDDL HEADER START## The contents of this file are subject to the terms of the# Common Development and Distribution License (the "License").# You may not use this file except in compliance with the License.#
www.jasspa.comoi_setup v1.25 2015/08/16 11:39:06
58

OpenIndiana Small System Server Build10.7 Postfix SMTPS Mailer
# You can obtain a copy of the license at usr/src/OPENSOLARIS.LICENSE# or http://www.opensolaris.org/os/licensing.# See the License for the specific language governing permissions# and limitations under the License.## When distributing Covered Code, include this CDDL HEADER in each# file and include the License file at usr/src/OPENSOLARIS.LICENSE.# If applicable, add the following below this CDDL HEADER, with the# fields enclosed by brackets "[]" replaced with your own identifying# information: Portions Copyright [yyyy] [name of copyright owner]## CDDL HEADER END#--><!DOCTYPE service_bundle SYSTEM "/usr/share/lib/xml/dtd/service_bundle.dtd.1"><!--
Copyright 2007 Sun Microsystems, Inc. All rights reserved.Use is subject to license terms.
#ident "@(#)postfix.xml 0.1 20090417"
NOTE: This service manifest is not editable; its contents willbe overwritten by package or patch operations, includingoperating system upgrade. Make customizations in a differentfile.
-->
<service_bundle type=’manifest’ name=’SFEpostfix:postfix -smtps’>
<service name=’site/postfix -smtps’ type=’service’ version=’1’>
<create_default_instance enabled=’false’ />
<single_instance />
<dependency name=’net-loopback’ grouping=’require_any’restart_on=’none’ type=’service’>
<service_fmri value=’svc:/network/loopback’ /></dependency>
<!--<dependency name=’net-service’ grouping=’require_all’
restart_on=’none’ type=’service’><service_fmri value=’svc:/network/service’/>
</dependency>-->
<!--<dependency name=’net-physical’ grouping=’require_all’
restart_on=’none’ type=’service’><service_fmri value=’svc:/network/physical’ />
</dependency>-->
<dependency name=’filesystem -local’ grouping=’require_all’restart_on=’none’ type=’service’>
<service_fmri value=’svc:/system/filesystem/local’ /></dependency>
<dependency name=’name -services’ grouping=’require_all’restart_on=’refresh’ type=’service’>
www.jasspa.comoi_setup v1.25 2015/08/16 11:39:06
59

OpenIndiana Small System Server Build10.7 Postfix SMTPS Mailer
<service_fmri value=’svc:/milestone/name -services’ /></dependency>
<!--<dependency name=’identity’ grouping=’optional_all’
restart_on=’refresh’ type=’service’><service_fmri value=’svc:/system/identity:domain’ />
</dependency>-->
<dependency name=’system -log’ grouping=’optional_all’restart_on=’none’ type=’service’>
<service_fmri value=’svc:/system/system -log’ /></dependency>
<!--If autofs is enabled, wait for it to get users homedirectories.--><dependency name=’autofs’ grouping=’optional_all’
restart_on=’none’ type=’service’><service_fmri value=’svc:/system/filesystem/autofs’ />
</dependency>
<dependent name=’postfix -smtps_multi -user’ grouping=’optional_all’restart_on=’none’>
<service_fmri value=’svc:/milestone/multi -user’ /></dependent>
<exec_method type=’method’ name=’start’exec=’/usr/sbin/postfix -c /etc/postfix -smtps start’timeout_seconds=’180’ />
<exec_method type=’method’ name=’stop’exec=’/usr/sbin/postfix -c /etc/postfix -smtps stop’timeout_seconds=’60’ />
<exec_method type=’method’ name=’restart’exec=’/usr/sbin/postfix -c /etc/postfix -smtps reload’timeout_seconds=’60’ />
<stability value=’Unstable’ />
<!--<property_group name=’general’ type=’framework’>
<propval name=’action_authorization’ type=’astring’value=’solaris.smf.manage.sendmail’ />
</property_group>-->
<template><common_name>
<loctext xml:lang=’C’>Postfix Mailserver</loctext>
</common_name>
<documentation><manpage title=’postfix’ section=’1’
manpath=’/usr/share/man’ /></documentation>
www.jasspa.comoi_setup v1.25 2015/08/16 11:39:06
60

OpenIndiana Small System Server Build10.7 Postfix SMTPS Mailer
</template></service>
</service_bundle>
Verify and import the manifest into the system.www# svccfg validate /tmp/postfix -smtps.xmlwww# svccfg import /tmp/postfix -smtps.xmlwww# svcs -xv postfix -smtps
svc:/site/postfix -smtps:default (Postfix Mailserver)State: disabled since 2 January 2014 10:04:51 GMT
Reason: Disabled by an administrator.See: man -M /usr/share/man -s 1 postfixSee: /var/svc/log/site -postfix -smtps:default.log
Impact: This service is not running.
10.7.2 Creating postfix-smtps configuration files
Create a new instance of postfix-smtps by cloning the existing postfix /etc configuration.www# cd /etcwww# ls -lad postfixdrwxr -xr-x 2 root sys 26 Sep 1 16:22 postfixwww# cp -rp postfix postfix -smtpswww# mkdir /var/spool/postfix -smtpswww# ls -lad /var/spool/postfixdrwxr -xr-x 16 postfix bin 16 Aug 15 20:35 /var/spool/postfixwww# chown postfix:bin /var/spool/postfix -smtpswww# mkdir /var/lib/postfix -smtpswww# chown postfix:root /var/lib/postfix -smtps
10.7.3 Setting up SASL authentication
Running a SMTPS then we require users to authenticate with the server before submitting mail. This user au-thentication is provided by the SASL component from dovecot. Create the SASL directory and configurationfile for the SMTPS authentication.www# mkdir /etc/postfix -smtps/saslwww# cat << EOF >> /etc/postfix -smtps/sasl/smtpd.confheredoc > pwcheck_method: auxpropheredoc > mech_list: LOGIN PLAINheredoc > EOFwww# more /etc/postfix -smtps/sasl/smtpd.confpwcheck_mehod: auxpropmech_list: LOGIN PLAIN
Make the directory /etc/sasl and symbolically link the SMTP file.www# mkdir -p /etc/saslwww# cd /etc/saslwww# ln -s /etc/postfix -smtps/sasl/smtpd.conf smtpd.conf
10.7.4 Postfix Configuration
With the SASL configuration and certificates set up then we are ready to configure postfix. Edit file /etc-/postfix-smtps/master.cf and change the smtp line to 465. Additionally, comment out the submission
www.jasspa.comoi_setup v1.25 2015/08/16 11:39:06
61

OpenIndiana Small System Server Build10.7 Postfix SMTPS Mailer
line for port 587.
# Modify the smtp service to 465#smtp inet n - n - - smtpd465 inet n - n - - smtpd
-o syslog_name=postfix/smtps-o smtpd_tls_wrappermode=yes-o smtpd_sasl_auth_enable=yes-o smtpd_client_restrictions=permit_sasl_authenticated ,reject
# -o milter_macro_daemon_name=ORIGINATING.....
# Submission - Port 587submission inet n - n - - smtpd
-o syslog_name=postfix/submission-o smtpd_tls_security_level=encrypt-o smtpd_sasl_auth_enable=yes-o smtpd_client_restrictions=permit_sasl_authenticated ,reject
# -o milter_macro_daemon_name=ORIGINATING
Edit the file /etc/postfix-smtps/main.cf and change the message queue and data directories in additionto local site information. The aliases are re-used for both mail daemons. The file is configured to run SSLwith our site certificates and authenticate the user. The additional configuration items include the following:queue_directory = /var/spool/postfix -smtpsdata_directory = /var/lib/postfix -smtpssmtpd_recipient_restrictions = permit_mynetworks , permit_sasl_authenticated , reject_unauth_destinationsmtpd_sasl_auth_enable = yessmtpd_sasl_path = inet :127.0.0.1:12345smtpd_sasl_type = dovecotsmtpd_tls_auth_only = yessmtpd_tls_cert_file = /CA3yr/ca3yr_cert -chain.crtsmtpd_tls_key_file = /CA3yr/ca3yr_cert.keysmtpd_tls_mandatory_protocols = !SSLv2smtpd_tls_security_level = encrypttls_random_source = /dev/urandom
With the recent security advisory then it is recommended that SSLv3 is disabled and a 2048 DH exchangedis required. The security may be increased further with the following configuration:smtpd_tls_mandatory_protocols = !SSLv2 , !SSLv3smtpd_tls_exclude_ciphers = aNULL , eNULL , EXPORT , DES, RC4, MD5, PSK, aECDH , EDH-DSS-DES-CBC3 -SHA, EDH-RSA-DES-CDC3 -SHA, KRB5 -DE5, CBC3 -SHA## Increase the DH key exchange size.#smtpd_tls_dh1024_param_file = /etc/postfix -smtps/dh2048.pemsmtpd_tls_dh512_param_file = /etc/postfix -smtps/dh512.pem
The dh2048.pem file may be built with openssl as follows:openssl dhparam -out dh2048.pem 2048openssl dhparam -out dh512.pem 512
Verify the configuration. Note that because we are using user authenticated connections then we do notvalidate the domain of any mail received. This allows us to relay messages that are not for our domain;useful when running mobile accounts and users are sending with domains other than our own. Quite whethermessages from another domain is able to relay though your ISP is a different matter and depends on your ISP.There is the possibility of relaying messages yourself however some mail servers do not accept a relay froma DSL address. My preference is to use the ISP mail relay but one does need to choose ones ISP carefully.www# postconf -n -c /etc/postfix -smtps
alias_database = dbm:/etc/mail/aliasesalias_maps = dbm:/etc/mail/aliasesalternate_config_directories = /etc/postfix -smtpsbroken_sasl_auth_clients = yescommand_directory = /usr/sbinconfig_directory = /etc/postfix -smtpsdaemon_directory = /usr/lib/postfixdata_directory = /var/lib/postfix -smtpsdebug_peer_level = 2disable_vrfy_command = yeshome_mailbox = Maildir/html_directory = /usr/share/doc/SFEpostfix/htmlinet_interfaces = all
www.jasspa.comoi_setup v1.25 2015/08/16 11:39:06
62

OpenIndiana Small System Server Build10.8 fetchmail
inet_protocols = ipv4mail_owner = postfixmailbox_command = /usr/bin/procmail -a "$EXTENSION" DEFAULT=$HOME/mail/Inbox MAILDIR=$HOME/mailmailbox_size_limit = 0mailq_path = /usr/bin/mailq.postfixmanpage_directory = /usr/share/manmessage_size_limit = 15728640mydestination = $myhostname , localhost.$mydomain , localhost , $mydomainmydomain = mydomain.co.ukmyhostname = www.mydomain.co.ukmynetworks = 192.168.8.0/24 , 127.0.0.0/8myorigin = $mydomainnewaliases_path = /usr/bin/newaliases.postfixqueue_directory = /var/spool/postfix -smtpsreadme_directory = /usr/share/doc/SFEpostfix/readmerelay_domains =relayhost = mailhost.zen.co.uksample_directory = /etc/postfixsendmail_path = /usr/sbin/sendmail.postfixsetgid_group = postfixsmtpd_banner = $myhostname ESMTP $mail_namesmtpd_recipient_restrictions = permit_mynetworks , permit_sasl_authenticated , reject_unauth_destinationsmtpd_sasl_auth_enable = yessmtpd_sasl_path = inet :127.0.0.1:12345smtpd_sasl_type = dovecotsmtpd_tls_auth_only = yessmtpd_tls_cert_file = /CA3yr/ca3yr_cert -chain.crtsmtpd_tls_key_file = /CA3yr/ca3yr_cert.keysmtpd_tls_mandatory_protocols = !SSLv2smtpd_tls_security_level = encrypttls_random_source = /dev/urandomunknown_local_recipient_reject_code = 550
Check the postfix settings
www# postfix -c /etc/postfix -smtps check
10.7.5 Starting the service
dovecot should be configured before starting the service because of the SASL dependency, refer to theprevious section and start dovecot first.
www# svcadm enable postfix -smtpswww# svcs -xv postfix -smtpssvc:/site/postfix -smtps:default (Postfix Mailserver)State: online since Sat Sep 1 17:55:12 2012
See: man -M /usr/share/man -s 1 postfixSee: /var/svc/log/site -postfix -smtps:default.log
Impact: None.
10.7.6 Postfix version number
To find the version number of the Postfix installation:
hal% /usr/sbin/postconf -d mail_versionmail_version = 2.9.5hal%
10.8 fetchmail
In order to collect mail from the ISP and other mail providers that is not delivered via SMTP (port 25) thenfetchmail is used to poll the mailbox and collect mail. fetchmail collects the E-mail messages and deliversthem to the postfix MTA via procmail.
10.8.1 Creating a new fetchmail service
Create a new manifest file for our fetchmail service which may be created in /tmp/fetchmail.xml.
www.jasspa.comoi_setup v1.25 2015/08/16 11:39:06
63

OpenIndiana Small System Server Build10.8 fetchmail
<?xml version="1.0"?><!DOCTYPE service_bundle SYSTEM "/usr/share/lib/xml/dtd/service_bundle.dtd.1"><service_bundle type=’manifest’ name=’OIfetchmail:fetchmail’>
<service name=’site/fetchmail’ type=’service’ version=’1’><create_default_instance enabled=’false’ /><single_instance /><dependency name=’loopback’ grouping=’require_all’
restart_on=’error’ type=’service’><service_fmri value=’svc:/network/loopback:default’/>
</dependency><dependency name=’physical’ grouping=’optional_all’
restart_on=’error’ type=’service’><service_fmri value=’svc:/network/physical:default’/>
</dependency><!--
If autofs is enabled, wait for it to get users home directories.-->
<dependency name=’autofs’ grouping=’optional_all’restart_on=’none’ type=’service’><service_fmri value=’svc:/system/filesystem/autofs’ />
</dependency><exec_method name=’start’ type=’method’
exec=’/usr/bin/fetchmail -f /etc/fetchmailrc’timeout_seconds=’60’>
<method_context><method_credential user=’root’ group=’other’ />
</method_context></exec_method><exec_method name=’stop’ type=’method’ exec=’:kill’ timeout_seconds=’60’>
<method_context><method_credential user=’root’ group=’other’ />
</method_context></exec_method><stability value=’Unstable’/><template>
<common_name><loctext xml:lang=’C’>Fetchmail from a server</loctext>
</common_name><documentation>
<manpage title=’fetchmail’ section=’1’manpath=’/usr/share/man’ />
</documentation></template>
</service></service_bundle>
Verify and import the manifest into the system:
root@www:/tmp# svccfg validate fetchmail.xmlroot@www:/tmp# svccfg import fetchmail.xmlroot@www:/tmp# svcs -xv fetchmailsvc:/site/fetchmail:default (Fetchmail from a server)State: disabled since Tue Aug 21 18:03:14 2012
Reason: Disabled by an administrator.See: http://illumos.org/msg/SMF -8000-05See: man -M /usr/share/man -s 1 fetchmail
Impact: This service is not running.
www.jasspa.comoi_setup v1.25 2015/08/16 11:39:06
64

OpenIndiana Small System Server Build10.8 fetchmail
10.8.2 Creating fetchmail configuration files
Create the configuration files for fetchmail, the file defines the logging file locations and rules to pull E-mailfrom the ISP or other mail provider.
www% cat << EOF >> /etc/fetchmailrc# Set the background poll mode in seconds. (every 15 mins)set daemon 900## Give the name of the last-resort mail recipient#set postmaster "postmaster"## Error logging locationset logfile /var/adm/fetchmail.log#set syslog## Set the id fileset idfile /var/adm/.fetchids##poll myIsp.co.ik protocol pop3:
uidluser "[email protected]" password "bob-password" is "bob" here;no keep limit 15728500 limitflushuser "[email protected]" password "alice -password" is "alice" here;no keep limit 15728500 limitflush#
EOF
The file contains private password information so ensure that it is not readable by anybody else.
www# chmod go-rw /etc/fetchmailrc
The example fetchmailrc file provided limits the size of messages that may be collected to 15MB, if filesexceed this length then they are deleted from the server and not delivered.
10.8.3 Starting the service
fetchmail is now set up and can be started.
www# svcadm enable fetchmailwww# svcs -xv fetchmailsvc:/site/fetchmail:default (Fetchmail from a server)State: online since Tue Aug 21 18:04:49 2012
See: man -M /usr/share/man -s 1 fetchmailSee: /var/svc/log/site -fetchmail:default.log
Impact: None.www# ps -eaf | grep fetchmail
root 1910 14147 0 18:05:22 pts/2 0:00 grep fetchmailroot 1834 13554 0 18:04:49 ? 0:00 /usr/bin/fetchmail -f /etc/fetchmailrc
10.8.4 Managing logs
Fetechmail can generate some long logs and it is best if the log is rolled. Edit /etc/logadm.conf and addthe following lines to the end of the file.
## Fetchmail log
www.jasspa.comoi_setup v1.25 2015/08/16 11:39:06
65

OpenIndiana Small System Server Build11 Web Services
#/var/adm/fetchmail.log -C 4 -p 7d -N -c
10.8.5 TODO
There are still a number of issues to be resolved with this configuration of fetchmail that need some furtherconsideration.
• Change fetchmail service so that it does not run as root. Explore possibility of creating a new fetchmailuser.
• Deal with large mail messages cleanly. Possibly remove the limit and always download the messageand let postfix deal with the bounce.
11 Web Services
In this chapter we configure the Web Services, this includes a web server (HTTP, HTTPS and WebDAV)using apache with support for PHP and MySQL. CalDAV and CardDAV services are provided by apacheusing DAViCal and postgres SQL.
11.1 Web Server packages
Get the packages that we are going to use for the Web subsystem.
www# pkg install apache -22www# pkg install apache -22/ documentation
Download DAViCal from www.davical.org; both DAViCal and awl are required.
11.2 Creating the file system
When we created the www zone then we added the file system /www which will be used as the directorycontainer for all of the web services. As this file system is imported from the global zone then it enables thefile system to be interrogated without logging into the www zone.Create the additional directories required:
wwww# mkdir -p /www/logwwww# mkdir -p /www/varwwww# mkdir -p /www/etc/DAVLockDBwwww# mkdir -p /www/htdocswwww# mkdir -p /www/webDAV/sharewwww# mkdir -p /www/DAViCal
11.3 Apache
Configure apache, edit the configuration file /etc/apache2/2.2/httpd.conf
# Disable the output of Apache version information in any response.ServerTokens Prod
....# Change this to Listen on specific IP addresses as shown below to
www.jasspa.comoi_setup v1.25 2015/08/16 11:39:06
66

OpenIndiana Small System Server Build11.3 Apache
# prevent Apache from glomming onto all bound IP addresses.#Listen 192.168.8.201:80...
# ServerAdmin: Your address, where problems with the server should be# e-mailed. This address appears on some server-generated pages, such# as error documents. e.g. [email protected] [email protected]
## ServerName gives the name and port that the server uses to identify itself.# This can often be determined automatically, but we recommend you specify# it explicitly to prevent problems during startup.#ServerName www.mydomain.co.uk
## DocumentRoot: The directory out of which you will serve your# documents. By default, all requests are taken from this directory, but# symbolic links and aliases may be used to point to other locations.#DocumentRoot /www/htdocs
## Each directory to which Apache has access can be configured with respect# to which services and features are allowed and/or disabled in that# directory (and its subdirectories).## First, we configure the "default" to be a very restrictive set of# features.#<Directory />
Options FollowSymLinksAllowOverride NoneOrder deny ,allowDeny from all
</Directory >
## Note that from this point forward you must specifically allow# particular features to be enabled - so if something’s not working as# you might expect, make sure that you have specifically enabled it# below.#
## This should be changed to whatever you set DocumentRoot to.#<Directory "/www/htdocs">
## Possible values for the Options directive are "None", "All",# or any combination of:# Indexes Includes FollowSymLinks SymLinksifOwnerMatch ExecCGI MultiViews## Note that "MultiViews" must be named *explicitly* --- "Options All"# doesn’t give it to you.## The Options directive is both complicated and important. Please see# http://httpd.apache.org/docs/2.2/mod/core.html#options# for more information.
www.jasspa.comoi_setup v1.25 2015/08/16 11:39:06
67

OpenIndiana Small System Server Build11.3 Apache
#Options Indexes FollowSymLinks
## AllowOverride controls what directives may be placed in .htaccess files.# It can be "All", "None", or any combination of the keywords:# Options FileInfo AuthConfig Limit#AllowOverride None
## Controls who can get stuff from this server.#Order allow ,denyAllow from all
</Directory >
.......
## ErrorLog: The location of the error log file.# If you do not specify an ErrorLog directive within a <VirtualHost># container, error messages relating to that virtual host will be# logged here. If you *do* define an error logfile for a <VirtualHost># container, that host’s errors will be logged there and not here.#ErrorLog "/www/log/apache_error.log"
## LogLevel: Control the number of messages logged to the error_log.# Possible values include: debug, info, notice, warn, error, crit,# alert, emerg.#LogLevel warn
......
Create the file /www/htdocs/index.html with a simple test page to enable the service to be confirmed andstart the service.
www# svcs -a | grep apachedisabled 12:12:51 svc:/network/http:apache22www# svcadm enable apache22...www# svcadm disable apache22www# svcadm restart apache22www# svcs -xv apache22
From a browser connect to the service to confirm operation.Note: For OS X then you may need to clear the DNS cache. To clear the OS cache:
sudo killall -HUP mDNSResponder
To disable Safari DNS prefetching:
defaults write com.apple.safari WebKitDNSPrefetchingEnabled -boolean false
www.jasspa.comoi_setup v1.25 2015/08/16 11:39:06
68

OpenIndiana Small System Server Build11.3 Apache
11.3.1 PHP support
PHP is an apache module, load the appropriate PHP packages, if MySQL and/or Postgres SQL are to be usedthen load the PHP connector(s) as well.
www# pkg install apache -php5www# pkg install php -52/ documentationwww# pkg install php-mysqlwww# pkg install php-pgsql
Edit the PHP configuration /etc/php/5.2/php/ini and configure the logs files to be sent to our preferredlocation.
# Change the error log location.error_log = /www/log/php5_exec.log# Change the maximum post size, depending on your application.post_max_size = 2K
Edit the apache configuration file /etc/apache2/2.2/httpd.conf and ensure that the PHP module is en-abled. PHP include paths may also be defined.
<IfModule php5_module ><IfModule mime_module >
AddType application/x-httpd -php .phpAddType application/x-httpd -php-source .phps
</IfModule >
# Define the PHP5 configuration, where inc files are located etc.php_value include_path "./:/www/inc"php_value default_charset "utf -8"
</IfModule >
Create an appropriate test file and restart the apache service and confirm operation from a browser.
www# svcadm restart apache22www# svcs -xv apache22
11.3.2 MySQL support
MySQL may be required by your HTTP server, the SQL database may be placed in the global zone andconnect remotely to the database from any service on our www domain.Install the MySQL package (root) and create a file system for the database, in this case then a MySQLdatabase should be contained on the spinning disks.
hal# zfs create tank01/mysqlhal# chown mysql:mysql /tank01/mysqlhal# chmod 755 /tank01/mysqlhal# zfs set mountpoint=/var/mysql/5.1/data tank01/mysql
hal# svcs -a | grep mysqldisabled 20:38:58 svc:/application/database/mysql:version_51hal# svcadm enable application/database/mysql:version_51hal# svcs -xv application/database/mysql:version_51
Change the root password to the database and create the permissions.
hal# mysql -u root -p Welcome to the MySQL monitor. Commands end with ; or \g.Your MySQL connection id is 1 Server version: 5.1.37 Source distribution
Type ’help;’ or ’\h’ for help. Type ’\c’ to clear the current input statement.
www.jasspa.comoi_setup v1.25 2015/08/16 11:39:06
69

OpenIndiana Small System Server Build11.3 Apache
mysql > UPDATE mysql.user SET password=PASSWORD("my-new-password") WHERE User=’root ’;
mysql > create database mydb;mysql > use mysql;mysql > grant create ,insert ,select ,update ,delete ,lock tables on mydb.* to
dbadmin@192 .168.8.201 identified by ’somepassword ’;
select * from user;select Host , User , Password from user;mysql > \qByehal#
The MySQL database may be accessed remotely from the Apache Webserver i.e. from PHP etc.
// mySQL database.// Define the connections to the database.$mysql_hostname = "192.168.8.200:3306";$mysql_database_name = "mydb";$mysql_username = "dbadmin";$mysql_password = "somepassword";
11.3.3 HTTPS services
For an HTTPS service on port 443 then create a virtual host in the configuration file /etc/apache2/2.2/-httpd.conf and add a new virtual host to the end of the configuration file.Note that if we have disabled ipv6 then we use Listen 0.0.0.0:port in order to remove errors in theapache.log of the form (128)Network is unreachable: connect to listener on [::]:8081
.....## Note: The following must must be present to support# starting without SSL on platforms with no /dev/random equivalent# but a statically compiled-in mod_ssl.#<IfModule ssl_module >SSLRandomSeed startup builtinSSLRandomSeed connect builtin</IfModule >.....
## SSL Server#Listen 0.0.0.0:443NameVirtualHost 192.168.8.201:443
<VirtualHost 192.168.8.201:443 ># General setup of the virtual hostDocumentRoot "/www/htdocs"ServerName "www.mydomain.co.uk:443"ServerAdmin "[email protected]"
# Virtual server loggingErrorLog "/www/log/apache_error_443.log"TransferLog "/www/log/apache_access_443.log"
# Turn on SSL for this port
www.jasspa.comoi_setup v1.25 2015/08/16 11:39:06
70

OpenIndiana Small System Server Build11.3 Apache
SSLEngine onSSLProtocol -all +SSLv3 +TLSv1SSLCipherSuite HIGH:!MEDIUM:!SSLv2:!EXP:!ADH:!aNULL:!eNULL:!NULLSSLOptions +StrictRequire
# Server CertificateSSLCertificateFile "/CA3yr/ca3yr_cert.crt"SSLCertificateKeyFile "/CA3yr/ca3yr_cert.key"SSLCertificateChainFile "/CA3yr/ca3yr_ca -bundle.crt"
# SSL Protocol Adjustments:BrowserMatch ".*MSIE.*" \
nokeepalive ssl-unclean -shutdown \downgrade -1.0 force -response -1.0
# Per-Server Logging:CustomLog "/www/log/ssl_request_443.log" \
"%t %h %{SSL_PROTOCOL}x %{SSL_CIPHER}x \"%r\" %b"
Alias /ssl "/www/somessldir"
## Define the values for the include path.#<Directory "/www/somessldir">
# Allow index translation.Options -Indexes FollowSymLinks -MultiViews -ExecCGIAllowOverride None
# Enable the environment vaiables for our SSL environment<IfModule env_module >
SetEnv SSL_BASEDIR /www/somessldir</IfModule >
# Password access if required.#AuthType Basic#AuthName "Mydomain Secure Area"#AuthUserFile /www/etc/password#Require user bob#Satisfy All
# On a directory access then run index.phpDirectoryIndex index.php
# Limits<Limit GET POST OPTIONS >
Order allow ,denyAllow from all
</Limit ><LimitExcept GET POST OPTIONS >
Order deny ,allowDeny from all
</LimitExcept ></Directory >
</VirtualHost >
Create a test HTML file and restart the apache service and confirm operation from a browser.
www# svcadm restart apache22www# svcs -xv apache22
www.jasspa.comoi_setup v1.25 2015/08/16 11:39:06
71

OpenIndiana Small System Server Build11.3 Apache
11.3.4 WebDAV
The WebDAV service provides a remote Web file system which may be used for storage which may be usedbuy the iOS iWorks applications, amongst others.Create the file system space in our www filesystem and change the ownership to webservd:webservd.
www# mkdir /www/etc/DavLockwww# chmod a+rw /www/etc/DavLockDBwww# chmod a+rw /www/webDAVwww# chown -R webservd:webservd /www/webDAV
Create the password file. Use MD5 it is better then crypt which is the default. Obviously use a betterpassword than used here.
www# htpasswd -m -c -b /etc/apache2 /2.2/dav.passwd bob "password"www# htpasswd -m -b /etc/apache2 /2.2/dav.passwd alice "password"
# Protect the password file.www# chown root /etc/apache2 /2.2/dav.passwdwww# chgrp webservd /etc/apache2 /2.2/dav.passwdwww# chmod 640 /etc/apache2 /2.2/dav.passwd
Groups can be useful with WebDAV, a groups file may be created as follows:
www% cat << EOF >> /etc/apache2 /2.2/dav.groupsusers: bob aliceadmin: alicereaders: fred freda aliceEOF
# Protect the groups file.www# chown root /etc/apache2 /2.2/dav.groupswww# chgrp webservd /etc/apache2 /2.2/dav.groupswww# chmod 640 /etc/apache2 /2.2/dav.groups
Configure apache, edit the configuration file /etc/apache2/2.2/httpd.conf. In this case a WebDAVservice is created on port 8081 which is secured with SSL
## Port 8081 - WebDAV with SSL#Listen 0.0.0.0:8081NameVirtualHost 192.168.8.201:8081#DAVLockDB /www/var/DavLockDB/DavLockDAVMinTimeout 180#<VirtualHost 192.168.8.201:8081 >
# General setup of the virtual hostDocumentRoot "/www/webDAV"ServerName "www.mydomain.co.uk:8081"ServerAdmin "[email protected]"
# Virtual server loggingErrorLog "/www/log/apache_error_8081.log"TransferLog "/www/log/apache_access_8081.log"
# Turn on SSL for this portSSLEngine onSSLProtocol -all +SSLv3 +TLSv1SSLCipherSuite HIGH:!MEDIUM:!SSLv2:!EXP:!ADH:!aNULL:!eNULL:!NULL
www.jasspa.comoi_setup v1.25 2015/08/16 11:39:06
72

OpenIndiana Small System Server Build11.3 Apache
SSLOptions +StrictRequire
# Server CertificateSSLCertificateFile "/CA3yr/ca3yr_cert.crt"SSLCertificateKeyFile "/CA3yr/ca3yr_cert.key"SSLCertificateChainFile "/CA3yr/ca3yr_ca -bundle.crt"
# SSL Protocol Adjustments:BrowserMatch ".*MSIE.*" \
nokeepalive ssl-unclean -shutdown \downgrade -1.0 force -response -1.0
# Per-Server Logging:CustomLog "/www/log/ssl_request_8081.log" \
"%t %h %{SSL_PROTOCOL}x %{SSL_CIPHER}x \"%r\" %b"
# For the root directory then only bob can write.<Directory /www/webDAV >
Options +IndexesIndexIgnore ".." "."IndexOptions -IconsAreLinks NameWidth=* FancyIndexing \
FoldersFirst SuppressLastModifiedIndexOrderDefault Ascending NameAddDescription "7-Zip archive" *.7zAddDescription "Log file" *.logAllowOverride NoneOrder allow ,denyAllow from all
AuthType BasicAuthName "mydomain WebDAV Server"AuthUserFile /etc/apache2 /2.2/dav.passwdRequire valid -user
DAV on</Directory >
# Add the following if any user is allowed to see the root# directory.#<Location /># Order Allow,Deny# Allow from all# Options +Indexes# IndexIgnore ..# IndexOptions -IconsAreLinks NameWidth=* FancyIndexing# SuppressLastModified FoldersFirst# IndexOrderDefault Ascending Name# Require valid-user#</Location>
## Users WebDAV - Valid for group of users.#Alias /users "/www/webDAV/users"<Directory /www/webDAV/users >
DAV OnOrder Allow ,DenyAllow from allAuthType BasicAuthName "mydomain WebDAV Server"AuthUserFile /etc/apache2 /2.2/dav.passwd
www.jasspa.comoi_setup v1.25 2015/08/16 11:39:06
73

OpenIndiana Small System Server Build11.3 Apache
AuthGroupFile /etc/apache2 /2.2/dav.groupsRequire group users
</Directory >
# We want to access this WebDAV directory using an Internet browser.<Location /users >
Options +IndexesIndexIgnore "."IndexOptions -IconsAreLinks NameWidth=* \
FancyIndexing FoldersFirst# SuppressLastModifiedIndexOrderDefault Ascending NameAddDescription "7-Zip archive" *.7zAddDescription "Log file" *.logRequire group users
</Location >
## Bob WebDAV - Only valid for a single user#Alias /bob "/www/webDAV/bob"<Directory /www/webDAV/bob>
DAV OnOrder Allow ,DenyAllow from allAuthType BasicAuthName "mydomain WebDAV Server"AuthUserFile /etc/apache2 /2.2/dav.passwdAuthGroupFile /etc/apache2 /2.2/dav.groupsRequire group users
</Directory >
# We want to access this WebDAV directory using an Internet browser.<Location /bob>
Options +IndexesIndexIgnore "."IndexOptions -IconsAreLinks NameWidth=* \
FancyIndexing FoldersFirst# SuppressLastModifiedIndexOrderDefault Ascending NameAddDescription "7-Zip archive" *.7zAddDescription "Log file" *.log
Require user bob</Location >
## Restricted WebDAV - Restrict area to mainly readers with a writer#Alias /sigen "/www/webDAV/restricted"<Directory /www/webDAV/restricted >
DAV OnOrder Allow ,DenyAllow from allAuthType BasicAuthName "mydomain WebDAV Server"AuthUserFile /etc/apache2 /2.2/dav.passwdAuthGroupFile /etc/apache2 /2.2/dav.groupsRequire group readers
</Directory >
www.jasspa.comoi_setup v1.25 2015/08/16 11:39:06
74

OpenIndiana Small System Server Build11.3 Apache
# We want to access this WebDAV directory using an Internet browser.# Alice is allowed to upload, everybody else is read only.<Location /sigen >
Options +IndexesIndexIgnore "."IndexOptions -IconsAreLinks NameWidth=* FancyIndexing FoldersFirst#SuppressLastModifiedIndexOrderDefault Ascending NameAddDescription "7-Zip archive" *.7zAddDescription "Log file" *.log<Limit GET OPTIONS PROPFIND >
Require group readers</Limit ><LimitExcept GET OPTIONS PROPFIND >
Require user alice</LimitExcept >
</Location >
## upload WebDAV - Generic upload area for any valid user.#Alias /upload "/www/webDAV/upload"<Directory /www/webDAV/upload >
DAV OnOrder Allow ,DenyAllow from allAuthType BasicAuthName "mydomain WebDAV Server"AuthUserFile /etc/apache2 /2.2/dav.passwdAuthGroupFile /etc/apache2 /2.2/dav.groupsRequire valid -user
</Directory >
# We want to access this WebDAV directory using an Internet browser.<Location /upload >
Options +IndexesIndexIgnore "."IndexOptions -IconsAreLinks NameWidth=* FancyIndexing FoldersFirstAddDescription "7-Zip archive" *.7zAddDescription "Log file" *.logIndexOrderDefault Ascending NameRequire valid -user
</Location ></VirtualHost >
Restart the apache service and confirm operation from a browser or WebDAV client.
www# svcadm restart apache22www# svcs -xv apache22
11.3.5 Log management
Manage the Apache logging, in this case we keep all of the logs just incase there are issues, they are main-tained in dated files.
www# logadm -w /www/log/apache_access.log -C 24 -c -p 1m -t ’$file -%Y-%m-%d’ -z 0www# logadm -w /www/log/apache_access_443.log -C 24 -c -p 1m -t ’$file -%Y-%m-%d’ -z 0www# logadm -w /www/log/apache_access_8443.log -C 24 -c -p 1m -t ’$file -%Y-%m-%d’ -z 0www# logadm -w /www/log/apache_access_8008.log -C 24 -c -p 1m -t ’$file -%Y-%m-%d’ -z 0www# logadm -w /www/log/apache_access_8081.log -C 24 -c -p 1m -t ’$file -%Y-%m-%d’ -z 0
www.jasspa.comoi_setup v1.25 2015/08/16 11:39:06
75

OpenIndiana Small System Server Build12 Calendar and Address Book Services
www# logadm -w /www/log/apache_error.log -C 24 -c -p 1m -t ’$file -%Y-%m-%d’ -z 0www# logadm -w /www/log/apache_error_443.log -C 24 -c -p 1m -t ’$file -%Y-%m-%d’ -z 0www# logadm -w /www/log/apache_error_8081.log -C 24 -c -p 1m -t ’$file -%Y-%m-%d’ -z 0www# logadm -w /www/log/apache_error_8443.log -C 24 -c -p 1m -t ’$file -%Y-%m-%d’ -z 0www# logadm -w /www/log/php5_exec.log -C 24 -c -p 1m -t ’$file -%Y-%m-%d’ -z 0www# logadm -w /www/log/apache_error_8008.log -C 24 -c -p 1m -t ’$file -%Y-%m-%d’ -z 0www# logadm -w /www/log/ssl_request_443.log -C 24 -c -p 1m -t ’$file -%Y-%m-%d’ -z 0www# logadm -w /www/log/ssl_request_8443.log -C 24 -c -p 1m -t ’$file -%Y-%m-%d’ -z 0www# logadm -w /www/log/ssl_request_8081.log -C 24 -c -p 1m -t ’$file -%Y-%m-%d’ -z 0
12 Calendar and Address Book Services
The Calendar and Address Book services user DAViCal which runs on top of apache with PHP v5 and usesthe postgres SQL database for event data storage.Apache2 and PHP5 should be installed on www with the following PHP5 additional package modules php5_-pgsql, php5_pdopgsql, php5_pdo, php5_iconv and php5_gettext.
12.1 Getting DAViCal and installing
Download DAViCal from http://debian.mcmillan.net.nz; both awl and davical are required.Create a directory for DAViCal, in our case then we use the /www directory on the www zone which is alsoaccessible from the Global zone as /tank01/www.
hal# mkdir -p /tank01/www/DAViCalhal# gtar zxvf awl -0.46.tar.gz -C /tank01/www/DAViCalhal# gtar zxvf davical -1.0.2.tar.gz -C /tank01/www/DAViCal
# Create a symbolic link to un-versionhal# cd /tank01/www/DAViCalhal# ln -s awl -0.46 awlhal# ln -s davical -1.0.2 davical
12.2 Setting up Postgres
Before configuring apache for DAViCal then set up the postgres SQL server. For our server then this isperformed in the Global zone rather then www where it will be used, the database will be accessed remotely.
hal# pkg install database/postgres -84 service/database/postgres -84 \postgres -84/ documentation postgres -common
We want to put the postgres data on the mirrored data disk so create a new zfs file system for postgres.
hal# zfs create tank01/postgreshal# chown postgres:postgres /tank01/postgreshal# chmod 755 /tank01/postgreshal# mv /var/postgres/8.4 /tank01/postgreshal# zfs set mountpoint=/var/postgres tank01/postgres
Edit the /etc/passwd file and change the home directory to "/home/postgres"
postgres:x:90:90: PostgreSQL Reserved UID:/export/home/postgres:/usr/bin/pfksh
Make the home directory:
hal# mkdir /export/home/postgreshal# chown postgres.postgres /export/home/postgres
www.jasspa.comoi_setup v1.25 2015/08/16 11:39:06
76

OpenIndiana Small System Server Build12.2 Setting up Postgres
Create a .profile file and set up the environment for the postgres user. Create the file /export/home/-postgres/.profile containing the following commands:
PATH=/usr/postgres /8.4/bin:${PATH}PGDATA=/var/postgres /8.4/dataexport PATH PGDATA
Ensure the file ownership is correct:
hal# chown postgres.postgres /export/home/postgres/.profile
Start the postgres service:
hal# svcs -a|grep postgdisabled 17:25:35 svc:/application/database/postgresql_84:default_64bitdisabled 17:25:35 svc:/application/database/postgresql_84:default_32bit
#hal svcadm enable postgresql_84:default_32bit
Initialise the postgres database (note I am not that familiar with postgres so there may be better ways ofdoing this).
su - postgresOpenIndiana (powered by illumos) SunOS 5.11 oi_151a5 June 2012postgres@hal:~$ psqlpsql (8.4.4)Type "help" for help.
postgres=#postgres=# \l
List of databasesName | Owner | Encoding | Collation | Ctype | Access privileges
-----------+----------+----------+-------------+-------------+-----------------------postgres | postgres | UTF8 | en_GB.UTF -8 | en_GB.UTF -8 |template0 | postgres | UTF8 | en_GB.UTF -8 | en_GB.UTF -8 | =c/postgres
: postgres=CTc/postgrestemplate1 | postgres | UTF8 | en_GB.UTF -8 | en_GB.UTF -8 | =c/postgres
: postgres=CTc/postgres(3 rows)
postgres=# \q
Reset the password of the postgres user. The default superuser, called ’postgres’, does not have a passwordby default. We need to add one:
$ sudo su postgres -c psql template1template1=# ALTER USER postgres with PASSWORD ’password ’;template1=# \q
Where ’password’ is your password. After this we need to modify the password of the postgres UNIX user:
$ sudo passwd -d postgres$ sudo su postgres -c passwd
You will be asked for a new password, enter the same password with the one you specified in the ALTERUSER statement above. If the ipf firewall is running then open port 5432 to allow remote access to the server.The default PostgreSQL installation in Solaris requires that a PostgreSQL user must also be a unix user, thismakes it difficult to create a new PostgreSQL user. To allow a PostgreSQL user to be different from a UNIXuser then the pg_hba.conf file needs to be altered.Edit the file /etc/postgresql/8.4/pg_hba.conf and allow access for the localhost and our remote server192.1.8.201 (www) only:
www.jasspa.comoi_setup v1.25 2015/08/16 11:39:06
77

OpenIndiana Small System Server Build12.3 Initialising the DAViCal Database
# "local" is for Unix domain socket connections onlylocal all all trust# IPv4 local connections (Add 192.168.8.201):host all all 127.0.0.1/32 trusthost all all 192.168.8.201/32 trust# IPv6 local connections (Disable we do not need this in our network):# host all all ::1/128 trust
Edit /var/postgres/8.4/data/postgresql.conf to allow remote connections:Change the listen_address from localhost to *.
listen_addresses = ’*’
Restart the service for the changes to become effective:
hal# svcadm restart postgresql_84:default_32bithal# svcs -xv postgresql_84:default_32bit
12.3 Initialising the DAViCal Database
We are not finished yet, the database has been set up but we still need to initialise the DAViCal database. Todo this then we also need to install the Perl and Perl database connector:
hal# pkg install library/perl -5/databasehal# pkg install database/postgres -84/language -bindingshal# pkg install library/perl -5/postgres -dbi
Install Perl YAML:
hal# perl -MCPAN -e ’install +YAML ’
We are now ready to create the DAViCal database, this is a Bash shell script and IT IS REALLY IMPOR-TANT TO RUN THE FOLLOWING STEPS IN THE BASH SHELL. Run the DAViCal database creationscript as the postgres user from a bash shell.When creating the PostgreSQL database then DAViCal needs to operate using UTF-8, if your Locale isset to something different to UTF-8 then you need to make sure that the database is set to UTF-8 andmatches a Sun Locale e.g. en_GB.UTF-8. After initialising the database then this can be changed by editingpostgresql.conf before creating the davical database with bash dba/create-database.sh otherwisethe creation fails.
hal# su - postrespostgres@hal: /www/DAViCal/davical -1.0.2$ cd /tank01/www/DAViCal/davicalpostgres@hal: /www/DAViCal/davical -1.0.2$ bash ./dba/create -database.sh
If things go wrong then you will need to find out what went wrong and drop the database so that the operationcan be fixed and restarted. The following steps may be used to undo the database creation:
postgres@hal: /www/DAViCal/davical -1.0.2$ psqlPassword:psql (8.4.4)Type "help" for help.
postgres=# DROP DATABASE davical;postgres -# \qpostgres@hal:
When the database succeeds then the administrator password will be displayed.
www.jasspa.comoi_setup v1.25 2015/08/16 11:39:06
78

OpenIndiana Small System Server Build12.4 Importing an existing DAViCal Database
postgres@hal: /www/DAViCal/davical -1.0.2$
# Fix the issue and then re-try the initialisationpostgres@hal: /www/DAViCal/davical -1.0.2$ bash ./dba/create -database.shSupported locales updated.Updated view: dav_principal.sql applied.CalDAV functions updated.RRULE functions updated.Database permissions updated.NOTE====* The password for the ’admin ’ user has been set to ’password ’
Thanks for trying DAViCal! Check in /usr/share/doc/davical/examples/ forsome configuration examples. For help , visit #davical on irc.oftc.net.
postgres@hal: /www/DAViCal/davical -1.0.2$
KEEP A NOTE OF THE PASSWORD you will need this to access the DAViCal administrator Web page asuser admin with the password set up users in the system.
12.4 Importing an existing DAViCal Database
If you have an old DAViCal database then it can be imported into the new database as follows:
# Dump the old calendaroldsystem# pg_dump -Fc davical >/tmp/davical.pgdump
# Restore the dump to the new systemnewsystem# pg_restore -Fc -d davical /tmp/davical.pgdump
12.5 Remote Server postgres preparation
The postgres database has been installed in the Global zone and in this configuration then it will be accessedremotely from our www virtual machine. Prepare the environment on www
Install the postgres package
www# pkg install pkg://openindiana.org/database/postgres -83
Test the remote connection
www# psql -h hal -U postgres -d test
12.6 Davical Configuration
From our www zone then davical itself needs to be configured via the file /www/DAViCal/davical/-config/config.php. This is a PHP script which is used by DAViCal. Assuming that the SSL portis external facing then can disable adminstrator access on port 8443 with $c->restrict_admin_port =’8008’;. If Apache2 is running in a zone and the SQL server is on another host or zone then change the con-nection to access the remote database with $c->pg_connect[] = ’hostaddr=192.168.1.y port=5432dbname=davical user=davical_app’;. Set the Locale to the same value as the PostgreSQL databasewith $c->default_locale = "en_GB.UTF-8";.The file config.php will something like:
www.jasspa.comoi_setup v1.25 2015/08/16 11:39:06
79
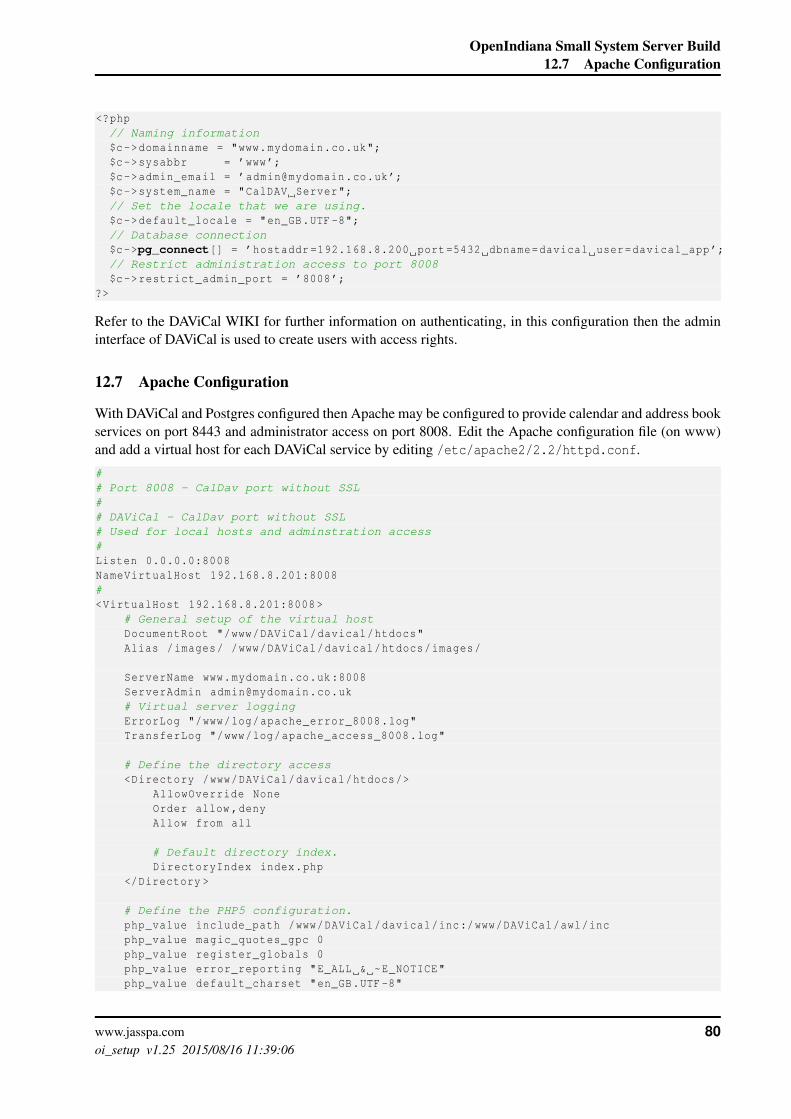
OpenIndiana Small System Server Build12.7 Apache Configuration
<?php// Naming information$c->domainname = "www.mydomain.co.uk";$c->sysabbr = ’www’;$c->admin_email = ’[email protected]’;$c->system_name = "CalDAV Server";// Set the locale that we are using.$c->default_locale = "en_GB.UTF -8";// Database connection$c->pg_connect[] = ’hostaddr =192.168.8.200 port=5432 dbname=davical user=davical_app’;// Restrict administration access to port 8008$c->restrict_admin_port = ’8008’;
?>
Refer to the DAViCal WIKI for further information on authenticating, in this configuration then the admininterface of DAViCal is used to create users with access rights.
12.7 Apache Configuration
With DAViCal and Postgres configured then Apache may be configured to provide calendar and address bookservices on port 8443 and administrator access on port 8008. Edit the Apache configuration file (on www)and add a virtual host for each DAViCal service by editing /etc/apache2/2.2/httpd.conf.
## Port 8008 - CalDav port without SSL## DAViCal - CalDav port without SSL# Used for local hosts and adminstration access#Listen 0.0.0.0:8008NameVirtualHost 192.168.8.201:8008#<VirtualHost 192.168.8.201:8008 >
# General setup of the virtual hostDocumentRoot "/www/DAViCal/davical/htdocs"Alias /images/ /www/DAViCal/davical/htdocs/images/
ServerName www.mydomain.co.uk:8008ServerAdmin [email protected]# Virtual server loggingErrorLog "/www/log/apache_error_8008.log"TransferLog "/www/log/apache_access_8008.log"
# Define the directory access<Directory /www/DAViCal/davical/htdocs/>
AllowOverride NoneOrder allow ,denyAllow from all
# Default directory index.DirectoryIndex index.php
</Directory >
# Define the PHP5 configuration.php_value include_path /www/DAViCal/davical/inc:/www/DAViCal/awl/incphp_value magic_quotes_gpc 0php_value register_globals 0php_value error_reporting "E_ALL & ~E_NOTICE"php_value default_charset "en_GB.UTF -8"
www.jasspa.comoi_setup v1.25 2015/08/16 11:39:06
80

OpenIndiana Small System Server Build12.7 Apache Configuration
# Get rid of caldav.php in the pathRewriteEngine On# Not if it’s the root URL.RewriteCond %{REQUEST_URI} !^/$# Not if it explicitly specifies a .php program, stylesheet or imageRewriteCond %{REQUEST_URI} !\.(php|css|js|png|gif|jpg)# For iPhoneRewriteRule ^.well -known(.*)$ /caldav.php/.well -known$1 [NC,L]# Everything else gets rewritten to /caldav.php/...RewriteRule ^(.*)$ /caldav.php/$1 [NC,L]
</VirtualHost >
## Port 8443 - CardDav port with SSL## DAViCal - CardDav port with SSL# Used for internal and external access#Listen 0.0.0.0:8443NameVirtualHost 192.168.8.201:8443#<VirtualHost 192.168.8.201:8443 >
# General setup of the virtual hostDocumentRoot "/www/DAViCal/davical/htdocs"ServerName www.mydomain.co.uk:8443ServerAdmin [email protected]# Virtual server loggingErrorLog "/www/log/apache_error_8443.log"TransferLog "/www/log/apache_access_8443.log"
# Turn on SSL for this portSSLEngine onSSLProtocol -all +SSLv3 +TLSv1SSLCipherSuite HIGH:!MEDIUM:!SSLv2:!EXP:!ADH:!aNULL:!eNULL:!NULLSSLOptions +StrictRequire
# Server CertificateSSLCertificateFile "/CA3yr/ca3yr_cert.crt"SSLCertificateKeyFile "/CA3yr/ca3yr_cert.key"SSLCertificateChainFile "/CA3yr/ca3yr_ca -bundle.crt"
# SSL Protocol Adjustments:BrowserMatch ".*MSIE.*" \
nokeepalive ssl-unclean -shutdown \downgrade -1.0 force -response -1.0
# Per-Server Logging:CustomLog "/www/log/ssl_request_8443.log" \
"%t %h %{SSL_PROTOCOL}x %{SSL_CIPHER}x \"%r\" %b"
# Define the directory access<Directory /www/DAViCal/davical/htdocs/>
Dav offAllowOverride NoneOrder allow ,denyAllow from all
# Default directory index.DirectoryIndex index.php
</Directory >
www.jasspa.comoi_setup v1.25 2015/08/16 11:39:06
81

OpenIndiana Small System Server Build12.8 DAViCal User Configuration
# Allow trailing namesAcceptPathInfo On
# Define the PHP5 configuration.php_value include_path /www/DAViCal/davical/inc:/www/DAViCal/awl/incphp_value magic_quotes_gpc 0php_value register_globals 0php_value error_reporting "E_ALL & ~E_NOTICE"php_value default_charset "utf -8"
# For CardDAV then we do not use caldav.php in the URL.# Redirect everything in this instance (Option a)# Activate RewriteEngineRewriteEngine On
# Not if it’s the root URL.RewriteCond %{REQUEST_URI} !^/$# Not if it explicitly specifies a .php program, stylesheet or imageRewriteCond %{REQUEST_URI} !\.(php|css|js|png|gif|jpg)# Everything else gets rewritten to /caldav.php/...RewriteRule ^(.*)$ /caldav.php/$1 [NC,L]
</VirtualHost >
Restart the apache service client.
www# svcadm restart apache22www# svcs -xv apache22
12.8 DAViCal User Configuration
With DAViCal running then connect to the administrator port 8008 and add users to the system (if required).The password for access was created automatically when the DAViCal database was set up and a note of thispassword should have been made during the installation process.
www.jasspa.comoi_setup v1.25 2015/08/16 11:39:06
82

OpenIndiana Small System Server Build13 CVS
13 CVS
Setting up CVS server for a legacy source control system. In this section we set up the CVS services butdo not address how to set up CVS as we are restoring a previously configured CVS repository. In ourconfiguration then this is performed in the Global zone (not www).Install the CVS package and create a directory to hold the repository.
hal# zfs listhal# zfs create tank01/cvs
Create a CVS user and group
hal# groupadd cvshal# useradd cvs
Optionally, edit /etc/passwd and /etc/group and change the UID/GID to 91 (or some other UID/GIDused by your organisation).
hal# mkdir /tank01/cvs/cvsroothal# chown -R cvs:cvs /tank01/cvshal# mkdir /export/cvshal# zfs set mountpoint=/export/cvs tank01/cvs/cvsroot
Create the services entry tmp/cvspserver-tcp.xml
<?xml version=’1.0’?><!DOCTYPE service_bundle SYSTEM ’/usr/share/lib/xml/dtd/service_bundle.dtd.1’><!--
Service manifest for the cvspserver service.-->
<service_bundle type=’manifest’ name=’cvspserver’><service
name=’network/cvspserver/tcp’type=’service’version=’1’>
<create_default_instance enabled=’true’/>
<restarter><service_fmri value=’svc:/network/inetd:default’ />
</restarter>
<!--Set a timeout of 0 to signify to inetd that we do not want totimeout this service, since the forked process is the one thatdoes the services work. This is the case for most/all legacyinetd services; for services written to take advantage of SMFcapabilities, the start method should fork off a process tohandle the request and return a success code.
--><exec_method
type=’method’name=’inetd_start’exec=’/usr/bin/cvs -f --allow -root=/export/cvs/cvsroot pserver’timeout_seconds=’0’><method_context>
<method_credential user=’root’ group=’root’ /></method_context>
</exec_method>
www.jasspa.comoi_setup v1.25 2015/08/16 11:39:06
83

OpenIndiana Small System Server Build13.1 User Configuration
<!--Use inetds built-in kill support to disable services.
--><exec_method
type=’method’name=’inetd_disable’exec=’:kill’timeout_seconds=’0’>
</exec_method>
<property_group name=’inetd’ type=’framework’><propval name=’name’ type=’astring’ value=’cvspserver’ /><propval name=’endpoint_type’ type=’astring’ value=’stream’ /><propval name=’proto’ type=’astring’ value=’tcp’ /><propval name=’wait’ type=’boolean’ value=’false’ /><propval name=’isrpc’ type=’boolean’ value=’false’ />
</property_group>
<stability value=’External’ />
<template><common_name>
<loctext xml:lang=’C’>cvspserver
</loctext></common_name>
</template></service>
</service_bundle>
Import the service entry:
hal# svccfg import /tmp/cvspserver -tcp.xmlhal# svcadm disable svc:/network/cvspserver/tcp:defaulthal# svcadm enable svc:/network/cvspserver/tcp:defaulthal# svcs -xv cvspserver/tcpsvc:/network/cvspserver/tcp:default (cvspserver)State: online since 1 September 2012 12:28:06 BST
Impact: None.
Initialise the CVS root directory in /export/cvs/cvsroot by setting up a new CVS repository or copyingin an existing CVS repository.
13.1 User Configuration
As a user then update the shell login script .profile or other shell equivalent (i.e. .zshenv, .bashrc, etc.).
## Set up CVSROOT#CVSROOT=:pserver:[email protected]:/export/cvs/cvsrootexport CVSROOT
www.jasspa.comoi_setup v1.25 2015/08/16 11:39:06
84

OpenIndiana Small System Server Build14 Backup
14 Backup
Automated backups are most important in order to preserve the most critical data. The system configurationdescribed here includes a SCSI Tape Drive which is the most efficient and cheapest method of preservingbusiness critical data. 31 tapes are used each labelled with a day number and they are rotated around. Onecould use more tapes to snapshot each month and archive them to a secure fire safe.The tapes are not large enough to store all of the data on the system but are sufficient to store all of the criticalbusiness files excluding anything that is automatically generated.There are backup applications such as Amanda which could provide backup solutions. There are othermethods where cheap large capacity removable HDDs could be used by exporting a ZFS snapshot.In our case we use a simple shell script running on a daily cron job to backup the system to tape. Additionallythe mail, calendar and other database’s of the system are snapshot and saved to a 7-zip archive. A number ofbackup and temporary directories are used./tank01/tmp - Temporary working area./tank01/backup - Archive backup area./tank01/backup/db1..3 - Database backup areas./tank01/backup/mail - Mail backup area./tank01/backup/calendar - Calendar backup areaThe backup files are controlled by a shell script the files used are:/etc/backup - The main script file/etc/backup.include - A list of directories to include in the backup/etc/backup.exclude - A list of directories to exclude from the backup/etc/backup.exclude.sh - A list of commands to find files to exclude
Create the working directories and ensure that they are not readable by others.
hal# mkdir -p /tank01/tmphal# mkdir -p /tank01/backuphal# chown root:root /tank01/backuphal# chmod o-wrx /tank01/backup
Create the shall script which is used for the backup. Place the script in file /etc/backup. The file shouldonly be readable by root as it will contain some database passwords.
hal# touch /etc/backuphal# touch /etc/backup.includehal# touch /etc/backup.excludehal# touch /etc/backup.exclude.shhal# chown root:root /etc/backup /etc/backup.include /etc/backup.exclude*hal# chmod u+x /etc/backup /etc/backup.exclude.shhal# chmod go-xwr /etc/backup /etc/backup.include /etc/backup.exclude*
Edit the script file /etc/backup and add the script. Within the script then the databases and mail are snapshotand backed up onto the local disk in a compressed 7-zip archive which is AES encrypted (noted that this takesa significant amount of time if the archive is large). The archives are written to tape with other information.Finally a mail message is sent to root reporting on the state of the backup and ZFS file system.
#!/bin/sh# set -x# Dump the database to the systemBACKUP_DIR="/tank01/backup"MYSQLDUMP="/usr/mysql/bin/mysqldump"PGDUMP="/usr/postgres /8.4/bin/pg_dump"GTAR="/usr/bin/gtar"
www.jasspa.comoi_setup v1.25 2015/08/16 11:39:06
85

OpenIndiana Small System Server Build14 Backup
TAR="/usr/sbin/tar"Z7="/usr/bin/7z a -m0=lzma -mx=9 -mfb=64 -ms=on -ppassword -mhe"GZIP="gzip"DISKTMPDIR="/tank01/tmp"#DB1_DIR=${BACKUP_DIR}/db1DB2_DIR=${BACKUP_DIR}/db2DB3_DIR=${BACKUP_DIR}/db3MAIL_DIR=${BACKUP_DIR}/mailCAL_DIR=${BACKUP_DIR}/calendarDATENAME=‘date +%Y%m%d_%H%M%S‘## Dump the DB1 Database#mkdir -p ${DB1_DIR}${MYSQLDUMP} -hlocalhost -udb1 -ppassword --opt DB1 > ${DISKTMPDIR}/db1_${DATENAME}.sql${Z7} ${DISKTMPDIR}/db1_${DATENAME}.7z ${DISKTMPDIR}/db1_${DATENAME}.sqlchmod go-rw ${DISKTMPDIR}/db1_${DATENAME}.7zmv ${DISKTMPDIR}/db1_${DATENAME}.7z ${DB1_DIR}/db1_${DATENAME}.7zrm -f ${DISKTMPDIR}/db1_${DATENAME}.7z ${DISKTMPDIR}/db1_${DATENAME}.sql## Dump the DB2 Database#mkdir -p ${DB2_DIR}${MYSQLDUMP} -hlocalhost -udb2 -ppassword --opt db2 > ${DISKTMPDIR}/db2_${DATENAME}.sql${Z7} ${DISKTMPDIR}/db2_${DATENAME}.7z ${DISKTMPDIR}/db2_${DATENAME}.sqlchmod go-rw ${DISKTMPDIR}/db2_${DATENAME}.7zmv ${DISKTMPDIR}/db2_${DATENAME}.7z ${DB2_DIR}/db2_${DATENAME}.7zrm -f ${DISKTMPDIR}/db2_${DATENAME}.7z ${DISKTMPDIR}/db2_${DATENAME}.sql## Dump the DB3 Database#mkdir -p ${DB3_DIR}${MYSQLDUMP} -hlocalhost -udb3 -ppassword --opt db3 > ${DISKTMPDIR}/db3_${DATENAME}.sql${Z7} ${DISKTMPDIR}/db3_${DATENAME}.7z ${DISKTMPDIR}/db3_${DATENAME}.sqlchmod go-rw ${DISKTMPDIR}/db3_${DATENAME}.7zmv ${DISKTMPDIR}/bd3_${DATENAME}.7z ${DB3_DIR}/db3_${DATENAME}.7zrm -f ${DISKTMPDIR}/db3_${DATENAME}.7z ${DISKTMPDIR}/db3_${DATENAME}.sql## Dump the calendar#mkdir -p ${CAL_DIR}${PGDUMP} -Fc davical -U davical_app > ${DISKTMPDIR}/davical_${DATENAME}.pgdump${Z7} ${DISKTMPDIR}/davical_${DATENAME}.7z ${DISKTMPDIR}/davical_${DATENAME}.pgdumpchmod go-rw ${DISKTMPDIR}/davical_${DATENAME}.7zmv ${DISKTMPDIR}/davical_${DATENAME}.7z ${CAL_DIR}/davical_${DATENAME}.7zrm -f ${DISKTMPDIR}/davical_${DATENAME}.7z ${DISKTMPDIR}/davical_${DATENAME}.pgdump## Backup the mail#cd /${GTAR} -cvf ${DISKTMPDIR}/mail_${DATENAME}.tar ./tank01/mail${Z7} ${DISKTMPDIR}/mail_${DATENAME}.tar.7z ${DISKTMPDIR}/mail_${DATENAME}.tarchmod go-rw ${DISKTMPDIR}/mail_${DATENAME}.tar.7zmv ${DISKTMPDIR}/mail_${DATENAME}.tar.7z ${MAIL_DIR}/mail_${DATENAME}.7zrm -f ${DISKTMPDIR}/mail_${DATENAME}.tar.7z ${DISKTMPDIR}/mail_${DATENAME}.tar## Do the backup#cd /SAVFILES="/etc/backup.include"
www.jasspa.comoi_setup v1.25 2015/08/16 11:39:06
86
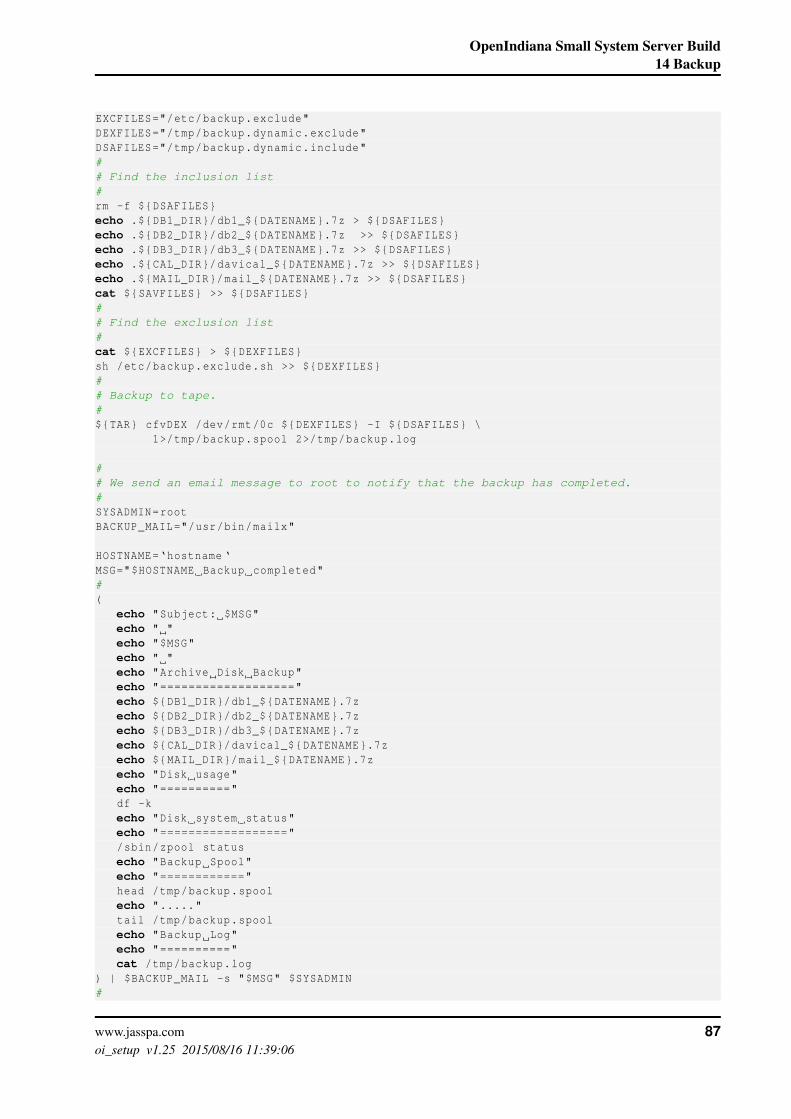
OpenIndiana Small System Server Build14 Backup
EXCFILES="/etc/backup.exclude"DEXFILES="/tmp/backup.dynamic.exclude"DSAFILES="/tmp/backup.dynamic.include"## Find the inclusion list#rm -f ${DSAFILES}echo .${DB1_DIR}/db1_${DATENAME}.7z > ${DSAFILES}echo .${DB2_DIR}/db2_${DATENAME}.7z >> ${DSAFILES}echo .${DB3_DIR}/db3_${DATENAME}.7z >> ${DSAFILES}echo .${CAL_DIR}/davical_${DATENAME}.7z >> ${DSAFILES}echo .${MAIL_DIR}/mail_${DATENAME}.7z >> ${DSAFILES}cat ${SAVFILES} >> ${DSAFILES}## Find the exclusion list#cat ${EXCFILES} > ${DEXFILES}sh /etc/backup.exclude.sh >> ${DEXFILES}## Backup to tape.#${TAR} cfvDEX /dev/rmt/0c ${DEXFILES} -I ${DSAFILES} \
1>/tmp/backup.spool 2>/tmp/backup.log
## We send an email message to root to notify that the backup has completed.#SYSADMIN=rootBACKUP_MAIL="/usr/bin/mailx"
HOSTNAME=‘hostname ‘MSG="$HOSTNAME Backup completed"#(
echo "Subject: $MSG"echo " "echo "$MSG"echo " "echo "Archive Disk Backup"echo "==================="echo ${DB1_DIR}/db1_${DATENAME}.7zecho ${DB2_DIR}/db2_${DATENAME}.7zecho ${DB3_DIR}/db3_${DATENAME}.7zecho ${CAL_DIR}/davical_${DATENAME}.7zecho ${MAIL_DIR}/mail_${DATENAME}.7zecho "Disk usage"echo "=========="df -kecho "Disk system status"echo "=================="/sbin/zpool statusecho "Backup Spool"echo "============"head /tmp/backup.spoolecho "....."tail /tmp/backup.spoolecho "Backup Log"echo "=========="cat /tmp/backup.log
) | $BACKUP_MAIL -s "$MSG" $SYSADMIN#
www.jasspa.comoi_setup v1.25 2015/08/16 11:39:06
87

OpenIndiana Small System Server Build14 Backup
# Clean up#rm -f /tmp/backup.logrm -f /tmp/backup.spoolexit 0
The file /etc/backup.include defines the directories to be included in the backup. Minimally, becausespace may be limited, then we need to backup the certificates, /etc directories with our system configuration,databases, mail and source control system. This is just sufficient to re-build the system and restore theexisting functionality reasonably quickly. Ideally we would like to back-up everything.Note “......” means there may be other files and is not part of the syntax:
./tank01/www
./etc
./zones/www/root/CA3yr
./zones/www/root/etc
./export/cvs
......
./export/home/bob
./export/home/alice
The file /etc/backup.exclude explicitly defines directories to exclude from the backup. Note “......” meansthere may be other files and is not part of the syntax:
./etc/svc/volatile
./etc/sysevent
./export/home/bob/.adabas
./export/home/bob/.adobe
./export/home/bob/.cache
.....
./export/home/bob/.Trash
./export/home/bob/.updatemanager
.....
./export/home/bob/tmp
./export/home/bob/working
.....
./var/opt
./var/run
./var/sadm
./var/tmp
.....
./tank01/root/www/etc/svc/volatile
./tank01/root/www/etc/sysevent
./tank01/root/www/var/opt
./tank01/root/www/var/run
./tank01/root/www/var/sadm
./tank01/root/www/var/tmp
./tank01/www/log
./tank01/www/DAViCal/awl -0.46
./tank01/www/DAViCal/awl
.....
./etc/gconf
./etc/sane.d
./etc/security
./etc/ConsoleKit
./etc/net-snmp
./etc/X11
./etc/brltty
./etc/fonts
./etc/certs
www.jasspa.comoi_setup v1.25 2015/08/16 11:39:06
88

OpenIndiana Small System Server Build14 Backup
./etc/openssl
.....
./zones/www/root/etc/gconf
./zones/www/root/etc/sane.d
./zones/www/root/etc/security
./zones/www/root/etc/ConsoleKit
./zones/www/root/etc/svc/volatile
./zones/www/root/etc/sysevent
./zones/www/root/etc/net-snmp
./zones/www/root/etc/X11
./zones/www/root/etc/brltty
./zones/www/root/etc/fonts
./zones/www/root/etc/certs
./zones/www/root/etc/openssl
.....
The file /etc/backup.exclude.sh contains commands to dynamically construct an exclude list. Note“......” means there may be other files and is not part of the syntax:
#!/bin/shFIND=find## Files to exclude#cd /${FIND} ./export/home/bob -depth -name "core" -print${FIND} ./export/home/bob -depth -name "*.mp3" -print${FIND} ./export/home/bob -depth -name "*.log" -print${FIND} ./export/home/bob -depth -name "*.o" -print${FIND} ./export/home/bob -depth -name "*.a" -print${FIND} ./export/home/bob -depth -name "*#" -print${FIND} ./export/home/bob -depth -name "*~" -print${FIND} ./export/home/bob -depth -name ".#*" -print${FIND} ./export/home/bob -depth -name "*.iso" -print${FIND} ./export/home/bob -depth -name "*.zip" -print${FIND} ./export/home/bob -depth -name "*.7z" -print${FIND} ./export/home/bob -depth -name "*.gz" -print.....#${FIND} ./export/home/alice -depth -name "core" -print.....
Edit crontab as root to schedule the backup job.
sudo suhal# EXPORT EDITOR=mehal# crontab -e
This runs up the editor me. Edit the cron job to run the script /etc/backup everyday at 3am. Add thefollowing lines.
# Schedule the backup at 3am every day0 3 * * * /etc/backup
The cron job will run everyday and send an E-Mail message as follows:
Subject: hal Backup completed
hal Backup completed
Archive Disk Backup===================
www.jasspa.comoi_setup v1.25 2015/08/16 11:39:06
89
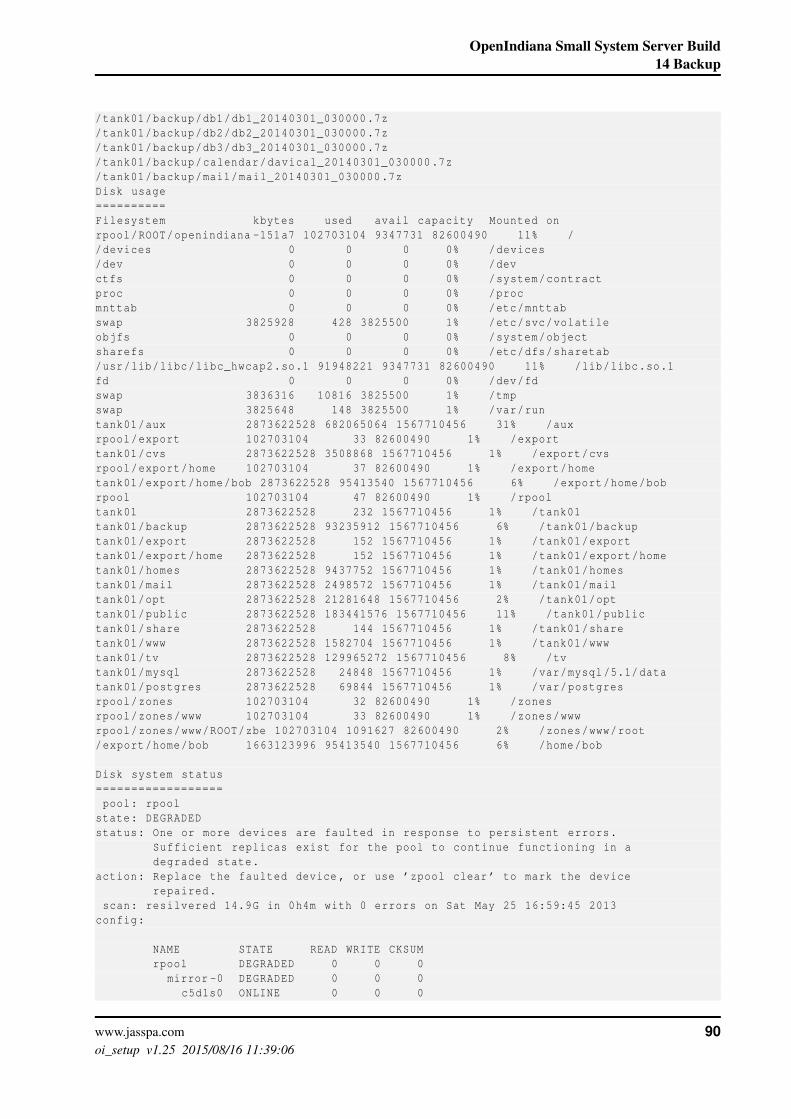
OpenIndiana Small System Server Build14 Backup
/tank01/backup/db1/db1_20140301_030000.7z/tank01/backup/db2/db2_20140301_030000.7z/tank01/backup/db3/db3_20140301_030000.7z/tank01/backup/calendar/davical_20140301_030000.7z/tank01/backup/mail/mail_20140301_030000.7zDisk usage==========Filesystem kbytes used avail capacity Mounted onrpool/ROOT/openindiana -151a7 102703104 9347731 82600490 11% //devices 0 0 0 0% /devices/dev 0 0 0 0% /devctfs 0 0 0 0% /system/contractproc 0 0 0 0% /procmnttab 0 0 0 0% /etc/mnttabswap 3825928 428 3825500 1% /etc/svc/volatileobjfs 0 0 0 0% /system/objectsharefs 0 0 0 0% /etc/dfs/sharetab/usr/lib/libc/libc_hwcap2.so.1 91948221 9347731 82600490 11% /lib/libc.so.1fd 0 0 0 0% /dev/fdswap 3836316 10816 3825500 1% /tmpswap 3825648 148 3825500 1% /var/runtank01/aux 2873622528 682065064 1567710456 31% /auxrpool/export 102703104 33 82600490 1% /exporttank01/cvs 2873622528 3508868 1567710456 1% /export/cvsrpool/export/home 102703104 37 82600490 1% /export/hometank01/export/home/bob 2873622528 95413540 1567710456 6% /export/home/bobrpool 102703104 47 82600490 1% /rpooltank01 2873622528 232 1567710456 1% /tank01tank01/backup 2873622528 93235912 1567710456 6% /tank01/backuptank01/export 2873622528 152 1567710456 1% /tank01/exporttank01/export/home 2873622528 152 1567710456 1% /tank01/export/hometank01/homes 2873622528 9437752 1567710456 1% /tank01/homestank01/mail 2873622528 2498572 1567710456 1% /tank01/mailtank01/opt 2873622528 21281648 1567710456 2% /tank01/opttank01/public 2873622528 183441576 1567710456 11% /tank01/publictank01/share 2873622528 144 1567710456 1% /tank01/sharetank01/www 2873622528 1582704 1567710456 1% /tank01/wwwtank01/tv 2873622528 129965272 1567710456 8% /tvtank01/mysql 2873622528 24848 1567710456 1% /var/mysql/5.1/datatank01/postgres 2873622528 69844 1567710456 1% /var/postgresrpool/zones 102703104 32 82600490 1% /zonesrpool/zones/www 102703104 33 82600490 1% /zones/wwwrpool/zones/www/ROOT/zbe 102703104 1091627 82600490 2% /zones/www/root/export/home/bob 1663123996 95413540 1567710456 6% /home/bob
Disk system status==================pool: rpool
state: DEGRADEDstatus: One or more devices are faulted in response to persistent errors.
Sufficient replicas exist for the pool to continue functioning in adegraded state.
action: Replace the faulted device , or use ’zpool clear ’ to mark the devicerepaired.
scan: resilvered 14.9G in 0h4m with 0 errors on Sat May 25 16:59:45 2013config:
NAME STATE READ WRITE CKSUMrpool DEGRADED 0 0 0
mirror -0 DEGRADED 0 0 0c5d1s0 ONLINE 0 0 0
www.jasspa.comoi_setup v1.25 2015/08/16 11:39:06
90

OpenIndiana Small System Server Build15 JASSPA MicroEmacs
c5d0s0 FAULTED 5 284 0 too many errors
errors: No known data errors
pool: tank01state: ONLINEstatus: Some supported features are not enabled on the pool. The pool can
still be used , but some features are unavailable.action: Enable all features using ’zpool upgrade ’. Once this is done ,
the pool may no longer be accessible by software that does not supportthe features. See zpool -features(5) for details.
scan: scrub canceled on Sat Mar 1 11:57:40 2014config:
NAME STATE READ WRITE CKSUMtank01 ONLINE 0 0 0
mirror -0 ONLINE 0 0 0c3t0d0 ONLINE 0 0 0c3t1d0 ONLINE 0 0 0
errors: No known data errorsBackup Spool============a ./tank01/backup/db1/db1_20140301_030000.7z 16 tape blocksa ./tank01/backup/db2/db2_20140301_030000.7z 195 tape blocksa ./tank01/backup/db3/db3_20140301_030000.7z 11 tape blocksa ./tank01/backup/calendar/davical_20140301_030000.7z 928 tape blocksa ./tank01/backup/mail/mail_20140301_030000.7z 2511817 tape blocks.....a ./export/home/bob/..... excludeda ./export/home/bob/.thunderbird excludeda ./export/home/bob/somefile 23 tape blocksa ./export/home/alice/ 0 tape blocksBackup Log==========tar: ./etc/dev/.devname_lookup_door is not a file. Not dumpedtar: ./etc/dev/.devfsadm_synch_door is not a file. Not dumped
15 JASSPA MicroEmacs
JASSPA MicroEmacs (me) is my default editor and needs to be installed and set-up. The pre-built zeroinstall image is used.
hal% wget http://www.jasspa.com/development/me-standalone/\jasspa -me-SunOS5.10-i386 -20091212.gzhal% gunzip -c jasspa -me-SunOS5.10-i386 -20091212.gz > mehal% chmod a+x mehal% chmod a-w mehal% sudo cp me /usr/bin
Install spelling dictionaries and icons for the desktop, these are installed globally in /usr/share/jasspa/-spelling .
hal% cd /tmphal% wget http://www.jasspa.com/spelling/ls_engb.tar.gzhal% wget http://www.jasspa.com/spelling/ls_enus.tar.gzhal% wget http://www.jasspa.com/release_20060909/meicons -extra.tar.gzhal% sudo mkdir -p /usr/share/jasspa/spellinghal% cd /usr/share/jasspa/spelling
www.jasspa.comoi_setup v1.25 2015/08/16 11:39:06
91

OpenIndiana Small System Server Build16 TeXLive
hal% sudo tar zxvf /tmp/ls_engb.tar.gzhal% sudo tar zxvf /tmp/ls_enus.tar.gzhal% cd /usr/share/jasspahal% sudo tar zxvf /tmp/meicons -extra.tar.gz
Set up MicroEmacs as user and root, my preferred settings are:
hal% meM-x user -setupStart -Up: Edit = OFFStart -Up: Keyboard = BritishStart -Up: Language = BritishPlatform Fonts:Font Name = -*-clean -medium -r-*-*-*-130-*-*-*-*-*-*Platform Fonts: Fence Display = Always draw & jump on closePlatform Fonts: Scroll Bars = Wide with splitterPlatform Fonts: Color Scheme = Lumina
16 TeXLive
TeXLive is the LATEX Documentation System which typeset this document. To install then download thelatest release as an ISO image from http://www.tug.org/texlive/To mount an ISO image under Solaris
hal# lofiadm -a /export/home/bob/Downloads/texlive2012.iso
and list the ISO images
hal# lofiadm
then mount the ISO image
hal# mount -F hsfs -o ro /dev/lofi/1 /mnt
Check to ensure that Solaris understands the image
hal# df -k /mntFilesystem kbytes used avail capacity Mounted on/dev/lofi/1 512418 512418 0 100% /mnt
list the image
# ls /mnt
Then install TeXLive
hal# cd /mnthal# ./install -tl
From the menu then change the install location to /opt/texlive/2012 using the d option and then proceedto install.
pre-generating all format files (fmtutil -sys --all), be patient...donerunning package -specific postactionsfinished with package -specific postactions
See/opt/texlive /2012/index.html
for links to documentation. The TeX Live web sitecontains updates and corrections: http://tug.org/texlive.
TeX Live is a joint project of the TeX user groups around the world;
www.jasspa.comoi_setup v1.25 2015/08/16 11:39:06
92
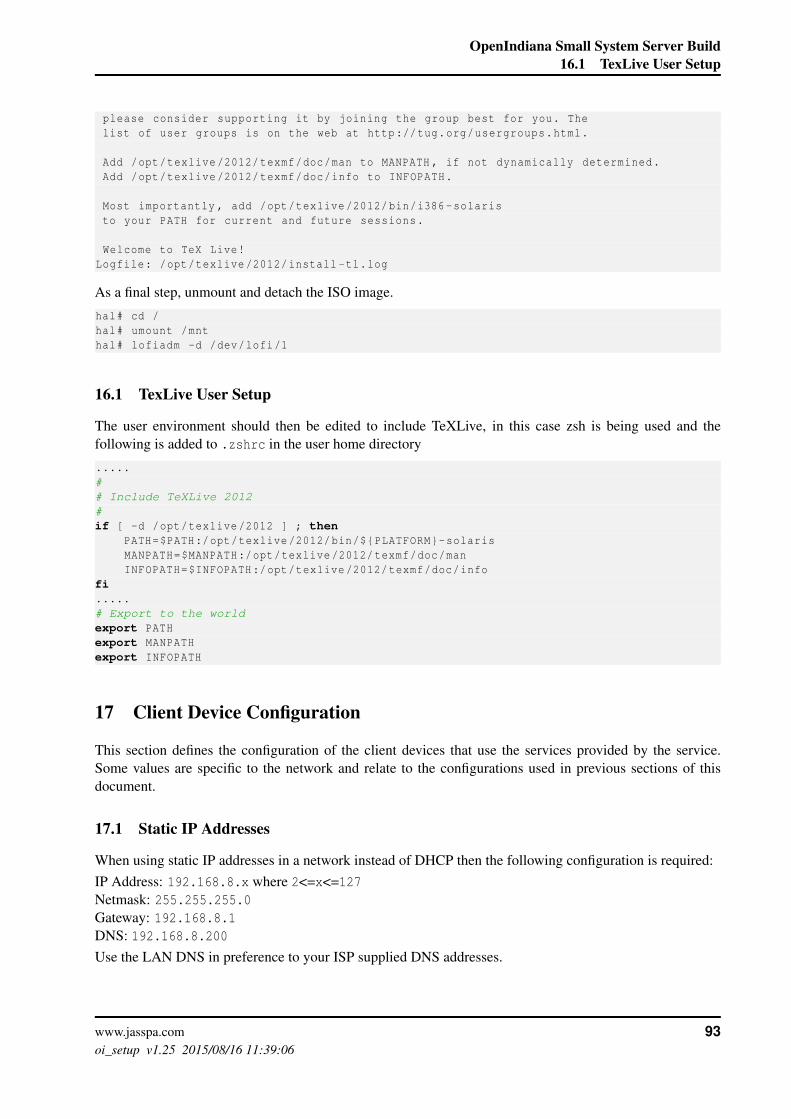
OpenIndiana Small System Server Build16.1 TexLive User Setup
please consider supporting it by joining the group best for you. Thelist of user groups is on the web at http://tug.org/usergroups.html.
Add /opt/texlive /2012/texmf/doc/man to MANPATH , if not dynamically determined.Add /opt/texlive /2012/texmf/doc/info to INFOPATH.
Most importantly , add /opt/texlive /2012/bin/i386 -solaristo your PATH for current and future sessions.
Welcome to TeX Live!Logfile: /opt/texlive /2012/install -tl.log
As a final step, unmount and detach the ISO image.
hal# cd /hal# umount /mnthal# lofiadm -d /dev/lofi/1
16.1 TexLive User Setup
The user environment should then be edited to include TeXLive, in this case zsh is being used and thefollowing is added to .zshrc in the user home directory
.....## Include TeXLive 2012#if [ -d /opt/texlive /2012 ] ; then
PATH=$PATH:/opt/texlive /2012/bin/${PLATFORM}-solarisMANPATH=$MANPATH:/opt/texlive /2012/texmf/doc/manINFOPATH=$INFOPATH:/opt/texlive /2012/texmf/doc/info
fi.....# Export to the worldexport PATHexport MANPATHexport INFOPATH
17 Client Device Configuration
This section defines the configuration of the client devices that use the services provided by the service.Some values are specific to the network and relate to the configurations used in previous sections of thisdocument.
17.1 Static IP Addresses
When using static IP addresses in a network instead of DHCP then the following configuration is required:IP Address: 192.168.8.x where 2<=x<=127Netmask: 255.255.255.0Gateway: 192.168.8.1DNS: 192.168.8.200Use the LAN DNS in preference to your ISP supplied DNS addresses.
www.jasspa.comoi_setup v1.25 2015/08/16 11:39:06
93

OpenIndiana Small System Server Build17.1 Static IP Addresses
17.1.1 OSX Lion DNS server priority
You do not need this fix if the DHCP server includes only the LAN DNS server.In OS X v10.6 and later the search order is dynamic, this can cause problems with local DNS over-ridesbeing resolved from the WAN rather than LAN which results in local server names becoming unresolved.To solve the problem then one could provide one DNS of the local server only.My preferred solution is described here:http://reviews.cnet.com/8301-13727_7-10471471-263.htmlwhich is reproduced here:To search DNS servers in a strict order in Mac OS X v10.6.3 or later. Making this change will result in DNSservers being tried in the specified search order for all queries, even if a server is not responsive. This mayaffect performance and reliability.Log in as an administrator and back up the mDNSResponder.plist file. To do this open a terminal (in/Applications/Utilities) and execute the following command on a single line:
sudo mv /System/Library/LaunchDaemons/com.apple.mDNSResponder.plist/System/Library/com.apple.mDNSResponder.plist_previous_LaunchDaemon
NOTE: That Apple’s article says to use mv, but you should use cp in this command. Alternatively, just go tothe mentioned folder via the Finder and copy the file to an alternate location.)Close the Terminal and open the com.apple.mDNSResponder.plist file in a text editor, the file is locatedin /System/Library/LaunchDaemons/. Locate the following key in the file:
<key>EnableTransactions </key><true/>
</dict >
Between the last <true/> and </dict>, add the following lines:
<key>StrictUnicastOrdering </key><true/>
Save the file, open a Terminal and then restart mDNSResponder using the following two commands:
sudo launchctl unload /System/Library/LaunchDaemons/com.apple.mDNSResponder.plistsudo launchctl load /System/Library/LaunchDaemons/com.apple.mDNSResponder.plist
17.1.2 OSX Lion DNS Search Domains
In Lion then the normal DNS search domain does not work as one might expect and short DNS names donot work. This may be fixed by reference tohttp://www.eigenspace.org/2011/07/fixing-osx-lion-dns-search-domains/which is reproduced here:Make a backup of /System/Library/LaunchDaemons/com.apple.mDNSResponder.plist from the com-mand line:
sudo cp /System/Library/LaunchDaemons/com.apple.mDNSResponder.plist \/System/Library/LaunchDaemons/com.apple.mDNSResponder.plist.original
Edit com.apple.mDNSResponder.plist - it is a plain text file, so use whatever text editor you have handy.Do not forget to use sudo.
sudo vim /System/Library/LaunchDaemons/com.apple.mDNSResponder.plist
Add <string>-AlwaysAppendSearchDomains</string> after line 16
www.jasspa.comoi_setup v1.25 2015/08/16 11:39:06
94

OpenIndiana Small System Server Build17.2 Mail Server
13 <key>ProgramArguments </key>14 <array >15 <string >/usr/sbin/mDNSResponder </string >16 <string >-launchd </string >17 <string >-AlwaysAppendSearchDomains </string >18 </array >
Now unload and reload the mDNSResponder service:sudo launchctl unload -w /System/Library/LaunchDaemons/com.apple.mDNSResponder.plistsudo launchctl load -w /System/Library/LaunchDaemons/com.apple.mDNSResponder.plist
17.2 Mail Server
The mail server is available on the intranet (local) and internet (global)SMTP: www.mydomain.co.uk:465 - SSL with plain authentication user/passwordSMTP: www.mydomain.co.uk:587 - STARTLS with plain authentication user/passwordIMAP: www.mydomain.co.uk:993 - SSL with plain authentication user/passwordUse SSL with password authentication for both services. The outgoing password is the same as the incoming.This is a relatively standard mail server configuration and is supported with most mailers such as Thunder-bird, Outlook, OS-X, iOS etc. On Android K-9 Mail may be used as a mail client.
17.3 Calendar
A CalDAV Calendar client connects to the server as follows:https://www.mydomain.co.uk:8443/user/calendar
Where user is the username, a password is required. Multiple calendars may be subscribed to if accesshas been granted, including calendar sharing. On Apple devices (OS-X, iOS) then the pathname /user/-calendar is not required and the system will locate this based on the user name.
17.4 Addressbook
A CalDAV Calendar client connects to the server as follows:https://www.mydomain.co.uk:8443/user/addressbook
Where user is the username, a password is required. On Apple devices (OS-X, iOS) then the pathname/user/addressbook is not required and the system will locate this based on the user name.On Android CardDAV Sync Free may be used to download your address book to the phone.
17.5 WebDAV
A WebDAV client connects to the server as follows:https://www.mydomain.co.uk:8081/dir
Where /dir is optionally specified if the WebDAV server is configured to restrict users to specific locationson the server. A username and password is required.The above syntax is supported natively on OS-X (Finder=>Go=>Connect to Server).For Microsoft Windows the application BitKinex available from WWW does a good job for uploadingcontent.On iOS then WebDAV is supported natively in Pages, Numbers and Keynote. The WebDAV Navigatorapp is a free client application which can be useful.
www.jasspa.comoi_setup v1.25 2015/08/16 11:39:06
95

OpenIndiana Small System Server Build17.6 WebServer
The WebDAV service may be opened with a regular web browser using the aforementioned URL for readingand content download.
17.6 WebServer
Web services may be available with/without SSL, depending on the configurationhttp://www.mydomain.co.uk - Without SSLhttps://www.mydomain.co.uk - With SSL and possibly password authentication
17.7 DAViCal Administrator
Administrator access for DAViCal from machine hal only using a web browser.https://www.mydomain.co.uk:8008
17.8 Printing
Printing may be performed via IPP, the DNS and mDNS configuration should allow the printers to be auto-matically located on OSX and iOS using Bonjour and Airprint.For Microsoft Windows devices then hal.mydomain.co.uk:631 may be used for printing, the correctprinter drivers should be installed.For iOS Airprint then there are a couple of issues as follows:
• Disable duplex when printing otherwise nothing happens (iOS issue)
• Pictures are not scaled to a single sheet. I think this is a CUPS issue and the default in later versionsof CUPS is to scale an image to fit the page.
• For iOS 7 then mDNS must be enabled, in addition then the DNS/mDNS definition must minimallyinclude URF=DM3. The iOS 6 constraints also apply.
• for iOS 6 then the DNS definition pdl=... must include image/urf which must also be handled inthe CUPS configuration (later releases of CUPS include this by default).
17.9 CUPs Print Server Administration
Administration of the CUPs Server from a web browser:http://hal.mydomain.co.uk:613 - from the LANhttp://localhost:613 - from the global zoneVisibility will depend on the server configuration.
17.10 Samba
Samba file systemsmb://hal.mydomain.co.uk/user - LANsmb://hal.local/user - When mDNS is enabledThe above syntax is supported on OS-X (Finder=>Go=>Connect to Server).From iOS then the FileBrowser(FB) app may be used to connect to a SMB share.Windows natively supports SMB.
www.jasspa.comoi_setup v1.25 2015/08/16 11:39:06
96

OpenIndiana Small System Server Build17.11 Samba Administration (SWAT)
17.11 Samba Administration (SWAT)
Administration of Samba from a web browser:http://hal.mydomain.co.uk:901 - from the LANhttp://localhost:901 - from the global zoneVisibility will depend on the server configuration.
17.12 SSH
If SSH has been enabled on the network then the server may be accessed as follows:OS-X: ssh -X -Y -l user hal.local - Using mDNSOS-X: ssh -X -Y -l user hal.mydomain.co.uk - Using DNS*NIX: ssh -X -l user hal.local - Using mDNS*NIX: ssh -X -l user hal - If not using mDNS*NIX: ssh -X -l user hal.mydomain.co.uk - Using DNSOn iOS then the iSSH app may be used to connect and login to the server.The SSH service has to be enabled on the server.
18 Conclusion
Some 18 months from commencing this project then I can say I have very few regrets over the selection ofHP Microserver hardware and OpenIndiana operating system environment.OpenIndiana has been extremely solid. Writing this then the up time is 260 days, the last time the systemwas re-booted was to replace a failed system disk.
hal% uptime2:14pm up 260 day(s), 4:06, 1 user , load average: 0.05, 0.04, 0.04
The original system was installed with OpenIndiana oi_151a5 which was upgraded to oi_151a7 when thesystem disk was replaced.Setting up the system from scratch was quite time consuming and took some 2 weeks part-time to get thesystem running with all of the services required with a few mistakes along the way and a lot of web searching.Installation is by no means a point and click operation but the time spent on correctly setting up the systemis time saved later as the administration has been virtually zero and only forced through disk failures.The advantages of using ZFS are huge, witnessed firsthand by the disk failures that have occurred. It isdifficult to comprehend the reliability of any system if there is any danger that a single bit in an executablebinary or data file becomes corrupted which will ultimately affect the running system and cause a mystifyingcrash or to exhibit strange behaviour. ZFS protects the system and easily allows the failed storage to beremoved and replaced immediately (provided of course one watches out for a fault).For the period then the savings in electricity consumption moving from a SunBlade 2500 to HP Microserverhave completely paid for the system as shown in Figure 8 (graph produced on iOS by Meter Readings).
www.jasspa.comoi_setup v1.25 2015/08/16 11:39:06
97

OpenIndiana Small System Server Build18 Conclusion
Figure 8: Power consumption for the period
www.jasspa.comoi_setup v1.25 2015/08/16 11:39:06
98