operation manual cloud-based p1775
TRANSCRIPT

201 Daktronics DriveBrookings, SD 57006-5128www.daktronics.com/support800.325.8766
VENUS® CONTROL SUITEOPERATION MANUAL
CLOUD-BASEDP1775DD4736661
Rev 105 October 2020

Copyright © 2020All rights reserved. While every precaution has been taken in the preparation of this manual, the publisher assumes no responsibility for errors or omissions. No part of this book covered by the copyrights hereon may be reproduced or copied in any form or by any means—graphic, electronic, or mechanical, including photocopying, taping, or information storage and retrieval systems—without written permission of the publisher.Daktronics trademarks are property of Daktronics, Inc. All other trademarks are property of their respective companies.

i
1 Introduction .........................................1Product Information ..................................1Software Overview ....................................1
Displays ...................................................1Features ...................................................1
Media Library .......................................2Playlists ..................................................2Dashboard ...........................................2
Access .........................................................2User Menu ...................................................3
Switch Accounts .....................................3My Profile .................................................3About .......................................................4Logout ......................................................4
2 User Interface—Standard Features ...5Main Menu .................................................5Dashboard .................................................5
Recently Played Media .........................6Device Connectivity ..............................6
Media ..........................................................7Media Library ..........................................7
New Media ..........................................7Media Management ..........................7Image Preview ....................................8
Shared Media .........................................8Playlists ......................................................10
Playlist Transitions .................................11Shared Playlists .....................................11
Advanced Scheduling with Advertisers ..........................................11Simple Scheduling with Display Owners ...............................................12
Sales ..........................................................12Sales for a Single Display .....................13Sales for Multiple Displays ...................14
Accounts ..................................................14Filters and Tags .........................................15
Filters ......................................................15Tags ........................................................15
3 Content Creation ..............................17General Recommendations ..................17
Image Specifications ...........................17Video Specifications ............................17
Web Editor App .......................................18Create a New Presentation .................18Editing a Presentation .........................19
Adding a Textbox ..............................19Adding Media ...................................20Adding Date/Time Element .............21
Slides Tab...............................................22Open Existing Presentation ..................22
Tag and Associate Media Files ..............23Download Media Files ............................24Delete Media Files ...................................24
4 Content Scheduling ..........................25Standard Playlist.......................................25
Create a Standard Playlist ...................25Configure Standard Playlist Properties ... ................................................................26Manage Displays/Zones in a Playlist ..26Manage Playlist Media ........................27Manage Playlist Item Constraints .......28Activate/Inactivate a Standard Playlist . ................................................................28
Overrides ..................................................28Create an Override ..............................28Configure Override Properties ............28
Synchronized Playlists ..............................30Create a Synchronized Playlist ...........30
Manage Rows ...................................31Manage Columns .............................32Manage Content ..............................32
Overrides and Synchronized Playlists .33Default Playlist Mode ..............................34Playlist Validation .....................................34Scheduling ................................................34Delete a Playlist ........................................34
5 Reporting App ...................................37Proof of Play Report.................................37
6 Tools ...................................................39Alerts ..........................................................39Events ........................................................40Time Range Aliases ..................................41
Table of Contents

ii
Scheduled Content .................................42Content Approval ...................................42
Display Owners .....................................42Advertisers .............................................43
Fonts ..........................................................44Upload/Delete Fonts ............................45Font Families .........................................45Web Browser Compatibility .................45
7 User Interface—Administrative Features .............................................46Main Menu ...............................................46Script Library .............................................46
Select Brightness ...................................46Activate Primary or Backup Devices .47
Users ..........................................................48Create User Profile ................................48Delete User Profile.................................49Reset Password .....................................49
Displays .....................................................49Add a Display .......................................50Configure a Display ..............................50Configure Associated Display Interfaces and Video Processors ........53Add a Layout ........................................53Configure AMBER Alerts .......................54Configure IPAWS Alerts for an Account . ................................................................54Activate/Inactivate IPAWS Alerts for a Display ...................................................55Copy a Display(s) .................................56Troubleshoot a Display .........................57
Reset the Display ...............................57Update the Display ...........................57Move Displays Between Accounts .57
Settings ......................................................588 Layout Creation ................................59
Create a Layout ......................................59Add a Zone ..............................................59Create a Zone View ................................61Manage Zone Order ...............................61Duplicate a Zone .....................................62Edit and Save a Layout ...........................62Monitor a Zone .........................................62
Manage a Layout ...................................63Upload a LAYOUT File ..............................63Download a Layout File ..........................64
9 Troubleshooting ................................65Password Recovery .................................65
Forgot a Password ................................65Reset a Password ..................................65
Change a Password ................................66Administrative Level Access ...............66Standard or Basic Level Access ..........66
Content Plays Incorrectly .......................66Associate a Playlist with a Display ......66Select the Time Zone ............................67Associate Content with an Account ..67
Daktronics Contact Information ............67

This page intentionally left blank.

Introduction1
1 IntroductionThis manual helps Daktronics customers operate Venus® Control Suite and all related apps. Review all of the information in this manual to understand the features that Venus® Control Suite offers.
This manual assumes the user has a basic working knowledge of personal computer operations such as using menus and folders. Terms that describe commonly used computer operations are used frequently in this manual.
Product InformationVenus® Control Suite is a control system software package composed of apps that provide interactive display control. Depending on installation method, users can access Venus® Control Suite from either a hosted server (remote, cloud-based control) or from a local computer server (local control). This manual will address the hosted version of Venus® Control Suite. Venus® Control Suite enables the user to import, create, edit, and organize display content in addition to managing accounts and running reports.
Venus® Control Suite has evolved to offer a set of apps that offers distinct functionality to customers in separate packages that can be added to the base functionality of the software.
The app launcher can be accessed via the app menu button found at the top right of the screen. Refer to Figure 1. The following is a list of current apps that can be accessed via the app menu:
• Venus Control Suite
• Web Editor
• Reporting
• Data Studio (via a package upgrade)
Software OverviewDisplaysA display is the central element in Venus® Control Suite. It represents both the LED display and the connected control equipment (players, video processors). Displays are targeted by playlists and reports, and the status of displays are shown on the Venus Control Suite Dashboard. Displays can be configured to change how and when content is shown.
FeaturesThree primary features manage displays and content after initial setup and launch:
• Media Library: a repository of all available content either uploaded or created with Venus® Control Suite
• Playlists: a collection designed to deliver scheduled content to displays
• Dashboard: a current view of displays associated with the account and content playing on the displays
The availability of some features depends on the display technology in use.
Figure 1: App Launcher

Introduction2
Media LibraryThe Media Library serves as a repository for storing and managing media files. Venus® Control Suite accepts several different media file formats and provides a web-based platform for generating content. Media files need to be stored in the Media Library before scheduling any content in a playlist. For more information on the Media Library, refer to Media (p.7) and Content Creation (p.17).
PlaylistsPlaylist is a collection of media files organized to play on specific displays in a specified order. Before content can be delivered, the displays on the Dashboard need to show that the devices are connected and ready for content. For more information on setting up a playlist, refer to Content Scheduling (p.25).
DashboardAfter logging in to Venus® Control Suite, an initial screen opens showing display tiles for each display in the system. This screen is the Dashboard. Refer to Figure 2 and Dashboard (p.5) for more information.
Figure 2: Dashboard
AccessWhile Venus® Control Suite runs on many different browsers and devices, use the latest versions of Google Chrome®, Mozilla Firefox®, Microsoft Edge® , or Apple Safari® for the best experience.
To access the hosted version of the software, go to https://venus.daktronics.com.
Note: The https in the above URL denotes a secure website.
To access the local version of the software, double-click the Venus® Control Suite icon. Refer to Figure 3.
After login, click Menu in the upper-left corner of the screen to expand the main menu. Main menu items are listed in Main Menu (p.5). For information on administrative menu items, refer to Main Menu (p.46).
Figure 3: Shortcut Icon

Introduction3
User MenuThe name or email address of the currently logged-in user is displayed in the upper-right corner of Venus® Control Suite. Click this name to open four menu items: Switch Accounts, My Profile, About, and Logout. Refer to Figure 4.
Switch AccountsCreate sub-accounts for advertisers or locations from within the main system account. These accounts are organized in a child-parent structure with specific sub-accounts under the main system account.
Note: Account structure and scheduling options may vary depending on whether the Simple or Advanced scheduling mode is used in a specific system. Contact Daktronics Sales for more information on account and scheduling services.
Click Switch Accounts and then a sub-account to create and manage playlists specific to that account. Playlists created in a sub-account play only on displays that are configured within the sub-account. When working within a sub-account, that account name and the user’s role are listed in a blue bar across the top of the screen. Refer to Accounts (p.14) for more information.
• In a Simple Scheduling environment, all media files are created in the main account and are available for display within a sub-account under Playlists .
• In an Advanced Scheduling environment, media files associated with a sub-account are only available for display in a playlist associated with that same sub-account under Playlists .
My ProfileClick My Profile to open the current user’s profile information. My Profile opens with the same My Information and Additional Information fields discussed in Users (p.48).
Note: Only the administrator who manages the user profile is able to change information in the My Information section.
To update the current user profile, follow these steps:
1. Click the username in the upper-right corner, and then click My Profile.
2. Type the required information in the Additional Information section.
3. Click Save.
Figure 4: Account Options

Introduction4
AboutThe About tab provides Daktronics contact information and links to access the knowledge base of Venus® Control Suite information, submit a service request, or contact a Daktronics trainer. Refer to Figure 5 and Daktronics Contact Information (p.67).
• Read the manual opens the latest version of this manual.
• Search our knowledge base searches the knowledge base articles on the Daktronics website. Type a question or relevant keywords into the search bar at the top, or scroll down the list of common questions for Venus® Control Suite.
• Request assistance through MySupport contacts Daktronics Customer Service for non-urgent needs that require assistance.
• Contact a trainer provides specific “how-to” help or submits a request for an email or call back from a trainer.
• Open Source attributions views open source libraries/licenses used to build Venus® Control Suite.
• Venus® Version Information lists information about the current Venus® system.
LogoutClick the Logout button to log out of the user and return to the login screen.
Figure 5: Contact Information

User Interface—Standard Features5
2 User Interface—Standard Features
Main MenuThe Venus® Control Suite main menu panel is on the left side of the screen. Click Show Menu in the upper-left corner of the screen to expand the menu panel.
Certain views appear different on a mobile device from those shown in this manual. Refer to the table below for the standard user menus:
DashboardThe Dashboard shows a tile for each display in the current account and in any sub-accounts. These display tiles show account names for displays owned by sub-accounts, connection information, and thumbnails of the scheduled content. Refer to Figure 1.
If the Dashboard shows more than 10 displays, the display tiles collapse and a filter menu opens on the right side of the screen. To reduce the number of displays shown on the dashboard, select a filter condition such as a display dimension, display owner, or tag. For more information to configure a display, refer to Displays (p.49). For information on adding display tags, refer to Filters and Tags (p.15).
Note: The Account display filter only appears in a hosted environment.
Menu Item Description
Shows status tiles for each display and any associated devices such as players, video processors, or web cameras
Opens the Media Library where uploaded media files and generated presentations are tagged, stored, and assigned to an account
Creates a playlist of media files to play in a specified order on a selected display
Configure scripts to modify brightness and active/backup status.
Creates new accounts for advertisers and associates content with a specific account
Opens a list of all users and shows each user’s role
Generates the list of associated displays and facilitates the tagging of displays
Contains supplemental features used in conjunction with primary features available in the main menu
Contains supplemental features used in conjunction with primary features available in the main menu

User Interface—Standard Features6
Indicator icons at the bottom of each display tile provide information about recently played media , device connectivity , and web cameras (if available). Refer to Figure 6. For collapsed display tiles, click any indicator icon to open an expanded tile.
Recently Played MediaThe Recently Played Media view provides a thumbnail of media scheduled for a display. Click Recently Played Media from the display tile to access this view.
Although updated content is visible as a thumbnail on the status tile for each display, this is not a live video. Both the recently played media files and the live webcams have a refresh rate equal to the image duration set while following the steps for Configure a Display (p.50).
Device ConnectivityThe Device Connectivity view provides detailed information on the devices connected to Venus® Control Suite. Click Device Connectivity from the display tile to access this view.
Any display status information populates within the display tile along with a coordinating indicator icon. Refer to Figure 7.
Figure 7: Display Status Information
The icon on the left border of each display tile provides a visual indicator of device connectivity without having to be in the device connectivity view. Each icon indicates a different state:
• A device has never been connected or associated to Venus® Control Suite.
• A device error requires attention.
• Content is being delivered to one or more devices.
Note: If content is being delivered to one of the display devices but another device has a communication error, the Communication Error and Download in Progress icons appear along the left border.
• No Icon: The display device is connected.
Note: For collapsed tiles, a green left border indicates that the display device is connected.
Figure 6: Display Tiles—Collapsed

User Interface—Standard Features7
The Last Download Complete message within the device connectivity panel indicates whether content has been delivered to the sign and when that content was delivered.
Click the underlined status (Offline/Online) of the display device to go to the Display page and verify device status. Refer to Displays (p.49).
MediaMedia opens a Media Library for storing and managing media files. Several options appear at the top of the screen, along with a menu of drop-down filters and tags on the right side. Refer to Figure 8.
Figure 8: Media Library (List View)
Media LibraryAs shown in Figure 7, seven options are available at the top of the Media Library window for managing and viewing media files: Add New, Add New drop-down list, Tag and associate selected items, Media Management, Delete Selected Items, List View, and Card View.
New MediaClick Add New to start the media file upload wizard, and follow the on-screen instructions. The Add New drop-down list has one option to upload existing content, two options to design content, and one option to explore media kits offered by Daktronics. Refer to Figure 9. For more information on how to create and upload media files, refer to Section 3: Content Creation (p.17).
Note: Users can also drag one or more media files directly into the Media Library.
Media ManagementClick the tag to organize media files into categories with labels called tags and associate content with an existing account. For more information on how to tag media files, refer to Tag and Associate Media Files (p. 23).
Figure 9: Content Creation Options
Figure 10: Delete a Media File

User Interface—Standard Features8
Click the trash can to delete selected media files. Click Confirm to continue. Refer to Figure 10.
Note: The deletion of a media file associated with any playlist removes that media file from those playlists.
Arrange the media files in the Media Library in one of two ways: List View or Card View. The List View shows the media files as items in a column. Refer to Figure 11. The Card View shows the media files as cards with a background image and additional details. Refer to Figure 12. The default view is the List View.
Figure 11: List View Figure 12: Card View
Click either the thumbnail image from the List View or the card from the Card View to open a media shelf with details about the media file. File details include account association, tags, file type, dimensions, file size, modification date, user who uploaded the file, and the account where the user uploaded the file. From this media shelf, the user can associate the file with an account, manage file tags, or delete the media file from the Media Library.
Note: Users viewing inherited media cannot associate the file with an account, manage file tags, or delete the file. Download the media file to edit the file. Refer to Shared Media (p.8) for more information on inherited media.
Image PreviewClick the thumbnail image from the media shelf to preview the image in an overlay. Click anywhere on the screen to close the overlay. This feature is also available in the Playlist media shelf and the Scheduled Content schedule details.
Note: Previews are presented in their native resolution. Presentations are previewed as a thumbnail of the first slide. Previews of videos are unavailable.
Shared MediaAccounts have the option to share media directly with sub-accounts. Any media uploaded in the current account can be visible to sub-accounts. The account name above the file name indicates that the media item is inherited from a linked account. The account name under the file name indicates account association. Refer to Figure 13.
Note: Accounts that want to edit inherited media must download the media into their own account. The media becomes uploaded media for that specific account. To download inherited media, click the media item and then Download.

User Interface—Standard Features9
If a display owner associates a media file with an advertiser account, the media file is automatically shared with the advertiser account. If an advertiser uploads media, it is automatically associated with the advertiser account.
Any media uploaded directly to the current account has the Uploaded filter option. Any media uploaded from a main account has the Inherited filter option. Filter Uploaded and Inherited media by selecting one of the Filters options under Added to Library. Refer to Figure 13. To show all, clear any selections from the filter.
Figure 13: Shared Media Library (Card View)
To change media sharing options, follow these steps:
1. Go to Settings and then click Account.
2. Select a media management option; refer to Figure 14:
• Click Automatic to share media automatically with all linked accounts. This is the default option for Simple Scheduling accounts.
• Click Manual and then Confirm to disable automatic sharing media with linked accounts. This is the default option for Advanced Scheduling accounts.
Note: Manual mode requires the account owner to share media selectively with specific accounts. Also, manually shared media no longer appears in the Media Library but remains in any previously scheduled playlists until manually removed from the playlist.
To share media selectively with a specific account, follow these steps:
1. Go to Media .
2. Select one or more specific media files from the Media Library to share with linked accounts.
3. Click Media Management . This button is only available if Media Management Mode is Manual in Settings > Account.
4. Select one or more accounts; refer to Figure 15.
Figure 14: Change the Media Sharing Option
Figure 15: Select an Account

User Interface—Standard Features10
5. Click Confirm. The Shared Media icon under the media dimensions indicates that the media is shared with one or more accounts.
To clear media from a specific account, follow these steps:
1. Go to Media .
2. Click Media Management from the Media Library. This button is only available if Media Management Mode is Manual in Settings > Account.
3. Clear one or more specific media files from Media Management to remove from a linked account. To remove media from more than one account, click Back , and then clear media files in another account. All currently shared media files are selected by default. Use the Search box to search through the media files. Refer to Figure 16.
4. Click Confirm after clearing all the media files.
PlaylistsA playlist is a collection of media files organized to play on a display in a specified order. Playlists enables the user to create, edit, or delete playlists. Once a playlist is created, it is assigned to play on one or more displays at a scheduled time.
Users can create three types of playlists: Overrides, Synchronized Playlists, and Standard Playlists. Each playlist type plays content on a respective target (display or zone) in a prioritized order. If multiple playlists have overlapping schedules, the playlists play based on priority. The following is a more detailed description of each type:
• Override: first priority; only affects the displays selected for the override. Refer to Overrides (p.28) for more information.
• Synchronized Playlist: second priority; supports different content to play across multiple displays simultaneously presented in a grid format. Refer to Synchronized Playlists (p.30) for more information.
• Standard Playlist: third priority; a single playlist of media for one or more displays. Refer to Standard Playlist (p.25) for more information.
Playlist information/status is available from the list located on the Playlists page. The exclamation point indicates that a playlist has expired or lacks displays or media items. Refer to Figure 17.
Figure 17: List of Playlists
Figure 16: Clear Media from a Linked Account

User Interface—Standard Features11
Playlists provides three options: add, tag, and delete playlists. To create and manage playlists, refer to Section 4: Content Scheduling (p.25).
To tag a playlist, follow these steps:
1. Select one or more playlists from Playlists . Click Select All to tag all playlists.
2. Click tag in the toolbar.
3. Select one or more tags to categorize the playlist(s). Type in the text box and press Enter or click the plus sign to create a new tag. Create as many tags as needed.
4. Click Save.
To delete a playlist, follow these steps:
1. Select one or more playlists from Playlists . Click Select All to select all playlists.
2. Click the trash can in the toolbar.
3. Click Confirm to delete the playlist(s), or click Cancel to return to Playlists .
Playlist TransitionsPlaylists may have transitions applied to them based on display settings. To verify if a display has transitions enabled, refer to Configure a Display (p.50).
Playlists may also have transitions applied directly to individual playlist items if display transitions are enabled. To apply a transition to a playlist item, refer to Manage Playlist Item Constraints (p.27).
Note: If a default transition is applied to a display and a playlist item has a different transition, the playlist item transition is used instead. If a playlist item has a transition applied but the display does not allow transitions, the transition does not play on the display.
Shared PlaylistsThe account name above the playlist title indicates association with a display owner’s account. Refer to Figure 18.
Figure 18: Shared Playlist in an Account
Advanced Scheduling with AdvertisersDisplay owners can associate playlists with advertiser accounts. Any associated playlist is visible in the advertisers’ Playlists .
The Shared Playlist icon below the playlist title indicates that the playlist is shared with an advertiser.
Note: Advertisers cannot edit a playlist shared with the account. However, advertisers can create their own playlists, add their own media, and add displays that have sales associated with the account.

User Interface—Standard Features12
Simple Scheduling with Display OwnersDisplay owners can add displays from other display owners to a playlist. The playlist is visible in the other display owners Playlists .
Note: Display owners cannot edit a playlist owned by another display owner.
Display owners can choose not to play specific playlist items that may not be relevant to them. These playlist items will not play on any playlists associated with the current account.
Click to opt out of a specific playlist item. Click to opt in to a specific playlist item. Refer to Figure 19.
Figure 19: Shared Playlist with Opt-Out
SalesSales is available only in Advanced Scheduling mode. This option shows blocks of display time (exposures) for a selected display that can be sold to an advertising account. Each hour of display time is divided into a number of slots as defined by the display configuration under Displays (p.49).
Note: Scheduling content in the Sales menu must match the schedule in the Playlist menu. If a playlist is set to play on dates outside of the Sales grid schedule, the content will not play.
Each slot can be divided into a percentage ranging from 0.5-100 percent and assigned to an account.
Note: Sales with percentages of less than 5 are totaled and summarized into one slot within View Details. Click the slot to open the sales dialog that lists all of the individual sales.
If a display owner creates a sale for an advertiser account on a specific display, the advertiser can add that display to a playlist. Refer to Shared Playlists (p.11) for more information.

User Interface—Standard Features13
Figure 20: Sales Menu
Sales for a Single DisplayTo create a sale, follow these steps:
1. Go to Sales . Sales opens with a list of displays. Refer to Figure 20.
Note: If the account only has one display, Sales opens with the list of time slots for that display.
2. Click the desired display. The list of time slots configured for that display opens.
3. Click Add New to create a sale for a specified range of days. Any open time slot can also be selected individually. New Sale opens.
4. Choose an account from the Account drop-down list. Refer to Figure 21.
5. Choose a Start Date and End Date.
6. Select an Ad Grid Slot. The first available slot is selected by default.
7. Type the Slot Percentage (0.5-100 percent). The maximum slot percentage is available by default. The number in the Exposures Per Day field auto-populates and is estimated based on the chosen slot percentage and image duration.
8. Click Save. The list of time slots opens again.
9. Repeat Steps 3-8 to fill remaining slots.
10. Click Done.
To delete a sale, follow these steps:
1. Click the desired slot in the ad grid. Edit Sale opens.
2. Click Delete.
3. Click Confirm to delete or Cancel to return to Edit Sale.
Figure 21: Add a New Sales Item

User Interface—Standard Features14
Sales for Multiple DisplaysDisplay owners with a network of displays can create a new sale across multiple displays without the need to make the same sale for each display.
To create a sale for multiple displays, follow these steps:
1. Go to Sales . Sales opens with a list of displays. Refer to Figure 20.
2. Select the desired displays. Click Select All to select all displays.
3. Click View Sales to create common sales. The list of common time slots configured for those displays opens in a composite ad grid. Common sales are labeled by the account name. Click View Details to view sales not common among the selected displays. Refer to Figure 22.
4. Click Add New to create a sale for a specified range of days. Any open time slot can also be selected individually. New Sale opens.
5. Choose an account from the Account drop-down list. Refer to Figure 23.
6. Choose a Start Date and End Date.
7. Select an Ad Grid Slot. The first available slot is selected by default.
8. Type the Slot Percentage (0.5-100 percent). The maximum slot percentage is available by default. The number in the Exposures Per Day field auto-populates and is estimated based on the chosen slot percentage and image duration.
9. Click Save. The list of displays opens again.
10. Repeat Steps 4-8 to fill the remaining slots.
To delete a sale for multiple displays, follow these steps:
1. Click the desired slot in the composite ad grid. The list of sales for that slot opens.
2. Click the trash can next to the sale or click Delete All.
3. Click Confirm to delete or Cancel to return to the list of sales.
AccountsUse Accounts to create accounts for specific advertisers or display owners.
• Advertiser accounts allow display owners to associate playlists with an advertiser or to associate a media file with the account to run a proof of play report for an advertiser.
Note: The Dashboard, Displays, Reports, Sales, Settings, and Scripts pages are not available for advertiser accounts.
Figure 22: Time Slots for Multiple Displays
Figure 23: Add a Group Sales Item

User Interface—Standard Features15
• Display owner accounts manage specific displays, media, scheduling, and other accounts.
To create an advertiser or display owner account, follow these steps:
1. Go to Accounts .
2. Click Add New.
3. Type the name of the account in the Account Name text box. Refer to Figure 24.
4. Select the Account Type: Advertiser or Display Owner.
5. Click Save.
Note: New accounts may also be created when uploading a new media file in the Media Library or when adding a new sales item in the Sales menu.
Filters and TagsFilters and tags are available across multiple features to provide unique sorting options within each feature.
FiltersThe Filters section appears on the right side of the window. Some menus require 11 or more items for the filter to appear. Filters provide users with sorting options determined by parameters specific to a menu. For example, Media Library sorting options in the drop-down list include media files listed by time frame added. Refer to Figure 25.
Some common filters include the following: sorting (chronological, alphabetical, recently modified), associated account, list item (media, playlist, display) owner, display dimensions, item type, and tags.
Note: After narrowing the list of items with any filter condition, click the red RESET button in the upper-right corner to return to the full list of items.
• Association: filters list items associated with an account (current or child account)
• Owner: filters list items owned by an account (current or parent account)
TagsTags are keywords used to categorize items (displays, events, media, playlists, scripts). These tags are flexible, user-defined keywords that may be used in any combination to organize groups of items. Tagged searches become more important as a list grows.
Tags created or selected in each list do not appear in any other tag cloud. Tags keep
Figure 24: Create an Account
Figure 25: Media Library Filters

User Interface—Standard Features16
groups of similar files together, organize content, and provide an easy way to search the list. After tags are assigned to an item, these tags may be used under the Tags option as search terms to retrieve categories of information.
If applicable, apply more than one tag to an item. For example, a media file for a summer truck sale can be tagged as truck, sale, and summer; this file is found after selecting any or all of these terms.
To use tags effectively, follow these guidelines:
• Ensure tags are specific, informative, and clear.
• Ensure tags are unique; there should not be two tags with the same meaning.
• Ensure tags are spelled correctly.
• Do not use punctuation or special characters.

Content Creation17
3 Content CreationUpload media files, also referred to as presentations, creative files, or content files, directly to the Venus® Control Suite Media Library. Use Daktronics Web Editor App to create media files.
All media files must be uploaded to the Media Library before they are used in a playlist. If sub-accounts exist under a main parent account, all media files should be created within the main account. These media files are accessible from any sub-account under the Playlists icon but cannot be edited within the sub-account.
General RecommendationsTo produce display content in Venus® Control Suite with the best quality and no distortion, use or create content with the specifications below.
Image Specifications
Image File Types Recommended File Format Acceptable File Formats
Content Studio JPEG PNG, BMP, TIF, GIF, PSD
Venus® Media Library PNG JPEG, BMP, Daktronics VMPF
Venus® Web Presentation PNG JPEG, BMP
• Images have a resolution of 72 dpi.
• Images have the color mode saved as RGB.
• Images have the same pixel dimensions as the display.
Video Specifications
Video File Types Recommended File Formats
Content Studio MPG, MPEG, MP4, MOV, WMV, Uncompressed AVI
Venus® Media Library MP4, MOV, Daktronics VMPF, Uncompressed AVI
Venus® Web Presentation MP4, MOV, Uncompressed AVI
• Videos are rendered at 29.97 fps.
• Videos are uncompressed, MPEG4, or H.264.
• Videos have a square pixel aspect ratio.
Note: QuickTime®/RLE file types (lossless format in Adobe® After Effects®) are not supported.
Refer to http://www.daktronics.com/venuslearning for guidelines to create effective digital content, such as the following:
• Text: Messages should be brief, simple, and legible with a clear font.
• Backgrounds: Backgrounds should have vibrant, saturated colors to attract attention; white backgrounds wash out images and can repel the eye at night.

Content Creation18
• Contrast: Messages should be easy to read; choose text and background colors with high contrast; text outlined in black or with a shadow increases readability if the contrast is low.
• Transitions: All transitions should be smooth and in a consistent style to avoid distracting from the message itself.
Web Editor App
Create a New Presentation1. Open Web Editor from the Apps Menu located in
the top right of the VCS landing page. Refer to Figure 26.
2. Click Create New Presentation from Web Editor’s opening menu or select New Presentation from the Web Editor menu. Refer to Figure 27.
3. Name the new presentation with your desired name and select a presentation size from the drop-down menu. Refer to Figure 28.
4. Once the presentation is named and sized, you can begin editing the presentation.
Figure 26: Web Editor in Apps Menu
Figure 27: Getting Started Menu Figure 28: Create New Presentation

Content Creation19
Editing a Presentation
Adding a Textbox1. From the Web Editor main menu, click the Add Textbox button .
2. Navigate to the Properties tab to alter the many elements of the textbox. Refer to Figure 29.
3. The Content section can be used to alter the text and background color of the textbox.
4. The Position section can be used to alter the size and position properties of the textbox.
Note: The size and position of the textbox can also be adjusted by clicking and dragging the textbox on the slide.
5. The Font section can be used to alter the font, font size, style, drop shadow, outline, and spacing of the text inside the textbox.
Figure 29: Web Editor Properties Menu for a Textbox

Content Creation20
Adding Media1. From the Web Editor main menu, click the Add Media button .
2. Navigate to the Properties tab to alter the properties of the media. Refer to Figure 30.
3. The Content section can be used to alter the type of media and background color of the media field.
4. The Position section can be used to alter the size and position properties of the image.
Note: The size and position of the media field can also be adjusted by clicking and dragging the field on the slide.
Figure 30: Web Editor Properties Menu for a Media Field

Content Creation21
Adding Date/Time Elements
1. From the Web Editor main menu, click the add
Date/Time Elements button .
2. Pick either Add Countdown or Add Date, Time or Temp. Refer to Figure 31.
3. Add Date, Time or Temp creates a dynamic element(s) that will display the date, time and/or temp. Select the desired options from the menu and click Set to add the element(s) to the slide. The Refer to Figure 32.
4. Add Countdown creates a dynamic element that will display a countdown timer to or from a selected time. Select the target date and time, format, count direction, time zone, and display style from the menu. Click Set to add the countdown element to the slide. Refer to Figure 33.
5. The Properties section can be used to alter background color, position, and font properties of both the date, time or temp and countdown elements. Refer to Figure 34.
Note: The size and position of the dynamic elements can also be adjusted by clicking and dragging the field on the slide.
Elements TabThe Elements tab lists all elements created for an individual slide of a presentation. These elements include all textboxes, media fields, date and time elements, and the slide. The list of elements descends from the top to the bottom layer.
Note: The elements can be dragged and dropped in the list to layer what elements can be seen above or below others.
Figure 31: Create Date/Time Element
Figure 32: Time or Temperature Field
Figure 33: Countdown Creation Figure 34: Web Editor Properties of Date/Time Elements

Content Creation22
The Elements tab is also used for a number of other functions:
• Lock/Unlock - Locks or unlocks the element in its current state
• Show/Hide - Shows or hides the element on the slide
• Duplicate - Duplicates the selected element
• Delete - Deletes the selected element
Slides TabThe Slides tab lists all slides in a presentation. The slides of a presentation can be arranged in the desired order by dragging and dropping the slide within the list. The duration of each of the slides can be set by clicking the duration timer and setting an appropriate time. Refer to Figure 35.
Note: Presentations will not play on displays if Animated Content is Off, a slide duration is less than the image duration, or a slide contains a video.
The Slides tab is also used for a number of other functions:
• Duplicate - Duplicates the selected slide
• Delete - Deletes the selected slide
Open Existing Presentation1. Open Web Editor from the Apps Menu located
in the top right of the VCS landing page.
2. Click Open Existing Presentation from Web Editor’s opening menu or select Open Presentation from the Web Editor menu. Refer to Figure 36.
3. Locate the desired presentation via the search and/or filters section(s) of the Open presentation menu. Refer to Figure 37.
4. You can make any alterations to the presentation once it is open.
Note: Remember to Save your presentation with the new alterations to ensure you keep the most recent version.
Figure 35: Slides Tab
Figure 36: Open Existing Presentation
Figure 37: Open Existing Presentation

Content Creation23
Tag and Associate Media FilesTag media during the file upload process or after the file is uploaded to the Media Library inside the Venus Control Suite App. During the multiple media file upload process, all the files are automatically selected by default and one or more tags can be applied to all files at once along with an associated account. If any file(s) should not be tagged or associated with an account, clear the check box beside the thumbnails.
Associate a media file with an account as a way to organize and filter content. Associate media files with a customer account to enable proof of play reports and to group media file plays by customer. Refer to Section 4: Content Scheduling (p.25).
For example, a summer truck sale media file can be tagged with general category terms and also associated with the specific car dealership account. This file would be found in searches for any of these tags or the account name. Refer to Accounts (p.14).
Only media files associated with a specific account are listed if that account name is selected from the Association drop-down list. The default for Association shows all media files including any unassociated with an account.
Only media files owned by a specific account are listed if that account name is selected from the Owner drop-down list. The default for Owner shows all media files including any owned by a parent account.
The Display Dimensions filter retrieves any media files (uploaded files or created presentations) that are the same size as a specific display.
To see which media files were added to the Media Library recently, the Added to Library filter shows files added in the past day, week, or month.
Narrow the list of media files in the Media Library by file type with the File Types filter. This filter selects images, videos, or presentation files. Refer to Figure 38.
To tag a media file during the upload process, follow these steps:
1. Go to Media . Media Library opens.
2. Click Add New or choose Upload Files from the Add New drop-down list. Upload Media opens.
3. Drag any desired media file(s) into the Upload Media window, or click Drop files or click here to upload to browse for saved files.
Note: By default, all uploaded media files are selected (check boxes to the left of the thumbnails) when they are uploaded. If the check box for a media file is cleared, it is uploaded to the Media Library but not tagged or associated with an account.
4. Click Next to associate and tag the selected media file(s) with an account. Refer to Figure 28. Tag and Associate Media opens as shown in Figure 39. For tag guidelines, refer to Filters and Tags (p.15).
Figure 38: File Type Filter
Figure 39: Tag and Associate Media Files

Content Creation24
5. Search and select an account to associate with the media file from the drop-down list if desired. Create a new account by choosing +Add New from the drop-down list. Refer to Accounts (p.14).
6. Select one or more tags to categorize the media file. Create a new tag by typing in the Tags text box and pressing Enter or clicking the plus sign .
7. Click Done.
After media files are uploaded, the same tag feature is also available via two other methods:
• Click the media file thumbnail in the Media Library to tag media files directly from the media shelf, and then follow Steps 5-7.
• Click Association under Filters in the Media Library, and then follow Steps 5-7.
Download Media FilesTo download media files from the Media Library, follow these steps:
1. Go to Media . The Media Library opens.
2. Click the thumbnail of the media file (image, video, or Content Studio file) to be downloaded. The media file information window opens.
3. Scroll down and click Download. The file downloads to the local computer.
4. Click the X in the upper-right corner of the media file window to exit back to the Media Library.
Delete Media FilesTo delete one or more media files, follow these steps:
1. Go to Media . The Media Library opens.
2. Select the media file(s) to be deleted.
3. Click the trash can at the top of the screen.
4. Click Confirm.

Content Scheduling25
4 Content SchedulingUse playlists to schedule content to play on a single display or multiple displays. Playlists organize media files to play in a specified order. Create playlist overrides to interrupt a running playlist and show an emergency message. For customers with displays in multiple accounts, playlists can only be created for displays located within the current account. For systems with Advanced Scheduling, playlists must be associated with an account, and advertising time slots must be scheduled in Sales .
Standard PlaylistSelect any standard playlist from the list to edit its content, change the display(s) where it plays, or edit the overall schedule. Individual playlist items also may be scheduled separately within a playlist. If a playlist is not needed, temporarily inactivate it or permanently delete it.
Create a Standard PlaylistTo create a standard playlist, follow these steps:
1. Go to Playlists .
2. Click Add New. The playlist creation page opens. Refer to Figure 40.
Note: In Advanced Scheduling mode, Playlist Association opens first; choose an account from the drop-down list to associate with the playlist.
3. Configure the playlist properties. Refer to Configure Standard Playlist Properties (p.26) for information on how to perform this step.
4. Add targets (displays/zones) and media as needed. Refer to Manage Displays/Zones in a Playlist (p.26) and Manage Playlist Media (p.27) for information on how to perform this step.
5. Adjust the scheduling parameters for individual playlist items if needed. Refer to Manage Playlist Item Constraints (p.27) for information on how to perform this step.
6. Click Save, or click the drop-down arrow then Save As to save a copy of the playlist. Save As inactivates the copy by default.
Note: An Unsaved changes indicator appears over the playlist title if the playlist contains any unsaved changes.
After Step 6, the playlist is delivered to the target(s) and will start to play according to the schedule set in Configure Standard Playlist Properties (p.26).
Figure 40: Standard Playlist Creation

Content Scheduling26
Configure Standard Playlist PropertiesTo configure playlist properties, follow these steps:
1. Click the title, active/inactive status, date range , days of week , time range , or playlist
mode indicators.
• The playlist is Active by default. Click Inactive to disable the playlist. Refer to Figure 41.
• The default is the current date without an end date. Select the Initial Start Date and Final End Date from the calendar drop-down list.
• The playlist inherits the Daily Time Range from the display. Click Set Custom Time Range to adjust the Daily Start Time and Daily End Time. Click > Add Time Range to add additional time ranges up to a maximum of 24. Click > Set Time Range Alias to add a preset time range.
• The default is determined by Scheduling Mode. Select a Playlist Mode or refer to Default Playlist Mode (p.34) to change the default.
2. Click Confirm.
Manage Displays/Zones in a PlaylistTo manage displays or specific zones within the displays in a playlist, follow these steps:
1. Click Add Displays under Displays, or click the plus sign . The Displays shelf opens to the right of the page with available search and filter options; Refer to Figure 42.
2. Choose the displays for the playlist. Click the plus sign next to each display to select individual displays. Select one or more filter options and then click Add All to add a group of displays.
Note: The Sales icon in ad grid zones shows the zone is available for Advanced Scheduling.
3. Click Confirm.
Figure 41: Playlist Properties
Figure 42: Displays or Zones Selection

Content Scheduling27
Manage Playlist MediaTo manage playlist media files, follow these steps:
1. Click Add Media Files under Media Files or the plus sign . The Media Library shelf opens to the right of the page with a list of the media files with available search and filter options; refer to Figure 43.
2. Choose the media files for the playlist. Click the plus sign next to each file or drag the file into the Media Files list with the drag handle
to select individual media files. Select one or more filter options and then click Add All to add a group of files.
Note: Each playlist can contain a maximum of 120 files. If more than 120 files are needed, create a second playlist.
3. Arrange the order the media files will play by dragging the row handle on the left side of the media files under Playlist Files and moving the files up or down. Refer to Figure 44. Click Remove All to remove all media files from the list if needed. The media properties and playlist item constraints are visible in the list.
4. Click Save.
Manage Playlist Item ConstraintsTo manage the constraints for an individual playlist item, follow these steps:
1. Go to Playlists . Playlists opens and shows all the playlists.
2. Click the desired playlist. The playlist information page opens.
3. Click the individual media file from the playlist to open the playlist item constraints window. Refer to Figure 45.
• Click Set Custom Date Range to change the item’s initial start date and final end date parameters. Click > Add Time Range to add additional time ranges up to a maximum of 24. Click > Set Time Range Alias to add a preset time range.
• Click Set Custom Days of Week to change the days that the playlist item will run. A blue option button indicates that the day is selected.
• Click Set Custom Time Range to change the start time and end time parameters.
• Click Set Custom Duration to change the image duration.
Figure 43: Select a Media File
Figure 44: Playlist items

Content Scheduling28
• Click Set Transition to select the transition type and speed for the playlist item. This option is only relevant if display transitions are enabled. Refer to Configure a Display (p.50) to change display transition settings.
4. Click Confirm.
To edit a web presentation item, click the thumbnail in Playlist Files, and then click the pencil at the top of the window.
Activate/Inactivate a Standard PlaylistNew playlists are active by default and will play according to the schedule set up at creation. Refer to Configure Standard Playlist Properties (p.26) to set up a playlist schedule.
To activate/inactivate a playlist, follow these steps:
1. Go to Playlists . Playlists opens, listing all the playlists.
2. Click the desired playlist.
3. Click active/inactive status in the toolbar. Set Playlist Properties opens. Refer to Figure 41.
4. Click Active to activate the playlist or Inactive to inactivate the playlist. Active playlists will play according to the schedule. Inactive playlists will not play according to the schedule.
5. Click Confirm, and then click Save.
Figure 45: Playlist Item ConstraintsOverridesUse an override to suspend a playlist and quickly push messages to the display(s). This option is useful in the event of an emergency.
Create an OverrideTo create an override, follow these steps:
1. Go to Playlists . Playlists opens.
2. Select Override from the Add New drop-down list. The override creation page opens. Refer to Figure 46.
Figure 46: Create an Override

Content Scheduling29
3. Configure the override properties. Refer to Configure Override Properties (p.29) for information on how to perform this step.
4. Add targets (displays/zones) and media as needed. Refer to Manage Displays/Zones in a Playlist (p.26) and Manage Playlist Media (p.27) for information on how to perform this step.
5. Adjust the schedule for individual playlist items if needed. Refer to Manage Playlist Item Constraints (p.27) for information on how to perform this step.
6. Click Save. The override is immediately delivered to the display(s) and starts to play according to the schedule selected in Configure Override Properties (p.29).
7. Click Exit to open the list of all playlists and overrides. Ensure that the override is configured correctly.
Note: If an override is active, a warning notice opens above the list of playlists. Refer to Figure 47.
Configure Override PropertiesTo configure override properties, follow these steps:
1. Click the title, active/inactive status, date range, or playlist mode. Refer to Figure 48.
• The override is Active by default. Click Inactive to disable the override. Refer to Figure 57.
• The default is the current date and time. Select the Start Date and Start Time from the calendar drop-down list.
2. Select the Override Mode. The default mode is Exclusive Mode. Refer to Figure 57.
• Exclusive: Override content replaces the scheduled content on any targeted display(s).
• Rotational: Override content is added to the scheduled content on any targeted display(s).
Note: If Exclusive and Rotational are selected, override content replaces scheduled content first and then is added to the scheduled content on any targeted display(s).
Figure 47: Override Warning Notice
Figure 48: Override Properties

Content Scheduling30
3. Fill in the mode-specific fields. The fields available to configure the override mode change depending on each mode.
4. Select Play Forever for the override to continue playing after the exclusive mode duration has expired.
5. Select one or more tags to categorize the override. Create a new tag by typing in the Tags text box and pressing Enter or clicking the plus sign .
6. Click Confirm.
Synchronized PlaylistsSynchronized playlists ensure multiple related pieces of content play across multiple displays at the same time. This feature enables the user to schedule different content to different displays from the same view.
Note: To ensure playlists maintain synchronization between the software and the display, time on the players must match the time indicated in Venus® Control Suite.
Figure 49: Synchronized Playlist Example
Create a Synchronized PlaylistTo create a new synchronized playlist, follow these steps:
1. Go to Playlists .
2. Select Synchronized Playlists from the Add New drop-down list.
3. Click the title, active/inactive status, date range , or time range indicators to configure the playlist from the Set Grid Properties window. Refer to Figure 49.
• The playlist is Active by default. Click Inactive to disable the playlist.
• The default is the current date with no end date. Select the Initial Start Date and Final End Date from the calendar drop-down list.
Content Scheduling31
• All days are selected by default. Select days of the week to change the days that the playlist will run. A blue option button indicates that the day is selected.
• The playlist inherits the Daily Time Range from the display. Click Set Custom Time Range to adjust the Daily Start Time and Daily End Time. Click > Add Time Range to add additional time ranges up to a maximum of 24. Click > Set Time Range Alias to add a preset time range.
4. Click Add Column to configure the playlist grid, select a display or zone, and then click Confirm to continue or Cancel to return to the previous menu.
Note: If a target is associated to multiple synchronized playlists with time ranges that overlap, the playlist will no longer maintain synchronization.
5. Add rows, columns, and content as needed. Refer to Manage Rows (p.31), Manage Columns (p.32), and Manage Content (p.32) for information on how to perform this step.
Note: The synchronized playlist can contain up to 200 media items.
6. Click Save, or click the drop-down arrow then Save As to save a copy of the playlist. Save As inactivates the copy by default.
Note: An Unsaved changes indicator appears over the playlist title if the playlist contains any unsaved changes; refer to Figure 49.
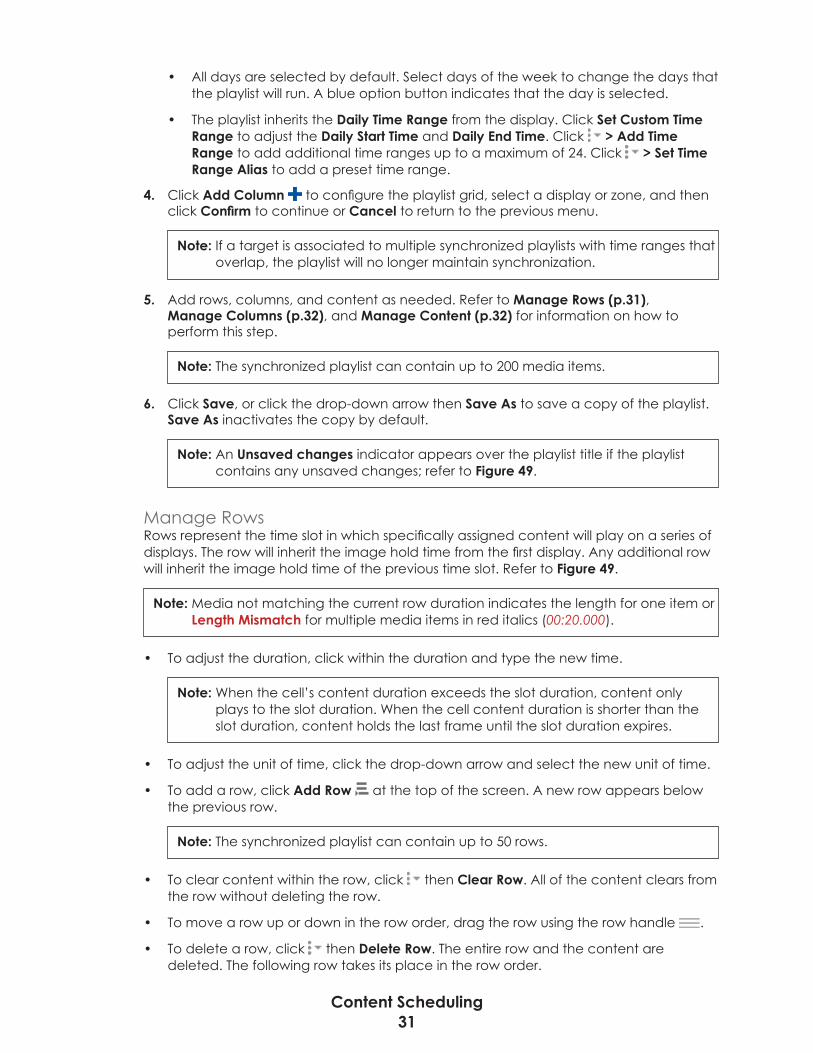
Manage RowsRows represent the time slot in which specifically assigned content will play on a series of displays. The row will inherit the image hold time from the first display. Any additional row will inherit the image hold time of the previous time slot. Refer to Figure 49.
Note: Media not matching the current row duration indicates the length for one item or Length Mismatch for multiple media items in red italics (00:20.000).
• To adjust the duration, click within the duration and type the new time.
Note: When the cell’s content duration exceeds the slot duration, content only plays to the slot duration. When the cell content duration is shorter than the slot duration, content holds the last frame until the slot duration expires.
• To adjust the unit of time, click the drop-down arrow and select the new unit of time.
• To add a row, click Add Row at the top of the screen. A new row appears below the previous row.
Note: The synchronized playlist can contain up to 50 rows.
• To clear content within the row, click then Clear Row. All of the content clears from the row without deleting the row.
• To move a row up or down in the row order, drag the row using the row handle .
• To delete a row, click then Delete Row. The entire row and the content are deleted. The following row takes its place in the row order.

Content Scheduling32
Manage ColumnsColumns represent the target (display or zone) that plays the content assigned to each time slot. The column header shows the display name, the zone name, and the dimensions of the display/zone selected. Refer to Figure 49.
Note: Media not matching the column dimensions indicates the size mismatch for one item or Size Mismatch for multiple media items in red italics (400x300).
• To add a column, click Add Column at the top of the screen. A new column appears at the right end of the columns. Select the target from the window.
Note: The synchronized playlist can contain up to 20 columns.
• To change a target to a column, click then Set Target. Then select the target from the window.
Note: Although Ad Grid Zones appear in the list of selectable targets, any Ad Grid Zone assigned as a target plays the content in the column and not content as assigned on the Sales page.
• To clear content within the column, click then Clear Column. All of the content clears from the column without deleting the column.
• To delete a column, click then Delete Column. The entire column and the content are deleted. The following column takes its place in the column order.
Manage ContentContent is represented by a cell where the row (duration) and the column (target) intersect. The content cell includes the thumbnail, name, and dimensions of the content. An empty cell includes the duration of transparent media.
Note: A cell with animated content (videos, presentations) not allowed by a display configuration is replaced with transparent content.
• To add media to a cell with transparent content, click the plus sign , and then select the desired content from the Media Library, or click Show Media Library .
• To add media to a cell with media, click then Add Media or click Show Media Library .
Note: Select filter options to reduce the number of items that appear in the list.
• To move content from the Media Library to a cell, drag the content using the drag handle .
Note: The cell can contain up to eight media items.
• To edit content in a cell, click then Edit Cell.
• Drag the row handle to change the order of content.
• Click to delete content.

Content Scheduling33
• To delete all content from a cell, click then Clear Cell. This replaces the deleted content with a transparent placeholder.
Note: Use transparent media as a placeholder for content lower in the zone order.
To change the parameters for a specific media item within a cell, follow these steps:
1. Click and then Edit Cell.
2. Click the media item in Cell Contents to open media item constraints. Refer to Figure 50.
3. Click Set Transition to select the transition type and speed for the playlist item. indicates that a cell has content with a transition. This option is only relevant if display transitions are enabled. Refer to Configure a Display (p.50) to change display transition settings.
4. Click Set Custom Date Range to change the date range other than the playlist’s Initial Start Date/Final End Date.
5. Click Set Custom Days of the Week to change the days that the media item will run. A blue option button indicates that the day is selected.
6. Click Set Custom Time Range to change the time range other than the playlist’s Daily Start Time/Daily End Time. Click > Add Time Range to add additional time ranges up to a maximum of 24. Click > Set Time Range Alias to add a preset time range.
7. Click Confirm to save or Cancel to not save and return to Cell Contents.
To reset the media item constraints to the playlist settings, click Use [Constraint] from Playlist from within each constraint menu.
Note: Media item constraints that conflict with the playlist properties appear as a red constraint icon ( ) and red italics (2:00 PM - 3:00 PM).
Overrides and Synchronized PlaylistsDisplays that appear in a synchronized playlist and are selected in an override do not affect the rest of the displays in the synchronized playlist. Displays with content in the synchronized playlist will continue to play as scheduled, and the display override will play the override content until the override expires. At that point, the display with the override continues its regularly scheduled content.
To prevent losing synchronization at the end of an override due to an offset between the override and the synchronized playlist, choose one of the following options:• Open the override or the playlist, and then save it without making any changes after
the override ends.• Open the override and delete it after the override ends.
Either option resends the synchronized schedule to the display, resynchronizing all the targets in the playlist.
For more information, refer to Overrides (p.28).
Figure 50: Media Item Constraints

Content Scheduling34
Default Playlist ModeStandard playlists for advanced scheduling accounts is Play One File by default. Standard playlists for simple scheduling accounts is Play All Files by default. Refer to Figure 51. To change this setting, follow these steps:
1. Go to Settings .
2. Click Account.
3. Select Play One File or Play All Files. Refer to Figure 51.
Note: A change to the default playlist mode only applies to new playlists.
Playlist ValidationAdministrators may have a requirement for targets (displays or zones) and media items to match by dimension or aspect ratio.
Playlist validation verifies that all targets match each other and media items match target dimensions in a standard playlist. If any mismatch is present, the playlist will not save.
Note: Playlist validation settings apply at the display owner level. Playlists created by advertisers are validated based on the display owner’s settings. Playlists that target another display owner’s display(s) are validated based on that display owner’s settings.
Figure 51: Account Settings
Playlist validation is Off by default. For an administrator to activate playlist validation, follow these steps:
1. Go to Settings .
2. Click Account.
3. Select On to activate or Off to inactivate playlist validation.
4. Select Pixel Accurate or Aspect Ratio. Refer to Figure 51.
Once activated, new and current playlists require validation when created or edited. Save and Save As are available only if the standard playlist meets both criteria:
• All target dimensions match each other. If not, a dashed underline appears under all target dimensions to indicate a dimension mismatch.
• All media items match the target dimensions. If not, a dashed underline appears under the media dimensions to indicate a dimension mismatch.
For an example of a playlist meeting neither criteria, refer to Figure 52.

Content Scheduling35
Figure 52: Display and Media Dimensions Mismatch
SchedulingBefore a playlist shows on a display, configure the display with the Schedule Mode enabled. By default, when a new display is added to the system, the Schedule Mode is enabled, or On, to enable scheduled playback. If content is scheduled to play but the Schedule Mode is Off, the content will not play.
Animation files are enabled separately. If an animation file type is part of a playlist, and Animated Content is Off, the animated file type is skipped. This option is useful in locations that restrict the use of animated content.
To ensure that Schedule Mode or Animated Content is enabled for a specific display, follow these steps:
1. Go to Displays .
2. Select the desired display from the list. Display Information opens.
3. Click Scheduling from the menu on the left. Scheduling opens. Refer to Figure 53.
4. Click On under Schedule Mode to enable scheduled content to play on the display.
5. Click On under Animated Content to enable animated files to play on the display.
6. Click Save.
Note: For information on available scheduling and content management services, contact the Daktronics Content Management Team at [email protected].
Delete a PlaylistTo delete a playlist (Standard, Override, or Synchronized), follow these steps:
1. Go to Playlists . Playlists opens and shows all the playlists.
2. Select the desired playlist(s) or Select All to delete all playlists.
3. Click the trash can in the toolbar.
4. Click Confirm in the confirmation message.
Figure 53: Allow Schedule Mode

Content Scheduling36
To delete a playlist from the playlist information page, follow these steps:
1. Go to Playlists . Playlists opens, listing all the playlists.
2. Click the desired playlist.
3. Click the trash can at the top of the screen.
4. Click Confirm in the confirmation message.

Reporting App37
5 Reporting AppThe Reporting App functions to provide information on playlist exposure, run time, and duration. Individual reports give data on specific advertising accounts, displays, or time periods.
The Reporting App can run a number of different reports; some basic reports are accessible with the default package while more advanced reports can be purchased through additional access.
Proof of Play ReportA Proof of Play report gives details on exposure (plays) and duration of each file and is accessible in all packages.
Note: The Proof of Play Report can be used as an example of how to run other reports; however, other reports may have additional fields to fill.
To run a proof of play report, follow these steps:
1. Open the Reporting App.
2. Click Add New.
3. Choose Proof of Play Report from the Report Type drop-down list box. Configure New Report expands with more options. Refer to Figure 54.
4. Type a descriptive report name in the Report Name text box.
5. Click Select Displays to select one or more displays as needed. Select Displays is the default option for all displays.
Note: Reports are generated with primary players by default. Select Use backup players to run a report on backup players only. This option is available if any display has a backup player configured.
6. Click the Accounts arrow, and then select one or more accounts under Select Accounts to select individual accounts. All Accounts is selected by default.
Figure 54: Create a Proof of Play Report

Reporting App38
7. Select Include Unassociated Media to include all media files in the report that are not associated with a specific account. This option is only available when All Accounts is selected.
8. Choose a report grouping method from the Grouping drop-down list:
• Group by Account: generates a multi-level list by Account, Media with thumbnail, Display, and Date.
• Group by Display: generates a multi-level list by Display, Account, Date, and Media.
9. Type the time and date parameters for the report under the Range heading.
Note: The Start Date begins on the Start Time, and the End Date concludes on the End Time.
10. Click Submit. The Reporting App will list all completed reports with the most recent report at the top of the list.
Note: Reports may take a few minutes to generate before they are ready to view.
11. Select and open the desired report.
12. Click Print at the top of the screen to print or save the report as a PDF or XLSX file or to export as an Excel file.
Exposures from play logs are totalled and then rounded to the nearest second. This formula may result in the total for a date range being slightly different than the sum of the daily durations. Refer to Figure 55.
Figure 55: Proof of Play Report

Tools39
6 ToolsThe Tools menu is a collection of supplemental features used in conjunction with primary features available in the main menu. For example, time range aliases supplement playlist creation. Refer to Figure 56 for features available in Tools by default.
Note: The available features can change depending on user rights and future releases of the software.
Figure 56: Tools Menu
AlertsThe Alerts menu groups all of the current IPAWS alerts assigned to displays in the account. The alert entry contains the category, headline, the number of displays with the alert, when it was issued, and what authority issued it. For example, refer to Figure 57.
Figure 57: Alerts Menu
To view current IPAWS alerts assigned to displays, follow these steps:
1. Go to Tools .
2. Click Alerts. The notification badge indicates the number of active alerts. All current, active alerts appear in a list.
3. Click an alert to view individual displays assigned the alert.
To activate/inactivate alerts on specific displays, follow these steps:
1. Go to the specific alert; refer to Figure 58.
2. Select one or more displays, or click Select All.
3. Click Set Active or Set Inactive.
4. Click Back to return to Alerts.

Tools40
Figure 58: Sample Alert
EventsEvents supplement the creation of proof of play reports by providing a calendar where users can enter upcoming events that take place during a certain time period. Refer to Figure 59.
To create a new event, follow these steps:
1. Go to Tools .
2. Click Events.
3. Click Add New.
4. Type a Title.
5. Click within Date and select a day on the calendar.
6. Select the appropriate Time Zone where the event takes place.
7. Type the Start Time and End Time.
8. Select Tags as needed. Type a new tag if the appropriate tag is not available. For tag guidelines, refer to Filters and Tags (p.15).
Note: Tags assist in sorting events when creating a proof of play report.
9. Click Confirm to save or Cancel to discard changes and return to Events.
To edit an event, click the event from the list and perform Steps 4-9.
To delete an event, select one or more events, and then click the trash can .
To filter 11 or more events, select one of the Filters options.
To run a proof of play report for an event, follow the instructions to create a proof of play report in Event Proof of Play Report (p.46).
Figure 59: Add an Event

Tools41
Time Range AliasesUsers can divide and name times of day into reusable time ranges referred to as aliases. Users can then assign an alias to a playlist item or schedule without having to enter the time ranges manually each time.
To create a new time range alias, follow these steps:
1. Go to Tools .
2. Click Time Range Aliases.
3. Click Add New. Refer to Figure 60.
4. Type a unique name for the alias that is appropriate for the time range.
5. Type a Start Time and End Time.
6. Click Save.
To create a new time range alias from the playlist, follow these steps:
1. Go to Playlists .
2. Select the appropriate playlist.
3. Click Set Custom Time Range from either the playlist or the playlist media item.
4. Click > Set Time Range Alias.
5. Click Add New. Refer to Figure 61.
6. Type a unique name for the alias that is appropriate for the time range.
7. Type a Start Time and End Time.
8. Click Save.
9. Select the new alias.
To delete a time range alias, follow these steps:
1. Go to Tools .
2. Click Time Range Aliases.
3. Select one or more time range alias from the list. Refer to Figure 73.
4. Click the trash can .
5. Click Confirm.
Figure 60: Time Range Aliases Menu
Figure 61: Select Alias from Playlist

Tools42
Scheduled ContentDisplay owners can view a simple visual representation of time ranges for scheduled content to better understand scheduling patterns. Refer to Figure 62.
Figure 62: Scheduled Content Menu
To view scheduled content, follow these steps:
1. Go to Tools and then click Scheduled Content. Refer to Figure 56.
2. Click Select Display and select a display (or zone) from the list. Scheduled content for the selected display opens.
3. Click the calendar to select a date. The current date is selected by default.
4. Click a media thumbnail to view Schedule Details. Refer to Figure 62.
• Media Thumbnail: shows a thumbnail of the selected media. Click the thumbnail image to preview the image in an overlay. Click anywhere on the screen to close the overlay.
• Schedule: shows the sale, playlist, and playlist item information. Click View Playlist to view the schedule in the Playlist menu.
• Media File: shows file information with respect to the scheduled media item.
Content ApprovalAdministrators of a display owner account can require advertiser accounts to submit content for approval. Content approval is only available for Advanced Scheduling and is disabled by default.
Once an administrator requires content approval for an advertiser, the advertiser must submit all content to the display owner before that content can be scheduled in a playlist.
Display OwnersTo enable content approval, follow these steps:
1. Go to Accounts .
2. Click the account that requires content approval.
3. Click Yes to enable or No to disable content approval.
4. Click Save.

Tools43
To approve/reject content, follow these steps:
1. Go to Tools .
2. Click Content Approval. The notification badge indicates the number of outstanding content approval requests. Refer to Figure 56.
3. Select one or more media items submitted for approval. Refer to Figure 63.
4. Click Approve or Reject . Approved or rejected content is marked in the list accordingly.
Note: Rejections require a response on why the content was rejected so the advertiser can make changes based on the response.
Click the media item thumbnail to show a detailed view of the content. Click the media item in the detailed view to preview content at its native resolution. Click Download to view content (images, videos) in detail.
Approved or rejected content is cleared once the page refreshes. Any content still pending approval remains in the list.
Figure 63: Content Approval Menu
AdvertisersIf an advertiser is required to send content for approval, the advertiser has Send for Approval available in the Media Library toolbar. The advertiser cannot schedule content to a playlist until content is approved.
To send content for approval, follow these steps:
1. Go to the Media Library .
2. Select the media items. Refer to Figure 64.
3. Click Send for Approval .
4. Click Confirm.

Tools44
Content sent for approval is marked with one of three indicators:
• Sent for Approval: Content is sent and awaits approval.
• Approved: Content is available to schedule in a playlist.
• Rejected: Content is not available for scheduling. Images/videos cannot be resent. Rejected content must be modified, uploaded as new content, and sent for approval again. Rejection comments are available in the content information.
Note: Approved or rejected presentations that are modified are required to be sent for approval again.
Figure 64: Media Library (List/Card View) with Approval Status
FontsAdministrators can upload fonts not provided in Venus® Control Suite by default. Fonts uploaded to Venus® Control Suite are also available in Content Studio.
Figure 65: Fonts Menu

Tools45
Upload/Delete FontsTo upload one or more fonts, follow these steps:
1. Go to Tools .
2. Click Fonts.
3. Click Upload. Refer to Figure 56.
Note: If the same font file is uploaded multiple times, the font only appears once in the Fonts list.
4. Drag any desired font file(s) into the Upload Font window or click the Drop files or click here to upload link to browse for saved files. Click Open.
Note: Unsupported file types will not upload; an exclamation point and a warning message are displayed next to the file name.
5. Click Next.
To delete one or more uploaded fonts, follow these steps:
1. Select one or more fonts from the Fonts list.
2. Click the trash can at the top of the list. Refer to Figure 56.
3. Click Confirm in the confirmation message.
Font FamiliesA font (e.g. Arimo) and its styles (e.g. Bold, Italic) are grouped into a font family. Some fonts have multiple font families (e.g. Open Sans, Open Sans ExtraBold). Venus® Control Suite groups fonts by family then provides the option to apply a style to the selected font. Refer to Add a Text Box Element (p.18) for more information on fonts in web presentations.
Web Browser CompatibilityIf the font embeddability is editable, it cannot be used in a web presentation on Internet Explorer 11. Upload installable fonts for Internet Explorer 11.
To verify the font embeddability type, follow these steps:
1. Right-click the desired font, and then click Properties.
2. Click the Details tab.
3. Verify the font embeddability type.

User Interface—Administrative Features46
7 User Interface—Administrative Features
Main MenuThe Venus® Control Suite main menu panel is on the left side of the screen. Click Menu in the upper-left corner of the screen to expand the menu panel.
These features are available to system administrators. Certain views look different on a mobile device from those shown in this manual. Refer to the table below for administrative menus:
Menu Item Description
Opens the Script Library where display commands are created and stored (e.g. sets brightness levels for displays)
Lists current user profiles and enables system administrators to update passwords or add/remove user profiles
Lists all available displays and provides management tools to include configuring durations, scheduling mode, and setting hours of operation
Updates firmware files for players and video processors. Contact Daktronics customer support for more information on updating firmware.
Script LibraryScripts opens the Script Library where display commands called scripts are created and stored. Organize scripts with tags in the same way that media files are tagged. For tag guidelines, refer to Filters and Tags (p.15).
To add a new script, follow these steps:
1. Go to Scripts . The Script Library opens.
2. Click Add New. The Configure Script window opens. Refer to Figure 66.
3. Type a name for the script in the Title text box.
4. Select Set Brightness or Activate Primary or Backup Devices from the Command drop-down list.
Select BrightnessTo select the brightness at a single value on one or more displays, follow these steps:
1. Select Set Brightness from the Command drop-down list. Refer to Figure 66. Command Parameters and Displays open below Script Details. Refer to Figure 67.
Figure 66: Configure a Script
Figure 67: Command Parameters - Brightness

User Interface—Administrative Features47
5. Click Confirm. Displays now lists the display(s) associated with the script. Click to the right of the display to remove it from the list.
6. Review the script settings and edit as necessary.
7. Click Save. The Script Library opens with a list of all created scripts. Refer to Figure 68.
8. Click Run this script to trigger the script on the selected display(s).
Activate Primary or Backup DevicesThis script automates the process to turn active and inactive devices on and off; refer to Configure Associated Display Interfaces and Video Processors (p.53).
Note: Verify that the primary and backup devices for the displays that require this script are configured prior to script creation. Refer to Step 7 in Configure a Display (p.50).
To select devices and the displays associated with those devices, follow these steps:
1. Select Activate Primary or Backup Devices from the Command drop-down list. Refer to Figure 66. Command Parameters and Displays open below Script Details. Refer to Figure 69.
2. Choose the device group to activate. This also inactivates the alternate device group. Select the Primary or Backup button located under Command Parameters.
• Primary: The main device running the display
• Backup: The secondary device that is available to run the same display in case of an issue with the primary device
3. Click Add Display. A list of available displays opens.
4. Select the box next to the display name to select one or more displays from the list. Use Show Filters or the search bar to modify the selection.
5. Click Confirm. Displays now lists the display(s) associated with the script. Click to the right of the display to remove it from the list.
6. Review the script settings and edit as necessary.
Figure 68: Sample Scripts
Figure 69: Command Parameters - Devices
2. Select the Brightness Mode from the drop-down list under Command Parameters.
• Automatic: Brightness is determined by the light sensor.
• Manual: Brightness is selected manually. Type a percent value or move the slider left or right to adjust the Brightness Setting.
3. Click Add Display. A list of available displays opens.
4. Select the box next to the display name to select one or more displays from the list. Use Show Filters or the search bar to modify the selection.

User Interface—Administrative Features48
7. Click Save. The Script Library opens with a list of all created scripts. Refer to Figure 68.
8. Click Run this Script to trigger the script on the selected display(s).
UsersUsers lists the current Venus® Control Suite user profiles and enables administrators to add users, delete users, update user information, reset profile roles, and reset passwords.
A remotely hosted Venus® Control Suite user is identified by a unique email address that serves as the username. A locally hosted Venus® Control Suite username does not require an email address. New user menu access is provided by the account administrator. Refer to User Menu (p.3) for more information on menus.
User Menu Access Administrator Standard Basic
Dashboard X X
Media X X
Playlists X X
Scripts X
Accounts X X X
Users X
Displays X
Settings X
Tools X X X
Create User ProfileTo add a new user profile, follow these steps:
1. Go to Users and then Add New.
2. Type the required information in the User Information section.
3. Choose an account from the Account drop-down box to assign a user to a specific account. If the current account has no sub-accounts, the current account is selected by default.
Note: If needed, a user may be reassigned to a different account later.
4. Choose an option from the Role drop-down box to assign the level of user access.
5. Complete the fields in the Additional Information section and click Save.
Note: If an administrator is not available and a new user account is required, please contact Daktronics support and have the order/invoice information available. Refer to Daktronics Contact Information (p.67).

User Interface—Administrative Features49
Delete User ProfileTo delete a user profile, follow these steps:
1. Go to Users .
2. Click the name of the user profile to be deleted.
3. Click the trash can above the User Information section. Refer to Figure 88.
4. Click Confirm in the confirmation message.
Reset PasswordTo reset a user password, follow these steps:
1. Go to Users .
2. Click the name of the desired user.
3. Click the lock above the User Information section. Refer to Figure 88. Reset Password opens.
4. Type the new password and confirm password.
5. Click Save.
Note: Click the copy icon to copy the Email Address.
DisplaysDisplays lists all displays controlled by Venus® Control Suite. Use this function to add a new display, make changes to existing displays, or delete a display. Each display and any devices associated with that display (players and video processors), are preconfigured in a hosted server system. In a local server system, all displays and their associated devices must be added manually. Once a display is entered into Venus® Control Suite, it is visible under both Dashboard and Displays .
Click Displays to open the Displays window. Displays are listed in alphabetical order by title and show the hours of operation, whether or not scheduled playback or animated content is allowed, display color depth, display size, and layout information. Displays that belong to another account will display the account name above the display title. Refer to Figure 89.
When Displays contains ten or more displays in the list, a filter menu opens on the right side of the screen. Choose a filter or tag to view specific displays.
To tag the display(s) from Displays , follow these steps:
1. Go to Displays , and then select one or more displays from the list.
2. Click the tag in the upper-left corner. Refer to Figure 71.
3. Select one or more tags to categorize the display(s). Create a new tag by typing in the Tags text box and pressing Enter or clicking the plus sign . For tag guidelines, refer to Filters and Tags (p.15).
4. Click Save.
Figure 70: User Information

User Interface—Administrative Features50
Figure 71: Display Information
Add a DisplayAll displays controlled by Venus® Control Suite are listed under Displays
.
To add a display, follow these steps:
1. Go to Displays .
2. Click Add New. Add Display opens. Refer to Figure 72.
3. Configure the new display per Configure a Display (p.50). For a new display, start at Step 3; for an existing display, start at Step 1. Display Configuration opens by default. The appearance depends on the scheduling mode and may not contain all the fields shown in Figure 72.
4. Click Save.
Configure a DisplayTo configure a display and any associated devices, follow these steps:
1. Go to Displays .
2. Click the display. The display information page opens. Refer to Figure 73.
Figure 72: Add a Display
Figure 73: Display Configuration

User Interface—Administrative Features51
3. Click an element in the column to configure.
• Type the display name in the Title text box.
Note: Title information should include the site or display name.
• Select the correct time zone for the display from the Display Time Zone drop-down list.
• Select an account to associate with the display from the drop-down list if desired.
Note: If the display is added from within an account, this option may not be available.
• Type the city and state (i.e. Brookings, SD) in the Location text box, click the magnifying glass , and select the location from the list.
Note: For a local server, type the Latitude and Longitude.
• Type a brief description for the display in the Description text box.
• Type the size of the display (in pixels) in the Width and Height text boxes.
• Select the correct display Color Depth from the drop-down list.
• Adjust the Temperature Offset if the sensor reads slightly too high or too low.
• Select either Automatic (light sensor) or Manual Brightness Mode. For Manual mode, move the slider or type the value to adjust the display brightness under the Brightness Setting.
4. Click Scheduling to allow scheduled or animated content to play on the display. Refer to Figure 74. Refer to Scheduling (p.35) for more information.
Note: If content is scheduled to play but Schedule Mode is Off, the content does not play. The content is skipped if animated content is in a playlist but Animated Content is Off. Animated content includes the following: videos, tickers, layout/slide transitions, element effects, and flashing text, in addition to layouts/slides/elements with durations less than the display duration.
• Image Duration: sets how long images show on the display and how often webcam images update
Figure 74: Allow Scheduled Content

User Interface—Administrative Features52
• Ad Grid Slots: sets how many slots per day are available for scheduling in the Sales menu
• Total Exposures: lists the total number of times media files are played on the display; this number is calculated automatically based on the image duration and the number of ad grid slots
• Exposures Per Slot: lists the number of times media files are played on the display in an ad grid slot; this number is calculated automatically based on the image duration and the number of ad grid slots
• Hours of Operation: sets the times that the display can show content; any content scheduled outside of these hours of operation is not shown on the display; click On to enable multiple hours of operation, and then adjust the Start Time and the End Time for each day of the week.
Note: The Ad Grid Slots, Total Exposures, or Exposures Per Slot fields are not available for systems that use the Simple Scheduling mode.
5. Click Layouts. For instructions, refer to Add a Layout (p.53).
6. Click Tags to add descriptive labels to content. For example, displays located at stores with a car wash are tagged “car wash” and a playlist is created specifically for displays with this tag. For tag guidelines, refer to Filters and Tags (p.15).
7. Click Transitions to adjust transition options for playlist media items. Refer to Manage Playlist Item Constraints (p.27) to add a transition to individual playlist items.
• Click Yes to allow transitions. Transitions are not enabled by default.
• Click Yes to set a default transition on all playlist media items that target the display; otherwise, no transition is set by default. Then select a default Transition and Speed from the available drop-down-lists.
8. Click Devices > Add Device to add any devices associated with the display. Choose the primary and backup DMP-8000, if applicable, and any DI-6000s or VIP-5X60s that are used to control the display.
Note: Devices may not be available when a display is first created. Changes made to the associated devices may result in connectivity loss. Make changes to these settings only with instruction from a Daktronics technician.
9. Click Troubleshooting to update the firmware for an associated device.
10. Click Web Cameras to add a webcam associated with a display.
11. Click Save.
12. Repeat Steps 2-10 for each additional display.
After the display is added to the system, it is listed under Displays and the Dashboard . It may take a few minutes for the associated devices to be visible in the dashboard.

User Interface—Administrative Features53
Configure Associated Display Interfaces and Video ProcessorsAssociated DI-6000s and VIP-5X60s are Inactive by default when they are added to Venus® Control Suite. In a primary/redundant pair, select only one VIP as Active.
To change a primary or redundant VIP to active, follow these steps:
1. Go to Displays .
2. Select the desired display.
3. Click Devices and select the DI-6000 or VIP-5X60 from the list of associated devices. The device information page opens.
4. Click the Inactive button to change the status to Active.
5. Click Okay.
6. Repeat Steps 1-5 for any other displays with associated DI-6000s or VIP-5X60s as needed.
7. Click the Dashboard to verify all processors and players are online.
Refer to Script Library (p.46) for more information on how to set up a script to switch from primary to backup automatically.
Add a LayoutVerify the desired layout is created and configured before adding a layout to a display. Refer to Layout Creation (p.59) to create a layout or edit a current layout.
Note: Since a single layout can be added to multiple displays, editing a layout affects those displays as well.
To add a layout to a display, follow these steps:
1. Go to Displays .
2. Select the desired display.
3. Click Layouts then Add Layout. Select Layout opens.
4. Select the appropriate layout from the list, and then click Done. Use Search to find specific layouts in the list. Refer to Figure 75.
5. Click Save.
Figure 75: Select a Layout

User Interface—Administrative Features54
Configure AMBER AlertsVerify the steps in Displays (p.49) before configuring AMBER Alerts. All AMBER Alerts are issued, updated, and canceled by the National Center for Missing and Exploited Children (NCMEC).
1. Go to Displays and then click Emergency Alerts to configure the display for an AMBER Alert subscription. Refer to Figure 94.
Note: At a minimum, the sign must have a width and height greater than 144 x 96 and an aspect ratio less than 5. If the display does not meet the minimum requirements, the Display menu will not display Emergency Alerts in the list of configurable options.
a. Type a five-digit zip code, and then press Enter or click the plus sign.
b. Modify the duration and frequency, but note that the default settings are the suggested industry standards.
2. Click On to subscribe to the service after configuring the display.
Whenever the NCMEC issues an AMBER Alert within the subscribed zip code, Venus® Control Suite automatically places the alert in the Media Library, creates an Override Playlist based on the parameters selected in Emergency Alerts, and displays the content on the Dashboard. Venus® Control Suite also automatically updates the Media Library and the Override Playlist with any updates issued by the NCMEC, but it does not reset the start time.
To monitor AMBER Alert content from the Dashboard, refer to Monitor a Zone (p.62).
Whenever the NCMEC cancels an AMBER Alert within the subscribed zip code, Venus® Control Suite automatically removes the alert from the Media Library and the Override Playlist.
A Proof of Play Report generated during or after an alert populates with play information for those alerts as unassociated files. Refer to Section 5: Reports (p.37) for more information on Proof of Play Reports.
Configure IPAWS Alerts for an AccountAll Integrated Public Alert & Warning System (IPAWS) alerts are issued, updated, and canceled by local, state, and federal alerting authorities.
1. Go to Settings and then click Alert Management.
2. Click On to activate the service for the account.
Note: IPAWS must be activated under Settings for the account and under Displays for the individual display; refer to Activate/Inactivate IPAWS Alerts for a Display (p.55).
Figure 76: AMBER Alerts

User Interface—Administrative Features55
3. Click Select All to select all Alert Categories, or select individual categories applicable to the account.
Note: Categories are only set at the account level and are not display specific.
4. Modify the duration and frequency, but note that the default settings are the recommended settings.
Note: Rotational duration is not available on bridged displays. Bridge displays do receive the alert override but only with an exclusive duration.
Activate/Inactivate IPAWS Alerts for a Display1. Go to Displays and then click Emergency
Alerts to activate IPAWS for the display. Refer to Figure 77.
Note: At smaller display sizes, the alert is broken up into multiple slides. This may cause alerts to have durations longer than expected.
2. Click On to subscribe to the service after configuring the display.
Note: IPAWS must be activated under Displays for the individual display and under Settings for the account; refer to Configure IPAWS Alerts for an Account (p.54).
3. Type a five-digit zip code, and then press Enter or click the plus sign.
Whenever the IPAWS issues an alert within the subscribed zip code, Venus® Control Suite automatically places the alert in the Media Library, creates an Override Playlist based on the parameters selected in Emergency Alerts, and displays the content on the Dashboard. Venus® Control Suite also automatically updates the Media Library and the Override Playlist with any updates issued by the IPAWS, but it does not reset the start time.
To monitor IPAWS content from the Dashboard, refer to Monitor a Zone (p.62).
Whenever the IPAWS cancels an alert within the subscribed zip code, Venus® Control Suite automatically removes the alert from the Media Library and the Override Playlist.
A Proof of Play Report generated during or after an alert populates with play information for those alerts as unassociated files. Refer to Section 5: Reports (p.37) for more information on Proof of Play Reports.
Figure 77: IPAWS Alerts

User Interface—Administrative Features56
Copy a Display(s)The administrator can create a new display from a current display without having to re-enter display configurations.
Note: Only certain parts of the configuration copy to the new display.
Figure 78: Display Copies
To create a copy of one or more displays from the display list, follow these steps:
1. Go to Displays and either:
• Select one or more displays from the list.
• Click a specific display from the list.
2. Click .
Note: New displays created in this manner only contain saved configurations of the original display.
3. Click Save. Each newly created copy appears below the original display. Refer to Figure 78.

User Interface—Administrative Features57
Troubleshoot a DisplayVenus® Control Suite provides the following troubleshooting options: reset the display and update a display’s firmware.
Reset the DisplayReset the display to soft-reboot all supported and associated devices within the display. This function blanks the display momentarily.
To reset the display, follow these steps:
1. Go to a display on Displays , and then click Troubleshooting.
2. Click Reset Display, and then click Confirm.
3. View the Dashboard to monitor the connection status. After a successful display reset, the display returns to normal operations.
Update the DisplayContact Daktronics Customer Support for information on firmware updates.
To update the display, follow these steps:
1. Go to Settings and then click Upload File. Refer to Figure 79.
2. Select the file from the file explorer, and then click Open.
3. Go to a display on Displays , and then click Troubleshooting.
4. Click Update Display, select the version, and then click Confirm.
A blue banner at the top of the Display page indicates an update is in progress. Once complete, the banner disappears.
Move Displays Between AccountsWhen necessary, administrators have the ability to move a display between accounts. Administrators can move displays between any accounts they manage.
When a display is moved, the following occurs:
• The display is moved from any associated playlists.
• Any sales associated with the display are moved.
To move a display, follow these steps:
1. Go to Displays .
2. Select the desired display.
3. Click Configuration.
4. Click the Account drop-down list. Refer to Figure 79.
5. Select an account from the Select Account dialog.
6. Click Save, and then click Confirm to save the configuration or Cancel to return to Configuration. Figure 79: Move a Display

User Interface—Administrative Features58
SettingsSettings provides several different menu options to manage devices and layouts; refer to Figure 79:
• Upload available firmware updates for associated devices (M-Series bridge, players, and video processors); refer to Update the Display (p.57).
• Select bridges to associate with M-Series displays and view the associations; refer to Configure an M-Series Bridge (p.57).
• Change the media sharing option; refer to Shared Media (p. 8).
• Change the default playlist mode; refer to Default Playlist Mode (p.34).
• Validate playlists to prevent mismatches between displays and media; refer to Playlist Validation (p. 34).
• Manage IPAWS alerts; refer to Configure IPAWS Alerts for an Account (p.54).

Layout Creation59
8 Layout CreationCreate layouts for displays with independently controlled zones directly from Tools . Use the built-in web layout tool to create layouts for multiple displays.
Create a LayoutTo create a layout, follow these steps:
1. Go to Tools . Refer to Figure 56.
2. Click Layouts.
3. Click New Layout.
4. Type a descriptive name for the new layout and select the size of the layout from the Size drop-down list. All configured display sizes are available in the drop-down list and a flexible Custom Size option. Refer to Figure 80.
5. Click Continue. The layout opens with a blank workspace or canvas that represents the selected display size. Refer to Figure 81.
Note: The Properties field contains several expandable/collapsible panels. Click the panel to show/hide information.
Add a ZoneTo add a zone to the layout canvas, follow these steps:
1. Click Add Zone at the top of the screen. Refer to Figure 82.
2. Configure the zone using the options under the Identification property. Refer to Figure 83.
a. Type the desired zone name in the Name field.
Note: The convention for zone names excludes reserved characters \ / : * ? “ < > | $. Each zone name needs to be unique.
Figure 80: New Display Layout
Figure 81: Layout Canvas
Figure 82: Add Zones

Layout Creation60
b. Select the text color using the Preview Color drop-down list, type a specific RGB value, or allow the layout editor to autoselect a color. Preview colors help to distinguish the zones from each other.
3. Configure the zone using the options under the Position property. Refer to Figure 84.
a. Specify the pixel position under the Top and Left text boxes, move the zone, or use the keyboard arrow keys to position the zone on the layout canvas.
b. Type the size of the zone in the Width and Height text boxes or use the mouse to drag the zone frame on the display canvas.
Note: To prevent gaps or overlaps between zones, click a zone or a corner and drag it near the edge of another zone to snap the edges together.
4. Select a mode under Stretch to adjust media that does not match the zone size. Refer to Figure 85.
• Stretch to Fill: The content fills the entire zone and ignores aspect ratio.
• Scale to Fill: One dimension of the content scales to fill the available space; extra content in the other dimension is cropped and maintains aspect ratio.
• Scale to Fit: The content shrinks to fit in the zone and maintains aspect ratio.
5. Select a zone under Ad Grid Zone. This associates a zone with an Ad Grid as needed for Advanced Scheduling. For more information, refer to Sales (p.12).
Figure 86 shows an example of a layout canvas with various configured zones.
Figure 86: Example Layout
Figure 83: Properties—Identification
Figure 84: Properties—Position
Figure 85: Properties—Content

Layout Creation61
Create a Zone ViewThe zone view provides a way to show the same content in multiple locations without the need to create multiple independent zones. With zone views, users only need to schedule to one zone in a Playlist rather than to multiple zones.
To create a zone view, follow these steps:
1. Add a zone if no zones are in the layout. Refer to Add a Zone (p.59) for more information.
2. Click Add View under the Position property for the zone. This creates a read-only view with the zone name in brackets. Refer to Figure 87. The content of this view depends on the zone during playlist creation. Views always share the width and height of the zone. If the zone parameters are changed, the view parameters are also changed.
Note: A zone view is not the same as a zone duplicate. A zone view is dependent on a zone while a duplicated zone is independent of the original zone. Refer to Duplicate a Zone (p.62) for more information.
Manage Zone OrderThe zone order (z-order) for the layout is listed under Zones on the right side of the screen. Z-order determines if a zone appears in front or back of another zone. It starts at the top (front) and works its way down to the bottom (back) of the list.
As a new zone is added to the layout, it is listed at the top of the Zones list. Rearrange the zones in the list to reorder the zones in the layout. Refer to the example in Figure 87.
Note: The primary zone always appears at the bottom of the z-order.
Figure 87: Example Layout with Zone View

Layout Creation62
Duplicate a ZoneTo reduce the amount of time required to create a layout with similar zones, follow these steps:
1. Click Duplicate by the zone listed in the z-order. Refer to Figure 87.
2. Modify the duplicated zone as needed.
Note: Duplicate any zone as needed to maintain properties. Rename the duplicated zones with a unique name before saving the layout.
Edit and Save a Layout1. Click the thumbnail in Tools and then click Edit Layout
at the top of the window to edit an existing layout. This opens the layout.
2. Make any necessary changes. For example, click the layout name and type the new name in the text box to edit the name of a layout.
3. Click Save or Save As from the Save drop-down list. The layout is now under Tools and identified by the name assigned in Step 3 of Create a Layout (p.59).
Monitor a ZoneThe zone monitor provides a view of a zone associated with a display from the Dashboard. This feature is available only after creating a layout and associating it with a display.
• Monitor a zone: Select a zone to monitor from the display tile. The display tile shows content playing in that zone. Refer to Figure 88.
Note: If a display does not have a layout, this option is not available.
• Monitor multiple zones: Open another Venus® Control Suite browser tab/window, and then select the zone to monitor. Each display tile shows content playing in each zone.
• Monitor AMBER Alerts on zoned displays: When an AMBER Alert is active, the alert becomes the active view on the display tile with the content of the alert showing. Refer to Figure 89. For more information on AMBER Alerts, refer to Configure AMBER Alerts (p.54).
Note: When the Dashboard contains more than 10 displays, AMBER Alerts do not show unless the Dashboard is filtered down to 10 or fewer.
Manage a LayoutAdd a Layout (p.53) under Displays (p.49) describes how to associate a layout with a display from the Display menu before using it in a playlist.
Figure 88: Zone Monitor
Figure 89: Zone Monitor—AMBER Alerts
Figure 90: Upload a LAYOUT File

Layout Creation63
Note: Users cannot delete a layout that is associated with a display or unassociate a layout if content is scheduled to that layout.
Manage Displays/Zones in a Playlist (p.26) describes how these layouts are accessible from any associated display under Playlists and can be targeted from the playlist.
Note: Users cannot rename a zone that is already associated with a playlist.
Upload a LAYOUT FileUse this feature to upload a LAYOUT file. LAYOUT files were originally created for Daktronics Show Control software and function like layouts created in Venus® Control Suite.
Note: Venus® Control Suite only converts the file name, size (pixel or percentage), and location (x,y) of the layout file. Child zones are not supported.
To upload a LAYOUT file, follow these steps:
1. Go to Tools .
2. Click Layouts, and then click Upload Layout from the New Layout drop-down list.
3. Select the LAYOUT file, and then click Open.
4. Type a descriptive title for the layout. Otherwise, the title defaults to the file name.
5. Select the size of the layout from the Size drop-down list. The sizes of all configured displays are available in the drop-down list along with a Custom Size option. Refer to Figure 90.
Note: If the layout and display size do not match, the bounding boxes for the display and the zones will not match in the preview. Adjust the Custom Size to match the layout size.
6. Click Continue. The layout opens with a workspace that represents the selected display size and configured zones. All zones have the same preview color.
7. Adjust the layout in the layout editor as needed.
Note: If the layout is configured with the wrong display size, delete the layout and reupload the layout with the correct display size selected in Step 5.
Download a Layout FileUse this feature to download a layout file as a backup. This applies to layouts created in Venus® Control Suite or LAYOUT files created for Daktronics Show Control software.
To download a layout file, follow these steps:
1. Go to Tools .
2. Click Layouts.
Figure 91: Download a Layout File

Layout Creation64
3. Click the layout file to download from the list.
4. Click Download; refer to Figure 91. The layout is saved as an XML file in a local download folder designated by the browser.
To download all layout files, follow these steps:
1. Go to Tools .
2. Click Layouts.
3. Click Export All . The layouts are saved as a ZIP file in a local download folder designated by the browser.
To upload an XML layout file, follow these steps:
1. Go to Tools .
2. Click Layouts, and then click Upload Layout from the New Layout drop-down list.
3. Select the XML layout file, and then click Open.

Troubleshooting65
9 TroubleshootingSelect the current username in the upper-right corner of the screen, and then click About to view software support information. A support information window opens with links to customer support services. Refer to Daktronics Contact Information (p.67). This troubleshooting section provides solutions to possible issues.
Password Recovery
Forgot a PasswordUsers in a hosted environment have two options if they forget their password:
• Click Forgot your password? on the Log In page and follow the on-screen instructions. Refer to Figure 93.
• Contact the account administrator or Daktronics at 1-800-325-8766 to request a new password.
Users in a local environment need to contact an account administrator or Daktronics.
For details on how to reset a user password as an account administrator, refer to Change a Password (p.66).
Reset a PasswordIf a password has been reset by an account administrator, follow these steps:
1. Open Venus® Control Suite.
• Hosted Server: Go to https://venus.daktronics.com.
• Local Server: Click the Venus® Control Suite icon on the computer desktop.
2. Log in using the provided password.
3. Type a new password in the New Password and Confirm Password text boxes when Update Password opens. This step is required only for the first-time login with a new password.
4. Update the account information in the User Information and Additional Information sections and click Save. The Dashboard window opens.
Note: After a user logs out of the current session, future logins use the new password.
Figure 92: Venus® System Log In

Troubleshooting66
Change a Password
Administrative Level AccessUsers with administrative level access can change their own password or the password for another user.
To change a password, follow these steps:
1. Go to Users .
2. Click the desired user profile. The user profile window opens.
3. Click the lock at the top of the screen. Refer to Figure 88. The Reset Password window opens.
4. Type a new password that is alphanumeric and at least eight characters. Refer to Figure 94.
5. Click Save.
Standard or Basic Level AccessFor users with standard or basic level access to change their own password, follow these steps:
1. Click the name in the upper-right corner of the screen and select My Profile.
2. Click the lock at the top of the screen. The Change Password window opens. Refer to Figure 94.
3. Type a new password that is alphanumeric and at least eight characters.
4. Click Save.
Content Plays IncorrectlyIf content exists but does not play on the display or does not play as scheduled, the media file, the playlist, or the display itself may not be configured correctly.
Associate a Playlist with a DisplayIf a playlist is created but it does not play on the targeted display, follow these steps:
1. Go to Playlists .
2. Click the desired playlist from the list.
3. Click Edit under the Displays section.
4. Select the correct display(s) where the playlist should be shown.
5. Click Save.
Figure 93: Reset Password

Troubleshooting67
Select the Time ZoneIf content does not play as scheduled, follow these steps to ensure the correct time zone is selected for the display location:
1. Go to Displays .
2. Select the desired display from the list. Display Information opens.
3. Select the correct time zone from the Display Time Zone drop-down list.
4. Click Save.
Associate Content with an AccountIf content exists in the Media Library but is not found during playlist creation, follow these steps to ensure the media file is associated with an account:
1. Go to Media .
2. Click the thumbnail for the desired media file. The media file information window opens.
3. Select the correct account from the Account drop-down list.
4. Click Save.
Daktronics Contact InformationClick the current username in the upper-right corner to reveal the user menu. Click About to open the support page with links to customer support services. Refer to Figure 4 and Figure 5.
Training videos that explain basic Venus® Control Suite functions are available online:
• http://www.daktronics.com/venus
Reach Daktronics Customer Support online:
• http://www.daktronics.com/support
For further assistance, Daktronics Customer Service is available 7:00 a.m. to 7:00 p.m. CST, Monday to Friday via telephone.
• Domestic (U.S. and Canada): 1-800-325-8766
• International: +1-605-697-4000

This page intentionally left blank.