oracle business intelligence 11g user guide for bi...
TRANSCRIPT
Oracle Business Intelligence 11g
User Guide for BI Mobile
Ankkitt Mathur
November 2012

© Peak Indicators Limited 2
Agenda Oracle BI Mobile
• Introduction • User Guide
• Installation & Configuring connection to an OBI environment • Opening reports and dashboards • Interacting with reports • Saving Favourites • Saving & Viewing Content Offline • Sharing content

© Peak Indicators Limited 3
User Guide for Oracle BI Mobile
Introduction
© Peak Indicators Limited 4
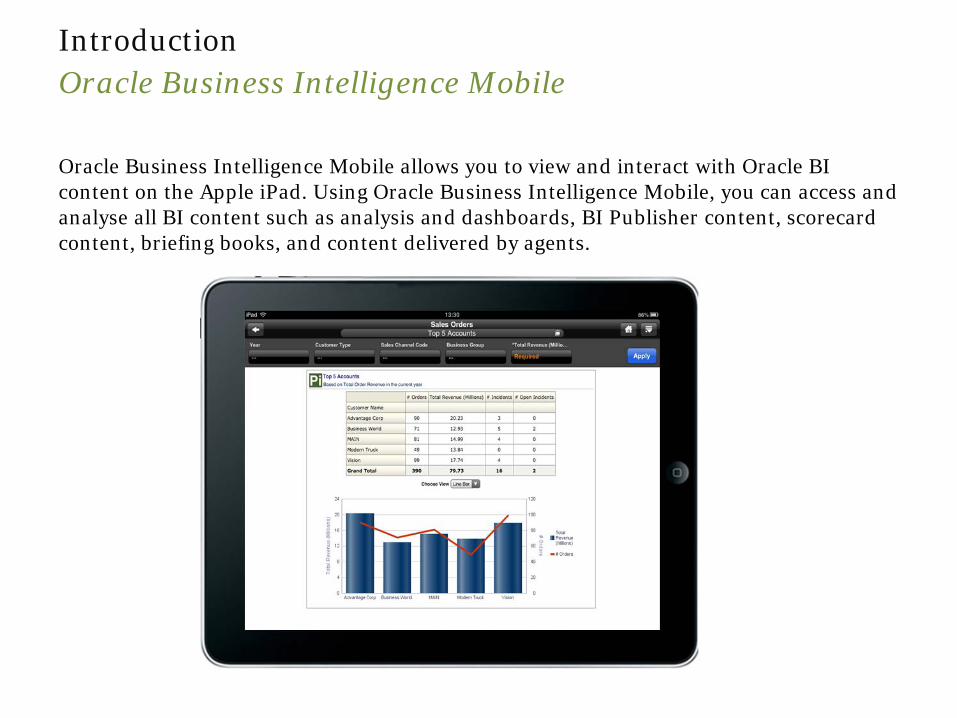
Introduction Oracle Business Intelligence Mobile Oracle Business Intelligence Mobile allows you to view and interact with Oracle BI content on the Apple iPad. Using Oracle Business Intelligence Mobile, you can access and analyse all BI content such as analysis and dashboards, BI Publisher content, scorecard content, briefing books, and content delivered by agents.

© Peak Indicators Limited 5
User Guide for Oracle BI Mobile
Installation and Configuration
© Peak Indicators Limited 6
Installation and Configuration Getting Started - Installing BI Mobile HD App
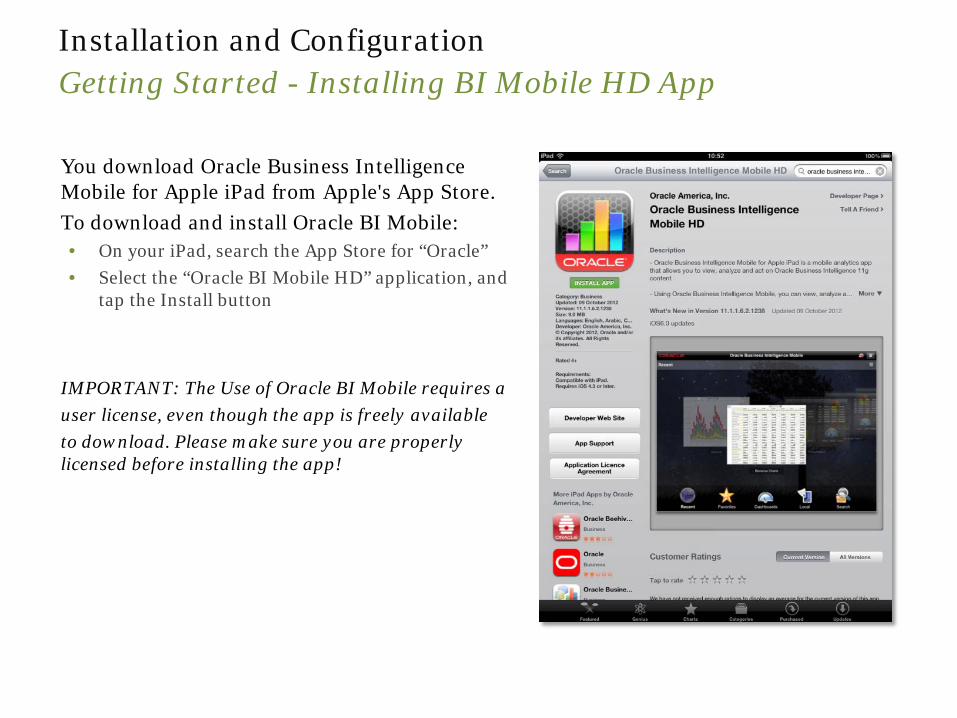
You download Oracle Business Intelligence Mobile for Apple iPad from Apple's App Store. To download and install Oracle BI Mobile: • On your iPad, search the App Store for “Oracle” • Select the “Oracle BI Mobile HD” application, and
tap the Install button
IMPORTANT: The Use of Oracle BI Mobile requires a user license, even though the app is freely available to download. Please make sure you are properly licensed before installing the app!
© Peak Indicators Limited 7
Installation and Configuration Getting Started - Configuration
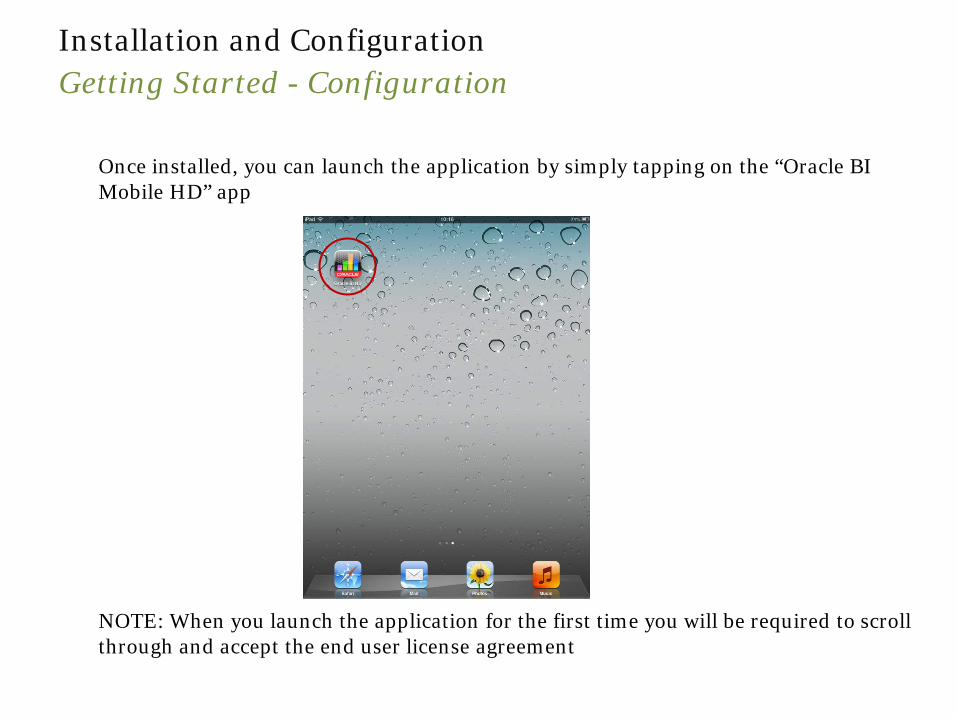
Once installed, you can launch the application by simply tapping on the “Oracle BI Mobile HD” app NOTE: When you launch the application for the first time you will be required to scroll through and accept the end user license agreement
© Peak Indicators Limited 8
Installation and Configuration Getting Started - Configuration
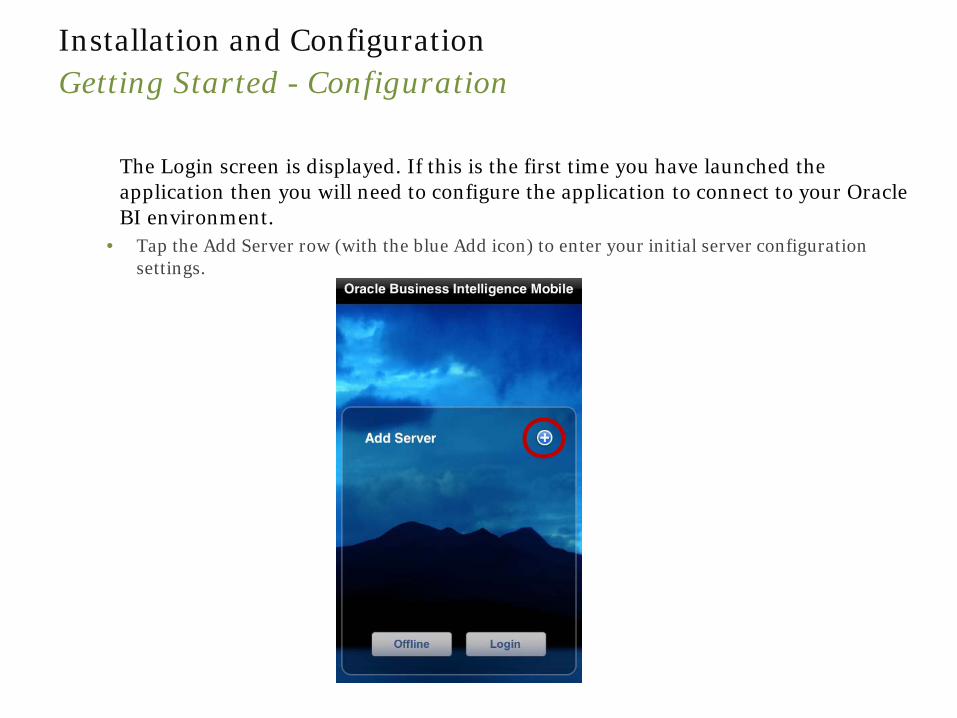
The Login screen is displayed. If this is the first time you have launched the application then you will need to configure the application to connect to your Oracle BI environment.
• Tap the Add Server row (with the blue Add icon) to enter your initial server configuration settings.

© Peak Indicators Limited 9
Installation and Configuration Getting Started - Configuration
• The Server Setting screen is displayed.
© Peak Indicators Limited 10
Installation and Configuration Getting Started - Configuration
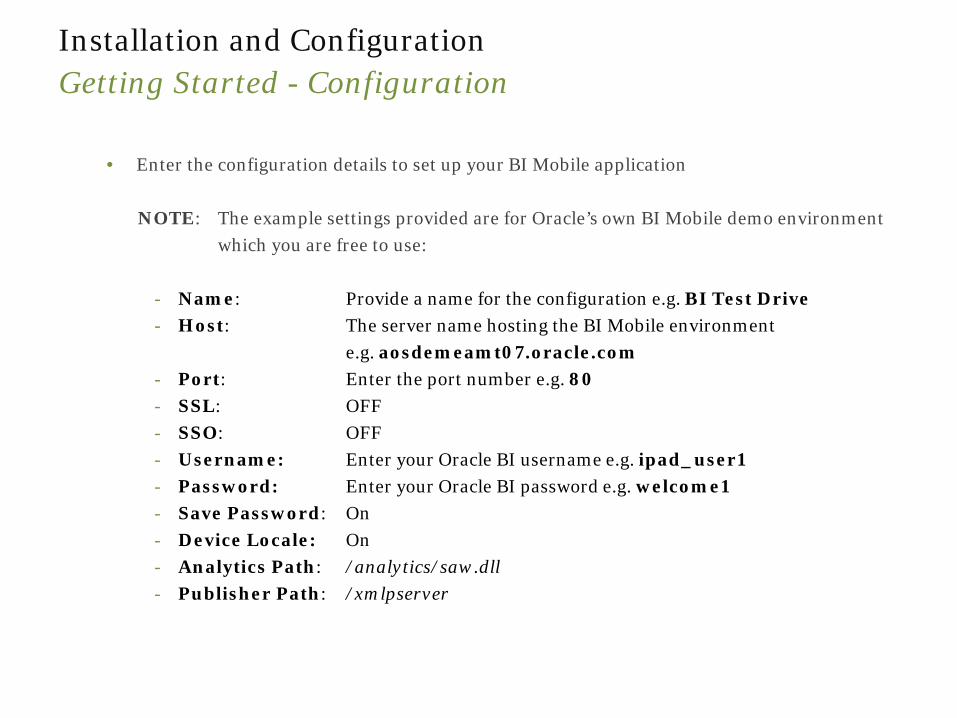
• Enter the configuration details to set up your BI Mobile application
NOTE: The example settings provided are for Oracle’s own BI Mobile demo environment which you are free to use:
- Name: Provide a name for the configuration e.g. BI Test Drive - Host: The server name hosting the BI Mobile environment e.g. aosdemeamt07.oracle.com - Port: Enter the port number e.g. 80 - SSL: OFF - SSO: OFF - Username: Enter your Oracle BI username e.g. ipad_user1 - Password: Enter your Oracle BI password e.g. welcome1 - Save Password: On - Device Locale: On - Analytics Path: /analytics/saw.dll - Publisher Path: /xmlpserver
© Peak Indicators Limited 11
Installation and Configuration Getting Started - Configuration
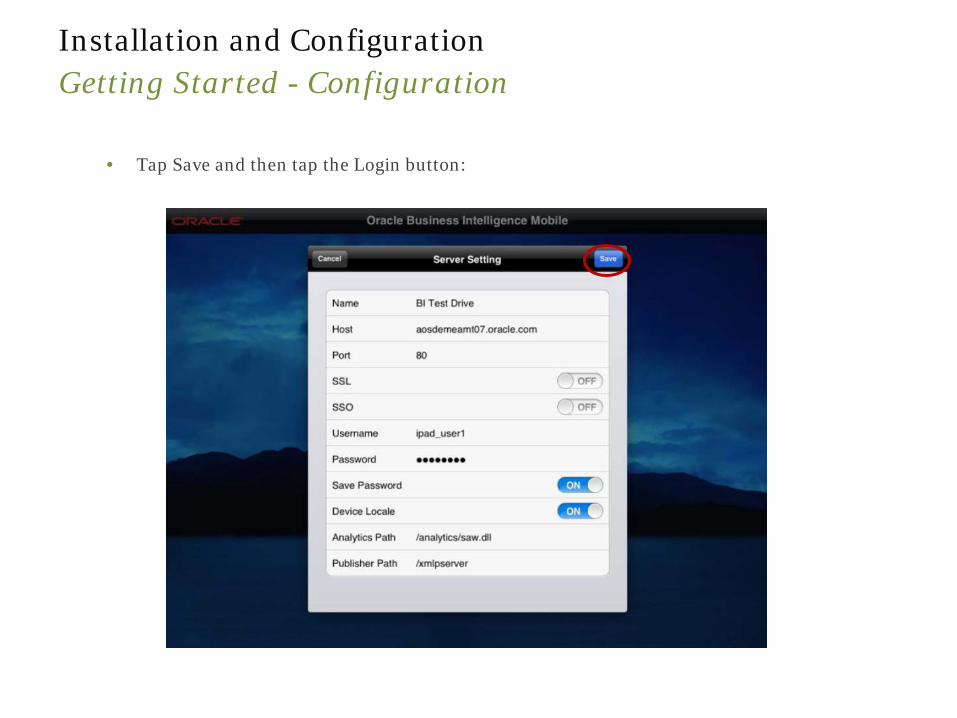
• Tap Save and then tap the Login button:
© Peak Indicators Limited 12
Installation and Configuration Getting Started - Configuration
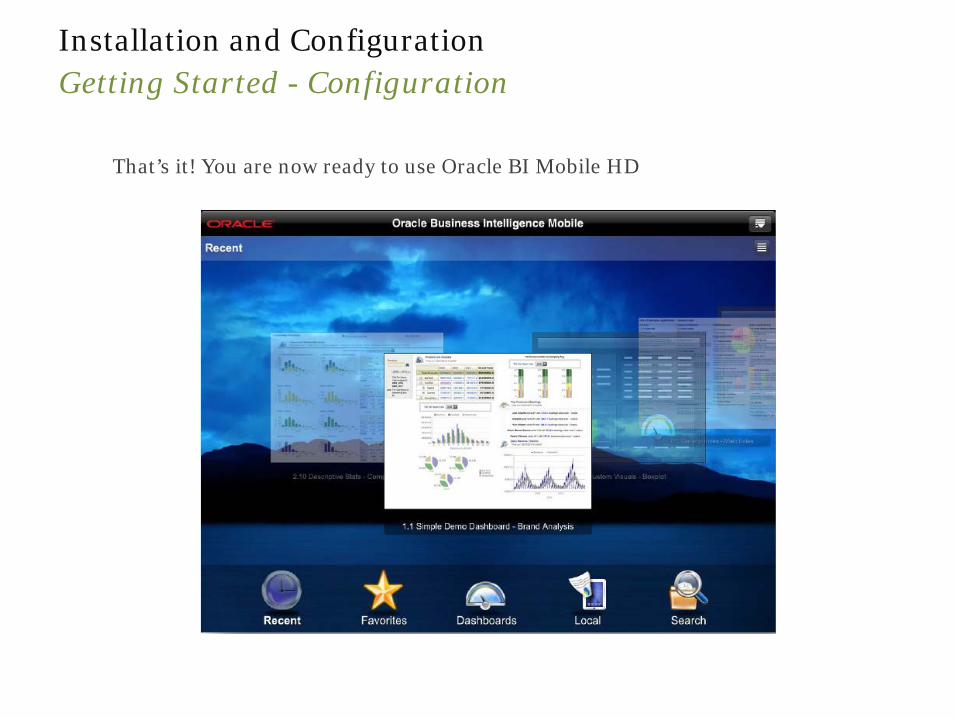
That’s it! You are now ready to use Oracle BI Mobile HD

© Peak Indicators Limited 13
User Guide for Oracle BI Mobile Opening Reports & Dashboards

© Peak Indicators Limited 14
Opening Reports & Dashboards Opening a Dashboard
To navigate to a Dashboard directly: • Tap the Dashboard button at the bottom, which will open a list of folders • Tap the destination Folder and then tap the required Dashboard

© Peak Indicators Limited 15
Opening Reports & Dashboards Opening a Dashboard
Oracle BI Mobile HD comes with a nice feature that allows you to scroll all the dashboards across the screen. The thumbnail images appear once you have gone to the dashboard for the first time.

© Peak Indicators Limited 16
Opening Reports & Dashboards Opening Another Dashboard Page
You can change to another dashboard page within the dashboard using the drop-down list at the top.

© Peak Indicators Limited 17
Opening Reports & Dashboards Returning Back to the Home Screen
• Once you’ve opened a dashboard you can return to the home screen by tapping the arrow at the top-left
© Peak Indicators Limited 18
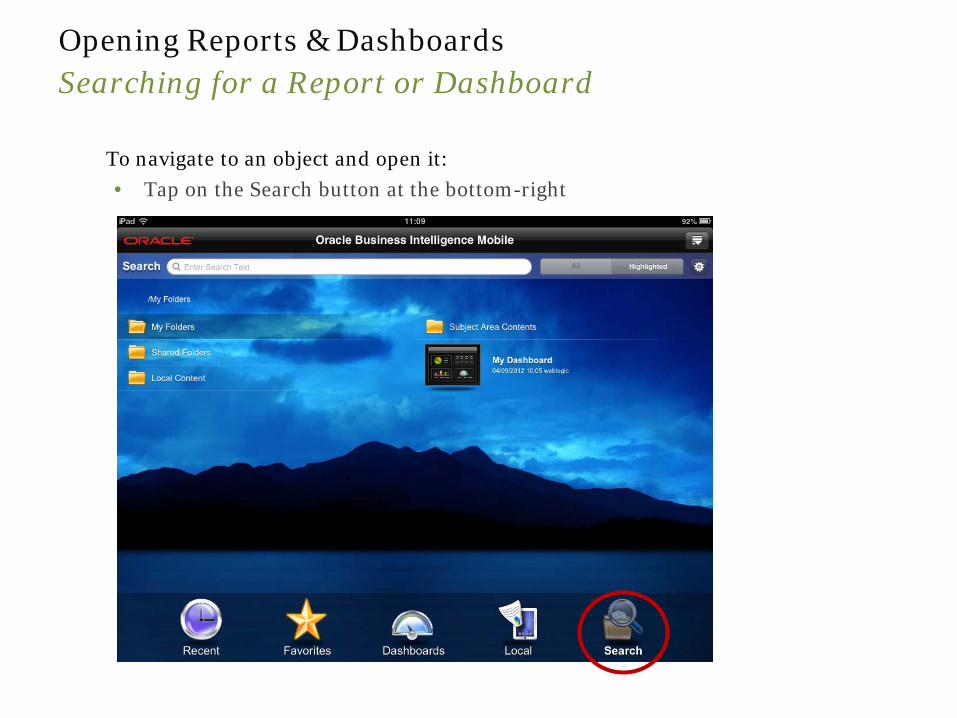
Opening Reports & Dashboards Searching for a Report or Dashboard
To navigate to an object and open it: • Tap on the Search button at the bottom-right
© Peak Indicators Limited 19
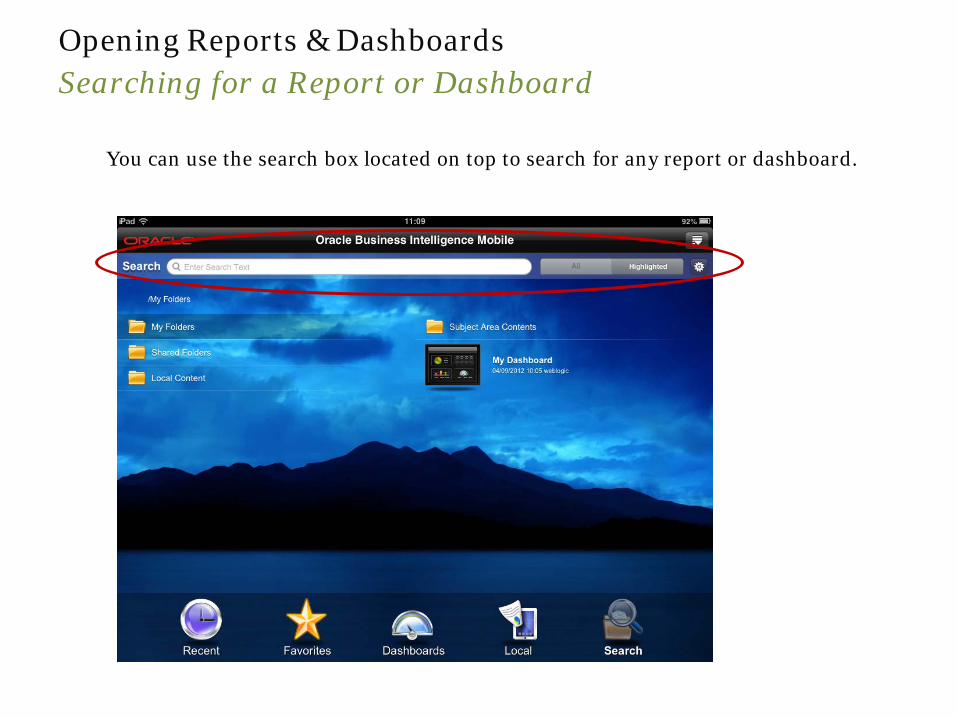
Opening Reports & Dashboards Searching for a Report or Dashboard
You can use the search box located on top to search for any report or dashboard.
© Peak Indicators Limited 20
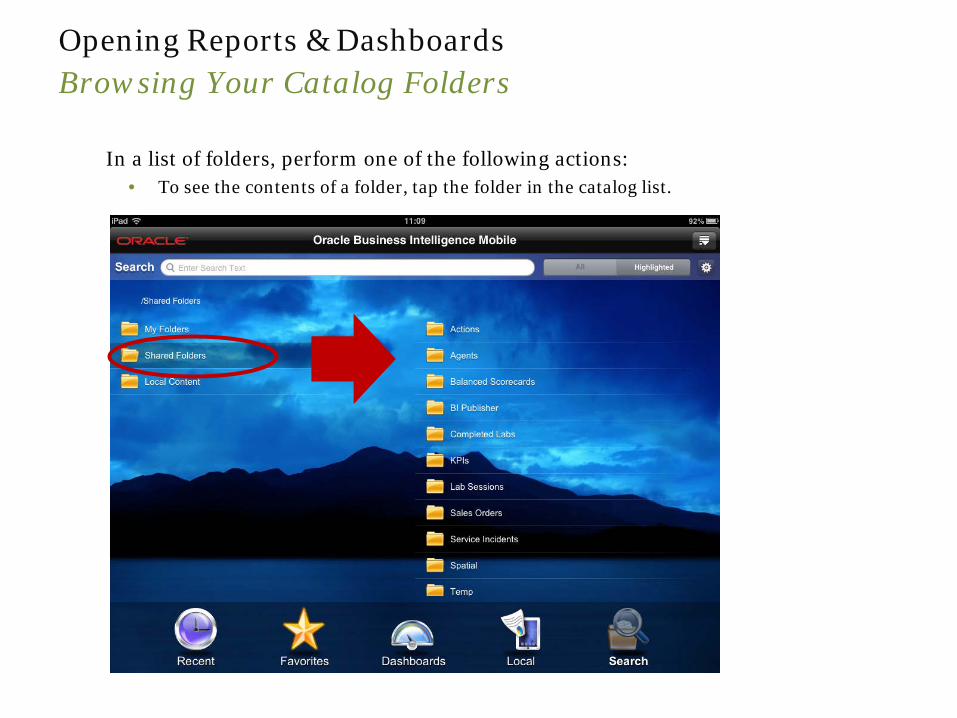
Opening Reports & Dashboards Browsing Your Catalog Folders
In a list of folders, perform one of the following actions: • To see the contents of a folder, tap the folder in the catalog list.

© Peak Indicators Limited 21
Opening Reports & Dashboards Browsing Your Catalog Folders
• To go up a folder level, tap the arrow to left of the directory path (below the search bar).

© Peak Indicators Limited 22
Opening Reports & Dashboards Browsing Your Catalog Folders
• You can browse for more content under ‘My Folders’ or ‘Shared Folders’

© Peak Indicators Limited 23
User Guide for Oracle BI Mobile Interacting with Reports
© Peak Indicators Limited 24
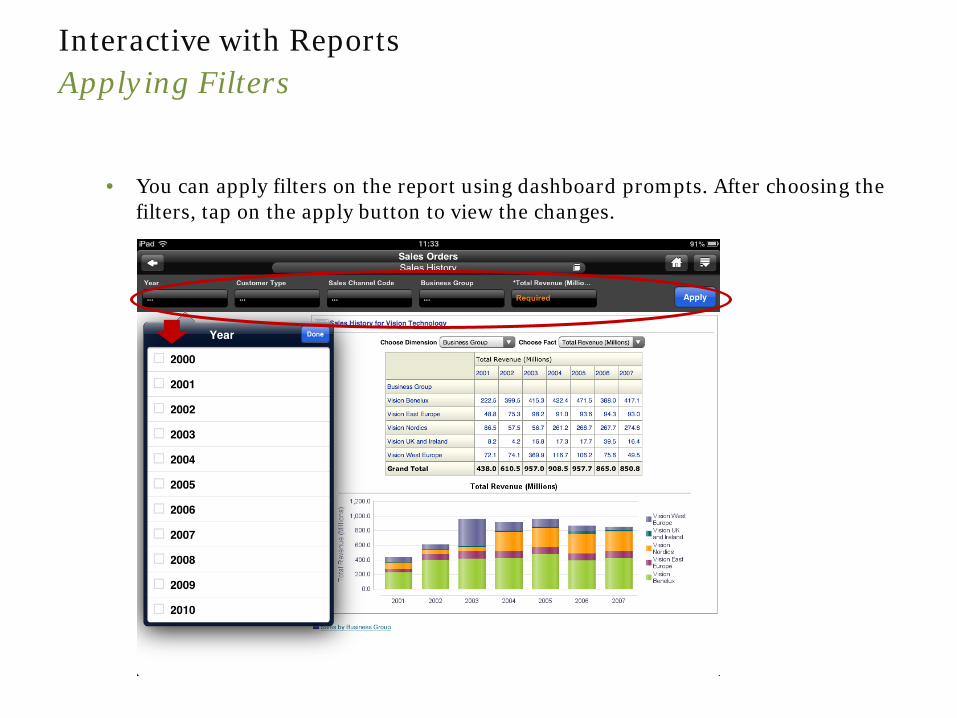
Interactive with Reports Applying Filters
• You can apply filters on the report using dashboard prompts. After choosing the filters, tap on the apply button to view the changes.
© Peak Indicators Limited 25
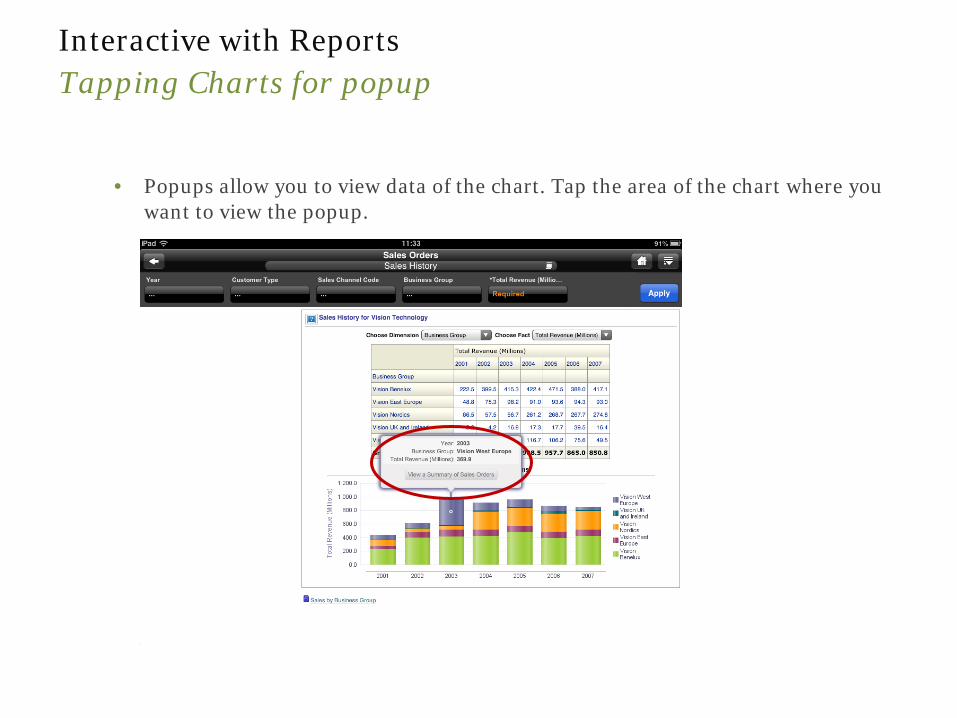
Interactive with Reports Tapping Charts for popup
• Popups allow you to view data of the chart. Tap the area of the chart where you want to view the popup.
© Peak Indicators Limited 26
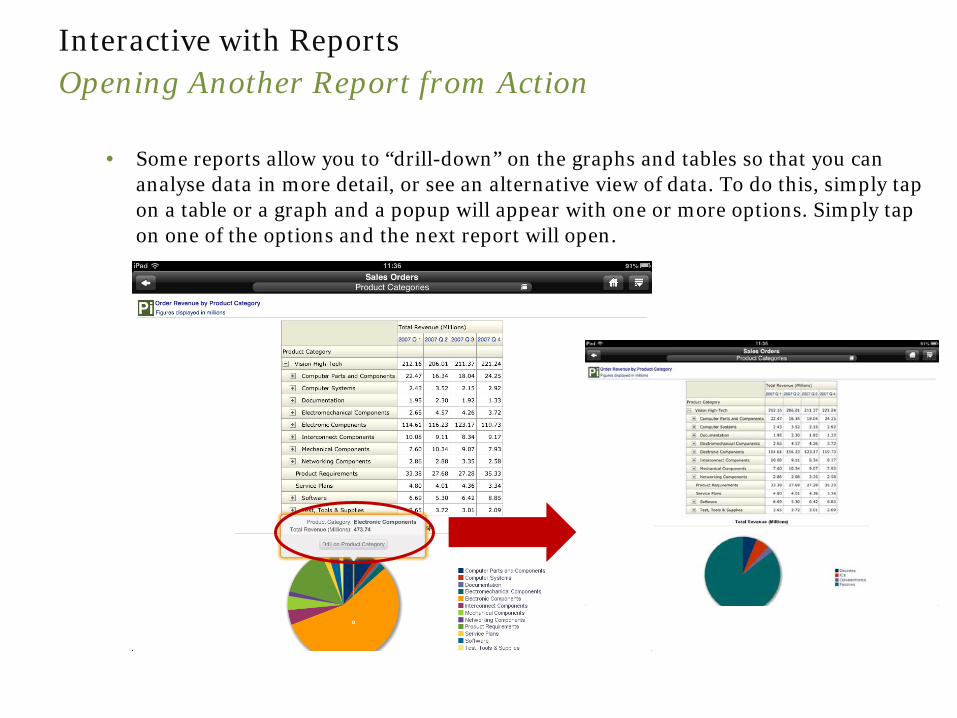
Interactive with Reports Opening Another Report from Action
• Some reports allow you to “drill-down” on the graphs and tables so that you can analyse data in more detail, or see an alternative view of data. To do this, simply tap on a table or a graph and a popup will appear with one or more options. Simply tap on one of the options and the next report will open.

© Peak Indicators Limited 27
User Guide for Oracle BI Mobile Favourites
© Peak Indicators Limited 28
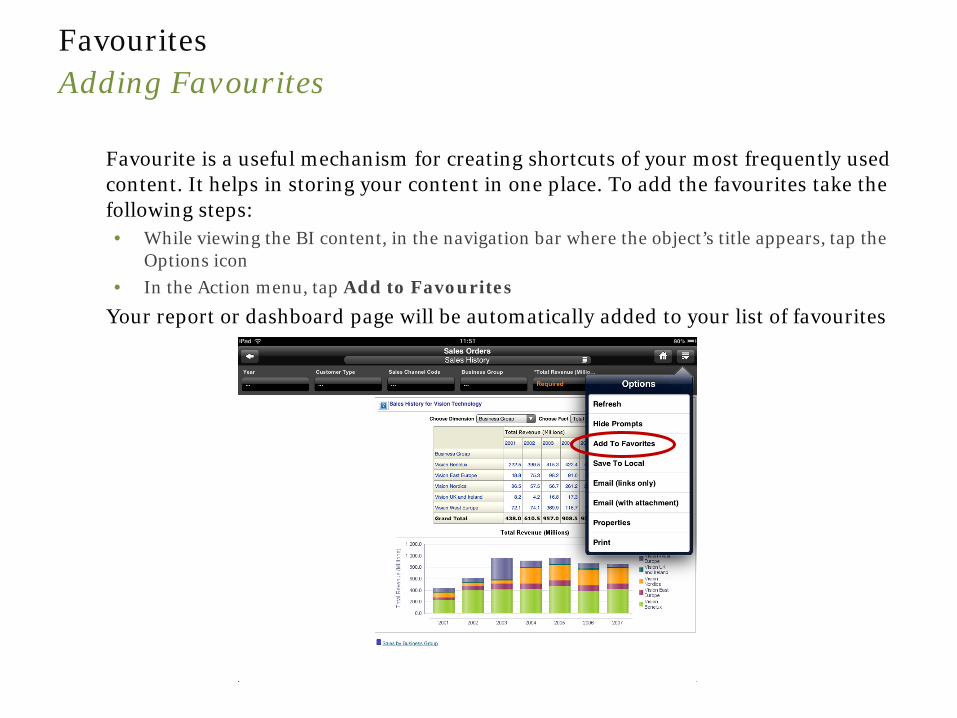
Favourites Adding Favourites
Favourite is a useful mechanism for creating shortcuts of your most frequently used content. It helps in storing your content in one place. To add the favourites take the following steps: • While viewing the BI content, in the navigation bar where the object’s title appears, tap the
Options icon • In the Action menu, tap Add to Favourites
Your report or dashboard page will be automatically added to your list of favourites
© Peak Indicators Limited 29
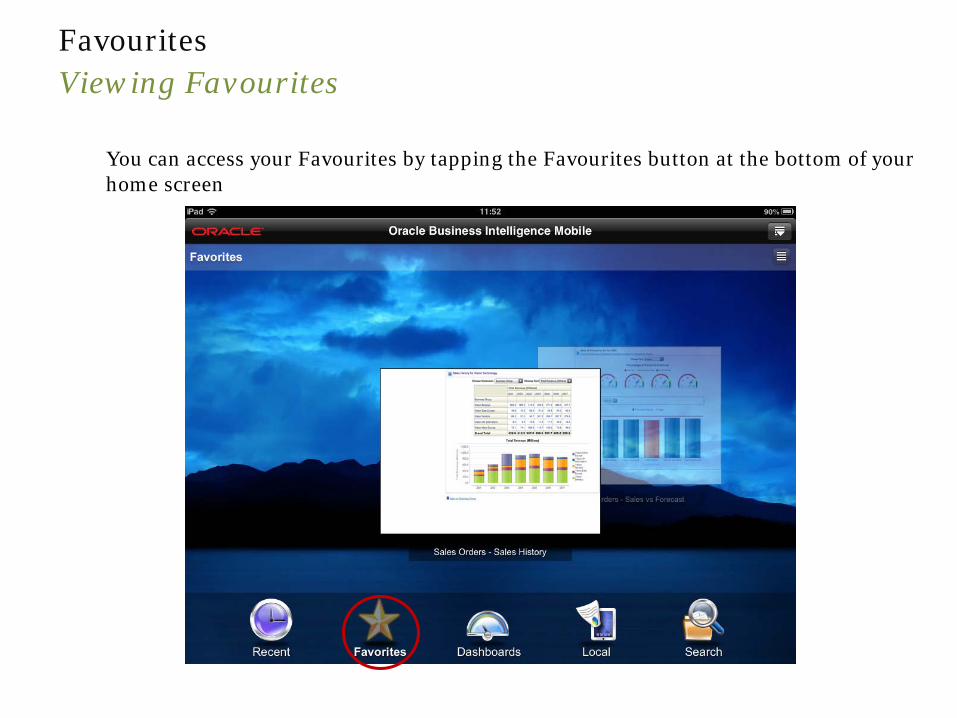
Favourites Viewing Favourites
You can access your Favourites by tapping the Favourites button at the bottom of your home screen
© Peak Indicators Limited 30
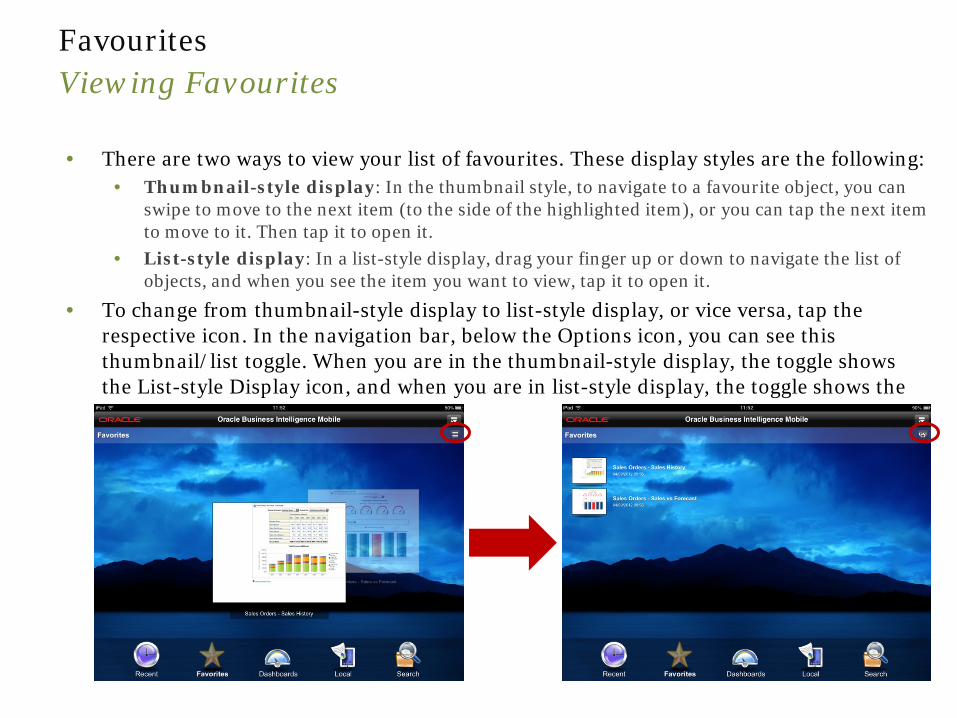
Favourites Viewing Favourites
• There are two ways to view your list of favourites. These display styles are the following: • Thumbnail-style display: In the thumbnail style, to navigate to a favourite object, you can
swipe to move to the next item (to the side of the highlighted item), or you can tap the next item to move to it. Then tap it to open it.
• List-style display: In a list-style display, drag your finger up or down to navigate the list of objects, and when you see the item you want to view, tap it to open it.
• To change from thumbnail-style display to list-style display, or vice versa, tap the respective icon. In the navigation bar, below the Options icon, you can see this thumbnail/list toggle. When you are in the thumbnail-style display, the toggle shows the List-style Display icon, and when you are in list-style display, the toggle shows the thumbnail-style Display icon.

© Peak Indicators Limited 31
User Guide for Oracle BI Mobile Saving & Viewing Content Online

© Peak Indicators Limited 32
Saving & Viewing Content Online Saving a Local Copy
• You can save local versions of BI content to your mobile device so that you can view the content again later on, even if your device is off-line (i.e. not connected to a network). You can save analyses, dashboards, briefing books, and BI Publisher reports.
To save BI content locally:
• While viewing BI content, tap the Options icon
• Tap Save to Local
• (Optional) Give the BI content a new name
• Tap OK
© Peak Indicators Limited 33
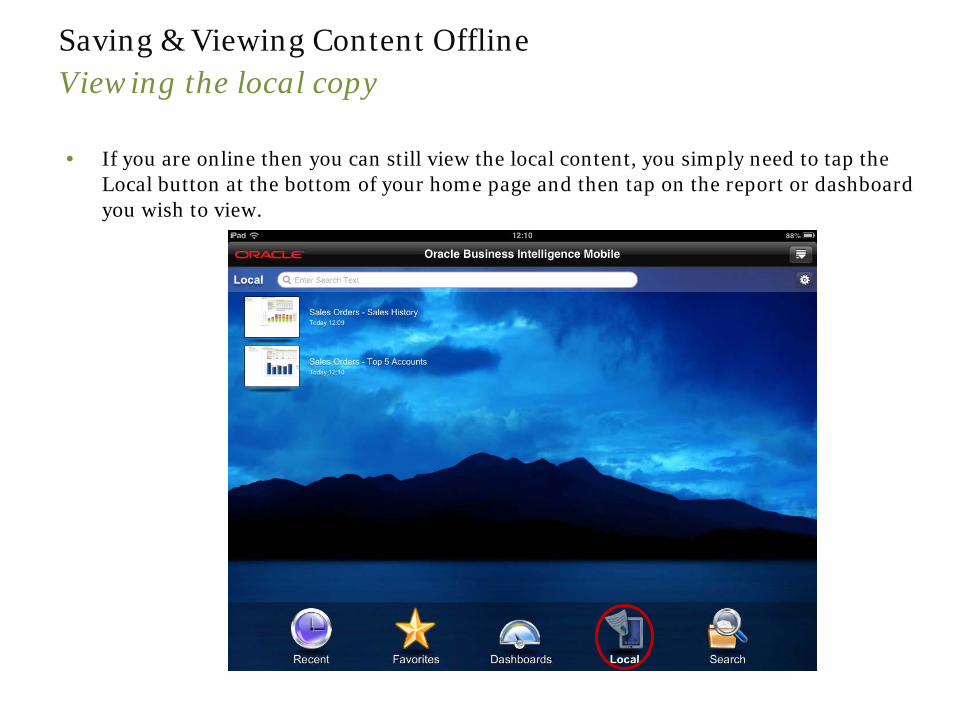
Saving & Viewing Content Offline Viewing the local copy • If you are online then you can still view the local content, you simply need to tap the
Local button at the bottom of your home page and then tap on the report or dashboard you wish to view.
© Peak Indicators Limited 34
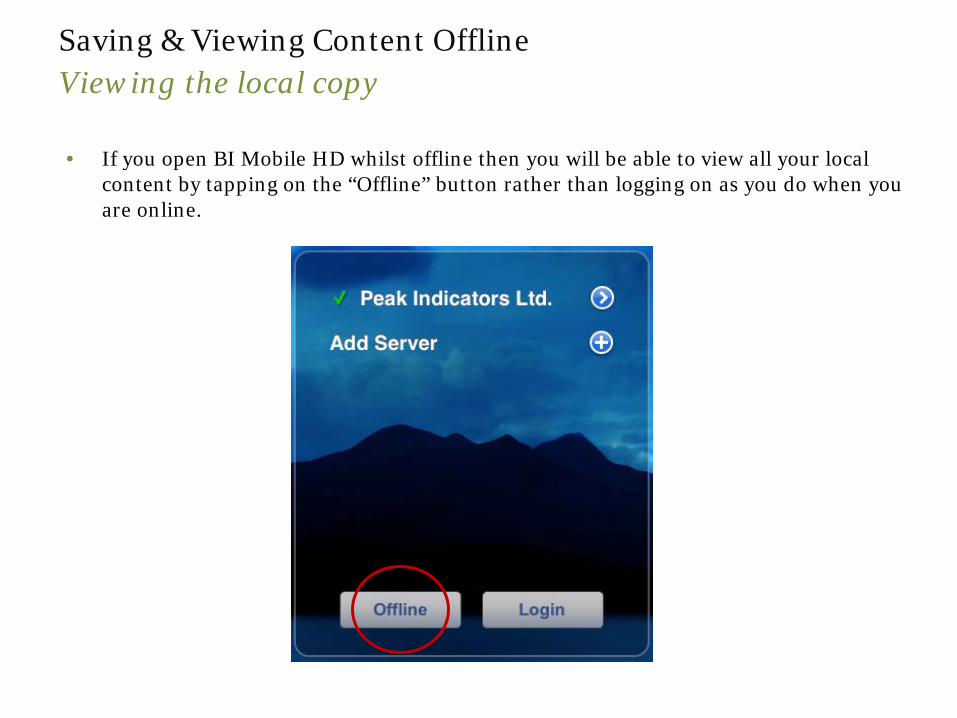
Saving & Viewing Content Offline Viewing the local copy • If you open BI Mobile HD whilst offline then you will be able to view all your local
content by tapping on the “Offline” button rather than logging on as you do when you are online.

© Peak Indicators Limited 35
Saving & Viewing Content Offline Viewing the local copy • That’s it! All your off-line content will then be listed for you to access.
Please Note: Your off-line content will not have any interactions, the reports and dashboards will always be static
© Peak Indicators Limited 36
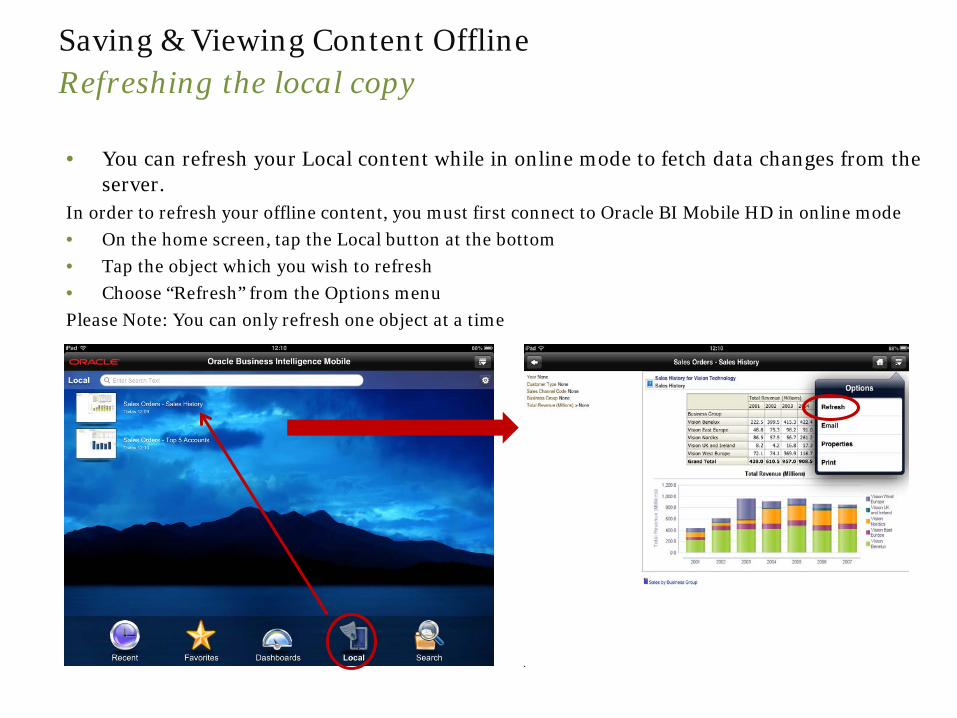
Saving & Viewing Content Offline Refreshing the local copy • You can refresh your Local content while in online mode to fetch data changes from the
server. In order to refresh your offline content, you must first connect to Oracle BI Mobile HD in online mode • On the home screen, tap the Local button at the bottom • Tap the object which you wish to refresh • Choose “Refresh” from the Options menu Please Note: You can only refresh one object at a time

© Peak Indicators Limited 37
User Guide for Oracle BI Mobile Sharing Content
© Peak Indicators Limited 38
Sharing Content Using Email
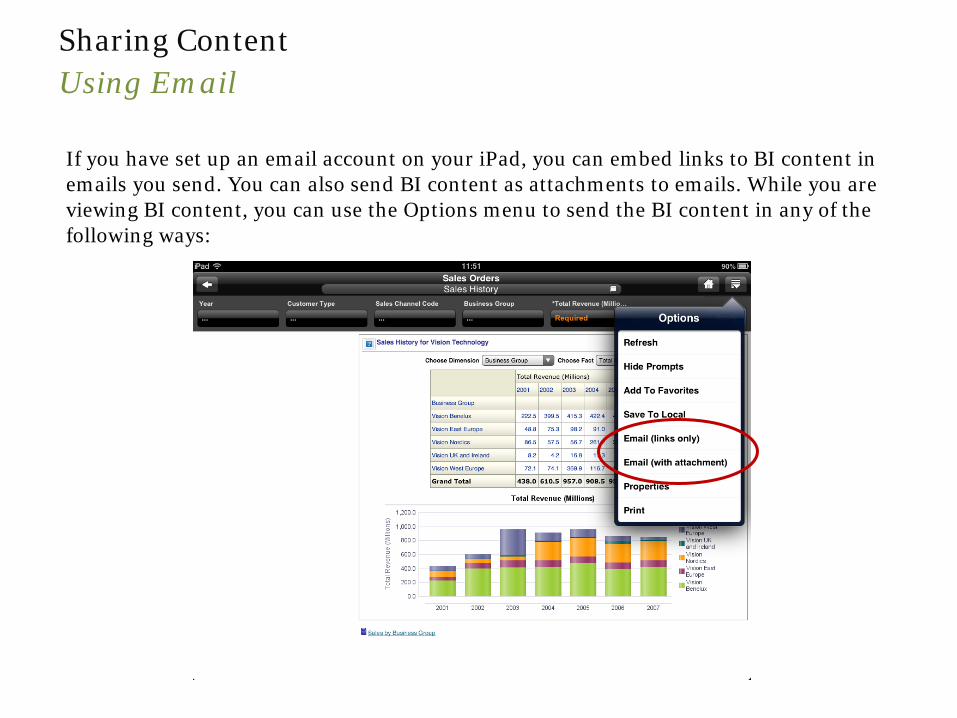
If you have set up an email account on your iPad, you can embed links to BI content in emails you send. You can also send BI content as attachments to emails. While you are viewing BI content, you can use the Options menu to send the BI content in any of the following ways:
© Peak Indicators Limited 39
Sharing Content Using Email
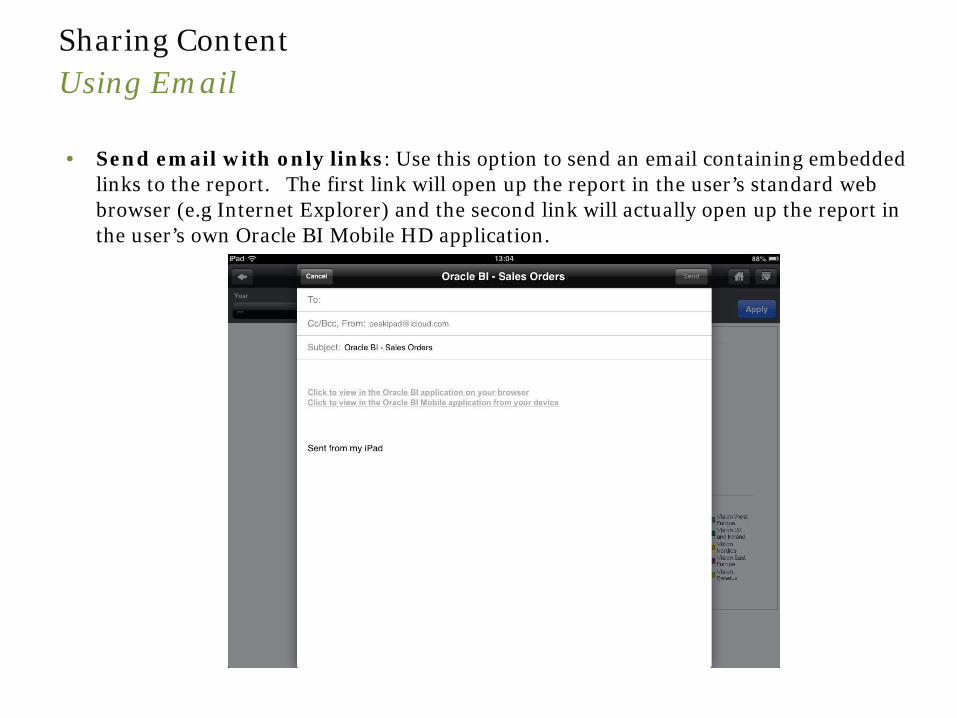
• Send email with only links: Use this option to send an email containing embedded links to the report. The first link will open up the report in the user’s standard web browser (e.g Internet Explorer) and the second link will actually open up the report in the user’s own Oracle BI Mobile HD application.

© Peak Indicators Limited 40
Sharing Content Using Email
• Send email with an attachment: By choosing this option, a copy of the report will also be attached to the email (so the email will naturally be larger). You still get the two links to open up the report via a web browser or Oracle BI Mobile HD application.
Note that you can configure this feature to either attach the report to the email as a separate file, or you can instead choose to display the report as “inline content” so that report is actually displayed embedded within the main email body. The next slide explains how to configure this feature.
© Peak Indicators Limited 41
Sharing Content Using Email
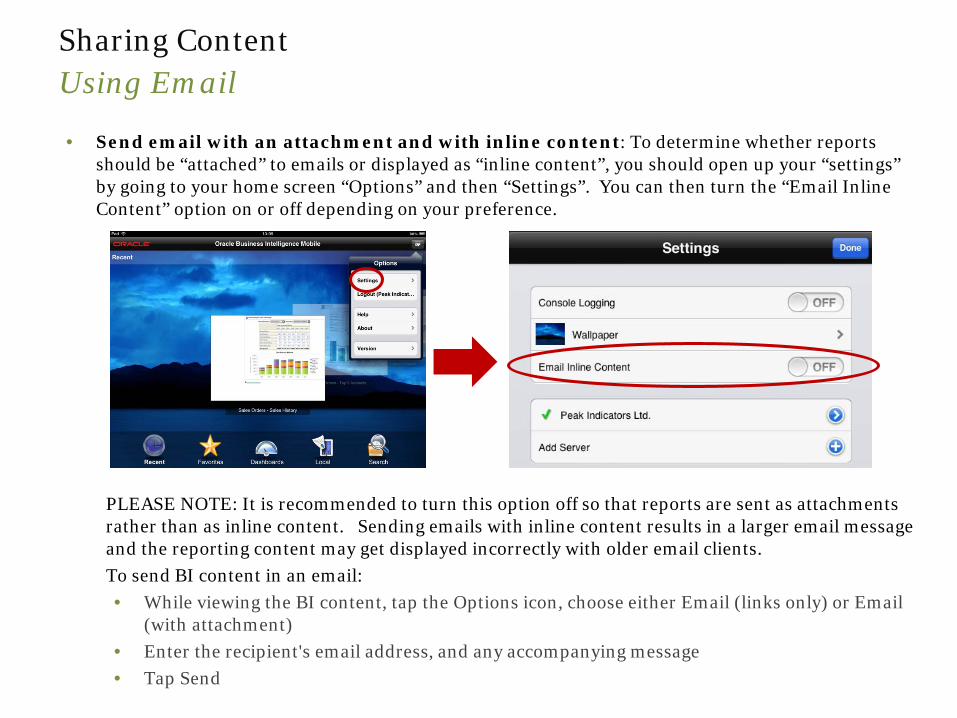
• Send email with an attachment and with inline content: To determine whether reports should be “attached” to emails or displayed as “inline content”, you should open up your “settings” by going to your home screen “Options” and then “Settings”. You can then turn the “Email Inline Content” option on or off depending on your preference.
PLEASE NOTE: It is recommended to turn this option off so that reports are sent as attachments rather than as inline content. Sending emails with inline content results in a larger email message and the reporting content may get displayed incorrectly with older email clients. To send BI content in an email: • While viewing the BI content, tap the Options icon, choose either Email (links only) or Email
(with attachment) • Enter the recipient's email address, and any accompanying message • Tap Send

© Peak Indicators Limited 42
Questions?

Helping Your Business Intelligence Journey