oracle governance, risk and compliance oracle governance, risk and compliance installation guide...
TRANSCRIPT
Oracle® Governance, Risk and Compliance
Installation Guide
Release 8.6.3
Part No. E24450-04
January 2012

Oracle Governance, Risk and Compliance Installation Guide
Part No. E24450-04
Copyright © 2011, 2012 Oracle Corporation and/or its affiliates. All rights reserved.
Primary Author: David Christie
Oracle is a registered trademark of Oracle Corporation and/or its affiliates. Other names may be trademarks of their respective owners.
The software and related documentation are provided under a license agreement containing restrictions on use and disclosure and are protected by intellectual property laws. Except as expressly permitted in your license agreement or allowed by law, you may not use, copy, reproduce, translate, broadcast, modify, license, transmit, distribute, exhibit, perform, publish or display any part, in any form, or by any means. Reverse engineering, disassembly, or decompilation of this software, unless required by law for interoperability, is prohibited.
The information contained herein is subject to change without notice and is not warranted to be error-free. If you find any errors, please report them to us in writing.
If this software or related documentation is delivered to the U.S. Government or anyone licensing it on behalf of the U.S. Government, the following notice is applicable.
U.S. GOVERNMENT RIGHTS
Programs, software, databases, and related documentation and technical data delivered to U.S. Government customers are “commercial computer software” or “commercial technical data” pursuant to the applicable Federal Acquisition Regulation and agency-specific supplemental regulations. As such, the use, duplication, disclosure, modification, and adaptation shall be subject to the restrictions and license terms set forth in the applicable Government contract, and, to the extent applicable by the terms of the Government contract, the additional rights set forth in FAR 52.227-19, Commercial Computer Software License (December 2007). Oracle USA, Inc., 500 Oracle Parkway, Redwood City, CA 94065.
The software is developed for general use in a variety of information management applications. It is not developed or intended for use in any inherently dangerous applications, including applications which may create a risk of personal injury. If you use this software in dangerous applications, then you shall be responsible to take all appropriate fail-safe, backup, redundancy and other measures to ensure the safe use of this software. Oracle Corporation and its affiliates disclaim any liability for any damages caused by use of this software in dangerous applications.
The software and documentation may provide access to or information on content, products and services from third parties. Oracle Corporation and its affiliates are not responsible for and expressly disclaim all warranties of any kind with respect to third party content, products and services. Oracle Corporation and its affiliates will not be responsible for any loss, costs, or damages incurred due to your access to or use of third party content, products or services.
Contents iii
Contents
1 Introduction
Prerequisites ................................................................................... 1-2
2 Installing GRC
Creating a GRC Schema ................................................................. 2-2
Downloading Files ........................................................................... 2-3
Creating GRC Repositories ............................................................. 2-4
Setting Up WebLogic ....................................................................... 2-4
Initial WebLogic Installation ....................................................... 2-4
Creating a WebLogic Domain ................................................... 2-5
Preparing Additional Files ......................................................... 2-7
Installing SOA Composites ....................................................... 2-8
Creating Keystores ................................................................... 2-8
Setting Up Credentials .............................................................. 2-9
Creating the SOA Admin User and Enabling Embedded LDAP .................................................................... 2-10
WebLogic Console Configuration ............................................ 2-11
Modifying Settings ................................................................... 2-12
Setting Up Tomcat Application Server ........................................... 2-13
GRC Configuration ........................................................................ 2-14
Completing the Installation ............................................................ 2-16
3 Deploying a VM Image of GRC
Deploying a GRC Distribution .......................................................... 3-1
Users and Passwords ...................................................................... 3-2

iv Oracle Governance, Risk and Compliance Installation Guide
Log File Locations ............................................................................ 3-3
Starting a GRC Distribution .............................................................. 3-3
Stopping a GRC Distribution ............................................................ 3-4
4 Additional EGRCC Configuration
Configuring Global Users ................................................................. 4-1
Configuring Datasources and Synchronizing Data ........................... 4-3
Determining Datasource IDs ............................................................ 4-5
5 Setting Up FAACG
Installing the Connector ................................................................... 5-1
Associate the GRC Domain with OID ........................................ 5-1
Create an OIDAuthenticator ...................................................... 5-2
Grant Permission to the EGRCC Code Base ............................ 5-4
Upload the Connector ................................................................ 5-4
Create and Synchronize a Datasource ...................................... 5-5
Performing GRC Setup in Fusion Setup Manager ........................... 5-6
Portlet Registration .................................................................... 5-6
Configure Offerings ................................................................... 5-6
Implementation Project .............................................................. 5-6
Create a GRC Setup Master Record ......................................... 5-6
Create a GRC Setup Detail Record ........................................... 5-7
Publish Configuration ................................................................ 5-7
6 Installing PEAs
Installing the Oracle PEA ................................................................. 6-1
Preliminary Steps ...................................................................... 6-1
Downloading and Preparing Files .............................................. 6-2
Automated Installation ............................................................... 6-3
Manual Installation..................................................................... 6-4
Postinstallation Steps ................................................................ 6-8
Installing the PeopleSoft PEA .......................................................... 6-9
Downloading and Preparing Files .............................................. 6-9
Installing the PEA .................................................................... 6-11
Importing a Project .................................................................. 6-12

Preface v
Preface
This Preface introduces the guides and other information sources available to help
you more effectively use Oracle Fusion Applications.
Disclaimer
The information contained in this document is intended to outline our general
product direction and is for informational sharing purposes only, and should be
considered in your capacity as a customer advisory board member or pursuant to
your beta trial agreement only. It is not a commitment to deliver any material, code,
or functionality, and should not be relied upon in making purchasing decisions. The
development, release, and timing of any features or functionality described in this
document remains at the sole discretion of Oracle. This document in any form,
software or printed matter, contains proprietary information that is the exclusive
property of Oracle. Your access to and use of this confidential material is subject to
the terms and conditions of your Oracle software license and service agreement,
which has been executed and with which you agree to comply. This document and
information contained herein may not be disclosed, copied, reproduced or
distributed to anyone outside Oracle without prior written consent of Oracle. This
document is not part of your license agreement nor can it be incorporated into any
contractual agreement with Oracle or its subsidiaries or affiliates.
Other Information Sources
My Oracle Support
Oracle customers have access to electronic support through My Oracle Support. For
information, visit http://www.oracle.com/support/contact.html or visit
http://www.oracle.com/accessibility/support.html if you are hearing impaired.
Use the My Oracle Support Knowledge Browser to find documents for a product
area. You can search for release-specific information, such as patches, alerts, white
papers, and troubleshooting tips. Other services include health checks, guided
lifecycle advice, and direct contact with industry experts through the My Oracle
Support Community.

vi Oracle Governance, Risk and Compliance Installation Guide
Oracle Enterprise Repository
Oracle Enterprise Repository provides visibility into service-oriented architecture
assets to help you manage the lifecycle of your software from planning through
implementation, testing, production, and changes. In Oracle Fusion Applications,
you can use the Oracle Enterprise Repository for:
• Technical information about integrating with other applications, including
services, operations, composites, events, and integration tables. The
classification scheme shows the scenarios in which you use the assets, and
includes diagrams, schematics, and links to other technical documentation.
• Publishing other technical information such as reusable components, policies,
architecture diagrams, and topology diagrams.
The Oracle Fusion Applications information is provided as a solution pack that you
can upload to your own deployment of Oracle Enterprise Repository. You can
document and govern integration interface assets provided by Oracle with other
assets in your environment in a common repository.
Documentation Accessibility
For information about Oracle’s commitment to accessibility, visit the Oracle
Accessibility Program website at http://www.oracle.com/us/corporate/accessibility
/index.html.
Comments and Suggestions
Your comments are important to us. We encourage you to send us feedback about
Oracle Fusion Applications Help and guides. Please send your suggestions to
[email protected]. You can use the Send Feedback
to Oracle link in the footer of Oracle Fusion Applications Help.
Introduction 1-1
1
Introduction
Oracle Governance, Risk and Compliance (GRC) is a set of products that regulate
activity in business-management applications. This document provides instructions
for the installation (or upgrade) of the following GRC products:
• Oracle Enterprise Governance, Risk and Compliance Manager (EGRCM)
consists of loosely coupled functional modules that collectively manage an
organization’s governance, risk, and compliance objectives.
• Oracle Enterprise Governance, Risk and Compliance Controls (EGRCC) com-
prises two components, each of which enables users to create “models” and
“controls” that define risks a company may face:
– Oracle Enterprise Transaction Controls Governor (ETCG) implements models
and controls that specify circumstances under which individual transactions
display evidence of error, fraud, or other risk.
– Oracle Application Access Controls Governor (AACG) executes models and
controls that define conflicts among duties that can be assigned in a company’s
applications, and identify users who have access to those conflicting duties.
AACG can also implement “preventive analysis” — it can evaluate controls
as duties are assigned to users of the company’s applications, preventing them
from gaining risky access.
• Oracle Fusion Application Access Controls Governor (FAACG) is a specialized
installation of EGRCC that enables it to apply access models and controls within
Oracle Fusion Applications.
As you implement GRC, keep the following in mind:
• You can install GRC on a server that you own and maintain (a “conventional”
installation), or you can use Oracle VM Server to deploy an image of GRC in-
itially configured by Oracle.
• You must select either EGRCM 8.6.3 or EGRCC 8.6.3. You cannot run both on
a single server.
• You can install version 8.6.3 of EGRCM, but you cannot upgrade to it from an
earlier version.
• You can either install version 8.6.3 of EGRCC directly or upgrade to it from
EGRCC version 8.6.0. To use AACG preventive analysis in instances of Oracle
1-2 Oracle Governance, Risk and Compliance Installation Guide
E-Business Suite or PeopleSoft, you must also install a Preventive Enforcement
Agent (PEA) in each instance. FAACG requires the installation of a “connector”
(which gathers data for analysis from Fusion), as well as integration with Oracle
Identity Management and other components.
Prerequisites
If you intend to deploy a VM image of GRC, you need to install Oracle VM
Manager and Oracle VM Server 2.2, and the remaining prerequisites do not apply to
you.
If you intend to perform a conventional GRC installation, then EGRCM and
EGRCC run on a 64-bit Linux server. Be sure the following lines exist in the
/etc/security/limits.conf file:
* soft nproc 8192
* hard nproc 32768
* soft nofile 65536
* hard nofile 131072
If you are installing FAACG, you must use GRC version 8.6.3.4000. If you are
installing EGRCM, or EGRCC without FAACG, you can use any patch level of GRC
version 8.6.3.
The installation of Governance, Risk and Compliance requires that the following also
be installed on the server:
• Oracle database 11g Release 2. (Configuration of a GRC schema is documented
in Chapter 2.)
• Java: Sun Java Development Kit 1.6 or higher. JRockit JDK R28.1.3 for Java
SE 6 with JRockit Mission Control 4.0.1 for Linux x86-64 is also supported.
GRC must have its own dedicated Java container. It was not designed to coexist
in a container with other web applications.
• Middleware: EGRCM requires WebLogic Server (WLS) 10.3.4 and related com-
ponents — some combination of Service Oriented Architecture (SOA) 11.1.1.4,
Repository Creation Utility (RCU) 11.1.1.4, and Application Development Run-
time (ADR) 11.1.1.4.
Install EGRCM with SOA if you intend to integrate with other applications and
want them to consume SOA worklists. Otherwise, install without SOA. Your
selection of other components depends on whether you install with SOA. (A
third option is to use EGRCM with a SOA instance you’ve already installed for
other purposes. In that case, install the same middleware components you would
if you were installing EGRCM without SOA.)
For EGRCC without FAACG, WebLogic 10.3.4 is preferred; Tomcat Applica-
tion Server version 6.0.24 is also supported. If you are installing EGRCC to run
FAACG, however, you must use WebLogic 10.3.5 with SOA 11.1.1.5.0.
Introduction 1-3
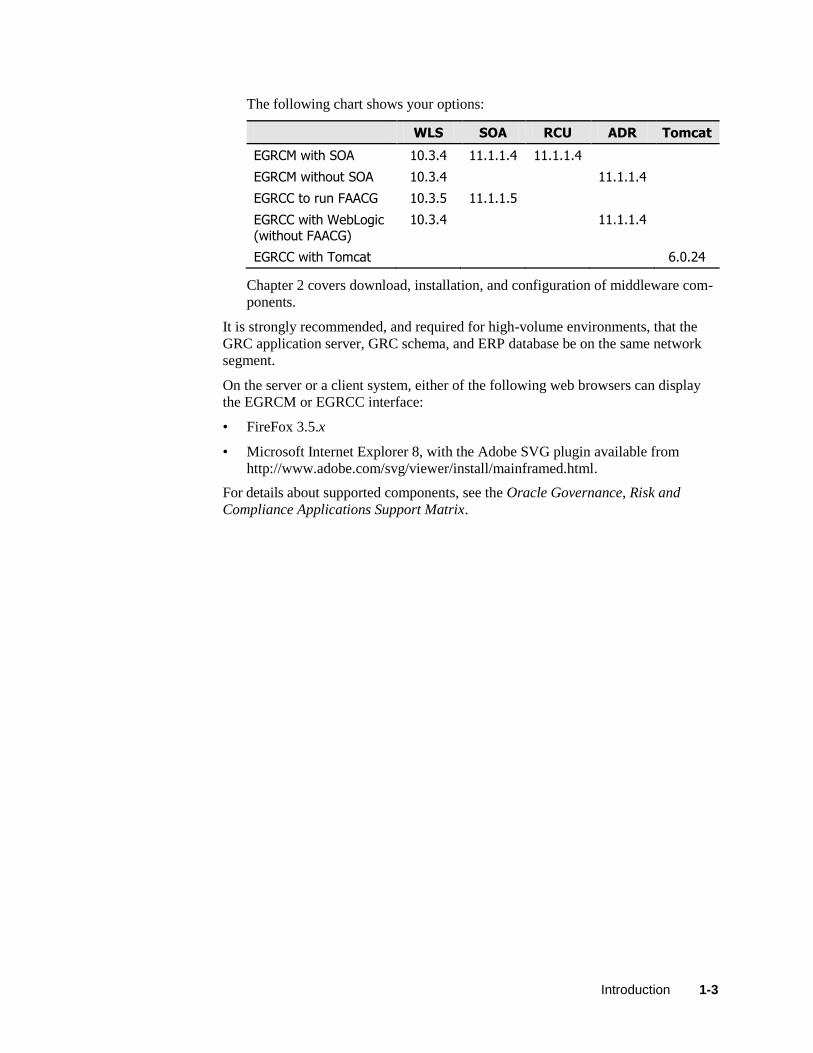
The following chart shows your options:
WLS SOA RCU ADR Tomcat
EGRCM with SOA 10.3.4 11.1.1.4 11.1.1.4
EGRCM without SOA 10.3.4 11.1.1.4
EGRCC to run FAACG 10.3.5 11.1.1.5
EGRCC with WebLogic (without FAACG)
10.3.4 11.1.1.4
EGRCC with Tomcat 6.0.24
Chapter 2 covers download, installation, and configuration of middleware com-
ponents.
It is strongly recommended, and required for high-volume environments, that the
GRC application server, GRC schema, and ERP database be on the same network
segment.
On the server or a client system, either of the following web browsers can display
the EGRCM or EGRCC interface:
• FireFox 3.5.x
• Microsoft Internet Explorer 8, with the Adobe SVG plugin available from
http://www.adobe.com/svg/viewer/install/mainframed.html.
For details about supported components, see the Oracle Governance, Risk and
Compliance Applications Support Matrix.

1-4 Oracle Governance, Risk and Compliance Installation Guide
Installing GRC 2-1
2
Installing GRC
To perform a conventional GRC installation, use procedures in this chapter. If you
intend to deploy a VM image of GRC, ignore this chapter and skip to Chapter 3.
For a conventional installation, decide first whether you are installing EGRCM or
EGRCC. If EGRCM, decide if you are installing SOA (yes if you are integrating
with other applications that will consume SOA worklists, and have no existing SOA
installation; otherwise, no). If EGRCC, determine whether you will use WebLogic
or Tomcat. (If you intend to run FAACG, the WebLogic installation of EGRCC is
required; you must also complete procedures in Chapter 5.)
Then complete the appropriate one of the following procedures. (Summary proce-
dures appear here, with details given in later sections of this chapter.)
If you are installing EGRCM with SOA:
1. Create a GRC schema in the Oracle database.
2. Download files to the GRC server and prepare them for use, and create a direc-
tory for the storage of EGRCM report data.
3. Install WebLogic Server and other components — Repository Creation Utility
(RCU) and Service Oriented Architecture (SOA).
4. Create a WebLogic domain. This entails setting up an Administration Server
and a “managed server” for SOA. Within the domain, install “SOA composites”
and “keystores,” set up security credentials, enable “embedded LDAP,” and create
a soaadmin user.
5. Perform configuration steps in a WebLogic Server Administration Console, and
modify memory and other settings to conform to GRC requirements.
6. Perform configuration steps in a GRC Manage Application Configurations page.
7. Run WebLogic to complete the installation.
If you are installing EGRCM to be used without SOA, or to be used with an already
existing SOA instance:
1. Create a GRC schema in the Oracle database.
2. Download files to the GRC server and prepare them for use, and create a direc-
tory for the storage of EGRCM report data.
3. Install WebLogic Server and Application Development Runtime.
2-2 Oracle Governance, Risk and Compliance Installation Guide
4. Create a WebLogic domain. This entails setting up an Administration Server
(but no managed server).
5. For EGRCM with a pre-existing SOA Server, configure “SOA composites” and
“keystores,” set up security credentials, enable “embedded LDAP,” and create a
soaadmin user for that server. (For EGRCM without SOA, skip this step.)
6. Perform configuration steps in a WebLogic Server Administration Console, and
modify memory and other settings to conform to GRC requirements.
7. Perform configuration steps in a GRC Manage Application Configurations page.
8. Run WebLogic to complete the installation.
If you are installing (or upgrading) EGRCC with WebLogic:
1. Create a GRC schema in the Oracle database or, for an upgrade, use the schema
already created for version 8.6.0.
2. Download files to the GRC server and prepare them for use. Ensure that two
directories, for the storage of report and ETL data generated by EGRCC, are
ready for use.
3. Install WebLogic Server. Install SOA (but not ADR) if you intend to run
FAACG. Install ADR (but not SOA) if you intend to run AACG or ETCG in an
Oracle EBS or PeopleSoft instance. Do not install RCU in any case.
4. Create a WebLogic domain. This entails creating an Administration Server in any
case, and a GRC managed server only if you are installing EGRCC to run FAACG.
5. Perform configuration steps in a WebLogic Server Administration Console, and
modify memory and other settings to conform to GRC requirements.
6. Perform configuration steps in a GRC Manage Application Configurations page.
7. Run WebLogic to complete the installation.
If you are installing EGRCC with Tomcat:
1. Create a GRC schema in the Oracle database.
2. Download files to the GRC server and prepare them for use. Create directories
for the storage of data generated by EGRCC.
3. Install Tomcat (as instructed in its documentation). On the GRC server, modify
Tomcat memory settings, and run a Tomcat setup script provided with EGRCC.
4. Perform configuration steps in a GRC Manage Application Configurations page.
5. Run Tomcat to complete the installation.
To upgrade EGRCC with Tomcat, reuse the GRC database schema, GRC data
directories, and Tomcat components already installed and configured for version
8.6.0. Download version 8.6.3 of GRC, deploy its files, and run Tomcat to install it.
Creating a GRC Schema
If you are performing a fresh installation of EGRCM or EGRCC, create a GRC
schema in the Oracle database. The following is a sample schema-creation script, in
which it is assumed that you have created a tablespace for use by GRC. The values

Installing GRC 2-3
you choose for tablespace name, user (schema) name, and password are represented
here by grc_tablespace, grc_user, and grc_password, respectively.
create user grc_user identified by grc_password default
tablespace grc_tablespace quota unlimited on grc_tablespace
quota 0k on system;
grant connect, resource to grc_user;
grant create any view to grc_user;
grant create any table to grc_user;
grant drop any table to grc_user;
You can choose to use the system tablespace, rather than create one specifically for
GRC. If so, delete the phrase “default tablespace grc_tablespace quota unlimited on
grc_tablespace quota 0k on system” from the script.
Run the following commands as the system user:
ALTER SYSTEM SET open_cursors=1000;
ALTER SYSTEM SET processes=400 scope=spfile;
ALTER SYSTEM SET sessions=600 scope=spfile;
ALTER SYSTEM SET deferred_segment_creation=FALSE;
After running these commands, bounce the database.
If you are upgrading EGRCC, use the schema already created for version 8.6.0. (If
you used an 11gR1 or 10g database with your 8.6.0 instance, though, upgrade the
database itself to 11gR2.) Before upgrading, take a backup of the 8.6.0 schema.
GRC may display information in any of twelve languages. To use the multilingual
capabilities of GRC, be sure the database that hosts the GRC schema is set up for
UTF-8 encoding. To do so, execute this command:
SELECT value$ FROM sys.props$ WHERE name = 'NLS_CHARACTERSET' ;
The return value should be AL32UTF8.
Downloading Files
To install EGRCM or EGRCC, you need a file called grc_863.zip. It’s available on
Oracle E-Delivery. Create a staging directory on your GRC server. (Throughout this
document, <grc_stage> represents the full path to this directory.) Download
grc_863.zip to your staging directory, and extract its contents there.
To validate your download, generate a checksum and compare it with a checksum
value published in Release Notes for the instance you are installing. To generate a
checksum, run the command md5sum <filename> against one of two files: grc.ear if
you will perform any installation incorporating WebLogic, or grc.war if you intend
to install GRCC with Tomcat.
If you intend to use WebLogic, you need middleware components appropriate for
the installation you will perform. These are available on E-Delivery.
If you are installing EGRCC to run FAACG, middleware components include:
• Oracle WebLogic Server 11gR1 (10.3.5) Generic and Coherence
• Oracle SOA Suite 11g Patch Set 4 (11.1.1.5.0)
2-4 Oracle Governance, Risk and Compliance Installation Guide
If you plan to install EGRCM, or EGRCC with WebLogic to perform analysis in
Oracle EBS or PeopleSoft, middleware components include some combination of
the following (see “Prerequisites” on page 1-2):
• Oracle Weblogic Server 11gR1 (10.3.4) Generic and Coherence
• Oracle SOA Suite 11g Patch Set 3 (11.1.1.4.0)
• Oracle Fusion Middleware Repository Creation Utility 11g (11.1.1.4.0) for
Linux x86
• Oracle Application Development Runtime 11g Patch Set 3 (11.1.1.4.0).
If you are installing EGRCC and intend to use Tomcat, download it from its site on
the Internet.
Creating GRC Repositories
If you are installing EGRCM or EGRCC, create a “Report Repository” — a
directory that stores copies of GRC reports that users schedule to be run. Note the
path to the Report Repository, as you will need to supply it later as a configuration
value. The Repository can reside on an NFS mount or any valid directory to which
the user running WebLogic or Tomcat has full permissions.
If you are installing EGRCC, also create a directory for the storage of ETL data used
by Enterprise Transaction Controls Governor. Again, note the path to this directory,
as you will need to supply it later as a configuration value. (This directory is not
needed for EGRCM.)
If you are upgrading EGRCC, reuse the Report Repository and Transaction ETL
directories created for version 8.6.0. But first, archive any 8.6.0 reports contained in
the Report Repository.
Setting Up WebLogic
If you are installing EGRCM, or if you are installing EGRCC to run FAACG, you
must use WebLogic. If you are installing EGRCC to run AACG or ETCG in Oracle
EBS or PeopleSoft, you may use either WebLogic or Tomcat. If you intend to use
Tomcat, skip ahead to “Setting Up Tomcat Application Server” on page 2-13.
If you will use WebLogic, install WebLogic Server (WLS) and related components
generally as their documentation instructs you to do. You will need to make choices
that support their use with GRC, and to some extent these choices depend on whether
you are installing EGRCM or EGRCC. Complete procedures, documented from here
to page 2-13, that are appropriate to the product you are installing. Then skip “Setting
Up Tomcat Application Server” and continue at “GRC Configuration” on page 2-14.
Initial WebLogic Installation
Regardless of whether you are installing EGRCM or EGRCC, ensure that Sun JDK
1.6 is in the path to install and run WebLogic Server. Then install WLS as a Standard
Default Deployment.
Installing GRC 2-5
Next, if you are installing EGRCM with SOA, complete these procedures:
1. Install Repository Creation Utility (RCU). These RCU components are required:
• Metadata Services (MDS schema)
• SOA Infrastructure (SOAINFRA schema)
• Business Activity Monitoring (ORABAM schema)
• User Messaging Service (ORASDPM schema)
2. Once RCU is installed, run it to install SOA schemas:
a. Set an XEDB environment variable to provide connection information for
your EGRCM database. Enter the following:
export XEDB=Dbhost:Dbport:SID
Replace Dbhost with the fully qualified domain name (FQDN) of your
EGRCM database server, Dbport with the port number at which the database
communicates with other applications, and SID with the service identifier
value configured for the database in the tnsnames.ora file.
b. Use the createRepository option in RCU to create repositories. Navigate to
<RCU_HOME>/bin (in which <RCU_HOME> represents the highest-level
directory in which RCU components exist). Then execute this command:
./rcu -silent -createRepository -connectString $XEDB
-dbUser sys -dbRole sysdba -lockSchemas false
-schemaPrefix EGRCM -component SOAINFRA -component MDS
-component ORASDPM -component BAM
As you run the script, you will be prompted to create passwords for each of
SOAINFRA, MDS, ORASDPM, and BAM.
3. Install Oracle SOA Suite. Enter the value “soa” as the Oracle Home Directory
on the Specify Installation Location screen.
If you are installing EGRCM without SOA, or EGRCM to be used with a pre-
existing SOA instance, install ADR. Do not install either RCU or SOA.
If you are installing EGRCC:
• Install ADR (but not RCU or SOA) if you intend to use ETCG or AACG to
perform analysis in Oracle EBS or PeopleSoft instances.
• Install SOA (but not RCU or ADR) if you intend to run FAACG (use AACG to
perform analysis in Fusion instances). Once again, enter the value “soa” as the
Oracle Home Directory on the Specify Installation Location screen.
Creating a WebLogic Domain
For any installation, create a new WebLogic domain. To do so, execute the follow-
ing command:
<MW_HOME>\wlserver_10.3\common\bin\config.sh
Note: <MW_HOME> represents the full path to the home directory of your middle-
ware installation — the highest-level directory in which Fusion Middleware com-
ponents exist, including WebLogic.
2-6 Oracle Governance, Risk and Compliance Installation Guide
The config.sh script runs a Fusion Middleware Configuration Wizard, which
prompts you to complete several steps:
1. Select templates.
For all installations, one template is selected automatically: “Base WebLogic
Server Domain — 10.3.x.0” (in which x is either 4 or 5, depending on your
version of WebLogic). Also select “Oracle Enterprise Manager — 11.1.1.0.”
When you do, a third template, “Oracle JRF — 11.1.1.0,” is selected with it.
Only if you are installing EGRCM with SOA, select three more templates:
“Oracle SOA Suite — 11.1.1.0,” “Oracle WSM Policy Manager — 11.1.1.0,”
and “Oracle JRF Webservices Asynchronous Services — 11.1.1.0.”
2. Create a name for your WebLogic domain. Use any name you wish. (Throughout
this document, the value <grc_domain> represents the name you configure here.)
In two other fields — Domain Location and Application Location — accept
default values.
3. At a Configure Administrator Username Password prompt, create a WebLogic
Server username and password. (For username, the default value is “weblogic.”)
4. At a Configure Server Start Mode and JDK prompt, select “Production Mode.”
In the JDK Selection area, ensure that the correct JDK is selected. (This is the
JDK instance you confirmed to be in the path to install and run WebLogic under
“Initial WebLogic Installation” on page 2-4.) If necessary, use the “Other JDK”
option to browse.
5. For EGRCM with SOA only, respond to a Configure JDBC Component Schema
prompt. Enter details you’ve already established as you used RCU to create
repositories (see step 2b of “Initial WebLogic Installation” on page 2-5). When
you complete this step, you should see the value “Test Successful” at a Test
Component Schema prompt.
6. For any installation, select “Administration Server” at a Select Optional Con-
figuration prompt. Also select “Managed Servers, Clusters and Machines” if
you are installing EGRCM with SOA or EGRCC to run FAACG (but not if you
are installing EGRCM to run with a pre-existing SOA or without SOA, or EGRCC
to perform analysis in Oracle EBS or PeopleSoft).
7. At a Configure the Administration Server prompt, enter the IP address of the
machine running the WebLogic Server. Also select an unused port for it.
8. If you are installing EGRCC to run FAACG, or EGRCM with SOA, a Configure
Managed Servers prompt appears:
• For EGRCC with FAACG, click the Add button. In the row that appears,
enter a name for a GRC server and the IP address of the machine running
WebLogic Server. Then continue at step 9.
• For EGRCM with SOA, confirm that the Configure Managed Servers
prompt displays a row for a SOA Server. This row appears as a result of
EGRCM-specific configuration you’ve already completed. Note the IP
address and port, which you’ll need to enter later in an EGRCM Worklist
page. Continue at step 9.
If you are installing EGRCM without SOA, EGRCM to run with a pre-existing
SOA, or EGRCC to perform analysis in Oracle EBS or PeopleSoft instances, you
Installing GRC 2-7
need not create a managed server. The Configure Managed Servers page and
several other Configuration Wizard pages do not appear. Skip ahead to step 12.
9. Skip the Configure Clusters page.
10. In a Configure Machines page, select the Unix Machine tab. Click Add. Assign
any name, and accept defaults for all other fields.
11. In the Assign Servers to Machines page, select the servers listed in the left box.
Move them to machine you created in step 10, which is listed in the right box.
12. In the Summary page, select Create.
Preparing Additional Files
Regardless of whether you are installing EGRCM or EGRCC, complete these
additional steps when the config.sh script finishes running:
1. Copy the following files from <MW_HOME>\oracle_common\modules\
oracle.adf.model_11.1.1, to <MW_HOME>\user_projects\domains\<grc_domain>\lib:
• adfm.jar
• adfdt_common.jar
• adfmweb.jar
2. Copy the following files from <grc_stage>/lib to <MW_HOME>\user-projects\
domains\<grc_domain>\lib:
• groovy-all-1.6.3.jar
• xdoparser-10.1.3.4.jar
3. Copy the file ojdbc6dms.jar from <grc_stage>/lib to <MW_HOME>/oracle_
common/modules/oracle.jdbc_11.1.1. (This copy operation will overwrite an
existing file.)
4. If you are installing EGRCC to run FAACG, invoke the WebLogic scripting
tool — wlst.sh — from <MW_HOME>\oracle_ common\common\bin. Use it to
apply the JRF template to the GRC managed server you created in step 8 of
“Creating a WebLogic Domain” (<grc_server> in the following example):
applyJRF('<grc_server>','<MW_HOME>/user_projects/domains/
<grc_domain>')
If you are installing EGRCM (with or without SOA) or EGRCC to perform
analysis in Oracle EBS or PeopleSoft instances, skip this step.
5. Create a directory called grc863 (for example, <MW_HOME>/grc863). This
directory should be entirely distinct from the <grc_stage> directory you created
as you downloaded GRC files.
6. Navigate to <grc_stage>/dist, and locate the file grc.ear. Copy it to the grc863
directory, and extract its contents there.
7. Look in the directory grc863\WEB-INF\lib to see if the files bicmn-10.1.3.4.jar,
geronimo-stax-api_1.0_spec-1.0.1.jar, and xdoparser-10.1.3.4.jar exist there. If
so, delete them.

2-8 Oracle Governance, Risk and Compliance Installation Guide
Installing SOA Composites
If you are installing EGRCM with SOA, or to run with a pre-existing SOA, create
“SOA composites.” (If you are installing EGRCM without SOA or EGRCC, this
does not apply; skip ahead to “WebLogic Console Configuration” on page 2-11.)
1. Start the Administration Server and SOA Server. (If you are installing EGRCM
with SOA, the latter is the managed server discussed in step 8 of “Creating a
WebLogic Domain,” page 2-6. If you are installing EGRCM to run with a pre-
existing SOA instance, this is the SOA server created for that instance.)
2. Locate the file composites.zip in <grc_stage>/dist.
3. Invoke the WebLogic scripting tool — wlst.sh — from <MW_HOME>\SOA_
HOME\common\bin.
4. A “wls:/offline” prompt appears. At it, enter the following command:
sca_deployComposite("http://host:port","<grc_stage>/dist/
composites.zip",overwrite=true,user="WebLogicAdminUser",
password="WebLogicAdminPassword")
In this command:
• Replace host with the FQDN of your GRC server, and port with the number
for your SOA Server.
• Replace <grc_stage> with the full path to the staging directory you created
as you downloaded GRC files.
• Replace WebLogicAdminUser and WebLogicAdminPassword with the user-
name and password created in step 3 of “Creating a WebLogic Domain,”
page 2-6.
When the script finishes running, look for this message: “---->Deploying
composite success.”
Creating Keystores
If you are installing EGRCM with SOA, or to run with a pre-existing SOA, create
“keystores” once SOA composites exist. (If you are installing EGRCM without SOA
or EGRCC, this does not apply; skip ahead to “WebLogic Console Configuration”
on page 2-11.)
1. Stop the (newly created or pre-existing) SOA Server and the Administration
Server.
2. Use keytool to set up your keystore. (Keytool is located in <Java_Home>/bin,
where <Java_Home> represents the highest-level directory in which Java com-
ponents are installed.) Execute the following command:
./keytool -genkeypair -alias orakey -keyalg "RSA" -keystore
default-keystore.jks -validity 3600
3. When prompted, designate a keystore password and a key password. This cre-
ates a keystore called default-keystore.jks, and a key pair with the alias orakey
within that keystore.
Installing GRC 2-9
4. Move the new keystore to a directory called fmwconfig. Execute this command:
mv default-keystore.jks <MW_HOME>/user_projects/domains/
<grc_domain>/config/fmwconfig
This overwrites a pre-existing default-keystore.jks file.
5. Start the Administration Server and the SOA Server.
Setting Up Credentials
If you are installing EGRCM with SOA, or to run with a pre-existing SOA, use
Enterprise Manager (EM) to set up credentials once keystores are created. (If you
are installing EGRCM without SOA or EGRCC, this does not apply; skip ahead to
“WebLogic Console Configuration” on page 2-11.)
1. Access EM at
http://host:port/em
In this URL, replace host with the FQDN of your GRC server, and port with the
number you selected for the WebLogic Administration Server. (See step 7 of “Cre-
ating a WebLogic Domain” on page 2-6.)
2. Click on Weblogic Domain → <grc_domain>.
3. Right-click on the <grc_domain> and select Security → Credentials.
4. On the Credentials page, click on the button labeled + Create Map. Enter
oracle.wsm.security as Map Name, and click OK. A new row, oracle.wsm.security,
is created.
5. Add keys to the wallet. For each key, click the button labeled + Create Key,
then supply the following values in response to prompts:
• basic.credentials (this contains user authentication)
– Select Map: oracle.wsm.security
– Key: basic.credentials
– Type: Password
– Username: weblogic
– Password: weblogic
– Description: User credentials key
• keystore-csf-key
– Select Map: oracle.wsm.security
– Key: keystore-csf-key
– Type: Password
– Username: owsm
– Password: Enter the keystore password you created in step 3 of
“Creating Keystores” (page 2-8).
– Description: Keystore key

2-10 Oracle Governance, Risk and Compliance Installation Guide
• enc-csf-key
– Select Map: oracle.wsm.security
– Key: enc-csf-key
– Type: Password
– Username: orakey
– Password: Enter the key password you created in step 3 of “Creating
Keystores” (page 2-8).
– Description: Encryption key
• sign-csf-key
– Select Map: oracle.wsm.security
– Key: sign-csf-key
– Type: Password
– Username: orakey
– Password: Enter the key password you created in step3 of “Creating
Keystores” (page 2-8).
– Description: Signing key
When you finish creating credentials, your domain should be running with at least
the Administration Server and SOA Server.
Creating the SOA Admin User and Enabling Embedded LDAP
If you are installing EGRCM with SOA, or to run with a pre-existing SOA, create a
user called soaadmin and enable Embedded LDAP. (If you are installing EGRCM
without SOA or EGRCC, this does not apply; skip ahead to “WebLogic Console Con-
figuration” on page 2-11.)
1. Shut down the SOA Server. (If you are installing EGRCM with SOA, this is the
managed server discussed in step 8 of “Creating a WebLogic Domain,” page 2-6.
If you are installing EGRCM to run with a pre-existing SOA instance, this is the
SOA server created for that instance.)
2. Log in to the WebLogic Server Administration Console at
http://host:port/console
In this URL, replace host with the FQDN of your GRC server, and port with the
number you selected for the WebLogic Administration Server. (See step 7 of “Cre-
ating a WebLogic Domain” on page 2-6.)
3. Click on Security Realms, then myrealm. Click Users and Groups. Click New,
and enter soaadmin in the Name field. Add a description. Accept “Default
Authenticator.” Enter a password of your choice in the Password field, and the
same value in the Confirm Password field. Click Save.
4. Click on the soaadmin user. Click on the Groups tab, and move the value
Administrators from Available to Chosen. Then save your settings.
Installing GRC 2-11
5. Click on <grc_domain>. Click the Security tab, then Embedded LDAP. Enter
any value for Credential, and then the same value for Confirm Credential.
6. Stop and start the Administration Server.
WebLogic Console Configuration
For any installation, use the WebLogic Server Administration Console to complete
additional configuration steps:
1. Make sure you are logged in to the WebLogic Console (see step 2 of “Creating
the SOA Admin User and Enabling Embedded LDAP,” page 2-10).
2. In the Change Center pane, click Lock & Edit.
3. In the Domain Structure pane, click on Deployments.
4. In the Summary of Deployments pane, select the Control tab.
5. In the Summary of Deployments pane, click on the Install button.
6. In the Path field of the Install Application Assistant pane, enter the full path to
the grc863 directory you created earlier (see step 5 of “Preparing Additional
Files” on page 2-7). Select “grc863 (open directory)” under Current Location.
7. In the Install Application Assistant pane, press next.
8. In the Install Application Assistant pane, choose “Install this deployment as an
application” in the “Choose targeting style” section.
9. In the Install Application Assistant pane, press Next. Then:
• If you are installing EGRCC to run FAACG, select the GRC managed
server you created in step 8 of “Creating a WebLogic Domain” (page 2-6).
• If you are installing EGRCM with SOA, select the Administration Server.
• If you are installing EGRCM without SOA, EGRCM to run with a pre-
existing SOA, or EGRCC to perform analysis in Oracle EBS or PeopleSoft
instances, you are not presented with an opportunity to select a server here.
Skip to step 10.
10. In the Install Application Assistant pane, choose “I will make this deployment
accessible from the following location” in the “Source accessibility” section.
Accept all other defaults.
11. In the Install Application Assistant pane, press Next.
12. In the Install Application Assistant pane, choose “Yes, take me to the deploy-
ment’s configuration screen” in the “Additional configuration” section.
13. In the Install Application Assistant pane, press Finish.
14. In the Install Application Assistant pane, press Save, then Activate Changes. On
the Deployments screen, the state of the grc863 application will be “Prepared.”
15. Select the grc863 application. Click Start, select “Servicing all requests,” and
wait until the application status changes to “Active.”

2-12 Oracle Governance, Risk and Compliance Installation Guide
Modifying Settings
Next, modify certain settings. The modifications you make depend on the installa-
tion you are performing. Note that files cited in the following procedures reside in
the <MW_HOME>/user_projects/domains/<grc_domain>/bin directory.
If you are installing EGRCC to run FAACG:
1. Stop the GRC managed server you created in step 8 of “Creating a WebLogic
Domain” (page 2-6).
2. Open the file setDomainEnv.sh in a text editor. Within it, locate JAVA_OPTIONS
and edit it to include the following:
-Djbo.ampool.maxpoolsize=600000
3. Open the file StartManagedWebLogic.sh in a text editor. Add the following line
to the file, replacing <grc_dir> with the full path to the grc863 directory you
created earlier (see step 5 of “Preparing Additional Files” on page 2-7).
JAVA_OPTIONS="-Xms512m -Xmx4096m -Xss512k -XX:MaxPermSize=512m
-Doracle.security.jps.auth.debug=true
-Doracle.security.jps.auth.debug.verbose=true
-Djava.security.debug=access,failure
-Djava.security.auth.login.config="<grc_dir>/grc/WEB-INF/
jaas.config"
-Djava.awt.headless=true
-Dweblogic.security.SSL.trustedCAKeystore="<MW_HOME>/wl
server_10.3/server/lib/cacerts" ${JAVA_OPTIONS}"
You may use a maximum memory setting (-Xmx) larger than 4096m if your
server has enough memory to support the larger value.
4. Start the GRC managed server.
If you are installing EGRCC to perform analysis in Oracle EBS or PeopleSoft
instances:
1. Stop the Administration Server.
2. Open the file setDomainEnv.sh in a text editor. Within it, locate JAVA_OPTIONS
and edit it to include the following:
-Djbo.ampool.maxpoolsize=600000
3. Open the file StartWebLogic.sh in a text editor. Add the following line to the
file, replacing <grc_dir> with the full path to the grc863 directory you created
earlier (see step 5 of “Preparing Additional Files” on page 2-7).
SAVE_JAVA_OPTIONS="-Xms512m -Xmx4096m -Xss512k -XX:MaxPermSize=512m
-Doracle.security.jps.auth.debug=true
-Doracle.security.jps.auth.debug.verbose=true
-Djava.security.debug=access,failure
-Djava.security.auth.login.config="<grc_dir>/grc/WEB-INF/
jaas.config"
-Djava.awt.headless=true
-Dweblogic.security.SSL.trustedCAKeystore="<MW_HOME>/wl
server_10.3/server/lib/cacerts" ${JAVA_OPTIONS}"
You may use a maximum memory setting (-Xmx) larger than 4096m if your
server has enough memory to support the larger value.
4. Start the Administration Server.
Installing GRC 2-13
If you are installing EGRCM without SOA:
1. Ensure the Administration Server is stopped.
2. Open the file setDomainEnv.sh in a text editor. Within it, locate JAVA_OPTIONS
and edit it to include the following:
-Djbo.ampool.maxpoolsize=600000
3. In setDomainEnv.sh, also locate the following lines:
# IF USER_MEM_ARGS the environment variable is set, use it
to override ALL MEM_ARGS values
if [ "${USER_MEM_ARGS}" != "" ] ; then
Insert the following line between those two lines:
USER_MEM_ARGS="-Xms512m -Xmx4096m -XX:PermSize=256m
-XX:MaxPermSize=512m -Djava.awt.headless=true"
You may use a maximum memory setting (-Xmx) larger than 4096m if your
server has enough memory to support the larger value.
4. Start the Administration Server.
If you are installing EGRCM with SOA, or to run with a pre-existing SOA:
1. Ensure the SOA Server and Administration Server stopped. (If you are instal-
ling EGRCM with SOA, the SOA Server is the managed server discussed in step
8 of “Creating a WebLogic Domain,” page 2-6. If you are installing EGRCM to run
with a pre-existing SOA instance, this is the SOA server created for that instance.)
2. Open the file setDomainEnv.sh in a text editor. Within it, locate JAVA_OPTIONS
and edit it to include the following:
-Djbo.ampool.maxpoolsize=600000
3. Open the file setSOADomainEnv.sh in a text editor. Update the following lines
in the file:
DEFAULT_MEM_ARGS="-Xms512m -Xmx4096m –Djava.awt.headless=true"
PORT_MEM_ARGS="-Xms512m –Xmx4096m –Djava.awt.headless=true"
You may use a maximum memory setting (-Xmx) larger than 4096m if your
server has enough memory to support the larger value.
4. Start the SOA Server and Administration Server.
Setting Up Tomcat Application Server
If you are installing EGRCC and prefer to use Tomcat Application Server rather than
WebLogic, disregard all the WebLogic information on pages 2-4 through 2-13, and
complete this section instead. (Then continue with “GRC Configuration,” page 2-14.)
Remember that you cannot use Tomcat if you are installing EGRCM, or if you are
installing EGRCC to run FAACG. You can use Tomcat if you are installing EGRCC
to run AACG or ETCG in Oracle EBS or PeopleSoft.
To install or upgrade EGRCC with Tomcat:
1. For a fresh installation, download and install Tomcat generally as its documen-
tation instructs you to do. For an upgrade, use the Tomcat components already
installed for EGRCC 8.6.0.
2-14 Oracle Governance, Risk and Compliance Installation Guide
2. Shut down the Tomcat application server.
3. If you are upgrading from version 8.6.0, remove the directory <TomcatHome>/
webapps/grcc, and all its contents. If you are performing a new installation, this
subdirectory does not exist; skip this step.
Note: Throughout this document, replace the value <TomcatHome> with the full
path to the highest-level directory in which Tomcat components are installed.
If you are upgrading, also remove the grcc directory from the Tomcat work area
(<TomcatHome>/work/Catalina/localhost/grcc). Also delete Tomcat logs, located
at <TomcatHome>/logs (you may want to save them to another location first).
4. If you are upgrading from version 8.6.0, navigate to <TomcatHome>/webapps
and, from it, delete the file grcc.war. If you are performing a new installation of
EGRCC 8.6.3, ignore this step.
5. Modify Tomcat settings. In <TomcatHome>/bin, create the file setenv.sh, and
include the following lines in it:
CATALINA_OPTS="-Djava.security.auth.login.config=
<TomcatHome>/webapps/grc/WEB-INF/jaas.config
-Doracle.security.jps.config=<TomcatHome>/bin/config/jps-
config.xml -Xss512k -Xms256M -Xmx4096M -XX:MaxPermSize=256m
-XX:+UseParallelGC -Djava.awt.headless=true
-XX:-UseGCOverheadLimit"
export CATALINA_OPTS
You may use a maximum memory setting (-Xmx) larger than 4096M if your
server has enough memory to support the larger value.
6. Navigate to <grc_stage>/dist. From there, run the file grc_tomcat_setup.sh
Supply the paths to <grc_stage>/dist subdirectory, <TomcatHome>, and the full
path to your Java home as parameters:
cmd> ./grc_tomcat_setup.sh <grc_stage>/dist <TomcatHome>
JavaHomePath
7. Start the Tomcat application server.
GRC Configuration
Regardless of whether you use WebLogic or Tomcat, open a Manage Application
Configurations page to perform GRC-specific configuration:
1. Access GRC at
http://host:port/grc
In this URL, replace host with the FQDN of your GRC server. Select one of the
following values for port:
• If you use WebLogic and are installing GRCC to run FAACG, enter the port
number you chose for the GRC managed server as you created a WebLogic
domain. (See step 8 of “Creating a WebLogic Domain” on page 2-6.)
Installing GRC 2-15
• If you use WebLogic and are performing any other installation, enter the port
number you chose for the Administration Server as you created a WebLogic
domain. (See step 7 of “Creating a WebLogic Domain” on page 2-6.)
• If you use Tomcat, replace port with 8080 (if you accepted the default value
when you installed Tomcat) or your configured value (if you changed the
default during Tomcat installation).
2. The Manage Application Configurations page appears with a Properties tab
selected. In the Installation Configuration section, type or select appropriate
property values. The following apply to both EGRCM and EGRCC:
• Select Application to Install: Choose Enterprise Governance, Risk and Com-
pliance Manager or Enterprise Governance, Risk and Compliance Controls.
(Once you complete the installation, this field no longer appears and its
setting cannot be modified.)
• User Name: Supply the user name for the GRC database.
• Password: Supply the password for the GRC database.
• Confirm Password: Re-enter the password for the GRC database.
• Port Number: Supply the port number at which the GRC database server
communicates with other applications.
• Service Identifier: Supply the service identifier (SID) for the GRC database
server, as configured in the tnsnames.ora file.
• Server Name: Supply the FQDN of the database server.
• Report Repository Path: Supply the full path to the Report Repository
directory discussed in “Creating GRC Repositories” on page 2-4.
• Log Threshold: Select a value that sets the level of detail in log-file entries.
From least to greatest detail, valid entries are error, warn, info, and debug.
The following apply only to EGRCC:
• Transaction ETL Path: Enter the full path to the directory you created to
hold ETL data used by Enterprise Transaction Controls Governor (see
“Creating GRC Repositories” on page 2-4).
• App Server Library Path: Enter the full path to the library subdirectory of
your web application server (for use in the upload of custom connectors for
AACG).
3. In the Language Preferences section on the Properties tab of the Manage
Application Configurations page, select the check boxes for up to twelve lan-
guages in which you want GRC to be able to display information to its users.
4. In the Performance Configuration section on the Properties tab of the Manage
Application Configurations panel, select or clear check boxes. The following
apply both to EGRCM and EGRCC:
• Externalize Report Engine: Select the check box to enable the reporting
engine to run in its own java process, so that the generation of large reports
does not affect the performance of other functionality. However, select the
check box only if you have installed on hardware identified as “certified” in
2-16 Oracle Governance, Risk and Compliance Installation Guide
the Oracle Governance, Risk and Compliance Applications Support Matrix;
clear the check box if you use hardware identified as “supported.”
• Optimize Appliance-Based Operation: Select the check box to optimize
performance if the GRC application and GRC schema reside on the same
machine. Do not select this check box if the GRC application and schema
do not reside on the same machine. When you select this check box, an
ORACLE_HOME Path field appears. In it, enter the full, absolute path to your
Oracle Home — the directory in which you have installed the Oracle data-
base that houses the GRC schema.
The following apply only to EGRCC:
• Optimize Distributed Operation: Select the check box to increase the speed
at which EGRCC performs distributed operations such as data synchroniza-
tion. However, for this selection to have any effect, you must configure at
least one datasource for EGRCC that has an entry in its Database Agent
field (see page 4-5). This entry, in turn, is a DB Link name configured exter-
nally to EGRCC. The Optimize Distributed Operation setting enhances per-
formance only in EGRCC exchanges with datasources for which values are
entered in the Database Agent field.
• Enable Era-Based ETL Optimization: Select this check box to cause ETCG
data synchronization to operate only on data entered in business-management
applications after a specified date. When you select this check box, an Anal-
ysis Start Date field appears. In it, enter a date from which you want synchro-
nization runs to recognize data changes. When you click in the field, a pop-
up calendar appears. Click left- or right-pointing arrows to select earlier or
later months (and years), and then click on a date in a selected month.
• Enable Parallel Processing: Select this check box to enable EGRCC to pro-
cess multiple controls simultaneously. However, use of this feature requires,
at a minimum, 16 GB of RAM; 24 GB is preferred.
When you select the Enable Parallel Processing check box, two fields appear.
In a Number of Cores Available for Processing field, enter the number of
processor cores you wish to devote to parallel processing; EGRCC devotes
one core to each control selected for analysis, until as many cores as you
select are in use. In a Maximum Megabytes of Physical RAM Available field,
specify an amount of memory for use in parallel processing. As a rule of
thumb, enter total RAM minus 8 GB; you may need to adjust this value if
other processes run slowly.
5. In the Manage Application Configurations page, click on Actions → Save. GRC
tests the values you’ve entered and, if they are valid, saves them. (If any are in-
valid, an error message instructs you to re-enter them.)
6. Exit the Manage Application Configurations page.
Completing the Installation
With components in place and properly configured, complete the installation, in
effect by running your web application server.
Installing GRC 2-17
1. Shut down your server — the Administration Server if you’re using WebLogic,
or the Tomcat application server if you’re using Tomcat. Then restart the server.
2. In a web browser, enter the GRC URL (see step 1 of “GRC Configuration” on
page 2-14).
3. Wait for a pop-up message to report, “Database upgrade and initialization process
complete.” Click on its OK button.
4. You are redirected to a GRC logon page. Log on to the application, using the
default logon values admin for user ID and admin for password. GRC requires
you to change the password the first time you log on.
If you installed EGRCM without SOA, or EGRCC (with or without FAACG)
you’re done.
If you installed EGRCM with SOA, or to run with a pre-existing SOA, complete
some additional steps:
1. Ensure that the SOA Server is up and running. (If you have installed EGRCM
with SOA, the SOA Server is the managed server discussed in step 8 of “Creating
a WebLogic Domain,” page 2-6. If you have installed EGRCM to run with a pre-
existing SOA instance, this is the SOA server created for that instance.)
2. In EGRCM, select Navigator → Tools → Setup and Administration → Manage
Application Configurations.
3. Select the Worklist tab and enter these values:
• Worklist Server User Name: Keep the default value, soaadmin.
• Worklist Server Password. Enter the password you created for the soaadmin
user (see step 3 of “Creating the SOA Admin User and Enabling Embedded
LDAP” on page 2-10).
• Worklist Server Confirm Password: Re-enter the Worklist Server Password.
• Worklist Server URL: http://host:port, in which host is the IP address of your
SOA server, and port is its port number.
• Worklist Server Protocol: Select the communications protocol — either
SOAP or RMI — used by the GRC application to send and receive SOA
requests.
4. In the Manage Application Configurations page, click on Actions → Save. Then
log off of EGRCM.
5. Stop the GRC Deployment in the WebLogic Console:
a Log in to the WebLogic Console at
http://host:port/console
Replace host with the FQDN of your GRC server, and port with the number
you selected for the WebLogic Administration Server. (See step 7 of “Creating
a WebLogic Domain” on page 2-6.)
b From the Domain Structure menu, select Deployments.
c From the Deployment page, locate the GRC deployment and verify the state
is Active.

2-18 Oracle Governance, Risk and Compliance Installation Guide
d Click the checkbox next to the GRC deployment.
e From the toolbar, click Stop → Force Stop Now.
6. Start the GRC Deployment in the WebLogic Console:
a From the Domain Structure menu, select Deployments.
b From the Deployment page, locate the GRC deployment and verify the state
is Prepared.
c Click the checkbox next to the GRC deployment.
d From the toolbar, click Start → Servicing All Requests.
Deploying a VM Image of GRC 3-1
3
Deploying a VM Image of GRC
Rather than perform a conventional GRC installation, you can deploy a GRC image
configured in advance by Oracle. You would use Oracle VM Server to deploy the
image.
The image is an instance of either EGRCM or EGRCC running with WebLogic. For
EGRCM, the image is initially configured to run without SOA; however, a SOA
instance is included, and once deployment is complete you can configure the image
to use SOA worklists. (SOA does not apply to EGRCC.) All other required elements,
such as operating system and database, are included in the image. The database in-
cludes both a GRC schema (which serves the application itself) and a data analytics
schema (for use in enhanced reporting).
Deploying a GRC Distribution
To deploy an Oracle GRC distribution for Oracle VM Server:
1. Obtain and install Oracle VM Manager and Oracle VM Server 2.2.
2. Add the hostname of the machine hosting Oracle VM Server to the “server
pool” in Oracle VM Manager.
3. Extract an Oracle GRC Distribution into the “running_pool” directory on the
Oracle VM Server. Use grcm.tar.gz if you want to run Enterprise Governance,
Risk and Compliance Manager, or grcc.tar.gz if you want to run Enterprise
Governance, Risk and Compliance Controls. Within an instance of Oracle VM
Server, you must choose one or the other; you can’t choose both.
4. Open the file vm.cfg in a text editor. (It’s located in the directory extracted from
the Oracle GRC Distribution.) In it, locate the “disk” line. Edit this line to contain
the path to system.img (which resides in the same directory as vm.cfg, extracted
from the Oracle GRC Distribution).
5. Log in to Oracle VM Manager. On the Resources tab, select Virtual Machine
Images.
6. Click on the Import button.
7. Select the second option, “Select from Server Pool (Discover and register).”
Then click Next.
3-2 Oracle Governance, Risk and Compliance Installation Guide
8. Ensure your VM is selected in a Virtual Machine Image Name drop-down field.
(Your VM is stored in a subdirectory of the “running_pool” directory, and its
name is the same as the name of this subdirectory.) Then select and fill in other
fields. (Note: For operating system, select Oracle Enterprise Linux 5 64-bit.)
Click the Next button.
9. A confirmation page appears. Review it and (assuming values are correct) click
on the Confirm button. The Virtual Machine Images entry page reappears.
10. Click on the Approve button. Another confirmation page appears. Review it and
(assuming values are correct) click on the Confirm button.
11. You should now see the VM in a powered off state. Click the Power On button
and enter “OS in Single User Mode.”
12. Once in Single User Mode, change the “root” user password and edit the net-
work configurations to make the VM accessible on your network.
Change the hostname and IP of the VM in the following files:
/etc/hosts/
/etc/resolv.conf
/etc/sysconfig/network
/etc/sysconfig/network-scripts/ifcfg-eth0
Change the hostname and IP of the DB in the following files:
/u01/app/oracle/product/11.2.0/db/network/admin/listener.ora
/u01/app/oracle/product/11.2.0/db/network/admin/tnsnames.ora
When all updates are completed, restart the instance.
13. Once the startup is completed, you should be able to log into the instance as the
“root” user or the “oracle” user. All applications are owned by the oracle user.
Users and Passwords
Default usernames and passwords within a GRC image include the following:
• Oracle Database: sys/manager
• Oracle Database: system/manager
• OS (root user): root/welcome
• OS (oracle user): oracle/welcome
• WebLogic Administration Server: weblogic/welcome1
• SOA (soa_server1) Managed Server: weblogic/welcome1
• Oracle WebLogic Server Console: weblogic/welcome1
• Oracle WebLogic Server Enterprise Manager: weblogic/welcome1
• GRC Schema: grc_user/grc_password
• GRC Data Analytics Schema: grc_user_da/grc_password
Deploying a VM Image of GRC 3-3
Log File Locations
Default locations of log files within a GRC image include the following:
• Oracle Weblogic Server - AdminServer (nohup):
/u01/app/Oracle/Middleware/user_projects/domains/grc_domain/bin/wls.log
• Oracle Weblogic Server - SOA (soa_server1) Managed Server (nohup):
/u01/app/Oracle/Middleware/user_projects/domains/grc_domain/bin/soa.log
• Oracle Weblogic Server - AdminServer:
/u01/app/Oracle/Middleware/user_projects/domains/grc_domain/servers/Admin
Server/logs
• Oracle Weblogic Server - SOA (soa_server1) Managed Server:
/u01/app/Oracle/Middleware/user_projects/domains/grc_domain/servers/soa_
server1/logs
• GRC Log:
/u01/app/Oracle/Middleware/user_projects/domains/grc_domain/servers/Admin
Server/stage/grc863/grc863/grc/log/grc.log
Starting a GRC Distribution
To start an Oracle GRC distribution for Oracle VM Server:
1. Log into the instance as the oracle user.
2. Set the ORACLE_HOME environment variable:
export ORACLE_HOME=/u01/app/oracle/product/11.2.0/db
3. Set the ORACLE_SID environment variable:
export ORACLE_SID=orcl
4. Add ORACLE_HOME/bin to the PATH:
export PATH=$ORACLE_HOME/bin:$PATH
5. Use SqlPlus to start the Oracle database. For example:
sqlplus /nolog
SQL> connect / as sysdba
SQL> startup
SQL> exit
6. Start the Oracle Database Listener:
lsnrctl start
7. Set your path to the following:
/u01/app/Oracle/Middleware/user_projects/domains/grc_domain/
bin
8. Start the WebLogic Administration Server:
nohup ./startWeblogic.sh > wls.log &
3-4 Oracle Governance, Risk and Compliance Installation Guide
9. Optionally, start the WebLogic SOA Managed Server (soa_server1). This step
applies to EGRCM only; skip this step if you use EGRCC.
nohup ./startManagedWeblogic.sh soa_server1 > soa.log &
10. Verify that WebLogic and (if applicable) SOA are available by connecting to
the Oracle WebLogic Server Enterprise Manager. (Replace <hostname> with
the value you created in step 12 of “Deploying a GRC Distribution,” page 3-2.)
http://<hostname>:7001/em
11. Verify that the GRC application (grc863) is available by connecting to the
Oracle WebLogic Server Console. (Replace <hostname> with the value you
created in step 12 of “Deploying a GRC Distribution,” page 3-2.)
http://<hostname>:7001/console
12. Logon to the GRC application. (Replace <hostname> with the value you created
in step 12 of “Deploying a GRC Distribution,” page 3-2.)
http://<hostname>:7001/grc
Stopping a GRC Distribution
To stop an Oracle GRC distribution for Oracle VM Server:
1. Log into the instance as the oracle user.
2. Set the ORACLE_HOME environment variable:
export ORACLE_HOME=/u01/app/oracle/product/11.2.0/db
3. Set the ORACLE_SID environment variable:
export ORACLE_SID=orcl
4. Add ORACLE_HOME/bin to the PATH:
export PATH=$ORACLE_HOME/bin:$PATH
5. Set your path to the following:
/u01/app/Oracle/Middleware/user_projects/domains/grc_domain/
bin
6. If the WebLogic SOA Managed Server (soa_server1) is running, stop it. This
step applies to EGRCM only; skip this step if you use EGRCC.
./stopManagedWeblogic.sh soa_server1
7. Stop the WebLogic Administration Server:
./stopWeblogic.sh
8. Stop the Oracle Database Listener
lsnrctl stop
9. Use SqlPlus to start the Oracle database. For example:
sqlplus /nolog
SQL> connect / as sysdba
SQL> shutdown immediate
SQL> exit
Additional EGRCC Configuration 4-1
4
Additional EGRCC Configuration
If you’ve installed Enterprise Governance, Risk and Compliance Controls, complete
additional configuration procedures as needed:
• Define the information AACG uses to create “global users.” Within business
applications subject to AACG models and controls, individual users may have
user-account information that varies from one application to the next. For each
such person, EGRCC creates a “global user” and maps that person’s business-
application IDs to it. You must change the default global-user value if you are
implementing FAACG (installing EGRCC to apply AACG models and controls
within Oracle Fusion Applications). Otherwise, global-user configuration is
optional.
• Set up datasources — connections to applications in which EGRCC is to perform
analysis. In addition, synchronize data for each datasource — collect informa-
tion required for AACG or ETCG analysis, and provide that information a format
that EGRCC recognizes. (For an AACG instance or an ETCG instance that per-
forms analysis in Oracle EBS of PeopleSoft, both datasource configuration and
data synchronization are somewhat different than for FAACG instances.)
Configuring Global Users
Implement one of the following options to determine the information EGRCC uses to
create global users. Important: Select an option that identifies each person uniquely.
• EMAIL_ONLY: Match the global user to email addresses from distinct data-
sources (or within one datasource). This is the default.
• EMAIL_AND_USER_NAME: Match the global user to email address plus username
from distinct datasources (or within one datasource). You must select this option
if you are implementing FAACG.
• EMAIL_AND_ALL_NAMES: Match the global user to email address, username,
given name, and surname from distinct datasources (or within one datasource).
As a regular procedure, EGRCC users will “synchronize data” — collect informa-
tion required for AACG or ETCG analysis, and provide that information to EGRCC.
Ideally, you should change global-user configuration (if you wish to) before anyone
synchronizes data with any business-management application.
4-2 Oracle Governance, Risk and Compliance Installation Guide
To use the default EMAIL_ONLY option, omit the rest of this section if either of the fol-
lowing is true:
• You are upgrading from version 8.6.0, and that version uses the default
EMAIL_ONLY configuration.
• You are performing a fresh installation.
However, if you wish to change the default EMAIL_ONLY configuration, use the fol-
lowing procedure to do so. Complete steps 1–3 if you are performing a fresh instal-
lation and data synchronization has not yet been run; in this case, omit step 4.
If you are upgrading, or if data synchronization has been performed even once, com-
plete steps 1–4. Warning: If you complete step 4 in this procedure, you may lose all
existing data. Back up your EGRCC data before initiating this procedure.
1. Use SQL*Plus, or any other tool with the ability to execute SQL commands on
a database, to connect to the GRC schema.
2. Run the following SQL statement:
DELETE FROM GRC_PROPERTIES
WHERE NAME like 'GLOBAL_USER_CONFIG';
COMMIT;
3. Run one of the following SQL statements, depending on the global-user format
you want to implement:
For email and username, run the following statement:
Insert into GRC_PROPERTIES (NAME, VALUE, DESCRIPTION, DEFAULT_VALUE,
VISIBLE, CONFIGURABLE, DATA_TYPE_ID)Values ('GLOBAL_USER_CONFIG',
'EMAIL_AND_USERNAME', 'Global User configuration. Possible values:
EMAIL_ONLY, EMAIL_AND_USERNAME, EMAIL_AND_ALL_NAMES', 'EMAIL_ONLY', 0, 0,
0);
COMMIT;
For email, username, given name, and surname, run the following statement:
Insert into GRC_PROPERTIES (NAME, VALUE, DESCRIPTION, DEFAULT_VALUE,
VISIBLE, CONFIGURABLE, DATA_TYPE_ID) Values ('GLOBAL_USER_CONFIG',
'EMAIL_AND_ALL_NAMES', 'Global User configuration. Possible values:
EMAIL_ONLY, EMAIL_AND_USERNAME, EMAIL_AND_ALL_NAMES', 'EMAIL_ONLY', 0, 0,
0);
COMMIT;
For email only, run the following statement. (As already noted, email-only is
the default configuration. Run this statement only if you have changed your
global-user configuration to one of the other formats, and want to change back.)
Insert into GRC_PROPERTIES (NAME, VALUE, DESCRIPTION, DEFAULT_VALUE,
VISIBLE, CONFIGURABLE, DATA_TYPE_ID) Values ('GLOBAL_USER_CONFIG',
'EMAIL_ONLY', 'Global User configuration. Possible values: EMAIL_ONLY,
EMAIL_AND_USERNAME, EMAIL_AND_ALL_NAMES', 'EMAIL_ONLY', 0, 0, 0);
COMMIT;
4. Complete this step if you are upgrading from EGRCC 8.6.0, or if you have com-
pleted a fresh installation, run data synchronization, and wish to reconfigure the
global user after doing so. Run the following SQL statements:
TRUNCATE TABLE SUM_ENTITLEMENT_ENTITLEMENT;
TRUNCATE TABLE SUM_ENTITLEMENT_PRIORITY;
TRUNCATE TABLE SUM_ENTITLEMENT_RISK;
TRUNCATE TABLE SUM_ENTITLEMENT_STATUS;
Additional EGRCC Configuration 4-3
TRUNCATE TABLE SUM_ENTITLEMENT_TAG;
TRUNCATE TABLE SUM_PRIORITY_TAG;
TRUNCATE TABLE SUM_ROLE_DIMENSION;
TRUNCATE TABLE SUM_ROLE_ENTITLEMENT;
TRUNCATE TABLE SUM_ROLE_PRIORITY;
TRUNCATE TABLE SUM_ROLE_ROLE;
TRUNCATE TABLE SUM_ROLE_STATUS;
TRUNCATE TABLE SUM_ROLE_USER;
TRUNCATE TABLE SUM_STATUS;
TRUNCATE TABLE SUM_STATUS_PRIORITY;
TRUNCATE TABLE SUM_STATUS_TAG;
TRUNCATE TABLE SUM_TAG_TAG;
TRUNCATE TABLE SUM_USER_ENTITLEMENT;
TRUNCATE TABLE SUM_USER_TAG;
TRUNCATE TABLE SUM_USER_STATUS;
TRUNCATE TABLE SUM_USER_PRIORITY;
TRUNCATE TABLE LAA_RUN_SIMULATION;
DELETE FROM LAA_RUN;
COMMIT;
Configuring Datasources and Synchronizing Data
Connect EGRCC to datasources (instances of business-management applications
that are to be subject to its analysis). Also synchronize data for each datasource —
collect information required for AACG or ETCG analysis.
EGRCC creates one global user for each user in the first datasource for which you
synchronize access data. It adopts the ID configured for each user in that datasource
as that user’s global ID. When you synchronize data for a second datasource, EGRCC
matches users who also exist in the first datasource to their already-existing global
user IDs. For each “new” user — each of those who do not exist in the first datasource
— EGRCC adopts the user ID from the second datasource as the user’s global ID.
And so on for each datasource for which you synchronize data.
AACG pages display the global user ID for each business-application user. A given
user’s ID may differ from one datasource to the next, and you may prefer to set IDs
from a particular datasource as the global user IDs.
It’s recommended, therefore, that you configure all datasources in which you expect
to apply AACG models and controls before you synchronize data for any of them.
Next, choose the datasource from which you want EGRCC to adopt IDs as global user
IDs, and synchronize that datasource first. Establish an order for the remaining data-
sources, each of which sets global IDs for users who do not exist in the datasources
for which synchronization has already been completed. Then synchronize the remain-
ing datasources in that order.
To configure datasources or to synchronize their data, log on to EGRCC. In a web
browser, enter the following,
http://host:port/grc
In this URL, host represents the FQDN of your GRC server, and port is the port
number at which it communicates with other applications:
• If you use WebLogic, this is the number you chose for the Administration Server as
you created a WebLogic domain. (See step 7 of “Creating a WebLogic Domain”
on page 2-6.)
4-4 Oracle Governance, Risk and Compliance Installation Guide
• If you use Tomcat, this is 8080 (if you accepted the default value when you
installed Tomcat) or your configured value (if you changed the default during
Tomcat installation).
When EGRCC is running, click on the Navigator (a link to the left of the applica-
tion, in the dark blue band that runs along its top). A pop-up window opens; in it,
select Administration Management. A Tasks panel (beneath the Navigator link) then
displays a list of Administrative tasks; in it, select Manage Application Data.
To configure an Oracle EBS or PeopleSoft datasource, complete these steps. (The
procedure is somewhat different for a Fusion datasource; see page 5-5.)
1. Ensure that the Datasources tab is selected.
2. Click on Actions → Create New. A new row appears. Double-click in each field
(or press Tab to move from an active field to the next field). Enter the following:
• Datasource Name: Create a name for the datasource.
• Description: Type a brief description of the datasource (optional).
• Host Name: Supply the FQDN for the machine that hosts the database used
by the business-management application.
• Port: Enter the port number that the database uses to communicate with
other applications.
• User Name: Supply the user name for the database used by the business-
management application. (For an Oracle EBS instance, this is typically APPS.)
• Password: Enter the password for the database.
• Confirm Password: Re-enter the password for the database.
• Service Identifier: Supply the SID value configured for the database in the
tnsnames.ora file.
• Application Type: From a list box, select the type of business-management
application to which you are connecting — by default, EBS or PeopleSoft.
• Version: From a list box, select the version number of the business-
management application to which you are connecting.
• Default: Select the radio button to designate a default datasource — one
whose data is subject automatically to models as they are saved. There can
be only one default datasource.
• Connector: Select a custom connector (if any have been uploaded to
EGRCC) to apply it to this datasource. Or, to use the default connector
provided with EGRCC, make no selection at all. (If so, the Connector field
displays Default after you save the datasource.)
A connector uses ETL technology to collect data from a business applica-
tion and provide it in a format that EGRCC recognizes. The default connec-
tor does this for instances of Oracle EBS and PeopleSoft; it applies to any
datasource for which no custom connector is selected.
• DB Type: From a list box, select the type of database — Oracle, MS SQL
Server, or DB2 — used by the business-management application being con-
figured as a datasource.
Additional EGRCC Configuration 4-5
• Database Agent: Tells the Oracle Data Integrator (ODI) agent to use DB
Link on Oracle databases. If you’ve specified a DB Link name externally
for the datasource, enter that name here. (See step 4 on page 2-15.)
3. When you finish entering values, click on Actions → Save.
To perform data synchronization:
1. Ensure that the Datasources tab remains selected in the Manage Application
Data page.
2. Select the row for the datasource with which you want to synchronize data.
3. Do either of the following:
• Click on Actions → Synchronize Access. Alternatively, click on the
Synchronize button in the tool bar, then on a Run Now option, and then on
an Access option. This causes data used by AACG to be synchronized once,
immediately.
If you are upgrading from version 8.6.0, you must run access synchronization
for each datasource. (You must first have deleted the content of a directory
that stores ETL data used by ETCG. This should have occurred when you
completed “Creating GRC Repositories” on page 2-4.)
• Click on Actions → Synchronize Transaction. Alternatively, click on the
Synchronize button in the tool bar, then on a Run Now option, and then on
an Transaction option. This causes data used by ETCG to be synchronized
once, immediately.
(You may also select another option, Actions → Schedule Synchronize, to estab-
lish a schedule on which data synchronization occurs regularly. For more on this,
see the Enterprise Governance, Risk and Compliance Controls User Guide.)
Each time a datasource is synchronized, EGRCC updates fields in the row for that
datasource: Last Access Synchronization Date and Last Access Synchronization
Status show the date of the most recent access synchronization, and its completion
status. Last Transaction Synchronization Date and Last Transaction Synchronization
Status do the same for the most recent transaction synchronization.
Determining Datasource IDs
When you configure a datasource, EGRCC assigns an ID number to it. If you intend
to implement preventive analysis for an Oracle EBS or PeopleSoft datasource, you
need to know its datasource ID. To determine the number, configure the datasource,
then complete the following steps:
1. Ensure that the Datasources tab remains selected in the Manage Application
Data page.
2. Right-click on the header row in the grid that displays configured datasources.
3. A list of available columns appears. In it, select the check box for the Datasource
ID column (click on it so that a check mark appears).
4. Left-click anywhere outside of the list of columns to close it.
4-6 Oracle Governance, Risk and Compliance Installation Guide
5. The Manage Application Data page now displays a Datasource ID column. In it,
note the ID number assigned to the datasource you’ve configured.
If, having determined the datasource IDs for your datasources, you wish to remove
the Datasource ID column from view, repeat this procedure but clear the Datasource
ID check box (click on it so that the check mark disappears).
Setting Up FAACG 5-1
5
Setting Up FAACG
If you have installed Enterprise Governance, Risk and Compliance Controls so that
you can use Application Access Controls Governor to perform segregation-of-duties
analysis in an instance of Oracle Fusion, complete the procedures in this chapter. (If
not, then this chapter does not apply to you.)
As prerequisites, Fusion Human Capital Management (HCM) and Oracle Identity
Management (OIM) must be installed, through the Fusion Applications provisioning
process. In conjunction with this, Oracle Internet Directory (OID) must be set up as
the LDAP repository whose identity store is managed by OIM. In addition, you
must have installed version 6.3.0.4000 of EGRCC to run with WebLogic (see
“Prerequisites” on page 1-2, as well as chapter 2 of this document).
Then, to set up Fusion Application Access Controls Governor (FAACG), change the
EGRCC “global user” configuration to EMAIL_AND_USERNAME (see page 4-1).
Then install a “connector” within your EGRCC instance. (The connector collects
data from a Fusion instance and provides it in a format that EGRCC recognizes.)
Finally , use Fusion Setup Manager to perform GRC setup.
Installing the Connector
To install a connector, you use a Manage Application Data page available within
EGRCC. Before doing so, however, you must complete several preliminary config-
uration steps.
Associate the GRC Domain with OID
To begin, associate your GRC domain (set up in “Creating a WebLogic Domain” on
page 2-5) with a “security store” maintained by OID.
1. Invoke the WebLogic scripting tool — wlst.sh — from <MW_HOME>\oracle_
common\common\bin.
2. Enter the following command:
reassociateSecurityStore(domain="fusion_domain",
servertype="OID", ldapurl="host:port", jpsroot="cn=nodename",
admin="cn=adminuser", password="adminpassword", join="true")
5-2 Oracle Governance, Risk and Compliance Installation Guide
In this command:
• fusion_domain is the name of the Fusion policy store (which is, in turn, the
branch of the security store that identifies privileges that can be granted within
applications). This value is identified beneath the “cn=JPSContext” entry in
the OID LDAP tree.
• host is the FQDN of the LDAP provider (your OID instance), and port is
the port number at which it communicates with other applications.
• nodename is the root node for your policy store within the OID LDAP tree.
• adminuser is the username for the OID administrative user.
• adminpassword is the password configured for the OID administrative user.
3. Bounce the WebLogic Administration Server and managed servers.
Create an OIDAuthenticator
Next, create an OIDAuthenticator:
1. Log in to the WebLogic Server Administration Console:
http://host:port/console
In this URL, replace host with the FQDN of your GRC server, and port with the
number you selected for the WebLogic Administration Server. (See step 7 of “Cre-
ating a WebLogic Domain” on page 2-6.)
2. Click on the “Security Realms” link in your application’s Security Settings.
3. Click on the “myrealm” link in the table.
4. Click on the “Providers” tab.
5. Click on the New button and enter the following values:
• Name: OIDAuthenticator
• Type: OracleInternetDirectoryAuthenticator
6. Click on the “OIDAuthenticator” link and then click on the “Provider Specific”
tab.
7. Supply values for properties in the “Provider Specific” screen. (Italicized entries
are literal values, to be entered as they are shown.)
• Host: The FQDN of the LDAP provider (your OID instance).
• Port: The port number at which the host communicates with other applica-
tions.
• Principal: The username for the OID administrative user, preceded by cn=.
• Credentials: The password configured for the OID administrative user.
• SSLEnabled: Leave this box unchecked.
• User Base DN: The LDAP path to the store for user information. For
example: cn=FusionUsers,cn=users,dc=us,dc=oracle,dc=com
• All User Filter: (&(cn=*)(objectclass=person))

Setting Up FAACG 5-3
• User From Name Filter: (&(cn=%u)(objectclass=person))
• User Search Scope: subtree
• User Name Attribute: cn
• User Object Class: person
• Use Retrieved User Name as Principal: Select this checkbox.
• Group Base DN: The LDAP path to the store for group (enterprise role)
information. For example: cn=FusionGroups,cn=groups,dc=us,dc=oracle,
dc=com
• All Groups Filter: (&(cn=*)(|(objectclass=groupofUniqueNames)
(objectclass=orcldynamicgroup)))
• Group From Name Filter: (|(&(cn=%g)(objectclass=groupofUniqueNames))
(&(cn=%g)(objectclass=orcldynamicgroup)))
• Group Search Scope: subtree
• Group Membership Searching: unlimited
• Static Group Name Attribute: cn
• Static Group Object Class: groupofuniquenames
• Static Member DN Attribute: uniquemember
• Static Group DN from Member DN filter: (&(uniquemember=%M)(objectclass=
groupofuniquenames))
• Dynamic Group Name Attribute: cn
• Dynamic Group Object Class: orcldynamicgroup
• Dynamic Member URL Attribute: labeleduri
• User Dynamic Group DN Attribute: Leave this field blank.
• Connection Pool Size: 6
• Connect Timeout: 0
• Connection Retry Limit: 1
• Parallel Connect Delay: 0
• Results Time Limit: 0
• Keep Alive Enabled: Leave this box unchecked.
• Follow Referrals: Select this checkbox.
• Bind Anonymously On Referrals: Leave this box unchecked.
• Propagate Cause For Login Exception: Leave this box unchecked.
• Cache Enabled: Select this checkbox.
• Cache Size: 32
• Cache TTL: 60
• GUID Attribute: orclguid
8. Save your settings, then click on “Activate Changes” on the left, topmost panel.
5-4 Oracle Governance, Risk and Compliance Installation Guide
9. Click the “OIDAuthenticator” link from the authenticator list, and set the
Control Flag to SUFFICIENT.
10. Click the “DefaultAuthenticator” link from the authenticator list, and set the
Control Flag to SUFFICIENT.
11. Click the Reorder button. Select “OIDAuthenticator” from the available provid-
ers, and move it to the top. To do so, click on the arrow on the right side, then
click OK.
12. Click on “Activate Changes” from the Change Center, then log out.
13. Bounce the WebLogic Administration Server and managed servers.
Grant Permission to the EGRCC Code Base
Use the WebLogic scripting tool to grant necessary permissions.
1. Invoke the WebLogic scripting tool — wlst.sh — from <MW_HOME>\oracle_
common\common\bin.
2. Execute the grantPermission command twice, as shown below. In the commands,
replace <grc863> with the full path to the grc863 directory created in step 5 of
“Preparing Additional Files,” on page 2-7. All other arguments to the commands
are literal values, to be entered as shown.
grantPermission(codeBaseURL= "file:/<grc863>/WEB-INF/-",
permClass="oracle.security.jps.service.policystore.PolicySt
oreAccessPermission", permTarget="context=SYSTEM",
permActions="getConfiguredApplications")
grantPermission(codeBaseURL= "file:/<grc863>/WEB-INF/-,
permClass="oracle.security.jps.service.policystore.PolicySt
oreAccessPermission", permTarget="context=APPLICATION,
name=*", permActions="getApplicationPolicy")
3. Bounce the WebLogic Administration Server and managed servers.
Upload the Connector
The Fusion connector is provided in a file called fusion-11.1.1.5.1-grc-8.6.3.4000-
adaptersetup.zip. To upload it to EGRCC:
1. Log on to EGRCC. In a web browser, enter the following URL, in which host is
the FQDN of your GRC server, and port is the number you chose for the GRC
managed server as you created a WebLogic domain. (See step 8 of “Creating a
WebLogic Domain” on page 2-6.)
http://host:port/grc
2. Click on the Navigator (a link to the left of the application, in the dark blue
band that runs along its top). A pop-up window opens; in it, select Administra-
tion Management. A Tasks panel (beneath the Navigator link) then displays a
list of Administrative tasks; in it, select Manage Application Data.
3. In the Manage Application Data page, select the Custom Connector tab.
4. Click on Actions → Upload File.

Setting Up FAACG 5-5
5. A Custom Connectors pop-up window opens. Click on its Browse button.
6. A Choose File dialog opens. In it, navigate to, and select, fusion-11.1.1.5.1-grc-
8.6.3.4000-adaptersetup.zip, which is among the files in <grc_ stage> directory
(see “Downloading Files” on page 2-3 ). The path and name of the file then
populate the field next to the Browse button in the Custom Connectors window.
7. Click on the Upload File button. A pop-up message reports the status of the
upload operation. Click on its OK button to clear it, and then click on the Close
button in the Custom Connector window.
8. Log off of EGRCC and restart both the Administration Server and the GRC
managed server. (Before doing so, be sure that the file dom4j-1.6.jar does not
exist in the library subdirectory of your web application server).
Create and Synchronize a Datasource
Having uploaded the connector, you will need to configure a datasource that asso-
ciates your Fusion instance with the connector:
1. Log on to EGRCC once again.
2. Once again, select Manage Application Data in the EGRCC Tasks list; this
time, ensure that the Datasources tab is selected.
3. Click on Actions → Create New. A new row appears. To enter values in this
row, double-click in each field (or press the Tab key to move from an active
field to the next field). Enter the following values:
• Datasource Name: Create a name for the datasource.
• Description: Type a brief description of the datasource (optional).
• Host Name: Supply the FQDN of the LDAP provider (your OID instance).
• Port: Enter the port number at which the host communicates with other
applications.
• User Name: Supply the username for the OID administrative user, preceded
by cn=.
• Password: Enter the password for the OID administrative user.
• Confirm Password: Re-enter the password for the OID administrative user.
• Service Identifier: Fusion
• Application Type: Fusion 1.0
• Version: Fusion 1.0
• Default: Leave unselected.
• Connector: Fusion
• DB Type: Leave blank.
• Database Agent: Leave blank.
4. When you finish entering values, click on Actions → Save.
Finally, perform a data synchronization. With the Datasources tab still selected in
the Manage Application Data page, select the row you’ve just created for the Fusion
datasource. Then either click on Actions → Synchronize Access, or click on the
5-6 Oracle Governance, Risk and Compliance Installation Guide
Synchronize button in the tool bar, then on a Run Now option, and then on an
Access option.
Performing GRC Setup in Fusion Setup Manager
Once the Fusion connector is installed, create an implementation project for GRC in
Fusion Setup Manager (FSM).
It’s assumed you are familiar with use of the Fusion Setup Manager, and with terms
such as offerings, activities, tasks, and tasklists. If not, see the Oracle Fusion Appli-
cation Installation Guide and the Fusion Setup Manager Administrator's Guide.
Portlet Registration
Begin by ensuring that GRC is registered successfully in FSM. With FSM open,
select Manage Portlet Registration under Implementations in the Tasks list (along
the left of the interface). If the Manage Portlet Registration page does not show that
GRC is registered, search for the “GRC Setup” Enterprise-Application and perform
the portlet registration. Refer to the FSM Administrator’s Guide for instruction on
how to perform portlet registration.
Configure Offerings
Because preseeded offerings are not GRC-enabled by default, use a Configure
Offerings page to enable GRC for the desired offering.
1. Open the page: Select Configure Offerings under Implementations in the Tasks
list.
2. Click on the Select Feature Choices icon for the selected offering. For example,
selecting the icon for the Customer Data Management offering displays a screen
in which Governance, Risk and Compliance is listed.
3. Select the Governance, Risk and Compliance entry — click on it so that a check
mark appears in its check box.
4. Click Save and Close.
Implementation Project
To display a GRC-Setup screen within FSM, create one or more implementation
projects. You can base a project on the offerings enabled for GRC, or you can
directly add GRC-Setup tasks (and tasklists). In either case, expanding a node will
display a “Go to Task” icon for the selected task within the node, and clicking on it
will render the GRC-Setup screen.
Create a GRC Setup Master Record
When you select a Go-to-Task icon, a Manage Setup Configurations screen enables
you to create new GRC setup records or to search for, update, or delete existing records.
Click the Create New icon to open a Configuration screen, in which you can create
or register a new GRC Setup configuration master record.
Setting Up FAACG 5-7
In this page, supply the following values:
• Code: A code that uniquely identifies the master record being created, for
example GRC_HCM.
• Name: Short name to describe the code, for example “GRC Setup Data for
Human Capital Management.”
• Description: Full description, for example, “This is the master record to define
GRC Setup data to enforce separation of duties mandate for HCM.”
Click the Save and Continue button to save the date prior to creating detail records.
(Clicking on Save and Close returns you to the Manage Setup Configurations
screen.)
Create a GRC Setup Detail Record
In the Configuration (master-record) screen, locate the Configuration Details panel
and click on its Create New icon. A Configuration Details screen opens, in which
you can create detail records for the master record.
In this page, enter the following values:
• Detail Name: Code that uniquely identifies the detail record being created.
• Name: Short name to describe the code.
• Description: Full description.
• Status: Nonmandatory field to specify the status of the detail record. It typically
contains Active or Inactive.
• Services URL: http://host:port/grc/Services/GrccService, in which host is the
FQDN of your GRC server, and port is the number you chose for the Admin-
istration Server as you created a WebLogic domain. (See step 7 of “Creating a
WebLogic Domain” on page 2-6.)
• User Name: The user name for a user granted the Admin role defined in the
GRC UI.
• Password: The password for the user granted the Admin role.
• Confirm Password: The same password, entered for verification.
• GRC Data Source: The name of the datasource configured under “Create and
Synchronize a Datasource” on page 5-5.
Click on Save and Close to return to the Configuration screen.
Publish Configuration
When detail records are complete, they must be published to Oracle Identity
Management. From the Configuration (master-record) screen, select (click on) a
detail record in the Configuration Details panel. Then select the Publish to OIM
icon (it looks like an arrow pointing upwards).
A Publish Configuration to OIM pop-up window opens. In it, enter these values:
5-8 Oracle Governance, Risk and Compliance Installation Guide
• Protocol: The protocol used for communication with the OIM managed server.
Either https or t3s is recommended, but you may use any protocol the OIM
managed server accepts.
• OIM Hostname: The name of the host of the OIM managed server.
• Port Number: The port of the OIM managed server.
• OIM User Name: The name of the user with admin role on the OIM managed
server. (This user must be able to invoke MBean operations.)
• OIM Password: The password of the OIM user.
Installing PEAs 6-1
6
Installing PEAs
In support of the AACG preventive analysis feature, install a Preventive Enforce-
ment Agent (PEA) on each instance of Oracle E-Business Suite or PeopleSoft that is to
be subject to AACG analysis.
There are distinct PEAs (and installation procedures) for EBS and PeopleSoft. See
the Oracle Governance, Risk and Compliance Applications Support Matrix for sup-
ported versions of Oracle EBS and PeopleSoft. Even if you have installed a PEA for
an earlier version of EGRCC, you must reinstall it for version 8.6.3.
Installing the Oracle PEA
On each EBS instance for which you want to enable preventive analysis, you must
install version 7.3.3 of Preventive Controls Governor (PCG) before installing ver-
sion 8.6.3 of the PEA. Keep the following in mind:
• You can install EGRCC 8.6.3 on its server without first having installed PCG
on any EBS instance. If so, however, AACG would not be able to apply preven-
tive analysis to Oracle EBS instances. You can implement preventive analysis
subsequently; to do so, you would first install PCG, then the PEA, on each EBS
instance for which you want to enable preventive analysis.
• Even after preventive analysis is enabled, you may choose to reinstall PCG on
an EBS instance. If so, you must also reinstall the PEA on that instance.
There are both an automated PEA installer and a manual PEA installation process.
If the Oracle EBS concurrent manager server and forms server reside on the same
instance, attempt automated installation first, as it’s simpler. If not, or if the auto-
mated installer fails, use the manual process. In either case, first complete some
preliminary steps that apply to both automated and manual installations.
Preliminary Steps
If you run your Oracle EBS instance in the Linux operating system, you must set a
display option. To do so, execute the following command:
export DISPLAY=localhost:1.0
As you install the PEA, you must supply the username and password of an EGRCC
user. It’s recommended that you create a user called wsclient, and specify that user
6-2 Oracle Governance, Risk and Compliance Installation Guide
during PEA installation. For information on creating users, see the Enterprise
Governance, Risk, and Compliance Controls User Guide for version 8.6.3.
When you configure an Oracle EBS instance as a datasource, EGRCC generates a
datasource ID number. You must supply that number as you install the PEA. Thus
sequence matters: Install EGRCC on its server and configure each EBS instance as a
datasource (see page 4-3) before you install the PEA on any EBS instance.
In the Oracle EBS instance on which you are installing the PEA, navigate to the cus-
tom application TOP (conventionally called XXLAAPPS_TOP) created on the Preven-
tive Controls Governor forms server. Execute a directory listing to determine if it
has a subdirectory named mesg. If not, create the subdirectory:
mkdir mesg
Downloading and Preparing Files
Create a staging directory on the server that supports Oracle E-Business Suite.
When this directory is created, complete the following steps:
1. Locate the Governance, Risk, and Compliance Controls Suite Disk in your Oracle
media pack. On it locate grcc-peainstallation-8.6.0-SNAPSHOT-ebs-package.zip.
Copy it to the staging directory, and extract its contents into that directory.
The extraction should produce subdirectories of the staging directory called db,
fndload, Forms, and lib, each of which contains files. Also, files called grcc-
peainstallation-8.6.0-SNAPSHOT.jar, install.properties, and pea.properties reside
in the staging directory.
2. To perform the automated installation, use a text editor to open and edit the
install.properties file in the staging directory. (For a manual installation, this step
is unnecessary.) Provide values for the following properties:
• APPS_USER_NAME = APPS
Supply the username for the database schema that supports your Oracle
EBS instance. Typically, this value is APPS.
• APPS_PASSWORD = apps_schema_password
Supply the password for the Oracle EBS database schema identified in the
previous property.
• XXLAAPPS_USER_NAME = XXLAAPPS
Supply the username for the database schema that supports PCG, installed on
your Oracle EBS instance. Typically, this value is XXLAAPPS.
• XXLAAPPS_PASSWORD = XXLAAPPS_passsword
Supply the password for the PCG database schema identified in the previ-
ous property.
• HOST = hostname
Supply the host name for the Oracle EBS database server.
Installing PEAs 6-3
• PORT = number
Supply the port number at which the Oracle EBS database server communi-
cates with other applications.
• SID = service_identifier
Supply the service identifier (SID) for the Oracle EBS database server.
• FREQUENCY = 30
Supply a number that sets the interval, in minutes, at which two PEA concur-
rent programs are to run. GRCC User Provisioning Poll handles the approval
or rejection of preventive analysis requests in the Oracle EBS instance. GRCC
User Provisioning Request Recovery transmits stored requests to EGRCC
when communications with the EBS instance have been interrupted, then
restored. The recommended value for both programs is 30.
3. Execute the environment file, if it is not included in the profile. Run this command:
. $APPL_TOP/$APPLFENV
Automated Installation
Once you have downloaded files and prepared them, execute the following steps to
complete an automated installation:
1. Navigate to your staging directory.
2. Run the installation file. Execute the following command:
java -jar grcc-peainstallation-8.6.0-SNAPSHOT.jar -ebs
The installation program prompts for property values required by the PEA:
• Enter GRCC user name
If you created a wsclient user on your GRCC instance, supply the value
wsclient here. If not, supply the user name configured for any GRCC user.
• Enter GRCC password
Enter the password for the user identified in the previous property.
• Enter GRCC server name
Supply the fully qualified server name of the server on which GRCC is
installed. To verify, ping the GRCC server from the server where the PEA
is being installed.
• Enter GRCC port number
Supply the port number at which the GRCC server communicates with
other applications.
• Enter GRCC web services URL
This property specifies the URL of the webservice where the GRCC in-
stance is installed. This URL should be /grc/services/GrcService/.
• Enter GRCC web services timeout
Enter a timeout, in seconds, for communication with the Oracle EBS server.
The default value is 60.
6-4 Oracle Governance, Risk and Compliance Installation Guide
• Enter datasource ID
Supply the datasource ID assigned by EGRCC to the Oracle EBS instance
in which you are installing the PEA. (This value is available in the EGRCC
Manage Application Data page; see “Determining Datasource IDs,” page 4-5).
The installation program updates the pea.properties file and then executes the
installation.
3. When the file finishes running, review its log file: In the staging directory, use a
text editor to open the file debugInstall.log. It notes status for several installa-
tion stages (Status of Packages, Status of Concurrent Programs, Status of Load
Java, and Status of Forms), as well as for overall installation.
• If the status for each is Success, PEA is installed. Ignore the manual instal-
lation procedure.
• Otherwise, the debugInstall.log file lists errors that have occurred at each
stage. Either resolve the errors and retry the automated installation process,
or complete the manual installation process (see the next section).
Manual Installation
If your Oracle EBS concurrent manager server and forms server reside on separate
instances, or if the automated PEA installation has failed, execute a manual installa-
tion instead. Once you have downloaded files and prepared them, complete the fol-
lowing sections.
Forms Installation
First, install forms. The PEA uses forms in twelve languages, for which you will
need to know language codes as you perform the installation. These codes include:
D German KO Korean
DK Danish NL Dutch
E Spanish PTB Brazilian Portuguese
F French US American English
I Italian ZHS Simplified Chinese
JA Japanese ZHT Traditional Chinese
Complete the following steps:
1. Navigate to your staging directory.
2. Execute the following command to execute the package (PKS).
(Here and in subsequent steps, appsSchemaName and appsSchemaPassword are the
user name and password for the database schema used by Oracle E-Business Suite.)
sqlplus appsSchemaName/appsSchemaPassword
@db/grcc_provdb_pkg.pks
3. Execute the following command to execute the package body (PKB).
sqlplus appsSchemaName/appsSchemaPassword
@db/grcc_provdb_pkg.pkb
Installing PEAs 6-5
4. To set the environment variable, execute one of the following commands, once
for each language. As you do, replace the placeholder CODE with the appropriate
language code (see above).
If you use Oracle E-Business Suite Release 12:
export FORMS_PATH=$FORMS_PATH:$AU_TOP/forms/CODE
If you use an earlier version of Oracle EBS:
export FORMS60_PATH=$FORMS60_PATH:$AU_TOP/forms/CODE
5. Execute one of the following commands to compile the library:
For Oracle E-Business Suite Release 12:
frmcmp_batch module=Forms/GRCC_PROV.pll module_type=library
userid=appsSchemaName/appsSchemaPassWord
For earlier versions of Oracle EBS:
f60gen module=Forms/GRCC_PROV.pll module_type=library
userid=appsSchemaName/appsSchemaPassWord
6. Execute the following command to copy the compiled library.
cp Forms/GRCC_PROV.* $AU_TOP/resource
7. To compile the forms, execute one of the following commands, once for each
language. Again, as you do, replace the placeholder CODE with the appropriate
language code (see page 6-4):
For Oracle EBS Release 12:
frmcmp_batch module=Forms/CODE/LAASCAUS.fmb
userid=appsSchemaName/appsSchemaPassWord
For earlier versions of Oracle EBS:
f60gen module=Forms/CODE/LAASCAUS.fmb
userid=appsSchemaName/appsSchemaPassWord
8. To back up the compiled forms, execute the following command, once for each
language. Again, as you do, replace the placeholder CODE with the appropriate
language code (see page 6-4):
cp $XXLAAPPS_TOP/forms/CODE/LAASCAUS.fmx
$XXLAAPPS_TOP/forms/CODE/LAASCAUS.fmx.orig
(If you followed recommendations as you installed Preventive Controls Gover-
nor, you selected XXLAAPPS as the application short name, and the environment
variable shown in this command — $XXLAAPPS_TOP — is correct. If you chose
another application short name as you installed Preventive Controls Governor,
make sure the environment variable in this command and the next reflects the
application short name you created.)
9. To copy the compiled form, execute the following command once for each
language. Again, as you do, replace the placeholder CODE with the appropriate
language code (see page 6-4):
cp Forms/LAASCAUS.fmx $XXLAAPPS_TOP/forms/CODE/LAASCAUS.fmx
6-6 Oracle Governance, Risk and Compliance Installation Guide
Concurrent Programs Installation
Change to your staging directory and, from it, run the following commands to set up
concurrent programs that support preventive analysis. In these commands:
• appsSchemaName and appsSchemaPassword are the user name and password
for the database schema used by Oracle E-Business Suite.
• XXLAAPPSUserName is the user name for the database schema that supports Pre-
ventive Controls Governor. This value is case-sensitive.
• frequency is a number setting the interval, in minutes, between scheduled runs of
concurrent programs (see the description of the FREQUENCY option on page 6-3).
Execute the following command to run the User Provisioning Poll concurrent program:
sqlplus appsSchemaName/appsSchemaPassword
@db/grccexecutable.sql XXLAAPPSUserName frequency
Execute the following command to run the User Provisioning Request Recovery
concurrent program:
sqlplus appsSchemaName/appsSchemaPassword
@db/grccexecrecover.sql XXLAAPPSUserName frequency
Once this initial setup is complete, execute the following command once for each of
the eleven supported languages, so that concurrent-program messages, parameter
names, and descriptions are available in each language. As before:
• Replace the placeholder CODE with the appropriate language code (see page 6-4).
• appsSchemaName and appsSchemaPassword are the user name and password
for the database schema used by Oracle E-Business Suite.
• stagedir is the path to the staging directory in which you copied and extracted
PEA files.
FNDLOAD appsSchemaName/appsSchemaPassword 0 Y UPLOAD
$FND_TOP/patch/115/import/afcpprog.lct stagedir/fndload/CODE/
AACG_CONCURRENT_PROGRAMS.ldt
Load Java
Complete the following steps:
1. Set the DB environment of APPS (the Oracle EBS database) and execute the
installation program, specifying a “manual” argument:
Java –jar grcc-peainstallation-8.6.0-SNAPSHOT.jar -ebs
-manual
This prepares the pea.properties file to be loaded into the database (as specified
in step 5).
2. Execute the following commands. These commands should not error out:
dropjava
loadjava
3. Execute the following commands. In steps 3–5, appsUserName and appsPassword
are the user name and password for the Oracle E-Business Suite database.
dropjava –user appsUserName/appsPassword –verbose –resolve
-genmissing lib/ag-pea-common-8.1.0-SNAPSHOT.jar
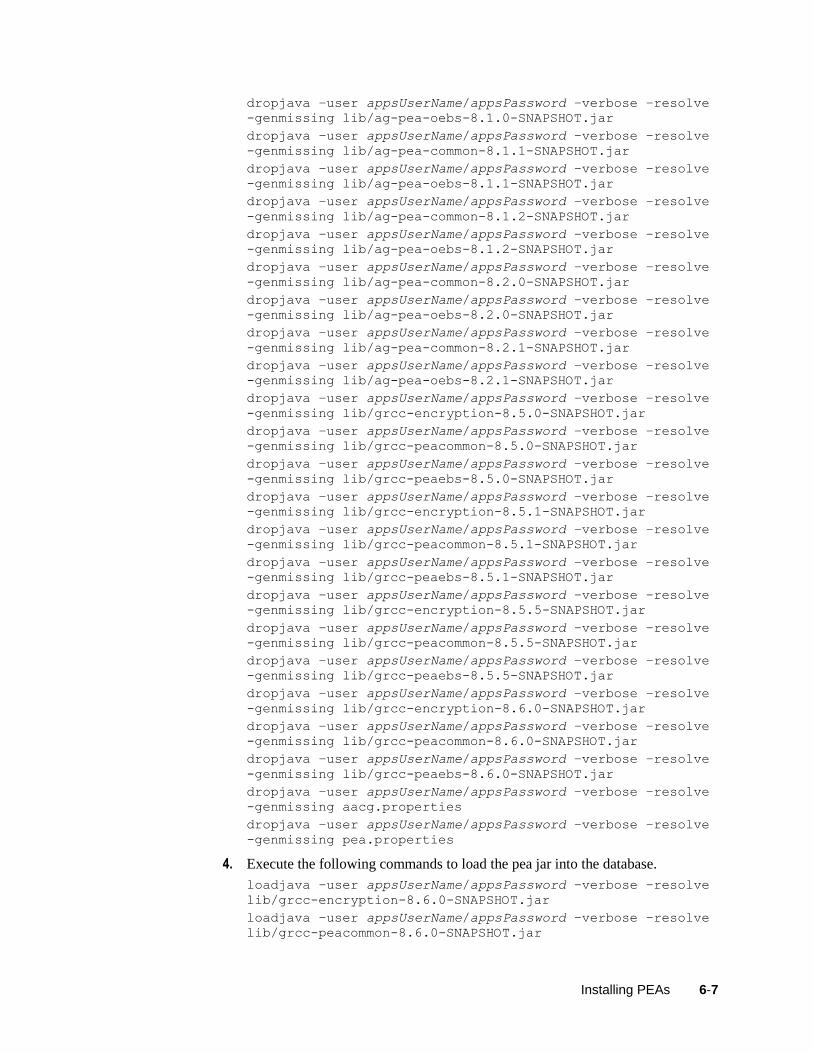
Installing PEAs 6-7
dropjava –user appsUserName/appsPassword –verbose –resolve
-genmissing lib/ag-pea-oebs-8.1.0-SNAPSHOT.jar
dropjava –user appsUserName/appsPassword –verbose –resolve
-genmissing lib/ag-pea-common-8.1.1-SNAPSHOT.jar
dropjava –user appsUserName/appsPassword –verbose –resolve
-genmissing lib/ag-pea-oebs-8.1.1-SNAPSHOT.jar
dropjava –user appsUserName/appsPassword –verbose –resolve
-genmissing lib/ag-pea-common-8.1.2-SNAPSHOT.jar
dropjava –user appsUserName/appsPassword –verbose –resolve
-genmissing lib/ag-pea-oebs-8.1.2-SNAPSHOT.jar
dropjava –user appsUserName/appsPassword –verbose –resolve
-genmissing lib/ag-pea-common-8.2.0-SNAPSHOT.jar
dropjava –user appsUserName/appsPassword –verbose –resolve
-genmissing lib/ag-pea-oebs-8.2.0-SNAPSHOT.jar
dropjava –user appsUserName/appsPassword –verbose –resolve
-genmissing lib/ag-pea-common-8.2.1-SNAPSHOT.jar
dropjava –user appsUserName/appsPassword –verbose –resolve
-genmissing lib/ag-pea-oebs-8.2.1-SNAPSHOT.jar
dropjava –user appsUserName/appsPassword –verbose –resolve
-genmissing lib/grcc-encryption-8.5.0-SNAPSHOT.jar
dropjava –user appsUserName/appsPassword –verbose –resolve
-genmissing lib/grcc-peacommon-8.5.0-SNAPSHOT.jar
dropjava –user appsUserName/appsPassword –verbose –resolve
-genmissing lib/grcc-peaebs-8.5.0-SNAPSHOT.jar
dropjava –user appsUserName/appsPassword –verbose –resolve
-genmissing lib/grcc-encryption-8.5.1-SNAPSHOT.jar
dropjava –user appsUserName/appsPassword –verbose –resolve
-genmissing lib/grcc-peacommon-8.5.1-SNAPSHOT.jar
dropjava –user appsUserName/appsPassword –verbose –resolve
-genmissing lib/grcc-peaebs-8.5.1-SNAPSHOT.jar
dropjava –user appsUserName/appsPassword –verbose –resolve
-genmissing lib/grcc-encryption-8.5.5-SNAPSHOT.jar
dropjava –user appsUserName/appsPassword –verbose –resolve
-genmissing lib/grcc-peacommon-8.5.5-SNAPSHOT.jar
dropjava –user appsUserName/appsPassword –verbose –resolve
-genmissing lib/grcc-peaebs-8.5.5-SNAPSHOT.jar
dropjava –user appsUserName/appsPassword –verbose –resolve
-genmissing lib/grcc-encryption-8.6.0-SNAPSHOT.jar
dropjava –user appsUserName/appsPassword –verbose –resolve
-genmissing lib/grcc-peacommon-8.6.0-SNAPSHOT.jar
dropjava –user appsUserName/appsPassword –verbose –resolve
-genmissing lib/grcc-peaebs-8.6.0-SNAPSHOT.jar
dropjava –user appsUserName/appsPassword –verbose –resolve
-genmissing aacg.properties
dropjava –user appsUserName/appsPassword –verbose –resolve
-genmissing pea.properties
4. Execute the following commands to load the pea jar into the database.
loadjava –user appsUserName/appsPassword –verbose –resolve
lib/grcc-encryption-8.6.0-SNAPSHOT.jar
loadjava –user appsUserName/appsPassword –verbose –resolve
lib/grcc-peacommon-8.6.0-SNAPSHOT.jar
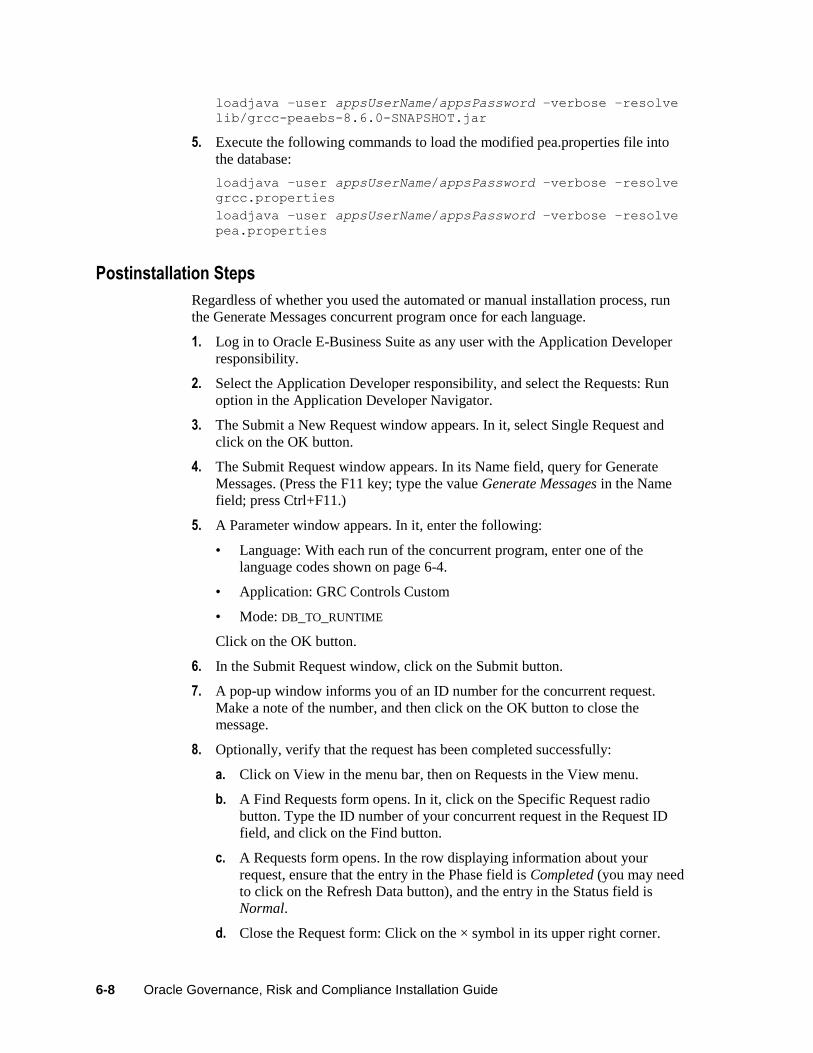
6-8 Oracle Governance, Risk and Compliance Installation Guide
loadjava –user appsUserName/appsPassword –verbose –resolve
lib/grcc-peaebs-8.6.0-SNAPSHOT.jar
5. Execute the following commands to load the modified pea.properties file into
the database:
loadjava –user appsUserName/appsPassword –verbose –resolve
grcc.properties
loadjava –user appsUserName/appsPassword –verbose –resolve
pea.properties
Postinstallation Steps
Regardless of whether you used the automated or manual installation process, run
the Generate Messages concurrent program once for each language.
1. Log in to Oracle E-Business Suite as any user with the Application Developer
responsibility.
2. Select the Application Developer responsibility, and select the Requests: Run
option in the Application Developer Navigator.
3. The Submit a New Request window appears. In it, select Single Request and
click on the OK button.
4. The Submit Request window appears. In its Name field, query for Generate
Messages. (Press the F11 key; type the value Generate Messages in the Name
field; press Ctrl+F11.)
5. A Parameter window appears. In it, enter the following:
• Language: With each run of the concurrent program, enter one of the
language codes shown on page 6-4.
• Application: GRC Controls Custom
• Mode: DB_TO_RUNTIME
Click on the OK button.
6. In the Submit Request window, click on the Submit button.
7. A pop-up window informs you of an ID number for the concurrent request.
Make a note of the number, and then click on the OK button to close the
message.
8. Optionally, verify that the request has been completed successfully:
a. Click on View in the menu bar, then on Requests in the View menu.
b. A Find Requests form opens. In it, click on the Specific Request radio
button. Type the ID number of your concurrent request in the Request ID
field, and click on the Find button.
c. A Requests form opens. In the row displaying information about your
request, ensure that the entry in the Phase field is Completed (you may need
to click on the Refresh Data button), and the entry in the Status field is
Normal.
d. Close the Request form: Click on the × symbol in its upper right corner.
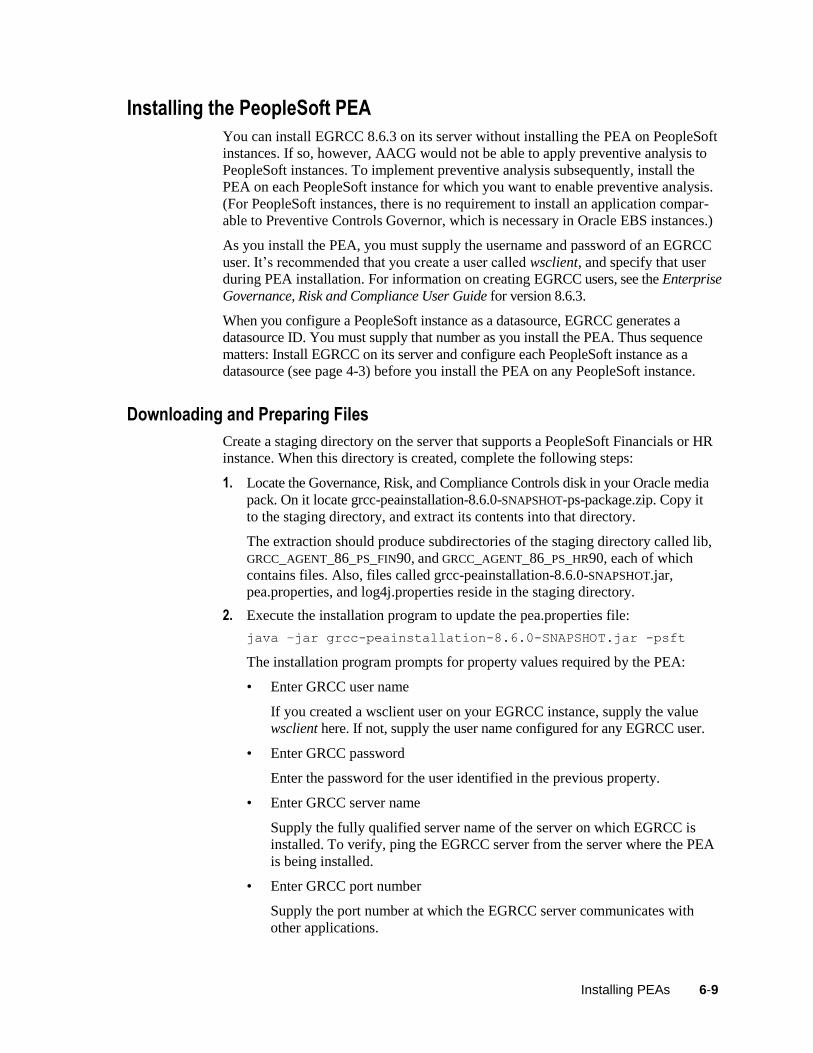
Installing PEAs 6-9
Installing the PeopleSoft PEA
You can install EGRCC 8.6.3 on its server without installing the PEA on PeopleSoft
instances. If so, however, AACG would not be able to apply preventive analysis to
PeopleSoft instances. To implement preventive analysis subsequently, install the
PEA on each PeopleSoft instance for which you want to enable preventive analysis.
(For PeopleSoft instances, there is no requirement to install an application compar-
able to Preventive Controls Governor, which is necessary in Oracle EBS instances.)
As you install the PEA, you must supply the username and password of an EGRCC
user. It’s recommended that you create a user called wsclient, and specify that user
during PEA installation. For information on creating EGRCC users, see the Enterprise
Governance, Risk and Compliance User Guide for version 8.6.3.
When you configure a PeopleSoft instance as a datasource, EGRCC generates a
datasource ID. You must supply that number as you install the PEA. Thus sequence
matters: Install EGRCC on its server and configure each PeopleSoft instance as a
datasource (see page 4-3) before you install the PEA on any PeopleSoft instance.
Downloading and Preparing Files
Create a staging directory on the server that supports a PeopleSoft Financials or HR
instance. When this directory is created, complete the following steps:
1. Locate the Governance, Risk, and Compliance Controls disk in your Oracle media
pack. On it locate grcc-peainstallation-8.6.0-SNAPSHOT-ps-package.zip. Copy it
to the staging directory, and extract its contents into that directory.
The extraction should produce subdirectories of the staging directory called lib,
GRCC_AGENT_86_PS_FIN90, and GRCC_AGENT_86_PS_HR90, each of which
contains files. Also, files called grcc-peainstallation-8.6.0-SNAPSHOT.jar,
pea.properties, and log4j.properties reside in the staging directory.
2. Execute the installation program to update the pea.properties file:
java –jar grcc-peainstallation-8.6.0-SNAPSHOT.jar -psft
The installation program prompts for property values required by the PEA:
• Enter GRCC user name
If you created a wsclient user on your EGRCC instance, supply the value
wsclient here. If not, supply the user name configured for any EGRCC user.
• Enter GRCC password
Enter the password for the user identified in the previous property.
• Enter GRCC server name
Supply the fully qualified server name of the server on which EGRCC is
installed. To verify, ping the EGRCC server from the server where the PEA
is being installed.
• Enter GRCC port number
Supply the port number at which the EGRCC server communicates with
other applications.
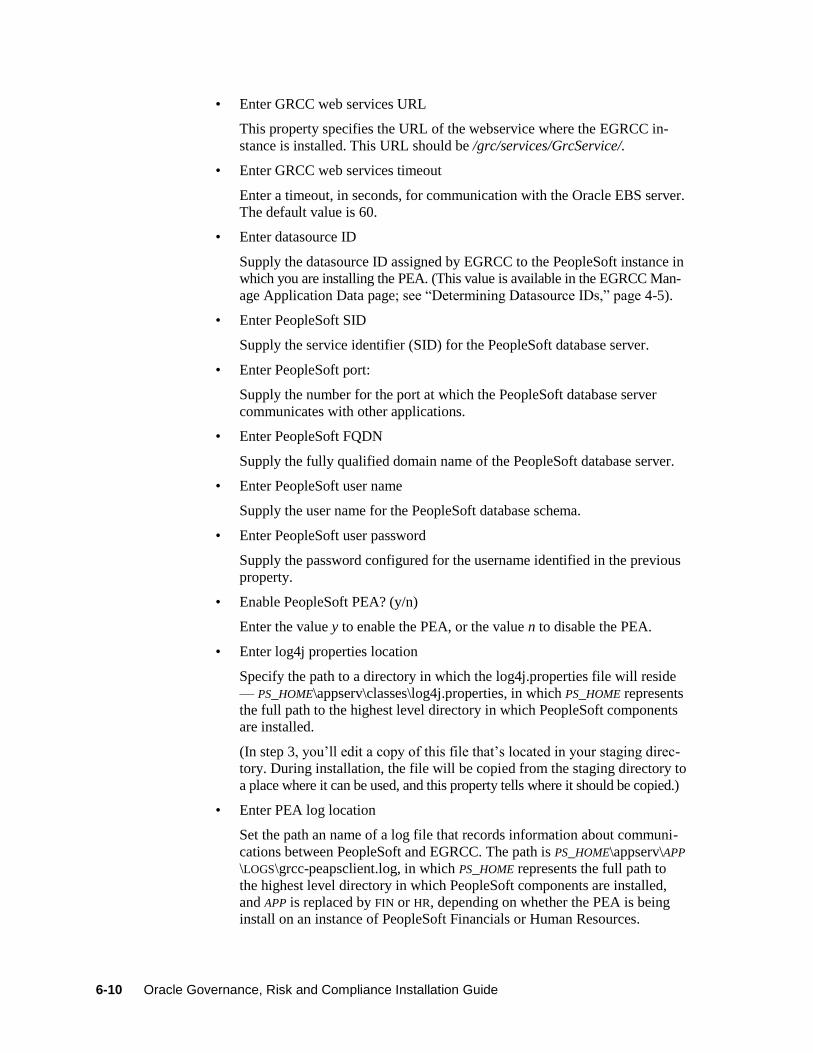
6-10 Oracle Governance, Risk and Compliance Installation Guide
• Enter GRCC web services URL
This property specifies the URL of the webservice where the EGRCC in-
stance is installed. This URL should be /grc/services/GrcService/.
• Enter GRCC web services timeout
Enter a timeout, in seconds, for communication with the Oracle EBS server.
The default value is 60.
• Enter datasource ID
Supply the datasource ID assigned by EGRCC to the PeopleSoft instance in
which you are installing the PEA. (This value is available in the EGRCC Man-
age Application Data page; see “Determining Datasource IDs,” page 4-5).
• Enter PeopleSoft SID
Supply the service identifier (SID) for the PeopleSoft database server.
• Enter PeopleSoft port:
Supply the number for the port at which the PeopleSoft database server
communicates with other applications.
• Enter PeopleSoft FQDN
Supply the fully qualified domain name of the PeopleSoft database server.
• Enter PeopleSoft user name
Supply the user name for the PeopleSoft database schema.
• Enter PeopleSoft user password
Supply the password configured for the username identified in the previous
property.
• Enable PeopleSoft PEA? (y/n)
Enter the value y to enable the PEA, or the value n to disable the PEA.
• Enter log4j properties location
Specify the path to a directory in which the log4j.properties file will reside
— PS_HOME\appserv\classes\log4j.properties, in which PS_HOME represents
the full path to the highest level directory in which PeopleSoft components
are installed.
(In step 3, you’ll edit a copy of this file that’s located in your staging direc-
tory. During installation, the file will be copied from the staging directory to
a place where it can be used, and this property tells where it should be copied.)
• Enter PEA log location
Set the path an name of a log file that records information about communi-
cations between PeopleSoft and EGRCC. The path is PS_HOME\appserv\APP
\LOGS\grcc-peapsclient.log, in which PS_HOME represents the full path to
the highest level directory in which PeopleSoft components are installed,
and APP is replaced by FIN or HR, depending on whether the PEA is being
install on an instance of PeopleSoft Financials or Human Resources.
Installing PEAs 6-11
• Enter interval for PEA poller
Set a time interval, in minutes, at which an “GRCC poller” may be scheduled
to run. The poller updates role assignments for PeopleSoft when the assign-
ments have been resolved in the EGRCC Manage Access Approvals page. In
the Roles panel of the PeopleSoft User Profiles page, a user may select a link
labeled “Schedule GRCC Poller”; if so, the poller runs at intervals defined
by this parameter.
The installation program generates a temporary folder in the staging directory; it
contains grcc-peaps-8.6.0-SNAPSHOT.jar for installation of PEA on PeopleSoft.
3. In the staging directory, use a text editor to open and edit the log4j.properties
file. Set the following property:
log4j.appender.file.File = PS_HOME\appserv\APP\LOGS\grcc-
peapsagent.log
In this value, replace PS_HOME with the full path to the highest level directory in
which PeopleSoft components are installed, and APP with FIN or HR, depending
on whether the PEA is being install on an instance of PeopleSoft Financials or
Human Resources.
Do not modify the values of other properties in the log4j.properties file.
Installing the PEA
Once you have downloaded files and prepared them, execute the following steps:
1. Stop the PeopleSoft application server.
To do so, use the psadmin utility: To start it, execute the command
PS_HOME\appserv\psadmin. In either case, replace PS_HOME with the full path to
the highest-level directory in which PeopleSoft components are installed. If
necessary, see PeopleSoft documentation for information on using the psadmin
utility.
2. From the PS_HOME\appserv\classes directory, remove any jar files that start with
“grcc,” “ag,” or “aacg.”
3. Copy the following files from the lib subdirectory of your staging directory to
the PS_HOME\appserv\classes directory:
grcc-peacommon-8.6.0-SNAPSHOT.jar
grcc-encryption-8.6.0-SNAPSHOT.jar
commons-logging-1.1.jar
log4j-1.2.14.jar
ojdbc14-10.2.0.3.jar
4. Copy the following file from the your staging directory to the PS_HOME\appserv\
classes directory:
grcc-peaps-8.6.0-SNAPSHOT.jar
(The temporary folder was generated by the running of the installation program.)
5. Copy the log4j.properties file from your staging directory to the directory you
specified for it in the “Enter log4j properties location” property when you ran
the grcc-peainstallation-8.6.0-SNAPSHOT.jar file.
6-12 Oracle Governance, Risk and Compliance Installation Guide
6. Use the psadmin utility to restart the PeopleSoft application server. (See step 1
for information on running the psadmin utility.)
Importing a Project
To complete the PEA installation, import a PeopleTools project:
1. Open the PeopleTools Application Designer. Log in as a user who has the
PeopleSoft administrator role.
2. Navigate to Tools > Copy Project > From File…
3. A Copy From File dialog opens. In a field labeled “Look in:” navigate to your
staging directory. This causes subdirectories of the staging directory to appear in
the large, unlabeled field below the “Look in:” field, and the names GRCC_AGENT_
86_PS_FIN90 and GRCC_AGENT_86_PS_HR90 to appear in the a field labeled
“Select Project from the List Below.” A Select button also becomes active.
4. For PeopleSoft 9.0 or 9.1 Financials, select GRCC_AGENT_86_PS_FIN90 in the
“Select Project” field, and click on the Select button. For PeopleSoft 9.0 or 9.1 HR,
select GRCC_ AGENT_86_PS_HR90 in the “Select Project” field, and click on the
Select button.
5. When the Copy from File dialog appears, click on the Copy button. After the
Progress dialog disappears, confirm that application objects appear in the Applica-
tion Designer project window and click on the Save All icon or File > Save All.
It’s important to follow instructions in the PeopleSoft Application Import/Update
Installation Guide when you apply an application import/update project to your data-
base. Failure to do so could corrupt your database and cause you to lose customiza-
tions that you have made to your database.